
Galaxy P1010 - Graphic tablet SAMSUNG - Free user manual and instructions
Find the device manual for free Galaxy P1010 SAMSUNG in PDF.


| Product Type | Graphic Tablet / Tablet Computer |
| Brand | Samsung |
| Model | Galaxy P1010 |
| Display Size | 10.1 inches (estimated) |
| Resolution | 1280 x 800 pixels (estimated) |
| Dimensions | Approximately 260 x 180 x 13 mm |
| Weight | Approximately 600 g |
| Battery Capacity | Li-Ion 7000 mAh (estimated) |
| Power Supply | AC adapter (5V, 2A) |
| Operating System | Android (version unknown) |
| Processor | 1 GHz Cortex-A8 (estimated) |
| RAM | 1 GB (estimated) |
| Storage | 16 GB internal, microSD slot |
| Connectivity | Wi-Fi 802.11 b/g/n, Bluetooth 3.0 |
| Stylus | Capacitive stylus supported (not included) |
| Main Functions | Drawing, note-taking, web browsing, media playback, apps |
| Cleaning Instructions | Wipe with soft dry cloth; avoid liquids |
| Safety Precautions | Do not expose to extreme temperatures; use only approved chargers |
| Spare Parts Availability | Battery, screen, charging port (contact Samsung service) |
| Repairability | Limited; professional service recommended |
| General Information | USB 2.0, 3.5mm headphone jack, front camera |
Frequently Asked Questions - Galaxy P1010 SAMSUNG
User questions about Galaxy P1010 SAMSUNG
0 question about this device. Answer the ones you know or ask your own.
Ask a new question about this device
Download the instructions for your Graphic tablet in PDF format for free! Find your manual Galaxy P1010 - SAMSUNG and take your electronic device back in hand. On this page are published all the documents necessary for the use of your device. Galaxy P1010 by SAMSUNG.
USER MANUAL Galaxy P1010 SAMSUNG
ANDROID TABLET
User Manual
Please read this manual before operating your device and keep it for future reference.
SAMSUNG
Intellectual Property
All Intellectual Property, as defined below, owned by or which is otherwise the property of Samsung or its respective suppliers relating to the SAMSUNG Galaxy Tab, including but not limited to, accessories, parts, or software relating thereto (the "Galaxy Tab System"), is proprietary to Samsung and protected under federal laws, state laws, and international treaty provisions. Intellectual Property includes, but is not limited to, inventions (patentable or unpatentable), patents, trade secrets, copyrights, software, computer programs, and related documentation and other works of authorship. You may not infringe or otherwise violate the rights secured by the Intellectual Property. Moreover, you agree that you will not (and will not attempt to) modify, prepare derivative works of, reverse engineer, decompile, disassemble, or otherwise attempt to create source code from the software. No title to or ownership in the Intellectual Property is transferred to you. All applicable rights of the Intellectual Property shall remain with SAMSUNG and its suppliers.
Samsung Electronics America (SEA), Inc.
Address: 85 Challenger Road
Ridgefield Park, New Jersey 07660
Toll Free Telephone: 1-800-SAMSUNG
Internet Address: http://www.samsungusa.com
©2011 Samsung Electronics America, Inc. All rights reserved.
Do you have questions about your Samsung Mobile Device?
For 24 hour information and assistance, we offer a new FAQ/ARS System (Automated Response System) at:
http://www.samsung.com/us/support
GT-P1010_WI-FI Tab_English_UM_UEKC6_BH_033111_F6
Nuance®, VSuite™, T9® Text Input, XT9® Smart Input, and the Nuance logo are trademarks or registered trademarks of Nuance Communications, Inc., or its affiliates in the United States and/or other countries.
The Bluetooth® word mark, figure mark (stylized “B Design”), and combination mark (Bluetooth word mark and “B Design”) are registered trademarks and are wholly owned by the Bluetooth SIG.
microSD™, microSDHC™, and the microSD logo are Trademarks of the SD Card Association.
Openwave® is a registered Trademark of Openwave, Inc.
SRS® and SRS® are trademarks of SRS Labs, Inc. CS Headphone and WOW HD technologies are incorporated under license from SRS Labs, Inc.
Google, the Google logo, Android, the Android logo, Android Market, Gmail, Google Mail, Google Apps, Google Calendar, Google Checkout, Google Earth, Google Latitude, Google Maps, Google Talk, Picasa, and YouTube are trademarks of Google Inc.
Wi-Fi is a registered trademark of the Wireless Fidelity Alliance, Inc.
Swype is a trademark of Swype, Inc.
Open Source Software
Some software components of this product incorporate source code covered under GNU General Public License (GPL), GNU Lesser General Public License (LGPL), OpenSSL License, BSD License and other open source licenses. To obtain the source code covered under the open source licenses, please visit: http://opensource.samsung.com.
Disclaimer of Warranties; Exclusion of Liability
EXCEPT AS SET FORTH IN THE EXPRESS WARRANTY CONTAINED ON THE WARRANTY PAGE ENCLOSED WITH THE PRODUCT, THE PURCHASER TAKES THE PRODUCT "AS IS", AND SAMSUNG MAKES NO EXPRESS OR IMPLIED WARRANTY OF ANY KIND WHATSOEVER WITH RESPECT TO THE PRODUCT, INCLUDING BUT NOT LIMITED TO THE MERCHANTABILITY OF THE PRODUCT OR ITS FITNESS FOR ANY PARTICULAR PURPOSE OR USE; THE DESIGN, CONDITION OR QUALITY OF THE PRODUCT; THE PERFORMANCE OF THE PRODUCT; THE WORKMANSHIP OF THE PRODUCT OR THE COMPONENTS CONTAINED THEREIN; OR COMPLIANCE OF THE PRODUCT WITH THE REQUIREMENTS OF ANY LAW, RULE, SPECIFICATION OR CONTRACT PERTAINING THERETO. NOTHING CONTAINED IN THE INSTRUCTION MANUAL SHALL BE CONSTRUED TO CREATE AN EXPRESS OR IMPLIED WARRANTY OF ANY KIND WHATSOEVER WITH RESPECT TO THE PRODUCT. IN ADDITION, SAMSUNG SHALL NOT BE LIABLE FOR ANY DAMAGES OF ANY KIND RESULTING FROM THE PURCHASE OR USE OF THE PRODUCT OR ARISING FROM THE BREACH OF THE EXPRESS WARRANTY, INCLUDING INCIDENTAL, SPECIAL OR CONSEQUENTIAL DAMAGES, OR LOSS OF ANTICIPATED PROFITS OR BENEFITS.
Table of Contents
Section 1: Getting Started ....4
Understanding This User Manual 4
Battery 5
Turning Your Device On and Off 6
Your Google Account 7
Using Google Maps 7
System Tutorial 7
Task Manager 7
Memory Card 8
Galaxy Tab Accessories 9
Securing Your Device 9
Troubleshooting....10
Android System Recovery 11
Section 2: Understanding Your Device ....12
Features 12
Front and Top Views 13
Side Views 14
Back and Bottom Views 14
Home Screen 15
Navigating Your Device 17
Notification Panel 18
Primary Shortcuts 20
Widgets 20
Shortcuts 22
Folders 23
Wallpapers 24
Applications 24
Section 3: Contacts and Accounts 29
Accounts 29
Contacts 30
My Profile 34
Groups 34
Favorites 36
Section 4: Entering Text ...... 37
Virtual QWERTY Keyboard 37
Text Input Methods 37
Changing the Input Method 37
Entering Text Using Swype 38
Entering Text Using the Samsung Keypad 40
Section 5: Messaging 41
Types of Messages 41
Gmail 41
Email 43
Google Talk 47
Section 6: Web and Social Networking .... 48
Browser 48
Maps 52
Latitude 53
Navigation 53
News & Weather 54
Places 54
Google Search 54
Voice Search 55
Feeds and Updates 55
YouTube 56
Section 7: Music 57
Music Player 57
Music Hub 59
Section 8: Photos and Video 60
Camera 60
Video 64
Gallery 64
Digital Frame 67
Media Hub 68
Section 9: Connections ......69
Wi-Fi 69
Bluetooth 70
USB Settings 71
Memory Card 72
Section 10: Applications and Widgets .....74
GPS Applications 74
Alarm Clock 75
AllShare 76
Amazon Kindle 77
Browser 77
Calculator 78
Calendar 78
Camera 80
Contacts 80
Daily Briefing 80
Date, Time, and Weather 81
Date, Time, or Weather 82
Digital Frame 82
Dual Clock 82
Email 82
FT Mobile 83
Gallery 83
Gmail 83
Google Search 83
Latitude 83
Maps 84
Market 84
Media Hub 84
Memo 85
Moviefone 85
Music 86
Music Hub 86
My Files 86
Navigation 87
News & Weather 87
NYTimes 87
Places 88
Power Control 88
Qik Manual 89
Qik Video 89
Samsung Apps 89
Settings 90
Social Hub 90
Talk 90
Task Manager 90
ThinkFree Office 91
Video 91
Voice Search 91
World Clock 92
WSJ 92
YouTube 93
Section 11: Settings 94
Accessing Settings 94
Wireless and Network 94
Sound Settings 100
Display Settings 102
Location and Security 103
Applications 106
Accounts and Sync 108
Privacy 109
SD Card and Device Storage 110
Search 110
Locale and Text 111
Voice Input and Output 114
Accessibility 115
Date and Time 115
About Device 116
Section 12: Health and Safety Information ...... 117
Exposure to Radio Frequency (RF) Signals 117
Specific Absorption Rate (SAR) Certification Information ... 121
Smart Practices While Driving 123
Battery Use and Safety 123
Display / Touch-Screen 125
Section 13: Warranty Information 132
Standard Limited Warranty 132
End User License Agreement for Software 135
Index 140
This section helps you to quickly start using your device.
Understanding This User Manual
The sections of this manual generally follow the features of your device. A robust index for features begins on page 140.
Also included is important safety information, beginning on page 117, that you should know before using your device.
This manual gives navigation instructions according to the default display settings. If you select other settings, navigation steps may be different.
Unless otherwise specified, all instructions in this manual assume that you are starting from a Home screen. To get to a Home screen, you may need to unlock the device. For more information, refer to “Securing Your Device” on page 9.
Note: Instructions in this manual are based on default settings and may vary from your device depending on the software version on your device and any changes to the device's settings.
Unless stated otherwise, instructions in this user manual start with the device unlocked, at the Home screen.
All screen images in this manual are simulated. Actual displays may vary depending on the software version of your device and any changes to the device's settings.
Special Text
In this manual, some text is set apart from the rest. This special text is intended to point out important information, share quick methods for activating features, define terms, and more. The definitions for these methods are as follows:
- Notes: Presents alternative options for the current feature, menu, or sub-menu.
- Tips: Provides quick or innovative methods or useful shortcuts.
- Important: Points out important information about the current feature that could affect performance.
- Warning: Brings important information to your attention that can help to prevent loss of data or functionality or damage to your device.
Text Conventions
This manual provides condensed information about how to use your device. To make this possible, the following text conventions are used to represent often-used steps:
→ Arrows are used to represent the sequence of selecting successive options in longer, or repetitive, procedures. For example:
From a Home screen, press the Menu Key → Settings → Wireless and network → Wi-Fi settings.
Battery
Your device is powered by a rechargeable, standard Li-Ion battery. A Wall/USB Charger (Charging Head and USB cable) are included with the device for charging the battery.
Note: The battery comes partially charged. You must fully charge the battery before using your device for the first time.
After the first charge, you can use the device while charging.
Warning!: Use only approved charging devices. Approved accessories are designed to maximize battery life. Using other accessories may invalidate your warranty and may cause damage.
Battery Indicator
The Battery icon in the Status Bar shows the battery power level. When battery power is 15% or less, your device prompts you to charge the battery. If you continue to operate the device without charging, the device powers off.
Tip: Task Manager provides helpful information about extending battery life. For more information, refer to “Task Manager” on page 7.
Charging the Battery
Your device comes with a Wall/USB Charger (Outlet Connector, Charging Head, and USB cable) to charge your device from any standard AC power outlet.
Note: The battery comes partially charged. You must fully charge the battery before using your device for the first time.
After the first charge, you can use the device while charging.
- Carefully slide the Outlet Connector into the Charging Head (1), making sure the connection is secure.

- Insert the USB cable into the Charging Head (2).
- Insert the USB cable into the device's Charger/Accessory Port (3).

- Plug the Charging Head into a standard AC power outlet.
- When charging is complete, unplug the Charging Head from the power outlet and remove the USB cable from the device.
Turning Your Device On and Off
Turning Your Device On
Press and hold the Power/Lock Key

Note: Your device's internal antenna is located along the top back of the device. Do not block the antenna; doing so may affect signal quality and may cause the device to operate at a higher power level than is necessary.
Turning Your Device Off
- Press and hold the Power/Lock Key
- At the prompt, touch Power off.
Your Google Account
Your new device uses your Google account to fully utilize its Android features, including Gmail, Maps, Navigation, Google Talk and the Android Market. When you turn on your device for the first time, set up a connection with your existing Google account or create a new Google account.
To create a Google account or set up your Google account on your device, use Accounts and sync settings. For more information, refer to “Accounts and Sync” on page 108.
Using Google Maps
In order to use some applications related to Google Maps, you must first connect to Wi-Fi. For more information, refer to “Wi-Fi Settings” on page 94.
You must also enable location services to use Google Maps. Some features require Standalone or Google location services. For more information, refer to “Location and Security” on page 103.
System Tutorial
To get the most out of your device, use the system tutorial to learn about important concepts:
From a Home screen, press the Menu Key → Settings → About device → System tutorial.
Task Manager
Your device can run applications simultaneously and some applications run in the background.
Use Task Manager to see which applications are running on your device and to end running applications to extend battery life. You can also uninstall applications from your device and see how much memory is used by applications.
Task Manager provides information about applications, including Active applications, Package, RAM manager, Summary, and Help.
To access the Task Manager:
- From a Home screen, touch
Applications

→ Task Manager
- Touch the Active applications tab to view applications running on your device. Touch End to end an application or End all to stop all running applications.
- Touch the Package tab to view applications installed from Android Market. Touch Uninstall to remove an application from your device.
- Touch the RAM manager tab to display the amount of RAM (Random Access Memory) currently in use. Touch Level 1 to clear inactive processes or Level 2 to clear inactive and background processes, then touch Clear Memory.
- Touch the Summary tab to view RAM and Storage memory statistics.
- Touch the Help tab to view useful tips for extending battery life.
Tip: To launch Task Manager from any screen, touch and hold the Home Key 📋, then touch Task Manager.
You can also access Task Manager from the Program Monitor widget. For more information, refer to "Widgets" on page 20.
Memory Card
Your device supports removable microSD or microSDHC memory cards, for storage of music, photos, videos, and other files.
Note: You can only store music files that you own (from a CD or purchased with the device) on a memory card.

Installing a Memory Card
- Open the Memory Card Slot cover and turn to expose the slot.
- With the gold contacts facing down, carefully slide the memory card into the slot, pushing gently until it clicks into place.
- Replace the Memory Card Slot cover.
Removing a Memory Card
Important!: To prevent damage to information stored on the memory card, unmount the card before removing it from the device.
- From a Home screen, press the Menu Key → Settings → SD card and device storage → Unmount SD card.
- Open the Memory Card Slot cover and turn to expose the slot.
- Gently press down on the memory card, so that it pops out from the slot, and carefully pull the card out.
- Replace the Memory Slot cover.
Galaxy Tab Accessories
To find accessories for your Galaxy Tab:
- Go to http://www.samsung.com/us/mobile/galaxy-tab-accessories.
Galaxy Tab accessories display.
- Use your model number to find compatible accessories.
Securing Your Device
By default, the device locks automatically when the screen times out or you can lock it manually. You can unlock the device using one of the default Unlock screens or, for increased security, use a personal screen unlock pattern.
For more information about creating and enabling a Screen unlock pattern, see "Set Screen Lock" on page 104.
For other settings related to securing your device, see "Location and Security" on page 103.
Note: Unless stated otherwise, instructions in this User Manual start with the device unlocked, at the Home screen.
Locking the device manually
Press the Power/Lock Key
Unlocking the device
- Press the Power/Lock Key

- Touch and drag Unlock from left to right.

You can also set the master Volume level from the lock screen. Touch and drag
Sound from right to left to toggle Sound between ON and OFF modes.

Note: You can choose the type of Screen Unlock you want to use, from Pattern, PIN or Password. For more information, refer to "Location and Security" on page 103.
Troubleshooting
If your device has fatal errors, hangs up, or freezes, you may need to close all programs or reset the device to regain functionality.
- If your device is still responsive, but a program is frozen, close the program using the Task Manager. For more information, refer to "Task Manager" on page 7.
- If your device is frozen and unresponsive, press and hold the Power/Lock Key for 8 to 10 seconds.
Android System Recovery
Android System Recovery is used for Google updates. The average user should never need to perform a system recovery.
Note: If you entered this menu by mistake, use the Volume Up/Down key to select reboot system now, then press the Home Key. Your device then continues to boot up.
To enter the Android System Recovery mode, follow these steps:
- With the device turned off, press the Power/Lock Key

and the Volume Up key at the same time until the device switches on.
- Once the Galaxy Tab logo appears, release the Power/Lock key while continuing to press the Volume Up key.
- Continue to press the Volume Up key for at least 8 seconds, until Recovery mode is launched and the Android System Recovery screen is displayed.
- Release the Volume Up key.
- The following options are available:
- reboot system now: turns on your device.
- apply sdcard:update.zip: allows you to apply updates to your device.
- wipe data/factory reset: clears all data from the device except captured pictures and videos. For more information, refer to "Factory Data Reset" on page 110.
- wipe cache partition: allows you to delete all cache data such as log files.
- format internal sd-card: allows you to reformat the internal microSD card.
- Use the Volume Up/Down key to scroll up or down, then use the Home Key to make a selection.
Section 2: Understanding Your Device
This section outlines key features of your device and describes the screen and the icons that appear when the device is in use. It also shows how to navigate through the device.
Features
- 7-inch 1024x600 WSVGA TFT LCD touch screen
- Android OS
- Android Market, plus pre-loaded applications
- Messaging Features:
- Gmail
- Email (corporate and personal)
- Connections: - Wi-Fi 802.11 b/g/n - Bluetooth 2.1
- Compatible with Adobe® Flash® 10.1
- Social Hub to integrate your e-mail, calendar and favorite social networking sites
- 3 Megapixel Camera/Camcorder with Flash, plus 1.3 Megapixel forward-facing Camera
- Photo Gallery that supports JPEG, PNG, GIF, A-GIF, WBMP, and BMP formats
- HD Video Player (720p) that supports H.263, H.264, MPEG4, 3GP, WMV (v9), Xvid, and DivX® formats
- DivX Certified® to play DivX® video up to 640x480, including premium content
- Music Player that supports WAV, MP3, AAC, AAC+, eAAC+, AMR-NB, AMR-WB, WMA (v9/10), MIDI, and SP-MIDI formats
- Support for microSD™ and microSDHC™ Memory Cards.
- Bluetooth® Wireless Technology. For more information about supported profiles, see “Bluetooth Profiles” on page 96.
Front and Top Views
The following items can be found on the front and top of your device as illustrated on the next page.
- 3.5mm Headset Jack: Plug in an optional headset.
- Light Sensor: Used to control screen brightness automatically and when taking photos with the Front-facing Camera.
- Front-facing Camera Lens: Used when taking photos.
- Menu Key: Press to display options for the current screen.
- Home Key: Press to display the Home screen. Press and hold to display recent applications or to launch Task Manager.
- Back Key: Press to return to the previous screen or option.
- Search Key: Press to launch Google Search, to search your device or the web.

Side Views
The following items can be found on the sides of your device.
- Power/Lock Key: Press and hold to turn the device on or off. Press to lock the device or to wake the screen for unlocking.
- Microphone: Used to pick up your voice or audio during recording.
- Volume Key: From a Home screen, press to adjust Master Volume. During calls or music playback, press to adjust volume. Press to mute the ringtone of an incoming call.
- Memory Card Slot: Install a memory card for storage of files.

Back and Bottom Views
The following items can be found on the back and bottom of your device.
- Camera Flash: Used when taking photos.
- Camera Lens: Used when taking photos or recording videos.
- Charger/Accessory Port: Plug in a USB cable for charging or to sync music and files.
- External Speakers: Used in music or video playback, notification tones, and for other sounds.

Home Screen
The Home screen is the starting point for using your device.
Note: Unless stated otherwise, instructions in this User Manual start with the device unlocked, at the Home screen.
- Status Bar: Presents icons to show notifications, battery power, and connection details. For a list of icons, see "Status Bar" on page 19.
- Widgets: Applications that run on the Home screen. These widgets are found on the Home screen by default. For more information, refer to "Widgets" on page 20.
- Home screen: The starting point for using your device. Place shortcuts, widgets and other items to customize your device to your needs.
- Shortcuts: Shortcuts to common applications. These shortcuts are found on the Home screen by default. For more information, refer to "Shortcuts" on page 22.
- Primary Shortcuts: Shortcuts to common features. For more information, refer to "Primary Shortcuts" on page 20.

Warning!: If your device has a touch screen display, note that a touch screen responds best to a light touch from the pad of your finger. Using excessive force or a metallic object when pressing on the touch screen may damage the tempered glass surface and void the warranty. For more information, refer to "Warranty Information" on page 132.
Extended Home Screen
The Home screen consists of the Home panel, plus four panels that extend beyond the display width to provide more space for adding shortcuts, widgets, and folders. You can also add four more panels, up to a total of nine.
Slide your finger horizontally across the screen to scroll to the left or right side panels. As you scroll, the indicator at the top of the display shows your current position.
Customizing the Home Screen
To customize the Home screen to suit your preferences just navigate to the desired Home screen, then touch and hold on the screen to display the Add to Home screen menu. Then touch one of the options:
- Widgets: For more information, refer to "Widgets" on page 20.
- Shortcuts: For more information, refer to "Shortcuts" on page 22.
- Folders: For more information, refer to "Folders" on page 23.
- Wallpapers: For more information, refer to "Wallpapers" on page 24.
Display settings
You can customize display settings to your preferences. For more information, refer to "Display Settings" on page 102.
Adding and removing Home screen panels
Your device comes with five Home screen panels. You can customize the Home screen to include additional panels.
Note: The panel in the first position displays when you press the Home Key.
- From a Home screen, press the
Menu Key → Edit
- Use these controls to configure panels:

Remove: Touch and drag a panel to the Trash Can to remove the panel from the Home screen.

Add: Touch to add a new panel, up to a total of 9.
- To rearrange the order of panels, touch and drag a panel to a new location.
Tip: You can also display Edit options by pinching the Home screen.
Navigating Your Device
Use command keys and the touch screen to navigate.
Command Keys
Menu Key
Press the Menu Key to display options for the current screen or feature.
Home Key
Press the Home Key to display the first Home screen.
Press and hold the Home Key to launch a menu of recent applications or to launch Task Manager.

Back Key
Press the Back Key to return to the previous screen, option, or step.
Search Key
Press the Search Key to search the web and your device.
Context-sensitive Menus
Context-sensitive menus offer options for features or screens. To access context-sensitive menus:
- Press the Menu Key
- Press and hold on an item.
Finger Gestures
Touch
Touch items to select or launch them. For example:
- Touch the on-screen keyboard to enter characters or text.
- Touch a menu item to select it.
- Touch an application's icon to launch the application.
Touch and Hold
Activate on-screen items. For example:
- Touch and hold a widget on the home screen to move it.
- Touch and hold on a field to display a pop-up menu of options.
Swipe, Flick, or Slide
Swipe, flick, or slide your finger vertically or horizontally across the screen. For example:
- Unlocking the screen
- Scrolling the Home screens or a menu
Pinch
Use two fingers, such as your index finger and thumb, to make an inward pinch motion on the screen, as if you are picking something up, or an outward motion by sweeping your fingers out. For example:

- Pinch the Home screen to show customization options.
- Pinch a photo in Gallery to zoom in.
Notification Panel
The Notification Panel shows information about connections, messages, and other items.
To display the Notification Panel:
Sweep your finger downward from the top of the screen.
From the Notification Panel, the following options are available:
- Touch an icon to activate the feature.
- Tap to clear all notifications.
- Tap a notification to open the application.
- Touch and hold, then slide your finger up to close the Notification Panel or touch the Back Key.

Icons
Icons at the top of the Notification Panel show status for:
- Wi-Fi: Touch to enable or disable Wi-Fi. For more information, refer to "Wi-Fi" on page 69.
- Bluetooth: Touch to enable or disable Bluetooth. For more information, refer to "Bluetooth" on page 70.
- GPS: Touch to enable Standalone GPS services. For more information, refer to "Use GPS Satellites" on page 104.
- Silent: Touch to toggle Silent mode On or Off.
Orientation lock: Touch to enable or disable Orientation Lock. When enabled, the screen orientation locks in the current orientation (horizontal or vertical) and the orientation does not change when you rotate the device.
Brightness
Touch and drag the slider to set the brightness or touch Auto to allow the device to set brightness automatically based on available light and battery charge status.
Clearing Notifications
- Sweep your finger downward from the top of the screen to display the Notifications Panel.
- Touch a notification to clear it.
-or-
Touch Clear to clear all notifications.
Status Bar
The Status Bar displays icons to show network status, battery power, and other details.

System Alert: Check Notifications Panel for alerts.

Battery Level: Shown fully charged.

Charging Indicator: Battery is charging.

Device Power Critical: Battery has only three percent power remaining. Charge immediately.

USB Charging Indicator: The device is connected to a computer using a USB cable, but it is not charging. The battery is only charged while connected to a computer, if the device is turned off. When the device is off, press the Power/Lock key to see the battery charging indicator.

USB Connected: Device is connected to a computer using a USB cable.

Download in progress: An application is being downloaded to the device.

Indicates that Flight Mode is active, which allows you to use many of your tablet's features, but it cannot access online information or applications.

New Email Message: You have new email.

New Gmail Message: You have new Gmail.

Alarm Set: An alarm is active. For more information, refer to "Alarm Clock" on page 75.

Silent mode: All sounds except media and alarms are silenced and vibrate mode is active. See "Silent Mode" on page 100.

Preparing SD Card: A memory card is installed.

Bluetooth Active: Bluetooth is turned on.

Wi-Fi Active: Wi-Fi is connected, active, and communicating with a Wireless Access Point (WAP).

Wi-Fi Action Needed: Action needed to connect to Wireless Access Point (WAP).

Acquiring GPS Signal: Displays when GPS is acquiring a signal.

GPS Active: Displays when GPS is active.
Primary Shortcuts
Primary Shortcuts appear at the bottom of the display.

Browser: Access the Internet. Appears on the Home screen by default. For more information, refer to "Browser" on page 48.

Applications: Access your device's applications. For more information, refer to "Applications" on page 24.

Email: Send and receive email from your device. Appears on the Home screen by default. For more information, refer to "Email" on page 43.
Widgets
Widgets are self-contained applications that you can place on the Home screen to access your favorite features.
Adding Widgets to the Home screen
- Navigate to the desired Home screen, then touch and hold on the screen to display the Add to Home screen menu.
- Touch Widgets, then touch a widget to add it to the Home screen.
Removing Widgets
Touch and hold the Widget until Remove appears at the bottom of the screen, then drag the Widget to the Remove icon to remove it.
Widgets

AccuWeather Clock: Display the forecast from AccuWeather. Touch the widget to choose locations.

Analog Clock: Display an analog clock.

Calendar: Display a calendar. For more information, refer to "Calendar" on page 78.

Calendar clock: Display an analog clock with the current date.

Daily Briefing: Monitor the weather, financial information, news, and your schedule from one convenient location. Appears on a Home screen by default. For more information, refer to "Daily Briefing" on page 80.

Date, time, and weather: Display the date, the time, and the weather for your current location or any other location. For more information, refer to "Date, Time, and Weather" on page 81.

Date, time, or weather. Display either the date, the time, or the weather for your current location or choose another location. For more information, refer to "Date, Time, or Weather" on page 82.

Dual clock: Display the date and time for two different locations. For more information, refer to "Dual Clock" on page 82.

Feeds and Updates: This application allows you to have feeds and updates from Facebook, MySpace, and Twitter displayed on your tablet. For more information, refer to "Feeds and Updates" on page 55.

Google Search: Display a Google Search bar. For more information, refer to "Google Search" on page 54.

Home screen tips: Display tips about the Home screen.

Latitude: Locate your friends on a map, and share or hide your location. For more information, refer to "Latitude" on page 53.

Market: Download applications from the Android Market. For more information, refer to "Market" on page 84.

News & Weather: Display current news and weather for your location. For more information, refer to "News & Weather" on page 54.

NYTimes: Allows you to read the latest edition of The New York Times newspaper. For more information, refer to "NYTimes" on page 87.

Picture frame: Display a picture on a Home screen.

Power control: Control Wi-Fi, Bluetooth, and GPS connections, and set automatic synchronization and brightness settings. For more information, refer to "Power Control" on page 88.

Program Monitor: Display the number of active applications. Touch to launch Task Manager. For more information, refer to "Task Manager" on page 7.

Y! Finance Clock: Display a clock with financial information from Yahoo!® Finance.

YouTube: Search YouTube and watch videos. For more information, refer to "YouTube" on page 56.
Shortcuts
Use Shortcuts for quick access to applications or features, such as Email or other applications.
Adding Shortcuts from a Home screen
- Navigate to a Home screen panel, then touch and hold on the screen to display the Add to Home screen menu.
- Touch Shortcuts, then touch a selection, then follow the prompts to add it to the Home screen.

Applications: Launch an application. For a list, see "Applications" on page 24.

Bookmark: Launch a bookmarked web page.

Contact: View a contact you specify.

Directions & Navigation: Get directions and navigation from Google Maps.

Email: Access an Email account. For more information, refer to "Email" on page 43.

Gmail label: Access a Gmail label.

Latitude: Locate your friends on a map and share or hide your location.

Settings: Go to a specific setting.
Adding Shortcuts from Applications
- Navigate to a Home screen panel.
- Touch Applications
- Touch and hold on an application icon. The Shortcut icon is automatically placed on the selected Home screen.
Removing Shortcuts
Touch and hold the Shortcut until Remove appears, then drag the Shortcut to the Remove icon.
Folders
Place Folders on the Home screen to organize items together on the Home screen.
- Navigate to the desired Home screen, then touch and hold on the screen to display the Add to Home screen menu.
- Touch Folders, then touch a selection:

New folder: Create a new empty folder.

All contacts: Create a folder containing all contacts.

Contacts with phone numbers: Create a folder containing contacts with stored phone numbers.

Received list from Bluetooth: Create a folder containing a list of items received from Bluetooth.

Recent documents: Display the ThinkFree Office Recent Docs list. Tap an entry to open the associated document. For more information, refer to "ThinkFree Office" on page 91.

Starred contacts: Create a folder containing contacts marked as Favorites.
Removing Folders
Touch and hold the Folder until Remove appears, then drag the Folder to the Remove icon.
Wallpapers
You can choose a picture to display in the background of the Home screen. Choose from preloaded wallpaper images or select a photo you have downloaded or taken with the Camera.
- From a Home screen, touch and hold on the screen to display the Add to Home screen menu, then touch Wallpapers.
- or -
From a Home screen, press the Menu Key
→ Wallpaper.
- Choose a source for images:
- Home screen Wallpaper: Access the Gallery to choose a picture from an installed memory card. Touch a picture to select it, then use the crop tool to resize the picture, if desired. Touch Save to save the picture as wallpaper.
- Live wallpapers: Choose from pre-loaded interactive animated wallpapers. Touch a wallpaper to see an example. Touch Settings to view options for the selection. Touch Set wallpaper to save your choice.
- Wallpaper gallery: Choose from pre-loaded wallpaper images. Touch a wallpaper, then touch Set wallpaper.
Applications
The Applications screen holds all applications on your wireless device. Applications that you download and install from the Android Market or from the web are also added to the Applications screen.
You can place shortcuts to applications on the Home screen, for quick access to the application. For more information, refer to "Adding Shortcuts from Applications" on page 23.
- From a Home screen, touch Applications
- Slide your finger across the screen left or right to scroll through the Applications screens.
- Touch an icon to launch the application.
Customizing the Applications Screens
- From a Home screen, touch Applications
- Press the Menu Key → Edit
- Touch and hold an application icon, then drag it to a new location.
- When you are finished, press the Menu Key → Save.
Note: To discard changes to the Applications screens before you save them, press the Menu Key → Cancel, then touch OK to confirm.
Applications

Alarm Clock: Schedule alarms to remind you of appointments or events, or as a wake-up. For more information, refer to "Alarm Clock" on page 75.

AllShare: Synchronize your device with your TV. A shortcut to AllShare appears on a Home screen by default. For more information, refer to "AllShare" on page 76.

Amazon Kindle™: Download Amazon books to read on your device. A shortcut to Amazon Kindle appears on a Home screen by default. For more information, refer to "Amazon Kindle" on page 77.

Browser: Access the Internet. By default, a shortcut to Browser appears on the Home screen as a Primary Shortcut. For more information, refer to "Browser" on page 48.

Calculator: The calculator provides the basic arithmetic functions; addition, subtraction, multiplication, and division. The calculator can also be used as a scientific calculator. For more information, refer to "Calculator" on page 78.

Calendar: Record events and appointments to manage your schedule. A shortcut to Calendar appears on a Home screen by default. For more information, refer to "Calendar" on page 78.

Camera: Take photos or record videos. A shortcut to Camera appears on a Home screen by default. For more information, refer to "Camera" on page 60.

Contacts: Save and manage contact information for your friends and colleagues. For more information, refer to "Contacts" on page 30.

Daily Briefing: Monitor weather, financial information, news, and your schedule, from one application. A shortcut to Daily Briefing appears on a Home screen by default. For more information, refer to "Daily Briefing" on page 80.

Digital Frame: Display a slideshow of photos, a clock, or play music. For more information, refer to "Digital Frame" on page 67.

Email: Send and receive email from your device. By default, a shortcut to Email appears as a Primary Shortcut on the Home screen. For more information, refer to "Email" on page 43.

FT Mobile: Read a fully optimized version of the world's leading business newspaper. This application lets you download the daily FT for offline reading and access the FT's award-winning content and video. It also allows you to view your personal investment portfolios. For more information, refer to "FT Mobile" on page 83.

Gallery: View and manage photos stored on your device or on an installed memory card. For more information, refer to "Gallery" on page 64.

Gmail: Send and receive emails with Gmail, Google's web-based email. For more information, refer to "Gmail" on page 41.

Google Search: Use the Google search engine to search the internet and your device. A shortcut to Google Search appears on a Home screen by default. For more information, refer to "Google Search" on page 54.

Latitude: Use Google Latitude to locate your friends on a map and share or hide your location. For more information, refer to "Latitude" on page 53.

Maps: Find locations and get directions with Google maps. A shortcut to Maps appears on a Home screen by default. For more information, refer to "Maps" on page 52.

Market: Browse, download, and install Android applications. A shortcut to Market appears on a Home screen by default. For more information, refer to "Market" on page 84.

Media Hub: Browse the latest movies and TV shows, then rent or purchase the media for viewing on your device. For more information, refer to "Media Hub" on page 68.

Memo: Create text memos and use Bluetooth to send memos. For more information, refer to "Memo" on page 85.

Moviefone: Browse a directory of movies, check the latest theater showtimes, find theater locations nearest to you, buy tickets in advance, view original movie content and news, and read movie reviews. For more information, refer to "Moviefone" on page 85.

Music: Play music stored on an optional installed memory card. For more information, refer to "Music Player" on page 57.

Music Hub: The Music Hub lets you purchase and download songs and albums. For more information, refer to "Music Hub" on page 59.

My files: Find, view and manage files stored on an optional installed memory card. For more information, refer to "My Files" on page 86.

Navigation: Use Google Maps Navigation to search for locations, with turn-by-turn directions. For more information, refer to "Navigation" on page 53.

News & Weather: View Google news and weather. For more information, refer to "News & Weather" on page 54.

NYTimes: Display the award-winning journalism of The New York Times on your device. A shortcut to NYTimes appears on a Home screen by default. For more information, refer to "NYTimes" on page 87.

Places: Use Google Maps to find places of interest, plus add your own favorite places. For more information, refer to "Places" on page 54.

Qik manual: Read through the Qik manual right on your Galaxy tablet. It contains the instructions you need to use the Qik Video application. For more information, refer to "Qik Manual" on page 89.

Qik Video: Qik lets you record and share videos with your friends, family, and favorite social networks like Facebook, YouTube, and Twitter. For more information, refer to "Qik Video" on page 89.

Samsung Apps: Connect to Samsung Apps and make your smart device even smarter. Simply and easily download an abundance of applications to your phone such as games, news, reference, social networking, navigation, and more. A shortcut to Samsung Apps appears on a Home screen by default. For more information, refer to "Samsung Apps" on page 89.

Settings: Configure your device to your preferences. For more information, refer to "Settings" on page 94.

Social Hub: Access your social networks, like Facebook, YouTube, and Twitter, all in one place. For more information, refer to "Social Hub" on page 90.

Talk: Chat with other Google Talk users. For more information, refer to "Google Talk" on page 47.

Task Manager: View and manage active applications. For more information, refer to "Task Manager" on page 7.

ThinkFree Office: Provides access to a Microsoft® Office-compatible applications suite. It also provides a centralized location for the management of your online and offline files. For more information, refer to "ThinkFree Office" on page 91.

Video: Play and manage videos stored on an installed memory card. For more information, refer to "Video" on page 64.

Voice Search: Perform a Google search by speaking your search terms. For more information, refer to "Voice Search" on page 55.

World clock: View the date and time in any time zone. For more information, refer to "World Clock" on page 92.

WSJ: Allows you to read the latest edition of The Wall Street Journal newspaper. A shortcut to WSJ appears on a Home screen by default. For more information, refer to "WSJ" on page 92.

YouTube: View and upload YouTube videos, right from your device. A shortcut to YouTube appears on the Main Home screen by default. For more information, refer to "YouTube" on page 56.
Section 3: Contacts and Accounts
This section explains how to manage contacts and accounts.
Accounts
Your device can synchronize with a variety of accounts. With synchronization, information on your device is updated with any information that changes in your accounts.
- Microsoft Exchange: Add your Exchange account to sync Contacts, Calendar and Email.
- Google: Add your Google account to sync your Contacts, Calendar and Gmail.
- Facebook: Add your Facebook account to sync Contacts.
- Twitter: Add your Twitter SNS Service to sync Contacts.
- MySpace: Sync with MySpace SNS Service for Contacts.
Note: You must register your device with your social networking site before using the device to access the network.
Setting Up Your Accounts
Set up and manage your synchronized accounts with the Accounts and sync setting.
- From a Home screen, press the Menu Key → Settings → Accounts and sync.
- Touch Add account, then touch the account type.
- Follow the prompts to enter your account credentials to complete the set-up process.
- The device communicates with account servers to set up your account. When complete, your account appears in the Manage accounts area of the Accounts and sync screen.
Setting Up a Facebook Account
Note: You must register your device with your social networking site before using the device to access the network.
- From a Home screen, press the Menu Key → Settings → Accounts and sync → Add account → Facebook. The Welcome to Facebook Sync screen displays.
- Touch Next.
- Enter your Email address and Password, then touch Log in.
- Follow the prompts to complete the set-up.
Setting Up a Twitter Account
Note: You must register your device with your social networking site before using the device to access the network.
- From a Home screen, press the Menu Key → Settings → Accounts and sync → Add account → Twitter. The Welcome to Twitter Sync screen displays.
- Touch Next.
- Enter your Username or email address and Password, then touch Log in.
- Follow the prompts to complete the set-up.
Setting Up a MySpace Account
Note: You must register your device with your social networking site before using the device to access the network.
- From a Home screen, press the Menu Key Settings → Accounts and sync → Add account → MySpace. The Welcome to MySpace Sync. screen displays.
- Touch Next.
- Enter your Email and Password, then touch Log in.
- Follow the prompts to complete the set-up.
Contacts
Store contact information for your friends, family and colleagues, to quickly access information or to send a message.
To access Contacts:
▶ From a Home screen, touch Applications → Contacts .

Creating Contacts
- From a Home screen, touch → Contacts →
Applications

- At the Save contact to prompt, touch an account for synchronizing the contact (available options depend on the accounts you have set up for synchronization).
- Touch contact fields to enter information:
- Touch the Photo ID to select a photo to identify the contact.
- Touch First name, then enter a first name for the contact.
- Touch Last name, then enter a last name for the contact. Touch to enter a Name prefix, Middle name, Name suffix, Phonetic given name, Phonetic middle name, or Phonetic family name.
- Touch Phone number to enter a phone number, then touch the Label button to choose a label from Mobile, Home, Work, Work fax, Home Fax, Pager, Other, Custom, or Callback to create a custom label. To add another number, touch.
- Touch Email address to enter an email address, then touch the Label button to choose a label from Work, Home, Mobile, Other, or Custom to create a custom label. To add another address, touch.
- Touch Instant msg to enter an instant message address, then touch the Label button to choose a label from Google Talk, AIM,
Windows Live, Yahoo!, Skype, QQ, ICQ, Jabber, or Custom to create a custom label. To add another IM, touch.
- Touch Groups to assign the contact to a group. For more information about Groups, see "Groups" on page 34.
- Touch Postal address fields to enter a physical address.
- Touch Organization fields to enter a company name or association. • To add more fields, touch More to choose Note, Nickname, Web address, Birthday, and Anniversary.
- When you finish entering information, touch Done.
Updating Contacts
Make changes to update an existing contact.
- From a Home screen, touch
Applications

→Contacts

- Touch a contact to view its information, then touch Edit.
- Continue entering contact information. For more information, refer to "Creating Contacts" on page 31.
- To delete a contact, touch Delete. At the prompt, touch OK.
Linked Contacts
Your device can synchronize with multiple accounts, including Google, Corporate Exchange, and other email providers, plus social networking sites like Facebook, Twitter, and MySpace. When you synchronize contacts from these accounts with your device, you may have multiple contacts for one person.
Linking, or joining, imported contact records allows you to see all the contact's numbers and addresses together in one Contact entry. Linking also helps you keep your contacts updated, because any changes that your contacts make to their information in the respective accounts is automatically updated the next time you synchronize with the account.
Linking contacts
- From a Home screen, touch
Applications

→Contacts
- Touch a contact to display its information.
- Press the Menu Key → More → Join contact and then touch another contact to link.
Unlinking contacts
- From a Home screen, touch
Applications

→Contacts

- Touch a contact to display its information.
- Touch the Joined contacts field to display linked contacts.
- Touch next to the contact to unlink it from the displayed contact.
Get Friends
Use the Get Friends feature to sync with your accounts. You can choose an account you have already added or add a new account.
For more information about setting up accounts on your device, see "Setting Up Your Accounts" on page 29.
- From a Home screen, touch
Applications

→Contacts

- Press the Menu Key → Get friends.
- Touch Add my account, then touch an account. For more information, refer to "Setting Up Your Accounts" on page 29.
- Press the Menu Key → Sync now.
Contacts Display Options
- From a Home screen, touch
Applications

→ Contacts

- Press the Menu Key → Display options to set options:
- Touch Only contacts with phones to restrict display to contacts with phone numbers.
- Touch Sort by to list contacts by First name or Last name.
- Touch Display contacts by to list contacts by First name first or Last name first
- Touch Device to choose groups to display or touch an account to choose display categories.
- Touch Done to save options.
Sending Namecards
Sending a Namecard (vCard)
You can send contact namecards as vCards by way of Bluetooth to other Bluetooth devices or in an Email or Gmail as an attachment.
Note: Not all Bluetooth devices accept contacts and not all devices support transfers of multiple contacts. Check the target device's documentation.
- From a Home screen, touch
→ Contacts

Applications

- Press the Menu Key → Send namecard via.
- Touch contact(s) to mark them for sending, then touch Send. A check mark indicates marked contacts.
- At the prompt, choose a sending method, then follow the prompts to send the namecard:
- Bluetooth: For more information, refer to "Bluetooth" on page 70.
- Email: For more information, refer to "Email" on page 43.
- Gmail. For more information, refer to "Composing and Sending Gmail" on page 42.
Note: Touch Use by default for this action to use the selected sending method every time you send a namecard.
Exporting and Importing Contacts
You can export your contact list to an installed memory card or import contacts (previously exported) from a memory card.
- From a Home screen, touch
Applications

→ Contacts

- Press the
Menu Key → Import/Export
- Touch Import from SD card or Export to SD card, then follow the prompts to complete the operation.
My Profile
My profile is your own contact record. You can send My profile as a vCard by way of Bluetooth or as an attachment by way of Email or Gmail.
- From a Home screen, touch Applications → Contacts.
- Press the Menu Key → More → My profile to display your contact information.
- To add information, press the Menu Key → Edit. For more information, refer to "Creating Contacts" on page 31.
Sending My Profile
You can send My Profile as a vCard by way of Bluetooth to other Bluetooth devices or as an attachment to a Gmail or other email.
- From a Home screen, touch Applications → Contacts .
- Press the Menu Key → More → My profile to display your contact information.
- Press the Menu Key → Send via.
- At the prompt, choose a sending method, then follow the prompts to send the profile:
- Bluetooth: For more information, refer to "Bluetooth" on page 70.
- Email: For more information, refer to "Email" on page 43.
For more information, refer to "Composing and Sending Gmail" on page 42.
Note: Touch Use by default for this action to use the selected sending method every time you send My Profile.
Groups
Assign contacts to Groups to make searching for contacts faster or to quickly call or send messages to group members. You can also assign a ringtone to a group, which lets you easily recognize incoming calls from group members.
Creating a New Group
- From a Home screen, touch Applications → Contacts , then touch the Groups tab.
- Touch
- Touch the Enter group name field to enter a group name.
- Touch Done to save the new group.
Deleting a Group
- From a Home screen, touch Applications

→ Contacts → Groups.
- Press the Menu Key → Delete groups.
- Touch a group to mark it or touch Select all to mark all groups. A check mark indicates marked groups.
- Touch Delete to delete the group(s).
Editing a Group
- From a Home screen, touch Applications

→ Contacts , then touch the Groups tab.
- Touch a Group to display it.
- Press the Menu Key → Edit group.
- Touch Done to save the changes.
Adding and Removing Group Members
- From a Home screen, touch Applications

→ Contacts, then touch the Groups tab.
- Touch a Group to display it.
- Press the Menu Key → Edit group members.
- To add a contact, touch the contact name on the left side of the screen.
- To remove a contact from the group, touch - next to the contact name.
Tip: You can also change a contact's group associations by editing the contact. For more information, refer to "Creating Contacts" on page 31.
Sending a Message to Group Members
- From a Home screen, touch Applications → Contacts , then touch the Groups tab.
- Touch a Group to display it.
- Touch Send, then touch Send email to create a new email.
- Touch contacts to mark them as recipients for the new message, then touch Send.
- The new message displays with marked contacts as recipients. For more information, refer to “Composing and Sending Email” on page 44.
Favorites
Mark contacts with a star to identify them as Favorites.
Favorites display on the Favorites tab in Contacts for fast viewing or messaging and are indicated by in the contact record.
Creating and Removing Favorites
- From a Home screen, touch
Applications

→ Contacts

- Touch a contact to display it, then touch the star next to the contact name.


next
- Touch the Star again to remove the contact from the Favorites list.
Accessing and Editing Favorites
- From a Home screen, touch Applications → Contacts , then touch the Favorites tab.
- Touch Edit Favorites to display all Favorites.
- Touch a contact to add it to the Favorites list.
- Touch next to a contact to remove it from the Favorites list.
Section 4: Entering Text
This section describes how to enter words, letters, punctuation and numbers when you need to enter text.
Virtual QWERTY Keyboard
Your device uses a virtual QWERTY keyboard for text entry. Use the keyboard to enter letters, punctuation, numbers, and other characters into text entry fields or applications. Access the keyboard by touching any text entry field.
The virtual QWERTY keyboard displays at the bottom of the screen. By default, when you rotate the device, the screen orientation updates to display the keyboard at the bottom of the screen.

Swype Keyboard
Text Input Methods
Your device offers two text input methods:
- Swype: Swype is a new text input method that allows you to enter words by gliding your finger over the virtual QWERTY keyboard, lifting your finger between words. You can also enable Word prediction, which matches your key touches to common words.
- Samsung Keypad: The Samsung Keyboard is a virtual QWERTY keyboard that allows you to enter text by touching keys on the screen. The Samsung Keypad includes predictive text, which matches your key touches to common words so that you can select the word to enter it into your text.
Changing the Input Method
When entering text, you can select the text input method.
- Touch and hold on a text input field
The Select Input Method popup displays.
- Touch an input method:
- Swype
- Samsung keypad
Entering Text Using Swype
Swype is a new way to enter text on touch screens. Instead of touching each key, use your finger to trace over each letter of a word. For each word, place your finger on the first letter and glide to the subsequent letters, lifting on the last letter.
This example shows how to enter the word "this". Put your finger down on the "t" and, without lifting, glide it to the "h", then to the "i", then over to the "s".

Here are a few tips to get you started:
- Spacing is automatic: When you finish a word, just lift your finger and start the next word.
- Double letters: Just "scribble" on the key.
- Capitalization: Swype recognizes and capitalizes the first word of sentences. If you want to capitalize a word that is not at the beginning of a sentence, just glide above the keyboard before gliding over the next letter.
- Contractions: Swype recognizes most words that include an apostrophe; just swype the letters of the word, including the apostrophe.
- Punctuation: Tap and hold a key to view a punctuation menu and make a selection.
- Accented characters: Just glide through the letters of the word. Swype usually recognizes the word and correctly accents the letters.
- Error correction: If you make a mistake, double-tap on the word you want to change.
Configuring Swype
Configure Swype to your preferences.
- For more information, refer to "Swype" on page 112.
- While entering text, touch the Swype Key → Options.
Swype Help
While entering text, you can get tips and help about using Swype.
- Touch the Swype Key to show Tips. Tap More Tips to see more.
- Touch the Swype Key → Tutorial for an interactive tutorial.
Entering Symbols and Numbers
Using the Swype Keyboard:
- Touch and hold on a key to enter the symbol or number at the top of the key.
- Touch and hold on a key until a menu of all characters available on that key appears, then touch a character to enter it.
- Touch to switch to Symbols mode, then touch a key.
- For more symbols, touch Shift, then touch the corresponding key.
Using the Numeric Keyboard
Switch to a Numeric Keyboard, to quickly enter numbers and mathematical operators:
▶ Touch and hold 123 ABC
Using Swype Speech Recognition
Enter text by speaking. Swype recognizes your speech and enters text for you.
Touch the microphone icon. When the "Speak now" prompt appears, speak the text you want to enter.
Editing Keyboard
The Editing Keyboard provides a quick way to move the cursor and highlight text. If the application in which you are working supports editing, you can cut, copy, or paste highlighted text.
Swype from the Swype Key to the SYM Key (123 SYM).

Entering Text Using the Samsung Keypad
The Samsung Keypad is a custom virtual QWERTY keyboard, featuring predictive text. Input characters by tapping the on-screen keys with your finger or use speech recognition.
As you enter characters, predictive text matches your key touches to common words and displays them. Select a word from the display to insert it into your text.

Configuring Samsung Keypad
Configure the Samsung Keypad to your preferences.
- For more information, refer to "Samsung Keypad" on page 113.
- While entering text, touch Settings.
Entering Upper and Lower Case Letters
The default case is lower case (abc). Enter upper and lower case alphabet letters by touching the Shift key to toggle the case, before touching the letter key(s).
- Touch once to switch from abc to Abc mode
- Touch and hold to switch to ABC mode
Entering Symbols and Numbers
To enter a number, touch , then touch the corresponding key.
To enter common symbols, touch to switch to Symbols mode, then touch the corresponding key.
There are three pages of symbols. Touch to switch to the next page.
Using Speech Recognition
Enter text by speaking. Samsung Keypad recognizes your speech and enters text for you.
Note: Enable Voice Input in Samsung keypad settings. For more information, refer to "Samsung Keypad" on page 113.
▶ Touch Speech Recognition
Section 5: Messaging
This section describes how to send and receive messages and other features associated with messaging.
Types of Messages
Your device supports these types of messages:
- Gmail: Send and receive Gmail from your Google account.
- Email: Send and receive email from your email accounts, including Corporate Exchange mail.
- Google Talk: Chat with other Google Talk users.
Note: Your Wi-Fi-only device does NOT support voice calling and messaging services. Please disregard any “dial” and “message” related menus because some Gmail options are identically set in all Android devices.
Gmail
Send and receive emails with Gmail, Google's web-based email.
Tip: To set up your Google account on your device, use Accounts and sync settings. For more information, refer to “Accounts and Sync” on page 108.
▶ From a Home screen, touch Applications
→ Gmail.

Setting Up Your Gmail Account
The first time you launch Gmail, your device prompts you to set up your Google account.
Note: You can use more than one Google account on your device. To add another account, use the Menu Key → Accounts option.

Applications

- At the Adding an Account screen, touch Next to begin, then touch an option:
- Create a new account: follow the prompts to create a new account.
- Sign in: Enter your Google Username and Password, then touch Sign In.
- The device communicates with the Google server to set up your account and synchronize your email. When complete, your Gmail appears in the Inbox.
Refreshing Your Gmail Account
Refresh your account to update your device from the Gmail servers.
- From a Home screen, touch
Applications

→ Gmail
- Press the
Menu Key

Refresh.
Managing Your Gmail Account
Use menu options to manage your Gmail.
- From a Home screen, touch
Applications

→ Gmail
- Press the Menu Key for these options:
- Refresh: Update your device from the Gmail servers. • Compose: Create and send new Gmail. • Accounts: Choose a Gmail account or add a Google account.
- Go to labels: View Gmail by label. • Search: Enter keywords to search mail.
- More
- Settings: Configure settings. For more information, refer to "Gmail account settings" on page 43. — Help: Learn about using Gmail. — About: View information about Gmail.
Composing and Sending Gmail
- From a Home screen, touch
Applications


- Press the
Menu Key
Compose.
- Touch the To field to enter recipients. As you enter names or email addresses, matching contacts display. Touch a contact to add it to the field.
- Touch the Subject field to enter a subject.
- Touch Compose Mail to enter the text of your email.
- While composing a message, press the Menu Key ☐ for these options:
- Send: Send the message.
- Save draft: Save the message as a draft for sending later.
- Add Cc/Bcc: Create Cc (copy) and Bcc (blind copy) fields in the message. After creating the fields, touch to enter recipients.
- Attach: Launch Gallery to select a photo to add to the message.
- Discard: Close the message without saving. • Help: Learn about using Gmail.
- Touch Send to send the message.
Gmail account settings
- From a Home screen, touch
Applications

→ Gmail
- Press the Menu Key → More → Settings for settings:
- General settings:
– Signature: Create a text signature to add to outgoing messages. - Confirm actions: Have your device prompt you to confirm Archive, Delete, and Send actions. - Reply all: Enable or disable Reply All as the default action when responding to messages. - Auto-advance: Choose a screen to show after you delete or archive a conversation. - Message text size: Set the size of text in message displays. - Batch operations: Allow changes to labels on more than one conversation. - Clear search history: Remove previous searches you performed. - Labels: Choose which labels are synchronized.
- Notification settings:
- Email notifications: When enabled, notifications for new email appear in the Status Bar.
- Select ringtone: Choose a ringtone for new email notifications.
- Vibrate: Choose vibration settings for email notifications.
- Notify once: When enabled, a notification appears in the Status Bar for new email, not for every new message.
Use Email to view and manage all your email accounts in one application.
Configuring Email Accounts
- From a Home screen, touch
Applications

- At the Set up email screen, enter an Email address and Password and touch Next.
- Enter an account name for the email account just added, which is displayed on the inbox for the email account.
- Enter your name, which is displayed on outgoing messages.
- Touch Done.
The device communicates with the appropriate server to set up your account and synchronize your email. When complete, your email appears in the Inbox for the account.
- Enter account credentials, then complete set-up by following the prompts to configure account options. Available options vary, depending on the provider.
If the account includes synchronization of contacts and calendars, you can choose whether to synchronize these features with your device.
- To add additional email accounts, press the Menu Key → Account manager → Add Account, then enter the Email address, Password, and so on.
Note: To configure email account settings at any time, use the Menu Key Account settings.
Composing and Sending Email
- From a Home screen, touch Applications
- Touch an account, if you have more than one account set up, then touch New message 📋.
- Touch the To field to enter recipients. As you enter names or email addresses, matching contacts display. Touch a contact to add it to the field.
- Touch Cc/Bcc to enter recipients in the Cc or Bcc fields.
- Touch the Subject field to enter a subject.
- Touch the text field to enter the email text.
- Touch Attach to add an attachment:
- Contact: Attach a contact name card.
- Location: Attach your current location or find a location on a map.
- While composing a message, press the Menu Key for these options:
- Save as draft: Save the message in Drafts.
- Discard: Delete the message without sending.
- Touch Send to send the message.
Managing Emails
Combined Inbox
You can view emails you receive to all accounts in the All inboxes screen or you can view email accounts individually.
- From a Home screen, touch Applications → Email
- Touch the pop-up menu at the top left of the screen to select:
- All inboxes: View all emails in a combined inbox.
- View emails for the account.
Printing Emails
You can print emails by way of Wi-Fi on a supported, Wi-Fi-enabled printer.
- From a Home screen, touch
Applications


- Open an email to view it.
- While viewing the email, press the
Menu Key

Print.
- If you are already connected to Wi-Fi, your device displays available printers. Touch a printer to proceed.
- or -
At the prompt, touch OK, then connect to a Wi-Fi network. After connecting, your device displays available printers. Touch a printer to proceed.
- Follow the prompts to print the email.
Note: These Samsung printers are supported: CLP-310 Series, CLP-320 Series, CLP-610 Series, CLP-620 Series, CLP-660 Series, CLP-670 Series, CLP-770 Series, CLX-3170 Series, CLX-3180 Series, CLX-3240 Series, CLX-6200 Series, CLX-6222 Series, CLX-6250 Series, CLX-8385 Series, CLX-8540 Series, CLX-9250_9350 Series, ML-1630W Series, ML-1865W Series, ML-2525W Series, ML-2580 Series, ML-2850 Series, ML-2853 Series, ML-2855 Series, ML-3470 Series, ML-3475 Series, ML-4050 Series, ML-4055 Series, ML-451x 501x Series, ML-4550 Series, ML-4555 Series, ML-5510 6210 Series, ML-8x00 Series, SCX-3200 Series, SCX-4623 Series, SCX-4323FW Series, SCX-4x24 Series, SCX-4x25 Series, SCX-4x26 Series, SCX-4x28 Series, SCX-4500W Series, SCX-5635 Series, SCX-5835_5935 Series, SCX-6545 Series, SCX-8030_8040 Series.
Account Manager
Account Manager lets you use settings to configure handling of email on your device.
Note: Available settings may depend on the email account and include setting how much email to synchronize, creating signatures for emails you send, and other handling options.
- From a Home screen, touch

Applications

- Press the
Menu Key

Account manager, then touch
an account for options:
- General settings:
– Account name: Enter a name to identify this account. - Your name: Enter your name, to appear on emails from this account. — Signature: Enter a signature to add to emails from this account. - Email check frequency: Lets you configure how often the device queries the remote server for new email changes. Options are: Never, Every 5 minutes, Every 10 minutes, Every 15 minutes, Every 30 minutes, Every hour, Every 4 hours, or Once a day. - Default account: When enabled, email from your device is automatically sent from this account. - Always Cc/Bcc myself: When enabled, your email address is copied on all emails you send.
- Exchange ActiveSync settings (Exchange accounts only):
— Period to sync Email: Choose how much email you want to see on your device. - Empty Server Trash: Touch to delete emails from the Trash or Deleted folder on the Email server. - Sync schedule: Set the schedule for synchronizing email from the server. – Out-of-office Settings (not supported). — Size to retrieve emails: Set a maximum size for retrieving emails. – Period to sync Calendar: Touch to choose a Calendar sync period. Options are: 2 weeks, 1 month, 3 months, 6 months, or All calendar.
- Notification settings:
- Email notifications: When enabled, the New Email icon appears in the Status Bar when a new email arrives.
- Select ringtone: Choose a ringtone for email notifications for this account. — Vibrate: When enabled, email notifications for this account are accompanied by vibration.
- Server settings:
- Incoming settings: Configure server settings.
- Outgoing settings: Configure outgoing settings.
- Sync contacts: When enabled, contacts from your account are synchronized with your device's Contacts.
- Sync calendar: When enabled, events from your account are synchronized with your device's Calendar.
- Common Settings :
- Forward with files: Enable or disable forwarding of file attachments.
Google Talk
Chat with other Google Talk users.
Tip: Talk requires that you have a Google account. To set up your Google account on your device use Accounts and sync settings. For more information, refer to "Accounts and Sync" on page 108.
▶ From a Home screen, touch Applications → Talk talk.
Note: If you have already set up your Google account, you are automatically logged in. If you do not have a Google account, you can touch Create to create a new Google account.
Section 6: Web and Social Networking
Browser
Your device is equipped with a full HTML Browser that allows you to access the internet.
▶ From a Home screen, touch Browser

Tip: Browser appears by default as a Primary shortcut on the Home screen.
Navigating the Web
Command Keys
- Press the Back Key or return to the previous page.
- Press and hold the Back Key to display a list of bookmarks.
- Touch and hold to display a list of recent pages.
- Touch to go forward to a recent page.

Touching and dragging
- Touch and drag your finger on the screen to navigate pages and to reposition pages within the screen.

Entering text in a field
- While browsing, touch a text field to display the virtual QWERTY keyboard to enter text.
Zoom
- Tap the screen twice to zoom in or out.
Tip: For convenient browsing, you can rotate the device to landscape mode.
Selecting items on a page
While browsing, use gestures and menus to navigate:
- Touch an item to select it.
- Touch a hyperlink to follow the link.
- Touch and hold on a hyperlink for these options:
- Open in new window: Open a new window to display the linked page.
- Copy link URL: Save the link's URL to the clipboard.
- Add link to Bookmarks: Create a bookmark to the page (without loading it).
- Save link: Save the linked page to Download history.
- Share link: Send the link by way of Bluetooth, Email, or Gmail.
You can have multiple windows open at one time to easily switch between windows.
- From a Home screen, touch Browser
- To open a new window, touch Windows
- To switch to another open window, touch , then touch another open window to display it.


Entering a URL
Access a website quickly by entering the URL.
- From a Home screen, touch Browser
- Touch the URL field at the top of the screen, then enter the URL using the virtual QWERTY keyboard.
- As you enter characters, potential matches display. Continue entering characters or touch a match to complete the URL.
- Touch Go to load the page.

Copying Fields or Text
Copy information from a web page to the clipboard for pasting.
Copying text
- From a Home screen, touch Browser
- Browse to a web page.
- On the web page, touch and hold on the text, then touch Copy on the pop-up menu.
- To paste the copied text, navigate to the desired field (or to another application), then touch and hold in a text field and touch Paste on the pop-up menu.
Copying a hyperlink or URL
- From a Home screen, touch Browser
- Browse to a web page.
- Touch and hold on the link or URL, then touch Copy link URL on the pop-up menu.
- To paste the copied link or URL, navigate to the desired field (or to another application), then touch and hold in a text field and touch Paste.
Using Bookmarks
While browsing, bookmark a site to quickly access it later.
Creating a bookmark
- From a Home screen, touch
Browser

- Browse to a website, then touch
Bookmarks

- Touch Add bookmark.
- At the Add bookmark prompt, confirm the Name and URL for the bookmark, then touch OK to save the bookmark.
Accessing bookmarks and history
Launch a bookmarked page or reload recent pages.
- From a Home screen, touch
Browser

- Touch Bookmarks
- On the Bookmarks tab, use these options:
- Touch a bookmark to load the page.
- Touch and hold on a bookmark for these options:
- Open: Launch the bookmarked page.
- Open in new window: Open the linked page in a new window. — Add shortcut to Home: Create a bookmark on the Home screen.
- Share link: Use Bluetooth, Email, or Gmail to send the link.
- Copy link URL: Save the link's URL to the clipboard.
- Set as homepage: Assign the bookmarked link as the home page.
- Delete bookmark: Remove the bookmark.
- On the Most visited tab, use these options:
- Touch a page to reload it.
- Touch the star next to a page to bookmark it.
- Touch and hold on a page for these options:
- Open: Launch the web page.
- Open in new window: Launch the web page in a new window.
- Add bookmark/Remove from bookmarks: Bookmark the page or remove the bookmark for this page.
- Remove from history: Remove the record of this page.
- On the History tab, use these options:
- Touch a page to load it.
- Touch Today, Yesterday, or Last 7 days for lists of recent pages.
- Touch the star next to a page to bookmark it.
- To clear the history, touch Clear.
- Touch and hold on a page for these options:
- Open: Launch the web page.
- Open in new window: Launch the web page in a new window.
- Add bookmark/Remove from bookmarks: Bookmark the page or remove the bookmark for this page.
- Remove from history: Remove the record of this page.
Browser Menu
While viewing a web page, press the Menu Key for options:
- Add bookmark: Create a bookmark for the current page. • Find on page: Search for content on the current page.
- Download manager: View and manage recent downloads.
- Brightness: Set the display's brightness.
- Settings: Customize the Browser (see Browser Settings).
- More:
- Print: Print the webpage by way of Wi-Fi on a supported, Wi-Fi-enabled printer.
- Share page: Use Bluetooth, Email, or Gmail to send the page's URL.
- Page info: View information about the current page, including the URL.
Browser Settings
- From a Home screen, touch Browser.
- Press the Menu Key → Settings:
• Page content settings
- Default zoom: Choose a default zoom level for web pages.
- Open pages in overview: When enabled, displays an overview of newly-opened pages.
- Text encoding: Choose a default character set for web pages.
- Block pop-up windows: When enabled, blocks pop-up windows.
- Load images: When enabled, images are automatically loaded when you visit a page. When disabled, images are indicated by a link, which you can touch to download the picture.
- Auto-fit pages: When enabled, the Browser automatically sizes web pages to fit your device's display.
- Landscape view only: When enabled, all pages display in the wider landscape orientation (rotate your device to view pages in landscape mode).
- Enable JavaScript: When enabled, the Browser automatically runs JavaScript scripts on pages you visit.
- Enable plug-ins: When enabled, the Browser automatically loads and runs plug-ins on pages you visit.
- Open in background: When enabled, new windows open behind the current window.
- Set home page: View and set the default first page that displays when you launch the Browser.
- Default storage: The default location for downloads (not configurable).
- Privacy settings
- Clear cache: Delete content and databases stored on the device. – Clear history: Delete the list of previously-visited pages.
- Accept cookies: When enabled, allows Browser to save and read cookie information used by web pages.
- Clear all cookie data: Delete cookie information saved to the device.
- Remember form data: When enabled, stores information you enter into forms to make future forms easier. – Clear form data: Deletes saved form information.
Web and Social Networking
- Enable location: When enabled, sites you visit can request access to your location. – Clear location access: Clear location access for all web sites.
• Security settings
- Remember passwords: When enabled, saves usernames and passwords for sites you visit, to make future visits easier.
- Clear passwords: Clear all saved usernames and passwords. — Show security warnings: When enabled, the Browser warns you if there is a problem with a site's security.
- Advanced settings
- Website settings: View and manage settings for individual websites.
- Reset to default: Clear all browser data and reset all settings to the factory defaults.
Maps
Use Google Maps to find your current location, get directions, and other location-based information. The Google Maps shortcut appears by default on the Home screen.
Note: You must enable location services to use Maps. Some features require Standalone or Google location services. For more information, refer to "Location and Security" on page 103.
From a Home screen, touch Applications

→ Maps - or -
From a Home screen, touch Maps

Tip: A shortcut to Maps appears on the Main Home screen by default.
Navigating the Map
Zooming
- Double-tap on the screen to zoom in.
- Touch Zoom in or Zoom out
Scrolling
Touch and drag on the screen to reposition the map in the display.
Touch
- Touch an icon on the map to display information about the location.
Maps Menu
- From a Home screen, touch
Maps

- While viewing a map, press the Menu Key for these options:
Search: Find a location.
- Directions: Get driving, public transport, or walking directions.
- Direct geodriving, public transport, or walking directions.
- Clear: Remove search results from the map.
- - Join Latitude: Join Latitude, to share your location with friends you choose and Google.
- Join Latitude: Join Latitude, to share your location with friends you choose and Google.
– Labs: Access experimental features. - Sign In: Enter your Google Username and Password, then touch Sign In - Help: Learn about Google maps. - Terms, Privacy & Notices: View information about Google Maps, including the Terms and Conditions, Privacy Policy, Legal Notices, and Web History. - About: View information about Maps.
– Labs: Access experimental features. - Sign In: Enter your Google Username and Password, then touch Sign In. - Help: Learn about Google Maps. - Terms, Privacy & Notices: View information about Google Maps, including the Terms and Conditions, Privacy Policy, Legal Notices, and Web History. - About: View information about Maps.
Latitude
Use Google Latitude to locate your friends on a map and share or hide your location.
From a Home screen, touch Applications → Latitude
Navigation
Use Google Navigation to find a destination and to get walking or driving directions.
Note: You must first create a wi-fi connection to use Navigation.
- From a Home screen, touch
Applications

→ Navigation
- To find a destination, touch an option:
- Speak Destination: Say the name or address of your destination.
- Type Destination: Enter the destination.
- Contacts: Choose a destination from a contact record.
- Starred Places: Choose destinations you have marked as favorites.
- Recent Destinations: Choose from recent destinations.
- While navigating, press the
Menu Key for options:
- Search: find a location.
- Route info: View information about the current route.
Web and Social Networking
- Layers: Choose map layers to display.
- Mute / Unmute: to silence voice-guided prompts.
- Exit Navigation: discard route information.
- More – Directions list: View directions in a step-by-step list.
- Set destination: Choose or enter a destination.
- Help: Learn about Google Maps.
- Terms, Privacy & Note: View information about Google Maps, including the Service Agreement and Privacy Policy, and give Feedback.
News & Weather
View Google news and weather.
- From a Home screen, touch
Applications

→ News & Weather

- Press the Menu Key for these options:
- Ref: Update the application from the Google servers.
- Settings :
- Weather settings Choose location(s) and set the metric for temperature displays.
- News settings Choose topics, configure settings for fetching articles and images, and view the terms of service for news service. – Refresh settings: Choose options for updating content.
- Application version: Touch and hold to see the application version number.
Places
Google Places uses your location to help you find nearby destinations, such as restaurants, bars, hotels, attractions, ATMs, and gas stations, or you can enter a location.
- From a Home screen, touch
Applications


- Touch a category or touch
Find places to enter criteria.
- Touch a destination to view details and for map and navigation options.
Google Search
Search the internet, and your device, using the Google search engine.
Tip: The Google Search widget appears on a Home screen by default. For information about displaying widgets on the Home screen, see “Adding Widgets to the Home screen” on page 20.
- From a Home screen, touch the
Google Search widget

- or -
From a Home screen, touch Applications

→ Google Search 8.
- Enter search criteria to display matching searches.
- Touch Voice Search to search using spoken commands.
Voice Search
Voice Search offers voice-activated Google searches.
Tip: Voice Search is also available on the Google Search widget, which appears on a Home screen by default.
- From a Home screen, touch
Applications

→ Voice Search.
- Voice Search uses your location to improve search results and offer other services. Touch Agree to allow location-based searches or Disagree to disallow.
- Touch Speak now, then speak your search criteria slowly and clearly. Google searches for the information and displays results.
Feeds and Updates
This application allows you to have feeds and updates from Facebook, MySpace, and Twitter displayed on your tablet.
- Press to activate the Home screen.
- Navigate to a desired empty Home screen.
- Touch and hold on an empty area of the screen.
- From the Add to Home screen window tap Widgets.
- Tap Feeds and Updates.
The Feeds and Updates screen displays on the selected Home screen.
- Tap on the Tap here to add account field.
- Select the Social networks that you would like to have added to your Feeds and Updates. The options are:
Facebook, MySpace, and Twitter.

You must first sign in to the social networks for which you would like to have feeds and updates displayed on your tablet.
- Enter Email and Password and tap Log in.
- The Feeds and Updates screen is updated with the latest feeds and updates from your social networks.
- Tap in the top right corner of the screen to automatically refresh your social networking feeds and content.

- Tap to display the following settings:
- Auto refresh: this option allows you to set how often your social networks are updated. Choose None, Every 1 hour, Every 4 hours, Every 8 hours, or Once a day.
- Select service: this option allows you to turn the Feeds and Updates to your different social networks on or off. Tap the social networks to toggle the green arrows on and off. The green arrow indicates that the Feeds and Updates are on.
YouTube
View and upload YouTube videos right from your device.
- From a Home screen, touch YouTube
-or-
From a Home screen, touch Applications
→ YouTube

- Browse and select videos for viewing.
- While browsing, press the Menu Key for these options:
• Home: Display the main YouTube screen.
• Browse: view videos by category such as Comedy, Music, or Education.
• Search: Enter criteria to find videos.
• My Channel: Add an account and configure account settings.
• Upload: Transfer a video from your device to YouTube.
• Settings: Configure display and search settings and view information about the application.
Section 7: Music
Music Player
The Music Player plays songs from an installed memory card.
- From a Home screen, touch Applications

→ Music
- Music Player scans your memory card and displays songs on the Songs, Playlists, Albums, Artists, or Genres tabs.
- Touch a song or playlist to begin playback.

- During playback, use the sound and playlist controls:
- Info: Touch to view information about the current song. - Favorite: Mark the current song as a Favorite (starred).
- Volume: Touch to activate on-screen volume control, then touch and drag on the scale to set volume. You can also press the Volume Key on the side of the device to adjust playback volume.
- List mode: Touch to switch to the list of songs.
- 5.1 Channel Mode: Touch to enable stereo sound.
- Shuffle: When enabled, songs play in random order. When disabled, songs play in the order they appear in List view.
- Repeat: Touch to repeat the current song, repeat all songs, or disable repeat mode.
- Playback controls:
- Touch to advance to the next song. Touch and hold to scan forward through the current song.
- Touch to go back to the previous song. Touch and hold to scan backward through the current song.
- Touch to pause playback. Touch to resume playback.
Creating a Playlist
- From a Home screen, touch Applications → Music, then touch the Playlists tab.
- Press the Menu Key → New playlist, then touch the name field to enter a name for the playlist.
- Touch Done to save the new playlist.
Adding Songs to Playlists
- From a Home screen, touch Applications → Music, then touch the Playlists tab.
- Touch the playlist, then press the Menu Key → Add music.
- Touch songs to select them or touch Select all. A checkmark indicates selected songs.
- Touch Add to add the selected songs to the playlist.
Adding a song to a playlist during playback
- From a Home screen, touch Applications → Music

- Touch a song to play it.
- Press the Menu Key → Add to playlist.
- Choose one of these options:
- Touch a playlist to add the selected song to the playlist.
- Touch Create playlist to create a new playlist for the song.
Music Player Settings
- From a Home screen, touch Applications → Music

- Press the Menu Key → Settings for these options:
- Equalizer: Touch to enable a visual effect, then select an effect. • Effect: Touch to choose a sound effect.
- Music menu: Choose the types of menus to display as tabs in Music Player.
Music Hub
Samsung Music Hub makes your device a personal music manager and lets you access, buy, and download millions of music tracks. Access top albums, top tracks, featured albums, and new releases. Music Hub allows you to search for tracks, albums, and artists. Enjoy music samples before you download them directly to your Wi-Fi Galaxy Tab.
Note: You must sign up for an account before accessing some of the Music Hub options.
- From a Home screen, touch
Applications

→ Music Hub

- Read the Disclaimer and tap OK to continue or Exit to exit.
The Music Hub Home screen displays.
- Tap one of the following options:
- Home: Displays a top album, top tracks, a featured album, and new releases. Tap an item to display more information and prices.
- Search: Lets you search for tracks, albums, and artists.
- Touch Tracks, Albums & Singles, or Artists and then touch Enter keyword and use the keyboard to type your search request.
- Touch Search. A list of items is displayed.
- Touch an entry in the list to display more information.
- My Music: Displays the following options:
- My Playlist: Tap Recently played to display a list of recently played tracks, My list to view tracks you have added to your list, and My library to view songs you have bought and downloaded.
- Basket: Displays songs that you have selected to buy. Touch CHECK OUT to start the purchase process. – Purchase List: Displays a list of your purchases.
- Settings: Displays the following options:
- Account: Tap SIGN IN, if you have an account, or SIGN UP, if you do not have an account. – Payment: Allows you to set up your payment method.
Section 8: Photos and Video
Camera
Use your device's built-in camera to take photos and record video.

Important!: Do not take photos of people without their permission. Do not take photos in places where cameras are not allowed. Do not take photos in places where you may interfere with another person's privacy.
Taking Photos
- From a Home screen, touch Camera
-or-
From a Home screen, touch Applications

→ Camera
- Using the display as a viewfinder, compose your photo by aiming the lens at the subject. To configure settings, see "Camera Options" on page 61.
- To take the photo, touch the Camera button.
- After taking a photo, touch Image Viewer to view the photo. While viewing the photo, use these options:
- Touch the screen with two fingers or double-tap on the screen to zoom all the way in or out. For more information, refer to "Pinch" on page 18.
- Press the Menu Key for options:
- Share: Send the photo by using AllShare, Bluetooth, Email, Gmail, or Picasa.
- Set as: Assign the photo as Contact icon, Home screen Wallpaper, or Lock screen Wallpaper.
- Delete: Erase the photo.
- Press the Back Key to return to the Camera to take more photos.
Tip: Touch the photo to show or hide Image Viewer options.
Camera Options
Camera options are represented by icons across both sides of the screen. While in Camera mode, touch the following icons to configure the camera:

Shooting mode: Choose an automatic shooting mode, from:
- Single shot: Take a single photo.
- Panorama: Touch the Camera button to take a photo, then use the on-screen guideline to move the viewfinder and take the next 7 shots automatically.
- Smile shot: Touch the Camera button to automatically focus on the subject's face and take the photo. • Self-shot: Take photos with the front camera.

Scene mode: Choose an automatic scene mode from Portrait, Landscape, Night, or Sports, or choose None.

Flash: Choose a flash mode from Auto, On, or Off.

Exposure value: Set the brightness of the photo.

Settings → Image
- Resolutions: Set a size for the image. Options are: 3.2M (2048x1536), w2.4M (2048x1232), 2M (1600x1200), w1.5M (1600x960), w0.6M (1024x600), or 0.4M (800x600).
- White balance: Set the light source. Options are: Auto, Daylight, Cloudy, Incandescent, or Fluorescent.
- Effects: Apply an effect to photos. Options are: Normal, Negative, Black and white, or Sepia.
- ISO: Set the imaging sensitivity. Options are: Auto, ISO100, ISO200, or ISO400.
- Image quality: Choose a quality setting for photos. Options are: Superfine, Fine, or Normal.

Settings → Setup:
- Review: Enable or disable the instant review feature, which displays images immediately after capture. • GPS: Enable or disable tagging of photos with the GPS location.
- Shutter sound: Enable or disable the camera's shutter sound.
- Storage: Set the storage location. Options are: Device or Memory card.
- Reset: Set all Camera settings to the defaults.
Camcorder
Use your device's built-in Camcorder to record high-definition video in 720p resolution.
Tip: A shortcut to Camera appears on a Home screen by default.


Important!: Do not take videos of people without their permission. Do not take videos in places where cameras are not allowed. Do not take videos in places where you may interfere with another person's privacy.
Capturing Video
- From a Home screen, touch Camera 📷, then slide the Mode icon to the Camcorder setting.

- Using the display as a viewfinder, compose your shot by aiming the lens at the subject. To configure settings, see "Camcorder Options" on page 63.
- To start recording, touch the Record button. During recording, the button changes to Pause II. To Pause to temporarily stop recording. To resume recording, touch Record ● again.
- To stop recording, touch the Stop button.
- After recording, touch Image Viewer to view the video.
While viewing the video, use these options:
- Double-tap on the video to zoom all the way in or out.
- Press the Menu Key for the following options:
- Touch Share to send the video via AllShare, YouTube, Bluetooth, Gmail, or Email.
- Touch Play to review the video.
- Touch Delete to erase the video.
- Press the Back Key to return to the Camcorder.
Tip: Touch the video to show or hide Image Viewer options.
Camcorder Options
Configure the camcorder.
Camcorder options are represented by icons across both sides of the screen. While in Camcorder mode, touch the following icons to configure the camcorder:

Recording mode: Indicates recording mode.

Scene: Not available for videos.

Flash: Touch Off or On.

Exposure value: Set the brightness of the video.

Settings → Video :
- White balance: Set the light source. Options are: Auto, Daylight, Cloudy, Incandescent, or Fluorescent.
- Effects: Apply an effect to videos. Options are: Normal, Negative, Black and white, or Sepia. • Video quality: Choose a quality setting for videos. Options are: Fine or Normal.

Settings → Setup:
- Audio recording: Enable to record sound along with video.
- Review: Enable or disable the instant review feature, which displays videos immediately after capture.
- Shutter sound: Enable or disable the camera's shutter sound.
- Storage: Set the storage location. Options are: Device or Memory card.
- Reset: Set all Camcorder settings to the defaults.
Video
Your device's 7-inch 1024x600 WSVGA LCD screen provides playback of videos. Use Video to view and manage videos stored on an installed memory card.
- From a Home screen, touch
Applications


- Touch the Downloaded, Recorded, or Folders tab.
- While viewing the list, press the Menu Key for options:
- List Display videos by Name (default), Date, Size, or Type.
- Share the video with AllShare, YouTube, Bluetooth, Gmail, or Email.
- Delete: Touch videos to select them for deletion, or touch Select all to delete all videos.
- Auto play next: Touch to enable or disable automatic playing of videos in the order they appear.
- Touch a video to play it. While playing a video, touch the screen to display or hide on-screen playback controls.
- During playback, press the Menu Key for options:
- Mosaic search: allows you to see thumbnails of the video in various stages so you can go directly to the desired location.
- Share the video by AllShare, YouTube, Bluetooth, Gmail, or Email.
- Bookmarks: allows you to bookmark your videos.
- Subtitles: allows you to see subtitles for a video, if available.
- Details: provides details about the photo such as Name, Size, Resolution, Duration, Format, and Date modified.
Gallery
Your device's 7-inch 1024x600 WSVGA LCD screen provides high-resolution display of photos and videos.
Use Gallery to view, capture, and manage photos and videos.
Note: Your device comes with a 16GB memory card pre-installed.
Tip: A shortcut to Gallery appears by default on the Main Home screen.
Viewing Videos
- From a Home screen, touch
Applications

→ Gallery

- Touch a category, then touch a video to play it.
Note: Videos are marked with a Play button.
- While viewing a video, press the Menu Key for these options:
- Mosaic search: allows you to see thumbnails of the video in various stages so you can go directly to the desired location.
- Share the video via AllShare, YouTube, Bluetooth, Gmail, or Email. • Bookmarks: allows you to bookmark your videos.
- Subtitles: allows you to see subtitles for a video, if available.
- Details: provides details about the photo such as Name, Size, Resolution, Duration, Format, and Date modified.
Viewing Photos
- From a Home screen, touch
Applications

→ Gallery
- Touch a category, then touch a photo to view it.
- While viewing a photo, touch the screen for these options:
- Slides: Touch to view a slideshow of photos.
- Menu: Touch to display the following options:
- Share: Share the selected photo via AllShare, Picasa, Bluetooth, Gmail, or Email.
- Delete: Erase the photo.
- More: Touch for more options:
- Details: Display details about the photo.
- Set as: Use the picture as Home screen Wallpaper, Lock screen Wallpaper, or a Contact icon.
- Crop: Allows you to crop the image. Touch and drag the sides of the crop box to create the crop area, then touch Save. Touch Discard to stop without cropping the picture.
- Print: Connect to Wi-Fi, then send the photo to a printer.
- Rotate left: Allows you to rotate the picture counterclockwise 90 degrees.
- Rotate right: Allows you to rotate the picture clockwise 90 degrees.
Setting a Photo as a Contact Icon
- From a Home screen, touch
Applications

→ Gallery

- Touch a category, then touch a photo to select it.
- Touch Menu → More → Set as → Contact icon.
- Tap a contact entry and tap Save to save the selected photo as the contact's icon.
Setting a Photo as Wallpaper
- From a Home screen, touch
Applications

→ Gallery

- Touch a category, then touch a photo to select it.
- Touch Menu → More → Set as → Home screen Wallpaper
- Tap and drag the edges of the crop box inward or outward to edit the photo, then touch Save to set the edited photo as the Home screen wallpaper.
Sharing Photos and Videos
Share photos and videos with your friends.

- From a Home screen, touch
Applications
→ Gallery
- Touch a category to display thumbnails, then select items for sharing:
- To select an entire category, press the Menu Key ☐ while viewing categories, then touch Select all → Share.
- To select multiple photos or videos from a category, press the Menu Key ☐ while viewing the thumbnails. Touch thumbnails to mark them for sharing, then touch Share.
- Touch AllShare, YouTube (videos only), Picasa (photos only), Bluetooth, Email, or Gmail, then follow the prompts.
Digital Frame
Display a slideshow of photos, or a clock, along with music from your installed memory card.
- From a Home screen, touch
Applications

→ Digital Frame
- By default, Digital Frame displays a Clock. Tap the screen to choose from:
- Clock: plays a clock on the screen. While displaying a clock, press the Menu Key for these options:
- Clock style: Tap the type of clock and touch OK.
- Go to music: Launches Music Player so you can choose music to accompany the clock.
- Timeout: Set the period of time the clock displays before closing.
- Brightness: Set the brightness of the display. – Time format: Choose from a 12-hour or 24-hour clock.
- Slides: Displays a slideshow of photos from an installed memory card. While displaying slideshow, press the Menu Key for these options:
- Add to slideshow: Browse and select photos to display in the slideshow.
- Slideshow effects: Choose the type of transition between photos in the slideshow.
- Duration: Set the length of time each photo displays.
- Go to music: Launch Music Player, to choose music to accompany the slideshow.
- Timeout: Set the period of time the slideshow displays before ending. – Brightness: Set the brightness of the display.
- Music: Launches Music Player so you can select music to play with the Clock or Slideshow. For more information, refer to "Music Player" on page 57.
Media Hub
Samsung Media Hub is your one stop for the hottest movie and TV content. With hundreds of titles available at your fingertips, entertaining on the go has never been easier. You can rent or purchase your favorite content and conveniently watch anywhere. Featuring the stunning viewing quality Samsung is known for, Samsung Media Hub is your gateway to mobile video like you have never experienced it before.
Note: Media Hub service requires a Media Hub account and depends on service availability.
- From a Home screen, touch
Applications

→ Media Hub
- Read the End-User License Agreement (EULA) and tap Accept to continue or Decline to exit. The Media Hub screen displays.
- To rent or buy media, you must have a Media Hub account. Press the Menu Key → My Account to log in to your account or to create an account. Follow the prompts to complete log-in.
- Browse content using these options:
• What's new: Recently-added titles for rent or purchase. - My Me: content you have previously purchased or rented. - Movie Store: Movies you can rent or purchase. • TV Store : TV shows you can rent or purchase.
- When you find media you want to view, use these options:
- Watch Preview: View a short clip from the movie or show.
- Own: Purchase the media for unlimited viewing on your device. Follow the prompts to enter payment details.
- Rent: Purchase a time-limited download of the media. Follow the prompts to enter payment details.
Section 9: Connections
Your device includes features to connect to the internet and to other devices by using Wi-Fi, Bluetooth, or a USB cable. Your device also supports removable microSD™ or microSDHC™ memory cards for storing music, photos, videos, and files.
Wi-Fi
Wi-Fi is a wireless networking technology that provides access to local area networks. Use your device's Wi-Fi feature to:
- Access the internet for browsing or to send and receive email.
- Access your corporate network.
- Use hotspots provided by hotels or airports while traveling.
Wi-Fi communication requires access to an existing Wireless Access Point (WAP). WAPs can be Open (unsecured, as with most hotspots) or Secured (requiring you to provide login credentials). Your device supports the 802.11 b/g/n Wi-Fi protocol.
Configuring Wi-Fi Settings
For more information about configuring your device's Wi-Fi settings, see "Wi-Fi Settings" on page 94.
Finding Wi-Fi Networks
You can have your device automatically notify you of available networks. For more information, refer to “Network Notification” on page 95.
Turning Wi-Fi On or Off
Turn your device's Wi-Fi service on or off. When you turn Wi-Fi service on, your device automatically searches for available, in-range WAPs (Wireless Access Points).
Turning Wi-Fi On
- From any screen, sweep your finger downward from the top to display the Notification Panel.
- Touch Wi-Fi to turn Wi-Fi On.
Turning Wi-Fi Off
- From any screen, sweep your finger downward from the top to display the Notification Panel.
- Touch Wi-Fi to turn Wi-Fi Off.
Scanning and Connecting to a Wi-Fi Network
When you turn on Wi-Fi, your device searches for available Wi-Fi connections, then displays them on screen.
- From any screen, sweep your finger downward from the top to display the Notification Panel.
- Touch Wi-Fi to turn Wi-Fi On. Your device automatically scans for available Wireless Access Points.
- When the scan is complete, touch a Wi-Fi network to connect. If the Wi-Fi network is open, your device automatically connects. If the Wi-Fi network is secured, enter the password at the prompt to connect.
Adding a Wi-Fi Network Manually
- From a Home screen, press the Menu Key → Settings → Wireless and network → Wi-Fi settings
- Touch Wi-Fi to turn Wi-Fi On.
- Touch Add Wi-Fi network, then enter information about the network:
• Network SSID: Enter the name of the Wi-Fi Wireless Access Point. • Security: Select the type of security used by the WAP. - Password: If the WAP is secured, enter the password or hex key.
Note: Depending on the Security protocol used by the WAP, additional network information may be required.
- Touch Save to save the settings.
Bluetooth
Bluetooth is a short-range wireless communications technology for exchanging information over a distance of about 30 feet.
You do not need to line up the devices to send information with Bluetooth. If the devices are in range, you can exchange information between them, even if they are in different rooms.
Configuring Bluetooth Settings
Configure your device's Bluetooth settings. For more information, refer to "Bluetooth Settings" on page 96.
Turning Bluetooth On or Off
Turning Bluetooth On
- From any screen, sweep your finger downward from the top to display the Notification Panel.
- Touch Bluetooth to turn Bluetooth on.
Note: When Bluetooth is on, the Bluetooth icon displays in the Status Bar.
Turning Bluetooth Off
- From any screen, sweep your finger downward from the top to display the Notification Panel.
- Touch Bluetooth to turn Bluetooth off.
Pairing with a Bluetooth Device
Search for a Bluetooth device and pair with it, to exchange information between your device and the target device.
Tip: After pairing, your device and the target device recognize each other and exchange information without having to enter a passcode or PIN.
- From a Home screen, press the Menu Key → Settings → Wireless and network → Bluetooth settings.
- Touch Bluetooth to turn on Bluetooth.
- Enable the target device's discoverable or visible mode.
- Touch Scan devices.
- From the list of scanned devices, touch the target device, then follow the prompts to complete the pairing:
- If the target device requires a PIN, enter a PIN for the target device and touch OK. When prompted, enter the PIN on the target device.
- If the device allows automatic or smart pairing, your device attempts to pair with the device automatically. Follow the prompts on your device and the target device to complete the pairing.
USB Settings
Configure USB Settings to automatically identify your device when you attach it to a computer with a USB cable.
For more information, refer to "USB Settings" on page 98.
Samsung Kies
Samsung Kies is a software that enables you to update your device firmware by connecting to the PC.
To learn more about Samsung Kies and Samsung applications, browse featured applications and download Kies at: www.samsungapps.com.
Connecting With Samsung Kies
- Install Samsung Kies software on your PC.
- From a Home screen, press the Menu Key → Settings → Wireless and network → USB settings → Samsung Kies.
- Using an optional PC data cable, connect the multifunction jack on your device to a PC.
- Run Samsung Kies and follow the prompts to update your device firmware.
- Refer to Samsung Kies Help for more information.
Memory Card
Your device supports removable microSD™ or microSDHC™ memory cards for storing music, photos, videos, and files.
Note: Your device comes with a USB cable and includes a 16GB memory card pre-installed.
Installing and Removing a Memory Card
For more information about installing and removing a memory card, see "Memory Card" on page 8.
Important!: To prevent damage to information stored on the memory card, always unmount the card before removing it from the device.
Formatting a Memory Card
Formatting erases all content from the memory card and prepares it for use with your device.
Formatting a memory card using your device
- From a Home screen, press the Menu Key → Settings → SD card and device storage
- Touch Unmount SD card. At the prompt, touch OK to continue.
- After unmounting the SD card, touch Format SD card.
- Follow the prompts to confirm the formatting of the card.
Formatting a memory card using your computer
Consult your computer and/or memory card reader documentation for information about formatting memory cards.
Transferring Files to a Memory Card
Using the Media Player USB Setting
Menu Key → Settings
→ Wireless and network → USB Settings, then select Media player.
- Attach your device to the computer with the USB cable. Your computer recognizes the connection and launches the default media player.
- Use the media player software to transfer files to the memory card.
- When finished, touch the Home Key to quit Media player mode. Disconnect the USB cable.
Using the Mass Storage USB Setting
Note: Your device comes with a USB cable.
- From a Home screen, press the Menu Key → Settings → Wireless and network → USB Settings, then select Mass storage.
- Attach your device to the computer with a USB cable. Your device recognizes the connection and displays USB connected in the Status Bar and Notifications Panel.
- At the USB Mass Storage prompt, touch Mount to enable file copying between your computer and the memory card.
- At the prompt on the computer, select a transfer method:
- Open folder to view files using Windows Explorer. Drag and drop files from the PC to the memory card installed in your device.
- Manage the device using Windows Media Player. For more information, refer to “Music menu: Choose the types of menus to display as tabs in Music Player.” on page 58.
- Transfer files to the memory card. When finished, touch Turn Off on the USB Mass Storage prompt and disconnect the USB cable.
Section 10: Applications and Widgets
This section contains a description of each application that is available in the Applications Menu, its function, and how to navigate through that particular application. If the application is already described in another section of this user manual, then a cross reference to that particular section is provided. Various widgets are also described.
Tip: To open applications quickly, add the icons of frequently-used applications to one of the Home screens. For details, see “Adding Shortcuts from Applications” on page 23.
GPS Applications
GPS applications allow you to achieve real-time, GPS-enabled, turn-by-turn navigation and to access local searches based on a variety of category parameters.
To receive better GPS signals, avoid using your device in the following conditions:
• inside a building or between buildings • in a tunnel or underground passage - in poor weather • around high-voltage or electromagnetic fields • in a vehicle with tinted windows
Global GPS turn-by-turn navigation, mapping, and Point of Interest content is available for three continents, including North America (U.S., Canada, and Mexico), Western Europe, and China, where wireless coverage is available.
Important!: If you touch or cover the internal GPS antenna while using GPS services, it may impede the GPS signal resulting in the GPS services not working in an optimal manner. Refer to the following diagram to locate the approximate location of the internal GPS antenna.
Bluetooth/Wi-Fi Antenna

Alarm Clock
Set alarms for reminders or for wake-up times.
Setting Alarms
- From a Home screen, touch Applications
→ Alarm Clock

- Press the Menu Key → Add alarm.
- Touch fields to configure the alarm:
- Time: Set a time for the alarm to sound.
- Repeat: Choose One-time event or days for the alarm to repeat.
- Ring: Choose a tone for alarms.
- Vibrate: Enable or disable vibration for alarms.
- Snooze: Enable or disable the snooze feature.
- Label: Enter a name for the alarm.
- Touch Done to save the alarm.
Deleting Alarms
- From a Home screen, touch Applications
→ Alarm Clock.

- Press the Menu Key → Delete alarm.
- Touch alarms to mark them for removal or touch Select All.
- Touch Delete to remove the selected alarms.
Alarm Settings
- From a Home screen, touch Applications

→ Alarm Clock
- Press the Menu Key → Settings.
- Configure these settings:
- Alarm in silent mode: When enabled, alarm tones play, even when Silent mode is active.
- Alarm volume: Set the volume for alarm tones.
- Snooze duration: Choose a snooze period. When an alarm sounds, you can touch Snooze to repeat the alarm after the specified period of time.
- Side button settings: Configure the side buttons to use when responding to alarms.
AllShare
Use AllShare to share multimedia content from your device via Wi-Fi with DLNA (Digital Living Network Alliance) certified devices. With AllShare, you can:
- Play multimedia content from your device on another player, such as a Wi-Fi-capable TV or other playback device.
- Play multimedia content from another source, such as a wireless media server, on your device.
- Play multimedia content from another source, such as a wireless media server, on another device. Your device retrieves content from the source and uses Wi-Fi to deliver it to another device and acts as a remote to control playback.
Note: AllShare uses your device's Wi-Fi services. For more information about Wi-Fi, see "Wi-Fi" on page 69.
Configuring AllShare
Configure AllShare settings to identify your device as a server, connect to Wi-Fi, and set treatment of copied files.
- From a Home screen, touch
AllShare

- or -
From a Home screen, touch Applications

→ AllShare
- Press the Menu Key → Settings to configure these settings:
- Media server name: Enter a name for the media server, if desired (the default is your device's default name), then touch Save.
- Share media: Choose types of media for sharing, from Share videos, Share pictures, or Share audio, then touch OK.
- Access point network: Turn on your Wi-Fi service and connect to an available Wi-Fi Access Point.
- Upload from other devices: Set your device's treatment of files copied from other devices. Choose from Always accept, Always ask, or Always reject, then touch OK.
- Default memory: Choose the default location for saving downloaded files, from Device or Memory card.
Playing Media from your Device to Another Device
Play multimedia content from your device on another player, such as a Wi-Fi-capable TV or other playback device, and use your device as a remote to control playback.
- From a Home screen, touch AllShare

- In the Server column, touch My device.
- In the Display device column, touch the target device, then touch Next.
- Choose media from an installed memory card, then touch files to mark them for sharing. A checkmark indicates selected files.
Playing Media From Another Source on Your Device
Play multimedia content from another source, such as a wireless media server, on your device.
- From a Home screen, touch AllShare.
- In the Server column, touch the media server.
- In the Display device column, touch My Device, then touch Next.
- Choose media to play, then follow the prompts to start playback.
Playing Media From a Server on a Player via Your Device
Play multimedia content from another source, such as a wireless media server, on another device, using your device's Wi-Fi service. Your device retrieves content from the source and uses Wi-Fi to deliver it to the device and acts as a remote control.
- From a Home screen, touch AllShare.
- In the Server column, touch the media server.
- In the Display device column, touch the target device, then touch Next.
- Choose media to play, then follow the prompts to start playback.
Amazon Kindle
Use the Amazon Kindle™ application to download books for reading, right on your device.
Note: You must be registered with Amazon to use the Kindle application.
▶ From a Home screen, touch Amazon Kindle
- or -
From a Home screen, touch Applications
→ Amazon Kindle
Browser
Your device includes a full HTML Browser, to access the internet. For more information, refer to "Browser" on page 48.
Tip: By default, Browser appears as a Primary Shortcut on a Home screen.
From a Home screen, touch Browser
- or -
From a Home screen, touch Applications
→ Browser
Calculator
The calculator provides the basic arithmetic functions; addition, subtraction, multiplication, and division. You can also use this as a scientific calculator.
- From the Home screen, touch Applications → Calculator
- Enter the first number using the numeric keys.
- Enter the operation for your calculation by touching the Plus, Minus, Multiplication, or Division sign.
- Enter the next number.
- To view the result, touch the = key.
- Repeat steps 1 to 4 as many times as required.
Rotate your device to display the scientific calculator in landscape mode.
Calendar
Record events and appointments to manage your schedule.
- From a Home screen, touch Calendar
- or -
From a Home screen, touch Applications
→ Calendar

- Touch a tab to choose a calendar view:
- Day: Display today's schedule and scroll to other days.
- Week: Display the current week and scroll to other weeks.
- Month: Display the current month and scroll to other months.
- List: Display events in a chronological list.
- Press the Menu Key for these options:
- Go to: Display a specific date.
- Delete: Delete an event.
- Settings: Customize the calendar.
Creating a Calendar Event
To create a calendar event:
- From a Home screen, touch
Calendar

- or -
From a Home screen, touch Applications

→ Calendar

- Double-tap the date for which you want to enter an event.
- or -
Touch the date for which you want to enter an event, then touch 📋.
- Enter the event information in the New event screen, then touch Done.
Customizing the Calendar
- From a Home screen, touch
Calendar

- Press the Menu Key → Settings to configure settings:
• View settings:
– Calendars: View all your calendars. – Calendar sync: Synchronize calendars from multiple accounts. – First day of week: Choose a day to begin each week. – Hide declined events: Enable or disable display of events.
- Lock time zone: Allows you to lock event times and dates based on your selected time zone, which is defined by the following field.
- Select time zone: If Lock time zone is enabled, use this option to select a time zone to lock event times and dates.
- Notification settings:
- Vibrate: Set vibration behavior for calendar notifications.
- Select ringtone: Choose a tone for calendar notifications.
Sending Calendar Events
Send events as vCalendar files by using Bluetooth or as attachments to Email.
Note: Depending on the type of event, the Send via option may not be available.
- From a Home screen, touch
Calendar

- Touch an event, then touch
Send via.
- Choose a sending method:
- Bluetooth: For more information about Bluetooth pairing and sending, see “Pairing with a Bluetooth Device” on page 71.
- Email: For more information, refer to "Email" on page 43.
Camera
Take photos and record video with your device's built-in Camera. For more information, refer to "Camera" on page 60.
Tip: A shortcut to Camera appears on a Home screen by default.

Contacts
Store contact information for your friends, family and colleagues, to quickly access information or to send a message. For more information, refer to "Contacts" on page 30.
Tip: A shortcut to Contacts appears on a Home screen by default.

Daily Briefing
With Daily Briefing, you can monitor the weather, financial information, news, and your schedule in one convenient application.
Tip: The Daily Briefing widget appears on a Home screen by default.
- From a Home screen, touch Applications → Daily Briefing
- Touch Tap to add city.
- Touch Current location or touch the Search bar, enter the first letters of the city you want to add, then scroll through the list of cities to find the city.
- Touch the city you want to add and touch Save. The Edit city list screen displays.
- Touch Add to add another city or touch The AccuWeather.com screen displays.
- Sweep the screen to the left and touch Tap to add stock.


- Touch the Search bar, type a company name or stock
symbol, and touch

Stocks display.
- Touch the check mark next to the stocks you want to track and touch Save.
The Select stock index screen displays.
- Touch Add to add another stock or touch

The Y! Finance screen displays.
- Sweep the screen to the left and touch Tap to get news.
The AP Mobile news for the city displays.
- Sweep the screen to the left.
The Schedule screen displays a list of events, if any have been created. For more information, refer to “Creating a Calendar Event” on page 79.
- Sweep the screen to the left to view weather conditions.
Tip: After Daily Briefing is setup, touch on any field to display the information. Sweep the screen left or right to scroll through the Daily Briefing pages.
Customizing Daily Briefing
To customize Daily Briefing:
From any Daily Briefing main screen, press the Menu Key → Settings and touch one of the following options:
- AccuWeather.com • Y! Finance
- AP Mobile news.
Date, Time, and Weather
Display the date, the time, and the weather for your current location or any other location.
- Navigate to the desired Home screen, then touch and hold on the screen to display the Add to Home screen menu.
- Touch Widgets → Date, time, and weather.
The Date, time, and weather widget displays. The widget may be moved to the next available Home screen and you have to Tap on widget to confirm
- Touch the widget to add it to the Home screen.
- Tap the time (center) widget to choose a city for the time display.
Applications and Widgets
- Tap to add city (bottom widget) to choose a city for the weather display.
Date, Time, or Weather
Display either the date, the time, or the weather for your current location or choose another location.
- Navigate to the desired Home screen, then touch and hold on the screen to display the Add to Home screen menu.
- Touch Widgets → Date, time, or weather. The Configure Widget menu displays.
- Touch either Date, Time, or Weather. The selected widget appears.
- Customize the Time or Weather widget as explained in "Date, Time, and Weather" on page 81.
Digital Frame
Display a slideshow of photos, or a clock, along with music from your installed memory card. For more information, refer to "Digital Frame" on page 67.
▶ From a Home screen, touch Applications

→ Digital Frame
Dual Clock
Display the date and time for two different locations.
- Navigate to the desired Home screen, then touch and hold on the screen to display the Add to Home screen menu.
- Touch Widgets → Dual clock. The Dual clock widget displays, which is actually two widgets. Each widget displays a clock, a city name, the digital time, and the date.
- Tap either widget to choose a different city than the one currently displayed.
Send and receive email using popular email services. For more information, refer to "Email" on page 43.
Tip: Email appears as a Primary Shortcut on a Home screen by default.
▶ From a Home screen, touch Email

- or -
From a Home screen, touch Applications

FT Mobile
Read a fully optimized version of the world's leading business newspaper. This application lets you download the daily FT for offline reading and access the FT's award-winning content and video. It also allows you to view your personal investment portfolios.

Gallery
Use Gallery to view, capture, and manage photos and videos. For more information, refer to "Gallery" on page 64.
Tip: A shortcut to Gallery appears on the Main Home screen by default.

Gmail
Send and receive emails with Gmail, Google's web-based email. For more information, refer to "Gmail" on page 41.

Google Search
Search the internet, and your device, using the Google™ search engine. For more information, refer to "Google Search" on page 54.
Tip: The Google Search widget appears by default on a Home screen. For information about displaying widgets on the Home screen, see "Adding Widgets to the Home screen" on page 20.

Latitude
With Google Latitude, you can see the location of all of your friends on a map or on a list. You can also share or hide your location.
You must first set up your tablet to use wireless networks to help pinpoint your location. Also, Latitude works best when Wi-Fi is enabled.

Maps
Use Google Maps to find your current location, get directions, and other location-based information. For more information, refer to "Maps" on page 52.
Tip: A shortcut to Google Maps appears on the Main Home screen by default.
▶ From a Home screen, touch Maps
- or -
From a Home screen, touch Applications
→ Maps


Note: You must enable location services to use Maps. Some features require Standalone or Google location services. For more information, refer to "Location and Security" on page 103.
Market
Browse for new Android applications, games or downloads for your device. You must have a Google account set up on your device to download a new application.
- From a Home screen, touch Market

- or -
From a Home screen, touch Applications

→ Market

- The first time you open Market, read the Terms of Service, then touch Accept to continue.
- Browse for items to install:
- Apps : New applications.
- Games: New games.
- Downloads: New downloads and updates to applications installed on your device.
- While browsing, press the
Menu Key for the following
options:
• Search: Enter criteria to find applications. - Downloads: Display requested downloads, plus available updates to applications installed on your device. • Help: Get help for using Android Market.
Media Hub
Samsung Media Hub is your one stop for the hottest movie and TV content.
For more information, refer to "Media Hub" on page 68.
Note: Media Hub service requires a Media Hub account and depends on service availability.
From a Home screen, touch Applications

→ Media Hub

Memo
Create and manage text memos and use Bluetooth to send memos to paired Bluetooth devices.
Composing a Memo
- From a Home screen, touch
Applications

→ Memo

- Touch, compose the memo, then touch
Done to save.
For more information, refer to "Text Input Methods" on page 37.
Memo List Options
While viewing the list of Memos:
- Press the Menu Key for the following options:
- Sort: Sort the memo list by Date or Title.
- Delete: Select one or all memos and touch Delete.
- Send via: Touch Bluetooth or Email and then select one or all memos, and touch Done to send by the selected method.
- Maximize/Minimize: Show a maximum or minimum number of lines for each memo.
- Touch and hold a memo in the list to display the following options:
- Send via: Touch Bluetooth or Email to send the memo by the selected method. For more information, refer to "Bluetooth" on page 70.
- Delete: Touch Delete to delete the selected memo.
Memo Options
While viewing a Memo:
- Press the Menu Key for the following options:
- Print: Send this Memo to a printer.
- Send via: Touch Bluetooth or Email to send the memo by the selected method. For more information, refer to "Bluetooth" on page 70.
Movie lovers can experience the fun and convenience of Moviefone on their Galaxy Tab. With Moviefone mobile apps and a custom mobile web experience, you are mere taps away from on-the-go movie planning. Browse a directory of movies, check the latest theater showtimes, find theater locations nearest to you, buy tickets in advance, view original movie content and news, and read movie reviews. With Moviefone and your Galaxy Tab, you have movies at your fingertips.
- From a Home screen, touch
Applications

→ Moviefone

2. Tap one of the following options:
- Movies: Displays a list of movies playing in your area. Touch an entry to get more information about the movie.
- Upcoming: Displays a list of movies that will be coming soon, their release dates, and rating. Touch an entry to get more information about the movie.
- Theaters: Displays a list of theaters located near your present location. Touch an entry to get more information about the theater, including a list of movies offered there and showtimes for today.
- Trailers: Displays a list of video clips that show selected scenes from current and upcoming movies. Touch an entry to play the trailer.
- News: Displays a list of articles about movies, actors, and actresses from the past and present.
3. While viewing one of the above options, press the Menu Key
for these options:
- Sort Movies: Sort the list of movies by Release Date, by MPAA Rating, or Alphabetically. • Search: Enter a movie you want to find.
- Edit Location: Use your current location or use another location based on a ZIP code.
- Settings: Allows you to set the video quality and to log in to Facebook.
- About: Lists information about Moviefone including the license agreement.
Music
Play music files from an installed memory card. For more information, refer to "Music Player" on page 57.
Tip: A shortcut to Music Player appears on a Home screen by default.

Music Hub
The Music Hub lets you purchase and download songs and albums.
For more information, refer to "Music Hub" on page 59.

My Files
Find, view and manage files stored on an installed memory card. If the file is associated with an application on your device, you can launch the file in the application.

- Tap a folder and scroll down or up until you locate a file.
- Touch a file to launch it in the associated application (if the file is associated with an application).
- While browsing files, use these controls:
- Touch Up to go to a higher directory.
- Touch Select for these options:
- Touch files, then touch Send via to send the selected files by Bluetooth, Gmail or Email.
- Touch files, then touch Copy to copy the file(s) to the clipboard. Touch a new location, then touch Paste.
- Touch files, then touch Cut to remove the file(s) to the clipboard. You can touch a new location, then touch Paste to move the files.
- Touch files, then touch Delete to erase the files.
- Press the Menu Key for these options:
- New folder: Create a new folder for storing files. – Rename: Change the name of the folder. – Details: Select an item to view information about the item.
Navigation
Use Google Navigation to find a destination and get walking or driving directions. For more information, refer to "Navigation" on page 53.
From a Home screen, touch Applications

→ Navigation
News & Weather
View Google news and weather. For more information, refer to "News & Weather" on page 54.
From a Home screen, touch Applications → News & Weather
NYTimes
NYTimes allows you to read the latest web edition of The New York Times newspaper.
- From the Home screen, touch NYTimes
- or -
From a Home screen, touch Applications → NYTimes.
The Latest News screen is displayed.
- Tap on an article title to read it.
- Press the Menu Key ☐ before selecting an article for the following options:
- Section allows you to select a section that you are interested in reading about. Examples include Latest News, World, U.S., Politics, Business, and so on.
- About: provides information about The New York Times application such as Privacy Policy, Copyright Notice, and Feedback.
Applications and Widgets
- Press the Menu Key ☐ after selecting an article for the following options:
- Share: allows you to share an article by Email or Gmail.
- Font Size: allows you to choose the size of the font. Options are: Small, Medium, Large, and Huge.
Places
Google Places uses your location to help you find nearby destinations, such as restaurants, bars, hotels, attractions, ATMs and gas stations, or you can enter a location. For more information, refer to “Places” on page 54.
▶ From a Home screen, touch Applications

→ Places

Power Control
Active applications, Wi-Fi, Bluetooth, GPS, Synchronization, or the LCD Brightness functionality all act to drain your battery.
The Power Control widget is designed to quickly activate (turn on) or deactivate (turn off) those functions or applications that use the most battery power.
The following is a list of helpful tips that can help conserve your battery power:
- Reduce your backlight time.
- Turn off Bluetooth, Wi-Fi, and Synchronization when not in use.
- Deactivate the GPS when it is not needed. Most applications that use this function periodically query the GPS satellites for the current location. Each query drains your battery.
- Turn off Automatic application synchronization.
- Close any applications that may be running in the background (such as Music Player).
To use the Power Control shortcut bar:
- From the Home screen, touch and hold an empty area until the Add to Home screen menu displays.
- Touch Widgets → Power control.
The Power Control shortcut is added to the Home screen.
- Touch one of the icons on the Power Control widget to activate the application (Wi-Fi, Bluetooth, GPS, Synchronization, or LCD Brightness).

A green bar displayed beneath the icon means the application is activated (turned on).
- Touch one of the icons a second time to deactivate the application.
The green bar is removed from beneath the icon, which means the application is deactivated (turned off).
Qik Manual
Before you begin using the Qik Video application, read through the Qik manual right on your Galaxy tablet. It contains the instructions you need to use the Qik Video application.
- From the Home screen, touch
Applications

→ Qik_manual [Qik i].
The Qik App Manual main menu displays.
- Touch the entry that best describes what you need to do.
Options are:
- Create a Qik account
- Make a video call • Record and share a video
- Send and receive video messages
- Manage Video Gallery
Qik Video
Qik Video is a mobile video sharing service that lets you record and share videos with your friends, family, and your favorite social networks like Facebook, YouTube, and Twitter. Your video is automatically saved as you record. No more time-consuming manual uploads.
▶ From the Home screen, touch Applications

→ Qik_Video qik
Note: You cannot make a call when a Bluetooth headset is connected.
Samsung Apps
Connect to Samsung Apps and make your smart device even smarter. Simply and easily download an abundance of applications to your phone such as games, news, reference, social networking, navigation, and more.
▶ From a Home screen, touch Samsung Apps
- or -
From a Home screen, touch Applications

→ Samsung Apps
Settings
Configure your device to your preferences. For more information, refer to "Settings" on page 94.

Social Hub
Access your social networks, like Facebook, YouTube, and Twitter, all in one place.

To add an account:
- Touch Add account.
The Accounts and sync screen displays.
- Touch Add account at the bottom of the screen.
The Add an account screen displays.
- Touch the account you want to add and then enter the required information, such as email address and password.
The added account now appears on the Social Hub screen with any other accounts.
- Touch an account entry to start the application.
Talk
Use Google Talk to chat with other Google Talk users. For more information, refer to "Google Talk" on page 47.
From a Home screen, touch Applications → Talk.
Task Manager
View and manage active applications on your device. For more information, refer to "Task Manager" on page 7.
Tip: To quickly launch Task Manager, touch and hold the Home Key, then touch Task Manager.
From a Home screen, touch Applications → Task Manager.
ThinkFree Office
ThinkFree Office Mobile for Android is a Microsoft Office compatible office suite. This application provides a central place for managing your documents online or offline.
- From the Home screen, touch
Applications

→ ThinkFree Office

- Read the End User License Agreement, then touch Accept if you agree with the terms of use.
Four tabs display:
- Home displays the introduction to ThinkFree Office and lists a short description of each of the tabs and what type of information they provide.
- Recent Docs: displays recently viewed or downloaded documents.
- My Docs: This is where you keep your documents on this device. You can manage documents, or send them to others, and upload the documents to ThinkFree Online.
- Online provides your online storage information. You can also share your documents to others without using email attachments.
Video
View and manage videos stored on an optional installed memory card.
For more information, refer to "Video" on page 64.
Tip: A shortcut to Video appears on the Main Home screen by default.

From a Home screen, touch Applications

→ Video

Voice Search
Perform Google searches by speaking your search terms. For more information, refer to "Voice Search" on page 55.

From a Home screen, touch Applications

→ Voice Search

Tip: Voice Search is available on the Google Search bar widget, which appears on a Home screen by default.
World Clock
View the date and time in any time zone.
- From a Home screen, touch
Applications

→ World clock

- Press the Menu Key for these options:
- Add city: Choose a city to display.
- Change order: Touch the bars on an entry and drag the entry to a new position in the list. Touch Done to change the order.
- Remove: Select cities to remove from the display.
- DST settings: Enable or disable Daylight Savings Time adjustments.
WSJ allows you to read the latest web edition of The Wall Street Journal newspaper.
- From a Home screen, touch

- or -
From a Home screen, touch Applications

→ WSJ WSJ .
The Wall Street Journal screen displays.
- Tap Subscribe Now for full access, Register For Free for limited access, or Log In, if you are already a subscriber.
Follow the on-screen instructions.
When you log in, today's The Wall Street Journal displays.
- Press the Menu Key for these options:
- Subscribe : Touch Subscribe Now to subscribe to The Wall Street Journal tablet edition.
- Sections: Touch a section, such as Front Page, What's News, Opinion, and so on, to view that section. Touch Start Screen to go to the WSJ start screen.
- Quote: Touch the Search field and use the keypad to enter a company name or stock ID. Touch an entry in the resulting list for more information.
- Info: Touch Tips, FAQs, Customer Service, or Legal for WSJ help information.
- Press the Back Key to return to the start screen.
- Press the Menu Key → Logout → Yes to log out of the WSJ app.
YouTube
View and upload YouTube videos, right from your device. For more information, refer to "YouTube" on page 56.
Tip: A shortcut to YouTube appears on the Main Home screen by default.
From a Home screen, touch YouTube.

-or-
From a Home screen, touch Applications.

→ YouTube

Section 11: Settings
This section explains Settings for customizing your device.
Accessing Settings
From a Home screen, press the Menu Key → Settings. - or - From a Home screen, touch Applications → Settings
Wireless and Network
Control your device's wireless connections.
Flight Mode
Flight mode allows you to use many of your tablet's features, such as Camera, Games, and more, when you are in an airplane or in any other area where accessing data is prohibited.
Important!: When your tablet is in Flight Mode, it cannot access online information or applications.
- From a Home screen, press the Menu Key → Settings → Wireless and network.
- - or - From the Home screen, touch Applications → Settings → Wireless and network.
- Touch the Flight mode check box to enable Flight mode. A check mark displayed next to the feature indicates Flight mode is active.
Wi-Fi Settings
Your device supports Wi-Fi b/g/n. Use Wi-Fi settings to manage your device's Wi-Fi connections.
For more information about using your device's Wi-Fi features, see "Wi-Fi" on page 69.
Turning Wi-Fi On or Off
Turn your device's Wi-Fi service on or off. When you turn Wi-Fi service on, your device automatically searches for available, in-range Wireless Access Points (WAPs).
- From a Home screen, press the Menu Key → Settings → Wireless and network.
- Touch Wi-Fi settings, then touch Wi-Fi to turn Wi-Fi On or Off. When on, a check appears in the checkbox.
Network Notification
Have your device alert you to new Wireless Access Points (WAPs).
- From a Home screen, press the Menu Key → Settings → Wireless and network.
- Touch Wi-Fi settings, then touch Network notification to turn notifications On or Off. When on, a check appears in the checkbox.
Advanced Settings
Set up and manage wireless access points.
- From a Home screen, press the Menu Key → Settings → Wireless and network → Wi-Fi settings.
- Press the Menu Key → Advanced for these settings:
- Advanced:
- Wi-Fi sleep policy: By default, Wi-Fi turns off when the screen times out and data connections switch to mobile data. Use Wi-Fi sleep policy settings to specify when to switch from Wi-Fi to mobile data for data communications. Touch to choose from When screen turns off, Never when plugged in, or Never.
- MAC address: View your device's MAC address, required when connecting to some secured networks (not configurable). – Proxy: Touch to enter a proxy number.
- Port: Touch to enter a port number.
- IP Settings: Enter IP settings for configuring a connection to a network using a static IP, including:
- Use static IP: Touch to turn static IP On or Off.
- IP address: Enter the IP address.
- Gateway: Enter the gateway.
- Netmask: Enter the netmask.
- DNS 1: Enter the DNS1.
- DNS 2: Enter the DNS2.
Bluetooth Settings
Use Bluetooth settings to manage Bluetooth connections, set your device's name, and control your device's visibility.
Bluetooth Profiles
Profiles are specifications for services supported by individual devices to improve the ability of different devices to work together. Your device supports these Bluetooth® profiles:
- Serial Port: SPP 1.1 supports a remote Bluetooth device to act as a virtual serial port.
- Stereo: A2DP 1.2, AVRCP 1.0, GAVDP 1.2, AVDTP 1.2 and AVCTP 1.0 support delivery of stereo audio to a compatible Bluetooth device.
- Object Exchange:
- OPP 1.1 allows exchange of contact name cards (vCard 2.1), calendar events (vCalendar), and other non-protected files.
- BPP allows printing to compatible Bluetooth-enabled printers.
Note: This device does not support all Bluetooth profiles.
Turning Bluetooth On or Off
Turn your device's Bluetooth service On or Off. For more information about using Bluetooth to exchange information with other Bluetooth devices, see "Bluetooth" on page 70.
- From a Home screen, press the Menu Key → Settings → Wireless and network → Bluetooth settings.
- Touch Bluetooth to turn Bluetooth On or Off. When On, a check appears in the checkbox.
Additional Bluetooth Settings
When Bluetooth is on, additional settings are available.
- From a Home screen, press the Menu Key → Settings → Wireless and network → Bluetooth settings.
- Touch a setting to configure Bluetooth:
- Device Name: Your device's default name appears on screen. Touch to change the device name. Available when Bluetooth is turned On.
- Visible: Control your device's visibility to other devices' Bluetooth searches. Touch to turn On or Off. Available when Bluetooth is turned On.
- Scan devices: Touch to scan for nearby discoverable devices. After searching, touch a device to pair with it. For more information, refer to “Pairing with a Bluetooth Device” on page 71.
VPN settings
The VPN settings menu allows you to set up and manage Virtual Private Networks (VPNs).
Important!: Before you can use a VPN you must establish and configure one.
Adding a VPN
Before you add a VPN you must determine which VPN protocol to use: PPTP (Point-to-Point Tunneling Protocol), L2TP (Layer 2 Tunneling Protocol), L2TP/IPSec PSK (Pre-shared key based L2TP/IPSec), or L2TP/IPSec CRT (Certificate based L2TP/IPSec).
- From a Home screen, press the Menu Key → Settings → Wireless and network → VPN settings.
- Tap Add VPN.
- To establish a PPTP (Point-to-Point Tunneling Protocol):
- Tap Add PPTP VPN.
- Tap VPN name, add a name for this connection using the keypad, then tap OK.
- Tap Set VPN server, add a name using the keypad, then tap OK.
- Tap Enable Encryption to make a checkmark (if desired).
- Tap DNS search domains, add a name for DNS search using the keypad, then tap OK.
- To establish a L2TP (Layer 2 Tunneling Protocol):
- Tap Add L2TP VPN
- Tap VPN name, add a name for this connection using the keypad, then tap OK.
- Tap Set VPN server, add a name using the keypad, then tap OK.
- Tap Enable L2TP secret to make a checkmark (if desired).
- Tap Set L2TP secret and enter a password (if desired), then tap OK.
- Tap DNS search domains, add a name for DNS search using the keypad, then tap OK
- To establish a L2TP/IPSec PSK (Pre-shared key based L2TP/IPSec):
- Tap Add L2TP/IPSec PSK VPN.
- Tap VPN name, add a name for this connection using the keypad, then tap OK.
- Tap Set VPN server, add a name using the keypad, then tap OK.
- Tap Set IPsec pre-shared key, enter a key and tap OK.
- Tap Enable L2TP secret to make a checkmark (if desired).
- Tap Set L2TP secret and enter a password (if desired), then tap OK.
- Tap DNS search domains, add a name for DNS search using the keypad, then tap OK.
- To establish a L2TP/IPSec CRT (Certificate based L2TP/IPSec):
- Tap Add L2TP/IPSec CRT VPN
- Tap VPN name, add a name for this connection using the keypad, then tap OK.
- Tap Set VPN server, add a name using the keypad, then tap OK.
- Tap Enable L2TP secret to make a checkmark (if desired).
- Tap Set L2TP secret and enter a password (if desired), then tap OK.
- Tap Set user certificate, then tap OK.
- Tap Set CA certificate, then tap OK.
- Tap DNS search domains, add a name for DNS search using the keypad, then tap OK.
USB Settings
Configure how your device is identified when you attach it to a computer with a USB cable.
- From a Home screen, press the Menu Key → Settings → Wireless and network.
- Touch USB settings to choose a setting:
- Samsung Kies: Samsung Kies is a software suite that allows you to search and download applications directly from a PC. The applications are then installed onto a mobile device when synced with a PC, providing instant back up and peace of mind for application downloads. For more information, refer to "Samsung Kies" on page 71.
- Media player: When connected, your device syncs with media applications on your computer to copy purchased music or videos, or other files, to your device.
- Mass storage: When connected, your device is treated as a mass storage device for transferring files.
- Ask on connection: When you connect your device to a computer, a prompt asks you to choose a USB setting.
Note: Touch Help for information about using USB settings.
Synchronize
Your device can synchronize with a variety of accounts. (For more information, refer to “Accounts” on page 29.) Your device can also synchronize your contacts, schedule, and memos with a sync server. You can set up a profile and choose from several methods to keep server and device data synchronized.
Set Up a Synchronization Profile
- From a Home screen, press the Menu Key → Settings → Wireless and network → Synchronize.
- Touch Create new profile. The Sync profile screen displays.
- Touch Profile name and enter a name for the profile.
- Touch Sync category and then touch Contacts, Schedule, Memo, or Select all to choose what to synchronize. Touch Done to return to the Sync profile screen.
- Touch Sync type to set how to synchronize the device and the server. Options are: Full sync, Update both, Update to server, Update to device, Refresh from server, and Refresh from device. Touch Done to return to the Sync profile screen.
- Touch Sync server and enter the web address of the server to be synchronized, your login identifier, and your password.
- Touch Save to create the profile. The new profile is listed on the main Synchronize screen.
Start Synchronization
- From a Home screen, press the Menu Key → Settings → Wireless and network → Synchronize.
- Select a synchronization profile.
- Select Start sync to start synchronization.
Delete or Edit a Profile
- From a Home screen, press the Menu Key → Settings → Wireless and network → Synchronize.
- Touch and hold the profile you want to delete or edit. The Options display.
- Touch Delete to remove the profile or Edit sync profile to modify the profile.
Sound Settings
General
Silent Mode
Temporarily silence all the sounds your device makes except for media playback and alarms.
- From a Home screen, press the Menu Key → Settings → Sound settings.
- Touch Silent mode to enable or disable silent mode. When enabled, a check mark appears in the check box.
Volume
Set the volume level for all types of sounds.
Note: You can only set volume when Silent Mode is disabled.
- From a Home screen, press the Menu Key → Settings → Sound settings → Volume.
- Touch and drag the sliders to set:
- Incoming call volume: Adjust the sound for the incoming calls. • Media volume: Playback of music, videos and other multimedia content.
- Alarm volume: Notifications for alarms set in Clock.
- System volume: Application sounds and other sounds made by your device.
- Notification volume: Sounds for alerts to new messages and other events.
- Touch OK to save your setting.
Tip: You can also set Ringer volume from the Home screen by pressing the Volume Key.
Notifications
Notification Ringtone
Select a default ringtone for message, alarm, and other notifications.
- From a Home screen, press the Menu Key → Settings → Sound settings → Notification ringtone.
- Touch a ringtone to hear a sample and select it.
- Touch OK to save the setting.
Feedback
Audible Touch Tones
The Audible touch tones option is not available for this device.
Audible Selection
When enabled, tones play when you touch screen items.
- From a Home screen, press the Menu Key → Settings → Sound settings.
- Touch Audible selection to enable or disable tones. When enabled, a check mark appears in the check box.
Screen Lock Sounds
When enabled, tones play when unlocking and locking the screen.
- From a Home screen, press the Menu Key → Settings → Sound settings.
- Touch Screen lock sounds to enable or disable tones. When enabled, a check mark appears in the check box.
Haptic Feedback
When enabled, the device vibrates to indicate screen touches and other interactions.
- From a Home screen, press the Menu Key → Settings → Sound settings.
- Touch Haptic feedback to enable or disable vibration. When enabled, a check mark appears in the check box.
Vibration Intensity
Set the intensity of vibration for screen touch feedback.
- From a Home screen, press the Menu Key → Settings → Sound settings → Vibration intensity.
- Touch and drag the slider to set Vibration intensity.
- Touch OK to save your setting.
Display Settings
Wallpapers
Set wallpaper for home screen and lock screen.
- From a Home screen, press the Menu Key → Settings → Display settings → Wallpapers.
- Touch Home screen Wallpapers to select wallpaper from Home screen Wallpaper, Live wallpapers, or the Wallpaper Gallery. For more information, refer to "Wallpapers" on page 24.
Touch Lock screen wallpaper to choose None or to select wallpaper from the Gallery.
Font Style
Set the font for screen displays.
- From a Home screen, press the Menu Key → Settings → Display settings.
- Touch Font style to choose a font style or touch Get fonts online to browse and download a new font.
Brightness
Set the default screen brightness.
- From a Home screen, press the Menu Key → Settings → Display settings → Brightness.
- Touch and drag the slider to set the brightness or touch Automatic brightness.
- Touch OK to save the setting.
White Color Density
Set the density for display of the color white.
- From a Home screen, press the Menu Key → Settings → Display settings → White color density.
- Touch and drag the slider to set the density, then touch OK to save the setting.
Black Color Density
Set the density for display of the color black. Black color density can be used to enhance photo depth.
- From a Home screen, press the Menu Key → Settings → Display settings → Black color density.
- Touch and drag the slider to set the density, then touch OK to save the setting.
Saturation
Adjust the color saturation for the display.
- From a Home screen, press the Menu Key → Settings → Display settings → Saturation.
- Touch and drag the slider to set the saturation, then touch OK to save the setting.
Animation
Set the level of animations for transitions between screens.
- From a Home screen, press the Menu Key → Settings → Display settings → Animation.
- Touch No animation, Some animations, or All animations.
Screen Timeout
Set the length of delay between the last key press or screen touch and the automatic screen timeout (dim and lock).
- From a Home screen, press the Menu Key → Settings → Display settings → Screen timeout
- Touch a setting to select it.
Power Saving Mode
When enabled, your device automatically analyzes the screen and adjusts the brightness to conserve battery power.
- From a Home screen, press the Menu Key → Settings → Display settings.
- Touch Power saving mode to enable or disable the mode. When enabled, a check appears in the check box.
Horizontal Calibration
Horizontal calibration allows you to horizontally calibrate your display using the accelerometer.
- From a Home screen, press the Menu Key → Settings → Display settings → Horizontal calibration.
- Place your device on a level surface and tap Calibrate.
Location and Security
You value your privacy. So, by default, your device only acquires your location when you dial 911. To use Location-Based Services, you must first enable location services on your device.
My Location
Use Wireless Networks
Before you use applications such as Google Maps and find your location or search for places of interest, you must enable the Use wireless networks option or enable the GPS satellites.
- From a Home screen, press the Menu Key → Settings → Location and security.
- Tap Use wireless networks to enable location information using the wireless network.
Use GPS Satellites
- From a Home screen, press the Menu Key → Settings → Location and security.
- Tap Use GPS satellites to enable the GPS satellite.
Screen Unlock Settings
Set Screen Lock
Choose settings for unlocking your screen. For more information about using the lock and unlock features, see “Securing Your Device” on page 9.
- From a Home screen, press the Menu Key → Settings → Location and security.
- Touch Set screen lock/Change screen lock for these settings:
- None: Touch to disable all screen lock settings.
- Pattern: A screen unlock pattern is a touch gesture you create and use to unlock your device. Follow the prompts to create or change your screen unlock pattern.
- PIN: Touch to select a PIN to use for unlocking the screen.
- Password: Touch to create a password for unlocking the screen.
Passwords
Visible Passwords
When enabled, password characters display briefly as you touch them while entering passwords.
- From a Home screen, press the Menu Key → Settings → Location and security.
- Touch Visible passwords to enable or disable brief displays of password characters. When enabled, a check mark appears in the check box.
Device Administration
Add or remove device administrators.
- From a Home screen, press the Menu Key → Settings → Location and security.
- Touch Select device administrators.
Credential Storage
Use Secure Credentials
You can install credentials from an installed memory card and use Credential storage settings to allow applications to access the secure certificates and other credentials.
Note: You must have installed encrypted certificates from a memory card to use this feature.
- From a Home screen, press the Menu Key → Settings → Location and security.
- Touch Use secure credentials to enable or disable. When enabled, a check mark appears in the check box.
Install Encrypted Certificates from SD Card
Install encrypted certificates from an installed memory card.
Note: You must have installed a memory card containing encrypted certificates to use this feature.
- From a Home screen, press the Menu Key → Settings → Location and security.
- Touch Install encrypted certificates from SD card, then choose a certificate and follow the prompts to install.
Settings
Set Password
Set or change a password to protect credentials.
- From a Home screen, press the Menu Key → Settings → Location and security.
- Touch Set password, then follow the prompts.
Clear Storage
Clear stored credentials and reset the password.
Note: This setting only appears if you have installed encrypted certificates.
- From a Home screen, press the Menu Key → Settings → Location and security.
- Touch Clear storage to clear stored credentials and reset the password.
Applications
You can download and install applications from Android Market or create applications using the Android SDK and install them on your device. Use Applications settings to manage applications.
Warning!: Because this device can be configured with system software not provided by or supported by Google or any other company, end-users operate these devices at their own risk.
Unknown Sources
When enabled, you can install applications from sources other than the Android Market.
- From a Home screen, press the Menu Key → Settings → Applications.
- Touch Unknown sources to enable or disable the setting. When enabled, a check mark appears in the check box.
Manage Applications
Manage and remove applications from your device.
- From a Home screen, press the Menu Key → Settings → Applications → Manage applications.
- Touch an application to view and update information about the application, including memory usage, default settings and permissions.
Running Services
View and control services running on your device.
Warning!: Not all services can be stopped. Stopping services may have undesirable consequences on the application or Android System.
- From a Home screen, press the Menu Key → Settings → Applications → Running services.
- To stop a service, touch the service, then touch Stop at the confirmation prompt.
Development
Set options for application development.
USB Debugging
When enabled, allows debugging when the device is attached to a PC by a USB cable.
Note: This setting is used for development purposes.
- From a Home screen, press the Menu Key → Settings → Applications → Development.
- Touch USB debugging to enable or disable the setting. When enabled, a check mark appears in the check box.
Stay Awake
When enabled, the screen does not go to sleep (lock) while connected to a PC with a USB cable. This can be useful when using some applications because the device disconnects a Wi-Fi connection when the screen locks.
Note: This setting is used for development purposes.
- From a Home screen, press the Menu Key → Settings → Applications → Development.
- Touch Stay awake to enable or disable the setting. When enabled, a check mark appears in the check box.
Allow Mock Locations
This setting is used by developers when developing location-based applications.
Note: This setting is used for development purposes.
- From a Home screen, press the Menu Key → Settings → Applications → Development.
- Touch Allow mock locations to enable or disable the setting. When enabled, a check mark appears in the box.
Settings
Samsung Apps
Using the Samsung Apps option, the device notifies you when you are using Wi-Fi or Packet data for Samsung applications.
- From a Home screen, press the Menu Key → Settings → Applications → Samsung Apps.
- Touch Wi-Fi only to enable the setting.
Accounts and Sync
Set up and manage accounts, including your Google and Backup Assistant accounts.
General Sync Settings
Background Data
When enabled, all accounts can sync, send, and receive data at any time, in the background.
Important!: Disabling background data can extend battery life and lower data use. Some applications may still use the background data connection, even if this setting is disabled.
- From a Home screen, press the Menu Key → Settings → Accounts and sync.
- Touch Background data to enable or disable the setting. When enabled, a check mark appears in the check box.
Auto-Sync
When enabled, all accounts sync data at any time, automatically.
- From a Home screen, press the Menu Key → Settings → Accounts and sync.
- Touch Auto-sync to enable or disable the setting. When enabled, a check mark appears in the check box.
Manage Accounts
Use Manage accounts to set up and configure your accounts.
Note: Available settings depend on the type of account. Not all settings are available for all accounts.
- From a Home screen, press the Menu Key → Settings → Accounts and sync.
- Under Manage accounts, touch the account to modify its settings. For more information about accounts, see “Setting Up Your Accounts” on page 29.
Adding an Account
- From a Home screen, press the Menu Key → Settings → Accounts and sync.
- Under Manage accounts, touch Add account and follow the prompts to enter your credentials and set up the account.
Tip: For more information about adding accounts, see "Setting Up Your Accounts" on page 29.
Removing an Account
Important!: Removing an account also deletes all of its messages, contacts and other data from the device.
- From a Home screen, press the Menu Key → Settings → Accounts and sync.
- Touch an account to display its settings.
- Touch Remove account, then touch Remove account at the prompt to remove the account and delete all its messages, contacts and other data.
Privacy
Manage your device's use of personal information.
Mobile Backup and Restore
Back Up My Settings
Enable or disable backup of your settings to the Google server.
- From a Home screen, press the Menu Key → Settings → Privacy.
- Touch Back up my settings to enable or disable backup of settings to the Google server.
Automatic Restore
When enabled, backed-up settings are restored when you reinstall an application.
- From a Home screen, press the Menu Key → Settings → Privacy.
- Touch Automatic restore to enable or disable automatic restoration of settings from the Google server.
Personal Data
Factory Data Reset
Use Factory data reset to return your device to its factory defaults. This setting erases all data from the device, including Google or other email account settings, system and application data and settings, and downloaded applications. It does not erase current system software and bundled applications or files, such as music or photos, stored on an installed memory card.
- From a Home screen, press the Menu Key → Settings → Privacy.
- Touch Factory data reset, then follow the prompts to perform the reset.
SD Card and Device Storage
Manage the use of memory resources in your device's internal memory and on an installed memory card.
- From a Home screen, press the Menu Key → Settings → SD card and device storage.
Note: Total space and Available space settings cannot be configured.
2. Under External SD card:
- Total space and Available space display memory usage on an installed memory card (not user-configurable).
- Touch Unmount SD card to prepare the memory card for safe removal or formatting. For more information, refer to "Removing a Memory Card" on page 9.
- Touch Format SD card to erase the memory card and prepare it for use with your device. For more information, refer to “Formatting a Memory Card” on page 72.
3. Under Internal memory :
- Total space and Available space display usage of the internal device memory.
- Touch Format internal memory to format (erase) all data in internal memory. Read the warning and then touch Format internal memory.
4. Under Internal Device Storage:
- Available space displays usage for your device's 2GB internal memory.
Search
Use Search settings to define searchable areas on your device for Google Search, available by touching the Search Key.
Web
Configure settings for web searches.
Google Search
- From a Home screen, press the Menu Key → Settings → Search → Google search.
- Touch Show web suggestions to enable or disable display of suggestions from Google as you type search criteria.
- Touch Use My Location to enable or disable customized Google search results and other Google services based on your location information.
- Touch Search history to enable or disable saving of search criteria and results.
- Touch Manage search history to configure settings for search history.
Phone
Configure settings for searching content on your device.
Searchable Items
Choose device features to be included in Google searches.
- From a Home screen, press the Menu Key → Settings → Search → Searchable items.
- Touch items to enable or disable searching. When enabled, a check mark appears in the check box.
• Web: Bookmarks and web history. • Amazon Kindle: Titles and authors of your books. • Apps: Names of installed applications. • Contacts: Names of contacts. • Music: Artists, albums, and track names in your music files. • Voice Search: Previous Voice Search results.
- Press the Back Key to return to Search settings.
Clear Shortcuts
When you search and choose a search result, the result is saved as a search shortcut. This setting clears recent search shortcuts.
- From a Home screen, press the Menu Key → Settings → Search.
- Touch Clear shortcuts.
Locale and Text
Select Locale
Set the language used by your device.
- From a Home screen, press the Menu Key → Settings → Locale and text → Select locale.
- Touch a language/locale from the list.
Text Settings
Configure text entry options to your preferences.
Select Input Method
Choose the default text entry method.
- From a Home screen, press the Menu Key → Settings → Locale and text → Select input method.
- Touch Swype or Samsung keypad to set the default method.
Swype
Configure Swype settings. Swype is a new way to enter text by gliding your finger over the characters on the keyboard. For more information, refer to "Entering Text Using Swype" on page 38.
- From a Home screen, press the Menu Key → Settings → Locale and text → Swype.
- Touch items to configure the setting. Settings include:
- Preferences :
- Language: Allows you to select the languages available from the Swype keyboard. To choose the desired language, touch the language key.
- Keypad size: Select a Small or Large keypad size. — Word Prediction: When enabled, suggests possible matching words as you enter text. — Audio Feedback: When enabled, plays sounds as you enter text.
- Vibrate on keypress: When enabled, the device vibrates on text entry.
- Enable tip indicator: When enabled, displays a flashing indicator for quick help as you enter text.
- Swype Advanced settings :
- Auto-spacing: When enabled, inserts spaces automatically when you pause entering text. — Auto-capitalization: When enabled, automatically capitalizes the first letter of the first word in a sentence. — Show complete trace: When enabled, briefly display the Swype trace.
- Word choice window. Select how often word predictions display during text entry.
- Speed vs. accuracy: Set the sensitivity of Swype text recognition.
• Help
- Swype Help: View the Swype User Manual.
- Tutorial: View a tutorial for learning how to Swype.
- About:
- Version: View the current Swype software version.
Samsung Keypad
Configure Samsung keypad settings. For more information about entering text with the Samsung keypad, see “Entering Text Using the Samsung Keypad” on page 40.
- From a Home screen, press the Menu Key → Settings → Locale and text → Samsung keypad.
- Touch Input language to set a default text entry language.
- Touch XT9 to enable or disable XT9 predictive text, to have the system suggest words matching your text entries, and, optionally, complete common words automatically.
- When XT9 is enabled, touch XT9 advanced settings to set options:
- Word com: Enable or disable automatic word completion for words matching your text entries.
- Word completion point: Choose the number of letters for the system to use to predict words for automatic completion.
- Spell correction: Enable or disable automatic spell checking and correction.
- Next word prediction: When enabled, the system predicts the next word based on common usage patterns.
- Auto-append: When enabled, the most common predicted word is automatically added to your text.
- Auto-substitution: When enabled, the system automatically replaces words you enter with words from the XT9 auto-substitution list.
- Regional correction: When enabled, the system automatically changes the spelling of words based on norms for your locale.
- Recap: When enabled, the system re-displays matching words when you make corrections to a word inserted by the system.
- XT9 my words: Add words to your XT9 predictive text dictionary.
- XT9 auto-substitution: Manage the list of words the system uses for auto-substitution (Auto-substitution setting must be enabled).
- Touch Automatic full stop to enable or disable automatic insertion of a "full stop" (period and space to end a sentence) by tapping the space bar twice.
- Touch Auto-capitalization to enable or disable auto-capitalization. When enabled, the system automatically capitalizes words in your text based on common usage, such as at the beginning of sentences.
- Touch Voice input to enable or disable the Voice input feature. When enabled, you can choose to enter text by speaking the words, using Google's networked speech recognition feature.
- Touch Tutorial for help using Samsung keypad and XT9 predictive text.
Voice Input and Output
Use Voice input and output settings to customize your device's voice recognition feature and audible readout of text, for example, the contents of email messages.
Voice Input
Voice Recognition Settings
- From a Home screen, press the Menu Key → Settings → Voice input and output.
- Touch Voice recognition settings to configure:
- Language: Choose a language for your voice input.
- SafeSearch: Set the sensitivity for filtering of explicit images from the results of your voice-input Google searches.
- Block offensive words: Enable or disable blocking of recognized offensive words from the results of your voice-input Google searches.
- Show hints: Enable or disable display of hints as you use voice recognition features.
Voice Output
Text-to-Speech Settings
Voice output provides audible readout of text, for example, the contents of email messages.
- From a Home screen, press the Menu Key → Settings → Voice input and output.
- Touch Text-to-speech settings to configure:
• Text-to-speech settings: - Listen to an example: Play a sample of speech synthesis (available if voice data is installed). - Always use my settings: When enabled, settings you make override the application's default settings. - Default Settings: Configure settings to your preferences. When Always use my settings is enabled, these settings override the application's default settings. - Default engine: Choose the default text-to-speech engine application. - Install voice data: Download and install the speech synthesis data needed to activate Text-to-speech from Android Market (free). - Speech rate: Set the speed at which the text is spoken. – Language: Set the language voice for spoken text. - Engines: Configure settings for installed voice recognition engine(s). - Pico TTS: Install text-to-speech engine applications.
Accessibility
Accessibility services are special features to make using the device easier for those with certain physical disabilities. Use the Accessibility settings to activate these services.
Note: You can download accessibility applications from Android Market and manage their use here.
- From a Home screen, press the Menu Key → Settings → Accessibility.
- Touch Accessibility to activate or deactivate accessibility services. When activated, a check appears in the box.
Accessibility Services
Enable or disable accessibility services.
Note: You must activate Accessibility services before enabling services.
- From a Home screen, press the Menu Key → Settings → Accessibility.
If no accessibility applications are found, a "No accessibility applications found" message displays. Tap OK to install TalkBack.
Note: TalkBack, when installed and enabled, recites menu options, application titles, contacts, and other items when scrolling and making selections.
- Touch a service to enable or disable it. When enabled, a check mark appears in the check box.
Date and Time
By default, your device receives date and time information from the wireless network. When you are outside network coverage, you may want to set date and time information manually using the Date & time settings.
- From a Home screen, press the Menu Key → Settings → Date and time.
- Touch a setting to configure:
- Set date: Enter the current date (only available when the Automatic setting is disabled).
- Select time zone: Choose your local time zone (only available when the Automatic setting is disabled).
- Set time: Enter the current time (only available when the Automatic setting is disabled).
- Use 24-hour format for time displays.
- Select date format: Set the format for date displays.
About Device
View information about your device, including status, legal information, hardware and software versions, and a tutorial.
- From a Home screen, press the Menu Key → Settings → About device.
Menu Key → Settings
- Touch items to view details:
- Status: View Battery status, Battery level, Serial number, Wi-Fi MAC address, Bluetooth address, and Up time.
- Battery use: Display processes and applications that are running. Touch and hold on an item to view details.
- Legal information: Display Open source licenses, License settings, and Google legal information.
Tip: To find your device's DivX® registration code and information about registering your device to play DivX protected video, touch License settings → DivX® VOD.
- System tutorial: View a tutorial to help you learn how to use your device. Follow the prompts to move through the tutorial topics.
- Model number: Display your device's model number.
- Firmware: Displays the firmware version of your device.
- Kernel version: Display the kernel version of your device.
- Build number: Display your device's build number.
This section outlines the safety precautions associated with using your Galaxy Tab. The terms “GALAXY” or “mobile device” are used in this section to refer to your Galaxy Tab. Read this information before using your GALAXY.
Exposure to Radio Frequency (RF) Signals
Although GALAXY is not a cell phone, it can operate on the same network as cell phones and can use the same Radio Frequency (RF) signals to communicate with the network as a cell phone. Therefore, although the following information refers specifically to RF exposure from wireless phones, it may apply similarly to GALAXY when it is being used on a cell phone network.
The U.S. Food and Drug Administration (FDA) has published information for consumers relating to Radio Frequency (RF) exposure from wireless phones. The FDA publication includes the following information:
Do cell phones pose a health hazard?
Many people are concerned that cell phone radiation will cause cancer or other serious health hazards. The weight of scientific evidence has not linked cell phones with any health problems.
Cell phones emit low levels of Radio Frequency (RF) energy. Over the past 15 years, scientists have conducted hundreds of studies looking at the biological effects of the radio frequency energy emitted by cell phones. While some researchers have reported biological changes associated with RF energy, these studies have failed to be replicated. The majority of studies published have failed to show an association between exposure to radio frequency from a cell phone and health problems.
The low levels of RF cell phones emit while in use are in the microwave frequency range. They also emit RF at substantially reduced time intervals when in the stand-by mode. Whereas high levels of RF can produce health effects (by heating tissue), exposure to low level RF that does not produce heating effects causes no known adverse health effects.
The biological effects of radio frequency energy should not be confused with the effects from other types of electromagnetic energy.
Very high levels of electromagnetic energy, such as is found in X-rays and gamma rays, can ionize biological tissues. Ionization is a process where electrons are stripped away from their normal locations in atoms and molecules. It can permanently damage biological tissues including DNA, the genetic material.
The energy levels associated with radio frequency energy, including both radio waves and microwaves, are not great
Health and Safety Information
enough to cause ionization of atoms and molecules. Therefore, RF energy is a type of non-ionizing radiation. Other types of non-ionizing radiation include visible light, infrared radiation (heat), and other forms of electromagnetic radiation with relatively low frequencies.
While RF energy does not ionize particles, large amounts can increase body temperatures and cause tissue damage. Two areas of the body, the eyes and the testes, are particularly vulnerable to RF heating because there is relatively little blood flow in them to carry away excess heat.
Research Results to Date: Is there a connection between RF and certain health problems?
The results of most studies conducted to date say no. In addition, attempts to replicate and confirm the few studies that have shown a connection have failed.
The scientific community at large therefore believes that the weight of scientific evidence does not show an association between exposure to Radio Frequency (RF) from cell phones and adverse health outcomes. Still the scientific community has supported additional research to address gaps in knowledge. Some of these studies are described below.
Interphone Study
Interphone is a large international study designed to determine whether cell phones increase the risk of head and neck cancer. A report published in the International Journal of Epidemiology (June, 2010) compared cell phone usage for more than 5,000 people with brain tumors (glioma and meningioma) and a similar number of healthy controls.
Results of this study did NOT show that cell phones caused brain cancer. In this study, most people had no increased risk of brain cancer from using cell phones. For people with the heaviest use of cell phones (an average of more than 1/2 hour per day, every day, for over 10 years) the study suggested a slight increase in brain cancer. However, the authors determined that biases and errors prevented any conclusions being drawn from this data.
Additional information about Interphone can be found at http://www.iarc.fr/en/media-centre/pr/2010/pdfs/pr200_E.pdf.
Interphone is the largest cell phone study to date, but it did not answer all questions about cell phone safety. Additional research is being conducted around the world, and the FDA continues to monitor developments in this field.
International Cohort Study on Mobile Phone Users (COSMOS)
The COSMOS study aims to conduct long-term health monitoring of a large group of people to determine if there are any health issues linked to long-term exposure to radio frequency energy from cell phone use. The COSMOS study will follow approximately 300,000 adult cell phone users in Europe for 20 to 30 years. Additional information about the COSMOS study can be found at http://www.ukcosmos.org/index.html.
Risk of Brain Cancer from Exposure to Radio Frequency Fields in Childhood and Adolescence (MOBI-KIDS)
MOBI-KIDS is an international study investigating the relationship between exposure to radio frequency energy from communication technologies including cell phones and brain cancer in young people. This is an international multi-center study involving 14 European and non-European countries. Additional information about MOBI-KIDS can be found at http://www.creal.cat/programes-recerca/en_projectes-creal/view.php?ID=39.
Surveillance, Epidemiology, and End Results (SEER) Program of the National Cancer Institute
The National Cancer Institute (NCI) actively follows cancer statistics in the United States to detect any change in rates of new cases for brain cancer. If cell phones play a role in risk for brain cancer, rates should go up, because heavy cell phone use
has been common for quite some time in the U.S. Between 1987 and 2005, the overall age-adjusted incidence of brain cancer did not increase. Additional information about SEER can be found at http://seer.cancer.gov/
Cell Phone Industry Actions
Although the existing scientific data do not justify FDA regulatory actions, the FDA has urged the cell phone industry to take a number of steps, including the following:
- Support-needed research on possible biological effects of RF for the type of signal emitted by cell phones;
- Design cell phones in a way that minimizes any RF exposure to the user; and
- Cooperate in providing users of cell phones with the current information on cell phone use and human health concerns.
Reducing Exposure: Hands-Free Kits and Other Accessories
Steps to Reduce Exposure to Radio Frequency Energy
If there is a risk from being exposed to Radio Frequency (RF) energy from cell phones - and at this point we do not know that there is - it is probably very small. But, if you are concerned about avoiding even potential risks, you can take a few simple steps to minimize your RF exposure.
- Reduce the amount of time spent using your cell phone;
- Use speaker mode or a headset to place more distance between your head and the cell phone.
Hands-Free Kits
Hands-free kits may include audio or Bluetooth® headsets and various types of body-worn accessories such as belt-clips and holsters. Combinations of these can be used to reduce RF energy absorption from cell phones.
Headsets can substantially reduce exposure because the phone is held away from the head in the user's hand or in approved body-worn accessories. Cell phones marketed in the U.S. are required to meet RF exposure compliance requirements when used against the head and against the body.
Because there are no known risks from exposure to RF emissions from cell phones, there is no reason to believe that hands-free kits reduce risks. Hands-free kits can be used for convenience and comfort. They are also required by law in many states if you want to use your phone while driving.
Cell Phone Accessories that Claim to Shield the Head from RF Radiation
Because there are no known risks from exposure to RF emissions from cell phones, there is no reason to believe that accessories which claim to shield the head from those emissions reduce risks. Some products that claim to shield the user from RF absorption use special phone cases, while others involve nothing more than a metallic accessory attached to the phone. Studies have shown that these products generally do not work as advertised. Unlike “hands-free” kits, these so-called “shields” may interfere with proper operation of the phone. The phone may be forced to boost its power to compensate, leading to an increase in RF absorption.
Children and Cell Phones
The scientific evidence does not show a danger to any users of cell phones from RF exposure, including children and teenagers. The steps adults can take to reduce RF exposure apply to children and teenagers as well.
- Reduce the amount of time spent on the cell phone;
- Use speaker mode or a headset to place more distance between the head and the cell phone.
Some groups sponsored by other national governments have advised that children be discouraged from using cell phones at all. For example, The Stewart Report from the United Kingdom made such a recommendation in December 2000. In this report, a group of independent experts noted that no evidence exists that using a cell phone causes brain tumors or other ill effects. Their recommendation to limit cell phone use by children was strictly precautionary; it was not based on scientific evidence that any health hazard exists.
Additional information on the safety of RF exposures from various sources can be obtained from the following organizations (updated 10/1/2010):
• FCC RF Safety Program: http://www.fcc.gov/oet/rfsafety/. - Environmental Protection Agency (EPA): http://www.epa.gov/radtown/wireless-tech.html. - Occupational Safety and Health Administration (OSHA): http://www.osha.gov/SLTC/radiofrequencyradiation/. (Note: This web address is case sensitive.) - National Institute for Occupational Safety and Health (NIOSH): http://www.cdc.gov/niosh/. • World Health Organization (WHO): http://www.who.int/peh-emf/en/. - International Commission on Non-Ionizing Radiation Protection: http://www.icnirp.de. • Health Protection Agency: http://www.hpa.org.uk/Topics/Radiation/.
- US Food and Drug Administration: http://www.fda.gov/Radiation-EmittingProducts/RadiationEmittingProductsandProcedures/HomeBusinessandEntertainment/CellPhones/default.htm.
Specific Absorption Rate (SAR) Certification Information
Your mobile device is a radio transmitter and receiver. It is designed and manufactured not to exceed the exposure limits for Radio Frequency (RF) energy set by the Federal Communications Commission (FCC) of the U.S. Government.
These FCC exposure limits are derived from the recommendations of two expert organizations: the National Council on Radiation Protection and Measurement (NCRP) and the Institute of Electrical and Electronics Engineers (IEEE).
In both cases, the recommendations were developed by scientific and engineering experts drawn from industry, government, and academia after extensive reviews of the scientific literature related to the biological effects of RF energy.
The exposure limit set by the FCC for wireless mobile devices employs a unit of measurement known as the Specific Absorption Rate (SAR). The SAR is a measure of the rate of absorption of RF energy by the human body expressed in units of watts per kilogram (W/kg). The FCC requires wireless devices to comply with a safety limit of 1.6 watts per kilogram (1.6 W/kg).
The FCC exposure limit incorporates a substantial margin of safety to give additional protection to the public and to account for any variations in measurements.
SAR tests are conducted using standard operating positions accepted by the FCC with the mobile device transmitting at its highest certified power level in all tested frequency bands. Although the SAR is determined at the highest certified power level, the actual SAR level of the mobile device while operating can be well below the maximum value. This is because the mobile device is designed to operate at multiple power levels so as to use only the power required to reach the network. In general, the closer you are to a wireless base station antenna, the lower the power output.
Before a new model mobile device is available for sale to the public, it must be tested and certified to the FCC that it does not exceed the exposure limit established by the FCC. Tests for each model of a device are performed in positions and locations (e.g. near the body) as required by the FCC.
For typical operations, this mobile device has been tested and meets FCC RF exposure guidelines.
Use of other accessories may not ensure compliance with FCC RF exposure guidelines.
The FCC has granted an Equipment Authorization for this mobile device with all reported SAR levels evaluated as in compliance with the FCC RF exposure guidelines. The maximum SAR value for this model phone as reported to the FCC is:
Near the body: 0.70 W/kg.
SAR information on this and other model devices can be viewed online at http://www.fcc.gov/oet/ea. To find information that pertains to this particular model GALAXY, this site uses the FCC ID number A3LGTP1010A. This number can be confirmed by looking on the rear case of your GALAXY.
Follow the instructions on the website and it should provide values for typical or maximum SAR for a particular mobile device. Additional product specific SAR information can also be obtained at www.fcc.gov/cgb/sar.
Smart Practices While Driving
The primary responsibility of every driver is the safe operation of his or her vehicle.
Responsible drivers understand that no secondary task should be performed while driving whether it be eating, drinking, talking to passengers, or using a mobile device - unless the driver has assessed the driving conditions and is confident that the secondary task will not interfere with their primary responsibility. Do not engage in any activity while driving a moving vehicle which may cause you to take your eyes off the road or become so absorbed in the activity that your ability to concentrate on the act of driving becomes impaired. Samsung is committed to promoting responsible driving and giving drivers the tools they need to understand and address distractions.
Notice regarding legal restrictions on mounting this device in an automobile:
Laws in some states may prohibit mounting this device on or near the windshield of an automobile. In other states, the law may permit mounting this device only in specific locations in the automobile. Be sure to consult the state and local laws or ordinances where you drive before mounting this device in an automobile. Failure to comply with these restrictions could result in fines, penalties, or other damages.
Never mount this device in a manner that will obstruct the driver's clear view of the street and traffic.
Never use wireless data services such as Web browsing or e-mail while operating a vehicle.
Never watch videos, such as a movie or clip, or play video games while operating a vehicle.
For more information, go to http://www.ctia.org.
Battery Use and Safety
The battery in GALAXY is not intended to be replaced by the consumer. If you believe the battery is damaged or needs to be replaced, take the GALAXY to a service center for inspection and replacement.
- Do not let the GALAXY or battery come in contact with liquids. Liquids can get into the GALAXY's circuits, leading to corrosion. Even when the GALAXY appears to be dry and appears to operate normally, the circuitry could slowly corrode and pose a safety hazard. If the GALAXY and/or battery get wet, have them checked by your service provider or contact Samsung, even if they appear to be working properly.
- Do not place your battery in or near a heat source. Excessive heating can damage the GALAXY or the battery and could cause the GALAXY or the battery to explode. Do not dry a wet or damp battery with an appliance or heat source such as a microwave oven, hair dryer, iron, or radiator. Avoid leaving your GALAXY in your car in high temperatures.
- Do not dispose of the GALAXY or the battery in a fire. The GALAXY or the battery may explode when overheated.
- Avoid dropping the GALAXY. Dropping the GALAXY, especially on a hard surface, can potentially cause damage to the GALAXY. If you suspect damage to the GALAXY or battery, take it to a service center for inspection.
- Never use any charger or battery that is damaged in any way.
Important!: Use only Samsung-approved batteries, and recharge your battery only with Samsung-approved chargers which are specifically designed for your GALAXY.
WARNING!
Use of a non-Samsung-approved battery or charger may present a risk of fire, explosion, leakage, or other hazard. Samsung's warranty does not cover damage to the GALAXY caused by non-Samsung-approved batteries and/or chargers.
- Do not use incompatible batteries and chargers. Some websites and second-hand dealers not associated with reputable manufacturers and carriers, might be selling incompatible or even counterfeit batteries and chargers. Consumers should purchase manufacturer or carrier-recommended products and accessories. If unsure about whether a replacement battery or charger is compatible, contact the manufacturer of the battery or charger.
- Misuse or use of incompatible batteries and charging devices could result in damage to the equipment and a possible risk of fire, explosion, or leakage, leading to serious injuries, damages to your phone, or other serious hazard.
Samsung Mobile Products and Recycling
Samsung cares for the environment and encourages its customers to recycle Samsung mobile devices and genuine Samsung accessories, and other unwanted electronics, in accordance with local regulations and through an approved recycler.
Proper disposal of your mobile device and its battery is not only important for safety, it benefits the environment. Batteries must be recycled or disposed of properly.
For more information about recycling your GALAXY, go to: http://mobile.samsungusa.com/recycling/index.jsp or call 1-800-822-8837 for more information.
To find the nearest recycling location, go to: www.samsung.com/recyclingdirect or call 1-877-278-0799.
Warning!: Never dispose of batteries in a fire because they may explode.
UL Certified Travel Charger
The Travel Charger for this mobile device has met applicable UL safety requirements. Please adhere to the following safety instructions per UL guidelines:
FAILURE TO FOLLOW THE INSTRUCTIONS OUTLINED MAY LEAD TO SERIOUS PERSONAL INJURY AND POSSIBLE PROPERTY DAMAGE.
IMPORTANT SAFETY INSTRUCTIONS - SAVE THESE INSTRUCTIONS.
DANGER - TO REDUCE THE RISK OF FIRE OR ELECTRIC SHOCK, CAREFULLY FOLLOW THESE INSTRUCTIONS.
FOR CONNECTION TO A SUPPLY NOT IN NORTH AMERICA, USE AN ATTACHMENT PLUG ADAPTOR OF THE PROPER CONFIGURATION FOR THE POWER OUTLET.
THIS POWER UNIT IS INTENDED TO BE CORRECTLY ORIENTED IN A VERTICAL OR HORIZONTAL OR FLOOR MOUNT POSITION.
Display / Touch-Screen
Please note the following information when using your mobile device:
WARNING REGARDING DISPLAY
The display on your mobile device is made of glass or acrylic and could break if your mobile device is dropped or if it receives significant impact. Do not use if screen is broken or cracked as this could cause injury to you.
WARRANTY DISCLAIMER: PROPER USE OF A TOUCH-SCREEN MOBILE DEVICE
If your mobile device has a touch-screen display, please note that a touch-screen responds best to a light touch from the pad of your finger or a non-metallic stylus. Using excessive force or a metallic object when pressing on the touch-screen may damage the tempered glass surface and void the warranty. For more information, refer to "Standard Limited Warranty" on page 132.
GPS
GALAXY can use a Global Positioning System (GPS) signal for location-based applications. A GPS uses satellites controlled by the U.S. Government that are subject to changes implemented in accordance with the Department of Defense policy and the 2008 Federal Radio navigation Plan (FRP). Changes may affect the performance of location-based technology on your mobile device.
Your Location
Location-based information includes information that can be used to determine the approximate location of a mobile device. Mobile devices which are connected to a wireless network transmit location-based information. Additionally, if you use applications that require location-based information (e.g. driving directions), such applications transmit location-based information. The location-based information may be shared with third-parties, including your wireless service provider, applications providers, Samsung, and other third-parties providing services.
Navigation
Maps, directions, and other navigation data may contain inaccurate or incomplete data, and circumstances can and do change over time. In some areas, complete information may not be available. Therefore, you should always visually confirm that the navigational instructions are consistent with what you see before following them. All users should pay attention to road conditions, closures, traffic, and all other factors that may impact safe driving or walking. Always obey posted road signs.
Emergency Communication
GALAXY should not be relied upon for essential communications (medical emergencies, calls to 911, or communications to emergency services). GALAXY is not designed or intended to be used for such communications. Voice Over Internet Protocol (VOIP) services which may be used on GALAXY to make phone calls do not support 911 calls and are only intended for talking with friends.
Care and Maintenance
Your mobile device is a product of superior design and craftsmanship and should be treated with care. The suggestions below will help you fulfill any warranty obligations and allow you to enjoy this product for many years:
Keep your Samsung Mobile Device away from:
Liquids of any kind
Keep the mobile device dry. Precipitation, humidity, and liquids contain minerals that will corrode electronic circuits. If the mobile device does get wet, do not accelerate drying with the use of an oven, microwave, or dryer, because this may damage the mobile device and could cause a fire or explosion. Do not use the mobile device with a wet hand.
Doing so may cause an electric shock to you or damage to the mobile device.
Extreme heat or cold
Avoid temperatures below 0° C / 32° F or above 45° C / 113° F.
Microwaves
Do not try to dry your mobile device in a microwave oven. Doing so may cause a fire or explosion.
Dust and dirt
Do not expose your mobile device to dust, dirt, or sand.
Cleaning solutions
Do not use harsh chemicals, cleaning solvents, or strong detergents to clean the mobile device. Wipe it with a soft cloth slightly dampened in a mild soap-and-water solution.
Shock or vibration
Do not drop, knock, or shake the mobile device. Rough handling can break internal circuit boards.
Paint
Do not paint the mobile device. Paint can clog the device's moving parts or ventilation openings and prevent proper operation.
Responsible Listening
Caution!: Avoid potential hearing loss.
Damage to hearing occurs when a person is exposed to loud sounds over time. The risk of hearing loss increases as sound is played louder and for longer durations. Prolonged exposure to loud sounds (including music) is the most common cause of preventable hearing loss. Some scientific research suggests that using portable audio devices, such as portable music players and cell phones, at high volume settings for long durations may lead to permanent noise-induced hearing loss. This includes the use of headphones (including headsets, earbuds, and Bluetooth® or other wireless devices). Exposure to very loud sound has also
Health and Safety Information
been associated in some studies with tinnitus (a ringing in the ear), hypersensitivity to sound, and distorted hearing. Individual susceptibility to noise-induced hearing loss and potential hearing problems varies. Additionally, the amount of sound produced by a portable audio device varies depending on the nature of the sound, the device settings, and the headphones that are used. As a result, there is no single volume setting that is appropriate for everyone or for every combination of sound, settings, and equipment.
You should follow some common sense recommendations when using any portable audio device:
- Always turn the volume down before plugging the earphones into an audio source.
- Set the volume in a quiet environment and select the lowest volume at which you can hear adequately.
- Be aware that you can adapt to higher volume settings over time, not realizing that the higher volume may be harmful to your hearing.
- When using headphones, turn the volume down if you cannot hear the people speaking near you or if the person sitting next to you can hear what you are listening to.
- Do not turn the volume up to block out noisy surroundings. If you choose to listen to your portable device in a noisy environment, use noise-cancelling headphones to block out background environmental noise. By blocking background environment noise, noise-cancelling
headphones should allow you to hear the music at lower volumes than when using earbuds.
- Limit the amount of time you listen. As the volume increases, less time is required before your hearing could be affected.
- Avoid using headphones after exposure to extremely loud noises, such as rock concerts, that might cause temporary hearing loss. Temporary hearing loss might cause unsafe volumes to sound normal.
- Do not listen at any volume that causes you discomfort. If you experience ringing in your ears, hear muffled speech, or experience any temporary hearing difficulty after listening to your portable audio device, discontinue use and consult your doctor.
You can obtain additional information on this subject from the following sources:
American Academy of Audiology
11730 Plaza American Drive, Suite 300
Reston, VA 20190
Voice: (800) 222-2336
Email: info@audiology.org
Internet: http://www.audiology.org/Pages/default.aspx
National Institute on Deafness and Other Communication Disorders
National Institutes of Health
31 Center Drive, MSC 2320
Bethesda, MD 20892-2320
Email: nidcdinfo@nih.gov
Internet: http://www.nidcd.nih.gov/
National Institute for Occupational Safety and Health (NIOSH)
395 E Street, S.W.
Suite 9200
Patriots Plaza Building
Washington, DC 20201
Voice: 1-800-35-NIOSH (1-800-356-4647)
1-800-CDC-INFO (1-800-232-4636)
Outside the U.S. 513-533-8328
Email: cdcinfo@cdc.gov
Internet: http://www.cdc.gov/niosh/topics/noise/default.html
1-888-232-6348 TTY
Operating Environment
Remember to follow any special regulations in force in any area, and always switch your mobile device off whenever it is forbidden to use it, or when it may cause interference or danger. When connecting the mobile device or any accessory to another device, read its user's guide for detailed safety instructions. Do not connect incompatible products.
Using Your Mobile Device Near Other Electronic Devices
Most modern electronic equipment is shielded from Radio Frequency (RF) signals. However, certain electronic equipment may not be shielded against the RF signals from your wireless mobile device. Consult the manufacturer to discuss alternatives.
Implantable Medical Devices
A minimum separation of six (6) inches should be maintained between a handheld wireless mobile device and an implantable medical device, such as a pacemaker or implantable cardioverter defibrillator, to avoid potential interference with the device.
Persons who have such devices:
- Should ALWAYS keep the mobile device more than six (6) inches from their implantable medical device when the mobile device is turned ON;
- Should not carry the mobile device in a breast pocket;
- Should turn the mobile device OFF immediately if there is any reason to suspect that interference is taking place;
Health and Safety Information
Should read and follow the directions from the manufacturer of your implantable medical device. If you have any questions about using your wireless mobile device with an implantable medical device, consult your health care provider. For more information see: http://www.fcc.gov/oet/rfsafety/rf-faqs.html#.
Other Medical Devices
If you use any other personal medical devices, consult the manufacturer of your device to determine if it is adequately shielded from external RF energy. Your physician may be able to assist you in obtaining this information. Switch your mobile device off in health care facilities when any regulations posted in these areas instruct you to do so. Hospitals or health care facilities may be using equipment that could be sensitive to external RF energy.
Vehicles
RF signals may affect improperly installed or inadequately shielded electronic systems in motor vehicles. Check with the manufacturer or its representative regarding your vehicle before using your mobile device in a motor vehicle. You should also consult the manufacturer of any equipment that has been added to your vehicle.
Posted Facilities
Switch your mobile device off in any facility where posted notices require you to do so.
Potentially Explosive Environments
Switch your mobile device off when in any area with a potentially explosive atmosphere and obey all signs and instructions. Sparks in such areas could cause an explosion or fire resulting in bodily injury or even death. Users are advised to switch the mobile device off while at a refueling point (service station). Users are reminded of the need to observe restrictions on the use of radio equipment in fuel depots (fuel storage and distribution areas), chemical plants, or where blasting operations are in progress. Areas with a potentially explosive atmosphere are often, but not always, clearly marked. They include below deck on boats, chemical transfer or storage facilities, vehicles using liquefied petroleum gas (such as propane or butane), areas where the air contains chemicals or particles, such as grain, dust, or metal powders, and any other area where you would normally be advised to turn off your vehicle engine.
Restricting Children's Access to Your Mobile Device
Your mobile device is not a toy. Do not allow children to play with it because they could hurt themselves and others, damage the mobile device, or use services that increase your mobile device bill.
Keep the mobile device and all its parts and accessories out of the reach of small children.
FCC Notice and Cautions
FCC Notice
The mobile device may cause TV or radio interference if used in close proximity to receiving equipment. The FCC can require you to stop using the mobile device if such interference cannot be eliminated. Vehicles using liquefied petroleum gas (such as propane or butane) must comply with the National Fire Protection Standard (NFPA-58). For a copy of this standard, contact the National Fire Protection Association.
Cautions
Any changes or modifications to your mobile device not expressly approved in this document could void your warranty for this equipment and void your authority to operate this equipment. Only use approved batteries, antennas, and chargers. The use of any unauthorized accessories may be dangerous and void the mobile device warranty if said accessories cause damage or a defect to the mobile device. Although your mobile device is quite sturdy, it is a complex piece of equipment and can be broken. Avoid dropping, hitting, bending, or sitting on it.
Other Important Safety Information
- Only qualified personnel should service the mobile device. Faulty service may be dangerous and may invalidate any warranty applicable to the device.
- Ensure that any mobile devices or related equipment used in your vehicle are securely mounted.
- Check regularly that all wireless mobile device equipment in your vehicle is mounted and operating properly.
- Do not store or carry flammable liquids, gases, or explosive materials in the same compartment as the mobile device, its parts, or accessories.
- For vehicles equipped with an air bag, remember that an air bag inflates with great force. Do not place objects, including portable wireless equipment near or in the area over the air bag or in the air bag deployment area. If wireless equipment is improperly installed and the air bag inflates, serious injury could result.
- Switch your mobile device off before boarding an aircraft. The use of wireless mobile devices in aircraft is illegal and may be dangerous to the aircraft's operation. Check with appropriate authorities before using any function of a mobile device while on an aircraft.
- Failure to observe these instructions may lead to the suspension or denial of network services to the offender, or legal action, or both.
Standard Limited Warranty
What is Covered and For How Long?
Samsung Electronics America, Inc. (“SAMSUNG”) warrants to the original purchaser (“Purchaser”) that SAMSUNG’s Tablets and accessories (“Products”) are free from defects in material and workmanship under normal use and service for the period commencing upon the date of purchase and continuing for the following specified period of time after that date:
Tablet: 1 Year
Batteries (Including Internal Batteries): 1 Year
Case: 90 Days
Other Tablet Accessories: 1 Year
What is Not Covered?
This Limited Warranty is conditioned upon proper use of the Product by the Purchaser. This Limited Warranty does not cover: (a) defects or damage resulting from accident, misuse, abnormal use, abnormal conditions, improper storage, exposure to moisture or dampness, neglect, unusual physical, electrical or electromechanical stress, or defects in
132
appearance, cosmetic, decorative or structural items, including framing, and any non-operative parts unless caused by SAMSUNG; (b) defects or damage resulting from excessive force or use of a metallic object when pressing on a touch screen; (c) equipment that has the serial number or the enhancement data code removed, defaced, damaged, altered or made illegible; (d) any plastic surfaces or other externally exposed parts that are scratched or damaged due to normal use; (e) malfunctions resulting from the use of the Product in conjunction or connection with accessories, products, or ancillary/peripheral equipment not furnished or approved by SAMSUNG; (f) defects or damage from improper testing, operation, maintenance, installation, service, or adjustment not furnished or approved by SAMSUNG; (g) defects or damage from external causes such as collision with an object, or from fire, flooding, sand, dirt, windstorm, lightning, earthquake, or from exposure to weather conditions, or external battery leakage, theft, blown fuse, or improper use of any electrical source; (h) defects or damage caused by cellular signal reception or transmission, or viruses or other software problems introduced into the Product; (i) any other acts which are not the fault of SAMSUNG; or (j) Product used or purchased outside the United States. This Limited Warranty covers batteries only if battery capacity falls below 80% of rated capacity or the battery leaks, and this Limited Warranty does not cover any battery if (i) the battery has been charged by a battery charger not specified or approved by SAMSUNG for
charging the battery, (ii) any of the seals on the battery are broken or show evidence of tampering, or (iii) the battery has been used in equipment other than the SAMSUNG Tablet for which it is specified.
What are SAMSUNG's Obligations?
During the applicable warranty period, SAMSUNG will repair or replace, at SAMSUNG's sole option, without charge to Purchaser, any defective component part of Product. To obtain service under this Limited Warranty, Purchaser must return Product to an authorized Tablet service facility in an adequate container for shipping, accompanied by Purchaser's sales receipt or comparable substitute proof of sale showing the original date of purchase, the serial number of Product and the sellers' name and address. To obtain assistance on where to deliver the Product, call Samsung Customer Care at 1-800-SAMSUNG. Upon receipt, SAMSUNG will promptly repair or replace the defective Product. SAMSUNG may, at SAMSUNG's sole option, use rebuilt, reconditioned, or new parts or components when repairing any Product or replace Product with a rebuilt, reconditioned or new Product. Repaired/replaced cases will be warranted for a period of ninety (90) days. All other repaired/replaced Product will be warranted for a period equal to the remainder of the original Limited Warranty on the original Product or for 90 days, whichever is longer. All replaced parts, components, boards and equipment shall become the property of SAMSUNG. If SAMSUNG determines that any Product is not covered by this Limited Warranty, Purchaser must pay all parts, shipping, and labor charges for the repair or return of such Product.
What Are the Limits On SAMSUNG's Liability?
EXCEPT AS SET FORTH IN THE EXPRESS WARRANTY CONTAINED HEREIN, PURCHASER TAKES THE PRODUCT "AS IS," AND SAMSUNG MAKES NO WARRANTY OR REPRESENTATION AND THERE ARE NO CONDITIONS, EXPRESS OR IMPLIED, STATUTORY OR OTHERWISE, OF ANY KIND WHATSOEVER WITH RESPECT TO THE PRODUCT, INCLUDING BUT NOT LIMITED TO:
- THE MERCHANTABILITY OF THE PRODUCT OR ITS FITNESS FOR ANY PARTICULAR PURPOSE OR USE;
- WARRANTIES OF TITLE OR NON-INFRINGEMENT;
- DESIGN, CONDITION, QUALITY, OR PERFORMANCE OF THE PRODUCT;
- THE WORKMANSHIP OF THE PRODUCT OR THE COMPONENTS CONTAINED THEREIN; OR
- COMPLIANCE OF THE PRODUCT WITH THE REQUIREMENTS OF ANY LAW, RULE, SPECIFICATION OR CONTRACT PERTAINING THERETO.
NOTHING CONTAINED IN THE INSTRUCTION MANUAL SHALL BE CONSTRUED TO CREATE AN EXPRESS WARRANTY OF ANY KIND WHATSOEVER WITH RESPECT TO THE PRODUCT. ALL IMPLIED WARRANTIES AND CONDITIONS THAT MAY ARISE BY OPERATION OF LAW, INCLUDING IF APPLICABLE THE IMPLIED WARRANTIES OF MERCHANTABILITY AND FITNESS FOR A PARTICULAR PURPOSE, ARE HEREBY LIMITED TO THE SAME DURATION OF TIME AS THE EXPRESS
Warranty Information
WRITTEN WARRANTY STATED HEREIN. SOME STATES DO NOT ALLOW LIMITATIONS ON HOW LONG AN IMPLIED WARRANTY LASTS, SO THE ABOVE LIMITATION MAY NOT APPLY TO YOU. IN ADDITION, SAMSUNG SHALL NOT BE LIABLE FOR ANY DAMAGES OF ANY KIND RESULTING FROM THE PURCHASE, USE, OR MISUSE OF, OR INABILITY TO USE THE PRODUCT OR ARISING DIRECTLY OR INDIRECTLY FROM THE USE OR LOSS OF USE OF THE PRODUCT OR FROM THE BREACH OF THE EXPRESS WARRANTY, INCLUDING INCIDENTAL, SPECIAL, CONSEQUENTIAL OR SIMILAR DAMAGES, OR LOSS OF ANTICIPATED PROFITS OR BENEFITS, OR FOR DAMAGES ARISING FROM ANY TORT (INCLUDING NEGLIGENCE OR GROSS NEGLIGENCE) OR FAULT COMMITTED BY SAMSUNG, ITS AGENTS OR EMPLOYEES, OR FOR ANY BREACH OF CONTRACT OR FOR ANY CLAIM BROUGHT AGAINST PURCHASER BY ANY OTHER PARTY. SOME STATES DO NOT ALLOW THE EXCLUSION OR LIMITATION OF INCIDENTAL OR CONSEQUENTIAL DAMAGES, SO THE ABOVE LIMITATION OR EXCLUSION MAY NOT APPLY TO YOU.
THIS WARRANTY GIVES YOU SPECIFIC LEGAL RIGHTS, AND YOU MAY ALSO HAVE OTHER RIGHTS, WHICH VARY FROM STATE TO STATE. THIS LIMITED WARRANTY SHALL NOT EXTEND TO ANYONE OTHER THAN THE ORIGINAL PURCHASER OF THIS PRODUCT AND STATES PURCHASER'S EXCLUSIVE REMEDY. IF ANY PORTION OF THIS LIMITED WARRANTY IS HELD ILLEGAL OR UNENFORCEABLE BY REASON OF ANY LAW, SUCH PARTIAL ILLEGALITY OR UNENFORCEABILITY SHALL NOT AFFECT THE ENFORCEABILITY FOR THE REMAINDER OF THIS LIMITED WARRANTY
WHICH PURCHASER ACKNOWLEDGES IS AND WILL ALWAYS BE CONSTRUED TO BE LIMITED BY ITS TERMS OR AS LIMITED AS THE LAW PERMITS.
THE PARTIES UNDERSTAND THAT THE PURCHASER MAY USE THIRD-PARTY SOFTWARE OR EQUIPMENT IN CONJUNCTION WITH THE PRODUCT. SAMSUNG MAKES NO WARRANTIES OR REPRESENTATIONS AND THERE ARE NO CONDITIONS, EXPRESS OR IMPLIED, STATUTORY OR OTHERWISE, AS TO THE QUALITY, CAPABILITIES, OPERATIONS, PERFORMANCE OR SUITABILITY OF ANY THIRD-PARTY SOFTWARE OR EQUIPMENT, WHETHER SUCH THIRD-PARTY SOFTWARE OR EQUIPMENT IS INCLUDED WITH THE PRODUCT DISTRIBUTED BY SAMSUNG OR OTHERWISE, INCLUDING THE ABILITY TO INTEGRATE ANY SUCH SOFTWARE OR EQUIPMENT WITH THE PRODUCT. THE QUALITY, CAPABILITIES, OPERATIONS, PERFORMANCE AND SUITABILITY OF ANY SUCH THIRD-PARTY SOFTWARE OR EQUIPMENT LIE SOLELY WITH THE PURCHASER AND THE DIRECT VENDOR, OWNER OR SUPPLIER OF SUCH THIRD-PARTY SOFTWARE OR EQUIPMENT, AS THE CASE MAY BE.
This Limited Warranty allocates risk of Product failure between Purchaser and SAMSUNG, and SAMSUNG's Product pricing reflects this allocation of risk and the limitations of liability contained in this Limited Warranty. The agents, employees, distributors, and dealers of SAMSUNG are not authorized to make modifications to this Limited Warranty, or make additional warranties binding on SAMSUNG. Accordingly, additional statements such as dealer advertising or presentation,
whether oral or written, do not constitute warranties by SAMSUNG and should not be relied upon.
Samsung Electronics America, Inc. 85 Challenger Road Ridgefield Park, New Jersey 07660
©2011 Samsung Electronics America, Inc. All rights reserved.
No reproduction in whole or in part allowed without prior written approval.
End User License Agreement for Software
IMPORTANT. READ CAREFULLY: This End User License Agreement ("EULA") is a legal agreement between you (either an individual or a single entity) and Samsung Electronics Co., Ltd. for software owned by Samsung Electronics Co., Ltd. and its affiliated companies and its third party suppliers and licensors that accompanies this EULA, which includes computer software and may include associated media, printed materials, "online" or electronic documentation ("Software"). BY CLICKING THE "I ACCEPT" BUTTON (OR IF YOU BYPASS OR OTHERWISE DISABLE THE "I ACCEPT", AND STILL INSTALL, COPY, DOWNLOAD, ACCESS OR OTHERWISE USE THE SOFTWARE), YOU AGREE TO BE BOUND BY THE TERMS OF THIS EULA. IF YOU DO NOT
ACCEPT THE TERMS IN THIS EULA, YOU MUST CLICK THE "DECLINE" BUTTON, AND DISCONTINUE USE OF THE SOFTWARE.
- GRANT OF LICENSE. Samsung grants you the following rights provided that you comply with all terms and conditions of this EULA: You may install, use, access, display and run one copy of the Software on the local hard disk(s) or other permanent storage media of one computer and use the Software on a single computer or a mobile device at a time, and you may not make the Software available over a network where it could be used by multiple computers at the same time. You may make one copy of the Software in machine-readable form for backup purposes only; provided that the backup copy must include all copyright or other proprietary notices contained on the original.
- RESERVATION OF RIGHTS AND OWNERSHIP. Samsung reserves all rights not expressly granted to you in this EULA. The Software is protected by copyright and other intellectual property laws and treaties. Samsung or its suppliers own the title, copyright and other intellectual property rights in the Software. The Software is licensed, not sold.
- LIMITATIONS ON END USER RIGHTS. You may not reverse engineer, decompile, disassemble, or otherwise attempt to discover the source code or algorithms of, the Software (except and only to the extent that such activity is expressly permitted by applicable law notwithstanding this limitation), or modify, or
Warranty Information
disable any features of, the Software, or create derivative works based on the Software. You may not rent, lease, lend, sublicense or provide commercial hosting services with the Software.
- CONSENT TO USE OF DATA. You agree that Samsung and its affiliates may collect and use technical information gathered as part of the product support services related to the Software provided to you, if any, related to the Software. Samsung may use this information solely to improve its products or to provide customized services or technologies to you and will not disclose this information in a form that personally identifies you.
- UPGRADES. This EULA applies to updates, supplements, and add-on components (if any) of the Software that Samsung may provide to you or make available to you after the date you obtain your initial copy of the Software, unless we provide other terms along with such upgrade. To use Software identified as an upgrade, you must first be licensed for the Software identified by Samsung as eligible for the upgrade. After upgrading, you may no longer use the Software that formed the basis for your upgrade eligibility.
- SOFTWARE TRANSFER. You may not transfer this EULA or the rights to the Software granted herein to any third party unless it is in connection with the sale of the mobile device which the Software accompanied. In such event, the transfer must include all of the Software (including all component parts, the media and
printed materials, any upgrades, this EULA) and you may not retain any copies of the Software. The transfer may not be an indirect transfer, such as a consignment. Prior to the transfer, the end user receiving the Software must agree to all the EULA terms.
- EXPORT RESTRICTIONS. You acknowledge that the Software is subject to export restrictions of various countries. You agree to comply with all applicable international and national laws that apply to the Software, including the U.S. Export Administration Regulations, as well as end user, end use, and destination restrictions issued by U.S. and other governments.
- TERMINATION. This EULA is effective until terminated. Your rights under this License will terminate automatically without notice from Samsung if you fail to comply with any of the terms and conditions of this EULA. Upon termination of this EULA, you must cease all use of the Software and destroy all copies, full or partial, of the Software.
- THIRD-PARTY APPLICATIONS. Certain third-party applications may be included with, or downloaded to this mobile device. SAMSUNG makes no representations whatsoever about any of these applications. Since SAMSUNG has no control over such applications, Purchaser acknowledges and agrees that SAMSUNG is not responsible for the availability of such applications and is not responsible or liable for any content,
advertising, products, services, or other materials on or available from such applications. Purchaser expressly acknowledges and agrees that use of third-party applications is at Purchaser's sole risk and that the entire risk of unsatisfactory quality, performance, accuracy and effort is with Purchaser. It is up to Purchaser to take precautions to ensure that whatever Purchaser selects to use is free of such items as viruses, worms, Trojan horses, and other items of a destructive nature. References on this mobile device to any names, marks, products, or services of any third-parties are provided solely as a convenience to Purchaser, and do not constitute or imply an endorsement, sponsorship, or recommendation of, or affiliation with the third-party or its products and services. Purchaser agrees that SAMSUNG shall not be responsible or liable, directly or indirectly, for any damage or loss caused or alleged to be caused by, or in connection with, use of or reliance on any such third-party content, products, or services available on or through any such application. Purchaser acknowledges and agrees that your use of any third-party application is governed by such third-party application provider's Terms of Use, License Agreement, Privacy Policy, or other such agreement and that any information or personal data you provide, whether knowingly or unknowingly, to such third-party application provider, will be subject to such third-party application provider's privacy policy, if such a policy exists. SAMSUNG DISCLAIMS ANY RESPONSIBILITY FOR ANY
DISCLOSURE OF INFORMATION OR ANY OTHER PRACTICES OF ANY THIRD-PARTY APPLICATION PROVIDER.
- Disclaimer of Warranty Regarding Third-Party Applications. SAMSUNG DOES NOT WARRANT OR MAKE ANY REPRESENTATIONS REGARDING THE AVAILABILITY, USE, TIMELINESS, SECURITY, VALIDITY, ACCURACY, OR RELIABILITY OF, OR THE RESULTS OF THE USE OF, OR OTHERWISE RESPECTING, THE CONTENT OF ANY THIRD-PARTY APPLICATION WHETHER SUCH THIRD-PARTY APPLICATION IS INCLUDED WITH THE PRODUCT DISTRIBUTED BY SAMSUNG, IS DOWNLOADED, OR OTHERWISE OBTAINED. USE OF ANY THIRD-PARTY APPLICATION IS DONE AT PURCHASER'S OWN DISCRETION AND RISK AND PURCHASER IS SOLELY RESPONSIBLE FOR ANY DAMAGE TO YOUR MOBILE DEVICE OR LOSS OF DATA THAT RESULTS FROM THE DOWNLOADING OR USE OF SUCH THIRD-PARTY APPLICATIONS. SAMSUNG EXPRESSLY DISCLAIMS ANY WARRANTY REGARDING WHETHER PURCHASER'S PERSONAL INFORMATION IS CAPTURED BY ANY THIRD-PARTY APPLICATION PROVIDER OR THE USE TO WHICH SUCH PERSONAL INFORMATION MAY BE PUT BY SUCH THIRD-PARTY APPLICATION PROVIDER. ANY THIRD-PARTY APPLICATIONS PROVIDED WITH THIS MOBILE DEVICE ARE PROVIDED "AS IS" AND ON AN "AS AVAILABLE" BASIS, WITHOUT WARRANTIES OF ANY KIND FROM SAMSUNG, EITHER EXPRESS OR IMPLIED. TO THE FULLEST EXTENT POSSIBLE PURSUANT TO APPLICABLE LAW, SAMSUNG
Warranty Information
DISCLAIMS ALL WARRANTIES EXPRESS, IMPLIED, OR STATUTORY, INCLUDING, BUT NOT LIMITED TO, IMPLIED WARRANTIES OF MERCHANTABILITY, SATISFACTORY QUALITY OR WORKMANLIKE EFFORT, FITNESS FOR A PARTICULAR PURPOSE, RELIABILITY OR AVAILABILITY, ACCURACY, LACK OF VIRUSES, QUIET ENJOYMENT, NON-INFRINGEMENT OF THIRD PARTY RIGHTS OR OTHER VIOLATION OF RIGHTS. SAMSUNG DOES NOT WARRANT AGAINST INTERFERENCE WITH YOUR ENJOYMENT OF THE THIRD-PARTY APPLICATION, THAT THE FUNCTIONS CONTAINED IN THE THIRD-PARTY APPLICATION WILL MEET PURCHASER'S REQUIREMENTS, THAT THE OPERATION OF THE THIRD-PARTY APPLICATION WILL BE UNINTERRUPTED OR ERROR-FREE, OR THAT DEFECTS IN THE THIRD-PARTY APPLICATION WILL BE CORRECTED. PURCHASER ASSUMES THE ENTIRE COST OF ALL NECESSARY SERVICING, REPAIR, OR CORRECTION. SOME JURISDICTIONS DO NOT ALLOW EXCLUSIONS OR LIMITATIONS ON HOW LONG AN IMPLIED WARRANTY LASTS, SO THE ABOVE LIMITATIONS OR EXCLUSIONS MAY NOT APPLY TO YOU. NO ADVICE OR INFORMATION, WHETHER ORAL OR WRITTEN, OBTAINED BY PURCHASER FROM SAMSUNG SHALL BE DEEMED TO ALTER THIS DISCLAIMER OF WARRANTY REGARDING THIRD-PARTY APPLICATIONS, OR TO CREATE ANY WARRANTY.
- Limitation of Liability. SAMSUNG WILL NOT BE LIABLE FOR ANY DAMAGES OF ANY KIND ARISING OUT OF OR RELATING TO
THE USE OR THE INABILITY TO USE ANY THIRD-PARTY APPLICATION, ITS CONTENT OR FUNCTIONALITY, INCLUDING BUT NOT LIMITED TO DAMAGES CAUSED BY OR RELATED TO ERRORS, OMISSIONS, INTERRUPTIONS, DEFECTS, DELAY IN OPERATION OR TRANSMISSION, COMPUTER VIRUS, FAILURE TO CONNECT, NETWORK CHARGES, AND ALL OTHER DIRECT, INDIRECT, SPECIAL, INCIDENTAL, EXEMPLARY, OR CONSEQUENTIAL DAMAGES EVEN IF SAMSUNG HAS BEEN ADVISED OF THE POSSIBILITY OF SUCH DAMAGES. SOME JURISDICTIONS DO NOT ALLOW THE EXCLUSION OR LIMITATION OF INCIDENTAL OR CONSEQUENTIAL DAMAGES, SO THE ABOVE LIMITATION OR EXCLUSION MAY NOT APPLY TO YOU. NOTWITHSTANDING THE FOREGOING, SAMSUNG'S TOTAL LIABILITY TO PURCHASER FOR ALL LOSSES, DAMAGES, CAUSES OF ACTION, INCLUDING BUT NOT LIMITED TO THOSE BASED ON CONTRACT, TORT, OR OTHERWISE, ARISING OUT OF PURCHASER'S USE OF THIRD-PARTY APPLICATIONS ON THIS MOBILE DEVICE, OR ANY OTHER PROVISION OF THIS EULA, SHALL NOT EXCEED THE AMOUNT PURCHASER PAID SPECIFICALLY FOR ANY SUCH THIRD-PARTY APPLICATION THAT WAS INCLUDED WITH THIS MOBILE DEVICE. THE FOREGOING LIMITATIONS, EXCLUSIONS, AND DISCLAIMERS (INCLUDING SECTIONS 9, 10, AND 11) SHALL APPLY TO THE MAXIMUM EXTENT PERMITTED BY APPLICABLE LAW, EVEN IF ANY REMEDY FAILS ITS ESSENTIAL PURPOSE.
- U.S. GOVERNMENT END USERS. The Software is licensed only with “restricted rights” and as “commercial items” consisting of “commercial software” and “commercial software documentation” with only those rights as are granted to all other end users pursuant to the terms and conditions herein.
- APPLICABLE LAW. This EULA is governed by the laws of TEXAS, without regard to conflicts of laws principles. This EULA shall not be governed by the UN Convention on Contracts for the International Sale of Goods, the application of which is expressly excluded. If a dispute, controversy or difference is not amicably settled, it shall be finally resolved by arbitration in Seoul, Korea in accordance with the Arbitration Rules of the Korean Commercial Arbitration Board. The award of arbitration shall be final and binding upon the parties.
- ENTIRE AGREEMENT; SEVERABILITY. This EULA is the entire agreement between you and Samsung relating to the Software and supersedes all prior or contemporaneous oral or written communications, proposals and representations with respect to the Software or any other subject matter covered by this EULA. If any provision of this EULA is held to be void, invalid, unenforceable or illegal, the other provisions shall continue in full force and effect.
Index
A
Accessibility settings 115
Accounts
setting up 29
setting up a Facebook account 30
setting up a MySpace account 30
setting up a Twitter account 30
AllShare
configuring 76
Android keyboard
configuring 40
entering text 40
Android Market 84
Android System Recovery 11
Applications 24
downloading new 84
Applications settings
allow mock locations 107
development 107
managing 106
running services 107
stay awake 107
unknown sources 106
USB debugging 107
B
Back key 17
Battery
charging 5
indicator 5
installing and removing 5
Bluetooth
pairing with a device 71
profiles 96
settings 96
turning on or off 70
Browser 48
settings 51
C
Calculator 78
Calendar 78
Camcorder
recording video 62
settings 63
Camera
settings 61
taking photos 60
Children and Cell Phones 120
Contacts
creating 31
display options 33
exporting and importing 33
Get Friends 32
groups 34
linking 32
My Profile 34
namecards 33
setting a photo as contact icon 66
starred contacts 36
synchronizing with accounts 32
updating 31
D
Date & time settings 115
Display settings
animation 103
Black color density 102
brightness 102
font style 102
Horizontal Calibration 103
power saving mode 103
saturation 103
screen timeout 103
white color density 102
DivX®
registration code 116
Do cell phones pose a health
hazard? 117
E
combined inbox 44
composing and sending 44
configuring accounts 43
F
Facebook 55
setting up an account 30
Feeds and Updates 55
G
Gallery 64
sharing photos and video 66
viewing photos and video 65
Get Friends 32
Gmail
account settings 43
composing and sending 42
refreshing your account 42
setting up your account 41
Android Market 84
Gmail 41
Latitude 53
Maps 52
Navigation 53
Places 54
Search 54, 83
search settings 110
Voice Search 55
your account 7
YouTube 56, 93
GPS Applications 74
Groups
creating 34
sending a message 35
H
Health and Safety Information 117
Home key 17
Home screen 15
adding shortcuts 22
adding widgets 20
customizing 16
folders 23
primary shortcuts 20
wallpaper 24
Icons
Status Bar 19
Language and keyboard settings
select input method 112
select locale 111
Swype 112
Location and security settings
credential storage 105
device administration 105
location services 104
my location 104
screen unlock 104
visible passwords 105
Locking and Unlocking
screen lock sounds 101
unlocking the keypad 10
M
Maps 52, 84
Market 84
Memory Card
formatting 72
installing 8
removing 9
Memory settings
SD card and device 110
Menu
context-sensitive 17
key 17
Messages
Gmail 41
types 41
Music
creating a playlist 58
Music Player 57
types of menus 58
My Profile 34
sending with Bluetooth or Gmail 34
MySpace 55
setting up an account 30
N
Namecards
sending 33
Navigation 17
command keys 20
finger gestures 17
Primary Shortcuts 20
Notification Panel 18
P
Pairing with Bluetooth 71
Photo ID
setting 66
Photos
Gallery 64
setting as wallpaper 66
sharing 66
taking 60
Playlists
creating 58
Powering On and Off 6
Privacy settings
factory data reset 110
mobile backup and restore 109
personal data 110
Q
Qik Video 89
R
Reset
factory data 110
Ringtones
notification 100
S
SAR Value 122
Search settings
web 110
Securing your device
locking and unlocking 9
screen unlock settings 104
Security
locking and unlocking 9
locking your device 9
screen unlock pattern 104
Security settings
set screen lock 104
Settings 94
Silent mode 100
Sound settings
audible selection tones 101
haptic feedback 101
notification ringtone 100
ringer volume 100
screen lock sounds 101
silent mode 100
Standard Limited Warranty 132
Swype
configuring 38
entering text 38
help 39
Synchronization settings
auto-sync 108
background data 108
System Recovery 11
System Tutorial 7
T
Text
changing input method 37
entering 37
input methods 37
using Swype 38
virtual QWERTY keyboard 37
Text settings
Samsung keypad 113
Turning Your Device On and Off 6
Tutorial 7
Twitter 55
setting up an account 30
U
Unlocking your device
set an unlock pattern 104
V
Videos
Gallery 64
recording 62
sharing 66
Voice Search 55
Volume
key 14
W
Wallpaper
setting 66
Warranty Information 132
Widgets 20
Wi-Fi
adding a connection manually 70
scanning and connecting 70
settings 94
turning on or off 69, 95
WiFi (see Wi-Fi) 69
Wireless Networking
Bluetooth 70
Wi-Fi 69
Y
YouTube 56, 93


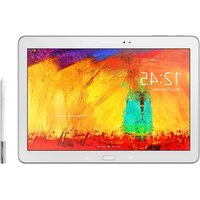
- INTELLECTUAL PROPERTY
- SAMSUNG ELECTRONICS AMERICA (SEA), INC
- OPEN SOURCE SOFTWARE
- DISCLAIMER OF WARRANTIES; EXCLUSION OF LIABILITY
- TABLE OF CONTENTS
- SECTION 1: GETTING STARTED
- SECTION 2: UNDERSTANDING YOUR DEVICE
- SECTION 3: CONTACTS AND ACCOUNTS
- SECTION 4: ENTERING TEXT
- SECTION 5: MESSAGING
- SECTION 6: WEB AND SOCIAL NETWORKING
- SECTION 7: MUSIC
- SECTION 8: PHOTOS AND VIDEO
- SECTION 9: CONNECTIONS
- SECTION 10: APPLICATIONS AND WIDGETS
- SECTION 11: SETTINGS
- SECTION 12: HEALTH AND SAFETY INFORMATION
- SECTION 13: WARRANTY INFORMATION
- INDEX
- UNDERSTANDING THIS USER MANUAL
- SPECIAL TEXT
- TEXT CONVENTIONS
- BATTERY
- BATTERY INDICATOR
- CHARGING THE BATTERY
- TURNING YOUR DEVICE ON AND OFF
- TURNING YOUR DEVICE ON
- TURNING YOUR DEVICE OFF
- YOUR GOOGLE ACCOUNT
- USING GOOGLE MAPS
- SYSTEM TUTORIAL
- TASK MANAGER
- MEMORY CARD
- INSTALLING A MEMORY CARD
- REMOVING A MEMORY CARD
- GALAXY TAB ACCESSORIES
- SECURING YOUR DEVICE
- LOCKING THE DEVICE MANUALLY
- UNLOCKING THE DEVICE
- TROUBLESHOOTING
- ANDROID SYSTEM RECOVERY
- FEATURES
- FRONT AND TOP VIEWS
- SIDE VIEWS
- BACK AND BOTTOM VIEWS
- HOME SCREEN
- EXTENDED HOME SCREEN
- CUSTOMIZING THE HOME SCREEN
- DISPLAY SETTINGS
- ADDING AND REMOVING HOME SCREEN PANELS
- NAVIGATING YOUR DEVICE
- COMMAND KEYS
- MENU KEY
- HOME KEY
- BACK KEY
- SEARCH KEY
- CONTEXT-SENSITIVE MENUS
- FINGER GESTURES
- TOUCH
- TOUCH AND HOLD
- SWIPE, FLICK, OR SLIDE
- PINCH
- NOTIFICATION PANEL
- ICONS
- BRIGHTNESS
- CLEARING NOTIFICATIONS
- STATUS BAR
- PRIMARY SHORTCUTS
- WIDGETS
- ADDING WIDGETS TO THE HOME SCREEN
- REMOVING WIDGETS
- SHORTCUTS
- ADDING SHORTCUTS FROM A HOME SCREEN
- ADDING SHORTCUTS FROM APPLICATIONS
- REMOVING SHORTCUTS
- FOLDERS
- REMOVING FOLDERS
- WALLPAPERS
- APPLICATIONS
- CUSTOMIZING THE APPLICATIONS SCREENS
- ACCOUNTS
- SETTING UP YOUR ACCOUNTS
- SETTING UP A FACEBOOK ACCOUNT
- SETTING UP A TWITTER ACCOUNT
- SETTING UP A MYSPACE ACCOUNT
- CONTACTS
- CREATING CONTACTS
- UPDATING CONTACTS
- LINKED CONTACTS
- LINKING CONTACTS
- UNLINKING CONTACTS
- GET FRIENDS
- CONTACTS DISPLAY OPTIONS
- SENDING NAMECARDS
- SENDING A NAMECARD (VCARD)
- EXPORTING AND IMPORTING CONTACTS
- MY PROFILE
- SENDING MY PROFILE
- GROUPS
- CREATING A NEW GROUP
- DELETING A GROUP
- EDITING A GROUP
- ADDING AND REMOVING GROUP MEMBERS
- SENDING A MESSAGE TO GROUP MEMBERS
- FAVORITES
- CREATING AND REMOVING FAVORITES
- ACCESSING AND EDITING FAVORITES
- VIRTUAL QWERTY KEYBOARD
- TEXT INPUT METHODS
- CHANGING THE INPUT METHOD
- ENTERING TEXT USING SWYPE
- CONFIGURING SWYPE
- SWYPE HELP
- ENTERING SYMBOLS AND NUMBERS
- USING THE NUMERIC KEYBOARD
- USING SWYPE SPEECH RECOGNITION
- EDITING KEYBOARD
- ENTERING TEXT USING THE SAMSUNG KEYPAD
- CONFIGURING SAMSUNG KEYPAD
- ENTERING UPPER AND LOWER CASE LETTERS
- USING SPEECH RECOGNITION
- TYPES OF MESSAGES
- GMAIL
- SETTING UP YOUR GMAIL ACCOUNT
- REFRESHING YOUR GMAIL ACCOUNT
- MANAGING YOUR GMAIL ACCOUNT
- COMPOSING AND SENDING GMAIL
- GMAIL ACCOUNT SETTINGS
- CONFIGURING EMAIL ACCOUNTS
- COMPOSING AND SENDING EMAIL
- MANAGING EMAILS
- COMBINED INBOX
- PRINTING EMAILS
- ACCOUNT MANAGER
- GENERAL SETTINGS
- EXCHANGE ACTIVESYNC SETTINGS (EXCHANGE ACCOUNTS ONLY)
- NOTIFICATION SETTINGS
- SERVER SETTINGS
- COMMON SETTINGS
- GOOGLE TALK
- BROWSER
- NAVIGATING THE WEB
- TOUCHING AND DRAGGING
- ENTERING TEXT IN A FIELD
- ZOOM
- SELECTING ITEMS ON A PAGE
- ENTERING A URL
- COPYING FIELDS OR TEXT
- COPYING TEXT
- COPYING A HYPERLINK OR URL
- USING BOOKMARKS
- CREATING A BOOKMARK
- ACCESSING BOOKMARKS AND HISTORY
- BROWSER MENU
- BROWSER SETTINGS
- SECURITY SETTINGS
- ADVANCED SETTINGS
- MAPS
- NAVIGATING THE MAP
- ZOOMING
- SCROLLING
- MAPS MENU
- LATITUDE
- NAVIGATION
- NEWS & WEATHER
- PLACES
- GOOGLE SEARCH
- VOICE SEARCH
- FEEDS AND UPDATES
- YOUTUBE
- MUSIC PLAYER
- CREATING A PLAYLIST
- ADDING SONGS TO PLAYLISTS
- ADDING A SONG TO A PLAYLIST DURING PLAYBACK
- MUSIC PLAYER SETTINGS
- MUSIC HUB
- CAMERA
- TAKING PHOTOS
- CAMERA OPTIONS
- SETTINGS → IMAGE
- SETTINGS → SETUP
- CAMCORDER
- CAPTURING VIDEO
- CAMCORDER OPTIONS
- VIDEO
- GALLERY
- VIEWING VIDEOS
- VIEWING PHOTOS
- SETTING A PHOTO AS A CONTACT ICON
- SETTING A PHOTO AS WALLPAPER
- SHARING PHOTOS AND VIDEOS
- DIGITAL FRAME
- MEDIA HUB
- WI-FI
- CONFIGURING WI-FI SETTINGS
- TURNING WI-FI ON OR OFF
- TURNING WI-FI ON
- TURNING WI-FI OFF
- SCANNING AND CONNECTING TO A WI-FI NETWORK
- ADDING A WI-FI NETWORK MANUALLY
- BLUETOOTH
- CONFIGURING BLUETOOTH SETTINGS
- TURNING BLUETOOTH ON OR OFF
- TURNING BLUETOOTH ON
- TURNING BLUETOOTH OFF
- PAIRING WITH A BLUETOOTH DEVICE
- USB SETTINGS
- SAMSUNG KIES
- CONNECTING WITH SAMSUNG KIES
- INSTALLING AND REMOVING A MEMORY CARD
- FORMATTING A MEMORY CARD
- FORMATTING A MEMORY CARD USING YOUR DEVICE
- FORMATTING A MEMORY CARD USING YOUR COMPUTER
- TRANSFERRING FILES TO A MEMORY CARD
- USING THE MEDIA PLAYER USB SETTING
- USING THE MASS STORAGE USB SETTING
- GPS APPLICATIONS
- ALARM CLOCK
- SETTING ALARMS
- DELETING ALARMS
- ALARM SETTINGS
- ALLSHARE
- CONFIGURING ALLSHARE
- PLAYING MEDIA FROM YOUR DEVICE TO ANOTHER DEVICE
- PLAYING MEDIA FROM ANOTHER SOURCE ON YOUR DEVICE
- PLAYING MEDIA FROM A SERVER ON A PLAYER VIA YOUR DEVICE
- AMAZON KINDLE
- CALCULATOR
- CALENDAR
- CREATING A CALENDAR EVENT
- CUSTOMIZING THE CALENDAR
- SENDING CALENDAR EVENTS
- DAILY BRIEFING
- CUSTOMIZING DAILY BRIEFING
- DATE, TIME, AND WEATHER
- DATE, TIME, OR WEATHER
- DUAL CLOCK
- FT MOBILE
- MARKET
- MEMO
- COMPOSING A MEMO
- MEMO LIST OPTIONS
- MEMO OPTIONS
- TAP ONE OF THE FOLLOWING OPTIONS
- WHILE VIEWING ONE OF THE ABOVE OPTIONS, PRESS THE MENU KEY
- MUSIC
- MY FILES
- NYTIMES
- POWER CONTROL
- QIK MANUAL
- QIK VIDEO
- SAMSUNG APPS
- SETTINGS
- SOCIAL HUB
- TALK
- THINKFREE OFFICE
- WORLD CLOCK
- ACCESSING SETTINGS
- WIRELESS AND NETWORK
- FLIGHT MODE
- WI-FI SETTINGS
- NETWORK NOTIFICATION
- BLUETOOTH SETTINGS
- BLUETOOTH PROFILES
- ADDITIONAL BLUETOOTH SETTINGS
- VPN SETTINGS
- ADDING A VPN
- SYNCHRONIZE
- SET UP A SYNCHRONIZATION PROFILE
- START SYNCHRONIZATION
- DELETE OR EDIT A PROFILE
- SOUND SETTINGS
- GENERAL
- SILENT MODE
- VOLUME
- NOTIFICATIONS
- NOTIFICATION RINGTONE
- FEEDBACK
- AUDIBLE TOUCH TONES
- AUDIBLE SELECTION
- SCREEN LOCK SOUNDS
- HAPTIC FEEDBACK
- VIBRATION INTENSITY
- FONT STYLE
- WHITE COLOR DENSITY
- BLACK COLOR DENSITY
- SATURATION
- ANIMATION
- SCREEN TIMEOUT
- POWER SAVING MODE
- HORIZONTAL CALIBRATION
- LOCATION AND SECURITY
- MY LOCATION
- USE WIRELESS NETWORKS
- USE GPS SATELLITES
- SCREEN UNLOCK SETTINGS
- SET SCREEN LOCK
- PASSWORDS
- VISIBLE PASSWORDS
- DEVICE ADMINISTRATION
- CREDENTIAL STORAGE
- USE SECURE CREDENTIALS
- INSTALL ENCRYPTED CERTIFICATES FROM SD CARD
- SET PASSWORD
- CLEAR STORAGE
- UNKNOWN SOURCES
- MANAGE APPLICATIONS
- RUNNING SERVICES
- DEVELOPMENT
- USB DEBUGGING
- STAY AWAKE
- ALLOW MOCK LOCATIONS
- ACCOUNTS AND SYNC
- GENERAL SYNC SETTINGS
- BACKGROUND DATA
- AUTO-SYNC
- MANAGE ACCOUNTS
- ADDING AN ACCOUNT
- REMOVING AN ACCOUNT
- PRIVACY
- MOBILE BACKUP AND RESTORE
- BACK UP MY SETTINGS
- AUTOMATIC RESTORE
- PERSONAL DATA
- FACTORY DATA RESET
- SD CARD AND DEVICE STORAGE
- UNDER EXTERNAL SD CARD
- UNDER INTERNAL MEMORY
- UNDER INTERNAL DEVICE STORAGE
- SEARCH
- WEB
- PHONE
- SEARCHABLE ITEMS
- CLEAR SHORTCUTS
- LOCALE AND TEXT
- SELECT LOCALE
- TEXT SETTINGS
- SELECT INPUT METHOD
- SWYPE
- SWYPE ADVANCED SETTINGS
- HELP
- ABOUT
- SAMSUNG KEYPAD
- VOICE INPUT AND OUTPUT
- VOICE INPUT
- VOICE RECOGNITION SETTINGS
- VOICE OUTPUT
- TEXT-TO-SPEECH SETTINGS
- ACCESSIBILITY
- ACCESSIBILITY SERVICES
- DATE AND TIME
- ABOUT DEVICE
- EXPOSURE TO RADIO FREQUENCY (RF) SIGNALS
- DO CELL PHONES POSE A HEALTH HAZARD
- RESEARCH RESULTS TO DATE: IS THERE A CONNECTION BETWEEN RF AND CERTAIN HEALTH PROBLEMS
- INTERPHONE STUDY
- INTERNATIONAL COHORT STUDY ON MOBILE PHONE USERS (COSMOS)
- RISK OF BRAIN CANCER FROM EXPOSURE TO RADIO FREQUENCY FIELDS IN CHILDHOOD AND ADOLESCENCE (MOBI-KIDS)
- SURVEILLANCE, EPIDEMIOLOGY, AND END RESULTS (SEER) PROGRAM OF THE NATIONAL CANCER INSTITUTE
- CELL PHONE INDUSTRY ACTIONS
- REDUCING EXPOSURE: HANDS-FREE KITS AND OTHER ACCESSORIES
- STEPS TO REDUCE EXPOSURE TO RADIO FREQUENCY ENERGY
- HANDS-FREE KITS
- CELL PHONE ACCESSORIES THAT CLAIM TO SHIELD THE HEAD FROM RF RADIATION
- CHILDREN AND CELL PHONES
- SPECIFIC ABSORPTION RATE (SAR) CERTIFICATION INFORMATION
- SMART PRACTICES WHILE DRIVING
- BATTERY USE AND SAFETY
- WARNING
- SAMSUNG MOBILE PRODUCTS AND RECYCLING
- UL CERTIFIED TRAVEL CHARGER
- DISPLAY / TOUCH-SCREEN
- WARNING REGARDING DISPLAY
- WARRANTY DISCLAIMER: PROPER USE OF A TOUCH-SCREEN MOBILE DEVICE
- GPS
- YOUR LOCATION
- EMERGENCY COMMUNICATION
- CARE AND MAINTENANCE
- KEEP YOUR SAMSUNG MOBILE DEVICE AWAY FROM
- LIQUIDS OF ANY KIND
- EXTREME HEAT OR COLD
- MICROWAVES
- DUST AND DIRT
- CLEANING SOLUTIONS
- SHOCK OR VIBRATION
- PAINT
- RESPONSIBLE LISTENING
- AMERICAN ACADEMY OF AUDIOLOGY
- NATIONAL INSTITUTE ON DEAFNESS AND OTHER COMMUNICATION DISORDERS
- NATIONAL INSTITUTE FOR OCCUPATIONAL SAFETY AND HEALTH (NIOSH)
- OPERATING ENVIRONMENT
- USING YOUR MOBILE DEVICE NEAR OTHER ELECTRONIC DEVICES
- IMPLANTABLE MEDICAL DEVICES
- OTHER MEDICAL DEVICES
- VEHICLES
- POSTED FACILITIES
- POTENTIALLY EXPLOSIVE ENVIRONMENTS
- RESTRICTING CHILDREN'S ACCESS TO YOUR MOBILE DEVICE
- FCC NOTICE AND CAUTIONS
- FCC NOTICE
- CAUTIONS
- OTHER IMPORTANT SAFETY INFORMATION
- STANDARD LIMITED WARRANTY
- WHAT IS COVERED AND FOR HOW LONG
- WHAT IS NOT COVERED
- WHAT ARE SAMSUNG'S OBLIGATIONS
- WHAT ARE THE LIMITS ON SAMSUNG'S LIABILITY
- END USER LICENSE AGREEMENT FOR SOFTWARE
- A
- B
- C
- D
- DIVX®
- DO CELL PHONES POSE A HEALTH
- E
- F
- G
- H
- HEALTH AND SAFETY INFORMATION
- LANGUAGE AND KEYBOARD SETTINGS
- LOCATION AND SECURITY SETTINGS
- LOCKING AND UNLOCKING
- M
- MEMORY SETTINGS
- MENU
- MESSAGES
- MYSPACE
- N
- NAMECARDS
- P
- PAIRING WITH BLUETOOTH
- PHOTO ID
- PHOTOS
- PLAYLISTS
- POWERING ON AND OFF
- PRIVACY SETTINGS
- Q
- R
- RESET
- RINGTONES
- S
- SAR VALUE
- SEARCH SETTINGS
- SECURITY
- T
- U
- V
- W
- Y
Brand : SAMSUNG
Model : Galaxy P1010
Category : Graphic tablet