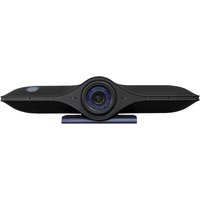
Agora - Video Conferencing System JPL - Free user manual and instructions
Find the device manual for free Agora JPL in PDF.


| Product Type | Video Conferencing System |
| Manufacturer | JPL |
| Model | Agora |
| Dimensions (W x D x H) | Approx. 30 x 20 x 5 cm |
| Weight | Approx. 1.2 kg |
| Power Supply | AC 100-240V, 50/60 Hz, external adapter |
| Power Consumption | Max. 15 W |
| Display Connectivity | HDMI output |
| Camera Resolution | 1080p Full HD |
| Field of View | 120° wide angle |
| Microphone Type | Built-in omnidirectional microphone array |
| Speaker | Built-in full-range speaker |
| Network Connectivity | Wi-Fi 802.11 a/b/g/n/ac, Ethernet RJ-45 |
| Supported Platforms | Zoom, Microsoft Teams, Google Meet, etc. |
| Control | Remote control included |
| Mounting Options | Desk stand or wall mount (bracket sold separately) |
| Operating Temperature | 0°C to 40°C |
| Storage Temperature | -20°C to 60°C |
| Cleaning Instructions | Wipe with a soft dry cloth; avoid liquids |
| Safety Precautions | Do not expose to water; use only supplied adapter |
| Spare Parts Availability | Contact JPL support for replacement parts |
| Warranty | Standard 2-year warranty |
Frequently Asked Questions - Agora JPL
User questions about Agora JPL
0 question about this device. Answer the ones you know or ask your own.
Ask a new question about this device
Download the instructions for your Video Conferencing System in PDF format for free! Find your manual Agora - JPL and take your electronic device back in hand. On this page are published all the documents necessary for the use of your device. Agora by JPL.
USER MANUAL Agora JPL
natural_image
Black remote control device with a circular lens mounted on a blue stand, accompanied by a remote control (no visible text or symbols)JPL Agora
User Guide
PROPELLER
BY JPL
4K Ultra HD All-In-One Video Sound Bar with Intelligent Zoom
Unpacking
Remove your camera from its packaging and ensure you have the correct specified accessories. Retain the camera box for storage, and also in the unlikely event that it needs to be returned for servicing or repair.
Warning
Ensure that all electrical connections (including extension leads and interconnections between pieces of equipment) are properly made and in accordance with the relevant manufacturer's instructions.
- Do not continue to operate the equipment if you are in any doubt about it working normally, or if it is damaged in any way. If this is the case, disconnect from your PC equipment and consult your dealer.
- Do not allow electrical equipment to be exposed to rain or moisture.
- Never push anything into holes, slots or any other opening on your camera as this could result in a fatal electrical shock.
- Do not open the camera housing as doing so will void the warranty.
- Never guess or take chances with electrical equipment.
Safety
For your own safety, this product should only be used with UKCA, CE, FCC, and RoHS approved equipment. Using this camera with non-approved equipment can void this products warranty.
Unplug this product from the power outlet before cleaning. Do not use liquid cleaners or aerosol cleaners. Use a damp cloth for cleaning.
Do not overload outlets and extension cords as this can result in risk of fire or electric shock.
Environmental Notice
This camera has been made to UKCA, CE, FCC, RoHS, and WEEE standards. In the interest of recycling raw materials, please do not dispose of this camera in the household waste at the end of its useful life. Disposal can take place at approved recycling or disposing locations in accordance with local regulations.
Consult your responsible authority for information about the professional and environment-friendly disposal of your device. If you want that we handle the disposal for you, you can send the device at your costs to JPL Telecom Limited.
General Limitation of Liability
The device is not designed, manufactured, or intended for use or resale, in environments that require fail-safe performance, such as in the operation of life-support systems and/or nuclear facilities. The device may only be used for these purposes with prior written permission from the manufacturer in each individual case.
Declaration of Conformity
This device complies with the basic health, safety and environmental requirements in all relevant directives. You will find the Declaration of Conformity on our website. www.jpltele.com

Contents
What's Included 4
Video Sound Bar - Overview 5
Setting up your Video Sound Bar 6
Video Enhancement 7
External Bluetooth Device Connection 7
Technical Information 8
- Camera Parameters
- Microphone Parameters
- Speaker Parameters
Technical Information 9
- Bluetooth Parameters
- Other Parameters
Bluetooth Remote Control 10
Bluetooth Remote Control 11
Camera Settings - Remote Control - Button Combination 12
Re-pairing Settings - Remote Control - Button Combination 12
Camera Status Indicator 13
Mode Status Indicator 13
Trouble Shooting 14
Conditions of Warranty 15
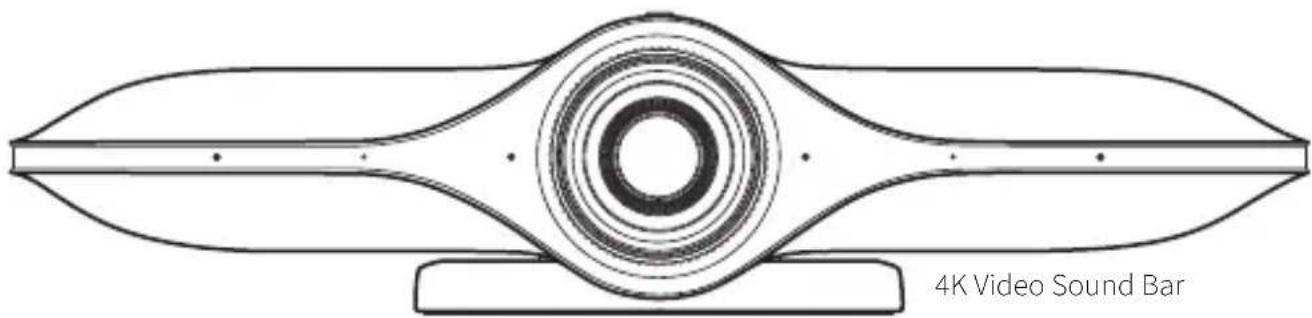
Thank you for choosing the JPL Agora Bluetooth Conference Room Video Sound Bar.

natural_image
Front view of a classic remote control with no visible text or symbols on the device itselfBluetooth Remote Control
- Requires 2 x AAA batteries (Batteries not included)


natural_image
Simple circular diagram with concentric rings and a central horizontal line (no text or symbols)Magnetic Privacy Cover

natural_image
Line drawing of a coiled cable with connectors (no text or symbols)USB-A to USB-A or USB-C Connection Cable

natural_image
Line drawing of a metal bracket with two mounting holes (no text or symbols)Wall Bracket

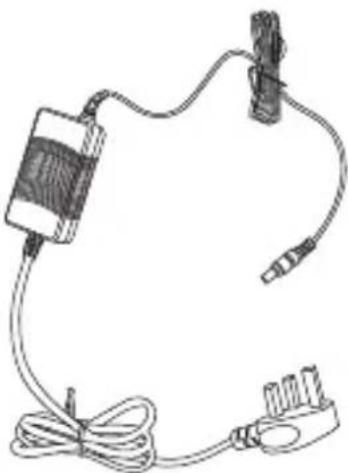
Wall Bracket Fixings Multi Country DC 12V
natural_image
Simple line drawing of a cable and plug assembly (no text or symbols)Power Adapter


- Placing your camera - Designed with a fully adjustable mount, the JPL Agora can be placed above a computer monitor, positioned on a desktop, or mounted on a wall or ceiling.
(a) Monitor Mount
Unfold the adjustable bracket and place the camera on top of your monitor, adjust the angle of the bracket so that it touches the back of the monitor.

natural_image
Technical line drawings of a device with front and top views (no text or symbols)(b) Wall Mount
Drill holes in the wall that match the pre-drilled holes on the back of the mount.

Make sure to check you are not drilling into any electrical wires hidden within the wall.
Put rawl plugs into the drilled holes and then attach the mount to the wall using the screws supplied.

- Connecting your camera is a simple Plug & Play.
No additional software or downloads are required.
(a) Connect the 12V DC jack to the port at the back of the camera and connect the mains adapter to a wall socket.
(b) Connect the camera to the display screen using the USB cable supplied.

natural_image
Circular diagram showing a device with USB label and ports, no readable text or symbols beyond the labelVideo Enhancement
To achieve the best camera performance, there are a few thing you can do:
- Do not sit in front of a window or other bright light source.
- Having an uncluttered background will have your viewers concentrating on you rather than looking at what you have in the background.
- The mounting system allows for tilting and aiming the camera. Tilt and move the camera to frame up everyone around the conference table.
- Visit your preferred video calling provider's website for exact information on system and requirements.
- To get a smoother video, especially at high resolution, we recommend network speed above 2Mbps.
External Bluetooth Device Connection
If your PC does not support Bluetooth, then you can use the Bluetooth in the JPL Agora to connect an additional Bluetooth device, such as a speakerphone. Once paired to the PC, you can select to use the speakerphone as your preferred audio device.
To connect an external Bluetooth speaker/microphone, first make sure the external Bluetooth device is in pairing mode and at the same time, plug the JPL Agora camera into the PC.
- Turn on the Bluetooth connectivity on your PC and the device name should appear in the list, click on it to add the external speaker/microphone.
Camera parameters:
| Total Pixels 8.3 million pixels - 4K |
| Focus Mode Fixed Focus |
| Aperture F/No. =2.5 ±5% |
| Image Colour 24 Bit |
| Maximum Effective Pixel 3840 x 2160 @30fps |
| Output Image Format MJPG and YUY2 |
| Picture Adjustment Brightness, Chroma, Saturation, Contrast, Sharpness |
| Field of view D=116° H=107° V=74° |
| Pan 0° |
| Tilt ±15° |
| Intelligent Zoom 16 step, 3 x digital zoom |
| Minimum Illumination 0.5 Lux |
| Exposure Automatic Exposure (AE) |
| AIC Auto White Balance (AWB), Dynamic Black Level, Calibration (ABLC) |
| Resolution @ 30fps 3840 x 2160, 1920 x 1080, 1280 x 720, 640 x 480 |
Microphone parameters:
| MIC Specification 4 x digital microphones | |
| SNR | ≥65.5dB |
| Sensitivity | -26dB Fs |
| Far-field voice pick-up | 0-10 metres |
| Horizontal voice pickup | Horizontal 180° |
| Communication mode | Full duplex |
Speaker parameters:
| Speaker Specification 2 x ø40mm x H 28mm | |
| Power | 3W each |
| Impedance 4Ω | |
| Frequency Range 20Hz~20KHz | |
| Distortion | 5% Max |
Technical Information
Bluetooth parameters:
| Bluetooth Standard Bluetooth 4.2/EDR/BLE |
| Frequency 2400 ~ 2480MHz |
| TX Power 4±1.5dBm (typical) |
| RX Sensitivity -85dBm (typical)π/4 DQPSK |
| Operating Systems Windows; Linux; Android |
| Operating Distance 10 meters |
Other parameters:
| Interface type USB 2.0 Type-A orUSB Type-C, Line In,Line Out, Bluetooth | |
| Voltage DC 12V < 2000mA | |
| OS Support Win 2000/XP/Vista/Win 7/Win 8/Win 10, Win CE withUVC, Linux with UVC(above Linux - 2.6.26)Mac OS X 10.4.8 or later,Android 4.0 with UVC | |
| Size L352 x W75 x H80mm | |
| Weight | 960g |

Bluetooth Remote Control
| Function | Operation |
| 1. Camera On/Off [ ] Single press to turn the video picture on/off | |
| 2. Mute Microphone [ ] Single press to mute / unmute camera microphone | |
| 3. Direction button Control direction movement of video picture[ ] Move up, [ ] Move down, [▲] Move left, [▼] Move right | |
| 4. Microphone [ ] Long press without release to switch to built-in microphone of remote controller, release to switch to camera microphone | |
| 5. AI zoom & Menu [ ] Single press to turn AI zoom on / AI zoom off | |
| 6. Volume up [ ] Single long press to increase volume (Synchronise volume control with PC ) | |
| 7. Volume down [ ] Single long press to decrease volume (Synchronise volume control with PC ) | |
| 8. Increase zoom [ ] Single long press to increase the zoom | |
| 9. Decrease zoom [ ] Single long press to decrease the zoom | |
| 10. Air Mouse [ ] [ ] Move up, [ ] Move down, [▲] Left click, [▼] Right click | |
| 11. Page up [ ] For scrolling to next page when viewing multi-page documents | |
| 12. Page down [ ] For scrolling to previous page when viewing multi-page documents | |
| 13. OK button [ OK ] Long press (5s) [ OK ] button to confirm or reset to standard settings | |
Camera Settings - Remote Control - Button Combination (Step-by-Step)
| Function | Operation |
| Activate Settings Mode | Long press (5) AI zoom & Menu [≡] for 5s and release then press any button to set video picture effect. Press (13) [OK] to confirm and exit. |
Adjustable Camera Settings - Remote Control - Button Combination (Step-by-Step)
| Function | Operation |
| Camera Brightness | Press (6) Volume up [+] / (7) Volume down [−] |
| Camera Contrast | Press (8) Increase zoom [+] / (9) Decrease zoom [−] |
| Camera Colour Saturation | Press (11) Page up [ ] / (12) Page down [ ] |
| Screen Mirror Effect Press (3) | Direction button[▲] Move up, [▼] Move down to mirror the screen horizontally[◀] Move left, [▼] Move right to mirror the screen vertically |
| Move the Image after Magnification [ ] [ ] to move the image accordingly | Press (12) Page down [ ] and then press (3) Direction button [▲] [▼] |
Re-pairing Settings - Remote Control - Button Combination (Press at the same time)
| Function | Operation |
| Clear Bluetooth settings | Long press (3s), (13) [OK] and (11) Page up [ ] together |
| Enter Pair Bluetooth mode | Long press (3s), (7) Volume down [ ] and (9) Decrease zoom [ ] together |

Camera Status Indicator
| Visual Indicator Operation | |
| Blue light stays on/turns off Camera opened/closed | |
Mode Status Indicator
| Visual Indicator Operation | |
| Light flashes or stays on Camera has Power and is Active | |
| Blue light flashes Camera & Remote Control Unpaired | |
| Blue light stays on Camera & Remote Control Paired | |
| Red light stays on/turns off Microphone mute turned on/off | |
| Purple light stays on External microphone connected | |
| Red and blue lights flash alternately enter into setting mode, press (13) [OK] will disappear | Long press (5) Al zoom & Menu [≡] on the remote control to |
| Purple light flashes 3 times | Long press (13) [OK] for 3s to 5s to enter RESET |
Trouble Shooting
1) No reaction when using the Bluetooth remote controller
a) If you do not see a red LED light when pressing any button on the remote controller, check to see if the remote controller has batteries and that they are installed correctly.
b) Repower the JPL Agora Camera and then press the Volume down [ ] and Decrease zoom [ ] at the same time for 3s.
2) Blue LED light flashes slowly on camera
a) Turn off the power for 3s and then reconnect it.
b) Press OK button [OK] and Page up [☐] buttons at the same time for 3s until red LED on remote controller turns off.
c) Press Volume down [●-] and Decrease zoom [●-] at the same time for 3s.
3) Image displays abnormally
a) Check that the lens is clean.
b) Press OK button [OK] for 3-5s to enter RESET.
4) Microphone is not active
a) Check to see if the JPL Agora is set as the default camera in the microphone settings on your PC.
b) Check if the microphone has been muted by the remote controller.
5) PC fails to read this camera
Check all cables are correctly connected.
6) No image displayed / The image breaks frequently
Check all cables are correctly connected.
7) The video quality is not good after accessing software
Check your video quality settings on the PC.
Conditions of Warranty
-
JPL Telecom Limited, Head Office: Units 1 & 2, Church Close Business Park, Church Close, Todber, Sturminster Newton, Dorset DT10 1JH, England, grants 3 year limited manufacturer's warranty* from the date of purchase, as the manufacturer of this product.
-
For you, as a consumer, this means: We guarantee that our devices are error-free when supplied. If a manufacturing error is identified within 36 months* of the delivery date we will repair or replace the device free of charge without you, as the consumer, having to provide the usual legally required proof that this fault was present when you received the device. We either use new parts or parts in mint condition for the repair or replacement delivery. Any parts removed from the device become our property and can be destroyed by us.
-
In addition to this warranty, you have the unlimited legal right to claim against the supplier on the basis of the terms of the warranty for defects on the basis of the purchase contract. However, in contrast to our Manufacturer's Warranty, the legal warranty for defects only applies to the device's state when sold.
-
You can only claim against this warranty if you return the faulty device to JPL Telecom Limited or our local general importer or distributor, outside England, at your own cost, with a valid proof of purchase (invoice or till receipt). When you return it to us, please provide a detailed description of the fault that has occurred, and also tell us your telephone number, in case we need to contact you. To prevent shipping damage, provide suitable transport packaging (e.g. original packaging with a secondary shipping box).
-
The Manufacturer's Warranty excludes damage caused by mishandling, operating errors, misuse, external influences, lightning strikes/power surges, modifications to the product and extensions. Shipping damage, consequential damage, and costs arising from down times and travel times are also excluded.
-
Do not open the camera housing as doing so will void the warranty. The warranty is cancelled if repairs are carried out by unauthorised agents.
*3 years limited warranty (2 years standard repair or replacement warranty plus a 3rd year cover on the camera only)
REGISTERED ADDRESS
UK Office: JPL Telecom Limited
Units 1 & 2, Church Close Business Park, Church Close, Todber, Sturminster Newton, Dorset, DT10 1JH, England
USA Office: JPL Telecom Holdings LLC
445 W Merritt Ave, Merritt Island, FL 32953, USA
Brand : JPL
Model : Agora
Category : Video Conferencing System