
SLT241 - Television MAJESTIC - Free user manual and instructions
Find the device manual for free SLT241 MAJESTIC in PDF.


| Product Type | LED TV |
| Screen Size | 24 inches |
| Resolution | 1366 x 768 pixels (HD Ready) |
| Aspect Ratio | 16:9 |
| Refresh Rate | 60 Hz |
| Contrast Ratio | 1000:1 (typical) |
| Brightness | 200 cd/m² |
| Viewing Angle | 178° horizontal / 178° vertical |
| Audio Output | 2 x 5W |
| Connectivity | HDMI (x2), USB (x1), VGA, AV (Composite), RF, Headphone out |
| Power Consumption (Typical) | 30 W |
| Standby Power | < 0.5 W |
| Dimensions (with stand) | 550 x 340 x 150 mm |
| Weight (with stand) | 3.5 kg |
| VESA Mount Compatible | Yes, 75 x 75 mm |
| Energy Class | A+ |
| Remote Control | Included |
| Wall Mountability | Yes (bracket not included) |
| Cleaning and Maintenance | Wipe with a soft dry cloth. Do not use solvents or abrasive cleaners. |
| Safety Precautions | Keep away from moisture. Do not block ventilation openings. Use only the supplied power cord. |
| Spare Parts and Repairability | Spare parts available through authorized service centers. Refer to user manual for disassembly instructions. |
| General Information | Brand: Majestic | Model: SLT241 | Category: Television |
Frequently Asked Questions - SLT241 MAJESTIC
User questions about SLT241 MAJESTIC
0 question about this device. Answer the ones you know or ask your own.
Ask a new question about this device
Download the instructions for your Television in PDF format for free! Find your manual SLT241 - MAJESTIC and take your electronic device back in hand. On this page are published all the documents necessary for the use of your device. SLT241 by MAJESTIC.
USER MANUAL SLT241 MAJESTIC
natural_image
Front view of a black rectangular TV with a 'MAJ'SITE' logo on the front panel (no additional text or symbols visible)Warnings
Do not touch the power plug with wet hands.
- Doing so may result in electric shock.

Do not use a damaged power cord or plug or a loose outlet.
- Doing so may result in fire or electric shock.
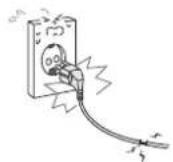
Do not plug several devices into the same outlet.
- Doing so may cause the outlet to overheat and start a fire.

Insert the power plug fully into the outlet.
• A loose or improperly inserted power plug may result in fire.

Do not bend the power cord excessively or place heavy objects on it.
- Doing so may result in fire or electric shock.

Be sure to ground the unit.
- Failing to do so may lead to electric shock when a short circuit or overload occurs. If necessary, install a ground fault circuit breaker. Never ground to a telephone line, lightning rod, or metal gas pipe. (Doing so may result in fire, electric shock, or other hazards.)

Cautions
When disconnecting the power cord from an AC outlet, always grasp it by the plug.
- Pulling on the cord can damage the internal wire and may result in fire.

Always unplug the unit before cleaning.
• doing so may result in fire or electric shock.

The purpose of these precautions is to ensure user safety and prevent property damage.
Be sure to read and observe all safety precautions.

Contents
Names of each part/Accessories 03
Remote control 04
First Time Installation 06
Select input source 07
TV MENU 07
Picture 09
Sound 10
Channel 11
Function 12
Time 13
Lock 13
Media Operation 15
Android Operation 16
Home 16
Settings 16
Apps 17
Network 17
Software Update 18
Date&Time 19
Language 19
Keyboard 19
Storage 19
Reset 20
Bluetooth 20
Back View


DC IN: Connect to the power adaptor.
RJ45: Connect to Router or Internet.
CVBS OUT+LINE L/R OUT: Connect to the AV OUT ports.
HDMI: Connect to the HDMI of DVD or other equipment.
RF: Connect antenna or cable 75 Ohm coaxial to receive TV signal.
OPTICAL: Connects to the Optical Audio in port of an audio device.
Common Interface: CI slot.
Mini AV: Connect it to the audio & video output terminal of DVD with the Converter cable.

: Connect to your headphone or other audio equipment
USB: Connect to USB device for multimedia and PVR.T
Position of input / output connections for guidance only. Models may vary.
2. 4G AIR MOUSE REMOTE CONTROL
1. Product diagram

2.Instructions
(1) Paring: Press the OK button and TV button at the same time after you have insert USB receiver into the USB port, the cursor can move swimmingly means the pairing is succeeded.
(2)Function of the key
HOME: After entering the sub-menu you can back to the original main menu directly.
RETURN: You can press the Return key to put the unit into last interface.
CURSOR LOCK: Short press to lock the cursor, and then return the cursor state.
THE BROWSER SHORTCUTS: A key to open the browser
3. Illustrated of the work status
(1) After the air mouse having paired to the terminal equipment, as the key pressed LED light shine, loosen the finger then light go out.
(2) Cursor speed regulation
From slow to fast: Press "HOME" and "VOL+" at the same time, the speed of cursor pointer is faster. From fast to slow: Press "HOME" and "VOL-" at the same time, the speed of cursor pointer is slower
(3)IR learning function: Example for learning the TV "POWER" key
①Long press the TV button, LED light will from fast flashing to slow flashing First, the smart RC enter IR learning mode.
②After the flying squirrel and a TV remote control have been infrared transmitter aligned, press the POWER button of the TV control, then LED of the air mouse will light, indicating that the air mouse has receive the code value that from TV remote control.
③Click the key of the air mouse that need to learn, the LED light becomes slow flashing, which means that the TV remote cotrol air mouse has received the code values.
④After the success of learning, you can press TV button to exit the learning mode, and then LED stop to light.
4. Instructions of the Keyboard Operating
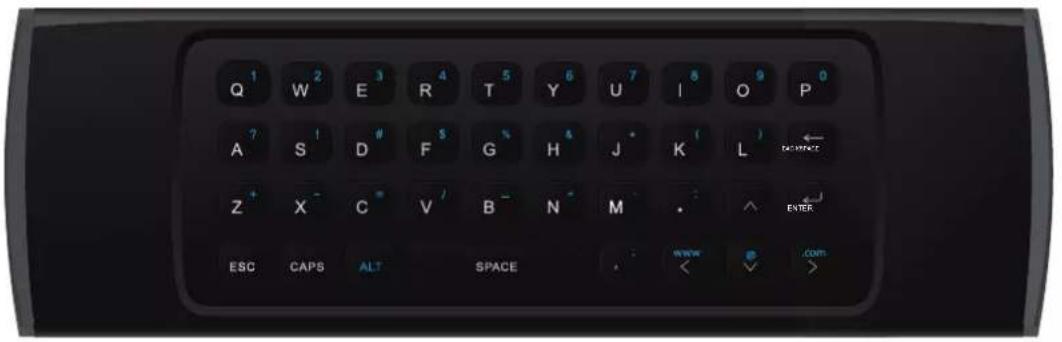
The keyboard composed by the 38 keys.
Backspace: Delete previous character
CAPS: Caps Lock
ENTER: Confirm the operation
SPACE:Spacebar
ALT: Numeric characters switch
5. Specification
Transmission and control:2.4G RF wireless
radio-frequency technique
The sensor:3-Gyro + 3-Gsensor
The key number:81 keys
Remote control distance:≥10 meter
The battery type: Two 7 batteries (AAA*2)
The machine power consumption: Less than
10mA in the work condition
Standby power consumption: in line with the European
"energy star" green environmental protection standard
Material:Rubber and silicone
Appearance of the color: Black
Dimension:172*52*19MM(two sides just 10mm thik)
The machine weight: About 100g
First Time Installation
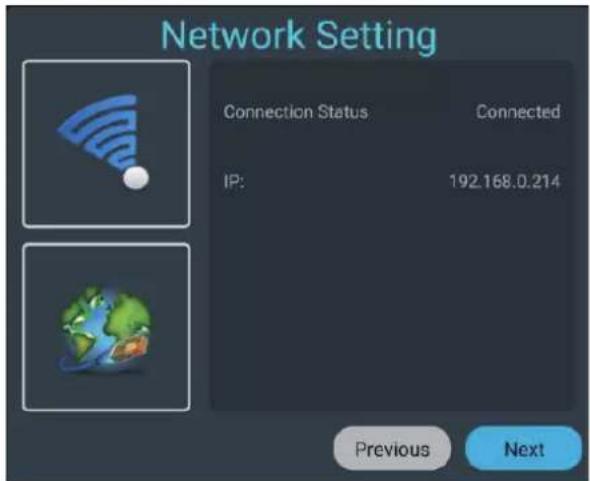
The Startup Wizard menu contains language settings and network settings.

Language settings: you can set the TV operating language.

Network settings: you can set according to the connection, wireless network settings WIFI connection, wired connection is to set the local area network.
Select Input Source

Press the "Source" button to display the input source menu, press the left or right button to select the corresponding input source, and press the Enter button to enter the relevant source.
TV MENU

Press the "menu" button to display the menu, press the up and down keys to select the appropriate settings, press the rightbuttontoentertherelevantsettings.
Picture

Picture Mode: Use the menu button to call up the menu, then right click to select the "Image Mode" option, press the left and right button to switch the image mode to Standard / Movie / Vivid / User.
Aspect Ratio: You can select ZOOM1, ZOOM2, 16:9 or 4:3 with left and right keys when the option of Aspect Ratio is picked. The aspect ration will automatically change in auto mode.
HDMI Mode: Switch the image mode when play picture/video in HDMI mode.
Color temperature: Select the "Color Temperature" option according to the method mentioned above, and then use the left and right keys to adjust the color temperature to cool / normal / warm.
Noise Reduction: Press up/down key to select "Noise Reduction" option. Press left/right key to select "Off", "Low", "Medium", "High" and "Auto" to improve the picture sharpness.
Sound
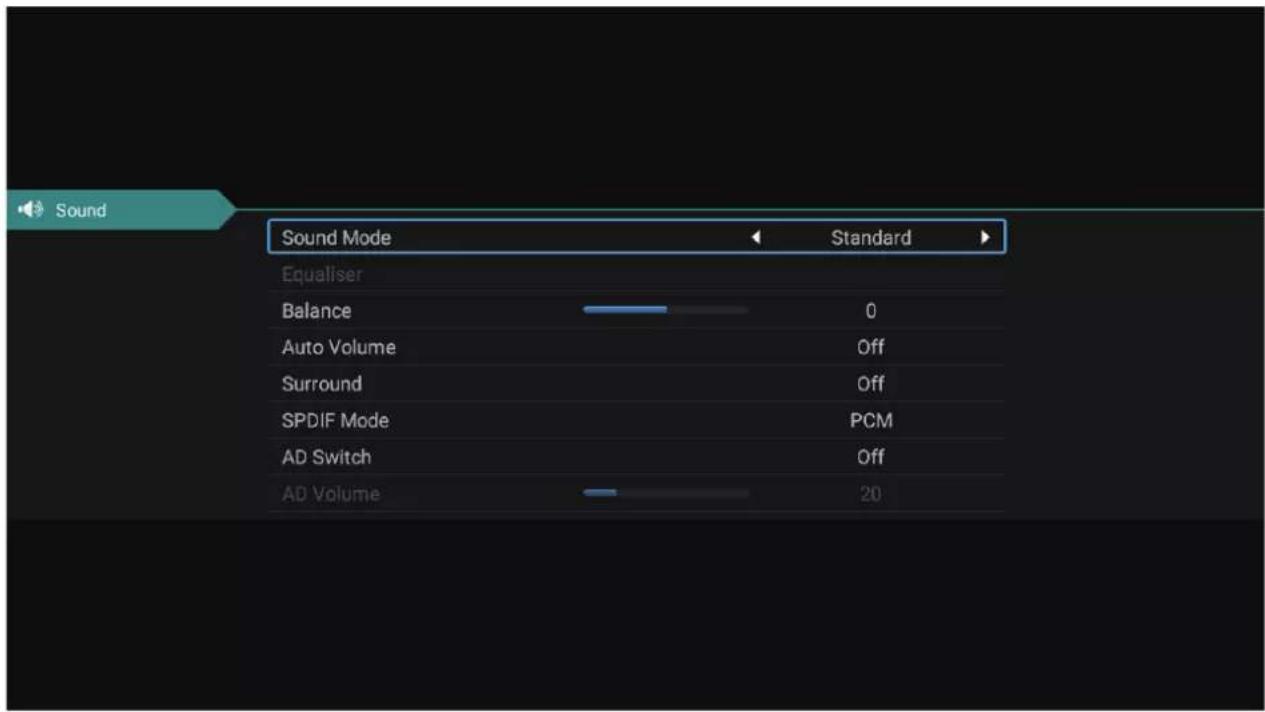
Sound mode: Use the up and down keys to select the sound menu, then press the right button to select the "Sound Mode" option, press the left and right button to switch the sound mode to Standard/Sports/Music/Movie/User.
Equalizer: Through the up and down keys selected "equalizer" option, and then press the OK key system will appear different bandwidth frequency level.
Balance: If the volumes of the left speaker and the right speaker are not the same, you can adjust the "Balance" to suit your personal preference.
Auto Volume/Surround: Select the "Auto Volume" option, then turn the "Auto Volume" function on or off with the left and right buttons. This method is also suitable for surround sound adjustment.
SPDIF Mode: This is used to convert the digital audio output mode. There are Auto, PCM, RAW, OFF
AD Switch: Select the "AD Switch" option, then turn the "AD Switch" function on or off with the left and right buttons
AD Volume: You can adjust the "AD Volume" to suit your personal preference.
Channel

Auto Search
Select option of Auto Tuning under the up and down keys. Then press OK button and the auto tuning will begin.
DTV Manual Search
To simulate manual search, select the Channel you need to store, and also select the color and sound system. Press the up and down keys to select the "Search" option, press the left and right button to search, and you can modify the frequency by fine tuning, choose the best frequency.
Channel Edit
You can use different color buttons or function buttons to delete, hide, move, edit, and set program preferences.


Function

OSD Time: Press the "menu display time" option, through the left and right direction keys can be changed to 5 seconds, 10 seconds, 15 seconds, 30 seconds, always optional.
CEC: Press the up and down keys to select the option, and then press the OK key to open the CEC function. When CEC is turned on, you can choose to turn on or off Auto Standby, Auto Power on, ARC, Auto Standby. When the TV is turned off, the CEC device will be automatically turned off. When Auto Power on is turned on, when the HDMI connected device is turned on, the TV will automatically turn on. Open the Device list to display the connected drive device.
PVR: You can check the recording history and change PVR setting as your demand.
Blue Screen: Turn on / off no signal blue screen.
Audio Language: Select Audio Language Setting will enter the audio selection list, generally can choose Dolby and other sound effects. Audio Language can switch the first audio language through the left and right direction keys, the default is English. Second Audio Language can switch the second audio language through the left and right direction keys, the default is English.
Subtitle: Select Subtitle Setting will enter the subtitle selection list, you can switch weak listening subtitles or normal subtitles or close subtitles. Subtitle Language can be used to select the subtitle language, and Second Subtitle Language can be used to set the second subtitle language.
Reset: Select the "restore default settings" option by using the up and down keys, and then click OK to enter the next window. Can choose to confirm or cancel, choose to confirm the television will restart, the menu data will restore the initial data, choose to cancel also back to the menu interface.
Time
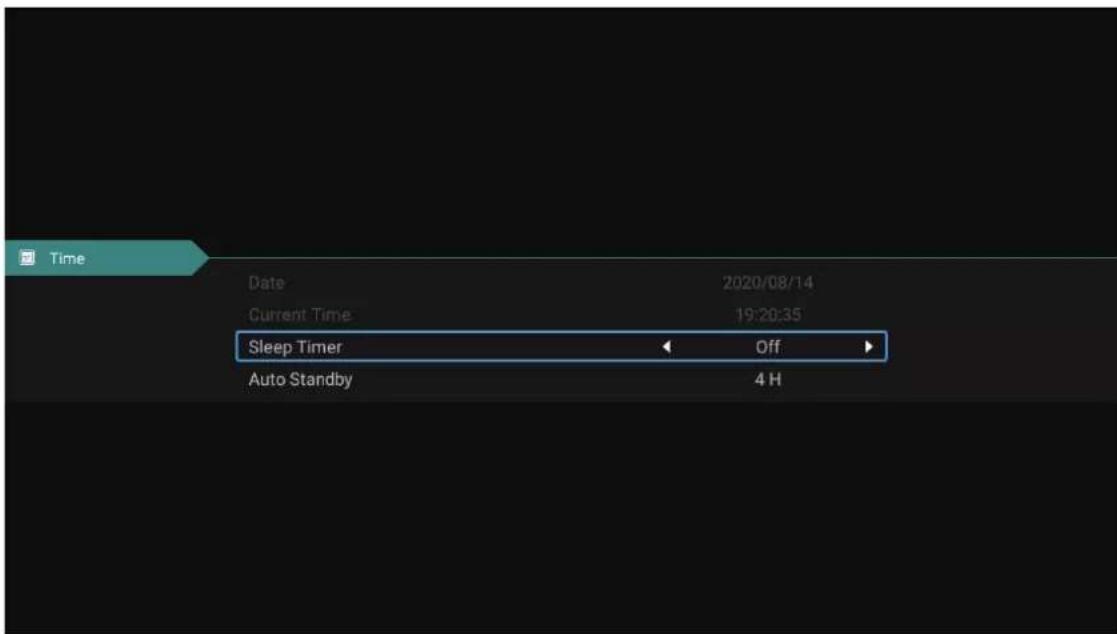
Date/Current time: This is not adjustable, when there is a signal when the automatic calibration.
Sleep time: The system provides OFF/10/20/30/60/90/120/180/240min sleep time to choose from.
Auto Standby: The TV will shift to Standby mode in 3H/4H/5H/OFF as you can choose.
Lock
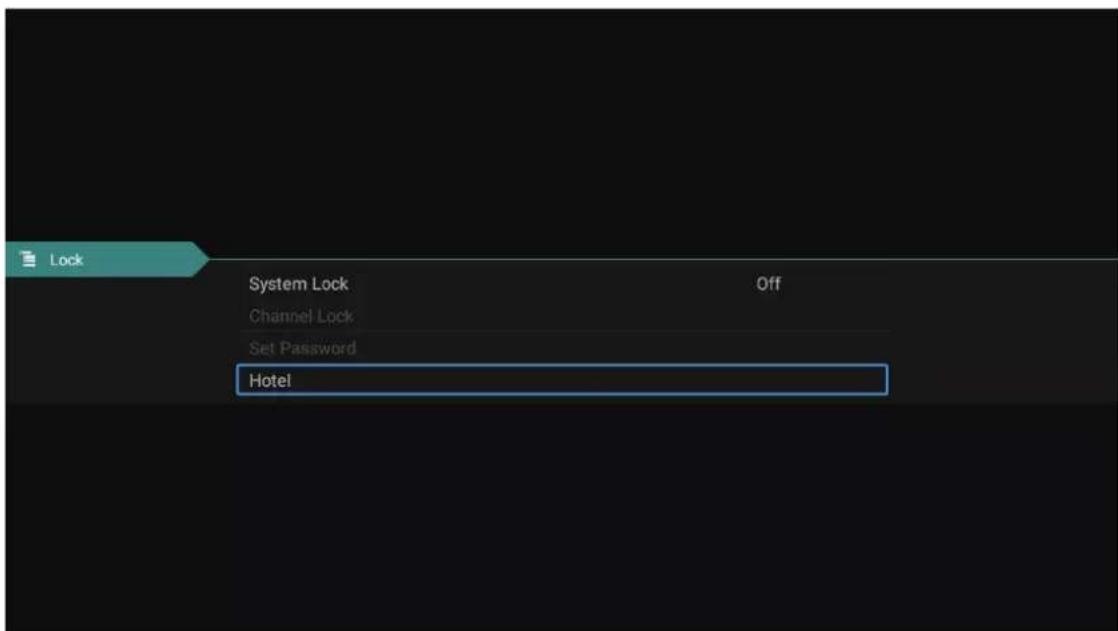
System Lock
Choose with the up and down keys, then open the lock function with left and right keys. Please remember that initial password is 0000. If you want to adjust password, you firstly should select option of set password and then input old password, new password. When new password you input again is correct and make sure above operation, this mean that you successfully reset password. When you want to shield some programs you don't like, please select the option of block program and input the channel number.
Hotel mode
In this mode, you can manage the opening and closing of the relevant channels, set the language, screen ratio operatio.

Key lock: Press the "key lock" option to turn the menu on or off through the left and right keys.
Scanlock:Pressthe " Scan lock option to turn the menu on or off through the left and right keys.
Inputlock:Pressthe "inputLock" optiontoturnthesignalchannelonoroffthroughtheleftandrightupanddown keys.
DefaultSource:Pressthe "DefaultSource" optiontoturnthemenuonoroffthroughtheleftandrightkeys.
Channel Type: Selectachannelnumberthatispoweredonbydefault.
MaxVolume:Presstoselectthe "maxvolume" optionandsettheparametersthroughtheleftandrightkeys.
DefaultVolume:Presstoselectthe “defaultvolume” optionandsettheparametersthroughtheleftandrightkeys.
Import: Insert the USB drive, place the USB drive with the relevant data files that need to set the hotel function, and clickImportData.
Export: Insert the USB drive, click the export option, and export the set hotel data to the USB drive.
Language: Press the "language" option to turn the Select the language with the up and down arrow keys.
Aspect Ratio: Press the "Aspect Ratio" option to set the parameters through the left and right keys.
Restore:Pressthe "Restore" optiontoresettheabovesettings.
Media Operation

Picture
Through the up and down keys to select the "picture" icon, press the confirmation button to confirm, and then press right to the folder, press the confirmation button to open the appropriate folder. After selecting the picture, press the confirmation key to open the picture, can carry on some operation through the left and right keys.
Music
Through the up and down keys to select the "Audio" icon, press the confirmation button to confirm, and then press right to the folder, press the confirmation button to open the appropriate folder. After selecting the Audio, press the confirmation key to open the Audio, you can make some operation through the left and right keys.
Video
Through the upper and lower keys selected "video" icon, press the confirmation key to confirm, then press right to the folder, press the confirmation key to open the corresponding folder. After the selection of the video, press the confirmation key to open the video, you can make some operation through the left and right.
Installation Package
Select the "Installation package" icon, press the enter key to confirm the entry, open the corresponding folder. After selecting the installation package, press the enter key to open and install.
USB Disk
Can read external devices, such as USB Disk.
Local Storage
The internal files of the system can be read.
Network Sharing
Access to the same segment, the server shares files.
Android Operation
Home
Press Home button to enter Smart TV interface.

The main page is designed with Zeasn UI, divided into: latest news, Featured APP, applications, music, sports.
*Different regions will receive different push content
Settings
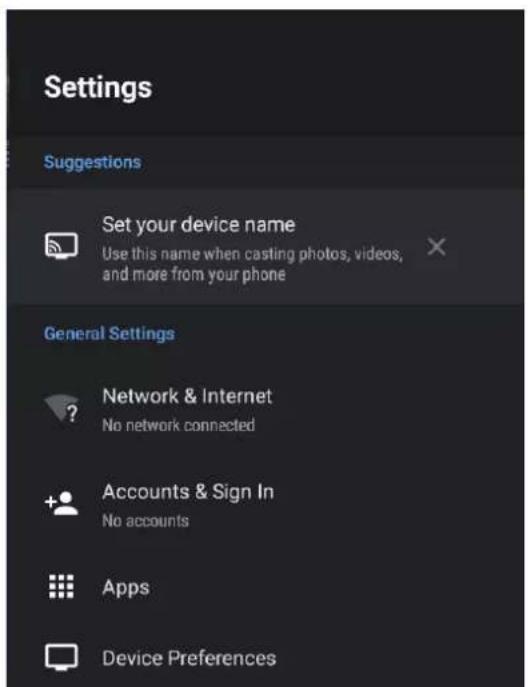

Pick the image of setting and Press OK button to appear the interface of the android setting.
The following is a brief description of the function of each menu:
Set your device name
Give your device a name to help identify it when casting or connecting to it from other devices.
Network&Internet
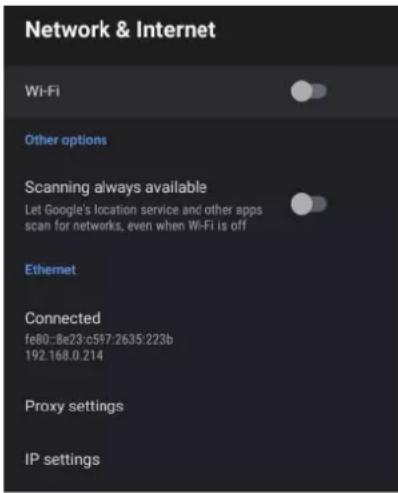
Enter the "Network" menu item "Wi-Fi", you can open or close the Wi-Fi connection function, there are 4 types of connection: select focus and enter the password in the list of connections, use without-password protected connection, manually add hot name to connect, and point-to-point direct connection.
For an Ethernet connection, insert the network cable into the network cable interface, and after identifying the network, the current ipv4 and ipv6 addresses will be displayed. Select Proxy Settings to set the proxy. IP settings can set the way to get the ip address. There are automatic acquisition or setting a static ip address.
Accounts & Sign In
Log in and manage your Google account.
Apps
View all apps and set app permissions.


Device Preferences
In the Device Preferences, you can see other settings under Android.

About: You can view and set the relevant information for the OTA update, you can also view the model, Android version, version number information.

Software Update: You can set the software local upgrade, automatically prompt to update the version, automatically upgrade the latest version, automatically download the latest version and the current version number.

Date&time:The date and time can be updated automatically based on the network or time zone, or you can turn off automatic updates and update to manual settings. You can view the currently located time zone and set the time system.

Language: System language can be selected here.
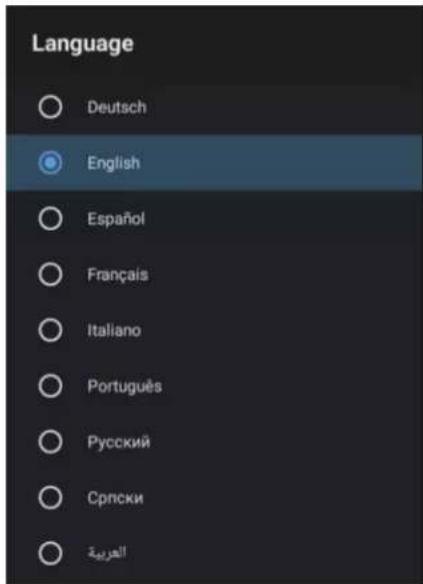
Keyboard: Users can be based on personal preferences of the keyboard input settings, you can also view the personal dictionary.
Storage: Here you can check the local memory capacity and current usage.

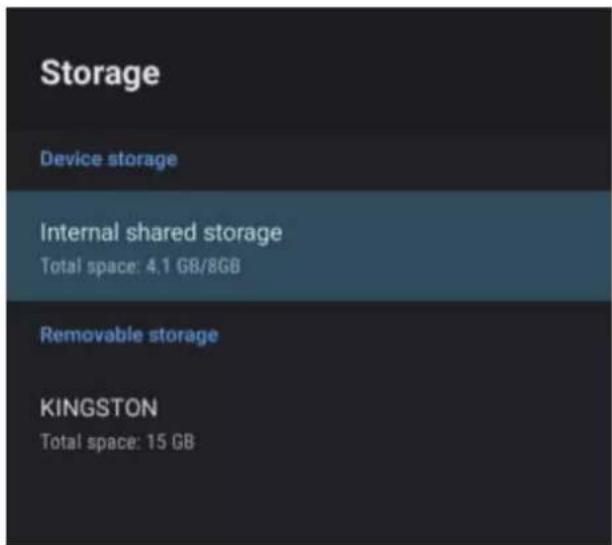
Reset: Here you can reset the unit. After reset, the data of Android system will be cleared.

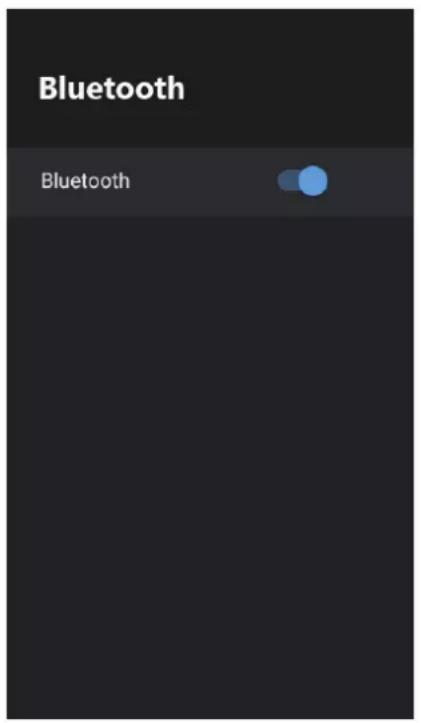
Bluetooth
Enter the bluetooth setting menu for bluetooth search and pairing operation.

NOTE: Thank you for purchasing a Majestic quality TV. Our products have been designed with over 20 years of engineering excellence and are designed of the highest quality standard in the Marine and RV industry. Should you encounter any problems that cannot be easily addressed within this instruction manual please feel free to contact us at these locations:
| Australia (Int'l Head Office): | 073 102 3575 |
| Canada: | 416 645 7420 |
| New Zealand: | 09 415 6936 |
| USA: | 561 459 1900 |
| UK & EU: | 0207 193 1919 |
All other countries please email support@majesticelectronics.com
Feel free to visit our website for more updated specifications or technical support www.majesticelectronics.com.au


- Warnings
- Cautions
- Contents
- 4G AIR MOUSE REMOTE CONTROL
- Product diagram
- 2.Instructions
- Illustrated of the work status
- Instructions of the Keyboard Operating
- Specification
- First Time Installation
- Select Input Source
- TV MENU
- Picture
- Sound
- Channel
- Auto Search
- DTV Manual Search
- Channel Edit
- Function
- Time
- Lock
- System Lock
- Hotel mode
- Media Operation
- Music
- Video
- Installation Package
- USB Disk
- Local Storage
- Network Sharing
- Android Operation
- Home
- Settings
- Set your device name
- Network&Internet
- Accounts & Sign In
- Apps
- Device Preferences
- Bluetooth
Brand : MAJESTIC
Model : SLT241
Category : Television