
BURGcam DOME 3030 - Surveillance Camera BURG WACHTER - Free user manual and instructions
Find the device manual for free BURGcam DOME 3030 BURG WACHTER in PDF.


| Product Type | Surveillance Camera |
| Model | BURGcam DOME 3030 |
| Brand | Burg Wächter |
| Video Resolution | Up to 1080p Full HD |
| Night Vision | Infrared, range up to 20m |
| Field of View | 90° |
| Lens | Fixed 2.8mm |
| Power Supply | 12V DC or PoE (Power over Ethernet) |
| Housing | Dome, vandal-resistant |
| Protection Rating | IP66 |
| Operating Temperature | -20°C to 50°C |
| Dimensions (Diameter x Height) | Approx. 120 x 90 mm |
| Weight | Approx. 500 g |
| Storage | MicroSD card up to 128GB |
| Connectivity | RJ45 Ethernet |
| Motion Detection | Yes, configurable |
| Audio | Built-in microphone (optional) |
| Software | Compatible with BurgCam app |
| Installation | Wall or ceiling mount |
| Maintenance | Clean dome with soft, dry cloth |
| Safety | Use only certified power supply unit |
| Spare Parts | Mounting kit and screws included |
Frequently Asked Questions - BURGcam DOME 3030 BURG WACHTER
User questions about BURGcam DOME 3030 BURG WACHTER
0 question about this device. Answer the ones you know or ask your own.
Ask a new question about this device
Download the instructions for your Surveillance Camera in PDF format for free! Find your manual BURGcam DOME 3030 - BURG WACHTER and take your electronic device back in hand. On this page are published all the documents necessary for the use of your device. BURGcam DOME 3030 by BURG WACHTER.
USER MANUAL BURGcam DOME 3030 BURG WACHTER
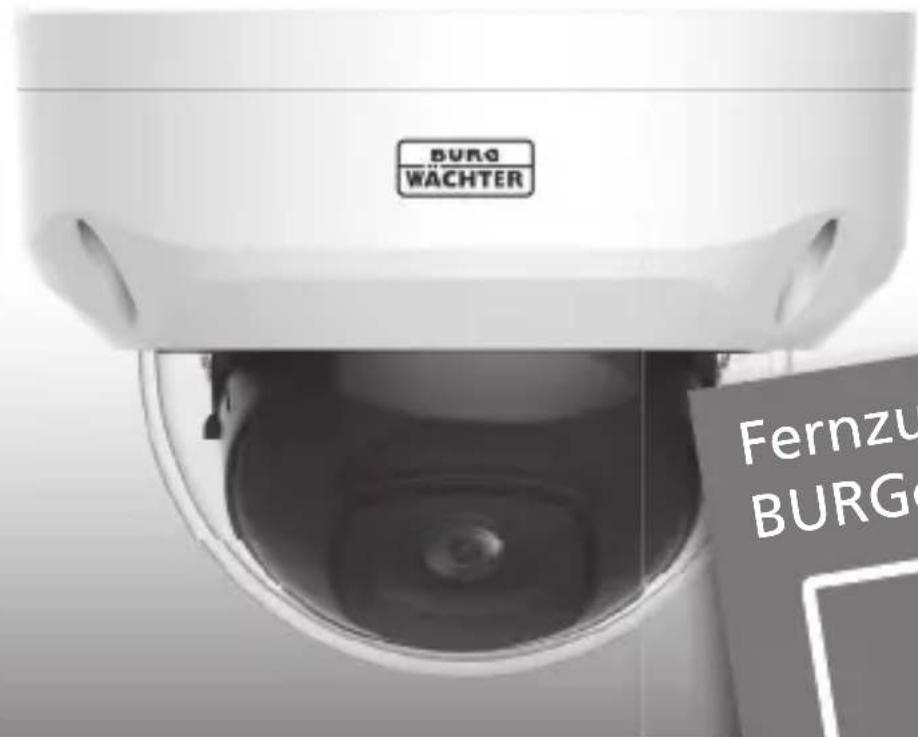
Wireless camera for indoor and outdoor use.
natural_image
Iconographic representation of three devices: a laptop, two smartphones, and one tablet, arranged in a row (no text or symbols)de Kurzanleitung
en Quick installation guide
BURGcam App for Android BURGcam App for iOS
BURGconfig Tool:
bar
| Item | Type | Model | IP | MAC | Version | Ausführen | |---|---|---|---|---|---|---| | 1 | IPC | SNC-311F8NF | 102.168.178.9 | 00:1c:44:68:70:63 | 2.420.8.0 | ✓ 0 ☑ | | 2 | IPC | SNC-841DDIw | 102.168.178.136 | 00:1c:44:58:e9:00 | 2.922.86BMW86.0.R | ✓ 0 ☑ | | 3 | IPC | SNC-441RCIA | 102.168.178.142 | 00:1c:44:58:49:58 | 2.922.86BMW861.0.T | ✓ 0 ☑ | | 4 | IPC | SNC-841DGBAs | 102.168.178.119 | 00:1c:44:58:a9:4e | 2.922.86BMW861.0.T | ✓ 0 ☑ | | 5 | NMR | SNVR-31642e | 102.168.178.133 | 00:1c:44:58:d4:2d | 3.295.86BMW863.0 | ✓ 0 ☑ | | 6 | SD | SNC-241R9IA | 102.168.178.140 | 00:1c:44:58:70:63 | 2.923.86BMW861.0.T | ✓ 0 ☑ | | 7 | IPC | GURGcomDONE | 102.168.178.123 | 00:1c:44:58:42:97 | 2.400.1.3 | ✓ 0 ☑ | | 8 | SD | SNC-241RSIA | 102.168.178.141 | e0:50:55:35:55:e2 | 2.923.86BMW861.0.T | ✓ 0 ☑ | | 9 | SD | GURGcom ZOOM | 102.168.178.127 | 00:1c:44:59:57:45 | 2.930.DWD1.0.R | ✓ 0 ☑ | IP Serie Geräte worden ausgewählt + Hinzulügen Entt.Abb 1
Login
Abb. 1

Abb. 4Abb. 5


natural_image
Exterior view of a historic white castle with twin towers, surrounded by green lawns and trees (no signage)Allgemeines

https://www.burg.biz/service-downloads/
manuals/#Videoueberwachung
Items included in the delivery
1 x Camera
1 x Stencil template sticker
1 x 12 V DC power supply
1 x Antenna
1 x Quick installation guide
1 x Set Screws and anchors
Special features
• Professional WIFI video security camera for outdoor use
• Resolution: 4 MP (2560 × 1440)
- Movement detection in zones
- Remote access via BURGcam App (Android, iOS)
• Night vision up to 20 m
- Weatherproof for outdoor use (IP67)
- Backlight suppression with high dynamic range
- WIFI and LAN operation
• professional solution for the home
• Recording on SD card up to 256 GB
- H.265 video streaming optimized for WIFI and extra recording capacity
• 2.4 GHz b/g/n WLAN, WPA2 encryption
- Wide 100irc field of view
• Fixings for mounting included
• Power supply included
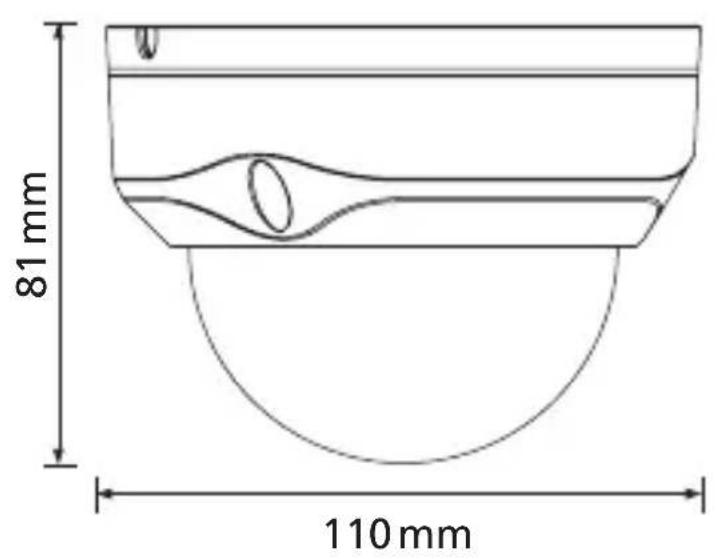
Technical drawing
Side view
Bottom view
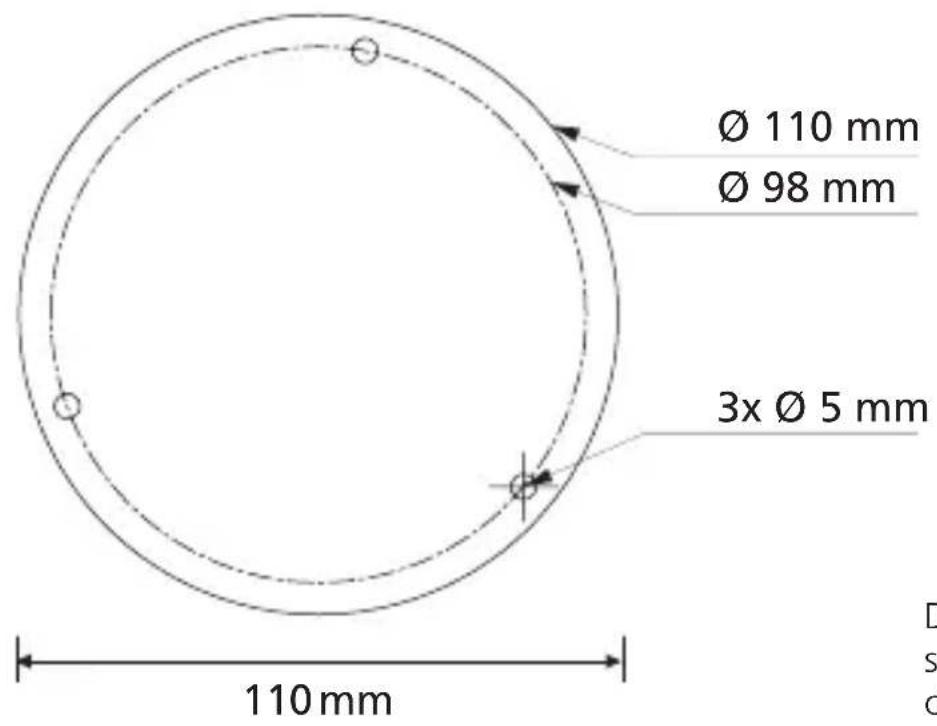
Drawings not true to scale. Subject to technical changes. Errors excepted.
Connections, indicators and buttons
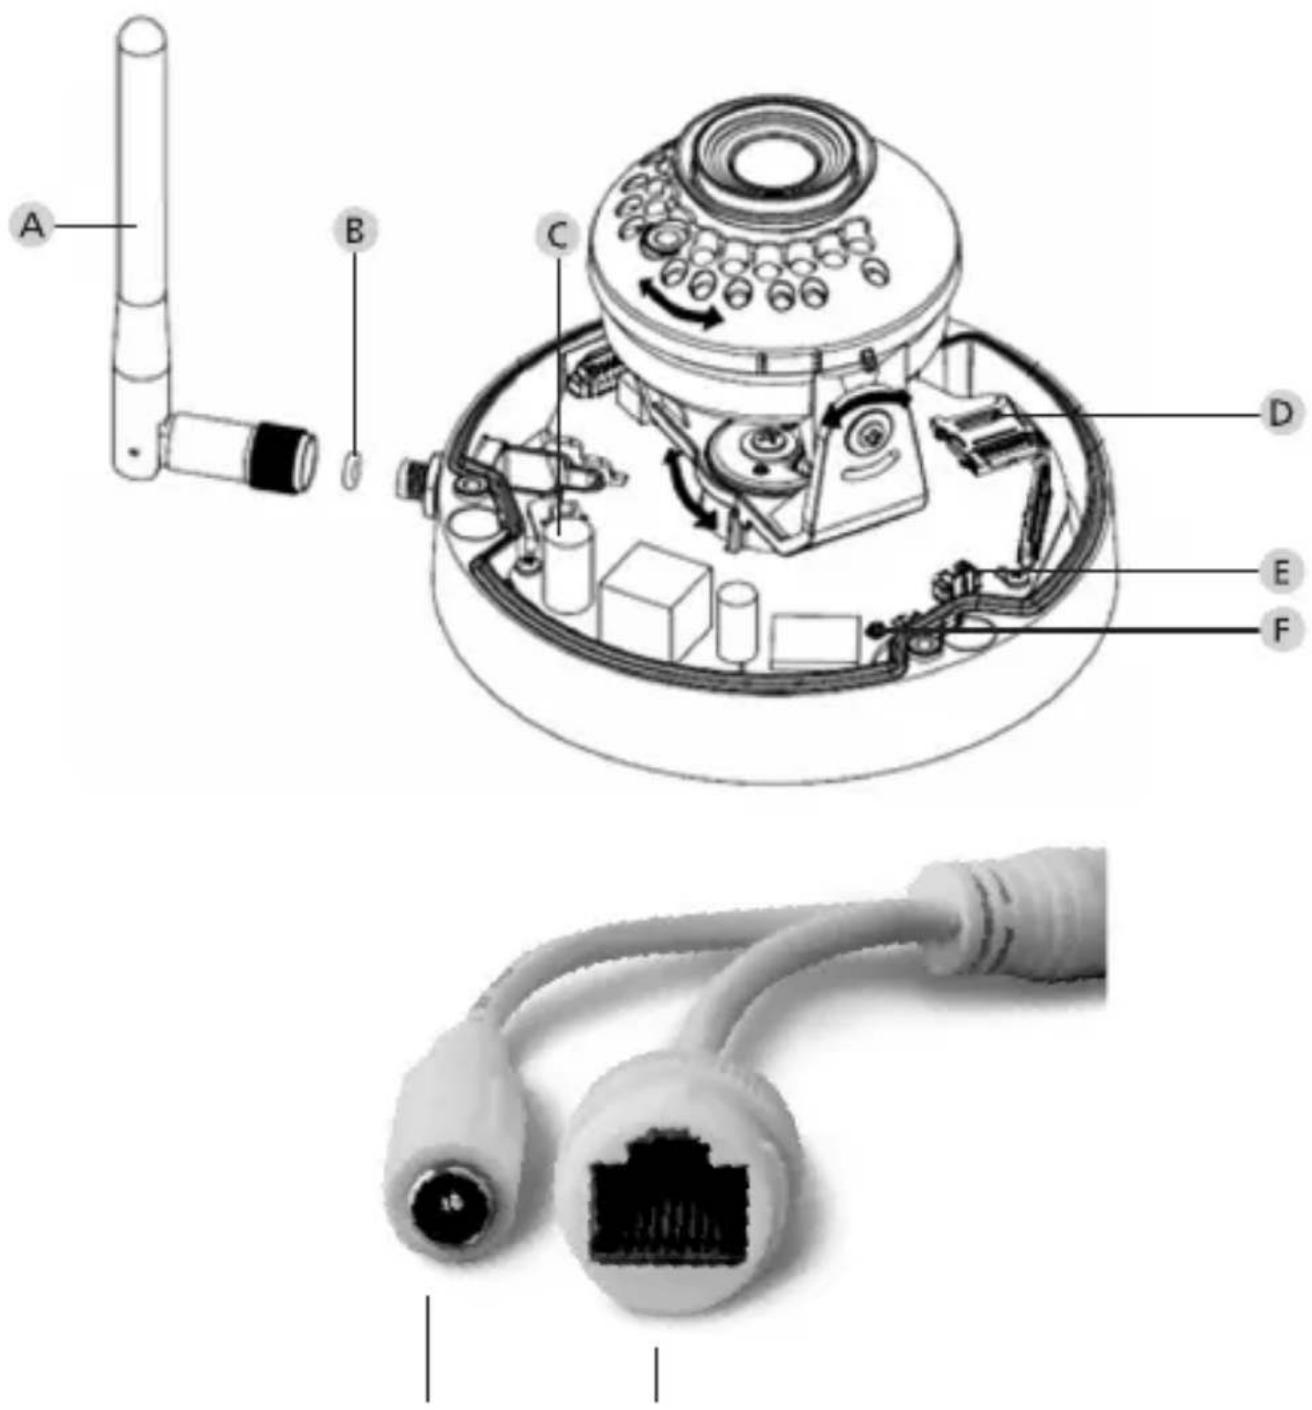
Connections, indicators and buttons
Description
A WiFi antenna
B Waterproof ring
C Reset: Press and hold the button for approx. 8 seconds until the control LED extinguishes in order to reset the camera configurations to factory default settings
D MicroSD card slot
Description
E / Status indicator light:
Red:Booting
Green slowly flashing: Booting completed; waiting for WiFi connection
Green quickly flashing: WiFi connection in progress
Green: WiFi connection successful; normal operation
Red and green lights
flashing alternately: Camera upgrade
Red slowly flashing: Network connection failed or disconnected
Red quickly flashing: Camera malfunction, booting failed, alarm or SD card malfunction
G 12 V DC power input port
H WIFI/ network cable connection
Installation
Preparations
Checklist:
| 1 Power supply is available at installation spot | |
| 2 For WIFI operation: WIFI signal strength is good enough for high quality video streaming. Maybe a repeater is required. | |
| 3 No power cable or water pipes can be damaged during installation | |
| 4 There are no obstacles in view field of the camera at desired location. Note: Check the plant growth | |
| 5 For WIFI operation: WIFI password is ready to hand | |
| 6 5 Ghz frequency band of the Dual-Band Router disabled | |
| 7 Smartphone connected to the WIFI SSID in which the camera is to be set up. |
Mounting
- For WIFI operation: First of all, please verify the WIFI signal strength using your smartphone / tablet. Check if there is a power supply at desired mounting location.
- Use the supplied screws, anchors and stencil sticker to fix the dome body in the desired location (see page 33). Loosen the little fixing screw on the lens and adjust the lens position according to your needs. Then tighten the fixing screw again.
Connect to the network
There is a choose of 4 possible installation methods:
Via PC and software
Option 1 (p. 40): Setup via LAN (network cable) and PC with the „BURGconfig Tool“ software
Via Smartphone and BURGcam App
Option 2 (p. 42): Connect via WIFI with the BURGcam App Option 3 (p. 44): Connect via LAN (network cable)
Before starting the setup process, install and start the BURGcam App on the smartphone to enable remote access to be set up.
Download BURGcam PRO App:
BURGcam App for Android BURGcam App for iOS
Option 1 - Setup via LAN (network cable) and PC with the „BURGconfig Tool“ software
Connect the camera to your local router using the network cable (not supplied). Make sure the camera and PC/notebook are on the same network. Install the BURGconfig tool and start the application. The camera is supplied with DHCP (automatic IP assignment) as standard.
If your network uses fixed IPs the camera is displayed with IP 192.168.1.108. In this case, switch your PC IP to the same network.
Select the desired device and click on the browser icon „e“ (Fig. 1)
The Setup Wizard appears and guides you through the menu. Follow the instructions and assign a secure password for the administrator account.
To add the device to the BURGcam App follow the instructions of „Integrating the camera in the BURGcam APP“.

BURGconfig Tool:
Click here to download.
Alternatively you can download the BURGconfig tool from the homepage www.burg.biz

bar
| Model | IP | Model | Version | | :--- | :--- | :--- | :--- | | 1 | IPC | SNC-311F8NF | 00:1e:44:68:70:63 | | 2 | IPC | SNC-641DOWe | 00:1e:44:68:e9:00 | | 3 | IPC | SNC-441RDA | 00:1e:44:68:49:58 | | 4 | IPC | SNC-641DBAe | 00:1e:44:68:e0:4e | | 5 | NMR | SNVR-31642e | 00:1e:44:68:d4:2d | | 6 | SD | SNC-241R9A | 00:1e:44:68:70:63 | | 7 | IPC | GURGcomDONE | 00:1e:44:68:42:97 | | 8 | SD | SNC-641R9A | e0:50:8e:25:5e:2 | | 9 | SD | GURGcom ZOOM | 00:1e:44:68:57:45 | The chart displays a single column of values for each item, with 'IP Serie' highlighted in green text at the bottom left. The 'Suche Einst.' label appears in the top-left corner.Fig 1
Option 2 -Setup via WIFI with the BURGcam App
- Tap on „Device Manager“ -> „+“ -> „Camera“ -> „WIFI Device“ -> „WIFI Connection“ to establish a connection between the camera and the router via WIFI. (Fig 1)
- Scan the QR code on the device nameplate. If necessary, activate the smartphone light (flash button top right) to clearly scan the QR code. (Fig 2).
- Check the device serial number and tap „Next“ (Fig. 3).
- Enter your WIFI password and tap „Next“.
Note:
a. Disable the 5GHz frequency band for the duration of the setup.
b. Make sure that the smartphone is connected to the same WIFI as the camera is to be connected to.
c. The router must be configured to allow devices to communicate with each other within the network.
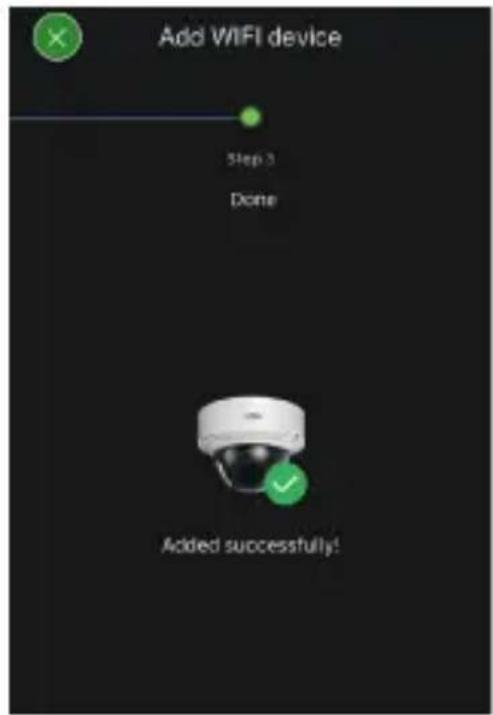
- The camera is now connected to the network (Fig. 4). Successful execution is displayed (Fig. 5).
The device was successfully added to the network. Continue on page 45, „Assign device password“.
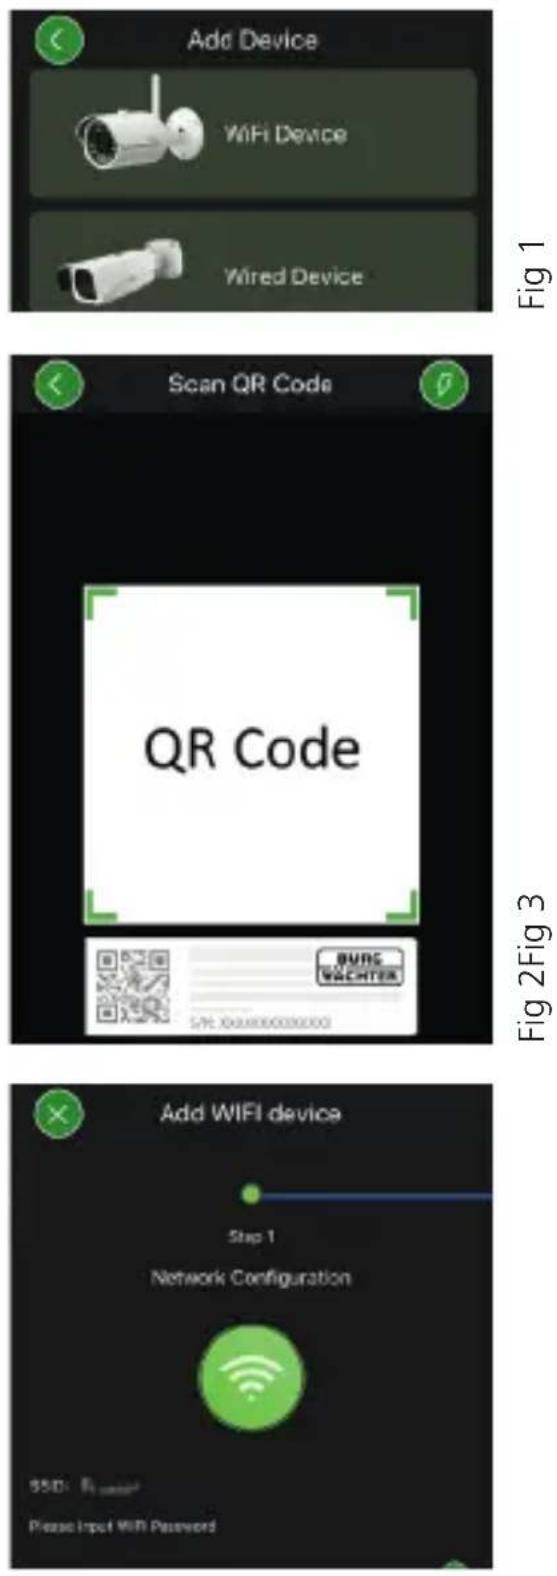

Fig 4Fig 5
Option 3 - Setup via LAN (network cable)
- Connect the camera to the network by using a network cable. Connect the power supply either. After booting, the system is ready to operate.
Continue on page 45, „Assign device password“.
Assign device password - Initial setup via smart-phone and the BURGcam App
- Select „Device Manager“ from the main menu.
- Tap + and select „Camera“.
- Select „Device Initialisation“, the first time you set up the system.
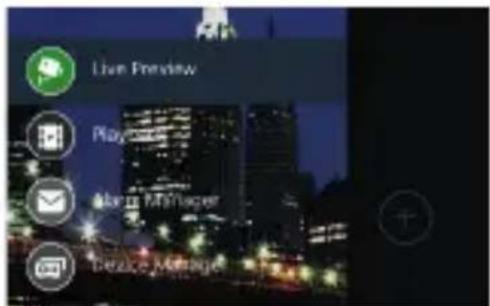
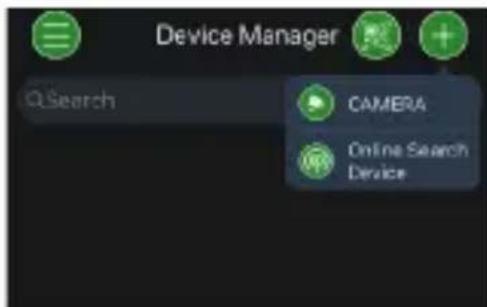

- Scan the QR code of the device and check the input.
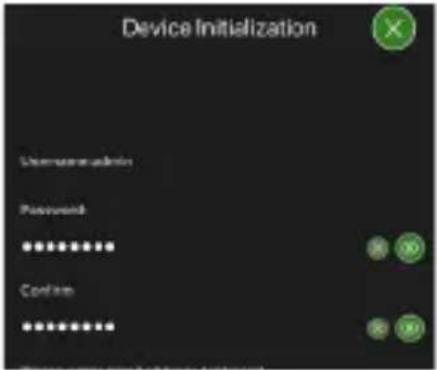
- Enter an individual admin-account password for the initialisation of the camera. To reset the device password, you should also enter the administrator's mail address. Then tap "Confirm".
- If the system is to be used with the BURGcloud P2P connection for remote access or if you wish to be informed about automatic updates, activate the corresponding function and then tap „Confirm“.
Device initialisation is now complete. Keep the password safe.


Integrating the camera in the BURGcam APP
Note: The BURGcam App displays the camera's core functions. More extensive functions and settings, e.g. for video analysis, are set up via the web interface between the camera and the PC
- Select „Device Manager“ from the main menu.
- Tap on + and select „Online Search“ to find devices in the local network.
- Select the device with the desired serial number from the list and tap „Add Device“.


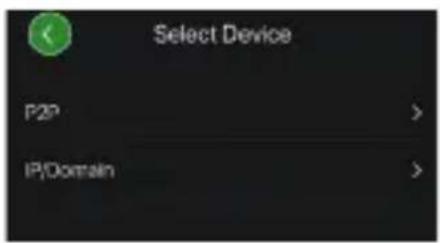
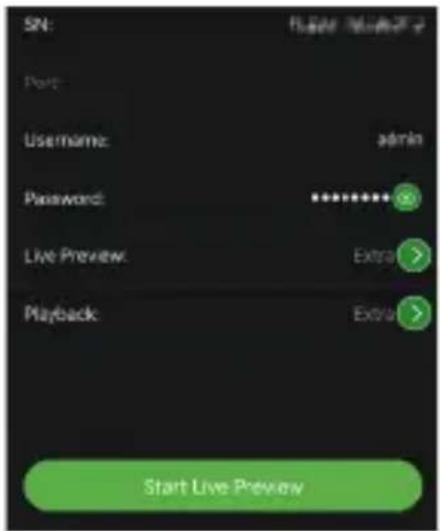
- Select P2P Remote Access if you wish to access the camera while on the move or IP if you wish to access the camera from the local network.
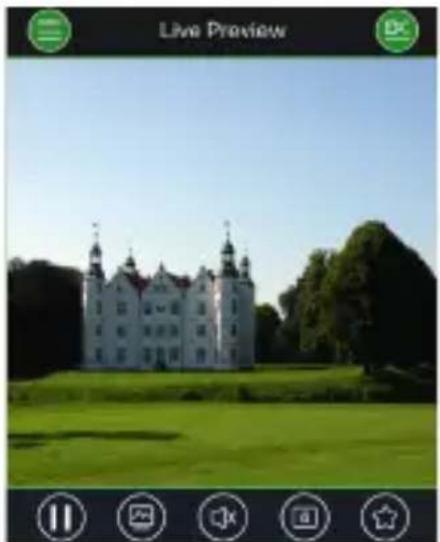
- Enter the device name and password and click „Start Live Preview“ to add the camera to the device list and view the live image.
The camera was successfully integrated in the BURGcam App.
natural_image
Exterior view of a historic white castle with twin towers, surrounded by green lawns and trees under a clear sky (no signage or text)General
Please take care that the codes and the code carrier do not fall into the wrong hands. Therefore, store the codes and code carrier in a safe location so that these can only be accessed by authorised persons. In case a code or code carrier is lost, immediately change the codes and create a new code carrier.
For your own security, it is urgently recommended:
- Personal data (e.g. birthdays) or other data that may be concluded from information about the user must not be used as a password.
- Change ALL user password at regular intervals.
- Only activate DDNS/UPNP when this is absolutely necessary, since these protocols are highly vulnerable.
- Assign user privileges in such a way that everyone receives the minimum necessary rights to be able to work without changing system-relevant data.
- Outsource surveillance systems into your own networks and do not link them together with IT/company-relevant networks.
- Replace outdated systems with new systems that meet modern IT security requirements.
- Checking frequently for system updates
Description of camera menu
Once you have logged in, you will see the camera's live image and the menu items.
1.LIVE
(Stream, Image setting, Image format)
2.PLAYBACK
(Calendar, searching for recordings)
3. SETTINGS
(Camera, Network, Event, Storage, System, Information)
4. LOGOUT
You will find detailed explanations on the menu items in the user manual
Technische Daten
| Camera type WIFI IR dome camera for indoor and outdoor applications | |
| Sensor 1/3" 4 MP Progressive Scan CMOS | |
| Resolution 4 MP: 2560 x 1440 | |
| 1080p: 1920 x 1080 (= Full HD) | |
| 720p: 1280 x 720 | |
| D1: 704 x 576 / 704 x 480 | |
| CIF: 352 x 288 / 352 x 240 | |
| Frame rate 20 fps @ 4 MP, 25/30 fps @ 1080 p | |
| Bit rate 4 Kbps – 8192 Kbps | |
| IR LEDs Up to 30 m range* | |
| IR cut filter Mechanical | |
| Lens 2.8 mm F2.0 Fixed lens | |
| Angle of view Horizontal: 100° | |
| White balance Auto | |
| WLAN IEEE802.11b/g/n; up to 50m(open field**) | |
| LAN (RJ-45) 10/100Base-T | |
| Supported protocols | IPv4 / IPv6, HTTP, HTTPS, TCP / IP, UDP, UPnP, RTSP, RTP, SMTP, NTP, DHCP, DNS, DDNS, FTP, IP Filter |
| Micro-SD card max. 256 GB; for recordings and snapshots (not included) | |
| Installation | Including bracket for wall or ceiling mount |
| Voltage | 12V DC |
| Power consumption | < 4.8W |
| Operating temperature | -30°C to +50°C |
| Classifi cation IP67 | |
| Dimensions ∅ 110 x 81 mm | |
| Weight 0.35 kg | |
Additional features:
| Backlight compensation | BLC/HLC/WDR |
| Noise reduction 3D | |
| Privacy zones 4 | |
| motion detection zones | 4 |
Note:
* The range of the built-in IR LEDs strongly depend on the location and the surroundings. Strongly absorbent surfaces, e. g. dark, rough structures (fl oor, lawn or asphalt) may lead to a considerable reduction of the maximum range.
** The range of the WLAN signal is highly dependent on the location of use. Metallic structures, walls, etc. influence the signal/connection.
Subject to technical changes without notice. Errors excepted.
Wave band:
IEEE 802.11b/g 2400–2483,5 MHz max. transmission power: 100 mW
IEEE 802.11n 2400–2483,5 MHz max. transmission power: 100 mW
Detailed user manual
The purpose of this quick installation guide is to start the device in an easy and convenient way. Further detailed explanations and descriptions of the various functions are available in the user manual which you can download as pdf fi le from our website:
www.burg.biz → service & downloads → Users manual → Assembly instructions → Video security
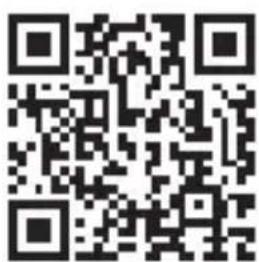
Alternatively, for quick access to the user manual, you can scan the QR-code below to view the user manual on your smartphone or tablet. This QR-code will also provide additional information (FAQ).
QR-code for user manual/further information in English:

General safety precautions and safety instructions
Assistance and technical support
If you have questions regarding this product or the installation process, please contact: camera-service@burg.biz
Please include the following information so that we can offer you the best possible service:
- Device name
- For questions about the App: Firmware Version / App Version and Smartphone with version information
• Installation information - For network issues: settings and network setup
• Detailed problem description
• Information on how and when we can reach you
Attention
Any changes or modifications to this appliance which have not been explicitly approved of by the respective regulatory authority, may lead to a prohibition of usage of this appliance. This appliance complies with the CE guidelines.
GDPR Note
When using video security systems, personal data is collected in an automated manner, processed and used. Such data are under the protection of the GDPR, which is direct as an EU regulation. The operator of the system is responsible for the operation and processing of the data. When installing the video security system, appropriate technical and organizational measures must be taken to safeguard the personal rights of those affected.
Safety instructions
- Before operating the appliance, please read this manual carefully and retain it for further reference.
- Before cleaning the appliance, it has to be switched off and unplugged from the power outlet. Wipe the appliance with a soft damp cloth.
- Do not use harsh cleansers or aerosols for cleaning. The type label may not be replaced.
- Do not use attachments unless recommended by the manufacturer as they may affect the functionality of the appliance and result in the risk of fire, electric shock or injury.
- Never install the appliance in areas exposed to water or other liquids.
- The appliance has to be installed in a safe and stable location which is able to carry the weight of the appliance. Quick stops, excessive force, and uneven surfaces may cause the appliance to fall causing serious injury to persons and damage to objects.
- Openings in the appliance, if any, are provided for ventilation to ensure reliable operation of the appliance and to protect if from overheating. These openings must not be covered or blocked. Please make sure that the appliance does not overheat.
- The appliance should only be operated from the type of power source indicated on the marking label. If you are not sure of the type of power supplied at the installation location, please contact your local dealer.
- An appliance which is powered through a polarized plug (a plug with one blade wider than the other) will fit into the
Safety instructions
power outlet only one way. This is a safety feature. If you are unable to insert the plug into the outlet, try reversing the plug. Do not defeat the safety purpose of the polarized plug.
- If the appliance is powered through a grounding-type plug, the plug will only fit into a grounding-type power outlet. This is a safety feature. If your outlet does not have the grounding plug receptacle, contact your local electrician.
- Route power cords and cables in a manner to protect them from damage by being walked on or pinched by items places upon or against them.
- For protection of the appliance during a lightning storm or when it is left unattended and unused for a longer period, unplug the appliance from the wall outlet. Disconnect any antennas or cable systems that may be connected to the appliance. This will prevent damage to the appliance due to lightning or power-line surges.
- Do not overload wall outlets and extension cords as this can result in a risk of fire or electric shock.
- Never insert items into the openings of the appliance. They may touch parts under electric current which may cause an electric shock.
- Never pour any liquids over the appliance.
- In case of any operating interruption or a complete operating failure please switch off the appliance and disconnect it from the wall outlet. Never attempt to service or repair the appliance yourself, as opening or removing covers may expose you to
dangerous voltage or other hazards. Refer all servicing to qualified service personnel.
- When replacement parts are required, be sure that the service technician uses replacements parts specified by the manufacturer or that have the same characteristics as the original part. Unauthorized substitutions may result in fire, electric shock or other hazards.
- Upon completion of any service or repairs to the appliance, ask the service technician to perform safety checks to verify that the appliance is in proper operating condition.
- The appliance must only be installed by qualified service personnel and has to comply with local specifications and regulations.
- Never point the camera at an object with a high degree of luminance. Bright vertical or horizontal lines can result in a distortion (outshine) of the entire image on the monitor. This artifact is not an error but a particularity of semiconductor CCDs when they are directly exposed to a powerful light source.
- At the installation site, the camera has to be adjusted to the given light conditions (see OSD).
- Please respect the local legal regulations on waste if you need to dispose of discarded appliances.

Please be aware that electrical and electronic equipment and batteries shall not be disposed of as household waste, but rather collected separately. Please obtain information on the collecting points for electrical waste from the responsible authority of you municipality
BURG-WÄCHTER KG hereby declares that this device complies with Directive 2014/53/EU, (RED) 2014/30/EU, (EMC), 2011/65/EU (RoHS) and Low Voltage Directive (2014/35/EU).
The full text of the EU Declaration of Conformity can be found on the following website www.burg.biz.
GNU GPL License note
Certain open source components are licensed pursuant to GNU General Public License. This establishes that the customers have the right to acquire, modify and redistribute the source code of said software in accordance with the terms of the GNU General Public License or Lesser General Public License.
A printed copy of the license text GPL V2 is included in this product shipment. The license text can also be downloaded from our homepage at
https://www.burg.biz/international/service-downloads/manuals/#Videosecurity
You as well as any other third party may request to have access to the complete and machine-readable open source code for the GPLv2 licensed software. The source code can be provided as free-of-charge download link or, alternatively, on a common data storage device (at cost price). This offer is valid for up to three years after you downloaded the software or after the product has been shipped to you.
Please send your request to the following address:
BURG-WÄCHTER KG
Altenhofer Weg 15
58300 Wetter
Deutschland
Tel: +49 2335 965 30
Fax: +49 2335 965 390
E-Mail: camera-service@burg.biz
We can't give support or guarantee for squeaky-cleanness of source codes. The source codes are only a part of whole software.
If you have technical questions about this device, please read the detailed user manual and the FAQ sheet which you will find on the following website: www.burg.biz.If, however, you still have questions, please send an e-mail to: camera-service@burg.biz.
Copyright
All rights reserved. This publication may not be reproduced, stored in a retrieval system or transmitted, in any form or by any means (electronic, mechanical, photocopying, recording or otherwise), without the written prior permission of BURG-WÄCHTER KG. No reproduction of any part or excerpts thereof are permitted. Errors excepted. Specifications are subject to change without notice for quality improvement. All companies or products mentioned in this publication are trademarks, registered trademarks or brands of the respective company.
Subject to technical changes without notice. Errors excepted.
Note
Note

BURG WÄCHTER
BURG-WÄCHTER KG
Altenhofer Weg 15
58300 Wetter
Germany
info@burg.biz
www.burg.biz


- Login
- Allgemeines
- Items included in the delivery
- Special features
- Technical drawing
- Connections, indicators and buttons
- Description
- E / Status indicator light:
- Installation
- Preparations
- Checklist:
- Mounting
- Connect to the network
- Via PC and software
- Via Smartphone and BURGcam App
- Option 1 - Setup via LAN (network cable) and PC with the „BURGconfig Tool“ software
- Option 2 -Setup via WIFI with the BURGcam App
- Note:
- Option 3 - Setup via LAN (network cable)
- Assign device password - Initial setup via smart-phone and the BURGcam App
- Integrating the camera in the BURGcam APP
- General
- Description of camera menu
- 1.LIVE
- 2.PLAYBACK
- SETTINGS
- LOGOUT
- Wave band:
- Detailed user manual
- General safety precautions and safety instructions
- Assistance and technical support
- Attention
- GDPR Note
- Safety instructions
- GNU GPL License note
- BURG-WÄCHTER KG
- Copyright
- Note
- BURG WÄCHTER
Brand : BURG WACHTER
Model : BURGcam DOME 3030
Category : Surveillance Camera