
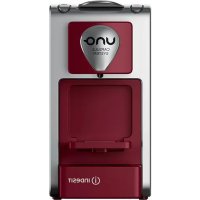
CMI 5038 IX - Coffee machine INDESIT - Free user manual and instructions
Find the device manual for free CMI 5038 IX INDESIT in PDF.


| Product Type | Built-in Coffee Machine |
| Brand | Indesit |
| Model | CMI 5038 IX |
| Dimensions (H x W x D) | 595 x 455 x 385 mm |
| Weight | 25 kg |
| Power Supply | 220-240 V, 50/60 Hz |
| Power Consumption | 1350 W |
| Water Tank Capacity | 1.8 L |
| Bean Container Capacity | 250 g |
| Pump Pressure | 15 bar |
| Functions | Espresso, Long Coffee, Cappuccino, Latte Macchiato, Hot Water, Steam |
| Grinder Type | Built-in ceramic burr grinder with adjustable grind setting |
| Milk Frother | Integrated steam wand with automatic frothing |
| Display | Digital LCD with icons and settings |
| Controls | Touch buttons and rotary knob |
| Water Filter | Compatible with Indesit water filter (optional) |
| Descaling Indicator | Yes, with automatic alert |
| Cleaning | Removable brew unit, drip tray, and water tank for easy cleaning |
| Safety Features | Child lock, auto shut-off, overheat protection |
| Energy Class | A+ |
| Noise Level | < 65 dB(A) |
| Installation Type | Built-in (requires niche) |
| Color | Stainless Steel (IX) |
| Spare Parts Availability | Water tank, brew unit, drip tray, filters, and gaskets available via Indesit service |
| Repairability Index | 7.5 / 10 (based on European standards) |
Frequently Asked Questions - CMI 5038 IX INDESIT
User questions about CMI 5038 IX INDESIT
0 question about this device. Answer the ones you know or ask your own.
Ask a new question about this device
Download the instructions for your Coffee machine in PDF format for free! Find your manual CMI 5038 IX - INDESIT and take your electronic device back in hand. On this page are published all the documents necessary for the use of your device. CMI 5038 IX by INDESIT.
USER MANUAL CMI 5038 IX INDESIT
Instructions for use
SAFETY INSTRUCTIONS
IMPORTANT TO BE READ AND OBSERVED
Before using the appliance, read these safety instructions. Keep them nearby for future reference. These instructions are also available on docs.indesit.eu
These instructions and the appliance itself provide important safety warnings, to be observed at all times. The manufacturer declines any liability for failure to observe these safety instructions, for inappropriate use of the appliance or incorrect setting of controls.
SAFETY WARNINGS
Very young children (0-3 years) should be kept away from the appliance. Young children (3-8 years) should be kept away from the appliance unless continuously supervised.
Children from 8 years old and above and persons with reduced physical, sensory or mental capabilities or lack of experience and knowledge can use this appliance only if they are supervised or have been given instructions on safe use and understand the hazards involved. Children must not play with the appliance. Cleaning and user maintenance must not be carried out by children without supervision.
WARNING: Accessible parts may become hot during use, young children should be kept away.
The appliance produces hot water. Take care to avoid contact with splashes - Risk of burns.
If the appliance is damaged or not working properly, do not attempt to carry out any repairs. Switch the appliance off, unplug from power supply and contact After-sales Service.
PERMITTED USE
CAUTION: the appliance is not intended to be operated by means of an external timer or separate remote controlled system.
This appliance is intended to be used only in household applications.
This appliance is not intended to be used in similar applications such as: staff kitchen areas in shops, offices and other working environments; farm houses; by clients in hotels, motels, bed & breakfast and other residential environments.
This appliance is not for professional use. Do not use the appliance outdoors.
Do not store explosive or flammable substances (e.g., gasoline or aerosol cans) inside or near the appliance - risk of fire.
INSTALLATION
The appliance must be handled and installed by two or more persons - risk of injury. Use protective gloves to unpack and install - risk of cuts.
Installation, including water supply (if any) and electrical connections, and repairs must be carried out by a qualified technician. Do not repair or replace any part of the appliance unless specifically stated in the user manual. Keep children away from the installation site. After unpacking the appliance, make sure that it has not been damaged during transport. In the event of problems, contact the dealer or your nearest After-sales Service. Once installed, packaging waste (plastic, styrofoam parts, etc.) must be stored out of reach of children - risk of suffocation. The appliance must be disconnected from the power supply before any installation operation - risk of electrical shock. During installation, make sure the appliance does not damage the power cable - risk of fire or electrical shock. Only activate the appliance when the installation has been completed.
The appliance can be installed above a built-in oven only if the latter is equipped with a cooling fan system.
ELECTRICAL WARNINGS
Prior to connecting the appliance, verify that the voltage on the rating plate corresponds to the voltage in your home.
It must be possible to disconnect the appliance from the power supply by unplugging it if the plug is accessible, or by a multi-pole switch installed upstream of the socket, and the appliance must be earthed, in conformity with national electrical safety standards.
Do not use extension leads, multiple sockets, or adapters. The electrical components must not be accessible to the user after installation. Do not use the appliance when you are wet or barefoot. Do not operate this appliance if it has a damaged power cable or plug, if it is not working properly, or if it has been damaged or dropped. If the power cable is damaged, it must be replaced with an identical one - risk of electrical shock.
CLEANING AND MAINTENANCE
WARNING: Ensure that the appliance is switched off and disconnected from the power supply before performing any cleaning or maintenance operation - risk of electrical shock. Never use steam cleaning equipment.
Never immerse the appliance in water.
Empty the drip tray regularly to avoid overflow - risk of injury.
Clean all the components thoroughly, taking particular care with parts in contact with the coffee and milk.
Always clean tubes inside milk container after use - Risk of poisoning.
During rinsing, hot water is spilled from the coffee spouts. Avoid contact with splashes of water - Risk of burns.
SAFEGUARDING THE ENVIRONMENT
DISPOSAL OF PACKAGING MATERIALS
The packaging material is 100% recyclable and is marked with the recycle symbol. The various parts of the packaging must therefore be disposed of responsibly and in full compliance with local authority regulations governing waste disposal.
SCRAPPING OF HOUSEHOLD APPLIANCES
This appliance is manufactured with recyclable or reusable materials. Dispose of it in accordance with local waste disposal regulations. For further information on the treatment, recovery and recycling of household electrical appliances, contact your local authority, the collection service for household waste or the store where you purchased the appliance. This appliance is marked in compliance with European Directive 2012/19/EU, Waste Electrical and Electronic Equipment (WEEE). By ensuring this product is disposed of correctly, you will help prevent negative consequences for the environment and human health.
The symbol on the product or on the accompanying documentation indicates that it should not be treated as domestic waste but must be taken to an appropriate collection center for the recycling of electrical and electronic equipment.
MOUNTING THE APPLIANCE
FOLLOW THE SUPPLIED separate mounting instructions when installing the appliance.
ACCESSORIES & PARTS
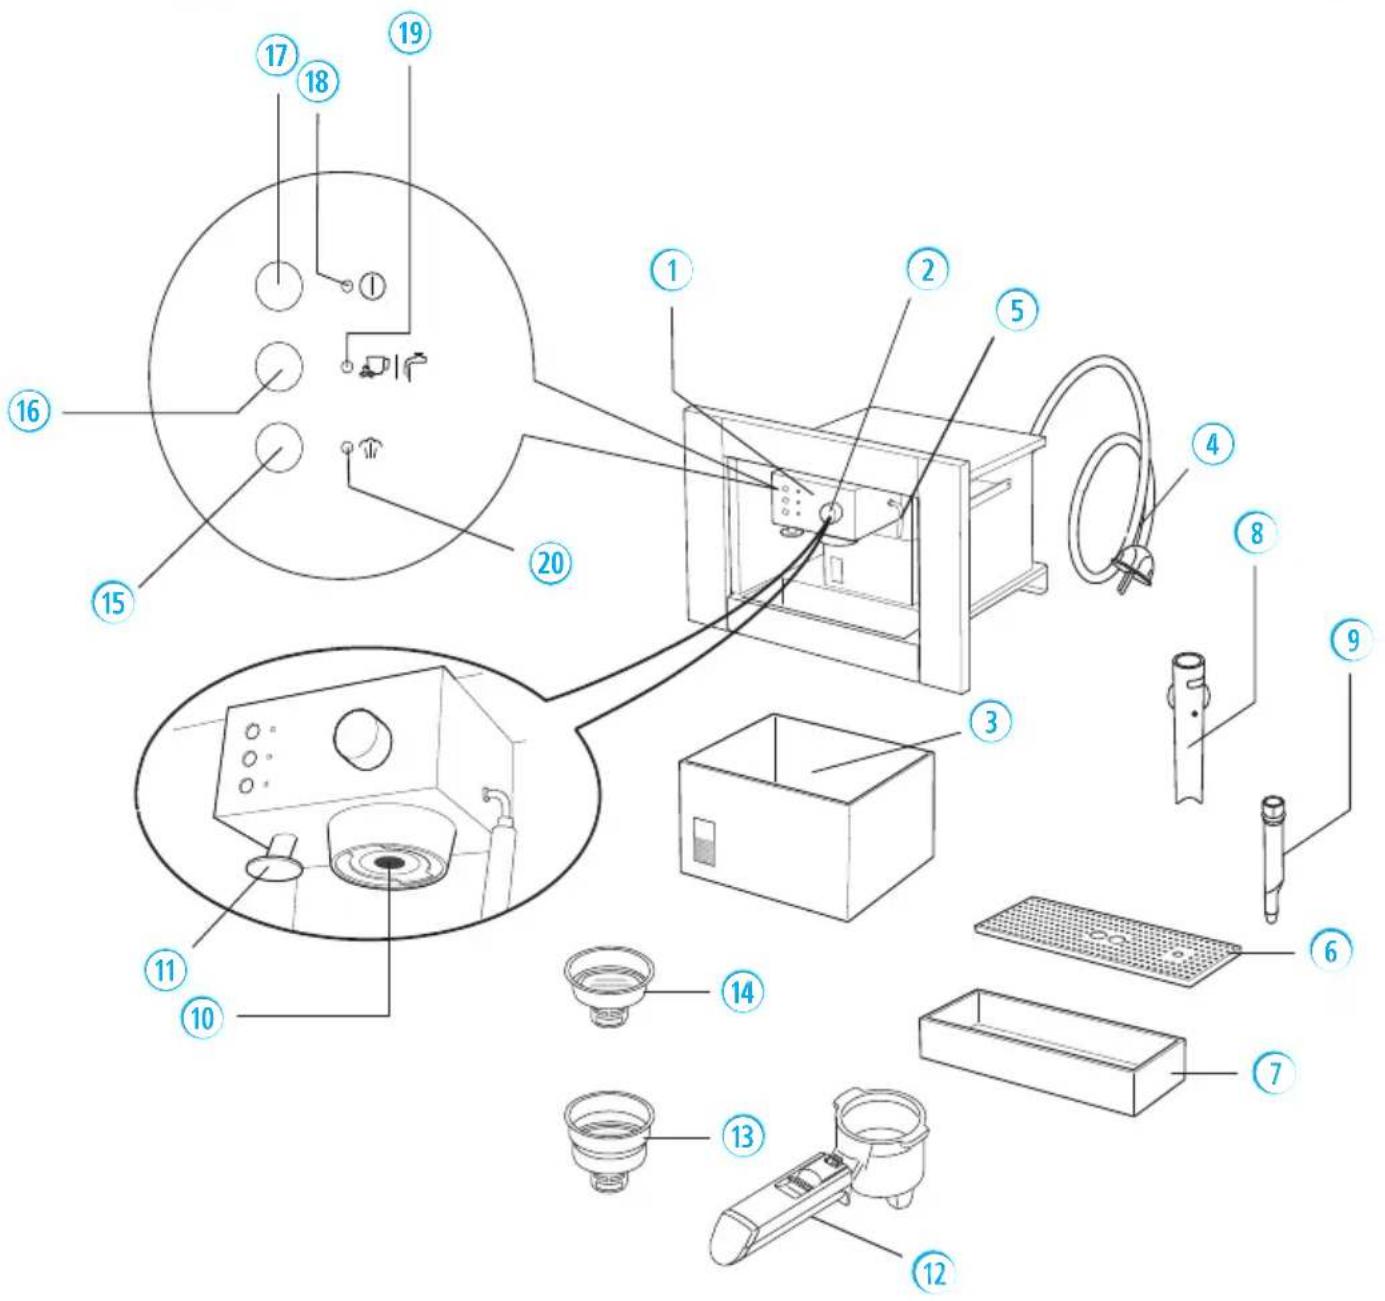
1 CONTROL PANEL 2 STEAM KNOB 3 WATER TANK 4 POWER CABLE 5 STEAM/HOT WATER TUBE 6 DRIP MESH 7 DRIP TRAY
8 CAPPUCCINO MAKER 9 Nozzle 10 BOILER OUTLET 11 PRESSER 12 FILTER HOLDER 13 LARGE TWO-CUP FILTER 14 SMALL ONE-CUP
15 STEAM SELECTOR BUTTON 16 COFFEE/HOT WATER BUTTON 17 ON/OFF BUTTON 18 ON LIGHT 19 TEMPERATURE OK LIGHT (COFFEE OR HOT WATER) 20 STEAM INDICATOR LIGHT
FILLING THE WATER TANK
1 REMOVE THE WATERTANK by pulling it out (towards the front).

NEVER USE THE APPLIANCE WITHOUT WATER IN THE TANK and always remember to top up when the level drops to a couple of centimetres from the bottom.
2 FILL THE TANK with fresh clean water taking care not to exceed the MAX level. Refit the tank.

AUTO OFF
FOR ENERGY SAVING PURPOSES, the appliance has an automatic switch-off function (the power light goes off), if it is not used for a long period of time.
To TURN THE APPLIANCE ON, press the ON/OFF switch.

PREHEATING THE COFFEE UNIT
To attach the filter holder, position it under the
boiler outlet
with the
handle
towards
the left,
push it
upwards and
at the same time rotate
the handle firmly towards the right.

- TURN THE APPLIANCE on by pressing the ON/OFF button and attach the filter holder to the appliance without adding ground coffee.
- PLACE A CUP UNDER THE FILTER HOLDER. Use the same cup as will be used to prepare the coffee in order to preheat it.
- WAIT FOR THE OK INDICATOR
LIGHT to come on, then immediately press the coffee knob. Run the water off until the OK indicator light goes out, then interrupt delivery by pressing the coffee button again.
- EMPTY THE CUP. Wait until the OK indicator light comes on again
then repeat the same operation. (It is normal for a small and harmless puff of steam to be given off when removing the filter holder).


HOW TO PREPARE ESPRESSO COFFEE USING THE FILTER HOLDER FOR GROUND
- AFTER PREHEATING the appliance as described
above, place the ground coffee filter in the filter holder, making sure the projection is correctly inserted in the slot. Use the smaller filter to make one coffee or the larger filter to make two coffees.

- To make a single coffee only, place one level
measure (about 7 g) of ground coffee in the filter. To prepare two coffees, place two loosely filled measures (about 6+6 g) of ground coffee in the filter.
Fill the filter a little at a time to prevent the ground coffee from overflowing.
NOTE: for correct operation, before adding the ground coffee to the filter holder, clean the filter from residues of ground coffee from the previous infusion.
- DISTRIBUTE THE GROUND COFFEE evenly and press
lightly with the presser.
NOTE: Correct pressing of the ground coffee is essential to obtain a good espresso. If pressing is excessive, coffee delivery will be slow and the froth will be dark. If pressing is too light, coffee delivery will be too rapid and the froth will be skimpy and light coloured.
- REMOVE ANY EXCESS COFFEE from the rim of the filter holder and attach the filter holder to the appliance. Rotate firmly to avoid leaks of water.
- PLACE THE CUP or cups under the filter holder spouts.
You are recommended to heat the cups before making the coffee by rinsing them with a little hot
- MAKE SURE THE OK LIGHT IS ON (if off, wait until it comes on), then press the coffee button. When the required quantity of coffee has been run off, press the same button again. (You should not run off coffee for more than 45 seconds at a time).
- To remove the filter holder, rotate the handle from right to left.
NOTE: to avoid splashes, never remove the filter holder while the appliance is delivering coffee.
- TO ELIMINATE THE USED COFFEE GROUNDS, block the filter in place using the lever incorporated in the handle and empty the coffee by turning the filter holder upside down and tapping.
- TO TURN THE COFFEE MACHINE OFF, press the ON/OFF button.
NOTE: the first time the appliance is used, all accessories and the internal circuits must be washed through by making at least five coffees without using ground coffee.

![graph TD A[" "] --> B["①"] C[" "] --> D["→"] E[" "] --> F["←"] G[" "] --> H["○↑"] I[" "] --> J["①"] K[" "] --> L["→"] M[" "] --> N["→"] O[" "] --> P["→"] Q[" "] --> R["○↑"]](/content/2026/06/1357307/images/c6f7cb773de7e4d3fd9161737f91bcab6cab4d8b508b566d425b3e93f9154113.jpg)


HOW TO PREPARE ESPRESSO COFFEE USING PODS
- PREHEAT THE APPLIANCE as described in the section "PREHEATING THE COFFEE UNIT", making sure the filter holder is attached. This obtains a hotter coffee.
NOTE: Use pods conforming to the ESE standard indicated on the pack with the following logo:
THE ESE STANDARD is a system accepted by leading pod producers and enables espresso coffee to be prepared simply and cleanly.
- PLACE THE SMALL FILTER (1 cup or pods) in the filter holder, making sure the projection is correctly inserted in the slot.

- INSERT A POD, centring it as far as possible on the filter. Always follow the instructions on the pod pack to position the pod on the filter correctly.
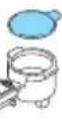
- ATTACH THE FILTER HOLDER TO the appliance. Always rotate as far as it will go.


- PROCEED AS in points 5, 6 and 7 in the previous paragraph.

HOW TO MAKE CAPPUCCINO COFFEE
- PREPARE THE ESPRESSO COFFEES as described in the previous paragraphs, using sufficiently large cups.
- PRESS THE STEAM BUTTON and wait for the OK light to come on. This indicates that the boiler has reached the ideal temperature for steam production.
- IN THE MEANTIME, fill a recipient with about 100 grams of milk for each cappuccino to be prepared. The milk must be at refrigerator temperature (not hot!). In choosing the size of the recipient, bear in mind that the milk doubles or triples in volume.
NOTE: you are recommended to use semiskimmed milk at refrigerator temperature.
- PLACE THE RECIPIENT containing the milk under the cappuccino maker.
- DIP THE CAPPUCCINO MAKER into the milk for about 5 mm and turn the steam knob anticlockwise, taking care not to immerse the raised line on the cappuccino maker (indicated by the arrow).
Turn the steam knob at least a half turn anticlockwise. Steam is discharged from the cappuccino maker, giving the milk a creamy frothy appearance. To obtain a creamier froth, dip the cappuccino maker into the milk and rotate the container with slow movements from the bottom upwards.


- WHEN THE REQUIRED TEMPERATURE IS REACHED (60°C is ideal), interrupt steam delivery by rotating the steam knob clockwise and at the same time pressing the steam button.


- POUR THE FROTHED MILK into the cups containing the espresso coffee prepared previously. The cappuccino is ready. Sweeten to taste and, if desired, sprinkle the froth with a little cocoa powder.
NOTE: To prepare more than one cappuccino, first make all the coffees then at the end prepare the frothed milk for all the cappuccinos.
NOTE: to make coffee again after the milk has been frothed, cool down the boiler first or the coffee will be burnt. To cool it, place a container under the boiler outlet, press the steam button and run off water until the OK light goes out. Make the coffee as described in the previous paragraphs.
NOTE: always clean the cappuccino maker after use. Proceed as follows:
- DISCHARGE A LITTLE STEAM for a few seconds by rotating
the steam knob. This empties any milk left inside the steam spout.

NOTE: to ensure hygiene, you are recommended to follow this procedure each time you make cappuccino to avoid milk stagnating in the milk circuit.
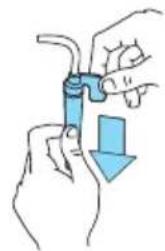
- WITH ONE HAND, HOLD THE CAPPUCCINO TUBE FIRMLY and with the other unscrew the cappuccino maker itself by rotating clockwise and extracting downwards.

- REMOVE THE NOZZLE from the steam tube by pulling it downwards.
- WASH THE CAPPUCCINO MAKER and steam nozzle thoroughly with warm water.
- MAKE sure the two holes shown in are not blocked. If necessary, clean with a pin.
- REPLACE THE STEAM NOZZLE by inserting it onto the steam tube and rotating firmly towards the top of the tube.
- REPLACE THE CAPPUCCINO MAKER by inserting it and rotating anticlockwise.

HOT WATER PRODUCTION
- TURN THE APPLIANCE ON by pressing the ON/OFF button. Wait until the OK indicator light comes on.
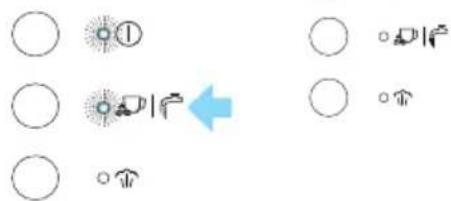
- PLACE A RECIPIENT under the cappuccino maker.
- PRESS THE COFFEE BUTTON and at the same time turn the steam knob anticlockwise. Water comes out of the cappuccino maker.
![graph TD A[" "] --> B[" "] C[" "] --> D[" "] E[" "] --> F[" "] G[" "] --> H[" "] I[" "] --> J[" "] K[" "] --> L[" "] M[" "] --> N[" "] O[" "] --> P[" "] Q[" "] --> R[" "] S[" "] --> T[" "] U[" "] --> V[" "] W[" "] --> X[" "] Y[" "] --> Z[" "]](/content/2026/06/1357307/images/795aed90d9eaaa56e7c1c5f56c5a25aa9650b5805dcad9fe0f47275f4d11c1dd.jpg)
- To interrupt delivery of hot water, close the
steam knob by rotating clockwise and press the coffee button again. (You should not run off hot water for more than 45 seconds at a time).
![graph TD A[" "] --> B[" "] C[" "] --> D[" "] E[" "] --> F[" "] G[" "] --> H[" "] I[" "] --> J[" "] K[" "] --> L[" "] M[" "] --> N[" "] O[" "] --> P[" "] Q[" "] --> R[" "] S[" "] --> T[" "] U[" "] --> V[" "] W[" "] --> X[" "] Y[" "] --> Z[" "]](/content/2026/06/1357307/images/d99b85700add05448f5495abcef22aa75ce3d2b4d5cd7431bd91636524d8b961.jpg)
CLEANING AND MAINTENANCE
- BEFORE PERFORMING ANY CLEANING operations, leave the appliance to cool down and unplug from the mains socket.
- Do NOT USE SOLVENTS OR ABRASIVE cleaning products to clean the appliance. A soft, damp cloth is sufficient.
- EMPTY AND WASH the drip tray and drip mesh frequently.
- CLEAN THE WATER TANK regularly.
CLEANING THE FILTER HOLDER
ABOUT EVERY 200 COFFEES, clean the filter holder for ground coffee as follows:
Remove the filter with frother. Clean the inside of the filter holder. Never wash in a dishwasher. Unscrew the cap of the frother by turning anticlockwise. Remove the frother from the container by pushing it from the cap end. Remove the gasket.
RINSE ALL COMPONENTS and clean the metal filter thoroughly in hot water using a brush.

Replace the filter and gasket on the plastic disk. Make sure to insert the pin on the plastic disk into the hole in the gasket indicated by the arrow.
Replace the assembly in the steel filter container, making sure the pin is inserted in the hole in the support.
Finally, screw on the cap by turning clockwise. Failure to clean as described above invalidates the guarantee.


MAKE SURE the holes in the metal filter are not
blocked. If necessary, clean with a pin.

CLEANING THE BOILER OUTLET
ABOUT EVERY 300 COFFEES, the espresso boiler outlet must be cleaned as follows:
- MAKE SURE the appliance is not hot and that it is unplugged from the mains.

- USING A SCREWDRIVER, unscrew the screw fixing the espresso boiler outlet filter.
- CLEAN THE BOILER with a damp cloth.
- CLEAN THE OUTLET thoroughly in hot water using a brush. Make sure the holes are not blocked. If necessary, clean with a pin.
- RINSE UNDER RUNNING WATER, rubbing all the time.
- SCREW THE BOILER OUTLET BACK ON. Failure to clean as described above invalidates the guarantee.

DESCALING
YOU ARE RECOMMENDED TO DESCALE the coffee machine about every 200 coffees or a maximum of every two months.
YOU SHOULD USE A COMMERCIALLY AVAILABLE PRODUCT SPECIFICALLY FOR DESCALING ESPRESSO COFFEE MACHINES.
IF SUCH A PRODUCT IS NOT AVAILABLE, proceed as follows.
- FILL THE TANK with half a litre of water.
- DISSOLVE 2 spoonfuls (about 30 grams) of citric acid (obtainable from chemist's or drug stores)
- PRESS THE ON/OFF BUTTON and wait for the OK indicator light to come on.
- MAKE SURE the filter holder is not attached and position a recipient under the boiler outlet.
- PRESS THE COFFEE BUTTON, half empty the tank by turning the steam knob every now and then to run off a little solution. Stop run-off by pressing the button again.
- Turn the appliance off.
- Leave the solution to work for 15 minutes then turn the appliance on again.
- Press the coffee button to empty the tank completely.
- To eliminate residues of solution and scale, rinse the tank well, fill with clean water (without citric acid) and replace in position.
- Press the coffee button and run the water off until the tank is completely empty.
- Interrupt water run-off and repeat operations 9, 10 and 11 again. Repair of damage to the coffee machine caused by scale is not covered by the guarantee unless descaling is performed regularly as described above.
| Problem Possible cause Solution | ||
| No ESPRESSO COFFEE IS DELIVERED | No water in the tank.The holes in the filter holder spouts are blocked.The espresso boiler outlet is blocked.The filter is blocked.The tank is incorrectly inserted. | Fill the tank with water.Clean the spout holes.Clean as described in the chapter “Cleaning the boiler outlet”.Clean as described in the section “cleaning the filter holder”.Insert tank correctly. |
| THE ESPRESSO COFFEE DRIPS from the edges of the filter holder rather than the holes. | The filter holder is inserted incorrectly.The espresso boiler gasket has lost elasticity.The holes in the filter holder spouts. | Attach the filter holder correctly and rotate firmly as far as it will go.Have the espresso boiler gasket elasticity replaced at a service centre.Clean the spout holes. |
| THE ESPRESSO COFFEE IS COLD | The espresso OK indicator light was not on when the coffe switch was pressed.No preheating performed.The cups were not preheated. | Wait until the OK light comes on not on when the coffee switch was pressed.Preheat as described in the paragraph “Preheating the appliance”.Preheat the cups by rinsing them in hot water. |
| THE PUMP IS EXCESSIVELY NOISY | The water tank is empty.The tank is incorrectly inserted. | Fill tank.Insert tank correctly. |
| THE COFFEE FROTH IS TOO LIGHT(delivered from the spout too fast) | The ground coffee is not pressed down firmly enough.There is not enough ground coffee.The ground coffee is too coarse.Incorrect type of ground coffee. | Press the ground coffee down more firmly).Increase the quantity of ground coffee.Use ground coffee for espresso coffee machines only.Change the type of ground coffee. |
| THE COFFEE FROTH IS TOO DARK(delivered from the spout too slowly) | The ground coffee is pressed down too firmly.There is too much ground coffee.The espresso boiler outlet is blocked.The filter is blocked.The ground coffee is too fine.The coffee is damp or ground too fine.Incorrect type of ground coffee. | Press the coffee down less firmly.Reduce the quantity of ground coffee.Clean as described in the chapter “Cleaning the boiler outlet”.Clean as described in the section “cleaning the filter holder”.Use ground coffee for espresso coffee machines only.Use only ground coffee for espresso coffee machines. Make sure it is not damp.Change the type of ground coffee. |
| NO MILK FROTH IS FORMED WHEN MAKING CAPPUCCINO | Milk not cold enough.Cappuccino maker dirty. | Always use semi-skimmed milk at refrigerator temperature.Thoroughly clean the holes in the cappuccino maker in particular  those indicated by the arrows. those indicated by the arrows. |
How to obtain the use and care guide

Download the use and care guide
from our website docs.indesit.eu (you can
use this QR Code), specifying the product's commercial code.


Alternatively, contact our Client After-sales Service.
Contacting our after-sales service
You can find our contact details in the warranty manual. When contacting our Client After-sales Service, please state the codes provided on your product's identification plate.
- SAFETY INSTRUCTIONS
- IMPORTANT TO BE READ AND OBSERVED
- SAFETY WARNINGS
- PERMITTED USE
- INSTALLATION
- ELECTRICAL WARNINGS
- CLEANING AND MAINTENANCE
- SAFEGUARDING THE ENVIRONMENT
- DISPOSAL OF PACKAGING MATERIALS
- SCRAPPING OF HOUSEHOLD APPLIANCES
- MOUNTING THE APPLIANCE
- ACCESSORIES & PARTS
- FILLING THE WATER TANK
- AUTO OFF
- PREHEATING THE COFFEE UNIT
- HOW TO PREPARE ESPRESSO COFFEE USING THE FILTER HOLDER FOR GROUND
- HOW TO PREPARE ESPRESSO COFFEE USING PODS
- HOW TO MAKE CAPPUCCINO COFFEE
- HOT WATER PRODUCTION
- CLEANING THE FILTER HOLDER
- CLEANING THE BOILER OUTLET
- DESCALING
- HOW TO OBTAIN THE USE AND CARE GUIDE
- CONTACTING OUR AFTER-SALES SERVICE
Brand : INDESIT
Model : CMI 5038 IX
Category : Coffee machine