
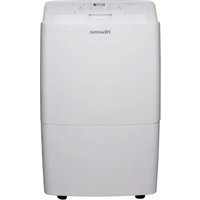
DH7019K1G - Dehumidifier HISENSE - Free user manual and instructions
Find the device manual for free DH7019K1G HISENSE in PDF.


| Product Type | Dehumidifier |
| Brand | Hisense |
| Model | DH7019K1G |
| Dehumidification Capacity (at 80°F, 60% RH) | 70 pints/day (33 L/day) |
| Recommended Room Size | Up to 4,500 sq ft |
| Dimensions (H x W x D) | 24.8 x 15.4 x 11.3 inches |
| Weight | 44.1 lbs (20 kg) |
| Power Supply | 115V / 60Hz |
| Power Consumption | 680W (approx.) |
| Refrigerant Type | R410A |
| Water Tank Capacity | 1.7 gallons (6.5 L) |
| Continuous Drain Option | Yes (with hose, not included) |
| Humidistat | Built-in, adjustable |
| Fan Speeds | 2 (High / Low) |
| Auto Defrost | Yes |
| Air Filter Type | Washable mesh filter |
| Filter Cleaning Indicator | Yes |
| Noise Level (dB) | 51 dB (low fan speed) |
| Energy Star Rated | Yes |
| Warranty | 1 year (parts and labor) |
| Safety Features | Overflow protection, auto shut-off, tip-over switch |
| Maintenance | Clean filter monthly, empty tank as needed, check drain hose |
| Spare Parts Availability | Filter, tank, drain hose, and fan motor available through authorized service |
| Repair Information | Contact Hisense customer service or a certified technician |
Frequently Asked Questions - DH7019K1G HISENSE
User questions about DH7019K1G HISENSE
0 question about this device. Answer the ones you know or ask your own.
Ask a new question about this device
Download the instructions for your Dehumidifier in PDF format for free! Find your manual DH7019K1G - HISENSE and take your electronic device back in hand. On this page are published all the documents necessary for the use of your device. DH7019K1G by HISENSE.
USER MANUAL DH7019K1G HISENSE
For questions about features, operation/performance, parts or service, call: 1-877-465-3566
Electrical Requirements 5
Location Requirements 5
DEHUMIDIFIER USE 6
Setting the Controls 6
Draining the Dehumidifier 10
Normal Sounds 13
DEHUMIDIFIER CARE 14
Cleaning the Air Filter 14
Cleaning the Dehumidifier 14
TROUBLE SHOOTING 15
Product Overview

The figures in this manual are based on the external view of a standard model. They may differ from that of the dehumidifier you have selected.
DEHUMIDIFIER SAFETY
Your safety and safety of others are very important
We have provided many important safety messages in this manual and on your appliance.
Always read and follow all safety messages.

This is the safety alert symbol.
This symbol alerts you to potential hazards that can kill or hurt you and others.
All safety messages will follow the safety alert symbol with the word
"DANGER" or "WARNING"
These words mean:
! DANGER
A hazard that if not avoided, will result in death or serious injury.
WARNING
A hazard that if not avoided, could result in death or serious injury.
All safety messages will tell you what the potential hazards are, tell you how to reduce the chance of injury and tell you what can happen if the instructions are not followed.
IMPORTANT SAFETY INSTRUCTIONS
DANGER
To reduce the risk of explosion, fire, death, electric shock, scalding, or injury to
persons when using this appliance, follow basic precautions, including the following:
INSTALLATION
■ Plug into a grounded 3 prong outlet. Do not remove ground prong.
■ Never attempt to operate this appliance if it is damaged, malfunctioning, partially disassembled, or has missing or broken parts, including a damaged cord or plug.
■ Do not use an electrical adapter or multiple-outlet adaptors with this dehumidifier.
■ Do not use an extension cord.
■ Unplug dehumidifier before servicing.
■ Do not drink water collected in the water bucket.
■ The appliance is not intended for use by young children or impaired people without supervision, young children should be supervised to ensure that they do not play with the appliance.
■ When installing or moving the appliance, be careful not to pinch, crush, or damage the power cord.
- Keep packing materials out of the reach of children. Packaging material can be dangerous for children. There is a risk of suffocation.
■ Do not use the appliance in standing water or allow the product to be directly splashed by water during use.
■ Store and install the appliance where it will not be exposed to temperatures below freezing or exposed to outdoor weather conditions.
■ Call an authorized service technician to repair or immediately replace all power cords that have become damaged. Do not use a cord that shows cracks or abrasion damage along its length or at either end.
■ Do not use the product if the outlet is damaged or loose.
■ In the event of a gas leak (propane gas, LP gas, etc.) do not operate this or any other appliance. Open a window or door to ventilate the area immediately.
■ Do not disassemble, repair or modify the product.
■ Do not store or use flammable gases or materials near the dehumidifier.
OPERATION
- Read all instructions before using the appliance and save these instructions.
■ Do not tamper with controls.
■ Push the power plug all the way into the wall outlet so that it is not loose.
■ Do not grasp the power cord or touch the appliance controls with wet hands.
■ Do not modify or extend the power cord.
■ If the product makes a strange noise or emits a smell or smoke, pull the power plug out and contact Hisense customer service.
■ Avoid placing the dehumidifier or other heavy objects on top of the power cord.
■ Do not use water to clean the dehumidifier. - Keep the air inlet and outlet free from obstructions.
■ Do not cover the power cord with a rug or carpeting. Placing heavy objects on top of the cord could damage it. - Keep the product away from fire and high heat.
■ Do not use the product in places where it could be splashed by water.
■ Do not insert fingers, sticks etc. into the air inlet or outlet. The fan is running at high speeds and could cause personal injuries.
■ Do not repair or replace any part of the appliance. All repairs and servicing must be performed by qualified service personnel unless specifically recommended in this owner's manual. Use only authorized factory parts.
■ Connect to a properly rated, protected, and sized power circuit to avoid electrical overload.
SAVE THESE INSTRUCTIONS
WARNING
To reduce the risk of injury to persons, malfunction, or damage to the product
or property when using this appliance, follow basic safety precautions, including the following:
INSTALLATION
■ Use this appliance only for its intended purpose.
This product is not designed for preserving precision instruments, tableware or art works.
■ Never unplug the appliance by pulling on the power cord. Always grip the plug firmly and pull straight out from the outlet.
■ Do not use the product in places where chemicals are used.
Chemicals and solvents dissolved in the air could cause product deformation and leaking,
■ Turn off the dehumidifier and pull out the power plug before cleaning.
Wait for the fan to stop moving.
■ Do not operate the dehumidifier without a filter.
Using the product without a filter could result in a reduced product lifespan, electric shock or injury.
OPERATION
■ Do not use the product for preserving animals/plants, precision instruments, art works etc.
■ Do not place any objects on top of the dehumidifier.
■ Turn off the dehumidifier and empty the water bucket before moving the dehumidifier.
■ Pull out the power plug if you will not be using the product for an extended period.
■ Do not use the product in a very small space such as a closet.
Poor ventilation could result in overheating.
■ Do not use wax, thinner or a strong detergent when cleaning. Wipe the product using a soft cloth.
■ Do not use the product in direct sunlight or rain.
■ Do not touch the product with wet hands.
■ Position the product on a firm, stable surface.
■ Remove cable ties and extend power cord before use.
■ Do not spray foreign substances or water on the product.
SAVE THESE INSTRUCTIONS
STORAGE AND DISPOSING OF THE UNIT
■ Dispose of this appliance in accordance with Federal and Local regulations.
■ Refrigerants must be evacuated before disposal.
■ Please recycle or dispose of the packaging material of the product in an environment-friendly manner.
■ To avoid damage to the compressor, never store or ship the appliance upside down or sideways.
INSTALLATION REQUIREMENTS
Electrical Requirements
⚠ WARNING

Electrical Shock Hazard
Always plug into a grounded three-prong outlet.
Do not remove ground prong.
Do not use an adapter.
Do not use an extension cord.
Failure to follow these instructions can result in death, fire, or electrical shock.
Specific electrical requirements are listed in the chart below. Follow the requirements for the type of plug on the power supply cord.
Power Supply Requirements

■ 115V (103.5 min. to 126.5 max.)
■ 15A time-delay fuse or circuit breaker
Recommended Grounding Method
This dehumidifier must be grounded. This dehumidifier is equipped with a power supply cord with a three-prong grounding plug. The cord must be plugged into a mating, grounded three-prong outlet, grounded in accordance with all local codes and ordinances. If a mating outlet is not available, it is the customer's responsibility to have a properly grounded three-prong outlet installed by a qualified electrician.
It is the customer's responsibility:
■ To contact a qualified electrical installer.
■ To assure that the electrical installation is adequate and conforms to the Nation Electrical Code, ANSI/NFPA 70-last edition, and all local codes and ordinances.
Copies of the standards listed may be obtained from:
Nation Fire Protection Association
1 Batterymarch Park
Quincy, Ma 02169-7471
www.nfpa.org
Location Requirements
WARNING
To reduce the risk of injury to persons, malfunction, or damage to the product or in this appliance, follow basic safety precautions, including the following:
NOTE: Your model may differ from the one shown.

A. 12" to 18" (30.5cm to 45.7cm)
■ Do not locate outdoors. This dehumidifier is intended for indoor, residential use only. This dehumidifier is not recommended for commercial use.
- Allow at least 12" to 18" (30.5 cm to 45.7 cm) of space on the rear and sides of the dehumidifier for models with back louver and above the dehumidifier for models with top louvers.
■ You will need a surface strong enough to support the dehumidifier when its bucket is full of water.
■ You will need a surface level enough to keep the water from spilling when the bucket is full of water.
■ Do not block the louvers of the unit.
■ Never operate this dehumidifier in an area that is likely to accumulate standing water. If this condition develops, for your safety disconnect the power supply before stepping into the water.
DEHUMIDIFIER USE
Setting the Controls
Control Panel
Control Type 1

Control Type 2

NOTE:
■ The control panel of your model may differ from the one shown above.
Starting/Stopping the Dehumidifier
WARNING
The dehumidifier should be
upright for at least 2 hours before use.
NOTES:
■ Before turning on the dehumidifier, be sure that the bucket is empty and fits all the way into the dehumidifier.
■ Each time you unplug the dehumidifier or power is interrupted, the controls will return to the previous settings when power is restored.
■ Humidity displayed is between 30% Relative Humidity and 90% Relative Humidity.
■ Humidity can be set between 30% Relative Humidity and 80% Relative Humidity.
■ It's important to set the desired humidity level to an achievable setting. To ensure energy-efficient operation, only use the dehumidifier in a closed space, with no open windows or other sources of moist air (to avoid continuous running).
■ Operating temperature is between 38° F to 90° F ( 3.2° C to 32.2° C).
At temperatures of 38° F( 3.2° C) or less,
water freezes inside the product. At temperatures over 90°F(32.2°C), the internal temperature of the product trips a protective device which deactivates the product to avoid product damage.
■ The compressor has a 3-minute delay before restarting. If the product is stopped and immediately restarted, to protect the compressor there is a 3-minute delay until the compressor restarts.
■ When the dehumidifier is operating, the indoor temperature will rise.
The dehumidifier does not have a cooling /heating function.
Heat is generated during operation, so the room temperature may be increased by about 6° F( 3° C) depending on the usage conditions (indoor temperature, size of the room).
WARNING

Electric Shock Hazard
Always plug into a grounded three-prong outlet.
Do not remove ground prong.
Do not use an adapter.
Do not use an extension cord.
Failure to follow these instructions can result in death, fire or electric shock.
- Plug into a grounded three-prong outlet.
- Press POWER to turn on the dehumidifier.
- Press FAN to choose the fan speed.
- Press MODE to choose the mode.
- Press the plus or minus button to set the level of humidity.
- Press POWER to turn off the dehumidifier.

NOTE:
The dehumidifier will retain your last settings.
Empty Bucket Light
If this light is on, the fan and the compressor will stop running. This light indicates that you need to check:
■ If the bucket is full, empty and re-install bucket.
■ If the bucket is not in position, remove the bucket and re-install it. Make sure the bucket fits all the way into the dehumidifier and the bucket light is off, or duhumidifier will not run.
Fan Speed
- Press FAN to select fan speed.
- Choose LOW, HIGH or AUTO.

■ LOW-Reaches the desired humidity setting with lower sound level.
■ HIGH-Will more quickly reach the desired humidity setting.
AUTO-Achieves set humidity at normal speed.■
NOTE:
Once the humidity set point is reached, the dehumidifier will stop running continuously, and the fan will be off periodically. The fan may periodically turn on, to read the humidity level, without the compressor running.
Desired Humidity-Mode
- Press MODE to select the desired humidity setting.

- Choose Auto Dry, Continuous or Manual Set.
■ AUTO DRY: The dehumidifier will operate in dry mode only. The Fan Speed is set automatically. The Desired Humidity is set to 50% automatically.
■ CONTINUOUS: The dehumidifier will operate continuously. The Fan Speed can be adjusted. The Desired Humidity can not be adjusted.
■ MANUAL SET: The dehumidifier will operate at the selected fan speed to the set humidity level. If the humidity level of the room is higher than the desired humidity setting, the compressor will turn on. If the humidity level of the room is lower than the desired humidity setting, the compressor will turn off, as well as the fan.
NOTE:
The de-icing function will turn off the compressor if a low temperature condition occurs. Pressing the MODE button or the plus or minus button will not increase or decrease the amount of moisture removed. When the de-icer senses then correct operating temperature, the compressor will cycle back on. Some freezing is normal will dehumidifiers are used at low temperatures.
Power
Press POWER to turn on or turn off the dehumidifier.

Humidity Level
- Press the Plus or Minus button to set the desired humidity level. Desired humidity in the digital display will flash for 5 seconds after operation.

- Actual room humidity will be displayed after 5 seconds of flashing the desired humidity.
NOTE:
Humidity can only be adjusted manually in Manual Set mode. In Continuous and Auto Dry mode, humidity level is set automatically.
Digital Display
Display shows relative humidity or time (depending on setting).
- When the dehumidifier operates in Manual Set mode, the display shows the relative humidity of the room.
- When the timer is selected, the display shows the time when the dehumidifier will turn on or turn off operates, depending on the setting.

NOTE:
The humidity displayed is only for reference. For accurate humidity, please check a hygrometer.
Timer
To set Timer for a 30-minute to 24-hour delay before the dehumidifier is turned off (the dehumidifier must be On):
- Press TIMER. Timer indicator light will come on, and the display will flash. The display will show remaining time before the dehumidifier will turn off.

- Press the Plus or Minus button to change the delay time, from 30 minutes to 24 hours.
To set Timer to turn on the dehumidifier, with previous setting:
- Turn off the dehumidifier.
- Press TIMER. Timer indicator light will flash. The display will show remaining time before the dehumiditier will turn on.
- Press the Plus or Minus button to change the delay time, from 30 minutes to 24 hours.
To clear the Timer delay program:
NOTE: Dehumiditier can be either on or off.
- Press TIMER once after it has been programmed. Display will show remaining time.
- While the display is showing the remaining time, press TIMER again. Timer indicator light will turn off.
To see the remaining time.
Press TIMER once after it has been programmed. Display will show remaining time.
NOTE:
Empty the drain water bucket before setting the timer function. If the water bucket becomes full during the Timer function, the Bucket Full light goes on and dehumidification stops.
Clean Filter
- When the Clean Filter indicator light is on, remove, clean and replace the air filter. See "Cleaning the Air Filter".
- Press the Clean Filter button to reset the filter monitor.

NOTE:
When the light is on, it will remain on for 180 hours or until you press Clean Filter button.
Pump (for Pump function model only)
This feature pumps water horizontally or vertically. Pump water to a drain, out a window or anywhere you think suitable.
IMPORTANT:
You must connect the drain hose to the unit before pressing the Pump button, or the pump will not operate. See "Pump drain" for connecting instructions.

- Press PUMP to activate the pump system for active drainage.
- Once the pump button is pressed, the pump light will switch on.
NOTE:
If the pump light flashes, it means that the pump is not ■ functioning properly.
If the drain hose is not correctly connected to the ■ unit or is bent, the pump light will flash and the pump system will not work. See "Trouble shooting" for direction.
Site for installing hose for pump function:

Draining the Dehumidifier
WARNING
Sickness Hazard
Do not drink water collected in water bucket.
Doing so can result in sickness.
Option 1 Bucket Draining
If a floor drain is not available, or you do not plan to run your dehumidifier continuously, you may want to simply empty the bucket.
- Grasp the bucket sides to slide out bucket.

- Lift the bucket up by the handle.

- Pour water into a sink or tub.

- Fold down the handle and reinstall the bucket.

IMPORTANT:
If the Empty Bucket light comes on, the dehumidifier will not operate. The bucket may need to be emptied or re-installed.
NOTE:
■ If the water bucket is removed immediately after turning off the dehumidifier, the water remaining in the heat exchanger may drip inside the water bucket storage area. Remove the water with a soft cloth.
■ While cleaning, do not touch the water level float.
■ Clean the water bucket once a week during use.
■ If the ambient temperature is low, there is less moisture in the air for the product to remove.
■ Unplug the product before removing the water bucket. If the bucket is removed while the product is operating, the compressor will stop.
Option 2 Gravity Draining
If you plan to run your dehumidifier continuously, you can choose direct draining by attaching a garden hose to the unit.
- Turn off the dehumidifier and unplug the power supply cord.
- Uncover the connector cover on the side of the unit.

-
Remove bucket.
-
Attach a garden hose to the drain hose connector on the inside of the dehumidifier. Securely attach the hose to be sure there is no water leak.
NOTE:
The garden hose sold separately. ■ The connection is designed for North ■ American garden hoses only.

A. Garden hose
B. Drain hose connector
IMPORTANT:
In North America the garden hose connectors are 3/4" diameter straight (non-tapered) thread with a pitch of 11.5 threads per inch(male part has an outer diameter of 1 1/16 inches (26.99mm).
WARNING
Take care not to injure hands
while connecting the hose.
- Place the other end of garden hose into a floor drain. Check to see that the hose lies flat and is in the drain. Make sure the draining end of the hose is on a lower level than the hose connection to the dehumidifier. The hose should not be kinked or pinched.

- Reinstall bucket.
NOTE:
■ To use the bucket without the garden hose, simply remove the garden hose, then reinstall bucket.
■ The bucket must be installed and properly aligned for the dehumidifier to operate with or without a garden hose connected.
Option 3 PUMP-Drain (for Pump function model only)
This feature can help to pump water horizontally or vertically with a 16 feet (487.68cm) hose included. You can also pump water to a floor drain, out a window or anywhere you think suitable.
NOTE: There are two types connectors, please choose the operating instructions for your model to use.
CONNECTOR TYPE 1
NOTE: You must connect the drain hose (with connector B) to drain hose connector A before pressing Pump button. If the pump does not function properly, see "Trouble shooting" for direction.

- To connect the drain hose to the unit, push drain hose connector B into the connector A.

- To disconnect the drain hose, push connector A in, and then pull connector B out.


How to disconnect
CONNECTOR TYPE 2
NOTE:
You must connect the drain hose (with connector B) to connector A before pressing the Pump button. If the pump does not function properly, see "Trouble shooting" for instructions.
Drain hose connector A

- To connect the drain hose to the unit, push drain hose connector B into the connector A.

- To disconnect the drain hose, press the release button on connector A, and then pull connector B out.

Water filter cleaning (For pump function model only)
-
Unplug the unit before cleaning it. After every 3 months of usage, the water filter need to be cleaned for a smooth water pump running.
-
Remove the bucket.

- Remove the plastic nut, sealing bolt and take the filter off.
NOTE: Before remove the filter, please put a draining dish under the unit and make sure there is not water draining from the port.


WARNING Take care not to injure hands while disassemble and re-install the water filter parts.
- Clean the water filter with soft brush.
■ If the filter is very dirty, wash it in water and a neutral detergent.
■ Clean the water filter every 3 months.

- Re-install the filter, filter sealing bolt and plastic nut back to the unit, make sure the filter is installed to the right position.

- Re-install the bucket to the unit.

NOTE: If the unit will not used for a certain period of time, please clean the water filter, drain the dehumidifier completely. And make sure re-install the water filter parts.
Service calls to clean the water filter are not covered under the product warranty.
Normal Sounds
When your dehumidifier is operating normally, you may hear sounds such as:
■ Compressor sounds, which may be loud.
■ Air movement from the fan.
- Clicking sounds when the dehumidifier or compressor turns on and off, and when the Automatic shut-off Switch is working.
DEHUMIDIFIER CARE
Your new dehumidifier is designed to give you many years of dependable service. This section explains how to clean and care for your dehumidifier.
To avoid damage to the compressor, never store or ship the appliance upside down or sideways.
Cleaning the Air Filter
The air filter is removable for easy cleaning. A clean filter helps remove dust, lint, and other particles from the air and is important for best operating efficiency. Check the filter every two weeks to see whether it needs cleaning.
- Turn off the dehumidifier.
- Remove the air intake grill.
- Take out the air filter.

- Use a vacuum cleaner to clean the air filter if the air filter is dirty, wash it in warm water with a mild detergent.
- Reinstall the air filter and the air intake grill.
- Turn on the dehumidifier.
NOTE:
Do not wash air filter in the dishwasher or use any chemical cleaners. Air dry filter completely before reinstalling to ensure maximum operating efficiency.

A. Air intake grill
B. Air filter
Cleaning the Dehumidifier
Exterior
- Turn off the dehumidifier and unplug the power supply cord.
- Dust the surface of the unit with a soft cloth or the dusting attachment of your vaccum cleaner.
Water Bucket
Every few weeks, rinse the inside of the water bucket with a mild detergent to avoid growth of mold, mildew and bacteria.
Water level float
The dehumidifier has a EMPTY BUCKET light and a water float. The bucket must be properly aligned for the water level float and the EMPTY BUCKET light to work.
NOTE:
Be sure the float is snapped correctly in place.

A. Water level float
B. Bucket
TROUBLE SHOOTING
Before calling for service, try the suggestions below.
Dehumidifier will not run
■ Is the dehumidifier turned on? Turn on the dehumidifier.
⚠ WARNING

Electrical Shock Hazard
Plug into a grounded three-prong outlet.
Do not remove ground prong.
Do not use an adapter.
Do not use an extension cord.
Failure to follow these instructions can result in death, fire or electric shock.
■ Is the power cord plugged into a grounded three-prong outlet?
Plug into a grounded three-prong outlet.
See "Electrical Requirements" on page 5.
■ Has a household fuse blown or has a circuit breaker tripped?
Replace the fuse or reset the circuit breaker.
If the problem continues, call an electrician.
See "Electrical Requirements" on page 5.
Is the bucket installed properly?■
Reinstall the bucket so that it fits all the way into the dehumidifier.
Does the bucket need to be emptied?■
Empty the bucket.
Is the water level float in place?■
Remove the bucket. Make sure the float is snapped in place. Reinstall the bucket.
Did the dehumidifier suddenly stop operating, ■ and won't turn on?
Confirm the power is connected, and the bucket is in place. If the unit still doesn't operate, call Hisense for Warranty service.
Dehumidifier runs but does not dehumidify
■ All models have an automatic de-icing function that will shut off the compressor and allow the fan to run.
When the de-icing function senses the correct operating temperature, the compressor will cycle back on.
The filter is dirty or obstructed debris. ■ Clean the filter.
Air coming from the dehumidifier is worm
■ Dehumidifier will put out warm air under normal operating conditions.
Dehumidifier displays error codes
■ If the dehumidifier displays an error code, please contact Hisense customer service.


- DEHUMIDIFIER SAFETY
- YOUR SAFETY AND SAFETY OF OTHERS ARE VERY IMPORTANT
- DANGER
- WARNING
- IMPORTANT SAFETY INSTRUCTIONS
- INSTALLATION
- OPERATION
- SAVE THESE INSTRUCTIONS
- STORAGE AND DISPOSING OF THE UNIT
- INSTALLATION REQUIREMENTS
- ELECTRICAL REQUIREMENTS
- ⚠ WARNING
- ELECTRICAL SHOCK HAZARD
- POWER SUPPLY REQUIREMENTS
- RECOMMENDED GROUNDING METHOD
- IT IS THE CUSTOMER'S RESPONSIBILITY
- LOCATION REQUIREMENTS
- DEHUMIDIFIER USE
- SETTING THE CONTROLS
- CONTROL PANEL
- NOTE
- STARTING/STOPPING THE DEHUMIDIFIER
- NOTES
- EMPTY BUCKET LIGHT
- FAN SPEED
- DESIRED HUMIDITY-MODE
- POWER
- HUMIDITY LEVEL
- DIGITAL DISPLAY
- TIMER
- TO SET TIMER FOR A 30-MINUTE TO 24-HOUR DELAY BEFORE THE DEHUMIDIFIER IS TURNED OFF (THE DEHUMIDIFIER MUST BE ON)
- TO SET TIMER TO TURN ON THE DEHUMIDIFIER, WITH PREVIOUS SETTING
- TO CLEAR THE TIMER DELAY PROGRAM
- TO SEE THE REMAINING TIME
- CLEAN FILTER
- PUMP (FOR PUMP FUNCTION MODEL ONLY)
- IMPORTANT
- SITE FOR INSTALLING HOSE FOR PUMP FUNCTION
- DRAINING THE DEHUMIDIFIER
- OPTION 1 BUCKET DRAINING
- OPTION 2 GRAVITY DRAINING
- TAKE CARE NOT TO INJURE HANDS
- WHILE CONNECTING THE HOSE
- OPTION 3 PUMP-DRAIN (FOR PUMP FUNCTION MODEL ONLY)
- CONNECTOR TYPE
- WATER FILTER CLEANING (FOR PUMP FUNCTION MODEL ONLY)
- NORMAL SOUNDS
- DEHUMIDIFIER CARE
- CLEANING THE AIR FILTER
- CLEANING THE DEHUMIDIFIER
- EXTERIOR
- WATER BUCKET
- WATER LEVEL FLOAT
- TROUBLE SHOOTING
- DEHUMIDIFIER WILL NOT RUN
- DEHUMIDIFIER RUNS BUT DOES NOT DEHUMIDIFY
- AIR COMING FROM THE DEHUMIDIFIER IS WORM
- DEHUMIDIFIER DISPLAYS ERROR CODES
Brand : HISENSE
Model : DH7019K1G
Category : Dehumidifier