
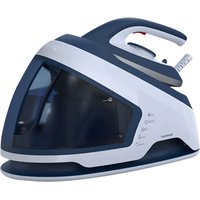
SDBS 2800 A1 - Iron SILVERCREST - Free user manual and instructions
Find the device manual for free SDBS 2800 A1 SILVERCREST in PDF.


| Product Type | Steam Iron |
| Model | SDBS 2800 A1 |
| Brand | SilverCrest |
| Power | 2800 W |
| Soleplate Material | Ceramic |
| Water Tank Capacity | 300 ml |
| Cord Length | 2 m |
| Weight | 1.2 kg |
| Dimensions (L x W x H) | 280 x 120 x 150 mm |
| Continuous Steam Output | 40 g/min |
| Spray Function | Yes |
| Anti-Drip System | Yes |
| Auto Shut-Off | Yes |
| Self-Cleaning Function | Yes |
| Anti-Calc System | Yes |
| Voltage | 220-240 V ~ 50/60 Hz |
| Swivel Cord | Yes |
| Warranty | 3 years |
Frequently Asked Questions - SDBS 2800 A1 SILVERCREST
User questions about SDBS 2800 A1 SILVERCREST
0 question about this device. Answer the ones you know or ask your own.
Ask a new question about this device
Download the instructions for your Iron in PDF format for free! Find your manual SDBS 2800 A1 - SILVERCREST and take your electronic device back in hand. On this page are published all the documents necessary for the use of your device. SDBS 2800 A1 by SILVERCREST.
USER MANUAL SDBS 2800 A1 SILVERCREST
Operating instructions
DE AT CH
DAMPFBÜGELEISEN
Bedienungsanleitung
GR CY
ΑΤΜΟΣΙΔΕΡΟ
Οδηγίες χρήσης
IAN 315311
GB IE NI CY
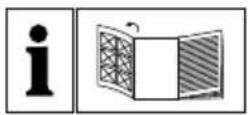
Before reading, unfold the page containing the illustrations and familiarise yourself with all functions of the device.
GR CY
GB/IE/NI/CY Operating instructions Page 1
Safety information....3
Before first use ....6
Filling the water tank....6
Plugging in and ironing ....7
Steam ironing....7
Touch sensor 8
Ironing with steam blast 8
Putting the steam iron down....8
After use 8
Drip-Stop function....8
Automatic descaling function 8
Automatic switch-off....9
Cleaning. 9
Self-cleaning function 9
Housing and sole of the iron 9
Storage 9
Troubleshooting ....10
Disposal....10
Kompernass Handels GmbH warranty ....11
Service....12
Importer 12
Introduction
Congratulations on the purchase of your new appliance.
You have selected a high-quality product. The operating instructions are part of this product. They contain important information about safety, usage and disposal. Before using the product, please familiarise yourself with all operating and safety instructions. Use the product only as described and for the range of applications specified. Please also pass these operating instructions on to any future owner.
Intended use
The steam iron is intended exclusively for the ironing of textiles. The iron may only be used indoors and in domestic households. All other use is deemed to be improper use. It is not suitable for commercial use!
Package contents
Steam Iron
Measuring beaker
Operating instructions
Appliance description
Figure A:
① Water jet
② Filler opening for the water tank
③ Button for the spray function
4 Steam blast button
5 Steam quantity button
6 Temperature control
⑦ Touch sensor field
8 Power cable with anti-kink protection
9 Base
10 Control lamp: Material type/AUTO OFF
⑪ Sole of the iron
12 Self-clean button


Figure B:
13 Measuring beaker
Technical data
Power supply: 220 - 240 V \~ (AC), 50 - 60 Hz
Power consumption: 2800 W
Safety information

RISK OF ELECTRICAL SHOCK!
The voltage of the power source must conform to the details given on the type plate of the appliance.
To avoid potential risks, arrange for a defective appliance to be checked and, if required, repaired by qualified technicians, or contact our Customer Service Department.
- Arrange for defective power plugs and/or cables to be replaced as soon as possible by a qualified technician or by our Customer Service Department to avoid the risk of injury.
- When disconnecting the appliance from the power source, pull only on the plug itself, never on the cable.
▶ Never bend (kink) or crush the power cable, always route it in such a way that it cannot come into contact with hot surfaces and such that no one can step on or trip over it.
Remove the plug from the mains power socket after every usage, before cleaning the appliance and when refilling the appliance with water.
▶ Always unwind the power cable fully before switching on and do not use an extension cable.
▶ Never touch the power cable or the plug with wet hands.
▶ Never use the steam iron adjacent to water contained in a bath, shower, wash basin or other vessels. The proximity of water is hazardous, even if the appliance is switched off.
▶ Under no circumstances should you immerse the steam iron in any liquid or permit liquids to penetrate into the housing of the steam iron. Do not expose the appliance to humidity and do not use it outdoors. If any liquid gets into the housing, disconnect the appliance from the mains power socket immediately and have it repaired by a qualified technician.
- Do not open the steam iron housing. Have a defective steam iron repaired only by an authorised technician.

RISK OF ELECTRICAL SHOCK!
- Do not use the appliance if it shows visible signs of damage, has fallen or leaks water. Arrange for it to be repaired by qualified specialists.
- Stop using the appliance if the anti-kink protection on the power cable is damaged!
This appliance may be used by children aged 8 years or more and by persons with reduced physical, sensory or mental capabilities or lack of experience and/or knowledge if they are supervised, or have been instructed in the safe use of the appliance and have understood the potential risks. Do not allow children to use the appliance as a plaything. Cleaning and user maintenance may not be carried out by children unless they are supervised.

RISK OF BURNS!
▶ Hold the steam iron only by the handle when it is hot.
▶ Children should be supervised to ensure that they do not play with the appliance.
▶ Never place your hands in the steam spray or on hot metal parts.
- Do not open the filler opening for the water tank while the iron is in use. Allow the steam iron to cool down first and remove the plug from the power socket.
The iron and its connecting cable must be kept out of the reach of children under the age of 8 while the iron is switched on or cooling down.

Caution! Hot surface!
⚠️ RISK OF INJURY! RISK OF FIRE!
▶ Never leave a hot steam iron unattended if it is switched on or connected to the mains power supply.
▶ Do not put the steam iron away until it has cooled down completely.
The steam iron should only be used and set down on stable surfaces.
▶ Use only the ironing temperatures stated in the care instructions as suitable for the material. Otherwise, you could damage the textiles.
If you do not know the correct care instructions, start with the lowest temperature setting.
- Place the iron only on a level and heat-resistant surface. The iron must be stable.
▶ When you put the steam iron down, always place it on its base.
CAUTION! PROPERTY DAMAGE!
If the clothing care instructions forbid ironing, symbol), the clothing item may not be ironed. Ignoring this warning could lead to permanent damage to the clothing item.
The water tank should be filled only with tap water or distilled water. Otherwise you will damage the steam iron.
- Do not clean the steam iron with solvents, alcohol or abrasive cleaning agents. These could damage it.
Before first use
■ Remove the steam iron from the packaging.
■ Remove all packaging materials from the appliance.

RISK OF SUFFOCATION!
▶ Plastic bags can be dangerous. To avoid fatalities through suffocation, keep plastic bags out of the reach of children.
Fill the water tank with water (See the chapter "Filling the water tank").
■ Insert the plug into a mains power socket supplying an electrical current as detailed on the rating plate.
■ Move the temperature control Ⓐ to the "MAX" position.
■ Wait for the iron to heat up until you hear a beep.
Pick up the iron and press the steam blast button a few times so that steam comes out of the sole of the iron.
■ Then iron over a piece of old piece of material to remove any residues that may remain on the sole of the iron ⑪.
Filling the water tank
■ Hold the iron in your hand at an angle.
■ Open the cover of the filler opening for the water tank ②. This is marked with:
■ Use the measuring beaker ⑬ to add tap water/distilled water to the water tank up to no more than the "MAX" marking that you can see through the filler opening to the water tank ②.
■ Close the cover of the filler opening for the water tank ②.
NOTE
If the mains water in your location is rated as hard, it is recommended that you mix the mains water with some distilled water. Otherwise, the jets for the steam blast function could become blocked with limescale prematurely.
To extend the optimal steam blast function, mix mains water with distilled water according to the table:
| Water hardness | Ratio of distilled water to tap water |
| very soft/soft 0 | |
| medium 1:1 | |
| hard 2:1 | |
| very hard 3:1 |
Ask your local water utility about the water hardness in your area.
Plugging in and ironing
Dry ironing without steam is possible at all temperatures, steam ironing is only possible in the red setting range ⚠️ on the temperature control ⑥.
■ Insert the plug into a mains socket.

CAUTION! PROPERTY DAMAGE!
If the clothing care instructions forbid ironing, (symbol), the clothing item may not be ironed. Ignoring this warning could lead to permanent damage to the clothing item.
- Check the care instructions on the labels in garments to see if they are suitable for ironing, and at which temperature setting.
| Tempera-ture control symbol 6 | Type of material | Control lamp Type of material 10 |
| MIN | The appliance does not heat up | |
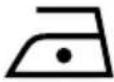 | Nylon, acrylic, rayon | NYLON |
 | Silk, wool, polyester mix fabrics | SILK/WOOL |
 | Cotton, viscose | COTTON |
| MAX | Linen | LINEN |
■ Select the appropriate temperature setting using the temperature control ⑥.
NOTE
While it is heating up, always place the iron on its base ⑨.
If you place the iron down on its sole ⑪ and do not move it, the automatic switch-off will be activated after 30 seconds (see chapter "Automatic switch-off") and the appliance stops heating.
The control lamp 10 for the set material type starts flashing. As soon as set temperature has been reached, the control lamp 10 for the set material type lights up permanently and you hear a beep.
- Wait until the control lamp 10 for the set material type lights up permanently and you hear a beep. You can start ironing.
■ To dampen the laundry, press the spray button ⚡ ③. Water is sprayed from the water jet ①.
This function is suitable for very dry and heavily crumpled garments.
Steam ironing
■ Press the steam quantity button ⑤ repeatedly until the desired steam quantity is set.
| Steam level Type of material | |
 | no steam |
| 1 | little steam |
| 2 | medium steam |
| 3 | lots of steam |
■ The temperature control ⑥ must be set to at least the red setting range. Otherwise no steam will be produced.
Touch sensor (TOUCH SENSOR)
The touch sensor in the handle allows the iron to 'recognise' whether you are holding it in your hand.
If the temperature control ⑥ is set in the red setting range ⚠ and a steam level is selected, steam will be produced as long as your hand is in contact with the touch sensor field ⑦.
If there is no contact with the touch sensor field ⑦, the iron will stop producing steam.
As soon as you pick up the iron again, steam production will be resumed.
Ironing with steam blast
The steam blast function is especially suitable for smoothing difficult-to-reach parts of a garment.
■ Raise the steam iron slightly.
For a steam blast, press the steam blast button
You can also use the steam blast
(VERTIC AL STEA M) function to smooth hanging textiles.
■ Hold the iron vertically and press the steam blast button 🔊 4.
Putting the steam iron down
RISK OF FIRE!
▶ Never leave a hot steam iron unattended if it is switched on or connected to the mains power supply.
■ Stand the steam iron only on its base ⑨.
After use
■ Remove the power plug from the mains power socket.
■ Empty the water tank and clean the sole of the iron ⑪.
Place the cooled-down steam iron on its base ⑨.
Drip-Stop function
With conventional steam irons, water can drip from the sole of the iron ⑪ at low temperatures. This iron however possesses a new feature, the DRIP-STOP function (DRIP STOP). At low temperatures the iron automatically switches off the steam-blast function.
Then set a suitable temperature with the temperature control ⑥. As soon as this is reached, steam production is resumed.
Automatic descaling function
a ANTI CAL C
There is a descaling cartridge in the water tank that helps reduce the build-up of limescale.
This descaling cartridge is a permanent fixture in the water tank and cannot be replaced.
Automatic switch-off
This steam iron is fitted with an automatic switch-off system. This stops the iron from heating up.
If the iron is resting on its sole ⑪ and is not moved for about 30 seconds, there will be a warning beep and the AUTO OFF control lamp ⑩ flashes. The iron will stop heating up. To deactivate the automatic switch-off, lift up the iron and move it gently from side to side. The AUTO OFF control lamp ⑩ goes out and the iron will heat up again.
If the iron is on its base ⑨ and is not moved for about 1 minute, there will be a warning beep and the AUTO OFF control lamp ⑩ flashes. The iron will stop heating up. To deactivate the automatic switch-off, lift up the iron and move it gently from side to side. The AUTO OFF control lamp ⑩ goes out and the iron will heat up again.
NOTE
The automatic switch-off is not intended as a substitute for removing the plug from the mains power! This is merely intended to reduce the fire hazard if you forget to switch off the iron!
Cleaning
Self-cleaning function
■ Fill the water tank to the "MAX" marking.
■ Insert the plug into the mains power socket.
■ Move the temperature control ⑥ to the "MAX" position.
■ Use the steam quantity button ⑤ to select steam level 3.
- Allow the steam iron to heat up until the control lamp "LINEN" ⑩ lights up permanently.
- Hold the steam iron horizontally over a suitable container.
NOTE
If your hands are sensitive to heat, wear oven gloves. Hot steam escapes during cleaning.
■ Press the self-clean button ⑫ and keep it pressed. Move the steam iron back and forth a little.
Steam and boiling water will flow from the steam exit holes in the sole of the iron ⑪. Any impurities and limescale that may be present are flushed out.
■ Release the self-clean button ⑫ as soon as all of the water in the water tank is used up.
Dry the sole of the iron ⑪ thoroughly. To do this, move the sole of the iron ⑪ back and forth several times over a towel or an old piece of material.
- Allow the steam iron to cool down before putting it away.
Housing and sole of the iron

MORTAL DANGER!
▶ Always remove the plug before cleaning the appliance. There is a risk of electric shock!

RISK OF INJURY!
▶ Allow the appliance to cool down before cleaning it. Otherwise, there is a risk of burns!

CAUTION! PROPERTY DAMAGE!
▶ Do not use aggressive, abrasive or chemical cleaning agents. They can damage the surface and also lead to irreparable damage to the appliance.
■ Clean the housing with a soft, dry cloth only.
■ Clean the sole of the iron Ⓟ using a damp cloth and a mild, non-scouring detergent.
■ Dry the appliance well before using it again.
Storage
Store the cooled-down appliance in a clean, dust-free and dry location.
Troubleshooting
The steam iron blasts out no steam/very little steam:
The reserves of tap water/distilled water in the steam iron are depleted. Fill the water tank (See "Filling the water tank").
The steam iron does not get hot:
■ The steam iron is not plugged in or is not switched on. Insert the plug into a wall power socket and adjust the temperature control ⑥ to the desired ironing temperature.
■ The steam iron is defective. Arrange for the steam iron to be repaired by qualified specialists.
Disposal

Never dispose of the appliance in your normal domestic waste. This product is subject to the provisions of European Directive 2012/19/EU.
Dispose of the appliance through an approved disposal centre or at your community waste facility. Please observe the currently applicable regulations. Please contact your waste disposal centre if you are in any doubt.

Your local community or municipal authorities can provide information on how to dispose of the worn-out product.

Dispose of all packaging materials in an environmentally friendly manner.
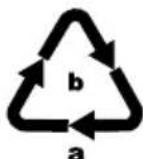
Dispose of the packaging in an environmentally friendly manner. Note the labelling on the packaging and separate the packaging material
components for disposal if necessary. The packaging material is labelled with abbreviations (a) and numbers (b) with the following meanings: 1–7: Plastics, 20–22: Paper and cardboard, 80–98: Composites.
This appliance has a 3-year warranty valid from the date of purchase. If this product has any faults, you, the buyer, have certain statutory rights. Your statutory rights are not restricted in any way by the warranty described below.
Warranty conditions
The validity period of the warranty starts from the date of purchase. Please keep your original receipt in a safe place. This document will be required as proof of purchase.
If any material or production fault occurs within three years of the date of purchase of the product, we will either repair or replace the product for you at our discretion. This warranty service is dependent on you presenting the defective appliance and the proof of purchase (receipt) and a short written description of the fault and its time of occurrence.
If the defect is covered by the warranty, your product will either be repaired or replaced by us. The repair or replacement of a product does not signify the beginning of a new warranty period.
Warranty period and statutory claims for defects
The warranty period is not prolonged by repairs effected under the warranty. This also applies to replaced and repaired components. Any damage and defects present at the time of purchase must be reported immediately after unpacking. Repairs carried out after expiry of the warranty period shall be subject to a fee.
Scope of the warranty
This appliance has been manufactured in accordance with strict quality guidelines and inspected meticulously prior to delivery.
The warranty covers material faults or production faults. The warranty does not extend to product parts subject to normal wear and tear or fragile parts such as switches, batteries, baking moulds or parts made of glass.
The warranty does not apply if the product has been damaged, improperly used or improperly maintained. The directions in the operating instructions for the product regarding proper use of the product are to be strictly followed. Uses and actions that are discouraged in the operating instructions or which are warned against must be avoided.
This product is intended solely for private use and not for commercial purposes. The warranty shall be deemed void in cases of misuse or improper handling, use of force and modifications/repairs which have not been carried out by one of our authorised Service centres.
Warranty claim procedure
To ensure quick processing of your case, please observe the following instructions:
■ Please have the till receipt and the item number (e.g. IAN 12345) available as proof of purchase.
■ You will find the item number on the type plate, an engraving on the front page of the instructions (bottom left), or as a sticker on the rear or bottom of the appliance.
If functional or other defects occur, please contact the service department listed either by telephone or by e-mail.
■ You can return a defective product to us free of charge to the service address that will be provided to you. Ensure that you enclose the proof of purchase (till receipt) and information about what the defect is and when it occurred.

You can download these instructions along with many other manuals, product videos and software on www.lidl-service.com.
Service
GB Service Great Britain
Tel.: 0800 404 7657
E-Mail: kompernass@lidl.co.uk
IE Service Ireland
Tel.: 1890 930 034
(0,08 EUR/Min., (peak))
(0,06 EUR/Min., (off peak))
E-Mail: kompernass@lidl.ie
CY Service Cyprus
Tel.: 8009 4409
E-Mail: kompernass@lidl.com.cy
IAN 315311
Importer
Please note that the following address is not the service address. Please use the service address provided in the operating instructions.
KOMPERNASS HANDELS GMBH
BURGSTRASSE 21
DE-44867 BOCHUM
GERMANY
www.kompernass.com
Περιεχόμενα
Εισαγωγή....14
KOMPERNASS HANDELS GMBH
BURGSTRASSE 21
DE-44867 BOCHUM
ΓΕΡΜΑΝΙΑ
www.kompernass.com
Inhaltsverzeichnis
Einleitung....26
KOMPERNASS HANDELS GMBH
BURGSTRASSE 21
DE-44867 BOCHUM
DEUTSCHLAND
www.kompernass.com
KOMPERNASS HANDELS GMBH
BURGSTRASSE 21
DE - 44867 BOCHUM
GERMANY
www.kompernass.com

- GB IE NI CY
- GR CY
- INTRODUCTION
- INTENDED USE
- PACKAGE CONTENTS
- APPLIANCE DESCRIPTION
- TECHNICAL DATA
- SAFETY INFORMATION
- RISK OF ELECTRICAL SHOCK
- RISK OF BURNS
- ⚠️ RISK OF INJURY! RISK OF FIRE
- CAUTION! PROPERTY DAMAGE
- BEFORE FIRST USE
- RISK OF SUFFOCATION
- FILLING THE WATER TANK
- NOTE
- PLUGGING IN AND IRONING
- STEAM IRONING
- TOUCH SENSOR (TOUCH SENSOR)
- IRONING WITH STEAM BLAST
- PUTTING THE STEAM IRON DOWN
- RISK OF FIRE
- AFTER USE
- DRIP-STOP FUNCTION
- AUTOMATIC DESCALING FUNCTION
- AUTOMATIC SWITCH-OFF
- CLEANING
- SELF-CLEANING FUNCTION
- HOUSING AND SOLE OF THE IRON
- MORTAL DANGER
- RISK OF INJURY
- STORAGE
- TROUBLESHOOTING
- THE STEAM IRON BLASTS OUT NO STEAM/VERY LITTLE STEAM
- THE STEAM IRON DOES NOT GET HOT
- DISPOSAL
- WARRANTY CONDITIONS
- WARRANTY PERIOD AND STATUTORY CLAIMS FOR DEFECTS
- SCOPE OF THE WARRANTY
- WARRANTY CLAIM PROCEDURE
- SERVICE
- IMPORTER
- ΠΕΡΙΕΧΌΜΕΝΑ
- INHALTSVERZEICHNIS
Brand : SILVERCREST
Model : SDBS 2800 A1
Category : Iron