
SKM 550 B2 - Food Processor SILVERCREST - Free user manual and instructions
Find the device manual for free SKM 550 B2 SILVERCREST in PDF.


| Product Type | Food Processor |
| Brand | SilverCrest |
| Model | SKM 550 B2 |
| Power Consumption | 550 W |
| Motor Type | Induction motor |
| Bowl Capacity | 2.5 L (max fill 2.0 L) |
| Feeder Tube Diameter | 75 mm |
| Speed Settings | 2 speeds + pulse |
| Attachments Included | Stainless steel chopping blade, slicing disc, shredding disc, dough hook |
| Safety Features | Interlock mechanism prevents operation if bowl or lid not properly locked; overload protection |
| Non-Slip Feet | Yes, 4 suction feet |
| Housing Material | ABS plastic |
| Bowl Material | Plastic (BPA-free) |
| Blade Material | Stainless steel |
| Cord Length | 1.2 m |
| Dimensions (W x D x H) | 28 x 22 x 38 cm |
| Weight | 3.5 kg |
| Dishwasher Safe Parts | Bowl, lid, blades, discs (all removable parts) |
| Voltage | 220-240 V, 50/60 Hz |
| Certifications | CE, GS |
| Repairability | Limited repair options; contact SilverCrest service |
Frequently Asked Questions - SKM 550 B2 SILVERCREST
User questions about SKM 550 B2 SILVERCREST
0 question about this device. Answer the ones you know or ask your own.
Ask a new question about this device
Download the instructions for your Food Processor in PDF format for free! Find your manual SKM 550 B2 - SILVERCREST and take your electronic device back in hand. On this page are published all the documents necessary for the use of your device. SKM 550 B2 by SILVERCREST.
USER MANUAL SKM 550 B2 SILVERCREST
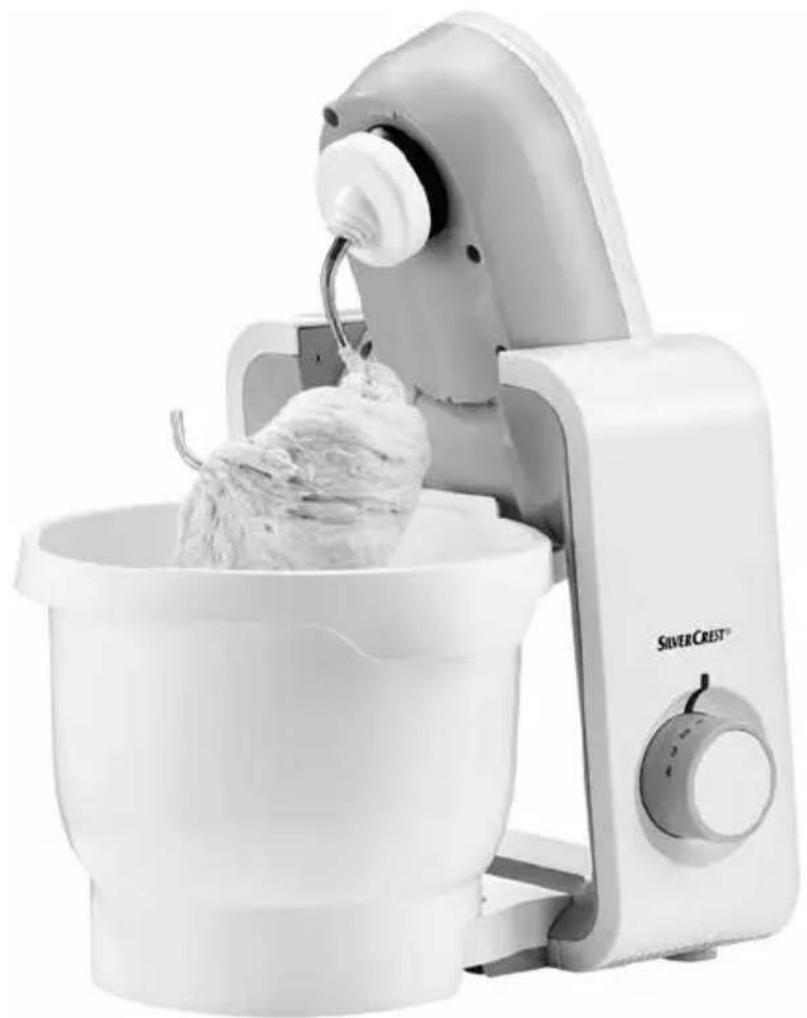
MULTI-FUNCTIONAL FOOD PROCESSOR SKM 550 B2
GB IE NI CY
MULTI-FUNCTIONAL FOOD
PROCESSOR
Operating instructions
DE AT CH
KÜCHENMASCHINE
Bedienungsanleitung
GR CY
KOYZINOMHXANH
Οδηγίες χρήσης
IAN 356370_2004
GB IE NI
CY

GB IE NI CY
Before reading, unfold both pages containing illustrations and familiarise yourself with all functions of the device.
GR CY
GB/IE/NI/CY Operating instructions Page 1

Contents
Introduction 2
Proper use ....2
Package contents....2
Appliance description 2
Safety instructions....3
First use 6
Operating positions 6
Working speeds....7
Working with the kneading hook, beater and whisk ....7
Working with the continuous shredder 8
Working with the blender....9
Cleaning and care 10
Cleaning the appliance .... 1 1
Cleaning the mixing bowl with lid, continuous shredder, lid with pusher, blender lid and all accessories 11
Cleaning the blender 11
Storage....11
Troubleshooting....12
Technical data 12
Recommended filling quantities .... 1 3
Appendix 14
Kompernass Handels GmbH warranty....14
Service 15
Importer 15
Recipes 16
Basic recipe for yeast dough 16
Basic recipe for shortcrust pastry 16
Basic recipe for sponge cake....16
Introduction
Congratulations on the purchase of your new appliance.
You have selected a high-quality product.
The operating instructions are part of this product. They contain important information on safety, use and disposal. Before using the product, familiarise yourself with all handling and safety guidelines.
Use this product only as described and only for the specified areas of application. Please also pass these operating instructions on to any future owner(s).
Proper use
This appliance is intended exclusively for processing foodstuffs in normal household quantities.
This appliance is intended solely for use in private homes. It is not suitable for commercial use!
This appliance is intended only for private use in enclosed, dry spaces. It must not be used outdoors.
The appliance may only be used with original accessories.
Package contents
Multi-functional food processor
Mixing bowl with lid
Blender with lid and measuring jug
Continuous shredder with pusher
Rotary cutting disc (thick and thin)
Rotary shredding disc (coarse and medium-fine)
Grating disc (fine)
Kneading hooks with dough deflector
Beater
Whisk
Accessories holder
2 screws (3.5 x 22 mm)
2 wall plugs (6 mm)
Operating instructions
NOTE
▶ One of the discs for the continuous shredder is pre-fitted inside the shredder on purchase!
▶ Check contents for completeness and damage immediately after unpacking.
Contact Customer Services if necessary.
Appliance description
Fold out the flaps on the front and rear covers of this operating manual.
Image E:
① Kneading hook with dough deflector
② Whisk
③ Beater
4 Blender with lid and measuring jug
⑤ Accessories holder
6 Mixing bowl with lid
7 Continuous shredder
8 Shredding disc
9 Grating disc
10 Drive shaft for continuous shredder
⑪ Rotary cutting disc
12 Lid with pusher for the continuous shredder
Image H:
13 Release button
14 Rotary switch
15 Pivoting arm
16 Drive unit
⑰ Recesses for the mixing bowl
18 Cable storage compartment
Safety instructions

The appliance should only be connected to a correctly installed and earthed mains power socket. Ensure that the mains voltage corresponds with the details on the rating plate of the appliance.
▶ Ensure that the power cable does not become wet or moist during use. Route the cable in such a way that it cannot be crushed or damaged.
- Keep the power cable away from hot surfaces.
- Do not perform any repairs to the appliance. All repairs must be performed by our Customer Service Unit or by a qualified specialist technician.
Remove the plug from the mains power socket when the appliance is being cleaned or in the event of a fault. Simply switching off the appliance is not sufficient, as the appliance is subject to mains voltage as long as the plug is connected to the mains power socket.
▶ Always remove the plug from the mains power socket when the appliance is not in use.
- Arrange for defective power plugs and/or cables to be replaced as soon as possible by a qualified technician or by our Customer Service Department to avoid the risk of injury.
- Keep the appliance and its mains cable away from children.

Never immerse the appliance in water or other liquids.
⚠ WARNING! RISK OF INJURY!
This appliance may not be used by children.
▶ Use only the original accessory parts for this appliance. Accessory parts from other manufacturers may not be suitable, and this may lead to risks!
This appliance may be used by persons with limited physical, sensory or mental capabilities or lack of experience and knowledge, provided that they are under supervision or have been told how to use the appliance safely and are aware of the potential risks.
▶ Do not allow children to play with the appliance.
▶ Never use the appliance for purposes other than those described in these instructions. Otherwise there is a risk of serious injury!
▶ Do not change accessories unless the drive unit is entirely at a standstill and the blender is unplugged from the power supply! The appliance will run on for a short time after being switched off!
▶ Never leave the appliance unattended!
Before changing any accessories or additional parts that move during operation, the appliance must be switched off and disconnected from the mains power.
▶ While the appliance is in operation, do not put anything other than the ingredients into the mixing bowl, continuous shredder or blender.
▶ Never insert any foreign objects and never reach into the feed tube or the blender with your hands to avoid the risk of injury or damage to the appliance.
▶ Warning – the blender blades are very sharp! Therefore, be very careful when removing the blender jug.
▶ Caution: The grating, cutting and shredding discs and the blender blades are very sharp!
▶ Take care when inserting and removing the grating, cutting and shredding discs, as well as during cleaning!
⚠ WARNING! RISK OF INJURY!
▶ Always disconnect the appliance from the mains power supply when fitting or removing accessory parts. This will prevent unintentional activation of the appliance.
The appliance will restart after any power outage!
The appliance must always be disconnected from the mains when left unsupervised and before assembly, disassembly or cleaning.
ATTENTION! PROPERTY DAMAGE!
▶ Do not operate the appliance without ingredients. Risk of overheating!
▶ Never fill the appliance with hot ingredients!
The blender is not suitable for chopping meat, herbs, onions, nuts, almonds or other hard foods.
These foods can only be mixed together with other ingredients, such as liquids, in the blender.
First use
1) Take all the parts out of the box and remove the packaging material and any protective wrapping or stickers.
2) Clean all components as described in the section "Cleaning and Care". Ensure that all parts are completely dry.
3) Place the appliance on a clean and level surface.
4) Secure the appliance to the surface using its four suction discs.
5) Pull the power cord out of the cable storage compartment 18.
6) Insert the plug into the mains power socket.
NOTE
▶ You can store the kneading hook ①, the whisk ②, the beater ③ and the shredding disc ⑧, the grating disc ⑨ and the rotary cutter disc ⑪ in the accessories holder ⑤.

DANGER - ELECTRIC SHOCK!
If you want to attach the accessories holder 5 to the wall using the mounting materials provided, you should make sure before you start drilling that there are no electric cables, wires or pipes running behind the wall surface where you want to drill!
7) Mark the drill holes on the wall using the accessories holder 5.
8) Use a 6 mm bit to drill holes at the pre-marked positions on the wall.
9) Push a wall plug into each hole.
10) Screw the screws into the wall plugs so that they stand proud of the wall just enough to allow you to hang the accessories holder ⑤ on them.
11) Place the accessories holder ⑤ over the screws and push it downwards so that the accessories holder ⑤ fits firmly on the screws.
Operating positions
ATTENTION! DAMAGE TO PROPERTY!
▶ Only operate the appliance with the accessories correctly inserted and in the operating positions shown in this table. NEVER operate the appliance without ingredients.
| Position Accessories | ||
| 1 | 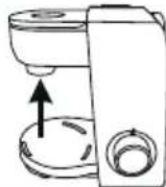 |  |
| 2 | 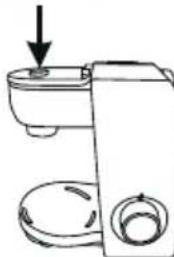 | 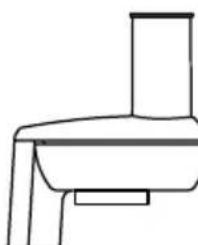 |
| 3 |  | 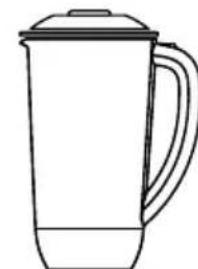 |
| 4 | 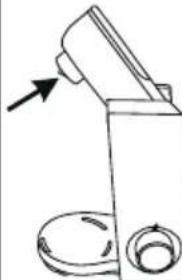 | Positioning the mixing bowl 6Using the kneading hook 1, beater 3and whisk 2 |
| 5 | 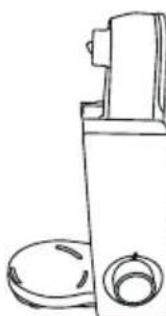 | Insertion of large quantities of foodstuffs for processing |
Working speeds
ATTENTION! PROPERTY DAMAGE!
▶ Operate the appliance with the respective accessories only at the specified speed levels. Otherwise the appliance could be damaged!
| Position | Accessories | Speed setting |
 | 1, 2, 3, 4 | |
 | 1, 2, 3, 4 | |
 | 1, 2 | |
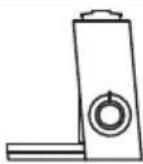 |  | 3, 4 |
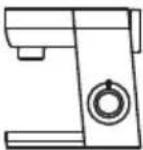 | 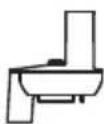 | 2, 3, 4 |
Working with the kneading hook, beater and whisk
WARNING! RISK OF INJURY!
▶ Under no circumstances should you place your hands or fingers in the mixing bowl ⑥ during operation! Danger of injury due to rotating parts!
▶ Switch from one accessory to another only when the drive unit 16 is at a complete standstill! After being switched off, the drive unit 16 will continue to run for a short time.
In cases of malfunction, switch the appliance off and remove the plug from the wall socket. This will prevent the appliance from becoming switched on again unintentionally.
NOTE
The appliance may only be used when the drive hubs not being used are fitted with their protective covers.
Proceed as follows to prepare the appliance for operation using the kneading hook ①, beater ③ and whisk ②:
1) Press down the release button ⑬ and move the pivoting arm ⑮ into operating position 4 (see the section "Operating positions") (Image A).
2) Set the mixing bowl ⑥ into place. Check that the base of the mixing bowl ⑥ is inserted fully into the recesses ⑰ provided for it on the blender.
3) If you want to use the kneading hook ①, insert the dough deflector into the drive unit ⑯ (Image D). Ensure that the hole through which the kneading hook is inserted is lying over the mounting hole on the drive unit ⑯.
4) Depending on the task to be performed, insert the kneading hook ①, beater ③ or whisk ② so that they firmly click firmly into the drive unit ⑯.
5) Add the ingredients you wish to process into the mixing bowl 6.
NOTE
▶ While kneading and/or mixing, please note that the dough in the mixing bowl ⑥ will increase in volume or will be pressed upwards by the tool. Take note of the table in the section "Recommended filling quantities".
6) Press down the release button 13 and move the pivoting arm 15 down into operating position 1 (Image A).
7) Slide the lid onto the mixing bowl ⑥ so that the catches on the pivoting arm ⑮ click into place.
8) Turn the rotary switch 14 to the required setting (Image B).
Refilling with ingredients
■ Add the ingredients through the hole in the lid during operation.
Or:
1) Switch the appliance off using the rotary switch ①.
2) Remove the lid.
3) Press down the release button 13 and move the pivoting arm 15 into operating position 5.
4) Add the ingredients.
After you have finished using your appliance
1) Switch the appliance off using the rotary switch ⑭.
2) Remove the lid.
3) Press down the release button 13 and move the pivot arm 15 into operating position 4.
4) Remove the attachment you have been using from the drive unit 16.
5) Remove the mixing bowl 6.
6) Clean the appliance (see section "Cleaning and care").
Working with the continuous shredder

WARNING! RISK OF INJURY!
▶ To avoid personal injury and damage to the appliance, never insert or place your hands or any foreign objects into the feed tube.
▶ Always use the pusher and no other implement or body part to push ingredients into the appliance. Danger of injury due to rotating parts!
▶ Switch from one accessory to another only when the drive unit 16 is at a complete standstill! After being switched off, the drive unit 16 will continue to run for a short time.
In cases of malfunction, switch the appliance off and remove the plug from the wall socket. This will prevent the appliance from becoming switched on again unintentionally.
NOTE
The appliance may only be used when the drive hubs not being utilised are fitted with their protective covers.
▶ Make sure that neither the kneading hooks ①, the whisk ②, or the beater ③ are attached to the pivot arm ⑮.
Proceed as follows to prepare the appliance for operation using the continuous shredder ⑦:
1) Press down the release button ⑬ and move the pivot arm ⑮ into operating position 4 (see the section "Operating positions").
2) Set the mixing bowl ⑥ into place. The base of the mixing bowl ⑥ must click into the recesses ⑰ on the appliance.
3) Press down the release button 13 and move the pivot arm 15 into operating position 2.
4) Remove the protective cover from the drive for the continuous shredder (Image C).
5) Insert the continuous shredder ⑦ into the hub socket (aligning the marking "6" on the continuous shredder ⑦ with the marking "▲" on the pivoting arm ⑮). Turn it in an anti-clockwise direction until the continuous shredder ⑦ clicks firmly in place (and the marking "9" on the continuous shredder ⑦ is aligned with the marking "▲" on the pivoting arm ⑮).
6) Set the drive shaft 10 into place.
7) Depending on the task you want to perform, place the cutting 11, shredding 9 or grating disc 8 onto the drive shaft 10 of the continuous shredder 7.
8) Place the lid with the pusher ⑫ onto the continuous shredder ⑦ (so that the marking "▼" on the lid ⑫ is lined up with the marking "●" on the continuous shredder ⑦) and lock the lid in (marking "▼" on the lid ⑫ is lined up with the marking "○" on the continuous shredder ⑦).
9) Turn the rotary switch 14 to the required setting.
NOTE
▶ Do not press too much food into the continuous shredder ⑦. Take note of the table in the section "Recommended filling quantities".
10) Add the ingredients through the opening in the lid with the help of the pusher.
After using your appliance
1) Switch the appliance off using the rotary switch 14.
2) Turn the continuous shredder ⑦ anti-clockwise and remove it.
3) Disassemble the continuous shredder ⑦ and clean all parts as shown in the section "Cleaning and care".
Working with the blender

WARNING! RISK OF INJURY!
▶ Allow hot fluids to cool to a lukewarm temperature (approx. 30 - 40°C) before pouring them into the blender ④.

WARNING! RISK OF INJURY FROM SHARP KNIFE/ROTATING DRIVE!
▶ Never put your hand into the attached blender ④ while it is running!
Remove the blade from the blender ④ only when it is at a complete standstill.
▶ Only use the blender ④ with the lid firmly in position.
In cases of malfunction, switch the appliance off and remove the plug from the wall socket. This will prevent the appliance from becoming switched on again unintentionally.
Proceed as follows to prepare the appliance for operation using the blender 4:
1) Press down the release button ⑬ and move the pivot arm ⑮ into operating position 3 (see the section "Operating positions").
SILVERCREST®
2) Remove the protective cover for the blender drive hub (turn so that the marking “▼” on the protective cover for the blender drive hub is in line with the marking “●” on the appliance itself) (Image F).
3) Position the blender ④ on top of the appliance (so that the marking "▼" on the blender ④ lines up with the marking "● on the appliance). Turn the blender anti-clockwise until the stop (so that the marking "▼" on the blender ④ lines up with the marking "● on the appliance itself) (Image G).
4) Add the ingredients.
-Maximum fill quantity: approx. 1 litre;
-Foaming liquids, maximum 0.5 litre;
-Ideal processing quantity for solids: 50 - 100 g.
NOTE
▶ Take note of the table in the section "Recommended filling quantities".
5) Place the lid onto the measuring jug slightly offset and then turn it until the lid clicks into place (Image I).
6) Turn the rotary switch 14 to the required setting.
Adding more ingredients
1) Switch the appliance off using the rotary switch ⑭.
2) Rotate the lid of the blender ④ a little (Image I), remove the lid and add the ingredients you want to mix
or
3) Rotate the measuring jug, which is placed in the lid of the blender ④, by 90° and remove it. Then gradually add the solid ingredients using the opening provided for this purpose.
After you have finished using your appliance
1) Switch the appliance off using the rotary switch 14.
2) Turn the blender ④ clockwise and remove it.
NOTE
▶ Ideally, you should clean the blender Ⓐ immediately after use (see the section "Cleaning and care"). This makes food residues easier to remove.
Cleaning and care

DANGER - ELECTRIC SHOCK!
▶ Before cleaning the appliance, disconnect the plug from the mains power socket! Risk of electric shock!

NEVER immerse the appliance in water or any other liquid!
ATTENTION! DAMAGE TO PROPERTY!
▶ Do not use abrasive or aggressive cleaning materials. These may damage the surfaces of your appliance.
TIPS
It is best to clean the appliance directly after use. This makes food residues easier to remove.
▶ Processing foodstuffs containing strong pigments, such as carrots, may cause staining of the plastic parts. Such stains can be removed using a little cooking oil.
Cleaning the appliance
■ Wipe the appliance with a damp cloth. For stubborn soiling use a mild detergent on the cloth. Wipe off any detergent residue using a cloth moistened with clean water. Then carefully dry the appliance.
Cleaning the mixing bowl with lid, continuous shredder, lid with pusher, blender lid and all accessories
■ Clean all accessories, the mixing bowl with its lid ⑥, the blender lid ④ and measuring jug, the protective cover for the drive hub, the continuous shredder ⑦ and its lid with the pusher ⑫ as well as the shredding disc ⑧, grating disc ⑨ and the rotary cutting disc ⑪ in warm water with a little detergent. Any residues can be removed with a washing-up brush. Rinse all parts with warm clean water and make sure that all parts are dry before re-using them.
NOTE

The accessories, the mixing bowl with its lid ⑥, the blender lid ④ and measuring jug, the protective cover for the drive hub, the continuous shredder ⑦ and its lid with the pusher ⑫ as well as the shredding disc ⑧, grating disc ⑨ and the rotary cutting disc ⑪ are also suitable for cleaning in the dishwasher.
▶ If you clean them in the dishwasher, please ensure that no plastic parts become trapped under pressure between other objects. This may cause them to become deformed.
▶ Wherever possible, place all plastic parts in the top basket of the dishwasher.
Cleaning the blender

WARNING! RISK OF INJURY!
▶ Do not handle the blender knife with your bare hands.
ATTENTION! DAMAGE TO PROPERTY!
The blender 4 is not suitable for cleaning in a dishwasher. Cleaning it in a dishwasher will cause irreparable damage to the blender 4.
■ Clean the blender ④ in warm water with a little mild detergent. Afterwards, rinse all parts with clean water so that no detergent residues remain.
In most cases, you an also achieve sufficiently hygienic cleaning directly after use in the following way:
1) Put some water containing a little detergent into the fully assembled blender ④.
2) Place the lid onto the measuring jug slightly offset and then turn it until the lid clicks into place (Image I).
3) Switch on the blender ④ for a few seconds.
4) Pour out the washing water. Any residues can be removed with a washing-up brush.
5) Afterwards, rinse out the blender ④ with plenty of clean water, so that all detergent residues are removed.
Storage
Place the mains cable in the cable storage compartment 18 when storing the appliance.
■ Store the cleaned appliance in a clean, dust-free and dry location.
Troubleshooting
If the appliance suddenly stops working:
■ The appliance has overheated and triggered the automatic safety cut-out.
- Turn the rotary switch 14 to 0.
-Remove the plug from the wall socket.
- Allow the appliance to cool for 15 minutes.
- If the appliance has not yet cooled off completely after 15 minutes, it will not start.
- Wait a further 15 minutes and try switching on again.
If the appliance does not switch itself on:
- Check that the plug is correctly connected to a wall socket.
- Check to make sure the protective cover for the drive hub for the blender ④ and for the continuous shredder ⑦ and the mixing bowl ⑥ are all positioned correctly and clicked into place.
- Check to see if the pivoting arm 15 is in the required position (see section "Operating positions").
If the steps described above do not solve the problem, then the appliance is defective. Arrange for it to be repaired by a qualified specialist technician or by the Customer Service Department.
Technical data
| Nominal voltage 220-240 V ~ (AC), 50 Hz | |
| Nominal power 550 W | |
| CO time: blender 4 | 3 minutes |
| Max. capacityMixing bowl: approx. 3.8 lBlender: approx. 1 l | |
| Protection class | II/☐ (double insulation) |
 | All of parts of this appliance which come into contact with food are food-safe. |
CO time
The CO time (continuous operation time) is the amount of time an appliance can be operated without the motor overheating and becoming damaged. After the appliance has been operated for the given CO time, switch it off until the motor has cooled down.
We recommend the following operating times when working with the continuous shredder ⑦ and mixing bowl ⑥:
After using it for 10 minutes, allow the appliance to cool down for 15 minutes.
Otherwise the appliance may overheat and activate the safety cut-out (see section "Troubleshooting").
Recommended filling quantities
| Attachment Accessories Food Amount Time Level | |||||
| Blender 4 | - Juice | 400 g ingredients +600 ml water | 30 sec. 3, 4 | ||
| - Ice cubes 110 g 10 sec. 3, 4 | |||||
| - Liquids 1000 ml 10 sec. 3, 4 | |||||
| Continuous shredder 7 | 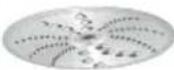 | carrots,potatoes,cucumber | 500 g *1 | 25 sec. | 2, 3,4 |
| carrots,potatoes,cucumber | 500 g *2 | 50 sec. | 2, 3,4 | ||
 | carrots,potatoes,cucumber | 500 g 25 sec. | 2, 3,4 | ||
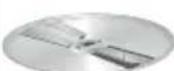 | carrots,potatoes,cucumber | 500 g *1 | 25 sec. | 2, 3,4 | |
| carrots,potatoes,cucumber | 500 g *2 | 40 sec. | 2, 3,4 | ||
| Mixing bowl 6 |  | Yeast dough | 500 g flour, 1 egg, 80 ml oil(at room temperature), 80 g sugar, 200–250 ml warm milk,25 g fresh yeast or 1 sachet of dry yeast, 1 pinch of salt *3 | 1st mixingprocess: 1 min. | 1 |
| 2nd mixing pro-cess: 10 min. | 2 | ||||
| [DWSA] | Spritz cookiepastry | 125 g butter (at room tempera-ture), 100–125 g sugar, 1 egg,1 pinch salt, 250 g flour *4 | 1st mixing pro-cess: 30 sec. | 1 | |
| 2nd mixing pro-cess: approx.10 min. | 2, 3,4 | ||||
 | Meringue | 8 egg whites | 2 - 3 min. | 4 | |
| Doublecream (30%fat content,Fridge tem-perature) | 200 ml | approx. 6 min. | 4 | ||
| 600 ml | approx. 3 min. | 4 | |||
*1: Use the coarse side of the rotary shredder disc or rotary cutting disc ⑪.
*2: Use the fine side of the rotary shredder disc or rotary cutting disc ⑪.
*3: The maximum quantity of flour is 500 g.
*4: The maximum volume for spritz cookie pastry amounts to about one and a half times to twice the quantities given in the recipe.
Appendix

Never dispose of the appli- ance in your normal domestic waste. This product is subject to the provisions of European Directive 2012/19/EU.
Dispose of the appliance via an approved disposal company or your municipal waste facility. Please comply with all applicable regulations. Please contact your waste disposal facility if you are in any doubt.

Your local community or municipal authorities can provide information on how to dispose of the worn-out product.

The packaging is made from environmentally friendly material and can be disposed of at your local recycling plant.

Dispose of the packaging in an environmentally friendly manner. Note the labelling on the packaging and separate the packaging material components for disposal if necessary. The packaging material is labelled with abbreviations (a) and numbers (b) with the following meanings: 1-7: Plastics, 20-22: Paper and cardboard, 80-98: Composites.
This appliance has a 3-year warranty valid from the date of purchase. If this product has any faults, you, the buyer, have certain statutory rights. Your statutory rights are not restricted in any way by the warranty described below.
Warranty conditions
The warranty period starts on the date of purchase. Please keep your receipt in a safe place. This will be required as proof of purchase.
If any material or manufacturing fault occurs within three years of the date of purchase of the product, we will either repair or replace the product for you or refund the purchase price (at our discretion). This warranty service requires that you present the defective appliance and the proof of purchase (receipt) within the three-year warranty period, along with a brief written description of the fault and of when it occurred.
If the defect is covered by the warranty, your product will either be repaired or replaced by us. The repair or replacement of a product does not signify the beginning of a new warranty period.
Warranty period and statutory claims for defects
The warranty period is not prolonged by repairs effected under the warranty. This also applies to replaced and repaired components. Any damage and defects present at the time of purchase must be reported immediately after unpacking. Repairs carried out after expiry of the warranty period shall be subject to a fee.
Scope of the warranty
This appliance has been manufactured in accordance with strict quality guidelines and inspected meticulously prior to delivery.
The warranty covers material faults or production faults. The warranty does not extend to product parts subject to normal wear and tear or to fragile parts which could be considered as consumable parts such as switches, batteries or parts made of glass.
The warranty does not apply if the product has been damaged, improperly used or improperly maintained. The directions in the operating instructions for the product regarding proper use of the product are to be strictly followed. Uses and actions that are discouraged in the operating instructions or which are warned against must be avoided.
This product is intended solely for private use and not for commercial purposes. The warranty shall be deemed void in cases of misuse or improper handling, use of force and modifications / repairs which have not been carried out by one of our authorised Service centres.
Warranty claim procedure
To ensure quick processing of your case, please observe the following instructions:
■ Please have the till receipt and the item number (e.g. IAN 123456_7890) available as proof of purchase.
■ You will find the item number on the type plate on the product, an engraving on the product, on the front page of the operating instructions (below left) or on the sticker on the rear or bottom of the product.
If functional or other defects occur, please contact the service department listed either by telephone or by e-mail.
■ You can return a defective product to us free of charge to the service address that will be provided to you. Ensure that you enclose the proof of purchase (till receipt) and information about what the defect is and when it occurred.

You can download these instructions along with many other manuals, product videos and installation software at www.lidl-service.com.
This QR code will take you directly to the Lidl service page (www.lidl-service.com) where you can open your operating instructions by entering the item number (IAN) 356370_2004.
Service
GB Service Great Britain
Tel.: 0800 404 7657
E-Mail: kompernass@lidl.co.uk
IE ServiceIreland
Tel.: 1890 930 034
(0,08 EUR / Min., (peak))
(0,06 EUR / Min., (off peak))
E-Mail: kompernass@lidl.ie
CY ServiceCyprus
Tel.: 8009 4409
E-Mail: kompernass@lidl.com.cy
IAN 356370_2004
Importer
Please note that the following address is not the service address. Please use the service address provided in the operating instructions.
KOMPERNASS HANDELS GMBH
BURGSTRASSE 21
44867 BOCHUM
GERMANY
www.kompernass.com
Recipes
Basic recipe for yeast dough Ingredients
500 g all-purpose flour
1 egg
80 ml cooking oil (room temperature)
80 g sugar
200-250 ml lukewarm milk
25 g fresh yeast or 1 sachet of dried yeast
1 pinch salt
Preparation
Place all ingredients in the mixing bowl 6. Knead for 1 minute at level 1 using the kneading hook ① and then for 10 minutes at level 2. Leave to rise in the mixing bowl ⑥ for 40 minutes. Form the dough into a ball.
◆ Roll out the dough on a baking tray and add toppings as required.
♦ Bake at 200° C (bottom/top heat) for 25–30 minutes.
Basic recipe for shortcrust pastry Ingredients
250 g plain flour
125 g cold butter
1 pinch salt
1 egg
150 g sugar
Preparation
Place all ingredients in the mixing bowl ⑥ and knead with the beater ② at level 3 for approx. 2–3 minutes until a crumbly dough is formed.
◆ Place this in the refrigerator for 30 minutes.
◆ Preheat oven to 200°C.
◆ Grease a springform tin and sprinkle lightly with flour.
◆ Roll out the dough between two pieces of cling film (approx. 30 cm in diameter), remove cling film and place dough into the springform tin.
♦ Bake at 200°C (bottom/top heat) for 15 minutes.
Basic recipe for sponge cake Ingredients
250 g butter
250 g sugar
1 sachet of vanilla sugar
250 g plain flour
4 eggs
1/2 sachet baking powder
Preparation
Put butter, sugar and vanilla sugar in the mixing bowl ⑥ and stir with the beater ② at level 3-4 until fluffy.
- Add the eggs one after the other and continue stirring until everything is well mixed.
- Add the flour and baking powder and mix everything into a smooth dough.
◆ Grease a rectangular cake tin (approx. 30 cm) and add the dough.
♦ Bake at 180°C (bottom/top heat) for approx. 50-60 min.
Περιεχόμενα
Εισαγωγή 18
KOMPERNASS HANDELS GMBH
BURGSTRASSE 21
44867 BOCHUM
ГЕРMANIA
www.kompernass.com
Συνταγές
KOMPERNASS HANDELS GMBH
BURGSTRASSE 21
44867 BOCHUM
DEUTSCHLAND
www.kompernass.com
Rezepte
KOMPERNASS HANDELS GMBH
BURGSTRASSE 21
44867 BOCHUM
GERMANY
www.kompernass.com

- MULTI-FUNCTIONAL FOOD PROCESSOR SKM 550 B2
- GB IE NI CY
- GR CY
- CONTENTS
- INTRODUCTION
- PROPER USE
- PACKAGE CONTENTS
- NOTE
- APPLIANCE DESCRIPTION
- SAFETY INSTRUCTIONS
- ⚠ WARNING! RISK OF INJURY
- ATTENTION! PROPERTY DAMAGE
- FIRST USE
- DANGER - ELECTRIC SHOCK
- OPERATING POSITIONS
- ATTENTION! DAMAGE TO PROPERTY
- WORKING SPEEDS
- WORKING WITH THE KNEADING HOOK, BEATER AND WHISK
- WARNING! RISK OF INJURY
- REFILLING WITH INGREDIENTS
- AFTER YOU HAVE FINISHED USING YOUR APPLIANCE
- WORKING WITH THE CONTINUOUS SHREDDER
- AFTER USING YOUR APPLIANCE
- WORKING WITH THE BLENDER
- WARNING! RISK OF INJURY FROM SHARP KNIFE/ROTATING DRIVE
- SILVERCREST®
- ADDING MORE INGREDIENTS
- CLEANING AND CARE
- TIPS
- CLEANING THE APPLIANCE
- CLEANING THE MIXING BOWL WITH LID, CONTINUOUS SHREDDER, LID WITH PUSHER, BLENDER LID AND ALL ACCESSORIES
- CLEANING THE BLENDER
- STORAGE
- TROUBLESHOOTING
- IF THE APPLIANCE SUDDENLY STOPS WORKING
- IF THE APPLIANCE DOES NOT SWITCH ITSELF ON
- TECHNICAL DATA
- CO TIME
- APPENDIX
- WARRANTY CONDITIONS
- WARRANTY PERIOD AND STATUTORY CLAIMS FOR DEFECTS
- SCOPE OF THE WARRANTY
- WARRANTY CLAIM PROCEDURE
- SERVICE
- IMPORTER
- RECIPES
- BASIC RECIPE FOR YEAST DOUGH INGREDIENTS
- PREPARATION
- BASIC RECIPE FOR SHORTCRUST PASTRY INGREDIENTS
- BASIC RECIPE FOR SPONGE CAKE INGREDIENTS
- ΠΕΡΙΕΧΌΜΕΝΑ
- ΣΥΝΤΑΓΈΣ
- KOMPERNASS HANDELS GMBH
- REZEPTE
Brand : SILVERCREST
Model : SKM 550 B2
Category : Food Processor