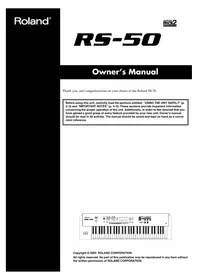
RS-50 - Synthesizer ROLAND - Free user manual and instructions
Find the device manual for free RS-50 ROLAND in PDF.


| Product Type | Synthesizer Workstation |
| Keyboard | 61 velocity-sensitive keys |
| Polyphony | 64 voices |
| Sound Sets | 2 sets (GM2/GS compatible) |
| Effects | Reverb, chorus, delay, multi-effects |
| Sequencer | 16-track MIDI sequencer |
| Arpeggiator | Built-in arpeggiator with patterns |
| Connectivity | MIDI In/Out/Thru, headphone, audio out |
| Dimensions | 1040 x 325 x 100 mm |
| Weight | 8 kg |
| Power Supply | AC 117/230V, 50/60 Hz, 18W |
| Power Consumption | 18 W |
| Included Accessories | Power cord, user manual |
| Maintenance | Clean with dry, soft cloth; avoid solvents |
| Safety | Keep away from moisture and direct sunlight |
| Spare Parts | Contact Roland authorized service |
| Repairability | Service by qualified technician recommended |
| General Information | Designed for home studios and live performance |
Frequently Asked Questions - RS-50 ROLAND
User questions about RS-50 ROLAND
0 question about this device. Answer the ones you know or ask your own.
Ask a new question about this device
Download the instructions for your Synthesizer in PDF format for free! Find your manual RS-50 - ROLAND and take your electronic device back in hand. On this page are published all the documents necessary for the use of your device. RS-50 by ROLAND.
USER MANUAL RS-50 ROLAND
Thank you, and congratulations on your choice of the Roland RS-50.
Before using this unit, carefully read the sections entitled: "USING THE UNIT SAFELY" (p. 2–3) and "IMPORTANT NOTES" (p. 4–5). These sections provide important information concerning the proper operation of the unit. Additionally, in order to feel assured that you have gained a good grasp of every feature provided by your new unit, Owner's manual should be read in its entirety. The manual should be saved and kept on hand as a convenient reference.

IMPORTANT: THE WIRES IN THIS MAINS LEAD ARE COLOURED IN ACCORDANCE WITH THE FOLLOWING CODE.
BLUE: NEUTRAL
BROWN: LIVE
As the colours of the wires in the mains lead of this apparatus may not correspond with the coloured markings identifying the terminals in your plug, proceed as follows:
The wire which is coloured BLUE must be connected to the terminal which is marked with the letter N or coloured BLACK.
The wire which is coloured BROWN must be connected to the terminal which is marked with the letter L or coloured RED.
Under no circumstances must either of the above wires be connected to the earth terminal of a three pin plug.
USING THE UNIT SAFELY
INSTRUCTIONS FOR THE PREVENTION OF FIRE, ELECTRIC SHOCK, OR INJURY TO PERSONS
About ⚠️ WARNING and ⚠️ CAUTION Notices
| ⚠ WARNING | Used for instructions intended to alert the user to the risk of death or severe injury should the unit be used improperly. |
| ⚠ CAUTION | Used for instructions intended to alert the user to the risk of injury or material damage should the unit be used improperly.* Material damage refers to damage or other adverse effects caused with respect to the home and all its furnishings, as well to domestic animals or pets. |
About the Symbols
| The △ symbol alerts the user to important instructions or warnings. The specific meaning of the symbol is determined by the design contained within the triangle. In the case of the symbol at left, it is used for general cautions, warnings, or alerts to danger. | |
| The ⊗ symbol alerts the user to items that must never be carried out (are forbidden). The specific thing that must not be done is indicated by the design contained within the circle. In the case of the symbol at left, it means that the unit must never be disassembled. | |
| The ● symbol alerts the user to things that must be carried out. The specific thing that must be done is indicated by the design contained within the circle. In the case of the symbol at left, it means that the power-cord plug must be unplugged from the outlet. |
ALWAYS OBSERVE THE FOLLOWING
WARNING
- Before using this unit, make sure to read the instructions below, and the Owner's Manual.

- Do not open (or modify in any way) the unit or its AC adaptor.

- Do not attempt to repair the unit, or replace parts within it (except when this manual provides specific instructions directing you to do so). Refer all servicing to your retailer, the nearest Roland Service Center, or an authorized Roland distributor, as listed on the "Information" page.

- Never use or store the unit in places that are:
- Subject to temperature extremes (e.g., direct sunlight in an enclosed vehicle, near a heating duct, on top of heat-generating equipment); or are
- Damp (e.g., baths, washrooms, on wet floors); or are
- Humid; or are
- Exposed to rain; or are
- Dusty; or are
- Subject to high levels of vibration.
! WARNING
• Make sure you always have the unit placed so it is level and sure to remain stable. Never place it on stands that could wobble, or on inclined surfaces.

- Be sure to use only the AC adaptor supplied with the unit. Also, make sure the line voltage at the installation matches the input voltage specified on the AC adaptor's body. Other AC adaptors may use a different polarity, or be designed for a different voltage, so their use could result in damage, malfunction, or electric shock.

- Do not excessively twist or bend the power cord, nor place heavy objects on it. Doing so can damage the cord, producing severed elements and short circuits. Damaged cords are fire and shock hazards!

- This unit, either alone or in combination with an amplifier and headphones or speakers, may be capable of producing sound levels that could cause permanent hearing loss. Do not operate for a long period of time at a high volume level, or at a level that is uncomfortable. If you experience any hearing loss or ringing in the ears, you should immediately stop using the unit, and consult an audiologist.

WARNING
- Do not allow any objects (e.g., flammable material, coins, pins); or liquids of any kind (water, soft drinks, etc.) to penetrate the unit.

- Immediately turn the power off, remove the AC adaptor from the outlet, and request servicing by your retailer, the nearest Roland Service Center, or an authorized Roland distributor, as listed on the "Information" page when:

- The AC adaptor or the power-supply cord has been damaged; or
• If smoke or unusual odor occurs - Objects have fallen into, or liquid has been spilled onto the unit; or
- The unit has been exposed to rain (or otherwise has become wet); or
- The unit does not appear to operate normally or exhibits a marked change in performance.
- In households with small children, an adult should provide supervision until the child is capable of following all the rules essential for the safe operation of the unit.

- Protect the unit from strong impact. (Do not drop it!)

- Do not force the unit's power-supply cord to share an outlet with an unreasonable number of other devices. Be especially careful when using extension cords—the total power used by all devices you have connected to the extension cord's outlet must never exceed the power rating (watts/amperes) for the extension cord. Excessive loads can cause the insulation on the cord to heat up and eventually melt through.

- Before using the unit in a foreign country, consult with your retailer, the nearest Roland Service Center, or an authorized Roland distributor, as listed on the "Information" page.

- DO NOT play a CD-ROM disc on a conventional audio CD player. The resulting sound may be of a level that could cause permanent hearing loss. Damage to speakers or other system components may result.

CAUTION
- The unit and the AC adaptor should be located so their location or position does not interfere with their proper ventilation.

• Always grasp only the output plug or the body of the AC adaptor when plugging into, or unplugging from, this unit or an outlet.

- At regular intervals, you should unplug the AC adaptor and clean it by using a dry cloth to wipe all dust and other accumulations away from its prongs. Also, disconnect the power plug from the power outlet whenever the unit is to remain unused for an extended period of time. Any accumulation of dust between the power plug and the power outlet can result in poor insulation and lead to fire.

- Try to prevent cords and cables from becoming entangled. Also, all cords and cables should be placed so they are out of the reach of children.

- Never climb on top of, nor place heavy objects on the unit.

- Never handle the AC adaptor body, or its output plugs, with wet hands when plugging into, or unplugging from, an outlet or this unit.

- Before moving the unit, disconnect the AC adaptor and all cords coming from external devices.

- Before cleaning the unit, turn off the power and unplug the AC adaptor from the outlet (p. 16).

- Whenever you suspect the possibility of lightning in your area, disconnect the AC adaptor from the outlet.

- Should you remove the ground terminal screw, make sure to put it in a safe place out of children's reach, so there is no chance of them being swallowed accidentally.

IMPORTANT NOTES
In addition to the items listed under "USING THE UNIT SAFELY" on page 2-3, please read and observe the following:
Power Supply
- Do not use this unit on the same power circuit with any device that will generate line noise (such as an electric motor or variable lighting system).
- The AC adaptor will begin to generate heat after long hours of consecutive use. This is normal, and is not a cause for concern.
- Before connecting this unit to other devices, turn off the power to all units. This will help prevent malfunctions and/or damage to speakers or other devices.
Placement
- Using the unit near power amplifiers (or other equipment containing large power transformers) may induce hum. To alleviate the problem, change the orientation of this unit; or move it farther away from the source of interference.
- This device may interfere with radio and television reception. Do not use this device in the vicinity of such receivers.
- Noise may be produced if wireless communications devices, such as cell phones, are operated in the vicinity of this unit. Such noise could occur when receiving or initiating a call, or while conversing. Should you experience such problems, you should relocate such wireless devices so they are at a greater distance from this unit, or switch them off.
- Do not expose the unit to direct sunlight, place it near devices that radiate heat, leave it inside an enclosed vehicle, or otherwise subject it to temperature extremes. Excessive heat can deform or discolor the unit.
- When moved from one location to another where the temperature and/or humidity is very different, water droplets (condensation) may form inside the unit. Damage or malfunction may result if you attempt to use the unit in this condition. Therefore, before using the unit, you must allow it to stand for several hours, until the condensation has completely evaporated.
- Do not allow objects to remain on top of the keyboard. This can be the cause of malfunction, such as keys ceasing to produce sound.
Maintenance
- For everyday cleaning wipe the unit with a soft, dry cloth or one that has been slightly dampened with water. To remove stubborn dirt, use a cloth impregnated with a mild, non-abrasive detergent. Afterwards, be sure to wipe the unit thoroughly with a soft, dry cloth.
- Never use benzine, thinners, alcohol or solvents of any kind, to avoid the possibility of discoloration and/or deformation.
Repairs and Data
- Please be aware that all data contained in the unit's memory may be lost when the unit is sent for repairs. Important data should always be backed up in another MIDI device (e.g., a sequencer), or written down on paper (when possible). During repairs, due care is taken to avoid the loss of data. However, in certain cases (such as when circuitry related to memory itself is out of order), we regret that it may not be possible to restore the data, and Roland assumes no liability concerning such loss of data.
Additional Precautions
- Never turn off the power while the display indicates "KEEP POWER ON!" If you turn off the power while this message is displayed, the internal user data will be lost.
- Please be aware that the contents of memory can be irretrievably lost as a result of a malfunction, or the improper operation of the unit. To protect yourself against the risk of loosing important data, we recommend that you periodically save a backup copy of important data you have stored in the unit's memory in another MIDI device (e.g., a sequencer).
- Unfortunately, it may be impossible to restore the contents of data that was stored in the unit's memory or in another MIDI device (e.g., a sequencer) once it has been lost. Roland Corporation assumes no liability concerning such loss of data.
- Use a reasonable amount of care when using the unit's buttons, sliders, or other controls; and when using its jacks and connectors. Rough handling can lead to malfunctions.
- Never strike or apply strong pressure to the display.
- When connecting / disconnecting all cables, grasp the connector itself—never pull on the cable. This way you will avoid causing shorts, or damage to the cable's internal elements.
-
To avoid disturbing your neighbors, try to keep the unit's volume at reasonable levels. You may prefer to use headphones, so you do not need to be concerned about those around you (especially when it is late at night).
-
When you need to transport the unit, package it in the box (including padding) that it came in, if possible. Otherwise, you will need to use equivalent packaging materials.
- Use only the specified expression pedal (EV-5; sold separately). By connecting any other expression pedals, you risk causing malfunction and/or damage to the unit.
- The explanations in this manual include illustrations that depict what should typically be shown by the display. Note, however, that your unit may incorporate a newer, enhanced version of the system (e.g., includes newer sounds), so what you actually see in the display may not always match what appears in the manual.
Handling CD-ROMs
- Unauthorized duplication, reproduction, hiring, and lending of the software included in the applied CD-ROM is prohibited.
- Avoid touching or scratching the shiny underside (encoded surface) of the disc. Damaged or dirty CD-ROM discs may not be read properly. Keep your discs clean using a commercially available CD cleaner.
* Microsoft and Windows are registered trademarks of Microsoft Corporation.
* Windows® is known officially as: "Microsoft® Windows® operating system."
* Apple and Macintosh are registered trademark of Apple Computer, Inc.
* MacOS is a trademark of Apple Computer, Inc.
* All product names mentioned in this document are trademarks or registered trademarks of their respective owners.
Contents
IMPORTANT NOTES ......4
Main Features....9
Panel descriptions ....10
Front panel....10
Rear panel....13
Getting ready....14
Reset to default factory settings (Factory Reset) ......17
Listening to the demo songs ....18
Quick Start ......19
Try out the sounds....20
Applying various effects to the sound....26
Using the Rhythm Guide ....36
Advanced Use....39
Overview of the RS-50 ....40
How the instrument is organized 40
Classification of RS-50 sound types....40
Effects 41
Number of voices 41
About memory 41
Temporary memory....41
Rewritable memory 41
Non-rewritable memory 41
Basic operation of the RS-50 42
Switching the mode....42
Patch mode....42
Performance mode 42
Editing parameters 42
Basic procedure 42
Executing a command 42
Assigning a name....43
When one page contains two or more settings.... 43
Inputting numbers and numerals 43
Selecting a part....43
Creating a patch (Patch mode) 44
How to make the patch settings....44
Changing the way that the tones are sounded (Key Mode) 44
Editing the patch parameters 44
Making settings that apply to the entire patch (Patch Common parameters) 45
Making settings for an individual tone (Patch Tone parameters) 46
Saving a patch....48
Convenient functions for patch editing (Patch Utility)....49
Copying patch parameters (PATCH PRM COPY).... 49
Initializing the parameters of a patch (PATCH INITIALIZE).... 50
Erasing a user patch you saved (PATCH REMOVE) 50
Transmitting patch/rhythm set settings from the MIDI OUT connector (XFER to MIDI) 51
Restoring the factory settings (FACTORY RESET) 51
Creating a rhythm set (Patch mode) 52
How to make the rhythm set settings....52
Editing the rhythm set parameters....52
Making settings that apply to the entire rhythm set (Rhythm Common parameters) ..... 52
Editing the settings of each rhythm tone (key) (Rhythm Tone parameters).... 52
Saving a rhythm set (User Rhythm Set) 53
Convenient functions for rhythm set editing (Rhythm Set Utility) 53
Copying effect settings from a rhythm set (RHY PRM COPY).... 53
Initializing the settings of a specific rhythm tone (RHY INITIALIZE) 54
Erasing a rhythm set you saved (RHY REMOVE) 54
Playing more than one sound simultaneously (Performance mode)......55
Choosing a part and selecting the sound....55
Selecting performance numbers....55
Editing the settings of a performance....55
Making settings that apply to the entire performance 55
Editing the effect settings of a performance....56
Editing the part settings of a performance (Part Setup).... 56
Editing the effect settings for each part of the performance (Performance Part Effect) ..... 58
Saving a performance 59
Convenient functions for performance editing (Performance Utility) 59
Copying part or effect parameters (PERFORM PRM COPY)....59
Initializing the parameters of a performance (PERFORM INIT) 60
Transmitting performance settings from the MIDI OUT connector (XFER to MIDI)...... 61
Restoring the factory settings (FACTORY RESET) 61
Using the phrase/arpeggio function 62
Creating your own arpeggio template (User Template) 62
Using chord memory function....64
Creating an original chord set (User Chord Set) 64
Adding effects 65
Turning the effect function on and off (MASTER EFFECT SWITCH) 65
The effect signal path....66
Making effects settings 67
Setting multi-effects parameters....68
Making chorus settings....86
Making reverb settings....87
Settings common to all modes (System Function) 88
How to make the system function settings....88
Functions of the system parameters 89
Settings common to the entire system (GENERAL) 89
Settings related to controllers (CONTROLLER) 89
Settings related to MIDI (MIDI)....90
Making scale tune settings for a patch (PATCH SCALE) 91
Contents
Performing with an external MIDI device....92
About MIDI 92
MIDI messages used by the RS-50 92
Using the RS-50 to play an external MIDI sound module....93
Connecting to external MIDI sound modules 93
Set the keyboard transmit channel 94
Playing the RS-50's sound generator from an external MIDI device.... 94
Connecting an external MIDI device....94
Setting the patch receive channel....95
Setting the program change receive switch....95
Selecting RS-50 sounds from an external MIDI device.... 95
Using an external MIDI controller to change the RS-50's tones.... 96
Recording to an external sequencer....96
Connecting to an external sequencer 96
Making settings before recording....96
Recording 97
Listening to the recorded performance....97
Playing together with the playback of a recorded performance.... 98
Transposing playback of performances (Master Key Shift)....98
Backing-up (saving) all RS-50 settings on your external MIDI sequencer.... 98
Using the RS-50 as a General MIDI/General MIDI 2 system-compatible sound module...... 98
Playing back General MIDI/General MIDI 2 music data 98
Performing with a computer 99
Appendix 101
Troubleshooting....102
Error Messages/Messages....105
Parameter list ....106
Original tone list....109
Patch list ....111
Rhythm set list ....116
Performance list....120
Rhythm guide list....120
Arpeggio template list ....120
Arpeggio style list....122
Multi-chord set list ....122
MIDI implementation chart ....124
Specifications....125
Index....126
Main Features
A broad range of new, high-quality sounds
Careful attention has been paid to refining the most important sounds for a live keyboard, such as piano, organ, strings, and brass. In addition, the latest cutting-edge sounds are also included.
The General MIDI score conforming to General MIDI /General MIDI 2 is also supported with high-quality sounds.
Quick and easy sound editing
To edit the sounds (patches) of the RS-50, you simply choose from the wide range of "tones" (pre-programmed instrumental sounds) and edit them. Editing is easy; you can adjust the brightness (filter), attack and decay, modulation (LFO), and effects, or layer two tones to create a rich sound.
Numerous phrase/arpeggio templates
In addition to an arpeggio function, the instrument also features "phrase templates," which allow you to activate performance techniques geared toward a particular sound as well as typical phrases simply by pressing a key---great tools for music production.
Multi-chord memory function
The Chord Memory function lets you play a registered chord by pressing a single key.
You can register different chord forms to each key, and recall multiple chords together.
Several sets of chord progressions that typically appear in one song have been registered as presets.
Compact and easy to carry
The RS-50 is compact, light, and easy to carry. It's an instrument with great sounds and professional-level functionality that can be easily carried between your bedroom and the stage or studio.
Dedicated sound editor is included
The dedicated sound editing program "RS Editor" (Mac and Windows versions on a hybrid CD-ROM) is included, allowing you to use your computer to create and rearrange sounds quickly and easily.
D Beam controller
The D Beam controller gives you control over a variety of effects, simply by moving your hand. In conjunction with the visual element, this can be a powerfully impressive addition to a live performance.
Rhythm Guide function
As an alternative to the metronome, you can use more realistic rhythm patterns as enjoyable backing for your playing.
General MIDI
General MIDI is a set of recommendations which seeks to provide a way to go beyond the limitations of proprietary designs, and standardize the MIDI capabilities of sound generating devices. Sound generating devices and music files that meet the General MIDI standard bear the General MIDI logo (music files bearing the General MIDI logo can be played back using any General MIDI sound generating unit to produce essentially the same musical performance.
General MIDI 2
The upwardly compatible General MIDI 2 (第12 recommendations pick up where the original General MIDI left off, offering enhanced expressive capabilities, and even greater compatibility. Issues that were not covered by the original General MIDI recommendations, such as how sounds are to be edited, and how effects should be handled, have now been precisely defined. Moreover, the available sounds have been expanded. General MIDI 2 compliant sound generators are capable of reliably playing back music files that carry either the General MIDI or General MIDI 2 logo.
In some cases, the conventional form of General MIDI, which does not include the new enhancements, is referred to as "General MIDI 1" as a way of distinguishing it from General MIDI 2.
Panel descriptions
Front panel

A
D BEAM CONTROLLER
You can apply a variety of effects to sounds simply by moving your hand (p. 31).
[SOLO SYNTH] (Solo Synthesizer) button
You can generate passages that sound as if you are rapidly playing the keyboard.
[ACTIVE EXPRESS] (Active Expression) button
This lets you use the D Beam controller for Active Expression.
[ASSIGNABLE] button
This lets you assign a desired function to the D Beam controller (p. 33).
B
[VOLUME] knob
Adjusts the overall volume that is output from the rear panel OUTPUT jacks and PHONES jack (p. 15).
C
MODE Section
[PATCH] button
Switches the RS-50 into the Patch mode (p. 42).
[PERFORMANCE] button
Switches the RS-50 into the Performance mode (p. 42).
[DEMO] button
Accesses the demo playback function (p. 18).
EDIT Section
[PARAM] (Parameter) button
This button accesses sound or performance settings (parameters). The settings that are accessed will depend on the selected mode (Patch/Performance) or state.
[ EFFECTS] button
This button switches effects (MFX, chorus, reverb) on/off, and accesses effect-related settings.
[UTILITY] button
In Patch/Performance modes, this button accesses various utility functions, such as those for copying data or initializing sound generator settings.
Others
[SYSTEM] button
This button accesses settings that affect the entire RS-50, such as tuning, display contrast, and MIDI message reception.
[PART SELECT] button
When this button is lit in Performance mode, you can use the direct access buttons to select a part to play from the keyboard or to edit (p. 43).
[AUDITION] button
You can repeatedly listen to an audition phrase for the currently selected patch (p. 22).

[WRITE] button
Saves patch/performance settings or system settings.
[-/+OCT] (Octave Shift) / [-/+TRANSPOSE] (Transpose) buttons
- /+OCT: These buttons adjust the pitch of the keyboard in octave steps (maximum +/-3 octaves) (p. 30).
- /+TRANSPOSE: Pressing either of these buttons while holding down [SHIFT] allows you to transpose the keyboard in semitone steps (-5–+6) (p. 31).
[PHRASE/ARPEGGIO] button
Switches phrase/arpeggio function on/off. To make settings for the phrase/arpeggio, make this button light and then press [PARAM] (p. 23).
[CHORD MEMORY] button
Switches chord memory function on/off. To make settings for the chord memory function, get this button to light and then press [PARAM] (p. 24).
D
DISPLAY
This displays information regarding the operation you are performing.
E
[RHYTHM GUIDE] button
Switches Rhythm guide function on/off (p. 36).
F
[NUMERIC] button
When this button is lit, the direct access buttons will function as a numeric keypad. This lets you directly input or specify a numerical value for the displayed item (patch number or parameter).
[0]-[9] (DIRECT ACCESS buttons)
In Patch mode, use these buttons to switch between the sound categories printed on the panel (p. 20). In Performance mode, use these buttons to directly select a performance by specifying the lowest digit of the performance number (p. 55). However, if the [NUMERIC] or [PART SELECT] buttons are lit, the [0]-[9] buttons will change to the corresponding function.
G
[VALUE -/+] buttons
Use these buttons to switch the number of an item (patch, performance, various parameters, etc.) in the display, or to increase/decrease a value. While one of these buttons is first held down and the other is pressed, the value then changes rapidly. Or, if you hold down [SHIFT] while using these buttons, the value will change in larger steps.
Panel descriptions
PAGE/CURSOR [ ]
JUMP [ ]/[] buttons
PAGE/CURSOR: Use these buttons to move between pages or to move the cursor (p. 42).
JUMP: In grouped pages, you can hold down [SHIFT] and use these buttons to move between groups (p. 42).
While one of these buttons is first held down and the other is pressed, the page or cursor then moves rapidly.
[EXIT] button
Press this button to return to the main screen of a mode, or when you want to cancel the current operation.
[ENTER] button
Use this button to finalize a value or execute an operation.
[SHIFT] button
By holding down this button and pressing another button, you can access a secondary function of that button (printed below the button in square brackets).
[TAP TEMPO] button
Adjusts the tempo according to the timing at which you tap this button. You can also use VALUE [-]/[+] to adjust the tempo if desired (p. 37).
H
PATCH MODIFY section
[DESTINATION TONE] button
Selects either UPPER or LOWER as the tone to be edited.
Patch Modify select button
Selects whether the three knobs located at the right will edit the envelope or the balance and LFO.
- If envelope is selected (ENV indicator lit)
[ATTACK] knob
Adjusts the attack speed of the sound (p. 28).
[DECAY] knob
Adjusts the speed at which the sound decays while you continue holding the key (p. 28).
[RELEASE] knob
Adjusts the length of the release after you take your finger off the key (p. 28).
- If balance/LFO is selected (BALANCE/LFO indicator lit)
[BALANCE] knob
Adjusts the LOWER and UPPER volume balance (p. 26).
[LFO RATE] knob
Adjusts the rate of the LFO effect, such as vibrato (p. 27).
[LFO DEPTH] knob
Adjusts the depth of the LFO effect, such as vibrato (p. 27).
[KEY MODE] button
Switches the Key Modes (p. 44).
[FILTER LFO] button
This determines whether the LFO changes the filter cutoff frequency (ON), or the pitch (OFF) (p. 27).
[CUTOFF] knob
Changes the tone's Cutoff Frequency value (p. 29).
[RESONANCE] knob
Changes the tone's Resonance value (p. 29).
|
Pitch bend/Modulation lever
This allows you to control pitch bend or apply vibrato (p. 29).
Rear panel
![graph TD A[" meters"] --> B[" MIDL BUY IN "] B --> C[" CONTROL HOLD "] C --> D[" OUTPUT LIMIRED PHONES "] D --> E[" DC IN "] E --> F[" POWER ON & OFF "] F --> G[" USE ISLAND ALL OR SUB-TV STARTOR ONLY "] style A fill:#f9f,stroke:#333 style B fill:#ccf,stroke:#333 style C fill:#cfc,stroke:#333 style…](/content/2026/06/1346059/images/94d5678424a33d980e78db7b8fbd925c27d72d63fc662791355b25bba38cb073.jpg)
A
MIDI connectors (IN, OUT)
These connectors can be connected to other MIDI devices to receive and transmit MIDI messages (p. 92). Use MIDI cables (sold separately) to make connections.
IN: MIDI messages from an external device are received at this connector.
OUT: MIDI messages are transmitted from this connector to an external device.
B
PEDAL jacks
CONTROL:
An optional expression pedal (such as the EV-5), pedal switch (the optional DP-2 or DP-8), or foot switch (the optional BOSS FS-5U) can be connected to this jack (p. 14).
HOLD:
An optional pedal switch (such as the DP-2 or DP-8) or foot switch (the optional BOSS FS-5U) can be connected to this jack for use as a hold pedal (p. 14).

If you are using DP-8, set the DP-8's function switch to "Switch."
C
OUTPUT jacks
These jacks output stereo (L/R) audio signals to your amp or mixer. For mono output, use the L jack.
D
PHONES jack
This is the jack for connecting headphones (sold separately) (p. 14).
E
Cord hook
To prevent the inadvertent disruption of power to your unit (should the plug be pulled out accidentally), and to avoid applying undue stress to the DC IN jack, anchor the power cord using the cord hook, as shown in the illustration.

F
DC IN jack
Connect the AC adaptor here (p. 14). Be sure to use only the supplied AC adaptor.
G
POWER switch
This switch turns the power on/off (p. 15).
H
Ground terminal
Depending on the circumstances of a particular setup, you may experience a discomforting sensation, or perceive that the surface feels gritty to the touch when you touch this device, microphones connected to it, or the metal portions of other objects, such as guitars. This is due to an infinitesimal electrical charge, which is absolutely harmless. However, if you are concerned about this, connect the ground terminal (see figure) with an external ground. When the unit is grounded, a slight hum may occur, depending on the particulars of your installation. If you are unsure of the connection method, contact the nearest Roland Service Center, or an authorized Roland distributor, as listed on the "Information" page.
Unsuitable places for connection
• Water pipes (may result in shock or electrocution)
• Gas pipes (may result in fire or explosion)
- Telephone-line ground or lightning rod (may be dangerous in the event of lightning)
Getting ready
Connecting the RS-50 to external equipment
The RS-50 does not contain an amp or speaker. You'll need to listen to it through powered monitors, a mixer and connected monitors, a stereo system, or through headphones.
Connect as follows when using the RS-50 as a stand-alone device.
![graph TD A["Stereo headphones"] --> B["AC adaptor"] B --> C["to AC power outlet"] D["Expression pedal (EV-5) or pedal switch"] --> E["Pedal switch (DP-2, DP-8) or foot switch (BOSS FS-5U)"] E --> F["Audio cable"] F --> G["Mixer etc."] F --> H["Monitor speakers (powered)"] F --> I["Audio set etc."] J…](/content/2026/06/1346059/images/62995d855137f7cd33a6c0dee4b6eff823ed4cc7587242c22797d46379e881de.jpg)
- Before starting the connection procedure, make sure that the power to all devices has been turned off.
- Connect the supplied AC adaptor to the RS-50, and then plug its other end into a power outlet.
NOTE
• To prevent malfunction and/or damage to speakers or other devices, always turn down the volume, and turn off the power on all devices before making any connections.
• To prevent the inadvertent disruption of power to your unit (should the plug be pulled out accidentally), and to avoid applying undue stress to the AC adaptor jack, anchor the power cord using the cord hook, as shown in the illustration.
- Use only the specified expression pedal (EV-5; sold separately). By connecting any other expression pedals, you risk causing malfunction and/or damage to the unit.
• Audio cables, MIDI cables, and stereo headphones are not included. You will need to purchase these items from your dealer.
MEMO
-
In order to take full advantage of the RS-50's performance, we recommend using a stereo amp/speaker system, If you are using a mono system, make you connections to the OUTPUT jack L (MONO).
• CONTROL PEDAL jack can also accommodate pedal switches. -
Connect the RS-50 and the external device as shown in the figure.
Use audio cables to connect audio equipment, such as an amp or speakers. If you are using headphones, plug them into the PHONES jack. Connect pedal switches or expression pedals as necessary.
If you want to know how to make the connections with another external device, refer to:
Using the RS-50 to play an external MIDI sound module (p. 93)
Playing the RS-50's sound generator from an external MIDI device (p. 94)
Recording to an external sequencer (p. 96)
Turning on/off the power
Turning on the power
-
Before turning on the RS-50's power, check the following:
-
Are all devices connected properly?
- Are the volume controls of the RS-50 and any other connected equipment turned to the minimum position?
-
Is the AC adapter correctly connected to the RS-50?
-
Press the power switch on the rear panel of the RS-50 to turn on the power.

- Turn on the power of the connected audio devices.
- Play the RS-50's keyboard and gradually raise the volume controls of the RS-50, or the connected audio equipment to an appropriate volume level.

NOTE
Once the connections have been completed (p. 14), turn on power to your various devices in the order specified. By turning on devices in the wrong order, you risk causing malfunction and/or damage to speakers and other devices.
NOTE
This unit is equipped with a protection circuit. A brief interval (a few seconds) after power up is required before the unit will operate normally.
NOTE
Turn up the RS-50's volume level carefully. Excessive volume can damage connected audio devices, your hearing, or annoy your neighbors.
Getting ready
Turning off the power
-
Before you turn off the power, make sure of the following points.
-
Are the volume controls of the RS-50 and the other connected equipment turned to the minimum position?
-
Have you saved the sounds or other data you've created? (p. 48, p. 53, p. 59)
-
Turn off the power for all connected audio devices.
-
Turn off the RS-50's power switch.
Adjusting the display contrast (LCD CONTRAST)
The characters in the display may be difficult to view immediately after turning on the power or after extended use; this may also be because of where and how the display is situated. Follow the steps below to adjust the display's contrast.
![graph TD A["VOLUME"] --> B["MODE"] B --> C["MODE PERFORM DEMO"] C --> D["PATH PERFORM DEMO"] D --> E["PART SELECT AUCTION"] E --> F["WRITE -DET +DET"] F --> G["+TRANSPOSE 1"] G --> H["END"] H --> I["+VALUE"] I --> J["EXIT"] J --> K["ENTER"] K --> L["+VALUE"] L --> M["START"] M --> N["+VALUE"] N -->…](/content/2026/06/1346059/images/9c3d91303ae220f997e6747fbeccdde9d6b68dd7fc4ceb2500a0368434c966be.jpg)

- Press [SYSTEM] so it is lit.
- Use PAGE/CURSOR [ ] to select "LCD Contrast."

- Use VALUE [-]/[+] to set the value (1-10).
MEMO
The LCD CONTRAST
setting is saved
automatically, and is
retained even while the power is off.
Reset to default factory settings (Factory Reset)
This restores all data in the RS-50 to the factory-set condition (Factory Reset).
![graph TD A["VOLUME"] --> B["MODE"] B --> C["EDIT"] C --> D["THIRAGE/ARPEGOID"] D --> E["RHYTHM GUIDE"] E --> F["1"] E --> G["2"] E --> H["3"] E --> I["4, 5"] style A fill:#f9f,stroke:#333 style B fill:#ccf,stroke:#333 style C fill:#cfc,stroke:#333 style D fill:#fcc,stroke:#333 style E fill:#cff,stro…](/content/2026/06/1346059/images/bf0845d74a12b0259186e68443839511d8e5dcd7cb671c1fef9bca49d1700289.jpg)


Be sure not to turn off the power while Factory Reset is being performed. If the power is turned off or interrupted while data is being written to memory, the internal data may become corrupted.
- Press [PATCH] so it is lit and you are in Patch mode.
- Press [UTILITY] so it is lit.
- Use PAGE/CURSOR [ ] to select "5:FACTORY RESET."

- Press [ENTER].

- Press [ENTER] again to execute the Factory Reset.
When the display indicates "COMPLETED," the factory reset operation has been completed.

If there is important data you've created that's stored in the RS-50's internal memory, you must note that all such data will be discarded when a Factory Reset is performed. If you want to keep the existing data, save it using an external sequencer (p. 98).

Press [EXIT] to cancel the factory reset.

Factory Reset can be executed not only from Patch mode, but also from the Utility functions of Performance mode (p. 61).
Listening to the demo songs
The RS-50 contains Demo songs.
Here's how to listen to the demo songs and experience the superb sounds and effects of the RS-50.
![graph TD A["MODE"] --> B["PATCH PERFORM DEMO"] A --> C["PARAM EFFECTS UTILITY"] A --> D["PHRASS/ARFENGID"] A --> E["CHORD MEMORY"] F["VOLUME"] --> G["SINEMA"] F --> H["OUTPUT"] I["EXIT"] --> J["INPUT"] K["EXIT"] --> L["FORM"] K --> M["KNO & OIO"] K --> N["OUTAB"] K --> O["ORCH"] K --> P["WORLD"] K -…](/content/2026/06/1346059/images/a8dd4f8ce9595994aa65dc3911723654e0cab3eb7e09b727d00a6e79a68aec74.jpg)
2


13
- Press [DEMO].
<< DEMO >> [ENT] All Songs
- Use VALUE [-]/[+] to select the song that you wish to hear.
If you want to listen to all of the songs played in order, select "All Songs."
- Press [ENTER] to start demo song playback.
The selected song is played back repeatedly.
When "All Songs" is selected, the entire selection of song is played back repeatedly.
- Press [EXIT] to stop playback.
To return the keyboard to performance mode, press [EXIT] again or press [DEMO] again so the indicator goes out.

- Unsaved settings changes may be lost when you start Demo Play. Carry out the write procedure as required to save such data before listening to the demo songs (p. 48, p. 53, p. 59).
- All rights reserved. Unauthorized use of this material for purposes other than private, personal enjoyment is a violation of applicable laws.
- No data for the music that is played will be output from MIDI OUT.

While the demo songs are playing back, playing the keyboard will not produce sound.
Demo songs list
The RS-50 comes with 3 demos.
“T”
© Roland Corporation
Short, sweet
© Roland Corporation
Catch Me
© Roland Corporation
Quick Start
Try out the sounds
Selecting a patch
On the RS-50, the sounds you use for normal playing are called patches. A patch is analogous to an instrument held by a member of an orchestra.
Each patch consists of two tones; an upper tone and lower tone. You can assign the two tones to their own region of the keyboard (p. 44), and make independent settings for each tone (p. 46).
■ Selecting a patch by category
The RS-50 allows you to rapidly select and call up a patch by specifying the type of patch. All the patches are organized into 10 category groups.
| Button | Category Group | Category Contents | |
| [1] | PIANO (Pf) | PNO AC.PIANO Acoustic Piano | |
| EP EL.PIANO Electric Piano | |||
| [2] KBD & ORGAN (Ky) | KEY KEYBOARDS Other Keyboards (Clav, Harpsichord, etc.) | ||
| BEL BELL Bell, Bell Pad | |||
| MLT MALLET Mallet | |||
| ORG ORGAN Electric and Church Organ | |||
| ACD ACCORDION Accordion | |||
| HRM HARMONICA Harmonica, Blues Harp | |||
| [3] GUITAR (Gt) | AGT | AC.GUITAR Acoustic Guitar | |
| EGT EL.GUITAR Electric Guitar | |||
| DGT DIST.GUITAR Distortion Guitar | |||
| [4] ORCH (Oc) | STR | STRINGS Strings | |
| ORC ORCHESTRA Orchestra Ensemble | |||
| HIT HIT&STAB Orchestra Hit, Hit | |||
| WND WIND Winds (Oboe, Clarinet, etc.) | |||
| FLT FLUTE Flute, Piccolo | |||
| [5] WORLD (Wr) | PLK | PLUCKED Plucked (Harp, etc.) | |
| ETH ETHNIC Other Ethnic | |||
| FRT FRETTEF Fretted Inst (Mandolin, etc.) | |||
| [6] BRASS (Br) | BRS | AC.BRASS Acoustic Brass | |
| SBR SYNTH.BRASS Synth Brass | |||
| SAX SAX Sax | |||
| [7] VOCAL & PAD (Vo) | BPD BRIGHT PAD Bright Pad Synth | ||
| SPD SOFT PAD Soft Pad Synth | |||
| VOX VOX Vox, Choir | |||
| [8] SYNTH (Sy) | HLD | HARD LEAD Hard Synth Lead | |
| SLD SOFT LEAD Soft Synth Lead | |||
| TEK TECHNO SYNTH Techno Synth | |||
| PLS PULSATING Pulsating Synth | |||
| FX SYNTH FX Synth FX (Noise, etc.) | |||
| SYN OTHER SYNTH Poly Synth | |||
| [9] BASS (Bs) | BS | BASS Acoustic & Electric Bass | |
| SBS SYNTH.BASS Synth Bass | |||
| [0] RHYTHM & SFX (Rh) | DRM DRUMS Rhythm Set | ||
| PRC PERCUSSION Percussion | |||
| SFX SOUND FX Sound FX | |||
| BTS BEAT&GROOVE Beat and Groove | |||
| CMB COMBINATION Other Patches | |||

- Press [PATCH] so it is lit and you are in Patch mode.
- Use [0]–[9] to specify the category group of the patch you want to select.
- Use VALUE [-]/[+] to select sounds within the category group.
Selecting sounds by category
In Patch mode, the direct access buttons [0]–[9] act as category select buttons. Since the patches you select for [0]–[9] (each category) will be remembered even when the power is turned off, you can select ten favorite patches from the panel and recall those patches instantly just by pressing [0]–[9].

MEMO
The rhythm sets are included in [0] (p. 22).
MEMO
You can turn [NUMERIC] on and use the [0]-[9] numeric keys to input a patch number directly. Press [ENTER] to finalize the number (p. 43).

Patch list (p. 111)
Try out the sounds
■ Selecting patches while listening to phrases (Patch Audition)
Without playing keyboards, you can audition the sounds using phrases that have been pre-programmed to be suitable for the character of each patch.

- Press [AUDITION].
The currently selected patch will begin sounding.
-
Select patches as described in Selecting a patch by category (p. 20).
-
Press [AUDITION] once again or press [EXIT] to stop the patch audition.
Selecting a rhythm set
The RS-50 provides rhythm sets that let you play different percussion instrument sounds or special effects from each key.

- Press [PATCH] so it is lit and you are in Patch mode.
- Press [0] to select "RHYTHM & SFX."
- Use VALUE [-]/[+] to switch rhythm sets.
There are patches other than rhythm sets in the Rhythm & SFX category group. Rhythm sets have "KIT," "MENU," or "GM2" in their names.
![graph TD A["UPPER"] --> B["ENV"] C["LOWER"] --> D["BALANCE/LFD"] E["DESTINATION"] --> F["ATTACK"] G["DELAY"] --> H["RATE"] I["RELEASE"] --> J["LFD"] K["CUTOFF"] --> L["RESONANCE"] M["KEY MODE"] --> N["8 SINGLE"] O["SPLIT"] --> P["9 DUAL"] Q["DEPTH"] --> R["0"] S["CUTOFF"] --> T["0"] U["RESONANCE"] -…](/content/2026/06/1346059/images/ee59664c44d17d147616c2ef6131a93717e9a194f0baefe92f4a655d4f8fc90e.jpg)
MEMO
With [0] pressed, you can turn [NUMERIC] on and use the [0]-[9] buttons to input a rhythm set number directly. Press [ENTER] to finalize the number (p. 43).

Rhythm set list (p. 116)
An arpeggio is a “broken chord” where each note is played separately. The Phrase/Arpeggio function lets you produce an arpeggio simply by holding down a chord, and is also a convenient way to input a performance into an external sequencer.
Since the RS-50 provides arpeggio templates that are suitable for the various sounds you select, you can produce appropriate arpeggios immediately.
You can also select Phrase Template which allows you to play arpeggio using only one key, without pressing a chord (p. 62).

- In Patch mode, press [1] to select piano sounds.
- Press [PHRASE/ARPEGGIO] so it is lit.
- Play the keyboard.
The instrument will play an arpeggio, according to the notes you have just voiced.
■ Changing the way in which the arpeggios are sounded
Then, try to change the way in which the arpeggios are sounded.
Settings that specify how arpeggios are sounded are provided as templates.
By switching templates, you can change the way in which the arpeggios are sounded.
- Press [0]–[9].


It switches to an arpeggio template suitable for the selected sound.
Pressing [0] will select the user template.


User template (p. 24)

Arpeggio template list (p.
120)
Try out the sounds
- When you press [EXIT], the Arpeggio function will remain on and you will return to the previous screen.
If you want to select an arpeggio template once again, press [PHRASE/ARPEGGIO] so it goes out, and then press [PHRASE/ARPEGGIO] once again so it is lit.
The selected arpeggio template remains stored in memory even while the power is off.
- To finish playing arpeggios, press [PHRASE/ARPEGGIO] again so the indicator goes out.
User template
The user template lets you set the various arpeggio template parameters as desired. On the RS-50 you can store eight different user templates. With [0] pressed, use VALUE [-]/[+] to select other user templates you have created.
For further information on how to make user templates, refer to Creating your own arpeggio template (User Template) (p. 62).
Playing a chord at the touch of a finger (Multi-chord Memory)
Chord Memory is a function that lets you play a chord simply by touching just one key to which a "Chord Form" has been registered. On the RS-50 you can register different chord forms to each key and save these chord forms as sets (multi-chord memory) and recall them when desired. If you save typical chord progressions as user chord sets, these are a convenient way to get immediate results, such as when inputting music into the external sequencer.


Twelve chord forms have been assigned from C to B.
- Press [CHORD MEMORY] so it is lit.

The Chord Memory function will be turned on, and the chord set name will be displayed.
- Play the keyboard.
The chord of the specified structure will sound according to the note name of the key you played.
■ Switching chord sets
Then, try to change chord sets.

- Use VALUE [-]/[+] to select a Chord Set.
The user chord set appears after the preset chord sets.
- When you press [EXIT], the Multi-chord Memory function will remain on and you will return to the previous screen.
If you want to select a chord set once again, press [CHORD MEMORY] so it goes out, and then press [CHORD MEMORY] once again so it is lit. The selected chord set remains stored in memory even while the power is off.
- To turn off the Multi-chord Memory function, press [CHORD MEMORY] again so the indicator goes out.
You can create your own chord set by saving chords you have created. For further information, refer to Creating an original chord set (User Chord Set) (p. 64).

Multi-chord set list (p. 122)
Applying various effects to the sound
Changing the tone with the knobs (Patch Modify)
Using the five panel knobs, you can change the tone in real time.
On the RS-50, each patch consists of two tones; the upper tone and the lower tone (p. 40). The way that the tones are sounded (Single/Split/Dual) is saved in each patch, and you can change this using [KEY MODE] (p. 44).
■ Selecting the tone that you want to modify (DESTINATION TONE)
Use the [DESTINATION TONE] button to specify whether you will modify the upper or the lower tone.


• UPPER lit: Only the upper tone will be modified
- LOWER lit: Only the lower tone will be modified
- Both lit: Both the upper and lower tones will be modified
■ Adjusting the volume balance of the two tones
You can use a knob to control the volume balance of the upper tone and lower tone.
MEMO
Patch Modify applies +/- adjustments relative to the settings of the original tone. Depending on the tone you select, this may not always produce a noticeable change in the sound.
MEMO
For a rhythm set, Patch Modify applies to the set as a whole.


- Press the patch modify select button to make the BALANCE/LFO indicator light.
- Turn the [BALANCE] knob.
Turning this to the right increases the volume of the upper tone, while turning it to the left increases that of the lower tone.
MEMO
You cannot change the volume balance for rhythm sets.
■ Vibrato and Wah effects (LFO)
The LFO, short for “low frequency oscillator,” makes changes to the sound in periodic fashion. Changing the pitch with the LFO produces the “vibrato effect,” and by changing the filter cutoff frequency with the LFO, you get what is called the “wah effect.”

- Press the patch modify select button to make the BALANCE/LFO indicator light.
- Make sure that [FILTER LFO] is off (unlit).
When [FILTER LFO] is off, the two LFO knobs will adjust the vibrato effect.
- Turn the [LFO DEPTH] knob.
Turning this to the right (clockwise) increases the depth of the undulating sound, while turning it to the left (counterclockwise) makes the undulation shallower and milder.
- Turn the [LFO RATE] knob.
Turning this to the right (clockwise) increases the speed of the undulating sound, while turning it to the left (counterclockwise) slows the undulation down.
- Press [FILTER LFO] so it is lit.
When [FILTER LFO] is on, the two LFO knobs will adjust the wah effect.
- Turn the [LFO DEPTH] knob.
Turning this to the right (clockwise) increases the depth of the undulating sound, while turning it to the left (counterclockwise) makes the undulation shallower and milder.
- Turn the [LFO RATE] knob.
Turning this to the right (clockwise) increases the speed of the undulating sound, while turning it to the left (counterclockwise) slows the undulation down.
MEMO
If it is on (lit), press
[FILTER LFO] once again so it goes out.
MEMO
[FILTER LFO] does not take effect on a rhythm set.
Applying various effects to the sound
■ Changing the sound's volume (ENVELOPE)
The volume continues to change from the time a key is pressed to when it is released.
A: Attack Time: The time from when the keyboard is pressed until the maximum tonal change is reached.
D: Delay Time: The time from when the maximum tonal change is reached until the Sustain Level is reached.
S: Sustain level: Volume that is sustained while you hold down the key
R: Release Time: The time from when the keyboard is released until the sound disappears.
Use the ENVELOPE 3 knobs to change the A, D, and R times.
* Each tone has its own Sustain level, which cannot be modified.

MEMO
The “envelope” is the curve that shows how the volume of an instrument changes from the beginning of a note to its end. Each musical instrument has a distinctive type of envelope, but this can change depending on how the instrument is played, and is an important factor in the character of the sound. For example, when a trumpet is blown strongly it produces a piercing sound with a rapid attack, but when blown softly it produces a gentler and more muted attack.

-
Press the patch modify select button so the ENV indicator is lit.
-
Turn the [ATTACK] knob.
Turning this to the right (clockwise) increases the time it takes for the sound to rise, while turning it to the left (counterclockwise) shortens this time.
- Turn the [DECAY] knob.
Turning this to the right increases the time it takes for the sound to reach the Sustain Level, while turning it to the left shortens this time.
- Turn the [RELEASE] knob.
Turning this to the right increases the time it takes for the sound to disappear, while turning it to the left shortens this time.
■ Changing the brightness of the sound and adding special qualities (CUTOFF/RESONANCE)
The sound generator section of the RS-50 contains a filter that can cut or boost specific frequency regions of the sound. [CUTOFF] specifies the frequency (cutoff frequency) at which the filter will begin to modify the sound, and [RESONANCE] boosts the region near the cutoff frequency to add a distinctive character to the sound.

- Turn the [CUTOFF] knob.
Turning this to the right (clockwise) brightens the sound, while turning it to the left (counterclockwise) makes the sound seem darker.
- Turn the [RESONANCE] knob.
Turning this to the right makes the sound more distinctive, while turning it to the left reduces these characteristics.
Using a lever to modify the sound
■ Changing the sound's pitch in real time (Pitch Bend Lever)
While playing the keyboard, move the lever to the left to lower the pitch, or to the right to raise the pitch.

Pitch Bend
You can set up to a two-octave pitch bend range, adjustable in semitones.
For further information, refer to Pitch Bend Range (p. 47).
■ Adding a vibrato effect to the sound (Modulation Lever)
While playing the keyboard, move the lever away from you to add a vibrato effect.

Modulation
When you want to use the Modulation Lever to add effects other than vibrato, refer to Mod (Modulation Assign) (p. 89).
MEMO
Independently for each patch, you can specify whether the effect is to be applied to the upper or the lower tone (p. 46).
Applying various effects to the sound
Using a pedal to modify the sound
With an external pedal, such as an expression pedal (the optional EV-5), pedal switch (the optional DP-2/8) or foot switch (the optional BOSS FS-5U) connected to the CONTROL PEDAL jack, you can then use the pedal to make changes in the tone. Just as with the Modulation lever, you can select the function affected when the pedal is pressed. For further information, refer to Pedal (Pedal Control Assign) (p. 90).

* When you want to apply the effect that causes the sounds being played to continue playing (called the "hold effect"), connect a pedal switch (the optional DP-2/8) or foot switch (the optional BOSS FS-5U) to the PEDAL HOLD jack.
Shifting the keyboard range in one-octave steps (Octave Shift)
Octave Shift is a function that shifts the pitch of the keyboard in one-octave units. This lets you shift the range of the keyboard to the most convenient range for playing. This is also convenient in a situation below.
When playing sounds outside the keyboard's range
While the RS-50 features a 61-key keyboard, with some songs you may want to play notes even higher or lower. Also, when playing a Rhythm Set etc., there may be percussion instruments that the RS-50's keyboard is not able to access. In such cases, you can use the Transpose function to play these notes.

- Use OCT [-]/[+] to transpose the pitch.
You can transpose the pitch of the keyboard in 1 octave units (-3- +3 octaves)

If you are using DP-8, set the DP-8's function switch to "Switch."
Moving the key range in half-steps (TRANSPOSE)
This function moves the key range in half-step units. This is convenient in situations like the ones below.
When matching the vocalist's register
Sometimes melodies may extend outside a vocalist's register. Therefore, if you want to perform with the song changed to a different key, you can play the song in a new key while still using the same fingering as before.
When changing from a difficult key to one that is easy to play
You can use simple fingerings to play difficult songs that include numerous sharps or flats.
When playing with the tone of a transposed instrument
You can play the patches of a transposed instrument just as it is written in the score.

- While holding down [SHIFT], press OCT [-]/[+].
You can transpose your performance over a range of -5–+6 semitones.
Waving your hand over the D Beam (D Beam Controller)
The D Beam controller can be used simply by waving your hand over it. Of the three buttons, one is assigned to the solo synth, another to the active expression effect, and the third button can be assigned to the function of your choice. You can also create effects in which the sound changes instantaneously, in a way that would not be possible by operating a knob or the bender lever.

- Press [SOLO SYNTH], [ACTIVE EXPRESS], or [ASSIGNABLE] so it is lit.
If you select [ASSIGNABLE], the function assigned to the D Beam controller will appear in the display.
<< D BEAM >> MODULATION

- While playing the keyboard to produce sound, place your hand over the D Beam, and slowly move it up and down.
An effect will be applied to the sound, depending on the function that is assigned to the D Beam controller.
- To turn off the D Beam controller, press the button once again to turn it off.
The usable range of the D Beam controller
The following diagram shows the usable range of the D Beam controller. Waving your hand outside this range will produce no effect.

Either [SOLO SYNTH], [ACTIVE EXPRESS], or [ASSIGNABLE] will blink while the D Beam controller is responding. When your hand leaves the usable range of the D Beam controller, the button will stop blinking, and will remain lit.
* The sensitivity of the D Beam controller will change depending on the amount of light in the vicinity of the unit. If it does not function as you expect, adjust the sensitivity as appropriate for the brightness of your location (p. 34). Also, the usable range of the D Beam controller will be considerably reduced when used under strong, direct sunlight. Please be aware of this when using the D Beam controller outside.
■ Effects that can be used with the D Beam controller
SOLO SYNTH
This lets you generate passages that sound as if you are playing the keyboard rapidly. For example, if you hold down the four notes C, D, E, and G with your right hand and move your left hand over the D Beam, a phrase such as “C D E G C D E G ...” will be repeated.
For example, you can use the D Beam to play a synth solo on a synth-lead type sound, and hold chords using a long, sustaining sound to create the impression of harp playing.
The chord memory function also provides a chord set that contain notes of a specific scale and is designed for use with this function (16. Scale Set).
ACTIVE EXPRESS (Active Expression)
You can use the D Beam as an Active Expression function. If you assign the Active Expression function to a patch that consists of dual tones (a patch whose [KEYMODE] is set to "DUAL"), you can create tonal changes for greater expressiveness, and to emphasize the forte passages in your playing. The patches suitable for active expression have "AEx" in their names.
MEMO
The explanations of each type in this manual are for when the D Beam Polarity is set to "NORMAL" (p. 34).
NOTE
With [SOLO SYNTH] switched on, pressing the keyboard alone will not result in the production of sound. You need to move your hand over the D Beam while you hold down keys.
MEMO
If the Active Expression Switch (p. 46) of the patch is turned OFF, this will be conventional expression (volume change).
NOTE
You will hear no sound if you play the keyboard when Active Expression has set the volume to 0.
ASSIGNABLE
Specifies a function controlled by the D Beam controller.
Use VALUE [-]/[+] and select one of the following functions.
| Value | Tx CC# Function/Parameter Changed |
| MODULATION | CC01 Vibrato Effect |
| PORTA TIME CC05 Portamento Time (p. 47) | |
| VOLUME CC07 Level | |
| BALANCE CC08 The volume balance of LOWER and UP-PER tones (p. 45) | |
| PAN CC10 Pan (p. 46) | |
| EXPRESSION CC11 Level | |
| PORTAMENTO CC65 Portamento Switch (p. 47) | |
| SOSTENUTO CC66 Holds the sound of the key being pressed | |
| SOFT CC67 Softens the Tone | |
| RESONANCE CC71 Tone Filter Resonance (p. 48) | |
| RELEASE TIME CC72 Tone Envelope Release Time (p. 48) | |
| ATTACK TIME CC73 Tone Envelope Attack Time (p. 48) | |
| CUTOFF CC74 Tone Filter Cutoff (p. 47) | |
| DECAY TIME | CC75 Tone Envelope Decay Time (p. 48) |
| LFO RATE | CC76 Tone LFO Rate (p. 47) |
| LFO DEPTH | CC77 Tone LFO Depth (p. 47) |
| LFO DELAY | CC78 Tone LFO Delay (p. 47) |
| CHO SEND LEVEL | CC93 Chorus Send Level (p. 46) |
| REV SEND LEVEL | CC91 Reverb Send Level (p. 46) |
| MFX PARAMETER1 | CC12 The parameter specified by Multi-effect Control 1 (p. 69) |
| MFX PARAMETER2 | CC13 The parameter specified by Multi-effect Control 2 (p. 69) |
| AFTERTOUCH | ---- |
| BEND UP ---- Pitch bend effect (center → up) | |
| BEND DOWN | ---- Pitch bend effect (center → down) |
In Patch mode, the effect will apply to the patch. In Performance mode, the effect will apply to the patch assigned to the current part. Use [DESTINATION TONE] to specify the tone (p. 26).
"TxCC#" refers to the controller number of control change messages sent from the MIDI OUT connector when the D Beam controller is operated. When set to AFTERTOUCH, Channel Aftertouch messages are sent. Set to AFTERTOUCH mainly when you want to control an external sound generator with Aftertouch messages.
Receiving these control change messages from the MIDI IN connector produces the same effect as moving the D Beam controller.
* When set to MFX PARAMETER1 or MFX PARAMETER2, be sure to note the following.
- When the multi-effects Type is set to 01: STEREO EQ (p. 69) or 42: LOFI (p. 83), Level is changed regardless of whether MFX PARAMETER1 or MFX PARAMETER2 is selected.
- When the multi-effects Type is set to 23: 2V PCH SHIFT (p. 77), or 24: FB PCH SHIFT (p. 78), the two parameters are changed simultaneously.
* When making the LFO RATE, LFO DEPTH or LFO DELAY settings, the effect achieved differs depending on whether [FILTER LFO] is on or off. When [FILTER LFO] is off, the LFO alters the pitch (vibrato effect). When [FILTER LFO] is on, the LFO changes the Filter Cutoff frequency (wah effect).
Applying various effects to the sound
■ Adjusting the sensitivity of the D Beam controllers (D BEAM SENS)
The sensitivity of the D Beam controller will change depending on the amount of light in the vicinity of the unit. If it does not function as you expect, adjust the sensitivity as appropriate for the brightness of your location. Increasing this value will raise the sensitivity.
- Press [SOLO SYNTH], [ACTIVE EXPRESS], or [ASSIGNABLE] so it is lit.
- Press [PARAM].
- Use PAGE/CURSOR [ ]/[] to select "Sens."

- Use VALUE [-]/[+] to adjust the sensitivity.
Value: 1–10
As you increase this value, the D Beam controller will become more sensitive. Normally, you will leave it at a setting of "5."
- Press [EXIT] or [PARAM] to return to the previous screen.
■ Changing the polarity of the change (D BEAM POLARITY)
By changing the D Beam Polarity setting, you can invert the direction of the effect that is applied.
- Press [SOLO SYNTH], [ACTIVE EXPRESS], or [ASSIGNABLE] so it is lit.
- Press [PARAM].
- Use PAGE/CURSOR [ ] to select "Polarity."

- Use VALUE [-]/[+] to change the polarity.
Value: NORMAL, REVERSE
- Press [EXIT] or [PARAM] to return to the previous screen.
MEMO
This setting remains stored in memory even while the power is off.
MEMO
This setting remains stored in memory even while the power is off.
Using the RS-50 effects
Three separate effects are always available in the RS-50. You can independently edit each effect's settings.
Multi-Effects
The RS-50 contains 47 different multi-effects, including distortion and a rotary speaker simulation.
Chorus
Chorus adds a sense of depth and spaciousness to patches.
Reverb
Reverb adds ambient characteristics that emulate the sound of various physical spaces, such as concert halls or auditoriums.
■ Turning effects on and off (Master Effects Switch)
![graph LR A["VOLUME"] --> B["MODE"] B --> C["EDT"] C --> D["TIME"] D --> E["TIME TEMP"] subgraph MODE B1["PATCH PERFORM DEMO"] --> B2["PARAM EFFECTS VOLTY"] B3["SYT EM SELECT AUCTION"] --> B4["WRITE - 27 +DCT"] B5["+ MISO-SE +1"] --> B6["SHORD MEMORY"] end subgraph EDT C1["PARAM EFFECTS VOLTY"] --> C…](/content/2026/06/1346059/images/a5a40188c4673dfa42b4650fcdb147c2504ea4e57e136907f0804f9b12cf61a9.jpg)

Turn on a switch to enable the corresponding effect (multi-effect, chorus, reverb). You may wish to turn these switches off when you want to listen to the unprocessed sound while editing it, or if you are using an external effects processor and do not want to use the built-in effects.
When shipped from the factory, all three effects are set to ON.
-
Press [PATCH] so it is lit and you are in Patch mode.
-
Press [EFFECTS] so it is lit.
The on/off state of each effect (multi-effect, chorus, reverb) will be displayed.

- Use PAGE/CURSOR [ ]/[] to select the effect type, and use VALUE [-]/[+] to turn to switch it on/off.
When you play the keyboard in this state, the effects whose master effect switch is turned on will be applied to the patches.
When the cursor is located at "Rev" and you want to edit the effect settings, press PAGE/CURSOR[▶] and the effect parameters will be displayed one after another starting with the multi-effect (MFX) parameters.
For further information, refer to Making effects settings (p. 67).
MEMO
The On/Off settings for each Effect affect the RS-50 as a whole (i.e., are system settings). This setting remains stored in memory even while the power is off.
Using the Rhythm Guide
The Rhythm Guide provides an easy way to produce full-fledged rhythm patterns as easily as using a metronome.
The Rhythm Guide can be used only in Performance mode, which lets you perform on the keyboard while using drum sounds simultaneously.

Performance mode (p. 55)
Selecting a rhythm pattern
![graph TD A["VOLUME"] --> B["MODE"] B --> C["EDIT"] C --> D["PHASE/APPEND"] D --> E["CHORD MEMORY"] E --> F["~ VALUE +"] F --> G["EXIT"] H["RHYTH MOUNT"] --> I["WIMES"] I --> J["RHYTH 5.0V"] J --> K["PANO"] K --> L["KND & LINS"] L --> M["GUTAR"] M --> N["ORCH"] N --> O["World"] O --> P["BRASS"] P -->…](/content/2026/06/1346059/images/3a0f09de47035f3909b7a722aade2ff7099763a8ce7809843e1aa44dd29fe9df.jpg)

- Press [PERFORM] so it is lit and you are in Performance mode.
- Press [RHYTHM GUIDE] so it is lit.
The rhythm pattern will begin playing.
- With the display showing the pattern name, use VALUE [-]/[+] to select a rhythm pattern.
- Once again press [RHYTHM GUIDE] so it is unlit; the rhythm pattern will stop.
To select a rhythm pattern without playing it
- Press [PERFORM] so it is lit and you are in Performance mode.
- Press [RHYTHM GUIDE] while holding down [SHIFT].
- Use VALUE [-]/[+] to select a rhythm set.
- Press [ENTER] to play back the rhythm pattern.

If you want to change the part that you will play along with the rhythm guide, press [PART SELECT] so it is lit; then use [1]-[9] to select the part (category) that you want to play from the keyboard.
Switching sounds


- Play the rhythm pattern.
- Press [PART SELECT] so it is lit.
- Press [0] so it is lit to select a rhythm set.
- Use VALUE [-]/[+] to select the rhythm set that you want to use with the rhythm pattern.
Change the tempo


When you have selected a rhythm pattern, you can specify the tempo.
- Press [TAP TEMPO] so it is lit.
The current tempo of the pattern will be displayed.

- Use VALUE [-] to adjust the tempo.
- Press [EXIT] to return to the previous screen.
Pressing a button to modify the tempo (Tap Tempo)
You can modify the tempo by the rate at which you press [TAP TEMPO].
- At quarter-note beats, press [TAP TEMPO] three or more times at the desired tempo.
The tempo will be calculated automatically, and set to the interval at which you pressed the button.
The button lets you check the tempo and time signature. During the playback of the rhythm pattern, the button will blink in red on the first beat of each measure, and in green on subsequent beats.
MEMO
BPM stands for Beats Per Minute, and indicates the number of quarter notes that occur in one minute.
Memo
Advanced Use
Overview of the RS-50
How the instrument is organized
Basic structure
Broadly speaking, the RS-50 consists of a keyboard controller section and a sound generator section.
![graph TD A["Sound Generator Section"] --> B["Keyboard Controller Section (controllers such as keyboard, pitch bend lever, etc.)"]](/content/2026/06/1346059/images/675ac8895d967538ee42ce65a24fb42fad97a27434107c013dbf6a0bcebb900e.jpg)
Keyboard controller section
This section consists of the keyboard, pitch bend/modulation lever, panel knobs and buttons, and D Beam controller. It also includes any pedals that may be connected to the rear panel. The performance information generated when you do things such as press/release a key, or depress the hold pedal is sent to the sound generator section and/or an external sound device.
Sound generator section
According to the performance data it receives from the Keyboard Controller section, this section generates and outputs sounds from the output jacks and headphone jack. Up to sixteen parts can each play different sounds (patches), with a simultaneous total of up to 64 notes. This section also includes three effects (reverb, chorus, multi-effects).
Classification of RS-50 sound types
When using the RS-50, you will notice that a variety of different categories come into play when working with sounds. What follows is a simple explanation of each sound category.
Tones
On the RS-50, the tones are the smallest unit of sound. However, it is not possible to play a tone by itself. The patch is the unit of sound that can be played, and the tones are the basic building blocks that make up the patch.
Patch
![graph LR A["Upper Tone Lower Tone"]](/content/2026/06/1346059/images/61d2805d3875452590f3905ef66f5033b5760bab74c82e4ec076dfbe02d2e084.jpg)
Patches
On the RS-50, the sounds you use for normal playing (e.g., from the keyboard) are called patches. A patch is analogous to an instrument held by a member of an orchestra. Each patch consists of two tones; an upper tone and lower tone. You can assign the two tones to their own region of the keyboard, or play them together to produce a richer sound (p. 44). Detailed settings can be made independently for each of the two tones (p. 46).
Rhythm sets
Rhythm sets are groups consisting of various percussion instrument sounds. Since percussion instruments generally do not play melodies, there is no need for a percussion instrument sound to be able to play a scale on the keyboard. It is, however, more important that as many percussion instruments as possible be available to you at the same time. Therefore, each key (note number) of a rhythm set will produce a different percussion instrument.

Performance
A performance is a set of sounds containing patches for the sixteen parts used when you use the Rhythm Guide or when using the RS-50 with an external MIDI device.
Part
A part corresponds to a single musician in a band or orchestra. Since the RS-50 has sixteen parts, you can use sixteen different patches or rhythm sets to play as many as sixteen performances simultaneously.
Current part
The "current part" is the part that will sound when you play the keyboard.
The RS-50 has a total of sixteen parts. For details on how to switch the current part, refer to “Selecting a part” (p. 43).
Effects
Effects let you apply a variety of special effects to patches or rhythm sets. You can use three effects simultaneously: chorus (which adds depth and spaciousness), reverb (which adds reverberation), multi-effects (each selectable from 47 types such as equalizer, overdrive, and delay).
Number of voices
Maximum polyphony
The sound generator of the RS-50 can produce up to 64 notes (voices) simultaneously. If data is received that attempts to play more than this number of voices, notes will be dropped out. When the number of requested voices exceeds 64, the RS-50 will give priority to the later-played notes, and will consecutively turn off the sounding notes. An appropriate Voice Reserve setting should be made with respect to any Parts that you cannot do without (p. 56).

Some Tones use more than two voices to create a single Tone. For the number of voices used by each Tone, refer to “Original tone list” (p. 109).
About memory
Patch and performance settings are stored in what is referred to as memory. There are three kinds of memory: temporary, rewritable, and non-rewritable.
![graph TD A["RS-50"] --> B["Presets"] A --> C["User"] B --> D["Patches: 128"] B --> E["Rhythm Sets: 2"] B --> F["Performances: 8"] B --> G["Arpeggio Templates: 8"] B --> H["Arpeggio Styles: 8"] B --> I["Multichord Sets: 8"] C --> J["SaveSelect Select"] D --> K["Temporary Area"] E --> K F --> K G -->…](/content/2026/06/1346059/images/f700ed76b9e1e87e347680d48f9ab17e4137bb80c75a4cfec473b7aaddaa5ab6.jpg)

All data stored in the user area can be stored on an external sequencer (p. 98). If you load the saved data back into the RS-50, all settings of the entire RS-50 will return to the state by they were in when the data was saved.
Temporary memory
Temporary area
This is the area that holds the data for the patch or the like that you've selected using the panel buttons.
When you play the keyboard or play back an external sequence, sound is produced based on data in the temporary area. When you edit a patch, you do not directly modify the data in memory; rather, you call up the data into the temporary area, and edit it there.
Settings in the temporary area are temporary, and will be lost when the power is turned off or when you select another setting. To keep the settings you have modified, you must write them into rewritable memory.
Rewritable memory
System memory
System memory stores system parameter settings that determine how the RS-50 functions.
User memory
User memory is where you normally store the data you need. USER memory contains 128 patches, 2 rhythm sets, 8 performances.
Non-rewritable memory
Preset memory
Data in Preset memory cannot be rewritten. However, you can call up settings from preset memory into the temporary area, modify them and then store the modified data in rewritable memory.
Basic operation of the RS-50
Switching the mode
The RS-50 has numerous functions, and these functions are organized into the following two modes. The operation of the sound generator and the screens that appear in the display will differ depending on the mode.
Patch mode
You will use this mode when you want to play the keyboard in a band or a solo performance.
When you turn on the power, the RS-50 will start up in Patch mode. From other modes, you can press [PATCH] to enter this mode.
All of the three built-in effects processors are used only for the patch you are playing.
In Patch mode you can select and edit patches, and create user patches.
PATCH PF01:RS Grand
Performance mode
In this mode, you can simultaneously play different sounds on sixteen parts. After turning on the power, press [PERFORM] to select this mode. The three built-in effects processors are used in common by the patches of each part.
You can create up to 8 user performances.
PERFORM POI:POP 1
Editing parameters
On the RS-50, the numerous parameters are organized into pages so that they can be displayed efficiently within the display. To select a parameter, move to the appropriate page. The underlined area (cursor) in the screen will blink to indicate that you may edit that value.

Basic procedure
The basic procedure for editing a parameter is to use PAGE/CURSOR [ ] [ ] to move between pages, and use VALUE [-]/[+] to modify the value in the page.

In cases where there are numerous pages, pages of related content are organized into groups. When editing such parameters, you can hold down [SHIFT] and use PAGE/CURSOR [ ][ ] to jump to the previous or next group.
MEMO
When using PAGE/CURSOR [ ] or VALUE [-]/[+], you can make the value change more rapidly by holding down one button while you press the other button. Or, if you hold down [SHIFT] while using these buttons, the value will change in larger steps, or you can move between sound category groups (p. 55).
MEMO
PAGE/CURSOR [ ] will move you more rapidly between pages if you continue holding them down. In some cases, you will automatically stop at the beginning of the group.
Executing a command
If [ENT] is indicated in the upper right of the display, you can execute the command you have selected by pressing [ENTER].

In the example above, pressing [ENTER] executes the Patch Parameter copy (p. 49).
Assigning a name
As an exception, in pages where you can assign a name to a patch or performance, pressing PAGE/CURSOR [ ] will not immediately take you to the next page. The cursor will move to each character in the name, and when the cursor is located at the last character, pressing PAGE/CURSOR [ ] again will take you to the next page. The same applies when moving in the opposite direction.
In pages where you can assign a name, you can hold down [SHIFT] and use PAGE/CURSOR [] to jump to the previous or next page.
![graph TD A["PATCHI COMMON\nName: RS Grand"] --> B["Press [▶"].] B --> C["PATCHI COMMON\nName: RS Grand"] C --> D["Press [▶"].] D --> E["PATCHI COMMON\nName: RS Grand ..."] E --> F["Press [▶"].] F --> G["PATCHI COMMON\nCategory: [PF"]PNG]](/content/2026/06/1346059/images/55714183d4d621ac27d3345f0c0f7409e07f8e7a48daff5a885b5c251a9107d5.jpg)
By pressing VALUE [-]/[+], you can change the character at the cursor position.
Value: amp; space, A - Z, a - z, 0 - 9,!``# % amp; '() * + , - . / :; lt; = gt; amp; ? @ [¥] ^ -
When inputting characters, you can perform the following operations conveniently by pressing [0]–[9].
[0]: Deletes all the characters.
[1]: Displays a “.” at the cursor position.
[2]: Displays a space at the cursor position.
[3]: Displays an "A" at the cursor position.
[4]: Displays an "a" at the cursor position.
[5]: Displays a "0" at the cursor position.
[6]: Converts capital and lowercase characters.
[7]: Inserts a space at the cursor position.
[9]: (no assignment)
[8]: Deletes a character at the cursor position and moves the following characters to the left.
When one page contains two or more settings
In cases such as the page shown below, use PAGE/CURSOR [ ] to switch between (A), (B) and (C), and use VALUE [-]/[+] to modify the value of each parameter.
Example: Master effect switch

Inputting numbers and numerals
On the RS-50, you can select a patch/performance number or input a numerical value by using VALUE [-]/[+], or by using [NUMERIC] [0]-[9] to input the value directly.
- Press [NUMERIC] so it is lit.
The indication will blink. - Use the [0]–[9] buttons to input the number.
- Pressing [0] while holding down [SHIFT] switches the +/- status.
- If you want to finalize the value, press [ENTER].
The value will be finalized, and [NUMERIC] will go out. If you decide to cancel, press [EXIT].
Selecting a part
On the RS-50 you can use [0]–[9] to select parts.
There are a total of sixteen parts. Select parts as follows.
-
Press [PERFORM] so it is lit and you are in Performance mode.
-
Press [PART SELECT] so it is lit.
-
Press the button as described below.
Part 1 [1] Part 11 [SHIFT] and [1] Part 2 [2] Part 12 [SHIFT] and [2] Part 3 [3] Part 13 [SHIFT] and [3] Part 4 [4] Part 14 [SHIFT] and [4] Part 5 [5] Part 15 [SHIFT] and [5] Part 6 [6] Part 16 [SHIFT] and [6] Part 7 [7] Part 8 [8] Part 9 [9] Part 10 [0]
Creating a patch (Patch mode)
To create a sound (patch) of your own on the RS-50, you will start with one of the existing patches (preset patches), and edit it to create the desired sound. A sound you create can be saved as one of 128 user patches.
MEMO
Each item that can be set is known as a parameter. When you change the values of parameters, you are doing what is referred to as Editing.
MEMO
Settings for the internal effects (reverb, chorus, multi-effect) are also saved as part of the patch settings. For details on editing the effect settings, refer to "Adding effects" (p. 65).
This chapter explains the procedures used in creating patches, and the functions of the patch parameters.
MEMO
If you want to edit the sound of a rhythm set, refer to "Creating a rhythm set (Patch mode)" (p. 52).
Three tips for editing patches
Select a patch that is similar to the sound you wish to create (p. 20).
It's hard to create a new sound that's exactly what you want if you just select a patch and modify its parameters at random. It makes sense to start with a patch whose sound is related to what you have in mind.
Choose the tone that you want to edit (p. 26)
You can assign a different instrumental sound to each of the two tones (upper/lower) in a patch, and edit them independently. Use [DESTINATION TONE] to choose the tone to be edited; UPPER only, LOWER only, or both.
MEMO
If the [KEY MODE] is SINGLE, the upper tone will always sound. If you want to hear only the lower tone while you edit, switch [KEY MODE] to DUAL, and turn the PATCH MODIFY section's BALANCE knob all the way to the "L" position.
Turn Effects off (p. 65).
Since the RS-50's effects have such a profound impact on its sounds, turn them off to listen to the sound itself so you can better evaluate the changes you're making. Since you will hear the original sound of the patch itself when the effects are turned off, the results of your modifications will be easier to hear. Actually, sometimes just changing effects settings can give you the sound you want.
How to make the patch settings
Including the parameters that can be controlled from the panel, a patch consists of the following types of settings.
- Settings used by the entire patch (Patch Common)
- Settings for each patch (Patch Tone)
Collectively, these are referred to as "patch parameters."
Changing the way that the tones are sounded (Key Mode)

On the RS-50, the sound of each patch is produced by combining two tones; the upper tone and the lower tone (p. 40). The [KEY MODE] setting lets you specify how these two tones will be sounded when you play the keyboard.
MEMO
This setting is also valid when using Patch Audition.
SINGLE: The upper tone is played by all keys on the keyboard.
SPLIT: The keyboard will be split; the lower range plays the lower tone, and the upper range plays the upper tone.
MEMO
You can change the point at which the lower and upper tones are divided (p. 45).
DUAL: The upper and lower tones are layered.
Editing the patch parameters
- Press [PATCH] so it is lit and you are in Patch mode.
- Select a patch.
- Press [PARAM] so it is lit.
Now you can edit the patch parameters.
Use PAGE/CURSOR [ ] to select the parameter that you want to edit.
[Non-Text]
"Selecting patch parameters" (p. 45)
![ROLAND RS-50 - [Non-Text] - 1](/content/2026/06/1346059/images/90d971b6dd53ef68865540689187558c6cb401dee0edbd6f3ae090f14912054a.jpg)
- If there is an editable parameter, the cursor (underline) will blink below its value. Now you can use VALUE [-]/[+] to modify the value of that patch parameter.

Selecting patch parameters
![graph TD A["PATCH COMMON"] --> B["PATCHI COMMON Name: BS Grand"] B --> C["PATCHI COMMON Category: [Pf"]PNQ] C --> D["PATCHI COMMON Active Exp Sw: OFE"] D --> E["PATCHITONE (both) No.0008:Piano 2"] E --> F["PATCHITONE (both) Tone Pan: Q"] F --> G["PATCHITONE (both) Release Time: +22"] G --> H["[SHIFT…](/content/2026/06/1346059/images/262125e4e30638f53e46f9b5d718d990f17f6d4a536d21034c632dd531b50403.jpg)
Making settings that apply to the entire patch (Patch Common parameters)
You can edit the following Patch Common parameters.
Name (Patch Name)
You can change the name of the patch.
Here you can use PAGE/CURSOR [ ] to move through the characters, and use VALUE [-]/[+] to finalize the desired character.
Value: space, A-Z, a-z, 0-9,!" # \$ % & ' ( ) * + , - . / : ; <= > ? @ [¥] ^ _ ^ { | }

"Assigning a name" (p. 43)
Category
Changes the category of the patch.

"Selecting a patch by category" (p. 20)
Key Mode
Specifies how the two tones will be sounded when you play the keyboard. The indication in the display is linked to the [KEY MODE] setting of the panel (p. 44).
VALUE
SINGLE: The upper tone is played by all keys on the keyboard.
SPLIT: The keyboard will be split; the lower range plays the lower tone, and the upper range plays the upper tone.
* You can change the point at which the lower and upper tones are divided (p. 45).
DUAL: The upper and lower tones are layered.

"Changing the way that the tones are sounded (Key Mode)" (p. 44)
Patch Level
Specifies the volume of the patch.
VALUE: 0-127
Tone Balance
Adjusts the volume balance of LOWER and UPPER. This is linked with the operation of the [BALANCE] knob of the panel (p. 26).
VALUE: -64 (LOWER)- +63 (UPPER)
Split Point
When "Key Mode" (p. 45) is set to SPLIT, this specifies the transition point between the upper and lower tones.
VALUE: A0-C8
Creating a patch (Patch mode)
Split Arp
When "Key Mode" (p. 45) is set to SPLIT, this specifies which tone will be affected by the arpeggiator.
VALUE
UPPER: The upper tone will be played by the arpeggiator.
LOWER: The lower tone will be played by the arpeggiator.
BOTH: Both the upper and lower tone will be played by the arpeggiator.
Solo Switch
If this setting is turned on, only one note will be sounded even if you hold down two or more keys.
This setting is effective when you want to solo using a patch for a monophonic instrument such as sax or flute.
VALUE
OFF: Chords can be played.
ON: The sound will play in solo mode (monophonically).
UPPER: Solo mode will be used only for the upper tone.
LOWER: Solo mode will be used only for the lower tone.
ModulationDst (Modulation Destination)
Specifies the tone that will be affected by modulation (p. 29).
VALUE
UPPER: Modulation will apply only to the upper tone.
LOWER: Modulation will apply only to the lower tone.
BOTH: Modulation will apply to both the upper and lower tone.
PitchBend Dst (Pitch Bend Destination)
Specifies the tone that will be affected by pitch bend (p. 29).
VALUE
UPPER: Pitch bend will apply only to the upper tone.
LOWER: Pitch bend will apply only to the lower tone.
BOTH: Pitch bend will apply to both the upper and lower tone.
Modify Dest (Modify Destination)
Specifies the tone that will be affected by adjustments to the sound using the panel knobs.
This is linked with the panel's [DESTINATION TONE] setting (p. 26).
VALUE
UPPER: Modification will apply only to the upper tone.
LOWER: Modification will apply only to the lower tone.
BOTH: Modification will apply to both the upper and lower tone.
ExpressionDst (Expression Destination)
Specifies the tone that will be affected by expression.
VALUE
UPPER: Expression will apply only to the upper tone.
LOWER: Expression will apply only to the lower tone.
BOTH: Expression will apply to both the upper and lower tone.
Active Exp Sw (Active Expression Switch)
Turns the active expression effect (p. 32) on/off.
VALUE
OFF: Expression will affect only the volume, as usual.
ON: An active expression effect using both tones will be produced.
Making settings for an individual tone (Patch Tone parameters)
You can set parameters that apply to each individual tone. The panel [DESTINATION TONE] switch specifies which tone(s) (upper/lower) will be affected by your settings (p. 26).
MEMO
If "BOTH" is selected, the value of the tone parameter assigned to the upper tone is displayed. If you change this value, the parameters for both Upper and Lower tones will be changed to the same values.
No. (Original Tone Number)
For each of the two tones (upper and lower) that make up a patch, you can select one of 640 different original tones.
VALUE: 0001-0640
Tone Pan
Sets the pan position (stereo location) of each tone when stereo output is used. With an increase in the value for L, more of the sound will be heard as coming from the left side. Similarly, more of the sound will originate at the right if the value of R is increased.
VALUE: L64-0-63R
- Specifying the amount of signal sent to the effect
MFX Switch (Multi-Effects Switch)
Switches the multi-effects on/bypass (off) for each tone.
VALUE: BYPASS, ON
Chorus Send Lvl (Chorus Send Level)
Sets the level of the signal sent to chorus for each tone.
VALUE: 0–127
Reverb Send Lvl (Reverb Send Level)
Sets the level of the signal sent to reverb for each tone.
VALUE: 0–127
Coarse Tune
Adjusts the pitch of the tone's sound up or down in semitone steps (+/-4 octaves).
VALUE: -48-+48
Fine Tune
Adjusts the pitch of the tone's sound up or down in one-cent steps (+/- 50 cents).
VALUE: -50—+50
MEMO
One cent is 1/100th of a semitone.
- Creating smooth pitch transitions (Portamento)
Portamento is an effect that creates a smooth transition in pitch between one key and the next. When the Solo Switch parameter is "ON," you can apply portamento to create an effect similar to a violinist changing the pitch smoothly by sliding their finger along the fingerboard.
Portamento Sw (Portamento Switch)
Specifies whether the portamento effect will be applied (ON) or not (OFF).
VALUE: OFF, ON
Portamento Time
When portamento is used, this specifies the time over which the pitch will change. Higher settings will cause the pitch change to the next note to take more time.
VALUE: 0–127
- Varying the sounds by the force of your keyboard playing
The force with which you play a key is expressed by a velocity value. When you play a note strongly, a high velocity value will be transmitted, producing a louder volume or a different tone. By editing the Velo Sens Depth and Velo Sens Ofs values, you can adjust the relationship between your keyboard playing strength and the loudness of the notes that are produced.
Velo Sens Depth (Velocity Sensitivity Depth)
Higher settings of this value allow you to produce notes in a wider range of loudness even with small changes in your playing strength. Lower settings of this value will mean that even if you vary your playing strength significantly, the notes that are sounded will not have a wide range of loudness.
VALUE: -64—+63
Velo Sens Ofs (Velocity Sensitivity Offset)
With higher settings of this value, loud sounds can be produced even when you play the keys softly. With lower settings of this value, the sounds will be soft even if you play strongly.
VALUE: -64—+63
Pitch Bend Range
Specifies the amount of pitch change in semitone units (maximum of two octaves) that will occur when you operate the pitch bend lever. The amount of change will be the same whether the lever is moved to left or right.
VALUE: 0–24
- Adjusting the modulation of the sound (LFO)
The LFO (Low Frequency Oscillator) applies cyclic change to the sound. It can be applied to the pitch, cutoff frequency, or volume to produce vibrato, wah, or tremolo effects. The original tones of the RS-50 contain LFO settings appropriate for each sound. You can edit the patches to adjust the speed of the LFO effect, and the depth to which it will affect the pitch and filter cutoff frequency.

You cannot simultaneously adjust the pitch depth and cutoff depth. Nor can you adjust the depth of the LFO effect on volume. If you need to use an adjustable tremolo effect, use the TREMOLO multi-effect (p. 84).
Filter LFO (Filter LFO Switch)
Selects whether the LFO Depth setting will control the depth of cutoff frequency modulation or of pitch modulation. This is linked with the operation of the [FILTER LFO] switch of the panel (p. 27).
VALUE
OFF (PCH): You can adjust the depth of the LFO's effect on pitch.
ON (FLT): You can adjust the depth of the LFO's effect on the filter cutoff frequency.
LFO Rate
Adjusts the modulation rate, or speed, of the LFO. This is linked with the operation of the [LFO RATE] knob of the panel (p. 27).
VALUE: -64-+63
LFO Depth
Specifies the depth of LFO. Normally, the depth of the LFO's effect on pitch will change. If Filter LFO is ON, the LFO's effect on cutoff frequency will change. This is linked with the operation of the [LFO DEPTH] knob of the panel (p. 27).
VALUE: -64-+63
LFO Delay
Adjusts the time from when the key is pressed (or released) until the LFO begins to be applied (or the duration that the effect continues).
VALUE: -64-+63
Adjusting the brightness or hardness of the sound (Filter)
The sound generator section of the RS-50 contains a filter that can cut or boost specific frequency regions of the sound. Each original tone in the RS-50 has its own filter settings, but you can use patch editing to modify these.
Cutoff Freq (Cutoff Frequency)
Specifies the frequency (cutoff frequency) at which the filter will begin to modify the sound. This is linked with the operation of the [CUTOFF] knob of the panel (p. 29).
VALUE: -64-+63
Creating a patch (Patch mode)
Resonance
This boosts the region near the cutoff frequency to add a distinctive character to the sound. Raising this value excessively may cause oscillation and distortion. This is linked with the operation of the [RESONANCE] knob of the panel (p. 29).
VALUE: -64—+63
- Adjusting the attack or decay of the sound (Envelope)
Each original tone of the RS-50 includes envelope settings, but you can use patch editing to apply relative adjustments to these settings. Depending on the tone you select, editing may not produce noticeable change in the sound. You cannot change the sustain level.
Attack Time
Adjusts the envelope attack time. This is linked with the operation of the [ATTACK] knob of the panel (p. 28).
VALUE: -64+63
Decay Time
Adjusts the envelope decay time. This is linked with the operation of the [DECAY] knob of the panel (p. 28).
VALUE: -64-+63
Release Time
Adjusts the envelope release time. This is linked with the operation of the [RELEASE] knob of the panel (p. 28).
VALUE: -64—+63
Saving a patch
When you have edited a patch to your liking, use the following procedure to save it.
-
Press [PATCH] so it is lit and you are in Patch mode.
-
Select the patch that you want to edit.
-
Edit the patch.

"Changing the tone with the knobs (Patch Modify)" (p. 26) "How to make the patch settings" (p. 44).
- When the sound is to your liking, press [WRITE].
Use VALUE [-]/[+] to specify the number in which the user patch is to be saved (U001-U128).

As shown above, the display will show only the user patch number if nothing has yet been saved to that number.

If you save to a number in which a user patch has already been saved, be aware that the previously saved settings will be overwritten and lost.
-
Press [ENTER].
-
Use VALUE [-]/[+] to specify the category for the user patch you want to save.


For more about the category, refer to "Patch categories" (p. 49).
- Press [ENTER] once again to execute.
When the user patch has been saved, the display will indicate "COMPLETED." This completes the procedure.

If you decide not to save the user patch, press [EXIT].
If you do not change "Name (Patch Name)" (p. 45), the patch will have the same name as the one you selected in step 2.
Patch categories
On the RS-50, a patch you edit can be named and saved in the desired category of sounds (User Patch). Saving an edited patch in the appropriate category will make it easier for you to find the patch when needed. This will also let you use arpeggiator settings that are appropriate for your user patch.
![WRITEIPATCH [ENT] [PF]PNO Category](/content/2026/06/1346059/images/a894309898ff0a44a058e6c0dcd028d6bf8c57086b4b95d8e04572a307275388.jpg)
Category Group Category Contents
| PIANO (Pf) | PNO AC.PIANO Acoustic Piano | |
| EP EL.PIANO Electric Piano | ||
| KBD & ORGAN (Ky) | KEY KEYBOARDS Other Keyboards (Clav, Harpsichord, etc.) | |
| BEL BELL Bell, Bell Pad | ||
| MLT MALLET Mallet | ||
| ORG ORGAN | Electric and Church Or-gan | |
| ACD ACCORDION | Accordion | |
| HRM HARMONICA | Harmonica, Blues Harp | |
| GUITAR (Gt) | AGT AC.GUITAR | Acoustic Guitar |
| EGT EL.GUITAR | Electric Guitar | |
| DGT DIST.GUITAR | Distortion Guitar | |
| ORCH (Oc) | STR STRINGS | Strings |
| ORC ORCHESTRA | Orchestra Ensemble | |
| HIT HIT&STAB | Orchestra Hit, Hit | |
| WND WIND | Winds (Oboe, Clarinet, etc.) | |
| FLT FLUTE Flute, Piccolo | ||
| WORLD (Wr) | PLK PLUCKED Plucked (Harp, etc.) | |
| ETH ETHNIC | Other Ethnic | |
| FRT FRETTED | Fretted Inst (Mandolin, etc.) | |
| BRASS (Br) | BRS AC.BRASS Acoustic Brass | |
| SBR SYNTH.BRASS | Synth Brass | |
| SAX SAX | Sax | |
| VOCAL & PAD (Vo) | BPD BRIGHT PAD | Bright Pad Synth |
| SPD SOFT PAD Soft Pad Synth | ||
| VOX VOX | Vox, Choir | |
| SYNTH (Sy) | HLD HARD LEAD | Hard Synth Lead |
| SLD SOFT LEAD | Soft Synth Lead | |
| TEK TECHNO SYNTH | Techno Synth | |
| PLS PULSATING | Pulsating Synth | |
| FX SYNTH FX | Synth FX (Noise, etc.) | |
| SYN OTHER SYNTH | Poly Synth | |
| BASS (Bs) BS | BASS Acoustic & Electric Bass | |
| SBS SYNTH.BASS | Synth Bass | |
| RHYTHM & SFX (Rh) | DRM DRUMS | Rhythm Set |
| PRC PERCUSSION | Percussion | |
| SFX SOUND FX | Sound FX | |
| BTS BEAT&GROOVE | Beat and Groove | |
| CMB COMBINATION | Other Patches | |
Convenient functions for patch editing (Patch Utility)
Patch Utility provides various functions that you will find convenient when editing patches, such as copying or initializing a patch.
Copying patch parameters (PATCH PRM COPY)
The settings of any patch can be copied to the currently selected patch. By making good use of this function, you can edit more efficiently. The following five parameters can be copied.
• UPPER TONE: Copy the settings of the upper tone.
- LOWER TONE: Copy the settings of the lower tone.
- MFX: Copy the multi-effect settings.
• CHORUS: Copy the chorus settings.
• REVERB: Copy the reverb settings.
Copying the UPPER TONE or LOWER TONE
-
Press [PATCH] so it is lit and you are in Patch mode.
Select the copy-destination patch. -
Press [UTILITY].
-
Use PAGE/CURSOR [ ] to select "1:PATCH PRM COPY."
-
Press [ENTER].
-
Use VALUE [-]/[+] to select "UPPER TONE" or "LOWER TONE."

6. Press PAGE/CURSOR [ ]
Use VALUE [-]/[+] to select the copy-source patch.
![ROLAND RS-50 - Press PAGE/CURSOR [ ] - 1](/content/2026/06/1346059/images/60b1a0424b59c9b1f7959ece90056b3f74926a0f924164c4edab3a04d1b2415a.jpg)
7. Press PAGE/CURSOR [ ]
Use VALUE [-]/[+] to specify whether the data is to be copied to the upper tone or the lower tone of the currently selected patch.
![ROLAND RS-50 - Press PAGE/CURSOR [ ] - 1](/content/2026/06/1346059/images/575a73e8ba34c4fa1a8dcb5bc9ad7909e3301ebe2a3e9e9c8b8fb45b8743466c.jpg)
8. Press [ENTER].
The upper tone or lower tone settings will be copied to the currently selected patch.
When the data has been copied, the display will indicate "COMPLETED." This ends the procedure.
Creating a patch (Patch mode)
Copying MFX, CHORUS, or REVERB effect settings
- Press [PATCH] so it is lit and you are in Patch mode. Select the copy-destination patch.
- Press [UTILITY].
- Use PAGE/CURSOR [ ] to select "1:PATCH PRM COPY."
- Press [ENTER].
- Use VALUE [-]/[+] to select "MFX," "CHORUS," or "REVERB."

- Press PAGE/CURSOR [ ]
Use VALUE [-]/[+] to specify whether you will copy "PATCH" effect settings or "PERFORM (Performance)" effect settings.

- Press PAGE/CURSOR [ ]
Copying "PATCH" effect settings
Use VALUE [-]/[+] to select the copy-source patch.

Copying "PERFORM (Performance)" effect settings
Use VALUE [-]/[+] to select the copy-source performance.

- Press [ENTER].
The effect settings will be copied to the currently selected patch.
When the data has been copied, the display will indicate "COMPLETED." This ends the procedure.
Initializing the parameters of a patch (PATCH INITIALIZE)
This operation initializes the currently selected patch settings. Since all patch parameters will be initialized, this is convenient when you want to create a sound from scratch.

The Initialize operation applies only to the currently selected sound; it will not change the content of sounds stored in user memory. If you want to restore all settings to the factory-set condition, execute the Factory Reset operation (p. 17).
- Press [PATCH] so it is lit and you are in Patch mode. Select the patch you want to initialize.
- Press [UTILITY].
- Use PAGE/CURSOR [ ] to select "2:PATCH INITIALIZE."
- Press [ENTER].

- Press [ENTER] once again to execute.
When initialization is finished, the display will indicate "COMPLETED." This ends the procedure.
Erasing a user patch you saved (PATCH REMOVE)
This operation erases the specified user patch. When you erase a patch, it will no longer be possible to select the patch of that number using direct access buttons. If you newly save a patch in that number, you will again be able to select it.
- Press [PATCH] so it is lit and you are in Patch mode.
- Press [UTILITY].
- Use PAGE/CURSOR [ ] to select "3:PATCH REMOVE."
- Press [ENTER].

- Use VALUE [-]/[+] to select the user patch that you want to erase.
- Press [ENTER].
When the data has been erased, the display will indicate "COMPLETED." This ends the procedure.
Transmitting patch/rhythm set settings from the MIDI OUT connector (XFER to MIDI)
You can transmit the settings of any patch from the MIDI OUT connector. This function can be used to save patch settings on an external sequencer. If you select "DUMP ALL" for the menu, you can transmit all data stored in the user area to an external sequencer.
- Press [PATCH] so it is lit and you are in Patch mode. Select the patch or the rhythm set you want to output.
- Press [UTILITY].
- Use PAGE/CURSOR [ ] to select "4:XFER to MIDI."
- Press [ENTER].
Transmitting the settings of currently selected patch
- Use VALUE [-]/[+] to select "CURRENT PATCH."
- Press [ENTER].
The selected patch settings will be transmitted from the MIDI OUT connector.
After the data has been transmitted, the display will indicate "COMPLETED." This ends the procedure.
Transmitting the settings of a user patch
- Use VALUE [-]/[+] to select "USER PATCHES."
- Press PAGE/CURSOR [ ]
Use VALUE [-]/[+] to specify the first number of the range of user patch numbers that you want to transmit.

- Press PAGE/CURSOR [ ]
Use VALUE [-]/[+] to specify the last number of the range of user patch numbers that you want to transmit.

- Press [ENTER].
The selected patch settings will be transmitted from the MIDI OUT connector.
After the data has been transmitted, the display will indicate "COMPLETED." This ends the procedure.
Transmitting all data stored in the user area
- Use VALUE [-]/[+] to select "DUMP ALL."

- Press [ENTER].
All data stored in the user area will be transmitted from the MIDI OUT connector.
When the display indicates "COMPLETED," the transmission operation has been completed.
MEMO
If you want to restore the stored data into the RS-50 once again, send the data to the RS-50's MIDI IN. Do not operate the RS-50 while this data is being received.
Restoring the factory settings (FACTORY RESET)
You can also perform the FACTORY RESET operation from Patch Utility.
For more about FACTORY RESET, refer to "Reset to default factory settings (Factory Reset)" (p. 17).
Creating a rhythm set (Patch mode)
The RS-50 provides rhythm sets that are suitable for a variety of musical genres. You can edit a preset rhythm set to modify the pitch/volume/panning of each percussion instrument sound to your liking, and save it as a user rhythm set.
How to make the rhythm set settings
A rhythm set consists of the following types of settings.
- Settings used by the entire rhythm set (Rhythm Common)
- Settings for each rhythm tone (key) (Rhythm Tone)
Collectively, these are referred to as "rhythm set parameters."
Editing the rhythm set parameters
-
Press [PATCH] so it is lit and you are in Patch mode.
-
Select a rhythm set (p. 22).

- Press [PARAM] so it is lit.
Now you can edit the rhythm set parameters.
Use PAGE/CURSOR [ ] to select the parameter that you want to edit.
- If there is an editable parameter, the cursor (underline) will blink below its value. Now you can use VALUE [-]/[+] to modify the value of that patch parameter.

Selecting rhythm set parameters
![graph TD A["RHYTHM COMMON"] --> B["RHYTHM COMMON\nName: Standard Kit"] B --> C["SHIFT"] + PAGE/CURSOR["▶"] B --> D["SHIFT"] + PAGE/CURSOR["◀"] E["RHYTHM TONE"] --> F["RHYTHMITONE\nPitch: 20"] F --> G["PAGE/CURSOR[▶"]] F --> H["PAGE/CURSOR[◀"]] I["RHYTHMITONE\nLevel: 100"] --> J["RHYTHMITONE\nC 4\nRe…](/content/2026/06/1346059/images/fbf9982c028ba770c1b262327ea50ac54e1a7e0aebe10ad11f299b02a56f6ea8.jpg)
Making settings that apply to the entire rhythm set (Rhythm Common parameters)
You can edit the following Rhythm Common parameters.
Name (Rhythm Set Name)
You can change the name of the rhythm set.
Here you can use PAGE/CURSOR [ ] to move through the characters, and use VALUE [-]/[+] to finalize the desired character.
Value: space, A-Z, a-z, 0-9,!" # \$ % & ' ( ) * + , - . / : ; <= > ? @ [¥] ^ _ ^ { | }

For further information, refer to "Assigning a name" (p. 43).
Editing the settings of each rhythm tone (key) (Rhythm Tone parameters)
A rhythm set assigns a different instrument to each key. For each of these instrumental sounds, you can edit the following parameters. Press a key to select the rhythm tone that you want to edit.


Pitch
Adjusts the pitch of the percussive sound in semitone steps.
VALUE: -60-+67
Level
Specifies the volume of the percussive sound.
VALUE: 0–127
Pan
Sets the pan position (stereo location) of each percussive sound when stereo output is used. With an increase in the value for L, more of the sound will be heard as coming from the left side. Similarly, more of the sound will originate at the right if the value of R is increased.
When set to RND (RANDOM), you obtain a specialized effect whereby the sound randomly moves left and right with each press of a key.
VALUE: RND, L63-0-63R
- Specifying the amount of signal sent to the effect
Chorus Send Lvl (Chorus Send Level)
Sets the level of the signal sent to chorus for each tone.
VALUE: 0-127
Reverb Send Lvl (Reverb Send Level)
Sets the level of the signal sent to reverb for each tone.
VALUE: 0-127
Saving a rhythm set (User Rhythm Set)
Once you have edited a rhythm set to your liking, use the following procedure to save it.
-
Press [PATCH] so it is lit and you are in Patch mode.
-
Select the rhythm set that you want to edit.
-
Edit the rhythm set and its rhythm tones.

"Making settings that apply to the entire rhythm set (Rhythm Common parameters)" (p. 52)
"Editing the settings of each rhythm tone (key) (Rhythm Tone parameters)" (p. 52)

The patch modify settings (p. 26) are not saved for rhythm sets.
- When the rhythm set is to your liking, press [WRITE].
Use VALUE [-]/[+] to specify the number in which the rhythm set is to be saved (U01-U02).

As shown above, the display will show only the rhythm set number if nothing has yet been saved to that number.

Be aware that your previously saved settings will be overwritten and lost if you save to a number in which a rhythm set has already been saved.
- Press [ENTER].
Unlike a patch, a rhythm set is always saved in the "RHYTHM & SFX" category group "DRM" (DRUMS).

For more about the category group, refer to "Patch categories" (p. 49).
When the rhythm set has been saved, the display will indicate "COMPLETED." This completes the procedure.

If you decide not to save the rhythm set, press [EXIT].
If you do not change "Name (Rhythm Set Name)" (p. 52), the rhythm set will have the same name as the one you selected in step 2.
Convenient functions for rhythm set editing (Rhythm Set Utility)
Rhythm Set Utility provides functions that you will find convenient when editing a rhythm set, such as initializing a rhythm tone or copying effect settings.
Copying effect settings from a rhythm set (RHY PRM COPY)
This operation copies effect settings from an existing rhythm set to the currently selected rhythm set. The following three parameters can be copied.
-
MFX: Copy the multi-effect settings.
• CHORUS: Copy the chorus settings.
• REVERB: Copy the reverb settings. -
Press [PATCH] so it is lit and you are in Patch mode.
Select the copy-destination rhythm set.
- Press [UTILITY].
- Use PAGE/CURSOR [ ] to select "1:RHY PRM COPY."
- Press [ENTER].
- Use VALUE [-]/[+] to select "MFX," "CHORUS," or "REVERB."

- Press PAGE/CURSOR []
Use VALUE [-]/[+] to specify whether you will copy "RHYTHM" effect settings or "PERFORM (Performance)" effect settings.
- Press PAGE/CURSOR [ ]
Copying "RHYTHM" effect settings
Select the copy-source rhythm set.

Copying "PERFORM (Performance)" effect settings
Select the copy-source performance.

- Press [ENTER].
The effect settings will be copied to the currently selected rhythm set.
When the data has been copied, the display will indicate "COMPLETED." This ends the procedure.
Creating a rhythm set (Patch mode)
Initializing the settings of a specific rhythm tone (RHY INITIALIZE)
This operation initializes the rhythm tone parameters (p. 52) to the state of the preset rhythm tone before its parameters were edited.
MEMO
If you want to return all parameters of the selected rhythm set to the preset state, simply re-select the preset rhythm set from which you started editing.
NOTE
The Initialize operation applies only to the currently selected tone; it will not change the content of other sounds stored in user memory. If you want to restore all settings to the factory-set condition, execute the Factory Reset operation (p. 17).
- Press [PATCH] so it is lit and you are in Patch mode.
- Select the rhythm set that contains the rhythm tone you want to initialize.
- Press [UTILITY].
- Use PAGE/CURSOR [ ] to select "2:RHY INITIALIZE."
- Press [ENTER].

- Use VALUE [-]/[+] to select the rhythm tone that you want to initialize.
VALUE: A 0 (key#21)-C 8 (key#108)
MEMO
You can also press a key to select the rhythm tone to edit.
- Press [ENTER] once again to execute.
When initialization is finished, the display will indicate "COMPLETED." This ends the procedure.
Erasing a rhythm set you saved (RHY REMOVE)
This operation erases the specified user rhythm set. When you erase a rhythm set, it will no longer be possible to select the rhythm set of that number. If you newly save a rhythm set in that number, you will again be able to select it.
- Press [PATCH] so it is lit and you are in Patch mode.
- Press [UTILITY].
- Use PAGE/CURSOR [ ] to select "3:RHY REMOVE."
- Press [ENTER].

- Use VALUE [-]/[+] to select the user rhythm set that you want to erase.
- Press [ENTER].
When the data has been erased, the display will indicate "COMPLETED." This ends the procedure.
Refer to Creating a Patch (Patch Mode) (p. 51) about Transmitting patch/rhythm settings from the MIDI OUT connector (XFER to MIDI), or Restoring the factory settings (FACTORY RESET).
Playing more than one sound simultaneously (Performance mode)
Choosing a part and selecting the sound
A performance contains sixteen parts that let you play different sounds simultaneously. Here's how to switch parts and assign a patch (or rhythm set) to each part.
- Press [PERFORM] so it is lit and you are in Performance mode.
- Press [PART SELECT] so it is lit, and use [0]–[9] to select a part.
Press [0] to select part 10 (Rhythm). To select the parts 11–16, hold down [SHIFT] and press [1]–[6] (p. 43). - Use VALUE [-]/[+] to specify a patch or a rhythm set for the part.
You can also select a patch using the [NUMERIC] function.
Assigning patches of the same category to multiple parts
While [PART SELECT] is lit, you can hold down [SHIFT] and use PAGE/CURSOR [] to step through the categories assigned to each part, selecting patches of the previous or next category group regardless of the button that is selected. This lets you assign patches of other categories than printed on the panel to each part. For example, if you want to prepare multiple patches of the same category, such as two types of organ, you can use the above method to select organ patches for a category that you do not use.
Quickly and consecutively auditioning the built-in sound of the RS-50 / Viewing a list of just the user patches
Using the above procedure, you can listen consecutively to all the built-in sounds of the RS-50 without pressing a category select button. Among the user patches organized into category groups, you can also view a list of just the user patches. Hold down [SHIFT] and press [ ]to switch categories, and after the "Bass" category you will see the user patches (u001-u128) displayed as a category.
* Only when viewing a list, the "u" at the beginning of user patch numbers will be displayed as a lowercase character.
Selecting performance numbers
Press [PART SELECT] so it will go out.
Using VALUE [-]/[+]
Pressing VALUE [-]/[+] will select the performance that precedes or follows the currently selected performance.
You do not need to press [ENTER] after making your selection. The number you select will take effect immediately, and the performance will be selected.
Using the direct access buttons
- When not using the [NUMERIC] function
Use the [0]-[9] buttons to input a number.
The upper digit will remain fixed, and only the lower digit will change. This is a convenient way to step through the numbers in succession.
You do not need to press [ENTER] after making your selection. The number you select will take effect immediately, and the performance will be selected.
- When using the [NUMERIC] function
- Press [NUMERIC] so it is lit.
- Use the [0]–[9] buttons to input a two-digit number.
The indication will blink. - If you want to finalize the value, press [ENTER].
The value will be finalized, and [NUMERIC] will go out. If you decide to cancel, press [EXIT].
MEMO
User performances will be displayed after the end of the preset performances. You can hold down [SHIFT] and use PAGE/CURSOR [] to switch between display of user and preset performances.
Editing the settings of a performance
The performances of the RS-50 contain settings that are made for the entire performance, and settings that are made individually for each part of the performance.
Settings made for the entire performance are:
- Settings for the entire performance, such as the performance name (p. 55)
• Effect settings for the performance (p. 56)
Settings made individually for each part of the performance are:
• Performance part settings (p. 56)
• Effect settings for performance parts (p. 58)
Making settings that apply to the entire performance
- Press [PERFORM] so it is lit and you are in Performance mode.
- Select a performance.
- Press [PARAM] so it is lit.
PERFORM COMMON Name: Pop 1
- Use PAGE/CURSOR [ ] to select a parameter, and use VALUE [-]/[+] to specify its value.
You can modify the following parameters.
[Non-Text]
To save the edited performance, refer to “Saving a performance” (p. 59).
Playing more than one sound simultaneously (Performance mode)
Making settings that apply to the entire performance (Performance Common Parameters)
Name (Performance Name)
You can change the name of the performance.
Here you can use PAGE/CURSOR [ ] to move through the characters, and use VALUE [-]/[+] to finalize the desired character.
Value: space, A-Z, a-z, 0-9,! " # \$ % & ' ( ) * + , - . / : ; <= > ? @ [ ¥ ] ^ _ ` { | }

For further information, refer to "Assigning a name" (p. 43).
Voice Rsv 1-16 (Voice Reserve 1-16)
The sound generator of the RS-50 can produce up to 64 notes (voices) simultaneously. If data is received that attempts to play more than this number of voices, notes will be dropped out. The RS-50 has a voice reserve setting that lets you allocate a minimum number of voices for each part. For example, if you set Voice Reserve to "10" for part 16, ten voices each for upper and lower tones will be allocated for part 16, even if the total number of voices being sounded by the RS-50 reaches the maximum of 64. In this way, consider the number of sounds you want to play and the number of tones in the patch you are using, and set the Voice Reserve of each part accordingly.


Value: 0–32
MEMO
You cannot make settings that would cause the total of all parts to exceed 32.
Level (Performance Level)
Specifies the volume of the performance.
Value: 0–127
MFX Source
When the MFX effect is applied in Performance mode, this specifies whether the effect will use the parameters of the performance itself, or the parameters of the patch assigned to the part (p. 65).

VALUE
PERFORM: The MFX effect will be applied according to the effect parameters of the performance itself.
PART1-PART16: The MFX effect will be applied according to the parameters of the patch that is selected for the part.
Editing the effect settings of a performance
In Performance mode you can press [EFFECTS] to edit the effect settings of a performance. For details, refer to “Adding effects” (p. 65).

To save the edited performance, refer to “Saving a performance” (p. 59).
Editing the part settings of a performance (Part Setup)
- Press [PERFORM] so it is lit and you are in Performance mode.
- Select a performance.
- Press [PART SELECT] so it is lit.
- Press [PARAM] so it is lit.
- Use [0]–[9] to select the part whose settings you want to edit.
To select the parts 11–16, hold down [SHIFT] and press [1]–[6] (p. 43).
Now you can edit the Part Setup parameters. - Use PAGE/CURSOR [ ] to select a parameter, and use VALUE [-]/[+] to specify its value.
You can modify the following parameters.

To save the edited performance, refer to “Saving a performance” (p. 59).
Part parameters of a performance (Part Setup Parameters)
Level (Part Level)
Sets the volume of each part. This is mainly used to achieve the volume balance between Parts.
Value: 0–127
Pan (Part Pan)
When stereo output is used, this setting sets the pan position (stereo location) of each Part. With an increase in the value for L, more of the sound will be heard as coming from the left side. Similarly, more of the sound will originate at the right if the value of R is increased. When set to RND (random), you obtain a specialized effect whereby the sound randomly moves left and right with each key stroke.
Value: RND, L63-0-63R
Playing more than one sound simultaneously (Performance mode)
Receive Ch (Receive Channel)
In Performance mode, the RS-50 will operate as a sixteen-part MIDI multitimbral sound module. This parameter specifies the MIDI receive channel for each part.
Value: 1-16
Each part of a performance is set to the following channels unless you change them.
| PART [1] (PIANO) Ch.1 |
| PART [2] (KBD & ORGAN) Ch.2 |
| PART [3] (GUITAR) Ch.3 |
| PART [4] (ORCH) Ch.4 |
| PART [5] (WORLD) Ch.5 |
| PART [6] (BRASS) Ch.6 |
| PART [7] (VOCAL & PAD) Ch.7 |
| PART [8] (SYNTH) Ch.8 |
| PART [9] (BASS) Ch.9 |
| PART [10 (0)] (RHYTHM & SFX) Ch.10 |
| PART [11] Ch.11 |
| PART [12] Ch.12 |
| PART [13] Ch.13 |
| PART [14] Ch.14 |
| PART [15] Ch.15 |
| PART [16] Ch.16 |
Receive Sw (Receive Switch)
Normally, you will leave this "ON." If you want to use an external sound module to play a certain part, you can turn this "OFF" to mute the internal sound generator for that part.
Value: OFF, ON
MEMO
The RS-50's keyboard will not play internal sound generator parts whose Receive Switch is turned OFF.
Receive Prg Chg (Receive Program Change Switch)
For each part, specify whether MIDI Program Change messages will be received (ON), or not (OFF).
Value: OFF, ON
Receive Bank Sel (Receive Bank Select Switch)
For each part, specify whether MIDI Bank Select messages will be received (ON), or not (OFF).
Value: OFF, ON
Scale Tune
| PERFORM |
| Scale Tune? [ENT] |
You can specify a different tuning (Scale Tune setting) for each part. Press [ENTER] to access the Scale Tune setting screen. For details, refer to "Editing the scale tune settings (SCALE TUNE)" (p. 58).
[Non-Text]
If you want to edit the scale tune for Patch mode, refer to "Making scale tune settings for a patch (PATCH SCALE)" (p. 91).
Part Patch Edit
| PERFORM |
| Patched Equity: [CENT] |
The patch assigned to each part can also be edited from Performance mode. You can press [ENTER], and edit the patch parameters and save the patch in the same way as from Patch mode (p. 44).
If you decide to stop editing the patch, press [EXIT] to return to the above screen.
NOTE
Patch mode and Performance mode share the same patches. This means that if you save a patch in one of these modes, the newly saved patch will sound if you select it in the other mode. To avoid problems, such as unintended changes in the sound of patches you are using in Performance mode, please be aware of this when you save patches.
If the same patch happens to be selected in both Patch mode and Performance mode, and you save the patch in one mode and then switch modes, the patch will still sound in accord with the settings prior to the save. However, once you re-select the patch or the performance again, the patch will then sound in accord with the newly saved settings.
Playing more than one sound simultaneously (Performance mode)
Editing the scale tune settings (SCALE TUNE)
The Scale Tune function lets you use a variety of tunings. For each note C–B, you can specify the pitch in units of one cent (1/100th of a semitone).
Scale Tune settings are made independently for each part.

If you want to edit the scale tune for Patch mode, refer to "Making scale tune settings for a patch (PATCH SCALE)" (p. 91).
-
Select the part setup parameter "Scale Tune" (p. 57).
-
Press [ENTER].
PERFORNISCHIE TUNE TYPE: FATH
-
Use PAGE/CURSOR [ ] to select "Type" or "Tune", and use VALUE [-]/[+] to specify its value.
-
Press [EXIT] to return to the above screen.
Type (Part Scale Tune Type)
You can switch the "Type" parameter to recall various sample settings for Scale Tune. When you change "Type," all scale tune parameters will be changed automatically.
EQUAL (Equal Temperament):
This tuning divides the octave into 12 equal parts, and is the most widely used method of temperament used in Western music.
JUST (maj) in C (Just Temperament (major):
Compared with equal temperament, the principle triads sound pure in this tuning. However, this effect is achieved only in one key, and chords will become ambiguous if you transpose.
JUST (min) in C (Just Temperament (minor):
Compared with equal temperament, the principle triads sound pure in this tuning. However, this effect is achieved only in one key, and chords will become ambiguous if you transpose.
ARABIC (Arabian Scale):
In this scale, E and B are a quarter note lower and C#, F# and G# are a quarter-note higher compared to equal temperament. The intervals between G and B, C and E, F and G#, Bb and C#, and Eb and F# have a natural third—the interval between a major third and a minor third.
Tune C-B (Part Scale Tune C-B)
Make scale tune settings for each part.
Value: -64—+63
Editing the effect settings for each part of the performance (Performance Part Effect)
-
Press [PERFORM] so it is lit and you are in Performance mode.
-
Select a performance.
-
Press [PART SELECT] so it is lit.
-
Use [0]–[9] to select the part whose settings you want to edit.
To select the parts 11–16, hold down [SHIFT] and press [1]–[6] (p. 43).
- Press [EFFECTS] so it is lit.
Now you can make settings for the performance part effect parameters.
- Use PAGE/CURSOR [ ] to select a parameter, and use VALUE [-]/[+] to specify the value.
You can modify the following parameters.

To save the edited performance, refer to “Saving a performance” (p. 59).
Master Effects Switch
The Master Effect Switch can also be set here. For details, refer to "Turning the effect function on and off (MASTER EFFECT SWITCH)" (p. 65).
MFX Switch
Switches the multi-effect on/bypass (off) in each Part.
Value: BYPASS, ON
Chorus Send Lvl (Chorus Send Level)
Sets the amount of chorus effect applied in each Part.
Value: 0–127
Reverb Send Lvl (Reverb Send Level)
Sets the amount of reverb effect applied in each Part.
Value: 0–127
Playing more than one sound simultaneously (Performance mode)
Saving a performance
Use the following procedure to save a performance you've edited.
1. Press [WRITE].
Use VALUE [-]/[+] to specify the number (U1–U8) at which the user performance is to be saved.
WRITEI PERFORM CENTJ TO: U 1: INIT PERFORM
![ROLAND RS-50 - Press [WRITE]. - 1](/content/2026/06/1346059/images/892b776e89d83a1ece9308d654cecf6707069345ec53e4063980082e62d1e81d.jpg)
Be aware that if you choose a number in which a user performance has already been saved, the previously saved settings will be overwritten and lost.
2. Press [ENTER].
If you have edited patches for some parts, the following message will appear.
Write Edited Patch?
Yes[ENT]/No[EXIT]
If you have not edited any of the patches in the performance, the user performance has been saved and the display will indicate "COMPLETED."
3. If you want to save the edited patch, press [ENTER].
The display will indicate the part where the edited patch is used. Use VALUE [-]/[+] to specify the number (U001-U128) at which the user patch is to be saved.
WRITEPART 1 CENT
To:0001:
If you decide not to save the user patch, press [EXIT].
![ROLAND RS-50 - If you want to save the edited patch, press [ENTER]. - 1](/content/2026/06/1346059/images/b4cd30d3dc9bb323e5d92ceeacabc326b18b015830fc3ad2115174b40220231e.jpg)
Be aware that if you choose a number in which a user patch has already been saved, the previously saved settings will be overwritten and lost.
4. Press [ENTER].
5. Use VALUE [-]/[+] to specify the category for the user patch you want to save.
WRITEIPart 1 [ENT] [PFPNO]
![ROLAND RS-50 - Use VALUE [-]/[+] to specify the category for the user patch you want to save. - 1](/content/2026/06/1346059/images/708fa8d7978143491bbbd13f38992bdad29df8d25cfecdb6a4667f9743bba3bf.jpg)
For more about the category, refer to "Patch categories" (p. 49)
6. Press [ENTER] once again to execute.
When the patch has been saved, the display will indicate "COMPLETED."
If there are more patches that have been edited, the parts that use such patches will be shown in a consecutive manner. Repeat steps 3.-6.
7. Once all the necessary patches have been saved, you are returned to the screen you were in at step 1.

8. Press [ENTER].
When the user performance has been saved, the display will indicate "COMPLETED."
MEMO
If you decide not to save the user performance, press [EXIT]. If you do not change "Name (Performance Name)" (p. 56), the performance will have the same name as the one you have been editing.
Convenient functions for performance editing (Performance Utility)
Performance Utility provides various functions that you will find convenient when editing performances, allowing you to do things such as copy or initialize a performance.
Copying part or effect parameters (PERFORM PRM COPY)
This operation copies the settings of a specified performance to the current performance. By using this you can edit more efficiently. The following four parameters can be copied. Effect-related parameters can also be copied from a patch.
• PART: Copy settings made for each part (p. 56).
- MFX: Copy multi-effect settings.
• CHORUS: Copy chorus settings.
• REVERB: Copy reverb settings.
Copying settings made for each part of a performance
- Press [PERFORM] so it is lit and you are in Performance mode.
Select the copy-destination performance.
-
Press [UTILITY].
-
Use PAGE/CURSOR [ ] to select "1:PERFORM PRM COPY."
-
Press [ENTER].
-
Use VALUE [-]/[+] to select "PART."

6. Press PAGE/CURSOR [ ]
Use VALUE [-]/[+] to select the copy-source performance.
![ROLAND RS-50 - Press PAGE/CURSOR [ ] - 1](/content/2026/06/1346059/images/04f176ee93272af6c2ddbe993f47cbd302e42af1c6bf1630a343fcea5025e266.jpg)
Playing more than one sound simultaneously (Performance mode)
7. Press PAGE/CURSOR [ ]
Use VALUE [-]/[+] to specify the copy-source part.
![ROLAND RS-50 - Press PAGE/CURSOR [ ] - 1](/content/2026/06/1346059/images/a097c4579a320ed2311fa9efaa85ed06749a7fb624cb1618eb4ba8faf7a08a4d.jpg)
MEMO
You can also select the part by pressing [0]–[9] or by holding down [SHIFT] and pressing [1]–[6].
8. Press PAGE/CURSOR [ ]
Use VALUE [-]/[+] to specify the copy-destination part.
![ROLAND RS-50 - Press PAGE/CURSOR [ ] - 1](/content/2026/06/1346059/images/6543c3eff6dbdcf010e77d26b7a071b1eafe1bb66ad9c79931aa4c06557a2ce9.jpg)
MEMO
You can also select the part by pressing [0]–[9] or by holding down [SHIFT] and pressing [1]–[6].
9. Press [ENTER].
Settings made for each part of the performance will be copied to the currently selected performance.
When the display indicates "COMPLETED," the copy operation has been completed.
Copying effect settings
- Press [PERFORM] so it is lit and you are in Performance mode.
Select the copy-destination performance.
-
Press [UTILITY].
-
Use PAGE/CURSOR [ ] to select "1:PERFORM PRM COPY."
-
Press [ENTER].
-
Use VALUE [-]/[+] to select "MFX," "CHORUS," or "REVERB."

6. Press PAGE/CURSOR [ ]
Use VALUE [-]/[+] to specify whether you will copy "PATCH" effect settings or "PERFORM (performance)" effect settings.
![ROLAND RS-50 - Press PAGE/CURSOR [ ] - 1](/content/2026/06/1346059/images/ec9ab4ddda9415696d669badc8f9f371388b0490de708cfc4bc5bd011d047d31.jpg)
7. Press PAGE/CURSOR [ ]
When copying "PATCH" effect settings
Use VALUE [-]/[+] to select the patch whose effect settings you want to copy.
![ROLAND RS-50 - Press PAGE/CURSOR [ ] - 1](/content/2026/06/1346059/images/d321382e55ab37638c5dc24692238ab534522e7f925dcb818b0ec63f34dc2b57.jpg)
When copying "PERFORM (Performance)" effect settings
Use VALUE [-]/[+] to select the performance whose effect settings you want to copy.

8. Press [ENTER].
The effect settings will be copied to the currently selected performance.
When the display indicates "COMPLETED," the copy operation has been completed.
MEMO
If you copy multi-effect settings, those settings will be pasted into the effect parameters of the performance, regardless of the MFX Source setting (p. 56). This means that if the MFX Source is set to "PART" for either or both the copy source and copy destination, you may not be able to tell that the copy made any difference. If the MFX Source of the current performance is set to "PART," change it to "PERFORM." Additionally, if MFX Source of the copy source is set to "PART," you will need to select "PATCH" in the above step 6, and select the patch assigned to that part in step 7 to copy the effect settings of the patch.
Initializing the parameters of a performance (PERFORM INIT)
This operation initializes the performance settings. Since all performance parameters will be initialized, this is convenient when you want to create a performance from scratch.
NOTE
The Initialize operation applies only to the currently selected performance; it will not change the content of other performances stored in user memory. If you want to restore all settings to the factory-set condition, execute the Factory Reset operation (p. 17).
- Press [PERFORM] so it is lit and you are in Performance mode.
Select a performance you want to initialize.
-
Press [UTILITY].
-
Use PAGE/CURSOR [ ] to select "2:PERFORM INIT."
-
Press [ENTER].

- Press [ENTER] once again to execute.
When initialization is finished, the display will indicate "COMPLETED." This ends the procedure.
Playing more than one sound simultaneously (Performance mode)
Transmitting performance settings from the MIDI OUT connector (XFER to MIDI)
You can transmit the settings of the current performance or user performance from the MIDI OUT connector. This function lets you save performance settings on an external sequencer. If you select "DUMP ALL" for the menu, you can transmit all data stored in the user area to an external sequencer.all data stored in the user area
- Press [PERFORM] so it is lit and you are in Performance mode.
Select the performance you want to output.
- Press [UTILITY].
- Use PAGE/CURSOR [ ] to select "3:XFER to MIDI."
- Press [ENTER].
Transmitting the settings of currently selected performance
This operation lets you transmit the settings of the current (edited and unsaved) performance.
- Use VALUE [-]/[+] to select "CUR PERFORM."

- Press [ENTER].
The currently selected performance settings will be transmitted from the MIDI OUT connector.
When the display indicates "COMPLETED," the transmission has been completed.
Transmitting the settings of a user performance
- Use VALUE [-]/[+] to select "USER PERFORM."

- Press PAGE/CURSOR [ ]
Specify the range of performances whose settings you want to transmit.
Use VALUE [-]/[+] to specify the first performance of the range of performances you want to transmit.

- Press PAGE/CURSOR [ ]
Use VALUE [-]/[+] to specify the last performance of the range of performances you want to transmit.

- Press [ENTER].
The performance settings of the specified range will be transmitted from the MIDI OUT connector.
When the display indicates "COMPLETED," the transmission operation has been completed.
Transmitting all data stored in the user area
- Use VALUE [-]/[+] to select "DUMP ALL."

- Press [ENTER].
All data stored in the user area will be transmitted from the MIDI OUT connector.
When the display indicates "COMPLETED," the transmission operation has been completed.

If you want to restore the stored data into the RS-50 once again, send the data to the RS-50's MIDI IN. Do not operate the RS-50 while this data is being received.
Restoring the factory settings (FACTORY RESET)
You can also perform the FACTORY RESET operation from Performance Utility.
For more about FACTORY RESET, refer to "Reset to default factory settings (Factory Reset)" (p. 17).
Using the phrase/arpeggio function
The RS-50 provides arpeggio templates that use phrases suitable for each category of instrument. Some of the arpeggio templates are phrase templates, which let you produce arpeggios with a single finger, without having to hold down a chord.

- Press [PHRASE/ARPEGGIO] so it is lit.

- Press [0]–[9] to choose the arpeggio template you want to use.
Play a chord on the keyboard. An arpeggio will begin playing according to the notes in the chord you play. Select a template or style you like.

If you select a phrase template, press only one key. If you play a chord, the phrase will play according to the last-played key.

- To stop the arpeggio performance, press [PHRASE/ARPEGGIO] once again so it goes out.
Creating your own arpeggio template (User Template)
You can create your own arpeggio template by editing the parameters of one of the preset templates. Your newly created template can be stored as one of eight user templates.
- Press [PHRASE/ARPEGGIO] so it is lit.

- Press [0]–[9] to select a template that produces arpeggios similar to what you want to create.
Pressing [0] will select the user template you have created. You can then use VALUE [-]/[+] to select other user templates.
- Press [PARAM] so it is lit.
Now you can edit the arpeggio parameters.

- Use PAGE/CURSOR [ ] to move the cursor, and use VALUE [-]/[+] to specify the value.
For details on the types and values of the parameters, refer to the following section "User template parameter list" (p. 62).
- When you are finished editing parameters, press [WRITE].
Use VALUE [-]/[+] to specify the number (UserTemplate 1-8) at which to save the user template.


Be aware that if you choose a number in which a user template has already been saved, the previously saved settings will be overwritten and lost.
- Press [ENTER].
When the user template has been saved, the display will indicate "COMPLETED."

If you decide not to save the user template, press [EXIT].
Now when you use the arpeggiator, you can press [0] and select the user template you just saved.
User template parameter list
Style (Arpeggio Style)
Specifies the basic way in which the arpeggio will be played.

For details regarding Arpeggio Style, refer to "Arpeggio style list" (p. 122).
Variation (Arpeggio Variation)
The arpeggiator provides several variations (performance patterns) for each arpeggio style. This parameter selects the variation number. The number of variations will differ according to the arpeggio style.
Motif (Arpeggio Motif)
Sets the order in which notes of the chord will sound.
VALUE
UP: Notes you press will be sounded, beginning from low to high.
DOWN: Notes you press will be sounded, from high to low.
UP&DOWN: Notes you press will be sounded, from low to high, and then back down from high to low.
RANDOM: Notes you press will be sounded, in random order.
NOTE-ORDER: Notes you press will be sounded in the order in which you pressed them. By pressing the notes in the appropriate order you can produce melody lines. Up to 128 notes will be remembered.
GLISSANDO: Each chromatic step between the highest and lowest notes you press will sound in succession, repeating upward and downward. Press only the lowest and the highest notes.
CHORD: All notes you press will sound simultaneously.
AUTO1: The timing at which keys will sound will be assigned automatically, giving priority to the lowest key that was pressed.
AUTO2: The timing at which keys will sound will be assigned automatically, giving priority to the highest key that was pressed.
PHRASE: Pressing a single key will sound a phrase based on the pitch of that key. If multiple keys are pressed, the last-pressed key will be valid.
MEMO
For a phrase template, this setting will be "PHRASE."
Accent Rate (Arpeggio Accent Rate)
Modifies the strength of accents and the length of the notes to adjust the "groove" feel of the arpeggio. A setting of "100%" will produce the most pronounced groove feel.
Value: 0–100%
Shuf Rate (Arpeggio Shuffle Rate)
This setting lets you modify the note timing to create shuffle rhythms.
With a setting of "50%" the notes will be spaced evenly. As the value is increased, the note timing will have more of a "dotted" (shuffle) feel.
Value: 0–100%


Shuf Resolution (Arpeggio Shuffle Resolution)
A "shuffle" feel is produced by delaying the even-numbered beats (beats 2, 4, 6,...). You can select either 16th notes or 8th notes to be affected by this delay.
Value: ♪, ♪
Hold (Arpeggio Hold Switch)
Switch between Hold On/Hold Off for the Arpeggiator performance.
Value: OFF, ON
Kbd Velocity (Arpeggio Keyboard Velocity)
Specifies the loudness of the notes that you play.
If you want the velocity value of each note to vary depending on how strongly you play the keyboard, set this parameter to "REAL." If you want each note to have a fixed velocity regardless of how strongly you play the keyboard, set this parameter to the desired value (1–127).
Value: REAL, 1–127
Octave Range (Arpeggio Octave Range)
Sets the key range in octaves over which arpeggio will take place. If you want the arpeggio to sound using only the notes that you actually play, set this parameter to "0." To have the arpeggio sound using the notes you play and notes 1 octave higher, set this parameter to "+1." A setting of "-1" will make the arpeggio sound using the notes you play and notes 1 octave lower.
Value: -3—+3
Key Trigger (Arpeggio Key Trigger)
Turn this "ON" if you want the arpeggio to start at the moment that you press the key. If you want the arpeggio to start playing in synchronization with Rhythm guide or the external sequencer, turn this "OFF."
Value: OFF, ON
Using chord memory function

"Playing a chord at the touch of a finger (Multi-chord Memory)" (p. 24)
- Press [CHORD MEMORY] so it is lit.

- Select the desired chord set.
When you play the keyboard, a chord of the specified structure will sound according to the key you press. Select the desired chord set (p. 25).
- To stop the performance using the chord memory, press [CHORD MEMORY] so it goes out.
Creating an original chord set (User Chord Set)
-
Press [CHORD MEMORY] so it is lit.
-
Press [PARAM] so it is lit.
-
Press PAGE/CURSOR[]→ move the cursor under the key number.

-
Either press a key or use VALUE [-]/[+] to specify the key (C-B) for which the chord is to be saved.
-
Press PAGE/CURSOR[ ]to move the cursor to the right.

- Press keys to input chords.
The display will indicate how many keys were pressed.
You can input 8 notes.

- Release all the keys.
The previously saved chords will be erased, and the new chords will be saved.
-
Repeat the above steps to continue inputting.
-
When you have finished creating the chord set, press [WRITE].

- Use VALUE [-]/[+] to specify the user chord set number.
You can create up to 8 user chord sets.
- Press [ENTER].
When the user chord set has been saved, the display will indicate "COMPLETED."
Adding effects
The RS-50 contains three effects processors: multi-effects, chorus, and reverb. Settings can be made separately for each effects processor.
There are 47 types of multi-effects, 8 types of chorus, and 8 types of reverb. You can use one of each type in a patch or part.
- Multi-effect/chorus/Reverb parameters can also be saved in a patch (rhythm set) or performance.
- In Patch mode, effects will be applied according to the settings of each patch. For details, refer to MFX Switch (p. 46), Chorus Send Lvl (p. 46), Reverb Send Lvl (p. 46) and in the section entitled Patch Tone Parameters. You will not hear the effects if the send level to chorus/reverb is too low, or if the MFX Switch is off. If you cannot hear the results of your editing the effect settings, check the settings listed above.
- In Performance mode, effects will be applied according to the settings of each patch, as well as the settings of each part. For details, refer to MFX Switch (p. 58), Chorus Send Lvl (p. 58), Reverb Send Lvl (p. 58) and in the section entitled Part Effect Parameters. Each effect is shared by all parts (patches).
- When using the multi-effect in Performance mode, you will normally apply the multi-effect using "the effect settings stored by the performance." However, if desired, you can set the performance parameter MFX Source (p. 56) so that the "effect settings stored by the patch assigned to a part" are used by all parts. When you edit the multi-effect settings, check MFX Source to see which of the above you are editing.
Turning the effect function on and off (MASTER EFFECT SWITCH)
In order to enable an effects processor (multi-effects, chorus, reverb), turn its switch on.
Turn these settings off when you wish to listen to the unprocessed sound as you create a sound, or when you wish to use an external effects processor instead of the onboard effects.
The On/Off settings for each Effect affect the RS-50 as a whole (i.e., are system settings). This setting remains stored in memory even while the power is off.
When shipped from the factory, all three effects are set to ON.
1. Press [EFFECTS] so it is lit.
The on/off status of each effect (multi-effect, chorus, reverb) will be displayed.
![ROLAND RS-50 - Press [EFFECTS] so it is lit. - 1](/content/2026/06/1346059/images/23381611e471d1beff8a4eb4bc2fbf51156ca60818a57b2ba8dbce6925ad2b56.jpg)
2. Use PAGE/CURSOR [ ] to select the effect type, and use VALUE [-]/[+] to switch it on/off.
When you play the keyboard in this state, the effects whose master effect switch is turned on will be applied to each patch.
When the cursor is located at "Rev" and you want to edit the effect settings, press PAGE/CURSOR [ ] and the effect parameters selected previously will be displayed.
For further information, refer to “Making effects settings” (p. 67).
Adding effects
The effect signal path
The following figure shows the path followed by the effects signals.
Performance Mode (Patch)
![graph TD A["Tone"] --> B["Tone MFX SW"] B --> C["Multi-FX"] C --> D["Chorus"] D --> E["Reverb"] E --> F["OUTPUT (R, L(MONO))"] G["Tone Cho Send Level"] --> H["Tone Rev Send Level"] I["Tone MFX SW"] --> J["Part MFX SW"] K["Part Cho Send Level"] --> L["Part Rev Send Level"] M["MFX Send Level to Cho"]…](/content/2026/06/1346059/images/5e995624319c69a010743c6db6337cfe73c673a3c20fd8f735e86cc06e74e512.jpg)
Performance Mode (Rhythm)
![graph TD A["Tone"] --> B["Part MPX SW"] B --> C["Multi-FX"] C --> D["Chorus"] D --> E["Reverb"] E --> F["OUTPUT (R, L(MONO))"] G["Tone Cho Send Level"] --> H["Part Cho Send Level"] H --> I["MFX Send Level to Cho"] I --> C J["Tone Rev Send Level"] --> K["Part Rev Send Level"] K --> L["Chorus"] L -->…](/content/2026/06/1346059/images/1c7b24bd79627fb8f44618efe27b11ebb23b2dbe1a8339670fbdb5e4ecf05f3c.jpg)
Patch Mode (Patch)
![graph TD A["Tone"] --> B["Tone MFX SW"] B --> C["Multi-FX"] C --> D["Chorus"] D --> E["Reverb"] E --> F["OUTPUT (R, L(MONO))"] G["Tone Cho Send Level"] --> C H["Tone Rev Send Level"] --> C I["MFX Send Level to Cho"] --> C J["MFX Send Level to Rev"] --> C K["Cho Send Level to Rev"] --> D](/content/2026/06/1346059/images/3cbc20d5ca0dfe54b6cbfa51651f3bfde67640b48e436ff0d148b7db2525ea3b.jpg)
Patch Mode (Rhythm)
![graph TD A["Tone"] --> B["Multi-FX"] B --> C["MFX Send Level to Cho"] B --> D["MFX Send Level to Rev"] C --> E["Tone Cho Send Level"] D --> F["Chorus"] E --> G["Tone Rev Send Level"] F --> H["Reverb"] G --> I["OUTPUT (R, L(MONO))"] H --> I I --> J["Output"]](/content/2026/06/1346059/images/5377d9e04dfe0515518cc63f0445bec95bb1eb667d04d9fddc0d149cada207a6.jpg)
Making effects settings
Selecting effect parameters
Select multi-effect, chorus, or reverb parameters as shown below.
![graph TD A["Master Effect Switch"] --> B["FX: MFX1 Chol Rev ✓ Sw ON ON ON"] B --> C["PAGE/CURSOR [▶"]] C --> D["FX: MFX1 Chol Rev ✓ Sw ON ON ON"] D --> E["PAGE/CURSOR [▶"]] E --> F["FX: MFX1 Chol Rev ✓ Sw ON ON ON"] F --> G["PAGE/CURSOR [▶"]] G --> H["FX PERFORM MFX Type:16 STEP FLANGER"] H --> I["M…](/content/2026/06/1346059/images/f5fb82db4468f2e0454f225664ab5d9ccf09533396e256f872a1dc4c99bffd60.jpg)
Adding effects
1. Press [EFFECTS] so it is lit.
The on/off state of each effect (multi-effect, chorus, reverb) will be displayed.
![ROLAND RS-50 - Press [EFFECTS] so it is lit. - 1](/content/2026/06/1346059/images/d976714680705ff95e7053c70aace08cd741d63add8d7e1479d828c0400a771c.jpg)
2. When the cursor is located at "Rev," press PAGE/CURSOR [ ] and the effect parameters will be displayed one after another starting with the multi-effect (MFX) parameters.
MEMO
By holding down [SHIFT] and using PAGE/CURSOR []
[▶] you can jump between the four parameter groups; effect on/off, multi-effect, chorus, and reverb.
Example: for a patch

Example: for a rhythm patch

Example: for a performance

MEMO
Depending on the type of effect that is selected, what is displayed will be different.
3. Use PAGE/CURSOR [ ] to select the parameter that you want to edit, and use VALUE [-]/[+] to modify the value of the parameter.
Setting multi-effects parameters
There are 47 types of multi-effects. You can select any one of these. After selecting the Type, you can change the values for each of the parameters.
Type (Multi-Effects Type)
Selections are made from the following 47 different multi-effects. Additionally, parameters for each of the multi-effects types can be found on the following pages.
Value:
00: THROUGH (p. 69)
01: STEREO EQ (p. 69)
02: OVERDRIVE (p. 69)
03: DISTORTION (p. 70)
04: PHASER (p. 70)
05: SPECTRUM (p. 70)
06: ENHANCER (p. 70)
07: AUTO WAH (p. 71)
08: ROTARY (p. 71)
09: COMPRESSOR (p. 71)
10: LIMITER (p. 72)
11: HEXA-CHORUS (p. 72)
12: TREMOLO CHO (p. 72)
13: SPACE-D (p. 73)
14: St CHORUS (p. 73)
15: St FLANGER (p. 73)
16: STEP FLANGER (p. 74)
17: St DELAY (p. 74)
18: LONG DELAY (p. 75)
19: MOD DELAY (p. 75)
20: 3 TAP DELAY (p. 76)
21: 4 TAP DELAY (p. 76)
22: TM CTRL DLY (p. 77)
23: 2V PCH SHIFT (p. 77)
24: FB PCH SHIFT (p. 78)
25: REVERB (p. 78)
26: GATED REVERB (p. 79)
27: OD>CHORUS (p. 79)
28: OD>FLANGER (p. 79)
29: OD>DELAY (p. 80)
30: DIST>CHORUS (p. 80)
31: DIST>FLANGER (p. 80)
32: DIST>DELAY (p. 80)
33: ENH>CHORUS (p. 81)
34: ENH>FLANGER (p. 81)
35: ENH>DELAY (p. 81)
36: CHORUS>DELAY (p. 82)
37: FLG>DELAY (p. 82)
38: CHO>FLANGER (p. 83)
39: CHORUS/DELAY (p. 83)
40: FLG/DELAY (p. 83)
41: CHO/FLANGER (p. 83)
42: LOFI (p. 83)
43: SLICER (p. 84)
44: TREMOLO (p. 84)
45: AUTO PAN (p. 84)
46: TUMBLING DLY (p. 85)
47: FBK RIPPER (p. 85)
Send Lvl to Cho (Multi-effect send level to chorus)
Sets the amount of the multi-effects sound that is sent to the chorus. Higher values result in more sound being sent.
Value: 0-127
Send Lvl to Rev (Multi-effect send level to reverb)
Sets the amount of the multi-effects sound that is sent to the reverb. Higher values result in more sound being sent.
Value: 0–127
Ctrl 1, 2 (Multi-Effects Control 1, 2)
On the RS-50, certain multi-effect parameters can be assigned to the modulation lever, knobs, pedal or D Beam. Of the parameters explained in Multi-effect parameters, the assignable parameters are marked with a “#” symbol. (Parameters marked with “#1” or “#2” can be simultaneously controlled using the controller marked with the same number.) Here you can exchange these assignments, or choose not to use them. For details, refer to p. 33, p. 89.
Value
OFF: Multi-effect control will not be used.
Items with a “#” symbol: The parameters that can be assigned to Ctrl1 or Ctrl2. These differ depending on the multi-effect type.
00: THROUGH
Effects are not applied. Select when creating Patches or Rhythm Sets that do not use multi-effects.
01: STEREO EQ (Stereo Equalizer)
This is a four-band stereo equalizer (low, mid x 2, high).
![graph LR A["L in"] --> B["4-Band EQ"] --> C["L out"] D["R in"] --> E["4-Band EQ"] --> F["R out"]](/content/2026/06/1346059/images/10f6d0db5dbd4d320ec1c799fa3bdb2d765bf634f8c0ee85fbf68fc5e7e77711.jpg)
| Parameter | Value Description |
| Low Freq | 200, 400 [Hz] Selects the frequency of the low range. |
| Low Gain -15- +15 [dB] Adjusts the gain of the low frequency. | |
| High Freq 2000, 4000, 8000 [Hz] | Selects the frequency of the high range. |
| High Gain -15- +15 [dB] Adjusts the gain of the high frequency. | |
| Mid1 Freq 200-8000 [Hz] Adjusts the frequency of Middle 1 (mid range). | |
| Mid1 Q 0.5, 1.0, 2.0, 4.0, 8.0 | This parameter adjusts the width of the area around the Middle 1 Frequency that will be affected by the Gain setting. Higher values of Q will result in a narrower area being affected. |
| Parameter | Value Description |
| Mid1 Gain | -15– +15 [dB] Adjusts the gain for the area specified by the Middle 1 Frequency and Q settings. |
| Mid2 Freq 200–8000 [Hz] Adjusts the frequency of Middle 2 (mid range). | |
| Mid2 Q 0.5, 1.0, 2.0, 4.0, 8.0 | This parameter adjusts the width of the area around the Middle 2 Frequency that will be affected by the Gain setting. Higher values of Q will result in a narrower area being affected. |
| Mid2 Gain -15– +15 [dB] Adjusts the gain for the area specified by the Middle 2 Frequency and Q settings. | |
| Level # 0–127 Adjusts the output level. | |
02: OVERDRIVE
This effect creates a soft distortion similar to that produced by vacuum tube amplifiers.
![graph LR A["L in"] --> B["+"] C["R in"] --> B B --> D["Over drive"] D --> E["Amp Simulator"] E --> F["2-Band EQ"] F --> G["L out"] F --> H["R out"] I["Pan L"] --> F J["Pan R"] --> F](/content/2026/06/1346059/images/082b26a8c4fe03feeccaa2ba477a3f7cfc4313c963cd9aad64af8d953099351c.jpg)
| Parameter | Value Description | |
| Drive # | 0-127 Adjusts the degree of distortion.The volume will change together with the degree of distortion. | |
| Pan # L64-63R | Adjusts the stereo location of the output sound.L64 is far left, 0 is center, and 63R is far right. | |
| Amp Type SMALL,BUILT-IN,2-STACK,3-STACK | Selects the type of guitar amp.SMALL: small ampBUILT-IN: single-unit type amp2-STACK: single-unit type amp3-STACK: large triple stack amp | |
| Low Gain -15- +15 [dB] Adjusts the gain of the low frequency. | ||
| High Gain -15- +15 [dB] Adjusts the gain of the high frequency. | ||
| Level 0-127 Adjusts the output level. | ||
Adding effects
03: DISTORTION
This effect produces a more intense distortion than Overdrive.
![graph LR A["L in"] --> C["+"] B["R in"] --> C["+"] C["+"] --> D["Distortion"] D --> E["Amp Simulator"] E --> F["2-Band EQ"] F --> G["Pan L"] F --> H["Pan R"] F --> I["R out"]](/content/2026/06/1346059/images/c976f47b0e942d8034be4397133d9088575f5f80e1129b541435a8fb215700b3.jpg)
| Parameter | Value Description |
| Drive # | 0–127 Adjusts the degree of distortion.The volume will change together with the degree of distortion. |
| Pan # L64–63R | Adjusts the stereo location of the output sound.L64 is far left, 0 is center, and 63R is far right. |
| Amp Type SMALL,BUILT-IN, 2-STACK, 3-STACK | Selects the type of guitar amp.SMALL: small ampBUILT-IN: single-unit type amp2-STACK: single-unit type amp3-STACK: large triple stack amp |
| Low Gain -15– | +15 [dB] Adjusts the gain of the low frequency. |
| High Gain -15– | +15 [dB] Adjusts the gain of the high frequency. |
| Level 0–127 | Adjusts the output level. |
04: PHASER
A phaser adds a phase-shifted sound to the direct sound, producing a twisting modulation that creates spaciousness and depth.
![graph LR A["L in"] --> B["+"] C["R in"] --> B B --> D["+"] D --> E["Phaser"] E --> F["Mix"] F --> G["+"] G --> H["L out"] G --> I["Pan L"] G --> J["Pan R"] G --> K["R out"] D --> L["Resonance"] E --> M["Resonance"]](/content/2026/06/1346059/images/cceb1ced8359ec16beb2169caa11175648ae7e3403e2f0fa7e122fbf9bed26b8.jpg)
| Parameter | Value Description |
| Manual # | 100–8000 [Hz] Adjusts the basic frequency from which the sound will be modulated. |
| Rate # 0.05–10.00 | [Hz] Adjusts the frequency (period) of modulation. |
| Depth 0–127 Adjusts the depth of modulation. | |
| Resonance 0–127 Adjusts the amount of feedback for the phaser. | |
| Mix 0–127 Adjusts the ratio with which the phase-shifted sound is combined with the direct sound. | |
| Pan L64–63R Adjusts the stereo location of the output sound.L64 is far left, 0 is center, and 63R is far right. | |
| Level 0–127 Adjusts the output level. | |
05: SPECTRUM
Spectrum is a type of filter which modifies the timbre by boosting or cutting the level at specific frequencies.
It is similar to an equalizer, but has 8 frequency points fixed at locations most suitable for adding character to the sound.
![graph LR A["L in"] --> B["+"] C["R in"] --> B B --> D["Spectrum"] D --> E["Pan L"] D --> F["Pan R"] D --> G["R out"] E --> H["L out"] F --> I["Pan R"] G --> J["R out"]](/content/2026/06/1346059/images/39dda701551f8bb6bb4a61a58e4f22dad72e2ad6a5524fbe12f431dde80c300c.jpg)
| Parameter | Value Description | |
| Band 1 | -15–+15 [dB] | Adjusts the 250 Hz level. |
| Band 2 -15–+15 | [dB] | Adjusts the 500 Hz level. |
| Band 3 -15–+15 | [dB] | Adjusts the 1000 Hz level. |
| Band 4 -15–+15 | [dB] | Adjusts the 1250 Hz level. |
| Band 5 -15–+15 | [dB] | Adjusts the 2000 Hz level. |
| Band 6 -15–+15 | [dB] | Adjusts the 3150 Hz level. |
| Band 7 -15–+15 | [dB] | Adjusts the 4000 Hz level. |
| Band 8 -15–+15 | [dB] | Adjusts the 8000 Hz level. |
| Q | 0.5, 1.0, 2.0, 4.0, 8.0 | Simultaneously adjusts the width of the adjusted areas for all the frequency bands. |
| Pan # L64–63R A | adjusts the stereo location of the output sound. L64 is far left, 0 is center, and 63R is far right. | |
| Level # | 0–127 | Adjusts the output level. |
06: ENHANCER
The enhancer controls the overtone structure of the high frequencies, adding sparkle and tightness to the sound.
![graph LR A["L in"] --> B["Enhancer"] B --> C["Mix"] C --> D["+"] D --> E["2-Band EQ"] E --> F["L out"] G["R in"] --> H["Enhancer"] H --> I["Mix"] I --> J["+"] J --> K["2-Band EQ"] K --> L["R out"]](/content/2026/06/1346059/images/a1a010f326f944f3d6b9fd7807384ee10dd60d47875eddb111baf02ec915cc9d.jpg)
| Parameter | Value Description |
| Sens # | 0–127 Adjusts the sensitivity of the enhancer. |
| Mix # 0–127 Adjusts the ratio with which the overtones generated by the enhancer are combined with the direct sound. | |
| Low Gain -15– +15 [dB] Adjusts the gain of the low frequency. | |
| High Gain -15– +15 [dB] Adjusts the gain of the high frequency. | |
| Level 0–127 Adjusts the output level. | |
07: AUTO WAH
The Auto Wah cyclically controls a filter to create cyclic change in timbre.
![graph LR A["L in"] --> C["+"] B["R in"] --> C C --> D["Auto Wah"] D --> E["L out"] D --> F["R out"]](/content/2026/06/1346059/images/28c36ca62a2e7d5471216e598b1fa14213ed70f8bca4facfc60256853d4b86a9.jpg)
| Parameter | Value Description | |
| Filter Type | LPF, BPF Selects | the type of filter.LPF: The wah effect will be applied over a wide frequency range.BPF: The wah effect will be applied over a narrow frequency range. |
| Rate # 0.05–10.00 | [Hz] Adjusts the | frequency of the modulation. |
| Depth 0–127 Adjusts the depth of the modulation. | ||
| Sens 0–127 Adjusts the sensitivity with which the filter is controlled. | ||
| Manual # 0–127 Adjusts the center frequency from which the effect is applied. | ||
| Peak 0–127 Adjusts the amount of the wah effect that will occur in the area of the center frequency. Lower settings will cause the effect to be applied in a broad area around the center frequency.Higher settings will cause the effect to be applied in a more narrow range. | ||
| Level 0–127 Adjusts the output level. | ||
08: ROTARY
The Rotary effect simulates the sound of the rotary speakers often used with the electric organs of the past.
Since the movement of the high range and low range rotors can be set independently, the unique type of modulation characteristic of these speakers can be simulated quite closely. This effect is most suitable for electric organ Patches.
![graph LR A["L in"] --> C["+"] B["R in"] --> C C --> D["Rotary"] D --> E["L out"] D --> F["R out"]](/content/2026/06/1346059/images/9eed184b636e94d841b30a0458dd3023f43a2cc4f2ffa92baecf6e09e900e5cf.jpg)
| Parameter | Value Description |
| High Slow | 0.05–10.00 [Hz] Adjusts the slow speed (SLOW) of the high frequency rotor. |
| Low Slow 0.05–1 | 0.00 [Hz] Adjusts the slow speed (SLOW) of the low frequency rotor. |
| High Fast 0.05–1 | 0.00 [Hz] Adjusts the fast speed (FAST) of the high frequency rotor. |
| Low Fast 0.05–10 | 0.00 [Hz] Adjusts the fast speed (FAST) of the low frequency rotor. |
| Parameter | Value Description | |
| Speed # | SLOW, FAST Simultaneously switch the rotational speed of the low frequency rotor and high frequency rotor.SLOW: Slows down the rotation to the specified speed (the Low Slow/Hi Slow values).FAST: Speeds up the rotation to the specified speed (the Low Fast/Hi Fast values).* When you want to use the pedal switch to switch the Rotary rotation speed, select MFX PARAMETER1 in Pedal Control Assign (p. 90). | |
| High Accel 0–15 | Adjusts the time it takes the high frequency rotor to reach the newly selected speed when switching from fast to slow (or slow to fast) speed.Lower values will require longer times. | |
| Low Accel 0–15 | Adjusts the time it takes the low frequency rotor to reach the newly selected speed when switching from fast to slow (or slow to fast) speed.Lower values will require longer times. | |
| High Level 0–127 | Adjusts the volume of the high frequency rotor. | |
| Low Level 0–127 | Adjusts the volume of the low frequency rotor. | |
| Separation 0–127 | Adjusts the spatial dispersion of the sound. | |
| Level # | 0–127 Adjusts the output level. | |
09: COMPRESSOR
The compressor flattens out high levels and boosts low levels, smoothing out unevenness in volume.
![graph LR A["L in"] --> C["Compressor"] B["R in"] --> C C --> D["2-Band EQ"] D --> E["L out"] D --> F["R out"] G["Pan L"] --> D H["Pan R"] --> D](/content/2026/06/1346059/images/10e231eed44064300ef00674a0a5bab893b074fcfae577f441acc614de32bcc5.jpg)
| Parameter | Value Description |
| Sustain | 0–127 Adjusts the time over which low level sounds are boosted until they reach the specified volume. |
| Attack | 0–127 Adjusts the attack time of an input sound. |
| Pan # L64–63R | Adjusts the stereo location of the output sound.L64 is far left, 0 is center, and 63R is far right. |
| Post Gain 0, +6, +12, +18 [dB] | Adjusts the output gain. |
| Low Gain | -15– +15 [dB] Adjusts the gain of the low frequency. |
| High Gain -15– +15 [dB] | Adjusts the gain of the high frequency. |
| Level # | 0–127 Adjusts the output level. |
Adding effects
10: LIMITER
The limiter compresses signals that exceed a specified volume level, preventing distortion from occurring.
![graph LR A["L in"] --> C["+"] B["R in"] --> C["+"] C["+"] --> D["Limiter"] D["+"] --> E["2-Band EQ"] E["2-Band EQ"] --> F["L out"] E["2-Band EQ"] --> G["L out"] E["2-Band EQ"] --> H["L out"] I["Pan L"] --> E["2-Band EQ"] J["Pan R"] --> E["2-Band EQ"] K["Pan R"] --> E["2-Band EQ"] L["R out"] --> E["2…](/content/2026/06/1346059/images/8b52a51b5f167483c4df4635bb6cbe7691eaf2076d29ed3e3fc961619282cf61.jpg)
| Parameter | Value Description |
| Threshold | 0–127 Adjusts the volume at which compression will begin. |
| Release 0–127 Adjusts the time from when the volume falls below the Threshold Level until compression is no longer applied. | |
| Ratio 1.5:1, 2:1, 4:1, 100:1 | Adjusts the compression ratio. |
| Pan # L64–63R Adjusts the stereo location of the output sound.L64 is far left, 0 is center, and 63R is far right. | |
| Post Gain 0, +6, +12, +18 [dB] | Adjusts the output gain. |
| Low Gain -15–+15 [dB] Adjusts the gain of the low frequency. | |
| High Gain -15–+15 [dB] Adjusts the gain of the high frequency. | |
| Level # 0–127 Adjusts the output level. | |
11: HEXA-CHORUS
Hexa-chorus uses a six-phase chorus (six layers of chorused sound) to give richness and spatial spread to the sound.
![graph LR L_in --> A["+"] R_in --> A A --> B["Balance D"] B --> C["L out"] A --> D["Hexa-Chorus"] D --> E["Balance W"] E --> F["R out"] D --> G["Balance D"] G --> H["Balance W"] H --> I["Balance W"] I --> J["Balance D"] J --> K["Balance D"]](/content/2026/06/1346059/images/d71e13be1339086b12f138c88a901b4c1749619b98bd83009979bb2924d3aaff.jpg)
| Parameter Value Description | ||
| Pre Delay | 0.0–100 [ms] Adjusts the time delay from when the direct sound begins until the chorus sound is heard. | |
| Rate # 0.05–10.00 [Hz] Adjusts the rate of modulation. | ||
| Depth 0–127 Adjusts the depth of modula-tion. | ||
| Pre Delay Dev | 0–20 | Pre Delay Deviation adjusts the differences in Pre Delay between each chorus sound.Pre Delay determines the time from when the direct sound begins until the processed sound is heard. |
| Depth Dev | -20–+20 | Adjusts the difference in modu-lation depth between each cho-rus sound. |
| Parameter | Value Description | |
| Pan Dev | 0-20 | Adjusts the difference in stereo location between each chorus sound.With a setting of 0, all chorus sounds will be in the center. With a setting of 20, each chorus sound will be spaced at 60 degree intervals relative to the center. |
| Balance # | D100:0W–D0:100W | Adjusts the volume balance between the direct sound and the chorus sound.With a setting of D100:0W only the direct sound will be output, and with a setting of D0:100W only the chorus sound will be output. |
| Level 0-127 Adjusts the output level. | ||
12: TREMOLO CHO (Tremolo Chorus)
Tremolo chorus is a chorus effect with added tremolo (cyclic modulation of volume).
![graph LR L_in --> A["+"] R_in --> A A --> B["Tremolo Chorus"] B --> C["+"] R_out --> D["+"] B --> E["L out"] B --> F["R out"] style A fill:#f9f,stroke:#333 style B fill:#ccf,stroke:#333 style C fill:#cfc,stroke:#333 style D fill:#fcc,stroke:#333 style E fill:#ffc,stroke:#333 style F fill:#fcc,stroke…](/content/2026/06/1346059/images/ceddf884bc87b457e7523b70f0caff47c56271e95d3969228a114d90c46a8768.jpg)
| Parameter | Value Description | |
| Pre Delay | 0.0–100 [ms] | Adjusts the time delay from when the direct sound begins until the chorus sound is heard. |
| Cho Rate | 0.05–10.00 [Hz] | Adjusts the modulation speed of the chorus effect. |
| Cho Depth | 0–127 Adjusts the modulation depth of the chorus effect. | |
| Treml Rate # | 0.05–10.00 [Hz] | Adjusts the modulation speed of the tremolo effect. |
| Treml Separation | 0–127 Adjusts the spread of the tremolo effect. | |
| Phase | 0–180 [deg] | Adjusts the spread of the tremolo effect. |
| Balance # | D100:0W–D0:100W | Adjusts the volume balance between the direct sound and the tremolo chorus sound.With a setting of D100:0W only the direct sound will be output, and with a setting of D0:100W only the tremolo chorus sound will be output. |
| Level 0–127 Adjusts the output level. | ||
13: SPACE-D
Space-D is a multiple chorus that applies two-phase modulation in stereo. It gives no impression of modulation, but produces a transparent chorus effect.
![graph LR L_in --> A1["Space-D"] A1 --> B1["Balance D"] B1 --> C1["+"] C1 --> D1["2-Band EQ"] D1 --> L_out["L out"] R_in --> A2["Space-D"] A2 --> B2["Balance D"] B2 --> C2["+"] C2 --> D2["2-Band EQ"] D2 --> R_out["R out"] B1 -->|Balance W| C1 C2 -->|Balance W| D2](/content/2026/06/1346059/images/ddcf38196a68104d4b6ddc6dc930cb8358b019b4a92e3ccd5d13fd4460519974.jpg)
| Parameter | Value Description |
| Pre Delay | 0.0–100 [ms] Adjusts the time delay from when the direct sound begins until the processed sound is heard. |
| Rate # 0.05–10.00 | [Hz] Adjusts the rate of modulation. |
| Depth 0–127 Adjusts the depth of modulation. | |
| Phase 0–180 [deg] | Adjusts the spatial spread of the sound. |
| Low Gain -15–+15 [dB] | Adjusts the gain of the low frequency. |
| High Gain -15–-15 [dB] | Adjusts the gain of the high frequency. |
| Balance # D100:0W–D0:100W | Adjusts the volume balance between the direct sound and the chorus sound.With a setting of D100:0W only the direct sound will be output, and with a setting of D0:100W only the chorus sound will be output. |
| Level 0–127 Adjusts the output level. | |
14: St CHORUS (Stereo Chorus)
This is a stereo chorus. A filter is provided so that you can adjust the timbre of the chorus sound.
![graph LR L_in --> A["Chorus"] A --> B["Balance D"] B --> C["+"] C --> D["2-Band EQ"] D --> E["L out"] R_in --> F["Chorus"] F --> G["Balance D"] G --> H["+"] H --> I["2-Band EQ"] I --> J["R out"] A --> C F --> H](/content/2026/06/1346059/images/79df48d59fe008418beba701fd3005400395bbc78833b1934fd4fa4bb0b93b8e.jpg)
| Parameter | Value Description |
| Filter Type | OFF, LPF, HPFSelects the type of filter.OFF: A filter will not be used.LPF: Cuts the frequency range above the cutoff frequency.HPF: Cuts the frequency range below the cutoff frequency. |
| Cutoff Freq 200–8000 [Hz] Adjuststhe basic frequency of the filter. | |
| Pre Delay 0.0–100 [ms] Adjuststhtime delay from when the direct sound begins until the processed sound is heard. | |
| Rate # 0.05–10.00 [Hz] Adjuststhe rate of modulation. | |
| Parameter | Value Description |
| Depth | 0–127 Adjusts the depth of modulation. |
| Phase 0–180 [deg] | Adjusts the spatial spread of the sound. |
| Low Gain -15– +15 [dB] | Adjusts the gain of the low frequency. |
| High Gain -15– +15 [dB] | Adjusts the gain of the high frequency. |
| Balance # D100:0W–D0:100W | Adjusts the volume balance between the direct sound and the chorus sound.With a setting of D100:0W only the direct sound will be output, and with a setting of D0:100W only the chorus sound will be output. |
| Level 0–127 Adjusts the output level. | |
15: St FLANGER (Stereo Flanger)
This is a stereo flanger. It produces a metallic resonance that rises and falls like a jet airplane taking off or landing. A filter is provided so that you can adjust the timbre of the flanged sound.
![graph TD A["L in"] --> B["+"] B --> C["Flanger"] C --> D["+"] D --> E["2-Band EQ"] E --> F["L out"] G["R in"] --> H["+"] H --> I["Flanger"] I --> J["+"] J --> K["2-Band EQ"] K --> L["R out"] M["Balance D"] --> D N["Balance W"] --> D O["Feedback Feedback"] --> C P["Balance D"] --> H Q["Balance W"] --…](/content/2026/06/1346059/images/48cedead5ef29eadd8b4d8810f7ee309eabcb500116b312e28a7263a4cbcb1cf.jpg)
| Parameter | Value Description |
| Filter Type | OFF, LPF, HPF Selects the type of filter.OFF: A filter will not be used.LPF: Cuts the frequency range above the cutoff frequency.HPF: Cuts the frequency range below the cutoff frequency. |
| Cutoff Freq 200–8000 [Hz] Adjusts the basic frequency of the filter. | |
| Pre Delay 0.0–100 [ms] Adjusts the time delay from when the direct sound begins until the flanger sound is heard. | |
| Rate # 0.05–10.00 [Hz] Adjusts the rate of modulation. | |
| Depth 0–127 Adjusts the depth of modulation. | |
| Phase 0–180 [deg] Adjusts the spatial spread of the sound. | |
| Feedback # | -98– +98 [%] Adjusts the amount (%) of the processed sound that is returned (fed back) into the input. Positive (+) settings will return the sound in phase, and negative (-) settings will return the sound in reverse phase. |
| Low Gain -15– +15 [dB] Adjusts the gain of the low frequency. | |
| High Gain -15– +15 [dB] Adjusts the gain of the high frequency. | |
Adding effects
| Parameter | Value Description | |
| Balance | D100:0W–D0:100W | Adjusts the volume balance between the direct sound and the flanger sound.With a setting of D100:0W only the direct sound will be output, and with a setting of D0:100W only the flanger sound will be output. |
| Level 0–127 Adjusts the output level. | ||
16: STEP FLANGER
The Step Flanger effect is a flanger in which the flanger pitch changes in steps.
![graph TD A["L in"] --> B["+"] B --> C["Step Flanger"] C --> D["+"] D --> E["2-Band EQ"] E --> F["L out"] G["R in"] --> H["+"] H --> I["Step Flanger"] I --> J["+"] J --> K["2-Band EQ"] K --> L["R out"] M["Balance D"] --> B N["Balance W"] --> D O["Feedback Feedback"] --> C P["Balance W"] --> J Q["Bala…](/content/2026/06/1346059/images/afa74e101f44da4294272210c60eda0e8d4aeb743f9d4d7e29672e9db51088ab.jpg)
| Parameter | Value Description |
| Pre Delay | 0.0–100 [ms] Adjusts the time delay from when the direct sound begins until the flanger sound is heard. |
| Rate 0.05–10.00 [Hz] | Adjusts the rate of modulation. |
| Depth 0–127 Adjusts the depth of modulation. | |
| Feedback # -98– | +98 [%] Adjusts the amount (%) of the flanger sound that is returned (fed back) into the input.Negative (-) settings will invert the phase. |
| Step Rate # 0.1–2 | 0.0 [Hz], note *2 |
| Phase 0–180 [deg] | Adjusts the spatial spread of the sound. |
| Balance D100:0W–D0:100W | Adjusts the volume balance between the direct sound and the flanger sound.With a setting of D100:0W only the direct sound will be output, and with a setting of D0:100W only the chorus sound will be output. |
| Reset OFF, ON | This setting determines whether the period for the pattern is reset (ON), or not (OFF) when sounds are played.While the rhythm guide is playing, the period for the pattern is not reset even if you set this ON. |
| Level 0–127 Adjusts the output level. | |
17: St DELAY (Stereo Delay)
This is a stereo delay.
When Feedback Mode is NORMAL:
![graph TD A["L in"] --> B["+"] B --> C["Delay"] C --> D["+"] D --> E["Balance W"] E --> F["L out"] G["R in"] --> H["+"] H --> I["Delay"] I --> J["+"] J --> K["Balance W"] K --> L["2-Band EQ"] L --> M["R out"] B --> N["Feedback"] I --> O["Feedback"] D --> P["Balance D"] J --> Q["Balance D"] L --> R["B…](/content/2026/06/1346059/images/02f60b210e77b1efe7990cee168902ed9a7a57f69220bd0533da9844688816be.jpg)
When Feedback Mode is CROSS:
![graph TD A["L in"] --> B["+"] C["R in"] --> D["+"] B --> E["Delay"] D --> F["Delay"] E --> G["Balance D"] F --> H["Balance D"] G --> I["+"] H --> J["+"] I --> K["Balance W"] J --> L["Balance W"] K --> M["2-Band EQ"] L --> N["2-Band EQ"] M --> O["L out"] N --> P["R out"] style A fill:#f9f,stroke:#333…](/content/2026/06/1346059/images/5309a1d6810b81af8d4a3bda061dbd78e31d3d280eaff32b26609105b2b3ac41.jpg)
| Parameter | Value Description | |
| Feedback Mode | NORMAL, CROSS | Selects the way in which delay sound is fed back into the effect. NORMAL: The left delay sound will be fed back into the left delay, and the right delay sound into the right delay. CROSS: The left delay sound will be fed back into the right delay, and the right delay sound into the left delay. |
| Delay Left 0–420 | [ms], note *1 | Adjusts the time from the direct sound until when the left delay sound is heard. |
| Delay Right 0–420 | [ms], note *1 | Adjusts the time from the direct sound until when the right delay sound is heard. |
| Phase Left NORMAL, INVERT | Selects the phase of the left delay sound. NORMAL: Phase is not changed. INVERT: Phase is inverted. | |
| Phase Right NORMAL, INVERT | Selects the phase of the right delay sound. NORMAL: Phase is not changed. INVERT: Phase is inverted. | |
| Feedback # -98– | +98 [%] Adjusts the proportion (%) of the delay sound that is fed back into the effect. Negative (-) settings will invert the phase. | |
| HF Damp | 200–8000 [Hz], BYPASS | Adjusts the frequency above which sound fed back to the effect will be cut.If you do not want to cut the high frequencies of the feedback, set this parameter to BY-PASS. |
| Low Gain -15- +15 [dB] Adjusts the gain of the low frequency. | ||
| High Gain -15- +15 [dB] Adjusts the gain of the high frequency. | ||
| Balance # D100:0W-D0:100W | Adjusts the volume balance between the direct sound and the delay sound.With a setting of D100:0W only the direct sound will be output, and with a setting of D0:100W only the delay sound will be output. | |
| Level 0–127 Adjusts the output level. | ||
18: LONG DELAY
This is useful when you want to apply a delay that is longer than 17: St DELAY.
![graph TD A["L in"] --> B["+"] C["R in"] --> D["+"] B --> E["Balance D"] D --> F["Balance D"] E --> G["+"] F --> H["+"] G --> I["2-Band EQ"] H --> J["2-Band EQ"] I --> K["L out"] J --> L["R out"] M["Delay"] --> N["Feedback"] O["Balance W"] --> P["Balance W"] Q["Balance W"] --> R["Balance W"]](/content/2026/06/1346059/images/d87784ea5b94e0667eeacacf0ccaad5c3bb54fd8701766236725f8af688efc72.jpg)
| Parameter | Value Description | |
| Delay 0–840 [ms] | , note *1 | Adjusts the time from the direct sound until the delay sound is heard. |
| Feedback # -98- | +98 [%] Adjusts the proportion (%) of the delay sound that is fed back into the effect.Negative (-) settings will invert the phase. | |
| HF Damp 200–8 | 000 [Hz], BYPASS | Adjusts the frequency above which sound fed back to the effect will be cut.If you do not want to cut the high frequencies of the feedback, set this parameter to BY-PASS. |
| Low Gain -15- | +15 [dB] Adjusts the gain of the low frequency. | |
| High Gain -15- | +15 [dB] Adjusts the gain of the high frequency. | |
| Balance # D100:0 | W-D0:100W | Adjusts the volume balance between the direct sound and the delay sound.With a setting of D100:0W only the direct sound will be output, and with a setting of D0:100W only the delay sound will be output. |
| Level 0–127 Adjusts the output level. | ||
19: MOD DELAY (Modulation Delay)
This effect adds modulation to the delayed sound, producing an effect similar to a flanger.
When Feedback Mode is NORMAL:
![graph TD A["L in"] --> B["+"] B --> C["Delay"] C --> D["Modulation"] D --> E["+"] E --> F["2-Band EQ"] F --> G["L out"] H["R in"] --> I["+"] I --> J["Delay"] J --> K["Modulation"] K --> L["+"] L --> M["2-Band EQ"] M --> N["R out"] B --> O["Feedback Feedback"] I --> P["Feedback Feedback"] O --> B P -…](/content/2026/06/1346059/images/7cf4401e07a115ecde9ab1bdb6d1db66f65eba27b95c49333351580fb9cfb672.jpg)
When Feedback Mode is CROSS:
![graph TD A["L in"] --> B["+"] C["R in"] --> D["+"] B --> E["Delay"] D --> F["Delay"] E --> G["Modulation"] F --> H["Modulation"] G --> I["Balance D"] H --> J["Balance W"] I --> K["2-Band EQ"] J --> L["2-Band EQ"] K --> M["L out"] L --> N["R out"] B --> O["Feedback Feedback"] D --> P["Feedback Feedba…](/content/2026/06/1346059/images/3af59fa981299dd0f75439eaeb0f2245e853affe1a71ec02ddf79a5125f63571.jpg)
| Parameter | Value Description | |
| Feedback Mode | NORMAL, CROSS | Selects the way in which delay sound is fed back into the effect. NORMAL: The left delay sound will be fed back into the left delay, and the right delay sound into the right delay. CROSS: The left delay sound will be fed back into the right delay, and the right delay sound into the left delay. |
| Delay Left 0–370 | [ms] Adjusts the time from the direct sound until when the left delay sound is heard. | |
| Delay Right 0–370 | [ms] Adjusts the time from the direct sound until when the right delay sound is heard. | |
| Feedback -98–+98 | [%] Adjusts the proportion (%) of the delay sound that is fed back into the effect. Negative (-) settings will invert the phase. | |
| HF Damp 200–8000 [Hz], BYPASS | Adjusts the frequency above which sound fed back to the effect will be cut. If you do not want to cut the high frequencies of the feedback, set this parameter to BY-PASS. | |
| Rate # 0.05–10.00 | [Hz] Adjusts the speed of the modulation. | |
| Depth 0–127 | Adjusts the depth of the modulation. | |
| Phase 0–180 [deg] | Adjusts the spatial spread of the sound. | |
Adding effects
| Parameter | Value Description |
| Low Gain | -15– +15 [dB] Adjusts the gain of the low frequency. |
| High Gain -15– | -15 [dB] Adjusts the gain of the high frequency. |
| Balance # D100:0W–D0:100W | Adjusts the volume balance between the direct sound and the modulation delay sound.With a setting of D100:0W only the direct sound will be output, and with a setting of D0:100W only the modulation delay sound will be output. |
| Level 0–127 Adjusts the output level. | |
20: 3 TAP DELAY (Triple Tap Delay)
The Triple Tap Delay produces three delay sounds; center, left and right.
![graph TD A["L in"] --> B["+"] C["R in"] --> D["+"] B --> E["Triple Tap Delay"] D --> F["Feedback"] E --> G["Center Tap"] F --> H["Right Tap"] G --> I["Balance W"] H --> J["Balance W"] I --> K["2-Band EQ"] J --> L["2-Band EQ"] K --> M["L out"] L --> N["R out"] O["Balance D"] --> P["+"] Q["Balance D"]…](/content/2026/06/1346059/images/9ab302bf07ed1e02f0fd5a52174b316a8ba9d96cb7cc5d38f235a6a6c7842d09.jpg)
| Parameter | Value Description | |
| Delay Left | 0–840 [ms], note *1 | Adjusts the time delay from the direct sound until when the left delay sound is heard. |
| Delay Right 0–840 [ms], note *1 | 0–840 [ms], note *1 | Adjusts the time delay from the direct sound until when the right delay sound is heard. |
| Delay Center 0–840 [ms], note *1 | 0–840 [ms], note *1 | Adjusts the time delay from the direct sound until when the center delay sound is heard. |
| Feedback # -98– | +98 [%] Adjusts the proportion (%) of the delay sound that is fed back into the effect.Negative (-) settings will invert the phase. | |
| HF Damp 200–8000 [Hz], BYPASS | 000 [Hz], BYPASS | Adjusts the frequency above which sound fed back to the effect will be cut.If you do not want to cut the high frequencies of the feedback, set this parameter to BY-PASS. |
| Left Level 0–127 | Adjusts the volume of the left delay sound. | |
| Right Level 0–127 | Adjusts the volume of the right delay sound. | |
| Center Level 0–127 | Adjusts the volume of the center delay sound. | |
| Low Gain -15– +15 [dB] Adjusts the gain of the low frequency. | ||
| High Gain -15– +15 [dB] Adjusts the gain of the high frequency. | ||
| Parameter | Value Description | |
| Balance # | D100:0W–D0:100W | Adjusts the volume balance between the direct sound and the delay sound.With a setting of D100:0W only the direct sound will be output, and with a setting of D0:100W only the delay sound will be output. |
| Level 0–127 Adjusts the output level. | ||
21: 4 TAP DELAY (Quadruple Tap Delay)
The Quadruple Tap Delay has four delays.
![graph TD L_in["L in"] --> A["+"] R_in["R in"] --> B["+"] A --> C["Feedback"] B --> C C --> D["Quadruple Tap Delay"] D --> E1["Delay 1"] D --> E2["Delay 2"] D --> E3["Delay 3"] D --> E4["Delay 4"] E1 --> F1["Balance D"] E2 --> F2["Balance W"] E3 --> F3["Balance W"] E4 --> F4["Balance D"] F1 --> G1["L…](/content/2026/06/1346059/images/67d6dd6ada64b344811e60d6fe3d59ccfd0207c5dcfd685e6b4098904486fafe.jpg)
The stereo location of each delay sound is as follows.

| Parameter | Value Description | |
| Delay 1 | 0–840 [ms], note *1 | Adjusts the time delay from the direct sound until when delay 1 sound is heard. |
| Delay 2 0–840 [ms], note *1 | Adjusts the time delay from the direct sound until when delay 2 sound is heard. | |
| Delay 3 0–840 [ms], note *1 | Adjusts the time delay from the direct sound until when delay 3 sound is heard. | |
| Delay 4 0–840 [ms], note *1 | Adjusts the time delay from the direct sound until when delay 4 sound is heard. | |
| Level 1 0–127 Adjusts the volume of delay 1 sound. | ||
| Level 2 0–127 Adjusts the volume of delay 2 sound. | ||
| Level 3 0–127 Adjusts the volume of delay 3 sound. | ||
| Level 4 0–127 Adjusts the volume of delay 4 sound. | ||
| Feedback # -98– | +98 [%] Adjusts the proportion (%) of the delay sound that is fed back into the effect.Negative (-) settings will invert the phase. | |
| HF Damp | 200–8000 [Hz], BYPASS | Adjusts the frequency above which sound fed back to the effect will be cut.If you do not want to cut the high frequencies of the feedback, set this parameter to BY-PASS. |
| Balance # D100:0W-D0:100W | Adjusts the volume balance between the direct sound and the delay sound.With a setting of D100:0W only the direct sound will be output, and with a setting of D0:100W only the delay sound will be output. | |
| Level 0–127 Adjusts the output level. | ||
22: TM CTRL DLY (Time Control Delay)
You can change the delay time in real time. Lengthening the delay will lower the pitch, and shortening it will raise the pitch.
![graph TD A["L in"] --> B["+"] C["R in"] --> D["+"] B --> E["Balance D"] D --> F["Balance D"] E --> G["+"] F --> H["+"] G --> I["2-Band EQ"] H --> J["2-Band EQ"] I --> K["L out"] J --> L["R out"] M["Time Control Delay"] --> N["Feedback"] N --> O["Balance W"] O --> G N --> P["Balance W"] P --> G](/content/2026/06/1346059/images/e1a4fa5c8813f77e5e4a359d8487a70837b1a5de9cfc87953b042981a5600462.jpg)
| Parameter | Value Description |
| Delay # | 0–840 [ms] Adjusts the time delay from the direct sound until when each de-lay sound is heard. |
| Feedback # -98- | +98 [%] Adjusts the proportion (%) of the delay sound that is fed back into the effect.Negative (-) settings will invert the phase. |
| Acceleration 0–15 | This parameter adjusts the time over which the Delay Time will change from the current setting to a newly specified setting.The rate of change for the Delay Time directly affects the rate of pitch change. |
| HF Damp 200–8000 [Hz], BYPASS | Adjusts the frequency above which sound fed back to the ef-fect will be cut.If you do not want to cut the high frequencies of the feed-back, set this parameter to BY-PASS. |
| Pan L64–63R Adjusts the stereo loca-tion of the delay sound.L64 is far left, 0 is center, and 63R is far right. | |
| Low Gain -15- +15 [dB] Adjusts the gain of the low fre-quency. | |
| High Gain -15- +15 [dB] Adjusts the gain of the high fre-quency. | |
| Parameter | Value Description | |
| Balance | D100:0W–D0:100W | Adjusts the volume balance between the direct sound and the delay sound.With a setting of D100:0W only the direct sound will be output, and with a setting of D0:100W only the delay sound will be output. |
| Level 0–127 | Adjusts the output level. | |
23: 2V PCH SHIFT (2-Voice Pitch Shifter)
A Pitch Shifter shifts the pitch of the direct sound. This 2-voice pitch shifter has two pitch shifters, and can add two pitch shifted sounds to the direct sound.
![graph TD L_in -->|Level Balance A| Sum1["+"] R_in -->|Level Balance B| Sum1 Sum1 -->|2Voice Pitch Shifter| L_out Sum1 -->|PanA L| Sum2["+"] Sum1 -->|PanA R| Sum2 Sum1 -->|PanB L| Sum3["+"] Sum1 -->|PanB R| Sum3 Sum2 -->|Balance D| L_out Sum2 -->|Balance W| R_out Sum3 -->|Balance D| L_out Sum3 -->|Ba…](/content/2026/06/1346059/images/eeb8473a2744a014a5f33b67a37131ea1f591b4ace23579780ae64d4f288048a.jpg)
| Parameter | Value Description | |
| Mode | 1, 2, 3, 4, 5 Higher settings of this parameter will result in slower response, but steadier pitch. | |
| Coarse A #1 -24- | +12 [semi] Adjusts the pitch of Pitch Shift A in semitone steps (-2- +1 octaves). | |
| Coarse B #2 | -24- +12 [semi] | Adjusts the pitch of Pitch Shift B in semitone steps (-2- +1 octaves). |
| Fine A #1 -100- | +100 [cent] | Makes fine adjustments to the pitch of Pitch Shift A in 2-cent steps (-100- +100 cents).One cent is 1/100th of a semi-tone. |
| Fine B #2 | -100- +100 [cent] | Makes fine adjustments to the pitch of Pitch Shift B in 2-cent steps (-100- +100 cents).One cent is 1/100th of a semi-tone. |
| Pre Delay A 0-500 [ms] Adjusts the time delay from when the direct sound begins until the Pitch Shift A sound is heard. | ||
| Pre Delay B | 0-500 [ms] Adjusts the time delay from when the direct sound begins until the Pitch Shift A sound is heard. | |
| Pan A | L64-63R Adjusts the stereo location of the Pitch Shift A sound.L64 is far left, 0 is center, and 63R is far right. | |
| Pan B | L64-63R Adjusts the stereo location of the Pitch Shift B sound.L64 is far left, 0 is center, and 63R is far right. | |
Adding effects
| Parameter | Value Description | |
| Level Balance | A100:0B–A0:100B | Adjusts the volume balance between the Pitch Shift A and Pitch Shift B sounds. |
| Balance D100:0W–D0:100W | Adjusts the volume balance between the direct sound and the pitch shift sound.With a setting of D100:0W only the direct sound will be output, and with a setting of D0:100W only the pitch shift sound will be output. | |
| Level 0–127 Adjusts the output level. | ||
24: FB PCH SHIFT (Feedback Pitch Shifter)
This pitch shifter allows the pitch shifted sound to be fed back into the effect.
![graph TD L_in --> A["+"] R_in --> B["+"] A --> C["Balance D"] B --> D["Balance D"] C --> E["+"] D --> F["+"] E --> G["2-Band EQ"] F --> H["2-Band EQ"] G --> I["L out"] H --> J["R out"] K["Pitch Shifter"] --> E K --> F K --> H L_in --> K R_in --> K K -->|Feedback| B](/content/2026/06/1346059/images/8d2355303004e222969db28e925baf33d8d1fa23ecfbcddfa3379bfe8a0cba75.jpg)
| Parameter | Value Description |
| Mode | 1, 2, 3, 4, 5 Higher settings of this parameter will result in slower response, but steadier pitch. |
| Coarse #1 -24- +12 [semi] Adjusts the pitch of the pitch shifted sound in semitone steps (-2- +1 octaves). | |
| Fine #1 -100- +100 [cent] | Makes fine adjustments to the pitch of the pitch shifted sound in 2-cent steps (-100- +100 cents). |
| Pre Delay 0-500 [ms] Adjusts the time delay from when the direct sound begins until the pitch shifted sound is heard. | |
| Feedback # -98- +98 [%] Adjusts the proportion (%) of the processed sound that is fed back into the effect.Negative (-) settings will invert the phase. | |
| Pan L64-63R Adjusts the stereo location of the pitch shifted sound.L64 is far left, 0 is center, and 63R is far right. | |
| Low Gain -15- +15 [dB] Adjusts the gain of the low frequency. | |
| High Gain -15- -15 [dB] Adjusts the gain of the high frequency. | |
| Balance D100:0W- D0:100W | Adjusts the volume balance between the direct sound and the pitch shift sound.With a setting of D100:0W only the direct sound will be output, and with a setting of D0:100W only the pitch shift sound will be output. |
| Level 0-127 Adjusts the output level. | |
25: REVERB
The Reverb effect adds reverberation to the sound, simulating an acoustic space.
![graph LR L_in --> A["+"] R_in --> B["+"] A --> C["Balance D"] B --> D["Balance D"] C --> E["+"] D --> F["+"] E --> G["Balance W"] F --> H["Balance W"] G --> I["2-Band EQ"] H --> J["2-Band EQ"] I --> K["L out"] J --> L["R out"]](/content/2026/06/1346059/images/637e7cbde77632e38085a52b6db3c6e86bca19c086408b3fb89b20c0df9a82e4.jpg)
| Parameter | Value Description | |
| Type | ROOM1, ROOM2, STAGE1, STAGE2, HALL1, HALL2 | Selects the type of Reverb effect. ROOM1: dense reverb with short decay ROOM2: sparse reverb with short decay STAGE1: reverb with greater late reverberation STAGE2: reverb with strong early reflections HALL1: reverb with clear reverberance HALL2: reverb with rich reverberance |
| Pre Delay 0.0–100 [ms] | Adjusts the time delay from when the direct sound begins until the reverb sound is heard. | |
| Time # | 0–127 Adjusts the time length of reverberation. | |
| HF Damp 200–8000 [Hz], BYPASS | Adjusts the frequency above which the reverberant sound will be cut. As the frequency is set lower, more of the high frequencies will be cut, resulting in a softer and more muted reverberance. If you do not want the high frequencies to be cut, set this parameter to BYPASS. | |
| Low Gain -15–+15 [dB] | Adjusts the gain of the low frequency. | |
| High Gain -15–+15 [dB] | Adjusts the gain of the high frequency. | |
| Balance # | D100:0W–D0:100W | Adjusts the volume balance between the direct sound and the reverb sound. With a setting of D100:0W only the direct sound will be output, and with a setting of D0:100W only the reverb sound will be output. |
| Level 0–127 Adjusts the output level. | ||
26: GATED REVERB
Gate Reverb is a special type of reverb in which the reverberant sound is cut off before its natural length.
![graph LR L_in --> G["Gated Reverb"] R_in --> G G --> B1["Balance D"] G --> B2["Balance W"] G --> B3["Balance W"] G --> B4["Balance D"] B1 --> E1["2-Band EQ"] B2 --> E2["2-Band EQ"] B3 --> E3["2-Band EQ"] B4 --> E4["2-Band EQ"] E1 --> L_out["L out"] E2 --> L_out E3 --> L_out E4 --> L_out](/content/2026/06/1346059/images/a95812e526a6bd47d0961a83cce441504c1f4da56bfa68927c1f287a540a4b13.jpg)
| Parameter | Value Description | |
| Type | NORMAL, RE-VERSE, SWEEP1, SWEEP2 | Selects the type of reverb.NORMAL: conventional gate re-verbREVERSE: backwards reverbSWEEP1: the reverberant sound moves from right to leftSWEEP2: the reverberant sound moves from left to right |
| Pre Delay 0.0–100 | [ms] Adjusts the | time delay fromwhen the direct sound beginsuntil the reverb sound is heard. |
| Gate Time 5–500 | [ms] Adjusts the | time from when thereverb is heard until when it dis-appears. |
| Low Gain -15–+ | 15 [dB] Adjusts the | gain of the low fre-quency. |
| High Gain -15–+ | 15 [dB] Adjusts the | gain of the high fre-quency. |
| Balance # D100:0 | W–D0:100W | Adjusts the volume balance be-tween the direct sound and thereverb sound.With a setting of D100:0W only thedirect sound will be output, andwith a setting of D0:100W only thereverb sound will be output. |
| Level # 0–127 | Adjusts the output level. | |
27: OD>CHORUS (Overdrive→Chorus)
This effect connects an overdrive and a chorus in series.
![graph LR A["L in"] --> B["+"] C["R in"] --> B B --> D["Overdrive"] D --> E["Chorus"] E --> F["Balance D"] E --> G["Balance W"] E --> H["Balance W"] E --> I["Balance D"] E --> J["R out"] F --> K["L out"] G --> K H --> K I --> K J --> K](/content/2026/06/1346059/images/c1d475250f64d8e862baa49b037460bce36c2f07c498fa0fc8db6a106ea374c6.jpg)
| Parameter | Value Description |
| OD Drive | 0–127 Adjusts the degree of overdrive distortion.The volume will change together with the degree of distortion. |
| OD Pan # L64–63R | Adjusts the stereo location of the overdrive sound.L64 is far left, 0 is center, and 63R is far right. |
| Parameter | Value Description | |
| Cho Delay | 0.0–100 [ms] Adjusts the time delay from when the direct sound begins until the chorus sound is heard. | |
| Cho Rate 0.05–10 | 0.00 [Hz] Adjusts the modulation speed of the chorus effect. | |
| Cho Depth 0–127 | Adjusts the modulation depth of the chorus effect. | |
| Cho Balance # | D100:0W–D0:100W | Adjusts the volume balance between the overdrive sound that is sent through the chorus and the overdrive sound that is not sent through the chorus.With a setting of “D100:0W,” only the overdrive sound will be output. With a setting of “D0:100W,” only the overdrive sound that is sent through the chorus will be output. |
| Level | 0–127 Adjusts the output level. | |
28: OD>FLANGER (Overdrive→Flanger)
This effect connects an overdrive and a flanger in series.
![graph TD A["L in"] --> B["+"] C["R in"] --> B B --> D["Overdrive"] D --> E["+"] F["Balance D"] --> G["+"] H["Balance W"] --> I["+"] J["Balance W"] --> K["+"] L["Balance D"] --> M["+"] N["R out"] --> O["+"] P["Feedback"] --> Q["+"] R["Flanger"] --> S["+"] T["L out"] --> U["+"]](/content/2026/06/1346059/images/26e9a28fd41f63af5248d74a11d451015810425859ca80ecac5a6bf250bd1368.jpg)
| Parameter | Value Description |
| OD Drive | 0-127 Adjusts the degree of overdrive distortion.The volume will change together with the degree of distortion. |
| OD Pan # L64-63R | Adjusts the stereo location of the overdrive sound.L64 is far left, 0 is center, and 63R is far right. |
| Flg Delay 0.0-100 [ms] | Adjusts the time delay from when the direct sound begins until the flanger sound is heard. |
| Flg Rate | 0.05-10.00 [Hz] |
| Flg Depth | 0-127 Adjusts the modulation depth of the flanger effect. |
| Flg Feedback -98- | +98 [%] Adjusts the proportion (%) of the flanger sound that is fed back into the effect.Negative (-) settings will invert the phase. |
Adding effects
| Parameter | Value Description | |
| Flg Balance # | D100:0W–D0:100W | Adjusts the volume balance between the overdrive sound that is sent through the flanger and the overdrive sound that is not sent through the flanger. With a setting of “D100:0W,” only the overdrive sound will be output. With a setting of “D0:100W,” only the overdrive sound that is sent through the flanger will be output. |
| Level 0–127 Adjusts the output level. | ||
29: OD>DELAY (Overdrive→Delay)
This effect connects an overdrive and a delay in series.
![graph TD A["L in"] --> B["+"] C["R in"] --> B B --> D["Overdrive"] D --> E["+"] F["Balance D"] --> G["+"] H["Balance W"] --> I["+"] J["Balance W"] --> K["+"] L["Balance D"] --> M["+"] N["Balance D"] --> O["+"] P["R out"] --> Q["+"] R["Feedback"] --> S["Delay"] S --> D](/content/2026/06/1346059/images/d172f06f2cdca34d20a21016c07460931afd32cbfcc44501482fa2eaa786d544.jpg)
| Parameter | Value Description |
| OD Drive | 0–127 Adjusts the degree of overdrive distortion.The volume will change together with the degree of distortion. |
| OD Pan # L64–63R | Adjusts the stereo location of the overdrive sound.L64 is far left, 0 is center, and 63R is far right. |
| Delay Time 0–500 [ms] | Adjusts the time delay from when the direct sound begins until the delay sound is heard. |
| Dly Feedback -98– +98 [%] | Adjusts the proportion (%) of the delay sound that is fed back into the effect.Negative (-) settings will invert the phase. |
| Dly HF Damp 200–8000 [1Hz], BYPASS | Adjusts the frequency above which delayed sound fed back to the effect will be cut.If you do not want to cut the high frequencies of the feedback, set this parameter to BY-PASS. |
| Dly Balance # D100:0W–D0:100W | Adjusts the volume balance between the overdrive sound that is sent through the delay and the overdrive sound that is not sent through the delay.With a setting of “D100:0W,” only the overdrive sound will be output. With a setting of “D0:100W,” only the overdrive sound that is sent through the delay will be output. |
| Level 0–127 | Adjusts the output level. |
30: DIST>CHORUS (Distortion→Chorus)
This effect connects distortion and chorus in series. The parameters are essentially the same as "27: OD>CHORUS," with the exception of the following two.
OD Drive→Dist Drive (Specifies the amount of distortion.)
OD Pan→Dist Pan (Specifies the stereo location of the distortion sound.)
![graph TD A["L in"] --> B["+"] C["R in"] --> B B --> D["Distortion"] D --> E["Chorus"] E --> F["Balance D"] E --> G["Balance W"] E --> H["Balance W"] E --> I["Balance D"] E --> J["Balance W"] E --> K["R out"] F --> L["L out"] G --> M["R out"]](/content/2026/06/1346059/images/60b1f19b321d0b8239d66c3a73f8a8e383cdf3273926da9d14a45b01381b4bfc.jpg)
31: DIST>FLANGER (Distortion→Flanger)
This effect connects distortion and flanger in series. The parameters are essentially the same as in "28: OD>FLANGER," with the exception of the following two.
OD Drive→Dist Drive (Specifies the amount of distortion.)
OD Pan→Dist Pan (Specifies the stereo location of the distortion sound.)
![graph TD A["L in"] --> B["+"] C["R in"] --> B B --> D["Distortion"] D --> E["+"] F["Balance D"] --> G["+"] H["Balance W"] --> I["+"] J["Balance W"] --> K["+"] L["Balance D"] --> M["+"] N["R out"] --> O["+"] P["Feedback"] --> Q["+"] R["Flanger"] --> S["+"] T["L out"] --> U["+"]](/content/2026/06/1346059/images/0326caedf040f9be72fa08e32558c2f865980df5b0c6473f4287e683555f4e47.jpg)
32: DIST>DELAY (Distortion→Delay)
This effect connects distortion and delay in series. The parameters are essentially the same as in "29: OD>DELAY," with the exception of the following two.
OD Drive→Dist Drive (Specifies the amount of distortion.)
OD Pan→Dist Pan (Specifies the stereo location of the distortion sound.)
![graph TD A["L in"] --> B["+"] C["R in"] --> B B --> D["Distortion"] D --> E["+"] F["Balance D"] --> G["+"] H["Balance W"] --> I["+"] J["Balance W"] --> K["+"] L["Balance D"] --> M["+"] N["Balance D"] --> O["+"] P["R out"] --> Q["+"] R["Feedback"] --> S["+"] T["Balance W"] --> U["+"] V["Balance W"] -…](/content/2026/06/1346059/images/d495137c281dd59ab1d5f2107ab73268d05e40d4b88b605501b010575378af41.jpg)
33: ENH>CHORUS (Enhancer→Chorus)
This effect connects an enhancer and a chorus in series.
![graph LR L_in --> Enhancer1["Enhancer"] R_in --> Enhancer2["Enhancer"] L_in --> Mix1["Mix"] R_in --> Mix2["Mix"] L_in --> Mix3["+"] R_in --> Mix4["+"] Mix1 --> Chorus Mix2 --> Chorus Mix3 --> Chorus Mix4 --> Chorus Chorus --> Balance_D1["Balance D"] Chorus --> Balance_W1["Balance W"] Chorus --> Bala…](/content/2026/06/1346059/images/a7cf042180076370845f8c28636bbdb8fb39cf9744fa1638b1a0ade2811190f8.jpg)
| Parameter | Value Description |
| Enhancer Sens # | 0-127 Adjusts the sensitivity of the enhancer. |
| Enhancer Mix 0-127 | Adjusts the ratio with which the overtones generated by the enhancer are combined with the direct sound. |
| Cho Delay 0.0-100 [ms] | Adjusts the time delay from when the direct sound begins until the chorus sound is heard. |
| Cho Rate 0.05-10.00 [Hz] | Adjusts the modulation speed of the chorus effect. |
| Cho Depth 0-127 | Adjusts the modulation depth of the chorus effect. |
| Cho Balance # D100:0W-D0:100W | Adjusts the volume balance between the enhancer sound that is sent through the chorus and the enhancer sound that is not sent through the chorus. With a setting of “D100:0W,” only the enhancer sound will be output. With a setting of “D0:100W,” only the enhancer sound that is sent through the chorus will be output. |
| Level 0-127 | Adjusts the output level. |
34: ENH>FLANGER (Enhancer→Flanger)
This effect connects an enhancer and a flanger in series.
![graph LR L_in --> Enhancer1["Enhancer"] R_in --> Enhancer2["Enhancer"] L_in --> Mix1["+"] R_in --> Mix2["+"] L_in --> Mix3["+"] R_in --> Mix4["+"] Mix1 --> Flanger["Flanger"] Mix2 --> Flanger Mix3 --> Flanger Mix4 --> Flanger Flanger --> Feedback["Feedback"] Feedback --> BalanceD["Balance D"] Balanc…](/content/2026/06/1346059/images/3b6a9084e8bebc07c6b06b4dea35801ae549e93333f4ce774e90e9a8841dd464.jpg)
| Parameter | Value Description |
| Enhancer Sens # | 0–127 Adjusts the sensitivity of the enhancer. |
| Enhancer Mix 0– | 127 Adjusts the ratio with which the overtones generated by the enhancer are combined with the direct sound. |
| Flg Delay 0.0–100 | [ms] Adjusts the time delay from when the direct sound begins until the flanger sound is heard. |
| Flg Rate 0.05–10 | 00 [Hz] Adjusts the modulation speed of the flanger effect. |
| Flg Depth 0–127 | Adjusts the modulation depth of the flanger effect. |
| Parameter | Value Description |
| Flg Feedback | -98– +98 [%] Adjusts the proportion (%) of the flanger sound that is fed back into the effect.Negative (-) settings will invert the phase. |
| Flg Balance # D1 | 00:0W–D0:100WAdjusts the volume balance between the enhancer sound that is sent through the flanger and the enhancer sound that is not sent through the flanger.With a setting of “D100:0W,” only the enhancer sound will be output. With a setting of “D0:100W,” only the enhancer sound that is sent through the flanger will be output. |
| Level 0–127 Adjusts the output level. | |
35: ENH>DELAY (Enhancer→Delay)
This effect connects an enhancer and a delay in series.
![graph LR L_in --> Enhancer1["Enhancer"] R_in --> Enhancer2["Enhancer"] L_in --> Mix1["Mix"] R_in --> Mix2["Mix"] L_in --> Mix3["+"] R_in --> Mix4["+"] Mix1 --> Add1["+"] Mix2 --> Add2["+"] Mix3 --> Add3["+"] Mix4 --> Add4["+"] Add1 --> BalanceD["Balance D"] Add2 --> Delay["Delay"] Add3 --> Feedback[…](/content/2026/06/1346059/images/bb045aa88dea4003015155c82334e74461193fc74c5b4be93e67e097e51981ee.jpg)
| Parameter | Value Description |
| Enhancer Sens # | 0–127 Adjusts the sensitivity of the enhancer. |
| Enhancer Mix 0– | 127 Adjusts the ratio with which the overtones generated by the enhancer are combined with the direct sound. |
| Delay Time 0–500 [ms] | Adjusts the time delay from when the direct sound begins until the delay sound is heard. |
| Dly Feedback | 98– +98 [%] Adjusts the proportion (%) of the delay sound that is fed back into the delay input.Negative (-) settings will invert the phase. |
| Dly HF Damp 200–8000 [Hz], BYPASS | Adjusts the frequency above which delayed sound fed back to the delay input will be cut.If you do not want to cut the high frequencies of the delay feedback, set this parameter to BYPASS. |
| Dly Balance # | D100:0W–D0:100W |
| Level 0–12 | Adjusts the output level. |
Adding effects
36: CHORUS>DELAY
This effect connects a chorus and a delay unit in series.
![graph LR L_in --> A["+"] R_in --> B["+"] A --> C["Balance D"] B --> D["Balance D"] C --> E["Chorus"] D --> E E --> F["+"] G["R in"] --> H["+"] I["Balance W"] --> J["+"] K["Balance W"] --> L["+"] M["Balance W"] --> N["+"] O["Balance D"] --> P["+"] Q["Balance D"] --> R["+"] S["Balance D"] --> T["+"] U…](/content/2026/06/1346059/images/43f984d16eb269dfdd3b54ce4e99b208c94f51bda60a310fc10a1d02a907774b.jpg)
| Parameter | Value Description |
| Cho Delay | 0.0–100 [ms] Adjusts the time delay from when the direct sound begins until the chorus sound is heard. |
| Cho Rate 0.05–10 | 0.00 [Hz] Adjusts the modulation speed of the chorus effect. |
| Cho Depth 0–127 | Adjusts the modulation depth of the chorus effect. |
| Cho Balance # D | 100:0W–D0:100W |
| Delay Time 0–50 | 0 [ms] Adjusts the time delay from when the direct sound begins until the delay sound is heard. |
| Dly Feedback -98 | - +98 [%] Adjusts the proportion (%) of the delay sound that is fed back into the delay input.Negative (-) settings will invert the phase. |
| Dly HF Damp 20 | 0–8000 [Hz], BYPASS |
| Dly Balance # D | 100:0W–D0:100W |
| Level 0–127 Adjusts the output level. | |
37: FLG>DELAY (Flanger→Delay)
This effect connects a flanger and a delay in series.
![graph LR L_in --> A["+"] R_in --> B["+"] A --> C["Balance D"] B --> D["Balance D"] C --> E["+"] D --> F["+"] E --> G["Feedback"] F --> H["Feedback"] G --> I["Flanger"] H --> J["Flanger"] I --> K["Balance W"] J --> L["Balance W"] K --> M["+"] L --> N["+"] M --> O["+"] N --> P["+"] O --> Q["+"] P -->…](/content/2026/06/1346059/images/26d4748f00df36cb0c46024a29c2a819e35eac013b47e0035df1aabccd5b116a.jpg)
| Parameter | Value Description |
| Flg Delay | 0.0–100 [ms] Adjusts the time delay from when the direct sound begins until the flanger sound is heard. |
| Flg Rate 0.05–10 | 00 [Hz] Adjusts the modulation speed of the flanger effect. |
| Flg Depth 0–127 | Adjusts the modulation depth of the flanger effect. |
| Flg Feedback -98 | +98 [%] Adjusts the proportion (%) of the flanger sound that is fed back into the effect.Negative (-) settings will invert the phase. |
| Flg Balance # D1 | 00:0W–D0:100W |
| Delay Time 0–500 | [ms] Adjusts the time delay from when the direct sound begins until the delay sound is heard. |
| Dly Feedback -98 | +98 [%] Adjusts the proportion (%) of the delay sound that is fed back into the delay input.Negative (-) settings will invert the phase. |
| Dly HF Damp 20 | 00–8000 [Hz], BYPASS |
| Dly Balance # D1 | 00:0W–D0:100W |
| Level 0–127 Adjusts the output level. | |
38: CHO>FLANGER (Chorus→Flanger)
This effect connects a chorus and a flanger in series.
![graph LR L_in --> A["+"] R_in --> B["+"] A --> C["Balance D"] B --> D["Balance D"] C --> E["Chorus"] D --> E E --> F["+"] G["Feedback"] --> H["Flanger"] I["Balance W"] --> H H --> J["+"] K["Balance W"] --> J J --> L_out["L out"] M["Balance W"] --> J J --> N_Rout["R out"]](/content/2026/06/1346059/images/cfd76fc1810e42a9c4049a4a9792f991e53d7a37b8835664c51592d11703ab12.jpg)
| Parameter | Value Description |
| Cho Delay | 0.0–100 [ms] Adjusts the time delay from when the direct sound begins until the chorus sound is heard. |
| Cho Rate 0.05–10 | 0.00 [Hz] Adjusts the modulation speed of the chorus effect. |
| Cho Depth 0–127 | Adjusts the modulation depth of the chorus effect. |
| Cho Balance # D | 100:0W–D0:100W |
| Flg Delay 0.0–100 | [ms] Adjusts the time delay from when the direct sound begins until the flanger sound is heard. |
| Flg Rate 0.05–10 | 00 [Hz] Adjusts the modulation speed of the flanger effect. |
| Flg Depth 0–127 | Adjusts the modulation depth of the flanger effect. |
| Flg Feedback -98 | +98 [%] Adjusts the proportion (%) of the flanger sound that is fed back into the effect.Negative (-) settings will invert the phase. |
| Flg Balance # D | 100:0W–D0:100W |
| Level 0–127 | Adjusts the output level. |
39: CHORUS/DELAY
This effect connects a chorus and a delay in parallel. The parameters are the same as for "36: CHORUS>DELAY." However, the Dly Balance parameter adjusts the volume balance between the direct sound and the delay sound.
![graph TD A["L in L-out"] --> B["+"] C["R in R-out"] --> D["+"] B --> E["Chorus"] D --> F["Delay"] E --> G["Feedback"] F --> G G --> H["Balance W"] H --> I["+"] J["Balance D"] --> I K["Balance D"] --> I I --> L["Output"] style A fill:#f9f,stroke:#333 style C fill:#f9f,stroke:#333 style J fill:#f9f,st…](/content/2026/06/1346059/images/4d462b63b10fdf51f81df6955ec4d760fc5491bcc7e5331cfaf08c2eb5d75102.jpg)
40: FLG/DELAY (Flanger/Delay)
This effect connects a flanger and a delay in parallel. The parameters are the same as for "37: FLG>DELAY." However, the Dly Balance parameter adjusts the volume balance between the direct sound and the delay sound.
41: CHO/FLANGER (Chorus/Flanger)
This effect connects a chorus and a flanger in parallel. The parameters are the same as for "38: CHO>FLANGER." However, the Flanger Balance parameter adjusts the volume balance between the direct sound and the flanger sound.
![graph TD A["L in L-out"] --> B["+"] C["R in R-out"] --> D["+"] B --> E["Chorus"] D --> F["Flanger"] E --> G["Balance D"] F --> H["Balance W"] G --> I["+"] H --> J["+"] I --> K["Balance D"] J --> L["Balance W"] K --> M["+"] L --> N["+"] M --> O["Balance D"] N --> P["+"] O --> Q["Balance W"] P --> R["…](/content/2026/06/1346059/images/4c0fbe71b744543c5a530d07da4fecc4be2769cca98d65b4bfe17c4f53e11825.jpg)
42: LOFI
This effect intentionally degrades the audio quality to simulate a Lo-Fi sound. It is particularly effective on drums.
![graph LR A["L in"] --> B["Lo-Fi"] --> C["2-Band EQ"] --> D["L out"] E["R in"] --> F["Lo-Fi"] --> G["2-Band EQ"] --> H["R out"]](/content/2026/06/1346059/images/76aac4aaf3b0f5d9e8794b200c438b5d79a90f6d37c28f37d1f4964ad378a40b.jpg)
| Parameter | Value Description | |
| Bit Down | 0–11 This setting | lowers the audio quality.The audio quality will worsen as this setting is increased. |
| S-RateDown 0–7 | This coarsens the output signal.The sound will become coarser as this setting is increased. | |
| Post Gain | 0, +6, +12, +18 [dB] | Adjusts the output signal. |
| Low Gain | -15–+15 [dB] | Adjusts the gain of the low frequency. |
| High Gain | -15–+15 [dB] | Adjusts the gain of the high frequency. |
| Output | MONO, STE-REO | Specifies how the sound will be output.With a setting of “MONO,” the output sound will be monaural. |
| Level # | 0–127 Specifies | the output volume from the Lo-Fi effect. |
Adding effects
43: SLICER
By applying successive cuts to the sound, this effect produces what are heard as backing phrases, even though you've played something much simpler. This is especially effective when applied to sustain-type sounds.
![graph LR A["L in"] --> B["Slicer"] --> C["L out"] D["R in"] --> E["Slicer"] --> F["R out"]](/content/2026/06/1346059/images/9fe380fc522cb3def192d3b66201626b00778ed9424719327034e8c30874168f.jpg)
| Parameter | Value Description | |
| Timing Pattern | 1–34 Selects a pattern to specify the timing at which the sound will be cut. | |
| Accent Pattern 1 | -16 Specifies the location of the accents. | |
| Accent Level # 0 | -127 Adjusts the volume of the accents.As this setting is increased, the accent will be more pronounced. | |
| Attack 0–127 Adjusts the attack time of an input sound.As this setting is increased, the attack will become faster. | ||
| Rate # 0.05–10.00 | [Hz],note *2 | This sets the period for the pattern. |
| Reset OFF, ON | Specifies whether the timing pattern at which the sound is cut will be reset (ON) or not (OFF) when you play a sound.While the rhythm guide is playing, the period for the pattern is not reset even if you set this ON. | |
| Level 0–127 Adjusts the output level. | ||
44: TREMOLO
Tremolo cyclically modulates the volume to add tremolo effect to the sound.
![graph LR A["L in"] --> B["Tremolo"] B --> C["2-Band EQ"] --> D["L out"] E["R in"] --> F["Tremolo"] F --> G["2-Band EQ"] --> H["R out"]](/content/2026/06/1346059/images/f8628409af08158e035f8b8cb2e00469e82bbdd80bac8de4c7c413da698a7d3a.jpg)
| Parameter | Value Description | |
| Mod Wave | TRI, SQR, SIN, SAW1/2 | TRI: The sound will be modulated like a triangle wave.SQR: The sound will be modulated like a square wave.SIN: The sound will be modulated like a sine wave.SAW1/2: The sound will be modulated like a sawtooth wave. The teeth in SAW1 and SAW2 point at opposite directions. |
| SAW1 SAW2 | ||
| Parameter | Value Description | |
| Rate # | 0.05-10.00 [Hz], note *2 | Adjusts the frequency (speed) of the change. |
| Depth # 0-127 Sets the depth to which the effect is applied. | ||
| Reset OFF, ON This setting determines whether the period for the pattern is reset (ON), or not (OFF) when sounds are played.While the rhythm guide is playing, the period for the pattern is not reset even if you set this ON. | ||
 | ||
| Low Gain -15- +15 [dB] Adjusts the gain of the low frequency. | ||
| High Gain -15- +15 [dB] Adjusts the gain of the high frequency. | ||
| Level 0-127 Adjusts the output level. | ||
45: AUTO PAN
The Auto Pan effect cyclically modulates the stereo location of the sound.
![graph LR A["L in"] --> B["Auto Pan"] B --> C["2-Band EQ"] C --> D["L out"] E["R in"] --> F["Auto Pan"] F --> G["2-Band EQ"] G --> H["R out"]](/content/2026/06/1346059/images/72d425eaf4714fd0151a1e0834def878159a68c2abc7d78330a879e44fd3b7db.jpg)
| Parameter | Value Description | |
| Mod Wave TRI, | SQR, SIN, SAW1/2 | TRI: The sound will be modulated like a triangle wave.SQR: The sound will be modulated like a square wave.SIN: The sound will be modulated like a sine wave.SAW1/2: The sound will be modulated like a sawtooth wave. The teeth in SAW1 and SAW2 point at opposite directions. |
SAW1 SAW2 | ||
| Rate # 0.05–10.00 | [Hz], note *2 | Adjusts the frequency (speed) of the change. |
| Depth # 0–127 Sets the depth to which the effect is applied. | ||
| Reset | OFF, ON This setting determines whether the period for the pattern is reset (ON), or not (OFF) when sounds are played.While the rhythm guide is playing, the period for the pattern is not reset even if you set this ON. | |
 | ||
| Low Gain -15-+15 [dB] Adjusts the gain of the low frequency. | ||
| High Gain -15--15 [dB] Adjusts the gain of the high frequency. | ||
| Level 0-127 Adjusts the output level. | ||
46:TUMBLING DLY (Tumbling Delay)
This is a delay that first produces "tumbling" delayed repeats, and then echoes the original sound.
It is most effective when applied to single notes of a "one-shot" sound.
![graph TD A["L in"] --> B["+"] C["R in"] --> D["+"] B --> E["Tumbling Delay"] D --> E E --> F["Balance D"] F --> G["+"] H["2-Band EQ"] --> I["L out"] J["Balance W"] --> K["+"] L["Balance W"] --> M["+"] N["Balance W"] --> O["+"] P["Balance D"] --> Q["+"] R["2-Band EQ"] --> S["R out"] T["Feedback"] -->…](/content/2026/06/1346059/images/6fdd16595a2901a07f634ee1ade5b78b91d2a476702c00c2bfe7f295269c3689.jpg)
| Parameter Value Description | ||
| Type TYPE1-TYPE6 Selects one of the six available types for the number of delay sounds heard in time “A” in the diagram below. | ||
| Pre Delay 0–500 | [ms] Adjusts time “A” in the diagram below. | |
| Delay Time 0–345 | [ms] Adjusts time “B” in the diagram below. | |
Level ... ... | ||
| HF Damp 200–8000 [Hz], BYPASS | Adjusts the frequency above which sound fed back to the effect will be cut.If you do not want to cut the high frequencies of the feedback, set this parameter to BY-PASS. | |
| Feedback # -98– | +98 [%] Adjusts the proportion (%) of the delay sound that is fed back into the effect.Negative (-) settings will invert the phase. | |
| Parameter | Value Description | |
| Balance # | D100:0W–D0:100W | Adjusts the volume balance between the direct sound and the delay sound.With a setting of D100:0W only the direct sound will be output, and with a setting of D0:100W only the delay sound will be output. |
| Level 0–127 Adjusts the output level. | ||
47: FBK RIPPER (Feedback Ripper)
This effect repeatedly cuts the sound, and outputs a delayed sound for the cut portion. You can create new phrases by applying this to a drum phrase or other phrase.
![graph TD A["L in"] --> B["+"] B --> C["Delay"] C --> D["Ripper"] D --> E["2-Band EQ"] E --> F["L out"] G["R in"] --> H["+"] H --> I["Delay"] I --> J["Ripper"] J --> K["2-Band EQ"] K --> L["R out"] M["Feedback Feedback"] --> B M --> H](/content/2026/06/1346059/images/3490094b3373339867288e80d1a3619966af3ae8255b34c74b1963e50a879292.jpg)
| Parameter | Value Description | |
| Mod Wave | TRI, SQR, SIN, SAW1/2 | TRI: The sound will be cut by a triangle wave.SQR: The sound will be cut by a square wave.SIN: The sound will be cut by a sine wave.SAW1/2: The sound will be cut by a sawtooth wave. The teeth in SAW1 and SAW2 point at opposite directions. |
  | ||
| Rate # | 0.05–10.00 [Hz], note *2 | Adjusts the frequency (speed) of the change. |
| Depth # | 0–127 Sets the depth to which the effect is applied. | |
| Delay Left | 0–420 [ms], note *1 | Adjusts the time from the direct sound until the left delay sound is heard. |
| Delay Right | 0–420 [ms], note *1 | Adjusts the time from the direct sound until the right delay sound is heard. |
| Dly Feedback | -98–+98 [%] Adjusts the proportion (%) of the delay sound that is fed back into the effect.Negative (-) settings will invert the phase. | |
| Reset | OFF, ON This setting determines whether the period for the pattern is reset (ON), or not (OFF) when sounds are played.While the rhythm guide is playing, the period for the pattern is not reset even if you set this ON. | |
| Level 0–127 Adjusts the output level. | ||
note *1
(Sixteenth note), ♩₃ (Eighth-note triplet), ♩ (Dotted sixteenth note),
♪ (Eighth note), ♩3 (Quarter-note triplet), ♩ (Dotted eighth note), (Quarter note),
3 (Half-note triplet), (Dotted quarter note), (Half note),
note *2
A3 (Sixty-fourth-note triplet), A (Sixty-fourth note), A3 (Thirty-second-note triplet),
(Thirty-second note), 3 (Sixteenth-note triplet), 4 (Dotted thirty-second note),
(Sixteenth note), ♩₃ (Eighth-note triplet), ♩ (Dotted sixteenth note).
♪ (Eighth note), ♩ (Quarter-note triplet), ♪ (Dotted eighth note),
(Quarter note), 3 (Half-note triplet), 1 . (Dotted quarter note), 1 (Half note).
-3 (Whole-note triplet), ↓ (Dotted half note), o (Whole note),
1013 (Double-note triplet), (Double note)(Dotted whole note),
Making chorus settings
Regardless of the mode, only one type of chorus can be used simultaneously.
There are eight types of chorus. You can select any one of these. After selecting the Type, you can change the values for each of the parameters.
Type (Chorus Type)
You can choose from 8 types of chorus.
Value
CHORUS 1-4: General chorus settings. Adds breadth and fullness to the sound.
FEEDBACK CHORUS: Chorus that produces a flanger-like effect, creating a soft sound.
FLANGER: This effect produces a rising and falling sweep reminiscent of a jet airplane.
SHORT DELAY: This is a delay with a short delay time.
SHORT DELAY(FB): This is a delay with a short delay time and many repeats.
MEMO
"Chorus Type" provides several preset-like example settings of the chorus parameters. When you switch types, the other chorus parameters will change according to the settings of the type you select. If you intend to edit the other parameters, select a type first, and then edit the other parameters.
Pre-LPF (Chorus pre-low pass filter)
A low-pass filter can be applied to the sound coming into the chorus to cut the high-frequency range. Higher values will cut more of the high frequencies, resulting in a more mellow chorus sound.
Value: 0-7
Level (Chorus Level)
Sets the amount of the chorus sound.
Value: 0–127
Feedback (Chorus Feedback Level)
Sets the level at which the chorus sound is re-input (fed back) into the chorus. By using feedback, a denser chorus sound can be created. Higher values result in a greater feedback level.
Value: 0–127
Delay (Chorus Delay Time)
Sets the delay time of the chorus effect.
Value: 0–127
Rate (Chorus Rate)
Sets the speed (frequency) at which the chorus sound is modulated. Higher values result in faster modulation.
Value: 0–127
Depth (Chorus Depth)
Sets the depth at which the chorus sound is modulated. Higher values result in deeper modulation.
Value: 0–127
Send Lvl to Rev (Chorus send level to reverb)
Sets the amount of chorus sound that will be sent to the reverb. Higher values result in more sound being sent.
Value: 0–127
Making reverb settings
Regardless of the mode, only one type of reverb can be used simultaneously.
There are eight types of reverb. You can select any one of these. After selecting the Type, you can change the values for each of the parameters.
Type (Reverb Type)
You can choose from 8 types of reverb.
Value
ROOM1-3: Simulates the reverberation of room interiors. It produces a well-defined and spacious reverberation.
HALL1, 2: Simulates the reverberation exhibited by halls. They provide a deeper reverberation than the Room reverbs.
PLATE: Simulates a plate reverb unit (a type of artificial reverb that utilized a metal plate).
DELAY: A standard delay, that produces echo effects.
PANNING DELAY: This is a special delay in which the delayed sound alternates between left and right. It is effective when you are listening in stereo.
MEMO
"Reverb Type" provides several preset-like example settings of the reverb parameters. When you switch types, the other reverb parameters will change according to the settings of the type you select. If you intend to edit the other parameters, select a type first, and then edit the other parameters.
Character (Reverb Character)
Selects the type of reverb. 0–5 are reverb effects, and 6 and 7 are delay effects.
Value: 0–7
Pre-LPF (Reverb pre-low pass filter)
A low pass filter can be applied to the sound coming into the reverb to cut the high frequency range. Higher values will cut more of the high frequencies, resulting in a more mellow reverberation.
Value: 0–7
Level (Reverb Level)
Sets the amount of the reverberant sound. Higher values result in louder reverberation.
Value: 0–127
Time (Reverb Time)
Sets the time over which the reverberation will continue. Higher values result in longer reverberation.
Value: 0–127
Delay Feedback (Reverb Delay Feedback)
This parameter is available when the Reverb Character (Character) is set to 6, 7 or the Reverb Type (Type) is set to Delay or Panning Delay. It sets the way in which delays repeat. Higher values result in more delay repeats.
Value: 0–127
Settings common to all modes (System Function)
Settings that affect the entire operating environment of the RS-50, such as tuning and MIDI message reception, are referred to as system functions. This section explains how to make settings for the System functions and describes the functions of the different System parameters. The parameters are organized into the following six groups.
- GENERAL:
Make settings common to the entire system (p. 89). - CONTROLLER:
Make controller-related settings (p. 89).
• MIDI: Make MIDI-related settings (p. 90). - PATCH SCALE (Patch Scale Tune):
Make scale tune settings for a patch (p. 91).
How to make the system function settings
- Press [SYSTEM] so it is lit.
- Select the parameter that you want to edit.
"Selecting system setting parameters" (p. 88) - Use VALUE [-]/[+] to modify the value.
- Repeat steps 2–3 to make the settings for the System function.


Changes you make to the system function settings are temporary, and will be lost when you turn off the power. If you want to save the settings you modified, perform the following operation.
- To save the settings you modified, press [WRITE].
| WRITE15YSTEM | CENTJ |
- Press [ENTER] to execute.

When you save system settings, the previously saved settings will be overwritten and lost.
If you decide not to save the system function, press [EXIT].
Selecting system setting parameters
![graph TD A["GENERAL"] --> B["SYSTEMIGENERAL LCD Contrast: IN1"] B --> C["SYSTEMIGENERAL Clock Source: INI"] C --> D["SYSTEMICONTROLLER Mod: MODULATION"] D --> E["MIDI"] E --> F["SYSTEMIMIDI Patch Rx Ch: 1"] F --> G["SYSTEMIPATCH SCALE Type: EQUAL"] G --> H["SYSTEMIPATCH SCALE Tune B: 8"] H --> I["PA…](/content/2026/06/1346059/images/a36e94645551abeba9f8c591d2efdec6c42f76c0293cef97ee2c0f45e0bd78b4.jpg)
Functions of the system parameters
System parameter functions are explained here according to the group in which they are found.
Settings common to the entire system (GENERAL)
LCD Contrast
Adjusts the contrast of the display.
VALUE: 1–10
MEMO
The LCD CONTRAST setting is saved automatically, and is retained even while the power is off.
Master Tune
Adjusts the overall tuning of the RS-50. The display shows the frequency of the A4 note (center A).
VALUE: 415.3–466.2 Hz
Master Key Sft (Master Key Shift)
Shifts the overall pitch of the RS-50 in semitone steps.
VALUE: -24—+24
Master Level
Adjusts the volume of the entire RS-50.
VALUE: 0–127
Hold Pedal (Hold Pedal Polarity)
Select the polarity of the Hold pedal. On some pedals, the electrical signal output by the pedal when it is pressed or released is the opposite of other pedals. If your pedal has an effect opposite of what you expect, set this parameter to "REVERSE." If you are using a Roland pedal (that has no polarity switch), set this parameter to "STANDARD."
VALUE: STANDARD, REVERSE
Local Control (Local Controller)
The Local Controller determines whether the internal sound generator is disconnected (OFF) from the keyboard controller section (keyboard, pitch bend/modulation lever, knobs, buttons, D Beam controller, pedal, and so on); or not disconnected (ON). Normally, this is left "ON", but if you wish to use the RS-50's keyboard and controllers to control only external sound modules, set it to "OFF."
VALUE: OFF, ON
Clock Source
Select "MIDI" if you want synchronization-related MIDI messages to be received from an external sequencer. Select "INT" if you want to synchronize to the RS-50's internal tempo. The multi-effect changes will also synchronize to this setting.
VALUE: INT, MIDI
Settings related to controllers (CONTROLLER)
Mod (Modulation Assign)
You can use the modulation lever to apply the following effects other than vibrato.
| Value | Tx CC# | Function/Parameter Changed |
| MODULATION | CC01 Vibrato | |
| PORTA TIME CC05 | Portamento | Time (p. 47) |
| VOLUME CC07 Level | ||
| BALANCE CC08 The | volume balance of LOW-ER and UPPER tones (p. 45). | |
| PAN CC10 Pan (p. 46) | ||
| EXPRESSION CC11 Level | ||
| PORTAMENTO CC65 | Portamento | to Switch (p. 47) |
| SOSTENUTO CC66 | Holds the sound of the key being pressed | |
| SOFT CC67 Softens the tone | ||
| RESONANCE CC71 | Tone Filter | Resonance (p. 48) |
| RELEASE TIME CC72 | Tone Envelope | Release Time (p. 48) |
| ATTACK TIME CC73 | Tone Envelope | Attack Time (p. 48) |
| CUTOFF CC74 Tone | Filter Cutoff (p. 47) | |
| DECAY TIME | CC75 Tone | Envelope Decay Time (p. 48) |
| LFO RATE | CC76 Tone | LFO Rate (p. 47) |
| LFO DEPTH | CC77 Tone | LFO Depth (p. 47) |
| LFO DELAY | CC78 Tone | LFO Delay (p. 47) |
| CHO SEND LEVEL | CC93 Chorus | Send Level (p. 46) |
| REV SEND LEVEL | CC91 Reverb | Send Level (p. 46) |
| MFX PARAMETER1 | CC12 The | parameter specified by Multi-effect Control 1 (p. 69) |
| MFX PARAMETER2 | CC13 The | parameter specified by Multi-effect Control 2 (p. 69) |
| AFTERTOUCH --- | ||
In Patch mode, the modulation lever will affect the patch. In Performance mode, the modulation lever will affect the patch that is assigned to the current part. Use [DESTINATION TONE] to specify the tone that will be affected (p. 26).
"TxCC#" refers to the controller number of the control change message sent from the MIDI OUT connector when the modulation lever is operated. When set to AFTERTOUCH, Channel Aftertouch messages are sent. Set to AFTERTOUCH mainly when you want to control an external sound generator with Aftertouch messages.
Receiving these control change message from the MIDI IN connector produces the same effect as operating the modulation lever.
* When set to MFX PARAMETER1 or MFX PARAMETER2, be sure to note the following.
- When the multi-effects Type is set to 01: STEREO EQ (p. 69) or 42: LOFI (p. 83), Level is changed regardless of whether MFX PARAMETER1 or MFX PARAMETER2 is selected.
* When making the LFO RATE, LFO DEPTH or LFO DELAY settings, the effect achieved differs depending on whether [FILTER LFO] is on or off. When [FILTER LFO] is off, the LFO alters the pitch (vibrato effect). When [FILTER LFO] is on, the LFO changes the Filter Cutoff frequency (wah effect).
Settings common to all modes (System Function)
Pedal (Pedal Control Assign)
This specifies the function of the pedal connected to the CONTROL PEDAL jack.
VALUE
In addition to the items listed in Modulation Assign, you can use the pedal to apply the following effects.
TAP TEMPO: Use the pedal to make tap tempo settings (p. 37).
C1 (C1 Knob Assign)
C2 (C2 Knob Assign)
C3 (C3 Knob Assign)
Select the effects that will be controlled by the [C1]/[C2]/[C3] knobs. VALUE
In addition to the items listed in Modulation Assign, you can use the pedal to apply the following effects.
PATCH MODIFY: The effect indicated on the panel will be controlled (p. 26).
* If you assign any effects other than PATCH MODIFY to the [C1]/[C2]/[C3] knobs, you must switch the Patch Modify select button to [ENV] (envelope). If [BALANCE/LFO] is selected, the balance and LFO will change.
* If you are using the [C1]/[C2]/[C3] knobs in Performance mode to control MFX PARAMETER settings, the "MFX Source" (p. 56) setting will determine the part whose effect will be controlled.
If MFX Source is set to "Part1-16," the effect of that part will be controlled.
If MFX Source is set to "PERFORM," the System "Perform Ctrl Ch (Performance Control Channel)" (p. 90) setting will determine the part whose effect will be controlled. If this setting is "OFF," no effect will be controlled.
Settings related to MIDI (MIDI)
Patch Rx Ch (Patch Receive Channel)
Specifies the receive channel of MIDI messages in Patch mode.
VALUE: 1–16
Patch Tx Ch (Patch Transmit Channel)
Specifies the transmit channel of MIDI messages in Patch mode. If you do not want to transmit MIDI messages to external MIDI devices, turn this parameter "OFF." If you want the transmit channel to always match the Patch Receive Channel, set this parameter to "RxCh."
VALUE: 1-16, RxCh, OFF
Perform Ctrl Ch (Performance Control Channel)
Performance Ctrl Ch selects the MIDI receive channel used during switching of performances when MIDI messages (Program Change/ Bank Select) are sent from an external MIDI device. Set this to "OFF" if performances are not to be switched from an external MIDI device.
VALUE: 1–16, OFF

If only a program change is received, and if the Perform Ctrl Ch parameter setting coincides with the MIDI receive channel of a part, priority will be given to switching the performance.

If this is set to 1–16, the RS-50 will transmit MIDI messages (program change/bank select) on that channel when the performance is switched.
Rx Prog Chg (Receive Program Change Switch)
Specifies whether Program Change messages will be received (ON) or not (OFF).
VALUE: OFF, ON
Rx Bank Sel (Receive Bank Select Switch)
Specifies whether Bank Select messages will be received (ON) or not (OFF).
VALUE: OFF, ON
Rx Sys Exc (Receive System Exclusive Switch)
Specifies whether System Exclusive messages will be received (ON) or not (OFF).
VALUE: OFF, ON
Tx Prog Chg (Transmit Program Change Switch)
Specifies whether Program Change messages will be transmitted (ON) or not (OFF).
VALUE: OFF, ON
Tx Bank Sel (Transmit Bank Select Switch)
Specifies whether Bank Select messages will be transmitted (ON) or not (OFF).
VALUE: OFF, ON
Tx Edit Data (Transmit Edit Data Switch)
Specify whether changes you make in the settings of a patch or performance will be transmitted as system exclusive messages (ON), or will not be transmitted (OFF).
VALUE: OFF, ON
Tx Active Sens (Transmit Active Sensing Switch)
Specifies whether Active Sensing messages will be transmitted (ON) or not (OFF).
VALUE: OFF, ON
Device ID (Device ID Number)
When you want to transmit or receive System Exclusive messages, set this parameter to match the Device ID number of the other MIDI device.
VALUE: 17-32
Soft Thru (Soft Through Switch)
The Thru function re-transmits all messages received at the MIDI IN connector to the MIDI OUT connector without modifying them in any way.
VALUE: OFF, ON
Making scale tune settings for a patch (PATCH SCALE)
The Patch Scale function lets you use a variety of tunings for patches used in Patch mode.

If you want to make scale tune settings for each part in Performance mode, refer to "Editing the scale tune settings (SCALE TUNE)" (p. 58).
Type (Patch Scale Tune Type)
You can switch the "Type" parameter to recall various sample settings for Patch Scale. When you change "Type," all patch scale tune parameters will be changed automatically.
VALUE: EQUAL, JUST (maj) in C, JUST (min) in C, ARABIC

For details on each type, refer to "Type (Part Scale Tune Type)" (p. 58).
Tune C-Tune B (Patch Scale Tune C-B)
Make scale tune settings for Patch mode.
VALUE: -64-+63
Performing with an external MIDI device
About MIDI
MIDI (Musical Instrument Digital Interface) is a standard specification that allows music data to be exchanged among electronic musical instruments and computers. By connecting MIDI devices that are equipped with MIDI connectors, you can play multiple instruments with a single keyboard, have multiple MIDI instruments perform in ensemble, program the settings to change automatically to match the performance as the song progresses, and more.
If you mainly use the RS-50 as a standalone keyboard instrument, you may really not need to know much at all about MIDI. However, the following MIDI-related information is provided so you can play the RS-50 using an external MIDI device, or master other advanced techniques.
MIDI connectors
The RS-50 has the following two types of MIDI connectors.

- MIDI IN Connector
Performance messages from an external MIDI device are received here. When the RS-50 receives MIDI messages, it will produce sound, change the sound it's using, or perform other operations.
- MIDI OUT Connector
This connector transmits MIDI messages to external MIDI devices. The RS-50's MIDI OUT connector is used for sending the performance data of the keyboard controller section, as well as the data used for saving various settings.
MIDI channels and multitimbral sound generators
MIDI transmits many types of data over a single MIDI cable. This is made possible by MIDI channels. MIDI channels allow messages intended for a given instrument to be distinguished from messages intended for another instrument. In some ways, MIDI channels are similar to television channels. By changing the channel on a TV receiver you can view the programs of different stations. This is because the television set has thus been directed to selectively display only the information being transmitted by a particular station. In the same way, MIDI also allows a device to select the information intended for that device out of the variety of information that is being transmitted to it.
![graph TD A["Station A"] --> C["TV Signal"] B["Station B"] --> C D["Station C"] --> C C --> E["Computer"] style C stroke:#000,stroke-width:2px note right of C: The cable from the antenna carries the TV signals from many broadcast stations.](/content/2026/06/1346059/images/083b09570f02ce9269db8166ba43e48fea1610ae08881b0b8089675be5e37d44.jpg)
The TV is set to the channel of the station you wish to watch.
MIDI uses sixteen channels, numbered 1–16. Normally, receiving devices should be set so they receive only the channels they need to receive.
Example:
Set the RS-50 to send on Channel 1 and Channel 2, then set sound module A to receive only Channel 1, and sound module B to receive only Channel 2. With this setup, you can get an ensemble performance, with, for example, a guitar sound from sound module A and bass from sound module B.

When used as a sound module, the RS-50 can receive on up to sixteen MIDI channels. Sound modules like the RS-50, which can receive multiple MIDI channels simultaneously and play different sounds on each channel, are called “multitimbral sound modules.”
MIDI messages used by the RS-50
MIDI uses various types of messages to transmit a wide variety of information. MIDI messages are broadly divided into two different categories, those handled through individual MIDI channels (Channel messages), and messages that are not related to separate channels (System messages).
The RS-50 mainly uses the following MIDI messages.
Channel messages
These are messages used for conveying what is happening in a performance. These comprise the bulk of MIDI messages.
Note On
This message is sent when a key is pressed. A Note-on message contains the following three types of information:
Note-on: A key has been played.
Note number: Which key was played
Velocity: The amount of force (velocity) used when the key was played.
The Note Numbers fall within the range of 0–127, with middle C (C4) as number 60.

Note number
Note Off
This message is sent when a key is released. When a Note-off message is received, the relevant note will be turned off. A Note-off message contains the following three types of information:
Note-off: A key was released
Note number: Which key was released
Velocity: The force (velocity) used during release of the key.
Pitch Bend Change
This message transmits whatever motion is made by the Pitch Bend lever.
Aftertouch
These messages indicate how strongly the keyboard was pressed after playing a note. There are two types of Aftertouch message: Channel Aftertouch, which applies to an entire channel; and Polyphonic Aftertouch, which applies to individual notes.
The RS-50 cannot transmit Aftertouch messages when its keys are pressed. Instead, you can do this by transmitting the Aftertouch assigned to the D Beam, Modulation lever, a pedal, or a knob.
Program Change
This message changes the instrument sound. You can switch Patches and Rhythm Sets on the RS-50 using program numbers 1–128 (p. 95).
Control Change
These are messages used for increasing performance expression. By assigning Modulation (CC# (Controller Number) 1), Pan (CC#10), Expression (CC#11), and other Control Change messages to the Modulation lever, pedals, and knobs, you can then use these controls to change Performances (p. 89).
Bank Select (CC#0, CC#32) messages are used in combination with Program Change messages to switch Patches and Rhythm Sets (p. 95).
System messages
This category includes exclusive messages, messages used for synchronization, and messages that keep a MIDI system running correctly.
Exclusive messages
Exclusive messages are messages used for exchanging patches and other kinds of data between compatible devices from the same manufacturer.
If messages exchanged using MIDI were limited only to those that conform to the universally shared MIDI specifications, it would not be possible to transmit messages that are unique to a particular manufacturer, or that are designed specifically for a certain device. For this reason, MIDI allows for an exclusive format for each manufacturer, which can be used to exchange a variety of messages. On the RS-50, you can use Exclusive messages to store Patch settings and other data to sequencers (p. 98).
About MIDI Implementation Charts
Although a variety of messages for performances can be handled using MIDI, depending on the functions of the connected device, the messages that can be sent and received may differ. To see which types of MIDI message a device can transmit and receive, refer to the MIDI Implementation Chart that is included in the manual of each device. Messages which are marked by a circle in the charts of both devices can be transmitted between the two devices.
Using the RS-50 to play an external MIDI sound module
By connecting the RS-50 to an external MIDI sound module with a MIDI cable and setting the channels, the external MIDI module can be used to produce sound when you play the RS-50's keyboard.
Connecting to external MIDI sound modules
Example 1: Connecting to one external MIDI sound module

Example 2: Connecting to two external MIDI sound modules

* Messages received at the MIDI IN connector are output from the MIDI THRU connector unchanged.
Example 3: Connecting to three or more external MIDI sound modules

Performing with an external MIDI device
* If you "daisy-chain" three or more MIDI devices using IN → THRU → IN → THRU ..., the MIDI signal may become garbled, and data errors may occur. In such cases, use a MIDI Patcher. MIDI Patcher are devices that allow a single stream of MIDI data to be sent to a large number of MIDI devices without causing data errors.
- Before starting the connection procedure, make sure that the power to all devices has been turned off.
- After reading "Connecting the RS-50 to external equipment" (p. 14), connect an audio device/system or headphones.
- Connect the external MIDI sound device with the MIDI cable as shown in the figure above.
- As described in "Turning on the power" (p. 15), turn on the power of each device.
Set the keyboard transmit channel
When you have finished connecting the external MIDI device, match the keyboard's Transmit channel and the Receive channel for each of the external MIDI sound generator's Parts. Here we will explain the settings for using the RS-50 in Patch mode.
* If you are using the RS-50 in Performance mode, the part and channel numbers will be the same unless you change the settings.
- Press [SYSTEM] so it is lit.
- Use PAGE/CURSOR [ ] to select "Patch Tx Ch."

MEMO
By holding down [SHIFT] and using PAGE/CURSOR [ ]
[▶] you can quickly select the "SYSTEM | MIDI" group (p. 88).
- Use VALUE [-]/[+] to modify the value.
Value
1-16: Performance data from the RS-50 will be transmitted on the selected channel.
RxCH: Performance data will be transmitted on the same channel as the Receive Channel (p. 57) of the part.
OFF: Performance data will not be transmitted.
Normally, you will use the "RxCH" setting.
- Press [WRITE] to save the settings.
For further information, refer to "How to make the system function settings" (p. 88).
Press [EXIT] to cancel the operation and return to the previous page. With the above settings, when the RS-50's keyboard is played, sounds are simultaneously played by the RS-50 and the external MIDI sound generator.
For instructions on setting the Receive channel for each of the Parts of the external MIDI sound generator, refer to the owner's manual that came with the device.
* If you want sounds to be played only by the external MIDI sound generator, set Local control to OFF (p. 96).

When you select a patch or rhythm set on the RS-50, a bank number and program number will be transmitted to the external MIDI sound module as described in the "Bank number/program number correspondence table" (p. 95). This will switch sounds on the external MIDI sound module, but if the external MIDI sound module receives a bank number for which it provides no sounds, it may choose a substitute sound or may produce no sound at all. In order to select a sound reliably, you may wish to first select the sound group on your external MIDI sound module, and then transmit only a program number. This will allow you to switch sounds within the same group. If you want to transmit only the program number, turn "Tx Bank Sel (Transmit Bank Select Switch)" (p. 90) off.
Playing the RS-50's sound generator from an external MIDI device
Next, try playing the RS-50 from an external MIDI device.
Connecting an external MIDI device

RS-50
- Before starting the connection procedure, make sure that the power to all devices has been turned off.
- After reading "Connecting the RS-50 to external equipment" (p. 14), connect an audio device/system or headphones.
- Connect the external MIDI sound device with the MIDI cable as shown in the figure below.
- As described in "Turning on the power" (p. 15), turn on the power of each device.
Setting the patch receive channel
When you have finished connecting the external MIDI device, match RS-50's Receive channel with the external MIDI device's Transmit channel. Here we will explain the settings for using the RS-50 in Patch mode.
* If you are using the RS-50 in Performance mode, the part and channel numbers will be the same unless you change the settings.
- Press [SYSTEM] so it is lit.
- Use PAGE/CURSOR [ ] to select "Patch Rx Ch" (patch receive channel).

MEMO
By holding down [SHIFT] and using PAGE/CURSOR [ ]
[▶] you can quickly select the "SYSTEM | MIDI" group (p. 90).
- Use VALUE [-]/[+] to modify the value.
VALUE
1-16: Performance data of each part will be received on the selected channel.
Setting the program change receive switch
Then, to enable tones to be switched from the external MIDI device, set the Receive Switch for Program Change and Bank Select to ON. Factory settings have these set to ON.
- Press [SYSTEM] so it is lit.
- Use PAGE/CURSOR [ ] to select "Rx Prog Chg" (Receive Program Change Switch) and "Rx Bank Sel" (Receive Bank Select Switch).
- Use VALUE [-]/[+] to set both parameters to "ON."
- Press [WRITE] to save the settings.
For further information, refer to “How to make the system function settings” (p. 88).
Press [EXIT] to cancel the operation and return to the previous page.
* For instructions on setting the external MIDI device's Transmit channel, refer to the owner's manual for that device.
* If you are using Performance mode, you will also need to set "Receive Sw," "Receive Prg Chg," and "Receive Bank Sel" for each part in addition to the settings described above (p. 57).
Selecting RS-50 sounds from an external MIDI device
Transmitting Bank Select (Controller Numbers 0 & 32) and Program Change messages from the external MIDI device to the RS-50 allows you to switch patches and rhythm sets.
- Transmit a value for the Bank Select MSB (controller number 0) (BnH 00H mmH) message to the RS-50.
- Transmit a value for the Bank Select LSB (controller number 32) (BnH 20H IIH) message to the RS-50.
- Transmit a Program Change (CnH ppH) to the RS-50.
n: MIDI channel number
mm, ll: Bank number
pp: Program number
MEMO
The "Perform Ctrl Ch" (Performance Control Channel) setting lets you switch performances in Performance mode. With the factory settings, this is set to "OFF"; performances will not be switched.
Bank number/program number correspondence table
The MIDI messages transmitted by an external MIDI device correspond with patches/rhythm sets on the RS-50 as shown in the following table.
* If the Program numbers on your external MIDI device are referenced as values from 0 to 127, find the appropriate number by subtracting 1 from the number in the following correspondence chart.
* When the RS-50 receives a Program Change message without receiving the Bank Select, it switches to the patch or rhythm set with the same Bank number as the currently selected patch or rhythm set.

For details on how numbers in the table correspond to the sound of the RS-50, refer to "Patch list" (p. 111).
Performance
| Group | Number Bank Number Program | NumberMSB LSB | ||
| User | 001-008 085 | 000 001-008 | ||
| Preset 001-032 | 085 064 001-032 | |||
Patch
| Group | Number Bank Number Program | Number | ||
| MSB LSB | ||||
| User | 001–128 087 | 000 001–128 | ||
| Preset 001–128 | 087 064 001– | 128 | ||
| 129–256 087 | 065 001–128 | |||
| 257–384 087 | 066 001–128 | |||
| 385–512 087 | 067 001–128 | |||
| 513–640 087 | 068 001–128 | |||
| GM Patch 001– | -256 121 000– | 001–128 | ||
Performing with an external MIDI device
Rhythm Set
| Group Number | Bank Number | Program | NumberMSE | |
| User | 001-002 086 | 000 001-002 | ||
| Preset 001-020 | 086 064 001- | 020 | ||
| GM Rhythm | 001-009 120 | 000 001-057 | ||
LSB
Using an external MIDI controller to change the RS-50's tones
Use of the Modulation lever, pedals, and control knobs to make changes to the RS-50's tones in real time is explained in "Settings related to controllers (CONTROLLER)" (p. 89).
Transmitting Controller numbers set with Modulation Assign (p. 89), Pedal Control Assign (p. 90), and Knob Assign (p. 90) to the RS-50 achieves the same effect as working the Modulation lever, pedals, and knobs.
Recording to an external sequencer
Now, try using an external sequencer to record your music onto multiple tracks, and then play back the recorded performance.
Connecting to an external sequencer

RS-50
- Before starting the connection procedure, make sure that the power to all devices has been turned off.
- After reading "Connecting the RS-50 to external equipment" (p. 14), connect an audio device/system or headphones.
- Connect the external MIDI sound device with a MIDI cable as shown in the figure below.
- As described in "Turning on the power" (p. 15), turn on the power of each device.
Making settings before recording
When recording to an external sequencer, the following steps must be carried out.
- Set the RS-50's Local Control to OFF (refer to the next section).
- Turn on the external sequencer's Thru function (p. 97).
- Set the performance (p. 97).
Setting the RS-50's local control to OFF
The setting that determines whether the keyboard controller section (p. 40) and sound generator section are separated is referred to as "Local Control."
When Local Control is on, playing the keyboard will produce sound, and moving the pitch bend lever will control the pitch.
When Local Control is off, playing the keyboard will not produce sound, and moving the pitch bend lever will not control pitch. The sound generator of the RS-50 will produce sound only in response to messages received from an external MIDI device.
Sequencer
![graph TD A["Recording"] --> B["Set Thru Function to On."] B --> C["MIDI IN MID OUT"] C --> D["MIDI OUT MIDI IN"] D --> E["Sound Generating Section"] E --> F["Set Local Control to Off."] F --> G["Keyboard Controller Section"] H["All performance data that arrives at MIDI IN will be output from MIDI OU…](/content/2026/06/1346059/images/4050ab4f2efd1419af841511a0a24e9efb208c0d00e15f9778fe145febb964f0.jpg)
RS-50
The performance data from the RS-50's keyboard controller section is output from the MIDI OUT connector and recorded by the sequencer. This performance data is then also output back to the RS-50 from the sequencer's MIDI OUT connector and played by the RS-50's sound generator.
If Local Control were ON, each note would be played twice; once by the music data from the keyboard controller section, and once again by the data sent from the sequencer. In order to prevent such double triggering, the Local Control setting is turned off to separate the keyboard controller section from the sound generating section.
* If your sequencer does not have a Thru function, set the RS-50's Local Control to ON.
-
Press [SYSTEM] so it is lit.
-
Use PAGE/CURSOR [ ] to select "Local Control."

MEMO
By holding down [SHIFT] and using PAGE/CURSOR []◀ [▶] you can quickly select the "SYSTEM|GENERAL" group (p. 90).
-
Use VALUE [-]/[+] to set the parameter to "OFF."
-
Press [WRITE] to save the settings.
For further information, refer to “How to make the system function settings” (p. 88).
Press [EXIT] to cancel the operation and return to the previous page.
* Regardless of the Local Control setting, music data from an external MIDI device is always received and will play the internal sound generator.
Turning on the external sequencer's thru function
Turn the sequencer's Thru function ON. The sequencer takes the performance data received at the MIDI IN connector and outputs the data unchanged from the MIDI OUT connector (refer to the previous section).
To determine whether or not your sequencer features a MIDI Thru function and for instructions on making the Thru function setting, refer to the owner's manual for your sequencer.
* If your sequencer does not have a Thru function, set the RS-50's Local Control to ON.
Setting the performance
Before beginning to record, first make the Performance settings (select the Patches and Key mode, make any multi-effects, chorus, and reverb settings, set the knobs, and so on).

Also set the Receive Channel and Receive Switch for each part (p. 57)
Recording
Recording the performance's settings at the beginning of the song
First, record the Performance settings at the beginning of the song. If this is done, playing back the song from the beginning will automatically set the RS-50 to the Performance settings that were used during recording (regardless of the Performance that was selected when playback began), ensuring that playback will use the correct sounds and settings.
* Record the song at the tempo at which it is to be played back. If the tempo used for playback of a song is changed from the tempo selected at the time of recording, the RS-50 may not be able to correctly receive the settings for the recorded Performance, which may prevent proper playback of the performance data.
- In Performance mode, press [UTILITY] so it is lit.
- Use PAGE/CURSOR [ ] to select "XFER to MIDI."
- Press [ENTER].
Make "XFER to MIDI" settings as described in "Transmitting performance settings from the MIDI OUT connector (XFER to MIDI)" (p. 61).
Select "CUR PERFORM" for "What."
- Put your external sequencer in recording mode before you execute "XFER to MIDI."
- Press [ENTER] to transmit the settings.
Do not press any key on the keyboard while the transmission is in progress. Pressing a key sends Note messages from the MIDI OUT connector.
To cancel the transmission, press [EXIT].
- After the transmission is finished, the display will indicate "COMPLETED."
- Stop the external sequencer.
Recording each part separately
Next, we will record the music data for each Part onto separate tracks. We will start recording the song from the measure following the one in which the Performance settings were recorded.
We will record tracks in the order of drums → bass → accompaniment → melody, while listening to the tracks that were recorded on previous passes.
For example, assign Tones to each Part as shown below.
Drums: Part 10
Bass: Part 9
Accompaniment: Part 6
Melody: Part 3
* Tone changes, and the actions of the Pitch Bend lever, Modulation lever, knobs, and other controls are also recorded.
* It is not necessary to record the song at the tempo at which it is to be played back. You may record at a tempo that is comfortable for you.
Listening to the recorded performance
When you finish recording all Parts, play it back and listen to the result. Note the following when playing back a song.
* If you modify the settings of each Part (volume, panning, etc.), you will need to re-record the modified performance settings at the beginning of the song.
Set the "Rx Sys Exc" (System Exclusive Receive Switch) to ON (p. 90)
When set to OFF, the performance settings recorded at the beginning of the song cannot be received. With the factory settings, this will be "ON."
Set the same Device ID number used for recording (p. 91)
If not set to the same Device ID number, the performance settings recorded at the beginning of the song cannot be received.
Make sure to start playback at the beginning of the song
When playback of a song is started at any point other than the beginning, the performance settings at the time of recording are not used, and the song is not played back correctly.
Playing together with the playback of a recorded performance
You can play the RS-50's keyboard along with a previous performance by playing while the recorded material is played back. In this case, select a Part that was not recorded for playing the keyboard.
Transposing playback of performances (Master Key Shift)
If you wish to transpose the playback of a song, use the Master Key Shift setting. This setting will transpose all Parts except for the Drum Part. You can specify a transposition of up to +/-2 octaves in semitone steps.
- Press [SYSTEM] so it is lit.
- Use PAGE/CURSOR [ ] to select "Master Key Sft."

- Use VALUE [-]/[+] to specify the value (-24- +24).
Value: -24- +24
- Press [WRITE] to save the settings.
For further information, refer to "How to make the system function settings" (p. 88).
Press [EXIT] to cancel the operation and return to the previous page.
Backing-up (saving) all RS-50 settings on your external MIDI sequencer
By executing the Performance or Patch Utility "XFER to MIDI" command (p. 51, p. 61) with DUMP ALL selected as the content to be transmitted (What), you can transmit all of the user area data (patches, performances, system, etc.) from the MIDI OUT connector. By recording these messages on your external MIDI sequencer and saving them, you can back up all of the RS-50's data. If you want to restore the backed-up data into the RS-50 once again, send the data to the RS-50's MIDI IN. Do not operate the RS-50 while this data is being received.
Using the RS-50 as a General MIDI/General MIDI 2 system-compatible sound module
You can play back music data designed for General MIDI and General MIDI 2 sound generators by connecting an external sequencer and using the RS-50 as a sound module.

For instructions on connecting the external sequencer, refer to p. 96.
Playing back General MIDI/General MIDI 2 music data
Be sure to note the following when playing back General MIDI or General MIDI 2 music data.
Set the System Exclusive Receive Switch to ON (p. 90).
When set to OFF, GM System On and GM 2 System On MIDI messages cannot be received. With the factory settings, this will be "ON."
Make sure to play back from the beginning of the song
When playback of a song is started at any point other than the beginning, the sound generator settings won't be reset to the default settings for General MIDI and General MIDI 2, so the song won't be played back correctly.
Performing with a computer
If you are using music software running on a computer, you can use the computer to operate the RS-50's controls. Not only can you create and play back song data, you can also have Tones switch automatically.
What's more, you can use the included RS Editor software to create Tones using the computer.
Connecting with MIDI cables
A MIDI interface is required for making MIDI connections with a computer. The MIDI interface is connected to the computer, and two MIDI cables connect the MIDI connectors of the MIDI interface to the RS-50's MIDI connectors.
![graph LR A["Computer"] --> B["MIDI Interface"] B --> C["MIDI INMIDI OUT"] B --> D["MIDI cable"] C --> E["RS-50 rear panel"] D --> E style A fill:#f9f,stroke:#333 style B fill:#ccf,stroke:#333 style C fill:#cfc,stroke:#333 style D fill:#fcc,stroke:#333](/content/2026/06/1346059/images/d98a0a4e45811899aa458fddf88b762c124a2e5c8397508d47545d71bbe3493d.jpg)
Installing the included editor software
To help you get more out of your RS-50, it comes with RS Editor software. Use RS Editor to freely create your own original sounds.
Detailed instructions on installing the software can be found in the online manual contained on the RS Editor CD-ROM.
- Windows users
In the RS Editor CD-ROM, open the Readme_E.txt.
- Macintosh users
In the RS Editor CD-ROM, open the ReadMe(English).
Memo
Appendix
Troubleshooting
If your system is not operating as you think it should be, first check the following points. If after checking these points the problem persists, consult your dealer or local Roland Service Station.
* If any sort of message is being displayed on the screen during an operation, refer to “Error Messages/Messages” (p. 105).
No power
Is the AC Adapter plugged into the power socket correctly?
No sound
Is the power for the connected amp and speakers turned on? (p. 15)
Is the volume turned down?
Check the volume settings for the RS-50 and any connected amp or mixer (p. 15).
Are the components properly connected? (p. 14)
If you are able to hear sound through headphones, this may suggest a short in a cable or a malfunctioning amp or mixer. Recheck connector cables and the connected equipment.
If you are in Performance mode, have the Part Level settings been lowered? (p. 56)
Have you switched the RS-50 mode to that for listening to demo songs?
Press [EXIT] to return to regular performance mode (p. 18).
Is [SOLO SYNTH] set to ON?
The RS-50 does not sound if you just switch [SOLO SYNTH] on. Hold down keys, then move your hand over the D Beam (p. 32).
Are the effects settings correct?
Check effects ON/OFF (p. 65), multi-effects levels (p. 46, p. 56), and other related settings.
Has the pitch of the patch exceeded the range in which it can be sounded normally?
Use "Octave Shift" to lower (raise) the range being played (p.30).
If no sound is produced when you press keys on the keyboard, is Local control set to OFF?
Set Local Control to ON (p. 89).
Do the transmission and reception channels match?
- If using the RS-50 to sound an external MIDI sound generator, check to make sure the channels being used for transmission by the keyboard are matched up with the channels used for reception by the relevant Parts on the external MIDI sound generator (p. 93).
- If using an external MIDI device to sound the RS-50, each Part's reception channel needs to be set so it matches the channels that will be used for transmission by the external MIDI device (p. 94).
Are volume levels being lowered by pedal movements, or by MIDI messages (expression messages) received from an external MIDI device?
Is the MIDI Rx (Receive) Switch of the corresponding part set to "OFF"?
If using the RS-50 with an external MIDI device, turn it "ON" (p. 95).
Could the Bank Select and Program Change messages transmitted by an external device have the wrong values?
If using the RS-50 with an external MIDI device, make sure that the correct Bank Select and Program Change messages (p. 95) are transmitted.
Is the Clock Source set to MIDI?
If you set the clock source to "MIDI," some of the effects that are synchronized with the tempo will not work. Set the clock source to "INT" except when you want to synchronize the RS-50 with an external MIDI device (p. 89).
The pitch is off
Could Transpose be on? (p. 31)
Are the Octave Shift settings correct? (p. 30)
Are the Scale Tune settings correct? (p. 91, p. 58)
Are the Master Key Shift settings correct? (p. 89)
Are the Master Tune settings correct? (p. 89)
Sounds are missing
Could a Solo switch be set to ON?
When a Solo switch (p. 46) is on, only one sound is played even when more than one key is pressed. If you want multiple sounds to play simultaneously, set the Solo switch to OFF.
Are you attempting to play more than 64 voices simultaneously?
- Reduce the number of notes that are played simultaneously.
- Set Voice Reserve higher for an important Part, to help assure that it will always be sounded (p. 56).
Effects not being applied correctly
Are the master effects switches set to OFF? (p. 65)
Are the Chorus settings correct?
Check the Chorus Level (p. 86), Chorus Depth (p. 87), and Chorus Send Level (p. 46, p. 58) settings.
Are the Reverb settings correct?
Check the Reverb Level (p. 87) and Reverb Send Level (p. 46, p. 58) settings.
Are the Chorus or Reverb settings for the rhythm set correct?
Check the Chorus Send Level (p. 53) and Reverb Send Level (p. 53) settings for each note of the rhythm set.
Is any Multi-Effects switch set to "BYPASS?"
Set the Multi-Effects switch for the part being used to ON (p. 46, p. 58).
Are the Multi-Effects Source setting correct? (p. 56)
Is the Clock Source set to "MIDI?"
If you set the clock source (p. 89) to "MIDI," some of the effects that are synchronized with the tempo will not work. Set the clock source to "INT" except when you want to synchronize the RS-50 with an external MIDI device.
Is the Tone Delay time value set to the note?
There is a maximum permissible value for the Delay Time parameter for such as 17: St DELAY. So, if the time setting is specified in terms of a note value, and the tempo is slowed down, this maximum permissible value will be reached, and it cannot be increased further.
The upper time limit for each is the maximum value that can be set other than the numerical value for the beat.
Effect control does not work
If you are using the [C1]/[C2]/[C3] knobs in Performance mode to control MFX PARAMETER settings, the “MFX Source” (p. 56) setting will determine the part whose effect will be controlled. If MFX Source is set to “Part1–16,” the effect of that part will be controlled.
If MFX Source is set to "PERFORM," the System "Perform Ctrl Ch (Performance Control Channel)" (p. 90) setting will determine the part whose effect will be controlled. If this setting is "OFF," no effect will be controlled.
Notes are delayed or unsteady during playback a song from an external sequencer
The RS-50 contains some patches that are intended for live playing in Patch mode; these include tones that use four voices for each note, or patches that use the Dual function to produce rich sounds. If you are using the RS-50 as a multitimbral sound module, playback may be smoother if you avoid using such sounds, and instead choose sounds that use fewer voices.
- Refer to “Patch list” (p. 111), and switch to patches that use tones with fewer voices.
- Select patches whose KEY MODE is other than "DUAL."
- If the number of notes you are attempting to play simultaneously is significantly greater than the maximum polyphony, reduce the number of note messages in the data.
- In some cases, you may be able to lighten the load of multiple notes by shortening the release of patches used in sections where the data is especially dense.
If you playback a song that contains an extremely large amount of data, notes may be delayed or unsteady during playback. This problem can also occur if the tempo is speeded up excessively.
- Delete unneeded note data or knob data from the song.
- Move notes that were input at the same location as chords, so that they are staggered slightly.
- Move data of parts other than the rhythm part slightly forward or backward.
Song data cannot be played back correctly
Did you start playback at some point other than the beginning of the song?
Songs meant for playback with General MIDI System and General MIDI 2 System sound generators have a GM/GM2 System On message recorded at the beginning of the song. If this message is not received, the song data may not play back correctly.
Are you playing back data whose format is something other than General MIDI 2 or General MIDI?
The sound generator of the RS-50 conforms to General MIDI 2 system. It is not compatible with song data that uses formats other than General MIDI 2 or General MIDI.
Cannot play phrase/arpeggios
Is the MIDI clock not being received when Clock Source (p. 89) is set to MIDI?
Set the system so that the MIDI clock is received from the external MIDI device. Certain MIDI devices you may have connected may not send the MIDI clock to the RS-50 except during recording or playback.
Sound does not stop when key is pressed
Is the Hold Pedal Polarity reversed? (p. 89)
MIDI messages not received correctly
Are the Patch Receive channel settings correct? (p. 90).
Is each Receive switch set correctly?
Check the Performance Control Channel (p. 90), Receive Program Change switch (p. 90), Receive Bank Select switch (p. 90), Receive System Exclusive switch (p. 90) settings.
Are Device ID number settings correct?
Set the Device ID number (p. 91) used when the Exclusive message was recorded to the sequencer.
Is the sequencer playback tempo correct?
Play back the data on the sequencer at the tempo used when the Exclusive message was recorded to the sequencer.
MIDI messages not transmitted correctly
Are the Patch transmission channel settings correct? (p. 95)
Is each Transmission switch set correctly?
Check the Transmit Program Change switch (p. 90), Transmit Bank Select switch (p. 90), Transmit Edit Data switch (p. 91), Transmit Active Sensing switch (p. 91) settings.
Using sequencer software, modulation lever and knob movements have no effect on the sound
Some types of sequencer software may not allow Soft Thru (i.e., data received at the MIDI IN connector is not sent from the MIDI OUT connector as is) for Exclusive messages. When recording Exclusive messages with such sequencer software, set Local Control to ON (p. 89).
Error Messages/Messages
| Message | Meaning Action | |
| Checksum Error | The checksum of a received System Exclusive message was incorrect. | Set the correct checksum value. |
| MIDI Buffer Full | Due to an inordinate volume of MIDI messages received, the RS-50 has failed to process them properly. | Reduce the amount of MIDI messages to be transmitted. |
| MIDI Communication Error | A problem has occurred with the MIDI cable connections. | Check that MIDI cables are not broken or pulled out. |
| Receive Data Error | A MIDI message was received incorrectly. | If the same error message is displayed repeatedly, the problem lies with the MIDI messages that are being transmitted to the RS-50. |
| User Memory Damaged | The data in user memory has been lost. | Use the Factory Reset function to initialize the memory to the factory settings. |
| CANCELED | Processing is canceled. (This is not an error message.) | — |
Parameter list
Patch parameters
Patches
Patch Common parameters (p. 45)
| Parameters | Value | |
| Name | Patch Name | space, A-Z, a-z, 0-9, !" # $ % & ' () * + ,-. / :; <= > ? @ [¥] ^ _ ` { | } |
| Category * Refer to | "Selecting a patch by category" (p. 20). | |
| Key Mode SINGLE, SPLIT, DUAL | ||
| Patch Level 0-127 | ||
| Tone Balance -64 (LOWER) - +63 (UPPER) | ||
| Split Point A0-C8 | ||
| Split Arp Split Arpeggio UPPER, LOWER, BOTH | ||
| Solo Switch OFF, ON, UPPER, LOWER | ||
| ModulationDst Modulation Destination UPPER, LOWER, BOTH | ||
| PitchBend Dst Pitch Bend Destination UPPER, LOWER, BOTH | ||
| Modify Dest Modify Destination UPPER, LOWER, BOTH | * This is linked with the panel's [DESTINATION TONE] setting. | |
| ExpressionDst Expression Destination UPPER, LOWER, BOTH | ||
| Active Exp Sw | Active Expression Switch | OFF, ON |
Patch Tone parameters (p. 46)
| Parameters | Value | |
| No. | Original Tone Number 0001-0640 | |
| Tone Pan | L64-63R | |
| MFX Switch | Multi-Effects Switch | BYPASS, ON |
| Chorus Send Lvl | Chorus Send Level | 0-127 |
| Reverb Send Lvl | Reverb Send Level | 0-127 |
| Coarse Tune | -48- +48 | |
| Fine Tune | -50- +50 | |
| Portamento Sw Portamento Switch OFF, ON | ||
| Portamento Time | 0-127 | |
| Velo Sens Depth | Velocity Sensitivity Depth | -64- +63 |
| Velo Sens Ofs | Velocity Sensitivity Offset | -64- +63 |
| Pitch Bend Range | 0-24 | |
| Filter LFO | Filter LFO Switch | OFF(PCH), ON(FLT) |
| LFO Rate | -64- +63 | |
| LFO Depth | -64- +63 | |
| LFO Delay | -64- +63 | |
| Cutoff Freq | Cutoff Frequency | -64- +63 |
| Resonance | -64- +63 | |
| Attack Time | -64- +63 | |
| Decay Time | -64- +63 | |
| Release Time | -64- +63 | |
Patch Effects parameters
* The same parameters are also provided for Rhythm sets.
| Parameters | Value | |
| Multi-effects group | ||
| Type | Multi-effects Type | 00 THROUGH-47 FBK RIPPER |
| --- | Multi-effects Parameters | The number of parameters varies depending on the Multi-effects Type. Refer to “Setting multi-effects parameters” (p. 68). |
| Send Lvl to Cho | Multi-effect send level to chorus | 0-127 |
| Send Lvl to Rev | Multi-effect send level to reverb | 0-127 |
| Ctrl 1 | Multi-effects Control 1 | Refer to “Setting multi-effects parameters” (p. 68). |
| Ctrl 2 | Multi-effects Control 2 | Refer to “Setting multi-effects parameters” (p. 68). |
| Chorus effects group | ||
| Type | Chorus type | CHORUS1, CHORUS2, CHORUS3, CHORUS4, FEEDBACK CHORUS, FLANGER, SHORT DELAY, SHORT DELAY(FB) |
| Pre-LPF | Chorus pre-low pass filter | 0-7 |
| Level | Chorus Level | 0-127 |
| Feedback | Chorus Feedback Level 0-127 | |
| Delay Chorus Delay Time 0-127 | ||
| Rate Chorus Rate 0-127 | ||
| Depth Chorus Depth 0-127 | ||
| Send Lvl to Rev Chorus send level to reverb 0-127 | ||
| Reverb effects group | ||
| Type | Reverb Type ROOM1, ROOM2, ROOM3, HALL1, HALL2, PLATE, DELAY,PANNING DELAY | |
| Character Reverb Character 0-7 | ||
| Pre-LPF Reverb pre-low pass filter 0-7 | ||
| Level Reverb Level 0-127 | ||
| Time | Reverb Time 0-127 | |
| Delay Feedback Reverb Delay Feedback 0-127 | ||
Rhythm Patches
Rhythm Common parameters (p. 52)
| Parameters | Value | |
| Name | Rhythm Set Name | space, A-Z, a-z, 0-9, !“ # $ % & ' () * + ,-. / :; <= > ? @ [¥] ^ _`{ | } |
Rhythm Tone parameters (p. 52)
| Parameters | Value | |
| Pitch | -60–+67 | |
| Level | 0–127 | |
| Pan | RND, L63–63R | |
| Chorus Send Lvl | Chorus Send Level | 0–127 |
| Reverb Send Lvl | Reverb Send Level | 0–127 |
Performance parameters
Performance Common parameters (p. 56)
| Parameters | Value | |
| Name | Performance Name | space, A-Z, a-z, 0-9, ! " # $ % & ' () * + ,-. / :; <= > ? @ [¥] ^ _ ` { | } |
| Voice Rsv 1-16 | Voice Reserve 1-16 | 0-32 |
| Level Performance Level | 0-127 | |
| MFX Source | PERFORM, PART1-PART16 | |
Performance Effects parameters
| Parameters | Value | |
| Multi-effects group | ||
| Type | Multi-Effects Type | 00 THROUGH-47 FBK RIPPER |
| --- | Multi-effects Parameters | The number of parameters varies depending on the Multi-effects Type. Refer to “Setting multi-effects parameters” (p. 68). |
| Send Lvl to Cho | Multi-effect send level to chorus | 0-127 |
| Send Lvl to Rev Multi-effect send level to reverb | 0-127 | |
| Ctrl 1 | Multi-Effects Control 1 | Refer to “Setting multi-effects parameters” (p. 68). |
| Ctrl 2 | Multi-Effects Control 2 | Refer to “Setting multi-effects parameters” (p. 68). |
| Chorus effects group | ||
| Type | Chorus type CHORUS1, CHORUS2, CHORUS3, CHORUS4, FEEDBACKCHORUS, FLANGER, SHORT DELAY, SHORT DELAY(FB) | |
| Pre-LPF Chorus pre-low pass filter | 0-7 | |
| Level Chorus Level | 0-127 | |
| Feedback | Chorus Feedback Level 0-127 | |
| Delay Chorus Delay Time | 0-127 | |
| Rate Chorus Rate | 0-127 | |
| Depth Chorus Depth | 0-127 | |
Parameter list
| Parameters | Value | |
| Send Lvl to Rev | Chorus send level to reverb 0–127 | |
| Reverb effects group | ||
| Type | Reverb Type ROOM1, ROOM2, ROOM3, HALL1, HALL2, PLATE, DELAY,PANNING DELAY | |
| Character Reverb Character 0–7 | ||
| Pre-LPF Reverb pre-low pass filter 0–7 | ||
| Level Reverb Level 0–127 | ||
| Time Reverb Time 0–127 | ||
| Delay Feedback Reverb Delay Feedback 0–127 | ||
Performance Part Setup parameters (p. 56)
| Parameters | Value | |
| Level | Part Level 0–127 | |
| Pan Part Pan RND, L63–63R | ||
| Receive Ch Receive Channel 1–16 | ||
| Receive Sw | Receive Switch | OFF, ON |
| Receive Prg Chg | Receive Program Change Switch | OFF, ON |
| Receive Bank Sel | Receive Bank Select Switch OFF, ON | |
| PART SCALE group | ||
| Type Part Scale Tune Type EQUAL, JUST(maj) in C, JUST(min) in C, ARABIC | ||
| Tune C-TuneB | Part Scale Tune C-B | -64–63 |
System parameters (p. 89)
| Parameters | Value | |
| GENERAL group | ||
| LCD Contrast | 1-10 | |
| Master Tune | 415.3-466.2 | |
| Master Key Sft | Master Key Shift -24- +24 | |
| Master Level | 0-127 | |
| Hold Pedal | Hold Pedal Polarity | STANDARD, REVERSE |
| Local Control | Local Controller | OFF, ON |
| Clock Source | INT, MIDI | |
| CONTROLLER group | ||
| Mod | Modulation Assign | MODULATION, PORTA TIME, VOLUME, BALANCE, PAN, EXPRESSION, PORTAMENTO, SOSTENUTO, SOFT, RESONANCE, RELEASE TIME, ATTACK TIME, CUTOFF, DECAY TIME, LFO RATE, LFO DEPTH, LFO DELAY, CHO SEND LEVEL, REV SEND LEVEL, MFX PARAMETER1, MFX PARAMETER2, AFTERTOUCH |
| Pedal | Pedal Control Assign | Values for Modulation Assign, TAP TEMPO |
| C1-C3 | C1-C3 Knob Assign | Values for Modulation Assign, PATCH MODIFY |
| MIDI group | ||
| Patch Rx Ch | Patch Receive Channel | 1-16 |
| Patch Tx Ch | Patch Transmit Channel | 1-16, RxCH, OFF |
| Perform Ctrl Ch | Performance Control Channel | 1-16, OFF |
| Rx Prog Chg | Receive Program Change Switch | OFF, ON |
| Rx Bank Sel | Receive Bank Select Switch OFF, ON | |
| Rx Sys Exc | Receive System Exclusive Switch | OFF, ON |
| Tx Prog Chg | Transmit Program Change Switch | OFF, ON |
| Tx Bank Sel | Transmit Bank Select Switch OFF, ON | |
| Tx Edit Data | Transmit Edit Data Switch | OFF, ON |
| Tx Active Sens | Transmit Active Sensing Switch | OFF, ON |
| Device ID | Device ID Number | 17-32 |
| Soft Thru | Soft Through Switch | OFF, ON |
| PATCH SCALE group | ||
| Type | Patch Scale Tune Type | EQUAL, JUST(maj) in C, JUST(min) in C, ARABIC |
| Tune C-Tune B | Patch Scale Tune C-B | -64- +63 |
Original tone list
| No. | Name | Voice |
| 0001 | Piano 1 2 | |
| 0002 | Piano 1w 1 | |
| 0003 | European Pf 2 | |
| 0004 | RS Grand 1 2 | |
| 0005 | RS Grand 2 2 | |
| 0006 | Piano F 2 | |
| 0007 | LA Piano 4 | |
| 0008 | Piano 2 2 | |
| 0009 | Piano 2w 1 | |
| 0010 | Mono Piano 1 | |
| 0011 | Piano 3 2 | |
| 0012 | Piano 3w 1 | |
| 0013 | Rock Piano 1 2 | |
| 0014 | Rock Piano 2 2 | |
| 0015 | Dance Piano 2 | |
| 0016 | Brite Piano 1 | |
| 0017 | Honky-tonk 1 2 | |
| 0018 | Honky-tonk 2 2 | |
| 0019 | Honky-tonk 3 2 | |
| 0020 | E.Piano 1 1 | |
| 0021 | St.Soft EP 2 | |
| 0022 | FM+SA EP 2 | |
| 0023 | 60's Rhodes 1 | |
| 0024 | RS Rhodes 1 | |
| 0025 | Touch Rhodes 1 | |
| 0026 | 70's Ballad | 2 |
| 0027 | Dyno Rhodes | 2 |
| 0028 | MKS20Rhodes | 2 |
| 0029 | StageRhodes1 2 | |
| 0030 | StageRhodes2 1 | |
| 0031 | Swurly | 1 |
| 0032 | BalladPanner | 2 |
| 0033 | Sine Rhodes | 2 |
| 0034 | Phase EP | 2 |
| 0035 | Phase Rhodes 2 | |
| 0036 | Tremolo Dyno | 2 |
| 0037 | E.Piano 2 1 | |
| 0038 | Detuned EP 2 | 2 |
| 0039 | St.FM EP 2 | |
| 0040 | IP Legend 2 | |
| 0041 | EP Phase | 2 |
| 0042 | Pure EP | 1 |
| 0043 | FM Rhodes 1 | 1 |
| 0044 | FM Rhodes 2 | 2 |
| 0045 | Stack IPiano 2 | |
| 0046 | Iard FM 2 | |
| 0047 | Harpsichord1 | 1 |
| 0048 | Coupled Hps. 2 | |
| 0049 | Harpsi.w 1 | |
| 0050 | Harpsi.o | 2 |
| 0051 | Harpsichord2 | 2 |
| 0052 | Harpsichord3 | 2 |
| 0053 | Synth Harpsi | 2 |
| 0054 | Clav. | 1 |
| 0055 | Pulse Clav 1 | |
| 0056 | RS Clavi 1 | 1 |
| 0057 | RS Clavi 2 | 1 |
| 0058 | RS Clavi 3 | 1 |
| 0059 | RS Clavi 4 | 1 |
| 0060 | RS Clavi 5 | 2 |
| 0061 | RS Clavi 6 | 1 |
| 0062 | AnalogClav 1 | 1 |
| 0063 | AnalogClav 2 | 2 |
| 0064 | Celesta | 1 |
| 0065 | Glockenspiel 1 | |
| 0066 | Music Box | 1 |
| 0067 | Vibraphone | 1 |
| 0068 | Vibraphone w 1 | |
| 0069 | RS Vibe | 2 |
| 0070 | Tr. Vibe | 2 |
| No. | Name | Voice |
| 0071 | SA Vibe | 1 |
| 0072 | Marimba 1 | |
| 0073 | Marimba w 1 | |
| 0074 | Xylophone 1 | |
| 0075 | Tubular-bell 1 | |
| 0076 | Church Bell | 1 |
| 0077 | Carillon | 1 |
| 0078 | Singing Bell | 2 |
| 0079 | Analog Bell 2 | |
| 0080 | Hyper Bell 2 | |
| 0081 | Warm Bell | 2 |
| 0082 | RS Crystal | 4 |
| 0083 | Chime Bells | 4 |
| 0084 | Tiny Bell | 1 |
| 0085 | Pretty Bell | 2 |
| 0086 | RS Digi Bell | 2 |
| 0087 | SouthernWind | 4 |
| 0088 | Mysterious | 4 |
| 0089 | Santur | 1 |
| 0090 | Organ 1 | 3 |
| 0091 | Trem. Organ | 2 |
| 0092 | 60's Organ 1 | 2 |
| 0093 | 70's E.Organ 2 | |
| 0094 | RS Organ 1 1 | |
| 0095 | RS Organ 2 1 | |
| 0096 | RS Organ 3 3 | |
| 0097 | RS Organ 4 3 | |
| 0098 | RS Organ 5 2 | |
| 0099 | Animal Organ | 1 |
| 0100 | Old Organ 1 | |
| 0101 | D-50 Organ 1 | |
| 0102 | Surf Organ | 1 |
| 0103 | Organ 2 | 1 |
| 0104 | Chorus Or.2 | 3 |
| 0105 | Perc. Organ | 2 |
| 0106 | Garage Organ | 2 |
| 0107 | Club Organ | 2 |
| 0108 | R&B Organ | 3 |
| 0109 | FM PercOrg | 1 |
| 0110 | Org Perc | 1 |
| 0111 | Organ 3 | 2 |
| 0112 | Power B Slw | 1 |
| 0113 | Power B Fst | 1 |
| 0114 | Gospel B | 3 |
| 0115 | Purple B | 2 |
| 0116 | RS Mad Org 2 | |
| 0117 | Church Org.1 | 1 |
| 0118 | Church Org.2 | 2 |
| 0119 | Church Org.3 | 2 |
| 0120 | Reed Organ | 1 |
| 0121 | Iuff Organ | 2 |
| 0122 | Accordion Fr | 2 |
| 0123 | Accordion It 2 | |
| 0124 | Harmonica | 1 |
| 0125 | Bandoneon 2 | |
| 0126 | Vodkakordion | 4 |
| 0127 | Squeeze Me! | 4 |
| 0128 | Guinguette 4 | |
| 0129 | Nylon-str.Gt | 2 |
| 0130 | Ukulele | 1 |
| 0131 | Nylon Gt.o | 2 |
| 0132 | Nylon Ct.2 | 1 |
| 0133 | Spanish Gtr | 2 |
| 0134 | Requint Gtr | 2 |
| 0135 | Steel-str.Gt | 1 |
| 0136 | 12str Ctr 1 | 2 |
| 0137 | Mandolin | 2 |
| 0138 | Steel + Body 2 | |
| 0139 | 6str Gtr | 1 |
| 0140 | St.SteelGtr. | 2 |
| No. | Name | Voice |
| 0141 | RS Ac.Ctr 2 | 1 |
| 0142 | Nylon+Steel 2 | |
| 0143 | 12str Gtr 2 | 2 |
| 0144 | Jazz Gt. | 1 |
| 0145 | Pedal Steel 1 | |
| 0146 | Clean Gt. 1 | |
| 0147 | Chorus Gt. 2 | |
| 0148 | Mid Tone GTR | 1 |
| 0149 | St.Strat Gtr | 2 |
| 0150 | 12str EGtr | 2 |
| 0151 | B.Guitar | 1 |
| 0152 | Wah Gt. | 1 |
| 0153 | WahWah Gtr | 1 |
| 0154 | Muted Gt. | 1 |
| 0155 | Junk Pop 1 | |
| 0156 | Junk Gt.2 | 1 |
| 0157 | Jazz Man 2 | |
| 0158 | D.Mute Gtr | 1 |
| 0159 | Overdrive Gt | 2 |
| 0160 | Guitar Pinch | 1 |
| 0161 | 5th OverDrv. | 2 |
| 0162 | DistortionGt | 2 |
| 0163 | Feedback Gtr | 2 |
| 0164 | Dist Rhy Gtr | 1 |
| 0165 | Heavy Gtr. | 1 |
| 0166 | Dazed Guitar | 2 |
| 0167 | 5th Dist. | 2 |
| 0168 | Gt.Harmonics | 1 |
| 0169 | Gt. Feedback 1 | |
| 0170 | Acoustic Bs. 2 | |
| 0171 | RS Ac.Bass 1 | 2 |
| 0172 | RS Ac.Bass 2 | 2 |
| 0173 | Upright Bs | 2 |
| 0174 | Fingered Bs. 1 | |
| 0175 | Finger Slap 2 | |
| 0176 | RS FngBs 1 | 2 |
| 0177 | RS FngBs 2 | 2 |
| 0178 | RS Jazz Bs | 2 |
| 0179 | Picked Bass1 | 1 |
| 0180 | Picked Bass2 | 1 |
| 0181 | RS Rock Bs | 2 |
| 0182 | Fretless Bs. | 1 |
| 0183 | RS FrtlessBs 2 | |
| 0184 | Syn Fretless | 2 |
| 0185 | Mr.Smooth | 2 |
| 0186 | Slap Bass 1 1 | |
| 0187 | Unison Slap 2 | |
| 0188 | Slap Bass 2 2 | |
| 0189 | Slap Bass 3 3 | |
| 0190 | Synth Bass 1 1 | |
| 0191 | SynthBass101 | 1 |
| 0192 | Acid Bass | 1 |
| 0193 | Clavi Bass | 2 |
| 0194 | Hammer | 2 |
| 0195 | 101Bass 1 | 1 |
| 0196 | 101Bass 2 | 1 |
| 0197 | MC202 Bs | 1 |
| 0198 | House Bs 1 | 1 |
| 0199 | House Bs 2 | 1 |
| 0200 | Low Bass | 2 |
| 0201 | SH Dullbass 2 | |
| 0202 | Deep Bass | 3 |
| 0203 | No Rez 4 You | 2 |
| 0204 | Square Bass | 2 |
| 0205 | Jungle Bass 1 | |
| 0206 | Organ Bass 1 | |
| 0207 | Garage Bass | 1 |
| 0208 | SH-2 Bass | 2 |
| 0209 | 106Bass | 1 |
| 0210 | Mini Bs | 1 |
| No. | Name | Voice |
| 0211 | Juno Bass 1 | |
| 0212 | MIG Bass | 2 |
| 0213 | MIG PunchBass | 2 |
| 0214 | MIG LiteBass | 2 |
| 0215 | Synth Bass 2 2 | |
| 0216 | Beef FM Bass | 2 |
| 0217 | RubberBass 2 | 2 |
| 0218 | Attack Pulse | 1 |
| 0219 | TB Bass | 1 |
| 0220 | FatTB Bass | 2 |
| 0221 | Acid TB Bs 1 | |
| 0222 | TB Dist Saw | 1 |
| 0223 | RS SynBass 1 | 3 |
| 0224 | PopSynthBass | 2 |
| 0225 | LightSynBass | 2 |
| 0226 | 101Bass 3 | 1 |
| 0227 | Smooth Bass | 2 |
| 0228 | Mild Bass | 2 |
| 0229 | Dark Bass | 2 |
| 0230 | Beef Bass 3 | |
| 0231 | RS SynBass 2 | 3 |
| 0232 | Unison Bass | 2 |
| 0233 | OilDrum Bass | 4 |
| 0234 | Dctune Bass | 3 |
| 0235 | Violin | 2 |
| 0236 | Slow Violin 1 | |
| 0237 | YlnSolo Marc | 1 |
| 0238 | Viola | 1 |
| 0239 | Cello | 2 |
| 0240 | VlcSolo Spic 1 | |
| 0241 | Contrabass | 1 |
| 0242 | Tremolo Str | 2 |
| 0243 | PizzicatoStr | 1 |
| 0244 | Captain Pizz | 4 |
| 0245 | Pizzy Techno | 1 |
| 0246 | Harp | 1 |
| 0247 | Yang Qin | 2 |
| 0248 | Brite Harp | 2 |
| 0249 | Timpani | 1 |
| 0250 | Strings | 2 |
| 0251 | Orchestra | 3 |
| 0252 | 60's Strings | 2 |
| 0253 | Orchestra 1 3 | |
| 0254 | Orchestra 2 2 | |
| 0255 | Orchestra 3 3 | |
| 0256 | Dry Strings 2 | |
| 0257 | StJV Str | 2 |
| 0258 | JV Strings | 1 |
| 0259 | DanceStrings | 1 |
| 0260 | Str Spiccato 1 | |
| 0261 | RS St.Str | 2 |
| 0262 | Brite Str | 2 |
| 0263 | Yelo Strings 4 | |
| 0264 | Oct Strings1 | 2 |
| 0265 | Oct Strings2 | 2 |
| 0266 | Tron Strings 1 | |
| 0267 | Slow Strings 2 | |
| 0268 | SlowStrings2 | 2 |
| 0269 | Warm Strings 2 | |
| 0270 | St.Slow Str. 2 | |
| 0271 | Syn.Strings1 2 | |
| 0272 | Syn.Strings3 2 | |
| 0273 | StraightStr. | 2 |
| 0274 | LoFi Strings 2 | |
| 0275 | RS Syn Str1 | 2 |
| 0276 | JP Saws | 2 |
| 0277 | Hybrid Str 2 | |
| 0278 | JUNOFullStr. | 2 |
| 0279 | Atk Syn Str. | 2 |
| 0280 | Syn.Strings2 2 |
| No. | Name | Voice |
| 0281 | Warm JP STR | 2 |
| 0282 | Saw Strings 2 | |
| 0283 | Soft JP Str. | 3 |
| 0284 | JP Strings 4 | |
| 0285 | RS Syn Str 2 3 | |
| 0286 | QB Str 1 | 2 |
| 0287 | QB Str 2 | 2 |
| 0288 | JUNO Strings | 2 |
| 0289 | Choir Aahs 1 | 2 |
| 0290 | Chorus Aahs | 2 |
| 0291 | Choir VSw 2 | |
| 0292 | Choir Aahs 2 | 2 |
| 0293 | St.ChoirAahs | 4 |
| 0294 | Melted Choir | 2 |
| 0295 | RS Choir | 3 |
| 0296 | Church Choir | 2 |
| 0297 | Voice Oohs 1 | |
| 0298 | Illumming | 2 |
| 0299 | Jazz Scat | 1 |
| 0300 | Fcm&Male Chr | 1 |
| 0301 | Female Oohs | 2 |
| 0302 | SynVox | 2 |
| 0303 | Analog Voice | 1 |
| 0304 | SH-2000 Vox 1 | |
| 0305 | RS SynVox 1 | 2 |
| 0306 | RS SynVox 2 | 1 |
| 0307 | SynVox Key | 2 |
| 0308 | IM Vox | 1 |
| 0309 | Tape Choir | 1 |
| 0310 | Doos Arpeg | 4 |
| 0311 | ChaosChoir 1 | 4 |
| 0312 | ChaosChoir 2 | 4 |
| 0313 | ChaosChoir 3 | 2 |
| 0314 | OrchestraHit | 2 |
| 0315 | Bass Hit | 2 |
| 0316 | 6th Hit | 2 |
| 0317 | Euro I Hit | 2 |
| 0318 | Club Hit | 4 |
| 0319 | Back Hit | 1 |
| 0320 | Techno Hit | 1 |
| 0321 | Philly Hit | 1 |
| 0322 | Noise&SawHit | 2 |
| 0323 | Trumpet | 2 |
| 0324 | Dark Trumpet | 1 |
| 0325 | Bright Tp | 2 |
| 0326 | RS Trumpet 1 | 1 |
| 0327 | RS Trumpet 2 | 1 |
| 0328 | RS Solo Tp | 1 |
| 0329 | Jenny Tpt | 1 |
| 0330 | Hugel Horn 1 | |
| 0331 | Dual Horns 2 | |
| 0332 | Trombone 1 | 1 |
| 0333 | Trombone 2 | 1 |
| 0334 | Bright Tb | 1 |
| 0335 | RS Trombone1 | 1 |
| 0336 | RS Trombone2 | 1 |
| 0337 | Tuba | 1 |
| 0338 | RS Tuba | 1 |
| 0339 | MuteTrumpet1 | 1 |
| 0340 | MuteTrumpet2 | 1 |
| 0341 | French Horns | 1 |
| 0342 | Fr.Horn 2 2 | |
| 0343 | RS F.Horn | 1 |
| 0344 | RS F.Horns 1 | 1 |
| 0345 | RS F.Horns 2 | 1 |
| 0346 | Wide Fr.Hrns | 2 |
| 0347 | Strings+Horn | 2 |
| 0348 | Orch Brass 1 2 | |
| 0349 | Orch Brass 2 2 | |
| 0350 | St.Orch Brs1 2 | |
| 0351 | St.Orch Brs2 4 | |
| 0352 St.Orch Brs3 4 | ||
| 0353 Henry IV 4 | ||
| 0354 Brass 1 2 | ||
| 0355 Brass 2 2 | ||
| 0356 Brite Brass 2 | ||
| 0357 BigBand 2 | ||
| 0358 Octave Brass 2 | ||
| 0359 RS Brass 1 4 | ||
| 0360 RS Brass 2 4 | ||
| 0361 RS Brass 3 2 | ||
| 0362 RS Brass 4 1 | ||
| 0363 Lo Brass 2 | ||
| 0364 TP&TB Sect 2 | ||
| 0365 Tp Sect 1 | ||
| 0366 Tb Sect 1 | ||
| 0367 TSax Sect 1 | ||
| 0368 St.Sax Sect 2 | ||
| 0369 Hat!Pop Brass 2 | ||
| 0370 Brass sfz 2 | ||
| 0371 Synth Brass1 2 | ||
| 0372 JP Brass 2 | ||
| 0373 Oct SynBrs 1 2 | ||
| 0374 Jump Brass 1 | ||
| 0375 Ilybrid Brass 2 | ||
| 0376 BPF Brass | 2 | |
| 0377 Oct SynBrs 2 2 | ||
| 0378 Oct SynBrs 3 4 | ||
| 0379 Synth Brass2 2 | ||
| 0380 SynBrass sfz 2 | ||
| 0381 Velo Brass 1 | 2 | |
| 0382 SoaringHorns | 4 | |
| 0383 Saw Brass 1 4 | ||
| 0384 Saw Brass 2 2 | ||
| 0385 Reso Brass 2 | ||
| 0386 DistSqrBrass 2 | ||
| 0387 JP8000SawBrs | 2 | |
| 0388 Velo Brass 2 | 2 | |
| 0389 Transbrass | 2 | |
| 0390 LA Brass | 4 | |
| 0391 WarmSynBrass | 2 | |
| 0392 DeepSynBrass | 2 | |
| 0393 Spit Brass | 2 | |
| 0394 Soprano Sax 1 | ||
| 0395 RS Sop Sax | 1 | |
| 0396 Alto Sax 1 | ||
| 0397 AltoSax Soft 1 | ||
| 0398 Alto Sax Vel 1 | ||
| 0399 Tenor Sax | 1 | |
| 0400 Tenor Sax F 2 | ||
| 0401 Blown Tenor 1 | ||
| 0402 Honky Tenor | 1 | |
| 0403 BaritoneSax1 | 1 | |
| 0404 BaritoneSax2 | 1 | |
| 0405 Oboe 1 1 | ||
| 0406 Oboe 2 1 | ||
| 0407 EnglishHorn1 | 1 | |
| 0408 EnglishHorn2 | 1 | |
| 0409 Bassoon 1 | 1 | |
| 0410 Bassoon 2 | 1 | |
| 0411 Clarinet 1 | 1 | |
| 0412 Clarinet 2 | 1 | |
| 0413 Piccolo 1 | 1 | |
| 0414 Piccolo 2 | 1 | |
| 0415 Flute | 1 | |
| 0416 RS Flute 1 | 1 | |
| 0417 RS Flute 2 | 2 | |
| 0418 Tron Flute 1 | 2 | |
| 0419 Tron Flute 2 | 1 | |
| 0420 Recorder | 1 | |
| No. | Name | Voice |
| 0421 | Pan Flute 1 | 1 |
| 0422 | Bottle Blow1 2 | |
| 0423 | RS Sicu Pipe | 1 |
| 0424 | RS Calliope | 3 |
| 0425 | Bottle Blow2 3 | |
| 0426 | Shakuhachi 1 | 1 |
| 0427 | Shakuhachi 2 | 1 |
| 0428 | Nay | 2 |
| 0429 | Tin Whistle1 1 | |
| 0430 | Tin Whistle2 2 | |
| 0431 | ShakuBamboo | 4 |
| 0432 | Whistle | 2 |
| 0433 | Ocarina | 2 |
| 0434 | Square Wave1 | 2 |
| 0435 | MG Square 1 | |
| 0436 | 2600 Sine 1 | |
| 0437 | Sine | 1 |
| 0438 | Twin Sine | 2 |
| 0439 | Shmoog | 2 |
| 0440 | Square Wave2 | 1 |
| 0441 | Dual Sqr&Saw | 4 |
| 0442 | Hollo Lead | 2 |
| 0443 | OB Lead 2 | |
| 0444 | JD Triangle 1 | |
| 0445 | 800 Lead | 1 |
| 0446 | RS Lead | 1 |
| 0447 | JP8Pls 05 | 1 |
| 0448 | JP8Pls 15 | 1 |
| 0449 | JP8Pls 30 | 1 |
| 0450 | JP8Pls 45 | 1 |
| 0451 | TB Dst Sqr 1 1 | |
| 0452 | TB Dst Sqr 2 1 | |
| 0453 | 260 Sub Osc | 1 |
| 0454 | Spectrum | 1 |
| 0455 | Saw Wave | 2 |
| 0456 | OB2 Saw | 1 |
| 0457 | Doctor Solo | 2 |
| 0458 | Natural Lead | 2 |
| 0459 | SequencedSaw | 2 |
| 0460 | SequencedPls | 2 |
| 0461 | Pattern It 2 | |
| 0462 | Hat Saw | 2 |
| 0463 | D-50 FatSaw | 2 |
| 0464 | Waspy Synth | 2 |
| 0465 | Naked Cheese | 1 |
| 0466 | MG Saw | 1 |
| 0467 | OB Warm Saw | 1 |
| 0468 | PS Saw 2 | |
| 0469 | RS SawLead 1 | 2 |
| 0470 | MG Lead 1 | 1 |
| 0471 | MG Lead 2 | 1 |
| 0472 | Homey Lead | 1 |
| 0473 | GR500 Lead | 1 |
| 0474 | IM Lead | 1 |
| 0475 | WindSyn Lead | 2 |
| 0476 | RS SawLead 2 | 2 |
| 0477 | MG Lead 3 | 1 |
| 0478 | RS SawLead 3 | 2 |
| 0479 | PurcFlatLead | 2 |
| 0480 | Air Wave | 1 |
| 0481 | Theramax | 1 |
| 0482 | JP SuperSaw 1 | |
| 0483 | JP8000Detunc | 1 |
| 0484 | Velo Cheese | 3 |
| 0485 | Dance Saws | 1 |
| 0486 | DanceStack 1 3 | |
| 0487 | DanceStack 2 3 | |
| 0488 | TranceSaws 1 | 3 |
| 0489 | Trance Keys 3 | |
| 0490 | TranceSaws 2 | 2 |
| No. | Name | Voice |
| 0491 | TranceSaws 3 | 2 |
| 0492 | Power Stack 2 | |
| 0493 | Alpha Rave 1 | |
| 0494 | Retro Rave | 4 |
| 0495 | Chrd Maj7 4 | |
| 0496 | RndmFltrChrd | 4 |
| 0497 | Cool Beam | 4 |
| 0498 | Syn.Calliope 2 | |
| 0499 | Chiffer Lead | 2 |
| 0500 | Charang 2 | |
| 0501 | Wire Lead | 2 |
| 0502 | Solo Vox | 2 |
| 0503 | 5th Saw Wave | 2 |
| 0504 | Bass & Lead | 2 |
| 0505 | Delayed Lead | 2 |
| 0506 | Iantasia | 2 |
| 0507 | Warm Pad 1 | |
| 0508 | Sine Pad 2 | |
| 0509 | Soft Pad | 1 |
| 0510 | QB2 Pad 1 | 2 |
| 0511 | QB2 Pad 2 | 1 |
| 0512 | Stacked Pad | 2 |
| 0513 | IS Hollow 1 | 2 |
| 0514 | IS Hollow 2 | 3 |
| 0515 | JP8 Sqr Pad | 2 |
| 0516 | Warm Sqr Pad | 3 |
| 0517 | Pipe Pad | 3 |
| 0518 | Square Pad 3 | |
| 0519 | JP8 Hollow 4 | |
| 0520 | JP8 Haunting | 4 |
| 0521 | Sugar Key | 2 |
| 0522 | BriteSaw Key | 2 |
| 0523 | Superlupiter 4 | |
| 0524 | Polysynth | 2 |
| 0525 | Space Voice 2 | |
| 0526 | Iopia | 2 |
| 0527 | IP50 Heaven 1 | |
| 0528 | Heaven Pad | 2 |
| 0529 | Vox Pad 2 | |
| 0530 | Bowcd Glass | 3 |
| 0531 | Metal Pad 3 | |
| 0532 | Halo Pad 2 | |
| 0533 | Sweep Pad | 1 |
| 0534 | LFO Sweep | 1 |
| 0535 | Saws Sweep 3 | |
| 0536 | Soft Sweep | 2 |
| 0537 | ForwardSweep | 2 |
| 0538 | ReverseSweep | 2 |
| 0539 | Deep Sweep | 2 |
| 0540 | Shaku Pad 3 | |
| 0541 | RS Combing | 4 |
| 0542 | Killer Pad | 1 |
| 0543 | LFO Pad | 4 |
| 0544 | RS RandomPad | 3 |
| 0545 | Ice Rain 2 | |
| 0546 | W.Chime Pad | 4 |
| 0547 | Saw Impulse 3 | |
| 0548 | Soundtrack | 2 |
| 0549 | Strobe | 4 |
| 0550 | Riff the 5th | 2 |
| 0551 | Star Dust 4 | |
| 0552 | Sweep Stack | 4 |
| 0553 | Crystal 2 | |
| 0554 | Syn Mallet 1 | |
| 0555 | TarzanBottom | 2 |
| 0556 | Atmosphere | 2 |
| 0557 | Brightness 2 | |
| 0558 | Bell Sugar | 3 |
| 0559 | D-50 Retour | 4 |
| 0560 | Goblin | 2 |
| No. | Name | Voice |
| 0561 | RandomEnding | 2 |
| 0562 | Acid Copter | 2 |
| 0563 | Itherality | 4 |
| 0564 | Just Before | 4 |
| 0565 | Labo-Fecdbak | 4 |
| 0566 | Faveoravo | 4 |
| 0567 | Time Warp 3 | |
| 0568 | RS Wire Key 3 | |
| 0569 | Echo Drops | 1 |
| 0570 | Echo Bell | 2 |
| 0571 | Echo Pan 2 | |
| 0572 | Star Theme 2 | |
| 0573 | Sitar 1 | 1 |
| 0574 | Sitar 2 | 2 |
| 0575 | Banjo | 1 |
| 0576 | Shamisen 1 1 | |
| 0577 | Shamisen 2 2 | |
| 0578 | Time Vault | 4 |
| 0579 | Koto | 2 |
| 0580 | Taisho Koto | 2 |
| 0581 | Kalimba 1 | |
| 0582 | Jublag | 1 |
| 0583 | Bagpipe | 2 |
| 0584 | Hiddle | 1 |
| 0585 | Shanai | 1 |
| 0586 | Tinkle Bell 3 | |
| 0587 | Agogo | 1 |
| 0588 | Steel Drum 1 | |
| 0589 | Woodblock | 1 |
| 0590 | Castanets | 1 |
| 0591 | Taiko | 1 |
| 0592 | Concert BD | 1 |
| 0593 | Melo. Tom 1 | 1 |
| 0594 | Melo. Tom 2 | 1 |
| 0595 | Synth Drum 2 | |
| 0596 | TR808 Tom | 2 |
| 0597 | Elec Perc | 1 |
| 0598 | Reverse Cym. | 1 |
| 0599 | Gt.FretNoise 1 | |
| 0600 | Gt.Cut Noisc | 1 |
| 0601 | String Slap | 1 |
| 0602 | NylonGtr Nz 1 | |
| 0603 | Breath Noisc 1 | |
| 0604 | Fl.Key Click | 1 |
| 0605 | Seashore | 1 |
| 0606 | Rain | 1 |
| 0607 | Thunder 1 | |
| 0608 | Wind | 1 |
| 0609 | Stream 2 | |
| 0610 | Bubble 2 | |
| 0611 | Bird 1 | 2 |
| 0612 | Dog | 1 |
| 0613 | Dorse-Gallop | 1 |
| 0614 | Bird 2 | 1 |
| 0615 | Telephone 1 | 1 |
| 0616 | Telephone 2 | 1 |
| 0617 | DoorCreaking | 1 |
| 0618 | Door | 1 |
| 0619 | Scratch 1 | |
| 0620 | Wind Chimes | 1 |
| 0621 | Helicopter 1 | |
| 0622 | Car-Engine 1 | |
| 0623 | Car-Stop | 1 |
| 0624 | Car-Pass | 1 |
| 0625 | Car-Crash 2 | |
| 0626 | Siren | 1 |
| 0627 | Train | 1 |
| 0628 | Jetplane | 2 |
| 0629 | Starship | 2 |
| 0630 | Burst Noise | 2 |
| No. | Name | Voice |
| 0631 | Applause | 2 |
| 0632 | Laughing | 1 |
| 0633 | Screaming | 1 |
| 0634 | Punch | 1 |
| 0635 | Heart Bcat 1 | |
| 0636 | Footsteps | 1 |
| 0637 | Gun Shot 1 | |
| 0638 | Machine Gun | 1 |
| 0639 | Lasergun 1 | |
| 0640 | Explosion | 2 |
[1] PIANO [2] KBD & ORG
| No. | NAME | Category | Patch Select | GM2 Patch Select | Voice | Key Mode | |||
| MSB = 87 MSB = 121 | |||||||||
| LSB PC | LSB PC | ||||||||
| 001 | Pf01 RS Grand PNO 64 1 --- 2 SPLIT | ||||||||
| 002 Pf02 RS Grand 2 PNO 64 2 --- 2 SINGLE | |||||||||
| 003 Pf03 Brignt Grand PNO 64 3 --- 2 SINGLE | |||||||||
| 004 Pf04 Moro Piano PNO 64 4 --- 1 SINGLE | |||||||||
| 005 Pf05 Rock Piano 1 PNO 64 5 --- 2 SINGLE | |||||||||
| 006 Pf06 Rock Piano 2 PNO 64 6 --- 2 SINGLE | |||||||||
| 007 Pf07 Dance Piano PNO 64 7 --- 2 SINGLE | |||||||||
| 008 Pf08 Brite Piano PNO 64 8 --- 1 SINGLE | |||||||||
| 009 Pf09 EL Grand PNO 64 9 --- 2 SINGLE | |||||||||
| 010 Pf10 Honky-tonk 3 PNO 64 10 --- 2 SINGLE | |||||||||
| 011 Pf11 LA Piano PNO 64 11 --- 4 SINGLE | |||||||||
| 012 Pf12 RS Grand/ABs PNO 64 12 --- 2 SPLIT | |||||||||
| 013 Pf13 RS Grand&Pad PNO 64 13 --- 4 DUAL | |||||||||
| 014 Pf14 RS Grand&Vox PNO 64 14 --- 4 DUAL | |||||||||
| 015 Pf15 AEx PianoVox PNO 64 15 --- 6 DUAL | |||||||||
| 016 Pf16 Stage Rhodes EP 64 16 --- 2 SINGLE | |||||||||
| 017 Pf17 Stage Rhodes2 EP 64 17 --- 2 SINGLE | |||||||||
| 018 Pf18 Stage Rhodes3 EP 64 18 --- 2 SINGLE | |||||||||
| 019 Pf19 Swect Stage EP 64 19 --- 2 SINGLE | |||||||||
| 020 Pf20 70's Ballad EP 64 20 --- 2 SINGLE | |||||||||
| 021 Pf21 Dyno Rhodes EP 64 21 --- 2 SINGLE | |||||||||
| 022 Pf22 RS Rhodes 1 EP 64 22 --- 1 SINGLE | |||||||||
| 023 Pf23 Pure EP EP 64 23 --- 1 SINGLE | |||||||||
| 024 Pf24 EP Tanner EP 64 24 --- 2 SINGLE | |||||||||
| 025 Pf25 Tremolo Dyno EP 64 25 --- 2 SINGLE | |||||||||
| 026 Pf26 RS Rhodes 2 EP 64 26 --- 1 SINGLE | |||||||||
| 027 Pf27 MK20 Rhds 1 EP 64 27 --- 2 SINGLE | |||||||||
| 028 Pf28 MK20 Rhds 2 EP 64 28 --- 2 SINGLE | |||||||||
| 029 Pf29 Touch Rhodes EP 64 29 --- 1 SINGLE | |||||||||
| 030 Pf30 Phase Rhodes EP 64 30 --- 2 SINGLE | |||||||||
| 031 Pf31 Phase Rhds 2 EP 64 31 --- 2 SINGLE | |||||||||
| 032 Pf32 Phase EP EP 64 32 --- 2 SINGLE | |||||||||
| 033 Pf33 Psycho Rhds EP 64 33 --- 2 SINGLE | |||||||||
| 034 Pf34 StageRhds/Bs EP 64 34 --- 2 SPLIT | |||||||||
| 035 Pf35 RS Wurly EP 64 35 --- 1 SINGLE | |||||||||
| 036 Pf36 Sinc Rhodes EP 64 36 --- 2 SINGLE | |||||||||
| 037 Pf37 FM EP EP 64 37 --- 1 SINGLE | |||||||||
| 038 Pf38 RS St.FM EP EP 64 38 --- 2 SINGLE | |||||||||
| 039 Pf39 Stacked EP EP 64 39 --- 2 SINGLE | |||||||||
| 040 Pf40 FM Rhodes EP 64 40 --- 2 SINGLE | |||||||||
| 041 Pf41 Hard FM EP 64 41 --- 2 SINGLE | |||||||||
| 042 Pf42 RS EP & Vox EP 64 42 --- 4 DUAL | |||||||||
| 043 Pf43 Piano 1 PNO 67 1 0 1 2 SPLIT | |||||||||
| 044 Pf44 Piano 1w PNO 67 2 1 1 SPLIT | |||||||||
| 045 Pf45 European Pf PNO 67 3 2 1 2 SINGLE | |||||||||
| 046 Pf46 Piano 2 PNO 67 4 0 2 2 SINGLE | |||||||||
| 047 Pf47 Piano 2w PNO 67 5 1 2 1 SINGLE | |||||||||
| 048 Pf48 Piano 3 PNO 67 6 0 3 2 SINGLE | |||||||||
| 049 Pf49 Piano 3w PNO 67 7 1 3 1 SINGLE | |||||||||
| 050 Pf50 Honky-tonk PNO 67 8 0 4 2 SINGLE | |||||||||
| 051 Pf51 Honky-tonk 2 PNO 67 9 1 4 2 SINGLE | |||||||||
| 052 Pf52 E.Piano 1 EP 67 10 0 5 1 SINGLE | |||||||||
| 053 Pf53 St.Soft EP EP 67 11 1 5 2 SINGLE | |||||||||
| 054 Pf54 FM+SA EP EP 67 12 2 5 2 SINGLE | |||||||||
| 055 Pf55 60's Rhodes EP 67 13 3 5 1 SINGLE | |||||||||
| 056 Pf56 E.Piano 2 EP 67 14 0 6 1 SINGLE | |||||||||
| 057 Pf57 Detuned EP 2 EP 67 15 1 6 2 SINGLE | |||||||||
| 058 Pf58 St.FM EP EP 67 16 2 6 2 SINGLE | |||||||||
| 059 Pf59 EP Legend EP 67 17 3 6 2 SINGLE | |||||||||
| 060 Pf60 EP Phase EP 67 18 4 6 2 SINGLE | |||||||||
| No. | NAME | Category | Patch Select | GM2 Patch Select | Voice | Key Mode | |||
| MSB = 87 MSB = 121 | |||||||||
| LSB PC | LSB PC | ||||||||
| 061 | Ky01 | RS Clavi 1 | KEY | 64 | 43 | --- | --- | 1 | SINGLE |
| 062 | Ky02 | RS Clavi 2 | KEY | 64 | 44 | --- | --- | 2 | SINGLE |
| 063 | Ky03 | RS Clavi 3 | KEY | 64 | 45 | --- | --- | 1 | SINGLE |
| 064 | Ky04 | RS Clavi 4 | KEY | 64 | 46 | --- | --- | 1 | SINGLE |
| 065 | Ky05 | Phaser Clav | KEY | 64 | 47 | --- | --- | 1 | SINGLE |
| 066 | Ky06 | AnalogClav 1 | KEY | 64 | 48 | --- | --- | 1 | SINGLE |
| 067 | Ky07 | AnalogClav 2 | KEY | 64 | 49 | --- | --- | 2 | SINGLE |
| 068 | Ky08 | Harpsichord2 | KEY | 64 | 50 | --- | --- | 2 | SINGLE |
| 069 | Ky09 | Synth Harpsi KEY | BEL 64 51 | --- --- 2 SINGLE | |||||
| 070 | Ky10 | Pretty Bell | BEL 64 52 | --- --- 2 SINGLE | |||||
| 071 | Ky11 | Hyper Bell | BEL 64 53 | --- --- 2 SINGLE | |||||
| 072 | Ky12 | Warm Bell | BEL 64 54 | --- --- 2 SINGLE | |||||
| 073 | Ky13 | RS Crystal | BEL | 64 | 55 | --- | --- | 4 | SINGLE |
| 074 | Ky14 | SouthernWind | BEL | 64 | 56 | --- | --- | 4 | SINGLE |
| 075 | Ky15 | Singing Bell | BEL | 64 | 57 | --- | --- | 2 | SINGLE |
| 076 | Ky16 | MOD Bell | BEL | 64 | 58 | --- | --- | 2 | SINGLE |
| 077 | Ky17 | MOD 5th Bell | BEL | 64 | 59 | --- | --- | 4 | DUAL |
| 078 | Ky18 | Mysterious | BEL | 64 | 60 | --- | --- | 4 | SINGLE |
| 079 | Ky19 | RS Digi Bell | BEL | 64 | 61 | --- | --- | 2 | SINGLE |
| 080 | Ky20 | RS Bell Str | BEL | 64 | 62 | --- | --- | 5 | DUAL |
| 081 | Ky21 | AEx SynBells | BEL | 64 | 63 | --- | --- | 8 | DUAL |
| 082 | Ky22 | RS Marimba MLT | BEL 64 | --- --- 1 SINGLE | |||||
| 083 | Ky23 | RS Vibe | MLT | 64 | 65 | --- | --- | 2 | SINGLE |
| 084 | Ky24 | SA Vibe | MLT | 64 | 66 | --- | --- | 1 | SINGLE |
| 085 | Ky25 | RS Vibe/AcBs MLT | BEL 64 67 | --- --- 2 SPLIT | |||||
| 086 | Ky26 | RS Organ 1 ORG 64 68 | --- --- 3 SINGLE | ||||||
| 087 | Ky27 | RS Organ 2 ORG 64 69 | --- --- 3 SINGLE | ||||||
| 088 | Ky28 | RS Organ 3 ORG 64 70 | --- --- 1 SINGLE | ||||||
| 089 | Ky29 | RS Organ 4 ORG 64 71 | --- --- 1 SINGLE | ||||||
| 090 | Ky30 | RS Organ 5 ORG 64 72 | --- --- 3 SINGLE | ||||||
| 091 | Ky31 | Jazz Organ 1 | ORG 64 73 | --- --- 1 SINGLE | |||||
| 092 | Ky32 | Jazz Organ 2 | ORG 64 74 | --- --- 1 SINGLE | |||||
| 093 | Ky33 | R&B Organ | ORG 64 75 | --- --- 3 SINGLE | |||||
| 094 | Ky34 | Power B Slw | ORG 64 76 | --- --- 1 SINGLE | |||||
| 095 | Ky35 | Power B Fst | ORG 64 77 | --- --- 1 SINGLE | |||||
| 096 | Ky36 | Gospel B | ORG 64 78 | --- --- 3 SINGLE | |||||
| 097 | Ky37 | Dist Mad Org | ORG 64 79 | --- --- 2 SINGLE | |||||
| 098 | Ky38 | Purple B | ORG 64 80 | --- --- 2 SINGLE | |||||
| 099 | Ky39 | Animal Organ ORC | BEL 64 81 | --- --- 1 SINGLE | |||||
| 100 | Ky40 | Surf Organ | ORG 64 82 | --- --- 1 SINGLE | |||||
| 101 | Ky41 | Old Organ | ORG 64 83 | --- --- 1 SINGLE | |||||
| 102 | Ky42 | D-50 Organ | ORG 64 84 | --- --- 1 SINGLE | |||||
| 103 | Ky43 | House Organ | ORG 64 85 | --- --- 1 SINGLE | |||||
| 104 | Ky44 | Garage Organ ORC | BEL 64 86 | --- --- 2 SINGLE | |||||
| 105 | Ky45 | Club Organ | ORG 64 87 | --- --- 2 SINGLE | |||||
| 106 | Ky46 | PM Prc Organ ORG 64 88 | --- --- 1 SINGLE | ||||||
| 107 | Ky47 | PipeOrgan/Bs | ORG 64 89 | --- --- 1 SPLIT | |||||
| 108 | Ky48 | Vodakakordion | ACD 64 90 | --- --- 4 SINGLE | |||||
| 109 | Ky49 | Squeeze Mc! ACD | BEL 64 91 | --- --- 4 SINGLE | |||||
| 110 | Ky50 | Guinguette ACD 64 92 | --- --- 4 SINGLE | ||||||
| 111 | Ky51 | Harpsichord | KEY | 67 | 19 | 0 | 7 | 1 | SINGLE |
| 112 | Ky52 | Coupled Iips. | KEY | 67 | 20 | 1 | 7 | 2 | SINGLE |
| 113 | Ky53 | Harpsi.w | KEY | 67 | 21 | 2 | 7 | 1 | SINGLE |
| 114 | Ky54 | Harpsi.o | KEY | 67 | 22 | 3 | 7 | 2 | SINGLE |
| 115 | Ky55 | Clav. | KEY | 67 | 23 | 0 | 8 | 1 | SINGLE |
| 116 | Ky56 | Pulse Clav | KEY | 67 | 24 | 1 | 8 | 1 | SINGLE |
| 117 | Ky57 | Celesta | KEY | 67 | 25 | 0 | 9 | 1 | SINGLE |
| 118 | Ky58 | Clockenspiel BEL 67 | BEL 67 68 69 70 71 SINGLE | ||||||
| 119 | Ky59 | Music Box | BEL | 67 | 27 | 0 | 11 | 1 | SINGLE |
| 120 | Ky60 | Vibraphone | MLT | 67 | 28 | 0 | 12 | 1 | SINGLE |
| 121 | Ky61 | Vibraphone w MLT | BEL 67 68 69 70 71 SINGLE | ||||||
| 122 | Ky62 | Marimba | MLT | 67 | 30 | 0 | 13 | 1 | SINGLE |
| 123 | Ky63 | Marimba w | MLT | 67 | 31 | 1 | 13 | 1 | SINGLE |
| 124 | Ky64 | Xylophone MLT | BEL 67 68 69 70 71 SINGLE | ||||||
| 125 | Ky65 | Tabular-bell BEL | BEL 67 68 69 70 71 SINGLE | ||||||
| 126 | Ky66 | Church Bell | BEL 67 68 69 70 71 SINGLE | ||||||
| 127 | Ky67 | Carillon | BEL 67 68 69 70 71 SINGLE | ||||||
| 128 | Ky68 | Organ 1 ORG 67 68 69 70 71 SINGLE | |||||||
| 129 | Ky69 | Trem. Organ ORG 67 68 69 70 71 SINGLE | |||||||
| 130 | Ky70 60's Organ 1 ORG 67 68 69 70 71 SINGLE | ||||||||
| 131 | Ky71 70's E.Organ ORG 67 68 69 70 71 SINGLE | ||||||||
| 132 | Ky72 Organ 2 ORG 67 68 69 70 71 SINGLE | ||||||||
| 133 | Ky73 | Chorus Or.2 ORG 67 | 42 1 18 | 3 SINGLE | |||||
| 134 | Ky74 | Perc. Organ ORG 67 43 | 2 18 2 SINGLE | ||||||
| 135 | Ky75 | Organ 3 ORG 67 44 0 19 | 2 SINGLE | ||||||
| 136 | Ky76 | Church Org.1 ORG 67 | 45 0 20 1 SINGLE | ||||||
| 137 | Ky77 | Church Org.2 ORG 67 | 46 1 20 2 SINGLE | ||||||
| 138 | Ky78 | Church Org.3 ORG 67 | 47 2 20 2 SINGLE | ||||||
| 139 | Ky79 | Reed Organ ORG 67 48 | 0 21 1 SINGLE | ||||||
| 140 | Ky80 | Puff Organ ORG 67 49 | 1 21 2 SINGLE | ||||||
| 141 | Ky81 | Accordion Fr ACD 67 | 0 0 22 2 SINGLE | ||||||
| 142 | Ky82 | Accordion It ACD 67 51 | 1 22 2 SINGLE | ||||||
| 143 | Ky83 | Harmonica HRM 67 52 | 0 23 1 SINGLE | ||||||
| 144 | Ky84 | Bandoneon ACD 67 53 | 0 24 2 SINGLE | ||||||
| 145 | Ky85 | Crystal BEL | 68 | 56 0 99 | 2 SINGLE | ||||
| 146 | Ky86 | Syn Mallet BEL | 68 | 57 1 99 | 1 SINGLE | ||||
| 147 | Ky87 | Tinkle Bell | BEL | 68 | 75 | 0 | 113 | 3 | SINGLE |
| 148 | Ky88 | Steel Drums MLT | 68 77 0 | 15 1 SINGLE | |||||
[3] GUITAR
| No. | NAME | Category | Patch Select | GM2 Patch Select | Voice | Key Mode | |||
| MSB = 87 MSB = 121 | |||||||||
| LSB PC | LSB PC | ||||||||
| 149 | Gt01 | St.Steel Gtr | AGT | 64 | 93 | --- | --- | 2 | SINGLE |
| 150 | Gt02 | RS Ac.Guitar | AGT | 64 | 94 | --- | --- | 1 | SINGLE |
| 151 | Gt03 | 12str Gtr 2 | AGT | 64 | 95 | --- | --- | 2 | SINGLE |
| 152 | Gt04 | IHybrid12stGt | AGT | 64 | 96 | --- | --- | 4 | DUAL |
| 153 | Gt05 | Nylon+Steel AGT | 64 97 | --- 2 S | NGL.E | ||||
| 154 | Gt06 | Nylon Guitar | AGT | 64 | 98 | --- | --- | 2 | SINGLE |
| 155 | Gt07 | Spanish Gtr | AGT | 64 | 99 | --- | --- | 2 | SINGLE |
| 156 | Gt08 | Requint Gtr | AGT | 64 | 100 | --- | --- | 2 | SINGLE |
| 157 | Gt09 | AEx BeyondGt | AGT | 64 | 101 | --- | --- | 6 | DUAL |
| 158 | Gt10 | RS Strat 1 | EGT | 64 | 102 | --- | --- | 1 | SINGLE |
| 159 | Gt11 | RS Strat 2 | EGT | 64 | 103 | --- | --- | 1 | SINGLE |
| 160 | Gt12 | St.Strat Gtr | EGT | 64 | 104 | --- | --- | 2 | SINGLE |
| 161 | Gt13 | 12str E-Ctr | EGT | 64 | 105 | --- | --- | 2 | SINGLE |
| 162 | Gt14 | RS Jazz Gtr | EGT | 64 | 106 | --- | --- | 1 | SINGLE |
| 163 | Gt15 | E.Guitar | EGT | 64 | 107 | --- | --- | 1 | SINGLE |
| 164 | Gt16 | Funk Gtr | EGT | 64 | 108 | --- | --- | 1 | SINGLE |
| 165 | Gt17 | Wah Guitar | EGT | 64 | 109 | --- | --- | 1 | SINGLE |
| 166 | Gt18 | Wah-Wah Gtr | EGT | 64 | 110 | --- | --- | 1 | SINGLE |
| 167 | Gt19 | Darmstrat | DGT | 64 | 111 | --- | --- | 4 | DUAL |
| 168 | Gt20 | Dazed Guitar | DGT | 64 | 112 | --- | --- | 2 | SINGLE |
| 169 | Gt21 | RS OD-Guitar | DGT | 64 | 113 | --- | --- | 2 | SINGLE |
| 170 | Gt22 | Heavy Gtr | DGT | 64 | 114 | --- | --- | 1 | SINGLE |
| 171 | Gt23 | Dist Mute | DGT | 64 | 115 | --- | --- | 1 | SINGLE |
| 172 | Gt24 | D.Mute Gtr | DGT | 64 | 116 | --- | --- | 1 | SINGLE |
| 173 | Gt25 | 5th OverDrv. | DGT | 64 | 117 | --- | --- | 2 | SINGLE |
| 174 | Gt26 | Power Chord | DGT | 64 | 118 | --- | --- | 2 | SINGLE |
| 175 | Gt27 | Nylon-str.Gt | AGT | 67 | 54 | 0 | 25 | 2 | SINGLE |
| 176 | Gt28 | Ukulcle | AGT | 67 | 55 | 1 | 25 | 1 | SINGLE |
| 177 | Gt29 | Nylon Gt.o AGT | 67 56 2 | 25 2 SINGLE | |||||
| 178 | Gt30 | Nylon Gt.2 | AGT | 67 | 57 | 3 | 25 | 1 | SINGLE |
| 179 | Gt31 | Steel-str.Gt | AGT | 67 | 58 | 0 | 26 | 1 | SINGLE |
| 180 | Gt32 | 12-str.Gt | AGT | 67 | 59 | 1 | 26 | 2 | SINGLE |
| 181 | Gt33 | Mandolin | AGT | 67 | 60 | 2 | 26 | 2 | SINGLE |
| 182 | Gt34 | Steel + Body | AGT | 67 | 61 | 3 | 26 | 2 | SINGLE |
| 183 | Gt35 | Jazz Gt. | EGT | 67 | 62 | 0 | 27 | 1 | SINGLE |
| 184 | Gt36 | Pedal Steel | EGT | 67 | 63 | 1 | 27 | 1 | SINGLE |
| 185 | Gt37 | Clean Gt. | EGT | 67 | 64 | 0 | 28 | 1 | SINGLE |
| 186 | Gt38 | Chorus Gt. | EGT | 67 | 65 | 1 | 28 | 2 | SINGLE |
| 187 | Gt39 | Mid Tone GTR | EGT | 67 | 66 | 2 | 28 | 1 | SINGLE |
| 188 | Gt40 | Mutcd Gt. | EGT | 67 | 67 | 0 | 29 | 1 | SINGLE |
| 189 | Gt41 | Funk Pop | EGT | 67 | 68 | 1 | 29 | 1 | SINGLE |
| 190 | Gt42 | Funk Gt.2 | EGT | 67 | 69 | 2 | 29 | 1 | SINGLE |
| 191 | Gt43 | Jazz Man | EGT | 67 | 70 | 3 | 29 | 2 | SINGLE |
| 192 | Gt44 | Overdrive Gt | DGT | 67 | 71 | 0 | 30 | 2 | SINGLE |
| 193 | Gt45 | Guitar Pinch | DGT | 67 | 72 | 1 | 30 | 1 | SINGLE |
| 194 | Gt46 | DistortionGt | DGT 67 73 | 0 31 2 SINGLE | |||||
| 195 | Gt47 | Feedback Gt. | DGT | 67 | 74 | 1 | 31 | 2 | SINGLE |
| 196 | Gt48 | Dist Rtm GTR DGT 67 75 2 31 1 SINGLE | |||||||
| 197 | Gt49 | Gt.Harmonics | EGT | 67 | 76 | 0 | 32 | 1 | SINGLE |
| 198 | Gt50 | Gt. Feedback | EGT | 67 | 77 | 1 | 32 | 1 | SINGLE |
| 199 | Gt51 | Atmosphere | AGT | 68 | 58 | 0 | 100 | 2 | SINGLE |
| No. | NAME | Category | Patch Select | GM2 Patch Select | Voice | Key Mode | |||
| MSB = 87 MSB = 121 | |||||||||
| LSB PC | LSB PC | ||||||||
| 200 | Gt52 | Gt.FretNoise | AGT | 68 | 88 | 0 | 121 | 1 | SINGLE |
| 201 | Gt53 | Gt.Cut Noise AGT 68 | 89 1 121 | 1 SINGLE | |||||
| 202 | Gt54 | String Slap | AGT | 68 | 90 | 2 | 121 | 1 | SINGLE |
[4] ORCH
| No. | NAME | Category | Patch Select | GM2 Patch Select | Voice | Key Mode | |||
| MSB = 87 MSB = 121 | |||||||||
| LSB PC | LSB PC | ||||||||
| 203 | Or01 | RS Strings 1 | STR | 64 | 119 | --- | --- | 4 | DUAL |
| 204 | Or02 | RS Strings 2 | STR | 64 | 120 | --- | --- | 4 | DUAL |
| 205 | Or03 | RS Strings 3 | STR | 64 | 121 | --- | --- | 4 | DUAL |
| 206 | Or04 | RS Strings 4 | STR | 64 | 122 | --- | --- | 3 | DUAL |
| 207 | Or05 | RS Strings 5 | STR | 64 | 123 | --- | --- | 2 | SINGLE |
| 208 | Or06 | VeloStrings | STR | 64 | 124 | --- | --- | 5 | DUAL |
| 209 | Or07 | SlowStrings1 | STR | 64 | 125 | --- | --- | 2 | SINGLE |
| 210 | Or08 | SlowStrings2 | STR | 64 | 126 | --- | --- | 2 | SINGLE |
| 211 | Or09 | Oct Strings | STR | 64 | 127 | --- | --- | 2 | SINGLE |
| 212 | Or10 | Str Spic 1 | STR | 64 | 128 | --- | --- | 1 | SINGLE |
| 213 | Or11 | Str Spic 2 | STR | 65 | 1 | --- | --- | 2 | DUAL |
| 214 Or12 | Tron Strings STR 65 2 | --- --- 1 | SINGLE | ||||||
| 215 | Or13 | Dance Str | STR | 65 | 3 | --- | --- | 1 | SINGLE |
| 216 | Or14 | LoFi Strings | STR | 65 | 4 | --- | --- | 2 | SINGLE |
| 217 Or15 | RS Orch 1 | STR 65 5 | --- 3 SINGLE | ||||||
| 218 | Or16 | RS Orch 2 | STR | 65 | 6 | --- | --- | 4 | DUAL |
| 219 | Or17 | IlybrdStrings | STR | 65 | 7 | --- | --- | 5 | DUAL |
| 220 | Or18 | JP Strings 1 | STR | 65 | 8 | --- | --- | 5 | DUAL |
| 221 | Or19 | JP Strings 2 | STR | 65 | 9 | --- | --- | 3 | DUAL |
| 222 | Or20 | JP Strings 3 | STR | 65 | 10 | --- | --- | 3 | SINGLE |
| 223 | Or21 | OB Strings 1 | STR | 65 | 11 | --- | --- | 2 | SINGLE |
| 224 | Or22 | OB Strings 2 | STR | 65 | 12 | --- | --- | 5 | DUAL |
| 225 Or23 | SawStrings 1 STR 65 | 13 --- 2 SINGLE | |||||||
| 226 Or24 | SawStrings 2 STR 65 | 14 --- 6 DUAL | |||||||
| 227 Or25 | JUNO Strings STR 65 15 | --- --- 2 SINGLE | |||||||
| 228 | Or26 | AIX Orchstra | STR | 65 | 16 | --- | --- | 6 | DUAL |
| 229 Or27 | RS Violin 1 STR 65 17 | --- --- 2 DUAL | |||||||
| 230 Or28 | RS Violin 2 STR 65 18 | --- --- 2 SINGLE | |||||||
| 231 | Or29 | Violin Marc | STR | 65 | 19 | --- | --- | 1 | SINGLE |
| 232 Or30 | RS Viola STR 65 20 | --- --- 1 SINGLE | |||||||
| 233 | Or31 | RS Cello 1 | STR | 65 | 21 | --- | --- | 3 | DUAL |
| 234 | Or32 | RS Cello 2 | STR | 65 | 22 | --- | --- | 2 | SINGLE |
| 235 | Or33 | Cello Spic | STR | 65 | 23 | --- | --- | 1 | SINGLE |
| 236 | Or34 | RS Contrabas | STR | 65 | 24 | --- | --- | 1 | SINGLE |
| 237 | Or35 | Trad Pizz | STR | 65 | 25 | --- | --- | 1 | SINGLE |
| 238 | Or36 | RS Pizz | STR | 65 | 26 | --- | --- | 5 | DUAL |
| 239 Or37 | RS Iarp OCI 65 27 | --- --- 2 SINGLE | |||||||
| 240 | Or38 | RS Oboe | WND | 65 | 28 | --- | --- | 1 | SINGLE |
| 241 Or39 | RS EnglishIm WND | 65 29 | --- --- 1 SINGLE | ||||||
| 242 | Or40 | RS Bassoon | WND | 65 | 30 | --- | --- | 1 | SINGLE |
| 243 | Or41 | RS Clarinet | WND | 65 | 31 | --- | --- | 1 | SINGLE |
| 244 | Or42 | RS Flute 1 | FLT | 65 | 32 | --- | --- | 1 | SINGLE |
| 245 | Or43 | RS Flute 2 | FLT | 65 | 33 | --- | --- | 2 | SINGLE |
| 246 | Or44 | Tron Flute | FLT | 65 | 34 | --- | --- | 1 | SINGLE |
| 247 | Or45 | RS Piccolo | FLT | 65 | 35 | --- | --- | 1 | SINGLE |
| 248 | Or46 | RS Calliope | FLT | 65 | 36 | --- | --- | 3 | SINGLE |
| 249 | Or47 | RS Sicu Pipe | FLT | 65 | 37 | --- | --- | 1 | SINGLE |
| 250 | Or48 | RS Blow | FLT | 65 | 38 | --- | --- | 3 | SINGLE |
| 251 | Or49 | Club Hit | HIT | 65 | 39 | --- | --- | 4 | SINGLE |
| 252 Or50 | Back Hit LITT 65 40 | --- --- 1 SINGLE | |||||||
| 253 Or51 | Techno Hit HITT 65 41 | --- --- 1 SINGLE | |||||||
| 254 | Or52 | Philly Hit | HIT | 65 | 42 | --- | --- | 1 | SINGLE |
| 255 | Or53 | Violin | STR | 67 | 94 | 0 | 41 | 2 | SINGLE |
| 256 | Or54 | Slow Violin | STR | 67 | 95 | 1 | 41 | 1 | SINGLE |
| 257 | Or55 | Viola | STR | 67 | 96 | 0 | 42 | 1 | SINGLE |
| 258 Or56 | Cello STR 67 97 0 43 2 SINGLE | ||||||||
| 259 | Or57 | Contrabass | STR | 67 | 98 | 0 | 44 | 1 | SINGLE |
| 260 | Or58 | Tremolo Str | STR | 67 | 99 | 0 | 45 | 2 | SINGLE |
| 261 | Or59 | PizzicatoStr | STR | 67 | 100 | 0 | 46 | 1 | SINGLE |
| 262 | Or60 | Strings | STR | 67 | 104 | 0 | 49 | 2 | SINGLE |
| 263 | Or61 | Orchestra | OCH | 67 | 105 | 1 | 49 | 3 | SINGLE |
| 264 | Or62 | 60s Strings | STR | 67 | 106 | 2 | 49 | 2 | SINGLE |
| 265 | Or63 | Slow Strings | STR | 67 | 107 | 0 | 50 | 2 | SINGLE |
| 266 | Or64 | Syn.Strings1 | STR | 67 | 108 | 0 | 51 | 2 | SINGLE |
| 267 | Or65 | Syn.Strings3 STR 67 | 109 1 51 | 2 SINGLE | |||||
| 268 | Or66 | OrchestraHit HIT 67 11 | 7 0 56 2 | SINGLE | |||||
| 269 | Or67 | Bass Hit HIT 67 118 1 56 | 2 SINGLE | ||||||
| 270 | Or68 | 6th Hit HIT 67 119 2 56 | 2 SINGLE | ||||||
| 271 | Or69 | Euro Hit HIT 67 120 3 56 | 2 SINGLE | ||||||
| 272 | Or70 | Oboe WND 68 16 0 69 | 1 SINGLE | ||||||
| 273 | Or71 | English Horn WND 68 | 17 0 70 1 | SINGLE | |||||
| 274 | Or72 | Bassoon WND 68 18 0 | 71 1 SINGLE | ||||||
| 275 | Or73 | Clarinet WND 68 19 0 | 72 1 SINGLE | ||||||
| 276 | Or74 | Piccolo FLT 68 20 0 73 | SINGLE | ||||||
| 277 | Or75 | Flute | FLT 68 21 0 | 74 1 SINGLE | |||||
| 278 | Or76 | Recorder | FLT 68 22 0 | 75 1 SINGLE | |||||
| 279 | Or77 | Pan Flute | FLT 68 23 0 | 76 1 SINGLE | |||||
| 280 | Or78 | Bottle Blow | FLT 68 24 0 | 77 2 SINGLE | |||||
| 281 | Or79 | Whistle | FLT 68 26 0 | 79 2 SINGLE | |||||
| 282 | Or80 | Ocarina | FLT 68 27 0 | 80 2 SINGLE | |||||
| 283 | Or81 | Fiddle | STR 68 73 0 | 111 1 SINGLE | |||||
[5] WORLD
| No. | NAME | Category | Patch Select | GM2 Patch Select | Voice | Key Mode | |||
| MSB = 87 MSB = 121 | |||||||||
| LSB | PC | LSB | PC | ||||||
| 284 | Wr01 | RS Sitar 1 | PLK | 65 43 | --- 1 SINGLE | ||||
| 285 | Wr02 | RS Sitar 2 | PLK | 65 44 | --- 2 SINGLE | ||||
| 286 | Wr03 | RS Shamisen ETII | 65 45 --- | --- 2 SINGLE | |||||
| 287 | Wr04 | RS Kalimba | ETH 65 | 46 --- | 1 SINGLE | ||||
| 288 | Wr05 | Jublag | ETH 65 | 47 --- | 1 SINGLE | ||||
| 289 | Wr06 | Tin Whistle | ETH | 65 48 | --- 1 SINGLE | ||||
| 290 | Wr07 | RS Shaku | ETH | 65 49 | --- 1 SINGLE | ||||
| 291 | Wr08 | ShakuBamboo | ETII | 65 50 | --- 4 SINGLE | ||||
| 292 | Wr09 | Nay | ETH | 65 51 | --- 2 SINGLE | ||||
| 293 | Wr10 | AEx CelticFl ETH | 65 52 --- | 2 DUAL | |||||
| 294 | Wr11 | Santur | PLK | 67 36 | 0 16 1 SINGLE | ||||
| 295 | Wr12 | Harp PLK 67 | 101 0 47 | 1 SINGLE | |||||
| 296 | Wr13 | Yang Qin | PLK | 67 102 | 1 47 2 SINGLE | ||||
| 297 | Wr14 | Shakuhachi | ETH | 68 25 | 0 78 1 SINGLE | ||||
| 298 | Wr15 | Sitar | PLK | 68 65 | 0 105 1 SINGLE | ||||
| 299 | Wr16 | Sitar 2 | PLK | 68 66 | 1 105 2 SINGLE | ||||
| 300 | Wr17 | Banjo | FRT 68 | 67 0 106 | 1 SINGLE | ||||
| 301 | Wr18 | Shamisen | PLK | 68 68 | 0 107 1 SINGLE | ||||
| 302 | Wr19 | Koto | PLK | 68 69 | 0 108 2 SINGLE | ||||
| 303 | Wr20 | Taisho Koto | PLK | 68 70 | 1 108 2 SINGLE | ||||
| 304 | Wr21 | Kalimba | PLK | 68 71 | 0 109 1 SINGLE | ||||
| 305 | Wr22 | Bagpipe ETH | 68 72 0 | 110 2 SINGLE | |||||
| 306 | Wr23 | Shanai | ETII | 68 74 | 0 112 1 SINGLE | ||||
[6] BRASS
| No. | NAME | Category | Patch Select | GM2 Patch Select | Voice | Key Mode | |||
| MSB = 87 MSB = 121 | |||||||||
| LSB | PC | LSB | PC | ||||||
| 307 | Br01 | RS Brass 1 | BRS | 65 | 53 | — | — | 8 | DUAL |
| 308 | Br02 | RS Brass 2 | BRS | 65 | 54 | — | — | 2 | SINGLE |
| 309 | Br03 | RS Brass 3 | BRS | 65 | 55 | — | — | 4 | SINGLE |
| 310 | Br04 | RS Brass 4 | BRS | 65 | 56 | — | — | 2 | SINGLE |
| 311 | Br05 | RS Brass 5 | BRS | 65 | 57 | — | — | 2 | SINGLE |
| 312 | Br06 | Tp&Tb Sect 1 | BRS | 65 | 58 | — | — | 2 | SINGLE |
| 313 | Br07 | Tp&Tb Sect 2 | BRS | 65 | 59 | — | — | 2 | SINGLE |
| 314 | Br08 | Tp Sect | BRS | 65 | 60 | — | — | 1 | SINGLE |
| 315 Br09 | Tb Sect BRS | 65 | 61 --- --- | 1 SINGLE | |||||
| 316 Br10 | Brass sfz BRS | 65 | 62 --- --- | 2 SINGLE | |||||
| 317 | Br11 | St.Sax Sect | BRS | 65 | 63 | — | — | 2 | SINGLE |
| 318 | Br12 | AEx UniTp+Tb | BRS | 65 | 64 | — | — | 2 | DUAL |
| 319 Br13 | F.HornSect 1 BRS | 65 | 65 | --- 1 SINGLE | |||||
| 320 Br14 | F.HornSect 2 BRS | 65 | 66 | --- 2 DUAL | |||||
| 321 Br15 | Wide FrHorns BRS | 65 | 67 | --- 2 SINGLE | |||||
| 322 | Br16 | Str + Horns | BRS | 65 | 68 | — | — | 2 | SINGLE |
| 323 | Br17 | Orch Brass 1 | BRS | 65 | 69 | — | — | 2 | SINGLE |
| 324 | Br18 | Orch Brass 2 | BRS | 65 | 70 | — | — | 2 | SINGLE |
| 325 Br19 | St.OrchBrs 1 BRS | 65 | 71 | --- 2 SINGLE | |||||
| 326 Br20 | St.OrchBrs 2 BRS | 65 | 72 | --- 4 SINGLE | |||||
| No. | NAME | Category | Patch Select | GM2 Patch Select | Voice | Key Mode | |||
| MSB = 87 MSB = 121 | |||||||||
| LSB | PC | LSB | PC | ||||||
| 327 | Br21 | St.OrchBrs 3 BRS | 65 | 73 --- 4 SINGLE | |||||
| 328 | Br22 | Henry IV | BRS | 65 | 74 | --- | --- | 4 | SINGLE |
| 329 | Br23 | Oct Brass | BRS | 65 | 75 | --- | --- | 2 | SINGLE |
| 330 | Br24 | Power Saws | SBR | 65 | 76 | --- | --- | 3 | DUAL |
| 331 Br | 25 RS Saw Brs 1 SBR | 65 77 | --- 6 DUAL | ||||||
| 332 Br | 26 RS Saw Brs 2 SBR | 65 78 | --- 6 DUAL | ||||||
| 333 | Br27 | RS OctSynBrs | SBR | 65 | 79 | --- | --- | 6 | DUAL |
| 334 | Br28 | Soft SynBrs | SBR | 65 | 80 | --- | --- | 4 | DUAL |
| 335 | Br29 | Deep SynBrs | SBR | 65 | 81 | --- | --- | 4 | DUAL |
| 336 | Br30 | RS Velo Brs | SBR | 65 | 82 | --- | --- | 2 | SINGLE |
| 337 | Br31 | JP Saw Brs | SBR | 65 | 83 | --- | --- | 4 | DUAL |
| 338 | Br32 | OB Brass | SBR | 65 | 84 | --- | --- | 5 | DUAL |
| 339 | Br33 | LA Brass | SBR | 65 | 85 | --- | --- | 4 | SINGLE |
| 340 | Br34 | BPF Brass | SBR | 65 | 86 | --- | --- | 4 | DUAL |
| 341 | Br35 | Dist SqrBrs | SBR | 65 | 87 | --- | --- | 2 | SINGLE |
| 342 | Br36 | Soaring Horn | SBR | 65 | 88 | --- | --- | 4 | SINGLE |
| 343 | Br37 | RS Trumpet 1 | BRS | 65 | 89 | --- | --- | 1 | SINGLE |
| 344 | Br38 | RS Trumpet 2 | BRS | 65 | 90 | --- | --- | 1 | SINGLE |
| 345 | Br39 | Bright Tp | BRS | 65 | 91 | --- | --- | 2 | SINGLE |
| 346 | Br40 | Flugel Horn | BRS | 65 | 92 | --- | --- | 1 | SINGLE |
| 347 Br | 41 Dual Tp BRS | 65 93 --- 2 SINGLE | |||||||
| 348 Br | 42 MuteTrump 1 BRS | 65 94 --- 1 SINGLE | |||||||
| 349 Br | 43 MuteTrump 2 BRS | 65 95 --- 1 SINGLE | |||||||
| 350 | Br44 | RS Tb 1 | BRS | 65 | 96 | --- | --- | 1 | SINGLE |
| 351 | Br45 | RS Tb 2 | BRS | 65 | 97 | --- | --- | 1 | SINGLE |
| 352 | Br46 | RS Tuba | BRS | 65 | 98 | --- | --- | 1 | SINGLE |
| 353 | Br47 | RS F.Horn | BRS | 65 | 99 | --- | --- | 1 | SINGLE |
| 354 | Br48 | RS Sop Sax | SAX | 65 | 100 | --- | --- | 1 | SINGLE |
| 355 Br | 49 RS Alto Sax | SAX 65 101 --- 1 SINGLE | |||||||
| 356 | Br50 | AltoSax Sft | SAX | 65 | 102 | --- | --- | 1 | SINGLE |
| 357 Br | 51 Honky Tenor SAX 65 | 103 --- 1 SINGLE | |||||||
| 358 | Br52 | RS Tnr Sax | SAX | 65 | 104 | --- | --- | 2 | SINGLE |
| 359 Br | 53 Blown Tenor SAX 65 | 105 --- 1 SINGLE | |||||||
| 360 | Br54 | RS Bari Sax | SAX | 65 | 106 | --- | --- | 1 | SINGLE |
| 361 | Br55 | Trumpet | BRS | 67 | 121 | 0 | 57 | 2 | SINGLE |
| 362 Br | 56 Dark Trumpet BRS | 67 122 1 57 1 SINGLE | |||||||
| 363 | Br57 | Trombone | BRS | 67 | 123 | 0 | 58 | 1 | SINGLE |
| 364 | Br58 | Trombone 2 | BRS | 67 | 124 | 1 | 58 | 1 | SINGLE |
| 365 | Br59 | Bright Tb | BRS | 67 | 125 | 2 | 58 | 1 | SINGLE |
| 366 Br | 60 Tuba | BRS | 67 126 0 59 1 SINGLE | ||||||
| 367 | Br61 | MutedTrumpet | BRS | 67 | 127 | 0 | 60 | 1 | SINGLE |
| 368 | Br62 | MuteTrumpet2 | BRS | 67 | 128 | 1 | 60 | 1 | SINGLE |
| 369 | Br63 | French Horns | BRS | 68 | 1 | 0 | 61 | 1 | SINGLE |
| 370 | Br64 | Fr.Horn 2 | BRS | 68 | 2 | 1 | 61 | 2 | SINGLE |
| 371 Br | 65 Brass 1 BRS | 68 3 0 62 2 SINGLE | |||||||
| 372 Br | 66 Brass 2 BRS | 68 4 1 62 2 SINGLE | |||||||
| 373 | Br67 | Synth Brass1 | SBR | 68 | 5 | 0 | 63 | 2 | SINGLE |
| 374 | Br68 | JP Brass | SBR | 68 | 6 | 1 | 63 | 2 | SINGLE |
| 375 | Br69 | Oct SynBrass | SBR | 68 | 7 | 2 | 63 | 2 | SINGLE |
| 376 | Br70 | Jump Brass | SBR | 68 | 8 | 3 | 63 | 1 | SINGLE |
| 377 | Br71 | Synth Brass2 | SBR | 68 | 9 | 0 | 64 | 2 | SINGLE |
| 378 | Br72 | SynBrass sfz | SBR | 68 | 10 | 1 | 64 | 2 | SINGLE |
| 379 | Br73 | Velo Brass 1 | SBR | 68 | 11 | 2 | 64 | 2 | SINGLE |
| 380 Br | 74 Soprano Sax SAX 68 | 12 0 65 1 SINGLE | |||||||
| 381 Br | 75 Alto Sax | SAX 68 13 0 66 1 SINGLE | |||||||
| 382 | Br76 Tenor Sax | SAX | 68 | 14 | 0 | 67 | 1 | SINGLE | |
| 383 Br | 77 Baritone Sax | SAX 68 15 0 68 1 SINGLE | |||||||
[7] VOCAL &PAD
| No. | NAME | Category | Patch Select | GM2 Patch Select | Voice | Key Mode | |||
| MSB = 87 M$B = 121 | |||||||||
| LSB | PC | LSB | PC | ||||||
| 384 Vb01 | Jazz Scat | VOX 65 107 | --- --- 1 | SINGLE | |||||
| 385 Vb02 | RS Vox Oohs | VOX 65 108 | --- --- 1 | SINGLE | |||||
| 386 Vb03 | FemMm Choir VOX | 65 109 | --- 1 | SINGLE | |||||
| 387 Vb04 | RS Choir | VOX 65 110 | --- --- 2 | SINGLE | |||||
| 388 Vb05 | StChoirAhs VOX 65 | 111 | --- 4 | SINGLE | |||||
| 389 Vb06 | SH-2000 Vox VOX 65 | 112 | --- 1 | SINGLE | |||||
| 390 Vb07 | RS SynVox 1 | VOX 65 113 | --- --- 2 | SINGLE | |||||
| 391 Vb08 | FM Vox VOX 65 114 | --- --- 1 | SINGLE | ||||||
| 392 Vb09 | Vox Pad | VOX 65 115 | --- --- 2 | SINGLE | |||||
| 393 Vb10 | CnaosChoir 1 | VOX 65 116 | --- --- 8 | DUAL | |||||
| 394 | Vo11 | ChaosChoir 2 VOX | 65 117 --- | --- 7 DUAL | |||||
| 395 Vo12 | AEx | StackVox VOX 65 | 118 --- | 4 DUAL | |||||
| 396 Vo13 | Heaven Pad SPD 65 119 --- 2 SINGLE | ||||||||
| 397 Vo14 | D-50 | Retour SPD 65 120 --- 4 SINGLE | |||||||
| 398 Vo15 | Warm Sqr Pad SPD 65 | 121 --- | 3 SINGLE | ||||||
| 399 Vo16 | Hollow Pad SPD 65 122 --- 5 DUAL | ||||||||
| 400 Vo17 | RS Hollow SPD 65 123 --- 8 DUAL | ||||||||
| 401 Vo18 | JP8 Hollow SPD 65 124 --- 4 SINGLE | ||||||||
| 402 Vo19 | JP8 Taunting SPD 65 125 --- 4 SINGLE | ||||||||
| 403 Vo20 | OB2 Pad 1 SPD 65 126 --- 2 SINGLE | ||||||||
| 404 Vo21 | OB2 Pad 2 SPD 65 127 --- 1 SINGLE | ||||||||
| 405 Vo22 | Saw Sweep 1 SPD 65 128 --- 3 SINGLE | ||||||||
| 406 Vo23 | Saw Sweep 2 SPD 66 1 --- 2 SINGLE | ||||||||
| 407 Vo24 | Saw Sweep 3 SPD 66 2 --- 3 SINGLE | ||||||||
| 408 Vo25 | Soft Pad 1 SPD 66 3 --- 3 DUAL | ||||||||
| 409 Vo26 | Soft Pad 2 SPD 66 4 --- 1 SINGLE | ||||||||
| 410 Vo27 | Oct SynStr SPD 66 5 --- 5 DUAL | ||||||||
| 411 Vo28 | Stacked Pad SPD 66 6 --- 2 SINGLE | ||||||||
| 412 Vo29 | RS Saw Pad BPD 66 7 --- 4 SINGLE | ||||||||
| 413 | Vo30 | Superlupiter | BPD | 66 | 8 | --- | --- | 4 | SINGLE |
| 414 | Vo31 | ReverseSwEEP | BPD | 66 | 9 | --- | --- | 2 | SINGLE |
| 415 Vo32 | RS Atmos BPD | 66 10 --- 5 DUAL | |||||||
| 416 | Vo33 | RS Combing | BPD | 66 | 11 | --- | --- | 4 | SINGLE |
| 417 | Vo34 | Comb Pad | BPD | 66 | 12 | --- | --- | 4 | SINGLE |
| 418 Vo35 | Saws Strobe | BPD | 66 13 --- 8 DUAL | ||||||
| 419 | Vo36 | Star Dust | BPD | 66 | 14 | --- | --- | 4 | SINGLE |
| 420 Vo37 | RS Wind Pad | BPD | 66 15 --- 7 DUAL | ||||||
| 421 Vo38 | Shakupad BPD | 66 16 --- 3 SINGLE | |||||||
| 422 | Vo39 | Sweep Stack | BPD | 66 | 17 | --- | --- | 4 | SINGLE |
| 423 | Vo40 | Reso Pad | BPD | 66 | 18 | --- | --- | 2 | SINGLE |
| 424 | Vo41 | ForwardSweep | BPD | 66 | 19 | --- | --- | 2 | SINGLE |
| 425 Vo42 | Power Stack BPD | 66 20 --- 3 DUAL | |||||||
| 426 Vo43 | DanceStack | BPD | 66 21 --- 5 DUAL | ||||||
| 427 | Vo44 | Trance Pad | BPD | 66 | 22 | --- | --- | 2 | SINGLE |
| 428 Vo45 | RS Rave | BPD | 66 23 --- 5 DUAL | ||||||
| 429 Vo46 | AEx StackPad | BPD | 66 24 --- 6 DUAL | ||||||
| 430 Vo47 | Syn Strings2 | SPD 67 110 0 | 52 2 | SINGLE | |||||
| 431 Vo48 | Choir Aabs VOX 67 111 0 53 2 | SINGLE | |||||||
| 432 Vo49 | Chorus Aabs VOX 67 112 1 53 2 | SINGLE | |||||||
| 433 Vo50 | Voice Oohs VOX 67 113 0 | 54 1 | SINGLE | ||||||
| 434 Vo51 | Humming VOX 67 114 1 | 54 2 | SINGLE | ||||||
| 435 Vo52 | Syn Vox VOX 67 115 0 | 55 2 | SINGLE | ||||||
| 436 Vo53 | Analog Voice VOX 67 16 | SINGLE | |||||||
| 437 Vo54 | Warm Pad SPD 68 45 0 | 90 1 | SINGLE | ||||||
| 438 Vo55 | Sine Pad SPD 68 46 1 | 90 2 | SINGLE | ||||||
| 439 Vo56 | Space Voice VOX 68 48 0 | 92 2 | SINGLE | ||||||
| 440 Vo57 | Itopia VOX 68 49 1 | 92 2 | SINGLE | ||||||
| 441 Vo58 | Bowed Class SPD 68 50 0 93 3 | SINGLE | |||||||
| 442 | Vo59 | Metal Pad | BPD | 68 | 51 | 0 | 94 | 3 | SINGLE |
| 443 | Vo60 | Halo Pad | BPD | 68 | 52 | 0 | 95 | 2 | SINGLE |
| 444 Vo61 | Sweep Pad SPD 68 53 0 | 96 1 | SINGLE | ||||||
| 445 Vo62 | Soundtrack SPD 68 55 0 | 98 2 | SINGLE | ||||||
| 446 | Vo63 | Echo Drops | BPD | 68 | 61 | 0 | 103 | 1 | SINGLE |
| 447 | Vo64 | Echo Bell | BPD | 68 | 62 | 1 | 103 | 2 | SINGLE |
| 448 | Vo65 | Echo Pan | BPD | 68 | 63 | 2 | 103 | 2 | SINGLE |
| 449 | Vo66 | Star Theme | BPD | 68 | 64 | 0 | 104 | 2 | SINGLE |
| No. | NAME | Cate-gory | Patch Select | GM2 Patch Select | Voice | Key Mode | |||
| MSB = 87 MSB = 121 | |||||||||
| LSB | PC | LSB PC | |||||||
| 461 | Sy12 | D-50 FatSaw | HLD | 66 | 36 | --- | --- | 2 | SINGLE |
| 462 | Sy13 | P5 Saw | HLD | 66 | 37 | --- | --- | 2 | SINGLE |
| 463 | Sy14 | MG Saw | HLD | 66 | 38 | --- | --- | 1 | SINGLE |
| 464 | Sy15 | OB Saw | HLD | 66 | 39 | --- | --- | 1 | SINGLE |
| 465 | Sy16 | Waspy Synth | HLD | 66 | 40 | --- | --- | 2 | SINGLE |
| 466 | Sy17 | Naked Cheese | HLD | 66 | 41 | --- | --- | 1 | SINGLE |
| 467 | Sy18 | Velo Cheese | HLD | 66 | 42 | --- | --- | 3 | SINGLE |
| 468 | Sy19 | Spectrum | HLD | 66 | 43 | --- | --- | 1 | SINGLE |
| 469 Sy20 | RS Sqr Wave HLD 66 | 44 --- 1 | SINGLE | ||||||
| 470 | Sy21 | OB Lead | SLD | 66 | 45 | --- | --- | 2 | SINGLE |
| 471 | Sy22 | Shmoog | SLD | 66 | 46 | --- | --- | 2 | SINGLE |
| 472 | Sy23 | RS Theramax | SLD | 66 | 47 | --- | --- | 1 | SINGLE |
| 473 | Sy24 | JD Triangle | SLD | 66 | 48 | --- | --- | 1 | SINGLE |
| 474 | Sy25 | Sine | SLD | 66 | 49 | --- | --- | 1 | SINGLE |
| 475 Sy26 | Twin Sine SLD 66 50 | --- --- 2 | SINGLE | ||||||
| 476 | Sy27 | Rndm Ending | PLS | 66 | 51 | --- | --- | 2 | SINGLE |
| 477 Sy28 | Rndm Pad PLS 66 52 | --- --- 3 | SINGLE | ||||||
| 478 | Sy29 | Etherality | PLS | 66 | 53 | --- | --- | 4 | SINGLE |
| 479 Sy30 | Saw Impulse PLS 66 | 54 --- 3 | SINGLE | ||||||
| 480 | Sy31 | LFO Pad | PLS | 66 | 55 | --- | --- | 4 | SINGLE |
| 481 Sy32 | RS Strobe | PLS 66 56 | --- 6 DUAL | ||||||
| 482 | Sy33 | Step Pad | PLS | 66 | 57 | --- | --- | 4 | SINGLE |
| 483 | Sy34 | RndmFltrChrd | PLS | 66 | 58 | --- | --- | 4 | SINGLE |
| 484 Sy35 | Slicer | PLS 66 59 | --- 5 DUAL | ||||||
| 485 | Sy36 | Sugar Key | SYN | 66 | 60 | --- | --- | 2 | SINGLE |
| 486 | Sy37 | Bell Sugar | SYN | 66 | 61 | --- | --- | 3 | SINGLE |
| 487 | Sy38 | BriteSawKey | SYN | 66 | 62 | --- | --- | 2 | SINGLE |
| 488 | Sy39 | RS WireKeys | SYN | 66 | 63 | --- | --- | 3 | SINGLE |
| 489 | Sy40 | DualWireKeys | SYN | 66 | 64 | --- | --- | 5 | DUAL |
| 490 | Sy41 | Trance Keys | SYN | 66 | 65 | --- | --- | 3 | SINGLE |
| 491 | Sy42 | Time Warp | TEK | 66 | 66 | --- | --- | 3 | SINGLE |
| 492 | Sy43 | Riff the 5th | TEK | 66 | 67 | --- | --- | 2 | SINGLE |
| 493 | Sy44 | Seq Pulse | TEK | 66 | 68 | --- | --- | 2 | SINGLE |
| 494 Sy45 | Chord Maj7 TEK 66 | 69 --- 4 | SINGLE | ||||||
| 495 Sy46 | Just Before FX 66 70 | --- 4 | SINGLE | ||||||
| 496 | Sy47 | Square Wave | HLD | 68 | 28 | 0 | 81 | 2 | SINGLE |
| 497 Sy48 | MG Square HLD 68 | 29 1 81 1 | SINGLE | ||||||
| 498 | Sy49 | 2600 Sine | HLD | 68 | 30 | 2 | 81 | 1 | SINGLE |
| 499 | Sy50 | Saw Wave | HLD | 68 | 31 | 0 | 82 | 2 | SINGLE |
| 500 | Sy51 | OB2 Saw | HLD | 68 | 32 | 1 | 82 | 1 | SINGLE |
| 501 | Sy52 | Doctor Solo | HLD | 68 | 33 | 2 | 82 | 2 | SINGLE |
| 502 | Sy53 | Natural Lead | HLD | 68 | 34 | 3 | 82 | 2 | SINGLE |
| 503 | Sy54 | SequencedSaw | HLD | 68 | 35 | 4 | 82 | 2 | SINGLE |
| 504 | Sy55 | Syn.Calliope | SLD | 68 | 36 | 0 | 83 | 2 | SINGLE |
| 505 | Sy56 | Chiffer Lead | SLD | 68 | 37 | 0 | 84 | 2 | SINGLE |
| 506 | Sy57 | Charang | HLD | 68 | 38 | 0 | 85 | 2 | SINGLE |
| 507 | Sy58 | Wire Lead | HLD | 68 | 39 | 1 | 85 | 2 | SINGLE |
| 508 | Sy59 | Solo Vox | SLD | 68 | 40 | 0 | 86 | 2 | SINGLE |
| 509 | Sy60 | 5th Saw Wave | HLD | 68 | 41 | 0 | 87 | 2 | SINGLE |
| 510 | Sy61 | Bass & Lcad | HLD | 68 | 42 | 0 | 88 | 2 | SINGLE |
| 511 | Sy62 | Delayed Lead | HLD | 68 | 43 | 1 | 88 | 2 | SINGLE |
| 512 | Sy63 | Fantasia | SYN | 68 | 44 | 0 | 89 | 2 | SINGLE |
| 513 | Sy64 | Polysynth | SYN | 68 | 47 | 0 | 91 | 2 | SINGLE |
| 514 | Sy65 | Ice Rain | SYN | 68 | 54 | 0 | 97 | 2 | SINGLE |
| 515 | Sy66 | Brightness | SYN | 68 | 59 | 0 | 101 | 2 | SINGLE |
| 516 | Sy67 | Coblin | PLS | 68 | 60 | 0 | 102 | 2 | SINGLE |
| 517 Sy68 | Breath Noise FX 68 91 0 122 1 | SINGLE | |||||||
| 518 Sy69 | FL Key Click FX 68 92 1 122 1 | SINGLE | |||||||
[8] SYNTH
| No. | NAME | Category | Patch Select | GM2 Patch Select | Voice | Key Mode | |||
| MSB = 87 MSB = 121 | |||||||||
| LSB | PC | LSB | PC | ||||||
| 450 Sy01 | RS SawLead 1 HLD | 66 25 --- | 2 | SINGLE | |||||
| 451 Sy02 | RS SawLead 2 HLD | 66 26 --- | 4 | DUAL | |||||
| 452 Sy03 | RS SawLead 3 HLD | 66 27 --- | 2 | SINGLE | |||||
| 453 | Sy04 | MG Lead 1 | HLD | 66 | 28 | --- | --- | 1 | SINGLE |
| 454 | Sy05 | MG Lead 2 | HLD | 66 | 29 | --- | --- | 1 | SINGLE |
| 455 | Sy06 | MG Lead 3 | HLD | 66 | 30 | --- | --- | 1 | SINGLE |
| 456 | Sy07 | MG Lead 4 | HLD | 66 | 31 | --- | --- | 1 | SINGLE |
| 457 | Sy08 | PM Lead | HLD | 66 | 32 | --- | --- | 1 | SINGLE |
| 458 | Sy09 | Sqr&Saw Ld | HLD | 66 | 33 | --- | --- | 4 | SINGLE |
| 459 | Sy10 | 800 Lead | HLD | 66 | 34 | --- | --- | 1 | SINGLE |
| 460 | Sy11 | Homey Lead | HLD | 66 | 35 | --- | --- | 1 | SINGLE |
[9] BASS [0] RHYTHM & SFX
| No. | NAME | Category | Patch Select | GM2 Patch Select | Voice | Key Mode | |||
| MSB = 87 M$B = 121 | |||||||||
| LSB PC | LSB PC | ||||||||
| 519 | Bs01 RS Ac.Bass 1 BS 66 71 | --- --- 2 SINGLE | |||||||
| 520 Bs02 RS Ac.Bass 2 BS 66 72 | --- --- 2 SINGLE | ||||||||
| 521 Bs03 Upright Bs BS 66 73 | --- --- 2 SINGLE | ||||||||
| 522 Bs04 RS Ing Bs 1 BS 66 74 | --- --- 4 DUAL | ||||||||
| 523 Bs05 RS Ing Bs 2 BS 66 75 | --- --- 2 SINGLE | ||||||||
| 524 Bs06 RS Ing Bs 3 BS 66 76 | --- --- 2 SINGLE | ||||||||
| 525 Bs07 RS Jazz Bs BS 66 77 | --- --- 2 SINGLE | ||||||||
| 526 Bs08 Bright Bass BS 66 78 | --- --- 1 SINGLE | ||||||||
| 527 Bs09 RS Rock Bs BS 66 79 | --- --- 2 SINGLE | ||||||||
| 528 Bs10 RS PretlsBs1 BS 66 80 | --- --- 2 SINGLE | ||||||||
| 529 Bs11 RS PretlsBs2 BS 66 81 | --- --- 2 SINGLE | ||||||||
| 530 Bs12 Mr.Smooth BS 66 82 | --- --- 2 SINGLE | ||||||||
| 531 Bs13 RS Slap Bs 1 BS 66 83 | --- --- 1 SINGLE | ||||||||
| 532 Bs14 RS Slap Bs 2 BS 66 84 | --- --- 2 SINGLE | ||||||||
| 533 Bs15 Unison Slap BS 66 85 | --- --- 2 SINGLE | ||||||||
| 534 Bs16 AEx FingerBs BS 66 86 | --- --- 3 DUAL | ||||||||
| 535 Bs17 MC202 Bass SBS 66 87 | --- --- 1 SINGLE | ||||||||
| 536 Bs18 House Bass 1 SBS 66 88 | --- --- 1 SINGLE | ||||||||
| 537 Bs19 SH101 Bass 1 SBS 66 89 | --- --- 1 SINGLE | ||||||||
| 538 Bs20 SLI101 Bass 2 SBS 66 90 | --- --- 1 SINGLE | ||||||||
| 539 Bs21 Dark Bass SBS 66 91 | --- --- 2 SINGLE | ||||||||
| 540 Bs22 Smoth Bass SBS 66 92 | --- --- 2 SINGLE | ||||||||
| 541 Bs23 Low Bass SBS 66 93 | --- --- 2 SINGLE | ||||||||
| 542 Bs24 Deco Bass SBS 66 94 | --- --- 3 SINGLE | ||||||||
| 543 Bs25 SH1 DullBass SBS 66 95 | --- --- 2 SINGLE | ||||||||
| 544 Bs26 Square Bass SBS 66 96 | --- --- 2 SINGLE | ||||||||
| 545 Bs27 Jungle Bass SBS 66 97 | --- --- 1 SINGLE | ||||||||
| 546 Bs28 Organ Bass SBS 66 98 | --- --- 1 SINGLE | ||||||||
| 547 Bs29 Garage Bass SBS 66 99 | --- --- 1 SINGLE | ||||||||
| 548 Bs30 Attack Bass SBS 66 100 | --- --- 5 DUAL | ||||||||
| 549 Bs31 House Bass 2 SBS 66 101 | --- --- 1 SINGLE | ||||||||
| 550 Bs32 RS SynBass 1 SBS 66 102 | --- --- 2 SINGLE | ||||||||
| 551 Bs33 SH-2 Bass SBS 66 103 | --- --- 2 SINGLE | ||||||||
| 552 Bs34 MG Punch Bs SBS 66 104 | --- --- 2 SINGLE | ||||||||
| 553 Bs35 MG Lite Bs SBS 66 105 | --- --- 2 SINGLE | ||||||||
| 554 Bs36 RS SynBass 2 SBS 66 106 | --- --- 3 SINGLE | ||||||||
| 555 Bs37 FatTB Bass SBS 66 107 | --- --- 2 SINGLE | ||||||||
| 556 Bs38 TB Bass SBS 66 108 | --- --- 1 SINGLE | ||||||||
| 557 Bs39 PopSynthBass SBS 66 109 | --- --- 2 SINGLE | ||||||||
| 558 Bs40 Acid TB Bs SBS 66 110 | --- --- 1 SINGLE | ||||||||
| 559 Bs41 TB Dist Saw SBS 66 111 | --- --- 1 SINGLE | ||||||||
| 560 Bs42 RS SynBass 3 SBS 66 112 | --- --- 2 DUAL | ||||||||
| 561 Bs43 Mini Bass SBS 66 113 | --- --- 1 SINGLE | ||||||||
| 562 Bs44 JUNO Bass 1 SBS 66 114 | --- --- 1 SINGLE | ||||||||
| 563 Bs45 JUNO Bass 2 SBS 66 115 | --- --- 1 SINGLE | ||||||||
| 564 Bs46 MG Bass 1 SBS 66 116 | --- --- 2 SINGLE | ||||||||
| 565 Bs47 MG Bass 2 SBS 66 117 | --- --- 2 SINGLE | ||||||||
| 566 Bs48 Unison Bs 1 SBS 66 118 | --- --- 2 SINGLE | ||||||||
| 567 Bs49 Unison Bs 2 SBS 66 119 | --- --- 3 SINGLE | ||||||||
| 568 Bs50 Unison Bs 3 SBS 66 120 | --- --- 3 SINGLE | ||||||||
| 569 Bs51 Unison Bs 4 SBS 66 121 | --- --- 2 SINGLE | ||||||||
| 570 Bs52 Unison Bs 5 SBS 66 122 | --- --- 4 SINGLE | ||||||||
| 571 Bs53 Detune Bass SBS 66 123 | --- --- 3 SINGLE | ||||||||
| 572 Bs54 AEx Synth Bs SBS 66 124 | --- --- 3 DUAL | ||||||||
| 573 Bs55 Acoustic Bs. BS 67 78 0 33 2 SINGLE | |||||||||
| 574 Bs56 Fingcred Bs. BS 67 79 0 34 1 SINGLE | |||||||||
| 575 Bs57 Finger Slap BS 67 80 1 34 2 SINGLE | |||||||||
| 576 Bs58 Picked Bass BS 67 81 0 35 1 SINGLE | |||||||||
| 577 Bs59 Freucss Bs. BS 67 82 0 36 1 SINGLE | |||||||||
| 578 Bs60 Slap Bass 1 BS 67 83 0 37 1 SINGLE | |||||||||
| 579 Bs61 Slap Bass 2 BS 67 84 0 38 2 SINGLE | |||||||||
| 580 Bs62 Synth Bass 1 SBS 67 85 0 39 1 SINGLE | |||||||||
| 581 Bs63 SynthBass101 SBS 67 86 1 39 1 SINGLE | |||||||||
| 582 Bs64 Acid Bass SBS 67 87 3 39 2 SINGLE | |||||||||
| 583 Bs65 Clavi Bass SBS 67 88 3 39 2 SINGLE | |||||||||
| 584 Bs66 Hammer SBS 67 89 4 39 2 SINGLE | |||||||||
| 585 Bs67 Synth Bass 2 SBS 67 90 0 40 2 SINGLE | |||||||||
| 586 Bs68 Beef FM Bass SBS 67 91 1 40 2 SINGLE | |||||||||
| 587 Bs69 RubberBass 2 SBS 67 92 2 40 2 SINGLE | |||||||||
| 588 Bs70 Attack Pulse SBS 67 93 3 40 1 SINGLE | |||||||||
| No. | NAME | Category | Patch Select | GM2 Patch Select | Voice | Key Mode | |||
| MSB = 87 MSB = 121 | |||||||||
| LSB PC LSB PC | |||||||||
| Rh01-Rh20: Rhythm set list (p. 116) | |||||||||
| 589 | Rh21 | RS SteelDrum | PRC | 66 | 125 | --- | --- | 1 | SINGLE |
| 590 | Rh22 | W.Chime Down | PRC | 66 | 126 | --- | --- | 1 | SINGLE |
| 591 | Rh23 | Nz & SawHit | SFX | 66 | 127 | --- | --- | 2 | SINGLE |
| 592 | Rh24 | NylonGtr Nz | SFX | 66 | 128 | --- | --- | 1 | SINGLE |
| 593 | Rh25 | Timpani | PRC | 67 | 103 | 0 | 48 | 1 | SINGLE |
| 594 R | Rh26 Agogo | PRC | 68 76 0 114 1 SINGLE | ||||||
| 595 | Rh27 | Woodblock | PRC | 68 | 78 | 0 | 116 | 1 | SINGLE |
| 596 | Rh28 | Castanets | PRC | 68 | 79 | 1 | 116 | 1 | SINGLE |
| 597 R | Rh29 Taiko | PRC | 68 80 0 117 1 SINGLE | ||||||
| 598 | Rh30 | Concert BD | PRC | 68 | 81 | 1 | 117 | 1 | SINGLE |
| 599 | Rh31 | Melo. Tom 1 | PRC | 68 | 82 | 0 | 118 | 1 | SINGLE |
| 600 | Rh32 | Melo. Tom 2 | PRC | 68 | 83 | 1 | 118 | 1 | SINGLE |
| 601 R | Rh33 Senth Drum PRC | 68 84 0 119 2 SINGLE | |||||||
| 602 | Rh34 | 808 Tom | PRC | 68 | 85 | 1 | 119 | 2 | SINGLE |
| 603 | Rh35 | Elec Perc | PRC | 68 | 86 | 2 | 119 | 1 | SINGLE |
| 604 | Rh36 | Reverse Cym. | PRC | 68 | 87 | 0 | 120 | 1 | SINGLE |
| 605 | Rh37 | Seashore | SFX | 68 | 93 | 0 | 123 | 1 | SINGLE |
| 606 R | Rh38 Rain | SFX | 68 94 1 123 1 SINGLE | ||||||
| 607 | Rh39 | Thunder | SFX | 68 | 95 | 2 | 123 | 1 | SINGLE |
| 608 R | Rh40 Wind | SFX | 68 96 3 123 1 SINGLE | ||||||
| 609 | Rh41 | Stream | SFX | 68 | 97 | 4 | 123 | 2 | SINGLE |
| 610 | Rh42 | Bubble | SFX | 68 | 98 | 5 | 123 | 2 | SINGLE |
| 611 R | Rh43 Bird | SFX | 68 99 0 124 2 SINGLE | ||||||
| 612 R | Rh44 Dog | SFX | 68 100 1 124 1 SINGLE | ||||||
| 613 R | Rh45 Horse-Gallop SFX | 68 101 2 124 1 SINGLE | |||||||
| 614 | Rh46 Bird 2 | SFX | 68 | 102 | 3 | 124 | 1 | SINGLE | |
| 615 R | Rh47 Telephone 1 SFX | 68 103 0 125 1 SINGLE | |||||||
| 616 R | Rh48 Telephone 2 SFX | 68 104 1 125 1 SINGLE | |||||||
| 617 R | Rh49 DoorCreaking SFX | 68 105 2 125 1 SINGLE | |||||||
| 618 R | Rh50 Door | SFX | 68 106 3 125 1 SINGLE | ||||||
| 619 | Rh51 Scratch | SFX | 68 | 107 | 4 | 125 | 1 | SINGLE | |
| 620 | Rh52 Wind Chimes | SFX | 68 | 108 | 5 | 125 | 1 | SINGLE | |
| 621 R | Rh53 Helicopter SFX | 68 109 0 126 1 SINGLE | |||||||
| 622 | Rh54 Car-Engine | SFX | 68 | 110 | 1 | 126 | 1 | SINGLE | |
| 623 | Rh55 Car-Stop | SFX | 68 | 111 | 2 | 126 | 1 | SINGLE | |
| 624 | Rh56 Car-Pass | SFX | 68 | 112 | 3 | 126 | 1 | SINGLE | |
| 625 R | Rh57 Car-Crash SFX | 68 113 4 126 2 SINGLE | |||||||
| 626 | Rh58 Siren | SFX | 68 | 114 | 5 | 126 | 1 | SINGLE | |
| 627 | Rh59 Train | SFX | 68 | 115 | 6 | 126 | 1 | SINGLE | |
| 628 | Rh60 Jctplane | SFX | 68 | 116 | 7 | 126 | 2 | SINGLE | |
| 629 | Rh61 Starship | SFX | 68 | 117 | 8 | 126 | 2 | SINGLE | |
| 630 | Rh62 Burst Noise | SFX | 68 | 118 | 9 | 126 | 2 | SINGLE | |
| 631 | Rh63 Applause | SFX | 68 | 119 | 0 | 127 | 2 | SINGLE | |
| 632 | Rh64 Laughing | SFX | 68 | 120 | 1 | 127 | 1 | SINGLE | |
| 633 R | Rh65 Screaming SFX | 68 121 2 127 1 SINGLE | |||||||
| 634 | Rh66 Punch | SFX | 68 | 122 | 3 | 127 | 1 | SINGLE | |
| 635 R | Rh67 Heart Beat SFX | 68 123 4 127 1 SINGLE | |||||||
| 636 | Rh68 Footsteps | SFX | 68 | 124 | 5 | 127 | 1 | SINGLE | |
| 637 | Rh69 Gun Shot | SFX | 68 | 125 | 0 | 128 | 1 | SINGLE | |
| 638 | Rh70 Machine Gun | SFX | 68 | 126 | 1 | 128 | 1 | SINGLE | |
| 639 | Rh71 Lasergun | SFX | 68 | 127 | 2 | 128 | 1 | SINGLE | |
| 640 | Rh72 Explosion | SFX | 68 | 128 | 3 | 128 | 2 | SINGLE | |
Rhythm set list
| Rh01:Standard Kit(PC:001) | Voice | Rh02:Rock Kit(PC:002) | Voice | Rh03:Jazz Kit(PC:003) | Voice | Rh04:Brush Kit(PC:004) | Voice | Rh05:Orch Kit(PC:005) | |
| C1 | 16 | ---- | ---- | ---- | ---- | ---- | |||
| 17 | ---- | ---- | ---- | ---- | ---- | ||||
| 18 | ---- | ---- | ---- | ---- | ---- | ||||
| 19 | ---- | ---- | ---- | ---- | ---- | ||||
| 20 | ---- | ---- | ---- | ---- | ---- | ||||
| 21 | ---- | ---- | ---- | ---- | ---- | ||||
| 22 | ---- | ---- | ---- | ---- | ---- | ||||
| 23 | ---- | ---- | ---- | ---- | ---- | ||||
| 24 | ---- | ---- | ---- | ---- | Tubular-bell | ||||
| 25 | ---- | ---- | ---- | ---- | Tubular-bell | ||||
| 26 | ---- | ---- | ---- | ---- | Tubular-bell | ||||
| 27 | R&B Snr 1 2 | RS Snr 3 2 | Dry Snr 1 | 1 | Dry Snr 2 | 1 | Tubular-bell | ||
| 28 | Sharp Kick 2 | Old Kick 2 | Sharp Kick 2 | Mix Kick 1 | Tubular-bell | ||||
| 29 | Old Kick 2 | Sharp Kick 2 | Mix Kick 1 | JazzDryKick2 | 2 | Tubular-bell | |||
| 30 | RS Snr 4 2 | RS Snr 4 2 | Dry Snr 2 | 1 | Jazz Rim | 1 | Tubular-bell | ||
| 31 | OldSharpKick 2 | RS Kick 1 2 | JazzDryKick1 | 2 | JazzDryKick1 | 2 | Tubular-bell | ||
| 32 | RS Snr 3 2 | RS Snr 1 2 | Brush Slap 1 | 1 | RS Jazz Snr | 1 | Tubular-bell | ||
| 33 | RS Kick 3 2 | RS Kick 2 2 | Jazz Kick 2 | 2 | Jazz Kick 2 | 2 | Tubular-bell | ||
| 34 | RS PHH [EXC1] 1 | RS PHH [EXC1] 1 | Jazz PHH | [EXC1] 1 | Brush PHH | [EXC1] 1 | |||
| 35 | RS Kick 1 2 | Power Kick 1 | Jazz Kick 3 | 2 | Jazz Kick 1 | 1 | Tubular-bell | ||
| 36 | RS Kick 2 2 | Hard Kick | 3 | JazzDryKick2 | 2 | Jazz Kick 3 | 2 | Concert BD | |
| 37 | RS Stick 2 | RS Stick 2 | Dry Stick 1 1 | Brush Slap 2 | 3 | Side Stick | |||
| 38 | RS Snr 1 2 | RS Snr 1 2 | Jazz Rim | 1 | BrushSwirl 2 | 2 | Concert Snr | ||
| 39 | Ghost&Flm 2 | Ghost&Flm 2 | SnareGhost | 1 | Brush Slap 1 | 1 | TR909 Clap 1 | ||
| 40 | RS Snr 2 2 | Rock Snr | 4 | RS Jazz Snr | 1 | BrushSwirl 1 | 1 | Concert Snr | |
| 41 | RS Tom L 1 | RS Tom L 1 | JazzTom L | 1 | Brush Tom L | 3 | Timpani | ||
| 42 | RS CHH 3 [EXC1] 1 | RS CHH 1 [EXC1] 1 | RS CHH 1 [EXC1] 1 | Brush CHH | [EXC1] 1 | Timpani | |||
| 43 | RS Tom L Flm 1 | RS Tom L 1 | JazzTomL/Fim | 1 | Brush Tom L | 3 | Timpani | ||
| 44 | RS CHH 4 [EXC1] 1 | RS CHH 2 [EXC1] 1 | RS CHH 2 [EXC1] 1 | Brush PHH | [EXC1] 1 | Timpani | |||
| 45 | RS Tom M 1 | RS Tom M 1 | JazzTom M | 1 | Brush Tom M | 3 | Timpani | ||
| 46 | RS OHH 2 | [EXC1] 1 | RS OHH 1 | [EXC1] 1 | Brush OHH | [EXC1] 1 | Timpani | ||
| 47 | RS Tom M Flm | 1 | JazzTomM/Fim | 1 | Brush Tom M | 3 | Timpani | ||
| 48 | RS Tom H | 1 | JazzTom H | 1 | Brush Tom H | 3 | Timpani | ||
| 49 | Crash Cym.3 | 2 | Jazz Crash 2 | Brush Crash | 1 | Timpani | |||
| 50 | RS Tom H Flm | 1 | Jazz TomH/Fim | 1 | Brush Tom H | 3 | Timpani | ||
| 51 | Rock Ride 1 | 1 | Jazz Ride 1 | 1 | Jazz Ride 1 | 1 | Timpani | ||
| 52 | ChinaCymbal2 | 2 | ChinaCymbal1 | 1 | ChinaCymbal1 | 1 | Timpani | ||
| 53 | Ride Bell 1 1 | 2 | Ride Bell 2 1 | Ride Bell 1 1 | Timpani | ||||
| 54 | Tambourine 1 | 1 | Tambourine 1 | 1 | Tambourine 3 | 1 | Tambourine 3 | ||
| 55 | Splash Cym | 1 | Splash Cym | 1 | Splash Cym | 1 | Splash Cym | ||
| 56 | Cowbell | 1 | Cowbell | 1 | Cowbell | 1 | ChinaCymbal2 | ||
| 57 | Rock Crash | 2 | Crash Cym.2 | 1 | Crash Cym.2 | 1 | Concert Cym 1 | ||
| 58 | Vibraslap | 1 | Vibraslap | 1 | Vibraslap | 1 | Rev.Cymbl 2 | ||
| 59 | Rock Ride 2 | 1 | Ride Cymbal | 1 | Jazz Ride 2 | 1 | Concert Cym 2 | ||
| 60 | Bongo High 2 | 1 | Bongo High 2 | 1 | Bongo High 2 | 1 | SlowAttack Cym | ||
| 61 | Bongo Low 2 | 1 | Bongo Low 2 | 1 | Bongo Low 2 | 1 | SlowAttack Cym | ||
| 62 | Conga Hi Mt2 | [EXC2] 1 | Conga Hi Mt2 | [EXC2] 1 | Conga Hi Mt2 | [EXC2] 1 | Talko | ||
| 63 | CongHiOp/Slp | [EXC2] 1 | CongHiOp/Slp | [EXC2] 1 | CongHiOp/Slp | [EXC2] 1 | CongHiOp/Slp | ||
| 64 | CongLwOp/Slp | 1 | CongLwOp/Slp | 1 | CongLwOp/Slp | 1 | CongLwOp/Slp | ||
| 65 | Timbale Hi 2 | 1 | Timbale Hi 2 | 1 | Timbale Hi 2 | 1 | Timbale Hi 2 | ||
| 66 | Timbale Lw 2 | 1 | Timbale Lw 2 | 1 | Timbale Lw 2 | 1 | Timbale Lw 2 | ||
| 67 | Agogo | 1 | Agogo | 1 | Agogo | 1 | Agogo | ||
| 68 | Agogo | 1 | Agogo | 1 | Agogo | 1 | Agogo | ||
| 69 | Cabasa | 1 | Cabasa | 1 | Cabasa | 1 | Cabasa | ||
| 70 | Maracas 1 | Maracas 1 | Maracas 1 | Maracas 1 | |||||
| 71 | ShortWhistle | [EXC3] 1 | ShortWhistle | [EXC3] 1 | ShortWhistle | [EXC3] 1 | ShortWhistle | ||
| 72 | LongWhistle2 | [EXC3] 1 | LongWhistle2 | [EXC3] 1 | LongWhistle2 | [EXC3] 1 | LongWhistle2 | ||
| 73 | Guiro Short | [EXC4] 1 | Guiro Sw | 1 | Guiro Sw | 1 | Cowbell | ||
| 74 | Guiro Long | [EXC4] 1 | Castanets 2 | 2 | Castanets 2 | 2 | Vibraslap | ||
| 75 | Claves | 1 | Claves | 1 | Claves | 1 | Claves | ||
| 76 | Woodblock | 1 | Woodblock | 1 | Woodblock | 1 | Woodblock | ||
| 77 | Woodblock | 1 | Woodblock | 1 | Woodblock | 1 | Woodblock | ||
| 78 | Cuica Mute | [EXC5] 1 | Cuica Sw | 1 | Cuica Sw | 1 | Castanets 2 | ||
| 79 | Cuica Open | [EXC5] 1 | Shaker Sw 1 | Shaker Sw 1 | Cuica Sw | ||||
| 80 | Triangl Mt 1 | [EXC6] 1 | Triangl Mt 1 | [EXC6] 1 | Triangl Mt 1 | [EXC6] 1 | Triangl Mt 1 | ||
| 81 | Triangl Op 1 | [EXC6] 1 | Triangl Op 1 | [EXC6] 1 | Triangl Op 1 | [EXC6] 1 | Triangl Op 1 | ||
| 82 | Shaker 1 | 1 | Bell Tree | 1 | Bell Tree | 1 | Shaker Sw 1 | ||
| 83 | Jingle Bell | 1 | Jingle Bell | 1 | Jingle Bell | 1 | Jingle Bell | ||
| 84 | WindChimeDwn | 1 | WindChimeDwn | 1 | WindChimeDwn | 1 | Bell Tree | ||
| 85 | Castanets 2 | 2 | W.ChimeShort | 1 | W.ChimeShort | 1 | WindChimeDwn | ||
| 86 | Surdo Mute | [EXC7] 1 | Surdo Mute | [EXC7] 1 | Surdo Mute | [EXC7] 1 | W.ChimeShort | ||
| 87 | Surdo Open | [EXC7] 1 | Surdo Open | [EXC7] 1 | Surdo Open | [EXC7] 1 | Bird 1 | ||
| 88 | FingerSnap | 1 | FingerSnap | 1 | FingerSnap | 1 | Church Bell | ||
| 89 | TR909 Clap 2 | 1 | TR909 Clap 2 | 1 | TR909 Clap 1 | 1 | Church Bell | ||
| 90 | Cheap Clap | 1 | TR808 Clap | 1 | TR808 Clap | 1 | FingerSnap | ||
| 91 | Bass Hit 2 | Bass Hit 2 | Bass Hit 2 | TR909 Clap 2 | |||||
| 92 | OrchestraHit | 2 | OrchestraHit | 2 | OrchestraHit | 2 | TR808 Clap | ||
| 93 | 6th Hit | 2 | 6th Hit | 2 | 6th Hit | 2 | OrchestraHit | ||
| 94 | Euro Hit | 2 | Euro Hit | 2 | Applause | 2 | Applause | ||
| 95 | Mtmm Click | 1 | Mtmm Click | 1 | Mtmm Click | 1 | Mtmm Click | ||
| 96 | Mtmm Bell 1 | Mtmm Bell 1 | Mtmm Bell 1 | Mtmm Bell 1 | |||||
| 97 | ---- | ---- | ---- | ---- | |||||
| 98 | ---- | ---- | ---- | ---- | |||||
| 99 | ---- | ---- | ---- | ---- | |||||
| 100 | ---- | ---- | ---- | ---- |
[EXC]: Percussion sound of the same number will not be heard at the same time.
PC: Program Number
Rh01-Rh05: MSB=086, LSB=064
| Rh06:R&B/HHop Kit (PC:006) | Voice | Rh07:Techno Kit (PC:007) | Voice | Rh08:House Kit (PC:008) | Voice | Rh09:808&909 Kit (PC:009) | Voice | Rh10:Perc Menu (PC:010) | |
| 16 | ---- | ---- | ---- | ---- | ---- | ||||
| 17 | ---- | ---- | ---- | ---- | ---- | ||||
| 18 | ---- | ---- | ---- | ---- | ---- | ||||
| 19 | ---- | ---- | ---- | ---- | ---- | ||||
| 20 | ---- | ---- | ---- | ---- | ---- | ||||
| 21 | ---- | ---- | ---- | ---- | ---- | ||||
| 22 | ---- | ---- | ---- | ---- | ---- | ||||
| 23 | ---- | ---- | ---- | ---- | ---- | ||||
| C1 | ---- | ---- | ---- | ---- | ---- | ||||
| 24 | ---- | ---- | ---- | ---- | ---- | ||||
| 25 | ---- | ---- | ---- | ---- | ---- | ||||
| 26 | ---- | ---- | ---- | ---- | ---- | ||||
| 27 | Dry Snr 2 1 | Elec Snare 2 | 2 | R&B Snr 2 2 | House Snr 1 | Mtrnm Click 1 | |||
| 28 | Sharp Kick 2 | PlasticKick1 | 2 | Old Kick 2 | House Kick 2 | Mtrnm Bell | |||
| 29 | Old Kick 2 | House Kick 2 | House Kick 2 | SH32 Kick | 2 | Scratch 1 1 | |||
| 30 | Jazz Rim 1 | Elec Snare 1 | 1 | TR808 Snr 2 | 1 | Elec Snare 2 | 2 | Scratch 2 1 | |
| 31 | TR909 Kick 2 1 | SH32 Kick | 2 | SH32 Kick | 2 | PlasticKick1 | 2 | Scratch Push | |
| 32 | RS Jazz Snr 1 | Finger Snr | 1 | Elec Snare 3 | 1 | Elec Snare 3 | 1 | Scratch Pull | |
| 33 | TechnoKick 1 2 | TR909 Kick 1 1 | TR909 Kick 2 1 | TR808 Kick 1 1 | ScratchPush2 | ||||
| 34 | RS PHH [EXC1] 1 | TR909 PHH | [EXC1] 2 | TR909 PHH | [EXC1] 2 | TR909 PHH | [EXC1] 2 | ScratchPull2 | |
| 35 | R&B Kick 2 2 | TR909 Kick 2 1 | TechnoKick 1 2 | TR808 Kick 2 1 | Beam HiQ | ||||
| 36 | R&B Kick 1 2 | TechnoKick 1 2 | PlasticKick1 | 2 | TR808 Kick 3 1 | Taiko | |||
| 37 | R&B Stick 3 | TR909 Rim 1 | Dry Stick 2 2 | TR808 Rim 1 | Surdo Mute | ||||
| 38 | R&B Snr 1 2 | TR909 Snr 1 | 1 | TR909 Snr 3 | 2 | TR808 Snr 1 | 2 | Surdo Open | |
| 39 | Cheap Clap 1 | TR909 Clap 1 | 1 | TR909 Clap 2 | 1 | TR808 Clap | 1 | Bongo High 1 1 | |
| 40 | R&B Snr 2 2 | TR909 Snr 2 | 1 | House Snr 1 | TR808 Snr 2 | 1 | Bongo Low 1 | ||
| 41 | R&B Tom L 1 | TR909 Tom 1 | TR909 Tom 1 | TR808 Tom 2 | 1 | Bongo High 2 1 | |||
| 42 | RS CHH 5 | [EXC1] 1 | TR909 CHH 2 | [EXC1] 1 | TR909 CHH 2 | [EXC1] 1 | TR808 CHH 1 | [EXC1] 1 | Bongo Low 2 |
| 43 | TR808 Kick 1 1 | TR909 Tom 1 | TR909 Tom 1 | TR808 Tom 1 | Conga Hi Mt | ||||
| 44 | RS CHH 6 | [EXC1] 1 | TR909 CHH 1 | [EXC1] 1 | TR909 CHH 1 | [EXC1] 1 | TR808 CHH 2 | [EXC1] 1 | CongaHi Open |
| 45 | R&B Tom M | 1 | TR909 Tom 1 | TR909 Tom 1 | TR808 Tom 2 | 1 | CongaLowOpen | ||
| 46 | RS OHH 3 | [EXC1] 1 | TR909 OHH | [EXC1] 1 | TR909 OHH | [EXC1] 1 | TR808 OHH | [EXC1] 1 | Conga Hi Mt2 |
| 47 | TR808 Kick 1 1 | TR909 Tom 1 | TR909 Tom 1 | TR808 Tom 1 | CongHiOp/Slp | ||||
| C3 | R&B Tom H | 1 | TR909 Tom 1 | TR909 Tom 1 | TR808 Tom 2 | 1 | CongLwOp/Slp | ||
| 49 | Crash Cym.3 | 2 | TR909 Crash | 1 | TR909 Crash | 1 | TR808 Crash | 1 | TR808Conga 1 |
| 50 | TR808 Kick 1 1 | TR909 Tom 1 | TR909 Tom 1 | TR808 Tom 1 | Timbale Hi 1 | ||||
| 51 | R&B Ride | 1 | TR909 Ride 1 | 1 | TR909 Ride 2 | 1 | TR909 Ride 3 | 1 | Timbale Lw 1 |
| 52 | TR808 Crash | 1 | ChinaCymbal2 | 2 | ChinaCymbal2 | 2 | TR909 Splash | 1 | Timbale Hi 2 |
| 53 | TR909RideBl1 | 1 | TR909RideBl2 | 1 | TR909RideBl1 | 1 | TR909RideBl2 | 1 | Timbale Lw 2 |
| 54 | Tambourine 1 | 1 | Tambourine 2 | 1 | Tambourine 3 | 1 | TR808Conga 1 | 1 | Cuica Mute |
| 55 | TR909 Splash | 1 | NoiseCymbal | 1 | TR909 Splash | 1 | TR909 Splash | 1 | Cuica Open |
| 56 | TR808Cowbell | 1 | TR808Cowbell | 1 | Cowbell | 1 | TR808Cowbell | 1 | Cuica Sw 1 |
| 57 | TR909 Crash | 1 | TR808 Crash | 1 | TR808 Crash | 1 | TR808 Crash | 1 | Castanets 1 |
| 58 | Vibraslap | 1 | Vibraslap | 1 | Vibraslap | 1 | TR909 PHH | [EXC1] 2 | Castanets 2 |
| 59 | TR909 Ride 2 | 1 | TR909 Ride 3 | 1 | TR909 Ride 3 | 1 | TR909 Kick 1 1 | Tambourine 1 | |
| 60 | Bongo High 2 1 | Bongo High 2 1 | Bongo High 2 1 | TR909 Kick 2 1 | Tambourine 2 | ||||
| 61 | Bongo Low 2 | 1 | Bongo Low 2 | 1 | Bongo Low 2 | 1 | TR909 Rim 1 | Tambourine 3 | |
| 62 | Conga Hi Mt2 | [EXC2] 1 | TR808Conga 1 | 1 | Conga Hi Mt2 | [EXC2] 1 | TR909 Snr 1 | 1 | Cabasa |
| 63 | CongHiOp/Slp | [EXC2] 1 | CongHiOp/Slp | 1 | CongHiOp/Slp | [EXC2] 1 | TR909 Clap 2 | 1 | Maracas |
| 64 | CongLwOp/Slp | 1 | CongLwOp/Slp | 1 | CongLwOp/Slp | 1 | TR909 Snr 2 | 1 | TR808Maracas |
| 65 | Timbale Hi 2 | 1 | Timbale Hi 2 | 1 | Timbale Hi 2 | 1 | TR909 Tom 1 | Claves | |
| 66 | Timbale Lw 2 | 1 | Timbale Lw 2 | 1 | Timbale Lw 2 | 1 | TR909 CHH 1 | [EXC1] 1 | TR808 Clave |
| 67 | Agogo | 1 | Agogo | 1 | Agogo | 1 | TR909 Tom 1 | Woodblock | |
| 68 | Agogo | 1 | Agogo | 1 | Agogo | 1 | TR909 CHH 2 | [EXC1] 1 | Woodblock |
| 69 | Cabasa | 1 | Cabasa | 1 | Cabasa | 1 | TR909 Tom 1 | Cowbell | |
| 70 | Maracas | 1 | TR808Maracas | 1 | Maracas | 1 | TR909 OHH | [EXC1] 1 | TR808Cowbell |
| 71 | ShortWhistle | [EXC3] 1 | ShortWhistle | [EXC3] 1 | ShortWhistle | [EXC3] 1 | TR909 Tom 1 | Vibraslap | |
| C5 | LongWhistle2 | [EXC3] 1 | LongWhistle2 | [EXC3] 1 | LongWhistle2 | [EXC3] 1 | TR909 Tom 1 | Shaker 1 | |
| 73 | Shaker Sw 1 | Cuica Sw 1 | Guiro Short | [EXC4] 1 | TR909 Crash | 1 | Shaker 2 | ||
| 74 | Cuica Sw 1 | Shaker Sw 1 | Guiro Long | [EXC4] 1 | TR909 Tom 1 | Shaker Sw 1 | |||
| 75 | Castanets 2 | 2 | TR808 Clave | 1 | Shaker 2 | 1 | TR909 Ride 1 | 1 | Guiro Short |
| 76 | Triangl Mt 2 | [EXC6] 1 | Guiro Sw 1 | Castanets 1 | ChinaCymbal2 | 2 | Guiro Long | ||
| 77 | Triangl Op 2 | [EXC6] 1 | Castanets 2 | 2 | TR808 Clave | 1 | TR909RideBl1 | 1 | Guiro Sw 1 |
| 78 | Bell Tree | 1 | Triangl Mt 1 | [EXC6] 1 | Cuica Mute | [EXC5] 1 | TR808Maracas | 1 | Triangl Mt 1 |
| 79 | Jingle Bell | 1 | Triangl Op 1 | [EXC6] 1 | Cuica Open | [EXC5] 1 | TR909 Splash | 1 | Triangl Op 1 |
| 80 | WindChimeDwn | 1 | Jingle Bell | 1 | Bell Tree | 1 | TR808Cowbell | 1 | Triangl Mt 2 |
| 81 | Surdo Mute | [EXC7] 1 | Surdo Mute | [EXC7] 1 | Surdo Mute | [EXC7] 1 | TR909 Crash | 1 | Triangl Op 2 |
| 82 | Surdo Open | [EXC7] 1 | Surdo Open | [EXC7] 1 | Surdo Open | [EXC7] 1 | TR808 Clave | 1 | Agogo |
| 83 | FingerSnap 1 | FingerSnap 1 | FingerSnap 1 | TR909 Ride 2 | 1 | Agogo | |||
| C6 | TR909 Clap 2 | 1 | TR909 Clap 2 | 1 | TR909 Clap 1 | 1 | NoiseCymbal | 1 | ShortWhistle |
| 85 | TR808 Clap 1 | 1 | TR808 Clap 1 | TR808 Clap 1 | TR909 Clap 1 | 1 | Long Whistle | ||
| 86 | TR909 Clap 1 | 1 | Rev.909Crash | 1 | Rev.909Crash | 1 | TR909 Clap 2 | 1 | LongWhistle2 |
| 87 | ScratchPush2 | [EXC8] 1 | Rev.909 OHH | 1 | Rev.909 OHH | 1 | TR808 Clap 2 | 1 | FingerSnap 1 |
| 88 | ScratchPull2 | [EXC8] 1 | Rev.909Kick2 | 1 | Rev.909Kick2 | 1 | Rev.909Kick2 | 1 | Cheap Clap 1 |
| 89 | Scratch Push | [EXC9] 1 | Rev.909HClap | 1 | Rev.909HClap | 1 | Rev.909Crash | 1 | TR909 Clap 1 |
| 90 | Scratch Pull | [EXC9] 1 | Beam HiQ | 1 | Beam HiQ | 1 | Rev.909 OHH | 1 | TR909 Clap 2 |
| 91 | Scratch 2 1 | Techno Hit 1 | Techno Hit 1 | Rev.909HClap | 1 | TR808 Clap | |||
| 92 | Rev.909HClap | 1 | Bass Hit 2 | Bass Hit 2 | Square Clck | 1 | Jingle Bell | ||
| 93 | Philly Hit | 1 | 6th Hit | 2 | 6th Hit | 2 | High-Q | 1 | Bell Tree |
| 94 | Siren | 1 | Euro Hit | 2 | Euro Hit | 2 | Beam HiQ | 1 | W.ChimeShort |
| 95 | Mtrmm Click 1 | MC500 Beep 2 | 1 | MC500 Beep 2 | 1 | MC500 Beep 2 | 1 | WindChimeDwn | |
| C7 | Mtrmm Bell | 1 | MC500 Beep 1 | 1 | MC500 Beep 1 | 1 | MC500 Beep 1 | 1 | Church Bell |
| 96 | ---- | ---- | ---- | ---- | ---- | ||||
| 97 | ---- | ---- | ---- | ---- | ---- | ||||
| 98 | ---- | ---- | ---- | ---- | ---- | ||||
| 99 | ---- | ---- | ---- | ---- | ---- |
[EXC]: Percussion sound of the same number will not be heard at the same time.
PC: Program Number
Rh06-Rh10: MSB=086, LSB=064
| Rh11:Drums Menu (PC:011) | Voice | Rh12:GM2 STANDARD (PC:001) | Voice | Rh13:GM2 ROOM (PC:009) | Voice | Rh14:GM2 POWER (PC:017) | Voice | Rh15:GM2 ELECTRIC (PC:025) | |
| 16 | ---- | ---- | ---- | ---- | ---- | ||||
| 17 | ---- | ---- | ---- | ---- | ---- | ||||
| 18 | ---- | ---- | ---- | ---- | ---- | ||||
| 19 | ---- | ---- | ---- | ---- | ---- | ||||
| 20 | ---- | ---- | ---- | ---- | ---- | ||||
| 21 | RS Kick 1 2 | ---- | ---- | ---- | ---- | ||||
| 22 | RS Kick 2 2 | ---- | ---- | ---- | ---- | ||||
| 23 | RS Kick 3 2 | ---- | ---- | ---- | ---- | ||||
| C1 | StandardKick 1 | ---- | ---- | ---- | ---- | ||||
| 24 | Jazz Kick 1 1 | ---- | ---- | ---- | ---- | ||||
| 25 | Jazz Kick 2 2 | ---- | ---- | ---- | ---- | ||||
| 26 | Jazz Kick 3 2 | High-Q | 1 | High-Q | 1 | High-Q | 1 | High-Q | |
| 27 | JazzDryKick1 2 | Slap | 1 | Slap | 1 | Slap | 1 | Slap | |
| 28 | JazzDryKick2 2 | Scratch Push | [EXC7] | Scratch Push | [EXC7] | Scratch Push | [EXC7] | Scratch Push | |
| 29 | Mix Kick 1 | Scratch Pull | [EXC7] | Scratch Pull | [EXC7] | Scratch Pull | [EXC7] | Scratch Pull | |
| 30 | Power Kick 1 | Sticks | 1 | Sticks | 1 | Sticks | 1 | Sticks | |
| 31 | Hard Kick 3 | Square Click | 1 | Square Click | 1 | Square Click | 1 | Square Click | |
| 32 | R&B Kick 1 2 | Mtmmm Click | 1 | Mtmmm Click | 1 | Mtmmm Click | 1 | Mtmmm Click | |
| 33 | R&B Kick 2 2 | Mtmmm Bell | 1 | Mtmmm Bell | 1 | Mtmmm Bell | 1 | Mtmmm Bell | |
| 34 | OldSharpKick 2 | Mix Kick 1 | Mix Kick 1 | Mix Kick 1 | Mix Kick 1 | ||||
| C2 | Sharp Kick 2 | StandardKick 1 | StandardKick 1 | Power Kick 1 | Elec Kick 2 | ||||
| 35 | Old Kick 2 | Side Stick | 1 | Side Stick | 1 | Side Stick | 1 | Side Stick | |
| 36 | SH32 Kick 2 | Standard Snr 1 | Standard Snr 1 | Dance Snare | 1 | Elec Snare 1 | |||
| 37 | TechnoKick 1 2 | TR909 Clap 1 | 1 | TR909 Clap 1 | 1 | TR909 Clap 1 | 1 | TR909 Clap 1 | |
| 38 | TR909 Kick 1 1 | Elec Snare 3 | 1 | Elec Snare 3 | 1 | Elec Snare 3 | 1 | Elec Snare 2 | |
| 39 | TR909 Kick 2 1 | Real Tom 3 | 1 | Room Tom 2 | 1 | Rock Tom 2 1 | Synth Drum | ||
| 40 | Elec Kick 2 | Close HiHat | [EXC1] | Close HiHat | [EXC1] | Close HiHat | [EXC1] | Close HiHat | |
| 41 | TR808 Kick 1 1 | Real Tom 3 | 1 | Room Tom 2 | 1 | Rock Tom 2 1 | Synth Drum | ||
| 42 | TR808 Kick 2 1 | Standard PHH | [EXC1] | Standard PHH | [EXC1] | Standard PHH | [EXC1] | Standard PHH | |
| 43 | TR808 Kick 3 1 | Real Tom 2 | 1 | Room Tom 1 | 1 | Rock Tom 2 1 | Synth Drum | ||
| 44 | House Kick 2 | Standard OHH | [EXC1] | Standard OHH | [EXC1] | Standard OHH | [EXC1] | Standard OHH | |
| 45 | Plastic Kick 1 2 | Real Tom 2 | 1 | Room Tom 1 | 1 | Rock Tom 2 1 | Synth Drum | ||
| 46 | Plastic Kick 2 1 | Real Tom 1 | 1 | Room Tom 1 | 1 | Rock Tom 1 1 | Synth Drum | ||
| 47 | RS Snr 1 2 | Crash Cym.1 | 1 | Crash Cym.1 | 1 | Crash Cym.1 | 1 | Crash Cym.1 | |
| 48 | RS Snr 2 2 | Real Tom 1 | 1 | Room Tom 1 | 1 | Rock Tom 1 1 | Synth Drum | ||
| 49 | RS Snr 3 2 | Ride Cymbal | 1 | Ride Cymbal | 1 | Ride Cymbal | 1 | Ride Cymbal | |
| 50 | RS Snr 4 2 | ChinaCymbal1 | 1 | ChinaCymbal1 | 1 | ChinaCymbal1 | 1 | Rev.Cymbal 1 | |
| 51 | Standard Snr 1 | Ride Bell 2 1 | Ride Bell 2 1 | Ride Bell 2 1 | Ride Bell 2 1 | ||||
| 52 | Rock Snr 4 | Tambourine 3 | 1 | Tambourine 3 | 1 | Tambourine 3 | 1 | Tambourine 3 | |
| 53 | RS Jazz Snr | 1 | Splash Cym 1 | Splash Cym 1 | Splash Cym 1 | Splash Cym 1 | |||
| 54 | Jazz Snr | 1 | Cowbell | 1 | Cowbell | 1 | Cowbell | 1 | Cowbell |
| 55 | Brush Slap 1 | 1 | Crash Cym.2 | 1 | Crash Cym.2 | 1 | Crash Cym.2 | 1 | Crash Cym.2 |
| 56 | Brush Slap 2 | 3 | Vibrasiap | 1 | Vibrasiap | 1 | Vibrasiap | 1 | Vibrasiap |
| 57 | BrushSwirl 1 | 1 | Ride Cymbal | 1 | Ride Cymbal | 1 | Ride Cymbal | 1 | Ride Cymbal |
| 58 | BrushSwirl 2 | 2 | Bongo High 1 1 | Bongo High 1 1 | Bongo High 1 1 | Bongo High 1 1 | |||
| 59 | R&B Snr 1 | 2 | Bongo Low 1 | 1 | Bongo Low 1 | 1 | Bongo Low 1 | 1 | Bongo Low 1 |
| 60 | R&B Snr 2 | 2 | Conga Hi Mt | 1 | Conga Hi Mt | 1 | Conga Hi Mt | 1 | Conga Hi Mt |
| 61 | Dry Snr 1 | 1 | CongaHi Open | 1 | CongaHi Open | 1 | CongaHi Open | 1 | CongaHi Open |
| 62 | Dry Snr 2 | 1 | CongaLowOpen | 1 | CongaLowOpen | 1 | CongaLowOpen | 1 | CongaLowOpen |
| 63 | TR909 Snr 1 | 1 | Timbale Hi 1 | 1 | Timbale Hi 1 | 1 | Timbale Hi 1 | 1 | Timbale Hi 1 |
| 64 | TR909 Snr 2 | 1 | Timbale Lw 1 1 | Timbale Lw 1 1 | Timbale Lw 1 1 | Timbale Lw 1 1 | |||
| 65 | TR909 Snr 3 | 2 | Agogo | 1 | Agogo | 1 | Agogo | 1 | Agogo |
| 66 | TR808 Snr 1 | 2 | Agogo | 1 | Agogo | 1 | Agogo | 1 | Agogo |
| 67 | TR808 Snr 2 | 1 | Cabasa | 1 | Cabasa | 1 | Cabasa | 1 | Cabasa |
| 68 | House Snr | 1 | Maracas | 1 | Maracas | 1 | Maracas | 1 | Maracas |
| 69 | Finger Snr 1 | ShortWhistle | [EXC2] | ShortWhistle | [EXC2] | ShortWhistle | [EXC2] | ShortWhistle | |
| 70 | Dance Snare | 1 | Long Whistle | [EXC2] | Long Whistle | [EXC2] | Long Whistle | [EXC2] | Long Whistle |
| 71 | Elec Snare 1 | 1 | Guiro Short | [EXC3] | Guiro Short | [EXC3] | Guiro Short | [EXC3] | Guiro Short |
| 72 | Elec Snare 2 | 2 | Guiro Long | [EXC3] | Guiro Long | [EXC3] | Guiro Long | [EXC3] | Guiro Long |
| 73 | Elec Snare 3 | 1 | Claves | 1 | Claves | 1 | Claves | 1 | Claves |
| 74 | Jazz Rim 1 | Woodblock | 1 | Woodblock | 1 | Woodblock | 1 | Woodblock | |
| 75 | RS Stick | 2 | Woodblock | 1 | Woodblock | 1 | Woodblock | 1 | Woodblock |
| 76 | Dry Stick 1 1 | Cuica Mute | [EXC4] | Cuica Mute | [EXC4] | Cuica Mute | [EXC4] | Cuica Mute | |
| 77 | Dry Stick 2 2 | Cuica Open | [EXC4] | Cuica Open | [EXC4] | Cuica Open | [EXC4] | Cuica Open | |
| 78 | R&B Stick | 3 | Triangl Mt 1 | [EXC5] | Triangl Mt 1 | [EXC5] | Triangl Mt 1 | [EXC5] | Triangl Mt 1 |
| 79 | Sticks | 1 | Triangl Op 1 | [EXC5] | Triangl Op 1 | [EXC5] | Triangl Op 1 | [EXC5] | Triangl Op 1 |
| 80 | Side Stick | 1 | Shaker 1 | 1 | Shaker 1 | 1 | Shaker 1 | 1 | Shaker 1 |
| 81 | TR909 Rim 1 | Jingle Bell | 1 | Jingle Bell | 1 | Jingle Bell | 1 | Jingle Bell | |
| 82 | |||||||||
| 83 | |||||||||
| 84 | TR808 Rim 1 | Bell Tree | 1 | Bell Tree | 1 | Bell Tree | 1 | Bell Tree | |
| 85 | RS CHH 1 | [EXC1] | Castanets | 1 | Castanets | 1 | Castanets | 1 | Castanets |
| 86 | RS CHH 2 | [EXC1] | Surdo Mute | [EXC6] | Surdo Mute | [EXC6] | Surdo Mute | [EXC6] | Surdo Mute |
| 87 | RS CHH 3 | [EXC1] | Surdo Open | [EXC6] | Surdo Open | [EXC6] | Surdo Open | [EXC6] | Surdo Open |
| 88 | RS CHH 4 | [EXC1] | ---- | ---- | ---- | ---- | |||
| 89 | RS CHH 5 | [EXC1] | ---- | ---- | ---- | ---- | |||
| 90 | RS CHH 6 | [EXC1] | ---- | ---- | ---- | ---- | |||
| 91 | Close HiHat | [EXC1] | ---- | ---- | ---- | ---- | |||
| 92 | Brush CHH | [EXC1] | ---- | ---- | ---- | ---- | |||
| 93 | TR909 CHH 1 | [EXC1] | ---- | ---- | ---- | ---- | |||
| 94 | TR909 CHH 2 | [EXC1] | ---- | ---- | ---- | ---- | |||
| 95 | TR808 CHH 1 | [EXC1] | ---- | ---- | ---- | ---- | |||
| 96 | TR808 CHH 2 | [EXC1] | ---- | ---- | ---- | ---- | |||
| 97 | RS OHH 1 | [EXC1] | ---- | ---- | ---- | ---- | |||
| 98 | RS OHH 2 | [EXC1] | ---- | ---- | ---- | ---- | |||
| 99 | RS OHH 3 | [EXC1] | ---- | ---- | ---- | ---- | |||
| 100 | Standard OHH | [EXC1] | ---- | ---- | ---- | ---- | |||
| 101 | Brush OHH | [EXC1] | ---- | ---- | ---- | ---- | |||
| 102 | TR909 OHH | [EXC1] | ---- | ---- | ---- | ---- | |||
| 103 | TR808 OHH | [EXC1] | ---- | ---- | ---- | ---- | |||
| 104 | RS PHH | [EXC1] | ---- | ---- | ---- | ---- | |||
| 105 | Jazz PHH | [EXC1] | ---- | ---- | ---- | ---- | |||
| 106 | Brush PHH | [EXC1] | ---- | ---- | ---- | ---- | |||
| 107 | TR909 PHH | [EXC1] | ---- | ---- | ---- | ---- |
[EXC]: Percussion sound of the same number will not be heard at the same time.
PC: Program Number
Rh11: MSB=086, LSB=064
Rh12-Rh15: MSB=120, LSB=000
| Rh16:GM2 ANALOG(PC:026) | Rh17:GM2 JAZZ(PC:033) | Rh18:GM2 BRUSH(PC:049) | Rh19:GM2 ORCHSTRA(PC:049) | Rh20:GM2 SFX(PC:057) | ||||||
| Voice | Voice Voice Voice | Voice Voice | ||||||||
| C1 | 16 | ---- | ---- | ---- | ---- | ---- | ||||
| 17 | ---- | ---- | ---- | ---- | ---- | |||||
| 18 | ---- | ---- | ---- | ---- | ---- | |||||
| 19 | ---- | ---- | ---- | ---- | ---- | |||||
| 20 | ---- | ---- | ---- | ---- | ---- | |||||
| 21 | ---- | ---- | ---- | ---- | ---- | |||||
| 22 | ---- | ---- | ---- | ---- | ---- | |||||
| 23 | ---- | ---- | ---- | ---- | ---- | |||||
| 24 | ---- | ---- | ---- | ---- | ---- | |||||
| 25 | ---- | ---- | ---- | ---- | ---- | |||||
| 26 | ---- | ---- | ---- | ---- | ---- | |||||
| 27 | High-Q 1 | High-Q 1 | High-Q 1 | Close HiHat [EXC1] 1 | ---- | |||||
| 28 | Slap 1 | Slap 1 | Slap 1 | Standard PHH [EXC1] 1 | ---- | |||||
| 29 | Scratch Push [EXC7] 1 | Scratch Push [EXC7] 1 | Scratch Push [EXC7] 1 | Standard OHH [EXC1] 1 | ---- | |||||
| 30 | Scratch Pull [EXC7] 1 | Scratch Pull [EXC7] 1 | Scratch Pull [EXC7] 1 | Ride Cymbal 1 | ---- | |||||
| 31 | Sticks 1 | Sticks 1 | Sticks 1 | Sticks 1 | ---- | |||||
| 32 | Square Click 1 | Square Click 1 | Square Click 1 | Square Click 1 | ---- | |||||
| 33 | Mtrmm Click 1 | Mtrmm Click 1 | Mtrmm Click 1 | Mtrmm Click 1 | ---- | |||||
| 34 | Mtrmm Bell 1 | Mtrmm Bell 1 | Mtrmm Bell 1 | Mtrmm Bell 1 | ---- | |||||
| 35 | Mix Kick 1 | Jazz Kick 2 2 | Jazz Kick 2 2 | Concert BD 1 | ---- | |||||
| TR808 Kick 1 1 | Jazz Kick 1 1 | Jazz Kick 1 1 | ConcertBD Mt 1 | ---- | ||||||
| 36 | TR808 Rim 1 | Side Stick 1 | Side Stick 1 | Side Stick 1 | ---- | |||||
| 37 | TR808 Snr 2 1 | Jazz Snr 1 | BrushSwirl 2 2 | Concert Snr 1 | ---- | |||||
| 38 | TR909 Clap 1 1 | TR909 Clap 1 1 | Brush Slap 1 1 | Castanets 1 | High-Q 1 | |||||
| 40 | Elec Snare 3 1 | Elec Snare 3 1 | BrushSwirl 1 1 | Concert Snr 1 | Slap 1 | |||||
| TR808 Tom 2 1 | Real Tom 3 1 | Real Tom 3 1 | Timpani 1 | Scratch Push [EXC7] 1 | ||||||
| 41 | TR808 CHH 2 [EXC1] 1 | Close HiHat [EXC1] 1 | Brush CHH [EXC1] 1 | Timpani 1 | Scratch Pull [EXC7] 1 | |||||
| 43 | TR808 Tom 2 1 | Real Tom 3 1 | Real Tom 3 1 | Timpani 1 | Sticks 1 | |||||
| 44 | TR808 CHH 1 [EXC1] 1 | Standard PHH [EXC1] 1 | Brush PHH [EXC1] 1 | Timpani 1 | Square Click 1 | |||||
| 45 | TR808 Tom 2 1 | Real Tom 2 1 | Real Tom 2 1 | Timpani 1 | Mtrmm Click 1 | |||||
| 46 | TR808 OHH [EXC1] 1 | Standard OHH [EXC1] 1 | Brush OHH [EXC1] 1 | Timpani 1 | Mtrmm Bell 1 | |||||
| 47 | TR808 Tom 2 1 | Real Tom 2 1 | Real Tom 2 1 | Timpani 1 | Gl.FretNoise 1 | |||||
| 48 | TR808 Tom 2 1 | Real Tom 1 1 | Real Tom 1 1 | Timpani 1 | Gt.CutNoise 1 | |||||
| 49 | TR808 Crash 1 | Crash Cym.1 1 | Brush Crash 1 | Timpani 1 | Gt.CutNoise 1 | |||||
| 50 | TR808 Tom 2 1 | Real Tom 1 1 | Real Tom 1 1 | Timpani 1 | String Slap 1 | |||||
| 51 | Ride Cymbal 1 | Ride Cymbal 1 | Ride Cymbal 1 | Timpani 1 | Fl.KeyClick 1 | |||||
| 52 | ChinaCymbal1 1 | ChinaCymbal1 1 | ChinaCymbal1 1 | Timpani 1 | Laughing 1 | |||||
| 53 | Ride Bell 2 1 | Ride Bell 2 1 | Ride Bell 2 1 | Timpani 1 | Screaming 1 | |||||
| 54 | Tambourine 3 1 | Tambourine 3 1 | Tambourine 3 1 | Tambourine 3 1 | Punch 1 | |||||
| 55 | Splash Cym 1 | Splash Cym 1 | Splash Cym 1 | Splash Cym 1 | Heart Beat 1 | |||||
| 56 | TR808Cowbell 1 | Cowbell 1 | Cowbell 1 | Cowbell 1 | Footsteps 1 | |||||
| 57 | Crash Cym.2 1 | Crash Cym.2 1 | Crash Cym.2 1 | ConcertCym 1 | Footsteps 1 | |||||
| 58 | Vibraslap 1 | Vibraslap 1 | Vibraslap 1 | Vibraslap 1 | Applause 2 | |||||
| 59 | Ride Cymbal 1 | Ride Cymbal 1 | Ride Cymbal 1 | ConcertCym 2 2 | Creaking 1 | |||||
| 60 | Bongo High 1 1 | Bongo High 1 1 | Bongo High 1 1 | Bongo High 1 1 | Door 1 | |||||
| 61 | Bongo Low 1 1 | Bongo Low 1 1 | Bongo Low 1 1 | Bongo Low 1 1 | Scratch 1 | |||||
| 62 | TR808Conga 1 1 | Conga Hi Mt 1 | Conga Hi Mt 1 | Conga Hi Mt 1 | Wind Chimes 1 | |||||
| 63 | TR808Conga 1 1 | CongaHi Open 1 | CongaHi Open 1 | CongaHi Open 1 | Car-Engine 1 | |||||
| 64 | TR808Conga 1 1 | CongaLowOpen 1 | CongaLowOpen 1 | CongaLowOpen 1 | Car-Stop 1 | |||||
| 65 | Timbale Hi 1 1 | Timbale Hi 1 1 | Timbale Hi 1 1 | Timbale Hi 1 1 | Car-Pass 1 | |||||
| 66 | Timbale Lw 1 1 | Timbale Lw 1 1 | Timbale Lw 1 1 | Timbale Lw 1 1 | Car-Crash 2 | |||||
| 67 | Agogo 1 | Agogo 1 | Agogo 1 | Agogo 1 | Siren 1 | |||||
| 68 | Agogo 1 | Agogo 1 | Agogo 1 | Agogo 1 | Train 1 | |||||
| 69 | Cabasa 1 | Cabasa 1 | Cabasa 1 | Cabasa 1 | Jetplane 2 | |||||
| 70 | TR808Maracas 1 | Maracas 1 | Maracas 1 | Maracas 1 | Helicopter 1 | |||||
| 71 | ShortWhistle [EXC2] 1 | ShortWhistle [EXC2] 1 | ShortWhistle [EXC2] 1 | ShortWhistle [EXC2] 1 | Starship 2 | |||||
| 72 | Long Whistle [EXC2] 1 | Long Whistle [EXC2] 1 | Long Whistle [EXC2] 1 | Long Whistle [EXC2] 1 | Gun Shot 1 | |||||
| 73 | Guiro Short [EXC3] 1 | Guiro Short [EXC3] 1 | Guiro Short [EXC3] 1 | Guiro Short [EXC3] 1 | Machine Gun 1 | |||||
| 74 | Guiro Long [EXC3] 1 | Guiro Long [EXC3] 1 | Guiro Long [EXC3] 1 | Guiro Long [EXC3] 1 | Lasergun 1 | |||||
| 75 | TR808 Clave 1 | Claves 1 | Claves 1 | Claves 1 | Explosion 2 | |||||
| 76 | Woodblock 1 | Woodblock 1 | Woodblock 1 | Woodblock 1 | Dog 1 | |||||
| Woodblock 1 | Woodblock 1 | Woodblock 1 | Woodblock 1 | Horse-Gallop 1 | ||||||
| 77 | Cuica Mute [EXC4] 1 | Cuica Mute [EXC4] 1 | Cuica Mute [EXC4] 1 | Cuica Mute [EXC4] 1 | Bird 1 | |||||
| 79 | Cuica Open [EXC4] 1 | Cuica Open [EXC4] 1 | Cuica Open [EXC4] 1 | Cuica Open [EXC4] 1 | Rain 1 | |||||
| 80 | Triangl Mt 1 [EXC5] 1 | Triangl Mt 1 [EXC5] 1 | Triangl Mt 1 [EXC5] 1 | Triangl Mt 1 [EXC5] 1 | Thunder 1 | |||||
| 81 | Triangl Op 1 [EXC5] 1 | Triangl Op 1 [EXC5] 1 | Triangl Op 1 [EXC5] 1 | Triangl Op 1 [EXC5] 1 | Wind 1 | |||||
| 82 | Shaker 1 1 | Shaker 1 1 | Shaker 1 1 | Shaker 1 1 | Seashore 1 | |||||
| 83 | Jingle Bell 1 | Jingle Bell 1 | Jingle Bell 1 | Jingle Bell 1 | Stream 2 | |||||
| 84 | Bell Tree 1 | Bell Tree 1 | Bell Tree 1 | Bell Tree 1 | Bubble 2 | |||||
| 85 | Castanets 1 | Castanets 1 | Castanets 1 | Castanets 1 | ---- | |||||
| 86 | Surdo Mute [EXC6] 1 | Surdo Mute [EXC6] 1 | Surdo Mute [EXC6] 1 | Surdo Mute [EXC6] 1 | ---- | |||||
| 87 | Surdo Open [EXC6] 1 | Surdo Open [EXC6] 1 | Surdo Open [EXC6] 1 | Surdo Open [EXC6] 1 | ---- | |||||
| 88 | ---- | ---- | ---- | Applause 2 | ---- | |||||
| 89 | ---- | ---- | ---- | ---- | ---- | |||||
| 90 | ---- | ---- | ---- | ---- | ---- | |||||
| 91 | ---- | ---- | ---- | ---- | ---- | |||||
| 92 | ---- | ---- | ---- | ---- | ---- | |||||
| 93 | ---- | ---- | ---- | ---- | ---- | |||||
| 94 | ---- | ---- | ---- | ---- | ---- | |||||
| 95 | ---- | ---- | ---- | ---- | ---- | |||||
[EXC]: Percussion sound of the same number will not be heard at the same time.
PC: Program Number
Rh16-Rh20: MSB=120, LSB=000
Performance list
| No. | Name |
| 01 | Pop 1 |
| 02 Pop | 2 |
| 03 Pop | 3 |
| 04 Pop | 4 |
| 05 Pop | 5 |
| 06 Rock | 1 |
| 07 Rock | 2 |
| 08 Contemporary1 | |
| 09 Contemporary2 | |
| 10 Funk | 1 |
| No. | Name |
| 11 Funk 2 | |
| 12 Jazz 1 | |
| 13 Jazz 2 | |
| 14 Bossa | |
| 15 Orchestra | |
| 16 Techno 1 | |
| 17 Techno 2 | |
| 18 Trance 1 | |
| 19 Trance 2 | |
| 20 House 1 | |
| No. | Name |
| 21 | House 2 |
| 22 Hip Hop 1 | |
| 23 Hip Hop 2 | |
| 24 R&B 1 | |
| 25 R&B 2 | |
| 26 Drum'n'Bass 1 | |
| 27 Drum'n'Bass 2 | |
| 28 BreakBeats 1 | |
| 29 BreakBeats 2 | |
| 30 Reggae 1 | |
| No. | Name |
| 31 | Reggae 2 |
| 32 SEQ | Template |
Rhythm guide list
| No. | Name |
| 01 | Pop 1 |
| 02 Pop | 2 |
| 03 Pop | 3 |
| 04 Pop | 4 (Bld) |
| 05 Pop | 5 (Shfl) |
| 06 Pop | 6 (Shfl) |
| 07 Pop | 7 (Vari) |
| 08 Pop | 8 (Vari) |
| 09 Pop | 9 (Vari) |
| 10 Rock | 1 |
| No. | Name |
| 11 Rock 2 | |
| 12 Rock 3 | |
| 13 Contemporary1 | |
| 14 Contemporary2 | |
| 15 Funk 1 | |
| 16 Funk 2 | |
| 17 Jazz 1 | |
| 18 Jazz 2 | |
| 19 Bossa | |
| 20 Techno 1 | |
| No. | Name |
| 21 | Techno 2 |
| 22 Trance 1 | |
| 23 Trance 2 | |
| 24 House 1 | |
| 25 House 2 | |
| 26 Hip Hop 1 | |
| 27 Hip Hop 2 | |
| 28 R&B 1 | |
| 29 R&B 2 | |
| 30 Drum'n'Bass | |
| No. | Name |
| 31 | Reggae 1 |
| 32 Reggae 2 | |
| -- Metronm 4/4 | |
| -- Metronm 2/4 | |
| -- Metronm 3/4 | |
* Bld: Ballad, Shfl: Shuffle, Vari: Variation
Arpeggio template list
| Category | Button | Name |
| Ac.Piano | [1] Piano Phr 1 | |
| [2] Piano Phr 2 | ||
| [3] Piano Phr 3 | ||
| [4] Piano Phr 4 | ||
| [5] Piano Phr 5 | ||
| [6] Piano Arp 1 | ||
| [7] Piano Arp 2 | ||
| [8] Piano Arp 3 | ||
| [9] Piano Arp 4 | ||
| Category | Button | Name |
| Bell | [1] Be | Phr 1 |
| [2] Be | Phr 2 | |
| [3] Be | Phr 3 | |
| [4] Be | Phr 4 | |
| [5] Be | Phr 5 | |
| [6] Be | Arp 1 | |
| [7] Be | Arp 2 | |
| [8] Be | Arp 3 | |
| [9] Be | Arp 4 |
| Category | Button | Name |
| Accordion | [1] ACD Phr 1 | |
| [2] ACD Phr 2 | ||
| [3] ACD Phr 3 | ||
| [4] ACD Phr 4 | ||
| [5] ACD Arp 1 | ||
| [6] ACD Arp 2 | ||
| [7] ACD Arp 3 | ||
| [8] ACD Arp 4 | ||
| [9] ACD Arp 5 | ||
| Category | Button | Name |
| El.Guitar | [1] E.Gt Phr 1 | |
| [2] E.Gt Phr 2 | ||
| [3] E.Gt Phr 3 | ||
| [4] E.Gt Phr 4 | ||
| [5] E.Gt Phr 5 | ||
| [6] E.Gt Arp 1 | ||
| [7] E.Gt Arp 2 | ||
| [8] E.Gt Arp 3 | ||
| [9] E.Gt Arp 4 | ||
| Category | Button | Name |
| E.I.Piano | [1] E. Piano Phr1 | |
| [2] E. Piano Phr2 | ||
| [3] E. Piano Phr3 | ||
| [4] E. Piano Phr4 | ||
| [5] E. Piano Phr5 | ||
| [6] E. Piano Arp1 | ||
| [7] E. Piano Arp2 | ||
| [8] E. Piano Arp3 | ||
| [9] E. Piano Arp4 | ||
| Category | Button | Name |
| Mallet | [1] Marimba Phr1 | |
| [2] Marimba Phr2 | ||
| [3] Xylophne Phr | ||
| [4] Viborphne Phr | ||
| [5] Steel Dr Phr | ||
| [6] MLT Arp 1 | ||
| [7] MLT Arp 2 | ||
| [8] MLT Arp 3 | ||
| [9] MLT Arp 4 | ||
| Category | Button | Name |
| Harmonica | [1] | HRM Phr 1 |
| [2] | HRM Phr 2 | |
| [3] | IIRM Phr 3 | |
| [4] | HRM Phr 4 | |
| [5] | HRM Phr 5 | |
| [6] | HRM Arp 1 | |
| [7] | HRM Arp 2 | |
| [8] | HRM Arp 3 | |
| [9] | IIRM Arp 4 |
| Category | Button | Name |
| Dist.Guitar | [1] D.Gt Phr 1 | |
| [2] D.Gt Phr 2 | ||
| [3] D.Gt Phr 3 | ||
| [4] D.Gt Phr 4 | ||
| [5] D.Gt Phr 5 | ||
| [6] D.Gt Arp 1 | ||
| [7] D.Gt Arp 2 | ||
| [8] D.Gt Arp 3 | ||
| [9] D.Gt Arp 4 | ||
| Category | Button | Name |
| Keyboard | [1] Clavi Phr 1 | |
| [2] Clavi Phr 2 | ||
| [3] Clavi Phr 3 | ||
| [4] Clavi Phr 4 | ||
| [5] Clavi Phr 5 | ||
| [6] Harpsi Phr | ||
| [7] Clavi Arp1 | ||
| [8] Clavi Arp2 | ||
| [9] Clavi Arp3 | ||
| Category | Button | Name |
| Organ | [1] Organ Phr 1 | |
| [2] Organ Phr 2 | ||
| [3] Organ Phr 3 | ||
| [4] Organ Phr 4 | ||
| [5] Organ Phr 5 | ||
| [6] Organ Arp 1 | ||
| [7] Organ Arp 2 | ||
| [8] Organ Arp 3 | ||
| [9] Organ Arp 4 | ||
| Category | Button | Name |
| Ac.Guitar | [1] A.Gt Phr 1 | |
| [2] A.Gt Phr 2 | ||
| [3] A.Gt Phr 3 | ||
| [4] A.Gt Phr 4 | ||
| [5] A.Gt Phr 5 | ||
| [6] A.Gt Arp 1 | ||
| [7] A.Gt Arp 2 | ||
| [8] A.Gt Arp 3 | ||
| [9] A.Gt Arp 4 | ||
| Category | Button | Name |
| Strings | [1] Strings Phr1 | |
| [2] Strings Phr2 | ||
| [3] Strings Phr3 | ||
| [4] Pizz Phr | ||
| [5] Violin Phr | ||
| [6] Strings Arp1 | ||
| [7] Strings Arp2 | ||
| [8] Strings Arp3 | ||
| [9] Strings Arp4 | ||
| Orchestra | [1] Orch Phr 1 | |
| [2] Orch Phr 2 | ||
| [3] Orch Phr 3 | ||
| [4] Orch Phr 4 | ||
| [5] Orch Phr 5 | ||
| [6] Orch Arp 1 | ||
| [7] Orch Arp 2 | ||
| [8] Orch Arp 3 | ||
| [9] Orch Arp 4 | ||
| Category | Button | Name |
| Ac.Brass | [1] Brass Phr 1 | |
| [2] Brass Phr 2 | ||
| [3] Brass Phr 3 | ||
| [4] Brass Phr 4 | ||
| [5] Mute'p Phr | ||
| [6] | TrombonePhr1 | |
| [7] | TrombonePhr2 | |
| [8] Trumpet Phr1 | ||
| [9] Trumpet Phr2 | ||
| Category | Button | Name |
| Soft Lead | ||
| Category | Button | Name |
| Drums | [1] Fill Phr 1 | |
| [2] Fill Phr 2 | ||
| [3] Fill Phr 3 | ||
| [4] Fill Phr 4 | ||
| [5] Fill Phr 5 | ||
| [6] SnRol Phr | ||
| [7] Tamb Phr | ||
| [8] Congo Phr | ||
| [9] Triangle Phr | ||
| Category | Button | Name |
| Hit & Stab | [1] Hit Phr 1 | |
| [2] Hit Phr 2 | ||
| [3] Hit Phr 3 | ||
| [4] Hit Phr 4 | ||
| [5] Hit Phr 5 | ||
| [6] Hit Arp 1 | ||
| [7] Hit Arp 2 | ||
| [8] Hit Arp 3 | ||
| [9] Hit Arp 4 | ||
| Category | Button | Name |
| Synth Brass | [1] SynBrassPhr1 | |
| [2] SynBrassPhr2 | ||
| [3] SynBrassPhr3 | ||
| [4] SynBrassPhr4 | ||
| [5] SynBrassPhr5 | ||
| [6] SynBrassArp1 | ||
| [7] SynBrassArp2 | ||
| [8] SynBrassArp3 | ||
| [9] SynBrassArp4 | ||
| Category | Button | Name |
| Techno Synth | [1] TekSyn Phr 1 | |
| [2] TekSyn Phr 2 | ||
| [3] TekSyn Phr 3 | ||
| [4] TekSyn Phr 4 | ||
| [5] TekSyn Phr 5 | ||
| [6] TekSyn Arp 1 | ||
| [7] TekSyn Arp 2 | ||
| [8] TekSyn Arp 3 | ||
| [9] TekSyn Arp 4 | ||
| Category | Button | Name |
| Percussion | [1] Timpani Phr | |
| [2] Timpani Roll | ||
| [3] CastanetPhr | ||
| [4] Taiko Phr | ||
| [5] Perc Arp 1 | ||
| [6] Perc Arp 2 | ||
| [7] Perc Arp 3 | ||
| [8] Perc Arp 4 | ||
| [9] Perc Arp 5 | ||
| Category | Button | Name |
| Wind | [1] ClarinetPhr1 | |
| [2] ClarinetPhr2 | ||
| [3] Oboe Phr 1 | ||
| [4] Oboe Phr 2 | ||
| [5] Oboe Phr 3 | ||
| [6] Wind Arp 1 | ||
| [7] Wind Arp 2 | ||
| [8] Wind Arp 3 | ||
| [9] Wind Arp 4 | ||
| Category | Button | Name |
| Sax | [1] Sax Phr 1 | |
| [2] Sax Phr 2 | ||
| [3] Sax Phr 3 | ||
| [4] Sax Phr 4 | ||
| [5] Sax Phr 5 | ||
| [6] Sax Arp 1 | ||
| [7] Sax Arp 2 | ||
| [8] Sax Arp 3 | ||
| [9] Sax Arp 4 | ||
| Category | Button | Name |
| Pulsating | [1] Plsating Phr1 | |
| [2] Plsating Phr2 | ||
| [3] Plsating Phr3 | ||
| [4] Plsating Phr4 | ||
| [5] Plsating Phr5 | ||
| [6] Plsating Arp1 | ||
| [7] Plsating Arp2 | ||
| [8] Plsating Arp3 | ||
| [9] Plsating Arp4 | ||
| Category | Button | Name |
| Sound FX | [1] Car Pass Phr | |
| [2] FootStep Phr | ||
| [3] Heart Bt Phr | ||
| [4] SFX Arp 1 | ||
| [5] SFX Arp 2 | ||
| [6] SFX Arp 3 | ||
| [7] SFX Arp 4 | ||
| [8] SFX Arp 5 | ||
| [9] SFX Arp 6 | ||
| Category | Button | Name |
| Flute | [1] Flute Phr 1 | |
| [2] Flute Phr 2 | ||
| [3] Flute Phr 3 | ||
| [4] Flute Phr 4 | ||
| [5] Piccolo Phr | ||
| [6] Flute Arp 1 | ||
| [7] Flute Arp 2 | ||
| [8] Flute Arp 3 | ||
| [9] Flute Arp 4 | ||
| Category | Button | Name |
| Bright Pad | [1] BrightPd Phr1 | |
| [2] BrightPd Phr2 | ||
| [3] BrightPd Phr3 | ||
| [4] BrightPd Phr4 | ||
| [5] BrightPd Phr5 | ||
| [6] BrightPd Arp1 | ||
| [7] BrightPd Arp2 | ||
| [8] BrightPd Arp3 | ||
| [9] BrightPd Arp4 | ||
| Category | Button | Name |
| Synth FX | [1] FX | Phr 1 |
| [2] FX | Phr 2 | |
| [3] FX | Phr 3 | |
| [4] FX | Phr 4 | |
| [5] FX | Phr 5 | |
| [6] FX | Phr 6 | |
| [7] FX | Arp 1 | |
| [8] FX | Arp 2 | |
| [9] FX | Arp 3 |
| Category | Button | Name |
| Bcat & Groove | [1] B1S Phr 1 | |
| [2] B1S Phr 2 | ||
| [3] B1S Phr 3 | ||
| [4] B1S Phr 4 | ||
| [5] B1S Phr 5 | ||
| [6] B1S Arp 1 | ||
| [7] B1S Arp 2 | ||
| [8] B1S Arp 3 | ||
| [9] B1S Arp 4 | ||
| Category | Button | Name |
| Plucked | [1] Harp Phr 1 | |
| [2] Harp Phr 2 | ||
| [3] Harp Phr 3 | ||
| [4] Kalimba Phr | ||
| [5] Koto Phr | ||
| [6] PI K Arp 1 | ||
| [7] PLK Arp 2 | ||
| [8] PLK Arp 3 | ||
| [9] PI K Arp 4 | ||
| Category | Button | Name |
| Soft Pad | [1] SoftPad Phr1 | |
| [2] SoftPad Phr2 | ||
| [3] SoftPad Phr3 | ||
| [4] SoftPad Phr4 | ||
| [5] SoftPad Phr5 | ||
| [6] SoftPad Arp1 | ||
| [7] SoftPad Arp2 | ||
| [8] SoftPad Arp3 | ||
| [9] SoftPad Arp4 | ||
| Category | Button | Name |
| Other Synth | [1] Synth Phr 1 | |
| [2] Synth Phr 2 | ||
| [3] Synth Phr 3 | ||
| [4] Synth Phr 4 | ||
| [5] Synth Phr 5 | ||
| [6] Synth Phr 6 | ||
| [7] Synth Phr 7 | ||
| [8] Synth Phr 8 | ||
| [9] Synth Arp | ||
| Category | Button | Name |
| Combination | [1] CMB Phr 1 | |
| [2] CMB Phr 2 | ||
| [3] CMB Arp 1 | ||
| [4] CMB Arp 2 | ||
| [5] CMB Arp 3 | ||
| [6] CMB Arp 4 | ||
| [7] CMB Arp 5 | ||
| [8] CMB Arp 6 | ||
| [9] CMB Arp 7 | ||
| Category | Button | Name |
| Ethnic | [1] Shamisen Phr | |
| [2] SitarGls Phr | ||
| [3] Bug Pipe Phr | ||
| [4] ShakuhatiPhr | ||
| [5] Mizmar Phr | ||
| [6] Gamelan Phr | ||
| [7] Tabla Phr | ||
| [8] Ethnic Arp 1 | ||
| [9] Ethnic Arp 2 | ||
| Category | Button | Name |
| Vox | [1] Vox Phr 1 | |
| [2] Vox Phr 2 | ||
| [3] Vox Phr 3 | ||
| [4] Vox Phr 4 | ||
| [5] Vox Phr 5 | ||
| [6] Vox Arp 1 | ||
| [7] Vox Arp 2 | ||
| [8] Vox Arp 3 | ||
| [9] Vox Arp 4 | ||
| Category | Button | Name |
| Bass | [1] FingerBs Phr1 | |
| [2] FingerBs Phr2 | ||
| [3] FingerBs Phr3 | ||
| [4] FingerBs Phr4 | ||
| [5] SlapBs Phr 1 | ||
| [6] SlapBs Phr 2 | ||
| [7] FretlsBs Phr | ||
| [8] AcBass Phr | ||
| [9] BsSlide Phr | ||
| Category | Button | Name |
| Fretted | [1] Banjo Phr 1 | |
| [2] Banjo Phr 2 | ||
| [3] Banjo Phr 3 | ||
| [4] Banjo Arp 1 | ||
| [5] Banjo Arp 2 | ||
| [6] Banjo Arp 3 | ||
| [7] Fretted Arp1 | ||
| [8] Fretted Arp2 | ||
| [9] Fretted Arp3 | ||
| Category | Button | Name |
| Hard Lead | [1] Hard Ld Phr1 | |
| [2] Hard Ld Phr2 | ||
| [3] Hard Ld Phr3 | ||
| [4] Hard Ld Phr4 | ||
| [5] Hard Ld Phr5 | ||
| [6] Hard Ld Arp1 | ||
| [7] Hard Ld Arp2 | ||
| [8] Hard Ld Arp3 | ||
| [9] Hard Ld Arp4 | ||
| Category | Button | Name |
| Synth Bass | [1] SynBass Phr1 | |
| [2] SynBass Phr2 | ||
| [3] SynBass Phr3 | ||
| [4] SynBass Phr4 | ||
| [5] SynBass Phr5 | ||
| [6] SynBass Phr6 | ||
| [7] SynBass Phr7 | ||
| [8] SynBass Phr8 | ||
| [9] SynBass Phr9 | ||
Arpeggio style list
| No. | Name | Variation |
| 01 | Note Values * 12 | |
| 02 1 | /8 Basic 1 5 | |
| 03 1 | /8 Basic 2 5 | |
| 04 1 | /8 Basic 3 5 | |
| 05 1 | /8 Basic 4 5 | |
| 06 1 | /8 Sync 1-1 5 | |
| 07 1 | /8 Sync 1-2 5 | |
| 08 1 | /8 Sync 1-3 5 | |
| 09 1 | /8 Sync 1-4 5 | |
| 10 1 | /8 Sync 2-1 5 | |
| 11 1 | /8 Sync 2-2 5 | |
| 12 1 | /8 Sync 2-3 5 | |
| 13 1 | /8 Sync 2-4 5 | |
| 14 1 | /8 Drive 1 5 | |
| 15 1 | /8 Drive 2 5 | |
| 16 1 | /8 Drive 3 5 | |
| 17 1 | /8 Drive 4 5 | |
| 18 1 | /8 Triplet1 5 | |
| 19 1 | /8 Triplet2 5 | |
| 20 1 | /16 Basic 1 5 | |
| 21 1 | /16 Basic 2 5 | |
| 22 1 | /16 Basic 3 5 | |
| 23 1 | /16 Basic 4 5 | |
| 24 1 | /16 Sync1-1 5 | |
| 25 1 | /16 Sync1-2 5 |
| No. | Name | Variation |
| 26 1 | 16 Sync1-3 5 | |
| 27 1 | 16 Sync1-4 5 | |
| 28 1 | 16 Sync2-1 5 | |
| 29 1 | 16 Sync2-2 5 | |
| 30 1 | 16 Sync2-3 5 | |
| 31 1 | 16 Sync2-4 5 | |
| 32 1 | 16 Drive 1 5 | |
| 33 1 | 16 Drive 2 5 | |
| 34 1 | 16 Drive 3 5 | |
| 35 1 | 16 Drive 4 5 | |
| 36 Rhythmix 1 5 | ||
| 37 Rhythmix 2 5 | ||
| 38 Piano Phr 6 | ||
| 39 E Piano Phr 6 | ||
| 40 Pno&EpBackng 9 | ||
| 41 Clavi Phr 6 | ||
| 42 Harpsi Phr 1 | ||
| 43 Bell Phr 6 | ||
| 44 Mallet Phr 6 | ||
| 45 Organ Phr 8 | ||
| 46 Org Backing 4 | ||
| 47 AccordionPhr | 5 | |
| 48 ACD Backing | 2 | |
| 49 Larm Phr | 6 | |
| 50 A.Gt Phr | 6 | |
| No. | Name | Variation |
| 51 | A.Gt Backing | 8 |
| 52 E | Gt Phr | 5 |
| 53 E | Gt Backing | 5 |
| 54 D | Gt Phr | 6 |
| 55 D | Gt Backing | 4 |
| 56 S | sr&Orc Phr | 12 |
| 57 L | It&Stab Phr | 6 |
| 58 W | ind Phr 6 | |
| 59 P | ute Phr | 6 |
| 60 P | lucked Phr | 6 |
| 61 E | hnic Phr 8 | |
| 62 B | anjo Phr | 4 |
| 63 B | anjoBacking | 3 |
| 64 Br | Brass Phr | 10 |
| 65 S | nBrs Phr | 6 |
| 66 S | ax Phr | 6 |
| 67 B | rightPadPhr | 6 |
| 68 S | oftPad Phr | 6 |
| 69 V | ox Phr | 6 |
| 70 F | ard Ld Phr 6 | |
| 71 S | oft Ld Phr | 6 |
| 72 T | eknoSyn Phr | 6 |
| 73 P | ulsc Phr | 6 |
| 74 F | x Phr | 7 |
| 75 S | ynth Phr | 9 |
| No. | Name | Variation |
| 76 | Ac&E.Bass 12 | |
| 77 | Synth Bs | 11 |
| 78 | Drum Phr | 10 |
| 79 | Perc Phr | 5 |
| 80 | SFX Phr | 4 |
| 81 | BIS Phr | 6 |
| 82 | CMB Phr | 3 |
* Variations based on note values : 1/4, 1/8, 1/12, 1/16, 1/32 (Single and Dual)
Multi-chord set list
- Pop 1
| Assign Key | Chord Name | Constituent Notes of Chord Forms |
| C | Cadd9 | C3, G3, D4, E4 |
| C# | C#maj9 | C#3, C4, D#4, F4 |
| D | D-7 | D3, F4, A3, C4 |
| D# | D#maj7 D#3, A#8, D4, G4 | |
| E | Cadd9 (on E) | E3, C4, D4, G4 |
| F | Fmaj9 | F2, A3, E4, G4 |
| F# | Dadd9 (on F#) | F#2, A3, D4, E4 |
| G | Cadd9 (on G) | G2, D4, E4, G4 |
| G# | F-6 (on Ab) | G#2, C4, D4, F4 |
| A | F (on A) | A2, A3, C4, F4 |
| A# | G- (on Bb) | A#2, A#3, D4, G4 |
| B | G (on B) | B2, B3, D4, C4 |
- Jazz 1
| Assign Key | Chord Name | Constituent Notes of Chord Forms |
| C | C6 9 C3, E3, A3, D4 | |
| C# | C#7(#9) | C#3, F3, B3, E4 |
| D | D-9 | D3, F3, C4, E4 |
| D# | D#7(#9) D#3, G3 | C#4, F#4 |
| E | E#7(#9) | E3, G#3, D4, G4 |
| F | Fmaj9 | F3, A3, E4, G4 |
| F# | F#7(#9) | F#3, A#3, E4, A4 |
| G | G7(13) | G2, F3, B3, E4 |
| G# | G#7(13) G#2, F#3, | C4, F4 |
| A | A-7(11) | A2, G3, C4, D4 |
| A# | Bb9 A#2, G#3, C4, | D4 |
| B | B-7(11) | B2, A3, D4, E4 |
- Blues
| Assign Key | Chord Name | Constituent Notes of Chord Forms |
| C | C7(9) C3, A#3, D4, E4 | |
| C# | C#7(9) | C#3, F3, B3, D#4 |
| D | D7(9) D3, F#3, C4, E4 | |
| D# | D#7(9) | D#3, C3, C#4, F4 |
| E | E7(#9) | E3, G#3, D4, G4 |
| F | F7(9) | F2, A3, D#4, G4 |
| F# | F#dim7 | F#2, A3, C4, D#4 |
| G | G7(13) | G2, F3, B3, E4 |
| G# | G#dim7 | G#2, B3, D4, F4 |
| A | A7(b13) | A2, G3, C#4, F4 |
| A# | Bb7(13) | A#2, G#3, D4, G4 |
| B | B-7(b5) | B2, A3, D4, F4 |
- Pop 2
| Assign Key | Chord Name | Constituent Notes of Chord Forms |
| C | Cmaj9 | C3, E3, B3, D4 |
| C# | C#dim7 | C#3, G3, A#3, E4 |
| D | D-9 | D3, F3, C4, E4 |
| D# | D#dim7 | D#3, A3, C4, F#4 |
| E | E-7 | E3, B3, D4, G4 |
| F | Fmaj9 | F3, A3, E4, C4 |
| F# | F#-7 (b5) | F#3, A3, C4, E4 |
| G | G7sus4 (9 13) | G2, A3, C4, F4 |
| C# | C#dim7 | C#2, B3, D4, F4 |
| A | A-9 | A2, B3, C4, G4 |
| A# | C7(on Bb) | A#2, C3, C4, I:4 |
| B | B-7(b5) | B2, A3, D4, F4 |
- Jazz 2
| Assign Key | Chord Name | Constituent Notes of Chord Forms |
| C | C6 9 C3, E3, A3, D4 | |
| C# | C#9 C#3, F3, B3, D#4 | |
| D | D-9 | D3, F3, C4, E4 |
| D# | D#9 | D#3, G3, C#4, F4 |
| E | E-9 | E3, G3, D4, F#4 |
| F | F-9 | F2, C#3, D#4, C4 |
| F# | F#-7(b5) | F#2, A3, C4, E4 |
| G | G7(b13) | G2, F3, B3, D#4 |
| C# | C#7(13) C#2, F#3, C4, F4 | |
| A | A7(b13) | A2, G3, C#4, F4 |
| A# | Bb7(13) | A#2, C#3, D4, C4 |
| B | B-7(11) | B2, A3, D4, E4 |
- Trad Maj
| Assign Key | Chord Name | Constituent Notes of Chord Forms |
| C | C | C3, E4, G4, C5 |
| C# | C#dim7 | C#3, E4, G4, A#4 |
| D | D- | D3, D4, F4, A4 |
| D# | D#dim7 | D#3, F#4, A4, C5 |
| E | E- | E3, E4, G4, B4 |
| F | F | F3, F4, A4, C5 |
| F# | F#-7(b5) | F#3, E4, A4, C5 |
| G | G | G3, D4, G4, B4 |
| C# | C#dim7 | C#3, D4, F4, B4 |
| A | A- | A2, E4, A4, C5 |
| A# | Bb A#2, D4, F4, A | A#4 |
| B | Bdim B2, D4, F4, B4 | B4 |
- Trad Min 1
| Assign Key | Chord Name Constituent Notes of Chord Forms | |
| C. | C-C3, D#4, G4, C5 | |
| C# Db C#3 | C#4, F4, G#4 | |
| D Ddim D3 | D4, F4, G#4 | |
| D# Eb D#3 | D#4, G4, A#4 | |
| E Edim7 | E3, C#4, G4, A#4 | |
| F F-F2, G4 | F4, G#4 | |
| F# Gbdim7 | F#2, C4, D#4, A4 | |
| G G-G2, | A#3, D4, G4 | |
| G# Ab G#2 | C4, D#4, G#4 | |
| A A-7(b5) | A2, C4, D#4, C4 | |
| A# Bb A#2 | D4, F4, A#4 | |
| B Bdim7 | B2, D4, F4, G#4 | |
- Jazz Min 1
| Assign Key | Chord Name Constituent Notes of Chord Forms | |
| C. | C-7(11) | C3, A#3, D#4, F4 |
| C# Db7(#)) | C#3, F3, B3, E4 | |
| D D-7(b5) | D3, C4, F4, G#4 | |
| D# Ebaug maj7 | D#3, F3, D4, G4 | |
| E E7(9) | E2, G#3, D4, F#4 | |
| F F7(9) | F2, A3, D#4, G4 | |
| F# Gbdim7 | F#2, A3, C4, D#4 | |
| G G7(#9) | G2, B3, F4, A#4 | |
| G# Abma7(#11) | G#2, C4, D4, G4 | |
| A A-7(b5) | A2, C4, D#4, G4 | |
| A# Bb-7 | A#2, G#3, C#4, F4 | |
| B Bdim7 | B2, G#3, D4, F4 | |
- 5th Stack
| Assign Key | Chord Name Constituent Notes of Chord Forms | |
| C | --- | C4, G4 |
| C# --- | C#4, C#4 | |
| D --- | D4, A4 | |
| D# --- | D#4, A#4 | |
| E --- | E4, B4 | |
| F --- | F4, C5 | |
| F# --- | F#4, C#5 | |
| G --- | G4, D5 | |
| G# --- | G#4, D#5 | |
| A --- A4, E5 | ||
| A# --- A#4, F5 | ||
| B --- | B4, F#5 | |
- Trad Min 2
| Assign Key | Chord Name | Constituent Notes of Chord Forms |
| C | C-C3, D#4, G4, C5 | |
| C# Db C#3, C#4, F4, G#4 | ||
| D Ddim D3, D4, F4, G#4 | ||
| D# Eaug | D#3, D#4, C4, B4 | |
| E E- | E3, E4, G4, B4 | |
| F F-F2, C4, F4, C#4 | ||
| F# Gbdim7 F#2, C4, D#4, A4 | ||
| G G | G2, B3, D4, G4 | |
| G# Ab C#2, C#4, D#4, C4 | ||
| A A-7(b5) | A2, C4, D#4, G4 | |
| A# Bb A#2, D4, F4, A#4 | ||
| B Bdim | B2, D4, F4, B4 |
- Jazz Min 2
| Assign Key | Chord Name Constituent Notes of Chord Forms | |
| C | C-7(9) | C3, D#3, A#3, D4 |
| C# Db7(9) | C#3, F1 | B3, D#4 |
| D D-7(9) | D3, F3, | C4, E4 |
| D# Eb7(9) | D#3, C3, C#4, F4 | |
| E Emaj7(9) | E2, G#3, D#4, F#1 | |
| F F-7(9) F2 | G#3, D#4, C4 | |
| F# Gbdim | 7 F#2, A3, C4, D#4 | |
| G G7(13) | G2, F3, B3, E4 | |
| G# Ab-6 | G#2, B3, D#4, F4 | |
| A A-7(b5) | A2, C4 | D#4, G4 |
| A# Bb-7 | A#2, G | B3, C#4, F4 |
| B B-7(b5) | B2, A3, | D4, F4 |
- Scale Set
| Assign Key | Chord Name Constituent Notes of Chord Forms |
| C | Major Scale |
| C# Major | Penta-tonic Scale |
| D Minor Scale | C4, D4, |
| D# Harmonic Min-or Scale | C4, D4, D#4, F4, G4, G#4, A#4 |
| E Melodic | Minor Scale |
| F Whole | Tone Scale |
| F# Blue note Scale | C4, D#4, |
| G Japanese Minor | C4, C#4, |
| G# Ryukyu Scale | C4, E4, |
| A Bari Scale | C4, C#4, |
| A# Spanish Scale | C4, C#4, |
| B Gypsy Scale | C4, C#4, |
- Pop Min 1
| Assign Key | Chord Name Constituent Notes of Chord Forms | |
| C | C-add9 | C3, D4, D#4, G4 |
| C# Dbma | 7 C#3, G#3, C4, F4 | |
| D D-7(b5) | D3, C4, F4, G#4 | |
| D# Ebma | 7 D#3, A#3, D4, G4 | |
| E Edim7 | E3, A#3, C#4, G4 | |
| F F-7(9) | F2, G#3, D#4, G4 | |
| F# Gbdim | 7 F#2, A3, C4, D#4 | |
| G G-7 | G2, A#3, D4, F4 | |
| G# Abma | 7 G#2, C4, D#4, G4 | |
| A A-7(b5) | A2, C4, D#4, G4 | |
| A# Bb7sus | 4(9 13) A#2, G#3, C4, D#4 | |
| B Bdim7 | 62, G#3, D4, F4 | |
- Oct Stack
| Assign Key | Chord Name Constituent Notes of Chord Forms | |
| C | --- | C4, C5 |
| C# --- | C#4, C#5 | |
| D --- | D4, D5 | |
| D# --- | D#4, D#5 | |
| E --- | E4, E5 | |
| F --- | F4, F5 | |
| F# --- | F#4, F#5 | |
| G --- | G4, G5 | |
| G# --- | G#4, G#5 | |
| A --- A4, A5 | ||
| A# --- A#4, A#5 | ||
| B --- | B4, B5 | |
- Pop Min 2
| Assign Key | Chord Name Constituent Notes of Chord Forms | |
| C | C-add9 | C3, D4, D#4, G4 |
| C# Eb7(on Db) | C#3, A#3, D#4, C4 | |
| D D-7(b5) | D3, G#3, C4, F4 | |
| D# Ibma7 | D#3, A#3, D4, C4 | |
| E Ema7(9) | E3, G#3, D#4, F#4 | |
| F F-7(9) F2 | G#3, D#4, G4 | |
| F# Gbdim7 | F#2, A3, C4, D#4 | |
| G G7(b13) | G2, F3, B3, D#4 | |
| G# Abma7 | G#2, C4, D#4, G4 | |
| A A-7(b5) | A2, C4, D#4, C4 | |
| A# C-7(on Bb) | A#2, C4, D#4, C4 | |
| B C-maj7(B) | B2, D4, D#4, G4 | |
- 4th Stack
| Assign Key | Chord Name Constituent Notes of Chord Forms | |
| C | — | C4, F4 |
| C# --- | C#4, F#4 | |
| D --- | D4, G4 | |
| D# --- | D#4, C#4 | |
| E --- | E4, A4 | |
| F --- | F4, A#4 | |
| F# --- | F#4, B4 | |
| G --- | G4, C5 | |
| G# --- | G#4, C#5 | |
| A --- A4, D5 | ||
| A# --- A#4, D#5 | ||
| B --- | B4, E5 | |
* If you wish to modify the key of each chord set, use the Transpose function.
MIDI implementation chart
SYNTHESIZER
Model RS-50
Date : May. 1, 2003
Version : 1.00
| Function... | Transmitted Recognized | Remarks | ||
| Basic Channel | DefaultChanged | 1-161-16 | 1-161-16 | |
| Mode | DefaultMessagesAltered | Mode 3X********** | Mode 3Mode 3, 4 (M = 1) | *2 |
| NoteNumber : True Voice | 0-127********** | 0-1270-127 | ||
| Velocity | Note OnNote Off | OO | OO | |
| After Touch | Key'sChannel's | XO | O *1O *1 | |
| Pitch Bend | O | O *1 | ||
| Control Change | 0, 32156, 38781011121364656667717273747576777884919398, 99100, 101 | O O O O O O O O O O O O O O O O O O O O O O O O O O O O O O O O O O O O O O O O O O O O O O O O O O O O O O O O O O O O O O O O O O O O O O O O O O O O O O O O O O O O O O O O O O O O O O O O O O O O O | O *1O *1O *1O *1O *1O *1O *1O *1O *1O *1O *1O *1O *1O *1O *1O *1O *1O *1O *1O *1O *1O *1O *1O *1O *1O *1O *1O *1O *1O *1O *1O *1O *1O *1 | Bank selectModulationPortamento timeData entryVolumeBalancePanpotExpressionEffect control 1Effect control 2Hold 1PortamentoSostenutoSoftResonanceRelease timeAttack timeCutoffDecay timeVibrato rateVibrato depthVibrato delayPortamento controlGeneral purpose effects 1General purpose effects 3NRPN LSB, MSBRPN LSB, MSB |
| ProgramChange : True Number | O********** | O *10-127 | Program No. 1-128 | |
| System Exclusive | O | O *1 | ||
| System Common | : Song Position: Song Select: Tune Request | XXX | XXX | |
| System Real Time : Commands | XX | OX *3X | ||
| Aux Messages | : All Sound Off: Reset All Controllers: Local On/Off: All Notes Off: Active Sensing: System Reset | XXXXO *1X | O (120, 126, 127)OX (123-127)OX | |
| Notes | *1 O X is selectable.*2 Recognized as M=1 even if M≠1.*3 Recognized when the Clock Source parameter (SYSTEM) is set to "MIDI." | |||
Mode 1 : OMNI ON, POLY
Mode 3: OMNI OFF, POLY
Mode 2 : OMNI ON, MONO
Mode 4: OMNI OFF, MONO
O: Yes
X: No
Specifications
RS-50: Synthesizer Keyboard (conforms to General MIDI 2 System)
Keyboard
61 keys (with velocity)
[Sound Generator]
Maximum Polyphony
64 voices
Parts
16
* Two Tones can be assigned to each part (Patch), and can be split or layered.
Wave Memory
32 M bytes (16-bit linear equivalent)
Preset Memory
Original Tones: 640
Patches: 640 (RS-50 original: 384, General MIDI 2: 256)
Rhythm Sets: 20 (RS-50 original: 11, General MIDI 2: 9)
Performances: 32
User Memory
Patches: 128
* Two Tones can be assigned to each Patch.
Rhythm Sets: 2
Performances: 8
Effects
Multi-Effects: 47 types
Reverb: 8 types
Chorus: 8 types
Rhythm Guide
Preset Patterns: 32
Tempo: 5–300 BPM (with tap tempo function)
Multi-Chord Memory
Preset Chord Sets: 16
* 12 chord forms are assigned to each set.
User Chord Sets: 8
* 12 chord forms can be assigned to each set.
Phrase/Arpeggio
Templates: 342
User Templates: 8
Styles (Variations): 473
Controllers
D Beam Controller: 1
Pitch Bend/Modulation Lever: 1
Control Knobs: 5
Display
20 characters, 2 lines (Backlit LCD)
Connectors
Output Jacks (L/MONO, R)
Headphones Jack
MIDI Connectors (IN, OUT)
Hold Pedal Jack
Control Pedal Jack
Power Supply
DC 9 V (AC Adaptor)
Current draw
1,000 mA
Dimensions
1,033 (W) x 294 (D) x 103 (H) mm
40-11/16 (W) x 11-5/8 (D) x 4-1/16 (H) inches
Weight
5.5 kg/12 lbs 3 oz (excluding AC adaptor)
Accessories
Owner's Manual
AC Adaptor (ACI Series or PSB-1U)
CD-ROM (Editor program for PC/Mac)
Options
Pedal Switch: DP-2, DP-8
Foot Switch: BOSS FS-5U
Expression Pedal: EV-5
* In the interest of product improvement, the specifications and/or appearance of this unit are subject to change without prior notice.
Index
A
Accent Rate (Arpeggio Accent Rate) 63
Active Exp Sw (Active Expression Switch) 46
ACTIVE EXPRESS (Active Expression) 32
Aftertouch 93
Arpeggiator 23,62
Arpeggio Accent Rate 63
Arpeggio Hold Switch 63
Arpeggio Key Trigger 63
Arpeggio Keyboard Velocity 63
Arpeggio Motif 62
Arpeggio Octave Range 63
Arpeggio Shuffle Rate 63
Arpeggio Shuffle Resolution 63
Arpeggio Style 62
Arpeggio Variation 62
Assign a name 43
Patch Name 45
Performance Name 56
Rhythm Set Name 52
ASSIGNABLE 33
Attack Time 28,48
C
C1-C3 (C1-C3 Knob Assign) 90
Category 45
Category groups 20
Channel messages 92
Character 87
Chord memory 64
Chorus 35
Chorus Delay Time 86
Chorus Depth 87
Chorus Feedback Level 86
Chorus Level 86
Chorus Parameters 86
Chorus pre-low pass filter 86
Chorus Rate 86
Chorus send level to reverb 87
Chorus Send Lvl (Chorus Send Level)
Patch Tone Parameters 46
Performance Part Effects 58
Rhythm Tone Parameters 53
Chorus Type 86
Clock Source 89
Coarse Tune 46
Control Change 93
CONTROLLER 89
Ctrl 1, 2 (Multi-Effects Control 1, 2) ...... 69
Current Part 40
cursor 42
CUTOFF 29
Cutoff Freq (Cutoff Frequency) 47
D
D Beam Controller 31
D BEAM POLARITY 34
D BEAM SENS 34
Decay Time 28
Patch Tone Parameters 48
Delay 86
Delay Feedback 87
Demo songs 18
Depth 87
DESTINATION TONE 26
Device ID (Device ID Number) 91
E
Edit Performance Settings .... 55
Effect Signal Path 66
Effects 41,65
ENT 42
Envelope 48
Exclusive messages 93
ExpressionDst (Expression Destination) 46
F
FACTORY RESET 17
Patch Utility 51
Performance Utility 61
Feedback 86
Filter 47
Filter LFO (Filter LFO Switch) 47
Fine Tune 47
G
GENERAL 89
General MIDI 9
General MIDI 2 9
H
Hold (Arpeggio Hold Switch) 63
Hold Pedal (Hold Pedal Polarity) 89
|
Input Numbers and numerals .... 43
K
Kbd Velocity (Arpeggio Keyboard Velocity) ...... 63
Key Mode 44-45
Key Trigger (Arpeggio Key Trigger) 63
L
LCD Contrast 16,89
Level
Chorus Level 86
Part Level 56
Performance Level 56
Reverb Level 87
Rhythm Tone 52
LFO 27,47
LFO Delay 47
LFO Depth 47
LFO Rate 47
Local Control (Local Controller) 89
Lower tone 40
M
MASTER EFFECT SWITCH 65
Master Effects Switch 35, 58
Master Key Sft (Master Key Shift) 89
Master Level 89
Master Tune 89
Maximum Polyphony 41
Memory 41
MFX Source 56
MFX Switch
Patch Tone Parameters 46
Performance Part Effect 58
MIDI 90,92
Mod (Modulation Assign) 89
Mode 42
Modify Dest (Modify Destination) 46
Modulation Lever 29
ModulationDst (Modulation Destination) 46
Motif (Arpeggio Motif) 62
Multi-chord Memory 24
Multi-effect send level to chorus 69
Multi-effect send level to reverb 69
Multi-Effects 35
Multi-Effects Control 1,2 ...... 69
Multi-Effects Parameters 68
Multi-Effects Type 68
N
Name 43
Patch Name 45
Performance Name 56
Rhythm Set Name 52
No. (Original Tone Number) 46
Note Off 92
Note On 92
Numbers and numerals 43
0
Octave Range (Arpeggio Octave Range) 63
Octave Shift 30
Original Tone Number 46
P
pages 42
Pan
Part Pan 56
Rhythm Tone Parameter 52
Parameters 42
Part 40,43
Part Patch Edit 57
Part Scale Tune C-B 58
Part Setup 56
Part Setup Parameters 56
Patch 20
Patch Audition 22
Patch categories 49
Patch Common Parameters 45
PATCH INITIALIZE 50
Patch Level 45
Patch Mode 42, 44, 52
Patch Modify 26
Patch parameters 44
PATCH PRM COPY 49
PATCH REMOVE 50
Patch Rx Ch (Patch Receive Channel) 90
PATCH SCALE 91
Patch Scale Tune C-B 91
Patch Tone Parameters 46
Patch Tx Ch (Patch Transmit Channel) 90
Patch Utility 49
Patches 40
Pedal 30
Pedal (Pedal Control Assign) 90
Perform Ctrl Ch (Performance Control Channel) ..... 90
PERFORM INIT 60
Performance Common Parameters .... 56
Performance Mode 42
Performance Part Effect 58
Performance Utility 59
Phrase templates 62
Phrase/Arpeggio 23
Pitch 52
Pitch Bend Change 93
Pitch Bend Lever 29
Pitch Bend Range 47
PitchBend Dst (Pitch Bend Destination) 46
Play
GM/GM2 Music Data 98
Portament Sw (Portamento Switch) 47
Portamento 47
Portamento Time 47
Power 15
Pre-LPF 86-87
Program Change 93
PTN INIT 59
R
Rate 86
Receive Bank Sel (Receive Bank Select Switch) ..... 57
Receive Ch (Receive Channel) 57
Receive Prg Chg (Receive Program Change Switch) 57
Receive Sw (Receive Switch) 57
Release Time 28
Patch Tone Parameters 48
RESONANCE 29
Resonance
Patch Tone Parameters 48
Reverb 35
Reverb Character 87
Reverb Delay Feedback 87
Reverb Level 87
Reverb Parameters 87
Reverb pre-low pass filter 87
Reverb Send Lvl (Reverb Send Level)
Index
Patch Tone Parameters 46
Performance Part Effects 58
Rhythm Tone Parameters 53
Reverb Time 87
Reverb Type 87
RHY INITIALIZE 54
RHY PRM COPY 53
RHY REMOVE 54
Rhythm Common Parameters 52
Rhythm Set 22
Rhythm Set Parameters 52
Rhythm Set Utility 53
Rhythm Sets 40
Rhythm Tone Parameters 52
RS Editor 99
Rx Bank Sel (Receive Bank Select Switch) 90
Rx Prog Chg (Receive Program Change Switch) ..... 90
Rx Sys Exc (Receive System Exclusive Switch) ..... 90
S
Save
Patch 48
Performance 59
SCALE TUNE 58
Scale Tune
Part Setup Parameters 57
Send Lvl to Cho 69
Send Lvl to Rev
Chorus Parameters 87
Multi-Effects Parameters 69
Shuf Rate (Arpeggio Shuffle Rate) 63
Shuf Resolution (Arpeggio Shuffle Resolution) ..... 63
Soft Thru (Soft Through Switch) 91
Solo Switch 46
SOLO SYNTH 32
Split Arp 46
Split Point 45
Style (Arpeggio Style) 62
Sustain level 28
System Function 88
System messages 93
System Parameters 89
T
Tap Tempo 37
Time 87
Tone Balance 45
Tone Pan 46
Tones 40
TRANSPOSE 31
Tune C-B (Part Scale Tune C-B) 58
Tune C-Tune B (Patch Scale Tune C-B) 91
Tx Active Sens (Transmit Active Sensing Switch) .... 91
Tx Bank Sel (Transmit Bank Select Switch) 90
Tx Edit Data (Transmit Edit Data Switch) 91
Tx Prog Chg (Transmit Program Change Switch) ... 90
Type
Chorus Type 86
Multi-Effects Type 68
Part Scale Tune Type 58
Patch Scale Tune Type 91
Reverb Type 87
U
Upper tone 40
User Chord Set 64
User Rhythm Set 53
User Template 62
User Template Parameters 62
V
Variation (Arpeggio Variation) 62
Velo Sens Depth (Velocity Sensitivity Depth) ...... 47
Velo Sens Ofs (Velocity Sensitivity Offset) 47
Vibrato Effect 27
Voice Rsv 1–16 (Voice Reserve 1–16) ...... 56
Volume Balance 26
W
Wah Effects 27
X
XFER to MIDI
Patch Utility 51
Performance Utility 61
Memo
Memo

-For EU Countries
This product complies with the requirements of European Directive 89/336/EEC.
For the USA
FEDERAL COMMUNICATIONS COMMISSION RADIO FREQUENCY INTERFERENCE STATEMENT
This equipment has been tested and found to comply with the limits for a Class B digital device, pursuant to Part 15 of the FCC Rules. These limits are designed to provide reasonable protection against harmful interference in a residential installation. This equipment generates, uses, and can radiate radio frequency energy and, if not installed and used in accordance with the instructions, may cause harmful interference to radio communications. However, there is no guarantee that interference will not occur in a particular installation. If this equipment does cause harmful interference to radio or television reception, which can be determined by turning the equipment off and on, the user is encouraged to try to correct the interference by one or more of the following measures:
– Reorient or relocate the receiving antenna.
– Increase the separation between the equipment and receiver.
- Connect the equipment into an outlet on a circuit different from that to which the receiver is connected.
- Consult the dealer or an experienced radio/TV technician for help.
This device complies with Part 15 of the FCC Rules. Operation is subject to the following two conditions:
(1) This device may not cause harmful interference, and
(2) This device must accept any interference received, including interference that may cause undesired operation.
Unauthorized changes or modification to this system can void the users authority to operate this equipment.
This equipment requires shielded interface cables in order to meet FCC class B Limit.
For Canada
NOTICE
This Class B digital apparatus meets all requirements of the Canadian Interference-Causing Equipment Regulations.
AVIS
When you need repair service, call your nearest Roland Service Center or authorized Roland distributor in your country as shown below.
AFRICA
EGYPT
Al Fanny Trading Office
9, EBN Hagar A1 Askalany Street,
ARD E1 Golf, Heliopolis,
Cairo 11341, EGYPT
TEL: 20-2-417-1828
REUNION
That Other Music Shop
(PTY) Ltd.
11 Melle St., Braamfontein,
Johannesbourg, SOUTH AFRICA
P.O.Box 32918, Braamfontein 2017
Johannesbourg, SOUTH AFRICA
TEL: (011) 403 4105
Paul Bothner (PTY) Ltd.
17 Werdmuller Centre,
Main Road, Claremont 7708
SOUTH AFRICA
P.O.BOX 23032, Claremont 7735,
SOUTH AFRICA
TEL:(021)674 4030
ASIA
CHINA
Roland Shanghai Electronics
Co., Ltd.
5F. No.1500 Pingliang Road
Shanghai 200090, CHINA
TEL: (021) 5580-0800
Roland Shanghai Electronics
Co., Ltd.
(BEIJING OFFICE)
10F. No.18 Anhuaxili
Chaoyang District, Beijing 100011
CHINA
TEL: (010) 6426-5050
Roland Shanghai Electronics
Co., Ltd.
(GUANGZHOU OFFICE)
2/F., No.30 Si You Nan Er Jie Yi
Xiang, Wu Yang Xin Cheng,
Guangzhou 510600, CHINA
Tel: (020) 8736-0428
HONG KONG
Tom Lee Music Co., Ltd.
Service Division
22-32 Pun Shan Street, Tsuen
Wan, New Territories,
HONG KONG TEL: 2415-0015
Parsons Music Ltd.
8th Floor, Railway Plaza, 39
Chatham Road South, T.S.T.
Kowloon, HONG KONG
TEL: 2333 1863
INDIA
Rivera Digitec (India) Pvt. Ltd.
409, Nirman Kendra Mahalaxmi
Flats Compound Off. Dr. Edwin
Moses Road, Mumbai-400011,
INDIA
INDONESIA
PT Citra IntiRama
J1. Cideng Timur No. 15J-150
Jakarta Pusat
INDONESIA
TEL: (021) 6324170
KOREA
Cosmos Corporation
1461-9, Seocho-Dong,
Seocho Ku, Seoul, KOREA
TEL: (02) 3486-8855
MALAYSIA
G.A. Yupangco & Co. Inc.
339 Gil J. Puyat Avenue
Makati, Metro Manila 1200,
PHILIPPINES
TEL: (02) 899 9801
SINGAPORE
Swee Lee Company
150 Sims Drive,
SINGAPORE 387381
TEL: 6846-3676
CRISTOFORI MUSIC PTE
LTD
Blk 3014, Bedok Industrial Park E,
02-2148, SINGAPORE 489980
TEL: 6243-9555
TAIWAN
ROLAND TAIWAN
ENTERPRISE CO., LTD.
Room 5, 9fl. No. 112 Chung Shan
N.Road Sec.2, Taipei, TAIWAN,
ROC
TEL: (02) 2561 3339
THAILAND
Theera Music Co., Ltd.
330 Verng NakornKasem, Soi 2,
Bangkok 10100, THAILAND
TEL: (02) 2248821
VIETNAM
Saigon Music
Suite DP-8
40 Ba Huyen Thanh Quan Street
Hochiminh City, VIETNAM
Tel: (08) 930-1969
AUSTRALIA/ NEW ZEALAND
AUSTRALIA
Roland Corporation
Australia Pty., Ltd.
38 Campbell Avenue
Dee Why West. NSW 2099
AUSTRALIA
TEL: (02) 9982 8266
NEW ZEALAND
Roland Corporation Ltd.
32 Shaddock Street, Mount Eden,
Auckland, NEW ZEALAND
TEL: (09) 3098 715
CENTRAL/LATIN AMERICA
ARGENTINA
Instrumentos Musicales S.A.
Av.Santa Fe 2055
(1123) Buenos Aires
ARGENTINA
TEL: (011) 4508-2700
BRAZIL
Roland Brasil Ltda
Rua San Jose, 780 Sala B
Parque Industrial San Jose
Cotia - Sao Paulo - SP, BRAZIL TEL: (011) 4615-7666
TEL: (011) 4615 5666
COSTA RICA
JUAN Bansbach
Instrumentos Musicales
Ave.1. Calle 11, Apartado 10237,
San Jose, COSTA RICA
TEL: 258-0211
CHILE
Comercial Fancy II S.A.
Rut.: 96.919.420-1
Nataniel Cox #739, 4th Floor
Santiago - Centro, CHILE
TEL: (02) 688-9540
EL SALVADOR
OMNI MUSIC
Boulevard Andrews, Albrook,
Panama City, REP. DE PANAMA
TEL: 315-0101
PARAGUAY
Distribuidora De
Instrumentos Musicales
J.E. Olear y ESQ. Manduvira
Asuncion PARAGUAY
TEL:(021)492-124
URUGUAY
Todo Musica S.A.
Francisco Acuna de Figueroa 1771
C.P.: 11.800
Montevideo, URUGUAY
TEL: (02) 924-2335
VENEZUELA
Musicland Digital C.A.
155, New National Road
Patras 26442, GREECE
TEL: 2610 435400
HUNGARY
Roland East Europe Ltd.
Warehouse Area 'DEPO' Pf.83
H-2046 Torokbalint, HUNGARY
TEL: (23) 511011
IRELAND
Roland Ireland
G2 Calmount Park, Calmount
Avenue, Dublin 12
Republic of IRELAND
TEL: (01) 4294444
ITALY
Roland Italy S. p. A.
Danvik Center 28, 2 tr.
S-131 30 Nacka SWEDEN
TEL:(0)8 702 00 20
SWITZERLAND
Roland (Switzerland) AG


- USING THE UNIT SAFELY
- INSTRUCTIONS FOR THE PREVENTION OF FIRE, ELECTRIC SHOCK, OR INJURY TO PERSONS
- ALWAYS OBSERVE THE FOLLOWING
- WARNING
- CAUTION
- IMPORTANT NOTES
- POWER SUPPLY
- PLACEMENT
- MAINTENANCE
- REPAIRS AND DATA
- ADDITIONAL PRECAUTIONS
- HANDLING CD-ROMS
- CONTENTS
- IMPORTANT NOTES ......4
- MAIN FEATURES....9
- PANEL DESCRIPTIONS ....10
- GETTING READY....14
- RESET TO DEFAULT FACTORY SETTINGS (FACTORY RESET) ......17
- LISTENING TO THE DEMO SONGS ....18
- QUICK START ......19
- TRY OUT THE SOUNDS....20
- APPLYING VARIOUS EFFECTS TO THE SOUND....26
- USING THE RHYTHM GUIDE ....36
- ADVANCED USE....39
- OVERVIEW OF THE RS-50 ....40
- BASIC OPERATION OF THE RS-50 42
- CREATING A PATCH (PATCH MODE) 44
- CREATING A RHYTHM SET (PATCH MODE) 52
- PLAYING MORE THAN ONE SOUND SIMULTANEOUSLY (PERFORMANCE MODE)......55
- USING THE PHRASE/ARPEGGIO FUNCTION 62
- USING CHORD MEMORY FUNCTION....64
- ADDING EFFECTS 65
- SETTINGS COMMON TO ALL MODES (SYSTEM FUNCTION) 88
- PERFORMING WITH AN EXTERNAL MIDI DEVICE....92
- PERFORMING WITH A COMPUTER 99
- APPENDIX 101
- MAIN FEATURES
- A BROAD RANGE OF NEW, HIGH-QUALITY SOUNDS
- QUICK AND EASY SOUND EDITING
- NUMEROUS PHRASE/ARPEGGIO TEMPLATES
- MULTI-CHORD MEMORY FUNCTION
- COMPACT AND EASY TO CARRY
- DEDICATED SOUND EDITOR IS INCLUDED
- D BEAM CONTROLLER
- RHYTHM GUIDE FUNCTION
- GENERAL MIDI
- GENERAL MIDI 2
- PANEL DESCRIPTIONS
- FRONT PANEL
- A
- [SOLO SYNTH] (SOLO SYNTHESIZER) BUTTON
- [ACTIVE EXPRESS] (ACTIVE EXPRESSION) BUTTON
- [ASSIGNABLE] BUTTON
- B
- [VOLUME] KNOB
- C
- MODE SECTION
- [PATCH] BUTTON
- [PERFORMANCE] BUTTON
- [DEMO] BUTTON
- EDIT SECTION
- [PARAM] (PARAMETER) BUTTON
- [ EFFECTS] BUTTON
- [UTILITY] BUTTON
- OTHERS
- [SYSTEM] BUTTON
- [PART SELECT] BUTTON
- [AUDITION] BUTTON
- [WRITE] BUTTON
- [-/+OCT] (OCTAVE SHIFT) / [-/+TRANSPOSE] (TRANSPOSE) BUTTONS
- [PHRASE/ARPEGGIO] BUTTON
- [CHORD MEMORY] BUTTON
- D
- DISPLAY
- E
- [RHYTHM GUIDE] BUTTON
- F
- [NUMERIC] BUTTON
- [0]-[9] (DIRECT ACCESS BUTTONS)
- G
- [VALUE -/+] BUTTONS
- PAGE/CURSOR [ ]
- JUMP [ ]/[] BUTTONS
- [EXIT] BUTTON
- [ENTER] BUTTON
- [SHIFT] BUTTON
- [TAP TEMPO] BUTTON
- H
- PATCH MODIFY SECTION
- [DESTINATION TONE] BUTTON
- PATCH MODIFY SELECT BUTTON
- IF ENVELOPE IS SELECTED (ENV INDICATOR LIT)
- [ATTACK] KNOB
- [DECAY] KNOB
- [RELEASE] KNOB
- [BALANCE] KNOB
- [LFO RATE] KNOB
- [LFO DEPTH] KNOB
- [KEY MODE] BUTTON
- [FILTER LFO] BUTTON
- [CUTOFF] KNOB
- [RESONANCE] KNOB
- PITCH BEND/MODULATION LEVER
- REAR PANEL
- MIDI CONNECTORS (IN, OUT)
- PEDAL JACKS
- OUTPUT JACKS
- PHONES JACK
- CORD HOOK
- DC IN JACK
- POWER SWITCH
- GROUND TERMINAL
- GETTING READY
- CONNECTING THE RS-50 TO EXTERNAL EQUIPMENT
- NOTE
- MEMO
- TURNING ON/OFF THE POWER
- TURNING ON THE POWER
- TURNING OFF THE POWER
- ADJUSTING THE DISPLAY CONTRAST (LCD CONTRAST)
- RESET TO DEFAULT FACTORY SETTINGS (FACTORY RESET)
- ENV
- BALANCE
- LISTENING TO THE DEMO SONGS
- DEMO SONGS LIST
- QUICK START
- TRY OUT THE SOUNDS
- SELECTING A PATCH
- SELECTING A PATCH BY CATEGORY
- SELECTING SOUNDS BY CATEGORY
- SELECTING PATCHES WHILE LISTENING TO PHRASES (PATCH AUDITION)
- SELECTING A RHYTHM SET
- CHANGING THE WAY IN WHICH THE ARPEGGIOS ARE SOUNDED
- USER TEMPLATE
- PLAYING A CHORD AT THE TOUCH OF A FINGER (MULTI-CHORD MEMORY)
- SWITCHING CHORD SETS
- (EURSDON >)
- APPLYING VARIOUS EFFECTS TO THE SOUND
- CHANGING THE TONE WITH THE KNOBS (PATCH MODIFY)
- SELECTING THE TONE THAT YOU WANT TO MODIFY (DESTINATION TONE)
- ADJUSTING THE VOLUME BALANCE OF THE TWO TONES
- VIBRATO AND WAH EFFECTS (LFO)
- CHANGING THE SOUND'S VOLUME (ENVELOPE)
- CHANGING THE BRIGHTNESS OF THE SOUND AND ADDING SPECIAL QUALITIES (CUTOFF/RESONANCE)
- USING A LEVER TO MODIFY THE SOUND
- CHANGING THE SOUND'S PITCH IN REAL TIME (PITCH BEND LEVER)
- ADDING A VIBRATO EFFECT TO THE SOUND (MODULATION LEVER)
- USING A PEDAL TO MODIFY THE SOUND
- SHIFTING THE KEYBOARD RANGE IN ONE-OCTAVE STEPS (OCTAVE SHIFT)
- WHEN PLAYING SOUNDS OUTSIDE THE KEYBOARD'S RANGE
- MOVING THE KEY RANGE IN HALF-STEPS (TRANSPOSE)
- WHEN MATCHING THE VOCALIST'S REGISTER
- WHEN CHANGING FROM A DIFFICULT KEY TO ONE THAT IS EASY TO PLAY
- WHEN PLAYING WITH THE TONE OF A TRANSPOSED INSTRUMENT
- WAVING YOUR HAND OVER THE D BEAM (D BEAM CONTROLLER)
- THE USABLE RANGE OF THE D BEAM CONTROLLER
- EFFECTS THAT CAN BE USED WITH THE D BEAM CONTROLLER
- SOLO SYNTH
- ACTIVE EXPRESS (ACTIVE EXPRESSION)
- ASSIGNABLE
- ADJUSTING THE SENSITIVITY OF THE D BEAM CONTROLLERS (D BEAM SENS)
- CHANGING THE POLARITY OF THE CHANGE (D BEAM POLARITY)
- USING THE RS-50 EFFECTS
- MULTI-EFFECTS
- CHORUS
- REVERB
- TURNING EFFECTS ON AND OFF (MASTER EFFECTS SWITCH)
- USING THE RHYTHM GUIDE
- SELECTING A RHYTHM PATTERN
- TO SELECT A RHYTHM PATTERN WITHOUT PLAYING IT
- SWITCHING SOUNDS
- CHANGE THE TEMPO
- PRESSING A BUTTON TO MODIFY THE TEMPO (TAP TEMPO)
- ADVANCED USE
- OVERVIEW OF THE RS-50
- HOW THE INSTRUMENT IS ORGANIZED
- BASIC STRUCTURE
- KEYBOARD CONTROLLER SECTION
- SOUND GENERATOR SECTION
- CLASSIFICATION OF RS-50 SOUND TYPES
- TONES
- PATCHES
- RHYTHM SETS
- PERFORMANCE
- PART
- CURRENT PART
- EFFECTS
- NUMBER OF VOICES
- MAXIMUM POLYPHONY
- ABOUT MEMORY
- TEMPORARY MEMORY
- TEMPORARY AREA
- REWRITABLE MEMORY
- SYSTEM MEMORY
- USER MEMORY
- NON-REWRITABLE MEMORY
- PRESET MEMORY
- BASIC OPERATION OF THE RS-50
- SWITCHING THE MODE
- PATCH MODE
- PERFORMANCE MODE
- EDITING PARAMETERS
- BASIC PROCEDURE
- EXECUTING A COMMAND
- ASSIGNING A NAME
- WHEN ONE PAGE CONTAINS TWO OR MORE SETTINGS
- INPUTTING NUMBERS AND NUMERALS
- SELECTING A PART
- CREATING A PATCH (PATCH MODE)
- THREE TIPS FOR EDITING PATCHES
- SELECT A PATCH THAT IS SIMILAR TO THE SOUND YOU WISH TO CREATE (P. 20)
- CHOOSE THE TONE THAT YOU WANT TO EDIT (P. 26)
- TURN EFFECTS OFF (P. 65)
- HOW TO MAKE THE PATCH SETTINGS
- CHANGING THE WAY THAT THE TONES ARE SOUNDED (KEY MODE)
- EDITING THE PATCH PARAMETERS
- [NON-TEXT]
- MAKING SETTINGS THAT APPLY TO THE ENTIRE PATCH (PATCH COMMON PARAMETERS)
- NAME (PATCH NAME)
- CATEGORY
- KEY MODE
- VALUE
- PATCH LEVEL
- TONE BALANCE
- SPLIT POINT
- SPLIT ARP
- SOLO SWITCH
- MODULATIONDST (MODULATION DESTINATION)
- PITCHBEND DST (PITCH BEND DESTINATION)
- MODIFY DEST (MODIFY DESTINATION)
- EXPRESSIONDST (EXPRESSION DESTINATION)
- ACTIVE EXP SW (ACTIVE EXPRESSION SWITCH)
- MAKING SETTINGS FOR AN INDIVIDUAL TONE (PATCH TONE PARAMETERS)
- NO. (ORIGINAL TONE NUMBER)
- TONE PAN
- SPECIFYING THE AMOUNT OF SIGNAL SENT TO THE EFFECT
- MFX SWITCH (MULTI-EFFECTS SWITCH)
- CHORUS SEND LVL (CHORUS SEND LEVEL)
- REVERB SEND LVL (REVERB SEND LEVEL)
- COARSE TUNE
- FINE TUNE
- CREATING SMOOTH PITCH TRANSITIONS (PORTAMENTO)
- PORTAMENTO SW (PORTAMENTO SWITCH)
- PORTAMENTO TIME
- VARYING THE SOUNDS BY THE FORCE OF YOUR KEYBOARD PLAYING
- VELO SENS DEPTH (VELOCITY SENSITIVITY DEPTH)
- VELO SENS OFS (VELOCITY SENSITIVITY OFFSET)
- PITCH BEND RANGE
- ADJUSTING THE MODULATION OF THE SOUND (LFO)
- FILTER LFO (FILTER LFO SWITCH)
- LFO RATE
- LFO DEPTH
- LFO DELAY
- ADJUSTING THE BRIGHTNESS OR HARDNESS OF THE SOUND (FILTER)
- CUTOFF FREQ (CUTOFF FREQUENCY)
- RESONANCE
- ADJUSTING THE ATTACK OR DECAY OF THE SOUND (ENVELOPE)
- ATTACK TIME
- DECAY TIME
- RELEASE TIME
- SAVING A PATCH
- PATCH CATEGORIES
- CONVENIENT FUNCTIONS FOR PATCH EDITING (PATCH UTILITY)
- COPYING PATCH PARAMETERS (PATCH PRM COPY)
- COPYING THE UPPER TONE OR LOWER TONE
- PRESS PAGE/CURSOR [ ]
- PRESS [ENTER]
- COPYING MFX, CHORUS, OR REVERB EFFECT SETTINGS
- INITIALIZING THE PARAMETERS OF A PATCH (PATCH INITIALIZE)
- ERASING A USER PATCH YOU SAVED (PATCH REMOVE)
- TRANSMITTING PATCH/RHYTHM SET SETTINGS FROM THE MIDI OUT CONNECTOR (XFER TO MIDI)
- TRANSMITTING THE SETTINGS OF CURRENTLY SELECTED PATCH
- TRANSMITTING THE SETTINGS OF A USER PATCH
- TRANSMITTING ALL DATA STORED IN THE USER AREA
- RESTORING THE FACTORY SETTINGS (FACTORY RESET)
- CREATING A RHYTHM SET (PATCH MODE)
- HOW TO MAKE THE RHYTHM SET SETTINGS
- EDITING THE RHYTHM SET PARAMETERS
- SELECTING RHYTHM SET PARAMETERS
- MAKING SETTINGS THAT APPLY TO THE ENTIRE RHYTHM SET (RHYTHM COMMON PARAMETERS)
- NAME (RHYTHM SET NAME)
- EDITING THE SETTINGS OF EACH RHYTHM TONE (KEY) (RHYTHM TONE PARAMETERS)
- PITCH
- LEVEL
- PAN
- SAVING A RHYTHM SET (USER RHYTHM SET)
- CONVENIENT FUNCTIONS FOR RHYTHM SET EDITING (RHYTHM SET UTILITY)
- COPYING EFFECT SETTINGS FROM A RHYTHM SET (RHY PRM COPY)
- INITIALIZING THE SETTINGS OF A SPECIFIC RHYTHM TONE (RHY INITIALIZE)
- ERASING A RHYTHM SET YOU SAVED (RHY REMOVE)
- PLAYING MORE THAN ONE SOUND SIMULTANEOUSLY (PERFORMANCE MODE)
- CHOOSING A PART AND SELECTING THE SOUND
- ASSIGNING PATCHES OF THE SAME CATEGORY TO MULTIPLE PARTS
- QUICKLY AND CONSECUTIVELY AUDITIONING THE BUILT-IN SOUND OF THE RS-50 / VIEWING A LIST OF JUST THE USER PATCHES
- SELECTING PERFORMANCE NUMBERS
- USING VALUE [-]/[+]
- USING THE DIRECT ACCESS BUTTONS
- EDITING THE SETTINGS OF A PERFORMANCE
- MAKING SETTINGS THAT APPLY TO THE ENTIRE PERFORMANCE
- MAKING SETTINGS THAT APPLY TO THE ENTIRE PERFORMANCE (PERFORMANCE COMMON PARAMETERS)
- NAME (PERFORMANCE NAME)
- VOICE RSV 1-16 (VOICE RESERVE 1-16)
- LEVEL (PERFORMANCE LEVEL)
- MFX SOURCE
- EDITING THE EFFECT SETTINGS OF A PERFORMANCE
- EDITING THE PART SETTINGS OF A PERFORMANCE (PART SETUP)
- PART PARAMETERS OF A PERFORMANCE (PART SETUP PARAMETERS)
- LEVEL (PART LEVEL)
- PAN (PART PAN)
- RECEIVE CH (RECEIVE CHANNEL)
- RECEIVE SW (RECEIVE SWITCH)
- RECEIVE PRG CHG (RECEIVE PROGRAM CHANGE SWITCH)
- RECEIVE BANK SEL (RECEIVE BANK SELECT SWITCH)
- SCALE TUNE
- PART PATCH EDIT
- EDITING THE SCALE TUNE SETTINGS (SCALE TUNE)
- TYPE (PART SCALE TUNE TYPE)
- TUNE C-B (PART SCALE TUNE C-B)
- EDITING THE EFFECT SETTINGS FOR EACH PART OF THE PERFORMANCE (PERFORMANCE PART EFFECT)
- MASTER EFFECTS SWITCH
- MFX SWITCH
- SAVING A PERFORMANCE
- PRESS [WRITE]
- IF YOU WANT TO SAVE THE EDITED PATCH, PRESS [ENTER]
- USE VALUE [-]/[+] TO SPECIFY THE CATEGORY FOR THE USER PATCH YOU WANT TO SAVE
- PRESS [ENTER] ONCE AGAIN TO EXECUTE
- ONCE ALL THE NECESSARY PATCHES HAVE BEEN SAVED, YOU ARE RETURNED TO THE SCREEN YOU WERE IN AT STEP 1
- CONVENIENT FUNCTIONS FOR PERFORMANCE EDITING (PERFORMANCE UTILITY)
- COPYING PART OR EFFECT PARAMETERS (PERFORM PRM COPY)
- COPYING SETTINGS MADE FOR EACH PART OF A PERFORMANCE
- COPYING EFFECT SETTINGS
- WHEN COPYING "PERFORM (PERFORMANCE)" EFFECT SETTINGS
- INITIALIZING THE PARAMETERS OF A PERFORMANCE (PERFORM INIT)
- TRANSMITTING PERFORMANCE SETTINGS FROM THE MIDI OUT CONNECTOR (XFER TO MIDI)
- TRANSMITTING THE SETTINGS OF CURRENTLY SELECTED PERFORMANCE
- TRANSMITTING THE SETTINGS OF A USER PERFORMANCE
- USING THE PHRASE/ARPEGGIO FUNCTION
- CREATING YOUR OWN ARPEGGIO TEMPLATE (USER TEMPLATE)
- USER TEMPLATE PARAMETER LIST
- STYLE (ARPEGGIO STYLE)
- VARIATION (ARPEGGIO VARIATION)
- MOTIF (ARPEGGIO MOTIF)
- ACCENT RATE (ARPEGGIO ACCENT RATE)
- SHUF RATE (ARPEGGIO SHUFFLE RATE)
- SHUF RESOLUTION (ARPEGGIO SHUFFLE RESOLUTION)
- HOLD (ARPEGGIO HOLD SWITCH)
- KBD VELOCITY (ARPEGGIO KEYBOARD VELOCITY)
- OCTAVE RANGE (ARPEGGIO OCTAVE RANGE)
- KEY TRIGGER (ARPEGGIO KEY TRIGGER)
- USING CHORD MEMORY FUNCTION
- CREATING AN ORIGINAL CHORD SET (USER CHORD SET)
- ADDING EFFECTS
- TURNING THE EFFECT FUNCTION ON AND OFF (MASTER EFFECT SWITCH)
- PRESS [EFFECTS] SO IT IS LIT
- USE PAGE/CURSOR [ ] TO SELECT THE EFFECT TYPE, AND USE VALUE [-]/[+] TO SWITCH IT ON/OFF
- THE EFFECT SIGNAL PATH
- MAKING EFFECTS SETTINGS
- SELECTING EFFECT PARAMETERS
- WHEN THE CURSOR IS LOCATED AT "REV," PRESS PAGE/CURSOR [ ] AND THE EFFECT PARAMETERS WILL BE DISPLAYED ONE AFTER ANOTHER STARTING WITH THE MULTI-EFFECT (MFX) PARAMETERS
- USE PAGE/CURSOR [ ] TO SELECT THE PARAMETER THAT YOU WANT TO EDIT, AND USE VALUE [-]/[+] TO MODIFY THE VALUE OF THE PARAMETER
- SETTING MULTI-EFFECTS PARAMETERS
- TYPE (MULTI-EFFECTS TYPE)
- SEND LVL TO CHO (MULTI-EFFECT SEND LEVEL TO CHORUS)
- SEND LVL TO REV (MULTI-EFFECT SEND LEVEL TO REVERB)
- CTRL 1, 2 (MULTI-EFFECTS CONTROL 1, 2)
- 00: THROUGH
- 01: STEREO EQ (STEREO EQUALIZER)
- 02: OVERDRIVE
- 03: DISTORTION
- 04: PHASER
- 05: SPECTRUM
- 06: ENHANCER
- 07: AUTO WAH
- 08: ROTARY
- 09: COMPRESSOR
- 10: LIMITER
- 11: HEXA-CHORUS
- 12: TREMOLO CHO (TREMOLO CHORUS)
- 13: SPACE-D
- 14: ST CHORUS (STEREO CHORUS)
- 15: ST FLANGER (STEREO FLANGER)
- 16: STEP FLANGER
- 17: ST DELAY (STEREO DELAY)
- 18: LONG DELAY
- 19: MOD DELAY (MODULATION DELAY)
- 20: 3 TAP DELAY (TRIPLE TAP DELAY)
- 21: 4 TAP DELAY (QUADRUPLE TAP DELAY)
- 22: TM CTRL DLY (TIME CONTROL DELAY)
- 23: 2V PCH SHIFT (2-VOICE PITCH SHIFTER)
- 24: FB PCH SHIFT (FEEDBACK PITCH SHIFTER)
- 25: REVERB
- 26: GATED REVERB
- 27: OD>CHORUS (OVERDRIVE→CHORUS)
- 28: OD>FLANGER (OVERDRIVE→FLANGER)
- 29: OD>DELAY (OVERDRIVE→DELAY)
- 30: DIST>CHORUS (DISTORTION→CHORUS)
- 31: DIST>FLANGER (DISTORTION→FLANGER)
- 32: DIST>DELAY (DISTORTION→DELAY)
- 33: ENH>CHORUS (ENHANCER→CHORUS)
- 34: ENH>FLANGER (ENHANCER→FLANGER)
- 35: ENH>DELAY (ENHANCER→DELAY)
- 36: CHORUS>DELAY
- 37: FLG>DELAY (FLANGER→DELAY)
- 38: CHO>FLANGER (CHORUS→FLANGER)
- 39: CHORUS/DELAY
- 40: FLG/DELAY (FLANGER/DELAY)
- 41: CHO/FLANGER (CHORUS/FLANGER)
- 42: LOFI
- 43: SLICER
- 44: TREMOLO
- 45: AUTO PAN
- 46:TUMBLING DLY (TUMBLING DELAY)
- 47: FBK RIPPER (FEEDBACK RIPPER)
- NOTE *1
- NOTE *2
- MAKING CHORUS SETTINGS
- TYPE (CHORUS TYPE)
- PRE-LPF (CHORUS PRE-LOW PASS FILTER)
- LEVEL (CHORUS LEVEL)
- FEEDBACK (CHORUS FEEDBACK LEVEL)
- DELAY (CHORUS DELAY TIME)
- RATE (CHORUS RATE)
- DEPTH (CHORUS DEPTH)
- SEND LVL TO REV (CHORUS SEND LEVEL TO REVERB)
- MAKING REVERB SETTINGS
- TYPE (REVERB TYPE)
- CHARACTER (REVERB CHARACTER)
- PRE-LPF (REVERB PRE-LOW PASS FILTER)
- LEVEL (REVERB LEVEL)
- TIME (REVERB TIME)
- DELAY FEEDBACK (REVERB DELAY FEEDBACK)
- SETTINGS COMMON TO ALL MODES (SYSTEM FUNCTION)
- HOW TO MAKE THE SYSTEM FUNCTION SETTINGS
- FUNCTIONS OF THE SYSTEM PARAMETERS
- SETTINGS COMMON TO THE ENTIRE SYSTEM (GENERAL)
- LCD CONTRAST
- MASTER TUNE
- MASTER KEY SFT (MASTER KEY SHIFT)
- MASTER LEVEL
- HOLD PEDAL (HOLD PEDAL POLARITY)
- LOCAL CONTROL (LOCAL CONTROLLER)
- CLOCK SOURCE
- SETTINGS RELATED TO CONTROLLERS (CONTROLLER)
- MOD (MODULATION ASSIGN)
- PEDAL (PEDAL CONTROL ASSIGN)
- C1 (C1 KNOB ASSIGN)
- C2 (C2 KNOB ASSIGN)
- C3 (C3 KNOB ASSIGN)
- SETTINGS RELATED TO MIDI (MIDI)
- PATCH RX CH (PATCH RECEIVE CHANNEL)
- PATCH TX CH (PATCH TRANSMIT CHANNEL)
- PERFORM CTRL CH (PERFORMANCE CONTROL CHANNEL)
- RX PROG CHG (RECEIVE PROGRAM CHANGE SWITCH)
- RX BANK SEL (RECEIVE BANK SELECT SWITCH)
- RX SYS EXC (RECEIVE SYSTEM EXCLUSIVE SWITCH)
- TX PROG CHG (TRANSMIT PROGRAM CHANGE SWITCH)
- TX BANK SEL (TRANSMIT BANK SELECT SWITCH)
- TX EDIT DATA (TRANSMIT EDIT DATA SWITCH)
- TX ACTIVE SENS (TRANSMIT ACTIVE SENSING SWITCH)
- DEVICE ID (DEVICE ID NUMBER)
- SOFT THRU (SOFT THROUGH SWITCH)
- MAKING SCALE TUNE SETTINGS FOR A PATCH (PATCH SCALE)
- TYPE (PATCH SCALE TUNE TYPE)
- TUNE C-TUNE B (PATCH SCALE TUNE C-B)
- PERFORMING WITH AN EXTERNAL MIDI DEVICE
- ABOUT MIDI
- MIDI CONNECTORS
- MIDI CHANNELS AND MULTITIMBRAL SOUND GENERATORS
- EXAMPLE
- MIDI MESSAGES USED BY THE RS-50
- CHANNEL MESSAGES
- NOTE ON
- NOTE OFF
- PITCH BEND CHANGE
- AFTERTOUCH
- PROGRAM CHANGE
- CONTROL CHANGE
- SYSTEM MESSAGES
- EXCLUSIVE MESSAGES
- ABOUT MIDI IMPLEMENTATION CHARTS
- USING THE RS-50 TO PLAY AN EXTERNAL MIDI SOUND MODULE
- CONNECTING TO EXTERNAL MIDI SOUND MODULES
- SET THE KEYBOARD TRANSMIT CHANNEL
- PLAYING THE RS-50'S SOUND GENERATOR FROM AN EXTERNAL MIDI DEVICE
- CONNECTING AN EXTERNAL MIDI DEVICE
- SETTING THE PATCH RECEIVE CHANNEL
- SETTING THE PROGRAM CHANGE RECEIVE SWITCH
- SELECTING RS-50 SOUNDS FROM AN EXTERNAL MIDI DEVICE
- BANK NUMBER/PROGRAM NUMBER CORRESPONDENCE TABLE
- USING AN EXTERNAL MIDI CONTROLLER TO CHANGE THE RS-50'S TONES
- RECORDING TO AN EXTERNAL SEQUENCER
- MAKING SETTINGS BEFORE RECORDING
- SETTING THE RS-50'S LOCAL CONTROL TO OFF
- TURNING ON THE EXTERNAL SEQUENCER'S THRU FUNCTION
- SETTING THE PERFORMANCE
- RECORDING
- RECORDING THE PERFORMANCE'S SETTINGS AT THE BEGINNING OF THE SONG
- RECORDING EACH PART SEPARATELY
- LISTENING TO THE RECORDED PERFORMANCE
- SET THE "RX SYS EXC" (SYSTEM EXCLUSIVE RECEIVE SWITCH) TO ON (P. 90)
- SET THE SAME DEVICE ID NUMBER USED FOR RECORDING (P. 91)
- MAKE SURE TO START PLAYBACK AT THE BEGINNING OF THE SONG
- PLAYING TOGETHER WITH THE PLAYBACK OF A RECORDED PERFORMANCE
- TRANSPOSING PLAYBACK OF PERFORMANCES (MASTER KEY SHIFT)
- BACKING-UP (SAVING) ALL RS-50 SETTINGS ON YOUR EXTERNAL MIDI SEQUENCER
- USING THE RS-50 AS A GENERAL MIDI/GENERAL MIDI 2 SYSTEM-COMPATIBLE SOUND MODULE
- PLAYING BACK GENERAL MIDI/GENERAL MIDI 2 MUSIC DATA
- SET THE SYSTEM EXCLUSIVE RECEIVE SWITCH TO ON (P. 90)
- MAKE SURE TO PLAY BACK FROM THE BEGINNING OF THE SONG
- PERFORMING WITH A COMPUTER
- CONNECTING WITH MIDI CABLES
- INSTALLING THE INCLUDED EDITOR SOFTWARE
- APPENDIX
- TROUBLESHOOTING
- NO POWER
- NO SOUND
- THE PITCH IS OFF
- SOUNDS ARE MISSING
- EFFECTS NOT BEING APPLIED CORRECTLY
- ARE THE MASTER EFFECTS SWITCHES SET TO OFF? (P. 65)
- ARE THE CHORUS SETTINGS CORRECT
- ARE THE REVERB SETTINGS CORRECT
- ARE THE CHORUS OR REVERB SETTINGS FOR THE RHYTHM SET CORRECT
- IS ANY MULTI-EFFECTS SWITCH SET TO "BYPASS
- ARE THE MULTI-EFFECTS SOURCE SETTING CORRECT? (P. 56)
- IS THE CLOCK SOURCE SET TO "MIDI
- IS THE TONE DELAY TIME VALUE SET TO THE NOTE
- EFFECT CONTROL DOES NOT WORK
- NOTES ARE DELAYED OR UNSTEADY DURING PLAYBACK A SONG FROM AN EXTERNAL SEQUENCER
- SONG DATA CANNOT BE PLAYED BACK CORRECTLY
- DID YOU START PLAYBACK AT SOME POINT OTHER THAN THE BEGINNING OF THE SONG
- ARE YOU PLAYING BACK DATA WHOSE FORMAT IS SOMETHING OTHER THAN GENERAL MIDI 2 OR GENERAL MIDI
- CANNOT PLAY PHRASE/ARPEGGIOS
- SOUND DOES NOT STOP WHEN KEY IS PRESSED
- MIDI MESSAGES NOT RECEIVED CORRECTLY
- MIDI MESSAGES NOT TRANSMITTED CORRECTLY
- USING SEQUENCER SOFTWARE, MODULATION LEVER AND KNOB MOVEMENTS HAVE NO EFFECT ON THE SOUND
- ERROR MESSAGES/MESSAGES
- PARAMETER LIST
- PATCH PARAMETERS
- PATCH EFFECTS PARAMETERS
- RHYTHM PATCHES
- PERFORMANCE PARAMETERS
- ORIGINAL TONE LIST
- RHYTHM SET LIST
- PERFORMANCE LIST
- RHYTHM GUIDE LIST
- ARPEGGIO TEMPLATE LIST
- ARPEGGIO STYLE LIST
- MULTI-CHORD SET LIST
- MIDI IMPLEMENTATION CHART
- SYNTHESIZER
- SPECIFICATIONS
- KEYBOARD
- [SOUND GENERATOR]
- PARTS
- WAVE MEMORY
- RHYTHM GUIDE
- MULTI-CHORD MEMORY
- PHRASE/ARPEGGIO
- CONTROLLERS
- CONNECTORS
- CURRENT DRAW
- DIMENSIONS
- WEIGHT
- ACCESSORIES
- OPTIONS
- INDEX
- K
- L
- M
- N
- 0
- P
- R
- S
- T
- U
- V
- W
- X
- FEDERAL COMMUNICATIONS COMMISSION RADIO FREQUENCY INTERFERENCE STATEMENT
- NOTICE
- AVIS
- AFRICA
- EGYPT
- REUNION
- ASIA
- CHINA
- HONG KONG
- INDIA
- INDONESIA
- KOREA
- MALAYSIA
- SINGAPORE
- CRISTOFORI MUSIC PTE
- 02-2148, SINGAPORE 489980
- TAIWAN
- THAILAND
- VIETNAM
- AUSTRALIA/ NEW ZEALAND
- AUSTRALIA
- NEW ZEALAND
- CENTRAL/LATIN AMERICA
- ARGENTINA
- BRAZIL
- COSTA RICA
- CHILE
- EL SALVADOR
- PARAGUAY
- URUGUAY
- VENEZUELA
- HUNGARY
- IRELAND
- ITALY
- SWITZERLAND
Brand : ROLAND
Model : RS-50
Category : Synthesizer