
Cook 4 Me CZ700 - Saucepan KRUPS - Free user manual and instructions
Find the device manual for free Cook 4 Me CZ700 KRUPS in PDF.


| Product Type | Electric Pressure Cooker / Multicooker |
| Brand | Krups |
| Model | Cook 4 Me CZ700 |
| Capacity | 6 liters |
| Inner Pot Material | Stainless steel with non-stick coating |
| Power | 1000 Watts |
| Voltage | 220-240 V |
| Frequency | 50/60 Hz |
| Dimensions (W x D x H) | 30 x 30 x 30 cm |
| Weight | 6.5 kg |
| Cooking Modes | Pressure cook, slow cook, steam, saute, keep warm |
| Display | Digital LCD with timer |
| Safety Features | Overheat protection, pressure regulator, lid locking system |
| Accessories Included | Steam basket, rice spoon, measuring cup |
| Cleaning | Inner pot dishwasher safe; exterior wipe with damp cloth |
| Warranty | 2 years |
| Spare Parts Available | Lid gasket, inner pot, steam valve |
Frequently Asked Questions - Cook 4 Me CZ700 KRUPS
User questions about Cook 4 Me CZ700 KRUPS
0 question about this device. Answer the ones you know or ask your own.
Ask a new question about this device
Download the instructions for your Saucepan in PDF format for free! Find your manual Cook 4 Me CZ700 - KRUPS and take your electronic device back in hand. On this page are published all the documents necessary for the use of your device. Cook 4 Me CZ700 by KRUPS.
USER MANUAL Cook 4 Me CZ700 KRUPS

DESCRIPTION
1 Lid open / close handle 2 Warning indicator for pressure and locking 3 Control panel 4 Cancel button
5 Main operation button 6 Cooking pot 7 Open / closed marking 8 Silencing valve
EPC03 Series
Low pressure 40kPa (109°C) / High pressure: 70kPa (115°C)
Product capacity: 6L / Useful capacity: 4L
Built-in heating
The regulation pressure is reached 10 minutes after the beep.
SAFETY INSTRUCTIONS

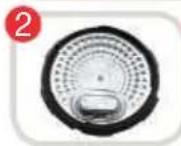


CLEANING OF THE VARIOUS COMPONENTS
REMOVING THE METAL LID:
REMOVING THE VALVE COVER:
CLEANING THE DECOMPRESSION BALL:
REINSERTING THE METAL LID SUB-ASSEMBLY:

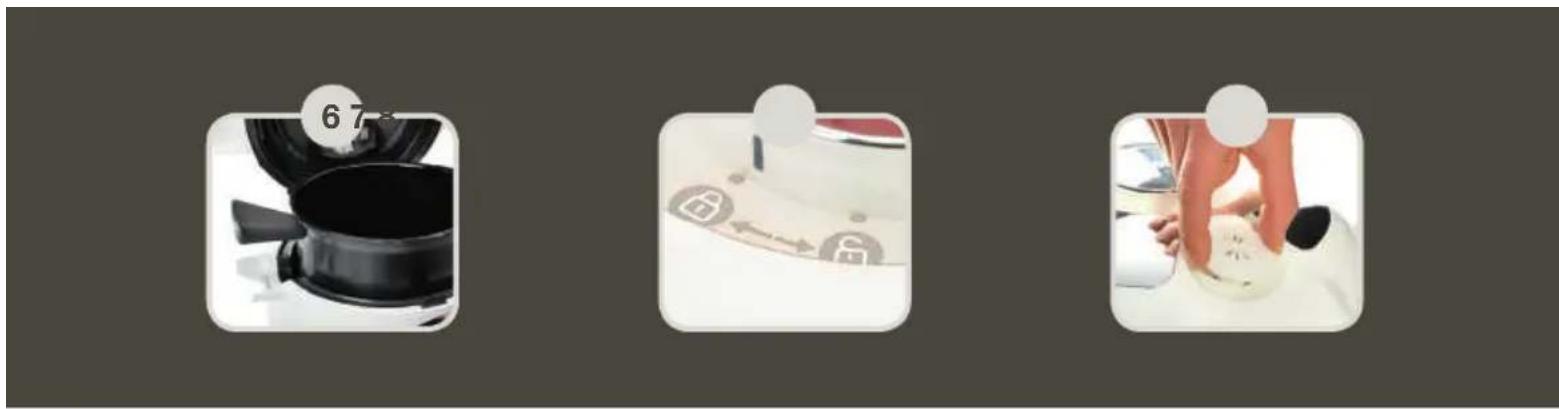
OPENING THE LID:
INSERT CONDENSATE TRAY:
POSITION THE CONTAINER IN THE APPLIANCE:


Select "Sounds"


CLEANING IN THE DISHWASHER:
MANUAL CLEANING:
Take the time to read all the following instructions carefully.
- Indoor use only. ■ For cleaning your appliance, please refer to the instructions for use. You can wash the cooking bowl and steam basket in soapy hot water or in the dishwasher. Clean the body of the appliance using a damp cloth.
■ Do not immerse the appliance in water. ■ Improper use of the appliance and its accessories may damage the appliance and cause injury.
■ Do not touch hot parts of the appliance. After use, the heating element surface is subject to residual heat.
■ For your safety, this product conforms to all applicable standards and regulations (Low Voltage Directive, Electromagnetic Compatibility, Food Compliant Materials, Environment, ...).
This appliance is not intended for use by persons (including children) with reduced physical, sensory or mental capabilities, or lack of experience and knowledge, unless they have been given supervision or instruction concerning use of the appliance by a person responsible for their safety.
Children should be supervised to ensure that they do not play with the appliance.
If the supply cord is damaged, it must be replaced by the manufacturer, its service agent or similar qualified persons in order to avoid a hazard. Do not replace the power cord with other cords.
■ This appliance is intended for domestic household use only. It is not intended to be used in the following applications, and the guarantee will not apply for:
- staff kitchen areas in shops, offices and other working environments;
- farm houses;
– by clients in hotels, motels and other residential type environments; - bed and breakfast type environments.
■ This appliance shall not be used by children. Keep the appliance and its cord out of reach of children. ■ Appliances can be used by persons with reduced physical, sensory or mental capabilities or lack of experience and knowledge if they have been given supervision or instruction concerning use of the appliance in a safe way and if they understand the hazards involved.
■ Children shall not play with the appliance. - Do not fill your appliance more than the MAX mark on the pot. Do not fill it more than half full for food that expands during cooking, such as rice, dehydrated vegetables.
Reduce the volume of water to avoid the risk of boiling over.
■ Please follow the recommendations on the volume of food and water to avoid the risk of boiling over which can damage your appliance and cause injury. ■ Before using your appliance, check that the float valve and the pressure limit valve are clean (see section Cleaning and maintenance).
■ Do not place any foreign objects in the pressure relief system. Do not replace the valve. ■ When you open the lid, always hold it by the lid handle. Position your arms in alignment with the side carrying handles. Boiling water could remain trapped between the gasket support and the lid and could cause burns.
■ Be careful also about the risk of scalding from the steam coming out of the appliance when you open the lid. First open the lid very slightly to allow the steam to escape gently. ■ Never force the appliance open. Make sure that the inside pressure has returned to normal. Do not open the lid when the product is under pressure. To do so, see the Instructions for use.
■ Use only the appropriate spare parts for your model. This is particularly important for the sealing gasket, the cooking pot and the metal lid. ■ Do not damage the sealing gasket. If it is damaged, have it replaced in an Approved Service Centre. ■ The steamer base for cooking is already integrated into the appliance. - Do not place the appliance in a heated oven or on a hot hob. Do not place the appliance close to an open flame or a flammable object. ■ Do not heat the cooking pot with any other heat source than the heating plate of the appliance and do not use any other pot. Do not use the cooking pot with other appliances. ■ Move the appliance with great care when it is under pressure. Do not touch the hot surfaces. Use the carrying handles when moving it and wear oven mitts, if necessary. Do not use the lid handle to lift the appliance.
■ Do not use appliance for other than the intended purpose.
■ This appliance is not a sterilizer. Do not use the appliance to sterilize preserving jars.
■ The appliance cooks food under pressure. Incorrect use may cause risks of burns due to steam.
■ Make sure that the appliance is properly closed before bringing it up to pressure (see Instructions for use).
- Do not use the appliance empty, without its pot or without liquid inside the pot. This could cause serious damage to the appliance.
■ After cooking meat which has an outer layer of skin (such as ox tongue), which could swell due to the effects of pressure, do not pierce the skin after cooking if it appears swollen: you could get burnt. Pierce it before cooking.
■ When cooking food with a thick texture (chick peas, rhubarb, compotes, etc.), shake the appliance slightly before opening it to ensure that the food or cooking juices do not spurt out.
■ Do not use the appliance to fry food in oil. Only browning is allowed.
In browning mode, be careful of risks of burns caused by spattering when you add food or ingredients into the hot pot.
■ During cooking and automatic steam release at the end of cooking, the appliance releases heat and steam. Keep your face and hands away from the appliance to avoid scalding. Do not touch the lid during cooking.
■ Do not use a cloth or anything else between the lid and the housing to leave the lid ajar. This can permanently damage the gasket.
■ Do not touch the safety devices, except while cleaning and maintaining the appliance in accordance with the instructions given.
■ Make sure that the bottom of the cooking pot and the heating element are always clean. Make sure that the central part of the heating plate is mobile.
■ Do not fill up your appliance without its cooking pot.
■ Use a plastic or wooden spoon to prevent any damage to the non-stick coating of the pot. Do not cut food directly in the cooking pot.
If a great deal of steam is released from the rim of the lid, unplug the power cord at once and check whether the appliance is clean. If necessary, send the appliance to an Approved Service Centre for repair.
■ Do not carry the appliance by holding it by the handles of the removable pot. Always use the two side handles on the housing of the appliance. Wear oven mitts if the appliance is hot. For more safety, make sure that the lid is locked before transporting the appliance.
If pressure is released continuously through the valve of the appliance (for more than 1 minute) while pressure cooking, send the appliance to a service centre for repair.
■ Do not use a damaged appliance. Take it to your approved service centre.
SAVE THESE INSTRUCTIONS CAREFULLY.
■ Use only spare parts sold in an approved service centre. ■ The warranty does not cover the abnormal wear and tear of the cooking pot. - Read these instructions for use carefully before using your appliance for the first time. Any use which does not conform to these instructions will absolve the manufacturer from any liability and void the warranty. In accordance with current regulations, before disposing of an appliance no longer needed, the appliance must be rendered inoperative (by unplugging it and cutting off the supply cord).

Environment protection first!
① Your appliance contains valuable materials which can be recovered.
Leave it at a local civic waste collection point.
- Your appliance contains valuable materials which can be recovered. - Leave it at a local civic waste collection point.
BEFORE USE

Remove the appliance from its packaging and read the instructions carefully before using the product for the first time.
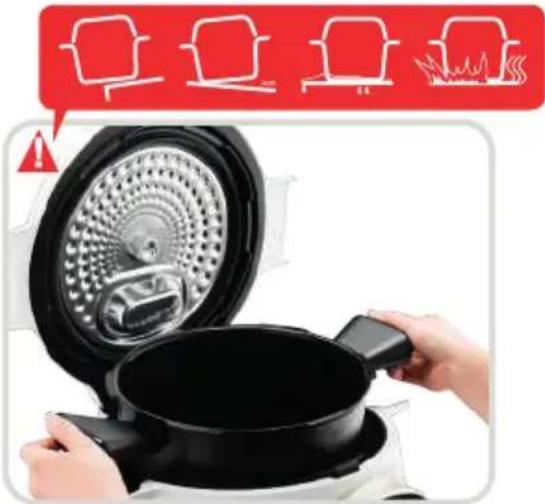
Install the appliance on a flat, dry and cold surface. Remove all the packaging, stickers or different accessories inside and outside the appliance.

To open the product, turn the open/close handle on top of the lid, until the marking is in line with the open padlock.




CLEAN THE DIFFERENT COMPONENTS
- Cooking pot
- Metal lid
- Valve cover
- Condensation trap
- Steam basket
- Decompression ball
HOW TO DISASSEMBLE AND REASSEMBLE THE LID

HOW TO DISASSEMBLE THE METAL LID:
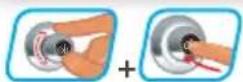
Grip the lid sub-assembly holding it by the seal, and unscrew the central nut in an anticlockwise direction. Remove the nut then the lid.

HOW TO TAKE THE VALVE COVER OFF:
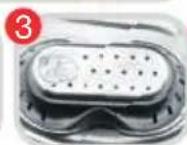
Clasp the valve cover by its middle part (as shown); then turn it slightly to unclip it. Clean the valve cover, paying special attention to the inside (check that there is no left over food).

ACCESSING THE DECOMPRESSION BALL:
Turn the ball cover, anti-clockwise, so as to bring the I marker into position 📞. Lift the cover up. Remove the ball, and gently clean it, along with its seat, with water and some washing-up liquid. Dry the ball using a soft cloth, then put it back in position. Put the ball cover back in place, and the marker I in position 🔒. Lock it by turning the ball cover so that the marker is opposite the pictogram “closed” 🔒

PUTTING THE METAL LID SUB- ASSEMBLY BACK IN TO PLACE:
Grip the lid sub-assembly by the seal as shown in the picture. Line up the lid with the central axis and press it flat against the sub-assembly. Put the nut back on and turn it clockwise, tightening it as far as it will go.

PUTTING THE VALVE COVER BACK:
Take the valve cover as shown in the picture (gripping the middle). Line up the interior circular shape with the three hooks and then push so that the valve cover clips on (you should hear a "clip" sound). The valve cover must be right up against the inside of the lid.

OPERATION
When turning on for the first time, you will access the settings menu:

Select your language

Select your country

USE
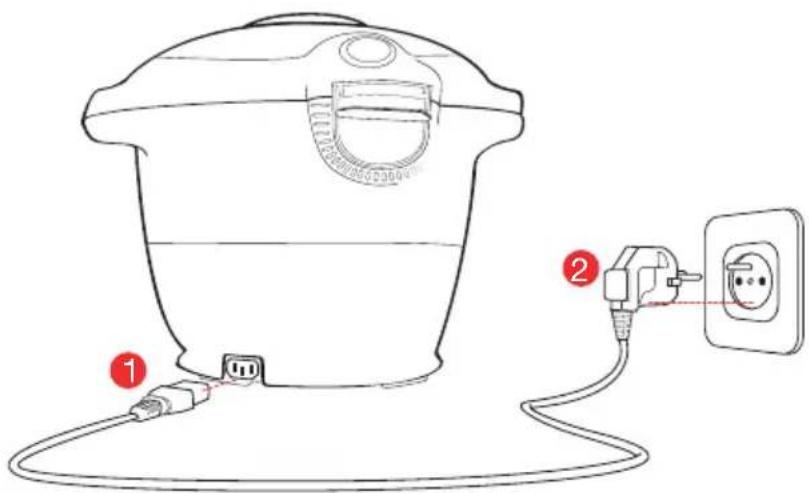
Never use the appliance without the cooking pot.
When using your appliance for the first time, the pot can release a slight odour. This is normal.

OPENING THE LID:
To open the product, turn the open/close handle so that the marking is in line with the open padlock. Never try to force the lid to open if it is stuck.

INSTALLING THE CONDENSATION TRAP:
Check that the condensation tank is empty then install it behind the appliance.

POSITIONING THE POT IN THE APPLIANCE:
Wipe the bottom of the cooking pot. Make sure there are no food remains or liquid under the bowl or on the heating plate.

OPEN/CLOSE INDICATOR:
When the indicator flashes, the lid is locked. When the indicator remains on, the appliance is pressurised; you can no longer open it.

INSTALLING THE STAND UNDER THE STEAM BASKET:
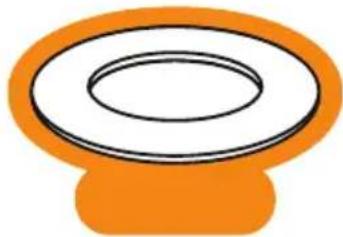
Nip the stand between your thumb and index finger to install under the steam basket.

Then install the pot in the appliance by positioning the bowl handles into the slots.

SETTINGS MENU

N.B.: each confirmation takes you back to the main menu. N.B.: even if the sound is deactivated, the alert sounds remain active.


"languages/countries"


Select your country


Select "screen/sounds"


Select "screen" Select "brightness"


Adjust the light

Select "demo mode"


To activate or deactivate the demo mode, please enter the code: 3424

Select "sounds"

Adjust the volume
N.B.: DEMO mode allows you to operate the product without heating or pressurising it.

MENU ON /OFF


Press YES/NO to turn the appliance on/off. Select and confirm.
PRESSURE
MANUAL MENU:
Use the "Manual" Menu to select cooking options. Choose your cooking option: Pressure Cooking, Classic Cooking (slow cooking, braising, roasting), Heat or Keep Warm.

Select the "manual" menu

Select the "Pressure Cooking" mode

Insert the pot then add the ingredients

Set the cooking time

Select immediate or delayed start (p.48)
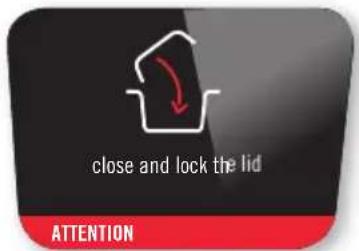
Close and lock

The appliance is preheating

Cooking has started

Cooking has finished

It's ready to try!


MANUAL MENU (COOKING MODE)
REGULAR
When using the "Classic Cooking" mode, you can further select the desired option:

Slow cooking

Braising

Roasting
depending on the desired result. The lid remains open for these types of cooking.
N.B.: The operation is the same, only the temperature is different.

Select the "manual" menu

Select the "classic cooking" function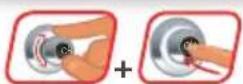

Select the desired function

Open the lid

Insert the pot
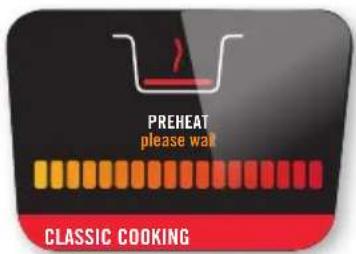
The appliance is preheating


To abort the browning process, press the Back button and select either stop or "Pressure Cooking"
REHEAT
N.B.: Reheating starts and the time increases.

Select the "manual" menu

Select the "reheat" mode

Insert the pot

Close and lock the lid

Reheating has started. To interrupt,

Do you want to stop reheating?

It's ready to try!

MANUAL MENU (COOKING MODE)
KEEP WARM
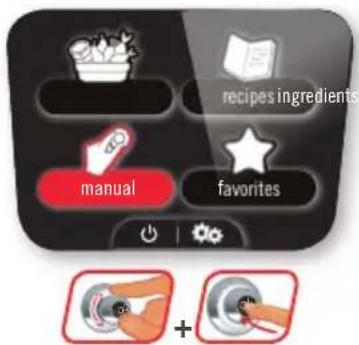
Select the "manual" menu

Select the "keep warm" function

Insert the pot

The appliance is preheating

The keeping warm function has started
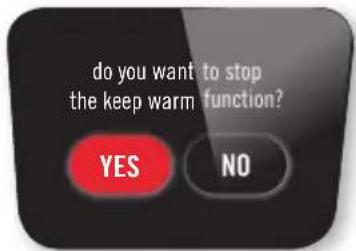
To abort the Keep Warm process, press the "Back" button and select "Yes"

MANUAL MENU (COOKING MODE)
DELAYED START (FAST COOK MODE)


Some foods cannot be cooked in Delayed start mode (e.g. meat, fish, milk, etc.). The cooking end time may vary according to the volume contained in the product.

Select "delayed start"
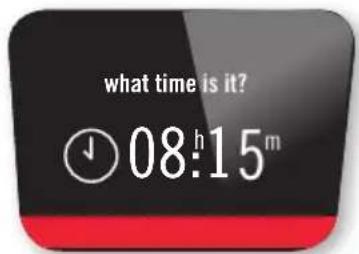
Select the current time
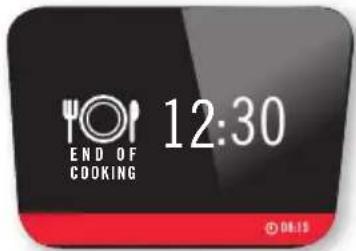
Select the end of cooking

Delayed start is programmed

INGREDIENTS MENU
INGREDIENTS MENU:
With the ingredients menu, cook your ingredients alone without you having to worry about the cooking mode or time: COOK 4 ME provides you with instructions for all weights and types of ingredients: meat, fish, vegetables, fruit and finally cereals.

Select the "ingredients" menu

Select
fruit & vegetables

Select broccoli

Select the required quantity of broccoli (min 300 g)

Start the recipe

Follow the instructions

The recommended cooking time is displayed

Select "immediate start"

Follow the instructions

Preheat

Start cooking

End of cooking

It's ready to try!

BEEF BOURGUIGNON RECIPE
RECIPE MENU:
In the Recipe Menu, you can choose between savoury and sweet recipes from three categories: Starter/ Main Course / Dessert

Select the recipe menu

Select the type of recipe

Select a recipe

Select the number of people

Show recipe

Prepare the ingredients

RECIPE MENU
RECIPE MENU: (CONTINUATION)
You can return to the initial menu by pressing the Back button for 30 seconds.


Start the recipe
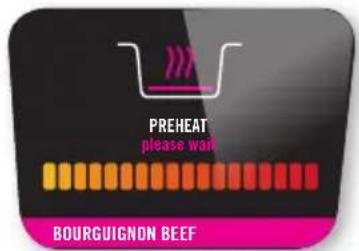
Preheating

Follow the instructions

Stop browning

Follow the instructions

Start the cooking

Cooking time

Preheating

It's ready to try!

INGREDIENTS

beef
lamb
pork
poultry
rabbit
veal

fish
mussels
scallops
shrimps/prawns
cod

barley
brown rice
buckwheat
bulgur
quinoa
wheat
millet
white rice
wild rice

artichokes
asparagus
aubergines
beetroot
broccoli
carrots
celery
cabbage
cauliflower
brussel sprouts
green cabbage
chard
courgettes
chicory
spinach
fennel
green beans
lentils
turnip
sweet potato
peas
pears
leeks
apples
potatoes
marrow
pepper
mushrooms
squash
RECIPE LIST
www.krups.com

Aubergine Caviar
Cream of Broccoli Soup
Mushrooms with Cheese Sauce
Pea & Mint Risotto
Glazed Carrots
Greek-Style Mushrooms
Hummus
Leek & Potato Soup
Mashed Potato
Minestrone
Ratatouille
Red Beet Dip
Tomato Soup
Vegetarian Pumpkin
Lemon Herb Sauce
Courgette & Parmesan Flan
Beef Bourguignon
Bolognese Sauce
Ham & Pea Risotto
Fettuccine carbonara
Flemish Beef Stew
Ragout of Lamb with Spring
Vegetables
Prawns with Coriander
Chicken with Green Curry
Chicken with Rice
Chicken-Courgette-Couscous
Couscous
Tasty Hamburger
Cod with Lentils
Veal with Lemon & Oregano
Veal Roulade with Tomato Sauce
Sauce
Salmon with Saffron
Leg of Lamb
Pineapple with Vanilla Syrup
Syrup
Apricot & Pineapple Dessert
Banana & Pear Mousse
Fruit Mousse
Stewed Apricot Halves
Spiced Pears
Coconut Milk Flan
Light Chocolate Cream
Vanilla Cream
Moist Chocolate Cake

FAVORITES MENU
SAVE A RECIPE AS A FAVOURITE
FAVORITE MENU:
With the favorites menu, create a link to your favorite recipes in the recipe menu.
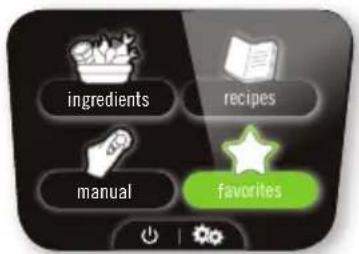
Select the "favorites" menu

Select "add"

Select the type of recipe
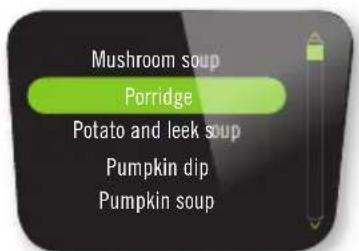
Select the recipe you want to appear as a favorite

Select the number of people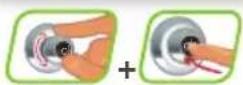

Select the required cooking time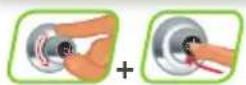

Select the "modify" menu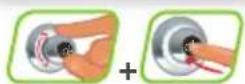

Change the number of people
N.B.: The "Modify" function allows you to adjust the cooking time and the number of people for a recipe already saved in the favorites.
PREPARE A RECIPE ALREADY SAVED AS A FAVORITE

Select the "favorites" menu

Select "my list"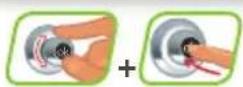

Select the recipe that you want to prepare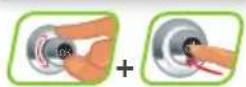

Follow the instructions as for a normal recipe
DELETE A RECIPE FROM THE FAVORITES MENU

Select the "favorites" menu

Select "delete"

Select the recipe you want to delete

Follow the instructions
CLEANING MAINTENANCE
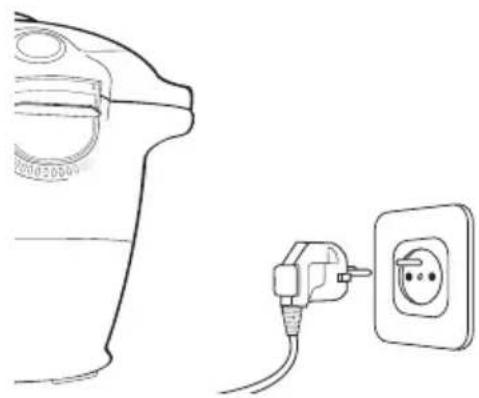
Once you have finished cooking your dish, disconnect the appliance to clean. Clean the appliance after each use.

After each use, remove the condensation trap and wash carefully in clear water or in the dishwasher. Take care to dry well. Return to its original position.

You can wash the cooking pot and steam basket in soapy hot water or in the dishwasher. Clean the body of the appliance using a damp cloth.
After several times in the dishwasher, the exterior of the tank may become discoloured. You may clean it using a scraper sponge.

To clean the metal lid, by hand or in the dishwasher, you need to remove the valve cover.
- Unscrew the screw at the centre of the metal lid
- Take off the metal lid
- Remove the valve cover

CLEANING IN THE DISHWASHER:
you can place the metal lid in the dishwasher, without removing the valves. After placing in the dishwasher, remove the ball and blow in the pipe to check that it is not blocked. Dry the ball and its support carefully using a soft cloth.

Before reinstalling the ball, check that the pipe is not blocked by blowing into it.

CLEANING BY HAND:
you can clean the metal lid using soapy hot water. Firstly, remove the ball then clean completely. Dry the ball and its support using a soft cloth.

Press on the internal part of the safety valve spring to check that it is not clogged.

Before removing the internal lid, clean the upper part of the cooking pot. Clean the inside of the appliance's metal lid using a damp sponge and check that the manometric rod is properly positioned to ensure that it is not blocked.
Rinse under water and check the mobility of the safety pin.

Replace the watertight seal at least every three years. This operation will be performed in an Approved Service Centre.

Do not store the appliance with the lid closed. Leave open or half open; this will prevent unpleasant odours.

In the event of accidental immersion of the appliance or if water is spilt directly on the heating element when the pot is not in position, take the appliance to an Approved Service Centre.

Transport the appliance using the two side handles. For greater safety, check that the handle is in the closed position. For greater safety, check that the lid is locked.

Clean the outside of the appliance's lid using a damp sponge. Clean the silencing valve at the back of the lid.
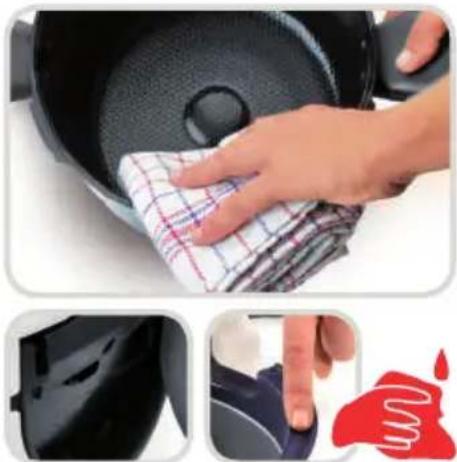
Clean the upper part of the cooking pot using a damp cloth. Clean the condensation trap using a damp cloth. Rinse under water and check that the manometric rod can move around.

Clean the seal on the metal lid using a damp cloth then rinse thoroughly. Do not use sharp objects.
| PROBLEMS POSSIBLE CAUSES SOLUTION | ||
| The lid does not close There are foreign bodies between the pot and the heating plate | Remove the pot, check that the heating plate, central element and under the pot are clean. Also check that the central element can move around | |
| The lid open handle is not correctly positioned | ||
| The metal lid and/or the tightening screw are not properly installed or fully screwed | ||
| The product does not decompress | The ball cover is not in place | Let the product cool completely and then remove the metal lid and position correctly the ball cover (fixed in the lock position) |
| The lid does not open once the steam is released | The manometric rod is still in the high position | After ensuring that no more steam is released and that the product is completely cold, insert a pick into the hole located between the open handle and the silencing valve. Be careful of steam being released once the stick is pushed in. When no more steam is released, try to open the appliance |
| The appliance does not become pressurised | Check that the seal, safety valve and manometric rod are clean | Clean your appliance by following the instructions provided in the instructions |
| Check that the lid is locked and the marking is properly aligned with the closed padlock. Check that the manometric rod can move around and if it needs cleaning | Check that the manometric rod can move around and if it needs cleaning | |
| The decompression ball is not positioned correctly or dirty | Check that the ball is correctly positioned and that the cover is in the locked position. Clean and dry the ball and its support | |
| PROBLEMS POSSIBLE CAUSES SOLUTION | ||
| ERROR CODES Code 24: the pressure decreases while pressure cooking Code 21 and 26: pressure fails to raise | Add liquid to your recipe (water, stock or a liquid sauce) 50-100ml at a time and re-start the recipe | |
| Steam is released from the sides of the lid during cooking (leaks) | The seal of the metal lid and/or the edges of the pot are dirty | Clean the sides of the pot and seal using a damp cloth. Do not use any sharp instruments |
| Wear, cuts and deformation of the seal | The seal must be changed every three years at most. Take your appliance to an Approved Service Centre | |
| Pot edges damaged Take your appliance to an approved service centre | ||
| The metal lid nut was not screwed enough | Tighten the nut to the metal lid center correctly | |
| Water flows behind the appliance | The condensation trap is not in position or is overflowing | Make sure that the condensation tank is properly positioned behind the appliance and that the flow pipe is not blocked |
| The safety valves and/or openings are obstructed | Verify that the tank is not too full and that there are no food that expand (see Safety Instructions booklet) | |
| The indicator is not flashing or does not come on | The LED is no longer working or the lid is not completely locked | Check that the product is completely locked. Take your appliance to an Approved Service Centre if the problem continues |
| The control panel does not light up | The appliance is not connected or is on standby | Check that the power lead is connected both to the appliance and the mains. Check that the appliance is not on standby by pressing the “OK” button |
| The appliance is damaged Take your appliance to an Approved Service Centre | ||
| Condensation appears on the indicator | There is condensation on the lid | Let the appliance dry in fresh air for a few hours |
| PROBLEMS POSSIBLE CAUSES SOLUTION | ||
| The metal lid can not be removed, it is blocked | The metal lid ball cover was not well positioned | Unscrew the nut in the metal lid center, and then press the prob into the center of the nut. This releases the lid and you can access the ball cover. Make sure it is well put back as the ball |
TROUBLESHOOTING TIPS FOR USB MODELS
| PROBLEMS POSSIBLE CAUSES SOLUTION | ||
| Key not recognised Key other | than KRUPS Use only KRUPS USB keys | |
| Active language different from that of the key | Go back to the settings of your appliance: select the language of the key | |
| Library memory full Delete a library | ||
| Nothing happens You are not | in the right menu | Go back to the main menu |
| Key or port damaged Contact customer service | ||


- DESCRIPTION
- EPC03 SERIES
- SAFETY INSTRUCTIONS
- CLEANING OF THE VARIOUS COMPONENTS
- REMOVING THE METAL LID
- REMOVING THE VALVE COVER
- CLEANING THE DECOMPRESSION BALL
- REINSERTING THE METAL LID SUB-ASSEMBLY
- OPENING THE LID
- INSERT CONDENSATE TRAY
- POSITION THE CONTAINER IN THE APPLIANCE
- CLEANING IN THE DISHWASHER
- MANUAL CLEANING
- TAKE THE TIME TO READ ALL THE FOLLOWING INSTRUCTIONS CAREFULLY
- SAVE THESE INSTRUCTIONS CAREFULLY
- ENVIRONMENT PROTECTION FIRST
- BEFORE USE
- CLEAN THE DIFFERENT COMPONENTS
- HOW TO DISASSEMBLE AND REASSEMBLE THE LID
- HOW TO DISASSEMBLE THE METAL LID
- HOW TO TAKE THE VALVE COVER OFF
- ACCESSING THE DECOMPRESSION BALL
- PUTTING THE METAL LID SUB- ASSEMBLY BACK IN TO PLACE
- PUTTING THE VALVE COVER BACK
- OPERATION
- USE
- INSTALLING THE CONDENSATION TRAP
- POSITIONING THE POT IN THE APPLIANCE
- OPEN/CLOSE INDICATOR
- INSTALLING THE STAND UNDER THE STEAM BASKET
- SETTINGS MENU
- MENU ON /OFF
- PRESSURE
- MANUAL MENU
- MANUAL MENU (COOKING MODE)
- REGULAR
- REHEAT
- KEEP WARM
- DELAYED START (FAST COOK MODE)
- INGREDIENTS MENU
- BEEF BOURGUIGNON RECIPE
- RECIPE MENU
- RECIPE MENU: (CONTINUATION)
- INGREDIENTS
- RECIPE LIST
- FAVORITES MENU
- SAVE A RECIPE AS A FAVOURITE
- FAVORITE MENU
- PREPARE A RECIPE ALREADY SAVED AS A FAVORITE
- DELETE A RECIPE FROM THE FAVORITES MENU
- CLEANING MAINTENANCE
- CLEANING BY HAND
Brand : KRUPS
Model : Cook 4 Me CZ700
Category : Saucepan