
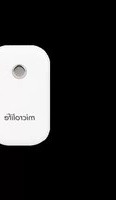
PF 100 - Medical device MICROLIFE - Free user manual and instructions
Find the device manual for free PF 100 MICROLIFE in PDF.


| Product type | Electronic upper arm blood pressure monitor |
| Brand | Microlife |
| Model | PF 100 |
| Dimensions (device) | Approximately 140 x 100 x 60 mm |
| Weight (device) | Approximately 340 g (without batteries) |
| Power supply | 4 AA batteries (1.5 V) or optional AC adapter |
| Measurement range | Pressure: 0 to 299 mmHg, Pulse: 40 to 199 beats/min |
| Accuracy | Pressure: ±3 mmHg, Pulse: ±5% |
| Memory | Up to 99 measurements with date and time |
| Main functions | Automatic measurement of blood pressure and pulse |
| Blood pressure indicator | WHO classification (color code) |
| Arrhythmia detection | Detection of irregular heartbeats |
| Automatic shut-off | Yes, after 1 minute of inactivity |
| Care and cleaning | Clean with a soft, dry cloth; do not immerse |
| Safety | Compliant with medical standards (CE 93/42/EEC) |
| Spare parts and repairability | Cuff available separately; repair by authorized center |
| General information | For home and professional use |
Frequently Asked Questions - PF 100 MICROLIFE
User questions about PF 100 MICROLIFE
0 question about this device. Answer the ones you know or ask your own.
Ask a new question about this device
Download the instructions for your Medical device in PDF format for free! Find your manual PF 100 - MICROLIFE and take your electronic device back in hand. On this page are published all the documents necessary for the use of your device. PF 100 by MICROLIFE.
USER MANUAL PF 100 MICROLIFE
Electronic Asthma Monitor
Instruction Manual
Important Safety Instructions

Type BF applied part

Batteries and electronic devices must be disposed of in accordance with the locally applicable regulations, not with domestic waste.

Ensure that children do not use the device unsupervised; some parts are small enough to be swallowed. Be aware of the risk of strangulation in case this device is supplied with cables or tubes.

Keep dry
Table of Contents
EN
1. Introduction
1.1 Intended Use
1.2 Environment of Use
1.3 Contraindications
-
Your Microlife Asthma Monitor
-
Preparation for your first measurement
3.1. Inserting the Batteries
3.2. Setting Date and Time
-
Carrying out a Measurement
-
Important Information for Measurement and Control of your Peak Flow Values
-
Self-Assessment with the Traffic Light Scheme
-
Cleaning and Disinfecting
7.1. Cleaning / Disinfecting the Mouthpiece
7.2. Cleaning / Disinfecting the Measuring Tube
7.3. Cleaning the Main Unit
-
Memory Handling
-
Analysing Data using Computer Interface
-
Messages / Malfunctions / Errors
-
Battery Replacement
-
Care and Safety Information
-
Guarantee
-
Technical Specifications
-
www.microlife.com
1. Introduction
Your new Microlife Monitor is a high quality medical device that measures your maximum possible exhalation which is called «peak flow» (referred to in medical terms as PEF – Peak Expiratory Flow).
Regular monitoring of your peak flow is extremely useful for controlling diseases of the airways such as asthma or chronic bronchitis. After the peak flow result is shown, a further value (for FEV1) will then be indicated. This value is also of interest for your doctor.
The measurements can be performed on your own, because the Microlife Monitor is very simple to use. It is as suitable for children in the pre-school age as for the elderly. Because the device has an automatic memory of 240 data entries, you do not need to note the values down; simply take the device with you the next time you visit your doctor. The device can be connected to a computer, and the values can be analysed by using the Microlife Asthma analyser software program.
Read through this instruction manual carefully before using the device and then keep it in a safe place.
1.1. Intended Use
Microlife Peak Flow Meter is a medical device intended for measuring peak expiratory flow (PEF) and forced expiratory volume in 1-second (FEV1). The device can be used by patients to take PEF and FEV1 measurements in both pediatric and adult patients.
- Peak Expiratory Flow (PEF) is the fasted speed air can be blown out of the lungs after a full inhalation.
- Forced Expiratory Volume in 1-second (FEV1) is the volume of air from exhalation in 1-second after a full inhalation.
Peak expiratory flow (PEF) and forced expiratory volume in 1-second (FEV1) are pulmonary function measurements indicative of the amount of air flow coming out of patient's air way during forced exhalation, which are used to track air way functions and to detect air way obstructions. These metrics are useful for monitoring respiratory conditions and diseases, including asthma and chronic obstructive pulmonary diseases (COPD).
1.2. Environment of Use
Microlife Peak Flow Meter is designed for home use, by patients (self-measurement or use under supervision) in a home setting. Please refer to the Technical Specification section for details about operating conditions and storage conditions.
1.3. Contraindications
This device is not suitable for self-measurement by patients who are unable to conduct the measurements correctly, for examples:
• Patients unconscious or in disabling conditions that does not allow correct self measurement operating conditions.
- Bedridden patients unable to stand or sit upright as required for correct measurement.
• Patients whose mouth cannot cover the mouthpiece as required for correct measurement, for instance very young children.
2. Your Microlife Asthma Monitor
The illustration shows the Microlife Asthma Monitor

3. Preparation for your first Measurement
Before your first use we recommend that you disinfect the mouthpiece as explained in this manual.
3.1. Inserting the Batteries
-
Please open the Battery Compartment from underneath and insert the two batteries (1.5V, size AAA).
-
Please watch the polarity as indicated by the symbols in the compartment.

3.2. Setting Date and Time
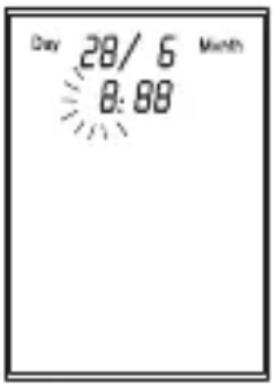
The monitor automatically records the time and date of each measurement. After new batteries have been inserted, the time/date display shows the following setting: year: 2002; day 01, month 01 and time 00:00 o'clock.
You must then re-enter the date and current time.
To do this, proceed as follows
(Example: Entering 15th June 2002, 09:50 o'clock):
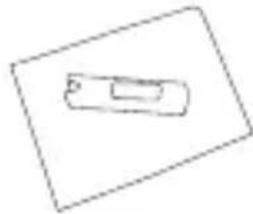
- Please open the Data Compartment from underneath at the position of the data symbol indication.
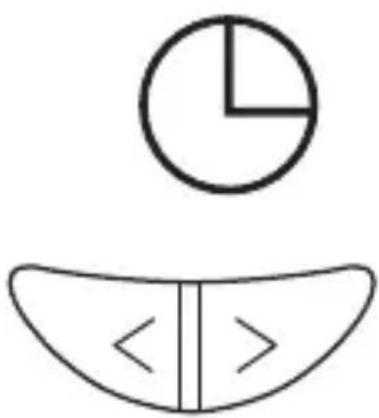
- Press the small time switch next to the clock symbol with a pen and «2002» starts blinking; release the switch.
- Using the two arrow keys on the front of the monitor you can decrease (left arrow button) or increase (right arrow button) the number. Release the arrow button when the correct number is reached.
- Press the time switch again to confirm the year setting and move to the month setting. The month digits blink.
- The current month can now be entered by pressing the arrow button. (Example: pressing 5 times the right arrow button advances to 06 for June)
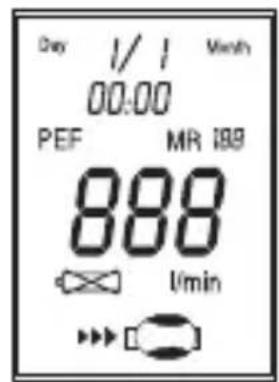
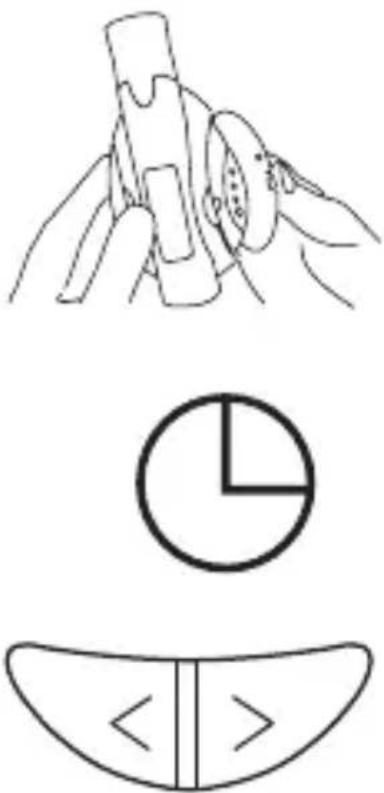

- Press the time switch again to confirm the month setting and move to the day setting. The day digits blink.
- The current day can now be entered by pressing the arrow button. (Example: pressing 14 times the right arrow button advances to 15 for 15th June)
- Press the time switch again to confirm the day setting and move to the hour setting. The hour digits blink.
- The current hour can now be entered by the arrow button. (Example: pressing 9 times the right arrow button moves to 09 for 09 o'clock)
- Press the time switch again to confirm the hour setting and move to the minute setting. The minute digits will now blink.
- The current minutes can now be entered by pressing the arrow button. (Example: pressing 9 times on the left arrow button moves to 50 for 09:50 o'clock).
- Press the time switch again to confirm all settings. Date and time are now stored, the clock starts running and the monitor switches to «ready» state condition which enable your first measurement.
- Close the data compartment.


Please note:
- If you hold down the arrow key for more than 2 seconds it speeds up.
- Date /time can also be set easily from computer when you run the Microlife Asthma Analyser Software.
4. Carrying out a Measurement
- When different people use this meter their individual readings cannot be assigned to different users when the data is stored.
- If time/date is not set, measurements can not be performed.
- If another person intends to use the device permanently, all data from the previous user should be erased as explained in this manual.
-
In case another user has already used the monitor, we recommend disinfecting the measuring tube as explained in this manual. In this case we also recommend that each user uses a new mouthpiece. Extra mouthpieces can be ordered through your Microlife dealer.
-
PresstheON/OFF button to turn the monitor on. At first, the last result of the memory is shown («0» if there are not yet data) and then the device indicates «READY» for a measure ment by two short beeps and blinking arrows.
-
You can perform the measurement while standing or sitting upright. For better compa rison of your data you should always perform the mea- surement in a similar position.
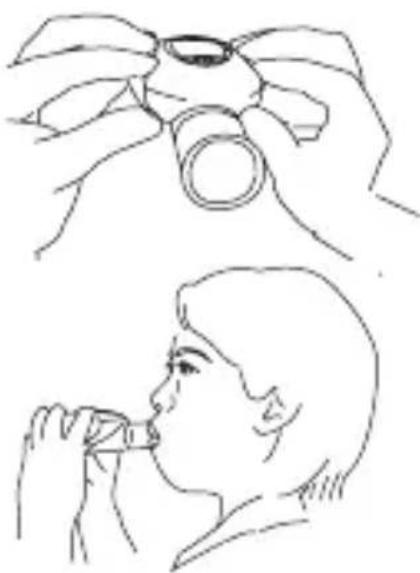
- Hold the monitor with both hands on the two rubber areas (compartments).
- Inhale completely and hold your breath for a moment.
- Cover the mouthpiece tightly with your lips.
- Blow into the measuring tube as hard and as fast as you can.
- A long beep confirms that the result is recorded. The peak flow value is displayed for about 3 seconds, then the FEV1 is shown. Afterwards the monitor is ready for a new measurement which is indicated by two short beeps.
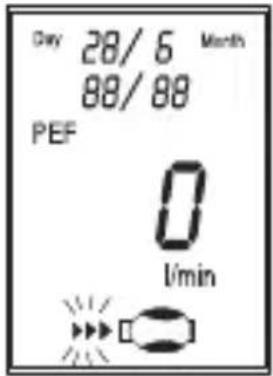


- It is recommended to perform three or more measurements sequentially. Please note that the monitor only saves the highest reading from switching the device on until switching it off.
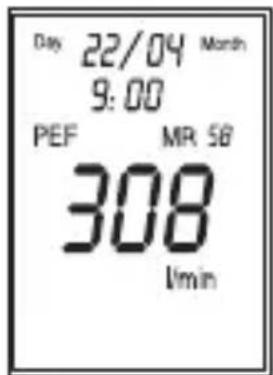
- After each measurement, at first the actual reading is shown in the display and then it switches automatically to the highest reading of your current measurement session.
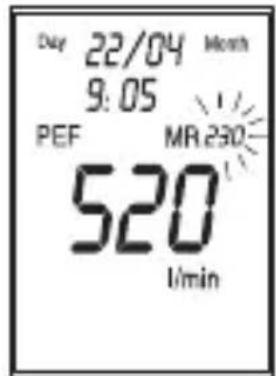
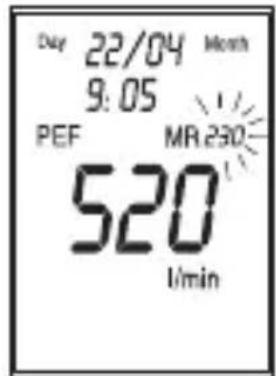
- Press the ON/OFF button to switch the monitor off. Before the monitor switches off, the highest value and its related memory position «MR xx» is displayed.
- Store the monitor in a clean and dust free place.
Traffic light indicator on the device
After the measurement, a small arrow in the display will indicate if the reading is in the green, yellow or red range.

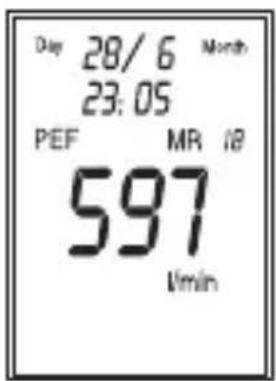
500 l/min is defined as reference value.
If a reading is above 80% (>400 l/min) of the reference value, it will be indicated in the green range. A reading in the yellow range indicates a reading between 60% and 80% (300 l/min - 400 l/min) of the reference value. A reading in the red range indicates a reading below 60% (<300 l/min) of the reference value.
It would be best to determine the area limits together with your physician and when required these ranges can be set manually within the software.
5. Important Information for Measurement and Control of your Peak Flow Values
- It is necessary to keep regular control of your peak flow values. Doctors generally recommend taking one measurement in the morning and one in the evening, every day, normally before inhaling your prescribed medication.
Carry out additional measurements whenever you feel unwell or perceive shortness of breath. - Your doctor is only interested in the highest peak flow value that you can achieve during a measurement session. Please repeat the measurements until you feel
you have got the best possible result for the moment. Take care to have sufficient relaxation between measurements. In case of poorer results at each successive measurement session talk to your doctor. It may be a sign of instable asthma.
- Please note that asthma attacks are indicated in advance by low peak flow values before you feel it! Please contact your doctor in cases such as these. Also do so if you have signs and symptoms such as chest tightness, shortness of breath coughing or wheezing.
- Self-measurement means control, not diagnosis or treatment. In any event, please be sure to discuss your measured values with your doctor. Your doctor will also explain which values are normal for you.
- You should never alter the dosages of any medication without talking to your doctor.
- Please note that the device stores up to 240 measured values with date and time. When the memory is full, the oldest values are automatically erased! Make sure you visit your doctor in time to analyse your data.
- Please confirm that date and time settings are always actual.
- The performance of the monitor can be affected by extremes of temperature and humidity. Please refer to «technical specifications» for details.
6. Self-Assessment with the Traffic Light Scheme
The so-called «traffic light scheme» allows you to self-assess your measured values and the course of your illness. This leads to an independent assessment of your illness symptoms with adjustment of your medication. If you or your physician wish to make use of this scheme, an asthma control card is enclosed with the device, on which a green, a yellow, and a red area are marked. The area limits should best be determined together with your physician and entered into the card.


Significance of the Traffic Light Scheme
Green area – OK
The lung disease is well under control. A higher medication dosage is not required.
Yellow area – Caution
Should your measured values frequently be located in this area, increase your medication dosage as discussed with your physician.
Red area – Danger
It is dangerous if your measured values are in this area! Act as discussed with your physician or seek emergency medical treatment.
7. Cleaning and Disinfecting
7.1. Cleaning / Disinfecting the Mouthpiece
We recommend disinfecting the mouthpiece before your first use and at least once a week using the following procedure:
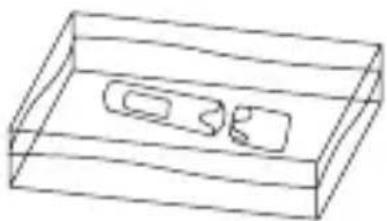
- Disconnect the mouthpiece from the measuring tube and put it for at least 10 minutes into continuously boiling water.
- Afterwards, put the mouthpiece on a fresh paper towel and let it air dry.
- Reassemble the mouthpiece on the measuring tube.
- Alternatively, you can disinfect the mouthpiece by putting it into commonly available disinfecting solutions. Please carefully follow the instructions for the disinfecting solution! Make sure that it is suitable for a mouthpiece.

7.2. Cleaning / Disinfecting the Measuring Tube
The performance of the monitor can be affected by spitting or coughing into the measuring tube. In this case please rinse the tube with distilled water (available at a pharmacy or drugstore). Please do not use tapwater.

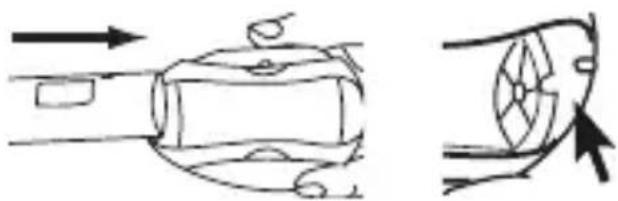
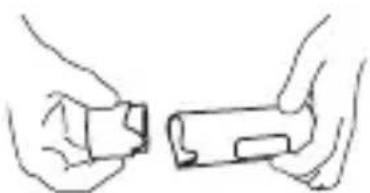
- Disconnect the measuring tube from the main unit by moving it in a forward direction.
- Disconnect the mouthpiece from the measuring tube.
- Rinse the tube in distilled water, afterwards please shake off the water and put it on a fresh paper towel for complete drying.
- In case another user has already used the monitor the measuring tube should be disinfected:
- Disconnect the tube as explained above and put it into a commonly available disinfecting solution. Please carefully follow the instructions for the disinfecting solution!
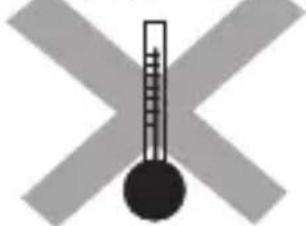
- Never put the measuring tube into boiling water!
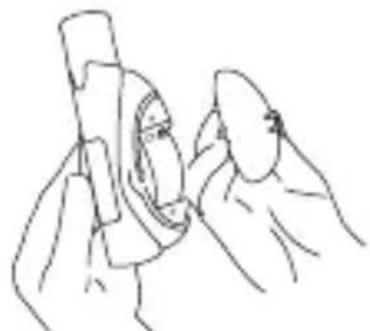
- Reconnect the mouthpiece to the measuring tube and reassemble it back to the main unit as shown. Make sure that the tube finally «clicks» into the fixed position.
- Please make sure that the mea surement tube and the device stay together by confirming that the identification on tube and device is the same.
7.3. Cleaning the Main Unit
Clean the main unit once a day with a clean, damp cloth. Never put the main unit into water!
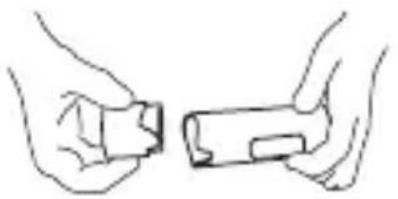
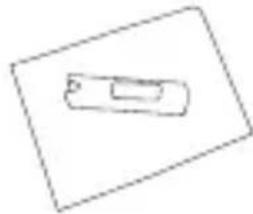

100°C/212°F


8. Memory Handling
The 240 measuring data can be reviewed on the display:
- Switch the monitor on and press the memory scroll buttons.
-
By pressing the «<» button, you can see the latest value stored in the memory with date and time; pressing this button once at a time shows all stored data. If you keep pressing the button you can move quickly through the memory.
-
The «>> button works in the opposite direction.
• Memory Capacity Low
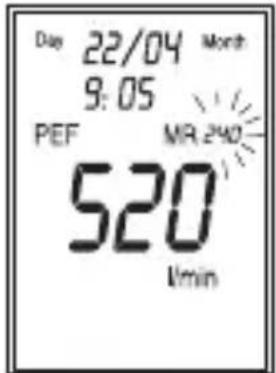
When the memory covers 230 or more data, «MR XX» is blinks after the monitor is switched on to indicate that the remaining memory capacity is low.
• Memory Full
When the memory is full with 240 data, the monitor gives a warning «beep» when switching on and «MR 240» is blinks. From now on, data is still memorised but the oldest values are automatically erased!
- MemoryClear
Please note: the memory is automatically cleared after data transfer to computer.


Clearing all data from the memory manually should be done when you intend to give the monitor to another person. To clear all data press the «<» and the «>> buttons simultaneously for 5 seconds, and then release the buttons. «clr» starts blinking in the display for about 3 seconds. If you really want to erase all data from memory you need to press the ON/OFF button during these seconds. Otherwise the monitor moves back to normal operation and the data remains.
• Clear the last measurement
You can erase the last memory reading by pressing both memory scroll buttons simultaneously for 5 seconds. After releasing the buttons «clr» will flash on the screen for 3 seconds. To erase the last reading you need to press both buttons again while the screen is flashing.
9. Analysing Data using Computer Interface
The monitor can be connected via a USB connection port with a computer and all memory data can be analysed by the Microlife Asthma Monitor software program. Download the free Microlife Asthma Analyser Software from www.microlife.com/support/software
10. Messages / Malfunctions / Errors
If an error occurs one of the following listed error codes is displayed.
| Message | Cause Remedy | |
| Er2 Data | communication between device and printer does not work. | Check the cable connection between device and printer. |
| no There is no data stored in the Monitor. | ||
| Hi The result is higher than 900 ml/min. This is a very good result. | ||
Other possible malfunctions
If problems occur when using the device, the following points should be checked:
| Malfunction Remedy | |
| The display remains empty. 1. | Check the polarity of the batteries (+/-). |
| Batteries have been installed. | 2. If the display is erratic or unusual, remove the batteries and re-install new batteries. |
| The instrument frequently fails to measure or the values measured are wrong. | 1. Ensure that the measuring tube is connected correctly.2. Check if when blowing into the tube, the wing wheel is rotating. Any objects, dust liquids or mucous may interfere the rotation of the wing wheel. In this case clean the tube as explained.3. Discuss the values with your doctor. |
If you have any questions regarding the use of this device, please ask your dealer or pharmacist for the Microlife Service representative in your country. The Microlife service team will be happy to help you.
11. Battery Replacement
When the battery low symbol appears in the display, the device is blocked until the batteries have been replaced. Please use 1.5 V «Long-Life» or «Alkaline» batteries, size «AAA». The use of 1.2 V Accumulator batteries is NOT recommended.
If the monitor is left unused for longer periods, please remove the batteries.
Please note that during battery exchange the data stored in the memory of the monitor is well protected and will NOT be lost.
After battery change (or when the unit has been disconnected from any power supply) time/date needs to be entered, again! Otherwise data can not be memorised.
12. Care and Safety Information
- Do not expose the device to extreme temperatures, humidity, dust or direct sunlight.
- Clean the device with a soft, dry cloth. Do not use gasoline, thinners or similar solvents. The measuring tube should not be washed in a dishwasher!
- Do not drop the instrument or treat it roughly in any way. Avoid strong vibrations.
- Never attempt to repair the instrument yourself. Any unauthorised opening of the instrument invalidates all guarantee claims!
- If the device received any knocks (dropping), you will recognise any malfunction or damages or you receive surprising results, it should be checked by the Microlife service representative in your country.
- Do not use this device if you think it is damaged or notice anything unusual.
- The function of this device may be compromised when used close to strong electromagnetic fields such as mobile phones or radio installations and we recommend a distance of at least 1 m. In cases where you suspect this to be unavoidable, please verify if the device is working properly before use.

13. Guarantee
This device is covered by a 2 year guarantee from the date of purchase. During this guarantee period, at our discretion, Microlife will repair or replace the defective product free of charge. Opening or altering the device invalidates the guarantee. The following items are excluded from the guarantee:
- Transport costs and risks of transport.
- Damage caused by incorrect application or non-compliance with the instructions for use.
- Damage caused by leaking batteries.
- Damage caused by accident or misuse.
- Packaging/storage material and instructions for use.
- Regular checks and maintenance (calibration).
- Accessories and wearing parts: Batteries, mouthpiece, measuring tube.
Should guarantee service be required, please contact the dealer from where the product was purchased, or your local Microlife service. You may contact your local Microlife service through our website: www.microlife.com/support Compensation is limited to the value of the product. The guarantee will be granted if the complete product is returned with the original invoice. Repair or replacement within guarantee does not prolong or renew the guarantee period. The legal claims and rights of consumers are not limited by this guarantee.
- Technical Specification
| Measuring range: PEF from 50 - 900 l/minFEV1 from 0.01 - 9.99 litres | |
| Measuring method: Rotating wing wheel | |
| Accuracy: PEF ± 20 l/min or 10% of the reading, whichever is greater.FEV1 ± 0.1 l or ± 5% of the reading, whichever is greater. | |
| Measuring resolution: PEF 1 l/min; FEV 1 0.01 l | |
| Data safety: data rememorised by EEPROM | |
| Memory: 240 measurements with date/time | |
| Size: 77 (W) x 144 (L) x 48 (H) mm | |
| Weight: 150g (with batteries) | |
| Storage conditions: -5 – +50 °C / 23 - 122 °F,10 – 90% relative maximum humidity | |
| Operation conditions: 10 – 40 °C / 50 - 104 °F,10 – 85% relative maximum humidity | |
| Power source: 2 batteries of 1.5 V, size AAA | |
| Battery lifetime: approximately 1000 measurements | |
| IP Class: IP20 | |
| Reference to standards: CE (EU Guidelines 93/42/EEC) EN60601-1, EN60601-1-2,EN ISO 23747, IEC60601-1-11, ATS standard 1994 update | |
| System requirements: Microsoft ® Vista, 7, 8, 550 MHz CPU,500 MB free hard disk, 256 MB RAM, 800 x 600 pixelresolution, 256 colour, CD-ROM drive or internet access foronline download, one free USB port | |
| Expected service life: | 5 years or 10000 measurements |
Technical modifications reserved!
15. www.microlife.com
Detailed user information about our products and services can be found at www.microlife.com


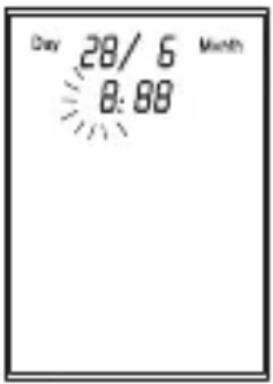


100°C/212°F






Remarque:


Description du programme «Feu tricolore»
Zone verte - OK

100°C/212°F



8. Mémoire





Beachte:



100°C/212°F





If you have any questions regarding the use of this device, please ask your dealer or pharmacist for the Microlife Service representative in your country. The Microlife service team will be happy to help you.
11. Battery Replacement
12. Care and Safety Information




Significato del semaforo del respiro
Zona verde: OK


100°C/212°F





Read the instructions carefully before using this device.
9F, 431, RuiGuang Road, NeiHu
Taipei 11492, Taiwan, China
www.microlife.com

Microlife UAB

P. Lukšio g. 32
08222 Vilnius
Lithuania
C€0044




- Electronic asthma monitor
- Instruction manual
- Important safety instructions
- Table of contents
- Introduction
- Intended use
- Environment of use
- Contraindications
- Your Microlife asthma monitor
- Preparation for your first measurement
- Inserting the batteries
- Setting date and time
- Please note
- Carrying out a measurement
- Traffic light indicator on the device
- Important information for measurement and control of your peak flow values
- Self-assessment with the traffic light scheme
- Significance of the traffic light scheme
- Green area – ok
- Yellow area – caution
- Red area – danger
- Cleaning and disinfecting
- Cleaning / disinfecting the mouthpiece
- Cleaning / disinfecting the measuring tube
- Cleaning the main unit
- Memory handling
- Analysing data using computer interface
- Messages / malfunctions / errors
- Other possible malfunctions
- Battery replacement
- Care and safety information
- Guarantee
- Www.Microlife.com
- Remarque
- Description du programme «feu tricolore
- Zone verte - ok
- Mémoire
- Beachte
- Significato del semaforo del respiro
- Zona verde: ok
Brand : MICROLIFE
Model : PF 100
Category : Medical device