
VRD-MC10 - Blu-ray player SONY - Free user manual and instructions
Find the device manual for free VRD-MC10 SONY in PDF.


| Product Type | Blu-ray player |
| Brand | Sony |
| Model | VRD-MC10 |
| Dimensions (W x H x D) | 430 x 55 x 250 mm |
| Weight | 3.5 kg |
| Power Supply | AC 120 V, 60 Hz |
| Power Consumption | 25 W (standby: 0.3 W) |
| Disc Playback | Blu-ray Disc, DVD, CD |
| Video Output | HDMI, Component, Composite |
| Audio Output | HDMI, Optical, Coaxial |
| Video Upscaling | Up to 1080p |
| Supported Video Formats | AVCHD, MPEG-2, MPEG-4, VC-1 |
| Supported Audio Formats | Dolby Digital, DTS, LPCM |
| Connectivity | USB, Ethernet |
| Remote Control | Included |
| Parental Control | Yes |
| Firmware Update | Via USB or network |
| Cleaning | Wipe with soft dry cloth |
| Safety | Do not expose to moisture |
| Spare Parts | Remote control, power cord |
| Repairability | Service by qualified technician only |
Frequently Asked Questions - VRD-MC10 SONY
User questions about VRD-MC10 SONY
0 question about this device. Answer the ones you know or ask your own.
Ask a new question about this device
Download the instructions for your Blu-ray player in PDF format for free! Find your manual VRD-MC10 - SONY and take your electronic device back in hand. On this page are published all the documents necessary for the use of your device. VRD-MC10 by SONY.
USER MANUAL VRD-MC10 SONY
Multi-Function DVD Recorder
Selecting copy mode 8
Introducing DVDirect 20
Preparations for Recording 29
Copying From a Camera 38
Copying From Video Devices 51
Viewing a Created Disc 57
Setup 66
Troubleshooting/References 71
Additional Information 80
Operating Instructions
VRD-MC10
AVCHD
MEMORY STICK™
HDMI
Safety Regulations
WARNING
To reduce the risk of fire or electric shock, do not expose this apparatus to rain or moisture.
Apparatus shall not be exposed to dripping or splashing and no objects filled with liquids, such as vases, shall be placed on the apparatus.
Do not install this equipment in a confined space such as a bookshelf or similar unit.
CAUTION:
Batteries or batteries installed apparatus shall not be exposed to excessive heat such as sunshine, fire or the like.
The use of optical instruments with this product will increase eye hazard. As the laser beam used in this multi function DVD recorder is harmful to eyes, do not attempt to disassemble the cabinet. Refer servicing to qualified personnel only.
This appliance is classified as a CLASS 1 LASER product. The CLASS 1 LASER PRODUCT MARKING is located on the bottom exterior.
CLASS 1 LASER PRODUCT
LASER KLASSE 1 PRODUKT
LUOKAN 1 LASERLAITE KLASS 1 LASER APPARAT
This label is located on the laser protective housing inside the enclosure.


This symbol is intended to alert the user to the presence of uninsulated “dangerous voltage” within the product’s enclosure that may be of sufficient magnitude to constitute a risk of electric shock to persons.

This symbol is intended to alert the user to the presence of important operating and maintenance (servicing) instructions in the literature accompanying the appliance.
This graphical symbol is located on the bottom of the unit.
Important Safety Instructions
1) Read these instructions. 2) Keep these instructions. 3) Heed all warnings. 4) Follow all instructions. 5) Do not use this apparatus near water. 6) Clean only with dry cloth. 7) Do not block any ventilation openings. Install in accordance with the manufacturer's instructions. 8) Do not install near any heat sources such as radiators, heat registers, stoves, or other apparatus (including amplifiers) that produce heat. 9) Do not defeat the safety purpose of the polarized or grounding-type plug. A polarized
plug has two blades with one wider than the other. A grounding type plug has two blades and a third grounding prong. The wide blade or the third prong are provided for your safety. If the provided plug does not fit into your outlet, consult an electrician for replacement of the obsolete outlet.
10) Protect the power cord from being walked on or pinched particularly at plugs, convenience receptacles, and the point where they exit from the apparatus. 11) Only use attachments/accessories specified by the manufacturer. 12) Use only with the cart, stand, tripod, bracket, or table specified by the manufacturer, or sold with the apparatus. When a cart is used, use caution when moving the cart/apparatus combination to avoid injury from tip-over.

13) Unplug this apparatus during lightning storms or when unused for long periods of time. 14) Refer all servicing to qualified service personnel. Servicing is required when the apparatus has been damaged in any way, such as power-supply cord or plug is damaged, liquid has been spilled or objects have fallen into the apparatus, the apparatus has been exposed to rain or moisture, does not operate normally, or has been dropped.
FCC Compliance Statements
This equipment has been tested and found to comply with the limits for a Class B digital device, pursuant to Part 15 of the FCC Rules.
These limits are designed to provide reasonable protection against harmful interference in a residential installation.
This equipment generates, uses, and can radiate radio frequency energy and, if not installed and used in accordance with the instructions, may cause harmful interference to radio communications.
However, there is no guarantee that interference will not occur in a particular installation.
If this equipment does cause harmful interference to radio or television reception, which can be determined by turning the equipment off and on, the user is encouraged to try to correct the
interference by one or more of the following measures:
- Reorient or relocate the receiving antenna.
- Increase the separation between the equipment and receiver.
- Connect the equipment into an outlet on a circuit different from that to which the receiver is connected.
- Consult the dealer or an experienced radio/TV technician for help.
You are cautioned that any changes or modifications not expressly approved in this manual could void your authority to operate this equipment.
The manufacturer of this product is Sony Corporation, 1-7-1 Konan Minato-ku Tokyo, 108-0075 Japan. The Authorized Representative for EMC and product safety is Sony Deutschland GmbH, Hedelfinger Strasse 61, 70327 Stuttgart, Germany. For any service or guarantee matters please refer to the addresses given in separate service or guarantee documents.
Notes on AC power adapter
- Please ensure that the socket outlet is installed near the equipment and shall be easily accessible.
- Be sure to use the supplied AC adapter and power cord.
- Do not use any other AC adapter. It may cause a malfunction.
- Connect the AC adapter to an easily accessible socket outlet.
- Do not touch the AC adapter with wet hands.
- Should you notice an abnormality in the AC adapter, disconnect it from the socket outlet immediately.
- Use a commercially available AC plug adapter, if necessary, depending on the design of the wall outlet.

- The set is not disconnected from the AC power source (mains) as long as it is connected to the wall outlet, even if the set itself has been turned off.
The nameplate is located on the bottom of the unit.
For Customers in U.S.A
Owner's Record
The product label is located on the bottom of the unit. Record the serial number in the space provided below. Refer to them whenever you call upon your Sony dealer regarding this product.
Model: VRD-MC10
Serial Number: ____
For the State of California, USA only
Perchlorate Material - special handling may apply, See www.dts.ca.gov/hazardouswaste/perchlorate Perchlorate Material: Lithium battery contains perchlorate.
For customers in the United Kingdom and Republic of Ireland
A molded plug complying with BS1363 is fitted to this equipment for your safety and convenience. Should the fuse in the plug supplied need to be replaced, a fuse of the same rating as the supplied one and approved by ASTA or BSI to BS1362, (i.e., marked with or mark) must be used. If the plug supplied with this equipment has a detachable fuse cover, be sure to attach the fuse cover after you change the fuse. Never use the plug without the fuse cover. If you should lose the fuse cover, please contact your nearest Sony service station.
Disposal of Old Electrical & Electronic Equipment (Applicable in the European Union and other European countries with separate collection systems)

This symbol on the product or on its packaging indicates that this product shall not be treated as household waste. Instead it shall be handed over to the applicable collection point for the recycling of electrical and electronic equipment. By ensuring this product is disposed of correctly, you will help prevent potential negative consequences for the environment and human health, which could otherwise be caused by inappropriate waste handling of this product. The recycling of materials will help to conserve natural resources. For more detailed information about recycling of
this product, please contact your local Civic Office, your household waste disposal service or the shop where you purchased the product.
- DVDirect, Handycam, CyberShot, Memory Stick and each logos are trademarks, or registered trademarks of Sony Corporation.
- AVCHD and AVCHD logo are trademarks of Sony Corporation and Panasonic Corporation.
- "PLAYSTATION" is a registered trademark of Sony Computer Entertainment Inc.
- Other system and product names used herein are registered trademarks or trademarks of their respective manufacturers, although the ™ and ® marks are not used in the text.
- Manufactured under license from Dolby Laboratories. Dolby and the double-D symbol are trademarks of Dolby Laboratories.
- The authorized software on this product is used under license from eSOL Co. Ltd.
- HDMI, High Definition Multimedia Interface and the HDMI logo are trademarks or registered trademarks of HDMI Licensing LLC.
Our product warranty is valid only when the supplied accessories are used in the specified or recommended system environment, in accordance with the documentation, and applies only to this DVDirect. Our customer service and user support apply only under these product warranty conditions. Please note that we cannot accept responsibility for failure of the computer or other devices, incompatibility with special hardware, operating problems caused by improper installation of software, loss of data, discs or other accidental or incidental damage that might occur when using this product. The guarantee and user support for this product are valid only within the countries or sales regions specified on the warranty card. Specifications may be changed without notice in the interest of product improvement.
Copyright
Television programs, films, video tapes, discs, and other materials may be copyrighted. Unauthorized recording of such material may be contrary to the provisions of the copyright laws. Also, use of this product with cable television transmission may require authorization from the cable television transmitter and/or program owner.
After-image lag
If you display a still image on a plasma or projection TV screen (except those of LCD screen types) for an extended period of time, "ghosting" after-image lag may occur. Static, non-moving images permanently on the TV screen if left on for an extended time.
Table of Contents
Safety Regulations ......2
Selecting copy mode
Find a type of copy mode ....8
Type of copy mode A Record HD (High Definition) video as is ....10
Type of copy mode B Record HD (High Definition) video taken by another digital video camera as is ..12
Type of copy mode C Down-convert videos to SD (Standard Definition) quality ....14
Type of copy mode ID Record SD (Standard Definition) video as is .....16
Type of copy mode Connect other video device and record SD (Standard Definition) video .....18
Recording photos from memory card ....18
Introducing DVDirect
About this manual....20
Features 22
Recording HD (High Definition) video 22
Recording SD (Standard Definition) video 22
Recording photos 22
Viewing a created disc 22
Before you begin.... 23
Package Contents ....25
Parts and Controls....26
Main unit.... 26
Remote control 28
Preparations for Recording
Turning the Power On 29
Inserting a Disc....30
Connecting Cables for Recording......31
USB cable 31
DV (i.LINK) cable 33
Audio/video cable (AV cable) 34
Memory Card 37
Copying From a Camera
Copying All Contents 38
Copying All Contents (from an 8cm disc) .... 40
Copying Only New Video/Photo...... 41
Copying Playlist 43
Copying Visual Index Lists...... 45
Copying Manually 47
One Touch Disc Burn...... 49
Copying From Video Devices
Copying All Contents (from a DV tape)...... 51
Copying All Contents (Photo)...... 52
Copying Manually 53
Copying Visual Index Lists (Photo) ..... 55
Viewing a Created Disc
Connecting to a TV 57
Viewing Videos 60
Viewing on a TV.... 60
Viewing on the DVDirect....61
Playing videos with the Disc Index function 62
Operation with remote control 62
Viewing Photos 63
Viewing on a TV.... 63
Viewing on the DVDirect....64
Playing a photo slideshow.... 64
Operation with remote control 65
Setup
Using the Setup Menu 66
Rec Quality (REC mode) 66
Auto Stop Timer.... 66
Auto Chapter 66
Auto Finalizing 67
Disc Menu 67
Slideshow Music....67
Troubleshooting/References
Troubleshooting.... 71
Supported Discs and Memory Cards.... 73
Recording Time and Video Lengths ..... 76
About Created Discs.... 78
Additional Information
Precautions.... 80
Specifications.... 81
Index....83
Find a type of copy mode
Depending on your video device or the type of disc you are creating, you can select the copy mode and device connection that best serves your needs.
Select the type of disc to create
- You can record videos and photos (JPEG files) onto the same disc depending on the copy mode selected.
- When you record photos taken with your digital still camera from its memory card onto a disc, see page 18.

I want to record HD (High Definition) video as is.
HD (High Definition) Disc (AVCHD format)
AVCHD format compatible device
Compatible players
Sony Blu-ray Disc player/recorder
PlayStation 3®
DVDirect

Not playable on DVD players/recorders.

I want to enjoy playback on various DVD players.
SD (Standard Definition) Disc
Compatible players
DVD player/recorder, Computer, DVDirect


Note
- Refer to "Notes on copying on discs" on page 23.
![graph TD A["Which device did you use to capture the video?"] --> B["Sony High Definition<br>Digital video camera<br>Digital still camera"] A --> C["Other High Definition<br>Digital video camera"] A --> D["Sony Standard Definition<br>Other Standard Definition<br>Digital video camera<br>Other video de…](/content/2026/06/1337680/images/c7b9de126b2ed5e706770381e82bb616db5e36b9149af8d77db4f26db2963f0c.jpg)
What is the recording media? Connection and setup
HDD
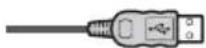
Use a USB cable
(supplied with camera or sold separately)
→ page 31

Built-in memory
Use a USB cable
(supplied with camera or sold separately)
→ page 31
8cm Disc
Use a USB cable
(supplied with camera or sold separately)
→ page 31

Memory Card
Insert a Memory Card into the slot *1
→ page 37

DV tape
Recording is not available.
You can record by down-converting to SD (Standard Definition). See Type of copy mode © (page 14) for details.
Select the copy mode and create a disc!

| One Touch Disc BurnPress the button on camera | Copying All ContentsThe entire contents of camera | Copying Only New Video/ PhotoOnly the new contents of camera | Copying Playlist*2Playlist contents on camera | Copying Visual Index ListsSelect by a scene/shooting date |
| page 49 | page 38 page 41 page 43 page 45 | |||
| page 49*3 | page 38 | page 41 | page 43 | page 45 |
| - | page 40 | - | - | - |
| page 49*4 | page 38 | page 41 | page 43 | page 45 |
*2 You cannot record photos. Copying Playlist is possible only with cameras that can create a playlist. *3 Built-in memory of "HYBRID Plus" Handycam® cannot be recorded by One Touch Disc Burn. *4 Recording possible only when connected to a camera via USB cable. Only some models support One Touch Disc Burn.
Note
- You cannot record HD (High Definition) video taken in REC mode at a bit rate exceeding 18Mbps, such as in [HD FX] mode (for example, High Definition Handycam®) in AVCHD format. In this case, you can record by down-converting to SD (Standard Definition) quality. See Type of copy mode © (page 14.)

Record HD (High Definition) video taken by another digital video camera* as is
* Not all camera operations are supported.

What is the recording media? Connection and setup
You cannot record by connecting a camera via a USB cable.
HDD

Built-in memory

8cm Disc

Memory Card

DV tape (HDV format)
Use a camera's function and copy videos and photos to memory card*

Insert a memory card into the slot
→ page 37

Recording is not available.
You can record by down-converting to SD (Standard Definition). See Type of copy mode ⓒ (page 14) for details.
Recording is not available.
You can record by down-converting to SD (Standard Definition). See Type of copy mode ⓒ (page 14) for details.
Select the copy mode and create a disc!

| Copying All ContentsThe entire contents of camera | Copying Visual Index ListsSelect by a scene/shooting date |
| page 38 page 45 |
Notes
- You cannot record HD (High Definition) video taken in REC mode at a bit rate exceeding 18Mbps, such as in [HD FX] mode (for example, High Definition Handycam®) in AVCHD format. In this case, you can record by down-converting to SD (Standard Definition) quality. See Type of copy mode © (page 14.)
- You cannot record by connecting another camera via a USB cable.

Down-convert videos to SD (Standard Definition) quality
You cannot record photos.

What is the recording media? Connection and setup
HDD
Use an AV cable
(supplied with camera or sold separately)
→ page 34

Built-in memory
Use an AV cable
(supplied with camera or sold separately)
→ page 34

8cm Disc
Use an AV cable
(supplied with camera or sold separately)
→ page 34

Memory Card
Use an AV cable
(supplied with camera or sold separately)
→ page 34

DV tape
Use an AV cable
(supplied with camera or sold separately)
→ page 34

Use a DV (i.LINK) cable
(supplied with camera or sold separately)
→ page 33

Select the copy mode and create a disc!

Copying Manually Recording while operating camera
page 47
page 47
page 47
page 47
page 53
Copying All Contents
The entire contents of camera
Copying Manually
Recording while operating camera
page 51 page 53
What is the recording media? Connection and setup
HDD
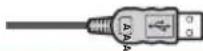
Use a USB cable
(supplied with camera or sold separately)
→ page 31
Built-in memory
Use a USB cable
(supplied with camera or sold separately)
→ page 31

8cm Disc
Use a USB cable
(supplied with camera or sold separately)
→ page 31

Memory Card
Insert a Memory Card into the slot *1
→ page 37

*1 You can record a video by connecting a camera via a USB cable.
DV tape
Use a DV (i.LINK) cable
(sold separately)
→ page 33

All of the above media
Other media
(8mm tape, MICROMV tape, etc.)
Use an AV cable
(supplied with camera or sold separately)
→ page 34

Select the copy mode and create a disc!

| One Touch Disc BurnPress the button on camera | Copying All ContentsThe entire contents of camera | Copying Only New Video/ PhotoOnly the new contents of camera | Copying PlaylistPlaylist contents on camera | Copying Visual Index ListsSelect by a scene/shooting date |
| page 49 | page 38 page 41 page 43 page 45 | |||
| page 49*3 | page 38 | page 41 | page 43 | page 45 |
| — | page 40 | — | — | — |
| page 49*4 | page 38 | page 41 | page 43 | page 45 |
| Copying\ All\ Contents*2 The entire contents of camera | Copying\ Manually*2 Recording while operating the camera |
| page 51 | page 53 |
| — page 47 |
*2 You cannot record photos. *3 Built-in memory of "HYBRID Plus" Handycam® cannot be recorded by One Touch Disc Burn. *4 Recording possible only when connected to a camera via USB cable. Only some models support One Touch Disc Burn.
Type of copy mode

Connect other video device and record SD (Standard Definition) video
You cannot record photos.

What is the recording media of your video device?
Connection and setup for your video device
You cannot record via a USB cable.
Video device with DV connector, capable of outputting DV signals
Use a DV (i.LINK) cable (sold separately)
→ page 33

Video device with AV OUT
Use an AV cable (supplied with DVDirect or sold separately)
→ page 34

Recording photos from memory card
Photos are recorded as a JPEG file.
Recorded memory card Connection for your memory card
"Memory Stick Duo" "Memory Stick" SD Card xD-Picture Card CompactFlash
Insert a Memory card into the slot
→ page 37
Select the copy mode and create a disc!

| Copying All ContentsThe entire contents of camera | Copying ManuallyRecording while operating the camera |
| page 51 page 53 | |
| — | page 53 |
Select the copy mode and create a disc!

| Copying All ContentsThe entire contents of camera | Copying Visual Index ListsSelect by an index/shooting date |
| page 52 page 55 |

About this manual
Before you start recording video or photo contents to a disc, read the "Selecting copy mode" pages. "Selecting copy mode" shows you the required connections for your device and guides you through the recording process.
Selecting copy mode (page 8)
Use the chart "Find a type of copy mode" (page 8) to determine a method appropriate for your device, and the type of disc you wish to create. Next, use the "Type of copy mode (A - E)" on pages 10 through 18 to determine the connection and device operation.

Preparations for Recording (page 29)
Connect your device to the DVDirect as instructed in the "Type of copy mode (A - E)." Configure your device if necessary.

Copying (pages 38, 51)
Select an available copy mode (A - E) best suited to your needs. Follow the instructions on the page referred to in this manual.

Viewing a Created Disc (page 57)
When recording is complete, connect the DVDirect to a TV and enjoy viewing your created discs.
Icons
In this manual, section headings have different icons depending on the device or operation. Use these icons to determine the connection or device operation.
Type of devices
| Icon Meaning | |
| Sony Camera | Sony digital video camera or Sony digital still came |
| Other Camera | Other digital video camera |
| Video Device | Video device with audio/video outputs |
Type of media
| Icon Meaning | |
| HDD | Functions available for camera recording to hard disk |
| Built-in Memory | Functions available for camera recording to built-in memory |
| 8cm Disc | Functions available for camera recording to 8cm disc |
| Memory Card | Functions available for camera recording to “Memory Stick Duo,” SD card, etc. |
| DV Tape | Functions available for camera recording to DV or D8 (Digital8) tapes |
About Handycam®
In this manual, Handycam® refers to a Sony camcorder. High Definition Handycam® refers to an HD (High Definition) compatible camcorder.
About Images
In this manual, “images” refer to both photos (still images) and videos.
About the DVDirect
In this manual, "DVDirect" refers to the VRD-MC10.
About illustrations
The on-screen display illustrations used in this manual may not match the graphics displayed on your screen.
Features
You can easily record videos or photos using the DVDirect.
![graph LR A["Camera"] --> B["PSY"] B --> C["Image Collection"] C --> D["Photo Records"] D --> E["Scanned Images"] style A fill:#f9f,stroke:#333 style B fill:#ccf,stroke:#333 style C fill:#cfc,stroke:#333 style D fill:#fcc,stroke:#333 style E fill:#cff,stroke:#333](/content/2026/06/1337680/images/decf542e639019bbf59eecf502ccfdfb6c1bfb4f042edf0ca602345b7983d746.jpg)
Recording HD (High Definition) video
You can record HD (High Definition) videos taken with a Sony digital video camera or digital still camera. Created discs can be played on an AVCHD compatible device. For details about AVCHD disc compatibility, see “Notes on HD (High Definition) disc compatibility” on page 24.
Recording SD (Standard Definition) video
You can record video from various cameras and AV devices directly onto discs in SD (Standard Definition) image quality. Created discs can be played on DVD players and other DVD devices.
Recording photos
You can archive photos from a memory card, or a connected Sony camera directly onto a disc. When you use a camera or memory card containing videos and photos, you can archive both videos and photos on the same disc.
Viewing a created disc
You can use the DVDirect to play back and check a created video/photo disc. Simply view it in the display window of the DVDirect, or connect the DVDirect to a TV. The DVDirect can also play back photos as a slideshow. When connecting a High Definition TV to the DVDirect with an HDMI cable, you can view HD (High Definition) videos in their original High Definition image quality.
Before you begin
Notes on the supported device and the image
The DVDirect supports the following copying.
• HD (High Definition) video
- High Definition (AVCHD format) video taken by a Sony digital video camera
- High Definition (AVCHD format) video taken by a Sony digital still camera
- High Definition (AVCHD format) video taken by an other digital video camera* 1
• SD (Standard Definition) video
- Standard Definition video taken by a Sony digital video camera
- Video from various video devices (video device with audio/video output)
- Photos
- Photos (JPEG format) taken by a digital video camera
- Photos (JPEG format) taken by a digital still camera
*1 See the following web site for details on supported camera models (English only): http://sony.storagesupport.com
The ability to copy depends on your device, recording media, type of video/photos or disc type you are creating. For details, see page 8 and select the corresponding connection and operation.
Notes on copying on discs
- You cannot copy:
- Videos with copy-protection signals (commercial DVDs, VHS software, some programs from satellite or CATV receivers, etc.).
- Videos to a disc (unfinalized) created with a device other than the DVDirect.
- You cannot record video unsupported by DVDirect via USB or a memory card inserted into the DVDirect's slot (for example, MPEG1 or MPEG4, other than AVCHD, etc. taken with a mobile phone or web-camcorder). You can record video using A/V cable.
- Videos will be recorded in SD (Standard Definition) quality, because HD (High Definition) is unavailable when recording:
- HD videos recorded in REC mode at a bit rate exceeding 18Mbps, such as in [HD FX] mode (for example, High Definition Handycam®) in AVCHD format.
- HD videos recorded on a DV tape using Sony High Definition Handycam® (HDV format).
- HD videos recorded with an HD (High Definition) compatible camera other than AVCHD format.
- If you erase or edit a video on a camera with a computer or PlayStation®3, you may not be able to copy videos properly by connecting the camera to the DVDirect. Use the camera to erase or edit video.
Notes on copying multiple types of image
- The DVDirect will copy photos and videos onto discs in the following order:
Photos
HD (High Definition) videos
SD (Standard Definition) videos
- SD (Standard Definition) videos and HD (High Definition) videos will be recorded on separate discs.
- Photos and videos are recorded on the same disc.
- Depending on the disc inserted in the DVDirect for recording and type of images to copy, the order may differ, or a new disc may be needed.
Viewing discs with the DVDirect
- You can only play discs recorded with the DVDirect.
- You cannot play commercial DVDs, or discs recorded on a device other than the DVDirect.
- You cannot play an 8cm disc or a memory card.
- The DVDirect does not have a speaker. There is no sound during playback.
Notes on HD (High Definition) disc compatibility
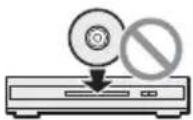
- An HD (High Definition) disc cannot be played on an AVCHD incompatible DVD player or recorder.
- Do not insert an HD (High Definition) disc in an AVCHD incompatible DVD player or recorder. The DVD player or recorder may fail to eject the disc and may erase its contents.
- An HD (High Definition) disc can be played on a compatible Blu-ray Disc player/recorder, PlayStation 3® or other compatible device.
Type of created disc and compatible devices
HD (High Definition) disc (containing High Definition videos)
No Yes
DVD device AVCHD format

compatible device
Yes

Computer*
SD (Standard Definition) disc (containing Standard Definition videos)
Yes

DVD device AVCHD format

compatible device
Yes
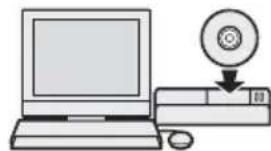
Computer
* Install the AVCHD compatible application on your computer beforehand. Even in the case of a computer environment that satisfies system requirements, there may be noise in video playback, frames may be dropped, or sound may be lost intermittently. (This does not depend on the quality of the created disc.)
Note on the screen of the connected TV
Only images or operation display can be displayed on the TV screen during playback. Images other than playback cannot be displayed on the TV screen.
Package Contents
Please confirm that the package contains the following items.
If any of these items are missing or damaged, please contact your dealer.
The number in parentheses indicates the number of items.
VRD-MC10 (DVDirect) (1)

Remote control unit (1)
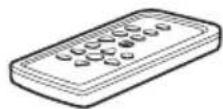
The remote control has a button-type lithium battery built in.
AC adapter (1)

AC power cord (1)
Audio/video cable (1)
Operating Instructions (this document) (1)
Warranty card (1)
Note
- Use an AC power cord appropriate to the region or country of use.
Parts and Controls
Main unit
Front and sides

1 AUDIO IN connectors (page 34) ②VIDEO IN connector (page 34) 3S VIDEO IN connector (page 34) 4DV IN connector (page 33) 5USB (Type A) port (page 31) 6 (power) button (page 29) 7 Remote sensor Point the remote control here. 8 Emergency eject hole If you cannot open the disc tray with the ▲ (eject) button, turn off the DVDirect. Insert a pin or straightened paper clip into this hole to open the disc tray. 9 Top panel (page 27) 10Disc tray (page 30) 11CompactFlash card slot (page 37) 12 Multi memory card slot (page 37) Insert a “Memory Stick,” SD Card or xD-Picture Card here. 13 Memory Stick Duo slot (page 37)
14 Memory card access LED
Lights amber when accessing a memory card.
15▲ (eject) button (page 30)
Note
- “Memory Stick Duo” uses a different slot from other memory cards. Make sure to insert a “Memory Stick Duo” into the Memory Stick Duo slot, and other types of memory cards into the multi memory card slot. If you try to insert a “Memory Stick Duo” into the multi memory card slot, it may become jammed.

Top panel

1 Display window Displays an operation screen, images from a playback device or memory card. ②VIDEO / COMPONENT / HDMI LEDs Indicates the output selected by pressing the OUTPUT button (③). 3 OUTPUT button (pages 60, 63)
4 RETURN button (page 66) 5 ↗/↓/←/→ cursor / ENTER button (pages 38, 53, 60, 63) 6 PLAY button (pages 60, 63) 7 STOP button (pages 38, 53, 62, 65) 8 RECORD button (pages 38, 53)
Rear panel

①HDMI OUT connector (page 58) 2 COMPONENT OUT (Y, PB, PR video out) connectors (page 58) 3 AUDIO OUT connectors (page 59)
④VIDEO OUT connector (page 59) 5 DC IN connector (page 29)
Remote control

①DISPLAY button (pages 62, 65)
2 ◀◀, ▶▶/▶▶ buttons (page 62)
3 ◀◀, ▶▶▶I buttons (pages 62, 65)
4 PLAY button (pages 62, 65)
5 STOP button (pages 62, 65)
6 RETURN button (page 66)
7 PAUSE button (pages 62, 65)
8 MENU button (pages 62)
9 ▲/▼/◄/►/ ENTER buttons (pages 62, 65)
Notes
- When operating the remote control, point it at the remote sensor on the front of the DVDirect (page 26).
- Only playback can be performed by the remote control.
To change the battery of the remote control
① While pressing on the tab, insert your fingernail into the slit to pull out the battery case. ② Place a new battery with the + side facing up. ③ Insert the battery case back into the remote control until it clicks.

Note
- The remote control has a button-type lithium battery built in. Do not use a battery other than of the same or equivalent type.
CAUTION
Danger of explosion if battery is incorrectly replaced. Replace only with the same or equivalent type.
Turning the Power On
1 Connect the supplied AC power cord to the AC adapter. 2 Insert the power plug of the AC adapter into the DVDirect's DC IN connector. 3 Insert the power plug of the AC power cord into a power outlet.
![graph LR A["DVDirect"] --> B["To DC IN connector"] B --> C["AC adapter"] C --> D["AC power cord"] D --> E["To power outlet"]](/content/2026/06/1337680/images/06591d9443e28d6217f3a2252c4b61c5f33d40d5e26de06a72a0eefaf96114f7.jpg)
Notes
- Be sure to use the supplied AC power cord and the AC adapter.
- Do not use damaged cables, such as cables with deformed connectors.
4 Press the ⏻ (power) button.
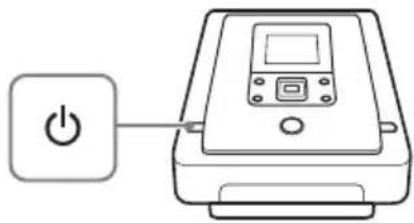
After the display window lights and the DVDirect logo appears, the initial screen (Top screen) appears.
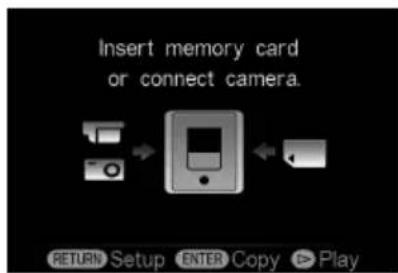
Inserting a Disc
1 Press the ▲ (eject) button.

The disc tray ejects.
2 Place the disc in the disc tray with its playing/recording side down, and press the ▲ (eject) button again.
Note
- Do not touch the recording side of the disc.

The disc tray closes.
Connecting Cables for Recording
For types of connection and settings, see the “Connection and setup for your Handycam®/video device” section for your “Type of copy mode (A - E)” on pages 10 through 18.
USB cable
1 Turn on the camera.
Note
- For the camcorder, make sure that the AC adapter is connected to the AC power cord.
Hint
- Depending on the model type, you may need to change the mode from the REC mode to other modes such as PLAY and EDIT. For details about modes, refer to your camera's operating instructions.
2 Connect the camera to the DVDirect.
![graph LR A["Multi port"] --> B["USB port (Type Mini B)"] B --> C["USB port (Type A)"] C --> D["USB cable (supplied with camera or sold separately)"] D --> E["USB cable/USB cable for multi-use terminal (supplied with camera or sold separately)"] E --> F["USB port (Type B)"]](/content/2026/06/1337680/images/825dbdc9ae858d03ed209188fd5a6b3f6e4646acbabe203329b7d8b661bf5a1c.jpg)
3 Check the USB connection on the camera.
Sony digital video camera
The [USB SELECT] screen appears. Be sure to select the media that stores images to record.
Button names on the [USB SELECT] screen
| Storage Media Button Name | |
| Hard disk drive [ USB CONNECT] [ COMPUTER] [ HDD], etc. | |
| Built-in memory [ USB CONNECT], etc. | |
| 8cm disc [ USB CONNECT] [ COMPUTER], etc. | |
| Memory card [ USB CONNECT] [ COMPUTER], etc. | |
Hints
- Depending on the model, USB connection may complete simply by connecting the camera to the DVDirect ([USB mode] screen appears). In this case, selecting the recording media is unnecessary.
- If your camera has a [USB SPEED] setting, specify [AUTO] ([AUTO] is the default setting).
Sony digital still camera
USB connection completes only by connecting the camera to the DVDirect. [USB mode] or [Mass Storage] screen appears.
Hints
- If your camera has a [USB Connect] setting, specify [AUTO] or [Mass Storage] ([AUTO] is the default setting).
- If your camera has a [LUN Settings] setting, you may need to set [Single], depending on the model (default setting is different depending on the model). • See the following web site for details on supported camera models (English only): http://sony.storagesupport.com
Note
- If a camera with built-in memory and memory card is connected to the DVDirect, the DVDirect will choose the memory card as the USB connection. However, built-in memory might be chosen depending on the model of the camera and its setting. For details, see the instruction manual of the camera, and confirm the settings of [USB Connect] and [LUN Settings].
Notes
- You need an audio/video cable (AV cable), instead of a USB cable, for connection to copy:
- "PhotoMOVIE" from an 8cm disc in a Handycam®. – videos from an 8cm disc formatted in VR mode in a Handycam®.
- For Handycam® (DV/D8), you cannot copy photos recorded on a “Memory Stick Duo” using a USB cable. Insert the “Memory Stick Duo” into the Memory Stick Duo slot.
1 Turn on the camera.
Note
- For the camera, make sure that the AC adapter is connected to the AC power cord.
2 Set the camera to playback mode.
- Playback operation differs among camcorders. For most camcorders, switch the power/mode button to playback, PLAY/EDIT or VTR mode to play video or perform recording. For details, refer to the operating instructions of your camcorder.
- When you copy HD (High Definition) videos using High Definition Handycam® (HDV) by connecting with DV (i.LINK) cable, set the [i.LINK CONV] setting on the Handycam® to [ON]. This will down-convert videos recorded in HD (High Definition) to SD (Standard Definition) quality.
3 Connect the camera to the DVDirect.
![graph LR A["Camera"] -->|DV connector| B["DV"] B --> C["DV IN connector"] C --> D["DV (i.LINK) cable (not supplied)"] style A fill:#f9f,stroke:#333 style B fill:#ccf,stroke:#333 style C fill:#cfc,stroke:#333 style D fill:#fcc,stroke:#333](/content/2026/06/1337680/images/643dbad3cab92c6c12ef18250f91d84d59c8abb49540b2a0df35b6e6ab0d4660.jpg)
Notes
- A DV (i.LINK) cable is for DV output from DV digital video camera only. You cannot record videos from MICROMV or HDV camcorders (HDV format) and other digital video devices having an i.LINK connector. You need an audio/video cable (AV cable) for these devices.
- The following models are not supported for recording with a DV (i.LINK) cable. Use an audio/video cable.
- DCR-VX700
- DCR-VX1000 -HDR-FX1 -HDR-FX7 -HDR-FX1000
Audio/video cable (AV cable)
1 Turn on the video device.
Note
- For the camera, make sure that the AC adapter is connected to the AC power cord.
2 Operate the video device to start playback of video.
- Playback operation differs among video devices. For most cameras, switch the power/mode button to playback, PLAY/EDIT or VTR mode to play video or perform recording. Cameras with multiple media require specifying the media (HDD, "Memory Stick Duo," 8cm disc, or Built-in memory). For details, refer to the operating instructions of your video device.
- The [A/V → DV OUT] setting on Handycam® (DV/D8) must be set to [OFF] ([OFF] is the default setting).
3 Connect the video device to the DVDirect.
Use an audio/video cable (supplied), AV cable (not supplied) or S-video cable (not supplied) when connecting a video device such as a VCR or DVR to the DVDirect.
Hints
- The connectors on a video device differ depending on the device. Refer to the operating instructions for your device, and use an appropriate cable.
- If your video device has an S-video connector, use an S-video cable for improved picture quality (compared to video cable quality).
For audio/video cables:


For S-video cables: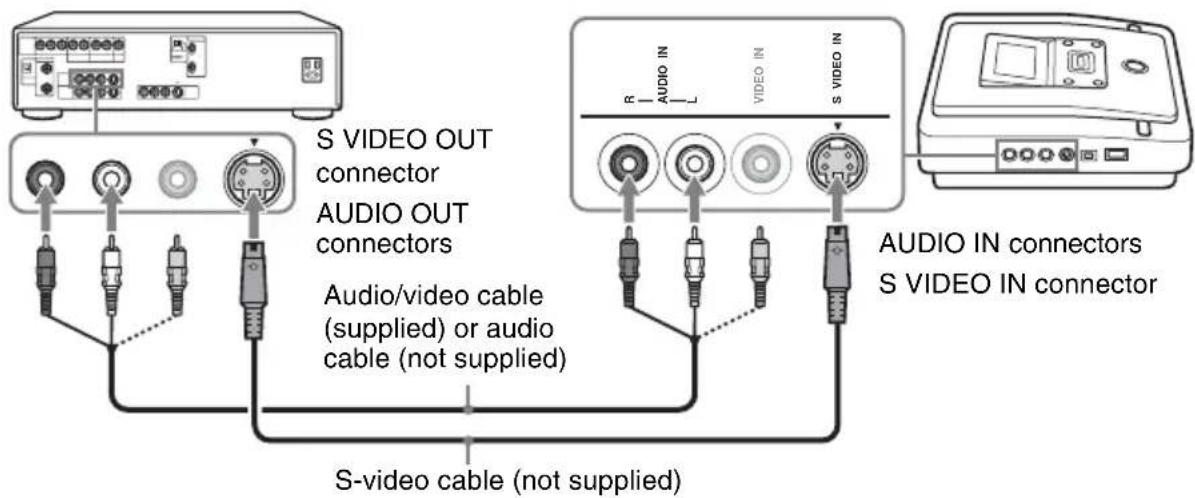

For a camcorder with an A/V OUT connector, you can use an AV cable with S-video to connect to the DVDirect.

For a camcorder with an A/V Mini jack, you can use an AV cable and S-video cable to connect to the DVDirect.
![graph TD A["Camera"] --> B["S-VIDEO OUT connector"] B --> C["A/V OUT connector"] C --> D["Audio IN connector"] D --> E["S VIDEO IN connector"] E --> F["AUDIO IN connectors"] F --> G["S VIDEO IN connector"] G --> H["S-video cable (not supplied)"] H --> I["AV cable (not supplied)"] I --> J["S-video ca…](/content/2026/06/1337680/images/deb07bd1715495d8e424115139477f1377c7c35df0374bfe31fa0d0335e520a7.jpg)
Memory Card
When copying videos or photos from a memory card, insert the memory card into its corresponding memory card slot on the DVDirect.
Insert a memory card into its corresponding slot.

"Memory Stick Duo," "Memory Stick," SD Card, or xD-Picture Card
Push the memory card into the slot until you hear a click. To remove, push the card and pull out.
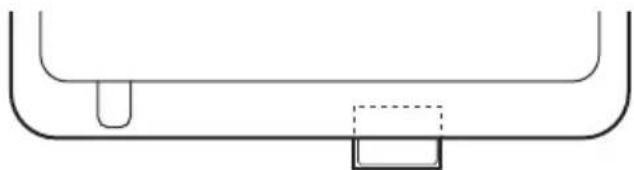
CompactFlash
Push the card into the CompactFlash card slot. The CompactFlash stays half exposed. To remove, pull out the CompactFlash.
Notes
- Do not use more than one memory card slot at a time. Insert only one memory card into a memory card slot.
- Do not insert another memory card while recording onto a disc. Doing so may cause a write error.
- Do not insert a "Memory Stick Duo" with a Memory Stick Duo adapter into the multi memory card slot.
- Never remove the memory card while the memory card access LED is lit. Otherwise data in the memory card may be damaged.
Copying All Contents
Sony Camera
HDD
Built-in Memory
Memory Card
Other Camera
Memory Card
This mode allows you to record images onto a disc from a camera connected to the DVDirect or memory card inserted into the slot with a single touch of the (record) button. The entire contents will be recorded. This is one of the simpler copy modes, eliminating the need to select videos and/or photos stored on your camera.
Before selecting this copy mode, turn on the DVDirect (page 29), insert a disc (page 30) and connect cables for recording (pages 31).
Notes
- For copying from an 8cm disc, follow the instructions in "Copying All Contents (from an 8cm disc)" (page 40).
- For copying from a DV tape, follow the instructions in "Copying All Contents" of "Copying From Video Devices" (page 51).
- You cannot copy videos/photos from media of different types on the camera at one time.
1 Make sure that the copy mode select screen appears.
When the DVDirect detects signals from a camera connecting to the USB port or memory card inserted into the slot, the copy mode select screen appears.

2 Press ↑ or ↓ to select [All] and press →.
Hint
- If you do not need to select the type of images, simply select [All] and press the (record) button to start recording. Go straight to step 5.
3 Make sure that the type of images you wish to copy is marked.
Press ↑ or ↓ to select an image. Pressing the ENTER button toggles the selection between marked and unmarked.
Marked image to copy
If both [HD Video] and [SD Video] types are selected for recording:
HD (High Definition) and SD (Standard Definition) videos are recorded onto separate discs.
For details, see "Notes on copying multiple types of image" on page 23.
Note
- You cannot select image types that cannot be recorded. (For example, a camera or memory card containing no video/photo data, or standard definition (SD) video taken by another digital video camera.)
4 Press the (record) button to start recording.

The DVDirect starts the recording process. The (record) button lights up during recording. The following appears in the display window.
When recording HD (High Definition) videos, [AVCHD] appears in the display window.
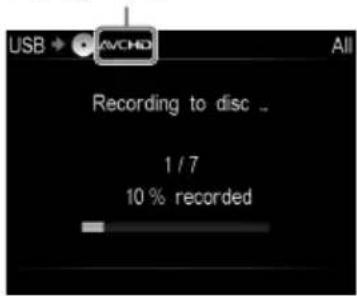
5 Change to a blank disc when the message [Insert a new disc.] appears.
If the contents of the camera do not fit onto a single disc, the disc will be ejected automatically when it becomes full. Remove the created disc and insert a blank one. Recording will resume automatically.
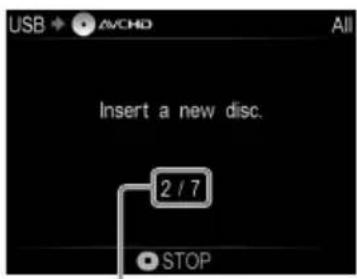
Next disc/number of required discs
6 Remove the created disc.
If [Auto Finalizing] is set to [ON], the disc will be finalized automatically when recording is complete (page 67).
To stop recording
Press the (stop) button when replacing a disc.
You cannot stop while recording is in progress.
Copying All Contents (from an 8cm disc)
Sony Camera
8cm Disc
This mode allows you to record video onto a disc from an 8cm disc camera connected to the DVDirect with a single tough of the (record) button. The entire contents will be recorded. If you have more than one 8cm disc to copy, you can consolidate and record their contents onto one 12cm disc.
Before selecting this copy mode, turn on the DVDirect (page 29), insert a disc (page 30) and connect a USB cable for recording (page 31).
1 Make sure that the copy mode select screen appears.
When the DVDirect detects a signal from a camera connecting to the USB port, the copy mode select screen appears.
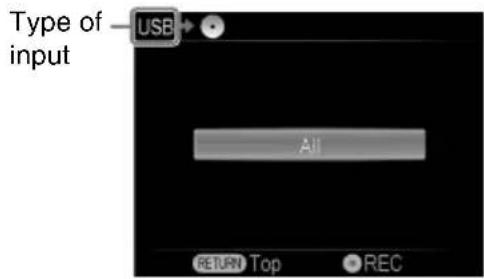
2 Make sure that [All] is selected and press the (record) button.

The DVDirect starts the recording process. The (record) button lights up during recording. The following appears in the display window.
When recording HD (High Definition) videos, [AVCHD] appears in the display window.

Notes
- You cannot select the type of images when recording from an 8cm disc. The entire images stored on the 8cm disc will be recorded (except for "PhotoMOVIE").
- Both the contents of an 8cm disc containing HD (High Definition) video and an 8cm disc containing SD (Standard Definition) video cannot be recorded on a 12cm disc.
- Depending on the combination of images on a disc inserted into the DVDirect and the 8cm disc inserted into the camera, images may not be recorded.
3 Change the 8cm disc of the camera when prompted.
If you are copying from only one 8cm disc, go straight to step 6.
![Continue copying? (Replace disc in camcorder and then select [Continue]) Continue Quit](/content/2026/06/1337680/images/5bd7472b7182cbe1262df3ef8bb46c74e89553e86a44609e1a6e6bb7bd29a2e3.jpg)
4 Press ↑ or ↓ to select [Continue] and press the ENTER button.
5 Repeat steps 3 and 4 for each 8cm disc.
6 When you finish copying from all 8cm discs, select [Quit] in the display of step 3 and press the ENTER button.
If [Auto Finalizing] is set to [ON], the disc will be finalized automatically when recording is complete (page 67).
To stop recording
When replacing an 8cm disc of the camera, select [Quit] and press the ENTER button.
You cannot stop while recording is in progress.
Copying Only New Video/Photo
Sony Camera HDD Built-in Memory Memory Card
You can copy only newly recorded contents of your camera whose previous contents have already been recorded onto a disc (by selecting [New Video/Photo] or One Touch Disc Burn). As the DVDirect automatically detects newly recorded videos/photos, you do not need to search for them yourself.
Before selecting this copy mode, turn on the DVDirect (page 29), insert a disc (page 30) and connect cables for recording (pages 31).
Hint
- Set [Auto Finalizing] to [OFF] before starting recording, if you wish to record additional videos and/or photos onto the disc later (page 67).
1 Make sure that the copy mode select screen appears.
When the DVDirect detects signals from a camera connecting to the USB port or memory card inserted into the slot, the copy mode select screen appears.

2 Press ↑ or ↓ to select [New Video/ Photo] and press →.
Hint
- If you do not need to select the type of images, simply select [New Video/Photo] and press the (record) button to start recording. Go straight to step 5.
3 Make sure that the type of images you wish to copy is marked.
Press ↑ or ↓ to select an image. Pressing the ENTER button toggles the selection between marked and unmarked.
Marked image to copy
If both [HD Video] and [SD Video] types are selected for recording:
HD (High Definition) and SD (Standard Definition) videos are recorded onto separate discs.
For details, see “Notes on copying multiple types of image” on page 23.
Note
- You cannot select image types that cannot be recorded. (For example, a camera or memory card containing no video/photo data, or standard definition (SD) video taken by another digital video camera.)
4 Press the (record) button to start recording.

The DVDirect starts the recording process. The (record) button lights up during recording. The following appears in the display window.
When recording HD (High Definition) videos, [AVCHD] appears in the display window.

5 Change to a blank disc when the message [Insert a new disc.] appears.
If the contents of the camera do not fit onto a single disc, the disc will be ejected automatically when it becomes full. Remove the created disc and insert a blank one. Recording will resume automatically.

Next disc/number of required discs
6 Remove the created disc.
If [Auto Finalizing] is set to [ON], the disc will be finalized automatically when recording is complete (page 67).
To stop recording
Press the (stop) button when replacing a disc.
You cannot stop while recording is in progress.
Hint
- The DVDirect stores the recording history of a camera (built-in memory), or a memory card, copying only newly-recorded video (to be recorded to a disc). The DVDirect can store a combined total of 10 recording history stored in a camera or memory card.
Notes on using a memory card
When copying from a memory card that has been shared between cameras, make sure that the clock on each camera is set correctly. If the clock setting is not correct, copying only new video/photo may not be performed as desired.
Copying Playlist
Sony Camera
HDD
Built-in Memory
Memory Card
This mode allows you to record videos within a Playlist created on your camera. For details on creating a Playlist, refer to your camera's operating instructions.
Before selecting this copy mode, turn on the DVDirect (page 29), insert a disc (page 30) and connect cables for recording (page 31).
1 Make sure that the copy mode select screen appears.
When the DVDirect detects signals from a camera connected to the USB port or a memory card inserted into the slot, the copy mode select screen appears.

2 Press or to select [Playlist] and press → .
Hint
- If you do not need to select the type of images, simply select [Playlist] and press the (record) button to start recording. Go straight to step 5.
3 Make sure that the type of Playlist images you wish to copy is marked.
Press ↑ or ↓ to select a Playlist to copy. Pressing the ENTER button toggles the selection between marked and unmarked.
Marked video to copy
If both [HD Video] and [SD Video] types are selected for recording:
HD (High Definition) and SD (Standard Definition) videos are recorded onto separate discs.
For details, see "Notes on copying multiple types of image" on page 23.
Note
- You cannot select image types that cannot be recorded. (For example, a camera or memory card containing no video/photo data, or standard definition (SD) video taken by another digital video camera.)
4 Press the (record) button to start recording.

The DVDirect starts the recording process. The (record) button lights up during recording. The following appears in the display window.
When recording HD (High Definition) videos, [AVCHD] appears in the display window.

5 Change to a blank disc when the message [Insert a new disc.] appears.
If the contents of the camera do not fit onto a single disc, the disc will be ejected automatically when it becomes full. Remove the created disc and insert a blank one. Recording will resume automatically.

Next disc/number of required discs
6 Remove the created disc.
If [Auto Finalizing] is set to [ON], the disc will be finalized automatically when recording is complete (page 67).
To stop recording
Press the (stop) button when replacing a disc.
You cannot stop while recording is in progress.
Copying Visual Index Lists
Sony Camera
HDD
Built-in Memory
Memory Card
Other Camera
Memory Card
You can record images selected by viewing thumbnails.
Before selecting this copy mode, turn on the DVDirect (page 29), insert a disc (page 30), and connect cables for recording (page 31).
1. Make sure that the copy mode select screen appears.
When the DVDirect detects signals from a camera connected to the USB port or a memory card inserted into the slot, the copy mode select screen appears.
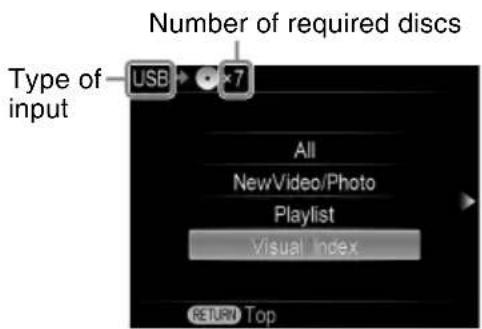
2. Press ↑ or ↓ to select [Visual Index] and press →.
3. Press ↑ or ↓ to select the type of images you wish to copy and press →.
Hint
- Unmark the contents type for easier navigation when:
- you have only a few videos/photos to select, or – you have types of images that you do not wish to record.
Marked image to copy
If both [HD Video] and [SD Video] types are selected for recording:
HD (High Definition) and SD (Standard Definition) videos are recorded onto separate discs.
For details, see "Notes on copying multiple types of image" on page 23.
Note
- You cannot select image types that cannot be recorded. (For example, a camera or memory card containing no video/photo data, or standard definition (SD) video taken by another digital video camera.)
4 Make sure that the shooting date folders of the images you wish to copy are marked.
Press ↑ or ↓ to select a shooting date folder. Pressing the ENTER button toggles the selection between marked and unmarked.
To record all videos/photos taken on a particular shooting date, select (mark) the shooting date folder and press the (record) button to start recording. Go straight to step 9.

5 Press ↑ or ↓ to select a shooting date folder and press →.
6 Press ↑ or ↓ to select a video or photo you wish to copy and press the ENTER button to mark.
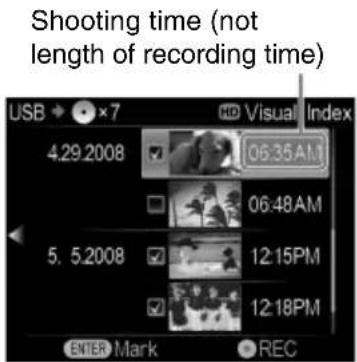
Hint
- When selecting a photo, the selected photo appears with one press of the → button. The photo can be rotated 90 degrees clockwise with each subsequent press of the → button.
7 To select a video or photo stored in a different shooting date folder, press ← and repeat steps 5 and 6.
To select different types of image, press repeatedly.
8 Press the (record) button to start recording.

The DVDirect starts the recording process. The (record) button lights up during recording. The following appears in the display window.
When recording HD (High Definition) videos, [AVCHD] appears in the display window.
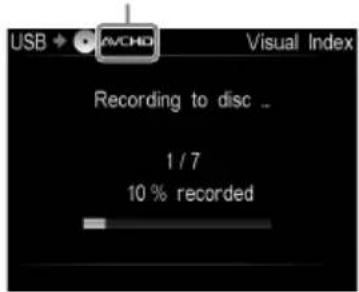
9 Change to a blank disc when the message [Insert a new disc.] appears.
If the contents of the camera do not fit onto a single disc, the disc will be ejected automatically when it becomes full. Remove the created disc and insert a blank one. Recording will resume automatically.

Next disc/number of required discs
10 Remove the created disc.
If [Auto Finalizing] is set to [ON], the disc will be finalized automatically when recording is complete (page 67).
To stop recording
Press the (stop) button when replacing a disc.
You cannot stop while recording is in progress.
Copying Manually
Sony Camera HDD Built-in Memory 8cm Disc Memory Card
This mode allows you to record video on the DVDirect while controlling playback manually on the connected camera.
Before selecting this copy mode, turn on the DVDirect (page 29), insert a disc (page 30) and connect an audio/video cable (AV cable) for recording (page 34).
Note
- For copying from a DV tape, follow the instructions in "Copying Manually" of "Copying From Video Devices" (page 53).
Hint
- When the prompt message [Format disc to record SD video?] appears after inserting a blank disc, select [Yes]. Formatting a disc may take several seconds to complete. You cannot record HD (High Definition) videos onto the formatted disc under this message.
1 Press the ENTER button on the Top screen.
2 Select the input ([S-VIDEO] or [VIDEO]) connected to the camera in [Select input].

The connected camera image appears.
3 Operate your camera to start video playback, and press the (record) button of the DVDirect.
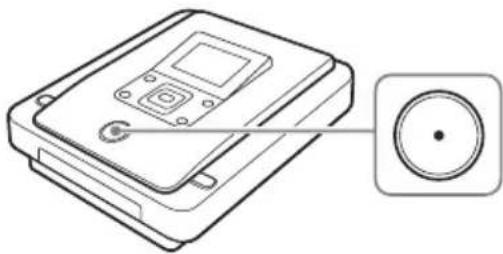
The message [Recording] appears in the display window, and the (record) button lights up during recording. The following appears in the display window.

To pause recording
Press the (record) button during recording. To resume recording, press the (record) button again.
4 Press the (stop) button to stop recording.
5 To record an additional video, repeat steps 3 and 4.
6 Press the ▲ (eject) button to eject the disc when recording is complete.
7 To finalize the disc, press ↑ or ↓ to select [Yes] and press the ENTER button.
If you select [No] and press →, the disc will be ejected without being finalized. You can skip step 8.

Note
- To finalize a disc means to make the disc playable on other DVD devices. For details about finalizing, refer to [Auto Finalizing] or [Finalize disc] on page 67.
8 Press ↑ or ↓ to select [OK] and press the ENTER button.

When finalizing has completed, the disc tray automatically opens.
Notes on copying manually from a camera
- Start recording immediately after inserting a disc. The recording process may take a few seconds to start after pressing the (record) button if the disc was inserted more than 10 minutes prior to starting.
- When you press the (stop) button, you may hear the noise of the disc turning momentarily.
One Touch Disc Burn
Sony Camera
HDD
Built-in Memory
Memory Card
This mode allows you to record video from a camera onto a disc by simply pressing DISC BURN on the camera. You can record additional video onto a disc that has been previously recorded on, as with copying only new images (page 41).
1 Turn on the DVDirect (page 29) and insert a disc (page 30).
2 Turn on the camera.
Note
- For the camera, make sure that the AC adapter is connected to the AC power cord.
3 Connect the camera to the DVDirect.

The USB SELECT screen appears on the camera's LCD screen.
4 Touch DISC BURN on the camera's LCD screen, or press the DISC BURN button on the camera.
![Touch [DISC BURN] or [DVD BURN]](/content/2026/06/1337680/images/3526ba8a3471a8c24608788431e043e56c934cfd975f130df0b63537c12743b7.jpg)
The DVDirect starts the recording process.
If the camera's media has both HD (High Definition) and SD (Standard Definition) videos:
HD (High Definition) and SD (Standard Definition) videos are recorded onto separate discs.
For details, see "Notes on copying multiple types of image" on page 23.
Notes
- Depending on the camera, the display that appears on the camera's LCD screen or button names on the camera may differ. (e.g. DVD BURN)
- In One Touch Disc Burn mode, you can record videos from an attached video camera; however, depending on the camera, the recordable media may vary. For example, in the case of a Handycam® containing both HDD and memory card media, only the HDD content can be recorded by One Touch Disc Burn.
- The DUBBING button of "HYBRID Plus" Handycam® does not work in the same manner as the DISC BURN button. Pressing the DUBBING button does not start recording with the DVDirect.
5 Change to a blank disc when the message [Insert a new disc.] appears.
If the contents of the camera do not fit onto a single disc, the disc will be ejected automatically when it becomes full. Remove the created disc and insert a blank one. Recording will resume automatically.
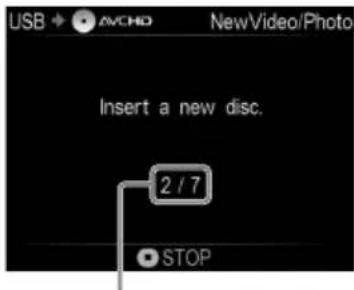
Next disc/number of required discs
6 Remove the created disc.
If [Auto Finalizing] is set to [ON], the disc will be finalized automatically when recording is complete (page 67).
To stop recording
Press the (stop) button when replacing a disc.
You cannot stop while recording is in progress.
Copying All Contents (from a DV tape)
Sony Camera DV Tape Other Camera DV Tape
This mode allows you to record the entire video tape content onto a disc. The DVDirect automatically controls playback on the connected video device.
Before selecting this copy mode, turn on the DVDirect (page 29), insert a disc (page 30) and connect DV (i.LINK) cable for recording (page 33).
1 Make sure that the copy mode select screen appears.
When the DVDirect detects a signal from a camera connected to the DV IN connector, the copy mode select screen appears.

Note
- If the copy mode select screen does not appear, press the ENTER button on the Top screen, and select [DV] in [Select input].
2 Press ↑ or ↓ to select [All] and press the (record) button.

The DVDirect starts recording at the same time the video device starts playback. If the video tape is not at its beginning, it will automatically rewind and the DVDirect will start recording. During recording, the message [Recording] appears in the display window, and the (record) button lights up. The following appears in the display window.
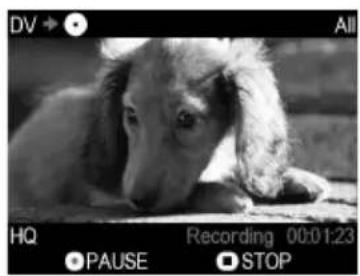
To pause recording
Press the (record) button during recording.
To resume recording, press the (record) button again.
To stop recording
Press the (stop) button, and then press the RETURN button. The DVDirect stops recording and returns to the copy mode select screen in step 1.
3 Remove the created disc.
If [Auto Finalizing] is set to [ON], the disc will be finalized automatically when recording is complete (page 67).
Hint
- Recording automatically stops when a blank portion over 2 minutes or the end of the DV tape is reached.
Copying All Contents (Photo)
Sony Camera
Memory Card
Other Camera
Memory Card
You can record all photos taken with your digital still camera from its memory card onto a disc. Before selecting this copy mode, insert a disc and memory card (pages 30 and 37).
1 Make sure that the copy mode select screen appears.
When the DVDirect detects a memory card inserted into any of the memory card slots, the copy mode select screen appears.

2 Press ↑ or ↓ to select [All] and press the (record) button.
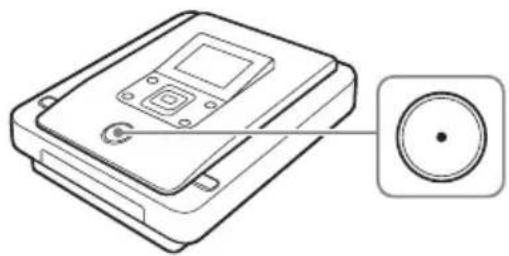
The DVDirect starts the recording process. The (record) button lights up during recording. The following appears in the display window.

3 Change to a blank disc when the message [Insert a new disc.] appears.
If the media contents do not fit onto a single disc, the disc will be ejected automatically when it becomes full. Remove the created disc and insert a blank one. Recording will resume automatically.
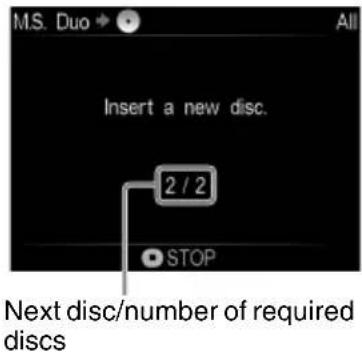
4 Remove the created disc.
If [Auto Finalizing] is set to [ON], the disc will be finalized automatically when recording is complete (page 67).
To stop recording
Press the (stop) button when replacing a disc.
You cannot stop while recording is in progress.
Copying Manually
Sony Camera DV Tape Video Device Other Camera DV Tape
This mode allows you to record video on the DVDirect while controlling playback manually on the connected video device.
Before selecting this copy mode, turn on the DVDirect (page 29), insert a disc (page 30) and connect cables for recording (pages 33 and 34).
Hint
- When the prompt message [Format disc to record SD video?] appears after inserting a blank disc, select [Yes]. Formatting a disc may take several seconds to complete. You cannot record HD (High Definition) videos onto the formatted disc under this message.
1 Make sure that the video device is correctly connected to the DVDirect.
For connection with DV (i.LINK) cable:
When the DVDirect detects a signal from a camera connected to the DV IN connector, the copy mode select screen appears. Press ↑ or ↓ to select [Manual] and press →.

Note
- If the copy mode select screen does not appear, press the ENTER button on the Top screen, and select [DV] in [Select input].
For connection with A/V cables:
Press the ENTER button on the Top screen and select the input ([S-VIDEO] or [VIDEO]) connected to the video device in [Select input].
2 Operate the video device to start playback, and press the (record) button of the DVDirect to start recording.


During recording, the message [Recording] appears in the display window, and the (record) button lights up. The following appears in the display window.

To pause recording
Press the (record) button during recording. To resume recording, press the (record) button again.
Hint
- The DVDirect starts and stops recording automatically as it detects video input signals from a connected video device. For example:
- When you press the (record) button before the connected video device starts playing, the DVDirect pauses. When the video device starts playing back, the DVDirect automatically starts recording video.
- If you stop playback on the video device during recording, video signal is interrupted and the DVDirect pauses recording. If you resume playback on the video device, the DVDirect resumes recording.
When the DVDirect waits for a video signal to resume recording, the message [Waiting for input signal.] appears in the DVDirect's display window. If no video signal is detected for 2 minutes, the DVDirect stops recording. (As video devices always output video signals from their operation screen or TV screen other than playback, some video devices may not operate as above.)
3 Press the (stop) button to stop recording.
4 To record an additional video, repeat steps 2 and 3.
5 Press the ▲ (eject) button to eject the disc when recording is complete.
6 To finalize the disc, press ↑ or ↓ to select [Yes] and press the ENTER button.
If you select [No] and press →, the disc will be ejected without being finalized. You can skip step 7 below.

Hint
- To finalize a disc means to make the disc playable on other DVD devices. For details about finalizing, refer to [Auto Finalizing] or [Finalize disc] on page 67.
7 Press ↑ or ↓ to select [OK] and press the ENTER button.

When finalizing has completed, the disc tray automatically opens.
Notes on copying manually from a video device
- When connecting the camera to the DVDirect with a DV (i.LINK) cable, a video appears in the DVDirect's display window a little behind appearing in the camera's LCD screen. When copying a video, operate the DVDirect while monitoring the DVDirect's display window.
- Start recording immediately after inserting a disc. The recording process may take a few seconds to start after pressing the (record) button if the disc was inserted more than 10 minutes prior to starting.
- When you press the (stop) button, you may hear the noise of the disc turning momentarily.
Copying Visual Index Lists (Photo)
Sony Camera
Memory Card
Other Camera
Memory Card
This method allows you to select and record photos from a camera's memory card onto a disc. You can select them by viewing thumbnails or by the shooting date.
Before selecting this copy mode, turn on the DVDirect (page 29), insert a disc and the memory card (pages 30 and 37).
1. Make sure that the copy mode select screen appears.
When the DVDirect detects a memory card inserted into any of the memory card slots, the copy mode select screen appears.

2. Press ↑ or ↓ to select [Visual Index] and press →. 3. Make sure that [Photo] is selected and press ➤.

Marked photo to copy
Hint
- If you wish to record all photos, press the (record) button to start recording. Go straight to step 9.
4. Make sure that the shooting date folders of the photos you wish to copy are marked.
Press ↑ or ↓ to select a shooting date folder. Pressing the ENTER button toggles the selection between mark and unmark.
To record all photos taken on a particular shooting date, select (mark) the shooting date folder and press the (record) button to start recording. Go straight to step 9.

5. Press ↑ or ↓ to select a shooting date folder and press →. 6. Press ↑ or ↓ to select a photo you wish to copy and press the ENTER button to mark.
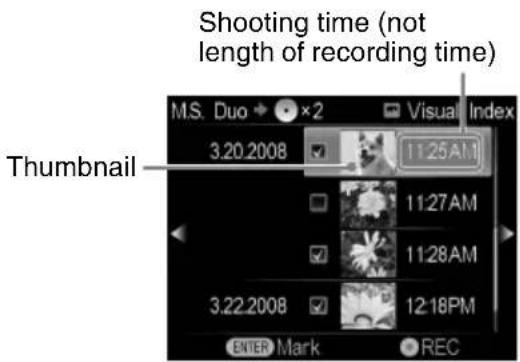
Note
- Depending on the photo, thumbnails may not appear.
Hint
- The selected photo appears with one press of the ➤ button. The photo can be rotated 90 degrees clockwise with each subsequent press of the ➤ button.
7 To select a photo stored in a different shooting date folder, press ← and repeat steps 5 and 6.
8 Press the (record) button to start recording.

The DVDirect starts the recording process. The (record) button lights up during recording. The following appears in the display window.

9 Change to a blank disc when the message [Insert a new disc.] appears.
If the media contents do not fit onto a single disc, the disc will be ejected automatically when it becomes full. Remove the created disc and insert a blank one. Recording will resume automatically.

Next disc/number of required discs
10 Remove the created disc.
If [Auto Finalizing] is set to [ON], the disc will be finalized automatically when recording is complete (page 67).
To stop recording
Press the (stop) button when replacing a disc.
You cannot stop while recording is in progress.
Connecting to a TV
You can use the DVDirect to playback created discs. Simply view them in the display window of the DVDirect, or connect the DVDirect to a TV.
To view on a TV, you need to connect and setup the DVDirect first. The video quality varies depending on the type of TV and the connection used. Choose the connection (1 - 3) that best suits for your TV.
Notes
- Only images or operation display can be displayed on the TV screen during playback. Images other than playback cannot be displayed on the TV screen.
- No picture appears on the DVDirect's display window when an external output is selected.
- If you connect the DVDirect to a TV with an HDMI cable or component video cable, play an SD (Standard Definition) disc, and then switch from the Top screen to the playback display (or vice versa), the TV screen image may be distorted. This is not a malfunction.
Hint
- HDMI and component video cables produce better picture quality for playing back HD (High Definition) discs.
![graph TD A["Computer"] --> B["HDMI IN"] A --> C["COMPONENT IN"] A --> D["AUDIO IN"] A --> E["AV IN"] B --> F["1 → Page 58"] C --> G["2 → Page 58"] D --> H["3 → Page 59"]](/content/2026/06/1337680/images/0e1aa0527394f885d5bc968e64309aa410371ee289940b556f4ada5cb20a36b6.jpg)
1 HDMI cable
![graph LR A["HDMI IN connector"] --> B["Hybrid"] B --> C["HDMI OUT connector"] D["HDMI cable (not supplied)"] --> C](/content/2026/06/1337680/images/aaf30f6d2b6b25e7f2d301bc5a7bc91f7d998d83296b2607109de8a532a026db.jpg)
Notes
- Use an HDMI cable that is HDMI compliant (look for the HDMI logo).
- Some TV sets may not work with the DVDirect. (e.g., no sound or picture)
- Be sure to connect the HDMI IN and the HDMI OUT with a cable. Connecting the HDMI OUT on both the TV and the DVDirect may cause damage.
- When the HDMI input on the TV supports Dolby Digital 5.1ch surround sound, it outputs 5.1ch surround audio for a disc recorded in 5.1ch surround sound.
- The DVDirect does not support HDMI CEC, such as BRAVIA® Theatre Sync™.
② Component video and audio cables
![graph TD A["Monitor"] --> B["Component video cable (not supplied)"] B --> C["COMPONENT IN connectors"] C --> D["Audio OUT connectors"] D --> E["Output device"] style A fill:#f9f,stroke:#333 style E fill:#bbf,stroke:#333 subgraph Component_Cable F1["Connector"] --> G1["Component OUT (Y, Pb, Pr) conne…](/content/2026/06/1337680/images/8f22f4df26e420b0c808b8ce75ca64d2099a473b05e3a1f32865d61c6fc7a065.jpg)
Note
- You will get no sound if only the COMPONENT (Y, PB, PR) connectors are connected. The AUDIO L/R (white and red) connectors must also be connected to obtain sound.
3 Audio/video cable

Connecting to a TV through a video device
Check the input connectors on the video device and use appropriate cables.
Connect a cable to the external input connector on the video device. If the video device has an input selector, select an appropriate external input (e.g., Video 1, Video 2, etc.).
Connecting to a monaural TV (with only one AUDIO IN connector)
Connect the VIDEO (yellow) connector of the audio/video cable to the VIDEO IN on the TV. Connect the AUDIO L (white) connector to the MONO AUDIO IN on the TV.
Viewing Videos
You can play back only discs created with the DVDirect.
Notes
- You cannot play back discs created with a video device other than the DVDirect. The DVDirect does not support playback of commercial DVDs or contents on a memory card inserted into the DVDirect.
- When you view a video on the DVDirect's display window, there is no sound.

Hints
- The DVDirect is compatible with "x.v.Color." When connecting the DVDirect to an x.v.Color-compliant TV (BRAVIA) with an HDMI cable (not supplied), colors in a video recorded by an x.v.Color-compliant High Definition Handycam® can be more faithfully reproduced. ([X.V.COLOR] setting on Handycam® must be set to [ON].)
- HD (High Definition) videos recorded in 720p resolution are output in 720p resolution, even if [HDMI settings] is set to [1080i].
Viewing on a TV
Before you begin, connect a TV to the DVDirect (page 57).

On your TV, select the input from the DVDirect.
For details, refer to the operating instructions for your TV.

Turn on the DVDirect.
The Top screen appears.


Press the OUTPUT button.

Note
- When only the Top screen appears on the DVDirect's display window in step 2, external output can be selected by pressing the OUTPUT button.

Press the up or down arrow to select [Yes] and press the ENTER button.

LED of the selected output lights up on the DVDirect when an external output is selected (page 27).
![SONY VRD-MC10 - Press the up or down arrow to select [Yes] and press the ENTER button. - 2](/content/2026/06/1337680/images/28d52e83a76936bf4a7e1fffb75fd7bf7bcd859f6e35c66283be01b232de826d.jpg)
Press the OUTPUT button repeatedly to change the output of the DVDirect.
Every time you press the OUTPUT button, the DVDirect changes its video output (VIDEO → COMPONENT → HDMI → DVDirect's display window).

Insert a disc created with the DVDirect, and press the (playback) button.
If the disc contains both videos and photos, press ↑ or ↓ to select [Video] and press →.

Playback starts automatically when an unfinalized disc is inserted.
When playing back a finalized disc, go to step 8.
Press ↑/↓/←/→ to select the title you want to view, and press the (playback) button.

Example: Disc Menu of SD (Standard Definition) disc (page 78)
The DVDirect starts playback.
To stop playback
Press the (stop) button. When you press the (play) button again, the DVDirect starts playback from the point when you pressed the (stop) button. To play from the beginning of the disc, reinsert the disc and press the (play) button.
Hint
- If you play the finalized disc, you can display the Disc Menu and play from the beginning of the selected title (pages 62 and 78).
Note on playback display
If you press the DISPLAY button on the remote during playback, the following playback information appears. When the DISPLAY button is pressed again, the information is not shown.

For details on chapter, scene, or title number, refer to "About Created Discs" on page 78.
Hint
When you connect the DVDirect to a High Definition TV and play back HD (High Definition) discs, the scene number and title number appear at the bottom of the display.
Viewing on the DVDirect
1. Turn on the DVDirect and insert a disc created with the DVDirect.
2. Press the (playback) button.
3. Follow steps 7 to 8 of "Viewing on a TV" (page 60).
Playing videos with the Disc Index function
You can play back sequentially the first 10 seconds of each scene of an HD (High Definition) video, from its beginning.
Select [Disc Index] on the Disc Menu of the HD (High Definition) disc displayed in step 8 of "Viewing on a TV."
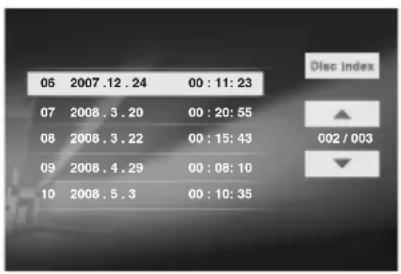
Each scene is played sequentially for 10 seconds from the beginning. If a scene recorded is too long, indexes will be automatically created every 5 minutes and played for 10 seconds.
If you press the ENTER button during playback with the Disc Index, normal playback starts. During playback with the Disc Index, playback information appears. If the DISPLAY button on the remote is pressed, the information is not shown.
Operation with remote control
| Button Operation | |
| DISPLAY Display info | |
| ▶/▶▶ | Fast forward (during playback)Change the search speed in three stages (during fast forward)Slow motion (during pause until the button is released) |
| ◀◀ | Fast reverse (during playback)Change the search speed (during fast reverse) |
| ▶▶▶ | Display the next title/chapter/scene |
| ▶◀◀ | Display the beginning of the current title/chapter/scene or the previous title/chapter/scene(Press twice to display the previous title/chapter/scene) |
| PLAY(○)*1 | Return to normal playback |
| PAUSE Pause/Resume | |
| STOP(○)*1 | Stop playback(return to the Top screen or video/photo selection screen) |
| MENU Display the Disc Menu*2 | |
| ◀/▶(◀/▶)*1 | Fast forward/Fast reverse (during playback)Change the search speed (during fast forward or fast reverse) |
| RETURN*1 | Return to the Top screen or video/photo selection screen |
1 The VRD-MC10 has an equivalent button for this operation. 2 For finalized discs only.
Viewing Photos
You can play back only discs created with the DVDirect.
Note
- You cannot playback discs created with a video device other than the DVDirect. The DVDirect does not support playback of commercial DVDs or contents on a memory card inserted to the DVDirect.
Viewing on a TV
Before you begin, connect a TV to the DVDirect (page 57).
1 On your TV, select the input from the DVDirect.
For details, refer to the operating instructions for your TV.
2 Turn on the DVDirect.
The Top screen appears.

3 Press the OUTPUT button.
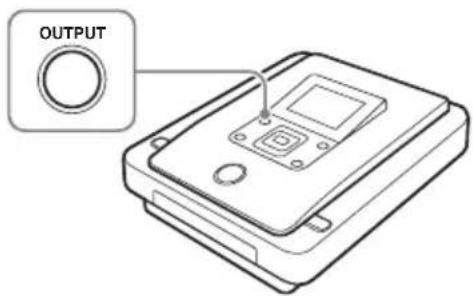
Note
- When only the Top screen appears on the DVDirect's display window in step 2, external output can be selected by pressing the OUTPUT button.
4 Press ↑ or ↓ to select [Yes] and press the ENTER button.

LED of the selected output lights up on the DVDirect when an external output is selected (page 27).
5 Press the OUTPUT button repeatedly to change the output of the DVDirect.
Every time you press the OUTPUT button, the DVDirect changes its video output (VIDEO → COMPONENT → HDMI → DVDirect's display window).
6 Insert a disc created with the DVDirect, and press the (playback) button.
7 If the disc contains both videos and photos, press ↑ or ↓ to select [Photo] and press the ENTER button.

8 Press ↑ or ↓ to select a date and press →.

9 Press ↑ or ↓ to select a photo and press the ENTER button.

The selected photo is displayed on the display window of the DVDirect.
Press ↑ or ↓ to display the next or the previous photo.
Note on playback display
If you press the DISPLAY button on the remote during playback, the following playback information appears. When the DISPLAY button is pressed again, the information is not shown.

Hint
- When you connect the DVDirect to High Definition TV and playback photos, shooting date and photo number appear in the bottom of display.
Viewing on the DVDirect
1 Turn on the DVDirect and insert a disc created with the DVDirect.
2 Press the (playback) button.
3 Follow steps 7 to 9 of "Viewing on a TV" (page 63).
Playing a photo slideshow
Select a date or photos in "Viewing on the DVDirect" (page 64) and press the ⏻ (playback) button.
The photos stored in the selected date, or the selected photos are continuously played in rotation. All photos after the selected date or selected photos are played. The DVDirect plays a factory-set background music or imported favorite music during a photo slideshow (page 67).
Operation with remote control
Photo display
| Button Function | |
| DISPLAY Display info | |
| ▶▶IDisplay the next photo | |
| ◀◀ Display the previous photo | |
| PLAY(◎)* | Play the slideshow |
| STOP(◎)* | Stop display(return to the Top screen or video/photo selection screen) |
| ▲/▼(♠/♦)* | Display the next or the previous photo |
| ▶(⇨)* | Rotate the photo 90 degrees clockwise |
| ◀(◀)* | Display the photo list |
| RETURN* Display the photo list | |
Slideshow
| Button Function | |
| DISPLAY Display info | |
| PAUSE | Continue to display the photo playback (play the slideshow again by pressing the PLAY button) |
| STOP (◎)* | Stop display (return to the Top screen or video/photo selection screen) |
| RETURN* Display the photo lists | |
* The VRD-MC10 has an equivalent button for this operation.
Using the Setup Menu
You can change the various settings for creating discs in the Setup Menu screen.
1 Turn on the DVDirect and press the RETURN button.

2 Press ↑ or ↓ to select a menu item, and press the ENTER button.
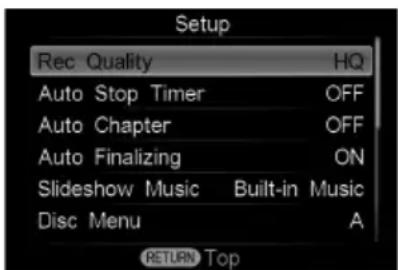
→ indicates the default settings.
Rec Quality (REC mode)
Select the recording quality for recording in SD (Standard Definition) quality.
These options are available when you use an audio/video cable, an AV cable, an S-video cable or a DV (i.LINK) cable to connect your video device.
→HQ
Highest image quality
HSP
High image quality
SP
Standard image quality
LP
Low image quality. You can record more videos on a disc.
Hint
- Disc recording capacity depends on the REC mode (page 77).
Auto Stop Timer
Select the preset time used to stop recording automatically when recording in the SD (Standard Definition) quality.
Auto Stop Timer is available when you use an audio/video cable, an AV cable or an S-video cable to connect your video device.
→OFF
Recording does not stop automatically.
30 minutes - 4 hours
Recording automatically stops when the preset time has passed after recording starts. Select 30 min, 60 min, 90 min, 2h, 3h, or 4h.
Note
- The Auto Stop Timer setting is canceled when: – the recording is completed,
- the (stop) button is pressed during recording, or – the power is turned off.
Auto Chapter
Specify the time interval at which chapters are created automatically on an SD (Standard Definition) disc.
Auto Chapter is available when you use an audio/video cable, an AV cable, an S-video cable or a DV (i.LINK) cable to connect your video device.
OFF
No chapters are inserted.
→5 min
Inserts chapters at approximately 5-minute intervals.
10 min
Inserts chapters at approximately 10-minute intervals.
15 min
Inserts chapters at approximately 15-minute intervals.
Auto Finalizing
Specify whether or not to finalize the disc automatically when recording is completed. This allows immediate playback on DVD players.
→ON
The disc will be finalized automatically when recording is completed. You can play back the finalized disc on other playback devices.
OFF
The disc will not be finalized when recording is completed. You can add videos and/or photos onto the same disc later.
Notes
• To playback the recorded disc on other playback devices, you need to finalize it with the DVDirect. - You cannot add videos and/or photos to a finalized disc. - When copying all contents or selecting the another copy mode requires more than one disc, the recorded discs will be finalized once full, regardless of the Auto Finalize setting. Only the last disc will remain unfinalized. - When you copy both SD (Standard Definition) and HD (High Definition) videos at one time, the recorded discs will be finalized once full, regardless of the Auto Finalize setting. Only the last disc of all HD (High Definition) and SD (Standard Definition) discs will remain unfinalized. If recorded onto only one disc or for the last disc, you can select whether or not to finalize the disc when prompted after recording is completed. - The disc will not be finalized in the Manual copy mode, even though [Auto Finalizing] is set to [ON].
Disc Menu
Select a background image (A - D) to apply to the Disc Menu screen for the discs created with the DVDirect. The background image is set to [A] by default.
Slideshow Music
You can import your favorite music for Slideshow Music (background music).
① Insert a CD of your favorite music, press ↑ or ↓ to select [Slideshow Music], and press the ENTER button.
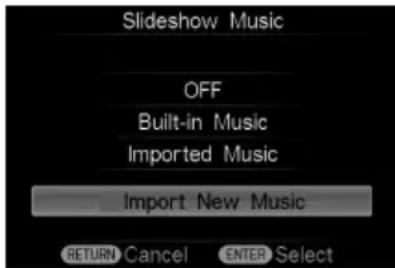
② Press ↑ or ↓ to select track number, and press the (record) button.

The DVDirect starts importing the music, and the message [Importing music ...] appears in the display window.
When the message [Complete] appears, importing has completed.
Hint
- When connecting the audio device with AUDIO IN connectors to the DVDirect's AUDIO OUT connectors, you can play back the music by selecting a track number.
Notes
- You can import only one track, with a maximum of 10 minutes playing time.
- Do not use a nonstandard disc, such as copy control CD.
Finalize disc Erase disc
If you eject a disc without finalizing, you can finalize it later.
① Insert a disc to finalize, press ↑ or ↓ to select [Finalize disc], and press the ENTER button.

② Press ↑ or ↓ to select [Yes] and press the ENTER button.

③ Press ↑ or ↓ to select [OK] and press the ENTER button.

The DVDirect starts finalizing the disc. When the message [Complete] appears, finalizing has completed.
Note
- It takes a few minutes to complete finalizing a disc. (Depending on the contents of a disc, time to complete finalizing a disc may vary.)
You can erase videos or photos recorded on a DVD+RW or DVD-RW disc. The erased disc is reusable as a blank disc.
Note
- Be aware that this operation erases all data.
① Insert a disc to erase, press ↑ or ↓ to select [Erase disc], and press the ENTER button.

② Press ↑ or ↓ to select [Yes] and press the ENTER button.

③ Press ↑ or ↓ to select [Yes] and press the ENTER button.

The DVDirect starts erasing the disc. When the message [Complete] appears, erasing has completed.
COMPONENT Settings
Specify the type of video signals from COMPONENT OUT connectors.
→480i
Outputs 480i resolution.
480p
Outputs 480p resolution.
1080i
Outputs 1080i resolution.
HDMI Settings
YPbPr/RGB
Specify the color space for converting video signals from the HDMI OUT connector.
→Auto
Select [Auto] unless necessary to specify the signal format.
Y/Pb/Pr 4:2:2
Converts the video signal format to Y/Pb/Pr 4:2:2.
Y/Pb/Pr 4:4:4
Converts the video signal format to Y/Pb/Pr 4:4:4.
RGB 16-235
Converts the video signal format to RGB 16-235.
RGB 0-255
Converts the video signal format to RGB 0-255.
Resolution
Specify the resolution to output over HDMI OUT connector.
→Auto
Select [Auto] unless necessary to specify the output resolution.
480p
Outputs 480p resolution.
1080i
Outputs 1080i resolution.
Hint
- HD (High Definition) videos recorded in 720p resolution are output in 720p resolution, even if [1080i] is set.
Sound
Specify the audio signal from the HDMI OUT connector.
→Auto
Select [Auto] unless necessary to specify the audio output. This outputs the audio signal suitable for the TV.
PCM
Down-mixes the audio signal to Linear PCM 2ch and outputs from HDMI OUT.
Note
- If your TV does not support Dolby Digital, DTS or AAC, connecting it to the DVDirect and selecting [Auto] may not get sound. Select [PCM], if you get no sound.
System Info
You can check the system software version of the DVDirect.
Select [System Info] to view the version of system software.
Select [Reset System] to clear the history stored on the DVDirect and revert the settings to the factory default.
Hints
- The system software is the built-in software that makes the DVDirect work.
- Selecting [Reset System] clears the recording history necessary for copying only new video/photo and resets the customized settings.
Demo
The DVDirect automatically plays a demo when it is not operated for a set period of time.
OFF
Disables the demo.
→ON
Enables the demo.
TV Type
You can select the aspect ratio of the connected TV.
16:9
Select this when you connect a wide-screen TV.
4:3
Select this when you connect a 4:3 screen TV.
Language
Select the language display for the display window.
Troubleshooting
If you experience any of the following difficulties while using the DVDirect, use this troubleshooting guide to help remedy the problem before requesting repairs. Refer also to the operating instructions of your camera or video devices.
General
To create an SD (Standard Definition) video disc by down-converting an HD (High Definition) video
- Connect a camera to the DVDirect using an audio/video cable, an AV cable or AV cable with S VIDEO (page 34). You cannot use a USB cable for connection.
Power
The DVDirect does not turn on.
- Make sure that the AC power cord is connected securely (page 29).
- Unplug the power cable and disconnect the video device from the DVDirect. Remove the memory card. Then, reconnect the video device to the DVDirect (or insert the memory card again) and turn it on.
Connection and operation
The camera is connected with a USB cable, but the DVDirect does not work.
- Make sure that your Sony camera is supported by the DVDirect.
- Make sure that the camera is configured for USB connection correctly and the USB cable is connected properly to the camera (page 31).
- Disconnect the USB cable from the DVDirect. Turn both the camera and the DVDirect off, then on again.
The camera is connected with a DV (i.LINK) cable, but the DVDirect does not work.
- Make sure that the camera is set to the PLAY/EDIT mode. If it is in the CAMERA mode, you cannot copy videos with the DVDirect (page 33).
- Disconnect the DV (i.LINK) cable from the DVDirect. Turn both the camera and the DVDirect off, then on again.
A video device is connected to VIDEO IN or S VIDEO IN of the DVDirect, but playback displays no video on the DVDirect's display window.
- Make sure that the audio/video cable or the S-video cable is connected properly to A/V OUT or S VIDEO OUT of the video device.
- The DVDirect is not detecting input signals from the connected video device. Turn on the video device, and configure or operate it to start playback.
- Make sure that a correct input type is selected. On the Top screen, press the ENTER button and select the input connector (S VIDEO or VIDEO) to which the video device is connected.
The number of discs required does not appear on the screen when recording.
- If many videos are recorded, display may take some time.
When copying Visual Index, 📄 appears on images.
- Images displaying cannot be copied.
Playback on a TV
The DVDirect is connected to a TV, but there is no sound or image.
- Using your TV's menu, specify the input type in use to connect the DVDirect.
- Press the OUTPUT button of the DVDirect and select the output type in use to connect to your TV. Make sure that the LED for the correct output type is lit (page 27).
The aspect ratio of an image played on a TV connected to the DVDirect differs from the aspect ratio of the recorded image.
- Make sure that the TV type setting on the DVDirect (page 70) corresponds with your TV.
- Change the aspect ratio of your TV. For details, refer to the operating instructions for your TV.
Playback
Other video devices do not playback the created SD (Standard Definition) disc.
- The disc may not be finalized. Use the DVDirect and finalize the disc first (page 68).
- Some video devices may not work properly for the created discs type.
- Your video device may not support the disc type (e.g., DVD+R, DVD+RW, DVD+R DL). Check if your video device supports the disc type.
Other video devices do not playback the created HD (High Definition) disc.
- A generic DVD player cannot playback HD (High Definition) discs. You need an AVCHD-compatible player (e.g., Blu-ray Disc player/recorder) to playback HD discs (page 24).
Other video devices do not play back the created photo disc.
- You need a video device capable of playing JPEG files.
- Some devices have different playback operations for JPEG files and videos. For details, refer to the operating instructions for your device.
Messages
You cannot select OUTPUT during this operation.
- You cannot display images via external outputs during recording or when using the Setup Menu.
Unknown USB device found. Check the connected device.
- An unsupported USB device is connected to the USB port of the DVDirect.
- The camcorder is supported by the DVDirect, but the USB connection or setting on the connected camera may not be correct.
Insert a recordable disc supported by this recorder.
- An incompatible disc is inserted. Insert a disc compatible with the DVDirect.
- DVD-RW or DVD+RW discs recorded on other video devices are not supported. Use [Erase disc] and erase videos or photos recorded on a disc. The erased disc is reusable as a blank disc (page 68).
The disc is finalized. Cannot record.
- The disc has already been finalized. You cannot use a finalized disc to record videos and/or photos.
No recordable content found.
- The camera or memory card has no video or photo to record.
- One or more videos in the Playlist created on the camera are missing (for copying Playlist only).
- The camera or memory card has no new video or photo to record (for copying new images only).
- A correct storage media is not selected on the USB SELECT screen after the camera is connected.
No recordable content found for One Touch Disc Burn.
- The camera or memory card has no new video or photo to record in the One Touch Disc Burn mode.
Cannot copy to this disc. Insert a new disc.
- You cannot add an HD (High Definition) video to a disc that contains a SD (Standard Definition) video.
- You cannot add an SD (Standard Definition) video to a disc that contains a HD (High Definition) video.
This disc cannot be played by this recorder.
- The DVDirect does not support playback of commercial DVDs or discs recorded on other video devices.
Too many photos. Will import maximum number of allowable photos only.
- If too many photos are saved into the camera or memory card, the DVDirect is copying the number of photos available.
XX/YY videos are not recordable. Continue copying?
- HD (High Definition) video taken in REC mode at a bit rate exceeding 18Mbps, such as in [HD FX] mode (for example, High Definition Handycam®) is contained in a camera or memory card. Such video does not comply with AVCHD format. Select [Yes] to record other than the above condition videos. (XX/YY: number of unrecordable videos/total number of videos)
Supported Discs and Memory Cards
Discs
The following writable discs are compatible with the DVDirect. However, not all disc operations are supported.
| Disc type Logo | Copying with DVDirect | Writing speed | |
| DVD+R Up to 16x |  | √ | |
| DVD+R DL(Double layer) |  | √ | Up to 8x |
| DVD+RW Up to 8x |  | √ | |
| DVD+RWHigh speed |  | √ | Up to 8x |
| DVD-R Up to 16x |  | √ | |
| DVD-R DL(Double layer) |  | - | |
| DVD-RW Up to 6x |  | √ |
Hint
- The DVDirect supports both CPRM and non-CPRM discs.
Note
- Blu-ray disc, DVD-R DL (Double layer), CD-R, CD-RW and 8cm disc are not supported.
Notes on using discs
- You cannot add recordings to a disc created on a PC or other DVD device.
- The quality of commercially made recordable discs can vary. Sub-standard discs may not record normally.
- Some recorded discs cannot be played on playback devices due to the recording quality or physical condition of the disc, or the characteristics of the playback device and playback software. The disc will not play if it has not been correctly finalized.
"Memory Stick"
The DVDirect supports the following types of “Memory Stick.” However, proper operation is not guaranteed for all “Memory Stick” products.
| “Memory Stick” type | Read |
| Memory Stick | ○ |
| Memory Stick (MagicGate/High-speed data transfer compatible) | ○*1 |
| Memory Stick Duo | ○ |
| Memory Stick Duo (MagicGate/High-speed data transfer compatible) | ○*1 |
| MagicGate Memory Stick ○* | 1 |
| MagicGate Memory Stick Duo | ○*1 |
| Memory Stick PRO | ○*1 |
| Memory Stick PRO Duo | ○*1*2 |
| Memory Stick PRO-HG Duo | ○*1 |
*1 Reading of data that requires MagicGate functions cannot be performed with the DVDirect. *2 Sony Memory Stick PRO Duo or Sony Memory Stick PRO-HG Duo operation is supported, up to 32 Gbytes. The memory card slot of the DVDirect does not support capacities exceeding 32 Gbytes. Even if you insert such a card into the camera's memory card slot and connect the camera to the DVDirect with the USB cable, recording will not be available (as of January 2010).
Notes on using "Memory Stick"
- If you slide the write-protect switch to LOCK with a fine-tipped object, you cannot record, edit, or delete images.

- Insert a “Memory Stick” into the Multi memory card slot, and insert a “Memory Stick Duo” into the Memory Stick Duo slot. When inserting a “Memory Stick Duo” with an adapter into the Multi memory card slot, the DVDirect may not work properly.
- Not all memory card operations are supported with card adapters.
- Use your camera to format the “Memory Stick.” When formatted on a computer, “Memory Stick” may not work properly.
- The position and shape of the write-protect switch may differ depending on the “Memory Stick” you use.
- Do not remove the "Memory Stick" while recording or when the Memory card access LED is on. • Data may be corrupted if:
- the "Memory Stick" is removed or the DVDirect is turned off while reading data, or
- the "Memory Stick" is used in locations subject to static electricity or electrical noise.
SD Card/xD-Picture Card/CompactFlash
The DVDirect has slots for the following memory cards. However, not all memory card operations are supported.
• SD Memory Card*1 - SDHC Memory Card*2 • xD-Picture Card - CompactFlash (Type I/Type II) and CF+Card (Type I/Type II)-compatible CompactFlash*3
*1 SD Memory Card operation is supported up to 2 Gbytes. *2 SDHC Memory Card operation is supported up to 32 Gbytes. The memory card slot of the DVDirect does not support capacities exceeding 32 Gbytes. Even if you insert such a card into the camera's memory card slot and connect the camera to the DVDirect with the USB cable, recording will not be available (as of January 2010). *3 Use CompactFlash with a power specification of 3.3V or 3.3V/5V. Cards with a power specification of 3V or 5V should not be used. Inserting other types of CompactFlash into the DVDirect's card slot may cause damage.
Notes on using memory cards
- Do not use a commercial card adapter. The DVDirect may not work properly.
- Do not use a metallic card adapter as malfunction may result.
- The DVDirect does not read copyright protected data.
Recording Time and Video Lengths
Time required for recording
When recording video, the length of time required for recording depends on the REC mode setting (FH, XP, HQ, SP, or LP) used to shoot the video and the number of scenes the video contains. Typically, more time is required to record videos onto a disc if the video was recorded with a higher image quality (bit rate) setting. The chart below provides a general estimate of time required to record for Sony devices.
Recording HD (High Definition) video
(Time required to copy a 1-hour video in SP mode on a disc)
| Camcorder connected via a USB cable (Media other than 8cm disc) | Camcorder connected via a USB cable (8cm disc) | Memory card slot on DVDirect |
| approx. 15 minutes approx. 30 minutes approx. 30 minutes | ||
Recording SD (Standard Definition) video
(Time required to copy a 1-hour video in SP mode on a disc)
| Camcorder connected via a USB cable (Media other than 8cm disc) | Camcorder connected via a USB cable (8cm disc) | Memory card slot on DVDirect |
| approx. 15 minutes approx. 30 minutes approx. 30 minutes | ||
Hint
- When a camcorder is connected to the DV IN, VIDEO IN or S VIDEO IN connector on the DVDirect, the length of time required for recording is the same as the playback time of the video.
Note
- You cannot record HD (High Definition) video taken in REC mode at a bit rate exceeding 18Mbps, such as in [HD FX] mode (for example, High Definition Handycam ® ) in AVCHD format. For REC mode or bit rate, refer to the operating instructions of your camera.
Disc space (recordable time) available for recording videos
The chart below provides a general estimate of disc space (recordable time) available for recording videos onto a disc for Sony devices.
HD (High Definition) discs (AVCHD format)
The recordable video length depends on the REC mode setting on the camera.
| REC mode setting used to shoot the video DVD-R/-RW/+R/+RW |
| FH approx. 30 minutes |
| XP approx. 30 minutes |
| FS approx. 35 minute |
| HQ+ approx. 40 minute |
| HQ approx. 55 minutes |
| SP approx. 1 hour 10 minutes |
| LP approx. 1 hour 35 minutes |
SD (Standard Definition) discs (USB connection or Memory card slot)
The recordable video length depends on the REC mode setting on the camera.
| REC mode setting used to shoot the video DVD-R/-RW/+R/+RW |
| HQ approx. 1 hour |
| SP approx. 1 hour 30 minutes |
| LP approx. 3 hours |
SD (Standard Definition) discs (DV IN, VIDEO IN or S VIDEO IN connector)
The recordable video length depends on the [Rec Quality] (REC mode) setting on the DVDirect (page 66).
| REC mode (Rec Quality) setting on the DVDirect DVD-R/-RW/+R/+RW |
| HQ approx. 1 hour |
| HSP approx. 1 hour 30 minutes |
| SP approx. 2 hours |
| LP approx. 3 hours |
Hint
- When using DVD+R DL, it takes 1.8 times longer than the above time.
Note
- You cannot record HD (High Definition) video taken in REC mode at a bit rate exceeding 18Mbps, such as in [HD FX] mode (for example, High Definition Handycam®) in AVCHD format. For REC mode or bit rate, refer to the operating instructions of your camera.
About Created Discs
The DVDirect creates a Disc Menu at the beginning of a disc recorded. The Disc Menu is displayed each time a disc is inserted into a player and available for selecting videos from dates or thumbnails.
According to the type of disc to create and device connection used for recording, titles and chapters are created in the following manner:
SD (Standard Definition) discs
(DV IN, VIDEO IN or S VIDEO IN connector)
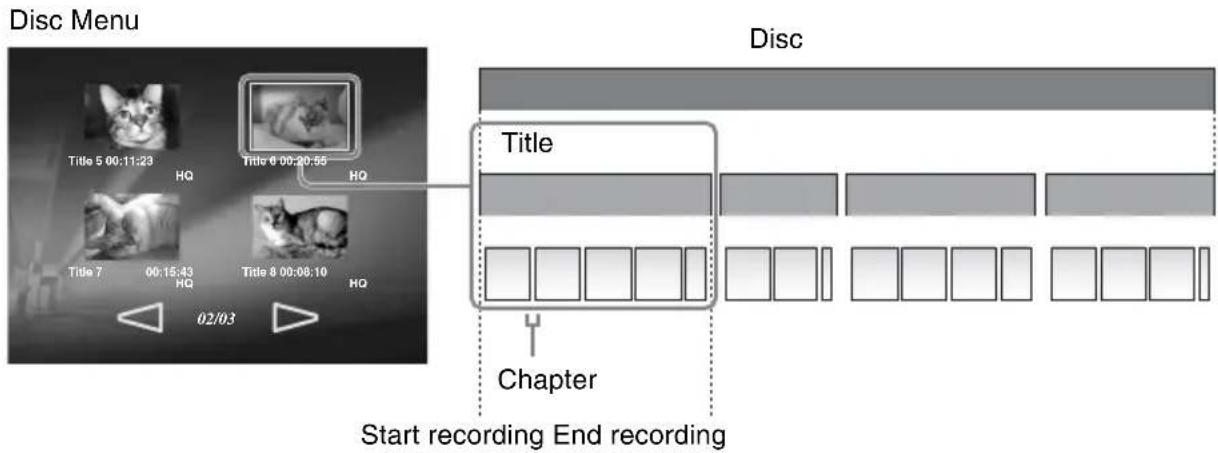
The Disc Menu displays thumbnails of the titles created between the points where you start and stop recording on the DVDirect.
For each title, chapters are automatically created according to the [Auto Chapter] setting configured in the Setup Menu (page 66).
SD (Standard Definition) discs (USB port or Memory card slot)

- The Disc Menu displays thumbnails of the titles created at points in the video where the shooting date changes. For each title, chapters (breakpoints of a video on the disc) are automatically created by scene between the point where you start and stop shooting on the camera.
- If you copy videos recorded in a variety of REC modes (HQ, SP, etc. setting on the camera), different aspect ratios (16:9 or 4:3 setting on a camera), or add videos to the disc, titles (even of the same shooting date) may be separated.
HD (High Definition) discs

- The Disc Menu lists the shooting dates of scenes. Each shooting date is configured by scene created between the point where you start and stop shooting on the camera.
- If you copy videos recorded in a variety of REC modes (HQ, SP, etc. setting on the camera), or add videos to the disc, titles (even of the same shooting date) may be separated.
- When an HD (High Definition) disc is played on the DVDirect, every shooting date appears on the playback screen as a title. You can select the shooting date by the remote.
- When selecting [Disc Index] in the top right of the Disc Menu, each scene is played sequentially for 10 seconds from the beginning. If a scene recorded is too long, indexes will be automatically created every 5 minutes and played for 10 seconds.
Notes
- Some players may not be able to display the Disc Menu.
- When photos and videos are recorded onto the same disc, the Disc Menu does not show thumbnails or shooting dates for photos.
Hint
- You can use factory-set images as a background image for the Disc Menu screen (page 67).
Precautions
Operation and storage conditions
Avoid using or storing the DVDirect in hot or humid locations, or places where it might be subject to severe vibration or direct sunlight.
Cleaning
Use a soft, dry cloth to clean the external surfaces of the DVDirect. Do not use an abrasive, disposable cloth such as paper towels, as they may damage the surface finishes.
Transportation
Please repack the DVDirect in its original carton when shipping by itself.
If the DVDirect is to be shipped, remove any disc beforehand.
Moisture condensation
Do not expose the DVDirect to sudden temperature changes. Do not use the DVDirect immediately after moving it from a cold to warm location or raising the room temperature suddenly, as condensation may have formed within the DVDirect. If the temperature changes suddenly while using the DVDirect, keep the power on, but stop using it for at least an hour.
Handling discs
- Handle discs only by the edges. Never touch the recording surface.

- Do not affix labels on discs.

- Do not store discs in dusty or humid locations, in direct sunlight, or near heat generating devices.
- To protect important data, always keep discs in their cases.
- Clean the disc with a cleaning cloth. Wipe the disc from the center out.
- Data may not be recorded properly if there are scratches or dust on the unrecorded area of writable discs. Handle discs very carefully.
Handling memory cards
- Do not drop, bend, or submit the memory cards to external shock.
- Do not disassemble or modify the memory cards.
- Avoid touching the terminal of a memory card or touching it with a metal object.
- Avoid getting liquids on a memory card or using them in areas subject to high humidity.
- Avoid using or storing a memory card in a location subject to:
- extremely high temperature, such as the interior of a car, outdoors exposed to direct sunlight, or near a heater.
- direct sunlight
- high humidity
- corrosive substances
- excessive dust
- electrostatic or electronic noises
- magnetic fields
- When storing or carrying a memory card, keep it in its original case to ensure protection of important data.
- Avoid removing a memory card from its slot or turning off the power button while the DVDirect is accessing it, as data may be rendered unreadable.
Handling an HDMI cable
- Position the HDMI cable correctly when connecting it to the HDMI connector.
- Be sure to insert the HDMI cable until it hits the positive stop.
- When carrying the DVDirect, or if it is to be shipped, remove the HDMI cable beforehand.
Specifications
Recording/Copying
Creatable discs
- Standard Definition (SD) disc (DVD-VIDEO format) *1 • High Definition (HD) disc (AVCHD format) *1
- Photodisc (JPEG files) * You can record both videos and photos onto these discs.
Recordable discs
DVD+R, DVD+RW, DVD-R, DVD-RW, DVD+R DL 12cm discs
Supported input devices (Video recording)
- Sony digital camcorder
- HDD
- Built-in memory
- Memory card
- 8 cm disc
- DV/D8 tape
- Sony digital still camera
- Built-in memory
- Memory card
- Other digital camcorder
- Memory card
- DV tape
• Video devices with video/audio outputs
Supported input devices (Photo recording)
- Sony digital camcorder
- HDD
- Built-in memory
- Memory card
- 8 cm disc
- Sony digital still camera
- Built-in memory
- Memory card
- Other digital camcorder
- Memory card
Supported photo format 2
JPEG, DCF2.0 compliant
*2 The following JPEG file is supported. Number of pixels: up to 8192×8192 File size: up to 7.2 MB
Playback
playable discs
Discs created with VRD-MC10 (Other commercial or recorded discs are not supported.)
Output
DVDirect's built-in LCD display or display devices connected to the VIDEO OUT of the DVDirect (for playback only)
Input/Output Interface
DV IN*1
4-pin i.LINK (IEEE1394)
*1 For DV input from DV digital video camera only. You cannot record videos from MICROMV or HDV camcorders (HDV format) and other digital video devices that have the i.LINK connector.
VIDEO IN
1 Vp-p/75 ohms
S VIDEO IN
4-pin mini-DIN
Y: 1 Vp-p/75 ohms
C: 0.286 Vp-p/75 ohms
AUDIO IN
2 Vrms (Impedance more than 47 kilohms)
USB port
Type A*2
*2 For Sony camera connection only.
COMPONENT OUT
Y: 1 Vp-p/75 ohms
PB: 0.7 Vp-p/75 ohms
2 Vrms (Load impedance more than 10 kilohms)
HDMI OUT
Type A (19-pin)
Memory Card Slot
"Memory Stick Duo"
"Memory Stick"*
SD Memory Card*
xD-Picture Card*
CompactFlash
* Multi card slot
General
Power
DC 16V (supplied from the DC IN jack)
Consumption
64W
AC adapter*1
Type: AC-NB16A
Input: AC 100 V - 240 V
Output: DC 16 V/4A
*1 Use an AC power cord appropriate for the region or country of use.
Size
Approx. 198 × 75 × 230 mm (W×H×D)
Weight
Approx. 1.75 kg
Operating temperature
5°C to 35°C
Design and specifications are subject to change without notice.
Index
A
All....38, 40, 51
Audio/video cable .....34, 59
Auto Chapter 66
Auto Finalizing....67
Auto Stop Timer....66
C
CompactFlash....37, 75
COMPONENT Settings ......68
Component video cable.... 58
D
Demo....69
Disc
Erase.... 68
Finalize.... 68
Inserting a disc 30
Recordable time 77
Supported discs ....73
Time required for recording 76
Disc Menu 67
DV (i.LINK) cable 33
H
Handycam ® 21
HD (High Definition) discs 77, 79
HDMI cable.... 58
HDMI Settings 69
|
Images 21
L
Language 70
M
Manual 47, 53
Memory Card 37, 73
"Memory Stick" 37, 74
"Memory Stick Duo" .....37, 74
N
New Video/Photo copying from a Handycam® 41
0
One Touch Disc Burn 49
P
Photo 55
Playlist....43 copying from a Handycam® ....43
R
Rec Quality (REC mode) ...... 66
Remote control.... 28
Reset System.... 69
S
SD (Standard Definition) discs 77, 78
SD Card....37, 75
Setup Menu 66
S-video cable.... 35
System Info 69
T
Top screen.... 29
TV Type 70
U
USB cable 31
V
Viewing a created disc .... 22
Connecting to a TV.... 57
Photos 63
Slideshow 64
Videos......60
Visual Index......45, 55
X
xD-Picture Card ....37, 75
P/N 7911000014C


- MULTI-FUNCTION DVD RECORDER
- SELECTING COPY MODE
- SAFETY REGULATIONS
- WARNING
- CAUTION
- IMPORTANT SAFETY INSTRUCTIONS
- FCC COMPLIANCE STATEMENTS
- NOTES ON AC POWER ADAPTER
- FOR CUSTOMERS IN U.S.A
- FOR THE STATE OF CALIFORNIA, USA ONLY
- FOR CUSTOMERS IN THE UNITED KINGDOM AND REPUBLIC OF IRELAND
- DISPOSAL OF OLD ELECTRICAL & ELECTRONIC EQUIPMENT (APPLICABLE IN THE EUROPEAN UNION AND OTHER EUROPEAN COUNTRIES WITH SEPARATE COLLECTION SYSTEMS)
- COPYRIGHT
- AFTER-IMAGE LAG
- TABLE OF CONTENTS
- INTRODUCING DVDIRECT
- PREPARATIONS FOR RECORDING
- COPYING FROM A CAMERA
- COPYING FROM VIDEO DEVICES
- VIEWING A CREATED DISC
- SETUP
- TROUBLESHOOTING/REFERENCES
- ADDITIONAL INFORMATION
- FIND A TYPE OF COPY MODE
- SELECT THE TYPE OF DISC TO CREATE
- HD (HIGH DEFINITION) DISC (AVCHD FORMAT)
- SD (STANDARD DEFINITION) DISC
- NOTE
- USE A USB CABLE
- INSERT A MEMORY CARD INTO THE SLOT
- RECORDING IS NOT AVAILABLE
- SELECT THE COPY MODE AND CREATE A DISC
- RECORD HD (HIGH DEFINITION) VIDEO TAKEN BY ANOTHER DIGITAL VIDEO CAMERA* AS IS
- WHAT IS THE RECORDING MEDIA? CONNECTION AND SETUP
- NOTES
- DOWN-CONVERT VIDEOS TO SD (STANDARD DEFINITION) QUALITY
- USE AN AV CABLE
- USE A DV (I.LINK) CABLE
- ALL OF THE ABOVE MEDIA
- CONNECT OTHER VIDEO DEVICE AND RECORD SD (STANDARD DEFINITION) VIDEO
- RECORDING PHOTOS FROM MEMORY CARD
- ABOUT THIS MANUAL
- SELECTING COPY MODE (PAGE 8)
- PREPARATIONS FOR RECORDING (PAGE 29)
- COPYING (PAGES 38, 51)
- VIEWING A CREATED DISC (PAGE 57)
- ICONS
- ABOUT HANDYCAM®
- ABOUT IMAGES
- ABOUT THE DVDIRECT
- ABOUT ILLUSTRATIONS
- FEATURES
- RECORDING HD (HIGH DEFINITION) VIDEO
- RECORDING SD (STANDARD DEFINITION) VIDEO
- RECORDING PHOTOS
- BEFORE YOU BEGIN
- NOTES ON THE SUPPORTED DEVICE AND THE IMAGE
- NOTES ON COPYING ON DISCS
- NOTES ON COPYING MULTIPLE TYPES OF IMAGE
- VIEWING DISCS WITH THE DVDIRECT
- NOTES ON HD (HIGH DEFINITION) DISC COMPATIBILITY
- HD (HIGH DEFINITION) DISC (CONTAINING HIGH DEFINITION VIDEOS)
- SD (STANDARD DEFINITION) DISC (CONTAINING STANDARD DEFINITION VIDEOS)
- NOTE ON THE SCREEN OF THE CONNECTED TV
- PACKAGE CONTENTS
- PARTS AND CONTROLS
- MAIN UNIT
- FRONT AND SIDES
- TOP PANEL
- REAR PANEL
- REMOTE CONTROL
- TO CHANGE THE BATTERY OF THE REMOTE CONTROL
- TURNING THE POWER ON
- INSERTING A DISC
- PRESS THE ▲ (EJECT) BUTTON
- PLACE THE DISC IN THE DISC TRAY WITH ITS PLAYING/RECORDING SIDE DOWN, AND PRESS THE ▲ (EJECT) BUTTON AGAIN
- CONNECTING CABLES FOR RECORDING
- USB CABLE
- TURN ON THE CAMERA
- HINT
- CONNECT THE CAMERA TO THE DVDIRECT
- CHECK THE USB CONNECTION ON THE CAMERA
- SONY DIGITAL VIDEO CAMERA
- HINTS
- SONY DIGITAL STILL CAMERA
- SET THE CAMERA TO PLAYBACK MODE
- AUDIO/VIDEO CABLE (AV CABLE)
- TURN ON THE VIDEO DEVICE
- OPERATE THE VIDEO DEVICE TO START PLAYBACK OF VIDEO
- CONNECT THE VIDEO DEVICE TO THE DVDIRECT
- MEMORY CARD
- INSERT A MEMORY CARD INTO ITS CORRESPONDING SLOT
- MEMORY STICK DUO," "MEMORY STICK," SD CARD, OR XD-PICTURE CARD
- COMPACTFLASH
- COPYING ALL CONTENTS
- SONY CAMERA
- OTHER CAMERA
- MAKE SURE THAT THE COPY MODE SELECT SCREEN APPEARS
- PRESS ↑ OR ↓ TO SELECT [ALL] AND PRESS →
- MAKE SURE THAT THE TYPE OF IMAGES YOU WISH TO COPY IS MARKED
- IF BOTH [HD VIDEO] AND [SD VIDEO] TYPES ARE SELECTED FOR RECORDING
- PRESS THE (RECORD) BUTTON TO START RECORDING
- CHANGE TO A BLANK DISC WHEN THE MESSAGE [INSERT A NEW DISC.] APPEARS
- REMOVE THE CREATED DISC
- TO STOP RECORDING
- COPYING ALL CONTENTS (FROM AN 8CM DISC)
- CM DISC
- MAKE SURE THAT [ALL] IS SELECTED AND PRESS THE (RECORD) BUTTON
- CHANGE THE 8CM DISC OF THE CAMERA WHEN PROMPTED
- PRESS ↑ OR ↓ TO SELECT [CONTINUE] AND PRESS THE ENTER BUTTON
- REPEAT STEPS 3 AND 4 FOR EACH 8CM DISC
- WHEN YOU FINISH COPYING FROM ALL 8CM DISCS, SELECT [QUIT] IN THE DISPLAY OF STEP 3 AND PRESS THE ENTER BUTTON
- COPYING ONLY NEW VIDEO/PHOTO
- PRESS ↑ OR ↓ TO SELECT [NEW VIDEO/ PHOTO] AND PRESS →
- PRESS THE (STOP) BUTTON WHEN REPLACING A DISC
- NOTES ON USING A MEMORY CARD
- COPYING PLAYLIST
- PRESS OR TO SELECT [PLAYLIST] AND PRESS →
- MAKE SURE THAT THE TYPE OF PLAYLIST IMAGES YOU WISH TO COPY IS MARKED
- COPYING VISUAL INDEX LISTS
- PRESS ↑ OR ↓ TO SELECT [VISUAL INDEX] AND PRESS →
- PRESS ↑ OR ↓ TO SELECT THE TYPE OF IMAGES YOU WISH TO COPY AND PRESS →
- MAKE SURE THAT THE SHOOTING DATE FOLDERS OF THE IMAGES YOU WISH TO COPY ARE MARKED
- PRESS ↑ OR ↓ TO SELECT A SHOOTING DATE FOLDER AND PRESS →
- COPYING MANUALLY
- PRESS THE ENTER BUTTON ON THE TOP SCREEN
- SELECT THE INPUT ([S-VIDEO] OR [VIDEO]) CONNECTED TO THE CAMERA IN [SELECT INPUT]
- OPERATE YOUR CAMERA TO START VIDEO PLAYBACK, AND PRESS THE (RECORD) BUTTON OF THE DVDIRECT
- PRESS THE (STOP) BUTTON TO STOP RECORDING
- TO RECORD AN ADDITIONAL VIDEO, REPEAT STEPS 3 AND
- PRESS THE ▲ (EJECT) BUTTON TO EJECT THE DISC WHEN RECORDING IS COMPLETE
- TO FINALIZE THE DISC, PRESS ↑ OR ↓ TO SELECT [YES] AND PRESS THE ENTER BUTTON
- PRESS ↑ OR ↓ TO SELECT [OK] AND PRESS THE ENTER BUTTON
- NOTES ON COPYING MANUALLY FROM A CAMERA
- ONE TOUCH DISC BURN
- TURN ON THE DVDIRECT (PAGE 29) AND INSERT A DISC (PAGE 30)
- TOUCH DISC BURN ON THE CAMERA'S LCD SCREEN, OR PRESS THE DISC BURN BUTTON ON THE CAMERA
- IF THE CAMERA'S MEDIA HAS BOTH HD (HIGH DEFINITION) AND SD (STANDARD DEFINITION) VIDEOS
- COPYING ALL CONTENTS (FROM A DV TAPE)
- SONY CAMERA DV TAPE OTHER CAMERA DV TAPE
- PRESS ↑ OR ↓ TO SELECT [ALL] AND PRESS THE (RECORD) BUTTON
- TO PAUSE RECORDING
- COPYING ALL CONTENTS (PHOTO)
- SONY CAMERA DV TAPE VIDEO DEVICE OTHER CAMERA DV TAPE
- MAKE SURE THAT THE VIDEO DEVICE IS CORRECTLY CONNECTED TO THE DVDIRECT
- FOR CONNECTION WITH DV (I.LINK) CABLE
- FOR CONNECTION WITH A/V CABLES
- OPERATE THE VIDEO DEVICE TO START PLAYBACK, AND PRESS THE (RECORD) BUTTON OF THE DVDIRECT TO START RECORDING
- TO RECORD AN ADDITIONAL VIDEO, REPEAT STEPS 2 AND
- NOTES ON COPYING MANUALLY FROM A VIDEO DEVICE
- COPYING VISUAL INDEX LISTS (PHOTO)
- MAKE SURE THAT THE SHOOTING DATE FOLDERS OF THE PHOTOS YOU WISH TO COPY ARE MARKED
- CONNECTING TO A TV
- HDMI CABLE
- ② COMPONENT VIDEO AND AUDIO CABLES
- AUDIO/VIDEO CABLE
- CONNECTING TO A TV THROUGH A VIDEO DEVICE
- CONNECTING TO A MONAURAL TV (WITH ONLY ONE AUDIO IN CONNECTOR)
- VIEWING VIDEOS
- VIEWING ON A TV
- ON YOUR TV, SELECT THE INPUT FROM THE DVDIRECT
- TURN ON THE DVDIRECT
- PRESS THE OUTPUT BUTTON
- PRESS THE UP OR DOWN ARROW TO SELECT [YES] AND PRESS THE ENTER BUTTON
- PRESS THE OUTPUT BUTTON REPEATEDLY TO CHANGE THE OUTPUT OF THE DVDIRECT
- INSERT A DISC CREATED WITH THE DVDIRECT, AND PRESS THE (PLAYBACK) BUTTON
- TO STOP PLAYBACK
- NOTE ON PLAYBACK DISPLAY
- VIEWING ON THE DVDIRECT
- PLAYING VIDEOS WITH THE DISC INDEX FUNCTION
- SELECT [DISC INDEX] ON THE DISC MENU OF THE HD (HIGH DEFINITION) DISC DISPLAYED IN STEP 8 OF "VIEWING ON A TV
- OPERATION WITH REMOTE CONTROL
- VIEWING PHOTOS
- PRESS ↑ OR ↓ TO SELECT [YES] AND PRESS THE ENTER BUTTON
- IF THE DISC CONTAINS BOTH VIDEOS AND PHOTOS, PRESS ↑ OR ↓ TO SELECT [PHOTO] AND PRESS THE ENTER BUTTON
- PRESS ↑ OR ↓ TO SELECT A DATE AND PRESS →
- PRESS ↑ OR ↓ TO SELECT A PHOTO AND PRESS THE ENTER BUTTON
- TURN ON THE DVDIRECT AND INSERT A DISC CREATED WITH THE DVDIRECT
- PRESS THE (PLAYBACK) BUTTON
- FOLLOW STEPS 7 TO 9 OF "VIEWING ON A TV" (PAGE 63)
- PLAYING A PHOTO SLIDESHOW
- USING THE SETUP MENU
- TURN ON THE DVDIRECT AND PRESS THE RETURN BUTTON
- PRESS ↑ OR ↓ TO SELECT A MENU ITEM, AND PRESS THE ENTER BUTTON
- REC QUALITY (REC MODE)
- →HQ
- HSP
- SP
- LP
- AUTO STOP TIMER
- →OFF
- MINUTES - 4 HOURS
- AUTO CHAPTER
- OFF
- →5 MIN
- MIN
- AUTO FINALIZING
- →ON
- DISC MENU
- SLIDESHOW MUSIC
- FINALIZE DISC ERASE DISC
- COMPONENT SETTINGS
- →480I
- P
- I
- HDMI SETTINGS
- YPBPR/RGB
- →AUTO
- Y/PB/PR
- RGB
- RESOLUTION
- SOUND
- PCM
- SYSTEM INFO
- DEMO
- TV TYPE
- LANGUAGE
- TROUBLESHOOTING
- GENERAL
- TO CREATE AN SD (STANDARD DEFINITION) VIDEO DISC BY DOWN-CONVERTING AN HD (HIGH DEFINITION) VIDEO
- POWER
- THE DVDIRECT DOES NOT TURN ON
- CONNECTION AND OPERATION
- THE CAMERA IS CONNECTED WITH A USB CABLE, BUT THE DVDIRECT DOES NOT WORK
- THE CAMERA IS CONNECTED WITH A DV (I.LINK) CABLE, BUT THE DVDIRECT DOES NOT WORK
- A VIDEO DEVICE IS CONNECTED TO VIDEO IN OR S VIDEO IN OF THE DVDIRECT, BUT PLAYBACK DISPLAYS NO VIDEO ON THE DVDIRECT'S DISPLAY WINDOW
- THE NUMBER OF DISCS REQUIRED DOES NOT APPEAR ON THE SCREEN WHEN RECORDING
- WHEN COPYING VISUAL INDEX, 📄 APPEARS ON IMAGES
- PLAYBACK ON A TV
- THE DVDIRECT IS CONNECTED TO A TV, BUT THERE IS NO SOUND OR IMAGE
- THE ASPECT RATIO OF AN IMAGE PLAYED ON A TV CONNECTED TO THE DVDIRECT DIFFERS FROM THE ASPECT RATIO OF THE RECORDED IMAGE
- PLAYBACK
- OTHER VIDEO DEVICES DO NOT PLAYBACK THE CREATED SD (STANDARD DEFINITION) DISC
- OTHER VIDEO DEVICES DO NOT PLAYBACK THE CREATED HD (HIGH DEFINITION) DISC
- OTHER VIDEO DEVICES DO NOT PLAY BACK THE CREATED PHOTO DISC
- MESSAGES
- YOU CANNOT SELECT OUTPUT DURING THIS OPERATION
- UNKNOWN USB DEVICE FOUND. CHECK THE CONNECTED DEVICE
- INSERT A RECORDABLE DISC SUPPORTED BY THIS RECORDER
- THE DISC IS FINALIZED. CANNOT RECORD
- NO RECORDABLE CONTENT FOUND
- NO RECORDABLE CONTENT FOUND FOR ONE TOUCH DISC BURN
- CANNOT COPY TO THIS DISC. INSERT A NEW DISC
- THIS DISC CANNOT BE PLAYED BY THIS RECORDER
- TOO MANY PHOTOS. WILL IMPORT MAXIMUM NUMBER OF ALLOWABLE PHOTOS ONLY
- XX/YY VIDEOS ARE NOT RECORDABLE. CONTINUE COPYING
- SUPPORTED DISCS AND MEMORY CARDS
- DISCS
- NOTES ON USING DISCS
- MEMORY STICK
- NOTES ON USING "MEMORY STICK
- SD CARD/XD-PICTURE CARD/COMPACTFLASH
- NOTES ON USING MEMORY CARDS
- RECORDING TIME AND VIDEO LENGTHS
- TIME REQUIRED FOR RECORDING
- DISC SPACE (RECORDABLE TIME) AVAILABLE FOR RECORDING VIDEOS
- HD (HIGH DEFINITION) DISCS (AVCHD FORMAT)
- SD (STANDARD DEFINITION) DISCS (USB CONNECTION OR MEMORY CARD SLOT)
- SD (STANDARD DEFINITION) DISCS (DV IN, VIDEO IN OR S VIDEO IN CONNECTOR)
- ABOUT CREATED DISCS
- SD (STANDARD DEFINITION) DISCS
- (DV IN, VIDEO IN OR S VIDEO IN CONNECTOR)
- SD (STANDARD DEFINITION) DISCS (USB PORT OR MEMORY CARD SLOT)
- HD (HIGH DEFINITION) DISCS
- PRECAUTIONS
- OPERATION AND STORAGE CONDITIONS
- CLEANING
- TRANSPORTATION
- MOISTURE CONDENSATION
- HANDLING DISCS
- HANDLING MEMORY CARDS
- HANDLING AN HDMI CABLE
- SPECIFICATIONS
- RECORDING/COPYING
- CREATABLE DISCS
- RECORDABLE DISCS
- SUPPORTED INPUT DEVICES (VIDEO RECORDING)
- SUPPORTED INPUT DEVICES (PHOTO RECORDING)
- SUPPORTED PHOTO FORMAT
- PLAYABLE DISCS
- OUTPUT
- INPUT/OUTPUT INTERFACE
- DV IN
- VIDEO IN
- S VIDEO IN
- AUDIO IN
- USB PORT
- COMPONENT OUT
- HDMI OUT
- MEMORY CARD SLOT
- CONSUMPTION
- AC ADAPTER
- SIZE
- WEIGHT
- OPERATING TEMPERATURE
- INDEX
- A
- C
- D
- H
- L
- M
- N
- R
- S
- T
- U
- V
- X
Brand : SONY
Model : VRD-MC10
Category : Blu-ray player