
BMP250710 - Oven GAGGENAU - Free user manual and instructions
Find the device manual for free BMP250710 GAGGENAU in PDF.


| Product type | Built-in oven |
| Brand | Gaggenau |
| Model | BMP250710 |
| Dimensions (H x W x D) | 60 cm x 90 cm x 55 cm |
| Net weight | 50 kg |
| Usable volume | 76 L |
| Power supply | 230 V / 50 Hz / 3.7 kW |
| Main functions | Convection, bottom heat, hot air grilling, grill, pyrolysis |
| Cleaning | Pyrolysis (self-cleaning) |
| Cavity material | Catalytic enamel |
| Safety | Child lock, automatic shut-off, overheat protection |
| Control panel | TFT touch screen with knobs |
| Door | Cold door with triple glazing |
| Included accessories | Round rack, drip tray, pizza stone |
| Repairability index | 8.7 / 10 |
| Availability of spare parts | Parts available within 2 weeks (references on request) |
| Energy class | A+ |
| Noise | < 50 dB(A) |
| Color | Brushed metal or black (depending on version) |
Frequently Asked Questions - BMP250710 GAGGENAU
User questions about BMP250710 GAGGENAU
0 question about this device. Answer the ones you know or ask your own.
Ask a new question about this device
Download the instructions for your Oven in PDF format for free! Find your manual BMP250710 - GAGGENAU and take your electronic device back in hand. On this page are published all the documents necessary for the use of your device. BMP250710 by GAGGENAU.
USER MANUAL BMP250710 GAGGENAU
Combi-microwave oven
SAVE THESE INSTRUCTIONS FOR FUTURE REFERENCE.
CONSERVEZ CETTE NOTICE D'UTILISATION POUR RÉFÉRENCE ULTÉRIEURE.
Table of Contents
Safety Definitions 4
IMPORTANT SAFETY INSTRUCTIONS 5
▲ PRECAUTIONS TO AVOID POSSIBLE EXPOSURE TO EXCESSIVE MICROWAVE ENERGY 5
GROUNDING INSTRUCTIONS 7
TV / Radio Interference 8
Intended Use 9
Child Safety 9
Cleaning Safety 9
Cooking Safety 10
In Case of Fire 11
Liquids 11
Cooking Items 12
Cooking Utensils 15
Thermometers 15
Pacemakers 16
Fan Motor Operation 16
Causes of damage 17
Protecting the environment 17
Tips for saving energy 17
Getting to know the appliance 18
Displays and controls 18
Function selector positions 18
Symbols 18
Colors and display 19
Additional information i 19
Cooling fan 19
Accessories 20
Special accessories 21
Before first use 21
Setting the language 21
Setting the time format 22
Setting the time 22
Setting the date format 22
Setting the date 22
Setting the temperature format 22
Completing initial set-up 23
Heating up the oven 23
Cleaning accessories 23
Activating the appliance 23
Standby 23
Activate appliance 23
Microwave 24
Notes regarding cookware 24
Microwave output 24
Setting the microwave 24
Oven 25
Setting the type of heating and temperature 26
Quick heat 26
Safety shut-off 26
Broil 27
Setting the Broil mode 27
Combination mode 27
Setting the combination mode 27
Sequential operation 28
Setting a series of operations 28
End of cooking time 29
Automatic programs 30
Setting a program 30
Adjust individually 31
Tips for automatic programs 31
Program table 32
Personal recipes 34
Recording a recipe 34
Programming a recipe 35
Entering a name 35
Starting a recipe 35
Change recipe 36
Deleting a recipe 36
Timer functions 36
Launching the timer menu 36
Timer 37
Stopwatch 37
Sabbath mode 38
Child lock 38
Activating the child lock 38
Deactivating the child lock 38
Basic Settings 39
Cleaning 41
Self-cleaning surface in the cooking compartment 42
Cleaning agent 42
Troubleshooting 44
Power cut 45
Demo mode 45
Technical specifications 45
Customer service 46
Tables and tips 47
Defrosting 47
Defrosting, heating up or cooking frozen food 49
Heating food 50
Cooking food 52
Microwave tips 53
Cakes and pastries 53
Baking tips 54
Roasting and grilling 55
Tips for roasting and grilling 57
Casseroles, gratins 58
Frozen convenience products 58
Test dishes 59
Acrylamide in foodstuffs 60
Additional information on products, accessories, replacement parts and services can be found at
www.gaggenau.com and in the online shop
www.gaggenau.com/zz/store
Safety Definitions

WARNING
This indicates that death or serious injuries may occur as a result of non-observance of this warning.

CAUTION
This indicates that minor or moderate injuries may occur as a result of non-observance of this warning.
NOTICE
This indicates that damage to the appliance or property may occur as a result of non-compliance with this advisory.
Note: This alerts you to important information and/or tips.

Protective earth (ground)
To identify any terminal which is intended for connection to an external conductor for protection against electric shock in case of a fault, or the terminal of a protective earth (ground) electrode.

Heavy load
Requires 2 people to carry
IMPORTANT SAFETY INSTRUCTIONS
READ ALL INSTRUCTIONS BEFORE USING THE APPLIANCE

CONSIGNES DE SÉCURITÉ IMPORTANTES
LISEZ TOUTES LES INSTRUCTIONS AVANT D'UTILISER L'APPAREIL
WARNING
Before installing, turn power OFF at the service panel. Lock service panel to prevent power from being turned ON accidentally.
SAVE THESE INSTRUCTIONS FOR FUTURE REFERENCE.
⚠ PRECAUTIONS TO AVOID POSSIBLE EXPOSURE TO EXCESSIVE MICROWAVE ENERGY
(1) Do not attempt to operate this oven with the door open, since open-door operation can result in harmful exposure to microwave every. It is important not to defeat or tamper with the safety interlocks.
(2) Do not place any object between the oven front face and the door or allow soil or cleaner residue to accumulate on sealing surfaces.
(3) Do not operate the oven if it is damaged. It is particularly important that the oven door close properly and that there is no damage to the:
door (bent)
• hinges and latches (broken or loosened)
• door seals and sealing surfaces.
(4) The oven should not be adjusted or repaired by anyone except properly qualified service personnel. Improper installation, service or maintenance can cause injury or property damage. Refer to this manual for guidance. Refer all servicing to a factory authorized service center.
WARNING
To reduce the risk of burns, electric shock, fire, injury to persons, or exposure to excessive microwave energy, read all instructions before using the appliance.
AVERTISSEMENT
IMPORTANT SAFETY INSTRUCTIONS
READ ALL INSTRUCTIONS BEFORE USING THE APPLIANCE

CONSIGNES DE SÉCURITÉ IMPORTANTES
LISEZ TOUTES LES INSTRUCTIONS AVANT D'UTILISER L'APPAREIL
WARNING
⚠️ If the information in this manual is not followed exactly, fire or shock may result causing property damage or personal injury.
When using electrical appliances basic safety precautions should be followed, including the following:
Read and follow the specific "PRECAUTIONS TO AVOID POSSIBLE EXPOSURE TO EXCESSIVE MICROWAVE ENERGY" found in the Safety Instructions chapter.
This appliance must be grounded. Connect only to properly grounded outlet (see GROUNDING INSTRUCTIONS).
Install or locate this appliance only in accordance with the provided installation instructions.
Be sure your appliance is properly installed and grounded by a qualified technician. Installation, electrical connections and grounding must comply with all local and regional codes.
Some products such as whole eggs and sealed containers – for example, closed glass jars – are able to explode and should not be heated in this oven.
Use this appliance only for its intended use as described in the manual. Do not use corrosive chemicals or vapors in this appliance. This type of oven is specifically designed to heat, cook, or dry food. It is not designed for industrial or laboratory use.
As with any appliance, close supervision is necessary when used by children (see CHILD SAFETY).
This appliance should be serviced only by qualified service personnel. Contact nearest authorized service facility for examination, repair, or adjustment.
Do not cover or block any vents or openings on the appliance.
AVERTISSEMENT
IMPORTANT SAFETY INSTRUCTIONS
READ ALL INSTRUCTIONS BEFORE USING THE APPLIANCE
CONSIGNES DE SÉCURITÉ IMPORTANTES
LISEZ TOUTES LES INSTRUCTIONS AVANT D'UTILISER L'APPAREIL
Do not store this appliance outdoors. Do not use this product near water – for example, near a kitchen sink, in a wet basement, near a swimming pool, or similar locations. Appliance is only for indoor and household use.
When cleaning surfaces of door and oven that come together on closing the door, use only mild, nonabrasive soaps, or detergents applied with a sponge or soft cloth. See door surface cleaning instructions in chapter "Cleaning and Maintenance".
To reduce the risk of fire in the oven cavity:
- Do not overcook food. Carefully attend appliance when paper, plastic, or other combustible materials are placed inside the oven to facilitate cooking.
- Remove wire twist-ties from paper or plastic bags before placing bag in oven.
- If materials inside the oven ignite, keep oven door closed, turn oven off, and disconnect the power cord, or shut off power at the fuse or circuit breaker panel.
- Do not use the cavity for storage purposes. Do not leave paper products, cooking utensils, or food in the cavity when not in use.

GROUNDING INSTRUCTIONS
This appliance must be grounded. Grounding reduces the risk of electric shock by providing a safe pathway for electric current in the event of a short circuit.
The appliance must be connected to a grounded, metallic, permanent wiring system, or an equipment grounding conductor should be run with the circuit conductors and connected to the equipment grounding terminal or lead on the appliance.
IMPORTANT SAFETY INSTRUCTIONS
READ ALL INSTRUCTIONS BEFORE USING THE APPLIANCE

CONSIGNES DE SÉCURITÉ IMPORTANTES
LISEZ TOUTES LES INSTRUCTIONS AVANT D'UTILISER L'APPAREIL
WARNING
Improper grounding can result in a risk of electric shock. Consult a qualified electrician if the grounding instructions are not completely understood, or if doubt exists as to whether the appliance is properly grounded. Do not use an extension cord. If the power supply cord is too short, have a qualified electrician install an outlet near the appliance.
The models stated on the front cover are dual-rated, designed to be connected to either 208 or 240V AC, 60 Hz, four-wire or three-wire electrical system.
TV / Radio Interference
This appliance generates and uses ISM frequency energy. If not installed and used properly, in strict accordance with the manufacturer's instructions, it may cause interference to radio and television reception. It has been type tested and found to comply with limits for ISM equipment pursuant to part 18 of FCC rules, which are designed to provide reasonable protection against such interference in a residential installation. However, there is no guarantee that interference will not occur in a particular installation. Turn the appliance on and off to determine if it causes interference. Try the following to correct the interference:
- Clean door and sealing surface of the oven.
● Reorient the receiving antenna of the radio or television. - Relocate the microwave oven with respect to the receiver.
- Move the microwave oven away from the receiver.
- Plug the microwave into a different outlet so that the oven and the receiver are on different branch circuits.
The manufacturer is not responsible for any radio or TV interference caused by unauthorized modification to this microwave oven. It is the responsibility of the user to correct such interference.
AVERTISSEMENT
IMPORTANT SAFETY INSTRUCTIONS
READ ALL INSTRUCTIONS BEFORE USING THE APPLIANCE

CONSIGNES DE SÉCURITÉ IMPORTANTES
LISEZ TOUTES LES INSTRUCTIONS AVANT D'UTILISER L'APPAREIL
Intended Use
This appliance is intended for normal family household use only. It is not approved for outdoor use. See the Warranty. If you have any questions, contact the manufacturer.
Do not use the cavity for storage purposes. Do not leave paper products, cooking utensils, or food in the cavity when not in use.
Do not operate oven when room humidity is excessive.
Child Safety
Do not allow children to use this appliance. Failure to do so can result in burns or serious injury to children. Children and pets should not be left alone or unattended in the area where the appliance is in use. They should never be allowed to play in its vicinity, whether or not the appliance is in use.
When children become old enough to use the appliance, it is the legal responsibility of the parents or legal guardians to ensure that they are instructed in safe practices by qualified persons.
Do not allow anyone to climb, stand, lean, sit, or hang on any part of an appliance, especially a door, warming drawer, or storage drawer. This can damage the appliance, and the unit may tip over, potentially causing severe injury.
Cleaning Safety
WARNING
Be sure the entire appliance has cooled and grease has solidified before attempting to clean any part of the appliance.
Utilisation prévue
IMPORTANT SAFETY INSTRUCTIONS
READ ALL INSTRUCTIONS BEFORE USING THE APPLIANCE

CONSIGNES DE SÉCURITÉ IMPORTANTES
LISEZ TOUTES LES INSTRUCTIONS AVANT D'UTILISER L'APPAREIL
Cooking Safety
CAUTION
To avoid personal injury or property damage, observe the following:
- Do not leave oven unattended while in use.
- Do not store flammable material next to or in the oven.
- When flaming foods under the microwave, always turn the fan on.
- Do not operate the oven while empty. This could damage the oven and result in a risk of fire.
- Do not store or use corrosive chemicals, vapors, flammables or nonfood products in or near this appliance. It is specifically designed for use when heating or cooking food. The use of corrosive chemicals in heating or cleaning will damage the appliance and could result in injury.
- Do not dry clothes, newspapers or other materials in the oven. Do not use newspapers or paper bags for cooking. Fire could result.
- Do not use recycled paper products unless labeled safe for microwave use. They may contain impurities which may cause sparks and result in fires when used.
- Always use potholders when removing items from the oven. The cooking container and the glass tray can be hot even if the oven is cool.
- Do not mount over sink.
- Do not store anything directly on top of the appliance surface when the appliance is in operation.
- Oversized food or oversized metal utensils should not be inserted in a microwave oven as they may create a fire or risk of electric shock.
Sécurité de cuisson
ATTENTION
IMPORTANT SAFETY INSTRUCTIONS
READ ALL INSTRUCTIONS BEFORE USING THE APPLIANCE
CONSIGNES DE SÉCURITÉ IMPORTANTES
LISEZ TOUTES LES INSTRUCTIONS AVANT D'UTILISER L'APPAREIL
- Do not clean with metal scouring pads. Pieces can burn off the pad and touch electrical parts involving a risk of electric shock.
- Do not store any materials, other than manufacturer's recommended accessories, in this oven when not in use.
- Do not cover racks or any other part of the oven with metal foil. This will cause overheating of the oven.
In Case of Fire
If materials inside an oven should ignite:
1 Keep door closed
2 Turn appliance off
3 Isolate the power by shutting off at fuse or circuit breaker
Liquids

Liquids, such as water, coffee, or tea are able to be overheated beyond the boiling point without appearing to be boiling. Visible bubbling or boiling when the container is removed from the microwave oven is not always present. THIS COULD RESULT IN VERY HOT LIQUIDS SUDDENLY BOILING OVER WHEN THE CONTAINER IS DISTURBED OR A UTENSIL IS INSERTED INTO THE LIQUID.
When heating liquids, always place a glass rod/spoon in the container. This will prevent delayed boiling.
IMPORTANT SAFETY INSTRUCTIONS
READ ALL INSTRUCTIONS BEFORE USING THE APPLIANCE
CONSIGNES DE SÉCURITÉ IMPORTANTES
LISEZ TOUTES LES INSTRUCTIONS AVANT D'UTILISER L'APPAREIL
CAUTION
Metal e.g. a spoon in a glass must be kept at least 1 in (25 mm) from the oven walls and the inside of the door. Sparks could irreparably damage the glass on the inside of the door.
Take ready meals out of the packaging. They will heat up more quickly and evenly in microwaveable ovenware. The different components of the meal may not require the same amount of time to heat up.
● Always cover the food. If you do not have a suitable cover for your container, use a plate or special microwave foil.
- Stir or turn the food several times during cooking. Check the temperature.
● After heating, allow the food to stand for a further 2 to 5 minutes so that it can achieve an even temperature.
● Always use an oven cloth or oven gloves when removing plates from the oven.
Cooking Items
Eggs: Do not cook or reheat whole eggs, with or without shell. Steam buildup in whole eggs may cause them to explode, and possibly damage the oven or cause injury. Reheating sliced hard-boiled eggs and cooking scrambled eggs is safe.
Popcorn: Use only popcorn in packages designed and labeled for microwave use, or pop it in a microwave oven corn popper. Follow popcorn manufacturers' directions and use a brand suitable for the wattage of your oven. Do not continue to heat after popping has stopped. Popcorn will scorch or burn. Do not leave oven unattended.
ATTENTION
IMPORTANT SAFETY INSTRUCTIONS
READ ALL INSTRUCTIONS BEFORE USING THE APPLIANCE

CONSIGNES DE SÉCURITÉ IMPORTANTES
LISEZ TOUTES LES INSTRUCTIONS AVANT D'UTILISER L'APPAREIL
CAUTION
When using pre-packaged microwave popcorn, check package weight before using the popcorn function. Set the oven for the weight of the popcorn package. If these instructions are not followed, popcorn may not pop adequately or may ignite and cause fire.
Foods with nonporous skins: Potatoes, tomatoes, sweet potatoes, apples, whole squash and sausages are examples of foods with nonporous skins. These types of foods must be pierced before cooking to prevent them from exploding.
Baby food / Baby formula: Do not heat baby bottles or food in microwave oven. The glass jar or the surface of food may appear warm while the interior can burn the infant's mouth and esophagus.
Deep fat frying: Do not deep fat fry in oven. Oil can be heated beyond ideal temperatures very quickly in a microwave oven. Temperatures can climb high enough for the cooking oils to reach their respective flash points and burst into flames. The heated oil may bubble and spatter causing possible damage to the oven and perhaps result in burns. Additionally, microwave-safe utensils may not be able to withstand the temperature of the hot oil, and could result in the utensil shattering, if it contains a slight imperfection, scratch or chip.
ATTENTION
IMPORTANT SAFETY INSTRUCTIONS
READ ALL INSTRUCTIONS BEFORE USING THE APPLIANCE

CONSIGNES DE SÉCURITÉ IMPORTANTES
LISEZ TOUTES LES INSTRUCTIONS AVANT D'UTILISER L'APPAREIL
Home Canning / Drying foods / Small quantities of foods: Do not use microwave oven for home canning or heating of any closed jar. Pressure will build up and the jar may explode. In addition, the oven cannot maintain the food at the proper canning temperature. Improperly canned food may spoil and be dangerous to consume. Small quantities of food or foods with low moisture content can dry out, burn or catch on fire. Do not dry meats, herbs, fruits or vegetables in your oven.
Proper cooking depends on time set and weight of food. If you use a smaller portion than recommended and cook at the time for the recommended portion, fire could result.
Browning dishes:. Microwave browning dishes or grills are designed for microwave cooking only. Preheating times vary depending on the size of the browning dish and food being cooked. Always follow instructions provided by the browning dish or grill manufacturer. Do not preheat browning dishes more than 6 minutes.
Oven roasting bags: If an oven bag is used for microwave cooking, prepare according to package directions. Do not use wire twist-ties to close bags, instead use nylon ties, cotton string or a strip cut from the open end of the bag. Make six 12 " (12.7 mm) slits by closure. Place oven cooking bag in a dish slightly larger than the food being cooked.
IMPORTANT SAFETY INSTRUCTIONS
READ ALL INSTRUCTIONS BEFORE USING THE APPLIANCE

CONSIGNES DE SÉCURITÉ IMPORTANTES
LISEZ TOUTES LES INSTRUCTIONS AVANT D'UTILISER L'APPAREIL
Cooking Utensils
Cooking utensils, the glass tray and racks get hot during microwaving. Always use potholders when removing items from the oven. Allow the glass tray and the metal racks (if used) to cool before handling.
Do not use metal utensils, or dishes with metallic trim in the oven.
When using aluminum foil in the oven, allow at least 1" (25.4 mm) of space between foil and interior oven walls or door.
The glass tray and the metal racks (if used) will get hot during cooking. The cooking container and the glass tray can be hot even if the oven is cool.
Never use paper, plastic, or other combustible materials that are not intended for cooking.
When cooking with paper, plastic, or other combustible materials, follow manufacturer's recommendations on product use. Do not use paper towels which contain nylon or synthetic fibers. Heated synthetics could melt and cause paper to ignite
Do not heat sealed containers or plastic bags in oven. Food or liquid could expand quickly and cause container or bag to break. Pierce or open container or bag before cooking.
Thermometers
Do not use regular cooking thermometers in oven. Most cooking thermometers contain mercury and may cause electrical arc, malfunction, or damage to the oven.
Utensiles de cuisson
IMPORTANT SAFETY INSTRUCTIONS
READ ALL INSTRUCTIONS BEFORE USING THE APPLIANCE

CONSIGNES DE SÉCURITÉ IMPORTANTES
LISEZ TOUTES LES INSTRUCTIONS AVANT D'UTILISER L'APPAREIL
Pacemakers
CAUTION
To avoid pacemaker malfunction, consult physician or pacemaker manufacturer about effects of microwave energy on pacemaker.
Fan Motor Operation
After using the oven the fan motor can rotate to cool the electric components. This is perfectly normal, and you can take out the food from the oven while the fan operates.
Proposition 65 Warning:
This product may contain a chemical known to the State of California, which can cause cancer or reproductive harm. Therefore, the packaging of your product may bear the following label as required by California:
STATE OF CALIFORNIA PROPOSITION 65 WARNING:

WARNING
Cancer and Reproductive Harm - www.P65Warnings.ca.gov
SAVE THESE INSTRUCTIONS.
Pacemakers
ATTENTION
- Metal - e.g. a spoon in a glass - must be kept at least 1" (25 mm) from the oven walls and the inside of the door. Sparks could irreparably damage the glass on the inside of the door.
- Water in the hot oven interior: Never pour water into the hot oven interior. Steam is produced. Damage to the enamel can arise due to the temperature change.
- Do not leave moist groceries in a closed oven for an extended period of time. It can lead to corrosion inside the oven.
- Fruit juice can leave stains in the oven. Always remove fruit juice immediately when safe to touch, and wipe up first with a damp and then a dry cloth.
- Cooling with the appliance door open: only allow the oven cavity to cool when it is closed. Even if the appliance door is only open a little, front panels of adjacent units could be damaged over time.
- Highly soiled door seal: the appliance door will no longer close properly during operation if the door seal is highly soiled. Adjoining furniture fronts may be damaged. Always keep the door seal clean.
- Appliance door as a seat or storage surface: do not stand, sit or hang on the appliance door. Do not place any cookware or accessories on the appliance door.
- Inserting accessories: depending on the appliance type, accessories can scratch the door pane when closing the appliance door. Always slide accessories fully into the oven interior.
- Do not hold or carry the appliance by the door handle. The door handle cannot carry the weight of the device and could break off, or the hinges can be damaged.
- Operating the microwave without food in the oven cavity may lead to overloading. Never run the microwave unless there is food in the oven cavity. An exception to this rule is a short ovenware test. → "Notes regarding cookware" on page 24
- Always set the microwave power as recommended for the food. High power settings can overheat foods very quickly.
Protecting the environment
Unpack the appliance and dispose of the packaging in an environmentally friendly manner.
Tips for saving energy
- Only preheat the oven if this is specified in the recipe or in the operating instruction tables.
- Use dark, black lacquered or enameled baking tins for baking. They absorb the heat particularly well.
- It is best to bake more than one cake, one after the other. The oven is still warm. This reduces the baking time for the second cake.
- For longer cooking times, you can switch the oven off 10 minutes before the end of the cooking time and use the residual heat to finish cooking.
Getting to know the appliance
You will get to know your new appliance here. We explain the control panel and the individual controls to you. You are informed about the oven interior and accessories.
Displays and controls
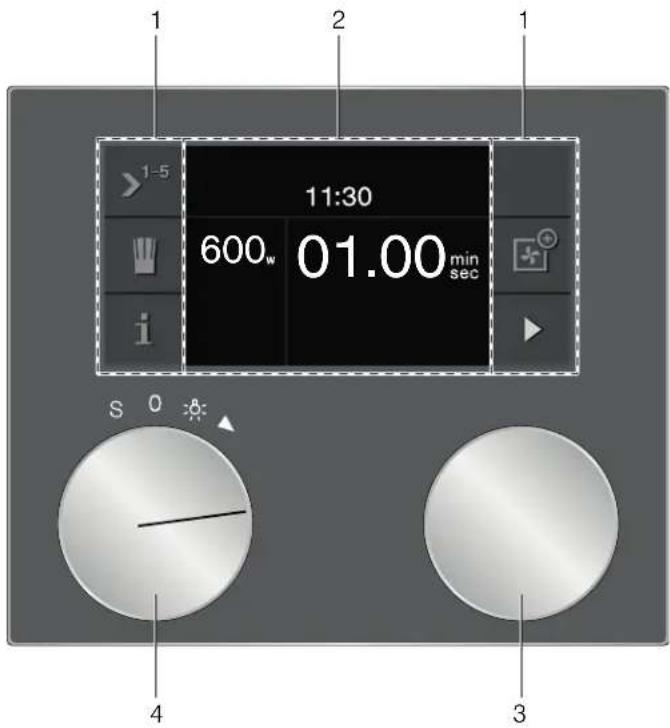
| 1 Control panel These areas are touch-sensitive. Touch a symbol to select the applicable function. | |
| 2 Display The display shows current set- tings and options, for example. | |
| 3 Rotary selector You can change the settings with the rotary selector or the function selector. | |
| 4 Function selector | Select the required microwave output, type of oven heating, basic settings or the light using the function selector. |
Function selector positions

Position Function
0 Off position
Light
2 1000 W microwave
3 600 W microwave
4 360 W microwave
5 180 W microwave
6 90 W microwave
7 ✦ Convection
8 ♣ Convection broil
9 ✉ Broil + circulated air
10 ^™ Broil
S Basic settings
Symbols
| SymbolFunction | |
| ▶ Start | |
| ■ Stop | |
| II Pause/end | |
| × Cancel | |
| C Delete | |
| √ Confirm/save settings | |
| > Selection arrow | |
| i Launching additional information | |
| ☐ Calling up additional tips | |
| III Calling up automatic programs, personal recipes | |
| ↘ Save | |
| ↘ Edit settings | |
| ☒ Child lock | |
| ☒ Launching the timer menu | |
| ☒ Launching the Sabbath mode | |
| ^1-5 Series of operations | |
| rec Recording a menu | |
| >A^3 Enter a name | |
| ☒ Delete letters | |
| O_w Microwave, letting dish rest | |
| ✗ Demo mode | |
| Preheating with status display | |
| Quick heating with status indicator | |
| Timer | |
| Stop watch | |
| Automatic programs: | |
| Weight | |
| Cooking result | |
| * Defrosting | |
| Cooking, combi cooking | |
| Combination mode: | |
| Calling up oven | |
| Removing oven | |
| Adding oven | |
| Calling up microwave | |
| Removing microwave | |
| Adding microwave | |
Colors and display
Colors
The various colors serve as user guidance in each setting situation.
orange Initial settings
Main functions
blue Basic settings
white Adjustable values
Presentation
Depending on the situation, the display of symbols, values, and indicators changes.
| Zoom Values and symbols that are currently selected will be displayed enlarged. | |
| Minimized screen display | After a short while, the display screen will be reduced and only the essential displayed. This function is pre-set and can be changed in the basic settings. |
600 _w
00.59 _sec min

Additional information i
By touching the i symbol, you can call up additional information.
Before starting, you receive information about the set heating function, for example. This allows you to check whether the current setting is suitable for your meal.
During operation, you receive information about the elapsed and remaining time and/or the current oven interior temperature, for instance.
Note: Slight temperature fluctuations are normal during continuous operation after heating up.
Cooling fan
Your appliance has a cooling fan. The cooling fan switches on during operation. The hot air escapes above the door.
The cooling fan continues to run for a certain time after the operation.

CAUTION
Do not cover the ventilation slots. Otherwise, the appliance may overheat.

ATTENTION
- The appliance remains cool during microwave operation. Despite this, the cooling fan will still switch on. The fan may run on even when the microwave operation has ended.
- Condensation may form on the door window, interior walls and floor. This is normal and does not adversely affect microwave operation. Wipe away the condensation after cooking.
Accessories
The accessories can be inserted into the appliance at 4 different heights.

Note: Microwavable cookware can be placed on the oven floor (level 0).

Wire rack
For cookware, cake tins, roasts, grilled items and frozen meals.
Note: You can pull the wire rack two thirds of the way out without it tipping. This allows meals to be removed more easily.

CAUTION
- Do not use the rack to pop popcorn.
- Do not cook with the rack on the floor of the microwave oven.
- For regular microwave cooking use the glass tray and remove the rack.
- The rack can get hot during cooking. Allow the rack to cool down before handling.

ATTENTION
For large roasts, moist cakes, casseroles and gratins. This can act as a splash guard if you are grilling meat directly on the wire rack. For this, insert the glass tray on level 1.
The glass tray can also be used as a standing surface during microwave operation.
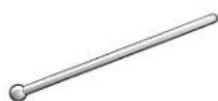
Glass rod
For heating liquids in narrow containers. It prevents delayed boiling. When heating liquids, always place a glass rod/spoon in the container.
Special accessories
You can order the following accessories from your specialist dealer:
Use the accessories only as indicated. The manufacturer assumes no liability for incorrect usage of the accessories.
BA 476 310 Handle, stainless steel for BM 450/451
BA 478 310 Handle, stainless steel for BM 484/485
Before first use
Here you will find everything you need to do before using the microwave to prepare food for the first time. Read the Safety information section beforehand.
→ "IMPORTANT SAFETY INSTRUCTIONS"
on page 5
The appliance must be completely fitted and connected.
The "First settings" menu appears in the display after the mains has been connected. You can now set your new appliance:
- Language
- Time format
• Time - Date format
Date
• Temperature format
Notes
- The "Initial settings" menu only appears when you first connect the power or if the appliance has been without power for several days.
After connecting the power, first the GAGGENAU logo appears for approx. 30 seconds, then the "Initial settings" menu appears automatically.
- You can change these settings at any time. → "Basic Settings" on page 39
Setting the language
The default language appears in the display.
- Select the desired display language with the rotary selector.
- Confirm with √.

Note: When the language is changed, the system is restarted; this procedure takes a few seconds.
Setting the time format
the two possible formats 24h and AM/PM appear in the display. The default format is 24h.
- Set the required format with the rotary selector.
- Confirm with √.

Setting the time
The time appears in the display.
- Set the required time with the rotary selector.
- Confirm with √.

Setting the date format
The three possible formats D.M.Y, D/M/Y and M/D/Y appear in the display. The D.M.Y is the default.
- Set the required format with the rotary selector.
- Confirm with √.

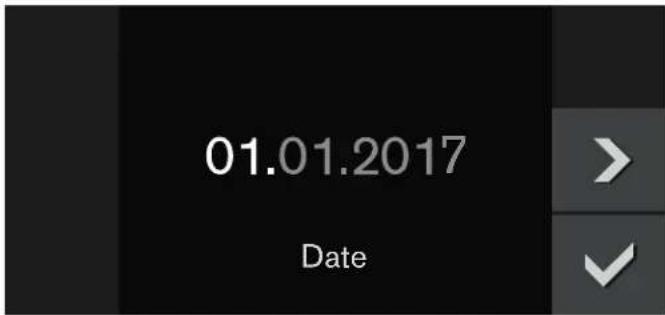
Setting the date
The default date appears in the display. The day setting is already active.
- Set the required day with the rotary selector.
- Switch to the month setting with the > symbol.
- Set the month with the rotary selector.
- Switch to the year setting with the > symbol.
- Set the year with the rotary selector.
- Confirm with √.
Setting the temperature format
The two possible formats °C and °F appear in the display. The °C format is selected by default.
- Set the required format with the rotary selector.
- Confirm with √.

Completing initial set-up
"Initial set-up complete" appears in the display.
Confirm with √.

The appliance enters the standby mode and the standby display appears. The appliance is now ready for operation.
Heating up the oven
Ensure that no packaging remnants have been left in the cooking compartment.
To remove the new cooker smell, heat up the oven when it is empty and closed. An hour with Convection Broil ✦ at 390^ F ( 200^ C) is ideal for this purpose. For instructions on how to set this type of heating, refer to the section.
Cleaning accessories
Before using accessories for the first time, thoroughly clean them with hot soapy water and a soft dish cloth.
Activating the appliance
Standby
The appliance is in standby mode if no function is set or the child lock is activated.
The brightness of the control panel is dimmed in standby mode.

Notes
- There are various indicators for standby mode. Pre-set is the GAGGENAU logo and the time. If you would like to change the display, see the section on
- The brightness of the display depends on the vertical viewing angle. You can even out the display using the "Brightness" setting in the basic settings.
Activate appliance
In order to exit standby mode, you can either
- Set the function selector,
- Touch a control panel,
• or open or close the door.
Now you can set the desired function. Read the appropriate chapters to learn how to set functions.
Notes
- If "Standby screen = off" is selected in the basic setting, you must turn the function selector to exit the standby mode.
- The standby display appears again if you have not made any settings for a long while after activation.
- The cooking compartment lighting goes out after a little while if the door is open.
Microwave
Microwaves are converted to heat in food. The microwave can be used solo, i.e. on its own, or in combination with a different type of heating.
Note: In the section "Tables and Tips", you will find examples for defrosting, heating, and cooking with the microwave. → "Tables and tips" on page 47
Notes regarding cookware
Heat-resistant cookware made of glass, glass ceramic, porcelain, ceramic or heat-resistant plastic is suitable. These materials allow microwaves to pass through. You can also use serving dishes. This saves you having to transfer food from one dish to another. You should only use cookware with decorative gold or silver trim if the manufacturer guarantees that it is suitable for use in microwaves.
Metal cookware is unsuitable. Metal does not allow microwaves to pass through. Food in covered metal containers will remain cold.

CAUTION
Metal e.g. a spoon in a glass must be kept at least 1 in (25 mm) from the oven walls and the inside of the door. Sparks could irreparably damage the glass on the inside of the door.

ATTENTION
Cookware test: Do not switch on the microwave unless there is food inside. The following cookware test is the only exception to this rule. If you are unsure whether your cookware is microwave compatible, perform this test: place the empty dish in the appliance for 12 for 1 minute at maximum power. Check the temperature during that time. The cookware should be cold or warm to the touch. The cookware is unsuitable if it becomes hot or sparks are generated.
Microwave output
You can make the following new settings:
| 90 W For defrosting delicate foods |
| 180 W For defrosting and continued cooking |
| 360 W For cooking meat and for heating delicate foods |
| 600 W For heating and cooking food |
| 1000 W For heating liquids |
Note: The microwave power can be set to 1000 watts for a maximum of 30 minutes. A cooking time of 90 minutes is possible with all other power settings.
Setting the microwave
- Set the required microwave output setting using the function selector.
- Set the cooking time using the rotary selector.
- Start with ▶.

The operation begins. The cooking time starts counting down.
An audible signal sounds once the cooking time has elapsed. The signal stops early if you touch the √ symbol, open the appliance door, or set the function selector to 0. The microwave operation has finished.
If you open the oven door during operation, the microwave operation is paused. After closing the door, touch the ▶ symbol. The operation continues.
You can change the cooking time at any time using the rotary selector.
You can change the output at any time using the function selector. Press ▶ to restart.
You can call up the elapsed cooking time using the i symbol. Touch the √ symbol to return to the standard display.
Pause:
The operation can be paused using the Ⅱ symbol. Use the ▶ symbol to continue.
Switching off:
To stop the operation and cancel the settings, turn the function selector to 0.
Note: It is normal for the fan to continue operating even when the door is open.
Oven
In oven mode, you can set the following types of heating:
| Type of heating Temperature °F (°C) | Usage | |
| ♣ Convection 100 (40) Let yeast dough rise, defrost cream cakes | ||
| 210 - 480(100-250) | Bake cakes, small baked goods, and pizza on the glass tray | |
| ♣ Convection broil | 210 - 480(100-250) | Roasting large pieces of meat |
| ♣ Broil + circulated air | 210 - 480(100-250) | For casseroles, gratins, and whole poultry |

CAUTION
The oven door and exterior and the wire rack will become hot during Convection. Always use oven mits.

ATTENTION
Setting the type of heating and temperature
- Use the function selector to set the required type of heating, e.g. "Convection".
The ♣ symbol for "Convection" and the default temperature 360^ F ( 180^ C) appear in the display.

- Set the temperature using the rotary selector.
Note: If required, you can now set the cooking time for your dish and delay the cooking-time end to a later time. Touch the >^1-5 symbol; the sequential operation menu is displayed. Use > to select and set the ☐ "Cooking time" function. Use > to select and set the ☐ "Cooking-time end" function.
For more detailed information "Sequential operation" on page 28
- Start with ▶.
The heat-up symbol appears in the display (only if the oven temperature has been set to 210^ ( 100^ ) or higher). The bars continuously display the heating status. When the set temperature has been reached, a signal sounds and the heat-up symbol goes out.
If the "Quick heat" function is activated, the symbol for "Quick heat" appears.
Note: You can activate or deactivate a heat-up signal in the basic settings. This signal sounds when the required temperature is reached.
You can change the temperature at any time using the rotary selector.
You can change the type of heating at any time using the function selector. Press ▶ to restart.
Pause:
The operation can be paused using the Ⅱ symbol. Use the ▶ symbol to continue.
Switching off:
To stop the operation and cancel the settings, turn the function selector to 0.
Calling up the current temperature:
Touch the i symbol to display the current oven temperature for several seconds (from 210^ F ( 100^ C)). Use the √ symbol to return to the standard display.
Note: During continuous operation after heating up, slight deviations in temperature are normal, depending on the type of heating.
Quick heat
Your appliance reaches the required temperature particularly fast with the "Quick heat" function.
So you achieve a uniform cooking result, do not place your meal in the oven interior until "Quick heat" has ended.
You must activate the "Quick heat" function in the basic setting. → "Basic Settings" on page 39
Safety shut-off
For your protection, the appliance has a safety shut-off feature. Every heating operation is switched off after 12 hours if the appliance is not operated during this time. A message appears in the display.
Exception:
programming with the long-term timer.
Turn the program selection to 0, after which you can operate the appliance in the manner to which you are accustomed.
Broil
In broil mode, you can set three broil settings:
| Type of heating Broil setting | Usage | |
| Broil 1 (low) | For soufflés and deep casseroles | |
| 2 (medium) For shallow casseroles and fish | ||
| 3 (high) For steaks, sausages and toast | ||
Setting the Broil mode
- Use the function selector to set the Broil mode.
The "Broil symbol and broil setting 3 appear in the display.

- Use the rotary selector to set the broil setting.
Note: If required, you can now set the cooking time for your dish and delay the cooking time end to a later time. Touch the >^1-5 symbol; the sequential operation menu is displayed. Use > to select and set the ☐ "Cooking time" function. Use > to select and set the ☐ "Cooking time end" function.
For more detailed information → "Sequential operation" on page 28
- Start with ▶.
You can change the broil setting at any time using the rotary selector.
You can change the operation mode at any time using the function selector. Press ▶ to restart.
Pause:
The operation can be paused using the Ⅱ symbol. Use the ▶ symbol to continue.
Switching off:
To stop the operation and cancel the settings, turn the function selector to 0.
Combination mode
In combination mode, an oven heating type or the grill mode operate simultaneously with the microwave. Your dishes cook faster and are nicely browned.
You can switch on all microwave power settings.
Exception: 1000 watts
You can also combine a type of heating with the sequential microwave operation.
Setting the combination mode
- Use the function selector to select the required type of oven heating or microwave output.
Note: You can start the combination mode with a type of oven heating or microwave output. In the following example, it is started with a type of oven heating.
- Set the oven temperature or grill setting using the rotary selector.

Depending on the operation mode selected, the symbol for microwave or the symbol for oven appears in the right-hand control panel, which enables you to add the relevant other operation mode.
- Add a microwave output setting using the symbol.
- Set the required microwave output setting using the function selector.
- Set the cooking time using the rotary selector.

- Start with ▶.
The operation begins. The cooking time starts counting down.
An audible signal sounds once the cooking time has elapsed. The signal stops early if you touch the √ symbol, open the appliance door, or set the function selector to 0. The combination mode has finished.
Changing settings
You can change the type of oven heating and oven temperature, the grill setting or the microwave output setting and cooking time. The changes can also be made during the operation; to do this, touch the Ⅱ symbol. The operation stops.
- Choose the operation mode using the ☐ or ☒ symbols.
- Use the function selector to change the type of oven heating or the microwave output setting.
- Use the rotary selector to change the oven temperature, grill setting, or the duration of the microwave output setting.
- Start with ▶.
Canceling settings
You can also delete the settings during the operation; to do this, touch the Ⅱ symbol. The operation stops.
- Choose the operation mode using the ☐ or ☑ symbols.
- Cancel the type of heating using the ☐ or ✕ symbols.
- Start with ▶.
Pause:
The operation can be paused using the Ⅱ symbol. Use the ▶ symbol to continue.
Switching off:
To stop the operation and cancel the settings, turn the function selector to 0.
Sequential operation
With a sequential operation, you can set up to five different types of heating and cooking times that are set one after another.
Setting a series of operations
- Select the required microwave output or type of oven heating using the function selector.

- Touch the ≥^1-5 symbol.
The sequential operation menu is displayed. - Set the cooking time, temperature or grill setting using the rotary selector.

- Use > to select the second phase.
- Select the required microwave output or type of oven heating using the function selector. Set the cooking time, temperature or grill setting using the rotary selector.

Note: You can set a stabilization time between two microwave outputs so that the temperature is distributed evenly within the food. To do this, touch the O_w symbol and set a time using the rotary selector.
- Use > to select the third phase.
- Select the required microwave output or type of oven heating using the function selector. Set the cooking time, temperature or grill setting using the rotary selector.

- Use > to select the 🔒 "Cooking time" function.
- Set the required cooking time using the rotary selector.
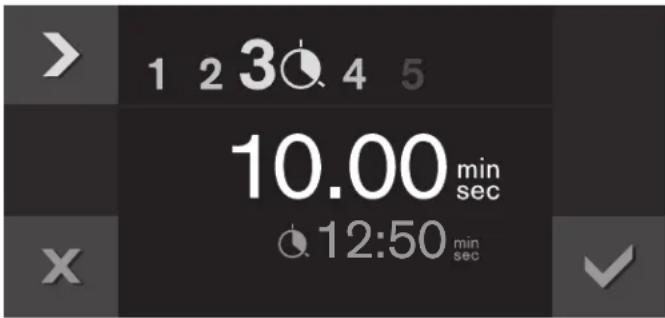
- Press √ to confirm.
The main menu for the sequential operation is displayed. The settings for each phase are shown in the display.

- Start with ▶.
The operation begins. The cooking time starts counting down.
Once the cooking time has elapsed, the appliance switches off. An audible signal sounds. The signal stops early if you touch the √ symbol, open the appliance door, or set the function selector to 0. The sequential operation has finished.
Changing the settings of the current phase:
Touch the Ⅱ symbol. The operation stops. Touch the ^1-5 symbol and change the settings. Use the √ symbol to exit the menu. Start with ▶.
Deleting the settings:
Touch the X symbol.
Pause:
The operation can be paused using the Ⅱ symbol. Use the
▶ symbol to continue.
Switching off:
To stop the operation and cancel the settings, turn the function selector to 0.
Notes
- The sequential operation can be supplemented with the combination mode.
- The 1000-watt microwave output setting can only be selected once.
- The oven heating functions cannot be combined with the 1000-watt microwave output setting.
- The order of each setting is entirely up to you. You can start with the cooking time, microwave output or type of oven heating.
- If you open the appliance door during cooking, the fan may continue to run.
End of cooking time
In oven mode, you can delay the cooking time end to a later time. This function is not available in conjunction with the microwave mode.
For example: It is 2:00 PM. The dish requires a cooking time of 40 minutes. You want it to be ready at 3:30 PM.
Enter the cooking time and delay the cooking time end until 3:30 PM. The electronics system calculates the start time. The appliance starts automatically at 2:50 PM and switches off at 3:30 PM.
Bear in mind that food that spoils easily should not be left in the oven for too long.
Delaying the cooking time end
You have set the type of heating, temperature, and cooking time.
-
Use > to select the Ⓧ "End of cooking time" function.
-
Set the required cooking time end using the rotary selector.

- Press √ to confirm.
A message is shown in the display to warn that a cooking time end has been set. Press √ to confirm.
- Start with ▶.

The appliance switches to standby. The display shows the operating mode, the temperature, the cooking time, and the remaining time until the start. The appliance starts at the calculated time and automatically switches off once the cooking time has elapsed.
Once the cooking time has elapsed, the appliance switches off. An audible signal sounds. The signal stops early if you touch the √ symbol, open the appliance door, or set the function selector to 0. The sequential operation has finished.
Changing the cooking time:
Touch the Ⅱ symbol. Use > to select the ⚪ "Cooking time" function. Set the required cooking time using the rotary selector. Press √ to confirm. Start with ▶.
Changing the end of cooking time:
Touch the Ⅱ symbol. Use > to select the Ⓠ "End of cooking time" function. Set the required cooking time end using the rotary selector. Press √ to confirm. Start with ▶.
Deleting the settings:
Touch the X symbol.
To cancel the entire procedure:
Set the function selector to 0.
Automatic programs
You can prepare food really easily using the automatic programs. You select the program and enter the weight of your food. The automatic program then applies the most suitable settings. You can select from 15 programs.
Note: The weight can only be set in kg.
Setting a program
- Set the function selector to any operation mode.
Note: The function selector must not be moved to 🌿 or S.
- Touch the "Chef's hat" symbol; the automatic programs are displayed.
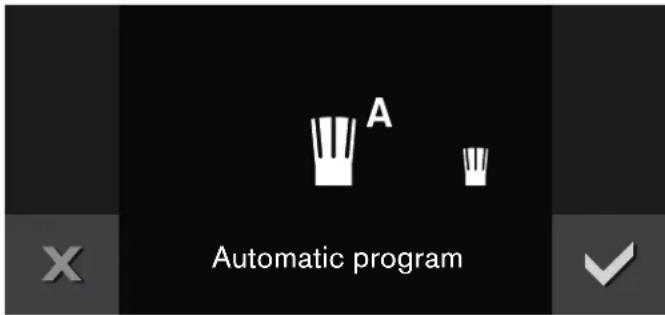
- Press √ to confirm.
The first program appears in the display.
- Use the rotary selector to select the required program, e.g. Cooking: "Fresh vegetables".

-
Touch _ to select the ☐ "Weight" function.
-
Turn the rotary selector to set the weight.
-
Press √ to confirm.
-
Start with ▶.
The operation begins. The cooking time starts counting down.
An audible signal sounds once the cooking time has elapsed. The signal stops early if you touch the √ symbol, open the appliance door, or set the function selector to 0. The program has finished.
Resting time:
Some dishes require a resting time after the end of the program in order to reach an even temperature or to simmer. Wait until the resting time has elapsed before removing the food from the appliance.
Tips:
Touch ☐ to view tips on cookware, accessories, and shelf position. Exit this display using the √ symbol.
Notes:
Use i to view notes on preparation. The i ^® symbol appears for important information and indicates that an action is required. Exit this display using the √ symbol.

For some dishes, the display provides instructions for turning or stirring during preparation. Follow the information provided. Opening the appliance door pauses the operation. After closing the appliance door, continue the operation by pressing ▶. If you do not turn or stir the dish, the program runs as normal until it reaches the end.
Pause:
The operation can be paused using the II symbol. Use the ▶ symbol to continue.
Switching off:
To stop the operation and cancel the settings, turn the function selector to 0.
Adjust individually
If the cooking result of a program does not suit you, you can adjust it individually before the program starts. Adjust the settings as described in points 1 to 4.
- Touch _ to select the individual settings.
-
Touch > to select the △ "Cooking result" function.
-
Turn the rotary selector to set the cooking result.
To the left = cooking result less well done.
To the right = cooking result more well done.

- Press √ to confirm.
The display changes to the program. The cooking time changes.
- Start with ▶.
The operation begins. The cooking time starts counting down.
Note: This change only applies for the current program flow. When the program is called up the next time, the original values of the automatic program apply.
Tips for automatic programs
Place the food in the cold cooking compartment.
Take the food out of its packaging and weigh it. If it is not possible to enter the exact weight, you should round it up or down.
For the programs, always use microwavable cookware, for example made of glass or ceramic. Observe the accessories tips in the program table.
A table of suitable types of food with appropriate weight ranges and the accessories required can be found in the section after the notes.
It is not possible to set a weight outside the weight range.
With many dishes, a signal sounds after a certain time. Turn or stir the food.
Defrosting:
- As far as possible, freeze and store food flat and in portion-sized quantities at -0.5°F (-18 °C).
- Place the frozen food in flat cookware, such as a glass or porcelain plate.
-
After defrosting in the appliance, leave the food to continue defrosting for an additional 15 to 90 minutes until it reaches an even temperature.
-
Liquid will be produced when defrosting meat or poultry. Drain off this liquid when turning meat and poultry and under no circumstances use it for other purposes or allow it to come into contact with other foods.
- Bread and rolls should only be defrosted in the required amounts, They will get stale quickly.
- Place frozen rolls in the oven. Suitable are only pre-baked rolls.
- After turning, remove any ground meat that has already defrosted.
- Whole poultry should be placed in the cookware breast-side down and poultry portions skin-side down.
Vegetables:
- Fresh vegetables: Cut into pieces of an equal size. Add one tablespoon of water for every 100 g vegetables.
- Frozen vegetables: This program is only suitable for blanched, not pre-cooked vegetables. It is not suitable for frozen vegetables in a cream sauce. Add 1 to 3 tablespoons of water. Do not add water to spinach or red cabbage.
Baked potatoes:
Use potatoes cut to the same thickness, washed, and dried. Pierce the peel.
Rice:
- Do not use brown or boil-in-the-bag rice.
- Add two to two-and-a-half times the amount of water to rice.
Fish:
Fish fillet, fresh: Add 1 to 3 tablespoons of water or lemon juice.
Leg of lamb:
First put the fat side down in the cookware. The leg of lamb should cover two thirds of the cookware bottom. Add 50-100 ml liquid.
Poultry:
- Place the chicken in the dish breast-side down.
- Place chicken portions in the cookware skin-side up.
Pizza, frozen:
Use pre-baked, frozen pizza with thin crust.
Resting times:
Some dishes need to rest in the oven after the program has ended.
| Dish Resting time | |
| Vegetables Approx. 5 minutes | |
| Potatoes Approx. 5 minutes First pour off the remaining water | |
| Rice 5 to 10 minutes | |
| Pork roast, meat loaf | 10 minutes |
Program table
| Suitable food Weight range Cookware/accessories, | shelf height | |
| Defrosting | ||
| Loaf of bread* Wheat bread, mixed wheat bread, whole-grain bread | 7.1 oz - 3.3 lb(0.20 - 1.50 kg) | Shallow cookware without lidCooking compartment floor |
| Rolls wheat rolls, pre-baked 1.8 - 21.2 oz | (0.05 - 0.60 kg) | Wire rackHeight 1 |
| Hamburger meat* Hamburger beef, lamb, or pork | 7.1 oz - 2.2 lb(0.20 - 1.00 kg) | Shallow cookware without lidCooking compartment floor |
| Whole poultry* Chicken, duck 24.7 oz - 4.4 lb | (0.70 - 2.00 kg) | Shallow cookware without lidCooking compartment floor |
* Observe the signals given when it is time to turn the food.
| Suitable food | Weight range | Cookware/accessories, shelf height | |
| Cooking | |||
| Fresh vegetables* Cauliflower, broccoli, carrots, kohlrabi, leeks, peppers, zucchini | 7.1 oz - 2.2 lb(0.20 - 1.00 kg) | Cookware with lidCooking compartment floor | |
| Frozen vegetables* Cauliflower, broccoli, carrots, kohlrabi, red cabbage, spinach | 5.3 oz - 2.2 lb(0.15 - 1.00 kg) | Cookware with lidCooking compartment floor | |
| Baked potatoes Waxy potatoes, predominantly waxy potatoes or floury potatoes, approx. 2.5 in (64 mm) thick | 7.1 oz - 4.4 lb(0.20 - 2.00 kg) | Cookware without lidCooking compartment floor | |
| Rice* Rice, long-grain rice 3.5 - 17.6 oz | (0.10 - 0.50 kg) | Deep cookware with lidCooking compartment floor | |
| Fresh fish fillet Fillet of pike, cod, ocean perch, pollock, pike-perch | 7.1 oz - 2.2 lb(0.20 - 1.00 kg) | Cookware with lidCooking compartment floor | |
| * Observe the stirring signals | |||
| Combi cooking | |||
| Frozen pizza Pizza with thin crust, pre-baked | 5.3 - 19.4 oz(0.15 - 0.55 kg) | Wire rackHeight 3 | |
| Frozen lasagne Lasagne bolognese 14.1 oz - 2.3 lb | (0.40 - 1.05 kg) | Cookware without lidCooking compartment floor | |
| Fresh chicken* Whole chicken 28.2 oz - 4.0 lb | (0.80 - 1.80 kg) | Cookware with lidCooking compartment floor | |
| Fresh chicken portions Chicken thigh, half chicken 17.6 oz - 3.5 lb(0.40 - 1.60 kg) | Cookware with lidCooking compartment floor | ||
| Meat loaf | approx. 3 in (76 mm) deep | 28.2 oz - 3.3 lb(0.80 - 1.50 kg) | Cookware without lidCooking compartment floor |
| Leg of lamb | Leg of lamb or boneless shoulder of lamb | 28.2 oz - 4.4 lb(0.80 - 2.00 kg) | Cookware without lidCooking compartment floor |
* Observe the signals given when it is time to turn the food.
Personal recipes
You have the option to save up to 50 individual recipes. You can record or program a recipe. You can enter a name for these recipes so that, if required, you can access them again quickly and easily.
Recording a recipe
It is possible to set up to 5 phases consecutively and to record at the same time.
- Select the required microwave output or type of oven heating using the function selector.
The ⚪ symbol is displayed. - Touch the ⚪ symbol and select "Personal recipes" using the rotary selector.
- Press √ to confirm.
- Use the rotary selector to select a free memory location.
- Touch the rec symbol.
- Set the microwave cooking time, temperature or grill setting using the rotary selector.

- Start with ▶.
The first phase is recorded, in this example, microwave output 600 W, microwave cooking time 5 minutes. The cooking time starts counting down in the display. After the cooking time has elapsed, you can record another phase.
Note: The phase can be stopped early using the ■ symbol.
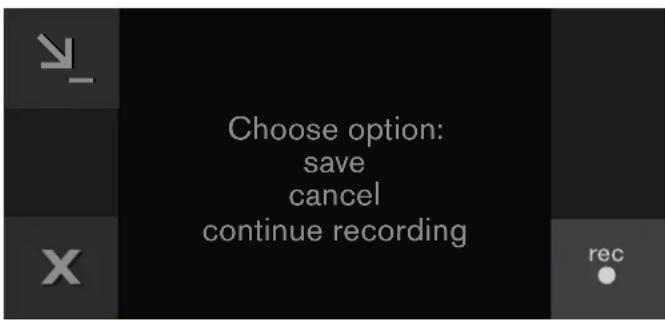
To proceed further, there are 3 options from which to choose.
To save: Touch the symbol. The recipe is saved. Enter the name in "ABC". "Entering a name" on page 35
To cancel: Touch the X symbol. The recipe is not saved.
To continue recording: Touch the symbol. The recording is continued.
- To continue recording: Touch the symbol.
- Select the required microwave output or type of oven heating using the function selector.
Set the microwave cooking time, temperature or grill setting using the rotary selector.
Example: Convection 320°F (160°C).
- Start with ▶.

Note: Type of oven heating: The cooking time is recorded.
- To finish this phase, touch the ■ symbol.
This phase is saved with the cooking time, in this example, 20 minutes.
- To continue recording: Touch the symbol.
- or -
If the dish has reached the desired cooking result, to stop saving the recipe.
- To save: Touch the ▼ symbol.
The recipe is saved. Enter the name in "ABC".
→ "Entering a name" on page 35
Notes
- If you open the appliance door, the recording of the phase ends.
• Operation in combination mode is possible.
→ "Combination mode" on page 27
Programming a recipe
You can program and save up to 5 preparation phases.
-
Select the required microwave output or type of oven heating using the function selector.
The Ⓞ symbol is displayed. -
Touch the ⚪ symbol and select "Personal recipes" with the rotary selector.
-
Press √ to confirm.
-
Use the rotary selector to select a free memory location.
-
Touch the _ symbol.
-
Enter the name in "ABC". → "Entering a name" on page 35
-
Touch the _ symbol.
-
Use the ≥slant symbol to select the first phase.
The initial type of heating set is displayed. You can change the type of heating using the function selector. Operation in combination mode is possible. → "Combination mode" on page 27
- Set the microwave cooking time, temperature or grill setting using the rotary selector.
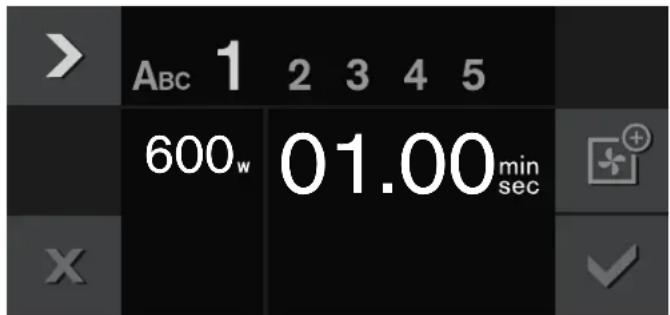
- Use the ≥slant symbol to select the next phase.
- or - If preparation is complete, finish making entries.
- Save with √.
- or - Cancel with X and exit the menu.
Entering a name
- Enter the recipe's name under "ABC".

| Rotary selector | Selecting lettersA new word always beings with an upper case letter. |
| >A^a Press briefly: cursor to the rightPress long: switch to diacritics and special charactersPress twice: insert line space | |
| Ȁ | Press briefly: cursor to the right |
| Press long: switch to normal characters | |
| Press twice: insert line space |
Clear letters
- Save with √.
- or - Cancel with X and quit the menu.
Note: For entering a name, Latin characters, certain special characters and numbers are available.
Starting a recipe
- Turn the function selector to any heating type.
The ⚪ symbol is displayed. - Touch the ⚪ symbol and select "Personal recipes" using the rotary selector.
- Press √ to confirm.
-
Use the rotary selector to select the desired recipe.
-
Start with ▶.
The operation begins. The cooking time starts counting down.
The settings for each phase are shown in the display.

Note: You can change the type of oven heating and oven temperature, the grill setting or the microwave output setting and cooking time while the recipe is cooking. This does not change the saved recipe.
Change recipe
You can change the settings of a recorded or programmed recipe.
- Turn the function selector to any heating type.
The ⚪ symbol is displayed. - Touch the ⚪ symbol and select "Personal recipes" using the rotary selector.
- Press √ to confirm.
- Use the rotary selector to select the desired recipe.
- Touch the _ symbol.
- Use the > symbol to select the desired phase.
The settings are displayed. You can change the settings with the rotary selector or the function selector. - Save with √.
- or -
Cancel with X and exit the menu.
Deleting a recipe
- Set the program selection to any heating function.
The Ⓞ symbol is displayed. - Touch the ☐ symbol. Select "Personal recipes" with the rotary selector.
- Confirm with √.
- Set the required recipe with the rotary selector.
- Clear the recipe with C.
- Confirm with √.
Timer functions
On the Timer menu, set:
Timer
Stop watch
Launching the timer menu
The appliance must be activated and the function selector set to 0 or ⚙.
Touch the Ⓤ symbol.

The Timer menu is displayed.
Do not use this element!
Notes
- If you turn the function selector to a type of heating or basic setting S while the timer or stop watch is running, a note appears on the display. Confirm the note with the √ symbol, interrupt the timer or the stop watch. The appliance is ready to use.
In order to continue the timer or stop watch, turn the function selector back to 0 or light ⚙.
- The timer and stop watch can be operated simultaneously.
In the 0 position, only the timer is displayed.
In the Light ⚙ position, the timer and stop watch are displayed.
Timer
The timer only runs as long as no other function is set. You can enter a maximum of 90 minutes.
Setting the timer
- Call up the Timer menu.
The "Timer" function ⚙ is displayed.
- Turn the rotary selector to set the desired time.

- Start with ▶.
The Timer menu closes and the timer starts to run. The symbol for the timer appears on the display and the time can be seen counting down.
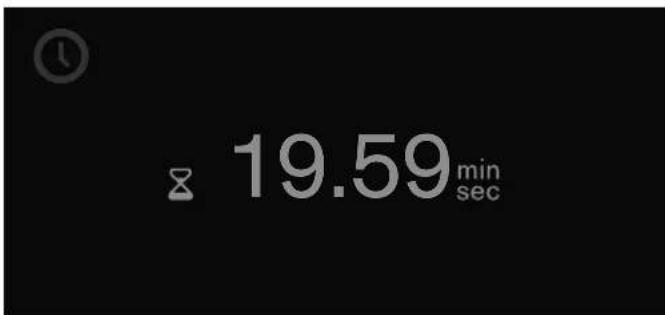
A signal sounds once the time has elapsed. The audible signal ceases if you touch the √ symbol.
You can exit the Timer menu at any time by touching the X symbol. This way, the settings are lost.
Suspend timer:
Call up the Timer menu. Select the "Timer" function with >, select ☒, and touch the || symbol. To let the timer run on, touch the ▶ symbol.
Switch off the timer early:
Call up the Timer menu. Select the "Timer" function with >, select X, and touch the C symbol.
Stopwatch
The stop watch only runs as long as no other function is set.
The stop watch counts from 0 seconds up to 90 minutes. It has a pause function. This allows you to stop the stop watch from time to time.
Starting the stopwatch
- Launch the timer menu.
- With >, select the "Stopwatch" function Ⓞ.

- Start with ▶.
The timer menu is closed and the time runs. The ⏻ symbol and the elapsing timer are shown in the display.

Stopping and restarting the stopwatch
- Launch the timer menu.
- With >, select the "Stopwatch" function Ⓞ.
- Touch the II symbol.

The time stops. The symbol changes to Start ▶ again.
- Start with ▶.
The time continues to run. Once 90 minutes have been reached, the display pulsates and a signal sounds. It goes off when you touch the √ symbol. The ⏻ symbol disappears from the display. The operation has ended.
Switching off the stopwatch:
Launch the timer menu. With >, select the "Stopwatch" function ⏻ and touch the C symbol.
Sabbath mode
With this function, the appliance uses the heating mode Convection to hold a temperature of 185^ F ( 85^ C).
You can keep food warm for up to 74 hours without having to switch the appliance on and off.
Bear in mind that food that spoils easily should not be left in the oven for too long.
Notes
- You have to set the Sabbath mode to "available" in the basic settings. "Basic Settings" on page 39
- The Sabbath mode time cannot be selected if the timer or stop watch are activated.
Setting the Sabbath mode
- Set the function selector to 🐘.
- Touch the Ⓤ symbol.
24 h at 185°F (85°C) appears in the display as a default value.
- Touch the Ⓤ symbol.

-
Set the required cooking time ⚙ using the rotary selector.
-
Press √ to confirm.
-
Start with ▶.
The appliance starts. Ⓤ and the temperature appear on the display.
Oven and display lighting are switched off. The control panel is locked; no tones sound if it is touched.
When the time has elapsed, the appliance does not heat up anymore. Turn the function selector to 0.
Switching off:
To cancel the transaction, turn the function selector to 0.
Child lock
The appliance has a child lock to make sure children cannot operate it inadvertently.
Notes
- You must set the child lock in the basic setting to "Available". → "Basic Settings" on page 39
- If there is a power cut while the child lock is activated, it may be deactivated when the power returns.
Activating the child lock
Requirement:
Program selector is set to 0.
Touch the 🔒 symbol for at least 6 seconds.
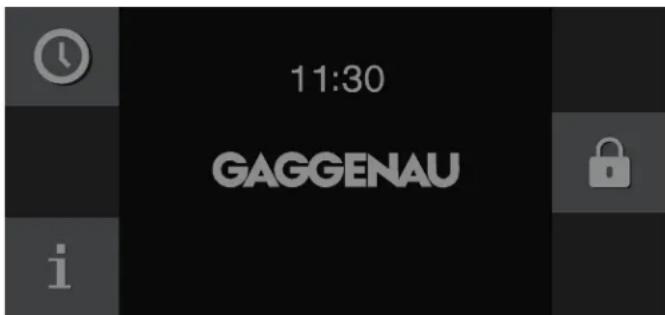
The child lock is activated. The standby screen appears. The 🔒 appears at the top of the display.
Deactivating the child lock
Requirement:
Program selector is set to 0.
Touch the ☑ symbol for at least 6 seconds.

The child lock is deactivated. You can switch on the appliance in the usual manner.
Basic Settings
The basic settings of your appliance can be adjusted individually.
- Rotate function selector to S.
You are now in the "Basic settings" menu.
-
Select the desired basic setting using the rotary selector.
-
Touch the _ symbol.
- You can change the basic setting by turning the rotary selector.
- Use √ to save or X to cancel and exit the current basic setting.
- Turn the function selector to 0 to exit the basic settings menu.
The changes are saved.
| Basic setting Possible settings Explanation | |||
 | Brightness Stages 1, 2, 3, 4, 5*, 6, 7, 8 Setting display brightness | ||
 | Standby screen On*/Off- Clock- Clock + GAGGENAU logo*- Date- Date + GAGGENAU logo- Clock + date- Clock + date + GAGGENAU logo | Appearance of the standby screen.Off: no display. Use this setting to reduce the standby consumption of your appliance.On: several displays can be set, confirm "On" with √ and choose the desired display with the rotary selector.The selection is displayed. | |
 | Display screen Minimized*/Standard When 'Minimized' is set, only the most important details are displayed after a short time. | ||
 | Touchpad color Gray*/White Select the color of symbols on the touchpads | ||
 | Touchpad tone Tone 1*/Tone 2/Off Select the signal tone when touching a touchpad | ||
 | Touchpad volume | Levels 1, 2, 3, 4, 5*, 6, 7, 8 | Sets the volume of the touchpad tone |
 | Signal volume | Levels 1, 2, 3, 4, 5*, 6, 7, 8 | Sets the volume of the signal tone |
 | Preheating speed/signal | Preheating with signal*Quick heat with signalPreheating without signalQuick heat without signal | The audible signal sounds when the desired temperature is reached during preheating.With quick heat, the desired temperature is reached especially fast. |
 | Time format | AM/PM / 24 h* | Time display in 24 or 12-hour format |
 | Time | Current time | Setting the time |
 | Daylight savings | Manual*/Automatic | Automatic time changeover when changing daylight savings time. If automatic: setting of the month, day and week when the time is to be changed. To be set separately for summer and winter time. |
 | Date format D.M.Y* | Setting the date format |
| D/M/Y | ||
| M/D/Y | ||
 | Date Current date Setting the date. Switch between the year/month/day with the > symbol. | |
 | Temperature format °C*/°F Set the temperature unit | |
 | Language German* / French / Italian / Spanish/ Portuguese / Dutch / Danish /Swedish / Norwegian / Finnish /Greek / Turkish / Russian / Polish /Czech / Slovenian / Slovakian / Arabic / Hebrew / Japanese / Korean /Thai / Chinese / English US /English | Select language for the text displayNote:When the language is changed, the system is restarted; this procedure takes a few seconds.Then the General settings menu is closed. |
 | Factory settings Restore appliance to factory settings Confirm the question "Delete all individual settings and restore appliance to factory settings?" with √ or cancel with X.Note:When restoring factory settings, the personal recipes are also deleted.After restoring the factory settings, you will see the "Initial settings" menu. | |
 | Demo mode On/Off* For presentation purposes only. The appli-ance does not heat in the demo mode, but all other functions are available.The "Off" setting must be activated for normal operation. The setting is only possible in the first three minutes after connecting the appli-ance. | |
 | Sabbath mode Not Available* / Available | Available: Sabbath mode can be set.→ "Sabbath mode" on page 38 |
 | Child lock Not Available* / Available | Available: the child lock can be activated.→ "Child lock" on page 38 |
| * Factory settings | ||
Cleaning
If taken care of and cleaned conscientiously, your appliance will stay beautiful and intact for a long time. Here we explain how to take care of and clean your appliance correctly.
Note: Unpleasant odors, for example after fish has been prepared, can be removed very easily. Add a few drops of lemon juice to a cup of water. Always place a glass rod/ spoon in the container to prevent delayed boiling. Heat the water for 1 to 2 minutes at maximum microwave output.

WARNING
Be sure the entire appliance has cooled and grease has solidified before attempting to clean any part of the appliance.

AVERTISSEMENT
The appliance becomes very hot. Never touch the hot inside surfaces of the oven interior or heating elements. Always allow the appliance to cool down. Keep children away.

AVERTISSEMENT
Risque de brûlure
Risk of electrical shock!
Moisture entering the appliance can cause an electrical shock. Don't use a high-pressure cleaner or steam cleaner.

AVERTISSEMENT
Scratched glass in the appliance door can burst. Do not use any glass scrapers or strong or abrasive cleaning agents.

AVERTISSEMENT
Risque de blessure
Self-cleaning surface in the cooking compartment
The back panel of the oven is coated with self-cleaning enamel. It cleans itself while the oven is in operation. Sometimes, larger splashes of food may not disappear until the oven has been operated several times. You can remove remains of spices and similar with a dry cloth or a soft brush.

natural_image
Diagram of a server rack with two directional arrows pointing to hexagonal patterns (no text or symbols)Notes
- Never treat the self-cleaning surface with oven cleaner. If oven cleaner accidentally gets onto the rear wall, remove it immediately with a sponge and plenty of water.
- Never use abrasive cleaning agents. You will scratch or destroy the highly porous coating.
- Never clean the self-cleaning surface with a scouring pad.
- Light discoloration of the enamel does not affect self-cleaning.
Cleaning the bottom of the cooking compartment, ceiling, and side walls: Use a dish rag and hot soapy water or vinegar solution.
Cleaning agent
To ensure that the different surfaces are not damaged by using the wrong cleaning agent, observe the information in the table.
Do not use:
- Harsh or abrasive cleaning agents.
- Metal or glass scrapers to clean the glass in the appliance door.
• Metal or glass scrapers to clean the door seal. - Hard scouring pads or sponges.
Wash new sponge cloths thoroughly before use.
| Area Cleaning agent | |
| Appliance front Hot soapy water: Clean using a dish cloth and then dry with a soft cloth.Do not use a metal or glass scraper for cleaning. | |
| Display Wipe down using a microfiber clothor a slightly damp cloth. Do not wipe with a wet cloth. | |
| Stainless steel Hot soapy water: Clean using a dishcloth and then dry with a soft cloth.Remove flecks of limescale, grease,starch and albumin (e.g. egg white)immediately. Corrosion can formunder such flecks. Special stainless-steel cleaning agents are availablefrom customer service or from spe-cialist retailers. | |
| Aluminum Clean with a mild window cleaningagent. Using a window cloth or a non-fluffing microfiber cloth, wipe over thesurfaces lightly in a horizontal direc-tion. | |
| Cookingcompartment(self-leaning back wall) | Do not use oven cleaner!Remove residue with dry cloth or soft brush.Refer to section"Self-cleaning surface in the cooking compartment". |
| Cookingcompartment(except forstainless steel) | Hot soapy water or vinegar solution:Clean using a dish cloth and then drywith a soft cloth. If oven is very dirty:use oven cleaner, but only when ovenis cold. |
| Cookingcompartmentmade ofstainless steel | Do not use oven spray or any otheraggressive oven cleaners or abrasivematerials. Scouring pads, roughsponges and pan cleaners are alsounsuitable. These items scratch thesurface. Allow the interior surfaces todry thoroughly. |
| Very dirtystainless steelor enameledcookingcompartment | Oven cleaner gel (order number463582 from customer service or inthe online shop).Please note:May not get on seals on the doorand lamp!Soak for max. 12 hours.Do not use on warm surfaces.Rinse thoroughly with water.Observe the manufacturer'sinstructions. |
Area Cleaning agent
| Glass cover for the cooking compartment light | Hot soapy water: Clean with a dish cloth. |
| Door panels Glass cleaner: Clean with a dish cloth. Do not use a glass scraper. | |
| Do not remove door seal. | Hot soapy water: Clean with a dish cloth and do not scour. Do not use a metal or glass scraper for cleaning. |
| Accessories Hot soapy water: Soak and clean with a dish cloth or brush. | |
Cleaning the glass cover
The glass oven-light cover is located on the left side wall inside the oven. Undo the screw from the cover. Then you can clean the glass with soapy water.

WARNING
Risk of burns!
The glass cover for the oven light gets hot. Only touch the glass cover with temperature-resistant gloves.

AVERTISSEMENT
Risque de brûlures
You can often easily eliminate problems that may occur on your own. Before calling customer service, take into account the following information.

WARNING
Risk of electric shock!
Incorrect repairs are dangerous. Repairs may only be carried out by one of our trained after-sales engineers. If the appliance is faulty, unplug the mains plug or switch off the fuse in the fuse box. Contact the after-sales service.

AVERTISSEMENT
Disruption Possible cause Solution
| Appliance not working, no display Power failure Check whether other kitchen appliances are working. | ||
| Fuse defective Have a qualified electrician check in the fuse box whether the fuse for the appliance is in working order. | ||
| Operating error Switch off the fuse for the appliance in the fuse box and switch it on again after about 10 seconds. | ||
| Appliance cannot be started Appliance door is not quite closed Close appliance door | ||
| The food takes longer than usual to heat up | The microwave power setting is too low | Select a higher power setting |
| A larger amount than usual has been placed in the appliance | Double the amount = almost double the time | |
| The food was colder than usual. Stir or turn the food during cooking | ||
| Appliance is not working, display is not responding. 📄 appears in the display. | Child lock activated Deactivate child lock (see section entitled ‘Child lock’) | |
| Appliance does not heat up, 🔖 appears in the display | Appliance is in the demo mode Deactivate demo mode in the basic settings | |
| Error Message E300 | Incorrect wiring at first power up | Check wiring of appliance at connection point. Wiring should be checked by a qualified person. |
| L1 & L2 not powered up simultaneously | Power on L1 & L2 simultaneously. | |
| Failure module combination | Please contact after-sales service and inform them of the error code. | |
| Error message "Exxx" | If an error message appears, turn the program selection to 0; if the display goes off, it was a one-time problem. If the problem occurs repeatedly or if the display stops, please contact after-sales service and inform them of the error code. | |
Power cut
Your appliance can bridge a power cut of a few seconds. Operation continues.
If the power cut was for a longer period and the appliance was in operation, a message appears in the display. Operation is interrupted.
Set the function selector to 0, then the appliance can be operated again as usual.
Demo mode
The demo mode is activated if the symbol appears in the display. The appliance does not heat up.
Briefly disconnect the appliance from the mains (switch off the domestic fuse or the circuit-breaker in the fuse box). Then deactivate the demo mode within 3 minutes in the basic setting. "Basic Settings" on page 39
Technical Specifications
| Power supply 208/240 V, 60 Hz | |
| Max. total connected load | 3,300 W |
| Microwave output 1,000 W (IEC 60705) | |
| Max. grill output power 2,000 W | |
| Convection output power | 1,600/2,100 W |
| Microwave frequency 2,450 MHz | |
| Fuse 20 A | |
| Appliance dimensions W/H/D | 2314" × 17^7/_8" × 22" (590 mm x 455 mm x 559 mm) |
| Overall volume 1.3 cu.ft (37 l) | |
| Usable oven space 1.3 cu.ft (36 l) | |
| Overall oven interior dimensions W/H/D | 1712" × 9^3/_8" × 13^7/_8" (445 mm x 239 mm x 352 mm) |
| Usable oven interior dimensions W/H/D | 17" × 914" × 1334" (432 mm x 236 mm x 350 mm) |
Customer service
If your appliance needs repairs, our customer service is there for you. We work hard to help solve problems quickly and without unnecessary service calls, getting your appliance back up and running correctly in the least amount of time possible.
When you call, please indicate the product number (E-Nr.) and serial number (FD-Nr.) so that we can support you in a qualified manner. You will find the type plate with these numbers at the inside of the appliance door. To avoid having to search for a long time when you need it, you can enter your appliance data and the customer support telephone number here.
E-Nr. FD-Nr.
Customer Service
Please read the use and care instructions provided with your appliance. Failure to do so may result in an error in using the appliance. This could result in a service call that instead of fixing a mechanical issue is only needed for customer education. Such calls are not covered by the appliance warranty.

natural_image
Illustration of a window corner with a black arrow pointing to the edge (no text or symbols)Please find the contact data of all countries in the enclosed customer service list.
To book an engineer visit and product advice
USA 877 442 4436
toll-free
CANADA 877 442 4436
toll-free
You can rely on the manufacturer's expertise. Rest assured that the repair will be handled by trained service technicians who have the original replacement parts for your appliance.
Tables and tips
Here, you can find a selection of dishes and the ideal settings for them. We will show you which type of heating and which temperature or microwave power setting is best for your meal. You can find information about suitable accessories and the height at which they should be inserted. There are also tips about cookware and preparation methods.
Do not use this element!
Notes
- The values in the table always apply to food placed in the cooking compartment when it is cold and empty. Only preheat the appliance if the table specifies that you should do so. Before using the appliance, remove all accessories from the cooking compartment that you will not be using.
- Do not line the accessories with greaseproof paper until after they have been preheated.
- The times specified in the tables are only guidelines. They will depend on the quality and composition of the food.
- Use the accessories provided. Additional accessories may be obtained as optional accessories from specialist retailers or from customer service.
- Always use an oven cloth or oven gloves when taking hot accessories or cookware out of the cooking compartment.

WARNING
Risk of scalding!
When pulling out the glass tray, hot liquid may overflow. Carefully pull the glass tray out of the cooking compartment.

AVERTISSEMENT
Risque de brûlure
The following tables provide you with numerous options and settings for the microwave.
The times given in the tables are guidelines; they depend on the cookware used, and the quality, temperature and consistency of the food.
Time ranges are often specified in the tables. Set the shortest time first and then extend the time if necessary.
It may be that you have different quantities from those specified in the tables. There is a rule of thumb for operating the microwave: Double the amount = double the time, half the amount = half the time.
You can place the cookware in the middle of the wire rack or on the cooking compartment floor. The food will then absorb the microwaves from all sides.
Defrosting
Place the frozen food in an open container on the oven floor.
Delicate parts such as chicken legs and wings or fatty outer layers of roasts can be covered with small pieces of aluminum foil. The foil may not touch the walls of the appliance. You can remove the foil halfway through the defrosting time.
Turn or stir the food once or twice during the defrosting time. Large pieces of food should be turned several times. When turning, remove any liquid that has been produced during defrosting.
Leave defrosted items to stand at room temperature for an additional 10 to 60 minutes so that the temperature can even out. You can remove the giblets from poultry at this point.
Note: Place the cookware on the cooking compartment floor.

WARNING
Health Risk!
Liquid will be produced when defrosting meat or poultry. Drain off this liquid when turning meat and poultry, and under no circumstances, use it for other purposes, or allow it to come into contact with other foods.

AVERTISSEMENT
Risques à la santé
Defrosting, heating up or cooking frozen food
Take ready meals out of the packaging. They will heat up more quickly and evenly in microwavable cookware. The different components of the meal may not require the same amount of time to heat up.
Food that lies flat will cook more quickly than food that is piled high. You should therefore distribute the food so that it is as flat as possible in the cookware. Food should not be placed in layers on top of one another.
Always cover the food. If you do not have a suitable cover for your container, use a plate or special microwave foil.
Stir or turn the food 2 or 3 times during cooking.
After heating, allow the food to stand for an additional 2 to 5 minutes to allow the temperature to even out.
This will help the food retain its own distinct taste, so it will require less seasoning.
Note: Place the cookware on the cooking compartment floor.
| Dish Amount Microwave power in watts, | Notes | ||
| cooking time in minutes | |||
| Menu, plated meal, ready meal (2-3 components) | 10.6 - 14.1 oz(300 - 400 g) | 600 W, 11 - 15 min. Covered | |
| Soups 14.1 - 17.6 oz | 600 W, 8 - 13 min. Cookware with lid | ||
| (400 - 500 g) | |||
| Stew 17.6 oz | 600 W, 11 - 15 min. | Cookware with lid | |
| (500 g) | 600 W, 20 - 25 min. | ||
| 2.2 lb(1000 g) | |||
| Slices or pieces of meat in sauce, e.g. goulash | 17.6 oz(500 g) | 600 W, 12 - 17 min. | Cookware with lid |
| 2.2 lb(1000 g) | 600 W, 25 - 30 min. | ||
| Dish Amount Microwave power in watts, | cooking time in minutes | Notes | |
| Fish, e.g. fillet steaks 14.1 oz | (400 g) | 600 W, 10 - 15 min. | Covered |
| 28.2 oz (800 g) | 600 W, 20 - 25 min. | ||
| Side dishes, e.g. rice, pasta 8.8 oz (250 g) | 17.6 oz (500 g) | 600 W, 2 - 5 min. | Cookware with lid, add liquid |
| 600 W, 8 - 10 min. | |||
| Vegetables, e.g. peas, broccoli, carrots | 10.6 oz (300 g) | 600 W, 8 - 10 min. | Cookware with lid, add 1 tbsp of water |
| 21.2 oz (600 g) | 600 W, 14 - 17 min. | ||
| Creamed spinach 15.9 oz | (450 g) | 600 W, 11 - 16 min. Cook without additional water | |
Heating food

WARNING
Risk of scalding!
There is a possibility of delayed boiling when a liquid is heated. This means that the liquid reaches boiling temperature without the usual steam bubbles rising to the surface. Even if the container only vibrates a little, the hot liquid may suddenly boil over and spatter. When heating liquids, always place a glass rod/spoon in the container. This will prevent delayed boiling.


AVERTISSEMENT
Risque de brûlure

CAUTION
Metal e.g. a spoon in a glass must be kept at least 1" (25 mm) from the oven walls and the inside of the door. Sparks could irreparably damage the glass on the inside of the door.

ATTENTION
- Take ready meals out of the packaging. They will heat up more quickly and evenly in microwavable cookware. The different components of the meal may not require the same amount of time to heat up.
- Always cover the food. If you do not have a suitable cover for your container, use a plate or special microwave foil.
- Stir or turn the food several times during the heating time. Check the temperature.
- After heating, allow the food to stand for an additional 2 to 5 minutes to allow the temperature to even out.
- Always use an oven cloth or oven gloves when removing plates from the appliance.
Note: Place the cookware on the cooking compartment floor.
| Heating food Weight Microwave output in watts, cooking time in minutes | Notes | ||
| Menu, plated meal, ready meal (2-3 components) | 12.3 - 17.6 oz (350-500 g) | 600 W, 4-8 min. Covered | |
| Beverages 0.32 pt | (150 ml) | 1000 W, 1-2 min. Always place a glass rod/spoon in the container. Do not overheat alcoholic drinks; check occasionally while heating. | |
| 0.62 pt (300 ml) | 1000 W, 2-3 min. | ||
| 1.1 pt (500 ml) | 1000 W, 4-5 min. | ||
| Baby food, e.g. baby bottles 0.11 pt (50 ml) | 360 W, 1⁄2-1 min. No nipples or lids. Always shake well after heating. You must check the temperature! | ||
| Soup 1 cup 6.2 oz | (175 g) each | 600 W, 2-3 min. - | |
| Soup, 2 cups 6.2 oz | (175 g) each | 600 W, 3-4 min. - | |
| Soup, 4 cups 6.2 oz | (175 g) each | 600 W, 6-8 min. - | |
| Meat or pieces of meat in sauce | 17.6 oz (500 g) | 600 W, 8-11 min. Covered | |
| Stew | 14.1 oz (400 g) | 600 W, 6-8 min. Cookware with lid | |
| 28.2 oz (800 g) | 600 W, 8-11 min. | ||
| Vegetables, 1 portion | 5.3 oz (150 g) | 600 W, 2-3 min. Add a little liquid | |
| Vegetables, 2 portions | 10.6 oz (300 g) | 600 W, 3-5 min. | |
Cooking food
Food that lies flat will cook more quickly than food that is piled high. You should therefore distribute the food so that it is as flat as possible in the cookware. Food should not be placed in layers on top of one another.
Cook the food in cookware with a lid. It should be turned or stirred occasionally.
This will help the food retain its own distinct taste, so it will require less seasoning.
After heating, allow the food to stand for an additional 2 to 5 minutes to allow the temperature to even out.
Note: Place the cookware on the cooking compartment floor.
| Dish Amount Microwave power in watts, | Notes | ||
| cooking time in minutes | |||
| Whole chicken, fresh, no giblets | 2.6 lb(1200 g) | 600 W, 25 - 30 min. Turn halfway through the cooking time. | |
| Fish fillet, fresh 14.1 lb | (400 g) | 600 W, 7 - 12 min. | |
| Fresh vegetables 8.8 oz | (250 g) | 600 W, 6 - 10 min. | Cut the vegetables into pieces of equal size. Add 1 to 2 tbsp water per 3.5 oz (100 g) of vegetables, stir. |
| 17.6 oz(500 g) | 600 W, 10 - 15 min. | ||
| Side dishes, Potatoes 8.8 oz | (250 g) | 600 W, 8 - 10 min. | Cut the potatoes into pieces of equal size. Add 1 tbsp water per 3.5 oz (100 g) of vegetables, stir. |
| 17.6 oz(500 g) | 600 W, 12 - 15 min. | ||
| 26.5 oz(750 g) | 600 W, 15 - 22 min. | ||
| Rice 4.4 oz | (125 g) | 600 W, 4 - 6 min. + 180 W 12 - 15 min. | Add double the amount of liquid. |
| 8.8 oz(250 g) | 600 W, 6 - 8 min. + 180 W 15 - 18 min. | ||
| Sweet foods, e.g. pudding (instant) | 1.1 pt(500 ml) | 600 W, 6 - 8 min. Stir the pudding thoroughly 2 to 3 times using an egg whisk while heating. | |
| Fruit, compote 17.6 oz | (500 g) | 600 W, 9 - 12 min. Stir while heating. | |

CAUTION
Do not leave oven unattended while popping corn. Popcorn may ignite and cause fire.

ATTENTION
| You cannot find any information about the settings for the quantity of food you have prepared. | Lengthen or shorten the cooking time according to the following rule of thumb: Double the amount = double the time, half the amount = half the time |
| The food has become too dry. | Next time, set a shorter cooking time or select a lower microwave power setting. Cover the food and add more liquid. |
| The time has elapsed but the food is not defrosted, hot or cooked. | Set a longer time. Large quantities and food that is piled high require longer times. |
| Time has elapsed but the food is overheated at the edge but not done in the middle. | Stir it during the cooking time and next time, select a lower microwave power setting and a longer cooking time. |
| After defrosting, the poultry or meat is defrosted on the outside but not defrosted in the middle. | Next time, select a lower microwave output setting. If you are defrosting a large quantity, turn it several times. |
Cakes and pastries
Baking tins: It is best to use dark-colored metal baking tins.
When using the microwave, use baking containers made of glass, ceramic or plastic. These must be heat-resistant up to 480^ F ( 250^ C). Cakes will not brown so well if you use these types of baking containers.
Tables: The times given apply to food placed in a cold oven.
The temperature and baking time depend on the consistency and amount of the mixture. This is why temperature ranges are given in the tables. Begin with the lowest temperature and, if necessary, use a higher setting the next time. A lower temperature results in more even browning.
More information can be found in the "Baking tips" section that follows the tables.
Always place the cake pan in the center of the wire rack.
| Cake Cookware Height Type of | heating | Temperature °F (°C) | Cooking time in minutes | |||
| Sponge cake, simple | Ring-shaped cake pan/Vienna ring pan/cake pan | 1 | ♣ 320 - 340 | (160-170) | 60-80 | |
| Sponge cake, delicate (e.g.sandcake) | 1 | 300 - 320 (150-160) | 60-70 | |||
| Cake base with edge of short-crust pastry | Springform cake pan | 1♣ | 320 - 340 | (160-170) | 35-45 | |
| Sponge cake base Fruit sponge cake | pan | 1♣ | 320 - 340 | (160-170) | 35-45 | |
| Hot water sponge cake Springform cake | pan | 1♣ | 340 - 355 | (170-180) | 45-50 | |
| Cake with dry topping (sponge) Glass tray | 2♣ 320 - 340 | (160-170) | 35-50 | |||
| Cake with moist topping, e.g. yeast dough with apple crumble | Glass tray 2♣ | 310 - 330 | (155-165) | 55-65 | ||
| Plaited loaf with 17.6 oz (500 g) flour | Glass tray | 2 | ♣ | 320 - 340 (160-170) | 30-40 | |
* Allow cake to cool in the oven for approx. 20 minutes.
** Never pour water directly into a hot oven.
| Cake Cookware Height Type of | heating | Temperature °F (°C) | Cooking time in minutes | |
| Stollen with 17.6 oz (500 g) flour Glass tray 2 ✦ 340 - 355 | (170-180) | 60-70 | ||
| Pizza Glass tray 2 ✦ 390 - 410 | (200-210) | 30-40 | ||
| Yeast bread 2.2 lb (1 kg)** Glass tray 2 ✦ 355 - 375 | (180-190) | 50-60 | ||
* Allow cake to cool in the oven for approx. 20 minutes.
** Never pour water directly into a hot oven.
| Cake Cookware Height Microwave power | setting in watts | Cooking time in minutes | Type of heating | Temperature °F (°C) | ||
| Nut cake | Springform cake pan | 1 | 90 W | 30-35 | ♣ | 340 - 355(170-180) |
| Fruit tart or cheesecake with pastry* | Springform cake pan | 2 | 360 W | 40-50 | ♣ | 300 - 320(150-160) |
| Fruit pie, delicate with sponge | Ring cake pan or springform cake pan | 1 | 90 W | 30-45 | ♣ | 340 - 375(170-190) |
| Savory cakes(e.g. quiche/onion tart) | Springform cake pan or quiche pan | 2 | 90 W | 50-70 | ♣ | 320 - 355(160-180) |
* Allow cake to cool in the oven for approx. 20 minutes.
| Small baked products | Cookware | Height Type of heating | Temperature °F (°C) | Cooking time in minutes | |
| Cookies | Glass tray | 2 | ♣ | 300 - 340 (150-170) | 20-35 |
| Meringue | Glass tray | 2 | ♣ | 230 (110) | 90-120 |
| Macaroons | Glass tray | 2 | ♣ | 230 (110) | 35-45 |
| Puff pastry | Glass tray | 2 | ♣ | 355 - 390 (180-200) | 35-45 |
| Bread rolls (e.g. rye bread rolls) | Glass tray | 2 | ♣ | 355 - 390 (180-200) | 25-45 |
Baking tips
| You want to bake according to your own recipe. | Use similar items in the baking tables as a guide. |
| How to tell whether sponge cake is baked through. | Approximately 10 minutes before the end of the baking time specified in the recipe, poke the cake with a toothpick at its highest point. If the toothpick comes out clean, the cake is ready. |
| The cake collapses. | Use less fluid next time or set the oven temperature 10 degrees lower. Observe the specified mixing times in the recipe. |
| The cake has risen in the middle but is lower around the edge. | Only grease the base of the springform cake pan. After baking, loosen the cake carefully with a knife. |
| The cake is too dark. | Select a lower temperature and bake the cake for a little longer. |
| The cake is too dry. | Make tiny holes in the finished cake using a toothpick. Then drizzle fruit juice or an alcoholic beverage over it. Next time, select a temperature 10 degrees higher and reduce the baking time. |
| The bread or cake (e.g. cheesecake) looks good, but is soggy on the inside (sticky, with streaks of water). | Use slightly less fluid next time and bake for slightly longer at a lower temperature. When baking cakes with a moist topping, bake the base first, cover with almonds or bread crumbs and then add the topping. Please follow the recipe and follow the baking times. |
| The cake cannot be turned out of the dish when it is turned upside down. | Let the cake cool for 5 to 10 minutes after baking; then it will be easier to turn out of the pan. If it still does not turn out, carefully loosen it around the edges with a knife. Turn the cake pan upside down again and cover it several times with a cold, wet cloth. Next time, grease the pan well and sprinkle some bread crumbs into it. |
| You have measured the temperature of the oven using your own meat thermometer and found there is a discrepancy. | The oven temperature is measured by the manufacturer after a specified period of time using a test rack in the center of the cooking compartment. Cookware and accessories affect the temperature measurement, so there will always be some discrepancy when you measure the temperature yourself. |
| Sparks are generated between the pan and the wire rack. | Check that the pan is clean on the outside. Change the position of the pan in the cooking compartment. If this does not help, continue baking without microwave or use the glass tray as a surface. The baking time will then be longer. |
Roasting and grilling
Tables: The times given apply to food placed in a cold oven.
The temperature and roasting time depend on the type and amount of food being cooked. This is why temperature ranges are given in the tables. Begin with the lowest temperature and, if necessary, use a higher setting the next time.
For more information, see the section entitled "Tips for grilling and roasting" that follows the tables.
Cookware: You may use any heat-resistant cookware that is suitable for use in a microwave. Metal roasting dishes are only suitable for roasting without microwaves.
The cookware can become very hot. Use oven gloves to take the cookware out of the oven.
Place hot glass cookware on a dry kitchen towel after it has been removed from the oven. The glass could crack if placed on a cold or wet surface.
Tips for roasting: Use a deep roasting dish for roasting meat and poultry.
Check that your cookware fits in the cooking compartment. It should not be too big.
Meat: Cover the bottom of the cookware with liquid. Add slightly more liquid for pot roasts. Turn pieces of meat halfway through the cooking time. When the roast is ready, turn off the oven and allow it to rest for an additional 10 minutes. This allows better distribution of the meat juices.
Grilling tip: Always keep the oven door closed when grilling and do not preheat.
As far as possible, the pieces of food you are grilling should be of equal thickness. Steaks should be at least 1 inch (25 mm) thick. This will allow them to brown evenly and remain succulent and juicy. Only add salt to steaks once they have been grilled.
Use tongs to turn the pieces of food you are grilling. If you pierce the meat with a fork, the juices will run out and it will become dry.
Dark meat, such as beef, browns more quickly than lighter-colored meat, such as veal or pork. When grilling light-colored meat or fish, these often only brown slightly on the surface, although they are cooked and juicy on the inside.
The grill element switches off and on again automatically. This is normal. The grill setting determines how frequently this occurs.
Steaming tips: Use cookware with a lid for braising fish.
Put two to three tablespoons of liquid and a little lemon juice or vinegar into the cookware.
| Dish Amount Microwave power | Height Type of heating | Temperature °F (°C), grill setting | Notes | ||
| setting in watts, cooking time in minutes | |||||
| Pot-roasted beef Approx.2.2 lb(1000 g) | 180 W, 80-90 min. 0 | 320 - 340 | (160-170) | Cookware with lid | |
| Steak, medium rare Approx.2.2 lb(1000 g) | 180 W, 30-40 min. 0 | 355 - 390 | (180-200) | Cookware without lid.Turn halfway through the cooking time. | |
| Pork roast without (e.g. neck) | Approx.26.5 oz(750 g) | 360 W, 35-45 min. 0 | 340 - 355 | (170-180) | Cookware without lid. |
| Boned pork with rind*(e.g. shoulder) | Approx.2.2 lb(1000 g) | 180 W, 80-90 min. 0 | 340 - 355 | (170-180) | Cookware without lid.Do not turn. |
| Pork tenderloin Approx.17.6 -21.2 oz(500-600 g) | 180 W, 35-40 min. 0 | 355 - 375 | (180-190) | Cookware without lid. | |
| Meat loaf Approx.26.5 oz(750 g) | 360 W, 30-35 min. 0 | 390 - 410 | (200-210) | Cookware without lid. | |
| Chicken, whole Approx.2.2 - 2.6 lb(1000-1200 g) | 360 W, 30-40 min. 0 | 355 - 375 | (180-190) | Cookware with lid. Place with the breast side up.Do not turn. | |
| Chicken portions,e.g. chicken quarters | Approx.28.2 oz(800 g) | 360 W, 20-30 min. 0 | 355 - 375 | (180-190) | Cookware without lid.Place with the skin side up. Do not turn. |
| Duck | Approx.3.3 - 3.7 lb(1500-1700 g) | 180 W, 70-80 min. 0 | 445 - 480 | (230-250) | Cookware with lid.Do not turn. |
| Duck breastDuck breast, 2 pieces | Approx.17.6 oz(500 g)8.8 - 10.6 oz(250-300 g)each | 180 W, 15-20 min. 0 | 3 | Cookware without lid.Place with the skin side up. Do not turn. | |
| Turkey breast,turkey legs | 24.7 -31.7 oz(700-900 g) | 180 W, 30-40 min. 0 | 2 | Deep cookware without lid. Do not turn. | |
| Fish, grilled | Approx.17.6 oz(500 g) | 600 W, 10-15 min. 0 | 3 | Cookware without lid.Defrost frozen fish before cooking. | |
* Make cuts in the pork rind.
| Dish Amount Weight Height Type of | heating | Grill setting | Cooking time in minutes | |||
| Steaks, ca. 1 in (25 mm) thick | 2 - 3 pieces approx. | 7.1 oz(200 g) each | 1+3^** | 3 | 3 | 1st side:approx. 10 - 152nd side: approx. 5 - 10 |
| Grilled sausages 4 - 6 pieces approx. | 5.3 oz(150 g) each | 1+3^** | 3 | 3 | 1st side:approx. 10 - 152nd side: approx. 5 - 10 | |
| Fish steak* 2 - 3 pieces approx. | 5.3 oz(150 g) each | 1+3^** | 3 | 3 | 1st side:approx. 10 - 122nd side: approx. 8 - 12 | |
| Fish fillet* 2 - 3 pieces approx. | 10.6 oz(300 g) each | 1+3^** | 3 | 3 | 1st side:approx. 10 - 152nd side:approx. 10 - 15 | |
| Toast | 12 slices | - | 3 | 3 | 1st side: approx. 3 - 52nd side: approx. 2 - 3 | |
| Toast with topping | 2-4 slices*** | - | 1+3^** | 3 | Depending on topping:8-10 | |
* Grease the wire rack first with oil.
** Slide the wire rack in at level 3 and the glass tray at level 1.
*** Toast the slices of bread in advance
Tips for roasting and grilling
| The table does not contain information for the weight of the roast. | For small roasts, select a higher temperature and a shorter cooking time. For larger roasts, select a lower temperature and a longer cooking time. |
| This is how you can tell when the roast is ready. | Use a meat thermometer (available from specialist shops) or carry out a “spoon test.” Press down on the roast with a spoon. If it feels firm, it is ready. If the spoon can be pressed in, it needs to be cooked for a little longer. |
| The roast looks good but the juices are burnt. | Next time, use a smaller roasting dish or add more liquid. |
| The roast looks good but the juices are too clear and watery. | Next time, use a larger roasting dish and add less liquid. |
| The roast is not well-done enough. | Carve the roast. Prepare the gravy in the roasting dish and place the slices of roast meat in the gravy. Finish cooking the meat using the microwave only. |
Casseroles, gratins
The table applies to dishes placed in a cold oven.
Place the casserole in microwaveable cookware on the cooking compartment floor.
Use large shallow cookware for casseroles and gratins. Food takes longer to cook in narrow, deep containers and browns more on top.
Casseroles and gratins should be left to cook in the oven for an additional 5 minutes after the oven has been switched off.
| Dish Amount Cookware Height Microwave | watts | Cooking time in minutes | Type of heating | Temperature °F (°C) | |||
| Casseroles, sweet,e.g. quark soufflé with fruit | Approx.3.3 lb(1500 g) | Flat ovenproofdish ca. 2 in(50 mm) height,e.g. tart pan | 0 180 W 25-35 | ### | 265 - 300 | (130-150) | |
| Savory casseroles made from cooked ingredients(e.g. pasta bake) | Approx.2.2 lb(1000 g) | Flat ovenproofdish ca. 2 in(50 mm) height,e.g. 9 in x13 incasserole | 0 600 W 20-30 | ### | 320 - 375 | (160-190) | |
| Savory casseroles made from raw ingredients(e.g. potato gratin) | Approx.2.4 lb(1100 g) | Flat ovenproofdish ca. 2 in(50 mm) height,e.g. 9 in x13 incasserole | 0 600 W 25-35 | ### | 340 - 355 | (170-180) | |
Frozen convenience products
Observe the instructions on the packaging. The values in the table apply to food placed in a cold oven.
| Dish Cookware Height Type of | heating | Temperature °F (°C) | Cooking time in minutes | ||
| Strudel with fruit filling* | Glass tray | 2 | ♣ | 390 - 430 (200-220) | 40-50 |
| French fries | Glass tray | 2 | ♣ | 410 - 445 (210-230) | 20-30 |
| Pizza | Wire rack | 2 | ♣ | 355 - 390 (180-200) | 10-20 |
| Pizza baguette | Wire rack | 2 | ♣ | 320 - 375 (160-190) | 15-20 |
| Croquettes | Glass tray | 2 | ♣ | 390 - 430 (200-220) | 20-30 |
| Rösti | Glass tray | 2 | ♣ | 390 - 430 (200-220) | 20-30 |
* Preheat the oven for 5 minutes.
Test dishes
The quality and function of microwave combination appliances are tested by testing institutes using the following dishes.
In accordance with EN 60705, IEC 60705, DIN 44547, and EN 60350
Microwave defrosting
| Dish Microwave power in watts, cooking time in minutes | Notes |
| Meat, 17.6 oz (500 g) 180 W, 7 min. +90 W, 8-12 min. or "Defrost Hamburger meat" program | Place Pyrex dish with a diameter of 9 in (230 mm) on the oven floor. |
| Microwave cooking | |
| Dish Microwave power in watts, cooking time in minutes | Notes |
| Custard, 35.3 oz (1000 g) 600 W, 11-12 min. + 180 W, 15-20 min. Place Pyrex dish on the oven floor. | |
| Sponge, 16.8 oz (475 g) 600 W, 8-10 min. Place Pyrex dish with a diameter of 9 in (230 mm) on the oven floor. | |
| Meat loaf, 31.7 oz (900 g) 600 W, 25-30 min. Place Pyrex dish on the oven floor. | |
Combined microwave cooking
| Dish Microwave power in watts, cooking time in minutes | Type of heating | Temperature in °F (°C), grill setting | Notes | |
| Potato gratin | 360 W, 30-35 min. | 1 | Place Pyrex dish with a diameter of 9 in (230 mm) on the oven floor. | |
| Cake | 180 W, 20-25 min. | ♣ | 375 - 390 (190-200) | Place Pyrex dish with a diameter of 9 in (230 mm) on the wire rack, on level 1. |
| Chicken | 360 W, 30-35 min. | ♣ | 465 (240) | Put the chicken breast-side down in deep cookware without a lid and place on the cooking compartment floor. Turn halfway through the cooking time. |
In accordance with DIN 44547 and EN 60350
Baking
The values in the table apply to food placed in a cold oven.
| Dish | Notes regarding cookware | Height | Type of heating | Temperature °F (°C) | Baking time in minutes |
| Piped cookies | Glass tray | 2 | ♣ | 320 - 340(160-170) | 30-35 |
| Small cakes* | Glass tray | 2 | ♣ | 320 - 340(160-170) | 25-30 |
| Hot water sponge cake | Springform cake pan on the wire rack | 1♣ | 340 - 355(170-180) | 45-50 | |
| Yeast sheet cake | Glass tray | 2 | ♣ | 320 - 355(160-180) | 50-60 |
| Dish Notes regarding cookware Height Type of | heating | Temperature °F (°C) | Baking time in minutes | ||
| Double crust apple pie | Dark springform cake pan directly on the wire rack | 2♣ | 340 - 375 | (170-190) | 80-100 |
* Preheat the oven for 5 minutes.
Grilling
The values in the table apply to food placed in a cold oven.
| Dish Accessories Height Grill ^**** | Cooking time in minutes | |
| Browning toast Wire rack 3 3 4-5 | ||
| Beef burgers, x 12* | Wire rack and glass tray | 3+1 3 30-35 |
* turn over after 12 of the cooking time.
Acrylamide in foodstuffs
Which foods are affected?
Acrylamide is mainly produced in grain and potato products that are heated to high temperatures, such as potato chips, french fries, toast, bread rolls, bread, fine baked goods (cookies, gingerbread, Spekulatius).
| Tips for keeping acrylamide to a minimum when preparing food | |
| General | Keep cooking times to a minimum. Cook meals until they are golden brown, but not too dark. Large, thick pieces of food contain less acrylamide. |
| Baking | With Convection max. 355°F (180°C). |
| Cookies | Egg or egg yolk reduces the production of acrylamide. Spread out a single layer evenly on the glass tray. |
| Oven fries | Cook at least 14.1 oz (400 g) at once on a glass tray so that the fries do not dry out. |
Gaggenau
BSH Home Appliance Corporation
1901 Main Street, Suite 600
Irvine, CA 92614
+1.877.442.4436
USA
www.gaggenau-usa.com
© 2018 BSH Home Appliances

- Table of Contents
- Safety Definitions 4
- IMPORTANT SAFETY INSTRUCTIONS 5
- ▲ PRECAUTIONS TO AVOID POSSIBLE EXPOSURE TO EXCESSIVE MICROWAVE ENERGY 5
- GROUNDING INSTRUCTIONS 7
- Causes of damage 17
- Protecting the environment 17
- Getting to know the appliance 18
- Before first use 21
- Activating the appliance 23
- Microwave 24
- Oven 25
- Broil 27
- Combination mode 27
- Sequential operation 28
- Automatic programs 30
- Personal recipes 34
- Timer functions 36
- Sabbath mode 38
- Child lock 38
- Basic Settings 39
- Cleaning 41
- Troubleshooting 44
- Technical specifications 45
- Customer service 46
- Tables and tips 47
- Safety Definitions
- WARNING
- CAUTION
- NOTICE
- Protective earth (ground)
- Heavy load
- IMPORTANT SAFETY INSTRUCTIONS
- CONSIGNES DE SÉCURITÉ IMPORTANTES
- SAVE THESE INSTRUCTIONS FOR FUTURE REFERENCE.
- ⚠ PRECAUTIONS TO AVOID POSSIBLE EXPOSURE TO EXCESSIVE MICROWAVE ENERGY
- AVERTISSEMENT
- To reduce the risk of fire in the oven cavity:
- GROUNDING INSTRUCTIONS
- TV / Radio Interference
- Intended Use
- Child Safety
- Cleaning Safety
- Utilisation prévue
- Cooking Safety
- Sécurité de cuisson
- ATTENTION
- In Case of Fire
- Liquids
- Cooking Items
- Cooking Utensils
- Thermometers
- Utensiles de cuisson
- Pacemakers
- Fan Motor Operation
- Proposition 65 Warning:
- SAVE THESE INSTRUCTIONS.
- Protecting the environment
- Tips for saving energy
- Getting to know the appliance
- Position Function
- Colors and display
- Colors
- Presentation
- Additional information i
- Cooling fan
- Accessories
- Wire rack
- Glass rod
- Special accessories
- Before first use
- Notes
- Setting the language
- Setting the time format
- Setting the time
- Setting the date format
- Setting the date
- Setting the temperature format
- Completing initial set-up
- Heating up the oven
- Cleaning accessories
- Activating the appliance
- Standby
- Activate appliance
- Microwave
- Notes regarding cookware
- Microwave output
- Setting the microwave
- Pause:
- Switching off:
- Oven
- Setting the type of heating and temperature
- Calling up the current temperature:
- Quick heat
- Safety shut-off
- Exception:
- Broil
- Setting the Broil mode
- Combination mode
- Setting the combination mode
- Changing settings
- Canceling settings
- Sequential operation
- Setting a series of operations
- Changing the settings of the current phase:
- Deleting the settings:
- End of cooking time
- Delaying the cooking time end
- Changing the cooking time:
- Changing the end of cooking time:
- To cancel the entire procedure:
- Automatic programs
- Setting a program
- Resting time:
- Tips:
- Notes:
- Adjust individually
- Tips for automatic programs
- Defrosting:
- Vegetables:
- Baked potatoes:
- Rice:
- Fish:
- Leg of lamb:
- Poultry:
- Pizza, frozen:
- Resting times:
- Personal recipes
- Recording a recipe
- Programming a recipe
- Entering a name
- Clear letters
- Starting a recipe
- Change recipe
- Deleting a recipe
- Timer functions
- Launching the timer menu
- Timer
- Setting the timer
- Suspend timer:
- Switch off the timer early:
- Stopwatch
- Starting the stopwatch
- Stopping and restarting the stopwatch
- Switching off the stopwatch:
- Sabbath mode
- Setting the Sabbath mode
- Child lock
- Activating the child lock
- Requirement:
- Deactivating the child lock
- Basic Settings
- Cleaning
- Risque de brûlure
- Risk of electrical shock!
- Risque de blessure
- Self-cleaning surface in the cooking compartment
- Cleaning agent
- Do not use:
- Cleaning the glass cover
- Risk of electric shock!
- Power cut
- Demo mode
- Customer service
- Tables and tips
- Defrosting
- Health Risk!
- Risques à la santé
- Defrosting, heating up or cooking frozen food
- Heating food
- Risk of scalding!
- Cooking food
- Cakes and pastries
- Roasting and grilling
- Casseroles, gratins
- Frozen convenience products
- Test dishes
- Baking
- Grilling
- Acrylamide in foodstuffs
Brand : GAGGENAU
Model : BMP250710
Category : Oven