
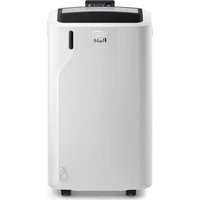
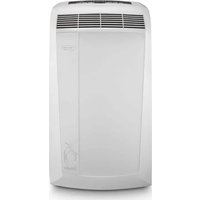
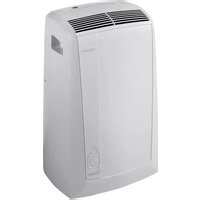
PAC N92ECO Silent - Air conditioner DELONGHI - Free user manual and instructions
Find the device manual for free PAC N92ECO Silent DELONGHI in PDF.


| Product Type | Portable Air Conditioner |
| Model | PAC N92ECO Silent |
| Brand | DeLonghi |
| Cooling Capacity | 9000 BTU/h |
| Energy Efficiency | Class A |
| Noise Level (Low/High) | 45/54 dB(A) |
| Dimensions (W x D x H) | 45.3 x 39.5 x 77.5 cm |
| Weight | 32 kg |
| Power Supply | 220-240 V ~ 50 Hz |
| Power Consumption (Cooling) | 1050 W |
| Refrigerant | R32 |
| Airflow (Max) | 350 m³/h |
| Dehumidification Capacity | 1.2 L/h |
| Water Tank Capacity | 1.5 L (condensate) |
| Operating Modes | Cooling, Fan, Dehumidifier, Auto |
| Fan Speeds | 3 (Low, Medium, High) + Silent |
| Timer | 24-hour programmable |
| Remote Control | Yes (included) |
| Air Filter | Washable mesh filter |
| Installation | Window kit included (vertical/horizontal) |
| Castors | Yes, for easy mobility |
| Safety Features | Overheat protection, auto-restart after power failure |
| Maintenance | Clean filter every 2 weeks; empty water tank regularly |
| Repairability | Spare parts available via authorized service centers |
Frequently Asked Questions - PAC N92ECO Silent DELONGHI
User questions about PAC N92ECO Silent DELONGHI
0 question about this device. Answer the ones you know or ask your own.
Ask a new question about this device
Download the instructions for your Air conditioner in PDF format for free! Find your manual PAC N92ECO Silent - DELONGHI and take your electronic device back in hand. On this page are published all the documents necessary for the use of your device. PAC N92ECO Silent by DELONGHI.
USER MANUAL PAC N92ECO Silent DELONGHI
IMPORTANT SAFEGUARDS
Essential safety requirements
Only use the local air conditioner according to the instructions in this manual. These instructions do not cover every possible condition and situation that could occur. Common sense and prudence must always be followed during installation, operation and storage of any electrical appliance. This appliance was built for household use and must not be used for other purposes.
FUNDAMENTAL SAFETY WARNINGS:
- The appliance is not intended for use by persons (including children) with reduced physical, sensory or mental capabilities, or lack of experience and knowledge, unless they have been given supervision or instruction concerning use of the appliance by a person responsible for their safety. Children should be supervised to ensure that they do not play with the appliance.
- Do not set heavy or hot objects on the appliance.
Since the appliance uses electricity, the following safety instructions must be followed:
- Modifying or changing the characteristics of the appliance in any way is dangerous.
- The appliance must be installed according to national laws governing electrical systems.
- For any repairs, always consult the Technical Service Centres authorised by the manufacturing company. Repairs performed by incompetent individuals can be hazardous.
- This appliance must be earthed. Have the electrical system checked by a qualified electrician.
- Avoid using extension cords.
- Before any cleaning or maintenance operation, always unplug from the mains.
- Do not pull on the electrical cord to move the appliance.
- Do not install the appliance in areas
where the air may contain gas, oil or sulphur or near heat sources.
- If the power cable is damaged, it must be replaced by the manufacturer or the manufacturer's Customer Services in order to avoid all risk.
- Do not operate your LOCAL AIR CONDITIONER in a wet room such as a bathroom or laundry room.
FOR EUROPEAN MARKETS ONLY:
- This appliance can be used by children aged 8 upwards and by persons with reduced physical, sensory or mental capabilities or who lack of experience and knowledge if they are supervised or have been given instructions concerning use of the appliance in a safe way and understand the hazards involved. Children must not play with the appliance. Cleaning and user maintenance must not be carried out by children unless they are older than 8 and supervised. Keep the appliance and its cord out of the reach of children under 8 years of age.
Please note:
- Clean the air filter at least once a week.
- When transporting, the appliance must be kept upright or resting on one side. Before transporting, drain all the water from the appliance. After transporting, wait at least one hour before turning on the appliance.
- Do not cover the appliance with plastic bags when stored.
- The packaging materials are recyclable. Please place them in the appropriate recycling collection containers.
- At the end of its life, deliver the local air conditioner to the appropriate collection centres.
SPECIFIC INFORMATION REGARDING APPLIANCES WITH R290 REFRIGERANT GAS
• Thoroughly read all of the warnings. - When defrosting and cleaning the appliance, do not use any tools other than those recommended by the manufacturing company. - The appliance must be placed in an area without any continuous sources of ignition (for example: open flames, gas or electrical appliances in operation). - Do not puncture and do not burn. • Refrigerant gases can be odourless. - The appliance must be installed, used and stored in an area that is greater than 15 m2. - This appliance contains 295 g of R290 refrigerant gas. - R290 is a refrigerant gas that complies with the European directives on the environment. Do not puncture any part of the refrigerant circuit. - If the appliance is installed, operated or stored in a non-ventilated area, the room must be designed to prevent the accumulation of refrigerant leaks resulting in a risk of fire or explosion due to ignition of the refrigerant caused by electric heaters, stoves, or other sources of ignition. - The appliance must be stored in such a way as to prevent mechanical failure. - Individuals who operate or work on the refrigerant circuit must have the appropriate certification issued by an accredited organisation that ensures competence in handling refrigerants according to a specific evaluation recognized by associations in the industry. - Repairs must be performed based on the recommendations from the manufacturing company. Maintenance and repairs that require the assistance of other qualified personnel must be performed under the super-
DESCRIPTION
1 air outlet grille 2 control panel 3 handles 4 castors 5 filter 6 evaporator air intake grille 7 air exhaust hose housing 8 condenser air intake grille
vision of an individual specified in the use of flammable refrigerants.
9 power cable 10 drain hose with 2 caps 11 flange with cap 12 air exhaust hose 13 hose adapter (2 pieces) 14 wall mounting accessory 15 window outlet 16 remote control unit
PREPARING FOR USE
ELECTRICAL CONNECTIONS
Before plugging the appliance into the mains socket, check that:
- The mains power supply corresponds to the value indicated on the rating plate on the back of the appliance; • The mains socket and electrical circuit are adequate for the appliance; • The mains socket matches the plug. If this is not the case, have the plug replaced;
- The mains socket is adequately earthed. Failure to follow these important safety instructions absolves the manufacturer of all liability.
The power cable must be replaced by a qualified professional only.
The instructions below will enable you to prepare your local air conditioner for operation as efficiently as possible.
Before use, make sure the air intake and outlet grilles are unobstructed.
AIR-CONDITIONING WITHOUT INSTALLATION
Just a few simple steps and your comfort is ensured with your air conditioner:
- Screw one of the hose adapters 13 one end of the air exhaust hose 12
- Fit the other adapter to the air exhaust hose housing at the back of the appliance (see fig. A).
- Screw the end of the hose without adapter to the adapter previously mounted on the appliance (see fig. A).

- Fit the window outlet to the air exhaust hose as shown in fig. B.
- Place the local air conditioner near a window or French window.
- Make sure the air exhaust hose is unobstructed.

Open the window or French window slightly and position the outlet 15 as shown in figure C.

Keep the air hose as short and free of curves as possible to avoid constrictions.
AIR-CONDITIONING WITH INSTALLATION
If required, your appliance can also be installed semi-permanently (Fig. D).

Proceed as follows:
Drill a hole (ø134mm) in an outside wall or through a window pane. Respect the height and dimensions of the hole given in figure E.

Keep the air hose as short and free of curves as possible to avoid constrictions.
- Fit the wall flange accessory provided in the hole.
- Fit the air exhaust hose 13 in the relevant hose 17 located on the rear side of the appliance (see fig. A).
- Screw the wall mounting accessory 14 to the air exhaust hose 13. If necessary, unscrew the adapter 12 from the air exhaust hose and replace it with the wall installation terminal 14 (fig. F).
- Insert the other end of the hose 12 on the flange 11 as shown in fig. G.

When the hose 12 is not fitted, the hole can be closed with the flange cap 11.
NOTE.
When installing the local air conditioner semi-permanently, you should leave a door slightly open (as little as 1 cm) to guarantee correct ventilation.
THE CONTROL PANEL

DESCRIPTION OF THE CONTROL PANEL
A ON/STAND-BY button B MODE selection button
Air conditioning, dehumidifying, fan. C Fan speed selection button (MAX/MED/SILENT) D Timer button E Programmed operation increase temperature/time button F Programmed operation decrease temperature/time button G Display (Displays the temperature values set, room temperature and the programmed operating time) H Timer in operation indicator light I/L/M Fan speed lights N Fan mode light O Air-conditioning mode light P Dehumidifying mode light Q Alarm light R Remote control signal receiver S Light: displays room temperature T Light: displays set temperature

Never turn the local air conditioner off by unplugging from the mains. Always press the button, then wait for a few minutes before unplugging. This allows the appliance to perform a cycle of checks to verify operation.
OPERATION
TURNING THE APPLIANCE ON
Plug the appliance into the mains.
Press the ON/STAND-BY button (A) (when turned on, the local air conditioner starts operating in the same mode as when it was turned off).
The display shows the room temperature.
Press the MODE button (B) until the indicator light corresponding to the required mode lights up:
Light (O): air-conditioning mode
Light (N): fan mode
Light (P): dehumidifying mode
AIR-CONDITIONING MODE
Ideal for hot humid weather when you need to cool and dehumidify the room.
By default, the room temperature is displayed.
Light (S) is on.
To set the required temperature, press the + (E) or - (F) buttons until the required temperature is displayed. (To switch between °F and °C, press the E and F buttons together for a few seconds).
Light (T) comes on and light (S) goes off.
Fifteen seconds after setting the temperature, the display switches back to room temperature.
Light (S) comes on again.
You can adjust temperature in air conditioning mode only.
Then select the fan speed by pressing the FAN button (C) until the indicator light corresponding to the required fan speed lights up:
MAX: the local air conditioner operates at maximum to reach the required temperature as rapidly as possible
MED: reduces noise levels but still maintains a good level of comfort
SILENT: for silent operation
The most suitable temperature for the room during the summer varies from 24 to 27°C. You are recommended, however, not to set a temperature much below the outdoor temperature.
DEHUMIDIFYING MODE
Ideal for reducing the humidity in a room (spring or autumn, damp rooms, rainy spells, etc). When the dehumidifying mode is selected, the light (P) comes on.
At the same time, the "SILENT" fan speed light (M) comes on. In this mode, other speeds cannot be selected.
Note: remember to fit the air exhaust hose as described in the chapter "Preparing for use".
FAN MODE
Adjust fan speed by pressing the FAN button (C) as described for the air-conditioning mode. Remember that the higher the speed, the more air is filtered. If you select "SILENT" speed, less air is filtered but the appliance is also less noisy.
PROGRAMMING THE TIMER
The timer can be used to delay appliance start up or shut down. This avoids wasting electricity by optimising operating periods.
How to programme delayed start up
- Plug the appliance into a mains socket and press the ON/STAND-BY button (A), then select the required operating mode and other settings (temperature, fan speed, etc).
- Press the ON/STAND-BY button (A) again to place the appliance in standby mode.
- Press the timer button (D). The timer light "H" flashes.
- Use the + (E) or - (F) buttons to set the number of hours delay before the appliance comes on.
- The time increases or decreases in steps of one hour.
The indicator light (H) flashes until the appliance starts up.
You can set the appliance to come on with a delay of up to 12 hours.
To cancel the timer programme, press the timer button (D) again.
Light (H) stops flashing.
How to programme delayed shut down
- Delayed shut down can be programmed in any operating mode (air conditioning / fan/ dehumidifying).
- Press the timer button (D). The timer light "H" flashes.
- Use the + (E) or - (F) buttons to set the number of hours delay before the appliance goes off.
The time increases or decreases in steps of one hour.
The light (H) flashes until the appliance turns off as programmed.
At the set time, the LOCAL AIR CONDITIONER shuts down and remains in standby.
To cancel the timer programme, press the timer button (D) again.
Light (H) stops flashing.
USING THE REMOTE CONTROL UNIT
USING THE REMOTE CONTROL
- Point the remote control at the receiver on the local air conditioner. The remote control must be no more than 5 metres away from the appliance (without obstacles between the remote control and the receiver).
- The remote control should be handled with extreme care and respect. Do not drop it, expose it to direct sunlight, or leave it near sources of heat.

DESCRIPTION OF THE REMOTE CONTROL
Replacing the batteries
- Remove the cover on the rear of the remote control;
- Replace the old batteries with two new LR03 "AAA" 1.5V batteries, inserting them correctly (see the instructions inside the battery compartment);
- Replace the cover.
If the remote control unit is replaced or discarded, the batteries must be removed and disposed of in accordance with current legislation as they are harmful to the environment. Do not mix alkaline, standard (zinc-carbon) and rechargeable (nickel-cadmium) batteries. Do not throw the batteries in the fire as they could explode or leak dangerous liquids.

TURNING THE APPLIANCE ON
Plug the appliance into the mains.
Press the ONSTAND-BY button (17) (when turned on, the local air conditioner starts operating in the same mode as when it was turned off).
Press the MODE button (18) to select the required mode
COOLING
DEHUMIDIFYING
FAN ONLY
On the control panel, the light corresponding to the selected mode comes on. For air conditioning/dehumidifying/fan only settings and programming the timer, see pages 21-22. The 22 button, on the other hand, allows the temperature scale to be easily changed from °C to °F and vice versa.
TIPS
To get the best from your air conditioner, follow these recommendations:
- Close the windows and doors in the room to be air conditioned.
The only exception is when the appliance is installed through a hole in the wall.
In this case, you are recommended to leave a slight draught through a door or window to guarantee correct ventilation.
- Never use the appliance in very damp rooms (laundries for example).
- Never use the appliance outdoors.

- Protect the room from direct exposure to the sun by partially closing curtains and/or blinds to make the appliance much more economical to run.
- Never rest objects of any kind on the air conditioner.
- Never obstruct the air intake or outlet grilles. Make sure there are no heat sources in the room.

Do not cover the appliance.

Close blinds or curtains.
- Make sure the LOCAL AIR CONDITIONER is on a level floor.
CLEANING
Before cleaning or maintenance, turn the appliance off by pressing the STAND-BY button (A) or, on models with remote control, by pressing the STAND-BY button on the remote control.
Use a vacuum cleaner to remove the dust collected on the filter.
If it is very dirty, immerse it in warm water and rinse it a number of times.
Then always unplug the appliance from the mains socket.
The water should never be hotter than 40°C. After washing, leave the filter to dry. Put the filter back in its housing.
CLEANING THE CABINET
You should clean the appliance with a slightly damp cloth, then dry it with a dry cloth.
For safety reasons, never wash the local air conditioner with water.
Precautions
Never use petrol, alcohol, or solvents to clean the appliance. Never spray insecticide liquids or similar.
CLEANING THE AIR FILTERS
To keep your local air conditioner working efficiently, you should clean the dust filter every week of operation.
The filter is housed in the intake grille.
To clean the filters, remove the filter as shown in figure H.
START OF SEASON CHECKS
Make sure the power cable and plug are undamaged and the earth system is efficient. Follow the installation instructions precisely.
END OF SEASON OPERATIONS
To drain all water from the circuit, first unscrew in the anticlockwise direction the external cap from the drain hose on the back of the appliance then remove the internal cap (figure I) and allow the water to drain out into a basin. When all the water has been drained, close the hose with the 2 caps.
Clean the filter and leave it to dry before putting it back in its housing.


TROUBLESHOOTING
PROBLEM CAUSE REMEDY
| The local air condi-no electricitytioner does not come on | it is not plugged into the mainsthe safety device has tripped | waitplug into the mainscontact your service centre |
| The local air condi-the air exhaust hose has a constrictiontioner works for a short time only | the air exhaust hose is blockedthere are bends in the air exhaust hose | position the exhaust hose correctlycheck there are no obstacles obstructing air dischargeeliminate the bends |
| The local air condi-window optioner works, but does not cool the room | there are heat sources in the room (burner, lamp, etc)the exhaust hose is detachedair filter cloggedthe local air conditioner is not powerful enough for the conditions or size of the room | close the windoweliminate the heat sourceconnect the exhaust hoseclean or replace the filter |
| Particular odour in the room | air purifying filters clogged | clean or replace the filters |
| The local air condi-the safety device has tripped rate for about 3 minutes after turning it on | ||
| The alarm light Q comes on | the tank inside the appliance is full. | empty the tank (see "End of season operations) on page 25). |
SELF-DIAGNOSIS
The appliance has a self diagnosis system to identify a number of malfunctions. Error messages are displayed on the appliance display.
IF...IS DISPLAYED,  “Low Temperature”...MEANS:room temperature is too low “Low Temperature”...MEANS:room temperature is too low | IF...IS DISPLAYED,  “High Temperature”...MEANS:room temperature is too high “High Temperature”...MEANS:room temperature is too high | IF...IS DISPLAYED,  “Probe Failure”(sensor damaged)...MEANS:contact your local customer service “Probe Failure”(sensor damaged)...MEANS:contact your local customer service |
GUARANTEE/TECHNICAL SPECIFICATION
GUARANTEE AND TECHNICAL ASSISTANCE TECHNICAL SPECIFICATION
The conditions of the guarantee and technical assistance are given on the certificate supplied with your appliance.
Power supply voltage see rating plate
Max. absorbed power during air conditioning "
Refrigerant "
Cooling capacity
LIMIT CONDITIONS
Room temperature for air conditioning 21 ÷ 35°C
DISPOSAL

The appliance must not be disposed of with household waste, but taken to an authorized waste separation and recycling center.
Transport, filling, cleaning, recovery, and disposal of refrigerant should be performed by a clinical service center appointed by the manufacturer only.
The appliance should be disposed of by a specialist center appointed by the manufacturer only.
- IMPORTANT SAFEGUARDS
- ESSENTIAL SAFETY REQUIREMENTS
- FUNDAMENTAL SAFETY WARNINGS
- FOR EUROPEAN MARKETS ONLY
- PLEASE NOTE
- SPECIFIC INFORMATION REGARDING APPLIANCES WITH R290 REFRIGERANT GAS
- DESCRIPTION
- PREPARING FOR USE
- ELECTRICAL CONNECTIONS
- AIR-CONDITIONING WITHOUT INSTALLATION
- AIR-CONDITIONING WITH INSTALLATION
- NOTE
- THE CONTROL PANEL
- DESCRIPTION OF THE CONTROL PANEL
- OPERATION
- TURNING THE APPLIANCE ON
- AIR-CONDITIONING MODE
- DEHUMIDIFYING MODE
- FAN MODE
- PROGRAMMING THE TIMER
- HOW TO PROGRAMME DELAYED START UP
- HOW TO PROGRAMME DELAYED SHUT DOWN
- USING THE REMOTE CONTROL UNIT
- USING THE REMOTE CONTROL
- DESCRIPTION OF THE REMOTE CONTROL
- REPLACING THE BATTERIES
- COOLING
- DEHUMIDIFYING
- FAN ONLY
- TIPS
- CLEANING
- CLEANING THE CABINET
- PRECAUTIONS
- CLEANING THE AIR FILTERS
- START OF SEASON CHECKS
- END OF SEASON OPERATIONS
- TROUBLESHOOTING
- SELF-DIAGNOSIS
- GUARANTEE/TECHNICAL SPECIFICATION
- GUARANTEE AND TECHNICAL ASSISTANCE TECHNICAL SPECIFICATION
- LIMIT CONDITIONS
- DISPOSAL
Brand : DELONGHI
Model : PAC N92ECO Silent
Category : Air conditioner