
MX Master 3 - Mouse LOGITECH - Free user manual and instructions
Find the device manual for free MX Master 3 LOGITECH in PDF.


| Product Type | Wireless Mouse |
| Brand | Logitech |
| Model | MX Master 3 |
| Dimensions (H x W x D) | 4.5 x 3.3 x 2.0 in (114 x 84 x 51 mm) |
| Weight | 141 g (4.97 oz) |
| Power Source | Rechargeable Li-Po battery (500 mAh) via USB-C |
| Battery Life | Up to 70 days (full charge), 3 hours charge for full day use |
| Connectivity | Bluetooth Low Energy, Logitech Unifying USB Receiver |
| Sensor | Darkfield Laser Sensor (4000 DPI) |
| Buttons | 7 programmable buttons including gesture button |
| Scroll Wheel | MagSpeed Electromagnetic Scroll Wheel with SmartShift (ratchet/free-spin), horizontal scroll wheel |
| Operating Systems | Windows 10/11, macOS, Linux, Chrome OS, iPadOS |
| Software | Logitech Options (or Logi Options+) for customization |
| Maintenance & Cleaning | Wipe with a soft, dry cloth. Do not use liquids or solvents. |
| Safety | Use only provided USB cable and charger. Do not expose to moisture. |
| Spare Parts & Repairability | Replacement USB receiver (Logitech Unifying), USB-C cable. User-replaceable battery (soldered, professional replacement recommended). |
| General Information | Ergonomic design for right-handed users, USB-C to USB-A cable included, 1-year limited warranty. |
Frequently Asked Questions - MX Master 3 LOGITECH
User questions about MX Master 3 LOGITECH
0 question about this device. Answer the ones you know or ask your own.
Ask a new question about this device
Download the instructions for your Mouse in PDF format for free! Find your manual MX Master 3 - LOGITECH and take your electronic device back in hand. On this page are published all the documents necessary for the use of your device. MX Master 3 by LOGITECH.
USER MANUAL MX Master 3 LOGITECH
- Make sure the mouse is turned on — the number 1 LED on the bottom of the mouse should blink quickly.
NOTE: If the LED is not blinking quickly, perform a long press (three seconds).
- Choose how you want to connect:
• Use the included wireless USB receiver
Plug the receiver into a USB port on your computer
- Connect directly using Bluetooth
Open the Bluetooth settings on your computer to complete the pairing. Click here for more details on how to do this on your computer. If you experience issues with Bluetooth, click here for Bluetooth troubleshooting.
- Install Logitech Options Software.
Download Logitech Options to use all the possibilities this mouse offers. To download and learn more about Logitech Options, go to logitech.com/options.
LEARN MORE ABOUT YOUR PRODUCT
Product Overview
1 - MagSpeed scroll wheel 6 - USB-C charging port 2 - Mode shift button for the scroll wheel 7 - On/Off button 3 - Gesture button 8 – Darkfield 4000DPI sensor 4 - Thumb wheel 9 – Easy-Switch & connect button 5 – Battery status LED 10 - Back/forward buttons
Pair to a second computer with Easy-Switch
Your mouse can be paired with up to three different computers using the easy-switch button to change the channel.
- A short press on the Easy-Switch button lets you switch channels. Select the channel you want and go to the next step.
- Press and hold the Easy-Switch button for three seconds. This puts the mouse in discoverable mode so that it can be seen by your computer. The LED will start blinking quickly.
- Choose how you want to connect the keyboard to your computer:
- Bluetooth: Open the Bluetooth settings on your computer to complete the pairing. You can find more details here.
- USB receiver: Plug the receiver to a USB port and open Logitech Options. In Options, select Add devices > Setup Unifying device, and follow the instructions.
MagSpeed adaptive scroll-wheel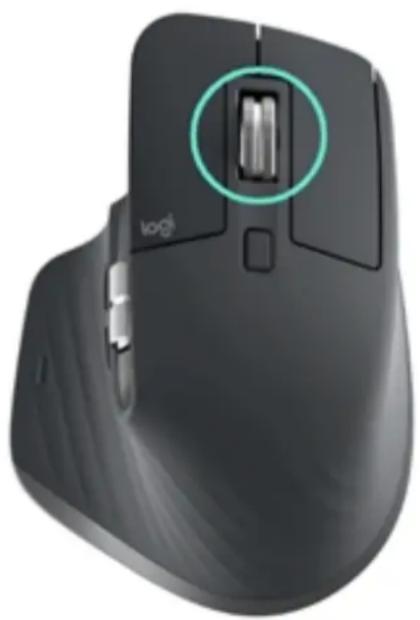
The speed-adaptive scroll wheel shifts between two scrolling modes automatically. As you scroll faster, it will automatically shift from line-by-line scrolling to free-spinning.
• Line-by-line (ratchet) mode — ideal for precise navigation of items and lists. - Hyper-fast (free-spin) mode — near-frictionless spinning, letting you fly through long documents and web pages.

Switch modes manually
You can also manually switch between modes by pressing the mode shift button.

By default, mode shift is assigned to the button on top of the mouse. Use the Logitech Options Software, to disable SmartShift if you prefer to stay in a single scrolling mode and shift manually. You can also adjust the SmartShift sensitivity, which will change the speed required to automatically shift into free spinning.

Thumb wheel

Scroll side to side effortlessly with a stroke of your thumb.
Install Logitech Options software to extend thumb wheel capabilities:
- Adjust thumbwheel scrolling speed, and direction
- Enable app-specific settings for the thumbwheel:
• Zoom in Microsoft Word and PowerPoint • Adjust brush size in Adobe Photoshop • Navigate your timeline in Adobe Premiere Pro • Switch between tabs in the browser • Adjust volume • Assign custom keystrokes to the wheel rotation (up and down)
Gesture Button
Install Logitech Options software to enable gestures.

To use the Gesture button:
Hold down the Gesture button while moving the mouse left, right, up, or down.
| Gesture Button | Windows 10 | Mac OS | ||
| Single press | O | Task View | O | Mission Control |
| Hold and move down | ↑ | Start Menu | ↑ | Mission Control |
| Hold and move up | ↓ | Show/hide desktop | ↓ | App Expose |
| Hold and move right | → | Switch between desktops | → | Switch between desktops |
| Hold and more left | ← | Switch between desktops | ← | Switch between desktops |
You can use gestures for desktop navigation, app management, pan, zoom, and more. You can assign up to five different actions to the Gesture button. Or map gestures to other MX Master buttons, including the middle button or manual shift button.
Back/Forward buttons
Conveniently located, the back and forward buttons enhance navigation and simplify tasks.
To move back and forward:
- Press the back or forward button to navigate web or document pages, depending on the location of the mouse pointer.
NOTE: On the Mac, enabling of the back/forward buttons requires installation of Logitech Options software.
Install Logitech Options software to unlock new capabilities for the back/forward buttons.
In addition to enabling the buttons for use with Macs, Logitech Options software lets you map other useful functions to the buttons, including undo/redo, OS navigation, zoom, volume up/down, and more.
App-Specific Settings
Your mouse buttons can be assigned to perform different functions for different applications. For example, you can assign the thumb wheel to do horizontal scrolling in Microsoft Excel and zoom in Microsoft PowerPoint.
With Logitech Options, you can install predefined app-specific settings that adapt the mouse button behavior to be optimized in selected applications.
The following app-specific settings have been created for you:

| 1 | 2 | 3 | |
| Default settings Browser (Chrome, Edge, Safari) | Middle ButtonOpen link in a new tabPan | Horizontal scrollSwitch between tabs | Back / ForwardBack / Forward |
| Microsoft Excel | (Hold and move the mouse)Pan | Horizontal scroll | Undo / Redo |
| Microsoft Word | (Hold and move the mouse) | Zoom | Undo / Redo |
| Pan | |||
| Microsoft PowerPoint | (Hold and move the mouse)Pan | Zoom | Undo / Redo |
| Adobe Photoshop | (Hold and move the mouse)Pan | Brush size | Undo / Redo |
| Adobe Premiere Pro | (Hold and move the mouse)Pan | Horizontal timeline navigation | Undo / Redo |
| Apple Final Cut Pro | (Hold and move the mouse) | Horizontal timeline navigation | Undo / Redo |
With these settings, the Gesture button and the wheel mode-shift button are keeping the same functionality across all applications.
Each of these settings can be customized manually, for any application.

Flow
With Logitech Flow, you can work on multiple computers with a single MX Master 3.
You can use the mouse cursor to move from one computer to the next. You can even copy and paste between computers, and if you have a compatible Logitech Keyboard,
such as MX Keys, the keyboard will follow the mouse and switch computers at the same time.
You will need to install Logitech Options software on both computers and follow these instructions.
Battery
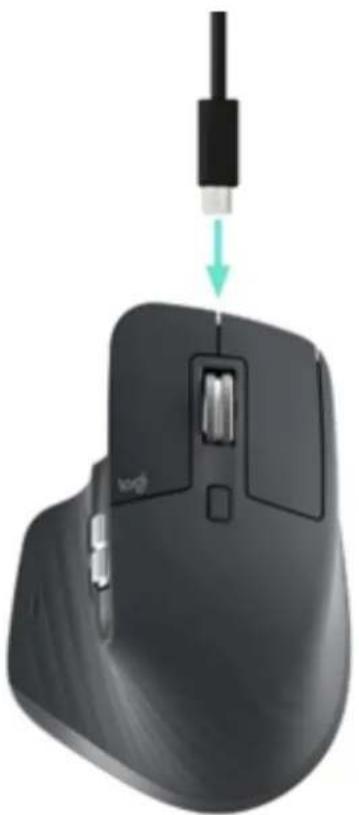
Charge mouse battery:
Connect one end of the provided charging cable to the USB-C port on the mouse and the other end to a USB power source.
A minimum of 3 minutes charging gives you enough power for a full day of use. Depending on how you use the mouse, a full charge can last up to 70 days.
NOTE: Battery life may vary depending on user and operating conditions.
Check mouse battery status:
Three LED lights on the side of the mouse indicate battery status.

Install Logitech Options software to receive battery status notifications, including low-charge warnings.
LED Color
Green
Red
Pulsing green
Indications
From 100% to 10% charge
10% charge or below
While charging

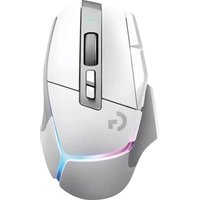

Brand : LOGITECH
Model : MX Master 3
Category : Mouse