
ER1510 - Lawn mower PANASONIC - Free user manual and instructions
Find the device manual for free ER1510 PANASONIC in PDF.


| Product Type | Electric Lawn Mower |
| Brand | Panasonic |
| Model | ER1510 |
| Power Source | Corded Electric (120V, 60Hz) |
| Motor Power | 1200 W |
| Cutting Width | 30 cm (12 inches) |
| Cutting Height Adjustment | 5 positions (20-70 mm) |
| Grass Bag Capacity | 30 L |
| Weight | 10.5 kg |
| Dimensions (L x W x H) | 42 x 35 x 28 cm |
| Cable Length | 10 m |
| Blade Type | Rotary steel blade |
| Safety Features | Safety lock button, blade brake |
| Noise Level | 82 dB(A) |
| Recommended Lawn Area | Up to 300 m² |
| Maintenance | Clean after use; sharpen blade annually |
| Spare Parts Availability | Blade, grass bag, wheels, handle |
| Warranty | 2 years |
Frequently Asked Questions - ER1510 PANASONIC
User questions about ER1510 PANASONIC
0 question about this device. Answer the ones you know or ask your own.
Ask a new question about this device
Download the instructions for your Lawn mower in PDF format for free! Find your manual ER1510 - PANASONIC and take your electronic device back in hand. On this page are published all the documents necessary for the use of your device. ER1510 by PANASONIC.
USER MANUAL ER1510 PANASONIC
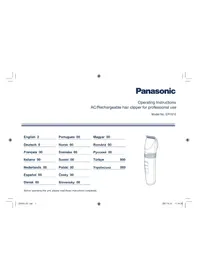
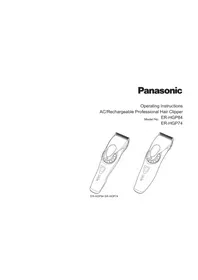
Operating Instructions
AC/Rechargeable hair clipper for professional use
Model No. ER1510
| English 2 | Português 00 | Magyar 00 | |
| Deutsch 0 | Norsk 00 | Română 00 | |
| Français 00 | Svenska 00 | Русский 00 | |
| Italiano 00 | Suomi 00 | Türkçe | 000 |
| Nederlands 00 | Polski 00 | Українська | 000 |
| Español 00 | Česky 00 | ||
| Dansk 00 | Slovensky 00 |
Before operating this unit, please read these instructions completely.

Important
▶ Before use
This clipper is designed for professional use to trim hair and beards. Charge it for 8 hours before use for the fist time in order to activate the built-in rechargeable batteries. It can be operated on either an AC adaptor or rechargeable batteries. Read all instructions carefully before use.
▶ Charging the clipper
- Use the ER1510 hair clipper with the RE5-95 adaptor only.
- Avoid charging the batteries at temperatures below 5 °C or above 35 °C.
- Avoid charging the batteries in direct sunlight or near a radiating heat source.
- The charge status ( )amp may blink at an early stage when it is used for the first time or if it has not been used for 6 or more months even if it is fully charged. This is not a malfunction.
- Even though the clipper may not be used for an extended period, charge every 6 months to preserve battery life.
- The power cord cannot be replaced. If it is damaged, the AC adaptor should be discarded.
▶ Using the clipper
- Warning - Keep the appliance dry.
- The clipper may become warm during operation and/or charging. This is normal.
- Check that the blades and the attachments are not damaged before use. Replace them if they are damaged.
- You should not allow permanent wave lotion, hair restorer or hair spray to come into contact with the main body or the blades. Doing so may result in cracking, discoloring or corrosion.
- You should not drop the clipper on the floor.
- You should not knock the blades and the attachments against hard objects.
- You should not trim the hair of a pet.
▶ Cleaning the clipper
- Clean the housing using only a cloth slightly dampened with water or a mild soap solution.
- Never use a caustic solution.
- Never submerge the clipper in water.
▶ Storing the clipper
- This appliance is not intended for use by persons (including children) with reduced physical, sensory or mental capabilities, or lack of experience and knowledge, unless they have been given supervision or instruction concerning use of the appliance by a person responsible for their safety. Children should be supervised to ensure that they do not play with the appliance.
- Never tamper with moving parts.
- Avoid grabbing the clipper by the power cord, as it may become detached, causing damage or injury.
- If the clipper is not working properly, have it inspected at an authorized service center.
Specifications
Power source: 230 V AC, 50 Hz
Motor voltage: 2.4 V DC
Charging time: 1 hour
Airborne Acoustical Noise: 000 (dB (A) re 1 pW)
READ ALL INSTRUCTIONS BEFORE USE.
Parts identification

A Main body
① Trimming height indicator
② Dial (Height adjustment control)
③ 0.CHARGE/1 switch
④ Battery capacity lamp
⑤ Charge status (→) lamp
⑥ Plug receptance
B Blade
⑦ Mounting hook
⑧ Cleaning lever
⑨ Moving blade
⑩ Stationary blade
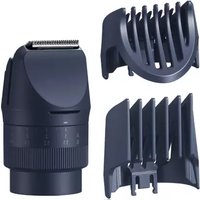
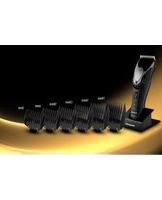
© 3 mm comb attachment
D 4 mm comb attachment
E 6 mm comb attachment
F 9 mm comb attachment
G 12 mm comb attachment
H 15 mm comb attachment
① AC adaptor (RE5-95)
⑪ Power cord
⑫ Appliance plug
J Cleaning brush
K Oil
L Charging stand
⑬ Charging plug
⑭ Plug receptance
M Comb attachment shelves (×2)
Charge
Charging the hair clipper
1 Connect the power cord to the charging stand.
2 Slide the 0-CHARGE/1 switch to "0-CHARGE".
3 Place the clipper on the charging stand and plug in the adaptor into a household outlet.
- Charge status ( ➞ ) lamp glows and charging starts.
- Charging is completed when Charge status (▶) lamp blinks. (Max. 1 hour later)
- 1 full charge will provide approximately 70 minutes of continuous operation.

About the LED display
While charging

glows.
- "HIGH", "MID" or "LOW" blinks.
After charging is completed

blinks once every second.
10 minutes after charging is completed

blinks once every 2 seconds.
• "HIGH/MID/LOW" go out.
While using

"HIGH" blinks - The battery capacity is enough. "MID" blinks - The battery capacity is approx. 60% or less.
"LOW" blinks - The battery capacity is approx. 10% or less.
Charge the clipper when "LOW" starts to blink.
▶ Charging without the charging stand
- Slide the 0-CHARGE/1 switch to "0-CHARGE", and insert the appliance plug into the clipper.

- Plug in the adaptor into a household outlet.

▶ AC operation
If you connect the AC adaptor to the clipper in the same way as for charging, and turn on the power, you can use it even if the battery capacity is low.
- If the clipper does not operate, charge the clipper for approximately 1 minute.
- Be careful not to discharge the battery completely with the power left turned on. It results in shortening the battery life.
Cut
Using the hair clipper
Turn the dial clockwise or counterclockwise to adjust the moving blade back and forth to get the desired height. Adjustable in 5 stages from 0.8 mm to 2.0 mm in 0.3 mm steps without attachments.

▶ Using the comb attachments
1 Select the trimming heights indicated on the insides and sides of the attachments.
2 Set the dial to "0.8" and then mount the attachment to the clipper as illustrated.

Removing the attachment from the clipper Remove the attachment as illustrated.

Care
Blade maintenance
▶ Blade life Blade life will vary according to the frequency and length of use. It is expected to be about 3 months when used for 15 haircuts a day.
Removing and mounting the blade
▶ Removing the blade
- Hold the clipper with the switch facing upward and push the blade with your thumb while catching the blade in your other hand.
- Be sure to turn off the power before you remove the blade.

Mounting the blade 1. Set the dial to "2.0".
- Fit the mounting hook into the blade mounting on the clipper and push in until it clicks.


Cleaning the blade

-
Brush off any hairs from the clipper and from around the blade.
-
Remove the blade and brush off the hairs from the blade edge.
-
Brush the hairs out from between the stationary blade and the moving blade while pressing down on the cleaning lever to raise the moving blade.
Lubrication
- Apply a few drops of the oil to the space between the stationary blade and moving blade.
- Apply the oil to the clipper before and after each use.
- Set the dial to "2.0" and then remount the blade on the clipper.

Removing the built-in rechargeable batteries
- Remove the blades ① and four screws ②.
- Remove the spring ③, the under cover ④, and the blade holder ⑤.
- Remove the dial ⑥ and open the housing ⑦, and then take out two batteries ⑧.
- Disconnect the clipper from a household outlet.
• Fully discharge the batteries. - Be careful not to short-circuit the batteries.


WARNING - Do not attempt to replace the batteries for the purpose of reusing the clipper. This could result in the risk of fire or electric shock.
Important notice regarding environmental protection The built-in rechargeable Nickel-Metal Hydride batteries contain substances that may be environmentally harmful. Please remove the batteries before discarding your clipper.
For environmental protection and recycling materials This clipper contains Nickel-Metal Hydride batteries. Please make sure that the batteries are disposed of at an officially assigned location, if there is one in your country.
Information on Disposal for Users of Waste Electrical & Electronic Equipment (private households)

This symbol on the products and/or accompanying documents means that used electrical and electronic products should not be mixed with general household waste. For proper treatment, recovery and recycling, please take these products to designated collection points, where they will be accepted on a free of charge basis.
Alternatively, in some countries you may be able to return your products to your local retailer upon the purchase of an equivalent new product.
Disposing of this product correctly will help to save valuable resources and prevent any potential negative effects on human health and the environment which could otherwise arise from inappropriate waste handling. Please contact your local authority for further details of your nearest designated collection point. Penalties may be applicable for incorrect disposal of this waste, in accordance with national legislation.
For business users in the European Union
If you wish to discard electrical and electronic equipment, please contact your dealer or supplier for further information.
Information on Disposal in other Countries outside the European Union
This symbol is only valid in the European Union. If you wish to discard this product, please contact your local authorities or dealer and ask for the correct method of disposal.
Matsushita Electric Works, Ltd.
1048, Kadoma, Osaka 571-8686, Japan
No.1 EN, GE, FR, IT, DU, SP, DA, PT, NW, SW, FI, PL, CZ, SK, HU, RO, RU, TK, UA (欧州)
Printed in Japan
- IMPORTANT
- BEFORE USE
- CHARGING THE CLIPPER
- USING THE CLIPPER
- CLEANING THE CLIPPER
- STORING THE CLIPPER
- SPECIFICATIONS
- CHARGE
- CHARGING THE HAIR CLIPPER
- ABOUT THE LED DISPLAY
- WHILE USING
- USING THE HAIR CLIPPER
- CARE
- BLADE MAINTENANCE
- REMOVING AND MOUNTING THE BLADE
- REMOVING THE BLADE
- CLEANING THE BLADE
- LUBRICATION
- REMOVING THE BUILT-IN RECHARGEABLE BATTERIES
- INFORMATION ON DISPOSAL FOR USERS OF WASTE ELECTRICAL & ELECTRONIC EQUIPMENT (PRIVATE HOUSEHOLDS)
- FOR BUSINESS USERS IN THE EUROPEAN UNION
- INFORMATION ON DISPOSAL IN OTHER COUNTRIES OUTSIDE THE EUROPEAN UNION
Brand : PANASONIC
Model : ER1510
Category : Lawn mower