
NV-DS25B - VCR PANASONIC - Free user manual and instructions
Find the device manual for free NV-DS25B PANASONIC in PDF.


| Product Type | VHS Video Cassette Recorder |
| Model | NV-DS25B |
| Brand | Panasonic |
| Video System | PAL / SECAM / NTSC playback |
| Head System | 4-head helical scan |
| Recording Format | VHS (SP, LP, EP) |
| Dimensions (W x H x D) | 430 x 95 x 280 mm |
| Weight | Approx. 4.5 kg |
| Power Supply | 220-240 V AC, 50Hz |
| Power Consumption | Approx. 20 W |
| Inputs | RF antenna, Composite video/audio (RCA) |
| Outputs | RF modulator, Composite video/audio (RCA) |
| Remote Control | Infrared remote control included |
| Timer Recording | Yes, with on-screen programming |
| Special Features | Auto tracking, index search, slow-motion, still frame |
| Maintenance | Clean video head with cleaning cassette; keep ventilation slots clear |
| Safety | Class II equipment; unplug during storms; avoid liquids |
| Spare Parts Availability | Limited; check with authorized Panasonic service centers |
| Repairability | Moderate; requires specialized tools for head replacement |
| General Information | Front-loading VCR with analog tuner; manufactured in the 1990s |
Frequently Asked Questions - NV-DS25B PANASONIC
User questions about NV-DS25B PANASONIC
0 question about this device. Answer the ones you know or ask your own.
Ask a new question about this device
Download the instructions for your VCR in PDF format for free! Find your manual NV-DS25B - PANASONIC and take your electronic device back in hand. On this page are published all the documents necessary for the use of your device. NV-DS25B by PANASONIC.
USER MANUAL NV-DS25B PANASONIC
Operating Instructions

Mini DV PAL
Before use, please read these instructions completely.
Dear Customer,
We would like to take this opportunity to thank you for purchasing this Panasonic Movie Camera. Please read these Operating Instructions carefully and keep them handy for future reference. Please note that the actual controls and components, menu items, etc. of your Movie Camera may look somewhat different from those shown in the illustrations in these Operating Instructions.
Information for Your Safety
Movie Camera
●The rating plate is on the bottom side of the Movie Camera.
AC Adaptor
●The rating plate is on the bottom side of the AC Adaptor.
- As this AC Adaptor gets hot during use, operate it in a well-ventilated place; do not use it in a tight enclosure.
Caution for AC Mains Lead
For your safety, please read the following text carefully.
This appliance is supplied with a moulded three-pin mains plug for your safety and convenience.
A 5-ampere fuse is fitted in this plug. Should the fuse need to be replaced, please ensure that the replacement fuse has a rating of 5 amperes and it is approved by ASTA or BSI to BS1362.
Check for the ASTA mark or the BSI mark on the body of the fuse.
If the plug contains a removable fuse cover, you must ensure that it is refitted when the fuse is replaced.
If you lose the fuse cover, the plug must not be used until a replacement cover is obtained.
A replacement fuse cover can be purchased from your local Panasonic Dealer.
IF THE FITTED MOULDED PLUG IS UNSUITABLE FOR THE SOCKET OUTLET IN YOUR HOME, THE FUSE SHOULD BE REMOVED AND THE PLUG CUT OFF AND DISPOSED OF SAFELY.
THERE IS A DANGER OF SEVERE ELECTRICAL SHOCK IF THE CUT OFF PLUG IS INSERTED INTO A 13-AMPERE SOCKET.
If a new plug is to be fitted, please follow the wiring code described below.
If in any doubt, please consult a qualified electrician.
IMPORTANT
The wires in this mains lead are coloured in accordance with the following code:
Blue: Neutral Brown: Live
As the colours of the wires in the mains lead of this appliance may not correspond with the coloured markings identifying the terminals in your plug, proceed as follows:
The wire which is coloured BLUE must be connected to the terminal in the plug which is marked with the letter N or coloured BLACK.
The wire which is coloured BROWN must be connected to the terminal in the plug which is marked with the letter L or coloured RED.
Under no circumstances should either of these wires be connected to the earth terminal of the three pin plug, marked with the letter E or the Earth Symbol.
■ Before Use
Remove the Connector Cover as follows.

■ How to replace the Fuse
- Remove the Fuse Cover with a screwdriver.

- Replace the fuse and attach the Fuse Cover.

Operating Instructions
●These Operating Instructions apply to models NV-DS12, NV-DS15, NV-DS150 and NV-DS25. - The illustrations used in these Operating Instructions show model NV-DS25, however, parts of the explanation refer to different models. - Depending on the model, some functions are not available.
■ WARNING
To reduce the risk of fire or shock hazard and annoying interference, use only the recommended accessories and do not expose this equipment to rain or moisture. Do not remove the cover (or back); there are no user serviceable parts inside. Refer servicing to qualified service personnel.
■ Carefully observe copyright laws.
Recording of pre-recorded tapes or discs or other published or broadcast material for purposes other than your own private use may infringe copyright laws. Even for the purpose of private use, recording of certain material may be restricted.

Contents—Basic Operations
Check List for the Standard Accessories ..... 4
Controls and Functions.... 5
The 3 Types of Power Supply....8
1) Supplying Power from an AC Mains Socket 8
2) Supplying Power from the Cigarette Lighter Socket in a Car 8
3) Supplying Power with the Battery ..... 10
Inserting the Cassette 12
● LP Mode 13
Using the Viewfinder.... 14
Using the LCD Monitor 14
Using the Menu Screen 16
Menu Functions 18
Adjusting the LCD Monitor/Viewfinder ..... 22
Setting the Date and Time 23
Recording (Filming) 24
Checking If the Picture Is Recorded ..... 26
Recording Backlit Scenes 26
Recording Yourself 28
Focusing on the Subject Manually 28
Enlarging Your Subject or Widening the Recording Angle 30
Recording Still Pictures on the Cassette ..... 30
Recording in the Cinema Mode 32
Recording with Minimised Camera Shake .... 32
Viewing the Just Recorded Scenes on the Movie Camera 34
Searching for a Scene That You Want to Play Back 34
● Adjusting the Volume 35
Playing Back in Slow Motion.... 36
Playing Back Still Pictures and Advancing Them One by One.... 36
Playing Back on a TV 38
After Use 38
Contents—Advanced Operations
Viewing Recorded Scenes During Recording Pause 40
Searching for the End of the Recorded Part on a Cassette 40
Searching for the Beginning of Recorded Scenes Marked with Index Signal.... 42
Starting to Record with Gradually Appearing Picture and Sound.... 44
Ending the Recording of a Scene with Gradually Disappearing Picture and Sound ..... 44
Recording in Special Situations 46
Recording with Special Effects 48
Motion-Sensor-Controlled Recording ..... 52
Recording in Dark Places without Any Illumination 54
Using the 0 Lux Night View Function together with the Motion-Sensor-Controlled Recording Function in Dark Places without Any Illumination .... 54
Recording with Natural Colours 56
Adjusting the White Balance Manually ..... 56
Adjusting the Shutter Speed Manually ..... 58
Adjusting the Iris (F Number) Manually ..... 58
Playing Back with Special Effects.... 60
Enlarging the Playback Picture.... 62
Adding New Sound on a Recorded Cassette 64
Using the MultiMediaCard 66
Recording Still Pictures on the MultiMediaCard 68
Playing Back Pictures Recorded on the MultiMediaCard 70
Erasing Pictures Recorded on the MultiMediaCard 72
Making the Unusable MultiMediaCard Usable 74
Copying Still Pictures from the MultiMediaCard onto the Cassette ..... 76
Using the Pictures Recorded on the MultiMediaCard on the Computer ..... 78
Indications (for MultiMediaCard) 79
Remote Controller.... 80
Contents—Editing
Copying onto an S-VHS (or VHS) Cassette ... 84
Using with Digital Video Equipment 85
Copying with the Help of an Editing Controller.... 86
Using the Movie Camera with a Computer .... 87
Using the Movie Camera with a Video Printer 88
Contents—Miscellaneous/Care of Unit/Options
Cautions for Use 90
Glossary 94
Indications 98
Specifications 101
Before Requesting Service (Problems & Solutions) 102
Optional Accessories 105
Index 106
Check List for the Standard Accessories
For purchasing additional Battery Packs, see the list of optional accessories on p. 105.
Controls and Functions
For more details, see the pages indicated in brackets.

8
① Card Multi Button [CARD MULTI] (p. 70) (NV-DS25 only)
② Rewind/Review Button [◀◀] (p. 34) Recording Check Button [[◀]] (p. 26) Reverse Search Button [—SEARCH] (p. 40) ③ Fast Forward/Cue Button [▶▶] (p. 34) Forward Search Button [SEARCH+] (p. 40) ④ Stop Button [■] (p. 34, 70) Fade Button [FADE] (p. 44) ⑤ Pause Button [11] (p. 36, 70) Still Button [STILL] (p. 31) ⑧ Play Button [▶] (p. 34, 70) Backlight Button [BLC] (p. 26) ⑦ LCD Monitor Open Button [▲OPEN] (p. 14) (NV-DS15, NV-DS150, NV-DS25 only) ⑧ LCD Monitor (p. 14, 22, 93) (NV-DS15, NV-DS150, NV-DS25 only)
Due to limitations in LCD production technology, there may be some tiny bright or dark spots on the LCD Monitor screen. However, this is not a malfunction and does not affect the recorded picture.
⑨ Speaker (p. 35) (NV-DS15, NV-DS150, NV-DS25 only) 10 Battery Holder (p. 10) ⑪ Battery Eject Button [PUSH] (p. 11) 12 Eyepiece Corrector Knob (p. 14)
Controls and Functions (continued)

⑬ Zoom Lever [W/T] (p. 30) ① Photoshot Button [PHOTO SHOT] (p. 30, 68) 15 Camera (Recording) Mode/VCR (Playback) Mode Card Playback Mode Button (and Lamps) [MODE] (p. 24, 34, 70) (Card Playback Mode is only available on model NV-DS25) ⑯ DC Input Socket [DC IN] (p. 8) ⑰ Recording Start/Stop Button (p. 24) ⑬ Movie Camera Off/On Switch [OFF/ON] (p. 14, 24, 38) 19 0-Lux Recording Switch [0 LUX OFF/ON] (p. 54) 20 Lens Hood (p. 93) 21 Lens 22 Recording Indicating (Tally) Lamp (p. 25) 23 Microphone (built-in, stereo) (p. 31) 24 White Balance Sensor (p. 95) Remote Control Sensor (p. 82) Built-in Infra-red Beam Emitters (p. 54) 25 Focus Button [FOCUS] (p. 28) 26 Menu Button [MENU] (p. 16) ② Mode Selector Switch [AUTO:MNL/MODE SELECT] (p. 24, 28, 46, 56, 58) 28 Multi-Function Dial [PUSH] (p. 16, 28, 35, 37, 58) 29 Eyecup
30 MultiMediaCard Slot Cover Open Lever [OPEN] (p. 66) (NV-DS25 only)
③1 MultiMediaCard Access Lamp [ACCESS] (p. 67) (NV-DS25 only)
32 Tape/Card Photoshot Selector [TAPE/CARD] (p. 68, 76) (NV-DS25 only)
33 MultimediaCard Slot (p. 66) (NV-DS25 only)
34 MultimediaCard Slot Cover (p. 66) (NV-DS25 only)
35 Accessory Shoe To attach the Stereo Zoom Microphone (optional) or the Stereo Microphone (optional),
38 Lens Cap (p. 15, 39, 56)
37 Grip Belt
You can adjust the Grip Belt to the size of your hand. When you open or close the Cassette Compartment, push down the buckle of the Grip Belt so that it does not prevent the Cassette Compartment from opening and closing completely.
Pass your hand through the Grip Belt and adjust its length. Fold back the end of the Grip Belt to securely fasten the velcro tape closure.
Edit Socket [EDIT] (p. 86, 88) S-Video Output Socket [S-VIDEO OUT] (p. 38, 84, 86, 87, 88) 10 DV Terminal (i.LINK) [i] (p. 85) Connect it to digital video equipment. 'I.LINK' is the name of the connector in accordance with the IEEE1394-1995. 'i' is the logo marked on products conforming with the 'i.LINK' specifications. (It is only possible to input digital signals with model NV-DS150.) ① Reset Button [RESET] (p. 102) ② Microphone Socket [MIC] To connect an external microphone or audio equipment. (Connecting to this socket deactivates the built-in microphone.) 4 Audio-Video Output Socket [AV OUT] (p. 38, 84, 86, 87) Headphone Socket [PHONES] (p. 39) When a cable is connected to this socket, the Movie Camera's built-in speaker' is turned off, "built-in speaker: NV-DS15, NV-DS150, NV-DS25 only 4 Digital Still Picture Terminal [D.STILL PICTURE] (p. 87)
45 Viewfinder (p. 14, 22, 93)
Due to limitations in LCD production technology, there may be some tiny bright or dark spots on the Viewfinder screen. However, this is not a malfunction and does not affect the recorded picture.
46 Cassette Compartment Window ⑦ Upper Cassette Compartment Cover (p. 12) 49 Shoulder Strap Holders (p. 93) 49 Cassette Eject Lever [OPEN/EJECT] (p. 12, 38) 50 Lower Cassette Compartment Cover (p. 12) ⑤ Tripod Receptacle To mount the Movie Camera on an optional tripod. 52 Cassette Holder (p. 12)

| Title Procedure Remarks, etc. | ||
| The 3 Types of Power Supply1) AC Adaptor (supplied) to supply power from an AC mains socket2) Car Battery Charger (optional) to supply power from the cigarette lighter socket in a vehicle3) Battery (supplied) (p. 10)1) Supplying Power from an AC Malns Socket |  | ●Before disconnecting the AC Mains Lead, set the [OFF/ON] Switch to [OFF].●If you use the Movie Camera for a long time, it becomes warm. However, this is normal.●The AC Mains Lead does not fit entirely into the AC Adaptor socket, but this has no effect on operation. |
| 2) Supplying Power from the Cigarette Lighter Socket in a CarThe use of the Car Battery Charger (VW KBD2E: optional) makes it possible to supply power to the Movie Camera in a car for recording and playback. It also allows charging the Movie Camera's Battery. | Start the engine and then plug the Car Battery Charger into the Cigarette Lighter Socket. | ●After use, be sure to disconnect the Car Battery Charger from the cigarette lighter socket.●If the Car Battery Charger is already connected to the cigarette lighter socket when you start the engine, the fuse in the Car Battery Charger's plug may blow out.●Also read the operating instructions of the Car Battery Charger. |

| NV-DS12 NV-DS15 | NV-DS150 NV-DS25 | |||
| VSR0418CGR-D120 | A | 1 h. 1 h. 1 h. | ||
| B | 1 h 20 min. | 1 h 20 min. (1 h 10 min.) | 1 h 20 min. (1 h 5 min.) | |
| C | 40 min. | 40 min. (35 min.) | 40 min. (35 min.) | |
| CCP-D210 | A | 1 h 50 min. 1 h 50 min. 1 h 50 min. | ||
| B | 2 h 20 min. | 2 h 20 min. (2 h.) | 2 h 15 min. (1 h 55 min.) | |
| C | 1 h 10 min. | 1 h 10 min. (1 h.) | 1 h 10 min. (1 h.) | |
| CGR-D220 | A | 2 h. | 2 h. | 2 h. |
| B | 2 h 50 min. | 2 h 50 min. (2 h 25 min.) | 2 h 40 min. (2 h 20 min.) | |
| C | 1 h 25 min. | 1 h 25 min. (1 h 15 min.) | 1 h 20 min. (1 h 10 min.) | |
| CCP-D320 | A | 3 h 15 min. | 3 h 15 min. | 3 h 15 min. |
| B | 4 h 50 min. | 4 h 50 min. (4 h 15 min.) | 4 h 40 min. (4 h 5 min.) | |
| C | 2 h 25 min. | 2 h 25 min. (2 h 10 min.) | 2 h 20 min. (2 h 5 min.) | |
| CGR-D815 | A | 5 h 20 min. | 5 h 20 min. | 5 h 20 min. |
| B | 9 h 20 min. | 9 h 20 min. (8 h.) | 9 h. (7 h 40 min.) | |
| C | 4 h 40 min. | 4 h 40 min. (4 h.) | 4 h 30 min. (3 h 50 min.) | |
| Title Procedure Remarks, etc. | |||||
3) Supplying Power with the BatteryBefore use, fully charge the Battery. When the [CHARGE] Lamp Flashes ContinuouslyIf the temperature of the Battery is extremely low orextremely high, the [CHARGE] Lamp on the ACAdaptor flashes continuously. It also flashescontinuously when some malfunction has occurred inthe Battery or the AC Adaptor. For details, read "Notesabout the AC Adaptor" (p. 90).Charge the Battery at a room temperature between10°C and 30°C.If the DC Input Load is connected to the AC Adaptor,disconnect it as charging is not possible otherwise.If the [CHARGE] Lamp does not light even though theBattery is attached, remove the Battery and then re-attach it.During recording and charging, the Battery becomeswarm. However, this is normal.If the temperature of the Battery is extremely high orextremely low, the [CHARGE] Lamp may keep onflashing and charging is not possible. After theBattery has cooled down or warmed up sufficiently,charging starts automatically. When the [CHARGE] Lamp Flashes ContinuouslyIf the temperature of the Battery is extremely low orextremely high, the [CHARGE] Lamp on the ACAdaptor flashes continuously. It also flashescontinuously when some malfunction has occurred inthe Battery or the AC Adaptor. For details, read "Notesabout the AC Adaptor" (p. 90).Charge the Battery at a room temperature between10°C and 30°C.If the DC Input Load is connected to the AC Adaptor,disconnect it as charging is not possible otherwise.If the [CHARGE] Lamp does not light even though theBattery is attached, remove the Battery and then re-attach it.During recording and charging, the Battery becomeswarm. However, this is normal.If the temperature of the Battery is extremely high orextremely low, the [CHARGE] Lamp may keep onflashing and charging is not possible. After theBattery has cooled down or warmed up sufficiently,charging starts automatically. | 1Have the front edge ofthe battery lined up withthe 1 mark on the sideof the AC Adaptor, andthen slide it horizontallyuntil it locks with aclick.[IMAGE] | 2Connect the AC MainsLead to the AC Adaptorand an AC mainssocket.The [POWER] Lamp andthe [CHARGE] Lamp lightand charging starts.The AC Mains Leaddoes not fit entirely intothe AC Adaptor socket,but this has no effect onoperation.[IMAGE] | 3Remove the Battery bysliding it in theopposite direction ofStep 7.Also disconnect the ACMains Lead. | 4Tilt the Viewfinderupward.[IMAGE] | Charging Time and Maximum Time forContinuous RecordingThe times shown in the above chart areapproximations. The figures in parentheses show therocording time when using the LCD Monitor.The times listed above for your information indicate theduration of recording performed at an ambienttemperature of 20°C and 60% relative humidity. Thecharging time may be longer when you charge theBattery at higher or lower temperature.Charging TimeMaximum Continuous Recording TimeIntermittent Recording Time(The Intermittent Recording Time indicates the totalrecording time possible when you start and stoprecording repeatedly.)The Battery Model VSB0418 is supplied.During use and charging, the Battery becomes warm.The Movie Camera, too, becomes warm during use.When you repeatedly stop and restart recording, therecording time per Battery is shorter than listed above.If you do not use the Battery for a long time, pleaseread "Precautions for Storage" (p. 92).The Battery models CGP-D110 and CGP-D105cannot be charged with this AC Adaptor.Removing the Battery from the Movie CameraWhile pressing the [PUSH] Button, slide the Batteryupward to remove it.Be careful not to drop the Battery by accident.Before removing the Battery, set the [OFF/ON] Switchto [OFF].Battery Eject Button |
| 5Insert the Battery Into the Battery Holder on theMovie Camera and slide it downward until it lockswith a click.[IMAGE] | Charge Lamp [CHARGE]Lit: During charging.Olf: When the Battery is fully charged.Charge Lamp[IMAGE] | ||||

●LP Mode
The desired recording speed can be selected with [REC SPEED] on the [RECORDING SETUP] Sub-Menu. (p. 18) If you select the LP Mode, the possible recording time is 1.5 times as long as in the SP Mode.
Recording in the LP mode does not deteriorate the picture quality. However, the playback picture may contain mosaic-like patterns and certain functions may be restricted.
- As the recording track width in the LP Mode is smaller than the head width, recording new sound onto an already recorded cassette (audio dubbing) (p. 64) is not possible.
- In the following cases, mosaic-like patterns may appear in the playback picture, or the picture may not be played back correctly: - When a cassette recorded in the LP Mode on this Movie Camera is played back on other digital video equipment.
- When a cassette recorded in the LP Mode on other digital video equipment is played back on this Movie Camera.
- When a cassette recorded in the LP Mode on this Movie Camera is played back on digital video equipment not featuring the LP Mode.
• In the Slow Motion or Still Advance Playback Mode (p. 36)
-When using the Camera Search Function (p. 40)
Title Procedure Remarks, etc.
| Inserting the Cassette | 1Slide the [OPEN/EJECT] Lever 1 to the right and simultaneously open the Lower Cassette Compartment Cover completely. The Cassette Holder slides out | 2Insert the cassette with Its window in position 2. | 3Press on the [PUSH CLOSE] mark to close the Upper Cassette Compartment Cover. The Cassette Holder with the cassette slides back inside. Confirm that the Cassette Holder has retracted completely. | 4Close the Lower Cassette Compartment Cover. | ●When inserting the cassette, make sure it faces in the right direction and then push it in until it stops.●When you insert a cassette onto which you have recorded before, use the Camera Search Function (p. 40) to search for the position from which you want to continue recording.●When you insert a new cassette, rewind the tape to the beginning before starting to record.If the Cassette Holder Does Not Slide Back In●Press on the [PUSH CLOSE] mark and close the Upper Cassette Compartment Cover securely.●Turn the Movie Camera off and then on again.●Check if the Battery is discharged.If the Cassette Holder Does Not Slide Out●Close the Lower Cassette Compartment Cover completely and then open it again.●Check if the Battery is discharged. |
Ejecting the Cassette●If the AC Adaptor or Battery is used to supply power, it is possible to insert or eject the cassette without turning on the Movie Camera. | When opening or closing the Cassette Compartment, push down the buckle 4 of the Grip Belt in the direction of the arrow so that it does not obstruct the opening and closing of the Cassette Compartment.●Otherwise the Grip Belt may prevent the Cassette Compartment from opening completely, or it may get caught under the Cassette Compartment Cover and prevent it from closing properly. | Preventing Accidental Erasure of Recordings Opening the cassette's erasure prevention slider 5 (sliding it in the direction of the [SAVE] arrow) prevents recording. To record again, close the erasure prevention slider (slide it in the direction of the [REC] arrow). | |||

Attaching the Lens Cap
1
Pass the longer loop of the Lens Cap Cord through the attached eye on the Lens Cap.
2
Then pass the shorter loop of the Lens Cap Cord through the centre of the longer loop and pull tight.

3
Attach the shorter loop to the Grip Belt.
You can hook the removed Lens Cap onto the Grip Belt. When not actually recording, always attach the Lens Cap to the Lens to protect it.


- Do not leave the Lens exposed to direct sunlight, as it could bundle the light beams and seriously heat damage the CCD Sensor.
●Before you start recording, remove the Lens Cap.
Title Procedure Remarks, etc.
| Using the ViewfinderBefore using the Viewfinder, adjust it to your eyesight so that the indications in the Viewfinder are clear and easy to read.Due to limitations in production technology, there may be some tiny bright or dark spots on the Viewfinder, however, these are not recorded on the tape. | 1Set the [OFF/ON] Switch to [ON]. | 2Tilt the Viewfinder upward.The angle of the Viewfinder can be adjusted upward. | 3Adjust by sliding the Eyepiece Corrector Knob. [12:30:4515.10.2000↓12:30:4515.10.2000 [12:30:4515.10.2000↓12:30:4515.10.2000 | •Do not leave the Viewfinder exposed to direct sunlight, as its magnifying glass could bundle the light beams and seriously heat-damage the Viewfinder.•The Viewfinder can be tilted upward by up to approximately 70°. 70° 70° |
| Using the LCD Monitor(NV-DS15, NV-DS150, NV-DS25 only)It is also possible to record while viewing the picture on the opened LCD Monitor.Relationship between Viewfinder and LCD MonitorOpening the LCD Monitor turns off the Viewfinder.Closing the LCD Monitor turns the Viewfinder on again.However, turning the LCD Monitor forward also turns on the Viewfinder again. (p. 28).•Due to limitations in production technology, there may be some tiny bright or dark spots on the LCD Monitor screen, however, these are not recorded on the tape. | 1Set the [OFF/ON] Switch to [ON].[IMAGE] | 2Push the [▲OPEN] Button and turn out the LCD Monitor approximately 90° In the direction of the arrow.The Viewfinder turns off.[IMAGE] | 3Adjust the angle of the LCD Monitor according to the desired recording angle.The LCD Monitor rotates upward a maximum of 180° and downward a maximum of 90° from its normal vertical position. Trying to forcefully rotate it beyond this range could seriously damage the Movie Camera.[180°←→90° | Closing the LCD MonitorPush the LCD Monitor close until the [▲OPEN] Button locks with a click. |

① Camera Functions Main-Menu

② VCR Functions Main-Menu

③ Card Functions Main-Menu

Title Procedure Remarks, etc.
| Using the Menu ScreenThis Movie Camera displays the settings of various functions in Menus to make it easy to select the desired functions and settings. | 1Press the [MENU] Button.When the [CAMERA] Lamp is lit, Camera Mode Menu ➊ is displayed.When the [VCR] Lamp is lit, VCR Mode Menu ➊ is displayed.When the [CARD P.B] Lamp is lit, Card Playback Mode Menu ➊ is displayed. (NV-DS25 only) | 2Turn the [PUSH] Dial to select the desired sub-menu.Turning the [PUSH] Dial changes the highlighted item. | 3Press the [PUSH] Dial to display the selected sub-menu. | 4Turn the [PUSH] Dial to select the item to be set. | Note About the Settings Made on the MenuThe settings you selected on the Menu are maintained when you turn the Movie Camera off. However, if you disconnect the power supply unit (Battery or AC Adaptor) from the Movie Camera before turning it off, the selected settings may not be maintained.While the Menu is displayed, recording or playback is not possible. During playback, displaying Menu is possible, but not during recording.Settings for the menu item(s) that cannot be used due to the combination of the selected functions are displayed in dark blue.You can also perform these operations by using the Remote Controller. (p. 80) |
5Press the [PUSH] Dial to set the selected item to the desired mode.Every press moves the cursor [▶] to the next mode. | ■Exiting the MenuPress the [MENU] Button again. | ||||
Menu Functions
Camera Functions Menu

The illustrations of the menus are intended for explaining the functions; the actual menus look somewhat different.
Camera Mode Main-Menu [CAMERA FUNCTIONS]
- CAMERA SETUP
- DIGITAL EFFECT
- CARD SETUP (NV-DS25 only)
- RECORDING SETUP
- DISPLAY SETUP
- OTHER FUNCTION
- OTHER FUNCTIONS
- DEMO MODE
[CAMERA SETUP] Sub-Menu ①
Digital Zoom [D.ZOOM] (p. 31) ② Cinema-like Format Recording [CINEMA] (p. 32) ③ Motion-Sensor-Controlled Recording [M.SENSOR] (p. 52, 54) 4 Returning to the Main-Menu [RETURN] If you set [RETURN] to [YES], the Menu changes back to the Main-Menu.
[DIGITAL EFFECT] Sub-Menu ②
⑤ Digital Effects 1 [EFFECT1] (p. 48) ⑥ Digital Effects 2 [EFFECT2] (p. 48)
[CARD SETUP] Sub-Menu ③ (NV-DS25 only)
⑦ Picture Quality [PICTURE QUALITY] (p. 69)
[RECORDING SETUP] Sub-Menu ④
8 Recording Speed Mode [REC SPEED] (p. 13) Audio Recording Mode [AUDIO REC] (p. 64) ⑩ Scene Index Mode [SCENEINDEX] (p. 42) ⑪ Wind Noise Reduction [WIND CUT] If you set [WIND CUT] to [ON], the noise of the wind hitting the Microphone is reduced. However, this also causes a slight deterioration of the sound reproduction in the bass range. ⑫ Zoom Microphone [ZOOM MIC] (p. 31)

[DISPLAY SETUP] Sub-Menu ⑤
13 Date and Time Indication [DATE/TIME] (p. 35) 14 Counter Display Mode [C.DISPLAY] (p. 99) 15 Counter Reset [C.RESET] (p. 97) To reset the counter to zero. However, the Time Code cannot be reset. 16 Display Mode [DISPLAY] (P. 99) ⑰ LCD Lighting Mode [LCD MODE] (p. 22) (NV-DS15, NV-DS150, NV-DS25 only) 18 LCD and Viewfinder Adjustment [LCD/EVF SET] (p. 22) (LCD Monitor adjustment is only for models NV- DS15, NV-DS150 and NV-DS25.)
[OTHER FUNCTIONS] Sub-Menu ⑥
19 Remote Controller Mode [REMOTE] (p. 83) 20 Recording Lamp [REC LAMP] (p. 25) 21 Beep Sound [BEEP SOUND]
(NV-DS15, NV-DS150, NV-DS25 only) If you set [BEEP SOUND] to [ON], a confirmation/alarm beep sound is emitted in the following cases: 1 Beep - When you start recording - When you switch the [OFF/ON] Switch from [OFF] to [ON] 2 Beeps - When you pause recording 10 Beeps - When you operate the Movie Camera in an inappropriate way before or during recording
22 Shutter Effect [SHTR EFFECT] (p. 31) 23 Date and Time Setting [CLOCK SET] (p. 23) 24 Self-Recording [SELFSHOOT] (p. 29) (NV-DS15, NV-DS150, NV-DS25 only)
[DEMO MODE] Sub-Menu ⑦
25 Demonstration Mode [DEMO MODE]
If you connect the AC Adaptor to the Movie
Camera, set the [OFF/ON] Switch to [ON]
without any cassette inserted, and leave it on
for approximately 10 minutes without performing any operation, the Movie
performing any operation, the Movie Camera automatically switches over In the
automatically switches over to the Demonstration Mode to show its f
Demonstration mode to show its functions. Pressing a button or performing some others
Pressing a button of performing some other operation suspends the Demonstration Mode
Leaving the Movie Camera again on for more
than 10 minutes without operating it, causes the
demonstration to start again
Also, when you set [DEMO MODE] to [ON] and
then exit the menu, the demonstration starts.
To cancel the Demonstration Mode, insert a
cassette or set [DEMO MODE] to [OFF].
Menu Functions (Continued)
VCR Functions Menu

VCR Mode Main-Menu [VCR FUNCTIONS]
- PLAYBACK FUNCTIONS
- DIGITAL EFFECT
- CARD SETUP (NV-DS25 only)
- RECORDING SETUP
- DISPLAY SETUP
- OTHER FUNCTIONS
[PLAYBACK FUNCTIONS] Sub-Menu ①
① Blank Search [BLANK SEARCH] (p. 40) 2 Automatic Printing [AUTO PRINT] (p. 89) ③ Index Search Mode [SEARCH] (p. 42) 4 Audio Output Mode [12bit AUDIO] (p. 65) ⑤ Returning to the Main-Menu [RETURN] If you set [RETURN] to [YES], the Menu changes back to the Main-Menu.
[DIGITAL EFFECT] Sub-Menu ②
6 Digital Effect On/Off [EFFECT] (p. 60) ⑦ Digital Effect Selection [EFFECT SELECT] (p. 60)
[CARD SETUP] Sub-Menu ③ (NV-DS25 only)
⑧ Picture Quality [PICTURE QUALITY] (p. 69)
[RECORDING SETUP] Sub-Menu ④
9 Recording Speed Mode [REC SPEED] (p. 13)
- To select the recording speed when inputting digital signals and dubbing them. (NV-DS150 only)
- When this setting is changed, the [REC SPEED] setting on the [RECORDING SETUP] Sub-menu of the [CAMERA FUNCTIONS] Main-Menu will likewise be changed.
[DISPLAY SETUP] Sub-Menu ⑤
All items on the [DISPLAY SETUP] Sub-Menu are the same as those on the [DISPLAY SETUP] Sub-Menu of the [CAMERA FUNCTIONS] Main-Menu.
[OTHER FUNCTIONS] Sub-Menu ⑥
10 Remote Controller Mode [REMOTE] (p. 83) ① Date and Time Setting [CLOCK SET] (p. 23)
Card Functions Menu (NV-DS25 only)

Card Playback Mode Main-Menu
[CARD FUNCTIONS] (NV-DS25 only)
- ERASE PICTURE
- CARD EDITING
- DISPLAY SETUP
- OTHER FUNCTIONS
- OTHER FUNCTIONS
[ERASE PICTURE] Sub-Menu ①
1 Selecting and Erasing a Picture [ERASE BY SELECTION] (p. 72) ② Erasing All Pictures [ERASE ALL] (p. 72)
[CARD EDITING] Sub-Menu ②
③ Recording to Cassette [RECORD TO TAPE] (p. 76) 4 Automatic Printing [AUTO PRINT] (p. 89) If you connect the Movie Camera to the Digital Video Printer and set [AUTO PRINT] to [YES], all pictures stored on the MultiMediaCard are printed automatically. ⑤ Searching a Picture [PICTURE SEARCH] (p. 71) ⑧ Formatting a MultiMediaCard [CARD FORMAT] (p. 74) ⑦ Returning to the Main-Menu [RETURN] If you set [RETURN] to [YES], the Menu changes back to the Main-Menu.
[DISPLAY SETUP] Sub-Menu ③
All items on the [DISPLAY SETUP] Sub-Menu are the same as those on the [DISPLAY SETUP] Sub-Menu of the [CAMERA FUNCTIONS] Main-Menu.
[OTHER FUNCTIONS] Sub-Menu ④
File Number Reset [FILE No.] (p. 75)
All the other items on the [OTHER FUNCTIONS] Sub-Menu are the same as those on the [OTHER FUNCTIONS] Sub-Menu of the [CAMERA FUNCTIONS] Main-Menu.
Adjusting the LCD Monitor/Viewfinder
(LCD Monitor adjustment is only for models NV-DS15, NV-DS150 and NV-DS25.)
If you set [LCD/EVF SET] on the [DISPLAY SETUP] Sub-Menu to [YES], the following items are displayed.

LCD Brightness [LCD BRIGHTNESS]
To adjust the brightness of the LCD screen. The Bar Indication is divided into 8 steps. The more vertical bars are shown, the brighter is the screen.
LCD Colour Level [LCD COLOUR LEVEL]
To adjust the colour saturation of the LCD screen. The Bar Indication is divided into 8 steps. The more vertical bars are shown, the stronger are the colours.
Viewfinder Brightness [EVF BRIGHTNESS]
To adjust the brightness of the Viewfinder. The Bar Indication is divided into 8 steps. The more vertical bars are shown, the brighter is the screen.
1 Press the [PUSH] Dial to select the item that you want to adjust. 2 Turn the [PUSH] Dial. Turning it increases or decreases the number of vertical bars of the Bar Indication.
Increasing the Brightness of the Whole LCD Monitor Screen
Set [LCD MODE] on the [DISPLAY SETUP] Sub-Menu to [BRIGHT].
- These adjustments have no influence on the actually recorded picture.
Setting the Date and Time
If you set [CLOCK SET] on the [OTHER FUNCTIONS] Sub-Menu to [YES], the menu shown below appears.

For example: To set the clock to 15th October 2000, 14:30.
1 Turn the [PUSH] Dial to set to [2000]. The years change in the following order: 2000→2001→...→2089→2000→... 2 Press the [PUSH] Dial to select [MONTH], then turn it to set to [10]. 3 Press the [PUSH] Dial to select [DAY], then turn it to set to [15]. 4 Press the [PUSH] Dial to select [HOUR], then turn it to set to [14]. 5 Press the [PUSH] Dial to select [MIN.], then turn it to set to [30]. 6 Press the [MENU] Button to finish the date and time setting. The operation of the clock starts from [00] seconds. Pressing the button one more time makes the menu disappear.
- As the time of the Movie Camera's built-in clock is subject to a slight imprecision, be sure to check the time before recording. If the flashing [35] Indication appears, charge the built-in battery and set the date and time again.
- The clock employs the 24-hour system.
■Charging the Built-in Lithium Battery The built-in lithium battery maintains the operation of the clock. When the [S] Indication appears, the built-in lithium battery is discharged. Charge the discharged battery in the following way and after charging is finished, set the date and time. c ] Connect the AC Adaptor to the Movie Camera and to an AC mains socket. (p. 8) 2Leave the Movie Camera turned off. Leave the Movie Camera in this condition for approximately 4 hours. After charging for 4 hours, the built-in lithium battery can power the clock for approximately 3 months.
Information for your safety
WARNING
THE LITHIUM BATTERY IN THIS EQUIPMENT MUST ONLY BE REPLACED BY QUALIFIED PERSONNEL. WHEN NECESSARY, CONTACT YOUR LOCAL PANASONIC SUPPLIER.

| Title Procedure Remarks, etc. | |||||
Recording (Filming)After setting the [OFF/ON] Switch to [ON] to turn the Movie Camera on and setting the Mode Selector Switch to [AUTO], you can start recording simply by pressing the Recording Start/Stop Button. In this case, the Movie Camera adjusts the focus and white balance fully automatically.Before RecordingCheck the following settings before recording especially important scenes:Recording Speed (p. 13, 18, 64)When you intend to perform editing or audio dubbing afterward: Set to [SP].Audio Recording Mode (p. 18, 64)When you want to perform audio dubbing afterward: Set to [12bit].Cinema Mode (p. 18, 32)Depending on the light source and recording situation, correct automatic focusing and white balance adjustment may not be possible. In such cases, adjust them manually.Focus: p. 28White Balance: p. 56Mode Selector Switch -  | 1Set the [OFF/ON] Switch to [ON].The [CAMERA] Lamp lights. [MODE][RECORD][RECEFAUSE] [MODE][RECORD][RECEFAUSE] | 2Press the Recording Start/Stop Button.Recording starts.The [RECORD] Indication appears briefly and then changes to [REC]. [IMAGE][IMAGE][IMAGE][IMAGE][IMAGE] [IMAGE][IMAGE][IMAGE][IMAGE][IMAGE] | 3To pause recording:Press the Recording Start/Stop Button again.The [PAUSE] Indication appears. [IMAGE][IMAGE][IMAGE][IMAGE] [IMAGE][IMAGE][IMAGE][IMAGE] | 4To finish recording:Set the [OFF/ON]Switch to [OFF]. | •If you leave the Movie Camera in the Recording Pause Mode for more than 6 minutes, it automatically switches off to protect the tape and to conserve battery power. To resume recording from this condition, set the [OFF/ON] Switch to [OFF] and then to [ON] again.•Be sure to remove the Lens Cap before setting the [OFF/ON] Switch to [ON]. If the Lens Cap is attached to the Lens when you set the [OFF/ON] Switch to [ON], the automatic white balance adjustment (p. 95) may not be precise.Recording Indicating (Tally) LampThe Recording Lamp lights during recording to let the people in front of the Movie Camera know that recording is being performed.If you set [REC LAMP] on the [OTHER FUNCTIONS] Sub-Menu to [OFF], the Recording Lamp does not light.•Even if [REC LAMP] on the [OTHER FUNCTIONS] Sub-Menu is set to [OFF], the Recording Lamp flashes briefly to confirm when the Movie Camera has received a command from the Remote Controller. |

■Video Head Clogging and Remedy
When the video heads (which contact the tape) are dirty, the playback picture contains mosaic-like patterns or the whole screen becomes black. If they become even more dirty, the recording performance deteriorates and in the worst case, recording may not be possible at all.

Causes of Dirty Video Heads
• A lot of dust in the air ●High-temperature and high-humidity environment. • Damaged tape. - Long-time use.
Using the Mini-DV Format Digital Video Head Cleaner (VFK1451)
1 Insert the Head Cleaner into the Movie Camera in the same way as a video cassette. 2 Press the Play Button [▶], and after approximately 20 seconds press the Stop Button [■]. (Do not rewind the tape.) 3 Take out the Head Cleaner. Insert a video cassette, perform recording and then play it back to check the picture. 4 If the picture is still not clear, repeat above operation steps 1–3. (Do not use the Head Cleaner more than 3 times in succession.) ●This Video Head Cleaner (VFK1451) is available from Panasonic service centres.
Notes:
- Do not rewind the tape in the Head Cleaner after every use. Rewind it only after the tape has reached its end, and then use it again in the same way from the beginning.
- If the video heads again become clogged with dirt soon after cleaning, this might be caused by a damaged tape. In this case, stop using that cassette immediately.
- Be careful not to clean the video heads too much. (Too much cleaning could cause excessive wear to the video heads. If the video heads get worn, the picture is not played back clearly even after cleaning.)
- If using the Head Cleaner does not clear the video head clogging, the Movie Camera requires cleaning or repairing by a service centre. Please consult with your dealer.
- Video head cleaning due to clogging is not a malfunction of the product and is not covered by your warranty.
| Title Procedure Remarks | 1Press the Recording Check Button [C] ❶ brieflyIn the Recording Pause Mode.The [CHK] Indication ❷ appears.After checking, the Movie Camera returns to theRecording Pause Mode.  | ●For Recording Check, the Movie Camera must be inthe same mode (SP or LP) as used for recording,otherwise the playback picture is distorted. |
| Recording Backlit Scenes(Backlight Compensation)To prevent the backlit subject from being recorded verydark.(Backlight means that the light falls on the subject frombehind, i.e. the subject is between the light source andthe Movie Camera.) | 1Keep the Backlight Button [BLC] pressed.The backlight is being compensated as long as youkeep the Button pressed, and the subject is recordedmore brightly. (The picture brightens up as a whole.) Returning to Normal RecordingRelease the Backlight Button [BLC]. Returning to Normal RecordingRelease the Backlight Button [BLC]. |

Mirror Mode for the Picture on the LCD Monitor (NV-DS15, NV-DS150, NV-DS25 only)
You are used to looking at yourself in the mirror. Therefore, when recording yourself with the LCD Monitor facing forward, the picture (as it is being recorded) might look unusual and distracting. If you prefer to see yourself on the LCD Monitor in the same way as you see yourself in a mirror, i.e. with the sides reversed, set [SELFSHOOT] on the [OTHER FUNCTIONS] Sub-Menu to [MIRROR]. However, the picture will still be recorded in the normal, non-reversed way. This mirror mode for the picture on the LCD Monitor works only during recording and in the Recording Pause Mode with the LCD Monitor facing forward. Also, it is completely different from the Mirror Mode of the Digital Effects 1 (p. 48).
- In the Mirror Mode, only the following indications are displayed. - : Recording - : Recording Pause - : Remaining Battery Power
When the General Warning/Alarm Indication [1] appears, turn the LCD Monitor backward so that you can confirm the actual Warning/Alarm Indication. (p. 100)

| Title Procedure Remarks, etc. | |||||
| Recording Yourself(Recording with the LCD Monitor Facing Forward) (NV-DS15, NV-DS150, NV-DS25 only)This makes it possible to record yourself while viewing the picture on the LCD Monitor or to show the persons in front of the Movie Camera the picture being recorded. | 1Open the LCD Monitor and turn it so that it faces forward (lens side). | Opening the LCD Monitor automatically turns off the Viewfinder. However, when you turn the LCD Monitor forward, the picture also appears in the Viewfinder.This lets you aim the Movie Camera and view the picture in the Viewfinder, while the persons in front of the Movie camera can check the picture on the LCD Monitor during recording. | |||
| Focusing on the Subject Manually (Manual Focus)This makes it possible to adjust the focus manually for subjects and recording situations for which automatic focusing is not precise.MF: Manual Focus ModeMNL: Manual | 1Set the Mode Selector Switch to [MNL].The [MNL] Indication appears. | 2Press the [FOCUS]Button to make the [MF]Indication (Manual Focus Mode) 1 appear.  | 3Turn the [PUSH] Dial to adjust the focus. | Returning to the Automatic Focusing ModePress the [FOCUS]Button to make the [MF]Indication disappear 2.Or, set the Mode Selector Switch to [AUTO].  | Hint for Manual Focus Adjustment•If you adjust the focus in the wide-angle setting, the subject may go out of focus when you enlarge it.Therefore, enlarge the subject 3 before you adjust the focus, so that the picture remains focused when you zoom out 4.  •If you want to adjust the focus manually after having adjusted the shutter speed (p. 58) or the iris (p. 58); be sure to press the [FOCUS] Button to make the [▶MF] Indication appear, even if the [MF] Indication is displayed. •If you want to adjust the focus manually after having adjusted the shutter speed (p. 58) or the iris (p. 58); be sure to press the [FOCUS] Button to make the [▶MF] Indication appear, even if the [MF] Indication is displayed. |

Using the Zoom Microphone Function
When using Zoom-In to shoot from a distance, you can also clearly record the sound.
- Set the [ZOOM MIC] on the [RECORDING SETUP] Sub-Menu to [ON]. {[Z.MIC] Indication appears.} The [Z.MIC] Indication will appear even when an external microphone or audio equipment has been connected to the [MIC] Socket (p. 7) but the Zoom Microphone Function will not work.
- When using Zoom-In, the microphone direction changes from stereo to monaural.
Digital Still Picture
A picture can be viewed as a still picture by pressing the [STILL] Button. The Digital Still Picture Mode is released by pressing the button again.
- It is recommended that the [PHOTO SHOT] Button be pressed after the Digital Still Picture Mode has been established by pressing the [STILL] Button where the shot is to be taken.
Recording Extra Close-up Shots of Small Subjects (Macro Close-up Function)
When the zoom magnification is 1×, the Movie Camera can focus on subjects down to a distance of approximately 5 mm between lens and subject. This allows recording very small subjects such as insects.
When the zoom magnification is 1×, the Movie Camera can focus on subjects down to a distance of approximately 5 mm between lens and subject. This allows recording very small subjects such as insects.

Enlarging Your Subject or Widening the Recording Angle (Zooming In/Out)
Enlarging Your Subject or Widening the Recording Angle (Zooming In/Out)
Recording close-ups of your subjects and recording wide-angle shots adds special effects to your videos.

To record a wider view (Zooming-out):
Push the [W/T] Zoom Lever toward [W]
To enlarge your subject (Zooming-in):
Push the [W/T] Zoom Lever toward [T].
- The Zoom Magnification Indication appears for a few seconds.
- The Zoom Magnification Indication appears for a few seconds.

Recording Still Pictures on the Cassette (Photoshot)
With this function, you can record still pictures with sound for approximately 7 seconds each. This function is convenient, for example, for pictures that you want to print on a Video Printer.

1
Press the [PHOTO SHOT] Button. (This function can be used during recording.)
The Movie Camera records a still picture for approximately 7 seconds and then switches over to the Recording Pause Mode.
• The image in the Viewfinder also stands still.


Enlarging Your Subjects Even More
(Digital Zooming)
If you set [EFFECT1] on the [DIGITAL EFFECT] Sub-Menu to [ & ZOOM] or [ZOOM], it is possible to further enlarge the subject.
For the item [D.ZOOM] on the [CAMERA SETUP] Sub-Menu, you can select either [40×] or [400×] as the maximum zoom magnification.
The [D.ZOOM] Indication appears. - 40×: Digital zooming up to 40× - 400×: Digital zooming up to 400× - Up to 20×, the zooming is done optically. - The higher the Digital Zoom Magnification is, the lower is the picture quality. - When you have zoomed to 20× or higher (digital zoom range), manually adjusting the white balance is not possible.
Continuous Photoshot
If you set [SHTR EFFECT] on the [OTHER FUNCTIONS] Sub-Menu to [ON] and keep the [PHOTO SHOT] Button pressed (either in the Recording Pause Mode or during recording), the Movie Camera automatically records still pictures successively at intervals of approximately 0.7 second until you release the button.
● One more still picture may be recorded after you release the [PHOTO SHOT] Button. - As the still pictures recorded in the Continuous Photoshot Mode or in the Digital Still Picture Mode are not marked with photoshot index signals, they cannot be located by using the Photoshot Index Search Function and printed with the Auto Print Function.
• The further you push the [W:T] Zoom Lever toward [W] or [T], the faster the zooming speed becomes. - When you have zoomed to the tele setting, precise focusing is only possible on subjects no closer than 2.2 metres.
- If you set [SHTR EFFECT] on the [OTHER FUNCTIONS] Sub-Menu to [ON], the screen blinks briefly and a simulated shutter click sound can be recorded when you press the [PHOTO SHOT] Button. This audiovisual effect is also recorded.
- With the still pictures that you have recorded in the Photoshot Mode, you can do the following:
- Index Search (p. 42) • Automatic printing (p. 89)
- The visual shutter effect and click sound may occur with slight delay after recording of the still picture has started. ● The picture quality deteriorates slightly.

![graph TD A["CAMERA FUNCTIONS"] --> B["CAMERA SETUP"] B --> C["D. ZOOM ▶40×<br>CINEMA OFF ▶ON<br>M. SENSOR ▶OFF"] C --> D["RETURN ▶ ---- YES<br>PRESS MENU TO EXIT"] E["CAMERA FUNCTIONS"] --> F["DIGITAL EFFECT"] F --> G["EFFECT1 OFF ▶&ZOOM<br>ZOOM WIPE MIX<br>STROBE GAINUP<br>TRACER MOSAIC<br>MIRROR"]…](/content/2026/06/1329835/images/1720b1b3c9868848f8903310c057dfc81644e0082bdb5623691b0df1dbfc7e74.jpg)

| Title | Procedure | |
| Recording in the Cinema Mode(Cinema Mode)This mode lets you record in the cinema-like wide-screen format. | 1Select the [CAMERA SETUP] on the[CAMERA FUNCTIONS]Main-Menu. (p. 16) | 2Turn the [PUSH] Dial to select [CINEMA]. |
| Recording with Minimised Camera Shake(Super Image Stabilizer)In recording situations where shaking of the Movie Camera is likely to happen, for example when you have zoomed in on a distant subject or when you record while walking, you can use this function to stabilize the image. | 1Select the [DIGITAL EFFECT] on the[CAMERA FUNCTIONS]Main-Menu. (p. 16) | 2Turn the [PUSH] Dial to select [EFFECT1]. |
| Remarks, etc. | ||
3Press the [PUSH] Dial to select [ON].Black bars appear at the top and bottom on the screen.  | 4Press the [MENU] Button to exit the Menu. | ·If you play back the picture recorded in the Cinema Mode on a wide-screen (16:9) format TV, the size of the playback picture is automatically adjusted to match the format of the TV screen. For details, read the TV's operating instructions.·Using the Cinema Mode does not widen the recording angle.Cancelling the Cinema ModeSet [CINEMA] on the [CAMERA SETUP] Sub-Menu to [OFF]. |
3Press the [PUSH] Dial to select [ [IMAGE] & ZOOM] or [ [IMAGE]]. | 4Press the [MENU] Button to exit the Menu.The [ [IMAGE] Indication appears.[IMAGE][IMAGE] | ·In case of very strong camera shake, it may not be possible to stabilize the picture.·In a dimly lit place, the Super Image Stabilizer Function may not work. In this case, the [ [IMAGE] Indication flashes.·Under fluorescent lamps, the picture brightness may fluctuate and the colours may be unnatural.·After-image distortion may occur.·When you use a tripod, we recommend that you turn the Super Image Stabilizer Function off.Cancelling the Super Image Stabilizer Function Set [EFFECT1] on the [DIGITAL EFFECT] Sub-Menu to [OFF]. |

Search Lock Function
For longer Cue or Review Playback, press the Cue Button [▶▶] or the Review Button [◀◀] only briefly. As this locks the search function, you do not need to keep the button pressed for a long time.
- To resume normal playback, press the Play Button [▶].
- In Cue and Review Playback, pictures with fast-moving subjects may contain mosaic-like patterns.
Hyper Check Function
- If you press the Fast-forward Button [▶▶] during fast-forwarding of the tape or the Rewind Button [◀◀] during rewinding of the tape, Cue Playback or Review Playback continues for as long as you keep the Button pressed.
- At the beginning and end of Cue Playback or Review Playback, some momentary picture distortion may occur.
Making the Date/Time
Indication Appear
This Movie Camera automatically records the date and time, however not directly in the picture but as part of the sub code (p. 96). To make the Date/Time Indication appear, set [DATE/TIME] on the [DISPLAY SETUP] Sub-Menu to the desired setting. It is also possible to make the Date/Time Indication appear and change it by repeatedly pressing the [DATE/TIME] Button on the Remote Controller. (p. 81)

Title Procedure Remarks, etc.
| Viewing the Just Recorded Scenes on the Movie Camera (Playback)You can play back recorded scenes right after recording. | 1Press the [MODE] Button until the [VCR] Lamp lights. | 2Press the Rewind Button [◀◀] to rewind the tape.●Rewind the tape to the point where the recording started.●If the tape reaches the beginning during rewinding, it automatically stops. | 3Press the Play Button [▶] to start playback. [IMAGE] [IMAGE] | 4To stop playback:Press the Stop Button [■]. | ●Adjusting the VolumeKeep the [PUSH] Dial ➊ pressed until the [VOLUME] Indication ➌ appears. Then, turn the [PUSH] Dial to adjust the volume. After adjusting, press the [PUSH] Dial to make the [VOLUME] Indication disappear.To adjust the volume with the Remote Controller, press the [T] or [W] Button to make the [VOLUME] Indication appear. You can then increase the volume by pressing the [T] Button or decrease it by pressing the [W] Button. A few seconds after finishing the adjustment, the [VOLUME] Indication disappears.●The output volume from the built-in speaker and [PHONES] socket is adjusted.*built-in speaker: NV-DS15, NV-DS150, NV-DS25 only●When using the Playback Zoom Function, it is not possible to adjust the sound volume.●If a cassette recorded with copyright protection signal is played back, the screen becomes black. | |
| Searching for a Scene That You Want to Play Back | Cue PlaybackKeep the Cue Button [▶▶] pressed during playback.[IMAGE][IMAGE] | Review PlaybackKeep the Review Button [◀◀] pressed during playback.[IMAGE][IMAGE] | Variable Speed Search FunctionIt is possible to change the speed of Cue Playback or Review Playback.1Press the Play Button [▶] during playback. | 2Turn the [PUSH] Dial to select the desired search speed.[IMAGE][IMAGE] | Returning to Normal PlaybackPress the Play Button [▶].Playback continues at normal speed. | ●The Variable Speed Search Function offers the following 6 different playback speeds both in forward and reverse directions: 1/5× (slow playback in SP Mode only), 1/3× (slow playback in LP Mode only), 1×, 2×, 5×, 10×, 20×●During Variable Speed Search, mosaic-like patterns appear in the picture.●When using the Variable Speed Search Function, the sound is muted. |


Using the Jog Dial (Jog Playback)
By turning the Jog Dial ([PUSH] Dial) on the Movie Camera in the Still Playback Mode, you can advance the still pictures one by one in forward or reverse direction.
forward W.B.SHUTTER:IRIS MF:VCLUCG reverse
| Title Procedure Remarks, etc. | |||||
| Playing Back in Slow Motion(Slow Motion Playback) | 1Press the Play Button[▶]. | 2Press the SlowMotion/Still AdvanceButton [◀] or [▶] on theRemote Controller. | Resuming NormalPlaybackPress the Play Button[▶].Playback continues withnormal speed. | ●During slow motion playback in reverse direction, the Time Code Indication may not be accurate.●Scenes recorded in the SP Mode are played back at approximately 1/5th of the normal speed.Scones recorded in the LP Mode are played back at approximately 1/3rd of the normal speed. | |
 |  | Pressing the [◀] Buttonstarts slow motionplayback in reversedirection, and pressingthe [▶] Button starts slowmotion playback inforward direction. |  | ||
| Playing Back Still Pictures and Advancing Them One by One(Still Playback/Still Advance Playback)You can freeze the action during playback andadvance the still pictures one by one. | 1Press the Play Button[▶]. | 2Press the Pause Button[▶].The playback picturastops in the Still PlaybackMode. | 3Press the SlowMotion/Still AdvanceButton [◀] or [▶] on theRemote Controller. | Resuming NormalPlaybackPress the Play Button[▶].Playback continues withnormal speed. | Pressing the [◀] Button advances the still pictures one by one in reverse direction. Pressing the [▶] Button advances the still pictures one by one in forward direction.●Each press of the [◀] Button advances to the next still picture in reverse direction. Each press of the [▶] Button advances to the next still picture in forward direction. Keeping either button pressed continuously advances the still pictures one by one until you release the button.●If you leave the Movie Camera in the Still Playback Mode for more than 6 minutes, it switches over to the Stop Mode to protect the video heads against excessive wear.●During Still Advance Playback, the Time Code Indication may not be accurate.●During Still Playback, adjusting the sound volume is not possible. |
 |  |  |  | ||
![AV OUT 21 pin Adaptor [VIDEO IN] [VIDEO IN] [AUDIO IN] AV Cable [S-VIDEO OUT] S-Video Cable](/content/2026/06/1329835/images/df0eac3854d2ff923b0d1239bbe4170cf4272c7e14a158a771a6fcf652699141.jpg)
Listening to the Playback Sound via Headphones
If you want to use headphones to listen to the playback sound, connect them to the [PHONES] Socket on the Movie Camera. In this case, no sound (including beep and shutter click sounds) is reproduced from the Movie Camera's built-in speaker*.
Making the Indications Appear on the TV Screen
Press the [OSD] Button ① on the Remote Controller
The On-Screen Indications also appear on the TV screen.

Title Procedure Remarks, etc.
| Playing Back on a TVBy connecting the Movie Camera to a TV, you can watch playback of the recorded scenes on the TV screen. | 1Connect the [AV OUT] Socket on the Movie Camera with the Video and Audio Input Sockets on the TV.Use the AV Cable and to connect to the TV.If your TV is equipped with an S-Video Socket, also connect the S-Video Cable.  | ●Before connecting, turn off both the Movie Camera and the TV.●If a cassette recorded with copyright protection signal is played back, the screen becomes black. However, scenes recorded with this Movie Camera do not contain a copyright protection signal.●If your TV is not equipped with AV Input Sockets, the 21pin Adaptor (purchase separately) is necessary. Consult your dealer. | ||
| After UseFor models NV-DS15, NV-DS150 and NV-DS25, first close the LCD Monitor. | 1Take out the cassette.(p. 12) | 2Set the [OFF/ON] Switch to [OFF]. | 3Remove the Battery (p. 11) and retract the Viewfinder. | Attaching the Lens CapAfter use, attach the supplied Lens Cap to the Lens to protect it. |

| Title | Procedure | Remarks, etc. | |||
| Viewing Recorded Scenes During Recording Pause (Camera Search)You can view recorded scenes when the Movie Camera is in the Recording Pause Mode.The Camera Search Function is convenient to search for a scene from which you want to start recording a new scene with smooth scene-to-scene transition. | 1Keep the Reverse Search Button [−SEARCH] or the Forward Search Button [SEARCH+] pressed.Pressing the [−SEARCH] Button plays back the picture in reverse direction.Pressing the [SEARCH+] Button plays back the picture in forward direction.  | 2Starting to Record from the Desired Position: Release the pressed Search Button.The Movie Camera is in the Recording Pause Mode. | 3Press the Recording Start/Stop Button to start recording.The Movie Camera starts recording a new scene with smooth scene-to-scene transition. | ●In the Camera Search Mode, the picture may contain mosaic-like patterns. However, this is a phenomenon particular to digital video and completely normal.●If the Recording Speed Mode (SP/LP) of the previous and the new recording are different, the playback picture may be distorted. | |
| Searching for the End of the Recorded Part on a Cassette (Blank Search)With the Blank Search Function, you can quickly locate the end of the recorded part on a cassette (or a blank part between recordings). | 1Press the [MODE] Button until the [VCR] Lamp lights. | 2Select the [PLAYBACK FUNCTIONS] on the [VCR FUNCTIONS] Main-Menu. (p. 16)The [PLAYBACK FUNCTIONS] Sub-Menu appears. | 3Turn the [PUSH] Dial to select [BLANK SEARCH]. | 4Press the [PUSH] Dial to select [YES]. Approximately 1 second before the end of the last recorded scene, the Movie Camera switches over to the Still Playback Mode. | ●If there is no blank part on a cassette, the Movie Camera stops at the end of the tape.●When the Blank Search has finished, you can press the [MODE] Button until the [CAMERA] Lamp lights, and then start recording. The new scene is recorded with a smooth transition from the last to the new scene.Cancelling the Blank Search Before It Has Finished Press the [■] Button. |


VCR Mode
CAMERA Mode
■ Index Search
To allow easy searching for desired scenes, this Movie Camera automatically records index signals during recording as follows: (While an index signal is being recorded, the [INDEX] Indication flashes for a few seconds.)
① Photoshot Index Signal
To search for still pictures recorded in the Photoshot Mode (p. 30) and to use for automatic printing (p. 89). A photoshot index signal is automatically recorded every time you record a still picture in the Photoshot Mode. However, in the Continuous Photoshot Mode (p. 31), no photoshot index signals are recorded.
INDEX
② Scene Index Signal
To search for the beginning of recorded scenes. A scene index signal is automatically recorded in the following cases: - When you start recording after inserting a cassette. However, if you switch the Movie Camera from the VCR Mode over to the Camera Mode or set the date and/or time before you start recording, no index signal is recorded. - According to the setting of [SCENEINDEX] on the [RECORDING SETUP] Sub-Menu of the [CAMERA FUNCTIONS] Main-Menu: [2HOUR]: An index signal is recorded when recording is restarted after a lapse of more than 2 hours. [DAY]: An index signal is recorded when recording is restarted after the date has changed since the last recording.
| Title | Procedure | Remarks, etc. | ||
| Searching for the Beginning of Recorded Scenes Marked with Index Signal (Index Search)■ Searching for Photoshot Pictures (Photoshot Index Search)●Press the [MODE] Button until the [VCR] Lamp lights.●Set [SEARCH] on the [PLAYBACK FUNCTIONS] Sub-Menu to [PHOTO]. | Photoshot Index Search in Forward Direction Press the Index Button [▶▶] on the Remote Controller. | Photoshot Index Search in Reverse Direction Press the Index Button [◀◀] on the Remote Controller. | ●At every press of the corresponding button, the tape is fast-forwarded or rewound to the next still picture recorded in the Photoshot Mode. After reaching the next still picture, the still picture is played back continually, however the sound only for approximately 4 seconds. (If you leave the Movie Camera in the Still Playback Mode for more than 6 minutes, it switches over to the Stop Mode to protect the video heads against excessive wear.) | ●The Photoshot Index Search may not work correctly for still pictures recorded near the beginning of the tape.●As no photoshot index signals are recorded for still pictures recorded in the Continuous Photoshot Mode (p. 31), the Photoshot Index Search Function cannot be used to search for these still pictures.●If you keep the [◀◀] or [▶▶] Button pressed for more than 2 seconds, the Intro Search Function is activated and it plays back all still pictures recorded in the Photoshot Mode on the cassette one after another for a few seconds each.(To cancel the Intro Search Function, press the Play Button [▶] or the Stop Button [■].) |
| ■ Searching for the Beginning of Recorded Scenes (Scene Index Search)●Press the [MODE] Button until the [VCR] Lamp lights.●Set [SEARCH] on the [PLAYBACK FUNCTIONS] Sub-Menu to [SCENE]. | Scene Index Search in Forward Direction Press the Index Button [▶▶] on the Remote Controller. | Scene Index Search in Reverse Direction Press the Index Button [◀◀] on the Remote Controller. | ●When you briefly press the corresponding button once, the [S 1] Indication appears and the search for the next scene marked with an index signal starts. After the Scene Index Search has started, every time you press the button, the indication changes successively from [S 2] to [S 9], and the beginning of the scene corresponding to the selected number is located. After reaching the desired scene, playback starts automatically.(At a time, Scene Index Search in forward or reverse direction is possible up to the ninth scene marked with index signal from the present tape position.) | ●If the interval between two scene index signals is less than 1 minute, the Scene Index Search may not work correctly.●The Scene Index Search may not work correctly for scenes recorded near the beginning of the tape.●If you keep the [◀◀] or [▶▶] Button pressed for more than 2 seconds, the Intro Search Function is activated and it plays back the beginning of all scenes marked with an index signal on the cassette one after another for a few seconds each.(To cancel the Intro Search Function, press the Play Button [▶] or the Stop Button [■].) |

| Title | Procedure | Remarks, etc. | ||
Starting to Record with Gradually Appearing Picture and Sound (Fading In)Fading-in lets you make the picture and sound appear gradually from a black screen at the beginning of a scene. | 1With the Movie Camera in the Recording Pause Mode, keep the Fade Button [FADE] pressed.The picture gradually disappears. | 2When the picture has completely disappeared, press the Recording Start/Stop Button to start recording. | 3Approximately 3 seconds after the recording has started, release the Fade Button [FADE].The picture gradually appears again. | ●Fading-in and fading-out cannot be used when recording still pictures in the Photoshop Mode (p. 30). |
Ending the Recording of a Scene with Gradually Disappearing Picture and Sound (Fading Out)Fading-out lets you make the picture and sound disappear gradually into a black screen at the end of a scene. | 1During recording, keep the Fade Button [FADE] pressed.The picture gradually disappears. | 2After the picture has completely disappeared, press the Recording Start/Stop Button to stop recording.The Movie Camera is in the Recording Pause Mode. | 3Release the Fade Button [FADE]. | |

| Title Procedure Remarks | Marks, etc. | |||
| Recording in Special Situations(Programme AE)This function lets you select Automatic Exposure settings optimized for special recording situations. | 1Slide the Mode Selector Switch down repeatedly from the [MNL] position, until the Movie Camera is put in the desired mode ([ ], [], [], [3] or [3]).The indication of the selected mode appears.PROGRAMME AEMODESELECT | Cancelling the Programme AE Function Set the Mode Selector Switch to [AUTO].PROGRAMME AEMODESELECT | •It is not possible to adjust the shutter speed (p. 58) or the iris value (p. 58) when one of the Programme AE Modes is selected.Sports Mode•When playing back on a VCR scenes that you have recorded in the Sports Mode, you can enjoy slow motion and still playback of very sharp images with fine details.•During normal playback, movements in the picture may not be smooth.•Avoid recording under fluorescent, mercury-vapour or natrium lamps in this mode, as the colour and the brightness of the playback picture might fluctuate.•When recording subjects lit by strong lights or with much light reflection, the playback picture may contain vertical streaks of light.•When the scene is not sufficiently lit, the [ ] indication flashes.•When using this mode for recording indoors, the playback picture may flicker.•It is not possible to use the Sports Mode [ ] together with the Gain-up Mode [GAIN UP].Portrait Mode•When using this mode for recording indoors, the playback picture may flicker.•It is not possible to use the Portrait Mode [ ] together with the Gain-up Mode [GAIN UP].Low Light Mode•It may not be possible to sufficiently brighten up extremely dark scenes.Spotlight Mode•When using this mode, the recorded picture may be extremely dark.•If a subject is extremely bright, the recorded picture may be whitish.Surf & Snow Mode•If a subject is extremely bright, the recorded picture may be whitish. | |
 |  | |||
 |  | |||
 | [ ] Sports ModeTo record scenes with fast-moving subjects such as sports scenes.[+] Portrait ModeTo make subjects stand out sharply from the background.[+] Low Light ModeTo record dark scenes more brightly.[3] Spotlight ModeTo record subjects under bright spotlights such as at a party, in the theatre, etc.[3] Surf & Snow ModeTo record subjects in brightly lit surroundings such as on a ski slope, beach, etc. | |||

1 6

11
② 7
12

③ 8
13

4 g

5 10
14
| Title Procedure | Remarks, etc. | ||||
| Recording with Special Effects (Digital Effects)In addition to the Super Image Stabilizer and Digital Zoom, this Movie Camera offers you various digital effect modes to make it easy to enhance your scenes in many creative ways. | 1Select the [DIGITAL EFFECT] on the [CAMERA FUNCTIONS]Main-Menu. (p. 16)[IMAGE] | 2Turn the [PUSH] Dial to select [EFFECT1] or [EFFECT2].[IMAGE] | 3Press the [PUSH] Dial to select the desired digital effect.[IMAGE] | 4Press the [MENU] Button to exit the Menu.• The picture now has the selected digital effect. However, the effect of the Wipe Function and the Mix Function only become visible when actually recording in the respective mode. (p. 50) | • If you have set [EFFECT1] on the [DIGITAL EFFECT] Sub-Menu to [GAINUP], you need to adjust the focus manually; however, adjusting the shutter speed (p. 58) and selecting a white balance mode (p. 56) are not possible.• If you have set [EFFECT2] on the [DIGITAL EFFECT] Sub-Menu to [B/W] or [SEPIA], changing the selected white balance mode is not possible.• It is not possible to use the Sports Mode [★] or the Portrait Mode [★.] together with the Gain-up Mode [GAIN UP].Cancelling the Digital EffectSet [EFFECT1] or [EFFECT2] on the [DIGITAL EFFECT] Sub-Menu to [OFF]. |
| Digital Effects 1 [EFFECT1]1Super Image Stabilizer and Digital Zoom Mode [7 &D.ZOOM] (p. 31, 32)This combination mode allows recording in the extreme tele range and prevents shaky picture.2Super Image Stabilizer mode [7] (p. 32)This prevents shaky pictures when recording in the tele range of from a moving vehicle.3Digital Zoom Mode [D.ZOOM] (p. 31)It enlarges the subject beyond the optical zooming range.4Wipe Mode [WIPE]It gradually replaces a picture of the last previously recorded scene with the picture of the new scene, like drawing the curtain. For details, (p. 50)5Mix Mode [MIX]It gradually fades out the picture of the last previously recorded scene while fading in the picture of the new scene. For details, (p. 50)6Strobe Mode [STROBE]It records the pictures with a stroboscope-like effect. | 7Gain-up Mode [GAIN UP]It electronically brightens up the picture.In this mode, adjust the focus manually.8Trailing Effect Mode [TRACER]The picture is recorded with a trailing effect.9Mosaic Mode [MOSAIC]The picture becomes mosaic-like.10Mirror Mode [MIRROR]The right half of the picture is a mirror image of the left half.Digital Effects 2 [EFFECT2]11Negative Mode [NEGA]The recorded pictures have reversed colours similar to photographic negatives.12Sepia Mode [SEPIA]Scenes are recorded with a brown tint similar to the colour of old photographs.13Black & White Mode [B/W]The picture is recorded in black and white.14Solarisation Mode [SOLARI]The picture is recorded with an effect similar to a painting. | ||||

| Title Procedure Remarks, etc. | |||||
Recording with Special Effects(Digital Effects) (Continued)■Wipe ModeIt gradually replaces a still picture of the last recorded scene with the moving picture of the new scene, like drawing a curtain. | 1Set [EFFECT1] on the [DIGITAL EFFECT] Sub-Menu to [WIPE] and exit the Menu. (p. 48)The [WIPE] Indication appears.[IMAGE] | 2Press the Recording Start/Stop Button to start recording.The normal recording starts.[IMAGE] | 3Press the Recording Start/Stop Button to pause recording.The last picture is stored in memory.The [WIPE] Indication changes to [WIPE].[IMAGE] | 4Press the Recording Start/Stop Button to start recording again.The last picture of the previous scene is gradually replaced by the new scene.[IMAGE] | ●If you perform any of the following operations after performing Step 3, the picture stored in memory is erased and the Wipe Function cannot be used:●Selecting any other digital function in [EFFECT1] or in [EFFECT2] on the [DIGITAL EFFECT] Sub-Menu.●Using the Camera Search Function.Wipe from a Photoshot Still PictureInstead of performing the Wipe from the last recorded picture, you can store a still picture in memory by pressing the [PHOTO SHOT] Button after Step 1 and then perform Step 4. |
■Mix ModeIt gradually fades out a still picture of the last recorded scene while fading in the moving picture of the new scene.____ | 1Set [EFFECT1] on the [DIGITAL EFFECT] Sub-Menu to [MIX] and exit the Menu. (p. 48)The [MIX] Indication appears.[IMAGE] | 2Press the Recording Start/Stop Button to start recording.The normal recording starts.[IMAGE] | 3Press the Recording Start/Stop Button to pause recording.The last picture is stored in memory.The [MIX] Indication changes to [MIX].[IMAGE] | 4Press the Recording Start/Stop Button to start recording again.The last picture gradually fades out while the new scene fades in.[IMAGE] | ●If you perform any of the following operations after performing Step 3, the picture stored in memory is erased and the Mix Function cannot be used:●Selecting any other digital function in [EFFECT1] or in [EFFECT2] on the [DIGITAL EFFECT] Sub-Menu.●Using the Camera Search Function.Mix from a Photoshot Still PictureInstead of performing the Mix from the last recorded picture, you can store a still picture in memory by pressing the [PHOTO SHOT] Button after Step 1 and then perform Step 4. |


| Title | Procedure | |
| Motion-Sensor-Controlled RecordingIn this mode, recording automatically starts when the built-in Motion Sensor detects some movement in the picture. | 1Select the [CAMERA SETUP] on the [CAMERA FUNCTIONS] Main-Menu. (p. 16) | 2Turn the [PUSH] Dial to select [M.SENSOR]. |
 ↓ ↓ ↓ ↓ |  |  ↓ ↓ |
| Cancelling the Motion Sensor Function During Stand-by Mode Set [M.SENSOR] on the [CAMERA SETUP] Sub-Menu to [OFF]. | Cancelling the Motion Sensor Function During RecordingPress the Recording Start/Stop Button for 2 seconds. | |
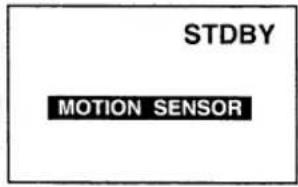
3Press the [PUSH] Dial to select [ON]. | 4Press the [MENU] Button to exit the Menu.The Motion Sensor Function Stand-by [STDBY] Indication appears. |
Approximately 1 second after the Movie Camera's Motion Sensor has detected movement in the picture, recording automatically starts. Approximately 10 seconds after movement in the picture has stopped, recording automatically stops and the Movie Camera is in the Motion Sensor Stand-by Mode.
When the Movie Camera remains in the Motion Sensor Stand-by Mode for more than 6 minutes, the Viewfinder or LCD Monitor* turns off to conserve power.
When the Motion Sensor again detects movement in the picture, recording automatically restarts after approximately 4 seconds, and the Viewfinder or LCD Monitor* turns on.
In the following recording situations, the motion sensor may not work correctly:
● A white wall or another single-color background behind the subject. ● A subject with horizontal, vertical, or oblique stripes. ● Sudden changes in the surrounding brightness. ● Exposure of the movie camera to slight shocks or vibration. ● Recording in a dimly lit place. (The [MOTION SENSOR] indication flashes.) ● Extremely slow or fast movement of the subject. ● Very little movement of the subject. ● A very small subject. ● Movement of the subject near the edge of the picture. ● A background with horizontal or vertical stripes.
The following functions do not activate in the motion sensor function stand-by mode:
● Normal recording ● Super image stabilizer ● Digital zoom ● Digital effects 1 ● Recording check ● Camera search function.
● To prevent accidental recording start caused by movie camera movement, the movie camera should be mounted on a tripod or otherwise secured in a very stable position.
● [EFFECT1] on the [DIGITAL EFFECT] sub-menu is automatically set to [OFF] when [M.SENSOR] on the [CAMERA SETUP] sub-menu is set to [ON].
● When [M.SENSOR] on the [CAMERA SETUP] sub-menu is set to [ON], it is not possible to manually start recording by pressing the Recording Start/Stop button or to activate the Recording Check or Camera Search function.
● When you use the AC adaptor to power the movie camera, the motion sensor function stand-by mode will continue when no movement is detected in the picture, even when the tape has reached the end during recording. Therefore, we recommend that you check the tape within a week. When you use the battery to power the movie camera, it remains in the motion sensor function stand-by mode until the battery is discharged, at which time the [CAMERA] lamp flashes for a few seconds.
● To ensure correct functioning of the motion sensor function, the moving subject should be quite large in the picture. Therefore, when you have zoomed the lens to the maximum wide-angle position, the distance between lens and subject should preferably be within about 2 meters. For subjects at larger distances, be sure to zoom in accordingly.
● The movie camera requires time to set up before recording starts. Therefore, the beginning of movement is not recorded.
● If there is a power interruption, the motion sensor function is cancelled.

| Title | Procedure | |
Recording in Dark Places without Any Illumination(0 Lux Night View Function)This function is convenient when you want to record at night in places without any illumination, for example for observing the behaviour of nocturnal animals, etc. In this mode, the Movie Camera emits infrared rays which makes it possible to record subjects that are invisible to the naked eye. | 1Set the [0 LUX OFF/ON] Switch to [ON].The [0LUX] Indication appears. | |
Using the 0 Lux Night View Function together with the Motion-Sensor-Controlled Recording Function in Dark Places without Any IlluminationIf you use the 0 Lux Night View Function together with the Motion-Sensor-Controlled Recording Function, recording starts automatically when the Movie Camera's built-in Motion Sensor detects some movement in the picture. This combined function is convenient for easy, unattended animal observation recordings at night. | 1Set the [0 LUX OFF/ON]Switch to [ON].The [0LUX] Indication appears. | 2Press the [MENU] Button.The [CAMERA FUNCTIONS] Main-Menu appears |
| 5Press the [PUSH] Dial to select [ON].[IMAGE] | 6Press the [MENU] to exit the Menu.The [STDBY] Indication appears. [IMAGE] | |
| Cancelling this FunctionSet the [0 LUX OFF/ON] Switch to [OFF].The [0LUX] Indication disappears. | |
| 3Turn the [PUSH] Dial to select the [CAMERA SETUP] and then press the [PUSH] Dial.The [CAMERA SETUP] Sub-Menu appears.WB/SHUTTERIRISMF/VOL/JOG | 4Turn the [PUSH] Dial to select [M.SENSOR].W/BSHUTTERIRISMF/VOL/JOG |
| Cancelling these Functions during Stand-by ModeSet [M.SENSOR] on the [CAMERA SETUP] Sub-Menu to [OFF] and then set the [0 LUX OFF/ON] Switch to [OFF]. | Cancelling these Functions during RecordingPress the Recording Start/Stop Button for more than 2 seconds and then set the [0 LUX OFF/ON] Switch to [OFF]. |
Remarks, etc.
Notes for recording in dark places without any illumination
The built-in infrared beam emitters light up. Be careful not to cover them with your hand when recording. Do not use the 0 Lux Night View function in brightly lit places and never aim the movie camera at the sun, as this could cause irreparable damage. The playback picture of scenes recorded with the 0 Lux Night View function will be in black and white. If you change the setting of the [0 LUX OFF/ON] switch during recording, a switching noise is also recorded. When recording in the 0 Lux Night View function, changing the selected white balance mode is not possible. It is not possible to use any of the Program AE modes when the 0 Lux Night View mode is activated. When using the 0 Lux Night View function, the subject should be within 3 meters from the movie camera. When the automatic focusing is not precise, adjust the focus manually. (In this case, the Manual Focus mode is activated when the [FOCUS] button 1 is pressed even if the Mode Selector switch 2 is set to [AUTO].) (p. 28) If you do not want the recording indicating (tally) lamp to light during recording using the 0 Lux Night View function, set [REC LAMP] on the [OTHER FUNCTIONS] sub-menu to [OFF]. If you use the Macro close-up function and approach extremely close to the subject when recording in the 0 Lux Night View function, the infrared beam from the movie camera's built-in infrared beam emitters may not reach the subject. As the iris is fully opened in the 0 Lux Night View mode, subjects in white or other light colors may be recorded whitish, blurred, and with weak contrast.
Note for using the 0 Lux Night View function together with the motion-sensor-controlled recording function
If you use the Motion Sensor function together with the 0 Lux Night View function, the [MOTION SENSOR] indication flashes, and recording may not be possible in some cases.

| Title Procedure Remarks, etc. | |||||
| Recording with Natural Colours(White Balance)This Movie Camera automatically adjusts the white balance to ensure that the pictures are recorded with natural colours. For certain types of subjects and lighting conditions, however, this Auto White Balance Adjustment Mode may not be able to ensure natural colours (p: 95). In these cases, you can select either one of the 3 preset modes explained below (indoor, outdoor, or the last manually adjusted white balance setting), or you can manually adjust the white balance. The modes change in the following order:12Automatic White Balance Adjustment [AWB]2Last manually adjusted White Balance setting [★]32Outdoor Mode [★]42Indoor Mode [★](recording under incandescent lamp) | 1Set the Mode Selector Switch to [MNL].The [MNL] Indication appears.PROGRAMME AE↓ADSLUTTERNSMODESELECT | 2Press the [PUSH] Dial. The [AWB] Indication appears.ME SHUTTERNSMODESELECT | 3Turn the [PUSH] Dial to select the desired White Balance Mode.ME SHUTTERNSMODESELECT | Returning to the Auto White Balance Adjustment ModeTurn the [PUSH] Dial until the [AWB] Indication appears. Or, set the Mode Selector Switch to [AUTO].ADSLUTTERNSMODESELECTPROGRAMME AE↑ | Notes about the Recording with Natural Colours•Be sure to remove the Lens Cap before setting the [OFF/ON] Switch to [ON]. If the Lens Cap is still attached to the Lens when the [CAMERA] Lamp lights, the automatic white balance setting may not be precise.Notes about the Adjusting the White Balance Manually•It is not possible to manually adjust the white balance when you have zoomed to 20× or higher (digital zoom range), when [EFFECT1] on the [DIGITAL EFFECT] Sub-Menu is set to [GAINUP] and when [EFFECT2] is set to [SEPIA] or [B/W].•We recommend that you adjust the white balance anew whenever there is a change in the recording situation.In the Following Cases, the [★] Indication Flashes:•When you recall the last manually adjusted white balance settingThe flashing indication tells you that the white balance setting you last adjusted is still maintained. This setting is kept until you adjust the white balance again.•When you are trying to adjust the white balance in a dark placeUnder weak illumination, precise manual white balance adjustment may not be possible. In this case, set the Mode Selector Switch to [AUTO] to record with automatic white balance adjustment.•During manual adjustment of the white balanceThe [★] Indication flashes while the white balance is being adjusted. When the white balance adjustment is finished, the [★] Indication stops flashing and remains lit. |
| Adjusting the White Balance ManuallyUse the Manual White Balance Adjustment Mode for all types of lighting outside the range 1 (p. 95), as the Auto White Balance Adjustment Mode can only ensure natural colours for the types of lighting within that range. For optimum results under almost any types of lighting, we recommend that you adjust the white balance manually for each now scene. | 1Attach the Lens Cap and zoom in until the entire screen becomes white.PROGRAMME AE↓ADSLUTTERNSMODESELECTADSLUTTERNSMODESELECT | 2Operate the above step 1 and 2. The [AWB] Indication appears.PROGRAMME AE↓ADSLUTTERNSMODESELECTADSLUTTERNSMODESELECT | 3Turn the [PUSH] Dial until the [★] Indication appears.ME SHUTTERNSMODESELECTADSLUTTERNSMODESELECT | 4Keep the [PUSH] Dial pressed until the [★] Indication stops flashing and remains lit.VEGETUERNSMODESELECTADSLUTTERNSMODESELECTADSLUTTERNSMODESELECTADSLUTTERNSMODESELECTADSLUTTERNSMODESELECTADSLUTTERNSMODESELECTADSLUTTERNSMODESELECTADSLUTTERNSMODESELECTADSLUTTERNSMODESELECTADSLUTTERNSMODESELECTADSLUTTERNSMODESELECTADSLUTTERNSMODESELECTADSLUTTERNSMODESELECTADSLUTTERNSMODESELECTADSLUTTERNSMODESELECTADSLUTTERNSMode | In the Following Cases, the [★] Indication Flashes:•When you recall the last manually adjusted white balance settingThe flashing indication tells you that the white balance setting you last adjusted is still maintained. This setting is kept until you adjust the white balance again.•When you are trying to adjust the white balance in a dark placeUnder weak illumination, precise manual white balance adjustment may not be possible. In this case, set the Mode Selector Switch to [AUTO] to record with automatic white balance treatment.During manual adjustment of the white balanceThe [★] Indication flashes while the white balance is being adjusted. When the white balance adjustment is finished, the [★] Indication stops flashing and remains lit. |


| Title Procedure | ||||
| Adjusting the Shutter Speed ManuallyTo achieve special creative effects or to cope with special lighting situations or fast-action scenes, you can adjust the shutter speed manually. | 1Set the Mode Selector Switch to [MNL].The [MNL] Indication appears. | 2Press the [PUSH] Dial until the Shutter Speed Indication appears.You can change between the Shutter Speed, the Iris (F Number), and the Manual White Balance Indications by repeatedly pressing the [PUSH] Dial. | 3Turn the [PUSH] Dial to adjust the shutter speed. | Returning to the Normal Shutter Speed Set the Mode Selector Switch to [AUTO]. |
 |  |  |  SELECT SELECT | |
| Adjusting the Iris (F Number) ManuallyTo achieve special creative effects or to cope with special lighting situations, you can adjust the iris (F number) manually. | 1Set the Mode Selector Switch to [MNL].The [MNL] Indication appears. | 2Press the [PUSH] Dial until the [F] Indication appears.You can change between the iris (F Number), the Manual White Balance, and the Shutter Speed Indications by repeatedly pressing the [PUSH] Dial. | 3Turn the [PUSH] Dial to adjust the Iris. | Returning to the Normal Iris Value (F Number) Set the Mode Selector Switch to [AUTO]. |
 |  |  |  SELECT SELECT | |
Remarks, etc.
Notes about adjusting the shutter speed manually
Range of shutter speed adjustment: 1/50–1/8000 s
The standard shutter speed is 1/50 s.
The nearer to [1/8000] a setting you select, the faster the shutter speed becomes.
The playback picture of subjects lit by strong lights or with much light reflection may contain vertical streaks of light.
During normal playback, the scene-to-scene transitions may not be smooth.
Avoid recording under fluorescent lamps, mercury lamps, or sodium lamps, as they can cause unstable colors and brightness of the playback picture.
When using the Gain-up mode (p. 48) or any of the Program AE modes (p. 46), it is not possible to adjust the shutter speed. If the shutter speed was manually adjusted, this setting is canceled. Adjust the shutter speed according to the recording situation.
Notes about adjusting the iris (F number) manually
Range of iris adjustment
CLOSE (Closed) → F16....F1.6 → OP (Opened) + 0dB...OP + 18dB
The nearer to [CLOSE] a value you select, the darker the picture becomes.
The nearer to [OP+18dB] a value you select, the brighter the picture becomes.
The figures with +dB show the Gain-up value. If you increase the value too much, the picture quality deteriorates.
●Manually adjusting the shutter speed after
performing manual iris adjustment changes the iris back to automatic adjustment.
Therefore, if you want to adjust both the shutter speed and iris manually, be sure to adjust the shutter speed first.
- When using any of the Programme AE Modes (p. 46), it is not possible to adjust the iris.
- Increasing the Gain-up value also increases the graininess of the picture.
- Depending on the zoom magnification, some iris values may not be displayed.


Title Procedure Remarks, etc.
| Playing Back with SpecialEffects (Playback Digital Effects)There are various modes available for adding specialdigital picture effects to your recordings duringplayback. They are identical to the Digital Effects 1 and2 (p. 48) that can be used during recording.1 [WIPE]2 [MIX]3 [STROBE]4 [NEGA]5 [SEPIA]6 [B/W]7 [TRACER]8 [SOLARI]9 [MOSAIC]10 [MIRROR] | 1Press the [MODE]Button until the [VCR]Lamp lights. | 2Press the Play Button[▶]. | 3Press the [SELECT] Button on the RemoteController to select the desired digital effect.Repeatedly pressing the [SELECT] Button changesthe selected digital effect in the order 1 to 10.Selecting a digital effect is also possible by setting[EFFECT SELECT] on the [DIGITAL EFFECT] Sub-Menu of the [VCR FUNCTIONS] Main-Menu to thedesired effect. | Suspending the Playback Digital EffectTemporarilyYou can suspend and re-activate the digital effect byrepeatedly pressing the [OFF/ON] Button 1).Suspending a digital effect is also possible by setting[EFFECT] on the [DIGITAL EFFECT] Sub-Menu to[OFF], and later to [ON] to re-activate it. When thedigital effect is temporarily suspended, the indication ofthe selected effect flashes.Cancelling the Digital EffectPress the [SELECT] Button on the Remote Controllerto make the displayed digital effect indicationdisappear. Or, set [EFFECT SELECT] on the [DIGITAL EFFECT] Sub-Menu to [OFF].When you want to output the signal of the picture witha digital effect added during playback, use the [AVOUT] Sockets. This signal cannot be output from theDV Terminal (p. 7) or the Digital Still Picture Terminal(p. 7).In the VCR Mode, the Wipe Function and the MixFunction can only be operated with the RemoteController.It is not possible use the Wipe Mode, Mix Mode,Trailing Effect Mode, or Mirror Mode of the PlaybackDigital Effects and the Playback Zoom Function(p. 62) at the same time.If you press the [OFF/ON] Button while the Wipe orMix is being performed, the effect is paused at thatpoint. If you press the [OFF/ON] Button again, theeffect resumes. |
| ■ Wipe Mode and Mix ModeAfter having selected [WIPE] or [MIX] in Step 3 | 1Press the [▶] Button tostart playback. | 2Press the [STORE]Button at the momentthat you want to storeas still image inmemory.The [WIPE] or [MIX]Indication appears andthe picture is stored inmemory. | 3Press the [OFF/ON] Button at the scene at whichyou want to use a Wipe or Mix effect.The scenes change with a Wipe or Mix effect. |


| Title | Procedure | |
Enlarging the Playback Picture(Playback Zoom)With this function, you can enlarge a part of the picture by up to 10 times during playback. | 1Press the [MODE]Button until the [VCR]Lamp lights. | 2Press the Play Button[▶]. |
Changing the Zoom MagnificationPress the [W] or [T] Zoom Button on the Remote Controller to change the magnification.•You can increase the magnification up to 10×. | ||
| Remarks, etc. | ||
| 3Press the Playback Zoom Button [P.B.ZOOM] on the Remote Controller.The centre part of the picture is enlarged about 2 times. | 4Cancelling the Playback Zoom FunctionPress the [P.B.ZOOM] Button on the Remote Controller. | ●In the Playback Zoom Mode, it is not possible to adjust the sound volume.●Turning the Movie Camera off or switching it from the VCR Mode over to the Camera Mode automatically cancels the Playback Zoom Mode.●Even while you are using the Playback Zoom Function, the picture output from the DV Terminal (p. 7) and the Digital Still Picture Terminal (p. 7) is not enlarged.●The more the picture is enlarged, the more its picture quality deteriorates.●It is not possible use the Wipe Mode, Mix Mode, Trailing Effect Mode, or Mirror Mode of the Playback Digital Effects (p. 60) and the Playback Zoom Function at the same time. |
| Shifting the Enlarged Part of the PicturePress the Arrow Button (▲, ◀, ▶, ▼) on the Remote Controller for the direction in which you want to shift the enlarged part of the picture. | ||


Title Procedure Remarks, etc.
| Adding New Sound on a Recorded Cassette (Audio Dubbing)You can add music or narration on a recorded cassette.If you perform audio dubbing onto a tape that was recorded with [AUDIO REC] on the [RECORDING SETUP] Sub-Menu of the [CAMERA FUNCTIONS] Main-Menu set to [16bit], the original sound is erased.If you intend to perform audio dubbing but also want to keep the original sound, be sure to set [AUDIO REC] to [12bit] before making the original recording.It is not possible to perform audio dubbing onto recordings made in the LP Mode. (p. 13) | 1Insert the recorded cassette and set the [OFF/ON] Switch to [ON].Make sure that the prevention slider of the cassette is set to [REC]. | 2Press the [MODE] Button until the [VCR] Lamp lights. | 3Search for the position from which you want to insert the new sound.Using Cue Playback, Review Playback or Variable Speed Search makes it easy to search for this point. | 4Press the Play Button [▶] and then Pause Button [■] on the Remote Controller | Playing Back the Sound Recorded with Audio DubbingDepending on the setting selected for [12bit AUDIO] on the [PLAYBACK FUNCTIONS] Sub-Menu of the [VCR FUNCTIONS] Main-Menu, the sound added with audio dubbing and the original sound are played back as follows:ST1: The original sound alone is played back.ST2: The dubbed sound alone is played back.MIX: The original sound and the sound added with audio dubbing are played back together.It is not possible to perform audio dubbing on an unrecorded part of the tape.If there was an unrecorded part on the tape when audio dubbing was performed, picture and sound distortion occur at that tape portion during playback.If you reset the Tape Counter to zero and turn on the Memory Stop Function (p. 97) at the point where you want the audio dubbing to end, the audio dubbing automatically stops when the tape reaches that point. |
5Press the [A.DUB] Button on the Remote Controller. ,A.DUB■ ,A.DUB■ | 6Press the Pause Button [■] on the Remote Controller to start audio dubbing....... A.DUB> A.DUB> | Stopping Audio DubbingPress the Pause Button [■] on the Remote Controller.The Movie Camera is again in the Still Playback Mode. | |||

| Title Procedure Remarks, etc. | |||||
Using the MultiMediaCard(NV-DS25 only)You can use the supplied MultiMediaCard to record still pictures onto it, even without a cassette inserted. You can also take favourite scenes recorded on the cassette and copy them as still pictures onto the MultiMediaCard, or you can copy still pictures recorded on the MultiMediaCard onto the cassette.■Inserting the MultiMediaCardBe sure to turn the Movie Camera off before inserting the MultiMediaCard.Set the [OFF/ON] Switch to [OFF]. | 1Slide the [OPEN] Lever to the left to open the Card Slot Cover.[IMAGE] | 2Hold the MultiMediaCard with its cut-off corner facing right and toward the Movie Camera and insert it straight until it stops.[IMAGE] | 3Close the Card Slot Cover securely.[IMAGE] | ●Do not turn the Movie Camera off while the MultiMediaCard is being read, such as during Card Photoshot recording, copying pictures onto the cassette, erasing pictures on the MultiMediaCard or using the Multi-Picture Function in the Card Playback Mode.This could damage the MultiMediaCard or recorded contents, and even cause malfunction of the Movie Camera.●Before closing the Card Slot Cover, be sure to confirm that the MultiMediaCard is inserted correctly.The [ACCESS] LampWhile accessing the MultiMediaCard (reading, recording, playing back, deleting, transmitting pictures), the [ACCESS] Lamp is lit.●While the [ACCESS] Lamp is lit, do not open the Card Slot Cover and remove the MultiMediaCard, or turn the Movie Camera off. Doing so could damage the card and cause a malfunction with the Movie Camera.[IMAGE] | |
■Taking Out the MultiMediaCardBe sure to turn the Movie Camera off before taking out the MultiMediaCard.Set the [OFF/ON] Switch to [OFF]. | 1Slide the [OPEN] Lever to the left to open the Card Slot Cover.[IMAGE] | 2Push the MultiMediaCard on its centre.[IMAGE] | 3Pull the MultiMediaCard straight out.[IMAGE] | 4Close the Card Slot Cover securely.[IMAGE] | |

Quality of Card Photoshot Pictures
You can choose among 3 picture quality modes for the Card Photoshop Function.
Maximum recordable number of pictures on the supplied 8 MB MultiMediaCard
FINE: Approx. 50 pictures
NORMAL: Approx. 100 pictures ECONOMY: Approx. 200 pictures
- When recording in more than one mode (FINE, NORMAL, ECONOMY) on the same
MultiMediaCard, the maximum recordable
number differs from the numbers indicated above.
• The maximum recordable numbers are
The maximum recordable numbers are approximations. When recording intricate pictures with fine details, the number of recordable still pictures on the MultiMediaCard decreases due to their large data volume.
- To be able to record an even larger number of still pictures, we recommend that you use the 16 MB MultiMediaCard VW-MMC16E (optional).
- To record pictures in high quality, set [PICTURE QUALITY] on the [CARD SETUP] Sub-Menu to [FINE]: to record as many pictures as possible, set it to [ECONOMY].
- When you select [ECONOMY] for recording, the playback picture may contain mosaic-like noise patterns depending on the picture content.


Title Procedure Remarks, etc.
| Recording Still Pictures on the MultiMediaCard (Card Photoshot) (NV-DS25 only)You can record still picture onto the MultiMediaCard both through the Movie Camera's lens and from scenes that you have already recorded on the cassette.●Sound is not recorded.●The Shutter Effect (p. 31) cannot be used.■Recording Still Pictures on the MultiMediaCard in the Camera Mode | 1Set the [OFF/ON] Switch to [ON].The [CAMERA] Lamp lights. | 2Slide the [TAPE/CARD] Selector to [CARD]. | 3Press the [PHOTO SHOT] Button at the scene that you want to record. | ●Electromagnetic waves, static electricity, malfunction of the Movie Camera or of the MultiMediaCard itself could erase the data recorded on it. To prevent the loss of picture data, we recommend that you make a backup copy on a cassette (p. 76) or on the computer (p. 78).●If you use the Card Photoshot Function during recording, the Movie Camera is automatically put in the Recording Pause Mode.●Before pressing the [PHOTO SHOT] Button, we recommend that you press the [II:STILL] Button to check the picture. |
| ■Recording Still Pictures on the MultiMediaCard in the VCR Mode: | 1Press the [MODE] Button until the [VCR] Lamp lights.The [VCR] Lamp lights. | 2Slide the [TAPE/CARD] Selector to [CARD]. | 3Start playback and press the [PHOTO SHOT] Button at the scene that you want to record.The picture stands still for approximately 4 seconds (when [PICTURE QUALITY] on the [CARD SETUP] Sub-Menu is set to [NORMAL]) while the picture is being recorded.[IMAGE][IMAGE] |

①
② Using the Picture Search Mode After setting the [PICTURE SEARCH] on the [CARD EDITING] Sub-Menu to [YES] to appear the picture search screen, turn the [PUSH] Dial to select the desired number of the picture and press it.

| Title Procedure | |||||
| Playing Back Pictures Recorded on the MultiMediaCard (Card Playback) (NV-DS25 only)■Playing Back Pictures | 1Press the [MODE] Button until the [CARD P.B] Lamp lights and the Movie Camera is in the Card Playback Mode.The last recorded still picture on the MultiMediaCard is displayed.[G2WS] | To play back later recorded pictures:Press the [SEARCH+] Button. | To play back all recorded pictures in succession (Slide Playback):Press the [▶] Button. The [SLIDE▶] Indication appears 1●All pictures are played back for approximately 6 seconds each, from the first to the last recorded picture, and playback then stops. | To pause the Slide Playback:Press the [III] Button. The [SLIDEIII] Indication appears 2●To resume the Slide Playback, press the [II] Button again or the [▶] Button. Playback resumes from the next picture and stops at the last recorded picture. | To stop the Slide Playback:Press the [■] Button.●To resume the Slide Playback, press the [▶] Button. Playback resumes from the next picture, and after all recorded pictures have been played back, it stops at the picture, at which you stopped the Slide Playback before.●The [N], [F] or [E] Indication displayed in Card Playback pictures shows the volume of image data of a still picture recorded on the MultiMediaCard. {p. 79} |
| To play back earlier recorded pictures:Press the [−SEARCH] Button. | |||||
■Selecting and Playing Back Pictures Displayed in the Multi-Picture Mode | 1Press the [MODE] Button until the [CARD P.B] Lamp lights and the Movie Camera is in the Card Playback Mode.The last recorded still picture on the MultiMediaCard is displayed. | 2Press the [CARD MULTI] Button.The pictures recorded on the MultiMediaCard are displayed in the Multi-Picture Mode. | 3Turn the [PUSH] Dial to select the desired picture.●The selected picture is marked with a red frame. | 4Press the [PUSH] Dial or the [CARD MULTI] Button.The selected picture appears In full screen size.[A150MUTTERO]or | Remarks, etc.●It is not possible to select the desired multi-picture with the Remote Controller.●In the Multi-Picture Mode, 9 still pictures are displayed on the same screen. If more than 9 still pictures are recorded on the MultiMediaCard, turn the [PUSH] Dial to display the next 9 pictures. (Instead of the [PUSH] Dial, you can also use the [SEARCH+] Button or the [−SEARCH] Button.)●When you play back a blank (unrecorded) MultiMediaCard, the screen becomes white and the [−−] Indication appears.●If you attempt to play back a still picture recorded in a different format or a picture whose Image data is defective, the [×] Indication and the [CARD ERROR] Indication could appear as warning.●When the still pictures are displayed in the Multi-Picture Mode, the Slide Playback cannot be activated. |

A![graph TD A["文件审核与归档"] --> B{是否符合要求} B -->|是| C["提交审批"] B -->|否| D["退回修改"] C --> E["归档完成"] D --> F["重新提交"] E --> G["归档完成"] F --> H["结束"]](/content/2026/06/1329835/images/a1d23125a107524701ec99fd3fb6739a7cd9b8088cb2bf62a8609d9624ece7ff.jpg)
。
| Title Procedure | ||||||
Erasing Pictures Recorded on the MultiMediaCard (NV-DS25 only)You can use the Movie Camera to erase the still pictures recorded on the MultiMediaCard. After erasing them, the pictures cannot be recovered any more.■ Selecting and Erasing Pictures AAfter putting the Movie Camera in the Card Playback Mode... (p. 70)Press the [MENU] Button. | 1Select [ERASE PICTURE] on the [CARD FUNCTIONS] Main-Menu. (p. 16) | 2Turn the [PUSH] Dial to select [ERASE BY SELECTION] and then press it. | 3Turn the [PUSH] Dial to select the picture that you want to erase and then press it.The selected picture flashes. | 4Press the [PHOTO SHOT] Button.The confirmation message appears. | 5Turn the [PUSH] Dial to select [YES] and then press it.The selected picture is now erased from the MultiMediaCard.If you select [NO], the picture selection is cancelled. | 6Press the [MENU]Button to exit the menu. |
| ■ Erasing All Pictures ®After putting the Movie Camera in the Card Playback Mode... (p. 70)Press the [MENU] Button.[IMAGE] | 1Select [ERASE PICTURE] on the [CARD FUNCTIONS] Main-Menu. (p. 16)[IMAGE] | 2Turn the [PUSH] Dial to select [ERASE ALL] and then press it.The confirmation message appears.[IMAGE] | 3Turn the [PUSH] Dial to select [YES] and then press it.All pictures stored on the MultiMediaCard are now erased.[IMAGE] | |||

| Title | Procedure | |
| Making the Unusable MultiMediaCard Usable (Formatting) (NV-DS25 only)If the MultiMediaCard can no longer be read by the Movie Camera, it may be possible to make it usable again by formatting it. After formatting, the previously recorded pictures cannot be recovered any more. | 1After putting the Movie Camera in the Card Playback Mode... (p. 70)Select [CARD EDITING] on the [CARD FUNCTIONS] Main-Menu. (p. 16) | 2Turn the [PUSH] Dial to select [CARD FORMAT] and then press it.The confirmation message appears. |

| Remarks, etc. | |
| 3Turn the [PUSH] Dial to select [YES] and then press it.The formatting starts.When the formatting has finished, the screen becomes white.[IMAGE] | We recommend that you use the AC Adaptor as power source when you format the MultiMediaCard to ensure uninterrupted power supply during formatting.File Numbering SystemWhen you record still pictures on the MultiMediaCard, the Movie Camera sequentially assigns file numbers which are automatically recorded together with each picture. However, when you use several MultiMediaCards or erase pictures, the numbers on a MultiMediaCard may no longer be in sequence.The file numbers can be confirmed if you import the pictures into the computer.When the last picture recorded on the MultiMediaCard is numbered 0010.JPG, for example, the next picture recorded even after resetting the file numbers is numbered 0011.JPG. If you want to record the pictures with file numbers starting from 0001, format the MultiMediaCard and then reset the file numbers.Resetting the File Numbers in the Movie Camera1 Select [OTHER FUNCTIONS] on the [CARD FUNCTIONS] Main-Menu.(p. 21)2 Set [FILE No.] to [RESET].The file number is now reset to zero.< img src="box1c1e">•Formatting the MultiMediaCard does not reset the file numbers in the Movie Camera.< img src="box1c1e"> |


| Title | Procedure | |
| Copying Still Pictures from the MultiMediaCard onto the Cassette (Picture Transmission) (NV-DS25 only)■ Copying a Single Picture | 1After putting the Movie Camera in the Card Playback Mode... (p. 70)Display the desired picture. (p. 70) | 2Slide the [TAPE/CARD] Selector to [TAPE]. (2008) (2008) |
| ■ Copying All Pictures | 1After putting the Movie Camera in the Card Playback Mode... (p. 70)Display the first picture. (p. 70)If you display a picture other than the first picture, only subsequent pictures will be copied.[IMAGE] | 2Slide the [TAPE/CARD] Selector to [TAPE]. |
| Remarks, etc. | ||
3Press the [PHOTO SHOT] Button.It takes approximately 7 seconds to copy the still picture onto the cassette. | • Using the Blank Search Function (p. 40) makes it easy to locate the end of the recorded part or a blank part on the cassette.• An (Photoshot) index signal is automatically recorded with a picture. This makes it possible to use the Index Search Function (p. 42) or the Auto Print Function (p. 89).• The gradual transition from one picture to the next is also recorded for approximately 1 second each.• When you play back the pictures copied from the MultiMediaCard onto the cassette using the Picture Transmission Function, the Date/Time Indication disappears momentarily during the gradual transition from one picture to the next.•[NOW WRINTING] indication appears during the copying.REC NOW WRITING | |
3Select [CARD EDITING] on the [CARD FUNCTIONS] Main-Menu. | 4Set [RECORD TO TAPE] to [YES].It takes approximately 7 seconds for each of the pictures to be copied onto the cassette.To stop the copying midway, press the [■] Button. | |
Using the Pictures Recorded on the MultiMediaCard on the Computer (NV-DS25 only)
![graph TD A["1: Display card with physical part"] --> B["2: MultiMedia Card with 7.0x power drive"] B --> C["3: Screen icon with cable and screen"] style A fill:#f9f,stroke:#333 style B fill:#ccf,stroke:#333 style C fill:#cfc,stroke:#333](/content/2026/06/1329835/images/79428a100a538c2a77a54fafdebc4f5418ca912fa26d35054b754a515fb4b8fc.jpg)
The following optional accessories are needed to capture the pictures on a MultiMediaCard in the computer.
① PC Card Adaptor (VW-MAP1E)
② Floppy Disk Adaptor (VW-MAF1E)
③ MultiMediaCard External Drive (VW-RWM1E)
Depending on the type of computer, it may not be possible to use one or more of the accessories above. For further details, consult your dealer.
- By using the PC Card Adaptor, you can import the still pictures recorded on the MultiMediaCard directly into a laptop computer or digital video printer.
- To erase pictures that you recorded on the MultiMediaCard by using the Movie Camera, be sure to erase them on the Movie Camera, not on the computer.
- You can import still pictures into the computer for editing and adding creative effects. (After editing or changing the picture data, playback on the Movie Camera is no longer possible.)
- If you record on the computer some data that is incompatible with the Movie Camera, it cannot be recognized on the Movie Camera.
- If you make any changes to the pictures on the MultiMediaCard after acquiring them on the computer, searching for pictures on that MultiMediaCard may no longer be possible.
Still Pictures Recorded on the MultiMediaCard
Compatibility cannot be guaranteed for pictures recorded on other video equipment and played back on this Movie Camera, or vice versa.

① Warning/Alarm
When any of the following indications lights or flashes, confirm the condition of the Movie Camera.
CARD FULL:
There is not enough memory left on the MultiMediaCard.
NO CARD: There is no MultiMediaCard inserted.
NO PICTURE:
There are no pictures recorded on the MultiMediaCard.
CARD ERROR:
The MultiMediaCard is not compatible with the Movie Camera. (p. 71)
② Card Playback Picture Indications
SLIDED: Slide Playback (p. 71)
SLIDEIII: Slide Playback Pause (p. 71)

③ Card Photoshot Picture Indications
N (F, E): Volume of image data recorded on the MultiMediaCard (during Card Playback) Picture quality selected for Card Photoshot pictures (during Card Photoshot Recording)
• [F] means data amount of approximately 128 KB, [N] of approximately 64 KB, and [E] of approximately 32 KB.
However, the actual data volume per picture depends on how detailed the picture is, and the displayed Playback Picture Quality Mode may not be the same as the one selected for recording.
[F] means Fine, [N] Normal, and [E] Economy.
[☐] (Red): During Card Photoshot recording
ACCESS: During reading of the MultiMediaCard (playback, formatting, or while the Multi-Picture Function is used)
[☐]: No MultiMediaCard inserted [☐] (Cyan): Ready for Card Photoshot recording
No. 00: Number (file number) of the Card Photoshot picture being played back
00: Remaining number of Card Photoshot pictures
Remote Controller
Using the wireless Remote Controller supplied with the Movie Camera allows operating most of the Movie Camera's major functions from a distance.

■Buttons on the Remote Controller
①Indication Output Button [OSD] (p. 39) To display the function and operation indications on a connected TV.
②Indication Shift Button [DISPLAY] (p. 99) To select the desired counter indication.
③Recording Button [REC] (p. 85) (NV-DS150 only) To dub digital signals Input Into the Movie Camera via the DV Input/Output Terminal, press the [REC] Button and the [PLAY] Button together.
4 Controls for Playback
Rewind/Review Button [◀◀]
To start review playback (p. 34).
To rewind the tape (p. 34).
To activate the Camera Search Function
(p. 40).
To activate the Recording Check Function
(p. 26).
To display the previous 9 pictures in the Card Multi-Picture Mode or in the Card Erase-Picture Mode (p. 70, 72). (NV-DS25 only)
Fast-forward/Cue Button [▶▶]
To start cue playback (p. 34).
To fast-forward the tape.
To activate the Camera Search Function
(p. 40)
To display the next 9 pictures in the Card Multi-
Picture Mode or in the Card Erase-Picture
Slow Motion/Still Advance Button [◀, ▶]
(p. 36)
To perform Slow Motion Playback.
To perform Still Advance Playback
(◀: in reverse direction, ▶: in forward
direction)
④Controls for Playback (Continued)
Index Search Button [◀◀, ▶▶] (p. 42)
To search for recorded scenes marked with an index signal.
(◀◀: in reverse direction, ▶▶: in forward direction)
Stop Button [■] (p. 34)
To stop the tape. To stop slide playback. (NV-DS25 only)
Pause Button [Ⅲ] (p. 36)
To pause playback. To pause slide playback. (NV-DS25 only)
⑤Playback Digital Effects
Selection Button [SELECT] (p. 60)
To select the desired playback digital effect.
Store Button [STORE] (p. 60)
To store a still picture in memory for the Wipe or Mix Function.
Off/On Button [OFF/ON] (p. 60)
To suspend the selected digital mode or re-activate it.
To start/pause a Wipe or Mix transition from the still picture stored in memory.
Controls for Menu Settings and Playback Zoom and Variable Speed Search
Menu Button [MENU] (p. 16)
To display the menu.
Item set Button [SET] Item select Button [ITEM]
Playback Zoom Button [P.B.ZOOM] (p. 62)
To enlarge a part of the playback picture.
• Each time this button is pressed, the Playback Zoom Function is toggled between on and off.
Upward Direction Button [A]
Left/Right Direction Button [◀, ▶] Downward Direction Button [▼]
Variable Speed Search Button
[VAR. SEARCH] (p. 35)
To change the speed of Cue Playback or Review Playback.
- Each time this button is pressed, the Variable Speed Search Function is toggled between on and off.
- When the Playback Zoom Function is on, the Direction Buttons of the Playback Zoom Function take precedence, and the following two buttons can no longer be operated.
Speed Selection Button [▲, ▼]
Selecting Pictures for Card Erase-Picture
Picture Selection Button [▼] Picture Confirm Button [▶]
⑦Controls for Recording, Zoom/Sound
Volume
Photoshot Button [PHOTO SHOT] (p. 30, 68) To record still pictures.
To show the message that prompts the user to verify whether the picture is to be erased in the Card Erase-Picture Mode. (NV-DS25 only)
Recording Start/Stop Button [START/STOP] (p. 24)
To start and pause recording.
Zoom/Sound Volume Buttons [ZOOM/VOL] To zoom in and out (p. 30, 56).
To adjust the volume of the playback sound (p. 35).
To change the zoom magnification of the Playback Zoom (p. 62).
⑧Audio Dubbing Button [A.DUB] (p. 64) To perform audio dubbing.
⑧Reset Button [RESET] (p. 97)
To reset the Tape Counter to zero.
10 Date and Time Button [DATE/TIME] (p. 35) To make the Date/Time indication appear or disappear.

■ Selecting the Remote Controller Mode
When using two Movie Cameras at the same time, selecting different Remote Controller Modes makes it possible to operate them separately.
- If the Remote Controller Mode set on the Movie Camera and on its Remote Controller are not matched, the [REMOTE] Indication appears.
- Replacing the batteries in the Remote Controller automatically resets it to the [VCR1] Mode. ① Press the [▶] Button and [■] Button simultaneously. This selects the [VCR1] Mode. ② Press the [◀] Button and [■] Button simultaneously. This selects the [VCR2] Mode.

| Title Procedure | ||||
| Remote Controller (Continued)■ Inserting the Button-type BatteryInsert the supplied button-type battery before using the Remote Controller.●When the button-type battery is exhausted, replace it with a new CR2025 battery.(The life of the battery is about 1 year. However, it depends on the frequency of use.)●Make sure you insert the battery with its poles correctly aligned.●Keep the button-type battery out of the reach of children. | 1Pull out the Battery Holder while pressing the Stopper Ⓞ. | 2Insert the button-type battery with the stamped (+) mark facing upward. | 3Insert the Battery Holder into the Remote Controller. | Information for your safetyWARNING"THE LITHIUM BATTERY IS A CRITICAL COMPONENT (TYPE NUMBER CR2025 MANUFACTURED BY PANASONIC).IT MUST NEVER BE SUBJECTED TO EXCESSIVE HEAT OR DISCHARGE. IT MUST THEREFORE ONLY BE FITTED IN EQUIPMENT DESIGNED SPECIFICALLY FOR ITS USE.REPLACEMENT BATTERIES MUST BE OF THE SAME TYPE AND MANUFACTURER.THEY MUST BE FITTED IN THE SAME MANNER AND LOCATION AS THE ORIGINAL BATTERY, WITH THE CORRECT POLARITY CONNECTIONS OBSERVED.DO NOT ATTEMPT TO RE-CHARGE THE OLD BATTERY OR RE-USE IT FOR ANY OTHER PURPOSE. IT SHOULD BE DISPOSED OF IN WASTE PRODUCTS DESTINED FOR BURIAL RATHER THAN INCINERATION." |
| ■ Using the Remote Controller | Aim the Remote Controller at the Remote Control Sensor on the Movie Camera and press the appropriate button.Distance to the Movie Camera: Less than 5 metres.Angle: Approximately 15' up, down, left and right from contro axis. | Remarks, etc.●The operative range described on the left is valid for using the Remote Controller indoors.When using it outdoors or under strong lights, it may not work correctly even within the left range.●Within a distance of about 1 metre, it is also possible to use the Remote Controller from the side ([MENU] Button side).Setting to be Made on the Movie Camera:Set [REMOTE] on the [OTHER FUNCTIONS] Sub-Menu to the desired Remote Controller Mode. | ||
Copying onto an S-VHS (or VHS) Cassette (Dubbing)
You can copy the picture and sound recorded on this Movie Camera onto an S-VHS or VHS cassette in a home video recorder.
![21 pin Acaptor [VIDEO IN] [AV OUT] [AV Cable] [S-VIDEO OUT] [S-VIDEO Cable] [S-VIDEO IN] [AUDIO IN]](/content/2026/06/1329835/images/eeb12b83f3eb3af683f300fa503c702fcc650fc4bf6c41a52a49744595634e43.jpg)
After making the connections shown above, perform the necessary operations.
Before copying, be sure to press the [OSD] Button on the Remote Controller (p. 80) so that no indications are visible. Otherwise, the displayed tape counter and function indications are also copied.
- If your VCR is not equipped with AV Input Sockets, the 21pin Adaptor (purchase separately) is necessary. Consult your dealer.
Movie Camera:
1 Set the [OFF/ON] Switch to [ON]. 2 Insert the recorded cassette. 3 Press the [MODE] Button until the [VCR] Lamp lights. 5 Press the Play Button [▶] to start playback. 8 Press the Stop Button [■] to stop playback.
VCR:
4 Insert an unrecorded cassette with intact erasure prevention tab. As some settings (external input, tape speed, etc.) on the VCR are necessary, please refer to your VCR's operating instructions. 6 Start recording. 7 Press the Pause or Stop Button to stop recording.
Using with Digital Video Equipment (Dubbing) (NV-DS150 only)

If you connect this Movie Camera with other Digital Video equipment (for example another Movie Camera of the same type) equipped with DV Input/Output Terminal (I.LINK) using the DV Cable VW-CD1E (optional), you can dub high-quality picture and sound in the digital format.
1 [Playback Unit] Insert the recorded cassette and set the Movie Camera to the VCR Mode. 2 [Recording Unit] Insert a cassette onto which you want to perform dubbing and set the Movie Camera to the VCR Mode. 3 [Playback Unit] Press the Play Button [▶] to start playback. 4 [Recording Unit] While pressing the [REC] Button, press the [PLAY] Button (both on the Remote Controller). Recording starts.

Stopping Dubbing
Press the Pause Button [■■] or the Stop Button [■] to stop recording. - Dubbing is automatically performed in the same audio recording mode as that of the cassette in the playback unit, regardless of the setting for [AUDIO REC] on the [RECORDING SETUP] Sub-Menu of the [CAMERA FUNCTIONS] Main-Menu of the recording unit. - The lower part of the monitor picture of the recording unit (the picture displayed on the LCD Monitor*, Viewfinder or TV) may be distorted, or the picture may roll up or down. However, this is not a malfunction and does not affect the picture being recorded. *LCD Monitor: NV-DS15, NV-DS150, NV-DS25 only - If the DV Cable is not connected, a black picture is recorded.

Copying with the Help of an Editing Controller
If you connect the Movie Camera to an Editing Controller equipped with 5-pin Edit Socket, this Movie Camera's playback functions can be controlled from the Editing Controller.
![graph TD A["User"] --> B["DC IN"] B --> C["Editor Controller (VW-EC500E)"] C --> D["To Edit Socket"] D --> E["21 pin Adaptor"] E --> F["[VIDEO IN"]] F --> G["[AUDIO IN"]] G --> H["[S-VIDEO OUT"]] C --> I["Editing Controller (VW-EC1E)"] I --> J["[EDITE"]] J --> K["[AV OUT"]] K --> L["[S-VIDEO OUT"]]](/content/2026/06/1329835/images/8652576b3dbd63d50511d8e39818364ea0056717688a41ceac1ec6cd9057d23e.jpg)
When Connecting the Editing Controller VW-EC500E (optional)
- When you perform editing with the NV-HS1000 VCR (optional) connected to this Movie Camera, first activate the Still Playback Mode on the Movie Camera and then start the actual editing operation.
- A VCR equipped with 5-pin Edit Socket is necessary.
- When you connect the VW-EC500E to the Movie Camera, an adjustment on the VW-EC500E is necessary. For the operation of the Editing Controller, refer to its operating instructions.
When Connecting the Editing Controller VW-EC1E (optional)
- When you perform editing with the NV-HS1000 VCR (optional) connected to this Movie Camera, first activate the Still Playback Mode on the Movie Camera and then start the actual editing operation.
- When you use the Editing Controller VW-EC1E, it is not necessary to connect it to the Edit Socket on the VCR, as the VCR's operation is performed via infrared remote control. Therefore, editing is also possible onto VCRs not equipped with an Edit Socket.
- For the operation of the Editing Controller, refer to its operating instructions.
When Editing with Time Code
Set [C.DISPLAY] on the [DISPLAY SETUP] Sub-Menu of the [VCR FUNCTIONS] Main-Menu to [TIMECODE] to make the Time Code appear. - When the Time Code is displayed, the Time Code Signal is output from the Edit Socket. - When the Counter Indication is displayed, the Linear Tape Counter Signal is output.
- If your VCR is not equipped with AV Input Sockets, the 21pin Adaptor (purchase separately) is necessary. Consult your dealer.
Using the Movie Camera with a Computer![graph TD A["Computer"] --> B["IR TRANSMITTER"] B --> C["Digital Still Picture"] C --> D["21 pin Adaptor"] D --> E["Monitor"] E --> F["AV OUT"] F --> G["S-VIDEO OUT"] G --> H["Interface Box"] G --> I["AC Adaptor"] J["Switch"] --> K["Analog unit"] L["Power Supply"] --> M["Ground"]](/content/2026/06/1329835/images/1f5d85643e661b9aa4899405be7ef1d1dc7c9d97760f17b28298b9330138d51c.jpg)
The Personal Computer Connection Kit VW-DTA9E (optional), or VW-DTA10B (optional) makes it possible to connect the Movie Camera to a computer and transmit still video images to it.
The above illustration shows the connections in case of using the VW-DTA10B. For the VW-DTA9E, refer to its operating instructions.
Computer System Requirements (VW-DTA10B)
DV STUDIO2 can be installed in a PC/AT compatible personal computer which can run Microsoft® Windows® 95/98.
Compatible machines:
Personal computer with 80486DX4 or higher CPU (Pentium TM or higher recommended) Graphic card:
True Color (approx. 16.7 million colours) recommended (operation also possible even with 256 colours)
Installed memory: 16 MB or more (32 MB or more recommended) Free hard disk space: At least 16 MB
Free hard disk space: At Disk drive: CD-ROM drive
Ports: RS-232C (D-sub 9 pin)/or USB Other requirements: Mouse
To connect the Movie Camera to the computer, use the special Interface Box ① contained in the Personal Computer Connection Kit.
- If your VCR is not equipped with AV Input Sockets, the 21pin Adaptor (purchase separately) is necessary. Consult your dealer.
- To use the DV STUDIO2 software via USB, a computer with Windows® 98 preinstalled is necessary. ●Pictures that you intend to import from cassette into computer applications should be recorded in the SP Mode.
- When recording, take care that the Time Code is uninterrupted from the beginning of the tape.
- For detailed explanations on the operating environment, connections and operations, refer to the Personal Computer Connection Kit's operating instructions.
- Windows® is a trademark of Microsoft Corporation U.S.A.
- All other company and product names in the operating instructions are trademarks of their respective corporations.
Using the Movie Camera with a Video Printer
If you connect the Movie Camera to a Video Printer, you can print still pictures from scenes recorded with the Movie Camera.
If you do not intend to use the Automatic Printing Function, connecting the Edit Cable is not necessary.
![Edit Cable VW-K5E (optional) [S-VIDEO IN] [EDIT] [EDITE] S-Video Cable [S-VIDEO OUT]](/content/2026/06/1329835/images/df2cd15fa6565f01d5337464827dd80392038a289251ccdff7d669ebaa429fd4.jpg)
Movie Camera:
1 Set the [OFF/ON] Switch to [ON] to turn the Movie Camera on. 2 Press the [MODE] Button until the [VCR] Lamp lights. 4 Press the Play Button [▶].
Video Printer:
3 Turn the Video Printer on. 5 Store the image in memory. 6 Start printing.
- For details about the operation of the Video Printer, read its operating instructions.
- Compatibility cannot be guaranteed for pictures recorded on other video equipment and played back on this Movie Camera, or vice versa.
■Using the Automatic Printing Function (Autoprint)
If you connect the Movie Camera to a Video Printer equipped with a 5-pin Edit Socket, you can use the Autoprint Function to automatically print all still pictures recorded in the Photoshop Mode.
Video Printer:
Movie Camera:
1 Turn the Video Printer on. 2 Make the necessary settings on the Video Printer according to the Input signal. 3 Set the [OFF/ON] Switch to [ON] to turn the Movie Camera on. 4 Press the [MODE] Button until the [VCR] Lamp lights. 5 Search for the first still picture from which you want to start printing with the Autoprint Function. If you want to print all still pictures recorded on the cassette, rewind the tape to its beginning. 6 Press the [MENU] Button. 7 Set [AUTO PRINT] on the [PLAYBACK FUNCTIONS] Sub-Menu to [YES]. Automatic printing starts. - If you want to stop the automatic printing in the middle, press the Stop Button [■] on the Movie Camera.
- When the cooling function of the Video Printer is activated and the printing speed slows down, automatic printing may stop. In this case, set [AUTO PRINT] on the [PLAYBACK FUNCTIONS] Sub-Menu on the [VCR FUNCTIONS] Main-Menu to [YES] again.
- If still pictures are recorded successively in the Photoshop Mode, some pictures may be skipped during printing.
- Before storing an image in memory on the Video Printer, press the [OSD] Button (p. 80) on the Remote Controller of the Movie Camera so that no indications appear in the picture. Otherwise, the Counter Indication and other function indications are also printed in the picture.
- The [PRINTER ERROR] Indication appears if the Movie Camera is not correctly connected to the Video Printer or when the ink cassette and/or the paper in the Video Printer are not loaded or used up.
- As index signals are not recorded with the still pictures recorded in the Continuous Photoshop Mode, automatic printing of these pictures is not possible.
- If you replace the ink cassette or paper during printing, the same picture may be printed twice.
- In the following cases, some pictures may be skipped when printing with the Auto Print Function.
- When you print still pictures recorded in the Photoshot Mode on a video camera of another brand.
- If you turn the Movie Camera on and off several times (3 times or more) between recording two still pictures in the Photoshot Mode.
- When you record a still picture in the Photoshot Mode on the same part of a cassette where a Photoshot picture was recorded before.
- When you select a different recording speed (SP/LP) between the recording of two still pictures in the Photoshot Mode.
- At the first Photoshot picture to be printed.
●A picture that is recorded very close to the beginning of the tape may not be printed.
●Pictures that you have edited or composed on a Video Printer (NV-MPD1B, NV-MPD5B, NV-MPD7B) can be recorded on the MultiMediaCard, however, they can no longer be played back on this Movie Camera. (NV-DS25 only)

Cautions for Use
Take care that no water enters the Movie Camera when using it in the rain and snow or on the beach.
●The Movie Camera and the cassette could become damaged. (It might not be required) - If seawater has accidentally splashed on the Movie Camera, moisten a soft cloth with tap water, wring it well and wipe the camera body carefully with it. Then thoroughly wipe it with a soft, dry cloth.
Keep the Movie Camera away from magnetized equipment (TVs, video games, etc.).
- If you use the Movie Camera on or near a TV, the electromagnetic radiation may cause picture and sound distortion.
- Strong magnetic fields generated by speakers and large motors may damage the recordings on the tape and distort the picture. ●The electromagnetic radiation from microprocessors can adversely influence the Movie Camera and cause picture and sound distortion.
- If the Movie Camera is adversely influenced by magnetized equipment and does not work correctly, turn the Movie Camera off, remove the Battery or disconnect the AC Adaptor and attach the Battery or connect the AC Adaptor again. Then turn the Movie Camera on.
Do not use the Movie Camera near a radio transmitter or high-voltage power line.
- If you record near a radio transmitter or high-voltage power line, the recorded picture and sound may be adversely influenced.
Do not use the Movie Camera for surveillance and other industrial applications.
- If the Movie Camera is used for a long time, the internal temperature may rise excessively and cause malfunction. - This Movie Camera is not designed for industrial use.
Take care that no sand or fine dust enters the Movie Camera when using it on a beach or in similar places.
- Sand and dust could damage the Movie Camera and cassette. (Be careful when inserting and removing the cassette.)
Do not spray insecticide or volatile agents on the Movie Camera.
- Such agents could deform the body and cause the surface coating to peel off. - Do not leave the Movie Camera in direct contact with rubber or plastic products for a long time.
Do not use benzine or thinner for cleaning.
- They could deform the body and cause the surface coating to peel off.
- Before cleaning, remove the Battery or unplug the AC Mains Lead from the AC mains socket.
- Wipe the Movie Camera with a soft, clean cloth. To remove persistent stains, wipe with a cloth moistened with mild detergent diluted with water, and then finish with a dry cloth.
- When storing or transporting the Movie Camera, place it in a softly padded bag or case to prevent the coating of the camera body from wearing off.
After use, always take out the cassette and remove the Battery or unplug the AC Mains Lead from the AC mains socket.
- If you leave the cassette in the Movie Camera, the tape can become loosened and damaged.
- If you leave the battery attached to the Movie Camera for a long time, the voltage level may drop very low so that the Battery cannot be used anymore even after charging.
Notes about the AC Adaptor
- If the temperature of the Battery is extremely high or extremely low, the [CHARGE] Lamp may keep on flashing and charging is not possible. After the Battery has cooled down or warmed up sufficiently, charging starts automatically. However, if the [CHARGE] Lamp continues to flash after the Battery has cooled down or warmed up sufficiently, some malfunction may have occurred in the Battery or in the AC Adaptor. In this case, consult with your dealer.
- When the battery is warm, charging takes longer than usual.
- When you use the AC Adaptor near a radio, the radio reception may be distorted. Keep the AC Adaptor more than 1 metre away from the radio.
- When the AC Adaptor is in use, it may emit a whirling sound. However, this is normal.
- After use, be sure to disconnect the AC Mains Lead from the AC mains socket. (If you leave it connected, a small amount of electricity is consumed.) ●Always keep the terminals of the AC Adaptor and the battery clean.
■Condensation
Determining Whether Condensation Has Formed Inside and Remedy for Condensation If the Condensation Indication flashes after you turn on the Movie Camera, condensation has formed inside the Movie Camera. In this case, the Movie Camera automatically switches off after approximately 1 minute. Remedy as follows:
1 Take out the cassette. All other functions do not work. Depending on the amount of condensation, it may not be possible to take out the cassette. In this case, wait 2–3 hours before taking out the cassette.
2 Leave the Cassette Compartment open and wait for 2–3 hours. The required time depends on the amount of condensation and the ambient temperature.
3 After 2–3 hours, turn the Movie Camera on and check if the Condensation Indication is not displayed. Even if the Condensation Indication is no longer displayed, wait 1 more hour for added safety before using the Movie Camera again.
Pay Attention to Condensation Even Before the Condensation Indication Appears.
- As condensation forms gradually, the Condensation Indication may not appear for the first 10–15 minutes after condensation has formed inside. - In an extremely cold place, the condensation could freeze and turn into frost. In such a case, it takes an additional 2–3 hours for the frost to first melt into condensation and then to be dissolved.
Remedy for a Fogged-up Lens Set the [OFF/ON] Switch to [OFF] and leave the Movie Camera in this condition for about 1 hour. When the lens has reached about the same temperature as its surroundings, it automatically clears up.
Periodic Inspection To ensure optimum picture quality, we recommend that you have worn-out parts such as video heads replaced after approximately 1000 hours of use. (However, this depends considerably on the conditions of use such as temperature, humidity and dust.)

Cautions for Use (Continued)
■Optimum Use of the Battery
Special Characteristics of the Battery
This Battery is a rechargeable lithium-ion battery. Its ability to generate electric energy is based on an internal chemical reaction. This reaction is easily influenced by ambient temperature and humidity, and the useful operation time that the Battery can provide becomes shorter at high and low temperatures. When used in extremely cold surroundings, the Battery may only be able to provide approximately 5 minutes of operation time. If the Battery becomes extremely hot, a protection function is activated and prevents the use of the Battery for some time.
After Use, Always Remove the Battery.
Be sure to remove the Battery from the Movie Camera. (If it is attached to the Movie Camera, a small amount of electric current is consumed even if the Movie Camera is turned off.) Leaving the Battery attached to the Movie Camera for a very long time could cause it to become excessively discharged, so that it cannot be used any more even after charging.
Keep the Battery's Terminals Clean.
Be careful that the terminals do not get plugged up with dust, dirt or other substances.
If you accidentally drop the Battery, confirm that the Battery itself and the terminals are not deformed. Attaching a deformed Battery to the Movie Camera or to the AC Adaptor could damage the Movie Camera or the AC Adaptor.
Discarding a Battery That Has Become
Unusable
●The usable life of the Battery is limited.
- Do not throw the Battery in a fire because it could explode.
■Precautions for Storage
Before Storing the Movie Camera, Take out the Cassette and Remove the Battery.
Store all equipment in a dry place where the temperature remains relatively constant. (Recommended temperature is 15°C–25°C and recommended relative humidity is 40%–60%.)
Movie Camera
- Wrap it with a soft cloth to prevent dust from
entering.
- Never leave the Movie Camera in places with high temperature.
Battery
- Extremely low or high temperature shortens the Battery life.
- Storing it in places with oily smoke and a lot of dust could cause the terminals to get rusty, and this can result in a malfunction.
- Do not allow metal objects (such as necklaces and hair pins) to touch the battery terminals. Short-circuiting may occur and generate heat, and touching it in this condition would inflict serious burns.
- Store the Battery in discharged condition. If you store the Battery for a long time, we recommend that you charge it once a year and completely use up the charge before storing it again in discharged condition.
Cassette
- Rewind the tape to its beginning before storing. Leaving the cassette with the tape stopped halfway for more than 6 months (depending on the storing condition) loosens the tape. Be sure to rewind it to the beginning.
- Put the cassette in its case to store it. Dust, direct sunlight (ultraviolet rays) and humidity could damage the tape. Dust contains hard mineral particles and cassettes with dust damage the video heads and other parts of the Movie Camera. Make it a habit to always put the cassette back into its case.
- Completely wind the tape forward and then rewind it once every half year. Leaving the cassette for more than a year without winding/rewinding it may deform the cassette because of stretching and shrinking of the tape due to changes in temperature and humidity. Also, the tape may stick together.
- Do not place the cassette near strongly magnetized objects or equipment.
- The tape surface is coated with microscopic magnetic particles and they record signals. Such objects as magnetic necklaces and toys have stronger magnetic force than commonly thought, and this could erase the recorded contents and cause noise in picture and sound.
MultiMediaCard (NV-DS25 only)
- While the MultiMediaCard is being read, do not remove it, turn off the power, or subject it to vibrations and shocks.
- Do not leave the MultiMediaCard in a place with high temperature, exposed to direct sunlight, or where electromagnetic waves and static electricity can be generated.
- Do not bend or drop the MultiMediaCard as this could damage the MultiMediaCard or the stored contents.
- After use, be sure to remove the
MultiMediaCard from the Movie Camera.
- After using the MultiMediaCard or when storing or carrying it, put it in the supplied MultiMediaCard Case.
- Do not touch the connector on the rear edge of the MultiMediaCard with your fingers and take care that no dirt, dust or water enters it.
■LCD Monitor/Viewfinder/Lens Hood
- In places where big changes in temperature occur, condensation may form on the LCD Monitor. Wipe it with a soft, dry cloth.
- If the Movie Camera is very cold when it is turned on, the picture on the LCD Monitor is initially a little darker than normally. However, as the internal temperature rises, the LCD Monitor regains its normal brightness.
- Extremely high precision technology is employed to produce the LCD Monitor screen featuring a total of approximately 112,000 pixels. The result is more than 99.99% effective pixels with a mere 0.01% of the pixels inactive or always lit. However, this is not a malfunction and does not affect the recorded picture.
Viewfinder
- Extremely high precision technology is employed to produce the Viewfinder screen featuring a total of approximately 113,000 pixels. The result is more than 99.99% active pixels, with a mere 0.01% of the pixels inactive or always lit. However, this is not a malfunction and does not affect the recorded picture.
- Do not leave the Viewfinder or the Lens aimed at the sun. This could seriously damage internal parts.
- If you use a large-capacity Battery (CGP-D320; optional) attached to the Movie Camera, viewing the picture in the Viewfinder from behind may not be practical. In this case, turn up the Viewfinder to an angle that allows comfortable viewing.
Lens Hood
- Never try to attach any conversion lens onto the front of the Lens Hood; it does not have a threaded mount on the front.
- When you want to attach the Tele Conversion Lens (VW-LT4314WE, optional), the Wide Conversion Lens (VW-LW4307WE, optional) or a filter of the Filter Kit (VW-LF43WE, optional), be sure to first remove the Lens Hood by turning it counterclockwise. If you attach a filter of the Filter Kit, you can attach the Lens Hood onto it.

- During recording with a filter or conversions lens attached, the four corners of the picture may become dark (vignetting effect), when you push the [W:T] Zoom Lever toward [W]. For details, please also read the operating instructions of the accessory being used.
Microphone Socket
- If you want to perform audio dubbing via an external microphone or audio equipment, connect it to the [MIC] Socket. In this case, the Movie Camera's built-in microphone is turned off.
■Repeat Playback
- If you keep the Playback Button [▶] pressed for more than 5 seconds, the Movie Camera switches over to the Repeat Playback Mode and the [R ▶] Indication appears. (To cancel the Repeat Playback Mode, set the [OFF/ON] Switch to [OFF].)
■Attaching the Shoulder Strap
Before you go recording outside, we recommend that you attach the Shoulder Strap to prevent the Movie Camera from dropping accidentally.
1 Pull the end of the Shoulder Strap through the Shoulder Strap Holder on the Movie Camera.

2 Fold the end of the Shoulder Strap back, pull it first through the loop and then the Shoulder Strap Length Adjuster. Pull it out more than 2 cm ① from the Shoulder Strap Length Adjuster so that cannot slip off.


Glossary
■ Focus
If you look at an object through a magnifying glass and move it closer or further away from your eye, you will reach a point where the object becomes clearly visible. Being focused or in focus means that the subject can be seen with optimum clarity and sharpness.
Human Eyes
Human eyes have lenses as well, and when we look at objects at different distances, the shape of these lenses changes automatically so that we can always see these objects clearly.
Movie Camera
The image of the subject enters the Movie Camera through the lens and is converted into an electric signal (video signal) for recording onto magnetic tape. The focus is adjusted either manually or automatically by moving a focusing lens.
Auto Focus Adjustment
The Auto Focus System automatically moves the internal focusing lens forward or backward and adjusts the focus so that the subject can be seen clearly.
The Auto Focus Adjustment has the following characteristics:
- It adjusts until the vertical contours of the subject are as sharp and clean as possible.
- It adjusts the focus on the subjects with strong contrast.
- It adjusts the focus on the subject in the centre of the Viewfinder. Unlike human eyes, the lens of the Movie Camera cannot instantaneously change the focus from a nearby to a distant subject and vice versa.
For the following subjects and recording situations, the Auto Focus system cannot provide precise adjustment. Use the Manual Focus Mode instead. (p. 28)
① Recording subjects with a part of it near the Movie Camera and another part far away from it
As the Auto Focus adjusts on the centre part of the image, it is often impossible to bring the nearby and distant parts of the subject into focus.
When you want to record a person with a distant mountain in the back, it is not possible to focus on both.
② Recording subjects behind glass covered with dirt or dust
As the focus is adjusted on the dirty glass, the subject behind the glass is out of focus. When recording a subject across a street on which cars are running, the focus may be adjusted on the cars.
③ Recording subjects in dark surroundings
As the amount of light information entering through the lens is greatly reduced, the Movie Camera cannot adjust the focus precisely.
④ Recording subjects surrounded by objects with shiny surfaces or much light reflection
As the Movie Camera adjusts the focus on objects with shiny surfaces or much light reflection, the subject may go out of focus. Therefore, when recording at a lake or the sea, evening scenes, fireworks, or under special types of lighting, the subject may be out of focus.
⑤ Recording fast-moving subjects
As the internal focusing lens is moved mechanically, it cannot follow fast-moving subjects without delay. Therefore, subjects like children running back and forth may temporarily go out of focus.
⑥ Subjects with weak contrast
As the Movie Camera adjusts the focus based on vertical contours in the picture, subjects with little contrast such as a white wall may be out of focus.
■ White Balance Adjustment
While most recording with a Movie Camera is probably done outdoors under sunlight, video recording is also done very often under artificial light sources, both indoors and outdoors. However, each of these light sources gives the subject slightly different colours.
Human Eyes
Human eyes can easily adjust to different kinds of lighting and see an object with the same colours even under different lighting.
Movie Camera
Unlike human eyes, the Movie Camera does not have the innate ability to adapt to changes in lighting, and they influence the colours being recorded. Therefore, depending on the light source, the picture would be recorded with a Danish or reddish tint. To minimise the influence of the lighting on the colours of the subject, an adjustment called White Balance Adjustment is necessary.
White Balance Adjustment
The White Balance Adjustment determines the colour of the light and adjusts the colours so that white remains pure white. As white is the basic colour of the entire colour spectrum, if white is reproduced correctly, the other colours are correct and natural, too.
Auto White Balance Adjustment
This Movie Camera stores the optimum settings for several common light sources in memory. The Movie Camera judges the recording situation by determining the tint of the light received through the lens and by the White Balance Sensor (p. 6), and it selects the setting for the most similar tint. This function is called Auto White Balance Adjustment.
However, as the white balance settings for only a dark light sources are stored in memory, the white balance is not correctly adjusted for other lighting conditions.
For the range of different types of lighting within which the Auto White Balance Function can provide precise adjustment, refer to the chart. For recording under lighting conditions outside this range, the Auto White Balance Function does not work correctly, and the recorded picture has a red or blue cast. However, the same also applies, if the subject is lit by more than one light source, even if these light sources are within this range.
■ Colour Temperature
Every light source has its own colour temperature measured in Kelvin (K). The higher the Kelvin value, the more bluish the light; the lower the value, the more reddish the light. The Kelvin value is related to the tint of the light, but not directly to its brightness.
The range ① indicated in the illustration below shows the light sources for which this Movie Camera can provide precise white balance adjustment and, therefore, natural colours in the recorded pictures, when using the Full Auto Mode. For light sources outside this range, adjust the white balance manually (p. 56). Also, additional lighting may be necessary.
① Control range of this Movie Camera's Auto White Balance Adjustment Mode ② Blue Sky ③ Cloudy sky (Rain) ④ TV screen ⑤ Sunlight ⑥ White fluorescent lamp ⑦ 2 hours after sunrise or before sunset ⑧ 1 hour after sunrise or before sunset ⑨ Halogen light bulb ⑩ Incandescent light bulb ⑪ Sunrise or sunset 12 Candlelight

Miscellaneous/ Care of Unit/Options
Glossary (Continued)
■ Digital Video System
In the digital video system, picture and sound are converted into digital signals and recorded onto the tape.
This completely digital recording allows recording and playback of picture and sound with minimum quality deterioration.
In addition, such data as Time code, Date and Time are also automatically recorded as digital signals.
Features
●Superior picture resolution ●Excellent signal-to-noise ratio - Stable pictures - Minimised quality deterioration in dubbing ●Minimised cross colour distortion - PCM digital sound ● No picture deterioration in LP Mode - 6.35 mm-wide tape - Compact cassette with long recording time ●Minimised quality deterioration in editing ●Time Code editing
Compatibility with S-VHS or VHS Cassettes
As this Movie Camera uses a digital method for recording picture and sound, there is no compatibility with conventional S-VHS or VHS video equipment using analog recording methods. In addition, the size and shape of the cassette are completely different.
Compatibility with Output Signals
As the video and audio signals output from the audio and video output sockets are analog—the same as in conventional video systems—you can connect this Movie Camera to your S-VHS or VHS VCR or TV for playback.
PCM Digital Sound
For recording of the sound, this Movie Camera offers the choice between two different PCM Audio Recording Modes.
●16 bit, 48 kHz, 2 channels
●12 bit, 32 kHz, 4 channels
The "16 bit, 48 kHz, 2 channels" Mode offers superior recording sound quality.
The "12 bit, 32 kHz, 4 channels" Mode lets you record the original sound in stereo on two channels and the dubbed sound in stereo on two separate channels.
Sub Code
The digital recording system offers the added capability of recording sub code containing various data.
The following data is recorded as sub code on this Movie Camera:
- Time code
- Recording date and time
- Index signals for locating still images recorded in the Photoshot Mode
- Index signals for locating the beginning of scenes marked with index signal


■ Time Code
Time Code signals are the data which indicate the time in hours, minutes, seconds and frames (25 frames/sec). Having this data included in the recording gives every single picture on the tape its own address.
- The Time Code is automatically recorded as part of the sub code with every recording you make.
- When you insert a new (previously unrecorded) cassette, the Time Code automatically starts from zero. If you insert a recorded cassette, the Time Code continues where the time code of the last previous scene stopped. (In this case, the zero indication [0h00m00s00f] may appear after inserting the cassette, but when the recording starts, the Time Code records from the previous value.)
- You cannot reset the Time Code to zero.
- In playback modes other than the Normal playback Mode, the Time Code may not be displayed (or not be correct).
- Unless the Time Code is recorded continuously from the beginning of the tape, precise editing may not be possible. To ensure that the Time Code is recorded without interruption, we recommend that you use the Camera Search Function (p. 40) or Blank Search Function (p. 40) before starting to record a new scene.

■ Memory Stop Function
The Memory Stop Function is convenient for the following operations.
Rewinding or fast-forwarding the tape to a desired position
1 Set [C.DISPLAY] on the [DISPLAY SETUP] Sub-Menu to [MEMORY]. 2 Reset the Tape Counter to zero at the tape position from which you want to play back later. (p. 19, 81) 3 Start playback or recording. 4 After playback or recording is finished: Press the [MODE] Button until the [VCR] Lamp lights. 5 Rewind the tape. The tape automatically stops approximately at the position at which you reset the counter to zero.
Stopping the editing automatically in the audio dubbing
1 Set [C.DISPLAY] on the [DISPLAY SETUP] Sub-Menu to [MEMORY]. 2 Reset the Tape Counter to zero at the tape position at which you want the editing to stop. 3 Play back a still picture at the point at which you want the audio dubbing to start. 4 Start the audio dubbing. (p. 64) The audio dubbing automatically stops approximately at the position at which you reset the counter to zero.

① Remaining Battery Power
As the remaining battery power decreases, the indication changes as follows:

When the battery is completely discharged, the ▲ (□) Indication flashes.
(When you are using the AC Adaptor, the Indication may appear, however, this has no meaning in this case.)
② Remaining Tape Time
The remaining tape time is displayed in minutes. (When it becomes less than 3 minutes, the indication starts to flash.)
- If a recording lasts less than 15 seconds, the Remaining Tape Time cannot be displayed correctly.
- The displayed remaining tape time may be shorter than the actual remaining tape time.
③ Cinema Mode (p. 32)
When recording the Cinema Mode, this indication is displayed.
Digital Zoom (p. 31)
When the Digital Zoom function is activated, this indication is displayed.
Digital Effects (p. 48, 60)
When a digital effect is activated, the corresponding indication is displayed.
Playback Zoom (p. 62)
When the Playback Zoom function is activated, this indication and the zoom magnification are displayed.
Recording Speed Mode (p. 13)
The selected Recording Speed Mode is displayed.
SP: Standard Mode
LP: Long-play Mode
Tape Counter, Time Code (p. 99)
The Tape Counter, Memory Stop Function or Time Code indication is displayed.
Zoom Magnification (p. 30)
When you push the [W/T] Zoom Lever up or down, the Zoom Magnification indication and the Zoom Gauge are displayed.
Recording Mode (p. 24, 28, 46, 56, 58)
AUTO: This appears when the Mode Selector Switch is set to [AUTO].
MNL: This appears when the Mode Selector Switch is set to [MNL].
Super Image Stabilizer (p. 32)
When the Super Image Stabilizer Function is activated, this indication is displayed.
Audio Recording Mode (p. 64)
12bit/16bit: The indication of the Audio Recording Mode that was selected for recording is displayed during playback.
Automatic Printing (p. 89)
AUTOPRINT: This indication is displayed when the Auto Print Function is being used.

⑦ Manual Focus (p. 28)
If you select the Manual Focus Mode, the [MF] Indication is displayed.
⑧ Programme AE Mode (p. 46)
The Programme AE Function offers the following settings:

⑨ Motion-Sensor-Controlled Recording Mode (p. 52, 54)
When the Motion-Sensor-Controlled Recording Mode is activated, this indication is displayed.
①
②
③
④
⑤
⑥

Tape Run Indications
REC: Recording (p. 24)
PAUSE: Recording Pause (p. 24)
STDBY: Motion Sensor Stand-by (p. 52, 54)
▷: Playback (p. 34)/Camera Search in forward direction (p. 40)
◀: Camera Search in reverse direction (p. 40)
II: Still playback (p. 36)
▷▷: Fast-forward/Cue playback (p. 34)
◀◀: Rewind/Review playback (p. 34)
▶/◀: Slow Playback in forward direction/ Slow Playback in reverse direction (p. 36)
▶/◀: Still Advance playback in forward direction / Still Advance playback in reverse direction (p. 36)
>>/<<: Index Search in forward direction / Index Search in reverse direction (p. 42)
CHK: Recording check (p. 26)
A.DUB ▶: Audio dubbing (p. 64)
A.DUB II: Audio dubbing pause (p. 64)
PHOTO: Recording in the Photoshot Mode (p. 30, 68)
BLANK: Blank Search (p. 40)
2×▶▶: Variable Speed Search (p. 35)
R ▶: Repeat playback (p. 93)
- When you record with the LCD Monitor facing forward using the Mirror Mode, none of the Tape Run Indications shown above appear. Only the Remaining Battery Power Indication, the Recording Indication [●] and the Recording Pause Indication [●■] appear. If the [!] Indication appears, turn the LCD Monitor so that it faces backward and then confirm the displayed warning message(s). (NV-DS15, NV-DS150, NV-DS25 only)
⑪ Shutter Speed (p. 58)
When you manually adjust the shutter speed, this indication is displayed.
⑫ Iris Value (F Number) (p. 58)
When you manually adjust the iris, this indication is displayed.
⑬ 0 Lux Night View Mode (p. 54)
When the 0 Lux Night View Mode is activated, this indication is displayed.
Changing the Counter Display Mode
By changing the setting for [C.DISPLAY] on the [DISPLAY SETUP] Sub-Menu, the Counter Display Mode can be changed in the order shown in the above illustrations ①–③.
① COUNTER: Tape Counter Indication
② MEMORY: Tape Counter Indication with activated Memory Stop Indication
③ TIMECODE: Time Code Indication
Changing the Display Mode
By changing the setting for [DISPLAY] on the [DISPLAY SETUP] Sub-Menu, the Counter Display Mode can be changed in the order shown in the above illustrations ④–⑥.
④ ALL: All Indications appear (initial setting)
⑤ PARTIAL: Only a few indications appear
⑥ OFF: The minimally required indications, such as the Operation Mode Indications and Warning/Alarm Indications, appear
Specifications
Digital Video Camera
Information for your safety
| Power Source: | DC 7.9/7.2 V |
| Power Consumption: | (NV-DS12) Recording: 4.2 W(NV-DS15, NV-DS150) Recording: 4.2 W (When using Viewfinder)4.9 W (When using LCD Monitor)(NV-DS25) Recording: 4.4 W (When using Viewfinder)5.1 W (When using LCD Monitor) |
| Recording Format: | Mini DV (Consumer-use Digital Video SD Format) |
| Tape Used: | 6.35 mm digital video tape |
| Recording/Playback Time: | SP: 80 min.; LP: 120 min. (with DVM80) |
| Video Recording System: | Digital Component |
| Television System: | CCIR: 625 lines, 50 fields PAL colour signal |
| Audio Recording System: | PCM Digital Recording: 16 bit (48 kHz/2ch), 12 bit (32 kHz/4ch) |
| Input Sensitivity/Impedance: | MIC IN (M3); -70 dBV, 5.6 Kohm |
| Image Sensor: | 1/4-inch CCD Image Sensor |
| Lens: | Auto Iris, F1.6, Focal Length; 2.9–58 mm, Macro (full range AF) |
| Outer Diameter: | 43 mm |
| Zoom: | 20:1 Power Zoom |
| Monitor: | (NV-DS15, NV-DS150, NV-DS25) 2.5-inch LCD |
| Viewfinder: | Colour Electronic Viewfinder |
| Microphone: | Stereo |
| Speaker: | (NV-DS15, NV-DS150, NV-DS25) 1 round speaker ∅ 28 mm |
| Standard Illumination: | 1,400 lx |
| Minimum Required Illumination: | 1 lx (Digital Gain-up Mode) |
| Video Output Level: | 1.0 Vp-p, 75 ohm |
| S-Video Output Level: | Y Output: 1.0 Vp-p, 75 ohm, C Output: 0.3 Vp-p, 75 ohm |
| Audio Output Level: | 316 mV, 600 ohm |
| Digital Still Picture: | Digital Still Picture Output, Control Signal Input/Output (Transfer rate: max. 115 kbps) |
| Digital Interface: | (NV-DS12, NV-DS15, NV-DS25) DV Output Terminal (i.LINK, 4-pin)(NV-DS150) DV Input/Output Terminal (i.LINK, 4-pin) |
| Dimensions: | Approx. 190 (W)×98 (H)×69 (D) mm |
| Weight: | (NV-DS12)Approx. 620 g (without Battery and DV cassette) Approx. 700 g (with VSB0418 and DVM60)(NV-DS15, NV-DS150)Approx. 680 g (without Battery and DV cassette) Approx. 760 g (with VSB0418 and DVM60)(NV-DS25)Approx. 690 g (without Battery and DV cassette) Approx. 770 g (with VSB0418 and DVM60) |
| Operating Temperature: | 0°C–40°C |
| Operating Humidity: | 10%–80% |
| Card Memory Functions (NV-DS25) | |
| Recording Media: | MultiMediaCard |
| Image Compression: | JPEG |
| AC Adaptor | Information for your safety |
| Power Source: | AC 100–240 V, 50/60 Hz |
| Power Consumption: | 20 W |
| DC Output: | DC 7.9 V, 9 W (Movie Camera Operation)DC 8.4 V, 1.2 A (Battery Charging) |
| Dimensions: | 70 (W)×45 (H)×116 (D) mm |
| Weight: | Approx. 165 g |
Weight and dimensions shown are approximate. Specifications are subject to change without notice.
Before Requesting Service (Problems & Solutions)
Power Supply
P1: The Movie Camera does not turn on.
S1: Is the Battery or the AC Adaptor connected correctly? Confirm the connection. (p. 8, 10)
P2: The Movie Camera has turned off automatically.
S2: If you leave the Movie Camera in the Recording Pause Mode for more than 6 minutes, it automatically switches off to protect the tape and to conserve battery power. (p. 25)
P3: The Movie Camera quickly turns off.
S3-1: Is the Battery discharged? When the Remaining Battery Power Indication is flashing or the [☐] Indication is displayed, the Battery is discharged. Charge the Battery or attach a fully charged Battery. (p. 10)
S3-2: Has condensation formed? If the Movie Camera is brought from a cold to a warm place, condensation may form inside. In this case, the Movie Camera automatically switches off and no operation can be performed except taking out the cassette. Wait until the Condensation Indication disappears. (p. 91)
P4: The Movie Camera is turned on but no functions operate.
S4: Press the [RESET] button on the Movie Camera with a pointed object. If this does not solve the problem, turn the power off for approximately one minute before turning the power on again. (If the above operation is performed when the [ACCESS] Lamp of the Card Slot is lighting for NV-DS25, the data of the MultiMediaCard may be damaged.)
Battery
P1: The Battery discharges quickly.
S1-1: Is the Battery fully charged? Charge it until the [CHARGE] Lamp on the AC Adaptor goes off. (p. 10)
S1-2: Are you using the Battery in a place where the temperature is very low? The ambient temperature greatly influences the Battery's performance. Its operation time becomes shorter in a cold place. (p. 92)
S1-3: Has the Battery reached the end of its service life? The service life of the Battery is limited. It depends on the way the Battery is used, but when the operation time even after proper charging is too short for normal use, the service life of the Battery has reached its end.
P2: The Battery cannot be charged.
S2: If the DC Input Lead is connected to the AC Adaptor, charging is not possible. Disconnect the DC Input Lead.
Normal Recording
P1: Recording cannot be started even though the Movie Camera is supplied with power and the cassette is inserted correctly.
S1-1: Is the erasure prevention slider of the cassette open? If it is open (set to [SAVE]), recording is not possible. (p. 13)
S1-2: Has the tape reached its end? Insert a new cassette. (p. 12)
S1-3: Is the Movie Camera turned on? (p. 14)
S1-4: Is the [CAMERA] Lamp lit? When the [CAMERA] Lamp is not lit, no recording functions can be operated. (p. 24)
S1-5: Is the Condensation Indication [☐] displayed? When condensation has formed, no functions except taking out the cassette can be operated. Wait until the Condensation Indication disappears. (p. 91)
Other Recording

P1: The picture in the Viewfinder suddenly stands still for a few seconds.
S1: Did you press the [PHOTO SHOT] Button? If you press the [PHOTO SHOT] Button, a still picture is recorded for approximately 7 seconds. After approximately 7 seconds, the Movie Camera switches back to the Recording Pause Mode. (p. 30)
P2: The Auto Focus Function does not work.
S2-1: Is the Manual Focus Mode selected? If you select the Auto Focus Mode, the focus is adjusted automatically. (p. 28)
S2-2: Is the subject or recording situation suitable for the Auto Focus Mode? The Auto Focus Function does not work correctly for some kinds of subjects and recording situations. In this case, use the Manual Focus Mode to adjust the focus. (p. 28)
Editing
P1: Audio dubbing cannot be performed.

S1-1: Is the erasure prevention slider of the cassette open? If it is open (set to [SAVE]), editing is not possible. (p. 13)
S1-2: Are you trying to edit parts of the tape recorded in the LP Mode? As the tracks recorded in the LP Mode are narrower than the heads, audio dubbing is not possible. (p. 13, 64)
Indications
P1: The Time Code becomes incorrect.
S1: In the Slow Motion Playback Mode in reverse direction, the counter of the Time Code Indication may not be stable, however, this is not a malfunction.
P2: The Remaining Tape Time Indication disappears.
S2: If you record a still picture in the Photoshot Mode, the Remaining Tape Time Indication may disappear temporarily. However, if you switch the Movie Camera over to the Normal Recording Mode, it appears again.
P3: The Remaining Tape Time Indication does not match the actual remaining tape time.
S3-1: If scenes of less than 15 seconds are recorded successively, the remaining tape time is not indicated correctly.
S-2: The Remaining Tape Time Indication may show a remaining tape time that is 2–3 minutes shorter than the actual remaining tape time.
Playback (Picture)
P1: No playback picture is reproduced when pressing the Play Button [▶].
S1: Is the [VCR] Lamp lit? When the [VCR] Lamp is not lit, no playback functions can be operated. (p. 34)
P2: Mosaic-like patterns appear in the picture during Cue, Review or Slow Motion Playback.
S2: This phenomenon is a characteristic of the digital video system. This is not a malfunction.
P3: The Movie Camera is correctly connected to a TV, but no playback picture is reproduced.
Did you select "Video Input" on the TV? Carefully read the operating instructions for your TV and select the channel that matches the input sockets used for connection.
P4: The playback picture is not reproduced clearly.
S4: Are the video heads on the Movie Camera dirty? If the video heads are dirty, the picture cannot be played back clearly. (p. 26)
Playback (Sound)
P1: No sound is played back from the Movie Camera's built-in speaker* or headphones.
S1: Is the volume set too low? During playback, keep the [PUSH] Dial pressed until the [VOLUME] Indication appears. Then turn the [PUSH] Dial to adjust the volume. (p. 35) *built-in speaker: NV-DS15, NV-DS150, NV-DS25 only
P2: Different sounds are played back together.
S2: [12bit AUDIO] on the [PLAYBACK FUNCTIONS] Sub-Menu of the [VCR FUNCTIONS] Main-Menu is set to [MIX]. Therefore, the original sound and the sound dubbed with audio dubbing are played back together. It is also possible to play them back individually. (p. 65)
P3: The original sound was erased by performing audio dubbing.
S3: If you perform audio dubbing on a recording made in the [16bit] Mode (p. 64), the original sound is erased. If you want to keep the original sound, be sure to select the [12bit] Mode for the original recording.
P4: No playback sound is reproduced.
S4-1: Is [12bit AUDIO] on the [PLAYBACK FUNCTIONS] Sub-Menu of the [VCR FUNCTIONS] Main-Menu set to [ST2] even though no audio dubbing has been performed on the cassette that you are playing back? When you play back a cassette onto which no audio dubbing was performed, [12bit AUDIO] must be set to [ST1]. (p. 65)
S4-2: Is the Variable Speed Search Function activated? Press the Play Button [▶] to cancel the Variable Speed Search Function (p. 35).
Before Requesting Service (Problems & Solutions) (Continued)
MultiMediaCard (NV-DS25 only)
P1: The recorded pictures are not beautiful.
S1: Was [PICTURE QUALITY] on the [CARD SETUP] Sub-Menu set to [ECONOMY]? If it was set to [ECONOMY] for recording, pictures with many fine details may contain mosaic-like patterns. Set [PICTURE QUALITY] to [NORMAL] or [FINE]. (p. 69)
P2: When a picture recorded on the MultiMediaCard is played back, the displayed picture quality indication is different from that originally set for the Card Photoshot recording. (p. 68)
S2: The picture quality selected for recording and that displayed for playback may be different. This is normal and not a malfunction.
P3: The played back Card Photoshot picture does not look normal.
S3: The image data may be damaged. To prevent the loss of picture data, we recommend that you make a backup copy on a cassette (p. 76) or on the computer (p. 78).
P4: The [×] Indication appears during playback.
S4: The picture was recorded in a different format or its data is damaged.
P5: Even after formatting, the MultiMediaCard cannot be used.
S5: The Movie Camera or the MultiMediaCard may be damaged. Consult with your dealer for servicing.
Others
P1: The cassette cannot be taken out.
S1-1: Is the Movie Camera supplied with power? Is the AC Adaptor correctly connected or the Battery correctly attached? To remove the cassette, the Movie Camera must be supplied with power, however, it is not necessary to set the [OFF/ON] Switch to [ON].
S1-2: The attached Battery may be discharged. Replace it with a charged Battery.
P2: No operation except taking out the cassette can be performed.
S2: Is the Condensation Indication [♠] displayed? If condensation has formed inside the Movie Camera, it automatically switches off and prevents all operations except taking out the cassette. Wait until the Condensation Indication disappears. (p. 91)
P3: The Remote Controller does not work.
S3-1: Is the button-type battery in the Remote Controller exhausted? If the Remote Controller does not work when you use it near the Remote Controller Sensor on the Movie Camera, the button-type battery is exhausted. Replace it with a new battery. (p. 82)
S3-2: Is the correct Remote Controller Mode selected? If the Movie Camera's setting for [REMOTE] on the [OTHER FUNCTIONS] Sub-Menu and the mode selected on the Remote Controller are not matched, operating the Movie Camera with the Remote Controller is not possible and the [REMOTE] Indication is displayed. (p. 83)
Optional Accessories
AC AdaptorVW-AD9B | Battery PackCGR-D120(800 mAh) | Battery PackCGP-D210(1400 mAh) | Battery PackCGR-D220(1600 mAh) | Battery PackCGP-D320(2800 mAh) |
Battery PackCGR-D815(5300 mAh) | Car BatteryChargerVW-KBD2E | 5-Pin SynchroCordVW-K10E | Wide ConversionLensVW-LW4307WE | Tele ConversionLensVW-LT4314WE |
Filter KitVW-LF43WE | Stereo ZoomMicrophoneVW-VMS1E | Stereo MicrophoneVW-VMS2E | Shoe AdaptorVW-SK11E | TripodVZ-CT55E |
Tripod withRemote ControllerVZ-CTR1E | Editing ControllerVW-EC500E | Editing ControllerVW-EC1E | Video TitlerVW-VT1B | Personal ComputerConnection KitVW-DTA9E |
Personal ComputerConnection KitVW-DTA10B | Edit CableVW-K5E | DV CableVW-CD1E | MultiMediaCardExternal DriveVW-RWM1E (NV-DS25 only) (NV-DS25 only) | PC Card AdaptorVW-MAP1E (NV-DS25 only) (NV-DS25 only) |
Floppy DiskAdaptorVW-MAF1E (NV-DS25 only) (NV-DS25 only) | MultiMediaCardVW-MMC8EVW-MMC8E-K (NV-DS25 only) (NV-DS25 only) | MultiMediaCardVW-MMC16EVW-MMC16E-K (NV-DS25 only) (NV-DS25 only) | Digital VideoHead CleanerVFK1451 |
Notes:
- Consult your dealer for details of other accessories not listed here.
- Some of the accessories listed above may not be available in some countries.
Digital Video Head Cleaner
- If you wish to purchase this Digital Video Head Cleaner, please contact your Panasonic dealer to obtain it from the Panasonic spare parts department.
Index

AC Adaptor (p. 8, 10, 90)
Audio Dubbing (p. 64)
Auto Focus (p. 94)
Automatic Printing Function (p. 89)
Automatic White Balance Adjustment (p. 95)
B
Backlight (p. 26)
Black & White Mode (p. 48)
Blank Search (p. 40)
F/G
Fade (p. 44)
FF (Fast-Forward) (p. 34)
F Number (p. 58)
Formatting the MultiMediaCard (p. 74)
Gain-up Mode (p. 48)
C
Camera Search (p. 40)
Card Photoshot (p. 68)
Card Playback (p. 70)
Charging the Battery (p. 10)
Cinema Mode (p. 32)
Colour Temperature (p. 95)
Condensation (p. 91)
Continuous Photoshot (p. 31)
Cue Playback (p. 34)
D
Date/Time Indication (p. 35)
Date/Time Setting (p. 23)
Digital Effects (p. 48, 60)
Digital Still Picture (p. 31)
Digital Zoom (p. 31)
Dubbing (p. 84, 85)
H/I
Hyper Check Function (p. 35)
Index Signals (p. 43)
Iris (p. 58)
J
Jog Playback (p. 37)
L
LCD Monitor (p. 14, 22, 93)
Low Light Mode (p. 46)


E
Editing Controller (p. 86)
Erasure Prevention Slider (p. 13)
M
Macro Close-up Function (p. 31)
Manual Focus (p. 28)
Memory Stop Function (p. 97)
Menu Screen (p. 16)
Microphone (p. 93)
Mirror Mode (p. 48, 60)
Mix Mode (p. 48, 50, 60)
Mosaic Mode (p. 48, 60)
MultiMediaCard (p. 66)
Multi-Picture Mode (p. 70)
N/O
Negative Mode (p. 48, 60)
Optional Accessories (p. 105)
T
Time Code (p. 97)
Trailing Effect Mode (p. 48, 60)
P
PCM Digital Sound (p. 96)
Photoshot (p. 30, 68)
Picture Search Mode (p. 71)
Figure Transmission (p. 76)
Mayback Digital Effect Function (p. 60)
Playback Zoom (p. 62)
Portrait Mode (p. 46)
Programme AE (p. 46)
V
Variable Speed Search Function (p. 35)
Video Head Clogging (p. 26)
Video Printer (p. 88)
Viewfinder (p. 14, 22, 93)
R
Recording Check (p. 26)
Recording Pause Mode (p. 24)
Rec Speed (p. 13)
Remaining Tape Time (p. 98)
Remote Controller (p. 80, 82)
Review Playback (p. 34)
W
White Balance (p. 56)
Wipe Mode (p. 48, 50, 60)
S
March Lock Function (p. 35)
fshoot (p. 29)
Sepia Mode (p. 48, 60)
Shutter Speed (p. 58)
Slow Motion playback (p. 36)
Solarisation Mode (p. 48, 60)
Sound Volume (p. 35)
SP/LP Mode (p. 13)
Sports Mode (p. 46)
Spotlight Mode (p. 46)
Still Advance Playback (p. 36)
Strobe Mode (p. 48, 60)
Sub Code (p. 96)
Super Image Stabilizer (p. 32, 48)
Surf & Snow Mode (p. 46)
Z
0 Lux Night View Function (p. 54)
Zoom (p. 30, 56)
Zoom Microphone Function (p. 31)
- DEAR CUSTOMER
- INFORMATION FOR YOUR SAFETY
- MOVIE CAMERA
- AC ADAPTOR
- CAUTION FOR AC MAINS LEAD
- IMPORTANT
- BEFORE USE
- HOW TO REPLACE THE FUSE
- OPERATING INSTRUCTIONS
- WARNING
- CAREFULLY OBSERVE COPYRIGHT LAWS
- CONTENTS—BASIC OPERATIONS
- CONTENTS—ADVANCED OPERATIONS
- CONTENTS—EDITING
- CONTENTS—MISCELLANEOUS/CARE OF UNIT/OPTIONS
- CHECK LIST FOR THE STANDARD ACCESSORIES
- CONTROLS AND FUNCTIONS
- CONTROLS AND FUNCTIONS (CONTINUED)
- ●LP MODE
- ATTACHING THE LENS CAP
- MENU FUNCTIONS
- CAMERA MODE MAIN-MENU [CAMERA FUNCTIONS]
- MENU FUNCTIONS (CONTINUED)
- ADJUSTING THE LCD MONITOR/VIEWFINDER
- LCD BRIGHTNESS [LCD BRIGHTNESS]
- LCD COLOUR LEVEL [LCD COLOUR LEVEL]
- VIEWFINDER BRIGHTNESS [EVF BRIGHTNESS]
- SETTING THE DATE AND TIME
- VIDEO HEAD CLOGGING AND REMEDY
- CAUSES OF DIRTY VIDEO HEADS
- USING THE MINI-DV FORMAT DIGITAL VIDEO HEAD CLEANER (VFK1451)
- NOTES
- MIRROR MODE FOR THE PICTURE ON THE LCD MONITOR (NV-DS15, NV-DS150, NV-DS25 ONLY)
- USING THE ZOOM MICROPHONE FUNCTION
- DIGITAL STILL PICTURE
- RECORDING EXTRA CLOSE-UP SHOTS OF SMALL SUBJECTS (MACRO CLOSE-UP FUNCTION)
- WHEN THE ZOOM MAGNIFICATION IS 1×, THE MOVIE CAMERA CAN FOCUS ON SUBJECTS DOWN TO A DISTANCE OF APPROXIMATELY 5 MM BETWEEN LENS AND SUBJECT. THIS ALLOWS RECORDING VERY SMALL SUBJECTS SUCH AS INSECTS
- ENLARGING YOUR SUBJECT OR WIDENING THE RECORDING ANGLE (ZOOMING IN/OUT)
- TO RECORD A WIDER VIEW (ZOOMING-OUT)
- RECORDING STILL PICTURES ON THE CASSETTE (PHOTOSHOT)
- ENLARGING YOUR SUBJECTS EVEN MORE
- (DIGITAL ZOOMING)
- CONTINUOUS PHOTOSHOT
- SEARCH LOCK FUNCTION
- HYPER CHECK FUNCTION
- MAKING THE DATE/TIME
- INDICATION APPEAR
- USING THE JOG DIAL (JOG PLAYBACK)
- INDEX SEARCH
- ① PHOTOSHOT INDEX SIGNAL
- ② SCENE INDEX SIGNAL
- IN THE FOLLOWING RECORDING SITUATIONS, THE MOTION SENSOR MAY NOT WORK CORRECTLY
- THE FOLLOWING FUNCTIONS DO NOT ACTIVATE IN THE MOTION SENSOR FUNCTION STAND-BY MODE
- REMARKS, ETC
- NOTES FOR RECORDING IN DARK PLACES WITHOUT ANY ILLUMINATION
- NOTE FOR USING THE 0 LUX NIGHT VIEW FUNCTION TOGETHER WITH THE MOTION-SENSOR-CONTROLLED RECORDING FUNCTION
- NOTES ABOUT ADJUSTING THE SHUTTER SPEED MANUALLY
- NOTES ABOUT ADJUSTING THE IRIS (F NUMBER) MANUALLY
- RANGE OF IRIS ADJUSTMENT
- QUALITY OF CARD PHOTOSHOT PICTURES
- USING THE PICTURES RECORDED ON THE MULTIMEDIACARD ON THE COMPUTER (NV-DS25 ONLY)
- STILL PICTURES RECORDED ON THE MULTIMEDIACARD
- ① WARNING/ALARM
- ② CARD PLAYBACK PICTURE INDICATIONS
- ③ CARD PHOTOSHOT PICTURE INDICATIONS
- REMOTE CONTROLLER
- BUTTONS ON THE REMOTE CONTROLLER
- CONTROLS FOR PLAYBACK
- ④CONTROLS FOR PLAYBACK (CONTINUED)
- ⑤PLAYBACK DIGITAL EFFECTS
- CONTROLS FOR MENU SETTINGS AND PLAYBACK ZOOM AND VARIABLE SPEED SEARCH
- ⑦CONTROLS FOR RECORDING, ZOOM/SOUND
- SELECTING THE REMOTE CONTROLLER MODE
- COPYING ONTO AN S-VHS (OR VHS) CASSETTE (DUBBING)
- VCR
- USING WITH DIGITAL VIDEO EQUIPMENT (DUBBING) (NV-DS150 ONLY)
- STOPPING DUBBING
- COPYING WITH THE HELP OF AN EDITING CONTROLLER
- WHEN CONNECTING THE EDITING CONTROLLER VW-EC500E (OPTIONAL)
- WHEN CONNECTING THE EDITING CONTROLLER VW-EC1E (OPTIONAL)
- WHEN EDITING WITH TIME CODE
- THE ABOVE ILLUSTRATION SHOWS THE CONNECTIONS IN CASE OF USING THE VW-DTA10B. FOR THE VW-DTA9E, REFER TO ITS OPERATING INSTRUCTIONS
- COMPUTER SYSTEM REQUIREMENTS (VW-DTA10B)
- COMPATIBLE MACHINES
- USING THE MOVIE CAMERA WITH A VIDEO PRINTER
- VIDEO PRINTER
- USING THE AUTOMATIC PRINTING FUNCTION (AUTOPRINT)
- CAUTIONS FOR USE
- CONDENSATION
- CAUTIONS FOR USE (CONTINUED)
- OPTIMUM USE OF THE BATTERY
- PRECAUTIONS FOR STORAGE
- BATTERY
- CASSETTE
- LCD MONITOR/VIEWFINDER/LENS HOOD
- VIEWFINDER
- LENS HOOD
- REPEAT PLAYBACK
- ATTACHING THE SHOULDER STRAP
- GLOSSARY
- FOCUS
- HUMAN EYES
- AUTO FOCUS ADJUSTMENT
- WHITE BALANCE ADJUSTMENT
- AUTO WHITE BALANCE ADJUSTMENT
- COLOUR TEMPERATURE
- GLOSSARY (CONTINUED)
- DIGITAL VIDEO SYSTEM
- FEATURES
- COMPATIBILITY WITH S-VHS OR VHS CASSETTES
- COMPATIBILITY WITH OUTPUT SIGNALS
- PCM DIGITAL SOUND
- SUB CODE
- TIME CODE
- MEMORY STOP FUNCTION
- ① REMAINING BATTERY POWER
- ② REMAINING TAPE TIME
- ③ CINEMA MODE (P. 32)
- DIGITAL ZOOM (P. 31)
- DIGITAL EFFECTS (P. 48, 60)
- PLAYBACK ZOOM (P. 62)
- RECORDING SPEED MODE (P. 13)
- TAPE COUNTER, TIME CODE (P. 99)
- ZOOM MAGNIFICATION (P. 30)
- RECORDING MODE (P. 24, 28, 46, 56, 58)
- SUPER IMAGE STABILIZER (P. 32)
- AUDIO RECORDING MODE (P. 64)
- AUTOMATIC PRINTING (P. 89)
- ⑦ MANUAL FOCUS (P. 28)
- ⑧ PROGRAMME AE MODE (P. 46)
- ⑨ MOTION-SENSOR-CONTROLLED RECORDING MODE (P. 52, 54)
- TAPE RUN INDICATIONS
- ⑪ SHUTTER SPEED (P. 58)
- ⑫ IRIS VALUE (F NUMBER) (P. 58)
- ⑬ 0 LUX NIGHT VIEW MODE (P. 54)
- CHANGING THE COUNTER DISPLAY MODE
- CHANGING THE DISPLAY MODE
- SPECIFICATIONS
- BEFORE REQUESTING SERVICE (PROBLEMS & SOLUTIONS)
- POWER SUPPLY
- NORMAL RECORDING
- OTHER RECORDING
- EDITING
- INDICATIONS
- PLAYBACK (PICTURE)
- PLAYBACK (SOUND)
- BEFORE REQUESTING SERVICE (PROBLEMS & SOLUTIONS) (CONTINUED)
- MULTIMEDIACARD (NV-DS25 ONLY)
- OTHERS
- DIGITAL VIDEO HEAD CLEANER
- INDEX
- B
- F/G
- C
- D
- H/I
- J
- L
- E
- M
- N/O
- T
- P
- V
- R
- W
- S
- Z
Brand : PANASONIC
Model : NV-DS25B
Category : VCR