
NV-VHD1B - VCR PANASONIC - Free user manual and instructions
Find the device manual for free NV-VHD1B PANASONIC in PDF.
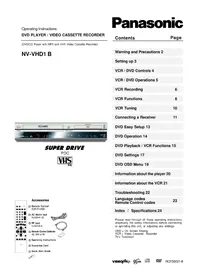


| Product Type | VCR (Video Cassette Recorder) |
| Brand | Panasonic |
| Model | NV-VHD1B |
| Video System | VHS (Video Home System) |
| Video Format | PAL (standard for European models) |
| Recording Time | Up to 3 hours (SP), 6 hours (LP) with E-180 tape |
| Audio System | Hi-Fi stereo (likely) |
| TV Tuner | Built-in analog tuner |
| Timer Recording | Yes, with on-screen programming |
| Input/Output | Composite video and audio (RCA), RF antenna in/out |
| Playback Features | Still, slow motion, frame advance, search |
| Dimensions (W x H x D) | 430 x 95 x 320 mm |
| Weight | 4.5 kg |
| Power Consumption | 22 W |
| Power Supply | AC 220-240 V, 50/60 Hz |
| Remote Control | Infrared remote included |
| Maintenance | Clean tape heads regularly with cleaning cassette |
| Safety | Do not expose to moisture; unplug during storms |
| Spare Parts | Contact Panasonic support or authorized service centers |
| Repairability | Serviceable by qualified technicians; user-replaceable fuses |
Frequently Asked Questions - NV-VHD1B PANASONIC
User questions about NV-VHD1B PANASONIC
0 question about this device. Answer the ones you know or ask your own.
Ask a new question about this device
Download the instructions for your VCR in PDF format for free! Find your manual NV-VHD1B - PANASONIC and take your electronic device back in hand. On this page are published all the documents necessary for the use of your device. NV-VHD1B by PANASONIC.
USER MANUAL NV-VHD1B PANASONIC
(DVD/CD Player with MP3 and Hi-Fi Video Cassette Recorder)
NV-VHD1 B

SUPER DRIVE
PDC

Accessories
□ Remote Control EUR7615KB0 □ AC Mains lead RJA0044-3C □ RF lead VJA0728-A ☐ Remote Control Batteries AA, UM3 or R6 □ Operating Instructions □ Guarantee Card □ Quick Start Guide


Panasonic
Contents
Page
Warning and Precautions 2
Setting up 3
VCR / DVD Controls 4
VCR / DVD Operations 5
VCR Recording 6
VCR Functions 8
VCR Tuning 10
Connecting a Receiver 11
DVD Easy Setup 13
DVD Operation 14
DVD Playback / VCR Functions 15
DVD Settings 17
DVD OSD Menu 19
Information about the player 20
Information about the VCR 21
Troubleshooting 22
Language codes Remote Control codes 23
Index / Specifications 24
Please read through all these operating instructions (especially the safety information) before connecting or operating this unit, or adjusting any settings.
OSD = On Screen Display VCR = Video Cassette Recorder TV = Television
Warnings and Precautions
| DANGER | - VISIBLE AND INVISIBLE LASER RADIATION WHEN OPEN AVOID DIRECT EXPOSURE TO BEAM. (FDA 21 CFR) |
| CAUTION | - VISIBLE AND INVISIBLE LASER RADIATION WHEN OPEN AVOID EXPOSURE TO BEAM. (IEC60825-1) |
| ATTENTION | - RAYONNEMENT LASER VISIBLE ET INVISIBLE EN CAS D'OUVERTURE EXPOSITION DANGEREUSE AU FAISCEAU. |
| ADVARSEL | - SYNILG OG USYNILG LASERSTRALING VED ÄBNING UNOGA UDS/ETTELESE FOR STRALING. |
| VAROI | - AVATTRESSA OLET ALTINA NÄKYVÄÄ YA NÄKYMÄTÖN LASERSTRATILE, ÄLA KATSYLLE SÄLTÄSSEESEN |
| VARNING | - SYNILG OG OSYNILG LASERSTRALING NÄR DENNA DEL AROPHMAD, BETRAKTA E STRALLEN. |
| ADVARSEL | - SYNILG OG USYNILG LASERSTRALING NÄR DEKSEL APNES. UNNÄGÄ EXPONERING FOR STRALEN. |
| VORSICHT | - SICHTBARE UND INSCHTBARE LASERSTRALUNG WENN ABDECKUNG GEÖFFNET, NCHT DEM STRAH, AUSSETZEN. |
| 注意 | - 打开时有可见及不可见激光辐射,避免激光束照射。注意 - ここを開くと可視不可視のレーザー光が出来ます。ピーレム連見取り! 離れにしていくってかい。ROLS0233 |
Inside of product
Inside of product
![graph TD A["CLASS 1 LASER PRODUCT"] --> B["back of product"] B --> C["Process Step 1"] C --> D["Process Step 2"] D --> E["Process Step 3"] E --> F["Process Step 4"] F --> G["Process Step 5"] G --> H["Process Step 6"] H --> I["Process Step 7"] I --> J["Process Step 8"] J --> K["Process Step 9"] K -->…](/content/2026/06/1329806/images/665514a2004ee115dd3329928ca546dcdcf6e84c985a92505ddd0317f48c2fe7.jpg)

How to replace the fuse
Confirm the AC mains plug is fitted and follow the instructions below. Illustrations may differ from the actual AC mains plug.
- Open the fuse cover with a screwdriver.

- Replace the fuse and attach the fuse cover.

• This unit is intended for use in moderate climates. - Please observe copyright laws when recording sound tracks and film.
Caution!
- Do not install or place this unit in a bookcase, built-in cabinet, or in another confined space. Ensure the unit is well ventilated. To prevent risk of electric shock or fire hazard due to overheating, ensure that curtains and any other materials do not obstruct the ventilation vents.
- Do not obstruct the unit's ventilation openings with newspapers, tablecloths, curtains, and similar items.
- Do not place sources of naked flames, such as lighted candles, on the unit.
- Dispose of batteries in an environmentally friendly manner. Batteries, packaging, and old equipment should not be disposed of as domestic waste, but in accordance with the applicable regulations.
- Do not remove the outer cover to prevent electric shock. There are no user-serviceable parts inside. Refer all servicing to qualified service personnel.
- Only transport and set up this equipment in a horizontal position and do not place anything heavy on it.
- Only connect leads when all the parts of this equipment, the TV, and other equipment are switched off.
- Only clean the outside of this equipment, using a soft cloth and no cleaning fluid. • The mains lead must not be used for other equipment.
- Do not connect or handle the equipment with wet hands.
- In case of rapid temperature changes, do not operate this equipment for a minimum of 1 hour.
- Do not place the unit on amplifiers or equipment that may become hot. The heat can damage the unit.
CAUTION!
THIS PRODUCT UTILIZES A LASER. USE OF CONTROLS OR ADJUSTMENTS OR PERFORMANCE OF PROCEDURES OTHER THAN THOSE SPECIFIED HEREIN MAY RESULT IN HAZARDOUS RADIATION EXPOSURE. DO NOT OPEN COVERS AND DO NOT REPAIR YOURSELF. REFER SERVICING TO QUALIFIED PERSONNEL.
Warning!
To reduce the risk of fire, electric shock or product damage, do not expose this equipment to rain, moisture, dripping or splashing and that no objects filled with liquids, such as vases, shall be placed on the equipment.
This equipment, the remote control, the mains lead must not be used if it is damaged. Protect them from:
- Direct sunlight, heat, cold, rain, wetness, oil, soiling and dust • Insertion of fingers or objects
- Shock, vibrations and mechanical stress (do not bend the mains lead) • Electric and magnetic fields • Lightning strikes during thunderstorms (disconnect mains and aerial plugs)
Instructions for inserting remote control batteries:
- The lifetime of the battery is about 1 year, depending on the frequency of use.
- Do not use one old and one new battery, or different types of batteries together (e.g. one alkali and one zinc-carbon battery).
- Only insert batteries which contain no toxic materials (such as lead, cadmium, mercury).
- Do not use rechargeable type batteries.
- If the remote control will not be used for a long time, remove the batteries and store them in a cool and dry place.
- Do not heat or short-circuit the batteries.
- Remove spent batteries immediately and replace them with type AA, UM3 or R6.
- Observe the and polarities when replacing the batteries.
Caution for AC Mains Lead (For United Kingdom)
For your safety, please read the following text carefully.
This appliance is supplied with a moulded three pin mains plug for your safety and convenience.
A 5-ampere fuse is fitted in this plug. Should the fuse need to be replaced please ensure that the replacement fuse has a rating of 5-ampere and that is approved by ASTA or BSI to BS1362.
Check for the ASTA mark or the BSI mark on the body of the fuse.
If the plug contains a removable fuse cover you must ensure that it is refitted when the fuse is replaced. If you lose the fuse cover the plug must not be used until a replacement cover is obtained. A replacement fuse cover can be purchased from your local dealer.
CAUTION!
IF THE FITTED MOULDED PLUG IS UNSUITABLE FOR THE SOCKET OUTLET IN YOUR HOME THEN THE FUSE SHOULD BE REMOVED AND THE PLUG CUT OFF AND DISPOSED OF SAFELY. THERE IS A DANGER OF SEVERE ELECTRICAL SHOCK IF THE CUT OFF PLUG IS INSERTED INTO ANY 13-AMPERE SOCKET.
If a new plug is to be fitted please observe the wiring code as stated below. If in any doubt please consult a qualified electrician.
IMPORTANT
The wires in this mains lead are colored in accordance with the following code: Blue: Neutral, Brown: Live. As these colors may not correspond with the colored markings identifying the terminals in your plug, proceed as follows: The wire which is colored Blue must be connected to the terminal which is marked with the letter N or colored Black or Blue. The wire which is colored Brown must be connected to the terminal which is marked with the letter L or colored Brown or Red.
WARNING: DO NOT CONNECT EITHER WIRE TO THE EARTH TERMINAL WHICH IS MARKED WITH THE LETTER E, BY THE EARTH SYMBOL OR COLOURED GREEN OR GREEN/YELLOW. THIS PLUG IS
NOT WATERPROOF - KEEP DRY.
Before use: Remove the connector cover.

VCR display
On Screen Display


| Main menu | Panasonic | VCR |
| Timer recording | ||
| Tuning | ||
| Clock setting | ||
| Other settings | ||
| Tuning | Panasonic | VCR |
| Manual | ||
| Auto-Setup Restart | ||
| Download | ||
| Shipping condition |

On Screen Display

Set up the connections shown here and connect the mains lead (supplied) to your AC IN.
- The RF (radio frequency) coaxial lead must be connected for TV reception, even if the video recorder is already connected with a 21-pin scart lead.
- For more information about the remote control buttons and cursors see pages 4-5.
Automatic Setting without Q Link
- Set the remote control to VCR.
- Switch on the unit, all the TV stations which can be received will be tuned automatically.
- Adjust the TV to the RF channel which is displayed on the VCR display, after automatic tuning is finished. Please also read the operating instructions for your TV.
- If the menu [Clock setting] appears, use the cursor buttons ▼◀▶ or the numeric buttons on the remote control to set the [Time] and [Date] manually.
- To end this procedure, press [ENTER].
- To set the [Owner ID], use the cursor buttons ▼◀▶ or the numeric buttons and press [ENTER] on the remote control to fill in the information.
- Press [EXIT] to make the On Screen Display disappear.
Note: If the [Auto-Setup] or [Owner ID] menu does not appear after switching on the unit, you can restart the automatic setting and set the [Owner ID] manually; see page 9.
An incorrect setting of time or date (observe summer- and wintertime) will influence the timer recording.

Automatic Setting with Q Link
If your TV is equipped with Q Link or with a similar function from other manufacturers (see note), the TV programme positions can be downloaded with a fully-wired 21-pin scart lead (not supplied). The programme positions must be tuned on the TV first.
- Connect the scart lead.
- Set the AV channel of the TV.
- Set the remote control to VCR/DVD.
- Switch on the unit.
- Downloading of the TV data starts.
- Set the [Time], [Date] and [Owner ID], see Automatic Setting without Q Link.
- When the channel indication stops flashing on the VCR display, the downloading is complete.
Note about Link: The following systems from other manufacturers have a similar function to Q Link from Panasonic. List of registered trademarks: Q Link (Panasonic), DATA LOGIC (Metz), Easy Link (Philips), Megalogic (Grundig), SMARTLINK (Sony)
Manual download start
- Set the AV channel of the TV.
- Set the remote control to VCR DVD
- Press |MENU|
- Select [Tuning]
• Access by pressing IENTERI
- Select [Download]
- Press |ENTERI
- Confirm by pressing IENTERI
- When the channel indication stops flashing on the VCR display, the downloading is complete.
Connect the TV only with a RF Coaxial lead
You must ensure that the video output channel is adjusted to the input channel of the TV. For this purpose, please also read the operating instructions for your TV.
- Set the remote control to VCR DVD
- Switch on the uni
- Press MENU for about 7 seconds until the number of the channel appears on the VCR display.
- Tune the TV until the test screen appears. A distorted picture on the channel can be reduced by adjusting the unit and the TV to another channel.
- Use the CH button or the numeric buttons to select the channel number.
- Tune the TV until the test screen appears.
- To store this adjustment, press ENTER.


The functions of these buttons can be operated by the remote control or directly on the unit. In this description, the remote control symbols are used in most cases.
TV Operations
To set the remote control code to operate the TV, see page 23.
| Switch the TV on and off. | |
| INPUT SELECTAV | Select TV or AV channel. |
| TV ASPECT | Switch the screen format between the wide screen and other formats. |
| Select the TV channel. | |
| VOLUME+-- | Operate the TV volume. |
General Operations
| VCR/DVD | Standby/on switch ⏻/ |Press to switch the unit from on to standby mode or vice versa. In standby mode, the unit is still consuming a small amount of power. |
| Menu Operation (indicated by ▲▼◀▶)These buttons are also used as cursors in order to select items on the menu.next line = ▲▼, next page = ◀▶ | |
| ENTER | Select or Store Operation |
| EXIT | EXIT a menu |
| 1 2 34 5 67 8 90 10 | Direct input (indicated by 1 2 3.../-) by pressing numeric buttons |
| CANCEL/RESET | Clear settings |
| REPLAY | Operate REPLAY Function.Press this button during playback. |
| VCR DVD| | TV | Switch the remote control to VCR, DVD or TV |
| INPUT SELECT | To select the input press this button repeatedly: VCR channel, A1, A2, A3 (front input) or dc (DVD) |
| VCR/DVD OUTPUT | Switch the common output from VCR to DVD or vice versa, see page 9.RQTD0021-B |
VCR Operations VCR display
 | Playback (indicated by ▷) |  |
 | Stop (indicated by □)To stop winding a tape, recording or playback. |  |
 | Still Playback (indicated by 1/▶Press this button during playback.Resume normal playback by pressing this button again or Playback ▷.Slow PlaybackKeep this button pressed down for more than 2 seconds during playback.Resume normal playback by pressing Playback ▷. |   |
 | Fast Forward and Forward Search |  |
 | Fast Rewind and Backward SearchTo select Fast Forward or Fast Rewind, press these buttons when the video has stopped.To briefly watch the picture during Fast Forward or Fast Rewind, hold down the corresponding button.To search press these buttons briefly during playback, and the search will continue until Playback ▷ is pressed.Two times pressing increases search speed (JET SEARCH).If you keep this button pressed, the search function will continue until you release the button. |  |
 | VHS Index Search Function (see page 8) | |
 TAPE TAPE | Remove the cassette.Press the EJECT button on the unitor press Stop □ for more than 3 seconds on the remote control. | |
 | Change the Sound mode.Press this button repeatedly.Stereo sound: OSD Display L RLeft channel: OSD Display LRight channel: OSD Display RMono sound: OSD Display - - | |
 DISPLAY DISPLAY | Display time, Tape counter or Remaining tape time.Press this button repeatedly. | |
 | Select the VCR channeland adjust the tracking, see page 23 | |
CANCEL/RESET | Reset the Tape counter.Press this button. When inserting a cassette,the counter is reset to 0:00.00 . | |
 34567 34567 90 90 | Select the channel or the Video Plus+ numberUse the numeric buttons.Example: 18 = 18 | |
 | Display the Main menu | |
VIDEO Plus+ | VCR Timer Recording Functionsee page 7 | |
| DIRLRE CTV REC | VCR Recording Functionssee page 6 | |
 | VCR Timer Recording Functionssee page 6, 7 | |
L-TI | VCR Timer Recording and Tape Speed Functionssee page 6, 7 | |
 | VCR Programme List and Intro-Jet Scan Functionsee page 8 | |
DVD Operations DVD display
 | Playback (indicated by ▷) |  |
| POSITION MEMORY | Restart from the memorized position | |
 | Playback Stop Resume (press button 1x) |  |
| Playback Stop (press button 2x) (indicated by □□) | STOP | |
 | Playback Pause (indicated by ||/▶ |  |
 | Slow-motion playbackKeep this button pressed down while paused.Slow playback forwardSlow playback backwardResume normal playback by pressing Playback ▷. |  |
 | Forward SearchBackward Search |  |
   | ADVANCED SURROUND:Playback if you are using 2 front speakersBASS PLUS: If you connected a subwooferPICTURE: Enhances detail in dark scenesDIALOGUE ENHANCER: Increases the volume of the dialogue soundReselect or store this settings |     |
 | Skip chapters or tracks | |
 DISC DISC | Remove the disc.Press the OPEN/CLOSE button on the unitor press Stop □ for more than 3 seconds on the remol |  |
 | To change audio soundtrack / language.Press AUDIO during playback. The soundtrack chang each time you press the button (see page 19). |  |
 | Call up the OSD-screens |  |
 MENU MENU | Call up the top menu of a disc |  |
 | Call up the menu of a disc |  |
 RETURN RETURN | Return from DVD SETUP menu to playback | |
 | Select language of subtitles (see page 17) | |
 | Call up the PLAYLIST menu (see page 15) | |
 | Call up the DVD SETUP menu (see page 18) |  |
 | Check the VCR recording status. For a moment tl recording menu or an Info box appears on the OSD (to record see page 7). |   |
 | Repeat Playback (see page 16) | |
 | A-B Repeat Playback (see page 16) | |
VCR Recording
VCR display
- Switch on and set the TV to the video output channel and insert a cassette with an intact erasure prevention tab into the VCR.
- Before recording, select the channel with the CH button. Select the AV channel INPUT SELECT AV1 if you want to record a programme from scart AV1, AV2, front input = A3 or Disc = DC.
- Switch the remote control to VCR 1 .
- Press IRECI to start recording.
- Press Stop □ to stop recording.
- Use Pause II/▶ to pause recording.
- Restart recording by pressing this button again. To preserve the video heads, the function will be switched off after 5 minutes.

Direct TV Recording
The |DIRECT TV RECI button allows you to immediately start recording the same programme that you are viewing on the TV, if your TV is equipped with Q Link or with a similar function from other manufacturers (see page 3) and connected with a fully-wired 21-pin scart lead (not supplied).

OTR Function (OTR = One Touch Recording) • REC/OTR
To record for a specific length of time, press this button on the VCR. You can extend the recording time from 30, 60, 120, 180 to 240 minutes by pressing the button repeatedly.
The selected length of recording time will appear on the VCR display. To stop in advance press Stop □. If you want to watch another TV programme at the same time as you are recording, select the channel on the TV.
VCR Display
Tape Speed
- Press IDISPLAYI until [REMAIN] on the VCR display appears.
- Press ISP/LP/EPI before recording to select the tape speed for the recording. Make sure that the remaining time on the cassette is longer than the time set for recording; otherwise, the whole programme cannot be recorded.
The following information appears on the VCR display:
[SP] standard recording time: optimum picture quality.
[LP] double recording time: slightly reduced picture quality.
[EP] (SUPER LP) triple recording time: slightly reduced picture quality.
Note: Distorted pictures produced when playing back some cassettes (e.g., type E300) after LP or EP recordings are not functional faults.
On Screen Display
Timer recording with On Screen Menu
With the On Screen Menu you can programme Timer recordings (up to 16 programmes).
Switch on and set the TV to the video output channel and insert a cassette with an intact erasure prevention tab into the VCR.
- Switch the remote control to VCR.
- Press |PROG/CHECK| to display [Timer recording] menu and press IENTERI.
- Set the channel [Pos]. You can use the cursors ▲▼◀▶ on the remote control to move around the menu, in order to make changes.
- Set the recording [Date], day or week. For example: Sa means that the programme will be recorded every Saturday, or Mo - Sa means that the programme will be recorded every day from Monday to Saturday.
- Set the [Start] time. If you keep this button pressed down ▲▼, the time will change in 30 minute jumps.
- Set the [Stop] time.
- Set the Tape Speed [SP], [LP], [EP] or [A] (automatic).

- In the setting A (automatic), the VCR automatically switches (with a short picture distortion) from SP to the slow tape speed LP, to record the programme as long as possible, if the remaining tape time is not long enough.
- The preset [PDC] settings can be manually changed.
[ON] The broadcaster provides PDC signals. If the program is starting earlier or later than planned the timer recording will be synchronised to the actual broadcast start.
Important! The time and date settings must be exactly same as programme information (programme magazine).
If there is a special PDC time noted, it must be used. (The recording can not start, if the settings are not exact.)
[- - -] The broadcaster does not provide PDC signals.
[OFF] The broadcaster providing PDC signals, but the function is turned off. With this setting you have to add to the start and stop time so that the whole film can be recorded completely, just in case the film is broadcasted out of the planned time.
• To store the programme, press IENTERI. • In order to preset other recordings, repeat this procedure. - Press |TIMER| to switch the VCR to Standby mode for Timer recording. Make sure that in the VCR display ☐ appears.


Timer recording with VIDEO Plus+
Switch on and set the TV to the video output channel, insert a cassette with an intact erasure prevention tab into the VCR and set the remote control to VCR operation.
- Press |VIDEO Plus+|
- Enter the VIDEO Plus+ number. For correction use◀.
- To access [Timer recording], press IENTERI.
- If the channel name is not set automatically, select the channel [Pos]▼ and store with [ENTER]. The name of the channel will be saved. To modify the [Name], see page 10.
- Set the Tape Speed [SP], [LP], [EP] or [A] (automatic).
- Check the remaining tape time. • To store the programme, press [ENTER].
- To preset other recordings, repeat the procedure.
- Press [TIMER] to switch the VCR to Standby mode. Make sure that the VCR display ☐ appears. VIDEO Plus+ and PlusCode are registered trademarks of Gemstar Development Corporation. The VIDEO Plus+ system is manufactured under licence from Gemstar Development Corporation.
Recording with Intelligent Timer Function
To easily set the Timer for programmes often broadcast on the same channel and time each day (for example, series), the Intelligent Timer Function remembers the channel number along with the start and end times of the last 8 programmes that you have recorded using Timer recording.
- Press [TIMER] • To select the programme ▲▼
- Press [TIMER] to switch the VCR to Standby mode for Timer recording. If you want to modify the data first, follow the next steps.
- If more than 8 programmes are stored, the oldest data will be lost. To delete recording data manually, press [CANCEL].
- To protect a programme, press and the lock symbol will appear. To unlock a programme, press ◀.
- To modify the data, press [ENTER] and the [Timer recording] menu will appear.
- Change the data ▲▼◀▶.
- Press [TIMER] to switch the VCR to Standby mode for Timer recording. For more information, see page 6.
Note: These functions can also be used with the VCR buttons: [INTELLIGENT TIMER], [TIMER REC]. When [Shipping condition], [Auto - Setup Restart], etc. has been carried out, Intelligent Timer data will be lost. To use Intelligent Timer Function, at least one timer recording has to be done.
Cancel Standby mode for Timer recording
- Press [TIMER] and in the VCR display ☐ will disappear. • Now you can playback a cassette or make a recording.
- After that, you must press the button again to switch the VCR to the Standby mode for Timer recording.
Check the Timer recording
- Press [PROG/CHECK] to display the [Timer recording] menu.
- Press [EXIT] to quit the menu.
Delete or change a Timer recording
- Press [PROG/CHECK] to display the [Timer recording] menu.
- Use ▲▼ to select the entry to be changed, press [CANCEL] to delete the Timer recording.
- Use ▲▼ to select the entry to be changed, press [ENTER], change entry with ▲▼◀▶.
- Press [ENTER] to store these changes.
- Press [EXIT] to quit the menu or press [TIMER] to switch the VCR to Standby mode.
Synchronous recording (DVD, VCD, CD, MP3)
To copy synchronously from the DVD, VCD, CD or MP3 to a VHS tape.
- Switch the remote control to DVD mode.
- Set the beginning of the scene with Playback ▷ and Pause II/▶
- Switch the remote control to VCR DVD
- Select the Disc channel (dc) by pressing IAVI
- Set the beginning of the recording with ↔, Playback ▷ and Pause II/▶
- Press RECI
- Start the recording, press Pause II/▶ (disc will start the playback synchronous).
Note:
- Copying of copy protected material from disc is against copyright laws. If copying is attempted a warning message will appear on the screen. Although the unit will continue recording, the playback picture will be distorted and unwatchable.
- Recording of NTSC material from disc to tape is not possible because this unit is not designed to convert NTSC to PAL format.
- Copying of copy protected material from disc is against copyright laws. If copying is attempted a warning message will appear on the screen. Although the unit will continue recording, the playback picture will be distorted and unwatchable. - Recording of NTSC material from disc to tape is not possible because this unit is not designed to convert NTSC to PAL format.
VCR Playback / VCR Functions
VCR display


VCR Playback
- When a cassette is inserted, the VCR switches on automatically.
- When a cassette without an erasure prevention tab is inserted, the VCR will automatically start playback. • The cassette will automatically rewind when the tape end is reached. • The CVC System (Crystal View Control) ensures optimum picture quality.
Normal Playback
- Press this button to start playback.
- Press this button to stop winding a tape or to stop recording.
- Press this button during playback.
- Resume normal playback by pressing this button again or Playback ▷.
- Keep this button pressed down for more than 2 seconds during playback.
- Resume normal playback by pressing Playback ▷.
Stop Playback
Still Playback
Slow Playback
Note: For search functions, see page 5.
Erasure prevention of a cassette
To prevent the accidental erasure of a cassette, remove the erasure prevention tab. If you want to record again on a cassette with erasure prevention, and this symbol ☐ is flashing on the VCR display, then cover the hole with adhesive tape.
NTSC Playback Function
This function allows playback of tapes recorded in NTSC on a PAL TV. On some TVs, pictures may be distorted during NTSC playback. Try to adjust your TV. For this purpose, please also read the operating instructions for your TV. Dubbing or recording of NTSC tapes with this VCR is not possible.
Repeat Playback Function
Press Playback ▷ for more than 5 seconds when the VCR is on stop mode (the letter R will appear on the OSD). The VCR will keep replaying the cassette until the end of the recorded part. Press Stop □ to exit this function.
Child lock Function
To deactivate the buttons on the unit and the remote control, press the IENTERI and IEXITI buttons at the same time until this display appears. This display will also appear if attempts are made to operate the unit when this function is activated, to inform that the unit cannot be operated. To cancel the Child Lock Function, press the same buttons until the display disappears.
If the power supply of the unit is disconnected, the Child Lock Function is cancelled after about 60 minutes.


| Programme List | Panasonic VCR 1/2 | |
| Pos | ||
| Name Date | Start | |
| 1. | ***01 27/10 | 17:44 |
| 2. | ***01 28/10 | 15:00 |
Playback Off Timer Function (to stop Playback automatically)
To stop the playback after a preset time, press Playback ▷ on the VCR for more than 3 seconds during playback. You can extend the playback time from 30, 60, 120, 180 to 240 minutes by pressing the button repeatedly. To stop in advance press Stop □. The selected length of playback time will appear on the VCR display.
Intro-Jet Scan Function
You can playback the beginning of each recording with the Intro-Jet Scan Function. Press the ISEARCHI button. The VCR will rewind to the start of the tape, and play with high speed for 10 seconds the beginning of each recording (which is longer than 15 minutes). Once you have found the recording, press Playback ▷. To cancel the search function, press the Stop □.
Note: For more explanation of the SEARCH button, see Programme List.
Programme List
The List of the Timer recordings are stored if the recordings are longer than 15 minutes (EP mode 25 minutes) and the cassette was not removed.
- Press ISEARCHI to display the [Programme List].
- Select the programme▼.
- By pressing the ISEARCHI button again, the VCR will wind the tape to the selected programme and start to playback.
- If you select another programme, press [SEARCH] again, the playback will stop and the [Programme List] will appear.
- Press [EXIT] to quit the menu.
Note: If you have removed the cassette, or the power supply was interrupted, the Intro-Jet Scan will be activated when pressing the [SEARCH] button.
VHS Index Search System
To quickly find the beginning of a programme, press forward INDEX▶▶, or press backward INDEX ◀◀. This function only works in playback mode or in stop mode. Depending on how many times you press these INDEX buttons (up to a maximum of 20 times), the VCR will search through the tape to find the start of the programme, and will automatically start playback (for each programme which is longer than 5 minutes).
For example, if you press the INDEX button three times, the VCR will search for the third programme.
To cancel the Index Search System, press Stop □.
| Main menu | Panasonic | VCR |
| Timer recording | ||
| Tuning | ||
| Clock setting | ||
| Other settings | ||
| Other settings | Panasonic | VCR |
| Tape length: AUTO( | ◀ E-240) | |
| Audio playback: MIX | ||
Setting the Audio playback
- Press [MENU]
- Select [Other settings]
- Access by pressing [ENTER]
- Select [Audio playback]
- Select the input field
- Select the settings▲▼ • Store by pressing [ENTER]
- Press [EXIT]
For tapes recorded with the audio dubbing function, select [MIX] to hear the mono and Hi-Fi audio tracks together. During playback, you can select the sound track with the IAUDIOI button.
[NORMAL] only original sound OSD: L R only dubbing sound (mono) OSD: - -
[MIX] original sound and dubbing sound OSD: L R only dubbing sound (mono) OSD: - -
| Main menu | Panasonic | VCR |
| Timer recording | ||
| Tuning | ||
| Clock setting | ||
| Other settings | ||
| Other settings | Panasonic | VCR |
| Tape length | : E - 195 | |
| Audio playback | : NORMAL | |
| SQPB | : AUTO | |
Tape length setting
- Press IMENUI
- Select [Other settings] • Access by pressing IENTERI
- Select the input field
- Set [Tape length] • Store by pressing |ENTER|
- Press |EXIT|
| Main menu | Panasonic | VCR |
| Timer recording | ||
| Tuning | ||
| Clock setting | ||
| Other settings | ||
| Clock setting | Panasonic | VCR |
| Clock setting : MAN. | ||
| Time : 20:30:24 | ||
| Date : 21.03.01 | ||
Clock setting
If the broadcaster is providing the time signal, the Time and Date is set automatically [Clock setting] is set on [AUTO]. To set the time manually:
- Press | MENUI
- Select [Clock setting] • Access by pressing |ENTER|
- Select [MAN]
- Access by pressing |ENTER|
- Set the Time and Date ▼◀▶ • Store these settings by pressing ENTER
- Press EXIT
| Main menu | Panasonic | VCR |
| Timer recording | ||
| Tuning | ||
| Clock setting | ||
| Other settings | ||
| Other settings | Panasonic | VCR |
| Tape length | : AUTO (← E-240) | |
| Audio playback : NORMAL | ||
| SQPB | : AUTO | |
| VCR/DVD OUTPUT | : AUTO | |
| VCR display : DIMMED | ||
| OSD | : 4:3 | |
| AV2 | : NORMAL | |
| Remote | : VCR2 | |
Remote Control setting
To use a second Panasonic VCR with one remote control in the same place:
- Press MENU
- Select [Other settings] • Access by pressing ENTER
- Select [Remote]
- Select the input field
- Select the setting • Store by pressing ENTER
- Press EXIT [VCR1] To use first VCR. [VCR2] To use second VCR.
To operate both of them, adjust remote control:
- hold ENTER and press 1 to operate VCR1
- hold ENTER and press 2 to operate VCR2
| Main menu | Panasonic | VCR |
| Timer recording | ||
| Tuning | ||
| Tuning | Panasonic | VCR |
| Manual | ||
| Auto - Setup Restart | ||
| Download | ||
| Shipping condition | ||
| Owner ID | ||
Owner ID
- Press MENU
- Select [Tuning]▼
- Access by pressing |ENTER|
- Select [Owner ID]
- Press |ENTER|
- Use the cursor buttons ▲▼◀▶ and |ENTER| on the remote control to fill in the information.
- Press |EXIT|
| Main menu | Panasonic | VCR |
| Timer recording | ||
| Tuning | ||
| Clock setting | ||
| Other settings | ||
| Other settings | Panasonic | VCR |
| Tape length | : AUTO (← E-240) | |
| Audio playback | : NORMAL | |
| SQPB | : AUTO | |
| VCR/DVD OUTPUT | : AUTO | |
| VCR display | : DIMMED | |
| OSD | : 4:3 | |
Setting of On Screen Displays (OSD)
- Press |MENU|
- Select [Other settings]
- Access by pressing |ENTER|
- Select [OSD]
- Select the input field
- Select the setting ▲▼ • Store by pressing |ENTER|
- Press |EXIT|
[4:3] displays are on the edge of the screen (the displays are not visible during playback in 16:9 format)
[16:9] displays are on the edge of the screen in 16:9 format (the displays are in the centre of the screen in 4:3 format)
[OFF] No On Screen Displays
| Main menu | Panasonic | VCR |
| Timer recording | ||
| Tuning | ||
| Clock setting | ||
| Other settings | ||
| Other settings | Panasonic | VCR |
| Tape length :AUTO( ←E-240) | ||
| Audio playback :NORMAL | ||
| SQPB :AUTO | ||
Setting of SQPB (S-VHS Quasi Playback)
- Press [MENU]
- Select [Other settings] ▼
- Access by pressing [ENTER]
- Select [SQPB] ▼
- Select the input field
- Select the settings • Store by pressing [ENTER]
- Press [EXIT]
SQPB settings:
[AUTO] VCR automatically recognises types of recordings [ON] Only S-VHS / S-VHS ET recordings should be played [OFF] Only VHS recordings should be played
Note: Distorted pictures during these playback functions are not functional faults.
| Main menu | Panasonic | VCR |
| Timer recording | ||
| Tuning | ||
| Clock setting | ||
| Other settings | ||
| Other settings | Panasonic | VCR |
| Tape length : AUTO ( ← E-240) | ||
| Audio playback : NORMAL | ||
| SQPB : AUTO | ||
| VCR/DVD OUTPUT : AUTO | ||
| VCR display : ON | ||
Setting the Brightness
of the VCR display (in standby mode)
- Press |MENU|
- Select [Other settings]
- Access by pressing |ENTER|
- Select [VCR display]
- Select the input field
- Select the setting • Store by pressing |ENTER|
- Press |EXIT|
Adjust the Brightness of the VCR display:
[ON] The VCR display is brightly illuminated
[DIMMED] The VCR display is dimmed
| Main menu | Panasonic | VCR |
| Timer recording | ||
| Tuning | ||
| Clock setting | ||
| Other settings | ||
Output control
- Press |MENU|
- Select [Other settings]
- Access by pressing |ENTER|
- Select [VCR/DVD OUTPUT]
- Select the input field
- Select the setting • Store by pressing |ENTER|
- Press |EXIT|
[AUTO] If a button is pressed, the output is connected automatically to corresponding part of the unit. For example: while watching a DVD the VCR playback button is pressed, the unit will switch to VCR playback.
[MAN.] It is necessary to switch manually with the IVCR/DVD OUTPUT button from DVD to VCR or vice versa.
VCR Tuning


Setting the sound system
This system can receive transmissions which are broadcast with NICAM sound.
This is a sound system with two sound channels
which broadcasts either stereo sound or two separate mono channels (M1 and M2).
- Press IMENUI
- Select [Tuning]
- Access by pressing IENTERI
- Access [Manual] by pressing IENTERI
- Select the channel▼
- Press [ENTER]
- Select [NICAM]
- Select the input field
- Select the sound setting [AUTO] or [OFF] • Store by pressing [ENTER]
- Press [EXIT]
Select the setting [NICAM] to [OFF] if you want to record a normal mono sound on the Hi-Fi tracks of the VCR, for example, if the stereo sound is distorted through the reception conditions.


Change the order of the Channel positions and the names of the TV station
- Press [MENU]
- Select [Tuning]
- Access by pressing [ENTER]
- Access [Manual] by pressing [ENTER]
- Select the Channel to be changed
- Access by pressing [ENTER]
- Select the input field for [POS]
- Input the Channel position ▲▼ • Store the setting by pressing [ENTER]
- Select [Name]
- Select the input field • Input the name of the TV station by selecting the first letter with ▲▼
- Select the next letter
- Select the next letter with ▲▼.
To input an empty character, select the blank character between Z and *.
• Store the setting by pressing [ENTER] - Press [EXIT]


| Tuning | Panasonic | VCR | |
| Pos. Name Ch | |||
| 33 ***33 37 | |||
| 34 ---- | |||
| 35 ***35 23 | |||
| Delete | Add | Move | |


Setting a new Channel
Add / Delete / Move
a Channel on the list
- Press [MENU]
- Select [Tuning]
- Access by pressing [ENTER]
- Access [Manual] by pressing [ENTER] • Search for an unused Channel position with ▲▼
(for rapid search, keep the cursor button pressed down), or [Add] between other Channels using the n button and add by pressing [ENTER]
- Access by pressing [ENTER]
- Select the new Channel ▲▼ • Store by pressing ENTER
- Select [Tuning] menu by pressing MENU
- Select the Channel to be deleted ▲▼
- Select [Delete] by pressing the Button
- Delete by pressing ENTER
- Select the Channel to be moved ▲▼
- Select [Move] by pressing the button
- Move the Channel to the new position ▲▼ • Store this new position by pressing ENTER
- Press EXIT


Restart Automatic settings
- Press MENU
- Select [Tuning]
- Access by pressing ENTER
- Select [Auto - Setup Restart]
- Press [ENTER]
- Confirm by pressing [ENTER]
Restoring the original settings of the VCR (Shipping condition)
- Press [MENU]
- Select [Tuning]
- Access by pressing [ENTER]
- Select [Shipping condition]
- Press [ENTER] • Confirm by pressing [ENTER]
- Disconnect the unit from AC mains for one minute.
Connecting External Equipment

Connecting a Satellite Receiver
With some Satellite Receivers it is possible to start a Timer recording, with a 21-pin scart lead (not supplied) by using EXT LINK function. (Please read the operating instructions for your Satellite Receiver for further information).
| Main menu | Panasonic | VCR |
| Timer recording | ||
| Tuning | ||
| Clock setting | ||
| Other settings |
| Other settings | Panasonic | VCR |
| Tape length:AUTO(◀E-240) | ||
| Audio playback:NORMAL | ||
| SQPB:AUTO | ||
| VCR/DVD OUTPUT:AUTO | ||
| VCR display:DIMMED | ||
| OSD:4:3 | ||
| AV2:NORMAL | ||


Controls for external recordings with a Satellite Receiver
- Press [MENU]
- Select [Other settings]
- Access by pressing |ENTER|
- Select [AV2]
- Select the input field
- Select the setting • Store by pressing IENTERI
- Press IEXITI
After you have preset the recording in the Satellite Receiver, set the VCR on Standby Recording by pressing IEXT LINKI on the VCR. As long as a video picture is being transmitted by the Satellite Receiver, the VCR will record it. This notice is displayed on the screen. In order to delete this notice, press IENTERI. To stop the recording, press the EXT LINK button on the VCR.
Note: The programmes to be recorded on your VCR should not overlap with the recordings of the Satellite Receiver.
[EXT LINK2] To control external recording with some Satellite Receiver (Videosignal).
[EXT LINK1] For a Digital Receiver which transmits a special control signal for recordings, for example the F.U.N. Receiver (TU-DSF31).
[NORMAL] To connect an external equipment (e.g. TV), the EXT LINK button on the VCR is not activated.
[DECODER] To connect an external decoder

Connecting a Decoder
With a 21-pin scart lead connect a Decoder to AV2. This device is used to decode scrambled broadcasts (Pay TV).
External source on AV3

Connect your external source (for example: Video Camcorder) to the front input. To select A3 press INPUT SELECT AVI
repeatedly. The sound will be recorded on the HiFi audio tracks and the mono audio track. To record only mono use L-audio input.
Connecting External Equipment
Connecting with Audio / Video cable
Connect the Audio / Video cable (white=L, red=R, yellow=video) according to the colours / markings of the terminals.

If your TV is supporting RGB, then connect a 21 pin scart lead with AV1 (TV) to reach the best picture quality for DVD playback, For RGB setting see page 18.
Analogue recording: You can record to a Mini Disc (MD) or audio cassette or connect to a Dolby Pro Logic amplifier.
Connecting with Optical digital audio lead
- Select [Yes] in [PCM Down conversion] (see page 18).
- Adjust the settings to suit the equipment you have connected.
Note: You cannot use DTS Digital Surround decoders not suited to DVD.
You can record the digital signal directly onto an MD. The recording equipment should handle a sampling frequency of 48 kHz/16 bit. Change the settings in the SETUP menu [AUDIO] as follows.
PCM Down conversion: [Yes] Dolby Digital: [PCM]
DTS Digital Surround: [Off] MPEG: [PCM]
Note: VCR audio signal is not connected to DVD OUT terminal.
Connecting with S-VIDEO lead
The S-VIDEO terminal achieves a more vivid picture than the VIDEO OUT terminal (only DVD out).

Note: Do not connect the unit through another video cassette recorder. Connect directly to the TV, otherwise the picture may not be displayed correctly due to the copy guard.
Connecting an Active subwoofer
You can enjoy more powerful bass by connecting an active subwoofer.
- Place the subwoofer as close as possible to the front of the center.
- Turn the BASS-function to [BASS PLUS ON] to boost the output from the subwoofer (see page 17).
- Adjust the volume of the subwoofer to suit your preference.
Note:
- If you connect an amplifier with Dolby Pro Logic decoder you will also need to connect center and surround speakers to enjoy surround sound.
- The Dolby Pro Logic decoder will not function correctly if [A.SRD] (ADVANCED SURROUND) and [BASS PLUS] is on. Turn [A.SRD] and [BASS PLUS] off.
Change of initial settings
| PCM-Down conversion | [Yes] [No] | connected an amplifier with an optical digital audiolead. connected an amplifier with audio leads. |
| Dolby Digital | [PCM] [Bitstream] | connected an unit without a built-in Dolby Digital decoder. connected an unit with a built-in Dolby Digital decoder. |
| DTS Digital Surround | [Off] [Bitstream] | connected an unit without a built-in DTS decoder. connected an unit with a built-in DTS decoder. |
| MPEG | [PCM] [Bitstream] | connected an unit without a built-in MPEG decoder. connected an unit with a built-in MPEG decoder. |
IMPORTANT
If the equipment you connected cannot decode the signal, the setting must be changed to default settings. If not, signals the equipment cannot process will be output by this unit, causing high levels of noise which can damage your hearing and the speakers.

VCR/DVD

- Select DVD output DVD VCR1 L L TV Switch remote control to DVD①
- Select desired language ◀▶▲▼
- Press ENTER to confirm
- Press SETUP or RETURN to exit the screen
Initial settings for the unit can be adjusted in an easy way in the shown succession.
Adjust the settings with the buttons on the remote control ◀▶ ▲▼.

TV screen formats
There are two types of TV format, 4:3 or 16:9. The 16:9 format corresponds to Widescreen.
When you select [Widescreen (16:9)], the following setting [Pan&Scan / Letterbox] will be skipped.
Note: This may not work with some discs.

Pan&Scan
If you have a regular television (4:3 format) and wish to view 16:9 software in the Pan&Scan style, (if the disc supports this format). Expands the picture to fill the screen from top to bottom without distortion. However, the edges of the picture are cut off.
Letterbox
If you have a regular television (4:3 format) and wish to view 16:9 software in the Letterbox style.
The whole picture is displayed, but black bands appear top and bottom of the screen.

OPTICAL (optical output)
If you have connected the player with an Optical digital audio lead to a digital amplifier or an amplifier with a built-in decoder to the OPTICAL output, select [Yes].
If you have selected [No] above, the next setting is [Child lock password]

DTS (Digital Theater Systems)
Method of coding multi channel audio signals. Realistic sound effects are possible.
Select [Yes] when you connect the player to a unit with built-in DTS decoder.

Dolby Digital
Method of coding and compression of more channel audio signals, developed by Dolby Laboratories.
A large amount of audio information can be recorded on one disc. Dolby Digital is used in many cinema, digital television programmes, DVDs and video games around the world.
Select [Yes] when you connect the player to a unit with a built-in Dolby Digital decoder.

MPEG
Select [Yes] when you connect the player to a unit with a built-in MPEG decoder.

Child lock password
You can prevent the play back of DVDs when you enter a password.

Password
Enter a 4-digit password.


Playback
- Switch remote control to DVD
- Press IVCR/DVD OUTPUTI to select DVD output
- Press | ▲ OPEN/CLOSE| on the unit
- Place the disc on the disc tray
- Press Playback ▷ and playback begins automatically
Note: The procedure of reading disc information can take longer time!
Playback Pause (DVD, VCD, CD)
- Press Pause II/▶ during playback
- Press Playback ▷ to restart playback
Playback Stop (DVD, VCD, CD)
- Playback Stop Resume, press 1x Stop □ during playback
- Playback Stop, press 2x Stop □ during playback
Remove the disc
- Press the OPEN/CLOSE button on the unit or press Stop □ for more than 3 seconds on the remote control.
Starting play from a selected track (VCD, CD)
While stopped, enter a track number using the remote control.
Example: To select track 18, press the numeric buttons 18. Playback starts from the selected track.
Note: This may not work with some discs.
Frame by frame viewing (DVD, VCD)
While paused, press ◀ or ▶ on the remote control. The frame changes each time you press the buttons. The frames change in succession if you press and hold the button. Pressing Pause II/▶ also activates forward frame-by-frame.
Note: You cannot move backwards frame by frame with VIDEO CD.

Slow-motion playback (DVD, VCD)
- Press Pause II/▶ during playback.
- Press SLOW; the speed of slow-motion increases by up to 5 steps by pressing the button repeatedly.
- Press Playback ▷ to restart playback.
Note: You cannot move backwards with VIDEO CD during slow-motion.

Fast Forward and Rewind-SEARCH (DVD, VCD, CD)
- Press SEARCH ↔ ▶ during playback; the speed of search increases by up to 5 steps by pressing the button repeatedly (for MP3 only 1 step possible).


MP3 menu
- Press [MENU]
- Press SKIP ↔ to select the page before or page after
- Select Folder (GROUP) ◀▶
- Select MP3 Title ▲▼
- Select [PLAY MODE] to add Title to [PLAYLIST]
- Press [ENTER] to playback MP3 Title
- Press Stop □ to stop playback (press Playback ▷ to continue playback)
- Press Stop □□
Programmed playback and Random playback (DVD, VCD, CD, MP3)
You can select up to 32 tracks to play in the order you choose.
- Press [PLAY MODE] while stopped, to display the screen [PROGRAM].
- Select the numbers of the tracks with the numeric buttons ① ② ③ ... or cursor buttons ▲▼◀▶ and press [ENTER]. (To clear an input, select [No.] and press [CANCEL] button.)
- Select ◀ [PLAYLIST]
- Press [ENTER], now begins in the programmed sequence.
Exiting programme mode
- Press Stop ⊥ to exit programme mode (press Playback ▷ to continue programme)
- Press Stop □□
- Select ◀[PLAYLIST]
- Press |EXIT| the programme is retained in memory.
Note: The programme is cleared when the unit is turned off, or the disc tray is opened.
Clear the [PLAYLIST]
- Press |PLAY MODE| while stopped
- Select◀▼ [CLEAR LIST]
- Press |ENTERI
- Press |EXIT|
RANDOM playback
- Press |PLAY MODE| while stopped
- Select ◀▼ [RANDOM]
- Press IENTERI (to exit RANDOM mode press two times Stop □)
Chapter review (DVD, VCD, CD, MP3)
- Press ▷ for 5 sec. during playback of a DVD. The beginning of each chapter starts for some seconds. Playback starts from the point where you stopped.
Note: Chapter Review feature works only within a title.
DVD menus
DVDs can have several menus. The menu displayed when you press TOP MENU may be different from the menu displayed when you press MENU.
Note: The function of these buttons is different for every disc. Read the disc's instructions for further details about operation.

Repeat Playback (DVD, VCD, CD, MP3)
Press REPEAT during playback.
The display changes as illustrated.

Note: Repeat playback does not work if the elapsed playback time is not shown on the unit's display.
There is no mode for repeating the whole DVD.

Repeat of a Video-CD (VCD)
- Press Stop □ during playback until PBC PLAY disappears from the display.
- Enter the number of the desired track.
- Press REPEAT (to Exit Repeat mode press Stop □).
A-B Repeat Playback (DVD, VCD, CD, MP3)
You can repeat a section between points A and B within a title or track.
- Press A-B REPEAT during playback.
- Press ENTER at the starting point (A).
- Press ENTER at the finishing point (B).
To cancel this function, press A-B REPEAT and wait until the indicator is switched off. The unit automatically determines the end of a title/track as point B, when the end of the title/track is reached.
Note: A-B repeat playback does not work if the elapsed playback time is not shown on the unit's display.
Resume function (DVD, VCD, CD, MP3)
- Press Stop during playback, the unit remembers the position.
- Press Playback while symbol [▶] in the DVD display is flashing. Playback restarts from the position you stopped it.
Cancel the Resume function
- Press Stop during playback.
- Press Stop until [▶] disappears from the DVD's display.
Note: The resume function does not work if the playback time is not displayed. The position is cleared when the disc tray is opened or the unit is switched to standby.

Replaying a scene (DVD, VCD, CD, MP3)
• Press REPLAY during playback. The player skips back a few seconds each time, to replay parts of scenes.
Note: You cannot skip beyond the beginning of a track or title. This feature doesn't work with some discs.

Skipping chapters or tracks (DVD, VCD, CD, MP3)
- Press SKIP during playback or while paused. Each press increases the number of chapters or tracks skipped.
POSITION MEMORY function (DVD, VCD, CD, MP3)
This function allows you to memorise a position to start from even after switching the unit to standby or changing discs. You can memorise positions for up to five different discs at a time.
- Press |POSITION MEMORY| during playback.
- Press Stop □□ to clear the position before playback.
Start playback after switching to standby
- Press Playback ▷ to start playback from the memorised position and the position is cleared.


ADVANCED SURROUND (DVD) Dolby Digital, 2-channel or over only
Makes it possible to have a surround-like effect during playback, if you are using 2 front speakers.
• [ADVANCED SURROUND NORMAL (1)]
• [ADVANCED SURROUND EMPHASIZED (2)]
• [ADVANCED SURROUND OFF] Factory preset
Turn [ADVANCED SURROUND] off if it causes distortion.
When you have connected an active subwoofer to the SUBWOOFER terminal on the rear of the unit.
• [BASS PLUS ON] Factory preset
• [BASS PLUS OFF]
PICTURE (DVD, VCD) ©
• [CINEMA 1] Mellows images and enhances detail in dark scenes.
• [CINEMA 2] Sharpens images and enhances detail in dark scenes.
- [USER] Separate settings for colour, contrast and brightness.
• [NORMAL] Normal mode : Factory preset
DIALOGUE ENHANCER (DVD) Dolby Digital, 3-channel or over only
Increase the volume and clarity of speech or dialogue during playback.
• [DIALOGUE ENHANCER ON]
• [DIALOGUE ENHANCER OFF] Factory preset
Recalling your settings with one button (DVD, VCD, CD)
This feature allows the settings that you made for ADVANCED SURROUND, BASS, CINEMA and DIALOGUE ENHANCER to be stored and recalled with just one button press.
- Storing the settings in memory: Press and hold the button ONE TOUCH MEMORY until [MEMORY ON] appears on the display. The settings remain in the memory even if you turn the unit off.
- To cancel: Press the button ONE TOUCH MEMORY to set the factory preset [MEMORY OFF] appears in the display.
- Recalling the settings: Press the button ONE TOUCH MEMORY [MEMORY ON] appears in the display.
Basic operation
- Press SETUP the [SETUP] screen appears
- Select the [SETUP] menu ▲▼ select Menu list ▶
- Select the setting you want to change ▲▼ select Settings ▶
- Select and change the setting ▲▼
- Press ENTER to confirm
- Press SETUP or RETURN to exit the screen
Subtitles (DVD)
- Press SUBTITLE during playback
The language changes each time you press the button or ▲▼.
To switch subtitle display off, select [OFF] (see page 18, 19).
Child lock password (DVD)
only for DVD-VIDEO discs available
- Press SETUP
- Select [Child lock] ▶▼
- Settings
- Select [On - - - - ] ▲▼
- Input your 4-digit password, if you enter a wrong number press |CANCEL|
- Press |ENTER| to store the password
- Press SETUP to exit the SETUP screen
By choosing the rating level you can prohibit viewing certain scenes of a disc or complete discs.
(This may not work with some discs.) Don't forget your password.
Note: If you have forgotten your password see page 23.
Sound and Picture DVD settings
- Press |DISPLAY| during playback
- Press |DISPLAY| the OSD menu appears
Note: Select the function direct with the buttons A—B—C—D, (see page 19)
DVD Settings
| Panasonic DVD SETUP | ||
| Soundtrack language | English | |
| Subtitle language | Automatic | |
| DVD Menu language | English | |
| Child lock | Off | |
| Level | All | |
| DISCVIDEOAUDIODISPLAYDEMOEASYSETto selectto access Menu | ||
| Panasonic DVD SETUP | ||
| TV Aspect | 4:3 Pan&Scan | |
| DISC | AV1 Output (Scart) | Video |
| VIDEO | Still mode | Automatic |
| AUDIO | NTSC Disc output | PAL 60 |
| DISPLAY | ZOOM | Off |
| DEMO | ||
| EASYSET | ||
| to select to access Menu | ||
SETUP DISC (DVD, VCD) Language codes see page 23. - Press [SETUP] to call up the menus of the DVD player.
| Menu list | Factory preset | Settings | |
| Soundtrack language | English | 6978 | Original |
| Subtitle language | Automatic | Off | ---- |
| DVD Menu language | English | 6978 | |
| Child lock | Off | On ---- | |
| Level | All | 1 - 8 | |
SETUP VIDEO (DVD, VCD)
| Menu list | Factory preset | Settings | |
| TV Aspect | 4:3 Pan&Scan | 4:3 Letterbox | 16:9 |
| AV1 Output (Scart) | Video | RGB | |
| Still mode | Automatic | Field | Frame |
| NTSC Disc output | PAL60 | NTSC | |
| ZOOM | Off | On | |
- Use the Zoom function to expand widescreen pictures to fill more of the television screen (only for DVD-Video in [4:3 Letterbox] style).
| Panasonic DVD SETUP | PCM Down conversion | Yes |
| Dolby Digital | PCM | |
| DISC | DTS Digital Surround | Off |
| VIDEO | MPEG Audio | PCM |
| AUDIO | Dynamic range compr. | Off |
| DISPLAY | ||
| DEMO | ||
| EASYSET |
SETUP AUDIO (DVD, VCD)
| Menu list | Factory preset | Settings | |
| PCM Down conversion | Yes | No | |
| Dolby Digital | PCM | Bitstream | |
| DTS Digital Surround | Off | Bitstream | |
| MPEG Audio | PCM | Bitstream | |
| Dynamic range compr.only in the format Dolby Digital | Off | On | |
| Panasonic DVD SETUP | |
| Menu language English | |
| On-screen messages On | |
| Player front display Bright | |
| DISC | |
| VIDEO | |
| AUDIO | |
| DISPLAY | |
| DEMO | |
| EASYSET | |
| to select to access Menu | |
SETUP DISPLAY
| Menu list | Factory preset | Settings | |
| Menu language | English | ||
| On-screen messages | On | Off | |
| Player front display | Bright | Dimmed | Auto |
| Panasonic DVD SETUP | DEMO Off |
| DISC | |
| VIDEO | |
| AUDIO | |
| DISPLAY | |
| DEMO | |
| EASYSET | |
| to select to access Menu | |
SETUP DEMO
A demonstration of the unit's On-Screen displays, select [Off] or [On]. Press any button to stop the DEMO mode.
DVD-VIDEO
VCD
CD-DA
MP3
OSD screens are menus that contain information about the disc or unit.
These menus allow you to perform operations by changing this information.
Note: For some DVD-VIDEO discs certain settings are not allowed by disc. Please use the DVD menu.
Progress Indicator
Press DISPLAY during playback

Press DISPLAY, the OSD menu appears

TITLE / TRACK
If there are several titles/tracks on a DVD, VCD or CD, use this menu item to select them.

CHAPTER
If there are several chapters on a DVD, use this menu item to select them.

TIME --:--:--
Enter time for DVD to start from this position. For VCD, CD switch REMAIN/ELAPSED TIME.

AUDIO
If the DVD offers alternatives you can select from the other soundtracks on the disc.

SUBTITLE OFF
When subtitles are available in several languages, you can select the language of choice.

ANGLE 1/2
Scenes which were filmed several times from different camera angles. You can select this different angles.

REPEAT OFF
Repeat of titles/tracks, chapters/folders or marked sections.

* * * * *
You can mark up to 5 scenes which you can select directly during playback.

Makes possible to have a surround-like effect if you are using only 2 front speakers. Turn Advanced Surround off if it causes distortion.

BASS PLUS ON
When you have connected an active subwoofer.

Makes the dialogue in movies easier to hear.

PICTURE : NORMAL
[Normal], [Cinema], [User].

COLOUR 0
Adjust the colour level to suit your preference.

CONTRAST 0
Adjust the contrast to suit your preference

BRIGHTNESS 0
Adjust the brightness to suit your preference.

Bar position selection
Adjust the vertical position of the OSD bar on the screen.
Information about the player
This product incorporates copyright protection technology that is protected by the method claims of certain U.S. patents and other intellectual property rights owned by Macrovision Corporation and other rights owners. Use of this copyright protection technology must be authorized by Macrovision Corporation, and is intended for home and other limited viewing uses only unless otherwise authorized by Macrovision Corporation. Reverse engineering or disassembly is prohibited.


Do not use irregularly shaped discs, such as heart-shaped. These can damage the unit.


Region codes
Region numbers are allocated to DVD players and software according to where they are sold. You can play DVDs if their region number is the same or includes the same number, or is marked All.
Disc formats
DVD-Video, DVD-R (R4.7), CD-Audio (CD-DA), Video-CD, CD-R/CD-RW (CD-DA, Video-CD formatted discs). Note: It may not be possible to play some CD-R/RW discs due to the condition of the recording.
DVD formats
This unit includes a 2-channel Dolby Digital decoder. Connect the analog outputs (Left and Right) to an external Dolby Surround Pro Logic decoder to enjoy 4-channel surround sound (Left, Center, Right and Surround) or connect the digital audio output of this unit to an external multi-channel Dolby Digital decoder to enjoy programs in up to 5.1-channel surround sound (Left, Center, Right, Left Surround, Right Surround, Subwoofer).
Manufactured under license from Dolby Laboratories.
"Dolby", "Pro Logic" and the double-D symbols are trademarks of Dolby Laboratories.
This unit does not have a DTS decoder. Connect this unit to equipment that has a DTS decoder to enjoy DVDs with this mark. "DTS" and "DTS Digital Surround" are trademarks of Digital Theater System, Inc.
DVD Glossary
Bitstream: This is the digital form of multiple channel audio data before it is decoded into its various channels.
Dolby Digital: A technology developed by Dolby Laboratories that allows audio (mono up through 5.1 channels) to be conveniently transmitted, stored and reproduced in high fidelity. Dolby Digital is used in many movie theatres, digital television programs, DVDs and video games around the world.
DTS Digital Surround: This surround system is used in many movie theatres around the world. There is good separation between the channels, so realistic sound effects are possible.
Dynamic range: Dynamic range is the difference between the lowest level of sound that can be heard above the noise of equipment and the highest level of sound before distortion occurs.
Field: One frame is made up of 2 fields.
A regular television shows these fields one after the other to create frames.
Field still: A field still is not blurred, but it has only half the information of a frame still so picture quality is lower.
Frame: Frames are the still pictures that go together to make a moving picture. There are about 25/30 frames shown each second.
Frame still: A still is shown when you pause a moving picture. A frame still is made up of 2 alternating fields, so the picture may appear blurred, but overall quality is high.
Letterbox: When a rectangular picture is displayed on a normal TV, with black bands top and bottom.
Optical digital audio lead: Electronic signals are converted to optical signals for output to an amplifier. This reduces noise caused by electronic interference.
Pan&Scan: Expands a 16:9 widescreen picture to fill a 4:3 normal TV screen. The edges of the picture are cut off, but there are no black bands or distortion to the picture.
PCM (pulse code modulation): PCM is the digital method used when recording music CDs. DVDs have a greater volume so they use linear PCM, which has a higher sampling rate.
Playback control: If a Video CD has " playback control" written on it or its jacket, it means that particular scenes or information can be selected for viewing interactively on the television, using the menu screen. This unit can playback Video CDs with playback control.
Title/Chapter: DVDs are divided into large sections called titles and smaller sections called chapters. The numbers assigned to these sections are called title numbers and chapter numbers.
Track: Video CDs and CDs are divided into sections called tracks, and the numbers assigned to these sections are called track numbers.
TV-screen formats: TVs have two different formats: 4:3 (normal) or 16:9 (widescreen).
VCR Special Features
I-TIMER: This INTELLIGENT TIMER function makes programming and recording easier than ever before. The INTELLIGENT TIMER stores program data for up to 8 timer recordings. For example, if you want to record the continuation of your favorite series, you only need to press the I-TIMER button and the stored program data will be displayed with today's date. You can then select the program, and by confirming with the TIMER REC button, the programming is complete. If your remote control is not at hand, you can also program directly using the buttons on your VCR.
Easy Guide OSD: The Easy Guide OSD guides you step by step to your destination. There is a large number of different individual settings and languages, with a quick overview of all functions.
Super VHS Quasi Playback (SQPB): Do you want to occasionally watch tapes recorded with an S-VHS VCR? No problem anymore: This VCR can play back tapes in VHS quality that were recorded in S-VHS and S-VHS-ET formats.
SUPER Long Play: Super Long Play (EP mode) allows you to record three times longer than in Standard Play (SP) mode. You can record up to 720 minutes (12 hours) on a 240-minute cassette.
AUTO Long Play: If the remaining tape length is shorter than the required recording time, this VCR supports a recording mode that automatically switches from Standard Play (SP) to Long Play (LP) to complete the recording of the film.
Intro-Jet Scan: To check the content of the tape, you can use the Search button to play 10 seconds of each recording. When you find the title you want, simply press the Play button to watch the film.
Jet Rewind: Panasonic VCRs are equipped with a Jet Rewind Drive. Rewinding an E180 cassette takes only 60 seconds. For convenient winding and searching, the tape transport speeds up extremely fast and stops softly in a very short time.
Q Link: With a Euro AV connection and the Q Link function, the VCR can communicate with the TV: - Automatically copies the tuning positions of the TV - After playback finishes, the VCR automatically switches to Standby mode if you turn off the TV - One touch on DIRECT TV REC and the VCR records the film you are watching on the TV - If you insert a tape into your VCR, the TV in Standby mode will be switched on automatically.
External Link: With External Link, timer recording from a satellite or digital receiver is now very simple. Set your programme on the receiver and switch your VCR to Standby mode using the External Link function; at the set time, recording will start automatically.
NTSC Playback: In Europe, the PAL colour system is mainly used, but some other countries use the NTSC colour format. With the NTSC Playback function of the VCR, you can watch an NTSC VHS tape (for example, from overseas) on your PAL TV.
REC/OTR: When you want to record manually, you can easily set the recording time to 30, 60, 120, 180, or 240 minutes by simply pressing the REC/OTR button repeatedly. The selected recording time will be displayed.
PDC: Some stations broadcast this signal to control the start and stop time of a timer-recorded programme. The VCR can interpret this signal to record the beginning and end of the film correctly, even if the broadcasting time is shifted (for example, if a live show runs longer than scheduled).
VIDEO Plus+: The VIDEO Plus+ numbers make it extremely easy to set the VCR for timer recording. Simply type the numeric code (for example, from a TV magazine), and the VCR will translate this number into the timer recording data. After the data are confirmed (by pressing the TIMER REC button), the recording is already programmed.
I-TIMER
page 7
Easy Guide OSD
SQPB
page 9
SUPER Long Play
page 6, 7
AUTO Long Play
page 6, 7
Intro-Jet Scan
page 7, 8
Jet Rewind
page 5
QLink
page 3, 6
External Link
page 11
NTSC Playback
page 10
REC/OTR
page 6
PDC
page 6
VIDEO Plus+
page 7
Troubleshooting
The display is not illuminated:
The mains lead is not connected.
- Check the connection
Safety devices are operating.
- Disconnect the unit from AC mains for one minute, then check if the unit can be operated.
The display is illuminated, but the unit cannot operate:
The unit is in Timer recording Standby mode.
- Cancel Standby mode by pressing the TIMER button.
The child lock is activated.
- Settings can be changed (see page 8).
Tape transport noise
During JET SEARCH the tape transport noise will increase.
• This is not a functional fault.
The recording function does not work correctly
The VCR display flashes when you try to record.
- To record, use a video cassette with an intact erasure prevention tab (see page 6).
The programmed recording function does not work.
• The time and date must be set correctly (see page 6).
The VCR does not record, even though the recording has been programmed.
- Set the start time and the stop time correctly, and set the VCR to Standby Recording by pressing the TIMER button (see pages 6-7).
- The PDC function was used to set the recording, but the start time input was incorrect (see pages 6-7).
Automatic clock correction is not working correctly.
[Clock setting] is set to manual [MAN.].
• Set the clock to [AUTO] (see page 9).
There is no programme with a clock signal available.
Set the clock manually (see page 9).
The picture or the sound is distorted.
The TV reception is not adjusted.
• Readjust the reception (see page 3).
The sound is distorted.
- Set the sound system (see page 10).
The tracking is not set correctly.
- Adjust the VCR tracking manually (see page 23).
Picture distortion can be caused by using E300 cassettes which were recorded with a slow tape speed (LP or EP).
• You are advised not to use E300 cassettes.
The aerial lead or scart lead is not correctly connected or is defective.
- Check the connections, aerial signal and leads (replace leads if necessary).
Setting for SQPB (S-VHS Quasi Playback) is not correct.
- Setting can be changed (see page 10).
The video heads are soiled or worn out.
- Please contact service center for assistance. Head cleaning by a service center is not covered by warranty.
This product may receive radio interference caused by mobile telephones during use.
- In such interference is apparent, please increase separation between the product and the mobile telephone.
The cassette is recorded in a tape speed, colour or video standard which is not corresponding to the VCR setting.
- Check which standard was used when the video cassette was recorded.
The remote control does not work correctly
The signal from the remote control does not reach the unit's window, or the distance is too long.
- Point the remote control in direction to the unit.
- Remove obstructions between the unit and the remote control (its transmitting distance is about 7 metres).
The batteries in the remote control are exhausted,
or the batteries have not been inserted with the correct polarity.
- Check the batteries and if necessary insert new batteries (see page 2).
No response when buttons are pressed
- Check if the remote control is operating VCR1 or VCR2 by holding IENTER1 and pressing [1] or [2] (see page 9)
Some operations may be prohibited by the disc or tape.
The unit may not be operating properly due to lightning or static electricity.
- Press [O/I] to switch the unit to standby mode, disconnect the AC mains lead, then reconnect it.
Condensation has formed.
- Wait 1 to 2 hours for it to evaporate.
Playback does not start even when Playback ▷ is pressed
- You can only playback DVD discs if the region number is the same as, or includes the same region number as the unit, or if the DVD is marked [All].
• The disc may be dirty. - Ensure that the disc is inserted with the label on the side to be played facing upwards. - For some discs it takes time to read the disc information (this is not a functional fault).
Alternative DVD languages cannot be selected
- An alternative language cannot be selected if the disc does not contain more than one language.
- With some discs, the alternative language must be selected in a disc menu.
No DVD subtitles
- Subtitles only appear if they are recorded on the disc.
- Subtitles are switched off. Display the subtitles.
Soundtrack or subtitle language is not the one selected in the DVD setup menu
• The language is not recorded on the disc.
Angle cannot be changed
• Only one angle is recorded on the disc.
DVD SOUND
No sound, distorted sound
- Check the connections. Check the volume on the equipment you have connected. If the DVD is recorded in DTS, no sound will be output. Try selecting another soundtrack.
- Turn ADVANCED SURROUND off, if it causes distortion.
Piercing noise comes from the speakers
- Ensure you have selected the correct setting for [Dolby Digital], [Digital Surround] and [MPEG] in the SETUP screen's AUDIO menu.
DVD PICTURE
Picture distorted during search
• The picture will be somewhat distorted at times. This is normal.
No picture
- Ensure that the equipment is connected properly.
- Ensure that the equipment is turned on.
- Ensure the television's video input setting is correct.
The picture shown on the television is not normal
- Go to the VIDEO menu in the SETUP screen and change [TV Aspect] to suit your TV.
- Ensure that the unit is connected directly to the television and is not connected through a video cassette recorder.
Ensure the [AV1 Output (Scart)] selection is correct for the TV input.
Troubleshooting
Adjusting the VCR Playback picture
If the picture is distorted with noise bars, press the TRACKING / V-LOCK button in the (+) or (-) direction during Playback, Still Playback or Slow Playback.


For automatic adjustment, press (+) and (-) at the same time.
• The tracking cannot be adjusted on certain cassettes. • This is not a functional fault of the VCR.
The meaning of some VCR On Screen Displays
Please use tape with unbroken recording tab!
The REC button or REC/OTR button was pressed to record, but the cassette's erasure prevention tab has been broken off.
- In order to record, use a video cassette with an intact erasure prevention tab (see page 6).
This action is not possible before time and date are set
The PROG./CHECK button, REC CHECK or ShowView button was pressed without a date and time being set on the VCR.
• Set the date and time (see page 9).
No timer programmes to be done!
The TIMER button was pressed, but no timer recording was programmed.
• Programme a timer recording (see pages 6-7).
Please put VCR into stop mode first
An attempt was made to change the programmed data while a timer recording was still in progress.
- You must stop the recording first by pressing the TIMER button before you can change the programming.
The meaning of some DVD On Screen Displays
[NO PLAY] appears on the unit's display
A disc was inserted that the unit cannot play.
- Insert one that it can.
[No] on-screen menu.
- Go to the DISPLAY menu in the SETUP screen and select [On-screen messages On].
OSD- screens not displayed or only partially on the television
- Move the OSD downwards using the bar position selection.
[H] appears on the unit's display:
Trouble is likely to have occurred. The number following [H] depends on the status of the unit.
- Press[1/1] to switch the unit to standby mode and then back to ON, disconnect the AC mains lead, and then reconnect it.
The signal is copy protected. Copying is not allowed.
- Please observe copyright laws when recording sound tracks and film.
If you have forgotten your password
• While DVD is stopped, press and hold down on the unit
and (DVD area) and also, until [Initialized] appears on the television screen
- Turn the unit off then on again. All of the settings will return to the factory default values. You will have to set the initial settings by using EASY SETUP, see page 17.
Remote control sliding cover
If the sliding cover of the remote control becomes detached accidentally, push the cover down until it clicks into position.


Language codes
| Abkhazian 6566 | Fiji | 7074 | Lingala | 7678 | Singhalese | 8373 |
| Afar 6565 | Finnish | 7073 | Lithunian | 7684 | Slovac | 8375 |
| Afrikaans 6570 | French | 7082 | Macedonian | 7775 | Slovenian | 8376 |
| Albanian 8381 | Frisian | 7089 | Malagasy | 7771 | Somali | 8379 |
| Ameharic 6577 | Galician | 7176 | Malay | 7783 | Spanish | 6983 |
| Arabic 6582 | Georgian | 7565 | Malayalam | 7776 | Sundanese | 8385 |
| Armenian 7289 | German | 6869 | Maltese | 7784 | Swahili | 8387 |
| Assamese 6583 | Greek | 6976 | Maori | 7773 | Swedish | 8386 |
| Aymara 6588 | Greenlandic | 7576 | Marathi | 7782 | Tagalog | 8476 |
| Azerbaijani 6590 | Guarani | 7178 | Moldavian | 7779 | Tajik | 8471 |
| Bashkir 6665 | Gujarati | 7185 | Mongolian | 7778 | Tamil | 8465 |
| Basque 6985 | Hausa | 7265 | Nauru | 7865 | Tatar | 8484 |
| Bengali 6678 | Hebrew | 7387 | Nepali | 7869 | Telugo | 8469 |
| Bhutani 6890 | Hindi | 7273 | Norwegian | 7879 | Thai | 8472 |
| Bihari 6672 | Hungarian | 7285 | Oriya | 7982 | Tibetan | 6679 |
| Breton 6682 | Icelandic | 7383 | Pashto | 8083 | Tigrinya | 8473 |
| Bulgarian 6671 | Indonesian | 7378 | Persian | 7065 | Tonga | 8479 |
| Burmese 7789 | Interlingua | 7365 | Polish | 8076 | Turkish | 8482 |
| Byelorussian6669 | Irish | 7165 | Portuguese | 8084 | Turkmen | 8475 |
| Cambodian 7577 | Italian | 7384 | Punjabi | 8065 | Twi | 8487 |
| Catalan 6765 | Japanese | 7465 | Quechua | 8185 | Ukrainian | 8575 |
| Chinese 9072 | Javanese | 7487 | Rhaeto-Rom. | 8277 | Urdu | 8582 |
| Corsican 6779 | Kannada | 7578 | Romanian | 8279 | Uzbek | 8590 |
| Croatian 7282 | Kashmiri | 7583 | Russian | 8285 | Vietnamese | 8673 |
| Czech 6783 | Kazakh | 7575 | Samoan | 8377 | Volapük | 8679 |
| Danish 6865 | Kirghiz | 7589 | Sanskrit | 8365 | Welsh | 6789 |
| Dutch 7876 | Korean | 7579 | Scots Gaelic | 7168 | Wolof | 8779 |
| English 6978 | Kurdish | 7585 | Serbian | 8382 | Xhosa | 8872 |
| Esperanto 6979 | Laotian | 7679 | Serbo-Croat. | 8372 | Yiddish | 7473 |
| Estonia 6984 | Latin | 7665 | Shona | 8378 | Yoruba | 8979 |
| Faroese 7079 | Latvian | 7686 | Sindhi | 8368 | Zulu | 9085 |
Remote Control codes
This remote control setting allows you to operate many functions of TVs from different brands.
If the TV cannot be operated properly, enter the other code listed. (If it is still not working, try other buttons to operate your TV.)
Please also read the operating instructions for your TV.
- While keeping the ⏻ button pressed, set the two-digit code.
| Brand | Code | Brand | Code | Brand | Code |
| Panasonic | 01-04,44 | ITT | 25 | SALORA | 26 |
| AIWA | 35 | JVC | 17,39 | SAMSUNG 31,32,43 | |
| AKAI | 27,30 | LOEWE | 07 | SANSUI | 05,31,33 |
| BLAUPUNKT | 09 | METZ | 28,31 | SANYO | 21 |
| BRANDT | 10,15 | MITSUBISHI 06,19,20 | SBR | 06 | |
| BUSH | 05,06 | MIVAR | 24 | SCHNEIDER 05,06,29-31 | |
| CURTIS | 31 | NEC | 36 | SELECO | 06,25 |
| DESMET | 05,31,33 | NOKIA | 25-27 | SHARP | 18 |
| DUAL | 05,06 | NORDMENDE 10 | SIEMENS | 09 | |
| ELEMIS | 31 | ORION | 37 | SINUDYNE 05,06,33 | |
| FERGUSON 10 | PHILIPS | 05,06 | SONY | 08 | |
| GOLDSTAR/LG | 31 | PHONOLA | 31,33 | TELEFUNKEN 10-14 | |
| GOODMANS 05,06,31 | PIONEER | 38 | THOMSON 10,15 | ||
| GRUNDIG | 09 | PYE | 05,06 | TOSHIBA | 16 |
| HITACHI 22,23,31,40-42 | RADIOLA | 05,06 | WHITE WESTING- | ||
| INNO HIT | 34 | SABA | 10 | HOUSE | 05,06 |
| IRRADIO | 30 | ||||
Note: If your Panasonic TV can be operated with Code 44, the remote control can operate some additional TV functions with the buttons:
A = red, B = green, C = yellow, D = blue, for example select the Panasonic TV input with: 📋, INPUT SELECT AVI and the A, B, C or D button.
.Safety information
CE
This equipment complies with European conformity requirements, in accordance with the conditions of electromagnetic compatibility and product safety.
回
This equipment complies with the requirements of protection class 2.
BEAB Approved
This equipment complies with the safety requirements of the BEAB.
| Page | Page | Page | Page | ||||
| A-B repeat play | 16 | EJECT | 5 | Optical digital audio lead | 12,13,20 | SEARCH 5,8,14 | |
| Add | 10 | EP (SUPER LP) 6,7 | Pal 60 | 18 | SET UP 18 | ||
| ADVANCED SURROUND | 17,19 | Erasure prevention 8 | Pan&Scan | 13,18,20 | Shipping condition 10 | ||
| Aerial | 3 | EXIT | 4 | Passwort | 13 | SKIP 16 | |
| Analogue recording | 12 | EXT LINK | 11,21 | PCM Down conversion | 12,18 | Slow playback | 5 |
| ANGLE | 19 | Fast Forward, Fast Rewind | 5,14 | PDC | 6,21 | Slow-motion playback | 14 |
| AUDIO | 5,19 | Field | 18,20 | Picture distorted | 3,23 | Sound system | 10 |
| Automatic Setting | 3 | Frame 18,20 | Playback | 5,8,14,15,20 | Soundtrack language | 18 | |
| AV input / AV Output (Scart) | 2,3,8,11,12,18 | Frame by frame viewing | 14 | PLAY MODE 15 | SP | 6,7 | |
| BASS PLUS | 17,19 | INDEX (VHS Index Search System) | 8 | Playback Off Timer | 8 | SQPB (S-VHS Quasi Playback) | 9,21 |
| Batteries | 2 | INPUT SELECT | 4,10 | POSITION MEMORY | 16 | Still mode / Still playback | 5,18 |
| Bitstream | 12,18,20 | Intro-Jet Scan | 8,21 | PROG. / CHECK | 6,7 | Stop | 5 |
| Brightness of VCR display | 9 | I-TIMER (INTELLIGENT TIMER) 7,21 | Programme List | 8 | Subtitles / Subtitle language | 17,18,19 | |
| CANCEL | 4,5,7,15,17 | JET SEARCH | 5 | Programme playback | 15 | SUBWOOFER | 12,17,19 |
| Channel | 3,10 | Language codes 23 | Progress Indicator 19 | SUPER LP (EP) | 6,7,21 | ||
| CHAPTER / Chapter review | 15,16,19,20 | Laser | 2 | Q Link | 3,6,21 | S-VIDEO | 12 |
| Child lock | 8,13,17,18,23 | Letterbox | 13,18,20 | Random playback | 15 | Synchronous recording | 7 |
| CINEMA | 17 | LP, AUTO LP | 6,7,21 | REC, REC/OTR, Recording | 6,7 | Tape counter | 5 |
| Clock | 3,9 | MENU | 5 | Receiver | 11 | Tape length setting 9 | |
| CVC | 8 | Menu Operation | 4 | REC CHECK | 5 | Tape Speed | 6 |
| DATE | 3,9 | Mono sound | 5,10 | Remaining tape time (REMAIN) | 5,6,7 | TITLE | 16,19,20 |
| Delete | 10 | Move | 10 | Remote control | 2,4,5,9,23 | TIMER, Timer recording | 6,7 |
| DIALOGUE ENHANCER | 17,19 | MP3 menu | 15 | Repeat Playback | 8,16 | TOP MENU | 15 |
| Digital Audio-output | 12 | MPEG | 12,13,18 | REPLAY | 4,16 | TRACKING / V-LOCK | 23 |
| Digital recording 12 | NICAM sound | 10 | RESET | 5 | TV ASPECT | 5 | |
| DIMMED | 9 | NTSC | 8,18,21 | Restart Automatic settings | 10 | TV Operation | 4 |
| DIRECT TV REC 6 | OFF | 6 | Resume function | 16 | VCR / DVD OUTPUT | 4,9 | |
| DISPLAY | 5,6,9,18 | ON | 6 | RETURN | 5 | VCR display | 9 |
| Disposal | 2 | On Screen Displays / OSD Menu 9,18,19,23 | RF coaxial lead | 3 | VCR Operation | 5 | |
| Dolby Digital | 12,13,18,20 | ONE TOUCH MEMORY | 17 | RGB | 12,18 | VIDEO Plus+ | 7,21 |
| DTS Digital Surround | 12,13,18,20 | OPEN/CLOSE | 5 | Safety | 2 | Volume | 4 |
| DVD Menu | 15 | OPTICAL 12,13 | Satellite Receiver | 11 | Warning | 2 | |
| Dynamic range | 18,20 | Owner ID | 3,9 | Scart 3,11,12,18 | ZOOM | 18 | |
| EASY SETUP | 13 |
Specifications
| Power source 220-240 V AC, 50/60 Hz | Matsushita Electric Industrial Co., Ltd. | |
| Power consumption | 28W (in operation) / approx. 7W (in standby mode) | http://www.panasonic.co.uk |
| Controls | multifunctional remote control (VCR, DVD and TV) / VCR / DVD direct controls (main functions) | |
| VCR Playback functions | PAL and NTSC Playback on PAL TV / S-VHS Quasi Playback (SQPB) | |
| Disc Playback functions DVD-Video, DVD-R (R4.7), CD-Audio (CD-DA), Video-CD, CD-R/CD-RW,(CD-DA, Video-CD formatted discs), MP3 | ||
| Video and Audio heads | Helical scanning system: 4 heads (Super Ferrite Head) / 2 heads Hi-Fi | |
| Tape speed / Record and playback time | SP: 23.39 mm/s , 240 min / LP: 11.7 mm/s , 480min (E240 cassette) | |
| VCR Fast forward or fast rewind time approx. 60 s (E180 cassette) | ||
| Video TV Colour system VCR: PAL 625/50 / DVD: PAL 625/50, PAL 525/60, NTSC | ||
| Video input and output level Pin jack/AV 1.0 V p-p (75 Ohm) | ||
| DVD S video output | Y output level: 1 Vp-p (75 Ohm) / C output level: Pal: 0.300 Vp-p (75 Ohm) | NTSC: 0.286 Vp-p (75 Ohm) |
| Output connector: S terminal | ||
| DVD RGB video output | R G B output level: 0.7 Vp-p (75 Ohm) / Output connector: AV1 | |
| VCR RF modulated | UHF channel (21-68), 75 Ohm | |
| VCR Horizontal resolution | more than 240 lines (SP) | |
| VCR Signal-to-noise ratio video | more than 43 dB (SP) | |
| Audio Input level | 0.5Vrms, more than 10 kOhm | |
| Audio Output level | VCR: 0.5Vrms, less than 1 kOhm / DVD: 2Vrms. (1 kHz, 0 dB) Output connector: Pin jack/AV, 2 ch (L/R), Subwoofer | |
| VCR Dynamic range audio | more than 90 dB (Hi-Fi sound tracks) | |
| DVD Dynamic range audio | DVD (linear audio): 96 dB / CD audio: 96 dB / Total harmonic distortion CD audio: 0.0025 %, S/N ratio: 115dB | |
| VCR Audio frequency response | 80 Hz to 8 kHz / 20 Hz to 20 kHz (Hi-Fi sound tracks) | |
| DVD frequency response (linear audio) | 4 Hz to 22 kHz (48 kHz sampling) / 4 Hz to 44 kHz | (96 kHz sampling) / CD audio: 4 Hz to 20 kHz |
| DVD Optical digital output | Optical terminal | |
| Laser Pick up | Wave length: 658 nm/790 nm / Laser power: Class 2 / Class 1 | |
| Operating temperature / humidity | 5°C to 40°C / 35-80% relative humidity | |
| Weight and Dimensions | Approximate value: 5.2 kg / 430 (width) x 89 (height) x 345 mm (depth) | |
- NV-VHD1 B
- SUPER DRIVE
- ACCESSORIES
- PANASONIC
- CONTENTS
- PAGE
- WARNINGS AND PRECAUTIONS
- HOW TO REPLACE THE FUSE
- CAUTION
- WARNING
- INSTRUCTIONS FOR INSERTING REMOTE CONTROL BATTERIES
- CAUTION FOR AC MAINS LEAD (FOR UNITED KINGDOM)
- IMPORTANT
- AUTOMATIC SETTING WITHOUT Q LINK
- AUTOMATIC SETTING WITH Q LINK
- MANUAL DOWNLOAD START
- CONNECT THE TV ONLY WITH A RF COAXIAL LEAD
- TV OPERATIONS
- VCR RECORDING
- DIRECT TV RECORDING
- OTR FUNCTION (OTR = ONE TOUCH RECORDING) • REC/OTR
- TAPE SPEED
- TIMER RECORDING WITH ON SCREEN MENU
- TIMER RECORDING WITH VIDEO PLUS
- RECORDING WITH INTELLIGENT TIMER FUNCTION
- CANCEL STANDBY MODE FOR TIMER RECORDING
- CHECK THE TIMER RECORDING
- DELETE OR CHANGE A TIMER RECORDING
- SYNCHRONOUS RECORDING (DVD, VCD, CD, MP3)
- NOTE
- VCR PLAYBACK / VCR FUNCTIONS
- VCR PLAYBACK
- NORMAL PLAYBACK
- STOP PLAYBACK
- STILL PLAYBACK
- SLOW PLAYBACK
- ERASURE PREVENTION OF A CASSETTE
- NTSC PLAYBACK FUNCTION
- REPEAT PLAYBACK FUNCTION
- CHILD LOCK FUNCTION
- PLAYBACK OFF TIMER FUNCTION (TO STOP PLAYBACK AUTOMATICALLY)
- INTRO-JET SCAN FUNCTION
- PROGRAMME LIST
- VHS INDEX SEARCH SYSTEM
- SETTING THE AUDIO PLAYBACK
- TAPE LENGTH SETTING
- CLOCK SETTING
- REMOTE CONTROL SETTING
- OWNER ID
- SETTING OF ON SCREEN DISPLAYS (OSD)
- SETTING OF SQPB (S-VHS QUASI PLAYBACK)
- SQPB SETTINGS
- SETTING THE BRIGHTNESS
- ADJUST THE BRIGHTNESS OF THE VCR DISPLAY
- OUTPUT CONTROL
- VCR TUNING
- SETTING THE SOUND SYSTEM
- CHANGE THE ORDER OF THE CHANNEL POSITIONS AND THE NAMES OF THE TV STATION
- SETTING A NEW CHANNEL
- ADD / DELETE / MOVE
- A CHANNEL ON THE LIST
- RESTART AUTOMATIC SETTINGS
- RESTORING THE ORIGINAL SETTINGS OF THE VCR (SHIPPING CONDITION)
- CONNECTING EXTERNAL EQUIPMENT
- CONNECTING A SATELLITE RECEIVER
- CONTROLS FOR EXTERNAL RECORDINGS WITH A SATELLITE RECEIVER
- CONNECTING A DECODER
- EXTERNAL SOURCE ON AV
- CONNECTING WITH AUDIO / VIDEO CABLE
- CONNECTING WITH S-VIDEO LEAD
- CONNECTING AN ACTIVE SUBWOOFER
- TV SCREEN FORMATS
- PAN&SCAN
- LETTERBOX
- OPTICAL (OPTICAL OUTPUT)
- DTS (DIGITAL THEATER SYSTEMS)
- DOLBY DIGITAL
- MPEG
- CHILD LOCK PASSWORD
- PASSWORD
- PLAYBACK
- PLAYBACK PAUSE (DVD, VCD, CD)
- PLAYBACK STOP (DVD, VCD, CD)
- REMOVE THE DISC
- STARTING PLAY FROM A SELECTED TRACK (VCD, CD)
- FRAME BY FRAME VIEWING (DVD, VCD)
- SLOW-MOTION PLAYBACK (DVD, VCD)
- FAST FORWARD AND REWIND-SEARCH (DVD, VCD, CD)
- MP3 MENU
- PROGRAMMED PLAYBACK AND RANDOM PLAYBACK (DVD, VCD, CD, MP3)
- EXITING PROGRAMME MODE
- CLEAR THE [PLAYLIST]
- RANDOM PLAYBACK
- CHAPTER REVIEW (DVD, VCD, CD, MP3)
- DVD MENUS
- REPEAT PLAYBACK (DVD, VCD, CD, MP3)
- REPEAT OF A VIDEO-CD (VCD)
- A-B REPEAT PLAYBACK (DVD, VCD, CD, MP3)
- RESUME FUNCTION (DVD, VCD, CD, MP3)
- CANCEL THE RESUME FUNCTION
- REPLAYING A SCENE (DVD, VCD, CD, MP3)
- SKIPPING CHAPTERS OR TRACKS (DVD, VCD, CD, MP3)
- POSITION MEMORY FUNCTION (DVD, VCD, CD, MP3)
- START PLAYBACK AFTER SWITCHING TO STANDBY
- ADVANCED SURROUND (DVD) DOLBY DIGITAL, 2-CHANNEL OR OVER ONLY
- PICTURE (DVD, VCD) ©
- DIALOGUE ENHANCER (DVD) DOLBY DIGITAL, 3-CHANNEL OR OVER ONLY
- RECALLING YOUR SETTINGS WITH ONE BUTTON (DVD, VCD, CD)
- BASIC OPERATION
- SUBTITLES (DVD)
- CHILD LOCK PASSWORD (DVD)
- SOUND AND PICTURE DVD SETTINGS
- DVD SETTINGS
- SETUP DEMO
- INFORMATION ABOUT THE PLAYER
- REGION CODES
- DISC FORMATS
- DVD FORMATS
- DVD GLOSSARY
- VCR SPECIAL FEATURES
- I-TIMER
- EASY GUIDE OSD
- SQPB
- SUPER LONG PLAY
- AUTO LONG PLAY
- INTRO-JET SCAN
- JET REWIND
- QLINK
- EXTERNAL LINK
- NTSC PLAYBACK
- REC/OTR
- PDC
- VIDEO PLUS
- TROUBLESHOOTING
- THE DISPLAY IS NOT ILLUMINATED
- THE DISPLAY IS ILLUMINATED, BUT THE UNIT CANNOT OPERATE
- TAPE TRANSPORT NOISE
- THE RECORDING FUNCTION DOES NOT WORK CORRECTLY
- AUTOMATIC CLOCK CORRECTION IS NOT WORKING CORRECTLY
- THE PICTURE OR THE SOUND IS DISTORTED
- THE REMOTE CONTROL DOES NOT WORK CORRECTLY
- NO RESPONSE WHEN BUTTONS ARE PRESSED
- ALTERNATIVE DVD LANGUAGES CANNOT BE SELECTED
- NO DVD SUBTITLES
- SOUNDTRACK OR SUBTITLE LANGUAGE IS NOT THE ONE SELECTED IN THE DVD SETUP MENU
- ANGLE CANNOT BE CHANGED
- DVD SOUND
- NO SOUND, DISTORTED SOUND
- PIERCING NOISE COMES FROM THE SPEAKERS
- DVD PICTURE
- PICTURE DISTORTED DURING SEARCH
- NO PICTURE
- THE PICTURE SHOWN ON THE TELEVISION IS NOT NORMAL
- ADJUSTING THE VCR PLAYBACK PICTURE
- THE MEANING OF SOME VCR ON SCREEN DISPLAYS
- PLEASE USE TAPE WITH UNBROKEN RECORDING TAB
- THIS ACTION IS NOT POSSIBLE BEFORE TIME AND DATE ARE SET
- NO TIMER PROGRAMMES TO BE DONE
- PLEASE PUT VCR INTO STOP MODE FIRST
- THE MEANING OF SOME DVD ON SCREEN DISPLAYS
- [NO PLAY] APPEARS ON THE UNIT'S DISPLAY
- [H] APPEARS ON THE UNIT'S DISPLAY
- THE SIGNAL IS COPY PROTECTED. COPYING IS NOT ALLOWED
- IF YOU HAVE FORGOTTEN YOUR PASSWORD
- REMOTE CONTROL SLIDING COVER
- LANGUAGE CODES
- REMOTE CONTROL CODES
- SAFETY INFORMATION
Brand : PANASONIC
Model : NV-VHD1B
Category : VCR