
NV-VS50EG - VCR PANASONIC - Free user manual and instructions
Find the device manual for free NV-VS50EG PANASONIC in PDF.


| Product Type | Video Cassette Recorder (VCR) |
| Brand | Panasonic |
| Model | NV-VS50EG |
| Dimensions (W x H x D) | Approx. 430 x 95 x 350 mm |
| Weight | Approx. 4.5 kg |
| Power Supply | AC 220-240V, 50/60 Hz |
| Power Consumption | Approx. 20 W |
| Video Head System | 4-head helical scanning |
| Recording System | VHS standard |
| Tape Speeds | SP (Standard Play), LP (Long Play) |
| Input/Output | RF antenna input, AV input/output, S-Video output |
| Timer Recording | Yes, with on-screen programming |
| Remote Control | Included (IR) |
| Auto Head Cleaning | Yes |
| Playback Compatibility | VHS tapes (NTSC/PAL) |
| Special Features | Auto tracking, Hi-Fi stereo sound, auto power off |
| Maintenance | Clean heads with cleaning cassette; keep vents free of dust |
| Safety | Auto power off, child lock, overheat protection |
| Spare Parts & Repairability | Remote control, loading belt, video heads available; repair by qualified technician |
| General Information | Designed for home entertainment; operates in PAL system |
Frequently Asked Questions - NV-VS50EG PANASONIC
User questions about NV-VS50EG PANASONIC
0 question about this device. Answer the ones you know or ask your own.
Ask a new question about this device
Download the instructions for your VCR in PDF format for free! Find your manual NV-VS50EG - PANASONIC and take your electronic device back in hand. On this page are published all the documents necessary for the use of your device. NV-VS50EG by PANASONIC.
USER MANUAL NV-VS50EG PANASONIC
NV-VS50EN/A NV-VS70EN/A

S-VHS-C Camcorder
S-VHS-C Movie Camera
Operating Instructions
Operating Instructions

VHSC
VHS
PAL
625
S-VHS
ET
Before use, please read these instructions completely.
Before use, please read these instructions completely.
Information for Your Safety
WARNING
To reduce the risk of fire or shock hazard and annoying interference, use only the recommended accessories and do not expose this equipment to rain or moisture.
Do not remove the cover (or back); there are no user serviceable parts inside. Refer servicing to qualified service personnel.
Movie Camera
The rating plate is on the underside of the Movie Camera.
AC Adaptor
The rating plate is on the underside of the AC Adaptor.
As this equipment gets hot during use, operate it in a well ventilated place; do not install this equipment in a confined space such as a bookcase or similar unit.
■ Carefully read the Operating Instructions and use the Movie Camera correctly.
Injury or material damage resulting from any kind of use that is not in accordance with the operating procedures explained in these Operating Instructions are the sole responsibility of the user.
These Operating Instructions are for the two Movie Camera models NV-VS50 and NV-VS70. Please note that the actual controls and components, etc. of your Movie Camera may look somewhat different from those shown in the illustrations in these Operating Instructions.
■ Try out the Movie Camera.
Be sure to try out the Movie Camera before recording your first important event and check that it records properly and functions correctly.
■ The manufacturer is not liable for loss of recorded contents.
The manufacturer shall in no event be liable for the loss of recordings due to malfunction or defect of this Movie Camera, its accessories or cassettes.
■ Carefully observe copyright laws.
Recording of pre-recorded tapes or discs or other published or broadcast material for purposes other than your own private use may infringe copyright laws. Even for the purpose of private use, recording of certain material may be restricted.
Table of Contents
If you want to start using the Movie Camera immediately, be sure to read at least the pages marked with ♠.
Preparations
Standard Accessories 10
Controls and Components 12
The 3 Types of Power Supply 18
●Supplying Power from an AC Mains Socket 18
●Supplying Power with the Battery 20
Using the LCD Monitor 26
Using the Menus 28
Menu Functions 30
Adjusting the Brightness and Colour
Level of the LCD Monitor/Finder 38
♠Inserting/Ejecting the Cassette 40
- Selecting the Correct Tape Length 42
- Confirming the Remaining Tape Time 42
- About the VHS Formats 44
Adjusting the Finder 46
Adjusting the Grip Belt 46
Attaching the Lens Cap 46
Inserting the Button-type Battery 48
Setting the Date and Time 50
- Recording with the Date/Time/Title Superimposed in the Picture 52
Basic Operations
▲Recording in the Full Auto Mode 54
Checking the End of a Recorded Scene (Recording Check Function) 58
- Viewing Recorded Scenes During Recording Pause (Camera Search Function) 58
Recording Backlit Scenes (Backlight Mode) 58
Zooming In/Out 60
●Voice Zoom 60
●Recording Extra Close-up Shots of Small Subjects (Macro Close-up Function) 60
♠Playback 62
●Watching Playback on the Movie Camera 62
- TBC (Time Base Corrector) Function 64
●DNR (Digital Noise Reduction) Function 64
- Playing Back on a VCR (Using the Supplied Cassette Adaptor) 66
●High-Speed Rewinding 68
- Eliminating Picture Distortions (Manual Tracking Adjustment) 68
- Cue Playback 70
- Review Playback 70
- Still Playback....70
Watching Playback on a TV 72
After Use 72
- Cleaning the Finder 72
- Cleaning the LCD Monitor 72
- Cleaning the Movie Camera Body 72
- Cleaning the Lens 72
Advanced Operations
Fade In/Fade Out 74
Recording a Still Picture (Snapshot Recording) 76
Using Special Effects (Digital Effects) 78
Recording a Still Picture (Snapshot Recording) 76
Using Special Effects (Digital Effects) 78
- Selecting a Desired Digital Effect 78
●Digital Effects 1 [EFFECT1] 80
●Digital Effects 2 [EFFECT2] 84
●Using the Super Image Stabilizer Function 86
- Using the Digital Zoom Function 88
- Displaying 9 Small Still Pictures on the Screen (Multi Image) 90
- Displaying a Small Still Picture Inside the Normal Picture (Picture-in-Picture) 94
- Mix Function and Wipe Function 96
- Digital Fade 98
Motion-Sensor-Controlled Recording 100
Recording in Dark Places without Any Illumination (0 Lux Night View Function) 104
Recording with Manual White Balance Adjustment ..... 106
- Colour Temperature and White Balance Adjustment .... 108
Recording with Manual Focus Adjustment .... 110
Recording in Special Situations (Programme AE) ..... 112
Advanced Operations
Using the Remote Controller 116
- Inserting the Button-type Battery into the Remote Controller 122
Using the Remote Controller 116
- Inserting the Button-type Battery into the Remote Controller 122
Recording Yourself with the LCD Monitor Facing Forward 124
Recording with Pre-programmed Titles Inserted in the Picture 128
Creating Your Own Titles and Inserting Them During Recording (Digital Superimposer Function) 132
- Inserting Your Own Title at the Beginning of a Recording 134
- Inserting Your Own Title During Recording .... 134
Using Various Functions during Playback 136
●Playback Title Indication 136
-Playback Digital Effects 138
-Playback Digital Superimposer 150
Enlarging the Playback Picture (Playback Zoom) ..... 152
Using the Tape Counter Indication 154
- Checking the Elapsed Tape Time .... 154
- Using the Memory Stop Function 158
Dubbing (Copying) 160
Using the Movie Camera with a Computer 162
Precautions, Technical Information, etc.
Precautions 164
●Precautions for the Movie Camera 164
●Precautions for the AC Adaptor 164
●Precautions for the Battery 166
●Precautions for the Cassette 166
●Causes of Condensation and Remedy 168
●Video Head Clogging and Remedy 168
How the White Balance (Tint) Adjustment Works ...... 170
How the Focus Adjustment Works .... 170
Indications 172
- Demonstration Mode 178
Optional Accessories 180
Specifications 182
Before Requesting Service (Problems & Solutions) ..... 184
1.2.3. | [A][B] |  | ||
4. |  | 6.5.7. | 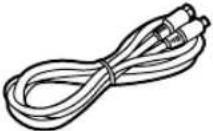 | |
8.9.10.  |  | 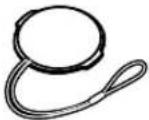 | 11. | |
中文
Standard Accessories
Standard Accessories
- AC Adaptor (→ 18, 20, 164) To supply power to the Movie Camera and to charge the Battery. DC Input Lead (→ 18) To connect the AC Adaptor to the Movie Camera.
- AC Mains Lead (→ 18, 20) To connect the AC Adaptor to an AC mains socket. [A] Australia and New Zealand [B] Areas other than Australia and New Zealand
- Battery (→ 20, 166) To supply power to the Movie Camera.
- Cassette Adaptor and Battery (→ 66)
- Shoulder Strap (→ 16)
- AV Cable (→ 72, 160, 162) To connect the Movie Camera to the video input and audio input sockets on a TV or a VCR.
- S-Video Cable (→ 72, 160, 162)
- Remote Controller and Button-Type Battery (→ 116, 122)
- Button-Type Battery (→ 48) To supply power to the Movie Camera's built-in clock.
- Lens Cap (→ 46)
- Personal Computer Connection Kit (→ 162)

Controls and Components
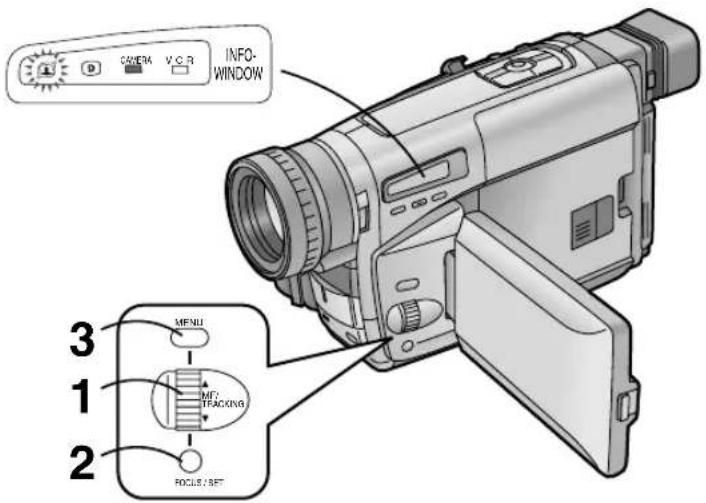
1 Super Image Stabilizer Indication Lamp [icon] (→ 78, 86) 2 Digital Effect Indication Lamp [D] (→ 78, 138) 3 Camera Mode Lamp [CAMERA] (→ 54) 4 VCR Mode Lamp [VCR] (→ 62) 5 0-Lux Recording Switch [0 LUX OFF/ON] (→ 104) 6 White Balance Sensor (→ 170) 7 Remote Control Sensor (→ 120) 8 Built-in Infra-red Beam Emitters (→ 104) 9 Lens Cap Holder (→ 46)
10 Microphone
11 Tally Lamp (→ 56)
12 Fade Button [FADE] (→ 74, 98, 148)
13 Focus Button [FOCUS] (→ 110)
Item Set Button [SET] (→ 28)
Tracking Button (→ 68)
14 Multi-Function Dial [▲▼/MF/TRACKING] (→ 28, 68, 110)
15 Menu Button [MENU] (→ 28)
16 Auto Exposure Selector Button [PROG. AE] (→ 54, 106, 110, 112)
17 Digital Image Store Button [STORE] (→ 132, 150) Digital Image Superimposer Button [OFF/ON] (→ 132, 150)
18 Colour Selector Button for Digital Fade/Digital Image [COLOUR] (→ 98, 132, 148, 150)
19 Eyecup

20 Reverse Search Button [-SEARCH]
Rewind/Rewind Search/High-Speed Rewind Button ◀◀
Recording Check Button [→58)
21 Stop Button [■] (→62)
22 Forward Search Button [SEARCH+] (→ 58)
Fast Forward/Cue Button [▶▶]
23 White Balance Button [W.B] (→ 106)
Pause Button [Ⅲ] (→ 70)
24 Playback Button [▶] (→ 62)
Backlight Button [BLC] (→ 58)
TBC Button [TBC] (→ 64)
25 LCD Monitor Open Lever [▲OPEN]
26 LCD Monitor (→ 26, 38, 72)
20 Reverse Search Button [-SEARCH] (→ 58) Rewind/Review/High-Speed Rewind Button [◀◀] (→ 62, 68, 70) Recording Check Button [[▶]] (→ 58)
21 Stop Button [■] (→ 62)
22 Forward Search Button [SEARCH+] (→ 58) Fast Forward/Cue Button [▶▶] (→ 70)
23 White Balance Button [W.B] (→ 106) Pause Button [Ⅲ] (→ 70)
24 Playback Button [▶] (→ 62) Backlight Button [BLC] (→ 58) TBC Button [TBC] (→ 64)
25 LCD Monitor Open Lever [▲OPEN] (→ 26)
26 LCD Monitor (→ 26, 38, 72)
Due to limitations in LCD production technology, there may be some tiny bright or dark spots on the LCD Monitor screen. However, this is not a malfunction and does not affect the recorded picture.
27 Cassette Compartment Lock Button [LOCK] (→ 40)
28 DC Input Socket [DC IN] (→ 18)
29 Finder (→ 46, 72)
Due to limitations in LCD production technology, there may be some tiny bright or dark spots on the Finder screen, the whole screen may have a slight colour cast, and flickering may occur. However, this is not a malfunction and does not affect the recorded picture.
30 Cover of the Button-type Battery's Compartment [BACKUP BATTERY] (→ 48)
31 Battery Holder (→ 20)
32 Battery Eject Lever [◀BATTERY EJECT] (→ 20)

33 Video Output Socket [V] (→ 72, 160, 162) 34 Audio Output Socket [A] (→ 72, 160, 162) 35 S-Video Output Socket [S-VIDEO] (→ 72, 160, 162) 36 Recording Start/Stop Button (→ 54) 37 Off/On Mode Selector Switch [CAMERA/OFF/VCR] (→ 46, 54, 62, 72) 38 Grip Belt (→ 46) 39 Speaker (→ 62) 40 Digital Still Picture Terminal [DIGITAL STILL PICTURE] (→ 162) 41 Cassette Eject Button [▲ EJECT] (→ 40) 42 Date/Time/Title Button [DATE/TITLE] (→ 52, 130, 136) 43 Recording Start/Stop Button [REC] (→ 54, 56) Multi Image/Picture-in-Picture Button [MULTI] (→ 90, 92, 94, 140, 142, 144) Snapshot Recording Button [SNAP] (→ 76) 44 Zoom Lever [W/T] (→ 60, 88) Volume Adjustment Lever [-VOL+] (→ 62) 45 Eyepiece Corrector Lever (→ 46) 46 Shoulder Strap Holders Pull one end of the Shoulder Strap through the Shoulder Strap Holder ①. Fold the end of the Shoulder Strap back, pull it through the Shoulder Strap Length Adjuster. Pull it out more than 2 cm ② from the Shoulder Strap Length Adjuster so that it cannot slip off. 47 Tripod Receptacle
Three types of power supply
The 3 Types of Power Supply
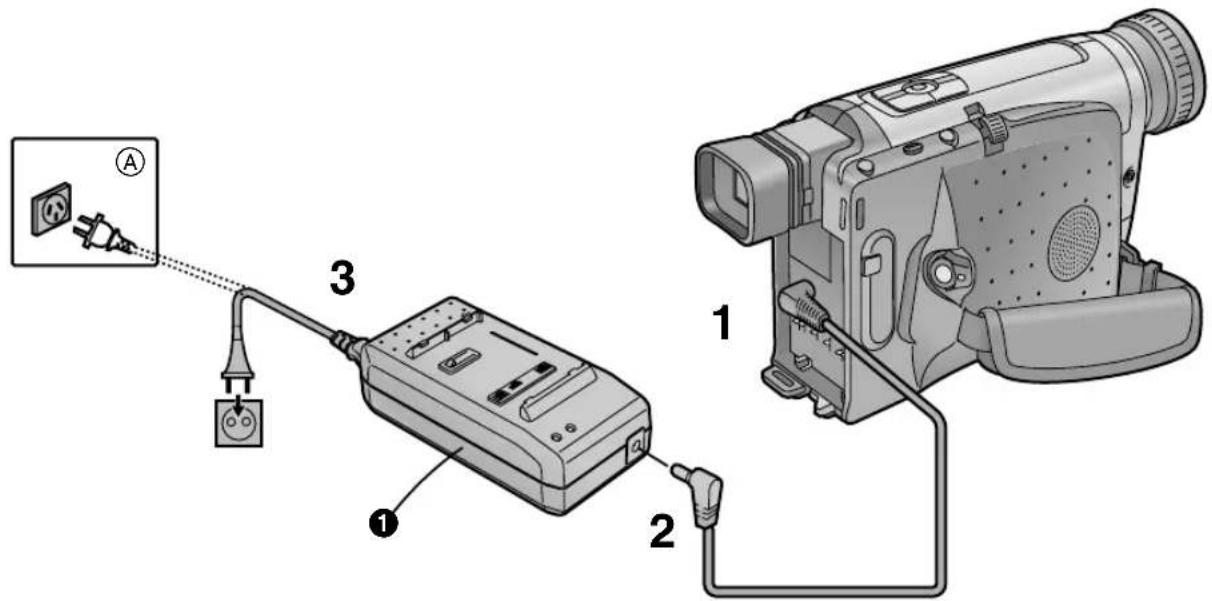
1) AC Adaptor ① (supplied) to supply power from an AC mains socket 2) Car Battery Charger (optional) to supply power from the cigarette lighter socket in a vehicle 3) Battery (supplied) (→ 20)
Supplying Power from an AC Mains Socket
1 Connect the DC Input Lead to the [DC IN] Socket on the Movie Camera. 2 Connect the other end of the cable to the [DC OUT] Socket on the AC Adaptor. 3 Connect the AC Mains Lead to the AC Adaptor and to an AC mains socket.
Ⓐ: Australia and New Zealand
- Before connecting the DC Input Lead to the Movie Camera, be sure to set the [CAMERA/OFF/VCR] Switch to [OFF].
- The AC Adaptor features automatic universal voltage adjustment (AC 100–240 V, 50/60 Hz), therefore, there is no need for any manual voltage adjustment for use in other countries.

Supplying Power with the Battery
Charge the Battery before using it.
1 Attach the Battery.
Supplying Power with the Battery
Charge the Battery before using it.
1 Attach the Battery.
- Align the Battery with line 1 and push it in the direction of the arrow while holding it down.
- When charging, do not connect the DC Input Lead to the AC Adaptor.
2 Connect the AC Mains Lead to the AC Adaptor and an AC mains socket.
- The [POWER] Lamp ② and the [CHARGE] Lamp ③ light and charging starts. (for NV-VS50) The [POWER] Lamp ② lights and then the [CHARGE] Lamp ③ flashes and charging starts. (for NV-VS70)
- If the [CHARGE] Lamp ③ does not light even though the Battery is attached, remove the Battery and then re-attach it.
3 Remove the Battery by sliding it in the opposite direction of Step 1 above.
4 Insert the Battery with its top (so that the arrow points upward) into the top Battery Holder and press the bottom of it toward the Movie Camera until it locks with a click.
Removing the Battery from the Movie Camera
Hold the Battery firmly to prevent it from dropping and pull it off while sliding the [◀BATTERY EJECT] Lever ④ in the direction of the arrow.
- Before removing the Battery, set the [CAMERA/OFF/VCR] Switch to [OFF].
■Charging Lamp [CHARGE]
Flashing (NV-VS70 only): During charging
Lit (NV-VS50): During charging
Lit (NV-VS70):
The Battery can already be used to operate the Movie Camera but it is not yet fully charged.
(Approx. 30-minute battery charge)
Off: The Battery is fully charged.
| NV-VS50 | NV-VS70 | ||
CGR-V14CGR-V14SCGR-V610![PANASONIC NV-VS50EG - ■Charging Lamp [CHARGE] - 1](/content/2026/06/1329805/images/d184061d93a9973723ef9f78f491b38b126f91d4042d0b969ba9c2878b6fecdb.jpg) | A | 2 h 40 min. | 1 h 20 min. |
| B | 2 h 10 min. (1 h 30 min.) | 2 h 10 min. (1 h 25 min.) | |
| C | 50 min. (35 min.) | ||
CGR-V26SCGR-V620![PANASONIC NV-VS50EG - ■Charging Lamp [CHARGE] - 2](/content/2026/06/1329805/images/4eff653b3c64f117025be7517f0d29a8f261fd7aa0935734c6e71ff51ac958c4.jpg) | A | 4 h 50 min. 2 h 25 min. | |
| B | 4 h 10 min. (2 h 55 min.) | 4 h 10 min. (2 h 45 min.) | |
| C | 50 min. (35 min.) | ||
CGR-V53SCGR-V816![PANASONIC NV-VS50EG - ■Charging Lamp [CHARGE] - 3](/content/2026/06/1329805/images/28d8bc69c3b64a4e5704f10d8cd403114b6ddca1135a7b174da71794372875e7.jpg) | A | 10 h 20 min. 5 h 10 min. | |
| B | 8 h 20 min. (5 h 50 min.) | 8 h 20 min. (5 h 30 min.) | |
| C | 50 min. (35 min.) |
Charging Time and Maximum Continuous Recording Time in the Manual Recording Mode
A: Charging Time for a Full Charge (B) Maximum Continuous Recording Time (C) Maximum Continuous Recording Time for an Approx. 30-Minute Charge
- "1 h 10 min." stands for "1 hour and 10 minutes".
The Battery Model CGR-V14 is supplied. - The times shown in the above chart are approximations. The figures in parentheses show the recording time when using the LCD Monitor. - Only the NV-VS70 models come with 30-Minute battery Charge.
Maximum Continuous Recording Time means the duration of continuous recording performed at an ambient temperature of 25°C and 60% relative humidity. In actual recording, however, the use of the zoom and other functions increases the power consumption, and higher or lower temperatures reduce the Battery's ability to generate electricity. Therefore, the actual recording time per Battery may be approximately 30%–50% shorter than listed above.
- When first charging a Battery that is completely discharged as a result of being in storage for an extended period of time, etc., the [POWER] Lamp and the [CHARGE] Lamp both flash.
- Charge the Battery at a room temperature between 10°C and 30°C.
- During recording or charging, the Battery becomes warm. However, this is normal.
- To ensure precise indication of the remaining battery power, always use a fully charged Battery when attaching a Battery.
CGR-V14
CGR-V14S
CGR-V610![PANASONIC NV-VS50EG - ■Charging Lamp [CHARGE] - 4](/content/2026/06/1329805/images/d71a9c86006ce376aead7dbf95890ce8481c92ca034dc99b2391ae31478e629a.jpg)
![PANASONIC NV-VS50EG - ■Charging Lamp [CHARGE] - 5](/content/2026/06/1329805/images/c552efe3a34d48e3559f5762cb3fd0673375ca7fc8bbe2e7e84be3f4586e9c0a.jpg)
Checking the Remaining Battery Power
You can confirm the remaining charge in the attached Battery in the Finder or on the LCD Monitor. This also shows you approximately how much more continuous recording time you can get from the attached Battery. The indicated time does not change in 1-minute steps.
The above illustrations show how the Remaining Battery Operation Time Indication changes according to the remaining operation time.
1: Actual remaining battery operation time (A): Remaining Battery Operation Time Indication (This indication does not appear when recording in the Mirror Mode.) (→ 126)
Remaining Battery Operation Time Indication
This indication shows the remaining duration of continuous recording at an ambient temperature of 25°C when a fully charged battery was attached. Therefore, in the following cases, the actual available recording time is different from the times shown above:
When Recording Is Not Performed Continuously
In most cases, you will frequently start and stop recording, turn the movie camera on and off, use the zoom and other functions, all of which consume power. Therefore, the actual available recording time from the battery is approximately 30%-50% shorter than listed. (→22)
When the Ambient Temperature Is Extremely Low or Extremely High
The characteristics of the battery vary according to the ambient temperature, and at a very low temperature, the possible recording time becomes extremely short. In addition, the remaining battery operation time indication on the movie camera decreases a little faster than at an ambient temperature of 25°C.
(At a higher temperature, it tends to decrease more slowly.)
When the Service Life of the Battery Has Reached Its End When the operation time even after full charging is too short for normal use, the service life of the battery has reached its end. (→166)

Using the LCD Monitor
Improved LCD backlight transmission makes the picture extra bright. In addition, special coating of the LCD's surface diffuses the light from outside to minimize light reflection, so the picture has vivid colours and is easy to see.
1 Slide the [▲OPEN] lever to the left and simultaneously open the LCD monitor in the direction of the arrow approximately 90°.
Closing the LCD Monitor
Turn the LCD monitor back toward the movie camera body until it locks with a click.
- The picture seen on the LCD monitor looks slightly stretched vertically, however, the actually recorded picture remains unaffected by this.
- Return the LCD Monitor to its vertical position before closing it. Also, make sure that the Cassette Compartment is securely closed before closing the LCD Monitor.
- Opening the LCD Monitor automatically turns the Finder off. However, when you turn the LCD Monitor so that it faces forward, the Finder turns on again.
- When the Movie Camera is very cold when turning it on, the picture on the LCD Monitor is darker than normally. However, as it reaches normal temperature, it regains its normal brightness.
- To remove fingerprints, wipe the LCD Monitor with a soft cloth.
- Do not expose the LCD Monitor to direct sunlight. When sunlight falls onto the LCD Monitor, it may be difficult to view the picture.
Extremely high precision technology is employed to produce the LCD Monitor. The result is more than 99.99% active pixels with a mere 0.01% of the pixels inactive or always lit. However, this is not a malfunction and does not affect the recorded picture.

Chinese
Using the Menu Screen
This Movie Camera displays the settings of various functions in menus to make it easy to select the desired functions and settings.
1 Set the [CAMERA/OFF/VCR] Switch either to [CAMERA] or [VCR] while keeping the [MENU] Button pressed. - The [MENU LANGUAGE SELECT] Menu ① appears. 2 Press the [SET] Button to select the desired language. - Even if you select Chinese, the sub-menus are displayed in English. 3 Press the [MENU] Button. - When you press this button while the [CAMERA] Lamp is lit in red, the Camera Mode Menu ② appears. When you press this button while the [VCR] Lamp is lit in green, the VCR Mode Menu ③ appears. 4 Turn the [▲▼] Dial to select the desired sub-menu. - Turning the [▲▼] Dial changes the highlighted item. 5 Press the [SET] Button to display the selected sub-menu. 6 Turn the [▲▼] Dial to select the item to be set. 7 Press the [SET] Button to set the selected item to the desired mode.
Exiting the Menu
Press the [MENU] Button again.
- The method for making settings on the [DATE/TIME SETUP] Sub-Menu (→ 50) and [LCD/EVF SETUP] Sub-Menu (→ 38) differs slightly from that of other sub-menus. - You can display the menu during playback, but not during recording. Also, it is possible to start playback while the menu is displayed, but if you start recording, the displayed menu disappears. (When the Movie Camera's Digital Still Picture Terminal is connected to a computer by using the Personal Computer Connection Kit (→ 162), it is not possible to display the menu during playback.)
- Do not turn off the power while performing a menu operation.

Chinese
Menu Functions
The illustrations of the menus are for explanation purposes only and the actual menus may be somewhat different.
Camera Mode Main-Menu [CAMERA FUNCTIONS]
- CAMERA SETUP
- DIGITAL EFFECT
- TITLE SETUP
- DATE/TIME SETUP
- DISPLAY SETUP
- LCD/EVF SETUP
- OTHER FUNCTIONS
[CAMERA SETUP] Sub-Menu ①
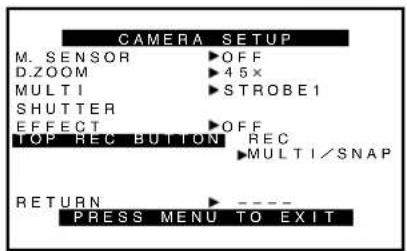
① Motion-Sensor-Controlled Recording [M.SENSOR] (→ 100) ② Digital Zoom [D.ZOOM] (→ 88) ③ Multi Image Modes [MULTI] (→ 90, 92) ④ Shutter Effect [SHUTTER EFFECT] (→ 76) ⑤ Top Side Recording Button [TOP REC BUTTON] (→ 56, 76, 90, 92, 94) ⑥ Returning to the Main-Menu [RETURN]
If you set [RETURN] to [YES], the menu changes back to the Main-Menu.
②
③
Chinese
DIGITAL EFFECT Sub-Menu ②
⑦ Digital Effects 1 [EFFECT1] (→ 78, 80, 82) ⑧ Digital Effects 2 [EFFECT2] (→ 78, 84) ⑨ Return to Main Menu [RETURN]
TITLE SETUP Sub-Menu ③
[DIGITAL EFFECT] Sub-Menu ②
⑦ Digital Effects 1 [EFFECT1] (→ 78, 80, 82) ⑧ Digital Effects 2 [EFFECT2] (→ 78, 84) ⑨ Return to Main Menu [RETURN]
[TITLE SETUP] Sub-Menu ③
⑩ Date/Time/Title Indication [DATE/TITLE] (→ 52) ⑪ Title [TITLE] (→ 128) ⑫ Language of the Title [LANGUAGE FOR TITLE] (→ 128) ⑬ Size of the Title [SIZE] (→ 130) ⑭ Colour of the Date/Time/Title Indication [COLOUR] (→ 128) ⑮ Return to Main Menu [RETURN]
④
⑤
⑥![LCD/EVF SETUP LCD BRIGHTNESS [ - ] | | | | --- [ + ] LCD COLOUR [ - ] | | | | --- [ + ] EVF BRIGHTNESS [ - ] | | | | --- [ + ] PRESS MENU TO RETURN](/content/2026/06/1329805/images/f6ad62e09f6a3b997c3179dd2fd952501486a6c7475cca8a7857af0637f20663.jpg)
⑦
Chinese
[DISPLAY SETUP] Sub-Menu ⑤
⑯ Tape Length [TAPE] (→ 42) ⑰ Counter Display Mode [DISPLAY] (→ 156) ⑱ Counter Reset [C.RESET] (→ 154) ⑲ Self-Recording [SELF SHOOT] (→ 124) ⑳ Return to Main Menu [RETURN]
[LCD/EVF SETUP] Sub-Menu ⑥ (→ 38)
[OTHER FUNCTIONS] Sub-Menu ⑦
21 Recording Speed Mode [REC SPEED]
- You can select the desired recording speed (SP Mode or LP Mode) by selecting the corresponding setting for [REC SPEED] on the [OTHER FUNCTIONS] Sub-Menu. ([SP] means Standard Play. [LP] means Long Play.) - If you set [S-VHS ET] on the [OTHER FUNCTIONS] Sub-Menu to [ON], [REC SPEED] is automatically set to [SP]. Even if you later set [S-VHS ET] to [OFF], [REC SPEED] remains set to [SP]. Therefore, to use the LP Mode when recording in the VHS format, set [REC SPEED] to [LP].
22 Recording Lamp [TALLY LAMP] (→ 56) 23 Voice Zoom [VOICE ZOOM] (→ 60) 24 Demonstration Mode [DEMO MODE] (→ 178) 25 S-VHS ET Mode [S-VHS ET] (→ 44)
- When an S-VHS-C cassette is inserted in the Movie Camera, [S-VHS] is indicated instead of [S-VHS ET] and you can set this item to [ON] or [OFF] to select or cancel the S-VHS recording format.
- If you insert an S-VHS-C cassette with a broken out erasure prevention tab, [S-VHS ET] is indicated instead of [S-VHS], however, this is not a malfunction. If you want to perform recording, use a cassette with an intact tab. (→ 40)
26Returning to the Main-Menu [RETURN]
①
②
③
④
⑤
⑥![LCD/EVF SETUP LCD BRIGHTNESS [ - ] | | | | --- [ + ] LCD COLOUR [ - ] | | | | --- [ + ] EVF BRIGHTNESS [ - ] | | | | --- [ + ] PRESS MENU TO RETURN](/content/2026/06/1329805/images/1b8b8a3eae003e7786754b81a8ba783d64d988ba0e74ca9504f03553dcd806b2.jpg)
VCR FUNCTIONS Main Menu
TITLE SETUP Sub-Menu ③ (→ 52, 128)
All other items on the [DIGITAL EFFECT] Sub-Menu are the same as those on the [DIGITAL EFFECT] Sub-Menu of the [CAMERA FUNCTIONS] Main-Menu.
[TITLE SETUP] Sub-Menu ③ (→ 52, 128)
All items on the [TITLE SETUP] Sub-Menu are the same as those on the [TITLE SETUP] Sub-Menu of the [CAMERA FUNCTIONS] Main-Menu.
[DATE/TIME SETUP] Sub-Menu ④ (→ 50)
[DISPLAY SETUP] Sub-Menu ⑤ (→ 42, 154, 156)
All items on the [DISPLAY SETUP] Sub-Menu are the same as those on the [DISPLAY SETUP] Sub-Menu of the [CAMERA FUNCTIONS] Main-Menu.
[LCD/EVF SETUP] Sub-Menu ⑥ (→ 38)
![LCD/EVF SETUP LCD BRIGHTNESS [-] | | | --- [+] LCD COLOUR [-] | | | --- [+] EVF BRIGHTNESS [-] | | | --- [+] PRESS MENU TO RETURN](/content/2026/06/1329805/images/27a980d7c9032ef3876b8014f6765d2daf8f9e91a3f3270d9dd561cc6c614953.jpg)


Adjusting the Brightness and Colour Level of the LCD Monitor/Finder
If you select the [LCD/EVF SETUP] Sub-Menu of the [VCR FUNCTIONS] or the [CAMERA FUNCTIONS] Main-Menu, the following items are displayed.
LCD Brightness [LCD BRIGHTNESS]
To adjust the brightness of the picture on the LCD screen.
LCD Colour Level [LCD COLOUR]
To adjust the colour saturation of the picture on the LCD screen.
Finder Brightness [EVF BRIGHTNESS]
To adjust the brightness of the picture in the Finder.
1 Press the [SET] Button to select the item that you want to adjust.
2 Turn the [▲▼] Dial to increase or decrease the vertical bars of the Bar Indication.
- The Bar Indication is divided into 8 steps. The more vertical bars are shown, the stronger is the brightness or colour saturation.
Exiting the Menu
Press the [MENU] Button twice.
- These adjustments have no influence on the actual picture recorded.
■Adjusting the Angle of the LCD Monitor
The LCD Monitor rotates upward a maximum of 180° ① and downward a maximum of 90° ② from its normal vertical position. Trying to forcefully rotate it beyond this range could seriously damage the Movie Camera.

Inserting/Ejecting the Cassette
1 Connect the AC Adaptor or attach a charged Battery. (→ 18, 20) 2 Turn the cog wheel ① to tighten the tape. 3 Slide the [▲OPEN] Lever to the left and simultaneously open the LCD Monitor in the direction of the arrow approximately 90°.
- Be sure to keep the LCD Monitor in its vertical position, so that the Cassette Compartment Cover, when it opens, does not hit the LCD Monitor.
4 Press the [▲ EJECT] Button. 5 Insert the cassette with the cassette window ② facing outward and push it all the way in. 6 Close the Cassette Compartment by pressing the [LOCK] Button.
- If the AC Adaptor or Battery is used to supply power, it is possible to insert or eject the cassette without turning on the Movie Camera.
- If a cassette with broken out erasure prevention tab is inserted, the [☐] Indication flashes.
■ Preventing Accidental Erasure of Recordings
- Recording on a previously recorded cassette erases the existing scenes and sound.
- To protect important recordings against accidental erasure, use a screwdriver to break out the tab ③ on the cassette (some cassettes have sliding-type tabs).
- To be able to record again on a protected cassette, firmly cover the hole where the tab was with two layers of adhesive tape 4.


Selecting the Correct Tape Length
To ensure that the Remaining Tape Time Indication displayed during recording and playback is correct, you need to set the tape length that matches that of the inserted cassette.
After selecting [TAPE] on the [DISPLAY SETUP] Sub-Menu... (→ 28)
1 Press the [SET] Button to select the correct tape length.
- The selected tape length is marked with the [▶] Mark. - The Tape Length Indications change in the following order:
![graph LR A["30"] --> B["45"] B --> C["60"] A --> D["30"] B --> E["45"] C --> F["60"]](/content/2026/06/1329805/images/3c12925bf42d358358d47a3b0f562c41a2f32dbc2bcc8b960aa5dffb974960a6.jpg)
2 Press the [MENU] Button to exit the menu.
①: Camera Mode ②: VCR Mode
Confirming the Remaining Tape Time
During recording and playback, the Remaining Tape Time Indication ③ is automatically displayed, so you always know how much time you have left on the cassette. However, to ensure correct display of the remaining tape time, the tape length of the cassette being used must be set correctly on the Movie Camera.
- When recording or playback starts, the Tape Length Indication disappears, and in its place the [R] Indication ③ flashes while the remaining tape time is being calculated. A few seconds later, the Remaining Tape Time Indication appears. ([R] means Remaining.)
- When the remaining tape time is less than 2 minutes, the [R] Indication and the Remaining Tape Time Indication start to flash.
When you use a cassette bearing the [P] Mark ④ or other special types of cassettes, the Remaining Tape Time Indication may not be very precise.
With this Movie Camera, you can choose one of the following 3 different formats for recording:
- VHS: also called "normal" or "conventional VHS" format
- S-VHS (Super-VHS): developed based on the VHS format but featuring higher resolution and picture quality (The [Indication appears.)
- S-VHS ET (Super-VHS Expansion Technology): This function allows recording and playback in S-VHS quality picture on a normal VHS-C cassette (The [S-VHS ET] Indication appears.)
(Recording in this format is only possible in the SP Mode.)
- When you insert a VHS-C cassette: If you set [S-VHS ET] on the [OTHER FUNCTIONS] Sub-Menu to [ON], recording is performed in the S-VHS ET format, and if you set [S-VHS ET] to [OFF], recording is performed in the VHS format. (→ 28)
- When you insert an S-VHS-C cassette: If you set [S-VHS] on the [OTHER FUNCTIONS] Sub-Menu to [ON], recording is performed in the S-VHS format, and if you set [S-VHS] to [OFF], recording is performed in the VHS format. (→ 28)
■Recording and Playback
Before starting to record, decide in which VHS format you want to record.
| Cassette | Recording Format | Compatible Playback Equipment |
| VHS-C | VHS (SP/LP) | VHS, S-VHS, S-VHS ET, SQPB |
| S-VHS ET (SP only) | S-VHS, S-VHS ET, SQPB | |
| S-VHS-C | VHS (SP/LP) | VHS, S-VHS, S-VHS ET, SQPB |
| S-VHS (SP/LP) | S-VHS, S-VHS ET, SQPB |
- A cassette that was recorded in the S-VHS or S-VHS ET format can also be played back on other S-VHS, S-VHS ET or SQPB (S-VHS Quasi Playback) video equipment. (However, with some equipment, playback may not be possible. In that case, connect this Movie Camera directly to the TV. (→ 72))
- If you want to record and play back with highest possible picture quality or store the cassettes for a long time, we recommend that you use S-VHS-C cassettes and record in the S-VHS format.
- If you record in the S-VHS ET format, the picture quality may not be very good with certain types of cassettes. To avoid negative surprises, we recommend that you make a trial recording and confirm that the quality of the recorded picture is satisfactory.
(To ensure optimum picture quality, we recommend the use of HG (high-grade) type cassettes.)
![graph TD A["0:00.00"] --> B["0:00.00"] B --> C["1"] C --> D["2"] D --> E["3"] E --> F["4"] F --> G["5"] G --> H["6"] H --> I["7"] I --> J["8"] J --> K["9"] K --> L["10"] L --> M["11"] M --> N["12"] N --> O["13"] O --> P["14"] P --> Q["15"] Q --> R["16"] R --> S["17"] S --> T["18"] T --> U["19"] U --…](/content/2026/06/1329805/images/d2732643c15ff9b3d18af9436be43e240a9634ee46ddd5a7f2176094454fd3c3.jpg)
Adjusting the Viewfinder
Adjusting the Finder
Before using the Finder, adjust it to your eyesight so that the indications in the Finder are clear and easy to read.
1 Set the [CAMERA/OFF/VCR] Switch to [CAMERA] or [VCR]. - Turn the switch while pressing the button ①.
2 If necessary, adjust the angle of the Finder by tilting it upward. 3 Adjust by turning the Eyepiece Corrector Lever.
Never aim the Movie Camera with its Finder or Lens directly at the sun; this could damage internal parts of the unit. ②
If sunlight or other strong light enters the Finder, sparkling noise occurs on the Finder screen. ③ If you block off the light, this phenomenon disappears after a few minutes and does not affect the recorded picture.
If a subject with strong contrast or a menu is displayed in the Finder, a ghost image may remain temporarily. ④ However, this is not a malfunction and does not affect the recorded picture.
Adjusting the Grip Belt
Adjust the length of the Grip Belt so that you can easily press the Recording Start/Stop Button ⑤ with your thumb and push the [W/T] Zoom Lever ⑥ with your index or middle finger.
Attaching the Lens Cap
Attach the shorter loop of the Lens Cap Cord to the Grip Belt. ⑦ You can attach the Lens Cap to the Lens Cap Holder on the Grip Belt. ⑧


Inserting the Button-type Battery
Before setting the date and time, insert the button-type battery (supplied).
1 Open the [BACKUP BATTERY] Cover and insert the button-type battery so that its (+) side is visible. 2 Close the [BACKUP BATTERY] Cover.
- Before inserting or removing the button-type battery, be sure to set the [CAMERA/OFF/VCR] Switch to [OFF].
- When the button-type battery is exhausted, the [💡] Indication flashes. In this case, replace it with a new CR2025 battery.
(The life of the battery is about 3 years.)
- To make it easier to remove the button-type battery, use a pointed object.
- The internal clock works even when the Movie Camera is turned off, and it consumes power from the button-type battery.
CAUTION
Danger of explosion if battery is incorrectly replaced. Replace only with the same or equivalent type recommended by the equipment manufacturer. Discard used batteries according to manufacturer's instructions.
WARNING
Risk of fire, explosion and burns. Do not recharge, disassemble, heat above 100°C or incinerate. Keep the Button-Type battery out of the reach of children. Never put Button-Type battery in mouth. If swallowed call your doctor.
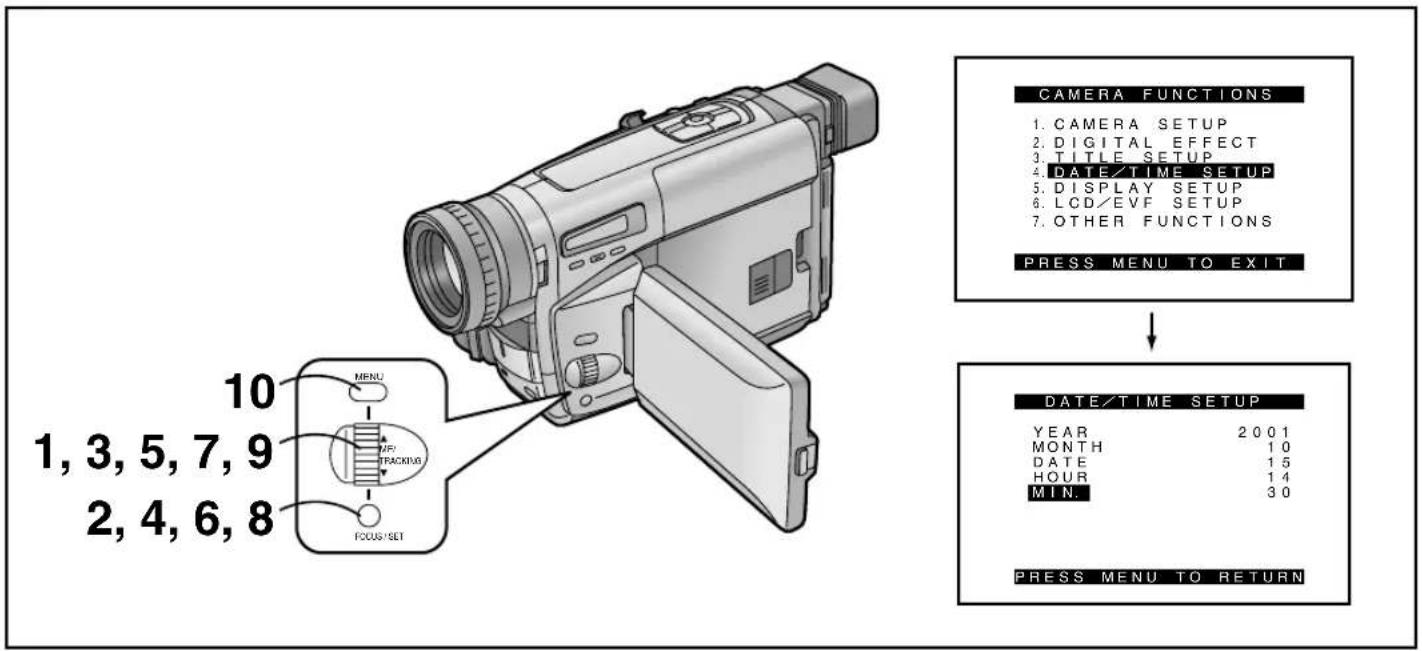
Setting the Date and Time
Setting the Date and Time
If you select the [DATE/TIME SETUP] Sub-Menu of the [CAMERA FUNCTIONS] Main-Menu, the menu shown above appears.
The initial setting of date and time is 0:00, 1st January, 2000.
For example: To set the clock to 15th October 2001, 14:30.
1 Turn the [▲▼] Dial to set to [2001].
●The years change in the following order: ...1990...1991...2000...2089...1990...
2 Press the [SET] Button to select [MONTH].
3 Turn the [▲▼] Dial to set to [10].
4 Press the [SET] Button to select [DATE].
5 Turn the [▲▼] Dial to set to [15].
6 Press the [SET] Button to select [HOUR].
7 Turn the [▲▼] Dial to set to [14].
8 Press the [SET] Button to select [MIN].
9 Turn the [▲▼] Dial to set to [30].
10 Press the [MENU] Button to finish the date and time setting.
- The operation of the clock starts from [00] seconds.
- Pressing the button one more time makes the menu disappear.
- If you select the [DATE/TIME SETUP] Sub-Menu when the button-type battery is not inserted into the Movie Camera or is exhausted, the Main-Menu disappears and the [💡] Indication flashes instead. Insert a new button-type battery (→ 48) and then set the date and time again.
- As the Movie Camera's built-in clock is subject to slight imprecision, be sure to check the indicated time before recording.
●The clock employs the 24-hour system.


1
4
2
5
3
6
Chinese
When recording with the date/time/title superimposed in the picture
Recording with the Date/Time/Title Superimposed in the Picture
After displaying the [TITLE SETUP] Sub-Menu... (→ 28)
1 Turn the [▲▼] Dial to select [DATE/TITLE]. 2 Press the [SET] Button to select the desired indication.
• The indications change in the order ① to ⑥. ① Date and Time→② Date→ ③ Date, Time and Title → ④ Date and Title → ⑤ Title → ⑥ Date and Time with seconds →
- If the button-type battery for the built-in clock is not inserted into the Movie Camera or is exhausted, only the title is displayed. (→ 48)
3 Press the [MENU] Button to exit the menu. ●The selected Date/Time/Title Indication appears. 4 Press the Recording Start/Stop Button to start recording.
■Deleting the Date/Time/Title Indication
During recording or when the Movie Camera is in the Recording Pause Mode, press the [DATE/TITLE] Button to make the Date/Time/Title Indication disappear.
- After turning the Movie Camera off and then on again, the previously selected Date/Time/Title Indication is no longer displayed. To make it appear again, press the [DATE/TITLE] Button once.
- Be sure to turn the Movie Camera off before removing the Battery or disconnecting the AC Adaptor. Disconnecting the power supply while the Movie Camera is on erases the Date/Time/Title Indication (→ 128) stored in memory.

Chinese
When recording in the Full Auto Mode
Recording in the Full Auto Mode
The Full Auto Mode adjusts the white balance and focus automatically. However, if you want, you can also adjust either one or both of them manually. (→ 106, 110)
When recording in a dimly lit location, the picture may become noisy and less sharp, so we recommend that you use the IR/Video DC Light (optional), etc. to brighten up the scene.
1 Set the [CAMERA/OFF/VCR] Switch to [CAMERA].
- Turn the switch while pressing the button 1. •The [CAMERA] Lamp ② lights.
2 Press the [PROG. AE] Button repeatedly until the [AUTO] Indication ③ appears.
●The initial setting is [AUTO].
3 Press the Recording Start/Stop Button to start recording.
- Recording starts and the [▷▷] Indication and the [REC] Indication ④ appear. The Tally Lamp (→ 56) remains lit during recording. ([REC] means Recording.)
4 To pause recording:
Press the Recording Start/Stop Button again.
•The [PAUSE] Indication 5 appears.
5 To finish recording:
Set the [CAMERA/OFF/VCR] Switch to [OFF].
- If you use an E55 type cassette for recording, the picture may contain some distortion when you play it back. However, this is not a malfunction of the Movie Camera.


If you do not want the Tally Lamp to light during recording, set [TALLY LAMP] on the [OTHER FUNCTIONS] Sub-Menu to [OFF]. (→ 28)
- If you leave the Movie Camera in the Recording Pause Mode for more than 6 minutes, it automatically switches off to protect the tape and to conserve battery power. To resume recording from this condition, set the [CAMERA/OFF/VCR] Switch to [OFF] and then to [CAMERA] again.
■Using the [REC] Button as the Recording Start/Stop Button
- For certain recording angles, it may be more convenient to use the [REC] Button ② as the Recording Start/Stop Button.
- To be able to use the [REC] Button as the Recording Start/Stop Button, set [TOP REC BUTTON] on the [CAMERA SETUP] Sub-Menu to [REC]. (→ 28)
■About D.N.R. in a dimly lit location
In a dimly lit location, the Digital Noise Reduction is activated automatically to reduce noise in picture. In this case the noise may seem to draw after moving subject ③. However, this is not a malfunction of the Movie Camera.
4
2

3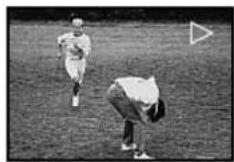


Chinese
Checking the End of a Recorded Scene
(Recording Check Function)
Checking the End of a Recorded Scene (Recording Check Function)
To play back the final few seconds of the last recorded scene in the Recording Pause Mode.
1 Press the [☐] Button briefly in the Recording Pause Mode.
- The [CHK] Indication 1 appears. After that, the Movie Camera returns to the Recording Pause Mode and is ready for recording the next scene. ([CHK] means Check.)
Viewing Recorded Scenes During Recording Pause (Camera Search Function)
This function makes it easy to search for a point in a previously recorded scene or cassette from which you want to start recording a new scene. In addition, it ensures smooth scene-to-scene transitions free from picture distortion.
2 Keep the [-SEARCH] Button (or the [SEARCH+] Button) pressed in the Recording Pause Mode.
②: Reverse Search
③: Forward Search
Recording Backlit Scenes (Backlight Mode)
To prevent the backlit subject from being recorded very dark. Under some conditions, this function may not work properly.
1 Keep the Backlight Button [BLC] pressed. ●The picture brightens up as a whole. ④
![1× V.ZOOM 10× V.ZOOM 22× V.ZOOM 1 -VOL+ W T [T]](/content/2026/06/1329805/images/1cd0da3a5455232ad652c21a156ea88ab24df889d32efaf774f1b337dfb59f85.jpg)
Zooming In/Out
Recording close-ups of your subjects and recording wide-angle shots add special effects to your videos.
1 To record a wider view (Zooming-out): Push the [W/T] Zoom Lever toward [W]. To enlarge your subject (Zooming-in): Push the [W/T] Zoom Lever toward [T].
●The Zoom Magnification Indication appears for a few seconds.
- The further you push the [W/T] Zoom Lever toward [W] or [T], the faster the zooming speed becomes.
- In the maximum telephoto setting (when you have zoomed in), precise focusing is only possible for subjects that are more than 1.8 m from the lens.
Voice Zoom
This function makes it possible to record the voices of distant persons slightly louder and more clearly, by emphasizing the frequency range of human voices according to the zoom position of the Movie Camera's lens. To activate the Voice Zoom Function, set [VOICE ZOOM] on the [OTHER FUNCTIONS] Sub-Menu of the [CAMERA FUNCTIONS] Main-Menu to [ON]. (→ 28)
•The [V.ZOOM] Indication 1 appears. ●The Voice Zoom Function works within the zoom range up to 14×: above that point, its effect remains unchanged. - Depending on the distance of the person(s) and the surrounding sounds, the Voice Zoom Function may not have much effect.
Recording Extra Close-up Shots of Small Subjects (Macro Close-up Function)
When the zoom magnification is 1×, the Movie Camera can focus on subjects down to a distance of approximately 5 mm between lens and subject. This allows recording very small subjects such as insects.
- When using the Macro Close-up Function, we recommend that you use the IR/Video DC Light (optional), etc. rather than the 0 Lux Night View Function to brighten up the scene.

Watching Playback on the Movie Camera
You can watch playback of the recorded scenes.
Watching Playback on the Movie Camera
You can watch playback of the recorded scenes.
1 Set the [CAMERA/OFF/VCR] Switch to [VCR].
- Turn the switch while pressing button 1. •The [VCR] Lamp ② lights.
2 Press the [◀◀] Button.
●The tape starts to rewind. When the tape reaches the beginning, the rewinding automatically stops.
3 Press the [▶] Button.
- Playback starts and the [▷] Indication ③ appears.
- When the tape reaches the end, it automatically rewinds to the beginning.
■ Stopping Playback
4 Press the [■] Button.
■ Adjusting the Sound Volume
Push the [-VOL+] Lever ④ toward [+] to increase the volume or push it toward [-] to decrease the volume. The [VOLUME] Indication appears and the number of bars increases or decreases. When you release the Lever, this indication disappears.
You can also adjust the volume with the Remote Controller. Increase the volume by pressing the [T] Button, or decrease it by pressing the [W] Button.
This adjustment is only possible during playback.
- Because the speaker ⑤ contains a magnet, do not bring a cassette near the speaker. It could adversely influence the recorded content.
- In the Playback Zoom Mode, it is not possible to adjust the sound volume.


TBC (Time Base Corrector) Function
TBC (Time Base Corrector) Function
Playback of certain cassettes can cause slight horizontal shaking of the picture or other distortion. To minimise such distortion and ensure a stable playback picture, this Movie Camera is equipped with the TBC Function. This function is automatically activated within a few seconds after playback has started, and the [TBC] Indication appears.
Cancelling the TBC Function
With certain cassettes, however, the TBC Function could cause slight vertical shaking or other distortion in the playback picture.
In this case, first try to adjust the tracking (→ 68). If this does not improve the picture, cancel the TBC Function by keeping the [TBC] Button pressed until the [TBC] Indication disappears. If you want to turn the TBC Function on again, press the [TBC] Button for a few seconds until the [TBC] Indication reappears.
Even if you cancel the TBC Function, it is automatically turned back on when you switch the Movie Camera from the Camera Mode to the VCR Mode.
In the Following Cases, the TBC Function Does Not Work:
In the Cue, Review or Still Playback Mode - When using the Camera Search or Recording Check Function - When adjusting the tracking - When playing back an unrecorded part on the tape
When you play back a cassette with stretched, shrunk or otherwise damaged tape, the TBC Function does not work correctly (it may repeatedly turn on and off). In this case, cancel the TBC Function.
DNR (Digital Noise Reduction) Function
- To reduce noise in the picture during playback, set [DNR] on the [PLAYBACK FUNCTIONS] Sub-Menu to [ON].
- This function can only be used when the TBC Function is activated (the [TBC] Indication is displayed).
- When the Playback Zoom Function, Multi Image Mode, Picture-in-Picture Mode, Mix Mode and Wipe Mode (→ 138, 152) is used with the Movie Camera in the VCR Mode, the Digital Noise Reduction Function does not work.
- If the playback picture or the subject's movements look unnatural, set [DNR] to [OFF].
- When you want to copy or edit scenes from this Movie Camera onto a VCR, set [DNR] to [OFF].



When playing back on a VCR
Playing Back on a VCR
(Using the Supplied Cassette Adaptor)
By using the supplied Cassette Adaptor, you can play back compact cassettes in your VCR in the same way as full-size cassettes.
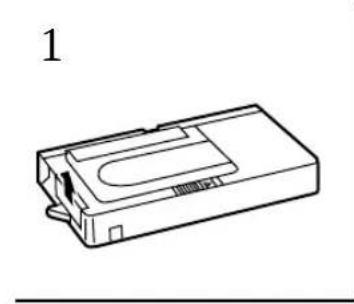
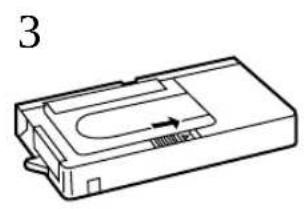
1 Push the Battery Compartment Cover upward and remove it. 2 Insert the supplied battery and then re-attach the Battery Compartment Cover. 3 Slide the Open Lever in the direction of the arrow. 4 Insert the recorded cassette and close the Top Cover. 5 Insert the Cassette Adaptor into the VCR. 6 Start playback on the VCR.
After use, take out the cassette from the Cassette Adaptor.


Chinese
High-Speed Rewinding
High-Speed Rewinding
1 Press the [◀◀] Button for more than 1 second
in the Stop Mode.
•The [◀◀◀] Indication ① appears. - During High-Speed Rewinding, the tape winding sound is louder. - When rewinding the tape to the beginning, the Movie Camera automatically changes over from the High-Speed Rewinding Mode to the Rewinding Mode near the beginning of the tape, and it switches over to the Stop Mode at the beginning of the tape. - When using the Remote Controller, press the [◀◀] Button for more than 3 seconds. - If you operate this Movie Camera from a computer (→162), it is not possible to use this function. - During High-Speed Rewinding, the Tape Counter shows [0:00.00].
Eliminating Picture Distortions
(Manual Tracking Adjustment)
This Movie Camera adjusts the tracking automatically. With certain cassettes, however, the tracking adjustment may not be precise. In this case, adjust the tracking manually.
1 Press the [FOCUS/SET] Button briefly during playback.
•The [TRACK.] Indication ② appears.
2 Turn the [TRACKING] Dial to adjust the
tracking.
- The Tracking Adjustment Function is automatically cancelled when the [TRACKING] Dial is not turned for 5 seconds.
- It may not be possible to remove the noise bars completely.
- It is not possible to adjust the tracking when a menu is displayed.
- If you eject the cassette after adjusting the tracking, the adjusted setting is cancelled.
Returning to the Auto Tracking Mode
Press the [FOCUS/SET] Button for more than 2 seconds during playback.

Chinese
During fast forward search playback
1 Keep the [▶▶] Button pressed during normal playback.
Review Playback
2 Keep the [◀◀] Button pressed during normal playback.
Search Lock Function
For longer Cue or Review Playback, press the Cue Button [▶▶] or the Review Button [◀◀] only briefly. As this locks the search function, you do not need to keep the button pressed for a long time.
- To resume normal playback, press the [▶] Button.
Still Playback
3 Press the [11] Button during normal playback.
Resuming Normal Playback
Press the [■■] Button again.
- In the Cue, Review and Still Playback Modes, horizontal noise bars ① appear in the picture, or the picture may become black and white or distorted.
- The picture reproduced on the LCD Monitor contains less noise than the picture in the Finder. During playback on a TV, however, the picture noise is the same as in the Finder.
- The horizontal noise bars have a different pattern in the SP Mode and LP Mode.
- During Cue or Review Playback, no indications are displayed on the LCD Monitor.
- If you leave the Movie Camera in the Still Playback Mode for approximately 6 minutes, it automatically switches over to the Stop Mode. And, if the Movie Camera is being powered by the Battery, it switches off completely after a further 6 minutes.

Watching Playback on a TV
Watching Playback on a TV
By connecting the Movie Camera to a TV, you can watch playback of the recorded scenes on the TV screen. Before connecting, turn off both the Movie Camera and the TV for safety's sake.
1 Use the AV Cable (supplied) to connect the Movie Camera with the TV.
- If your TV is equipped with an S-Video Socket, also connect the S-Video Cable ① (supplied).
After Use
1 Take out the cassette. (→ 40) 2 Set the [CAMERA/OFF/VCR] Switch to [OFF]. 3 Disconnect the AC Adaptor or remove the Battery.
Cleaning the Finder
If dust has entered the Finder... 4 Push the Buttons on both sides of the Finder and remove it in the direction of the arrow. 5 Remove dust with a blower brush (not supplied).
- If you use a cotton swab or similar to clean the inside of the Finder, use it very carefully to prevent scratching the screen inside the Finder.
To re-attach the Finder, push it forward onto the Finder Tube until it locks with a click.
Cleaning the LCD Monitor
Clean the LCD Monitor with a soft cloth or a blower brush.
Cleaning the Movie Camera Body
Wipe it with a soft cloth.
Cleaning the Lens
Clean the lens with a soft cloth or a blower brush.
Chinese
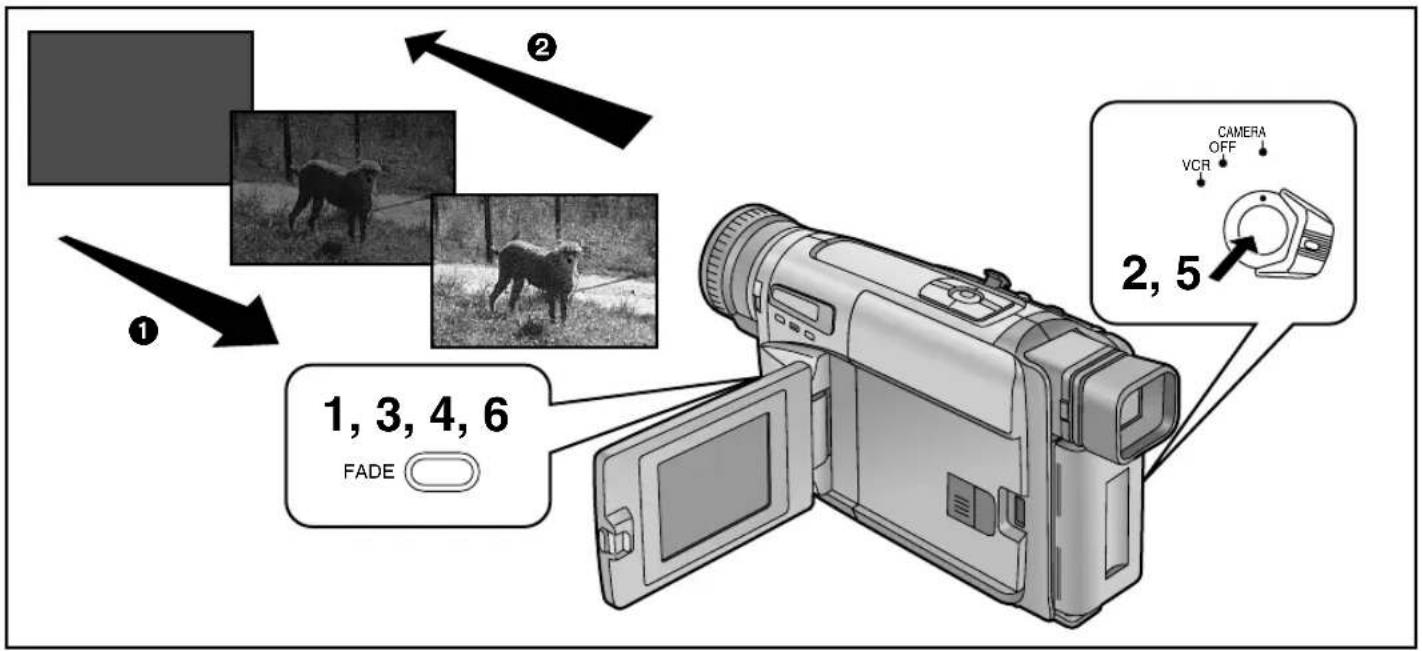
Fade In/Fade Out
■ Fade In ①
Fading in lets you make the picture (and sound) appear gradually at the beginning of a recording.
1 With the Movie Camera in the Recording Pause Mode, keep the [FADE] Button pressed. 2 When the picture has completely disappeared, press the Recording Start/Stop Button to start recording. 3 Approximately 3–4 seconds later, release the [FADE] Button.
■Fading Out ②
Fading out lets you make the picture (and sound) disappear gradually at the end of a recording.
4 During recording, keep the [FADE] Button pressed.
5 After the picture has completely disappeared, press the Recording Start/Stop Button to stop recording.
6 Release the [FADE] Button.
- In the Multi Image Mode and Picture-in-Picture Mode, normal fading in/out is not possible.

Recording a Still Picture (Snapshot Recording)
Recording a Still Picture (Snapshot Recording)
You can record a still picture together with sound for approximately 7 seconds at the press of a button. This is convenient for example for recording sharp, stable still pictures of signboards, maps, etc. in your videos.
- Since the still picture is recorded from the digital image memory, the picture quality is slightly inferior to that of normally recorded pictures.
- To prevent picture distortion, do not move or shake the Movie Camera during still picture recording.
After displaying the [CAMERA SETUP] Sub-Menu... (→ 28)
1 Turn the [▲▼] Dial to select [TOP REC BUTTON]. 2 Press the [SET] Button to select [MULTI/SNAP]. 3 Press the [MENU] Button to exit the menu. 4 Press the [SNAP] Button in the Recording Pause Mode.
- The image stands still and the [SNAP] indication appears.
- The still picture is recorded for approximately 7 seconds.
Shutter Effect Mode
If you set [SHUTTER EFFECT] on the [CAMERA SETUP] Sub-Menu to [ON], the screen blinks briefly like an SLR photo camera when you press the [SNAP] Button. This visual shutter effect is also recorded.
- When using the Snapshot Function repeatedly, wait at least 3–4 seconds before pressing the [SNAP] Button again.
- It is not possible to use the Snapshot Mode together with the Mix, Wipe, Multi Image, or Picture-in-Picture Mode. (→ 90, 92, 94, 96)

![graph TD A["CAMERA FUNCTIONS"] --> B["1. CAMERA SETUP"] A --> C["2. DIGITAL EFFECT"] A --> D["3. TITLE SETUP"] A --> E["4. DATE/TIME SETUP"] A --> F["5. DISPLAY SETUP"] A --> G["6. LCD/EVF SETUP"] A --> H["7. OTHER FUNCTIONS"] A --> I["PRESS MENU TO EXIT"] J["DIGITAL EFFECT"] --> K["EFFECT1 OFF SIS…](/content/2026/06/1329805/images/336efc11c2c5c233cf44604299f4c4681b8e60a388a8f129ac549a49d62451af.jpg)
Using Special Effects (Digital Effects)
In addition to the Super Image Stabilizer and Digital Zoom, this Movie Camera offers you various digital effect modes to make it easy to enhance your scenes in many creative ways.
Selecting a Desired Digital Effect
1 Press the [MENU] Button.
●The [CAMERA FUNCTIONS] Main-Menu appears.
2 Turn the [▲▼] Dial to select [DIGITAL EFFECT] and then press the [SET] Button.
●The [DIGITAL EFFECT] Sub-Menu appears.
3 Turn the [▲▼] Dial to select [EFFECT1] or [EFFECT2].
4 Press the [SET] Button to select the desired digital effect.
- When you select the Super Image Stabilizer Mode (→ 86), the [图标] Lamp ① lights. When you select any other digital effect, the [图标] Lamp ② lights.
5 Press the [MENU] Button to exit the menu.
- If you set the [CAMERA/OFF/VCR] Switch to [OFF] and then set it to [CAMERA] again, the indication of the selected digital effect flashes for a few seconds to inform you of the selected setting.
- If you have set [EFFECT2] on the [DIGITAL EFFECT] Sub-Menu to [B/W] or [SEPIA], it is not possible to manually adjust the white balance. (→ 106)
- In the Multi Image Mode, Picture-in-Picture Mode, Mix Mode and Wipe Mode, it is not possible to use any of the Digital Fade Modes.
- It is not possible to use the Snapshot Mode together with the Mix, Wipe, Multi Image or Picture-in-Picture Mode. (→ 90, 92, 94, 96)
- In the Multi Image Mode and Picture-in-Picture Mode, normal fading in/out is not possible.
- When the Movie Camera's Digital Still Picture Terminal is connected to a computer by using the Personal Computer Connection Kit (→ 162), the Multi Image, Picture-in-Picture, Mix and Wipe Modes cannot be used.
Cancelling the Digital Effect
Set [EFFECT1] or [EFFECT2] on the [DIGITAL EFFECT] Sub-Menu to [OFF].
1
2
3
4
5
6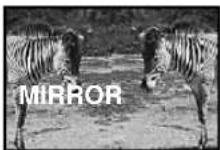
7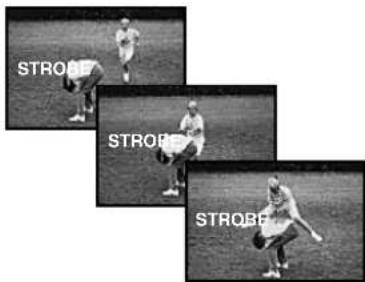
8
Chinese
Digital Effects [EFFECT1]
① Super Image Stabilizer Mode [icon] (→ 86) This prevents shaky pictures when recording in the tele range or from a moving vehicle. ② Digital Zoom Mode [D.ZOOM] (→ 88) It enlarges the subject beyond the optical zooming range. ③ Super Image Stabilizer and Digital Zoom Mode [ /D.ZOOM] This combination mode allows recording in the extreme tele range and prevents shaky pictures. ④ Mosaic Mode [MOSAIC] The picture becomes mosaic-like. ⑤ Stretch Mode [STRETCH] The picture is stretched horizontally while its height remains unchanged. ⑥ Mirror Mode [MIRROR] The right half of the picture is a mirror image of the left half. ⑦ Strobe Mode [STROBE]
The picture has a stroboscope-like effect.
- Since the strobe pictures are recorded from the digital image memory, the picture quality is slightly inferior to that of normally recorded pictures.
- When recording under fluorescent lamps, the brightness of the picture may fluctuate.
⑧ Gain-up Mode [GAIN UP]
It electronically brightens up the picture. In this mode adjust the focus manually.
- It is not possible to use the Gain-up Mode together with the Sports Mode or the Portrait Mode.
- Some after-image distortion may occur during recording with the Gain-up Function.
- When the Gain-up Mode is used, it is not possible to manually adjust the white balance or to cancel the manually adjusted white balance setting.
- When the Gain-up Mode is used, the focus can only be adjusted manually even if the [AUTO] Indication is displayed.
9![PANASONIC NV-VS50EG - Digital Effects [EFFECT1] - 1](/content/2026/06/1329805/images/43bca222748ddb35ca18099bbe087608bb8b23f81c141f612f4edd3d3b108517.jpg)
10![PANASONIC NV-VS50EG - Digital Effects [EFFECT1] - 2](/content/2026/06/1329805/images/3f1b98bef63e460e860b835593753962ddea75cd92c11189ccfb03a05ee062d6.jpg)
11![PANASONIC NV-VS50EG - Digital Effects [EFFECT1] - 3](/content/2026/06/1329805/images/5354dc1682a863ac035b300e39815f6ab89f832dfd6991706c387c5fe7743c7b.jpg)

Chinese
⑨ Multi Image Mode [MULTI] (→ 90, 92)
The screen is divided into 9 small still fields.
⑩ Picture-in-Picture Mode [P IN P] (→ 94)
A small still picture is inserted and displayed inside the normal picture.
⑪ Mix Mode [MIX] (→ 96)
It gradually fades out one scene while fading in the new scene over it.
⑫ Wipe Mode [WIPE] (→ 96)
With this function, you can change over from one scene to the next like drawing a curtain.
1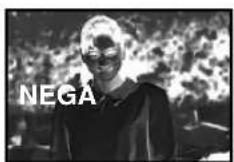
2
3
4
5
6
7
Chinese
Digital Effect [EFFECT2]
1. Negative State [NEGA]
The image colors are inverted, like a photographic negative.
2. Solarization State [SOLARI]
Shoots images with a painting-like effect.
3. Sepia State [SEPIA]
Shoots scenes in brown tones, similar to old photographs.
4. Black and White State [B/W]
Shoots images in black and white.
Digital Effects 2 [EFFECT2]
① Negative Mode [NEGA]
The picture has reversed colours similar to photographic negatives.
② Solarisation Mode [SOLARI]
The picture has an effect similar to a painting.
③ Sepia Mode [SEPIA]
Scenes have a brown tint similar to the colour of old photographs.
④ Black & White Mode [B/W]
The picture is in black and white.
⑤ Digital Fade 1 Mode [D.FADE1] (→ 98)
The picture fades in starting at the centre and extending toward the edges and fades out in reverse direction.
⑥ Digital Fade 2 Mode [D.FADE2] (→ 98)
The picture fades in and fades out in small dots similar to snow melting or falling.
⑦ Digital Fade 3 Mode [D.FADE3] (→ 98)
The picture fades in with a wipe effect and fades out.


Chinese
How to Use the Super Image Stabilizer Function
Using the Super Image Stabilizer Function
In recording situations where shaking of the Movie Camera is likely to happen, for example when you have zoomed in on a distant subject or when you record while walking, you can use this function to stabilize the image.
- In case of very strong camera shake, it may not be possible to stabilize the picture.
After displaying the [DIGITAL EFFECT] Sub-Menu... (→ 78)
1 Turn the [▲▼] Dial to select [EFFECT1].
2 Press the [SET] Button to select [SIS] or [SIS+D.ZOOM].
•The [icon] and/or [icon] Lamp lights.
3 Press the [MENU] Button to exit the menu.
•The [icon] and/or [D.ZOOM] Indication appear.
Cancelling the Super Image Stabilizer Function
Set [EFFECT1] on the [DIGITAL EFFECT] Sub-Menu to [OFF].
■In the Following Recording Conditions, the Picture Stabilizing Effect May Not Be Sufficient:
- Subjects with horizontal or vertical stripes
- Flat subjects
- Dark subjects (In this case, the [icon] Indication flashes. Increase the amount of light.)
- Subjects under many fluorescent lamps ●Under fluorescent lamps, the picture brightness may fluctuate and the colours may be unnatural. This happens because the shutter speed has been adjusted as well.

Chinese
How to use the digital zoom function
This function is convenient when you want to enlarge a very distant subject even more than is possible with the normal (optical) zoom which offers a magnification range of 1 × -22 × . For the Digital Zoom Function, you can choose between up to 45 × , up to 100 × and up to 550 × magnification.
After displaying the [DIGITAL EFFECT] Sub-Menu... (→ 78)
1 Turn the [▲▼] Dial to select [EFFECT1].
2 Press the [SET] Button to select [D.ZOOM] or [SIS+D.ZOOM].
- The [D] and/or [icon] Lamp lights.
3 Turn the [▲▼] Dial to select [RETURN] and then press the [SET] Button to select [YES].
●The [CAMERA FUNCTIONS] Main-Menu appears.
4 Select [D.ZOOM] on the [CAMERA SETUP] Sub-Menu. (→ 28)
5 Press the [SET] Button to select the desired digital zoom range (up to 45×, up to 100× or up to 550×).
6 Press the [MENU] Button to exit the menu.
- The [D.ZOOM] and/or [icon] indication appear.
7 Push the [W/T] zoom lever toward [T] or [W] to zoom in or out as desired.
- When using the digital zoom function, the picture quality is somewhat reduced.
- Within the digital zoom range (23×-550×), it is not possible to adjust the white balance manually or to cancel the manually adjusted white balance setting.
Cancelling the digital zoom function
Set [EFFECT1] on the [DIGITAL EFFECT] sub-menu to [OFF].

Displaying 9 small still pictures on the screen (multi image)
Displaying 9 small still pictures on the screen (multi image)
■Capturing and displaying a sequence of 9 still pictures (multi image strobe 1 mode)
This function captures and displays a sequence of 9 still pictures over approximately 1.5 seconds. This is very convenient for motion analysis of sports action, animal studies, etc.
After setting [EFFECT1] on the [DIGITAL EFFECT] sub-menu to [MULTI] and then displaying the [CAMERA SETUP] sub-menu... (→ 28)
- The [D] lamp lights.
1 Turn the [▲▼] dial to select [MULTI] and then press the [SET] button to select [STROBE1]. 2 Turn the [▲▼] dial to select [TOP REC BUTTON] and then press the [SET] button to select [MULTI/SNAP]. 3 Press the [MENU] button to exit the menu.
●The [MULTI] indication appears.
4 Press the [MULTI] Button at the scene that you want to capture as a sequence of 9 still pictures.
●A sequence of 9 still pictures appears.
Erasing the 9 Still Pictures
Press the [MULTI] Button.
If you press the [MULTI] Button again, another sequence of 9 still pictures is captured and displayed.
Cancelling the Multi Image Mode
Set [EFFECT1] on the [DIGITAL EFFECT] Sub-Menu to [OFF].
- If you press the [MULTI] Button during recording, a small noise may also be recorded.
- The quality of the pictures recorded in the Multi-Picture Mode is slightly inferior.
- The Sepia or Black & White Modes cannot be used for the displayed 9 still pictures (even though these indications may appear).

■Continuously Capturing and Displaying 9 Still Pictures (Multi Image Strobe 2 Mode)
This function continuously captures and displays sequences of 9 still pictures taken over approximately 1.5 seconds each.
After setting [EFFECT1] on the [DIGITAL EFFECT] Sub-Menu to [MULTI] and then displaying the [CAMERA SETUP] Sub-Menu... (→ 28)
•The [D] Lamp lights.
1 Turn the [▲▼] Dial to select [MULTI] and then press the [SET] Button to select [STROBE2]. 2 Turn the [▲▼] Dial to select [TOP REC BUTTON] and then press the [SET] Button to select [MULTI/SNAP]. 3 Press the [MENU] Button to exit the menu.
●The [MULTI] Indication appears.
4 Press the [MULTI] Button at the scene that you want the Multi Image Strobe 2 Function to start.
- Sequences of 9 still pictures are continuously displayed until you press the [MULTI] Button again.
Erasing the 9 Still Pictures
After pressing the [MULTI] Button to stop the capturing and displaying of sequences of 9 pictures, press the [MULTI] Button again.
If you press the [MULTI] Button once more, the capturing and displaying of sequences of 9 pictures starts again.
Cancelling the Multi Image Mode
Set [EFFECT1] on the [DIGITAL EFFECT] Sub-Menu to [OFF].
- If you press the [MULTI] Button during recording, a small noise may also be recorded.
- The quality of the pictures recorded in the Multi-Picture Mode is slightly inferior.
- The Sepia or Black & White Modes cannot be used for the displayed 9 still pictures (even though these indications may appear).



Displaying a Small Still Picture Inside the Normal Picture (Picture-in-Picture)
This function lets you display a small still picture inside the normal picture. You can use this function in the Recording and Recording Pause Modes.
After setting [EFFECT1] on the [DIGITAL EFFECT] Sub-Menu to [P IN P] and then displaying the [CAMERA SETUP] Sub-Menu... (→ 28)
•The [D] Lamp lights.
1 Turn the [▲▼] Dial to select [TOP REC BUTTON] and then press the [SET] Button to select [MULTI/SNAP].
2 Press the [MENU] Button to exit the menu.
●The [P IN P] Indication appears.
3 Aim the Movie Camera at the scene or subject that you want to capture as a small still picture and press the [MULTI] Button.
●A small picture appears inside the normal picture.
Erasing the Small Picture
Press the [MULTI] Button.
If you press the [MULTI] Button again, another small picture is displayed.
Cancelling the Picture-in-Picture Mode
Set [EFFECT1] on the [DIGITAL EFFECT] Sub-Menu to [OFF].
- The small picture is recorded with slightly inferior picture quality compared to that of normal moving pictures.
- If you press the [MULTI] Button during recording, a small noise may also be recorded.
- When a small still picture is displayed, it is not possible to apply the Sepia or Black & White Mode to the small picture, although their indications might appear.


Chinese
Mix Function and Wipe Function
Mix Function:
Mix Function and Wipe Function
Mix Function:
It gradually fades out a still picture of the last recorded scene while fading in the moving picture of the new scene.
Wipe Function:
It gradually replaces a still picture of the last recorded scene with the moving picture of the new scene, like drawing a curtain.
1 Set [WIPE] or [MIX] from [EFFECT1] on the [DIGITAL EFFECT] Sub-Menu. (→ 78)
•The [D] Lamp lights. ●The [WIPE] or [MIX] Indication appears.
2 Press the Recording Start/Stop Button to start recording normally.
3 Press the Recording Start/Stop Button to stop recording the scene.
●The last picture is stored in memory. - The [WIPE] or [MIX] Indication changes to [WIPE] or [MIX].
4 Press the Recording Start/Stop Button to start recording the next scene.
- The last picture of the previous scene is gradually replaced by the new scene.
Cancelling the Mix or Wipe Function
Set [EFFECT1] on the [DIGITAL EFFECT] Sub-Menu to [OFF].
- All subsequent scene-to-scene transitions will be recorded with this Mix or Wipe Effect until you cancel the Mix or Wipe Function.
- The Negative and Solarisation Effects cannot be applied to a picture stored in the digital image memory for the Mix or Wipe Function.
![graph TD A["① D.FADE1 BLK"] --> B["① D.FADE1 BLK"] B --> C["② D.FADE2 WHT"] C --> D["③ D.FADE3 BLK"] D --> E["③ D.FADE3 BLK"]](/content/2026/06/1329805/images/90cea303c48c751d8e0f724a1139312a56076ce06f30bdd1bf1a666cb9560faa.jpg)

Digital Fade Function
There are 3 Digital Fade Modes available.
① Digital Fade 1 [D.FADE1] ② Digital Fade 2 [D.FADE2] ③ Digital Fade 3 [D.FADE3]
There are 3 Digital Fade Modes available.
① Digital Fade 1 [D.FADE1] ② Digital Fade 2 [D.FADE2] ③ Digital Fade 3 [D.FADE3]
① Digital Fade 1 [D.FADE1] ② Digital Fade 2 [D.FADE2] ③ Digital Fade 3 [D.FADE3]
1 Set [EFFECT2] on the [DIGITAL EFFECT] Sub-Menu to [D.FADE1], [D.FADE2] or [D.FADE3]. (→ 78)
2 While keeping the [FADE] Button pressed, repeatedly press the [COLOUR] Button until the desired colour ① is displayed.
2 While keeping the [FADE] Button pressed, repeatedly press the [COLOUR] Button until the desired colour ① is displayed.
● The colours of the Digital Fade change in the following order:
![graph LR A["BLK (Black)"] --> B["WHT (White)"] B --> C["YEL (Yellow)"] C --> D["MAG (Magenta)"] E["BLU (Blue)"] <--_F["GRN (Green)"] F <--_G["CYN (Cyan)"] G <--_H["RED (Red)"] H <--_I["-->"]](/content/2026/06/1329805/images/a993ba85288447604294126c9f27a9aaa3d50bcd8a34a6b00dbb0d51ed7b3760.jpg)
■Fading In
3 With the Movie Camera in the Recording Pause Mode, keep the [FADE] Button pressed.
- The picture disappears gradually with the selected digital fade effect.
4 When the picture has completely disappeared, press the Recording Start/Stop Button to start recording.
5 Approximately 3–4 seconds later, release the [FADE] Button.
■Fading Out
6 During recording, keep the [FADE] Button pressed. 7 After the picture has completely disappeared, press the Recording Start/Stop Button to stop recording. 8 Release the [FADE] Button.
Cancelling the Selected Digital Fade Function
Set [EFFECT2] on the [DIGITAL EFFECT] Sub-Menu to [OFF].
![graph TD A["STDBY\nMOTION SENSOR"] --> B["REC\nMOTION SENSOR"] C["1, 5\n2, 3\n2, 4"] --> D["MENU\nMF TRACKING\nFOCUS/SET"] E["CAMERA FUNCTIONS\n1. CAMERA SETUP\n2. DIGITAL EFFECT\n3. TITLE SETUP\n4. DATE/TIME SETUP\n5. DISPLAY SETUP\n6. LCD/EVF SETUP\n7. OTHER FUNCTIONS\nPRESS MENU TO EXIT"] --> F["…](/content/2026/06/1329805/images/77c2faf956796b24a2ae656bc61993a048e714bbe749d83acc7d81c6038157b5.jpg)
Motion-Sensor-Controlled Recording
Motion-Sensor-Controlled Recording
In this mode, recording automatically starts when the built-in Motion Sensor detects some movement in the picture.
1 Press the [MENU] Button. ●The [CAMERA FUNCTIONS] Main-Menu appears. 2 Turn the [▲▼] Dial to select [CAMERA SETUP] and then press the [SET] Button. ●The [CAMERA SETUP] Sub-Menu appears. 3 Turn the [▲▼] Dial to select [M.SENSOR]. 4 Press the [SET] Button to select [ON]. 5 Press the [MENU] Button to exit the menu.
- The Motion Sensor Function Stand-by [STDBY] Indication appears.
- Approximately 1 second after the Movie Camera's Motion Sensor has detected movement in the picture, recording automatically starts. Approximately 10 seconds after movement in the picture has stopped, recording automatically stops and the Movie Camera is in the Motion Sensor Function Stand-by Mode.
- When the Movie Camera remains in the Motion Sensor Function Stand-by Mode for more than 6 minutes, the Finder or LCD Monitor turns off.
When the Motion Sensor again detects movement in the picture, recording automatically restarts after approximately 4 seconds, and the Finder or LCD Monitor turns on.
Cancelling the Motion Sensor Function During Stand-by: Set [M.SENSOR] on the [CAMERA SETUP] Sub-Menu to [OFF].
Cancelling the Motion Sensor Function During Recording: Press the Recording Start/Stop Button for approximately 2 seconds.
■ In the following recording situations, the Motion Sensor may not work correctly:
- A white wall or another single-colour background behind the subject. ● A subject with horizontal, vertical or oblique stripes.
- Sudden changes in the surrounding brightness.
- Exposure of the Movie Camera to slight shocks or vibration.
- Extremely slow or fast movement of the subject. ● Very little movement of the subject.
- Recording in a dimly lit place. (The [MOTION SENSOR] indication flashes.) ● A very small subject. ● Movement of the subject near the edge of the picture. ● A background with horizontal or vertical stripes.
- To prevent accidental recording start caused by Movie Camera movement, the Movie Camera should be mounted on a tripod or be otherwise secured in a very stable position.
- Although you can select a digital effect on the [DIGITAL EFFECT] Sub-Menu when [M.SENSOR] on the [CAMERA SETUP] Sub-Menu is set to [ON], the Motion Sensor Function has priority and the selected digital effect is automatically cancelled.
- When [M.SENSOR] on the [CAMERA SETUP] Sub-Menu is set to [ON], it is not possible to manually start recording by pressing the Recording Start/Stop Button or to activate the Recording Check or Camera Search Function.
- When you use the AC Adaptor to power the Movie Camera, the Motion Sensor Function Stand-by Mode will continue when no movement is detected in the picture, even when the tape has reached the end during recording. When you use the Battery to power the Movie Camera, it remains in the Motion Sensor Function Stand-by Mode until the Battery is discharged, at which time the [CAMERA] Lamp flashes for a few seconds.
- To ensure correct functioning of the Motion Sensor Function, the moving subject should be quite large in the picture. Therefore, when you have zoomed the lens to the maximum wide-angle position, the distance between lens and subject should preferably be within about 2 metres. For subjects at larger distances, be sure to zoom in accordingly.
- The Movie Camera requires time to set up before recording starts. Therefore, the beginning of movement is not recorded.
- If there is a power interruption, the Motion Sensor Function is cancelled.


Recording in Dark Places without Any Illumination (0 Lux Night View Function)
This function is convenient when you want to record at night in places without any illumination, for example for observing the behaviour of nocturnal animals, etc. In this mode, the Movie Camera emits infrared rays which makes it possible to record subjects that are invisible to the naked eye.
1 Set the [0 LUX OFF/ON] Switch to [ON] to make the [0LUX] Indication appear.
- The built-in Infra-red Beam Emitters ① light. Be careful not to cover them with your hand when recording.
- Do not use the 0 Lux Night View Function in brightly lit places and never aim the Movie Camera against the sun, as this could cause irreparable damage. ●The playback picture of scenes recorded with the 0 Lux Night View Function will be in black and white.
- If you change the setting of the [0 LUX OFF/ON] Switch during recording, a switching noise is also recorded.
- When recording with the 0 Lux Night View Function, it is not possible to adjust the white balance manually or to cancel the manually adjusted white balance setting.
- It is not possible to use any of the Programme AE Modes when the 0 Lux Night View Mode is activated.
- When using the 0 Lux Night View Function, the subject should be within 3 metres from the Movie Camera.
- When the automatic focusing is not precise, adjust the focus manually.
- If you do not want the Tally Lamp to light during recording using the 0 Lux Night View Function, set [TALLY LAMP] on the [OTHER FUNCTIONS] Sub-Menu to [OFF].
- As the iris is fully opened in the 0 Lux Night View Mode, subjects in white or other light colours may be recorded whitish, blurred and with weak contrast.
- If you use the 0 Lux Night View Function together with the Motion-Sensor-Controlled Recording Function, recording starts automatically when the Movie Camera's built-in Motion Sensor detects some movement in the picture. This combined function is convenient for easy, unattended animal observation recordings at night.
Cancelling the 0 Lux Night View Function
Set the [0 LUX OFF/ON] Switch to [OFF] to make the [0LUX] Indication disappear.
![graph LR A["MNL MNL"] --> B["Arrow"] B --> C["Step ①"]](/content/2026/06/1329805/images/bb4c670f23c77825d52e2ffa611e4d8c5988433c5c74da6db239e3240bd16d95.jpg)

Recording with Manual White Balance Adjustment
Recording with Manual White Balance Adjustment
With this Movie Camera, you can also adjust the white balance manually.
Use this mode for special subjects and recording conditions, for which the Full Auto Mode is not suitable, and for light sources outside the range ① (→ 108). Use it also when you want to manually adjust the white balance for each new scene as professionals do.
1 Press the [PROG. AE] Button repeatedly until an indication other than [AUTO] Indication appears. 2 Attach the White Lens Cap and zoom in until the entire screen is white. 3 Keep the [W.B] Button pressed until the [■□] Indication ① stops flashing and remains lit.
- When the Sepia Mode, Black & White Mode, Gain-up Mode or 0 Lux Night View Mode is being used, it is not possible to manually adjust the white balance. Also, if the white balance was manually adjusted, it cannot be cancelled, even if you press the [W.B] Button.
In the following cases, the [■] Indication flashes:
- During manual adjustment of the white balance. (If the surroundings are dark and the white balance cannot be adjusted, the [■4] Indication keeps flashing.)
- When the previously Manual White Balance Adjustment is maintained.
- When you are trying to adjust the white balance in the digital zoom range (23×-550×). In this case, first adjust the white balance in the optical zoom range (1×-22×) and then zoom back to within the Digital Zoom Mode.
Cancelling the Manual White Balance Mode
Press the [W.B] Button once. Or, press the [PROG. AE] Button repeatedly until the [AUTO] Indication appears.
Subjects and Recording Conditions Not Suitable for Recording in the Full Auto Mode
-Subjects with dark surfaces - When moving the Movie Camera from outdoors to indoors while recording - Subjects lit by different light sources - Subjects lit by mercury-vapour or natrium lamps
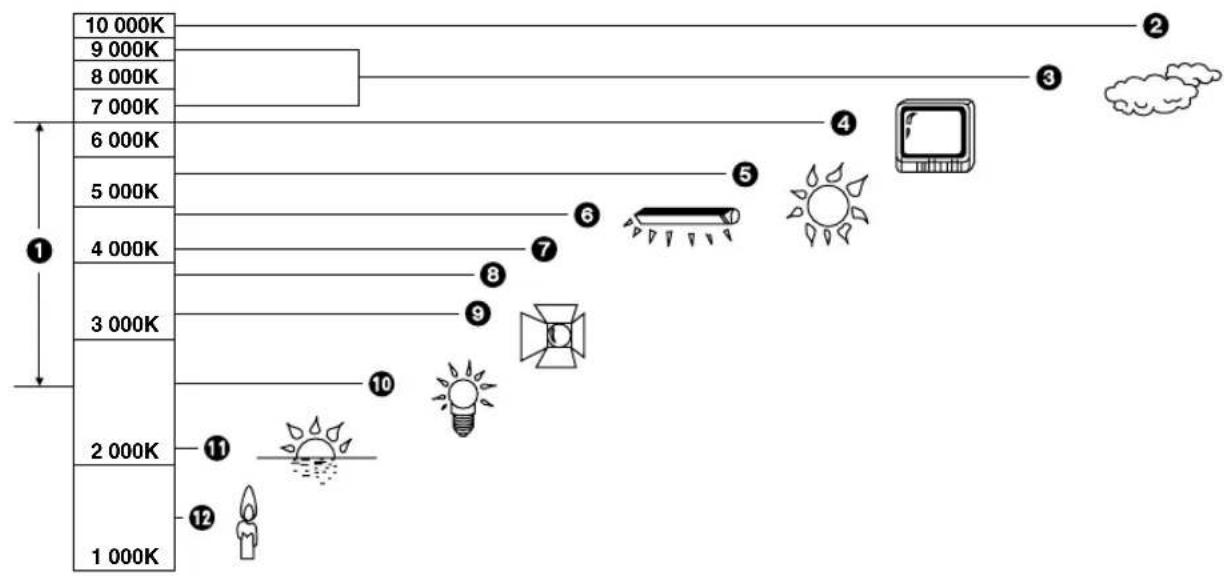
Colour Temperature and White Balance Adjustment
Every light source has its own colour temperature measured in Kelvin (K). The higher the Kelvin value, the more bluish the light; the lower the value, the more reddish the light. The Kelvin value is related to the tint of the light, but not directly to its brightness.
The range ① indicated in the illustration above shows the light sources for which this Movie Camera can provide precise white balance adjustment and, therefore, natural colours in the recorded pictures, when using the Full Auto Mode. For light sources outside this range, adjust the white balance manually. (→ 106) Also, additional lighting may be necessary.
1 Control range of this Movie Camera's Auto White Balance Adjustment Mode ②Blue sky ③ Cloudy sky (Rain) ④ TV screen 5 Sunlight ⑥ White fluorescent lamp ⑦2 hours after sunrise or before sunset ⑧1 hour after sunrise or before sunset 9Halogen light bulb ⑩Incandescent light bulb ⑪ Sunrise or sunset 12 Candlelight

2

Chinese
When shooting with manual focus adjustment
Recording with Manual Focus Adjustment
This makes it possible to adjust the focus manually for subjects and recording situations for which automatic focusing is not precise.
1 Press the [PROG. AE] Button repeatedly until an indication other than [AUTO] Indication appears. 2 Keep the [W/T] Zoom Lever pushed toward [T] to zoom in on the subject. ①
- Zooming in on the subject before adjusting the focus ensures that the subject remains precisely focused even when you later zoom out. ②
3 Turn the [MF] Dial to adjust the focus.
- The [MF] Indication ③ appears. ([MF] means Manual Focus.)
4 Push the [W/T] Zoom Lever toward [W] to zoom out as desired.
Cancelling the Manual Focus Mode
Press the [FOCUS] Button ④ once to make the [MF] Indication disappear. Or, press the [PROG. AE] Button repeatedly until the [AUTO] Indication appears.
Subjects and Recording Conditions Not Suitable for Recording in the Full Auto Mode
- Subjects with dark surfaces
- Subjects with shiny surfaces or a lot of light reflection -Subjects with weak contrast
- Subjects with part of it near and part of it far away from the Movie Camera
- Subjects without vertical contours - Subjects with fast movement
- Subjects behind moving objects
- Subjects behind glass covered by dirt, dust or water drops
1
4
2
5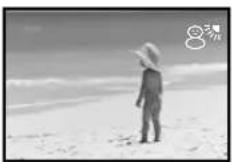
3

中文
Recording in Special Situations (Programme AE)
Recording in Special Situations (Programme AE)
This function lets you select Automatic Exposure settings optimized for special recording situations.
1 Press the [PROG. AE] Button repeatedly until the indication of the desired mode ([ ], [ ], [], [ ] or [ ] appears.
①Sports Mode [ ]
To record scenes with fast-moving subjects such as sports scenes.
② Portrait Mode [ ]
To make subjects stand out sharply from the background.
③ Low Light Mode [△]
To record dark scenes more brightly.
④ Spotlight Mode [💡]
To record subjects under spotlights (party, theatre, etc.).
⑤ Surf & Snow Mode [8]
To record subjects in brightly lit surroundings (ski slopes, beach, etc.).
- During recording, it is not possible to change the recording mode ([AUTO], [MNL], [✗], [✗], [△], [●], [8■]), even if you press the [PROG. AE] Button.
- It is not possible to use any of the Programme AE Modes when the 0 Lux Night View Mode is activated.
Cancelling the Selected Programme AE Function
Press the [PROG. AE] Button repeatedly until none of the indications ([ ], [ ], [ ], [], []) are displayed.
- When playing back scenes recorded in Sports Mode, you can enjoy slow motion and still playback of very sharp images with fine details.
- Avoid recording under fluorescent, mercury-vapor, or sodium lamps, as the color and brightness of the playback picture may fluctuate.
- When recording subjects lit by strong lights or with much light reflection, the playback picture may contain vertical streaks of light.
- When the scene is not sufficiently lit, the [ ] indication flashes.
- When using this mode for recording indoors, the playback picture may flicker.
Portrait Mode
- When using this mode for recording indoors, the playback picture may flicker.
Low Light Mode
- It may not be possible to sufficiently brighten extremely dark scenes.
- The use of this mode for recording may cause noise in the playback picture.
Spotlight Mode
- When using this mode, the recorded picture may be extremely dark.
- If a subject is extremely bright, the recorded picture may be whitish.
Surf & Snow Mode
- If a subject is extremely bright, the recorded picture may be whitish.

Using the Remote Controller
The Remote Controller lets you take part in the action and control the recording operation from in front of the Movie Camera.
■Buttons on the Remote Controller
① Date/Time/Title Button [DATE/TITLE] (→ 52, 130, 136) ②Indication Shift Button [COUNTER] To select the desired counter indication. (→ 156) ③ Reset Button [RESET] To reset the Tape Counter to zero. (→ 154) 4 Snapshot/Multi Image/Picture-in-Picture Button [MULTI/SNAP] (→ 76, 90, 92, 94, 140, 142, 144) ⑤ Fade Button [FADE] (→ 74, 98, 148) ⑥Colour Selector Button for Digital Fade [D.FADE COLOUR] (→ 98, 148) ⑦ Digital Image Store Button [STORE] (→ 132, 150) Digital Image Superimposer Button [OFF/ON] (→ 132, 150) ⑧Colour Selector Button for Digital Image [COLOUR] (→ 132, 150)
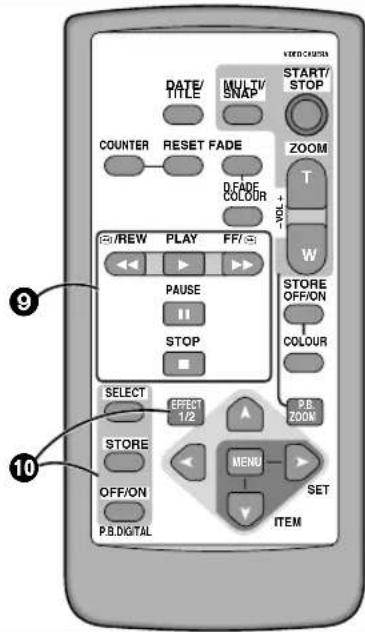
⑨ Playback Controls
Rewind/Review Button [◀◀]
Starts rewind review playback. (→70)
Rewinds the tape. (→62)
Rewinds the tape at high speed. (→68)
Activates the camcorder's search function. (→58)
Activates the recording check function. (→58)
Fast Forward/Cue Button [▶▶]
You can start high-speed search playback. (→70)
You can fast-forward the tape.
You can activate the camcorder search function. (→58)
Play button [▶] (→62)
Pause button [Ⅱ] (→70)
Stop button [■] (→ 62)
10 Playback Digital Effects
Digital Effect Button [EFFECT1/2]
9 Controls for Playback
Rewind/Review Button [◀◀]
To start review playback. (→ 70)
To rewind the tape. (→ 62)
To rewind the tape at high speed. (→ 68)
To activate the Camera Search Function. (→ 58)
To activate the Recording Check Function. (→ 58)
Fast Forward/Cue Button [▶▶]
To start cue playback. (→ 70)
To fast-forward the tape.
To activate the Camera Search Function. (→ 58)
Playback Button [▶] (→ 62)
Pause Button [III] (→ 70)
Stop Button [■] (→ 62)
⑩ Playback Digital Effects
Digital Effects Button [EFFECT1/2]
To select the Digital Effects 1 or Digital Effects 2. (→ 138)
Selection Button [SELECT]
To select the desired playback digital effect. (→ 138)
Store Button [STORE]
To store a still picture in memory for the Wipe or Mix
Function. (→ 146)
Off/On Button [OFF/ON]
To suspend the selected digital effect mode or re-activate it. (→ 138)
To start/pause a Wipe or Mix transition from the still picture stored in memory. (→ 146)

⑪ Controls for Recording and Zoom/Sound Volume
⑪ Controls for Recording and Zoom/Sound Volume
Recording Start/Stop Button [START/STOP] (→ 54)
Zoom/Sound Volume Buttons [ZOOM/VOL]
(→ 60, 62, 88, 152)
12 Controls for Menu Settings and Playback Zoom
Menu Button [MENU]
Item Set Button [SET]
Item Select Button [ITEM]
Playback Zoom Button [P.B. ZOOM]
To enlarge a part of the playback picture. (→ 152)
● Each time this button is pressed, the Playback Zoom Function is toggled between on and off.
Upward Direction Button [▲]
Left/Right Direction Button [◀, ▶]
Downward Direction Button [▼]
■Conditions for Correct Operation of the Remote Controller
- The distance to the Movie Camera must not be more than 5 metres.
- The Transmitter Window ① on the Remote Controller or the Remote Control Sensor ② on the Movie Camera must not be exposed to direct sunlight and not be covered with clothes, etc.
- When operating the Zoom Function with the Remote Controller, it is not possible to vary the zooming speed. Also, there is a slight delay between pressing the Zoom Buttons on the Remote Controller and the mechanical zoom adjustment on the Movie Camera.
- Within a distance of about 1 metre, it is also possible to use the Remote Controller from the side ([MENU] Button side).

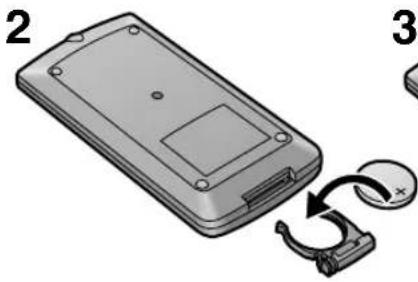

Inserting the Button-type Battery into the Remote Controller
Inserting the Button-type Battery into the Remote Controller
1 Pull out the Battery Holder while pressing the Stopper ①. 2 Insert the button-type battery with the stamped (+) mark facing upward. 3 Insert the Battery Holder into the Remote Controller.
■Replacing the Button-type Battery
- When the button-type battery is exhausted, replace it with a new CR2025 battery. (The life of the battery is about 1 year. However, it depends on the frequency of use.)
- Make sure you insert the battery with its poles correctly aligned.
- Do not short-circuit the battery.
- When you do not use the Remote Controller for a long time, take out the battery and store it in a cool, dry place.
CAUTION
Danger of explosion if battery is incorrectly replaced. Replace only with the same or equivalent type recommended by the equipment manufacturer. Discard used batteries according to manufacturer's instructions.
WARNING
Risk of fire, explosion and burns. Do not recharge, disassemble, heat above 100°C or incinerate. Keep the Button-Type battery out of the reach of children. Never put Button-Type battery in mouth. If swallowed call your doctor.
![graph TD A["CAMERA FUNCTIONS"] --> B["2,5"] B --> C["2,3"] C --> D["2,4"] D --> E["90° 1 OPEN"] E --> F["7,8"] F --> G["180° 6"] G --> H["7,8"] H --> I["CAMERA OFF VCR"]](/content/2026/06/1329805/images/a052042b9af9bb980726a3fe11cf615342727265741b91e11b7ab69e3085f7a5.jpg)
When recording yourself with the LCD monitor facing forward
Recording Yourself with the LCD Monitor Facing Forward
Turning the LCD Monitor so that it faces forward, allows you to aim the Movie Camera and view the picture in the Finder, while the persons in front of the camera can check the picture on the LCD Monitor during recording. If you mount the Movie Camera on a tripod and use the Remote Controller, you can also take part in the action that you are recording and check the picture from the front on the LCD Monitor.
1 Slide the [▲OPEN] Lever to the left and simultaneously open the LCD Monitor in the direction of the arrow approximately 90°. 2 Display the [DISPLAY SETUP] Sub-Menu. (→ 28) 3 Turn the [▲▼] Dial to select [SELF SHOOT]. 4 Press the [SET] Button to select the desired mode ([NOR.] or [MIR.]).
•[NOR.] means Normal Mode. •[MIR.] means Mirror Mode. (→ 126)
5 Press the [MENU] Button to exit the menu.
6 Turn the LCD Monitor until it faces forward approximately 180°. 7 Press the Recording Start/Stop Button ①.
■ Stopping Recording
Press the Recording Start/Stop Button ①.

1

■ Mirror Mode
When recording yourself with the LCD Monitor facing forward, the picture shown on it the way it is being recorded may be difficult to get used to.
This is because we usually look at ourselves in the mirror, so we see a mirror-image and this feels more natural. This Movie Camera features the Mirror Mode which displays the picture as a mirror-image.
However, even if you have selected in the Mirror Mode, the picture is recorded in the normal way.
- It is not possible to display and record the Date, Time and/or Title Indication in the Mirror Mode.
In the Mirror Mode, only the following indications can be displayed on the LCD Monitor and in the Finder:
[●]: Recording Mode Indication
[110]: Recording Pause Mode Indication
[●] Remaining Battery Indication
[☐]: General Warning/Alarm Indication
(In addition to these four indications, the Counter Indication and the Programme AE Mode Indications can also appear in the Finder.)
When you want to confirm other indications, return the LCD Monitor to position ① or ② shown in the illustration above. Especially when the [!] Indication is displayed, be sure to return the LCD Monitor to position ① or ② so that you can confirm the actual Warning/Alarm Indication.
- If you turn the LCD Monitor so that it faces forward, the Finder also automatically turns on. However, in the following cases, the Finder turns off:
- Changing from the Camera to the VCR Mode.
- Closing the LCD Monitor with the screen facing outward (as shown above 1).


Recording with Pre-programmed Titles Inserted in the Picture
Recording with Pre-programmed Titles Inserted in the Picture
You can insert one of 10 pre-programmed titles in recordings of special occasions such as weddings and birthday parties. These titles are available in 8 languages.
After selecting [LANGUAGE FOR TITLE] ① on the [TITLE SETUP] Sub-Menu... (→ 28)
1 Press the [SET] Button to select the desired language.
●The languages change in the following order:
![graph LR A["ENGLISH GERMAN FRENCH"] --> B["ITALIAN"] C["ARABIC CHINESE RUSSIAN SPANISH"] --> B](/content/2026/06/1329805/images/5f471d292edd1e2bb77e231a1d5082a00c87696600429dd770298876b725600f.jpg)
2 Turn the [▲▼] Dial to select [TITLE] ②.
3 Press the [SET] Button to select the desired title.
- The titles change in the order shown below. (In the other available languages, they are arranged in the same order.)
[HOLIDAY]→[HAPPY BIRTHDAY]→ [WEDDING]→[FAMILY]→[PARTY]→ [THE END]→[CONGRATULATIONS]→ [MERRY CHRISTMAS]→[HAPPY MEMORIES] →[HAPPY NEW YEAR]→[HOLIDAY]→
4 Turn the [▲▼] Dial to select [COLOUR] ③.
5 Press the [SET] Button to select the desired colour.
- You can select the colour of the title from among 8 colours. - The colours for the title change in the following order:
![graph LR A["WHITE YELLOW MAGENTA"] --> B["RED"] C["BLACK BLUE GREEN CYAN"] <--_D["Black Blue Green CYAN"]](/content/2026/06/1329805/images/9b1e113634049d9a527531271341dceabd28b219737350d6c0164b0bd361030f.jpg)

![graph LR A["2"] --> B["HOLIDAY"]](/content/2026/06/1329805/images/fb701fb64dedfec030ce5712d0c565e38cdea3ffe5aa6aef62743cb34f32a2c2.jpg)

Chinese
6 Turn the [▲▼] Dial to select [SIZE] ①.
7 Press the [SET] Button to select the desired size ([NORMAL] or [LARGE]).
- You can choose either of 2 sizes for the title.
- When you change the title size from [NORMAL] to [LARGE], the Title Indication changes as shown above ②.
8 Press the [MENU] Button to exit the menu.
- When a large-size title is displayed, some indications do not appear even if the corresponding modes are activated.
- If you set [SIZE] on the [TITLE SETUP] Sub-Menu to [LARGE], the large [RECORD] and [PAUSE] Indications, which usually appear briefly when you start or stop recording, do not appear.
- The Date/Time/Title Indication remains displayed when you exit the [TITLE SETUP] Sub-Menu after having changed the language of the title (→ 128), the type of Date/Time/Title Indication (→ 52), the title itself (→ 128), the size of the title or the colour of the title (→ 128).
- When the Movie Camera's Digital Still Picture Terminal is connected to a computer by using the Personal Computer Connection Kit (→ 162), the title is always in white, even if you choose another colour on the menu.
Recording with Pre-programmed Title Inserted in the Picture
During recording, press the [DATE/TITLE] Button to make the title appear.
Deleting the Title
Press the [DATE/TITLE] button to make the title disappear.


Chinese
Creating Your Own Titles and Inserting Them During Recording (Digital Superimposer Function)
This function lets you store the image of a handwritten title, signboard, printed title, or some similar object with strong contrast, in the Movie Camera's digital image memory. You can then change the dark parts of this image to a desired colour and superimpose it during recording.
1. Prepare a title that has strong contrast (e.g., write with a thick black marker). 2. With the Movie Camera in the Recording Pause Mode, aim it at the title.
- If the Full Auto Mode does not provide a sharp picture, adjust the focus manually. (→ 110)
- When you want to capture a small title, use the Macro Close-up Function. (→ 60)
- As the title picture is automatically cropped on all four sides, aim the Movie Camera so that there is sufficient empty space around the actual title.
3. Press the [STORE] button for more than 2 seconds.
- The title is now stored in the digital image memory and it remains displayed.
4. Press the [COLOUR] button repeatedly until the desired colour ① is displayed.
● The colours of the title change in the following order:
![graph LR A["WHT (White)"] --> B["YEL (Yellow)"] B --> C["MAG (Magenta)"] C --> D["RED (Red)"] E["BLK (Black)"] <--_F["BLU (Blue)"] F <--_G["GRN (Green)"] G <--_H["CYN (Cyan)"] H <--_I["Red"]](/content/2026/06/1329805/images/170d08e5b95c9249fcfce2339af89685119286acd50fa0202f341bdc65ee8102.jpg)
5. Press the [OFF/ON] button briefly to make the title disappear.
- Pressing the [OFF/ON] button briefly repeatedly makes the title appear and disappear.

Insert your own title at the beginning of a recording.
Inserting Your Own Title at the Beginning of a Recording
1 Press the [OFF/ON] Button briefly to make the title appear. - Confirm that the colour indicated is suitable for the intended scene. If necessary, change the colour. (→ 132)
2 Press the Recording Start/Stop Button to start recording. • To make the title disappear while recording of the scene continues, press the [OFF/ON] Button briefly.
3 Press the Recording Start/Stop Button to stop recording.
Inserting Your Own Title During Recording 4 Press the Recording Start/Stop Button to start recording.
5 At the point where you want to insert the title, press the [OFF/ON] Button briefly to make the title appear. • To make the title disappear while recording of the scene continues, press the [OFF/ON] Button briefly.
6 Press the Recording Start/Stop Button to stop recording.
- The title stored in the digital image memory may be automatically cancelled when you store a new title.
- The title stored in the digital image memory may be automatically cancelled or it may be missing partially when the Battery is removed, the AC Adaptor is disconnected or the Battery becomes discharged.
- By displaying the title which you stored in the digital image memory and using the Digital Fade 1, Digital Fade 2 or Digital Fade 3 Function (→ 98), you can fade the title together with the picture.
- It is not possible to apply the Negative Effect when storing a title in the digital image memory. ●After turning the Movie Camera off and then on again, the title that had been displayed in the picture is no longer displayed. To make it appear again, press the [OFF/ON] Button briefly.
- When the Movie Camera's Digital Still Picture Terminal is connected to a computer by using the Personal Computer Connection Kit (→ 162), inserting your own titles in the picture is not possible.


Using Various Functions during Playback
Using Various Functions during Playback
With this Movie Camera you can add various effects to the recorded picture during playback. This is especially convenient for creatively enhancing certain scenes when you edit individual recorded scenes into a finished video.
- Playback Title Indication
- Playback Digital Effects (→ 138)
- Playback Digital Superimposer (→ 150)
You can use these functions only when the TBC Function is activated. Make sure that the [TBC] Indication is displayed. (→ 64)
Playback Title Indication
The Date/Time/Title Indication that can be inserted in the pictures during recording (→ 128) can also be inserted in the picture during playback (editing).
You can select the desired language, title, colour and size on the [TITLE SETUP] Sub-Menu. (When the Movie Camera's Digital Still Picture Terminal is connected to a computer by using the Personal Computer Connection Kit (→ 162), the title is always in white, even if you choose another colour on the menu.)
The Playback Title Indication Function can be used only when the TBC Function is activated. Make sure that the [TBC] Indication is displayed. (→ 64)
1 During playback, press the [DATE/TITLE] Button to superimpose the desired Date/Time/Title Indication.
- To make the superimposed Date/Time/Title Indication disappear, press the [DATE/TITLE] Button again.
- The Date/Time Indication is generated by the Movie Camera's built-in clock.

There are various modes available for adding special digital picture effects to your recordings during playback. They are identical to the Digital Effects 1 and 2 (→ 80, 82, 84) that can be used during recording.
The Playback Digital Effect Function can be used only when the TBC Function is activated. Make sure that the [TBC] Indication is displayed. (→ 64)
EFFECT1
① MOSAIC ⑤ MULTI EFFECT2 ① NEGA ② SOLARI ③ SEPIA ④ B/W ⑤ D.FADE1 ⑥ D.FADE2 ⑦ D.FADE3
1 During playback, press the [EFFECT1/2] Button on the Remote Controller to select [EFFECT1] or [EFFECT2].
≥The [EFFECT1] or [EFFECT2] Indication appears for about 1 second.
2 Press the [SELECT] Button on the Remote Controller to select the desired digital effect.
≥The [D] Lamp lights. ≥Repeatedly pressing the [SELECT] Button changes the selected digital effect in the order ① to ⑧.
Suspending the Playback Digital Effect Temporarily
You can suspend and re-activate the digital effect by repeatedly pressing the [OFF/ON] Button ①. When the digital effect is temporarily suspended, the indication of the selected effect flashes.
Cancelling the Playback Digital Effect
Press the [SELECT] Button on the Remote Controller to make the displayed digital effect indication disappear.
≥The same setting can also be set using the [DIGITAL EFFECT] Sub-Menu on the [VCR FUNCTIONS] Main-Menu. ≥If you set the [CAMERA/OFF/VCR] Switch to [OFF] and then set it to [VCR] again, the previously selected Playback Digital Effect is automatically cancelled. ≥In the Multi Image Mode, Picture-in-Picture Mode, Mix Mode and Wipe Mode, it is not possible to use any of the Digital Fade Modes. ≥When the Movie Camera's Digital Still Picture Terminal is connected to a computer by using the Personal Computer Connection Kit (→ 162), the Multi Image Mode, Picture-in-Picture Mode, Mix Mode and Wipe Mode cannot be used.

![graph TD A["1"] --> B["2"] B --> C["3"] D["4"] --> E["5"] E --> F["6"] G["7"] --> H["8"] H --> I["9"]](/content/2026/06/1329805/images/04783cc448c5863b9581923f28c6f98656d1993c8b4d5cf38c5665cafb5882e6.jpg)

■Capturing and Displaying a Sequence of 9 Still Pictures (Multi Image Strobe 1 Mode)
This function captures and displays a sequence of 9 still pictures over approximately 1.5 seconds. This is very convenient for motion analysis of sports action, animal studies, etc.
The Playback Multi Image Function can be used only when the TBC Function is activated. Make sure that the [TBC] Indication is displayed. (→ 64)
Set the Multi-Picture Mode before performing the following steps. (→ 138)
●The [MULTI] Indication appears.
1 Press the [MENU] Button.
2 Turn the [▲▼] Dial to select [PLAYBACK FUNCTIONS] and then press the [SET] Button.
●The [PLAYBACK FUNCTIONS] Sub-Menu appears.
3 Turn the [▲▼] Dial to select [MULTI] and then press the [SET] Button to select [STROBE1].
4 Press the [MENU] Button to exit the menu.
5 Start playback, and when you reach the scene that you want to capture and display in the Strobe Multi-Picture Mode, press the [MULTI] Button.
- A sequence of 9 still pictures is displayed and the tape stops.
Making the Multi-Pictures Disappear
Press the [MULTI] Button.
Displaying the Multi-Pictures Again
Press the [MULTI] Button for more than 2 seconds.
- The quality of the pictures displayed in the Multi-Picture Mode is slightly inferior.
- The Sepia or Black & White Modes cannot be used for the displayed 9 still pictures (even though these indications may appear).

■Continuously Capturing and Displaying 9 Still Pictures (Multi Image Strobe 2 Mode)
This function continuously captures and displays sequences of 9 still pictures taken over approximately 1.5 seconds each. The Playback Multi Image Function can be used only when the TBC Function is activated. Make sure that the [TBC] Indication is displayed. (→ 64)
Set the Multi-Picture Mode before performing the following steps. (→ 138)
●The [MULTI] Indication appears.
1 Press the [MENU] Button.
2 Turn the [▲▼] Dial to select [PLAYBACK FUNCTIONS] and then press the [SET] Button. •The [PLAYBACK FUNCTIONS] Sub-Menu appears.
3 Turn the [▲▼] Dial to select [MULTI] and then press the [SET] Button to select [STROBE2].
4 Press the [MENU] Button to exit the menu.
5 Start playback and press the [MULTI] Button. •Sequences of 9 still pictures are continuously displayed.
6 Press the [MULTI] Button again at the point where you want to capture.
Making the Multi-Pictures Disappear
Press the [MULTI] Button.
Displaying the Multi-Pictures Again
Press the [MULTI] Button for more than 2 seconds.
- The quality of the pictures displayed in the Multi-Picture Mode is slightly inferior. - The Sepia or Black & White Modes cannot be used for the displayed 9 still pictures (even though these indications may appear).


Picture-in-Picture Function
This function lets you display a small still picture inside the normal playback picture.
The Playback Picture-in-Picture Function can be used only when the TBC Function is activated. Make sure that the [TBC] Indication is displayed. (→ 64)
Set the Picture-in-Picture Mode before performing the following steps. (→ 138)
●The [P IN P] Indication appears.
1 During playback, press the [MULTI] Button at the scene that you want to capture as a small still picture.
●A small picture appears inside the normal picture.
Erasing the Small Picture
Press the [MULTI] Button.
If you press the [MULTI] Button again, another small picture is displayed.
Cancelling the Picture-in-Picture Mode
Set [EFFECT1] on the [DIGITAL EFFECT] Sub-Menu to [OFF].
- The small picture is displayed with slightly inferior picture quality compared to that of normal moving pictures.
- If you press the [MULTI] Button during playback, slight picture noise may occur.
- When a small still picture is displayed, it is not possible to apply the Sepia or Black & White Mode to the small picture, although their indications might appear.

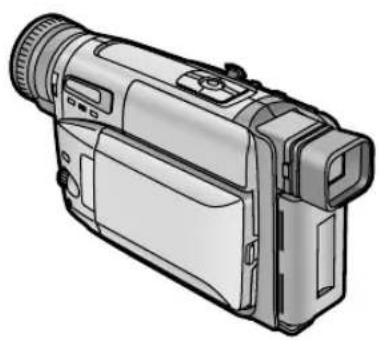
Chinese
■When using the Mix and Wipe Functions
■Mix Function and Wipe Function
The Playback Mix or Wipe Function can be used only when the TBC Function is activated. Make sure that the [TBC] Indication is displayed. (→ 64)
Set the Mix Mode or Wipe Mode before performing the following steps. (→ 138)
●The [MIX] or [WIPE] Indication appears.
1 Press the [▶] Button to start playback.
2 Press the [STORE] Button at the moment that you want to store as still image in memory.
- The [MIX] or [WIPE] Indication appears and the picture is stored in memory.
3 Press the [OFF/ON] Button at the scene at which you want to use a Wipe or Mix Effect.
The scenes change with a Wipe or Mix Effect.
Cancelling the Mix or Wipe Function
Press the [SELECT] Button on the Remote Controller to make the displayed [MIX] or [WIPE] Indication disappear.
- Operating the Wipe Function and the Mix Function during playback is only possible with the Remote Controller.
- If you press the [OFF/ON] Button while the Wipe or Mix is being performed, the effect is paused at that point. If you press the [OFF/ON] Button again, the effect resumes.
- It is not possible to use the Wipe or Mix Function during playback of an unrecorded part of the tape.
- The Negative and Solarisation Effects cannot be applied to a picture stored in the digital image memory for the Mix or Wipe Function.


1, 2, 3, 4, 6
Playback Digital Fade
There are 3 Playback Digital Fade Modes available. They are the same as the Digital Fade Modes that can be used for recording. (→ 98)
The Playback Digital Fade Modes can be used only when the TBC Function is activated. Make sure that the [TBC] Indication is displayed. (→ 64)
Set the desired Digital Fade Mode before performing the following steps. (→ 138)
1 During playback, repeatedly press the [COLOUR] Button while keeping the [FADE] Button pressed until the desired colour ① is displayed.
●The colours of the Digital Fade change in the following order:
![graph LR A["BLK (Black)"] --> B["WHT (White)"] B --> C["YEL (Yellow)"] C --> D["MAG (Magenta)"] E["BLU (Blue)"] <--_F["GRN (Green)"] F <--_G["CYN (Cyan)"] G <--_H["RED (Red)"] H <--_I["-->"]](/content/2026/06/1329805/images/02ff2f3b5abda4b16bcfe4ee398e2afd8a422820bf8260b2e9ef15862bd289f2.jpg)
Fading In
2 During playback, keep the [FADE] Button pressed.
- The picture disappears gradually with the selected digital fade effect.
3 Release the [FADE] Button at the point where you want to fade in.
Fading Out
4 During playback, press the [FADE] Button at the point where you want to fade out, and keep it pressed.
5 After the picture has completely disappeared, press the [■] Button.
-Playback stops.
6 Release the [FADE] Button.
Cancelling the Selected Digital Fade Function
Set [EFFECT2] on the [DIGITAL EFFECT] Sub-Menu to [OFF].


Playback Digital Superimposer
This function gives the pictures the same visual effect as the Digital Superimposer Function (→ 132).
The Playback Digital Superimposer Function can be used only when the TBC Function is activated. Make sure that the [TBC] Indication is displayed. (→ 64)
Storing Your Own Title in the Digital Image Memory
1. During playback, press the [STORE] button for more than two seconds when you reach the scene that you want to superimpose as a title in another scene.
- The title captured in the digital image memory remains on the screen.
Selecting the Desired Colour for the Title
2. While the title is displayed, press the [COLOUR] button repeatedly until the desired colour appears.
● The colours for the title change in the following order:
![graph LR A["WHT (White)"] --> B["YEL (Yellow)"] B --> C["MAG (Magenta)"] C --> D["RED (Red)"] E["BLK (Black)"] <--_F["BLU (Blue)"] F <--_G["GRN (Green)"] G <--_H["CYN (Cyan)"] H <--_I["Red"]](/content/2026/06/1329805/images/20c84221dff08812dd4312e7f71c6027dc63fd1408cdea4b3e6902f7c42f563f.jpg)
Cancelling the Playback Digital Superimposer Function: Press the [OFF/ON] button to make the title disappear.
- When the Movie Camera's Digital Still Picture Terminal is connected to a computer by using the Personal Computer Connection Kit (→ 162), inserting your own titles in the picture is not possible.


Enlarging the Picture During Playback (Playback Zoom)
With this function, you can enlarge a part of the picture by up to 10 times during playback.
1. During playback, press the Playback Zoom Button [P.B. ZOOM] on the Remote Controller.
● The centre part of the picture is enlarged about 2 times.
Changing the Zoom Magnification
2. Press the [W] or [T] Zoom Button on the Remote Controller to change the magnification.
- You can increase the magnification up to 10 × .
Shifting the Enlarged Part of the Picture
3 Press the Arrow Button (▲, ◀, ▶, ▼) on the Remote Controller according to the direction in which you want to shift the enlarged part of the picture.
Cancelling the Playback Zoom Function
Press the [P.B. ZOOM] Button on the Remote Controller.
- In the Playback Zoom Mode, it is not possible to adjust the sound volume.
- Turning the Movie Camera off or switching it from the VCR Mode over to the Camera Mode automatically cancels the Playback Zoom Mode.
- The more the picture is enlarged, the more its picture quality deteriorates.
- It is not possible to use any of the Digital Effects and the Playback Zoom Function at the same time. (→ 138)
2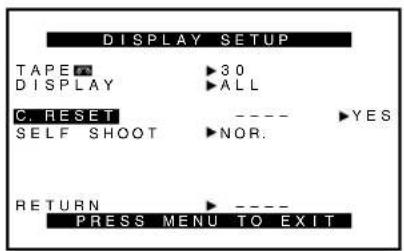
1
3
中文
使用磁帶計時器指示時
Using the Tape Counter Indication
The Tape Counter Indication is convenient for the following 2 purposes: to check the Elapsed Tape Time (described below), and to use the Memory Stop Function (→ 158).
Checking the Elapsed Tape Time
The Tape Counter Indication shows the elapsed tape time both during recording or playback.
You can freely reset this indication (return the counter to [0:00.00] ①). Therefore, by resetting the counter to zero when you start recording or playback, you can check the tape time that has elapsed from that point.
After displaying the [DISPLAY SETUP] Sub-Menu... (→ 28)
1 Turn the [▲▼] Dial to select [DISPLAY]. 2 Press the [SET] Button to select [ALL]. 3 Turn the [▲▼] Dial to select [C.RESET]. 4 Press the [SET] Button to select [YES].
- When recording or playback starts, the elapsed tape time is indicated in hours, minutes and seconds. During playback of parts of the tape on which no recording has been made, this indication does not change.
- If you rewind the tape further than the tape counter position [0:00.00], the minus sign [-] appears in front of the Tape Counter Indication.
- The Tape Counter Indication is automatically reset to [0:00.00] when you take out the cassette, remove the Battery or use the High-Speed Rewinding Function.
②: Camera Mode ③: VCR Mode
A


B
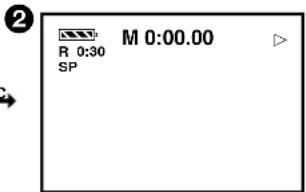


Changing the Tape Counter Indication
By changing the setting for [DISPLAY] on the [DISPLAY SETUP] Sub-Menu of the [VCR FUNCTIONS] or the [CAMERA FUNCTIONS] Main-Menu, the Counter Display Mode can be changed in the order shown in the above illustrations 1–4.
Camera Mode A
1 ALL: Elapsed Tape Time Indication (initial setting) 2 MEMORY: Memory Stop Indication and Elapsed Tape Time Indication (→ 158) 3 PARTIAL: No Counter Indication
Only a few indications are displayed so that all parts of the picture can be seen clearly. However, when you turn on the Movie Camera, all indications initially appear for a few seconds to inform you of the selected settings.
- In this condition, if you switch the Movie Camera over to the VCR Mode and then back to the Camera Mode, [ALL] is automatically selected for the Tape Counter Indication.
4 OFF: No Counter Indication
In this mode, only the Operation Mode Indications and Warning/Alarm Indications can appear. However, when turning on the Movie Camera, all indications appear for a few seconds to inform you of the selected settings.
VCR Mode B
1 ALL: Elapsed Tape Time Indication (initial setting) 2 MEMORY: Memory Stop Indication and Elapsed Tape Time Indication (→ 158) 3 OFF: No Counter Indication
In this mode, only the Operation Mode Indications and Warning/Alarm Indications can appear.
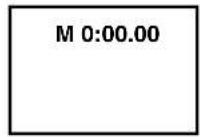

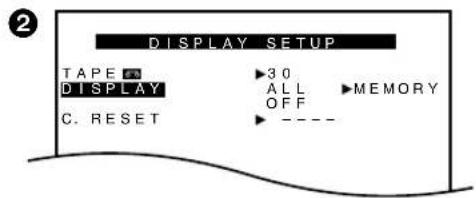

Using the Memory Stop Function
This function is convenient for temporarily marking a tape position during recording or playback so that you can easily find it again later for playback.
1 Reset the Tape Counter to zero at the tape position from which you want to play back later. (→ 116, 154) 2 Set [DISPLAY] on the [DISPLAY SETUP] Sub-Menu of the [CAMERA FUNCTIONS] 1 or the [VCR FUNCTIONS] Main-Menu 2 to [MEMORY]. 3 Start playback or recording. 4 After playback or recording is finished: Set the [CAMERA/OFF/VCR] Switch to [VCR].
5 Press the [▶▶] or [◀◀] Button. •The tape automatically stops approximately at the position at which you reset the counter to zero.
- During High-Speed Rewinding, the Tape Counter shows [0:00.00]. However, this does not activate the Memory Stop Function.

Chinese
Copy (Duplicate)
By connecting the AV Cable (supplied), you can copy the cassette recorded with this Movie Camera onto a VCR.
1 Connect the AC Adaptor. 2 Insert the recorded cassette into the Movie Camera and put it in the VCR Mode. 3 Insert an unrecorded cassette into the VCR and put it in the Recording Pause Mode. 4 Start playback on the Movie Camera. 5 Start recording on the VCR. 6 After reaching the end of the original recording: Stop recording on the VCR. 7 Stop playback on the Movie Camera.
- As the picture quality on the dubbed cassette is slightly reduced, we recommend that you select the standard speed (SP Mode) on the VCR for dubbing. (SP means Standard Play.)
- If your VCR is equipped with an Edit Switch, turn it on to ensure optimum picture quality of the dubbed cassette.
- If your VCR is equipped with an S-Video socket, also connect the S-Video Cable ① (supplied).

Chinese
Using the Movie Camera with a Computer
Using the Movie Camera with a Computer
The supplied Personal Computer Connection Kit makes it possible to connect the Movie Camera to a computer and transmit still video images to it.
Computer System Requirements
DV STUDIO2 can be installed in a PC/AT compatible personal computer which can run Microsoft® Windows® 95/98. (Already confirmed to operate correctly on Windows® Me)
Compatible machines:
Personal computer with 80486DX4 or higher CPU (Pentium™ or higher recommended)
Graphic card:
True Color (approx. 16.7 million colours) recommended (operation also possible even with 256 colours)
Installed memory: 16 MB or more (32 MB or more recommended)
Free hard disk space: At least 16 MB
Disk drive: CD-ROM drive
Ports: RS-232C (D-sub 9 pin)
Other requirements: Mouse
●Windows is a trademark or registered trademark of Microsoft Corporation U.S.A. - All other company and product names in the operating instructions are trademarks or registered trademarks of their respective corporations. ●Pictures that you intend to import from cassette into computer applications should be recorded in the SP Mode. - For detailed explanations on the operating environment, connections and operations, refer to the Personal Computer Connection Kit's operating instructions.
Chinese
Precautions
Precautions for the Movie Camera
Precautions for the Movie Camera
In the event of abnormal operation (e.g. if the unit emits smoke or an unusual smell), immediately stop operating the unit and consult qualified service personnel.
For Australia or New Zealand:
Consult the Panasonic Customer Care Centre on 132600.
■To prevent fire, electric shock and malfunction, observe the following points:
- Do not disassemble the Movie Camera or make any alterations to it.
- Protect against spray water and sand.
- Take care that water splashes (especially seawater) or dust do not enter the Movie Camera. If seawater has accidentally splashed onto the Movie Camera, moisten a soft cloth with tap water, wring it out well and carefully wipe the camera body with it. Then thoroughly wipe it with a soft, dry cloth.
- Do not insert any foreign objects.
- Do not cover with a cloth during use.
- Do not subject to strong vibrations or mechanical shocks.
- Do not use in places with oily smoke and a lot of dust.
- If a thunderstorm approaches, stop using the Movie Camera. (If you are using the AC Adaptor, disconnect it from the AC mains socket taking care not to touch any metal parts.)
- Do not use near magnetized equipment.
- Do not use near a radio or TV.
- Do not use near a cell phone because doing so may cause noise to adversely affect the picture and sound.
- Do not use with the cassette compartment facing down.
- Do not aim the lens or Finder directly at the sun; the lens collects light and the resulting heat could deform internal precision parts and cause irreparable damage to the Movie Camera.
- Do not leave in a closed car on a summer day. The inside temperature becomes higher than you imagine and this could damage the Movie Camera.
- Do not wash with water.
Water might leak into the Movie Camera and cause an electric shock or fire.
- Do not use a cleaning fluid, benzine, alcohol, thinner or other chemicals for cleaning. They might not only change the colour and damage the surface of the camera body, but might also increase the risk of fire if there is an open flame or heater nearby. ● Never leave the Movie Camera in places with high temperature.
Precautions for Storing the Movie Camera
Be sure to take out the cassette and remove the Battery before storing.
Avoid the following places:
- Places with high temperature and high relative humidity Recommended temperature: 15°C–25°C Recommended relative humidity: 40%–60%
- Places exposed to direct sunlight
- In direct contact with rubber or plastic products for a long time • In reach of children
Precautions for the AC Adaptor
Observe the following points:
- Use only for the specified Movie Camera and Battery.
- Do not handle with wet hands.
To unplug the AC Mains Lead, be sure to pull it out by the plug, not by the cable.
- Do not forcefully bend the cables or alter them.
- Do not operate very close to a radio, TV etc.
Chinese
Battery Precautions
Precautions for the Battery
The Battery's ability to generate electric energy is based on a chemical reaction. If the Battery is incorrectly handled, it could cause leakage, excessive rise in temperature, fire or explosion.
■Observe the Following Points:
- Use only the specified AC Adaptor or Car Battery Charger to charge the Battery, and use the Battery only for this Movie Camera.
- When you have finished using the Movie Camera, be sure to remove the Battery.
If you leave the Battery attached to the Movie Camera, a small amount of electricity is consumed even if the [CAMERA/OFF/VCR] Switch is set to [OFF], and this reduces the Battery's charge. Leaving the Battery attached to the Movie Camera for a very long time could discharge it excessively and this could make charging impossible.
- Do not allow metal objects such as keys and necklaces to touch the battery terminals. Short-circuiting may occur and generate heat, and this could cause the Battery to explode. Be especially careful when storing or carrying the Battery in a bag.
- Do not deform or alter the Battery.
- When the operation time even after proper charging is too short for normal use, the service life of the Battery has reached its end.
- If the Battery becomes too warm, a protection function is activated and it puts the Battery temporarily out of operation.
- Do not throw the Battery into a fire. This could cause it to explode.
Precautions for Storing the Battery
Avoid the following places, as they could shorten the service life of the Battery:
- Places with extremely high temperature and high relative humidity Recommended temperature: 15°C–25°C Recommended relative humidity: 40%–60%
- Places with oily smoke and a lot of dust The terminals of the Battery might rust.
- Before you store the Battery for a long time, perform playback or other operations to completely use up the remaining charge in the Battery. Then remove it from the Movie Camera and store it. We recommend that you reactivate the Battery about once a year by charging it and then completely using up the charge before storing it again.
Precautions for the Cassette
When you have finished using the Movie Camera, rewind the tape to the beginning and take the cassette out of the Movie Camera. If you store the cassette for a long time, fast-forward and then rewind it at least once a year to expose the tape to fresh air.
Observe the following points to prevent deformation of the cassette case and deterioration of the picture and sound quality.
- Do not subject the cassette to strong vibration or mechanical shocks.
- Do not place it near magnetized equipment.
- Avoid places where the temperature can become very high.
Chinese
Causes of Condensation and Remedy
Causes of Condensation and Remedy
When condensation has formed inside the Movie Camera and on the tape, recording becomes impossible. In addition, the tape might remain in contact with the heads and this could seriously damage the Movie Camera.
■Main Causes of Condensation
- When the Movie Camera is brought from a cold to a warm place.
- When the Movie Camera is taken outdoors from inside an air-conditioned car or house.
- When the heating is turned on in a cold room.
- When the Movie Camera is exposed to the cold breeze from an air-conditioner.
- When the Movie Camera is in a very hot or humid place or in a place with steam.
■Symptoms of Condensation
When turning on the Movie Camera, the Condensation Indication [U10/♠] appears.
(A few seconds later, the Movie Camera automatically turns itself off.)
■Remedy as Follows:
- Take out the cassette.
- Keep the Cassette Compartment open and wait a few hours.
- A few hours later, turn on the Movie Camera and confirm that the Condensation Indication is not displayed any more. For added safety, wait about 1 more hour.
■To Prevent Condensation from Forming
When bringing the Movie Camera from a very cold to a warm place, keep it in a tightly closed plastic bag or something similar for 1 to 2 hours before using it again.
■When the Lens Is Fogged up
Turn the Movie Camera on and wait for about 1 hour until it has reached about the same temperature as its surroundings.
Video Head Clogging and Remedy
If the video heads become dirty and clogged with dust, the picture quality deteriorates.
■Symptoms of Dirty Video Heads
- When turning on the Movie Camera, the [U11/×] Indication appears for the first few seconds.
- When playing back a cassette on the Movie Camera and watching the picture on a connected TV, white noise bars appear in the picture. However, if the heads are extremely dirty, the playback picture cannot be seen at all.
■Remedy as Follows:
Use a video head cleaning cassette to clean the heads. Carefully follow the instructions for its use as too much cleaning wears down the heads. If the playback picture is not clear after cleaning, it means that the video heads are worn out. Consult qualified service personnel.
How the White Balance (Tint) Adjustment Works
How the White Balance (Tint) Adjustment Works
Video recording takes place under various light sources, from sunlight as the main natural light source to a wide range of artificial light sources such as fluorescent lamps. As each of these light sources has a different colour temperature, each of them gives the colours of the subject a slightly different tint. Human eyes can easily adjust to different kinds of lighting and recognize an object as having the same colour, even under different light sources.
The eye of the Movie Camera (lens), however, cannot adapt to the change in lighting and is influenced by the lighting. Therefore, depending on the light source, the picture would be recorded with a bluish or reddish tint. To minimize the influence of the lighting on the colours of the subject, an adjustment called White Balance Adjustment is necessary.
■Auto White Balance
This Movie Camera offers both Auto White Balance Adjustment and Manual White Balance Adjustment. When the Movie Camera is in the Full Auto Mode, the internal system of the Movie Camera automatically determines the temperature of the light and compensates the tint of the subject accordingly. White is the basic colour by which the tint is determined. Because this adjustment is performed based on the white colour, it is called White Balance Adjustment. The optimum settings for several light sources are stored in the memory of the Movie Camera. The internal microcomputer compares the colour temperature of the light received by the White Balance Sensor positioned on the front of the Movie Camera with the colour stored in memory, and selects the setting for the most similar tint.
Be careful not to cover the White Balance Sensor (→ 12) with your hand, etc.
■Manual White Balance
Although this Movie Camera stores the optimum settings for several light sources in memory to correctly judge the white colour, it cannot cope with all light sources. Therefore, to record under those types of lighting (→ 106, 108) which cannot be correctly adjusted with Auto White Balance Adjustment, use Manual White Balance Adjustment. (→ 106)
How the Focus Adjustment Works
If you look at an object through a magnifying glass and move it closer or further away from your eye, you will reach a point where the object becomes clearly visible. Being focused or in focus means that the subject can be seen with optimum clarity and sharpness. The distance between the lens and the point where the rays of light come together is called Focal Distance or Focal Length and depends on the size and shape of the lens. Human eyes have lenses too, and when we look at objects at different distances, the shape of these lenses changes automatically so that we can always see the objects clearly.
■Auto Focus Adjustment
The image of the subject enters the Movie Camera through the lens and is converted into an electrical signal (video signal) for recording onto tape. Based on this signal, the Auto Focus System automatically adjusts the focal distance by moving the focusing lens forward or backward.
The focus is adjusted on the subject in the centre of the Finder.
1
6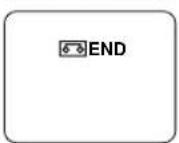
8 13
2
7
9
14
3
10
15
4
11
16
5
12
17
Chinese
Viewfinder indications
■ Warning/alarm indications
① Condensation (→168) ② Dirty video heads (→168) ③ Remaining battery power
■Warning/Alarm Indications
① Condensation (→ 168) ② Video Head Clogging (→ 168) ③ Remaining Battery Power
When the remaining battery power is used up, the Movie Camera automatically switches off. Replace the Battery with a fully charged one.
④ Cassette (→ 40)
No cassette is inserted. Or the tab of the inserted cassette is broken out. Insert a cassette with an intact tab.
⑤ Button-type Battery (→ 48)
The button-type battery is exhausted or is not inserted.
⑥ End of the Tape
When the tape has reached its end, this indication appears. Insert a new cassette.
⑦ General Warning/Alarm Indication
If you record with the LCD Monitor facing forward using the Mirror Mode (→ 126), this indication appears instead of the actual Warning/Alarm Indication.
■Recording and Playback Indications
⑧ Recording Mode (large indication) (→ 54) ⑨ Recording Mode (small indication) (→ 54) ⑩ Tape Movement during Recording (→ 54) ⑪ Recording Pause Mode (large indication) (→ 54) ⑫ Recording Pause Mode (small indication) (→ 54) ⑬ Recording Check Mode (→ 58) ⑭ Index Signal Recording Mode
An index signal is automatically recorded (and the [INDEX] Indication flashes briefly while it is being recorded) when you:
- Start recording after connecting the AC Adaptor or attaching the Battery.
- Start recording after inserting a cassette.
- Start recording after changing from the VCR to the Camera Mode. The recording of index signals makes it possible to use the VHS Index Search or Intro Scan Function during playback on a VCR equipped with these functions. (Refer to the operating instructions of your VCR.)
15 Playback Mode (→ 62) Camera Search Mode (→ 58) 16 Fast Forward/Cue Playback Mode (→ 70) 17 Rewind/Review Playback Mode (→ 70) Camera Search Mode (→ 58)
18
23
28
33
19
24
29
34
20 25

30
35
21 26

31
36
22
27
32
37
Chinese
18 High-speed rewind status (→68) ⑲ Still playback status (→70) 20 Tape counter Elapsed tape time (→154)
When the tape is rewound further than the position [0:00.00], the minus sign [-] appears in front of the Elapsed Tape Time Indication.
② Elapsed Tape Time with activated Memory Stop Function (→158) 22 Remaining Tape Time (→42) 23 Tape Length (→42) 24 Date and Time (→52) 25 Title (small indication) (→130) 26 Title (large indication) (→130) 27 Full Auto Mode (→54) 28 Recording Speed Mode (→34) 29 Zoom Magnification (→60) 30 Manual White Balance Mode (→106) ③1 Manual Recording Mode (→106, 110) 32 Sports Mode (→112) 33 Portrait Mode (→112) 34 Low Light Mode (→112) 35 Spotlight Mode (→112) 36 Surf & Snow Mode (→112) 37 Manual Focus Mode (→110)
38
39
40
41
42
43
44
45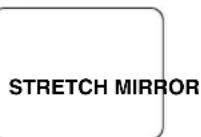
46
47
48
49
50
51
52
53
54
55
56
57
38 Magnetic tape tracking adjustment status (→ 68) 39 Color indication for digital images (→ 132, 150) 40 Snapshot recording status (→ 76) 41 Playback digital effect status (→ 138) 42 Super image stabilization status (→ 86) 43 Digital zoom status (→ 88) 44 Mosaic status (→ 80, 138) 45 Wide mode status (→ 80, 138) 46 Mirror mode status (→ 80, 138) 47 Strobe status (→ 80, 138) 48 High sensitivity status (→ 80) 49 Multi-screen status (→ 90, 92, 140, 142) 50 Picture-in-picture status (→ 94, 144) 51 Mix status (→ 96, 146) 52 Wipe status (→ 96, 146) 53 Negative status (→ 84, 138) 54 Overexposure status (→ 84, 138) 55 Sepia status (→ 84, 138) 56 Black and white status (→ 84, 138) 57 Digital fade status (→ 98, 148)
38 Tracking Adjustment Mode (→ 68) 39 Colour Indication for Digital Image (→ 132, 150) 40 Snapshot Recording Mode (→ 76) 41 Playback Digital Effect Mode (→ 138) 42 Super Image Stabilizer Mode (→ 86) 43 Digital Zoom Mode (→ 88) 44 Mosaic Mode (→ 80, 138) 45 Stretch Mode (→ 80, 138) 46 Mirror Mode (→ 80, 138) 47 Strobe Mode (→ 80, 138) 48 Gain up Mode (→ 80) 49 Multi Image Mode (→ 90, 92, 140, 142) 50 Picture-in-Picture Mode (→ 94, 144) 51 Mix Mode (→ 96, 146) 52 Wipe Mode (→ 96, 146) 53 Negative Mode (→ 84, 138) 54 Solarisation Mode (→ 84, 138) 55 Sepia Mode (→ 84, 138) 56 Black & White Mode (→ 84, 138) 57 Digital Fade Mode (→ 98, 148)
58 Zooming Mode (→ 152) 59 S-VHS Mode (→ 44) 60 S-VHS ET Mode (→ 44) 61 Recording Mode (→ 126) 62 Recording Pause Mode (→ 126)
- The above indications 61 and 62 are only displayed when recording in the Mirror Mode. (→ 126)
63 Motion-Sensor-Controlled Recording Function Stand-by Mode (→ 100) 64 0 Lux Night View Mode (→ 104) 65 Time Base Corrector (→ 64) 66 Digital Noise Reduction Mode (→ 64) 67 Voice Zoom Mode (→ 60) 68 Demonstration Mode
Demonstration Mode
When the Movie Camera is turned on and in the Camera Mode without any cassette inserted, and you leave it for 10 minutes without activating any function, it automatically switches over to the Demonstration Mode which demonstrates its many functions.
- You can also start the Demonstration Mode by setting [DEMO MODE] on the [OTHER FUNCTIONS] Sub-Menu of the [CAMERA FUNCTIONS] Main-Menu to [ON] and then exiting the menu.
- Pressing a button or displaying a menu temporarily suspends the Demonstration Mode. However, if you leave the Movie Camera in this condition without activating any function for more than approximately 10 minutes, the Demonstration Mode resumes.
- If you do not want the Demonstration Mode to be activated, set [DEMO MODE] on the menu to [OFF].
- If you set the [CAMERA/OFF/VCR] Switch to [CAMERA] while pressing the [▶] Button, [DEMO MODE] on the menu is automatically set to [ON] and the Demonstration Mode starts immediately.
- If you set the [CAMERA/OFF/VCR] Switch to [CAMERA] while pressing the [■] Button, [DEMO MODE] is automatically set to [OFF].
1. VW-AS7E/A 2. | CGR-V14SCGR-V610 CG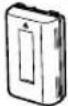 | 3. CGR-V26SGR-V620 CGR-V816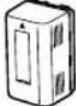 | 4. CGR-V53S | 5. VW-KBC7E | 6. VW-LF43WE |
7. 8W-LT4314WE | VW-LW4307WE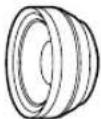 | 9. VZ-CT55E | 10. VW-TCA7E | 11.VZ-LDR10E | 12.VW-SK11E |

Optional Accessories
Optional Accessories
- AC Adaptor
- Battery Pack (Lithium-Ion)
- Battery Pack (Lithium-Ion)
- Battery Pack (Lithium-Ion)
- Car Battery Charger
- Filter Kit
- Tele Conversion Lens
- Wide Conversion Lens
- Tripod
- Cassette Adaptor
- IR/Video DC Light (Halogen & Infra-red) (It requires the Shoe Adaptor for attaching to the Movie Camera.)
- Shoe Adaptor (for attaching the IR/Video DC Light)
- Personal Computer Connection Kit
Some accessories are not available in some countries.
Specifications
S-VHS-C Camcorder
Your safety information
S-VHS-C Movie Camera Information for your safety
Power Source: DC 7.2 V (Battery)
DC 7.9 V (AC Adaptor)
Power Consumption
(Battery Operation): 4.5 W (When using Finder)
(NV-VS50)
6.0 W (When using LCD Monitor)
(NV-VS70)
6.2 W (When using LCD Monitor)
Tape Format: S-VHS-C/VHS-C Cassette
Recording/Playback Time: LP; 2 hours with EC60
VIDEO
Television System: CCIR; 625 lines, 50 fields
PAL colour signal
Output Level: VIDEO OUT (PHONO);
1.0 Vp-p, 75 ohm terminated
S-VIDEO OUT;
Y Output: 1.0 Vp-p, 75 ohm terminated
C Output: 300 mVp-p, 75 ohm terminated
AUDIO
Output Level/Impedance:
AUDIO OUT (PHONO);
-6 dBV (47 kohm loaded)/
less than 1 kohm
Audio Track: 1 track (Normal-Monaural)
Image Sensor: 1/5-inch CCD Image Sensor
Lens: 22:1 Power Zoom Lens
(Optical capability)
F1.6
Focal Length; 2.9–63.8 mm
Digital AI Auto Focus/Auto Iris
Filter Diameter; 43 mm
Monitor: (NV-VS50) 2.5-inch Colour LCD Monitor
(NV-VS70) 3-inch Colour LCD Monitor
Finder: 0.24-inch Electronic Finder
Standard Illumination: 1,400 lx
Operating Temperature: 0°C–40°C
Operating Humidity: 10%–80%
Weight: Approx. 850 g (without Battery)
Dimensions: Approx. 88 (W)×118 (H)×231 (D) mm
AC Adaptor (NV-VS50)
Information for your safety
Power Source: AC 100–240 V, 50/60 Hz
Power Consumption: 20 W
DC Output: DC 7.9 V, 8.5 W
(Movie Camera Operation)
DC 8.4 V, 0.7 A (Battery Charging)
Weight: Approx. 180 g (without AC Mains Lead)
Dimensions: Approx. 72 (W)×43 (H)×143 (D) mm
AC Adaptor (NV-VS70)
Information for your safety
Power Source: AC 100–240 V, 50/60 Hz
Power Consumption: 27 W
DC Output: DC 7.9 V, 8.5 W
(Movie Camera Operation)
DC 8.4 V, 1.4 A (Battery Charging)
Weight: Approx. 235 g (without AC Mains Lead)
Dimensions: Approx. 72 (W)×49 (H)×143 (D) mm
Weight and dimensions shown are approximate.
Specifications are subject to change without notice.
Chinese
Before Requesting Service (Problems & Solutions)
Power Supply
P1: The Movie Camera does not turn on.
S1: Is the Battery or the AC Adaptor connected correctly? Confirm the connection. (→ 18, 20)
P2: The Movie Camera has turned off automatically.
Before Requesting Service (Problems & Solutions)
Power Supply
P1: The Movie Camera does not turn on.
S1: Is the Battery or the AC Adaptor connected correctly? Confirm the connection. (→ 18, 20)
P2: The Movie Camera has turned off automatically.
S2: If you leave the Movie Camera in the Recording Pause Mode for more than 6 minutes, it automatically switches off to protect the tape and to conserve battery power. To resume recording from this condition, set the [CAMERA/OFF/VCR] Switch to [OFF] and then to [CAMERA] again. (→ 56)
P3: The Movie Camera quickly turns off.
S3-1: Is the Battery discharged? When the Remaining Battery Operation Time Indication shows "0:00" or the [☐] Indication is flashing, the Battery is discharged. Charge the Battery or attach a fully charged Battery. (→ 20)
S3-2: Has condensation formed? If the Movie Camera is brought from a cold to a warm place, condensation may form inside. In this case, the Movie Camera automatically switches off and no operations can be performed except taking out the cassette. Wait until the Condensation Indication disappears (approximately 2–3 hours). (→ 168)
Cassette
P1: The Remaining Tape Time Indication is not correct.
S1: Is the tape length of the inserted cassette correctly selected? Select the correct tape length. (→ 42)
P2: The Movie Camera and cassettes underwent security X-ray inspection at an airport. Does this affect the cassettes?
S2: No, this has no negative influence on the Movie Camera or the cassettes.
P3: When playing back a cassette that was stored for some time, the picture is distorted.
S3: The cassette was stored in an unsuitable place (dusty, humid, hot, etc.) or near strongly magnetized objects or equipment. Unfortunately, there is no remedy. Always store the cassettes correctly. (→ 166)
Recording
P1: No picture appears in the Finder.
S1: The LCD Monitor is open (Except when recording with the LCD Monitor facing forward). Securely close the LCD Monitor. (→ 26)
P2: Picture on the LCD Monitor is not clear.
S2: Picture quality is not properly adjusted. Adjust picture quality. (→ 38)
Recording (continued)
Recording (Continued)
P3: Recording does not start when pressing the Recording Start/Stop Button.
S3: The tab of the inserted cassette is broken out. Insert a cassette with intact tab. Or cover the hole where the tab was with two layers of adhesive tape. (→ 40)
P4: The Date/Time/Title Indication is not displayed.
S4-1: This is due to incorrect operation of the [DATE/TITLE] Button and/or the [MENU] Button. Press the [MENU] Button and set the desired Date/Time/Title Indication. Then press the [DATE/TITLE] Button so that the Date/Time/Title Indication appears. (→ 52)
S4-2: The button-type battery is exhausted or is not inserted. Replace it with a new one. (→ 48)
Playback
P1: No playback picture is reproduced when pressing the [▶] Button.
S1: Is the [CAMERA/OFF/VCR] Switch set to [VCR]? When it is set to [CAMERA], no playback function can be operated. (→ 62)
P2: The playback picture is distorted or contains noise bars.
S2-1: The tape in the cassette is loose. Tighten it. (→ 40)
S2-2: The video heads are dirty. Clean them with an optional video head cleaning cassette. (→ 168)
S2-3: The tracking is not adjusted correctly. Adjust the tracking correctly. (→ 68)
S2-4: You are playing back an E55 type cassette. As picture distortion tends to occur with this type of cassette, we recommend that you use cassettes other than type E55 for recording. (→ 54)
P3: The playback picture is not in colour.
S3: The colour adjustment on the TV is not made properly. Adjust the colour control on the TV.
Remote Controller
P1: The Remote Controller does not work.
S1-1: The button-type battery in the Remote Controller is exhausted. Replace it with a new button-type battery. (→ 122)
S1-2: The Remote Controller and/or the Movie Camera are exposed to strong light. Prevent strong light from falling on the Remote Controller and/or Movie Camera when using the Remote Controller.
Demonstration Mode
P1: The Movie Camera remains in the Demonstration Mode.
S1: The Demonstration Mode is designed for explaining the versatile functions of this Movie Camera. To switch this mode off, set [CAMERA/OFF/VCR] Switch to [OFF], then set it to [CAMERA] again while pressing the [■] Button. Or, set [DEMO MODE] on the [OTHER FUNCTIONS] Sub-Menu to [OFF]. (→ 178)
- INFORMATION FOR YOUR SAFETY
- WARNING
- MOVIE CAMERA
- AC ADAPTOR
- TABLE OF CONTENTS
- PREPARATIONS
- BASIC OPERATIONS
- ADVANCED OPERATIONS
- PRECAUTIONS, TECHNICAL INFORMATION, ETC
- 中文
- STANDARD ACCESSORIES
- CONTROLS AND COMPONENTS
- THREE TYPES OF POWER SUPPLY
- THE 3 TYPES OF POWER SUPPLY
- SUPPLYING POWER FROM AN AC MAINS SOCKET
- SUPPLYING POWER WITH THE BATTERY
- ATTACH THE BATTERY
- CONNECT THE AC MAINS LEAD TO THE AC ADAPTOR AND AN AC MAINS SOCKET
- REMOVE THE BATTERY BY SLIDING IT IN THE OPPOSITE DIRECTION OF STEP 1 ABOVE
- INSERT THE BATTERY WITH ITS TOP (SO THAT THE ARROW POINTS UPWARD) INTO THE TOP BATTERY HOLDER AND PRESS THE BOTTOM OF IT TOWARD THE MOVIE CAMERA UNTIL IT LOCKS WITH A CLICK
- REMOVING THE BATTERY FROM THE MOVIE CAMERA
- CHARGING LAMP [CHARGE]
- CHECKING THE REMAINING BATTERY POWER
- REMAINING BATTERY OPERATION TIME INDICATION
- WHEN RECORDING IS NOT PERFORMED CONTINUOUSLY
- WHEN THE AMBIENT TEMPERATURE IS EXTREMELY LOW OR EXTREMELY HIGH
- USING THE LCD MONITOR
- SLIDE THE [▲OPEN] LEVER TO THE LEFT AND SIMULTANEOUSLY OPEN THE LCD MONITOR IN THE DIRECTION OF THE ARROW APPROXIMATELY 90°
- CLOSING THE LCD MONITOR
- CHINESE
- USING THE MENU SCREEN
- EXITING THE MENU
- MENU FUNCTIONS
- CAMERA MODE MAIN-MENU [CAMERA FUNCTIONS]
- ADJUSTING THE BRIGHTNESS AND COLOUR LEVEL OF THE LCD MONITOR/FINDER
- LCD BRIGHTNESS [LCD BRIGHTNESS]
- LCD COLOUR LEVEL [LCD COLOUR]
- FINDER BRIGHTNESS [EVF BRIGHTNESS]
- ADJUSTING THE ANGLE OF THE LCD MONITOR
- INSERTING/EJECTING THE CASSETTE
- PREVENTING ACCIDENTAL ERASURE OF RECORDINGS
- SELECTING THE CORRECT TAPE LENGTH
- CONFIRMING THE REMAINING TAPE TIME
- RECORDING AND PLAYBACK
- ADJUSTING THE VIEWFINDER
- ADJUSTING THE FINDER
- ADJUSTING THE GRIP BELT
- ATTACHING THE LENS CAP
- INSERTING THE BUTTON-TYPE BATTERY
- CAUTION
- SETTING THE DATE AND TIME
- WHEN RECORDING WITH THE DATE/TIME/TITLE SUPERIMPOSED IN THE PICTURE
- RECORDING WITH THE DATE/TIME/TITLE SUPERIMPOSED IN THE PICTURE
- WHEN RECORDING IN THE FULL AUTO MODE
- RECORDING IN THE FULL AUTO MODE
- USING THE [REC] BUTTON AS THE RECORDING START/STOP BUTTON
- ABOUT D.N.R. IN A DIMLY LIT LOCATION
- CHECKING THE END OF A RECORDED SCENE
- (RECORDING CHECK FUNCTION)
- CHECKING THE END OF A RECORDED SCENE (RECORDING CHECK FUNCTION)
- VIEWING RECORDED SCENES DURING RECORDING PAUSE (CAMERA SEARCH FUNCTION)
- RECORDING BACKLIT SCENES (BACKLIGHT MODE)
- ZOOMING IN/OUT
- TO RECORD A WIDER VIEW (ZOOMING-OUT): PUSH THE [W/T] ZOOM LEVER TOWARD [W]. TO ENLARGE YOUR SUBJECT (ZOOMING-IN): PUSH THE [W/T] ZOOM LEVER TOWARD [T]
- VOICE ZOOM
- RECORDING EXTRA CLOSE-UP SHOTS OF SMALL SUBJECTS (MACRO CLOSE-UP FUNCTION)
- WATCHING PLAYBACK ON THE MOVIE CAMERA
- TBC (TIME BASE CORRECTOR) FUNCTION
- CANCELLING THE TBC FUNCTION
- IN THE FOLLOWING CASES, THE TBC FUNCTION DOES NOT WORK
- DNR (DIGITAL NOISE REDUCTION) FUNCTION
- WHEN PLAYING BACK ON A VCR
- HIGH-SPEED REWINDING
- PRESS THE [◀◀] BUTTON FOR MORE THAN 1 SECOND
- IN THE STOP MODE
- ELIMINATING PICTURE DISTORTIONS
- (MANUAL TRACKING ADJUSTMENT)
- PRESS THE [FOCUS/SET] BUTTON BRIEFLY DURING PLAYBACK
- TURN THE [TRACKING] DIAL TO ADJUST THE
- TRACKING
- RETURNING TO THE AUTO TRACKING MODE
- DURING FAST FORWARD SEARCH PLAYBACK
- REVIEW PLAYBACK
- SEARCH LOCK FUNCTION
- STILL PLAYBACK
- RESUMING NORMAL PLAYBACK
- WATCHING PLAYBACK ON A TV
- AFTER USE
- CLEANING THE FINDER
- CLEANING THE LCD MONITOR
- CLEANING THE MOVIE CAMERA BODY
- CLEANING THE LENS
- FADE IN/FADE OUT
- FADE IN ①
- FADING OUT ②
- RECORDING A STILL PICTURE (SNAPSHOT RECORDING)
- SHUTTER EFFECT MODE
- USING SPECIAL EFFECTS (DIGITAL EFFECTS)
- SELECTING A DESIRED DIGITAL EFFECT
- CANCELLING THE DIGITAL EFFECT
- DIGITAL EFFECTS [EFFECT1]
- DIGITAL EFFECT [EFFECT2]
- DIGITAL EFFECTS 2 [EFFECT2]
- HOW TO USE THE SUPER IMAGE STABILIZER FUNCTION
- USING THE SUPER IMAGE STABILIZER FUNCTION
- HOW TO USE THE DIGITAL ZOOM FUNCTION
- CANCELLING THE DIGITAL ZOOM FUNCTION
- DISPLAYING 9 SMALL STILL PICTURES ON THE SCREEN (MULTI IMAGE)
- CAPTURING AND DISPLAYING A SEQUENCE OF 9 STILL PICTURES (MULTI IMAGE STROBE 1 MODE)
- ERASING THE 9 STILL PICTURES
- CANCELLING THE MULTI IMAGE MODE
- CONTINUOUSLY CAPTURING AND DISPLAYING 9 STILL PICTURES (MULTI IMAGE STROBE 2 MODE)
- DISPLAYING A SMALL STILL PICTURE INSIDE THE NORMAL PICTURE (PICTURE-IN-PICTURE)
- ERASING THE SMALL PICTURE
- CANCELLING THE PICTURE-IN-PICTURE MODE
- MIX FUNCTION AND WIPE FUNCTION
- MIX FUNCTION
- WIPE FUNCTION
- CANCELLING THE MIX OR WIPE FUNCTION
- DIGITAL FADE FUNCTION
- THERE ARE 3 DIGITAL FADE MODES AVAILABLE
- FADING IN
- FADING OUT
- MOTION-SENSOR-CONTROLLED RECORDING
- IN THE FOLLOWING RECORDING SITUATIONS, THE MOTION SENSOR MAY NOT WORK CORRECTLY
- RECORDING IN DARK PLACES WITHOUT ANY ILLUMINATION (0 LUX NIGHT VIEW FUNCTION)
- CANCELLING THE 0 LUX NIGHT VIEW FUNCTION
- RECORDING WITH MANUAL WHITE BALANCE ADJUSTMENT
- CANCELLING THE MANUAL WHITE BALANCE MODE
- SUBJECTS AND RECORDING CONDITIONS NOT SUITABLE FOR RECORDING IN THE FULL AUTO MODE
- COLOUR TEMPERATURE AND WHITE BALANCE ADJUSTMENT
- WHEN SHOOTING WITH MANUAL FOCUS ADJUSTMENT
- RECORDING WITH MANUAL FOCUS ADJUSTMENT
- CANCELLING THE MANUAL FOCUS MODE
- RECORDING IN SPECIAL SITUATIONS (PROGRAMME AE)
- CANCELLING THE SELECTED PROGRAMME AE FUNCTION
- PORTRAIT MODE
- LOW LIGHT MODE
- SPOTLIGHT MODE
- SURF & SNOW MODE
- USING THE REMOTE CONTROLLER
- ⑨ PLAYBACK CONTROLS
- PLAYBACK DIGITAL EFFECTS
- CONTROLS FOR PLAYBACK
- ⑩ PLAYBACK DIGITAL EFFECTS
- ⑪ CONTROLS FOR RECORDING AND ZOOM/SOUND VOLUME
- CONTROLS FOR MENU SETTINGS AND PLAYBACK ZOOM
- CONDITIONS FOR CORRECT OPERATION OF THE REMOTE CONTROLLER
- INSERTING THE BUTTON-TYPE BATTERY INTO THE REMOTE CONTROLLER
- REPLACING THE BUTTON-TYPE BATTERY
- WHEN RECORDING YOURSELF WITH THE LCD MONITOR FACING FORWARD
- RECORDING YOURSELF WITH THE LCD MONITOR FACING FORWARD
- MIRROR MODE
- IN THE MIRROR MODE, ONLY THE FOLLOWING INDICATIONS CAN BE DISPLAYED ON THE LCD MONITOR AND IN THE FINDER
- RECORDING WITH PRE-PROGRAMMED TITLES INSERTED IN THE PICTURE
- TURN THE [▲▼] DIAL TO SELECT [SIZE] ①
- PRESS THE [SET] BUTTON TO SELECT THE DESIRED SIZE ([NORMAL] OR [LARGE])
- PRESS THE [MENU] BUTTON TO EXIT THE MENU
- RECORDING WITH PRE-PROGRAMMED TITLE INSERTED IN THE PICTURE
- DELETING THE TITLE
- CREATING YOUR OWN TITLES AND INSERTING THEM DURING RECORDING (DIGITAL SUPERIMPOSER FUNCTION)
- INSERT YOUR OWN TITLE AT THE BEGINNING OF A RECORDING
- INSERTING YOUR OWN TITLE AT THE BEGINNING OF A RECORDING
- USING VARIOUS FUNCTIONS DURING PLAYBACK
- PLAYBACK TITLE INDICATION
- DISPLAYING THE MULTI-PICTURES AGAIN
- PICTURE-IN-PICTURE FUNCTION
- WHEN USING THE MIX AND WIPE FUNCTIONS
- PLAYBACK DIGITAL FADE
- PLAYBACK DIGITAL SUPERIMPOSER
- ENLARGING THE PICTURE DURING PLAYBACK (PLAYBACK ZOOM)
- 使用磁帶計時器指示時
- USING THE TAPE COUNTER INDICATION
- CHECKING THE ELAPSED TAPE TIME
- CHANGING THE TAPE COUNTER INDICATION
- CAMERA MODE A
- VCR MODE B
- USING THE MEMORY STOP FUNCTION
- COPY (DUPLICATE)
- USING THE MOVIE CAMERA WITH A COMPUTER
- COMPUTER SYSTEM REQUIREMENTS
- COMPATIBLE MACHINES
- GRAPHIC CARD
- PRECAUTIONS
- PRECAUTIONS FOR THE MOVIE CAMERA
- FOR AUSTRALIA OR NEW ZEALAND
- TO PREVENT FIRE, ELECTRIC SHOCK AND MALFUNCTION, OBSERVE THE FOLLOWING POINTS
- PRECAUTIONS FOR STORING THE MOVIE CAMERA
- PRECAUTIONS FOR THE AC ADAPTOR
- OBSERVE THE FOLLOWING POINTS
- BATTERY PRECAUTIONS
- PRECAUTIONS FOR THE BATTERY
- PRECAUTIONS FOR STORING THE BATTERY
- PRECAUTIONS FOR THE CASSETTE
- CAUSES OF CONDENSATION AND REMEDY
- MAIN CAUSES OF CONDENSATION
- SYMPTOMS OF CONDENSATION
- REMEDY AS FOLLOWS
- TO PREVENT CONDENSATION FROM FORMING
- WHEN THE LENS IS FOGGED UP
- VIDEO HEAD CLOGGING AND REMEDY
- SYMPTOMS OF DIRTY VIDEO HEADS
- HOW THE WHITE BALANCE (TINT) ADJUSTMENT WORKS
- AUTO WHITE BALANCE
- MANUAL WHITE BALANCE
- HOW THE FOCUS ADJUSTMENT WORKS
- AUTO FOCUS ADJUSTMENT
- VIEWFINDER INDICATIONS
- WARNING/ALARM INDICATIONS
- DEMONSTRATION MODE
- OPTIONAL ACCESSORIES
- SPECIFICATIONS
- VIDEO
- AUDIO
- BEFORE REQUESTING SERVICE (PROBLEMS & SOLUTIONS)
- POWER SUPPLY
- P1: THE MOVIE CAMERA DOES NOT TURN ON
- P2: THE MOVIE CAMERA HAS TURNED OFF AUTOMATICALLY
- P3: THE MOVIE CAMERA QUICKLY TURNS OFF
- CASSETTE
- P1: THE REMAINING TAPE TIME INDICATION IS NOT CORRECT
- P2: THE MOVIE CAMERA AND CASSETTES UNDERWENT SECURITY X-RAY INSPECTION AT AN AIRPORT. DOES THIS AFFECT THE CASSETTES
- P3: WHEN PLAYING BACK A CASSETTE THAT WAS STORED FOR SOME TIME, THE PICTURE IS DISTORTED
- RECORDING
- P1: NO PICTURE APPEARS IN THE FINDER
- P2: PICTURE ON THE LCD MONITOR IS NOT CLEAR
- RECORDING (CONTINUED)
- PLAYBACK
- REMOTE CONTROLLER
Brand : PANASONIC
Model : NV-VS50EG
Category : VCR