DLP-20D7 - Television DAEWOO - Free user manual and instructions
Find the device manual for free DLP-20D7 DAEWOO in PDF.


| Product Type | CRT Television |
| Brand | Daewoo |
| Model | DLP-20D7 |
| Screen Size | 20 inches (diagonal) |
| Dimensions (with stand) | Approx. 18.9 x 17.7 x 19.3 inches (480 x 450 x 490 mm) |
| Weight | Approx. 33 lbs (15 kg) |
| Power Supply | AC 100-240V, 50/60Hz |
| Power Consumption | 75 W (typical) |
| Display Type | CRT (Cathode Ray Tube) |
| Aspect Ratio | 4:3 |
| Resolution | 640 x 480 (standard definition) |
| Input Connectors | RF antenna input, Composite AV (RCA), S-Video |
| Output Connectors | Headphone jack (3.5mm), Audio out (RCA) |
| Built-in Speaker | Mono speaker, 5W output |
| Remote Control | Infrared remote included |
| Teletext | Yes (FLOF mode) |
| Channel Tuning | Analog tuner, up to 99 channels |
| Sleep Timer | Yes (up to 120 minutes) |
| Child Lock | Yes (parental control) |
| Cleaning Instructions | Disconnect power, wipe screen with soft dry cloth; do not use chemicals. |
| Safety Warnings | Do not open cover; no user-serviceable parts inside; keep away from moisture. |
| Spare Parts Availability | Limited; contact Daewoo service centers or third-party suppliers. |
| Repariability Index | Low (CRT TVs are complex to repair; professional service required) |
Frequently Asked Questions - DLP-20D7 DAEWOO
User questions about DLP-20D7 DAEWOO
0 question about this device. Answer the ones you know or ask your own.
Ask a new question about this device
Download the instructions for your Television in PDF format for free! Find your manual DLP-20D7 - DAEWOO and take your electronic device back in hand. On this page are published all the documents necessary for the use of your device. DLP-20D7 by DAEWOO.
USER MANUAL DLP-20D7 DAEWOO
LCD TELEVISION INSTRUCTION MANUAL
DLP-20J1
DLP-20D7
DLP-20W2
PAL B/G, D/K, I/I,
SECAM B/G, D/K, L/L', NTSC(AV)
TELETEXT
SCART/VIDEO/S-VIDEO
MULTI-LANGUAGE OSD
Helpline Number: 0870 100 2525
Caution

CAUTION
RISK OF ELECTRIC SHOCK DO NOT OPEN

CAUTION : TO REDUCE THE RISK OF ELECTRIC SHOCK, DO NOT REMOVE COVER (OR BACK). NO USER-SERVICEABLE PARTS INSIDE. REFER SERVICING TO QUALIFIED SERVICE PERSONNEL.

The lightning flash with arrowhead symbol, within an equilateral triangle, is intended to alert the user to the presence of uninsulated "dangerous voltage" within the product's enclosure that may be of sufficient magnitude to constitute a risk electric shock.

The exclamation point within an equilateral triangle is intended to alert the user to the presence of important operating and servicing instructions in the literature accompanying the appliance.
WARNING: To reduce the risk of fire or electric shock hazard, do not expose this appliance to rain or moisture.
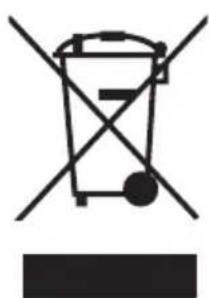
DISPOSAL OF USED ELECTRICAL & ELECTRONIC EQUIPMENT
The meaning of the symbol on the product, its accessory or packaging indicates that this product shall not be treated as household waste. Please, dispose of this equipment at your applicable collection point for the recycling of electrical & electronic equipments waste. In the European Union and Other European countries which there are separate collection systems for used electrical and electronic product. By ensuring the correct disposal of this product, you will help prevent potentially hazardous to the environment and to human health, which could otherwise be caused by unsuitable waste handling of this product. The recycling of materials will help conserve natural resources. Please do not therefore dispose of your old electrical and electronic equipment with your household waste. For more detailed information about recycling of this product, please contact your local city office, your household waste disposal service or the shop where you purchased the product.
Safety Precautions
1. CLEANING
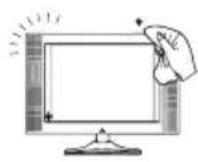
Unplug this TV equipment from the AC power outlet before cleaning. Do not use liquid cleaner or aerosol cleaners. Use a soft and damp cloth for cleaning.
2. ATTACHMENTS
Do not use attachments not recommended by the TV equipment manufacturer as they may result in the risk of fire, electric shock or other injury.
3. WATER AND MOISTURE
Do not place this TV equipment near water, for example, near bathtub, kitchen sink, laundry tub, in a wet basement, or near a swimming pool, or the like.
4. HEAT
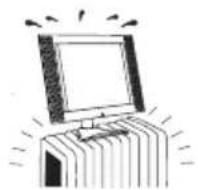
Keep the TV equipment away from the heat sources such as radiator, heater, stoves and other heat-generating products.
5. SETTING
Do not place this TV on unstable cart, stand, or table. Placing the TV on an unstable base can cause the TV to fall, resulting in serious personal injuries as well as damage to the TV. Use only a cart, stand, bracket or table recommended by the manufacturer or salesperson.
6. WALL OR CEILING MOUNTING
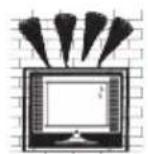
When mounting the product on a wall or ceiling, be sure to install the product using the designated mounting tool according to the method recommended by the manufacturer.
7. POWER
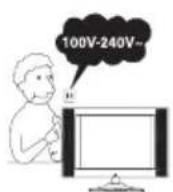
This TV equipment should be operated only from the type of power source indicated on the marking label. If you are not sure of the type of power supplied to your home, consult your TV dealer or local power company.
8. PIXEL AND FIXED IMAGE
The LCD panel is a very high technology product with 921,600 (DLP-20J1, DLP-20D7); 3,147,264 (DLP-20W2) thin film transistors which give you fine picture details.
Occasionally, a few non-active pixels may appear on the screen as a fixed point of blue, green or red please note that this does not affect the performance of your product.
A fixed image should not be displayed during hours, otherwise trace of this image may appear on the screen.
9. SET MOVING
When moving the product, place your fingers of one hand in the socket on the back of the CTV and support the front of the TV with the other hand.

Contents
Important Safeguards....5
Supplied Accessories....6
Functional Overview....7
Remote controller 7
Local Control 8
Preparation 10
Inserting Batteries into the Remote Control Unit. 10
Mains Connection 10
Aerial Connection 11
Connecting external equipment 13
Start Up....15
Language Menu 15
Automatic Tuning 15
Daily Use....16
Switching On TV Set 16
Switching Off TV Set 16
Program Selection (From 0 to 99) 17
Sound Control....17
Picture Control 18
Sleep Function 18
Menus Language Selection, Child Lock, Clock Setting,
Wake Up, Noise Reduction 19
Menus Description....20
Main Menu 20
How to use the sub-menus....20
Picture Menu 21
Sound Menu 21
Equalizer Menu....22
Install Menu 22
Edit Menu 23
Features Menu 25
Language Menu 25
Teletext 26
Page Selection....26
Useful Teletext Functions 26
Teletext Format Picture & Sound Control 27
Wall/Arm Mounting....29
Troubleshooting....30
Specifications 31
Important Safeguards
Location
Heat, Moisture, Dust, Vibration
Position your set so that bright light or sunlight doesn't fall directly onto the screen. Care should be taken not to expose the set to any unnecessary vibration, moisture, dust or heat. Do not expose the set to dripping or splashing.
Ventilation
Also ensure that the set is placed in a position to allow a free flow of air. Do not cover the ventilation openings on the back cover. Leave at least 10 cm around each side of the TV set.
Mounting
This set can be positioned by using the table top stand or wall mounting bracket. When you install the set using the wall mounting bracket, fix it carefully so it is secure.
Object Entry
Do not insert foreign objects, such as needles and coins, into the ventilation openings.
Lightning striking
You should disconnect your set from the mains and the aerial system during thunderstorms.
Cleaning
Unplug the set from the mains before cleaning. Dust the set by wiping the LCD screen and the cabinet with a soft, clean cloth. If the screen requires additional cleaning, use a clean, damp cloth. Do not use liquid cleaners or aerosol cleaners. Do not rub or strike the LCD with anything hard as this may scratch, or damage the LCD permanently.
Service
Never remove the back cover of the set as this can expose you to high voltage and other hazards. If the set does not operate properly, unplug it and call your dealer.
Supplied Accessories
Make sure that the following accessories are provided with the product.
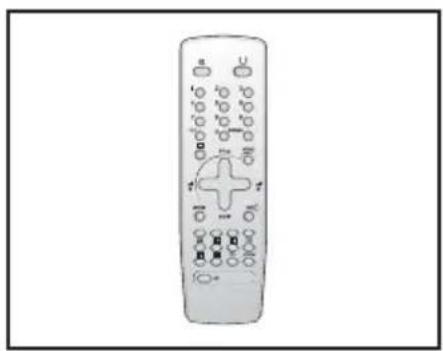
Remote controller Instruction manual
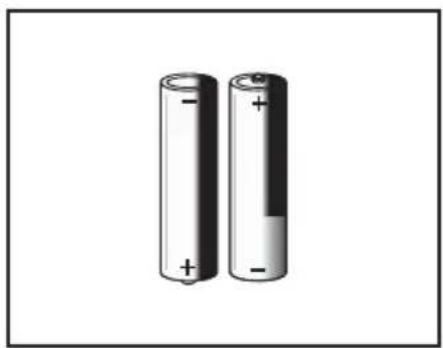
Batteries
(Option)
(2 × 1,5V, AAA)
Functional Overview
Remote controller
TV mode
A1 POWER
A2 SOUND MUTE
A3 NUMBER 0..9
A4 SLEEP
A5 TV / AV
A6 PROGRAM UP (CURSOR UP)
A7 VOLUME DOWN (CURSOR LEFT)
A8 .
A9 .
A10.
A11 SKIP
A12 MOVE
A13 3D(SOUND EFFECT)
A14 MODE
A15 ZOOM
A16 RECALL
A17 NORMAL
A18 OK/PRESET/HEAD-PHONE VOLUME
A19 MENU
A20 VOLUME UP (CURSOR RIGHT)
A21 PROGRAM DOWN (CURSOR DOWN)
A22 TV → TELETEXT
A23.
A24.
A25.
A26 DELETE / QUICK LIST - (OPTION)
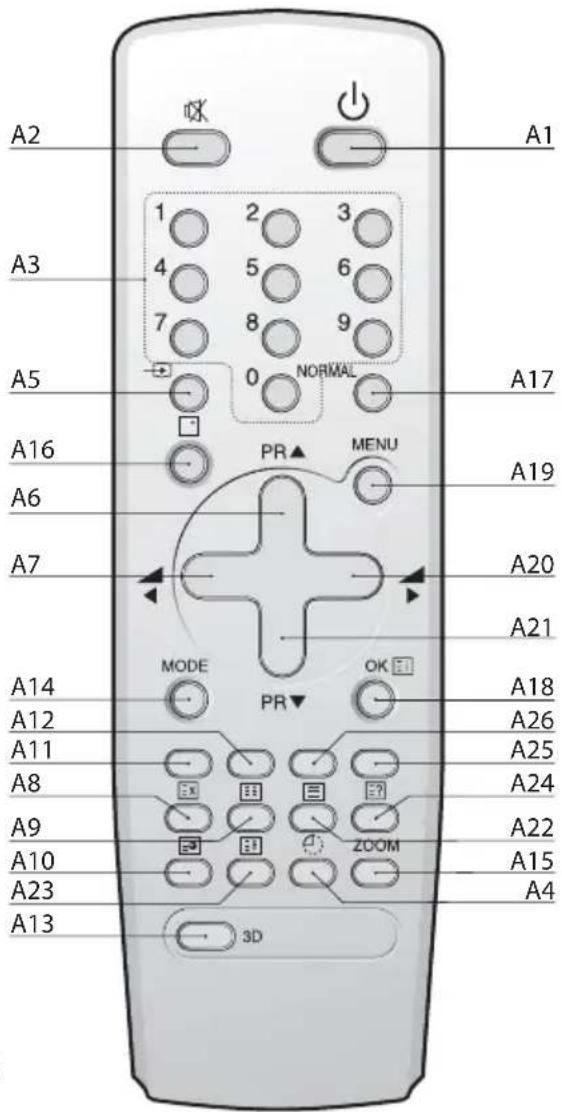
TELETEXT mode
A1 POWER
A2 SOUND MUTE
A3 NUMBER 0..9
A4.
A5 .
A6 PAGE UP
A7 VOL/BRIGHT DOWN
A8 CANCEL
A9 PAGE HOLD
A10 SUBPAGE
A11 RED
A12 GREEN
A13.
A14.
A15.
A16.
A17.
A18 INDEX
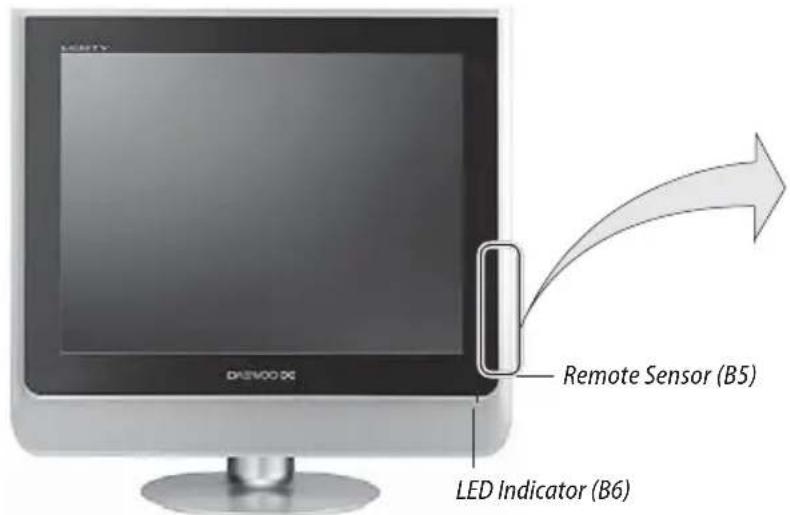
DLP-20J1
DLP-20W2
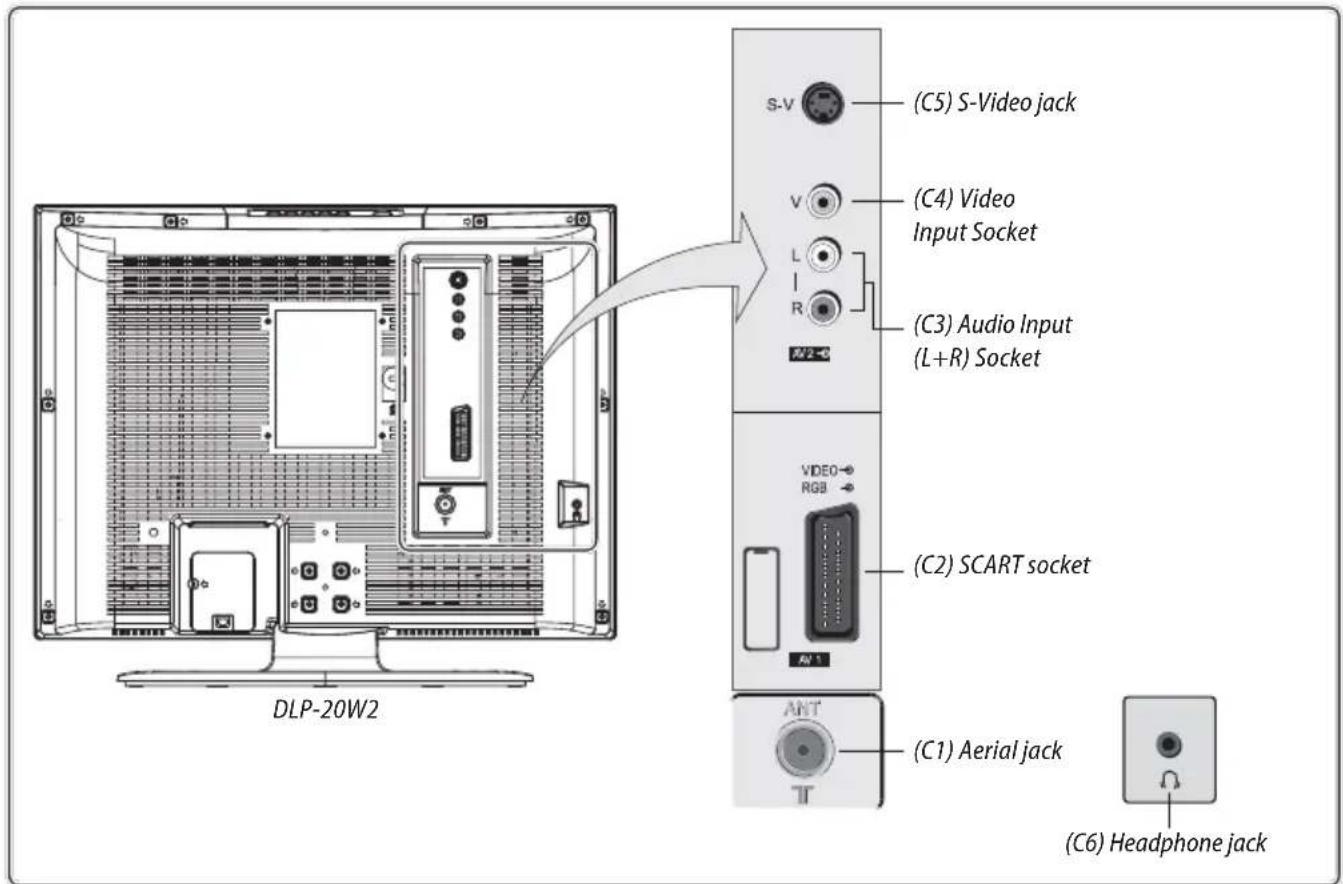
Rear
Preparation
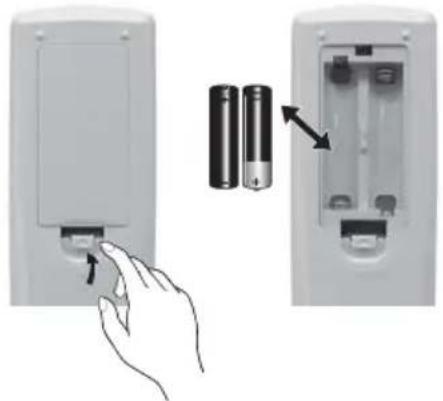
Inserting Batteries into the Remote Control Unit
To load the batteries, turn the remote control handset over and open the battery compartment. Insert the batteries (Two 1.5v, type R03 or AAA). Make sure that the polarity matches with the (+) and (-) marks inside of the battery compartment.
Note: To avoid damage from possible battery leakage, remove the batteries if you do not plan to use the remote control handset for an extended period of time.
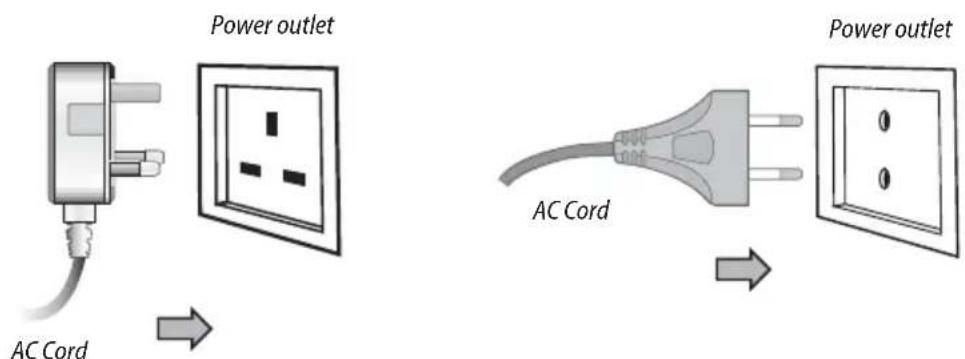
Mains Connection
- Plug the end of AC cord into a Power outlet with 220V-240V\~,50Hz.
Preparation
Aerial Connection
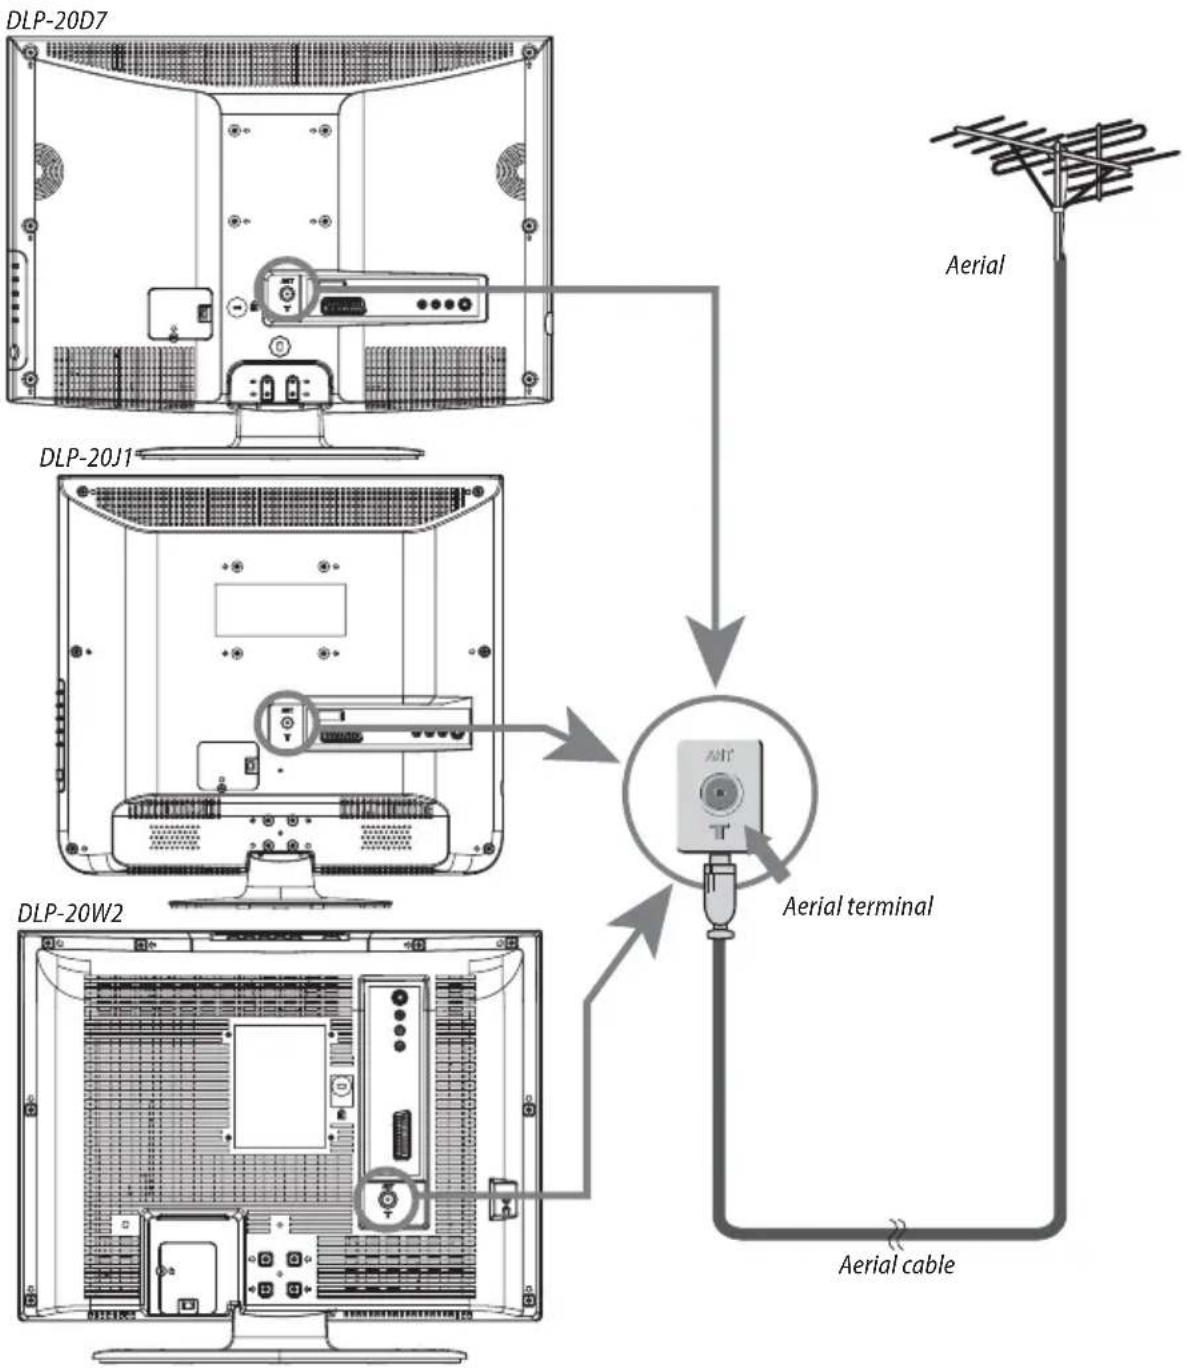
CONNECTING THE TV DIRECTLY TO AN AERIAL
Connect an aerial cable (75 ohm coaxial cable) to the Aerial terminal on the back of the TV set.
Preparation
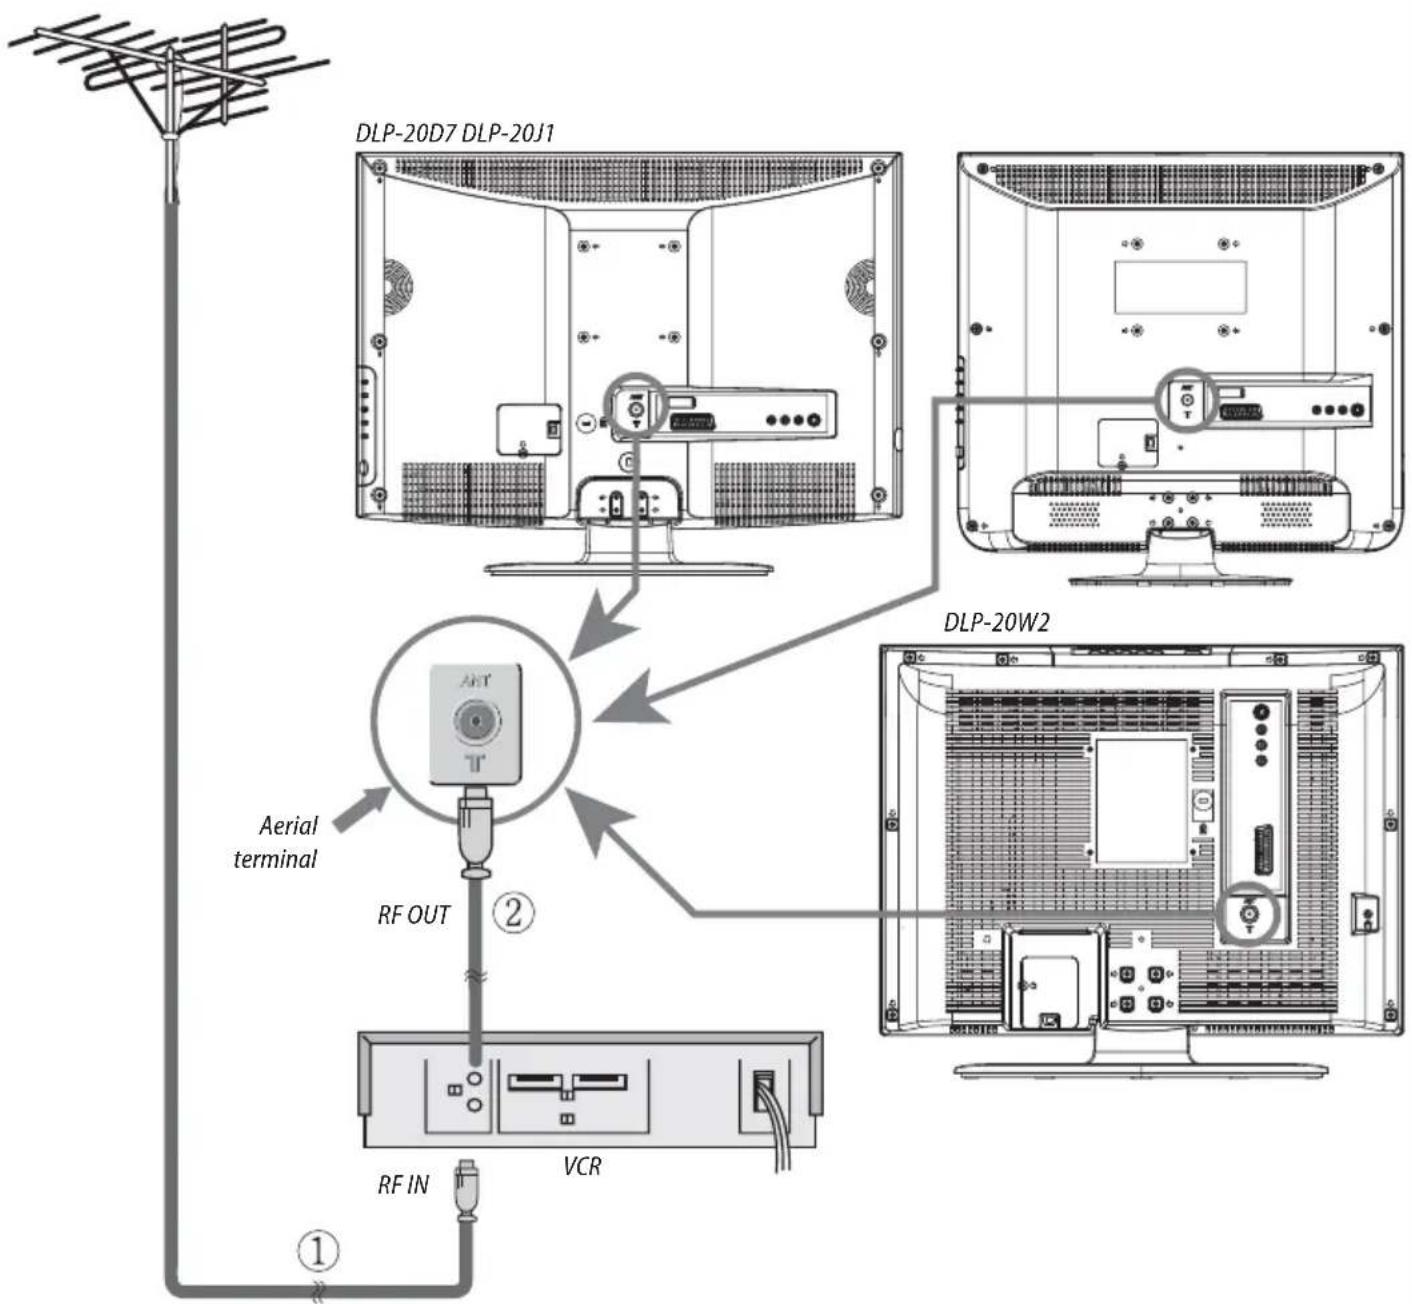
AERIAL CONNECTION WITH VCR
Connect your ① aerial cable to the RF(aerial) IN terminal on the VCR.
Connect the RF OUT terminal of the VCR to the Aerial terminal on the TV set with ② RF cable.
NOTE: If you wish to use only the Aerial (RF) connection, then you should store the VCR channel on programme number "ZERO" using the "Manual tuning" function (See page 23).
Now you can watch the VCR in TV mode by selecting the programme number "PR00".
Preparation
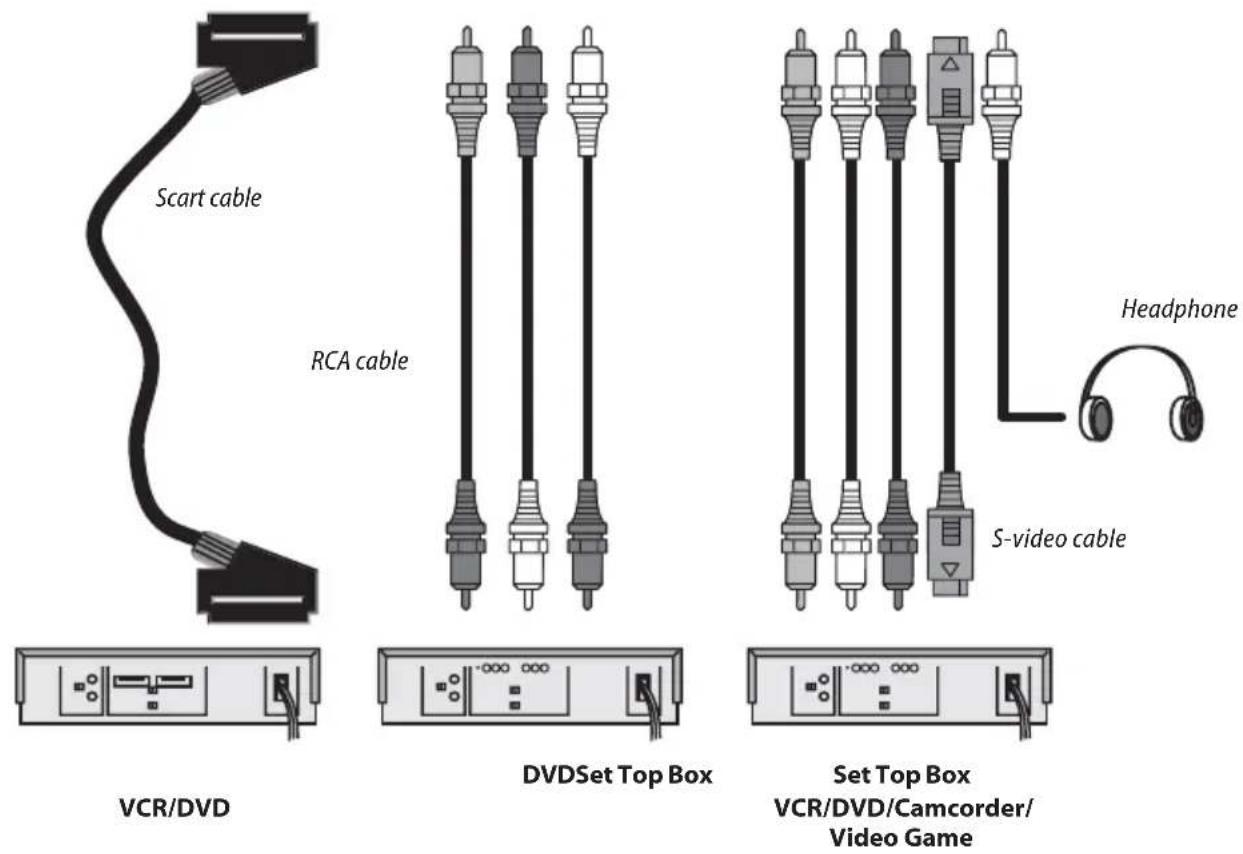
Connecting external equipment
DLP-20D7 DLP-20J1 DLP-20W2
![graph TD A["Monitor"] -->|Data Flow| B["Audio/Video/Video2"] B --> C["Server"] C --> D["Output"]](/content/2026/06/1325605/images/3a3bec91a2456c0c5821049e788939778fe5ef3ba6a4846690b5288cac985ac6.jpg)
Preparation
TV/AV MODE SELECTION
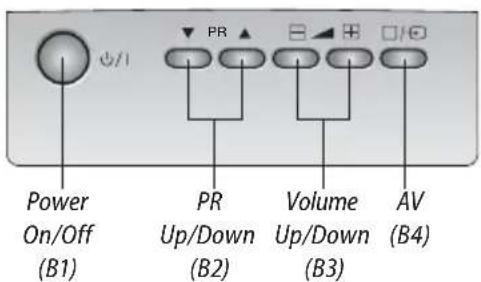
Press the TV/AV(☐ / ☑) button on the control panel repeatedly to select the source. You can also select the source using TV/AV(☐ / ☑) button on the remote controller.
TV → AV1 → AV2 → S-VIDEO → TV
In TV mode, you can change the TV programme number with the UP/DOWN button or the NUMBER button.
NOTE: When the TV SET has no signal, a screen saver will appear on the screen.
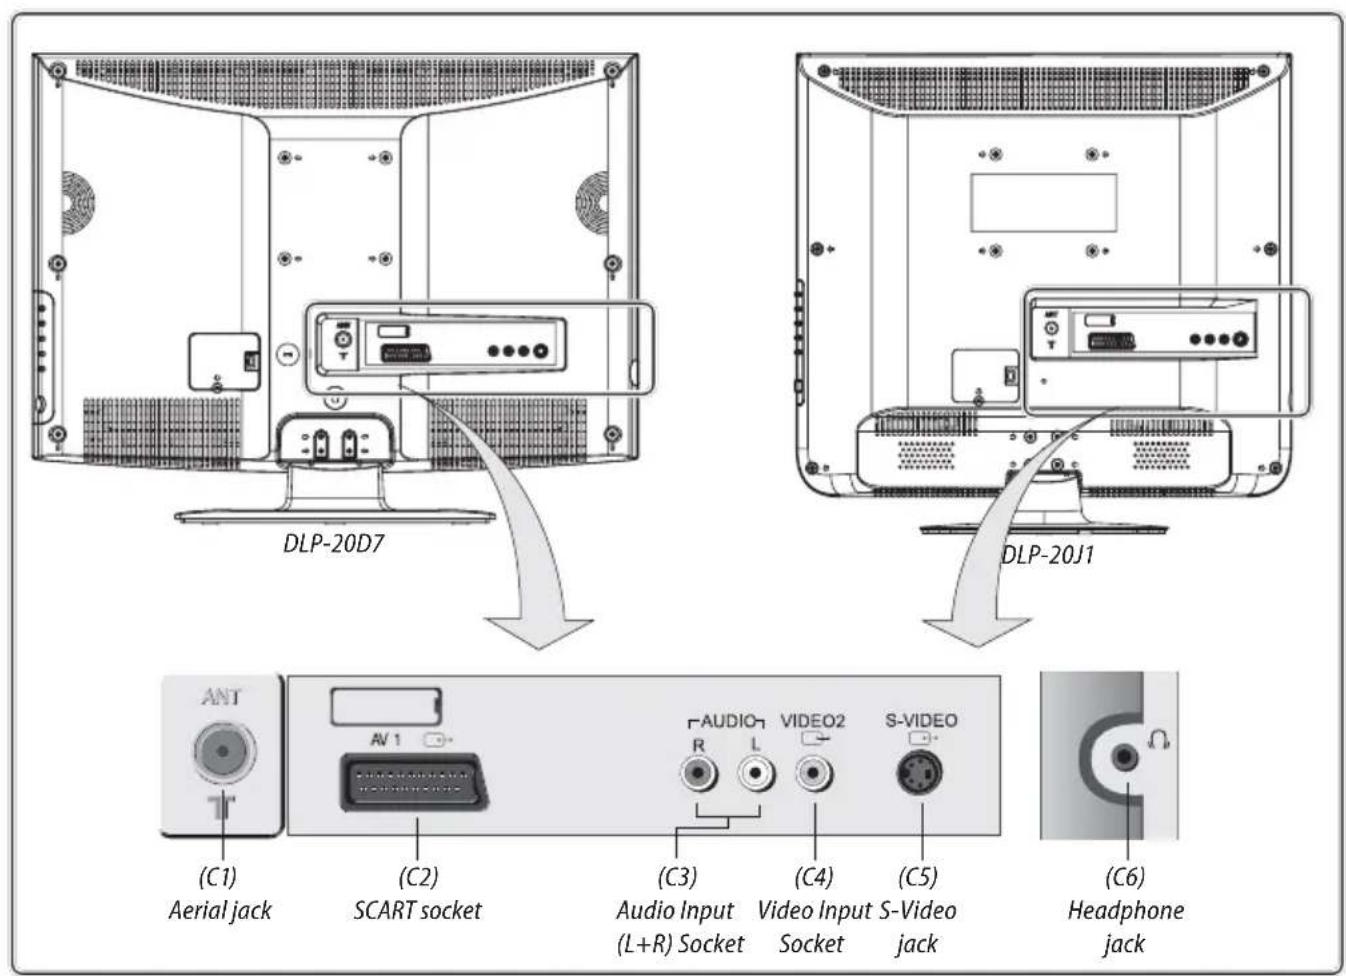
AV INPUT JACK (AV2)
This jack has video / audio inputs. It is used to connect a VCR, Camcorder, DVD, STB, Video game.
S-VIDEO INPUT JACK
It has Y/C inputs. This jack is used to connect S-Video equipment.
SCART JACK (AV1)
This jack has video / audio inputs and outputs, RGB inputs. It is used to connect a STB, VCR, DVD. When the signal is RGB, the TV set switches automatically to AV1 mode. In most cases, the TV set switches automatically to AV1 mode, when the external equipment is connected in playback mode. If not, then use the AV button to select AV1.
HEADPHONE JACK
Insert the headphone plug (3.5 mm ) into this jack( ☉ ). You can control the headphone sound with the OK button on the remote controller (see page 17).
Start Up
Language Menu
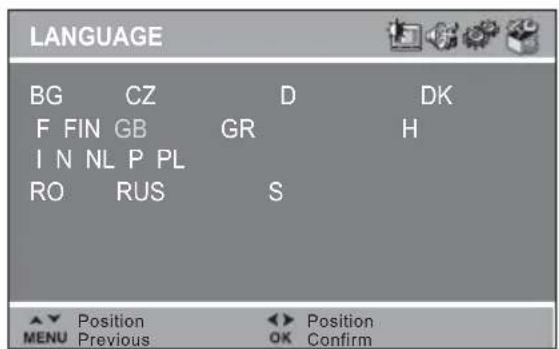
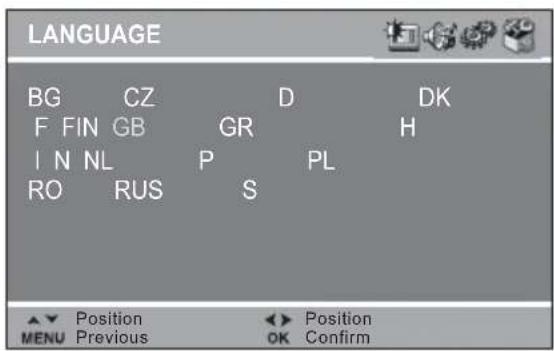
The very first time that you turn on the TV, the LANGUAGE menu will appear on the screen. Its purpose is to enable you to select the language that will be used for all the OSD (On Screen Display) menus. The user must enter a choice of language before proceeding further.
The language entered at this stage can still be modified at any later time, by entering the LANGUAGE menu (accessed from the FEATURES menu: see later section under MENU DESCRIPTION).
The descriptions used in the menu are those of the country code (e.g. GB = English, NL = Holland etc).
![PR MENU MODE PR▼ OK [E1]](/content/2026/06/1325605/images/884d34cf99f462c7e680363a38ad0cea10f94250899fcb8fcdd74976ec99a652.jpg)
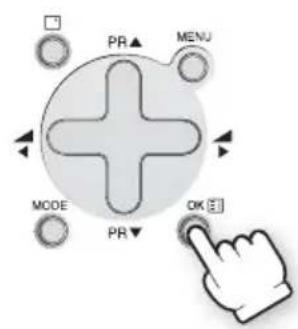
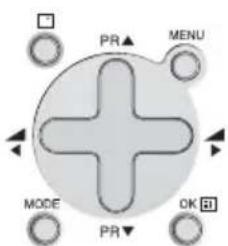
Selection is made by use of the remote control CURSOR UP (A6) / CURSOR DOWN (A21) keys and CURSOR RIGHT (A20) / LEFT (A7) keys.
Once you are satisfied with your selection, push the OK button (A18) to confirm your choice.
The choice will briefly highlight in red, after which the menu will disappear.
Note: The languages shown are subject to modification without prior notice.
Automatic Tuning
Automatic Tuning System
If you have a satellite decoder: If your decoder is connected to the TV set by the aerial jack (C1), you must power on the demodulator and tune Sky News before starting ATSS.
ATSS = Automatic Tuning and Sorting System. To start the ATSS function:
- Select "ATSS" function.
- Adjust to the required country.
- Press and hold the OK button (A18) to start the automatic tuning.
The ATSS function has started when the phrase "Please Wait!" appears (in red characters) in the help instructions box, below the Install menu. At this point release the OK button.
When the ATSS function is finished, the stored programs are displayed on screen using Edit menu presentation (to Exit tuning before automatic tuning is finished, press the remote control MENU button (A19).
Daily Use
Switching On TV Set
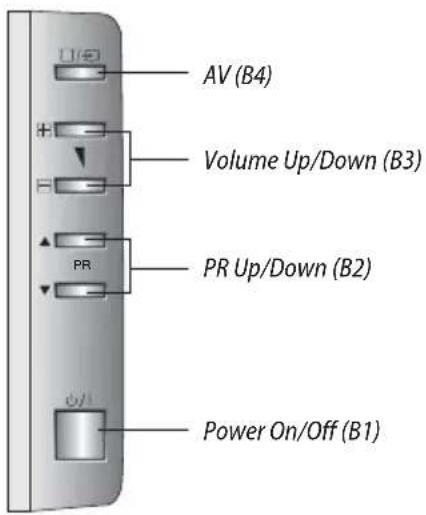
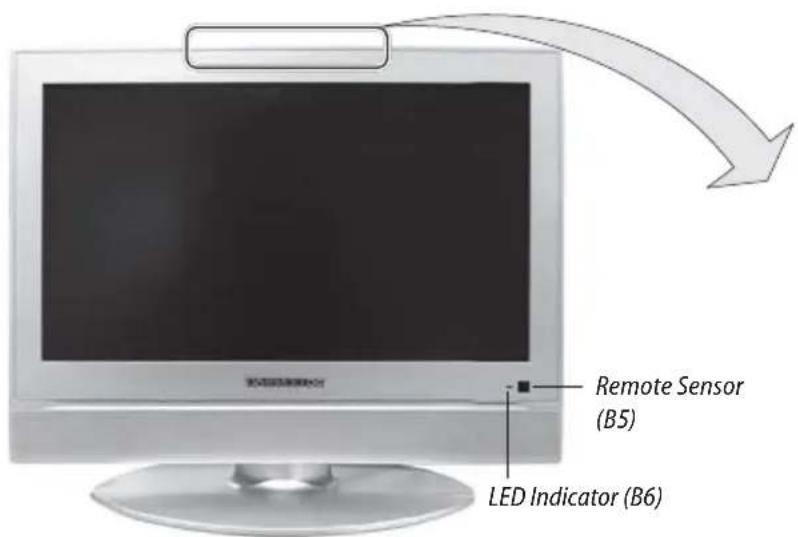
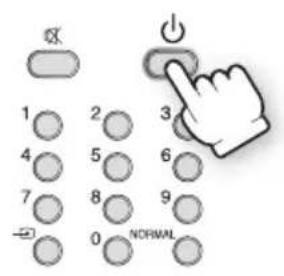
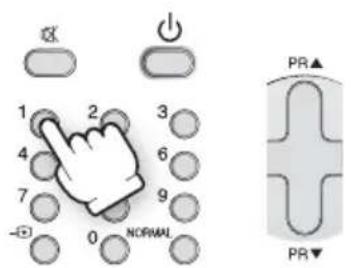
1) If stand-by indicator (B6) is red, then the TV set is in stand-by mode. You can switch on using the remote control POWER button (A1), the NUMBER 0....9 buttons (A3), or PROGRAM UP (A6) / DOWN (A21) buttons. The front panel PROGRAM UP/ DOWN buttons (B2) can also be used. Once on, the stand-by indicator turns to green and the picture appears on the screen.
2) If stand-by indicator (B6) is not lit, then the TV set is powered off. You must press the TV set front panel MAIN POWER button (B1). If a picture does not appear, then the standby indicator will be red. In this case, use the remote control as indicated in 1).
3) If stand-by indicator (B6) is flashing red, and green then the TV set is in child-lock mode. It is necessary to use the remote control POWER button (A1), NUMBER 0....9 buttons (A3), or PROGRAM UP (A6) / DOWN (A21) buttons. The front panel PROGRAM UP/DOWN buttons (B2) will not function. Once on, the stand-by indicator turns to green and the picture appears on the screen.

Switching Off TV Set
1) Pressing the remote control POWER button (A1), you can switch off to stand-by mode (low power consumption mode) which also allows quick restart by remote control (see above: SWITCHING ON TV SET).
2) Pressing the TV set front panel MAIN POWER button (B1), you can completely power off the TV set. In this case, you must use the same front panel POWER button (B1) to switch on again (see above: SWITCHING ON TV SET).
Remark: If a broadcast signal is not present after 10 minutes, the TV set will automatically turn to standby mode.
Daily Use
Program Selection (From 0 to 99)
Direct selection
Use the remote control NUMBER 0...9 buttons (A3).
For two digits program numbers, enter the second digit within 2 seconds.
Up / Down selection
Use the remote control PROGRAM UP (A6) / DOWN (A21) buttons or the TV set front panel PROGRAM UP / DOWN buttons (B2).
Sound Control
TV volume adjustment
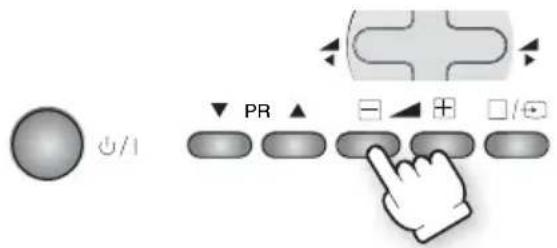
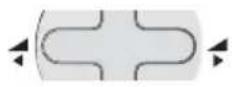
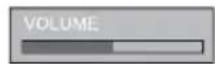
Use the remote control VOLUME UP (A20) / DOW (A7) buttons or the TV set front panel VOLUME UP / DOWN buttons (B3).
Headphone volume adjustment
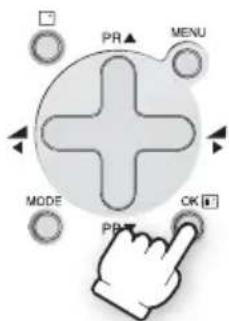
You can access directly to headphone volume menu, pressing OK button of remote control and adjust volume using LEFT/RIGHT button.
Remark: also you can adjust headphone volume level by selecting Sound Menu (see page 21)
Mute
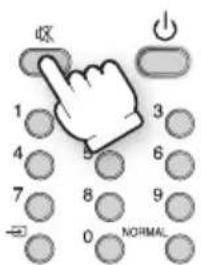
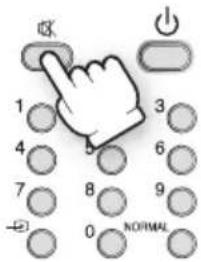
Mute the sound by pressing the remote control SOUND MUTE button (A2).
Then, logo is displayed. The previous sound setting is returned after pressing the same button a second time. If a sound related function is used (e.g. VOLUME, 3D) then the MUTE will also be cancelled.
Mono forcing, dual language
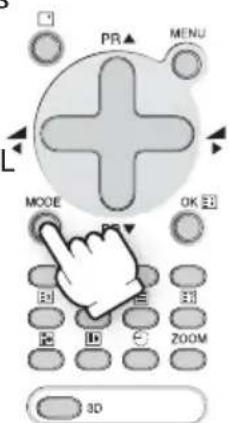
- If you are unable to get good sound quality for a program due to poor reception, you can force a change from stereo to mono transmission by pressing the remote control MODE button (A14). Then the program status display will indicate "MONO" with aicon.
- On the other hand, during a program with dual language transmission, the MODE button (A14) allows you to toggle between the first and second language. The program status display will indicate "DUAL 1" or "DUAL 2" (plus NICAM according to the received signal).
- To return to initial state, press again the MODE button (A14).
Daily Use
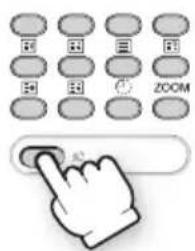
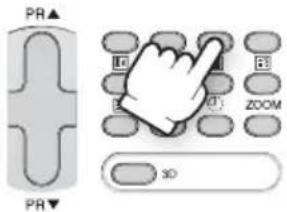
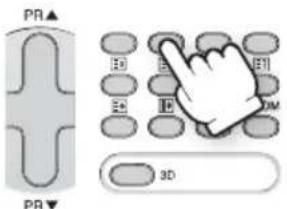
A SPATIAL sound effect is available, using the remote control 3D (A13) button.
The following display appears:
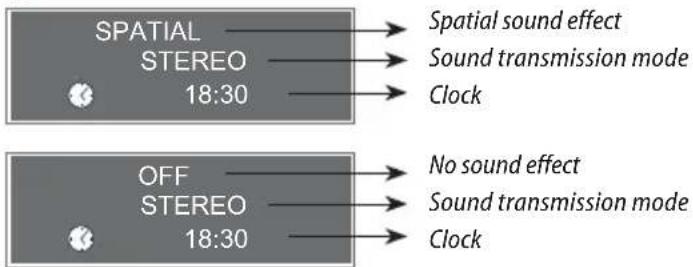
To return to initial sound effect, press again the 3D (A13) button.
The following display appears:
As an option, the sound effects PANORAMA and Dolby Virtual are available with the same button. For other adjustments such as BALANCE, EQUALIZER or AVL(option), use the SOUND menu (page 21).
Manufactured under license from Dolby Laboratories, "Dolby" and the double-D symbol are trademarks of Dolby Laboratories.
Picture Control
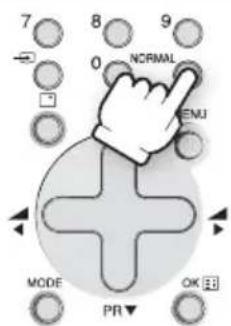
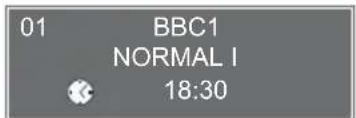
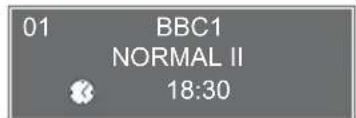
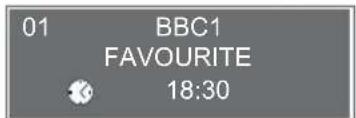
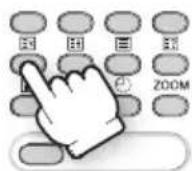
You can select three pictures settings, by using the remote control NORMAL button (A17):
- Normal I (standard hard picture)
- Normal II (standard soft picture)
- Favourite
For other adjustments: BRIGHTNESS, CONTRAST, COLOUR, SHARPNESS, NOISE REDUCTION, use the PICTURE menu. If an NTSC signal is received, then the TINT adjustment will also be available.
Sleep Function
The set will turn off (to stand-by mode) after a period of time that you can select. By repeated use of the remote control SLEEP button (A4), you can enter one of the following setting
OFF 20 min 40 min 60 min 80 min 100 min 120 min OFF

Daily Use
Format Selection
AUTO setting :
If picture format signalling data is received, then the most appropriate ZOOM format will be automatically selected. In the absence of this data, the default ZOOM format will be selected (see page 25, ZOOM AUTO function under FEATURES MENU). Otherwise, the preferred mode of the user can be forced by repeated pressing of the remote control ZOOM button (A15):
Television Format
The following picture formats are available:
AUTO → WIDE ZOOM FULL SCREEN WATERGLASS AUTO (DLP-20J1, DLP-20D7)
AUTO 4:3 FULL SCREEN ZOOM 14:9 TITLE-IN 14:9 ZOOM 16:9 TITLE-IN 16:9
→ AUTO (DLP-20W2)
Remark: If HD source is received, picture format will automatically set to AUTO.(above various picture formats are not available)
Menus Language Selection, Child Lock, Clock Setting, Wake Up, Noise Reduction
These functions are available in the Features menu (see description page 25).
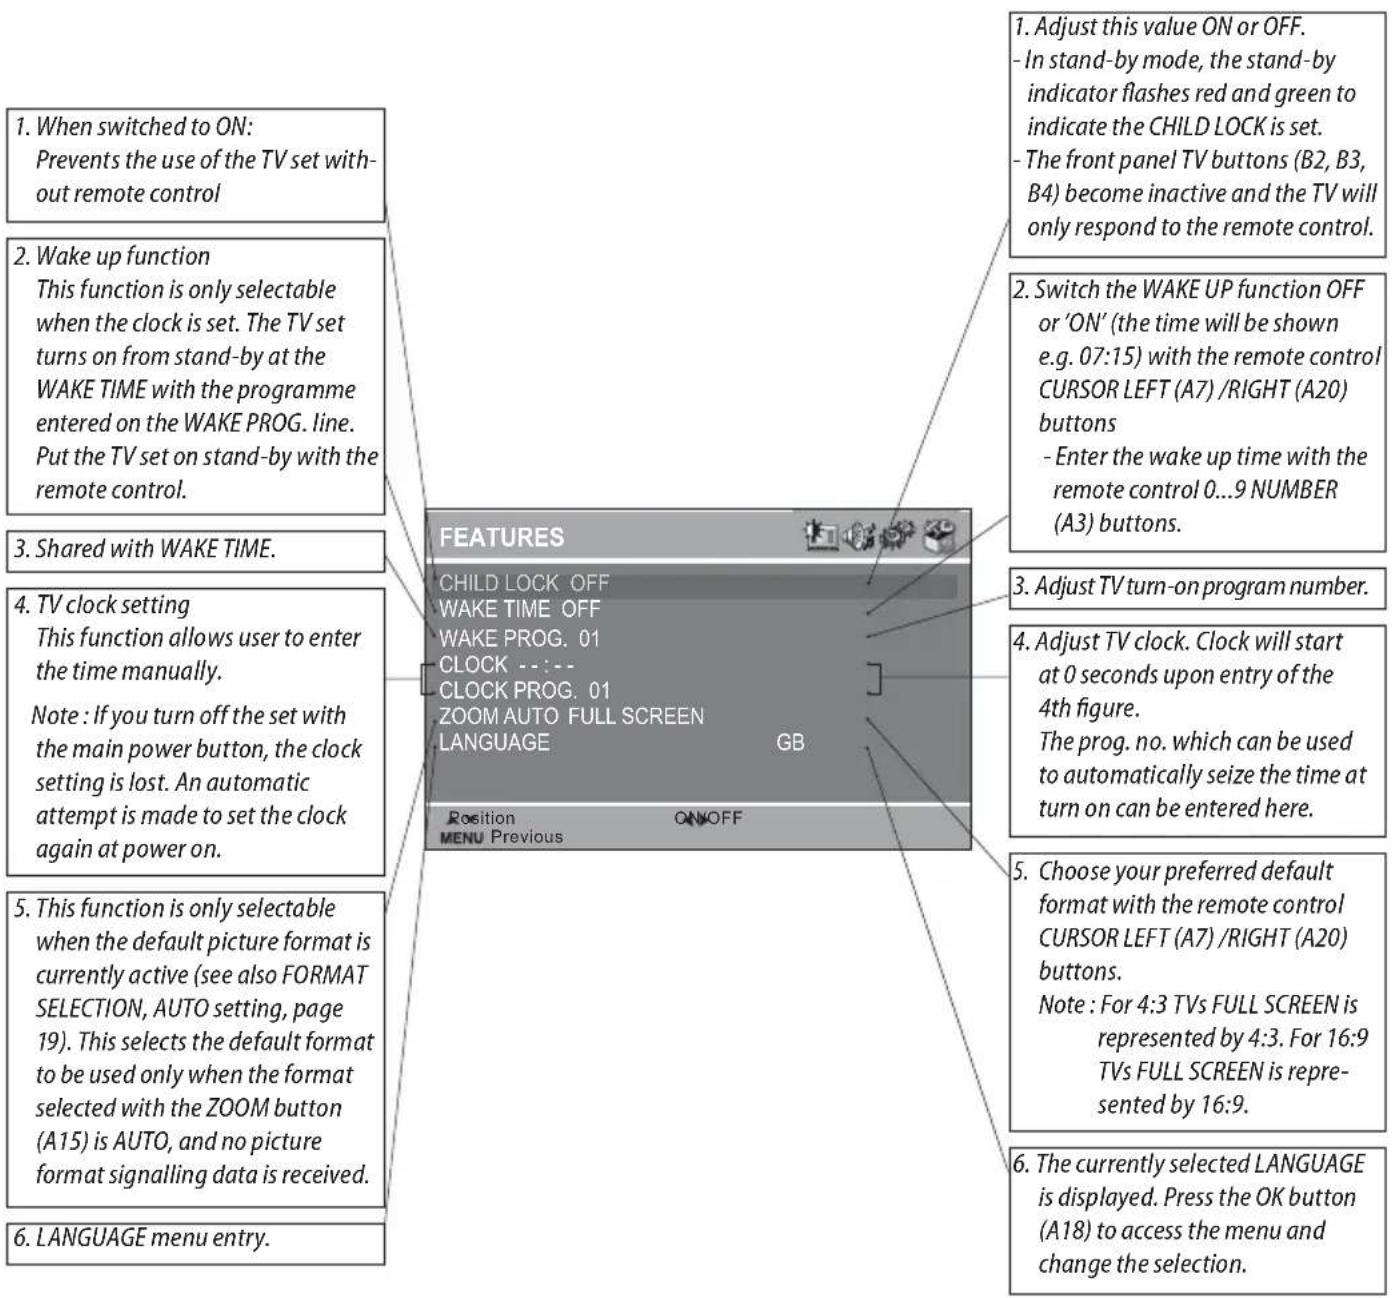
CHILD LOCK
This function only allows the TV to be turned on using the remote control. Once the user has set this CHILD LOCK to ON, it will remain in this condition until the user changes it again.
WAKE UP
It is necessary to have set the clock (either manually or automatically) in order to be able to use this function. If the clock is not set (--:-- is shown) then the WAKE TIME and WAKE PROG. will not be selectable. The default setting for WAKE TIME is in the "OFF" position. After each use (the TV turns on according to the previous setting) the WAKE TIME will be returned to the "OFF" position, conserving always the last time setting entered ready for re-use.
CLOCK SETTING
The TV will automatically attempt to set the clock when powered on (with the MAIN POWER button). It takes as reference information embedded in the teletext signal of the channel defined by CLOCK PROG. Therefore, automatic clock setting is only possible if teletext is available on this channel. If no time is captured automatically (the clock will show - - : - - ), then the TV will try again to set the clock whenever turning on from standby mode. Alternatively, the user can enter the time manually using the CLOCK function. However, if this is done the clock will not be periodically updated as would happen if the time is set automatically. We recommend that the user choose (if available) a CLOCK PROG which allows the time to be updated automatically.
DEFAULT ZOOM CONTROL
If the ZOOM control is set to AUTO (A15, see page 19 and 25, FORMAT SELECTION), then the picture format presented is controlled by the received picture format signalling data embed-
Menus Description
ded in the transmission. In the absence of this signalling data (as can often be the case) a default format must be used. This default format can be selected by the ZOOM AUTO function.
LANGUAGE
This can be changed at any time by the user in the LANGUAGE menu (accessed via the FEATURES menu).
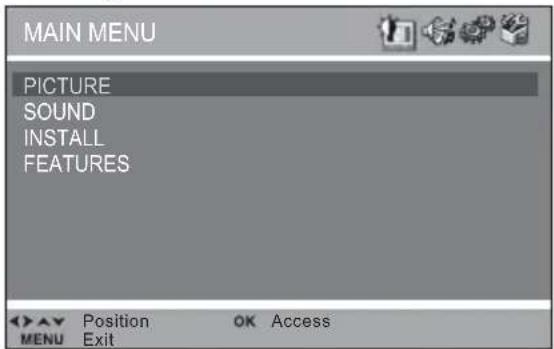
Main Menu
All menus are removed within 60 seconds if you don't press any button. Press the remote
control MENU button (A19) to display the main menu. Then, you have the choice between several sub-menus: If you want to Exit the main menu, press the MENU button (A19) a second time.
![PR MENU MODE PR OK [E1]](/content/2026/06/1325605/images/ba7a9e9d2f0987a6ab7986def20963fe6ea5d4eba84202fdd2d3d339475f7831.jpg)
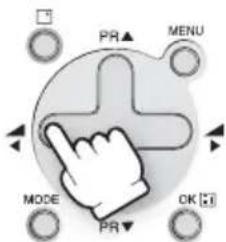
- To select one of the sub-menus, use the remote control CURSOR UP (A6), DOWN (A21) buttons.
- To enter the selected sub-menu, press the remote control OK button (A18).
Remark: In AV/S-VIDEO mode, the INSTALL menu is not available and will not be selectable.
How to use the sub-menus
The sub-menus referred to here are: PICTURE, SOUND, INSTALL, FEATURES.
- Adjust
the
function
using
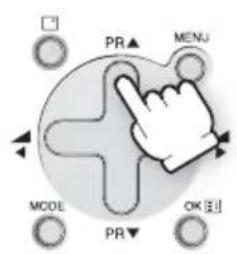
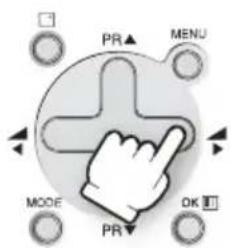
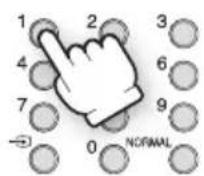
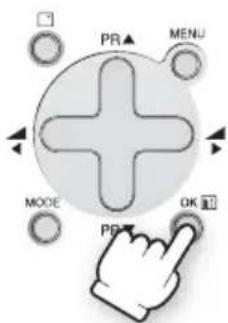
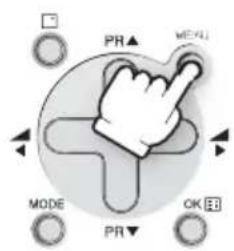
- Select the desired Position by using the remote control CURSOR UP (A6) or DOWN (A21) buttons.
- The remote control CURSOR LEFT (A7) or RIGHT (A20) buttons if you want to modify the function value.
- The remote control NUMBER 0...9 buttons (A3) to enter directly new data.
- Store (if needed) by pressing the remote control OK button (A18).
- Then Exit to main menu by pressing the MENU button (A19).
Menus Description
Picture Menu
(For operating instructions, see page 20, HOW TO USE THE SUB-MENUS)
- Select and adjust the level of each function: BACKLIGHT, BRIGHTNESS, CONTRAST, COLOUR, SHARPNESS, TINT (if available).
- The above modified values are automatically stored in FAVOURITE mode.
- NOISE REDUCTION feature can be activated or not.
- The OK (A18) or NORMAL button will select the picture presets FAVOURITE, NORMAL I, NORMAL II.
The currently selected preset will be displayed in the mode menu.
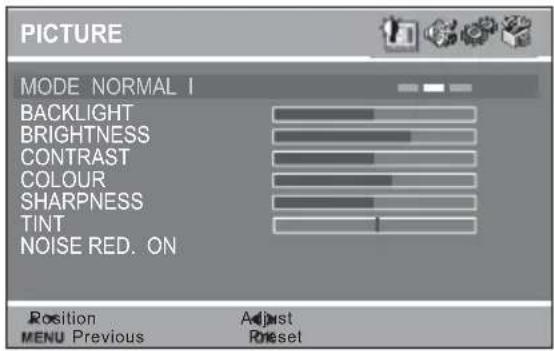
- The FAVOURITE preset contains the settings that you last entered.
If the NTSC standard is detected (eg from VHS player connected to AV1), then TINT will available. Otherwise TINT will be displayed, but not selectable.
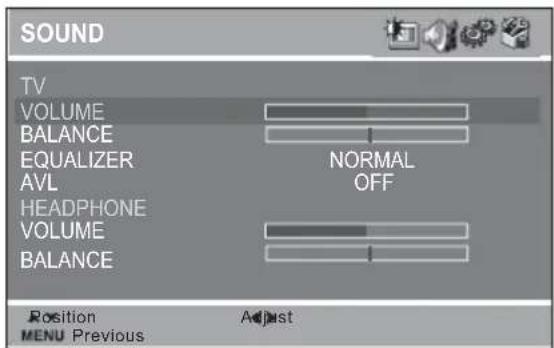
Sound Menu
(For operating instructions, see page 20, HOW TO USE THE SUB-MENUS)
By selecting Sound menu, you can adjust volume level of TV and Headphone.
- Select VOLUME function to adjust the volume level.
-
Select BALANCE function to adjust sound balance between the left and right speakers. If the indicator is highlighted in red, then the central balance position has been found.
-
Use the EQUALIZER function to select the sound presets NORMAL, SPEECH, MUSIC, FAVOURITE by use of the CURSOR LEFT (A7), RIGHT (A20) buttons. The FAVOURITE preset contains the settings that you last entered into the EQUALIZER menu.
- The OK button (A18) will enter the EQUALIZER menu, and allow you to change the FAVOUR-ITE settings.
- Automatic Volume Level (AVL, Option) feature has 4 levels according to your preference. This feature corrects for large volume level changes, such as occur when passing from a movie to advertisements. The AVL solves this problem by equalizing the volume level, over a SHORT, MEDIUM or LONG period (referring to the time constant over which the equalizing effect lasts).
Menus Description
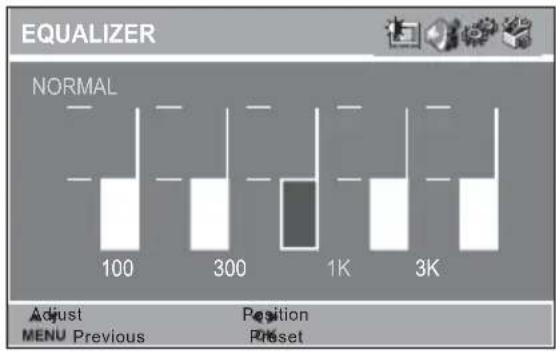
Equalizer Menu
- Select the equalizer band by use of the CURSOR LEFT (A7) or RIGHT (A20) buttons.
- Adjust the level of each of the 5 equalizer bands, 100Hz, 300Hz, 1000Hz, 3000Hz, 8000Hz, by use of the CURSOR UP (A6) and DOWN (A21) buttons.
- The above modified values are automatically stored in FAVOURITE mode.
- The OK button (A18) will select the sound presets NORMAL, SPEECH, MUSIC, FAVOURITE. The currently selected preset is displayed.
- The FAVOURITE preset always contains the settings that you last entered.
Install Menu
(For operating instructions, see page 20, HOW TO USE THE SUB-MENUS)
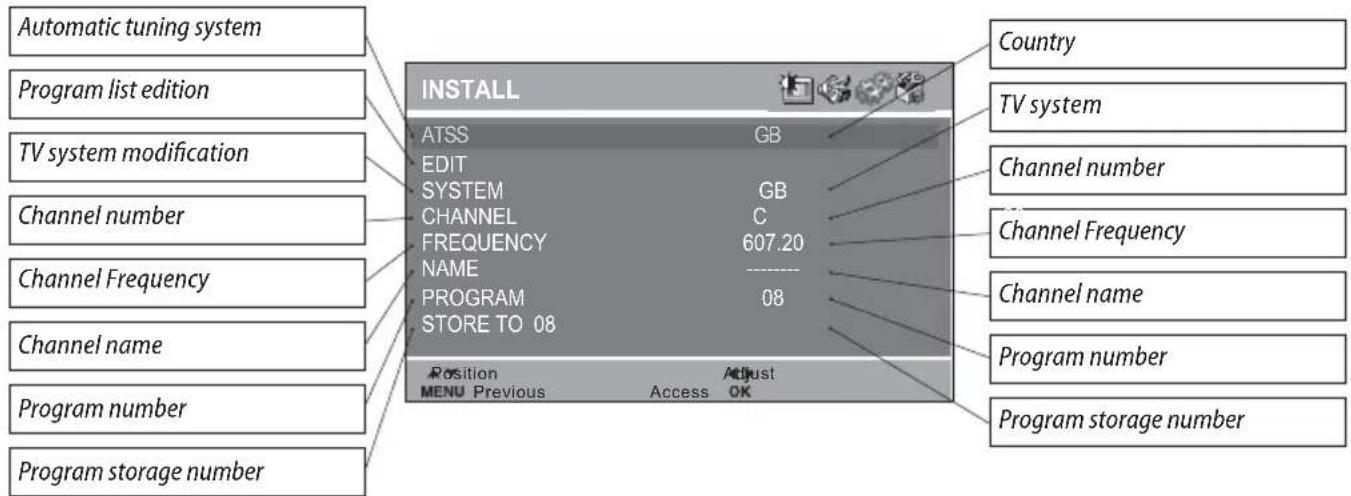
Automatic Tuning System
If you have a satellite decoder: If your decoder is connected to the TV set by the aerial jack (C1), you must power on the demodulator and tune Sky News before starting ATSS.
ATSS = Automatic Tuning and Sorting System. To start the ATSS function:
- Select "ATSS" function.
- Adjust to the required country.
- Press and hold the OK button (A18) to start the automatic tuning.
The ATSS function has started when the phrase "Please Wait!" appears (in red characters) in the help instructions box, below the Install menu. When the ATSS function is finished, the stored programs are displayed on screen using Edit menu presentation (to Exit tuning before automatic tuning finished, press the remote control MENU button (A19))
Edit Menu
This allows you to easily manipulate the existing program order allocation, by using Edit menu functions described below.
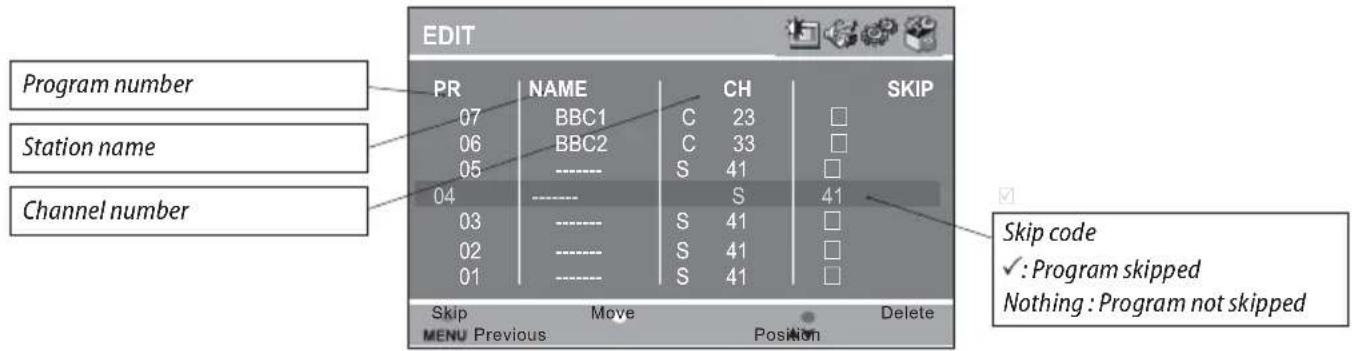
To enter the EDIT menu: From Install menu, select "Edit", and press the OK button (A18): the EDIT menu appears.
The current program being displayed is highlighted in blue (on the central line). In the above case, the current program is PR00. The 3 previous, and 3 following programs, are always displayed. Any program from 00 to 99 can be selected, by using the remote control CURSOR UP (A6) / DOWN (A21) buttons. The memorised programs can be modified as follows:
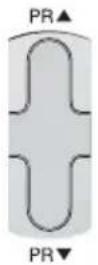
Channel skipping
- You can select skip "YES" or "NO" using the remote control RED "Skip" button (A11).
A program with skip "YES" doesn't appear on screen when changing channels with the PROGRAM UP (A6)/ DOWN (A21) buttons.
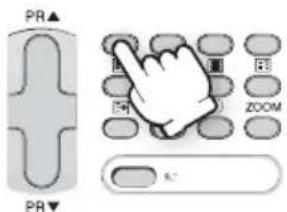
Channel deleting
- Select the program to delete using the remote control CURSOR UP (A6) / DOWN (A21) buttons.
- Press the remote control YELLOW "Delete" button (A26). The deleted program is moved to program number 99 with skip changed to "YES". The existing 99 program is moved to program number 98 and so on.
Channel order changing
- Select the program to move using the remote control CURSOR UP (A6) / DOWN (A21) buttons.
- Press the remote control GREEN "Move" button (A12): the program line background is highlighted in green, and can be moved to another position using the remote control CURSOR UP (A6)/ DOWN (A21) buttons.
- When the desired position is reached, confirm the new position pressing the remote control GREEN "Confirm" button (A12). Then the program line background will return again to blue.
Manual Channel Tuning
Choose a starting point.
- Select with "Program" the program from which you want to start manual tuning. Then the channel number, the frequency, the name and the program number of this program are displayed in the Install menu.
Channel searching
- Select the "Frequency" function.
- Press, and hold for more than 1 second, the remote control CURSOR RIGHT (A20) LEFT (A7) buttons to start up [down] manual tuning.
- Searching will stop automatically at the next channel found (to stop tuning, press the remote control MENU button (A19).
Note: You can directly locate a program by entering the data into the "channel" or the "frequency" function.
Enter station name
It is possible to enter your own choice of name for each program. You can change an existing name, or enter a name where none exists. If none exists “----” will be shown in the Install menu, and program status display.
- Select the "NAME" function.
- Select one of the 7 character positions by using the remote control CURSOR RIGHT (A20) / LEFT (A7) buttons to move the cursor.
- Then use the CURSOR UP (A6) /DOWN (A21) buttons to select the desired character for that position.
- Repeat the last two instructions for other positions, as desired.
- Once the name has been entered, press the OK button (A18) to store it. The name will be memorised to the program number currently shown on the "Store To" line. The "Store To" program number will highlight in red briefly.
TV system modification
If necessary, you can modify the TV system :
- Select "system" function.
- Adjust choosing between FRANCE (L/L'), GB (I), EURO (B/G), E/ EURO (D/K) systems. Then, the program displayed on the screen is changed to the chosen system.
Perform fine tuning
- If you are unable to get a good picture or reasonable quality sound due to poor reception, it is possible to perform fine tuning.
- Select the "frequency" function.
- Press, for less than 1 second, the remote control CURSOR RIGHT(A20) [LEFT(A7)] buttons to perform up [down] fine tuning in steps of 0.05MHz (50 kHz).
Store program in memory
- Select the "store to" function
- Enter the program number you want to store to either by using the remote control CURSOR RIGHT (A20) / LEFT (A7) buttons, or directly by using the remote control NUMBER 0...9 buttons (A3).
- Press the OK button (A18) to confirm.
Remarks: this function can also be used if you want to copy a program already memorised to another program number.
Features Menu
See section near the end of section DAILY USE for a more detailed explanation of these functions. (For operating instructions see page 20, HOW TO USE THE SUB-MENUS)
Language Menu
- Select the preferred LANGUAGE by use of the CURSOR LEFT (A7), RIGHT (A20) buttons, and the CURSOR UP (A6) or DOWN (A21) buttons.
- Press the OK button (A18) to confirm the selection (the choice will be highlighted in red).
Note: The languages shown are subject to modification without prior notice.
Teletext
ENTERING/LEAVING TELETEXT MODE
- Select the desired program with teletext.
- Press the remote control TELETEXT (☐) button (A22) to select teletext mode. The initial page (or the last page viewed if you have already used teletext in the present channel) appears.
- Teletext And Teletext (TAT) function (OPTION): if you want to watch two teletext pages on same screen, press the TELETEXT (☐ button (A22) again. When entering into TAT mode, the active teletext page is on the left hand part of the screen, at the base of the screen a menu coloured page links is available. The passive page, on the right hand part, is locked to the active page, usually it displays the next page in the list.
Using the remote control RIGHT (A20) / LEFT (A7) buttons, you can change the active page.
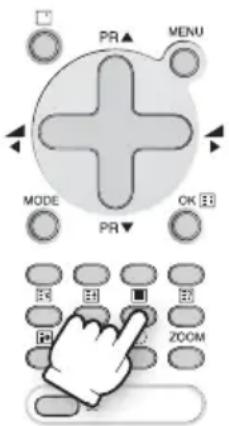
For example, you can hold the index page (press HOLD button (A9)); on one side of the screen and change the active page to the other side for navigation.
- Picture And Teletext (PAT) function (OPTION): If you want to watch the TV program and use teletext at the same time, press the TELETEXT button (A22) again. Teletext will be displayed on the right hand part of the screen, and the whole TV picture will be compressed into left hand part of the screen.
- To return to TV mode, press again the TELETEXT (☐) button (A22).
Page Selection
- You can directly enter the 3 figure page number by using the remote control NUMBER 0...9 buttons (A3).
- You can sequentially select teletext pages by pressing the remote control PAGE UP (A6) / DOWN (A21) buttons.
- At the base of the screen a menu of coloured page links is available, showing either page numbers or a title with headings (eg Sport, News)
in RED, GREEN, YELLOW or CYAN colour. These pages can be accessed by using the corresponding coloured buttons (A11, A12, A26, A25)
on the remote control.
Once a request is made, the page number is shown in the extreme top left corner of the
screen. If the requested page is not
immediately available the rolling header will be active until the page arrives.
Useful Teletext Functions
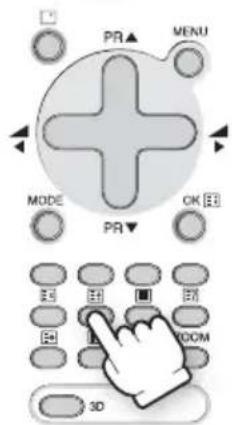
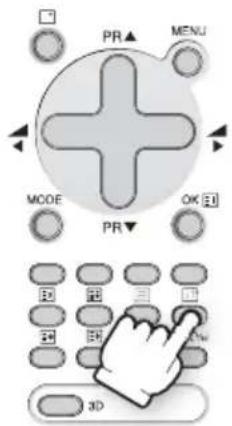
INDEX (☐) button (A18): Allows you to return directly to the initial teletext page.
SUBPAGE (☐) button (A10):
- Press the SUBPAGE button (A10). In the extreme top left corner, instead of the page number, "S..." will be displayed. This is ready to accept the subpage number.
- Enter directly the subpage number you want with the remote control NUMBER 0..9 buttons (A3): for example to request the 2nd subpage, type 0002.
- After a few seconds the subpage number is replaced by the page number in the header. You can press again SUBPAGE button (A10), to display the subpage number.
- If the requested page is not immediately available the rolling header will be active until the page arrives.
Warning: If the subpage is not available (does not exist), then the header will roll continuously and no new page will be found.
Note: Teletext specification allows for subpage numbers 0000 to 3979 (the first figure is limited to the range 0..3, and the third figure 0..7).
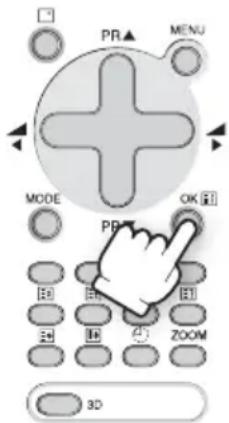
PAGE HOLD button (图) (A9):
Any teletext page or subpage can be held on the screen by pressing the PAGE HOLD button.
- The page number shown in the extreme top left corner instead of page number the HOLD icon is shown in green.
- Press the HOLD button again to cancel hold mode (the page number will return to white)
REVEAL (☐) button (A24): Press this button to reveal, on certain pages, hidden information such as the answer to a quiz.
- Press the button again to hide the information.
Teletext Format Picture & Sound Control
Doubling character height
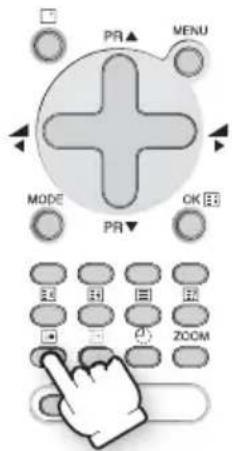
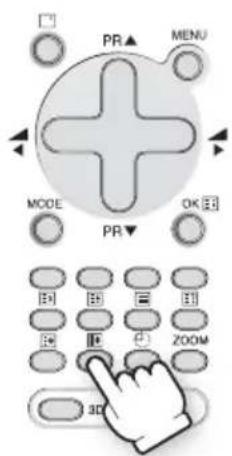
Repeatedly pressing the HEIGHT (☐) button (A23) doubles the character height in the following order:
Upper half of the page (UP) → Lower half of the page (DOWN) → Return to normal height.
If the page is in UP or DOWN mode, then normal size is automatically set if :
- A new page request is made (e.g. CYAN, INDEX or PAGE UP/DOWN).
- CANCEL mode (A8) function is used.
- VOLUME menu is activated with the MENU button (A19).
Note: The menu at the base of the screen is always visible
Volume and brightness control in teletext mode
VOLUME (and sound MUTE), BRIGHTNESS controls are all possible in teletext. The BRIGHTNESS control are dedicated to the teletext display.
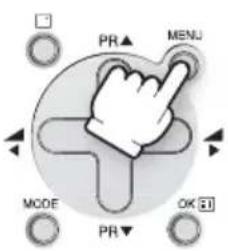
- Access the VOLUME control by pressing the MENU button (A19) in teletext mode. A barograph will appear in the lower part of the screen (as in TV mode). If MUTE is active a mute icon is also shown.
- A second press on the MENU button (A19) will access the BRIGHTNESS control.
- The active bargraph will timeout after 3-4 seconds (as in TV mode VOLUME control) or by pressing on the MENU button (A19) a third time after brightness control
- Each control can be adjusted by using the remote control CURSOR RIGHT (A20) / LEFT (A7) buttons.
- Mute can always be activated by pressing the SOUND MUTE button (A2).
- Any change to the VOLUME level will cancel the SOUND MUTE.
Watching tv while page searching
The CANCEL function can be used to make the teletext page transparent, thus revealing the TV picture:
- To enter cancel mode, press the CANCEL (☒) button (A8) while in teletext mode. The TV program will reappear on the screen, while only the teletext page number or the cancel icon remains at the top and left corner of the screen.
- You can enter a new page number in this mode only by using the remote control NUMBER 0...9 buttons (A3), or with the INDEX (E) button (A18).
- If a page has been requested, but has not yet arrived, cancel icon will be displayed until the page arrives. Once arrived the page number will be displayed.
- The teletext page can be made visible again by pressing the CANCEL (☑ button (A8).
- It should be noted that the TV program cannot be changed while in cancel mode.
- The CANCEL function is not available in PAT and TAT mode.
Watching tv with teletext subtitles
If the actual teletext page is a news flash or subtitle page, then most of the TV picture becomes visible. In this situation the ZOOM format chosen in TV mode is reactivated, where possible.
This is particularly useful while watching a program with the teletext subtitles. Only formats which do not allow the full height of the TV picture to be seen are not possible in teletext mode, as these would not allow all teletext lines to be displayed. Therefore only the formats ZOOM 14:9 AND ZOOM 16:9 (available with wide screen TV models) cannot be preserved with teletext subtitles. In this situation the default format FULL SCREEN (equal to 16:9) will be used.
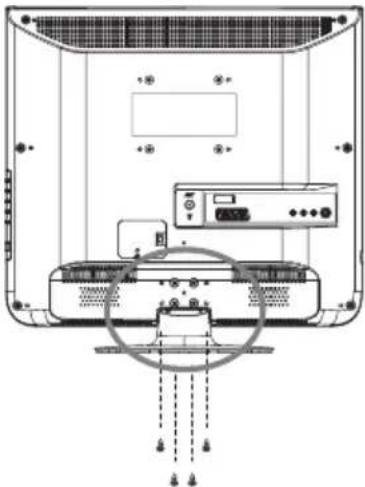
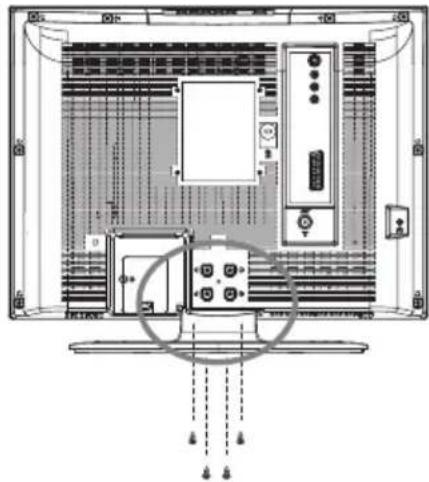
Wall/Arm Mounting
Attaching a Wall or Arm mounting device
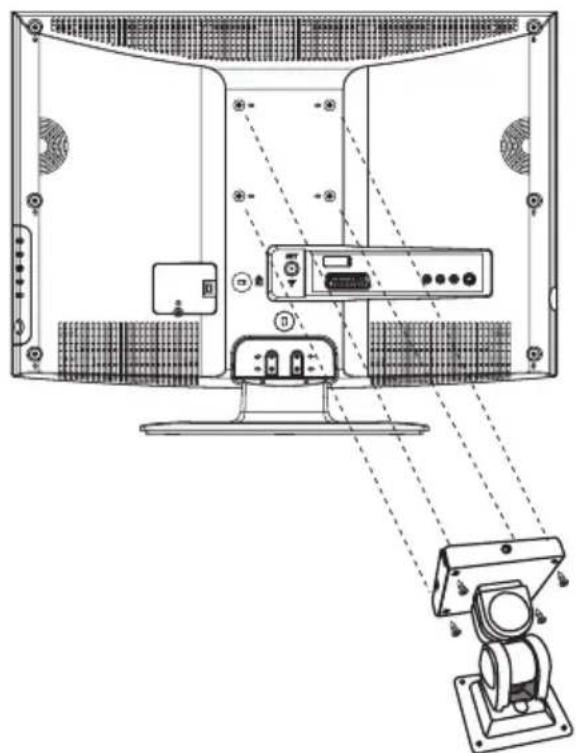
This TV supports the VESA mounting standard and will accommodate various VESA mounting devices.
To install any VESA mounting device, please follow the manufacturer's instructions.
- Remove all cables connected to the TV.
- Lay the LCD TV face-down on a flat surface with a blanket or other soft materials to protect the screen.
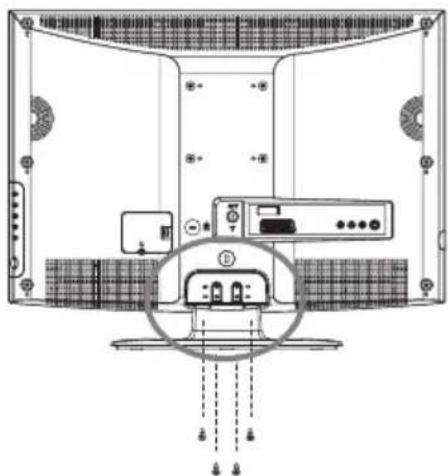
- Remove the four screws attaching the stand. Remove stand from LCD TV.
- Remove the four screws attaching the rear cover.
- Now you are ready to install the VESA mounting device suited to your applications (see instructions below).
- Connect all cables removed at step 1.
Installing VESA compliant mounting devices
- Align the mounting interface pad (100mm x 100mm hole spacing) with the holes in the televisions rear cover mounting pad.
- Secure bracket with the four screws (4mm∅) that came with the VESA mounting device.
Troubleshooting
Please check the following items before calling for the repair services.
| Problem Check item Reference page | ||
| TV set | ||
| Control/System lock up · The TV may have malfunctioned.· Switch your TV off and on again with the main button 🎨/1 on the TV set. | 16 | |
| Remote control does not work. | · Perform control/system lock up reset (as above)· Replace the batteries in the remote controller.· Make sure the Remote sensor window is not under strong light e.g. a fluorescent lamps. | 10 |
| Local buttons do not work. · Has the Child lock been switched on? 25 | ||
| No picture and no sound. · | Check that the TV set is switched on at the main ON/OFF switch. | 16 |
| No picture. · Make sure the brightness and contrast are not set to minimum. 21 | ||
| No colour · Make sure the Colour is not set to minimum.· Check the System settings. | 2122 | |
| Picture is too light or too dark. | · Adjust the Brightness, Contrast. 21 | |
| The picture is improperly tinted. | · Check the Tint adjustment (NTSC signal) 21 | |
| No sound. | · Check that the volume is not set to minimum.· Check sound is not muted. | 1717 |
| Aerial | ||
| The picture is not sharp.The picture shakes. | · Reception may be weak.· The quality of the broadcast may also be poor.· Make sure the aerial is facing the correct direction.· Check that the outside aerial is not disconnected. | |
| The picture is ghosted. | · Transmission aerial of amateur radios and cellular phones may cause interference.· Position the TV set as far away as possible from devices that may cause interference. | |
| The picture is spotted(snow). | · There may be interference from automobiles, trains, high voltage lines, neon lights, etc.· There may be interference between the aerial cable and power cable.· Try positioning cables further apart. | |
| Picture has lines and faded colours. | · Transmission aerial of amateur radios and cellular phones may cause interference.· Position the TV set as far away as possible from devices that may cause interference. | |
Specifications
| MODEL NAME DLP-20J1 DLP-20D7 DLP-20W2 | |||
| PANEL 20" TFT LCD | |||
| SCREEN SIZE 510.54mm(diagonal) 509.00mm(diagonal) | |||
| DISPLAY COLOUR 16.7M 16.2M | |||
| CONTRAST RATIO 700:1 600 : 1 | |||
| PIXEL PITCH 0.6375(H) x 0.6375(V) 0.32475(H) x 0.32475(V) | |||
| ASPECT RATIO 4:3 16 : 9 | |||
| POWER REQUIREMENT | AC 220 ~ 240V, 50Hz | ||
| POWER CONSUMPTION | 50W | 45W | 53W |
| SOUND OUTPUT | 2.0W + 2.0W | ||
| APPEARANCE(mm) | 514(W) x 498(H) x 257.3(D) | 608(W) x 456(H) x 215(D) | 509(W) x 420.5(H) x 239(D) |
| WEIGHT | 7.9Kg | 8.35Kg | 7.5Kg |
| RESOLUTION | 640 x 480 | 1366 x 768 | |
| TERMINALS | AV IN : SCART, COMPOSITE VIDEO, S-VIDEO, AUDIO L/RHEADPHONE : 3.5mm STEREO MINI-JACKANT. IN : COAXIAL-TYPE | ||
| RECEPTION CHANNEL | CCIR + CATV + HYPER ChannelVHF-L : NZ1 ~ S7 (42.25MHz ~ 147.25MHz)VHF-H : S8 ~ S36 (154.25MHz ~ 423.25MHz)UHF : S37 ~ E69 (431.25MHz ~ 855.25MHz) | ||
The specification shown above may be changed without prior notice for quality improvement (Weight and Dimensions shown are approximate).


- LCD TELEVISION INSTRUCTION MANUAL
- CAUTION
- DISPOSAL OF USED ELECTRICAL & ELECTRONIC EQUIPMENT
- SAFETY PRECAUTIONS
- CLEANING
- ATTACHMENTS
- WATER AND MOISTURE
- HEAT
- SETTING
- WALL OR CEILING MOUNTING
- POWER
- PIXEL AND FIXED IMAGE
- SET MOVING
- CONTENTS
- IMPORTANT SAFEGUARDS....5
- SUPPLIED ACCESSORIES....6
- FUNCTIONAL OVERVIEW....7
- PREPARATION 10
- START UP....15
- DAILY USE....16
- MENUS DESCRIPTION....20
- TELETEXT 26
- WALL/ARM MOUNTING....29
- TROUBLESHOOTING....30
- SPECIFICATIONS 31
- IMPORTANT SAFEGUARDS
- LOCATION
- HEAT, MOISTURE, DUST, VIBRATION
- VENTILATION
- MOUNTING
- OBJECT ENTRY
- LIGHTNING STRIKING
- SERVICE
- SUPPLIED ACCESSORIES
- FUNCTIONAL OVERVIEW
- REMOTE CONTROLLER
- TV MODE
- TELETEXT MODE
- PREPARATION
- INSERTING BATTERIES INTO THE REMOTE CONTROL UNIT
- MAINS CONNECTION
- AERIAL CONNECTION
- CONNECTING THE TV DIRECTLY TO AN AERIAL
- AERIAL CONNECTION WITH VCR
- TV/AV MODE SELECTION
- TV → AV1 → AV2 → S-VIDEO → TV
- AV INPUT JACK (AV2)
- S-VIDEO INPUT JACK
- SCART JACK (AV1)
- HEADPHONE JACK
- START UP
- LANGUAGE MENU
- AUTOMATIC TUNING
- AUTOMATIC TUNING SYSTEM
- DAILY USE
- SWITCHING ON TV SET
- SWITCHING OFF TV SET
- PROGRAM SELECTION (FROM 0 TO 99)
- DIRECT SELECTION
- UP / DOWN SELECTION
- SOUND CONTROL
- TV VOLUME ADJUSTMENT
- HEADPHONE VOLUME ADJUSTMENT
- MUTE
- MONO FORCING, DUAL LANGUAGE
- PICTURE CONTROL
- SLEEP FUNCTION
- FORMAT SELECTION
- AUTO SETTING
- TELEVISION FORMAT
- MENUS LANGUAGE SELECTION, CHILD LOCK, CLOCK SETTING, WAKE UP, NOISE REDUCTION
- CHILD LOCK
- WAKE UP
- CLOCK SETTING
- DEFAULT ZOOM CONTROL
- MENUS DESCRIPTION
- LANGUAGE
- MAIN MENU
- HOW TO USE THE SUB-MENUS
- PICTURE MENU
- SOUND MENU
- EQUALIZER MENU
- INSTALL MENU
- EDIT MENU
- CHANNEL SKIPPING
- CHANNEL DELETING
- CHANNEL ORDER CHANGING
- MANUAL CHANNEL TUNING
- CHANNEL SEARCHING
- ENTER STATION NAME
- TV SYSTEM MODIFICATION
- PERFORM FINE TUNING
- STORE PROGRAM IN MEMORY
- FEATURES MENU
- TELETEXT
- ENTERING/LEAVING TELETEXT MODE
- PAGE SELECTION
- USEFUL TELETEXT FUNCTIONS
- SUBPAGE (☐) BUTTON (A10)
- PAGE HOLD BUTTON (图) (A9)
- TELETEXT FORMAT PICTURE & SOUND CONTROL
- DOUBLING CHARACTER HEIGHT
- VOLUME AND BRIGHTNESS CONTROL IN TELETEXT MODE
- WATCHING TV WHILE PAGE SEARCHING
- WATCHING TV WITH TELETEXT SUBTITLES
- WALL/ARM MOUNTING
- ATTACHING A WALL OR ARM MOUNTING DEVICE
- INSTALLING VESA COMPLIANT MOUNTING DEVICES
- TROUBLESHOOTING
Brand : DAEWOO
Model : DLP-20D7
Category : Television