DLP-37C3 - Television DAEWOO - Free user manual and instructions
Find the device manual for free DLP-37C3 DAEWOO in PDF.


| Product Type | Television (DLP) |
| Screen Size | 37 inches (94 cm diagonal) |
| Display Resolution | 1366 x 768 pixels |
| Aspect Ratio | 16:9 |
| Dimensions (W x H x D) | 900 x 580 x 280 mm (without stand) |
| Weight | 22 kg (without stand) |
| Power Supply | AC 100-240V, 50/60Hz |
| Power Consumption | 200W (typical) |
| Standby Power | < 1W |
| Inputs | HDMI x2, Component, Composite, VGA, USB |
| Outputs | Optical audio, Headphone jack |
| Tuner | Analog & Digital (ATSC) |
| Speakers | 2 x 10W |
| Remote Control | Infrared with batteries (AAA) |
| Wall Mount | VESA 400 x 200 mm |
| Operating Temperature | 0°C to 40°C |
| Safety Features | Auto power off, child lock, surge protection |
| Maintenance | Clean with a soft dry cloth; avoid liquids |
| Spare Parts Availability | Power supply, main board, remote control available from Daewoo service centers |
Frequently Asked Questions - DLP-37C3 DAEWOO
User questions about DLP-37C3 DAEWOO
0 question about this device. Answer the ones you know or ask your own.
Ask a new question about this device
Download the instructions for your Television in PDF format for free! Find your manual DLP-37C3 - DAEWOO and take your electronic device back in hand. On this page are published all the documents necessary for the use of your device. DLP-37C3 by DAEWOO.
USER MANUAL DLP-37C3 DAEWOO
NO USER-SERVICEABLE PARTS INSIDE.
REFER SERVICING TO QUALIFIED SERVICE PERSONNEL.

The lightning flash with arrowhead symbol, within an equilateral triangle, is intended to alert the user to the presence of uninsulated “dangerous voltage” within the product’s enclosure that may be of sufficient magnitude to constitute a risk electric shock.

The exclamation point within an equilateral triangle is intended to alert the user to the presence of important operating and servicing instructions in the literature accompanying the appliance.
WARNING: TO REDUCE THE RISK OF FIRE OR ELECTRIC SHOCK HAZARD, DO NOT EXPOSE THIS APPLIANCE TO RAIN OR MOISTURE.
CAUTION : TO PREVENT ELECTRIC SHOCK, MATCH WIDE BLADE OF PLUG TO WIDE SLOT, FULLY INSERT.

DISPOSAL OF USED ELECTRICAL & ELECTRONIC EQUIPMENT (Europe only)
The meaning of the symbol on the product, its accessory or packaging indicates that this product shall not be treated as household waste. Please, dispose of this equipment at your applicable collection point for the recycling of electrical & electronic equipments waste. In the European Union and Other European countries which there are separate collection systems for used electrical and electronic product. By ensuring the correct disposal of this product, you will help prevent potentially hazardous to the environment and to human health, which could otherwise be caused by unsuitable waste handling of this product. The recycling of materials will help conserve natural resources. Please do not therefore dispose of your old electrical and electronic equipment with your household waste. For more detailed information about recycling of this product, please contact your local city office, your household waste disposal service or the shop where you purchased the product.
Important Safeguards
Please read the following safeguards for your TV and retain for future reference. Always follow all warnings and instructions marked on the television.
1. Read, Retain and Follow All Instructions
Read all safety and operating instructions before operating the TV. Retain them safely for future reference. Follow all operations and instructions accordingly.
2. Heed Warnings
Adhere to all warnings on the appliance and in the operating instructions.
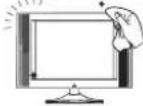
3. Cleaning
Unplug the TV from the wall outlet before cleaning. Do not use liquid, abrasive, or aerosol cleaners. Cleaners can permanently damage the cabinet and screen. Use a lightly dampened cloth for cleaning.
4. Attachments and Equipment
Never add any attachment and/or equipment without approval of the manufacturer as such additions may result in the risk of fire, electric shock or other personal injury.

5. Water and Moisture
The apparatus shall not be exposed to dripping or splashing and that no objects filled with liquids, such as vases, shall be placed on the apparatus.

6. Setting
Do not place this TV on an unstable cart, stand or table. Placing the TV on an unstable base can cause the TV to fall, resulting in serious personal injuries as well as damage to the TV. Use only a cart, stand, bracket or table recommended by the manufacturer or salesperson.
7. Ventilation
Slots and openings in the cabinet are provided for ventilation and to ensure reliable operation of the TV and to protect it from overheating. Do not cover the ventilations openings in the cabinet and never place the set in a confined space such as built-in cabinet unless proper ventilation is provided. Leave a minimum 10cm gap all around the unit.
8. Power Source
This TV should be operated only from the type of power source indicated on the marking label. If you are not sure of the type of power supplied to your home, consult your appliance dealer or local power company.
9. Grounding or Polarization
This TV is equipped with a polarized alternating current line plug (a plug having one blade wider than the other). This plug will fit into the power outlet only one way. This is a safety feature. If you are unable to insert the plug fully into the outlet, try reversing the plug. If the plug should still fail to fit, contact your electrician to replace your obsolete outlet. Do not defeat the safety purpose of the polarized plug.
10. Power-Cord Protection
Power-supply cords should be routed so that they are not likely to be walked on or pinched by items placed upon or against them, paying particular attention to cords at plugs, wall outlets, and the point where they exit from the TV.
11. Lightning
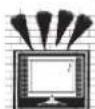
For added protection for this TV during a lightning storm, or when it is left unattended and unused for long periods of time, unplug it from the wall outlet and disconnect the antenna or cable system. This will prevent damage to the TV due to lightning and power-line surges.
12. Wall or Ceiling Mounting
When mounting the product on a wall or ceiling, be sure to install the product using the designated mounting tool according to the method recommended by the manufacturer.
Important Safeguards
13. Power Lines
An outside antenna system should not be located in the vicinity of overhead power lines or other electric light or power circuits, or where it can fall into such power lines or circuits. When installing an outside antenna system, extreme care should be taken to keep from touching such power lines or circuits as contact with them might be fatal.
14. Overloading
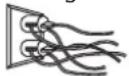
Do not overload wall outlets and extension cords as this can result in a risk of fire or electric shock.
15. Object and Liquid Entry
Never push objects of any kind into this TV through openings as they may touch dangerous voltage points or short-out parts that could result in fire or electric shock. Never spill liquid of any kind on or into the TV.
16. Outdoor Antenna Grounding
If an outside antenna or cable system is connected to the TV, be sure the antenna or cable system is grounded so as to provide some protection against voltage surges and built-up static charges. Section 810 of the National Electric Code, ANSI/NFPA No. 70-1984, provides information with respect to proper grounding of the mast and supporting structure, grounding of the lead in wire to an antenna discharge unit, size of grounding conductors, location of antenna discharge unit, connection to grounding electrodes, and requirements for the grounding electrode.
EXAMPLE OF ANTENNA GROUNDING

17. Servicing
Do not attempt to service this TV yourself as opening or removing covers may expose you to dangerous voltage or other hazards. Refer all servicing to qualified service personnel.
18. Damage Requiring Service
Unplug the TV from the wall outlet and refer servicing to qualified service personnel under the following conditions:
(a) When the power-supply cord or plug is damaged.
(b) If liquid has been spilled, or objects have fallen into the TV.
(c) If the TV has been exposed to rain or water.
(d) If the TV does not operate normally by following the operating instructions. Adjust only those controls that are covered by the operating instructions as an improper adjustment of other controls may result in damage and will often require extensive work by a qualified technician to restore the TV to its normal operation.
(e) If the TV has been dropped or the cabinet has been damaged.
(f) When the TV exhibits a distinct change in performance - this indicates a need for service.
19. Replacement Parts
When replacement parts are required, be sure the service technician has used replacement parts specified by the manufacturer or have the same characteristics as the original part. Unauthorized substitutions may result in fire, electric shock or other hazards.
20. Safety Check
Upon completion of any service or repair to the TV, ask the service technician to perform safety checks to determine that the TV is in safe operating condition.
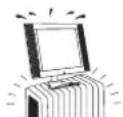
21. Heat
The product should be situated away from heat sources such as radiators, heat registers, stoves, or other products (including amplifiers) that produce heat.
Warning
This section must be read carefully and followed by the user prior to the operation of the product.
The manual states important instructions for the user's own safety, and the proper operation of the product.

WARNING
Ignoring or disregarding the contents of this section and improper operation of the product may result in the person's death or serious injury.
In case of an accident, please unplug the unit from the outlet immediately.
To reduce the risk of electric shock, do not remove cover or back. No user -serviceable parts inside. Refer to qualified service personnel for repair.

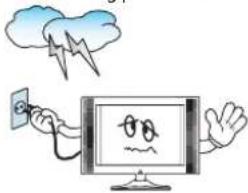
To prevent fire and damages to the product, unplug the unit from the outlet during lightning storm, or when it is left unattended and unused for a long period of time.
Slots and openings in the case are provided for ventilation to ensure reliable operation of the product. Never put in any item-such as a coin, paper, match- through these openings since it may touch dangerous voltage points that could result in fire or shock hazard.
Hold the plug when unplugging the unit from the outlet. The cord may cause fire or electric shock if damaged.

Do not put any object that contains water - such as flowerpot - near to the unit. The water may penetrate into the unit, and be a cause of fire or hazardous electric shock.
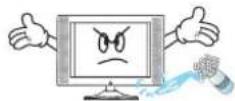
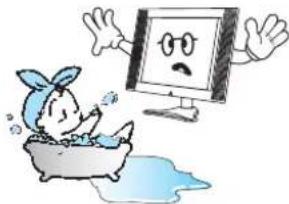
Do not put on or use the product near water and moisture-such as in a bathroom, washbowl, etc. It may be a cause of fire and electric shock hazards.
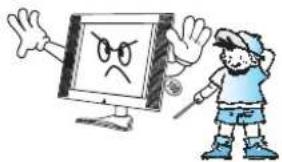
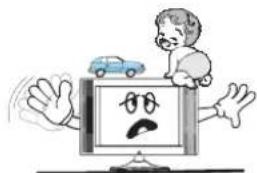
Do not let children hang on or climb on the product since it may be a cause of serious injury.
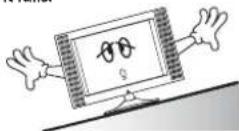
Do not cause the product to lean or put it in an unstable place since it may cause a serious injury to a person, as well as damage to the product if it falls.
Warning
This section must be read carefully and followed by the user prior to the operation of the product.
The manual states important instructions for the user's own safety, and the proper operation of the product.

CAUTION
Ignoring or disregarding the contents of this section and improper operation of the product may result in the person's death or serious injury.
Please keep the user's manual in a safe place for future reference.
Do not put volatile substance-such as benzene, naphtha-near the product since it may cause a change in the product's colour.

Refer servicing to qualified service personnel for cleaning at least once a year since dust inside the TV set may be a result or fire and malfunctioning of the product.

Do not put on any heavy item on the power cord since it may result in fire or hazardous electric shock if the cord is damaged.

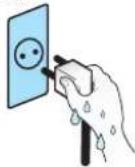
Do not touch the power cord with moisturized or wet hands when plugging to or unplugging from the outlet since it may be a cause of electric shock.
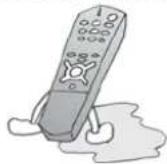
Do not spill water or drop the remote controller since it may be a cause of malfunctioning.
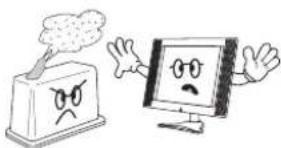
Do not cover the top of the television set. Ventilation will be prevented, and it may be a cause of fire if the product is internally overheated.

Please be advised of electric wires and cables when installing the antenna. It may be a cause of hazardous electric shock and fire if the antenna touches or falls on the electric wire; thus, it must be installed firmly, and far away from the cables.

Do not expose the product to a dusty or moisturized place since it may be a cause of malfunctioning.
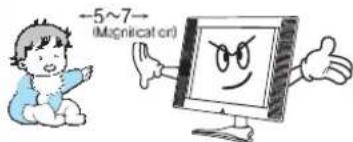
Do not view the TV too closely since it may cause damage in your eyesight.
The product should be situated away from any heat source-such as radiators, heat registers, stoves, or other products that produce heat.

Unplug the power from the outlet and all the related connections from the unit to prevent electric shock. At least two people must work together to move the TV set when transporting to prevent the TV from falling, and consequently, any serious injury or damage.

Table of Contents
Installation and Maintenance
Antenna Connection 9
Video Connection 12
Camcorder & Video Game Connection. 13
DVD Player Connection 14
STB Connection 15
PC Connection 16
Cable TV Broadcasting Connection....18
Connect with the Dolby Digital AMP 19
Name of Each Part. 20
Basic Guide
Parts of the Remote Controller....24
Method To Use Basic Menu 26
To Watch TV 27
Setting Up TV Stations 29
Selection of AV and Multimedia Input Signal . . . . . . . . . . . . . . 33
Application Guide
Screen Adjustment 35
POP Mode 39
Sound Adjustment 40
Selection of Language 43
Adjustment of Time....45
Other Functions 46
Teletext. 47
Assemble / separate parts. 48
Troubleshooting....51
Standard of Product 53
Supplied Accessories
Make sure that the following accessories are provided with the product.

AC cord Instruction manual
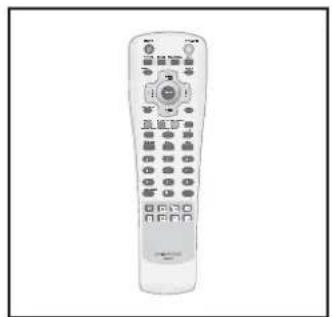
Remote
controller

Batteries
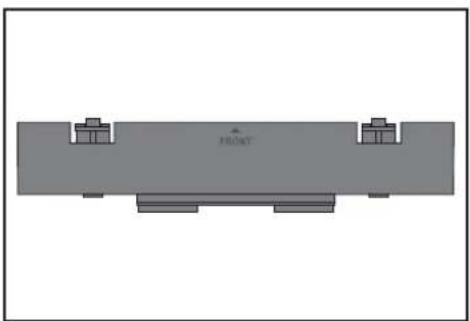
Cover
bottom
Antenna Connection
Indoor Antenna Connection
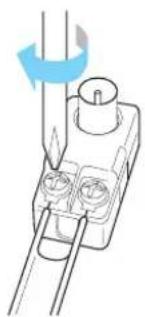
- Connect the feeder cable of the antenna to the combining adapter.
WHEN THE IMAGE IS NOT CLEAR: Unclear screen image and bad reception may be a cause of wrong antenna connection. Be sure to check its direction and place when installing.
- Connect the combining adapter to the antenna input at the left side of the TV set.
WHEN USING THE COMBINING ADAPTER: You may obtain the combining adapter at your closest Service Center.
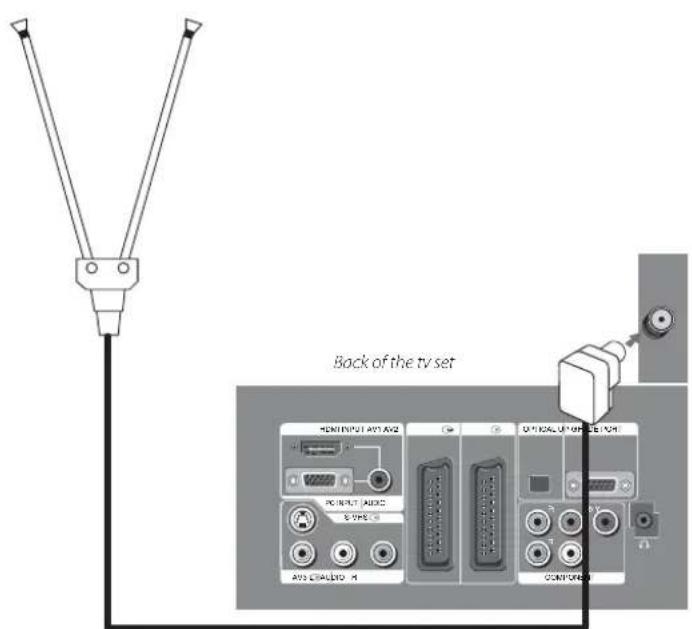
Antenna input
Antenna Connection
CTV Antenna Connection
Such community TV Antenna installation may be found in most of co-op apartments.
When a coaxial cable is used: Plug the coaxial cable to the antenna socket, and fix it firmly by turning it to the right.
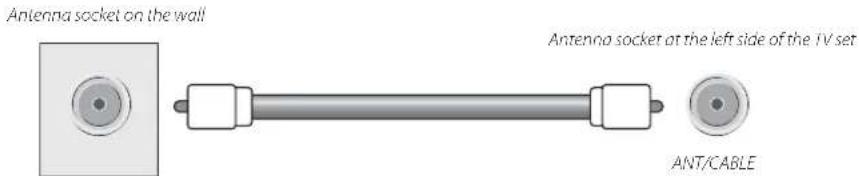
When a feeder cable is used: Plug the coaxial cable to the antenna socket, and fix it firmly by turning it to the right.

Feeder cable connection with the combining adapter
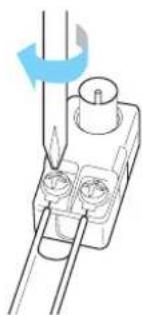
Antenna Connection
Outdoor Antenna Connection
Outdoor Antenna connection-such as VHF or/and UHF-may be necessary for installation at private houses.
Single Antenna Connection
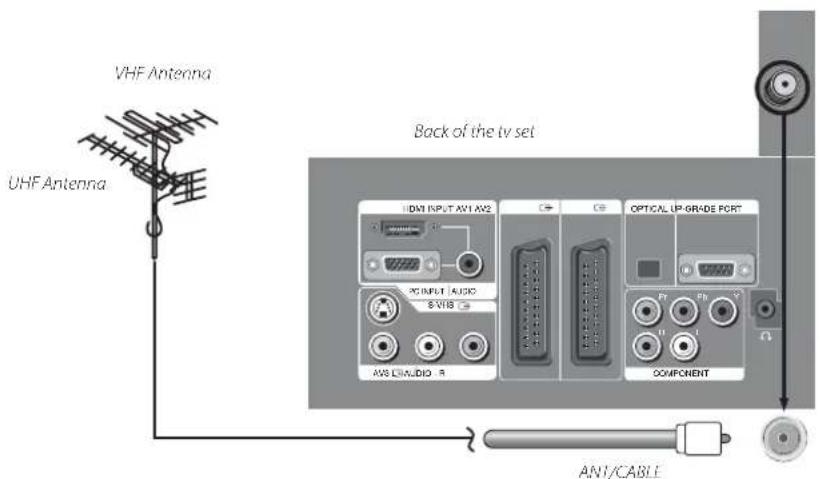
Separate Antenna Connection.
![graph TD A["VHF Antenna"] --> B["In case of coaxial cable"] A --> C["In case of feeder cable"] D["UHF Antenna"] --> E["In case of coaxial cable"] D --> F["In case of feeder cable"] G["ANT/CABLE"] --> H["Antenna combining Adapter (Separate purchase)"] H --> I["In case of coaxial cable"]](/content/2026/06/1325604/images/92a83efd280e190791f8f9cdcb68001a615ea19bc3bdaea6ebaccc0d03316fc5.jpg)
Video Connection
Connecting with an External Source
You may connect an S-Video input to enjoy clearer and brighter picture images. You can make the connection with the AV3 input.

Note : If S-video and RCA jack are connected the same time, The TV set will only detect the S-Video mode.
- If your AV device has both Video OUT terminal and S-Video OUT terminal, the S-Video connection is recommended for better picture quality.
Connecting with SCART VIDEO
- Prepare the scart lead for picture / sound.
- Connect the SCART input / output terminal of video with the SCART1(AV1), SCART2(AV2), input/output terminal of TV.
- Turn on the video, Insert the video cassette, and press the "PLAY" button.
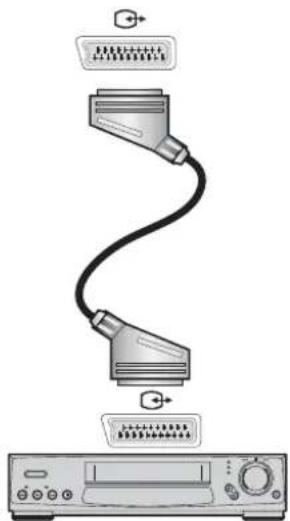
Note :
- SCART1 has CVBS/RGB input and RF output. It is used to connect a STB, VCR and DVD.
- SCART2 has CVBS input. It is used to connect a STB, VCR and DVD.
Camcorder & Video
Game Connection
Watching the Camcorder Recording on TV
- Prepare the S-video and RCA connector.
- These connectors connect to S-video or AV 3 as shown in the picture below.
- Turn on the TV set and camcorder/video game.
- Select AV3/S-video mode, using the "→"button of the Remote controller or "□/→"button of the TV set.
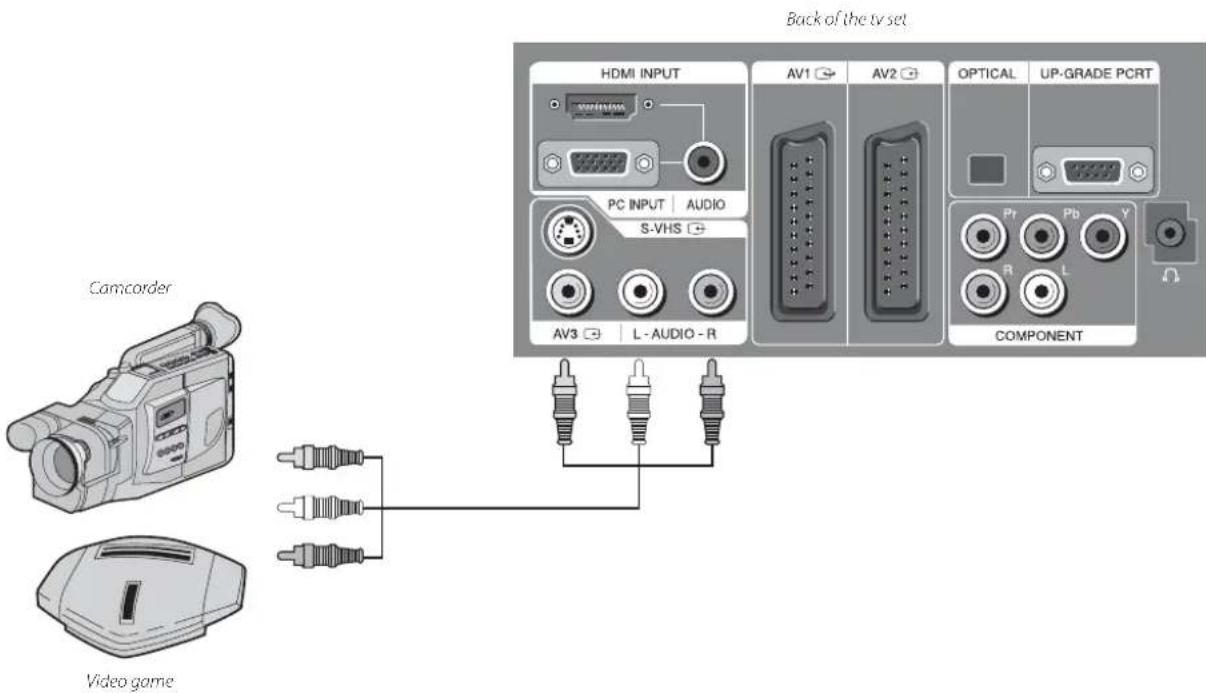
Note : If S-video and RCA jack are connected at the same time, the TV set only detects the S-Video mode.
* If your AV device has both Video OUT terminal and S-Video OUT terminal, the S-Video connection is recommended for better picture quality.
DVD Player
connection
When connecting with a component cable and Euro SCART cable
Back of the tv set

Note :
- When you connect with the component video, please check the colour of the cable between the DVD and TV set.
When connecting with a S-VHS cable and RCA cable
Back of the tv set

Note : If S-video and RCA jack are connected at the same time, the TV set will only detect the S-Video mode. • If your AV device has both Video OUT terminal and S-Video OUT terminal, the S-Video connection is recommended for better picture quality.
STB(Set Top Box)
Connection
When connecting with a HDMI cable
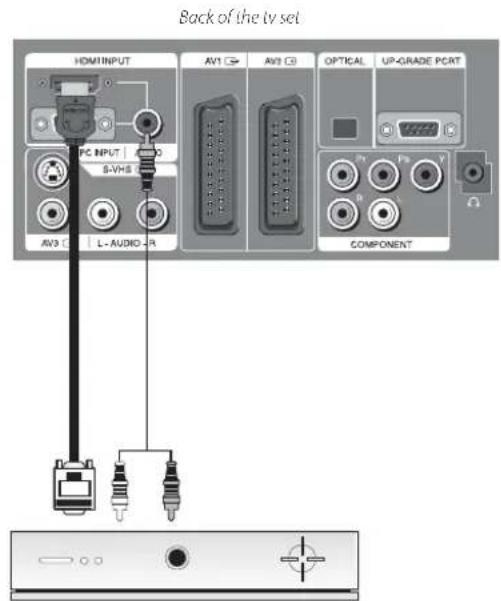
Set Top Box
When connecting with a component cable
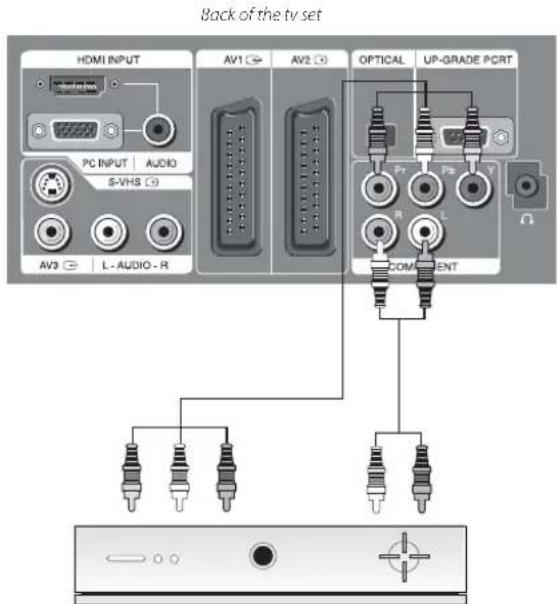
Set Top Box
PC
Connection
When connecting with PC(D-Sub) cable.
- First adjust resolution of the PC. (640 X 480, 800 X 600, 1024 X 768)
- Connect between PC and TV set using the D-sub and Audio cable as shown in the picture below.
- Turn on the PC and TV set.
- Select PC mode by pressing "MULTIMEDIA" button on the remote control or "☐/→" button of the TV set.
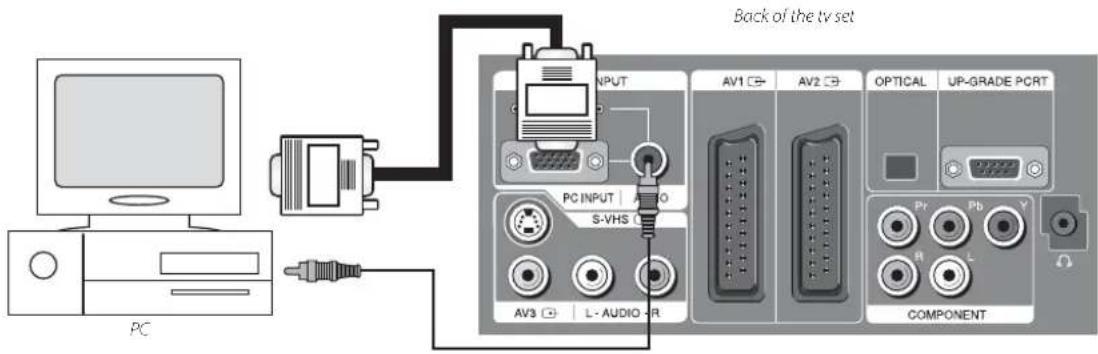
When connecting with a HDMI cable.
- First adjust resolution of the PC. (640 X 480, 800 X 600, 1024 X 768)
- Connect between PC and TV set using the HDMI and Audio cable as shown in the picture below.
- Turn on the PC and TV set.
- select DVI mode by pressing "MULTIMEDIA" button on the remote control or "☐/-☐" button of the TV set.
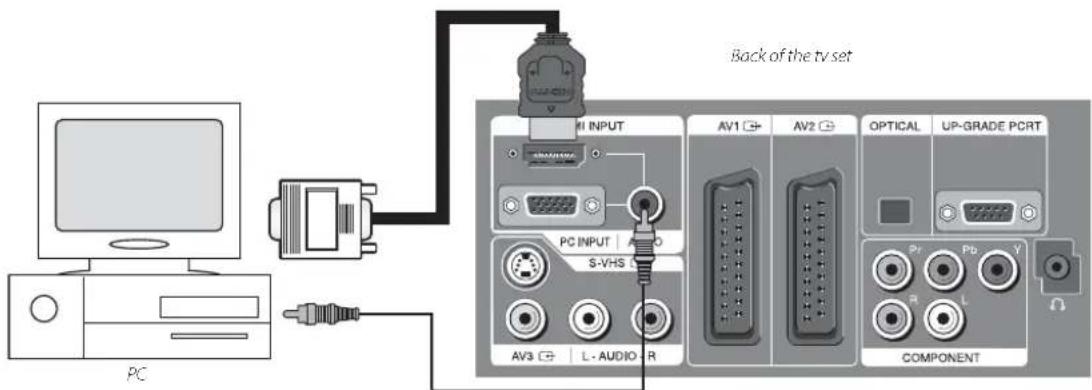
Note : If the graphic card of the PC only supports a DVI signal, you must connect the Audio cable as shown in the picture upper.
PC Connection
PC CONNECTION NOTES:
1) The resolution of the TV set is best at 1024 768(XGA).
2) If there is a [Vertical Frequency] setting menu in the [Display] Menu of the PC, adjust the frequency to 60Hz.
3) If the PC resolution is too high, it may be hard to detect signals. Select a suitable resolution.
4) HDMI input port receives only digital Signal.
5) Depending on the graphic card when you plug & unplug the HDMI connection the screen may not display correctly. Restart the computer if this happens.
Multi input resolution available in LCD TV.
| Resolution V-freq HDMI PC(D-Sub) Component Standard | |||||
| 640 X 480 | 60Hz o o x | ||||
| 72Hz o o x | |||||
| 75Hz o o x | VESA Standard | ||||
| 800 X 600 | 60Hz o o x | VESA Standard | |||
| 72Hz o o x | VESA Standard | ||||
| 75Hz o o x | |||||
| 1024 X 768 | 60Hz o o x | VESA Standard | |||
| 70Hz o o x | VESA Standard | ||||
| 75Hz o o x | VESA Standard | ||||
| 720 X 480 60Hz o x o | |||||
| 720 X 576 50Hz o o o | |||||
| 1280 X 720 | 50Hz o x o | ||||
| 60Hz o o o | |||||
| 1920 X 1080i | 50Hz o x o | ||||
| 60Hz o o o | |||||
| 720 X 480i 60Hz x x o | |||||
| 720 X 576i 50Hz x x o | |||||
Note :
- When you connect with component, D-Sub, and HDMI, you must check the input resolution of external devices.
- 1280 X 720 mode is commonly used for Component.
- So if this mode is used at PC mode, the screen can be enlarged.
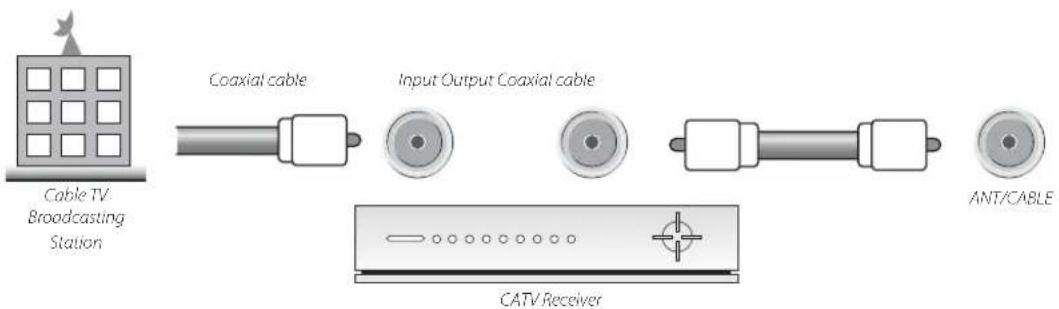
Cable TV Broadcasting Connection
External Input Connection Source
Watching cable television is only possible after you have subscribed to the local broadcasting company and installed a cable receiver. You may make the connection to any of the Component input and SCART input AV1, AV2.

Antenna Input Connection
Watching cable television is only possible after you have subscribed to the local broadcasting company and installed a cable receiver.
Connect with the Dolby Digital AMP.
If you connect the optical output to a Dolby digital AMP, you can listen to better sound.
![graph TD A["HDMI INPUT"] --> B["AV1"] A --> C["AV2"] A --> D["OPTICAL"] A --> E["UP-GRADE PCRT"] B --> F["COMPONENT"] C --> F D --> F E --> F F --> G["Optical output"] G --> H["Dolby Digital AMP"] H --> I["L"] H --> J["Woofer"] H --> K["Center"] H --> L["R"] I --> M["Surround"] J --> N["L"] K --> O[…](/content/2026/06/1325604/images/c3b8f084fec27e307549453b088245e6ac3443ba1ac5e69b650d8f76616ca872.jpg)
Name of
Each Part
Front Panel (DLP-26C2 / DLP-32C2)
Buttons on the TV set have the same functions as those of the remote controller.
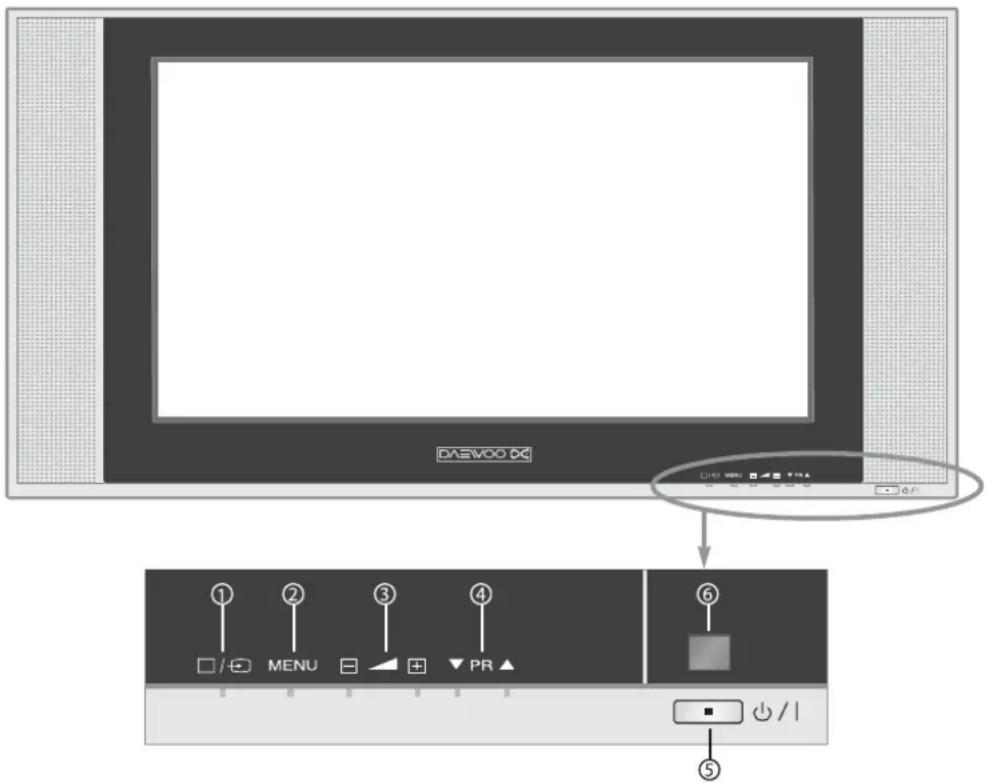
Control Key Buttons.
① □/→ Buttons : Each time you press this button, the TV will cycle through: TV / AV1 / AV2 / AV3(S-Video) / PC/HDMI / COMPONENT.
② MENU Button : Use this button to enter and exit the MENU.
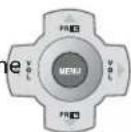
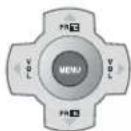
③ ▼▲+ Buttons : Use this buttons to change your TV's volume or to move the cursor in the menu.
④ ▼ PR ▲ PR Buttons : Use this buttons to change channels on your TV or to move the cursor in the menu.
⑤ Stand-by / TV ON button
Button: Use this button to change from TV STAND-by mode to TV ON mode.
☐/ |
⑥ Remote controller signal receiver
The screen contains the remote controller signal receiving window; therefore, point the remote controller towards the screen when using it.
Name of Each Part
Front Panel (DLP-26C3 / DLP-32C3 / DLP-37C3)
Buttons on the TV set have the same functions as those of the remote controller.
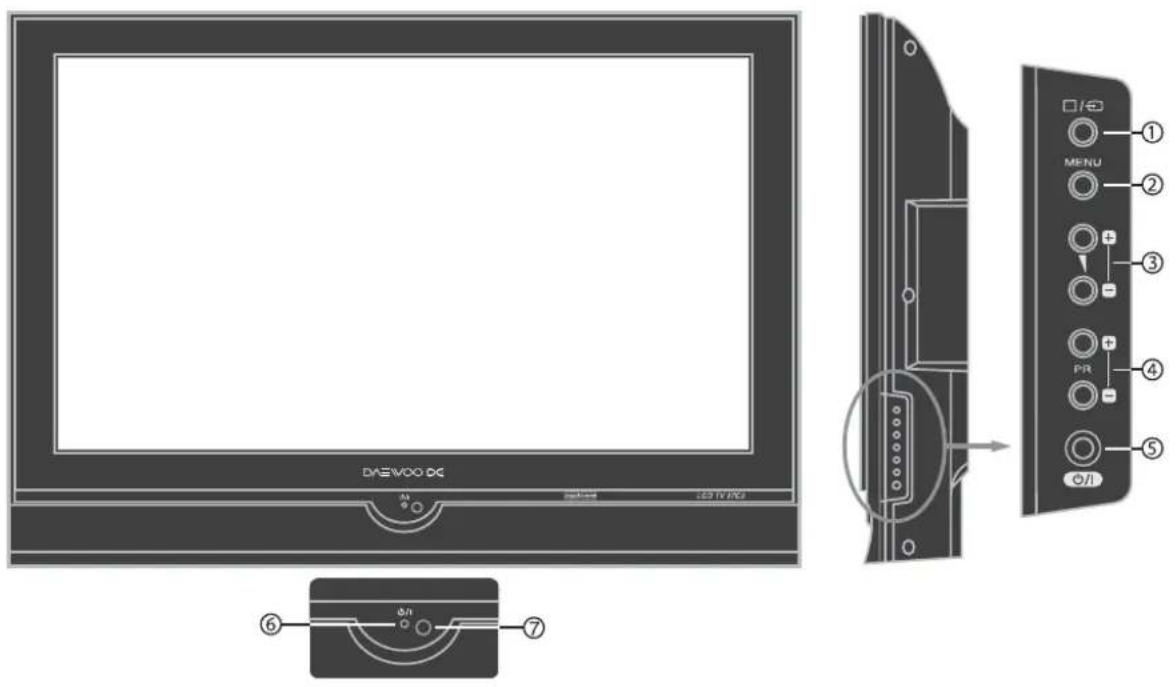
Control Key Buttons.
① □/→ Button : Each time you press this button, the TV will cycle through: TV / AV1 / AV2 / AV3(S-Video) / PC/HDMI / COMPONENT.
② MENU Button: Use this button to enter and exit the MENU.
③ + ▲ Buttons : Use this buttons to change your TV's volume or to move the cursor in the menu.
④ + PR □ PR Buttons : Use this buttons to change channels on your TV or to move the cursor in the menu.
⑤ Stand-by / TV ON button
Button: Use this button to change from TV STAND-by mode to TV ON mode.
⑥ ⏻ / |
⑦ Remote controller signal receiver
The screen contains the remote controller signal receiving window; therefore, point the remote controller towards the screen when using it.
Name of Each Part
Front Panel (DLP32C1 / DLP-42C1)
Buttons on the TV set have the same functions as those of the remote controller.
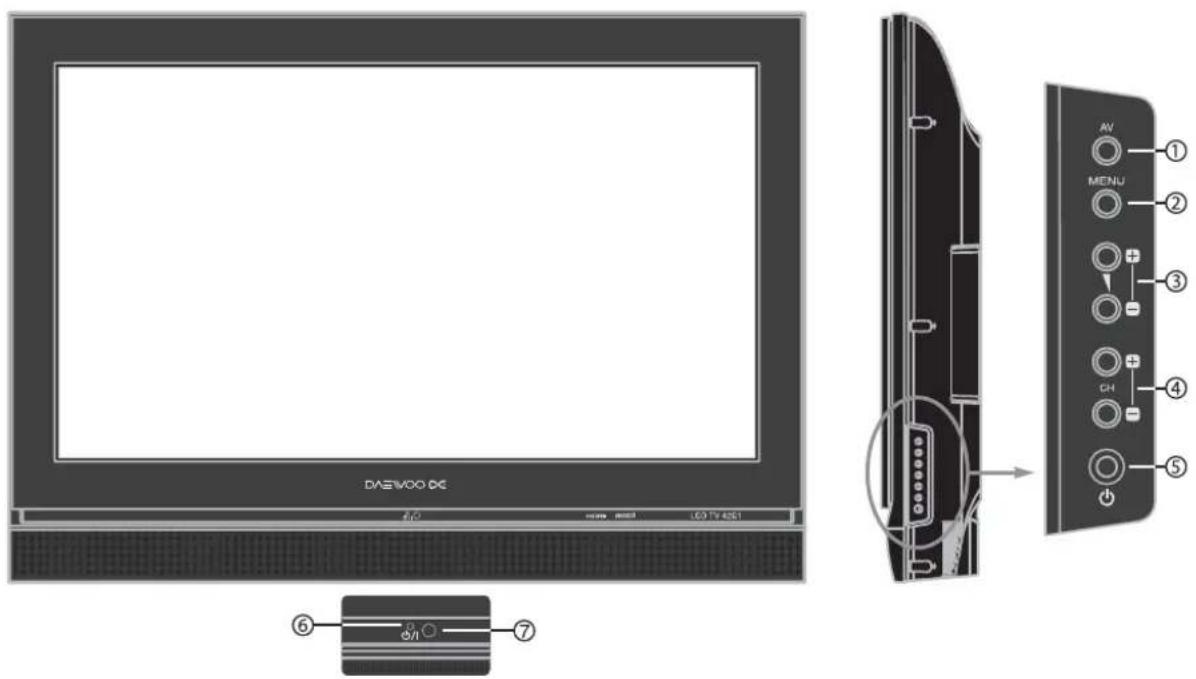
Control Key Buttons.
① AV Button: Each time you press this button, the TV will cycle through: TV / AV1 / AV2 / AV3(S-Video) / PC/HDMI / COMPONENT.
② MENU Button: Use this button to enter and exit the MENU.
③ Button : Use this buttons to change your TV's volume or to move the cursor in the menu.
④ +CH -PR Buttons: Use this buttons to change channels on your TV or to move the cursor in the menu.
⑤ Stand-by / TV ON button
Button: Use this button to change from TV STAND-by mode to TV ON mode.
⑥ ⏻/|
⑦ Remote controller signal receiver
The screen contains the remote controller signal receiving window; therefore, point the remote controller towards the screen when using it.
Name of Each Part
Side and Rear Panel

Rear Panel
Parts of the Remote
Controller
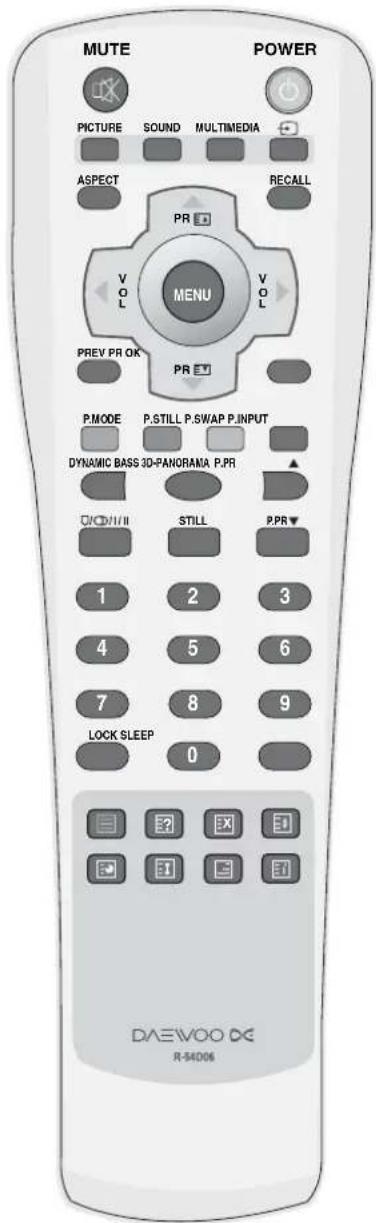
This remote controller is universal; thus, it may be convertible for TV, Video, CTV, etc.
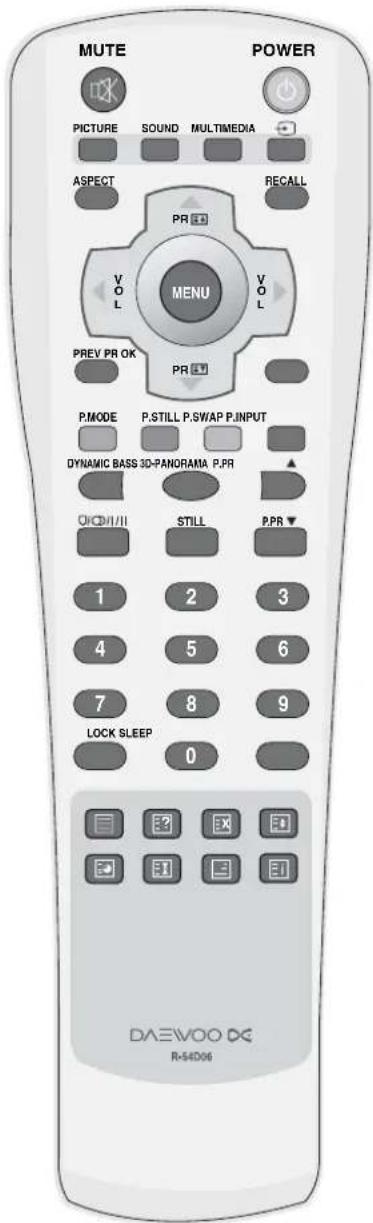
- ☑ (MUTE): Press this button, and the sound goes off. Press again, and the sound returns.
- ⏻ (POWER): TV on/off button in Stand-By mode.
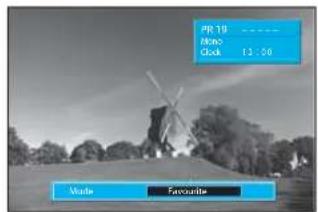
- PICTURE MODE : Picture modes changes as follows: Normal => Movie => Favourite => Normal
- SOUND MODE: Using the this button, Select the desired sound mode. News => Music => Favourite
- MULTIMEDIA: Each time you press this button, the TV will cycle through: PC => HDMI => Component => PC
- ☐: Each time you press this button, the TV will cycle through: TV => AV1 => AV2 => AV3 => TV
- ASPECT : Select screen aspect ratio: 16:9 => 14:9 => 4:3 => Panorama => Zoom1 => Zoom2 => Auto => 16:9
Note : When current mode is multimedia (PC, HDMI, Component), the aspect only works as the 16:9 mode.
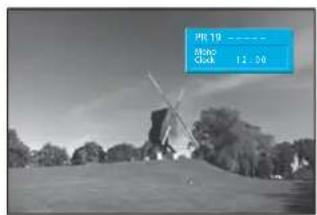
- RECALL: The present modes(TV, Video, Component, PC) and Signal information for 4 seconds. In TV mode, the Programme number, Sound, and Clock.
- ▼: Changes channels on your TV or move the cursor (UP / DOWN) in the menu.
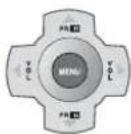
- ◀VOL ▶: Adjust the volume or move the cursor (LEFT / RIGHT) in the menu.
- MENU : Menu display button.
- PREV PR: Previous PROGRAMME button in TV mode.
- OK: Auto Tuning Start and Manual Tuning Store.
- P.MODE : Using this button, Select either POP On or Off.
Note : This button also uses channel skip and teletext.
- P.STILL: Using this button, you can freeze the sub screen in POP mode.
Note : This button also uses channel move and teletxt.
- P.SWAP : Using this button, you can swap the main screen for sub screen.
Note : This button also uses channel delete and teletxt.
- P. INPUT : Sub Screen input mode change as follows POP table mode.
Note :This button is also used in teletxt mode.
Parts of the remote controller
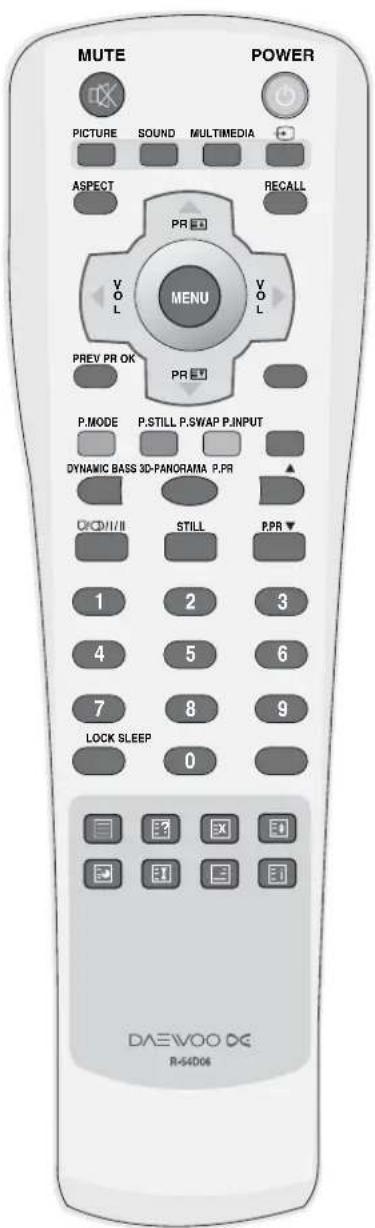
- DYNAMIC BASS: Using this button, you can enhance the bass.
- 3D-PANORAMA: Using this button, you can listen to the virtual surround sound.
- ▼WHENsub screen is RF(TV) mode in the POP, you can change PROGRAMMES using this button.
- You can select sound mode in Mono, Stereo, Dual1, Dual2, NiCAM STEREO. It works only in TV mode.
- STILL : Press this button to freeze the picture.
- NUMBER: Press the numbers on this board, you can select PR directly in TV mode.
Note: When the current state is ST-BY, you can turn on the TV using a digit key. Then, a PROGRAMME is selected according to digit number.
- LOCK: This prevents the use of the TV set without the remote control.
- SLEEP : Sleep Timer setting.
SLEEP TIMER: OFF => 10 => 20 => 30 => 40 => 50 => 60 => 70 => 80 => 90 => 100 => 110 => 120 => OFF - Teletext: see page 47.
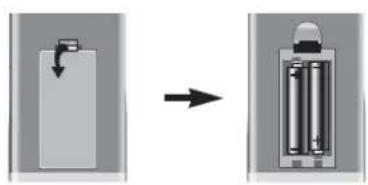
Inserting Batteries into the Remote Control Unit
To load the batteries, turn the remote control handset over and open the battery compartment. Insert the batteries (Two 1.5v, type AAA).
Make sure that the polarity matches with the (+) and (-) marks inside of the battery compartment.
Note : To avoid damage from possible battery leakage, remove the batteries if you do not plan to use the remote control handset for an extended period of time.
Method To Use
Basic Menu
Basic Menu
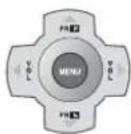
- The basic menu appears on the screen if you press the "MENU" button of the remote control.
- There are 5 items Picture, Screen, Sound, Function, and Install in the basic menu.
- Each item has sub-items under it. If the desired item is selected, the relevant sub-items are displayed upward.
1. Press the "MENU" button.
• The main menu appears if you press the "MENU" button.
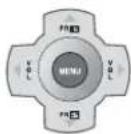
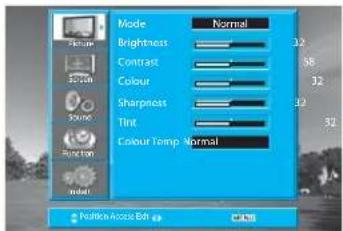
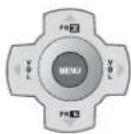
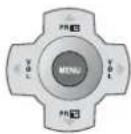
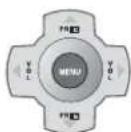
2. Press the "▼ PR ▲" button.
- You may setup according to the directions on the screen after selecting the desired item by pressing the "▼PR▲" button.
- If the setup is completed, exit from the menu by pressing the "MENU" button.
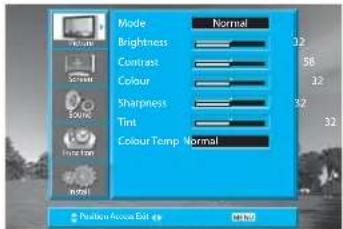

Picture: Adjust Mode, Brightness, Contrast, Colour, Sharpness and Tint(NTSC only).
Screen : Adjusts Aspect, Position(PC mode only)
Sound : Adjusts Mode, Equalizer, 3D Panorama, Dynamic Bass and Balance.
Function : Adjusts Language, Timer and Child Lock.
Install: Adjusts Auto Tuning, Manual Tuning, Fine Tuning and Edit.
To Watch TV
On/Off, Number, Mute, Recall,◀/▶ ▼/▲
Buttons with same name in the main body performs the same function.
Press the "ON/OFF" button of the front side of the set or Remote controller.
- The buttons of the remote control and the main body operate only when AC power is turned on.
Note : You can also turn on the TV using ▼For▲digit key in the ST-BY mode.
When pressing the Program button
- Select two digits if using the number button for channel selection. For example, to watch channel No.9,
Press the number button 0 and 9.
If pressing only number 9, it takes a longer time to select the channel.
To suddenly turn sound off
- Press the "MUTE (☐X)" button.
- No sound is heard if "MUTE(☐X)" is displayed on the screen.
- Sound is heard again if you press the "MUTE (☒)" button once again.
For example, please use this button when telephone rings or when guest comes while watching TV.
Check of TV operation status
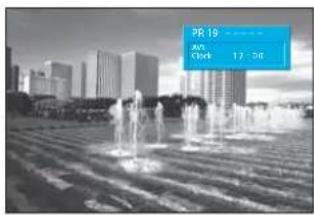
- If pressing the "RECALL" button, status of channel or broadcasting being currently watched or entry status of video component is displayed on the screen.
To Watch TV
1. Press the "ON/OFF" button of the main body.
• The Stand By LED lamp turns on in red colour.
- Press/▲ " button of the main body or "POWER" button of the remote control.
• The Stand By LED lamp on the front panel begins to flicker in red and green colour and the TV turns on.

POWER

2. Press the "▼ button.
- Select the desired program by pressing the "button" or the number button.

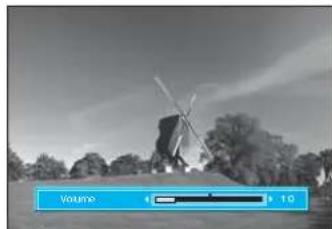
3. Adjust volume.
• Sound reduces by pressing the "button.
• Sound increases by pressing the "Voutton.
Note : Sound mutes by pressing the "MUTE" ( ) button.
4. Press the "POWER" button for turning the TV off.
• TV turns off and the power lamp changes to red colour.
POWER


Setting Up TV
Stations
Auto Tuning
- All stations that can be received are stored by this method. It is recommended that you use Auto tuning during installation of this set.
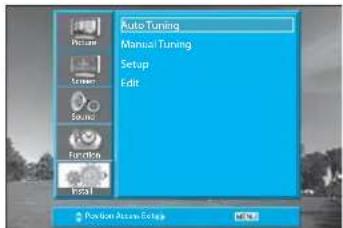
1. Press the "MENU" button to select the Install menu.
- Move the selection bar to the Install menu with "▼ PR ▲" buttons.
2. Select the "Auto Tuning".
- Place the selection bar on Auto Tuning and press the "VOL ►" button.
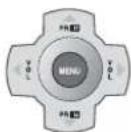
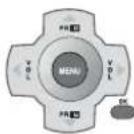
3. Select the country you require with the "◀VOL▶" button.
- After selecting the country, To start Auto Tuning press the "OK" button.
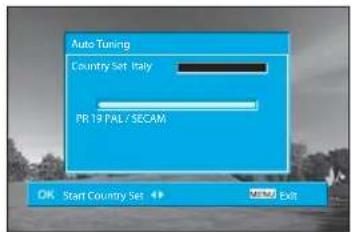
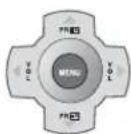
4. Please wait until the Edit menu appears.
- If you don't want to edit the programs now, escape from the menu with the "MENU" button.

Setting Up TV
Stations
Manual tuning
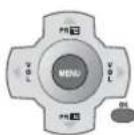
- Press the Number buttons(0\~9) or the "Button" to select a program number you want.
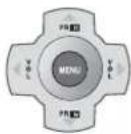
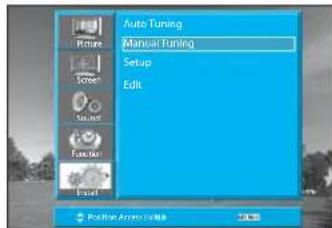
- Locate the selection bar on the Manual tuning at the Install menu.
- Press the "MENU" button to select the Install menu.
- Move the selection bar to the Install menu with "buttons.
- Place the selection bar on Manual Tuning and press the "VOL▶" button.
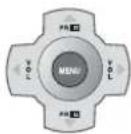
- Press the "◀VOL▶" buttons.
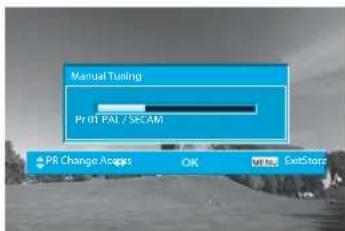
- A tuning screen will appear and cursor will move from left to right / from right to left. If you want to stop tuning press the "MENU" button.
- After searching a station, you must press the "OK" button to store the Program.
Note :
- If you are unable to get any programs using Auto Tuning because of a poor broadcasting signal, it is possible to store the Manual tuning.
- When you enter Manual Tuning after Auto Tuning in France or Swiss, if present channel is SECAM L/L', TV set can only search SECAM L/L'.
- If you enter by other than by SECAM L/L' signal, TV set can search every by SECAM L/L' signal except SECAM L/L'.
- You can change the Programme number in the Edit mode.
- Manual tuning does not support this function.
Setting Up TV
Stations
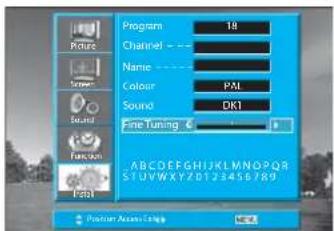
Setup
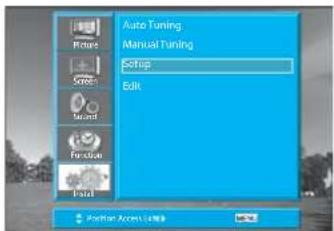
The Setup menu shows you information as follows:
- Picture information: PAL, SECAM, and SECAM-L
- Sound information: L, DK3, DK2, DK1, I, BG
- Station name, Program number and Real channel number.
1. Searching for channels in the Setup menu
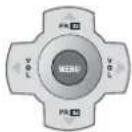
- Press the ▼▼按钮 to select a program number you want.
- Move to SETUP in the Install menu.
- Select the colour and sound system which you want.
- Search a real channel with "buttons.
2. Enter a station name
- Move to SETUP in the Install menu.
- Move the cursor to name by pressing "buttons.
- You can enter a station name with the "▼PR▲" and "◄VOL►" buttons.
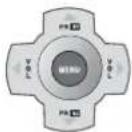

3. Fine tuning
- Move to SETUP in the Install menu.
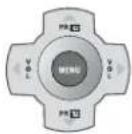
- Move the cursor to Fine Tuning by pressing "buttons.
- Adjust the fine tuning with the "◀VOL▶" buttons.
Note :
- If you are unable to get a good picture or Sound because of a poor broadcasting signal, adjustment of the fine tuning might improve it.
- The alphabet below OSD in the Setup menu only display on english.
• This part does not other language except english.
Setting Up TV
Stations
Edit
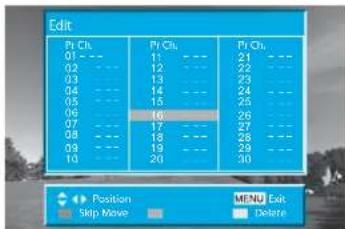
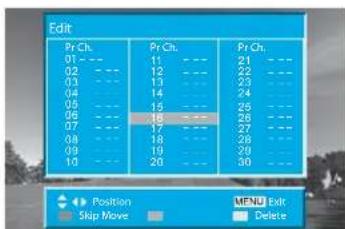
The Edit menu shows you information as follows:
- Program position assignment: Program number and Station name, Real channel number.
- Skip information: Red (Skip Yes), White (Skip No).
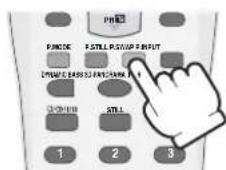
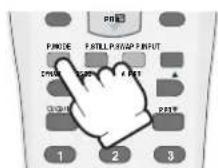
1. Deleting the program positions.
- Move to EDIT in the Install menu.
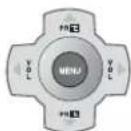
- Move the selection bar to program number to delete with the "▼PR▲" or "◀" buttons.
- Press the Delete(Yellow) button.
2. Moving the program positions
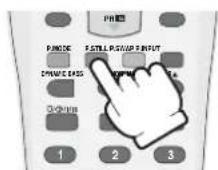
- Move to EDIT in the Install menu.
- Press the Move (Green) button. The colour of "Move" Character will be changed to Red from White.
- Move the selection bar to a new program number.
- Press the Move (Green) button again, then the programs are changed.


3. Skipping the Programs
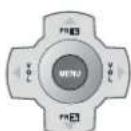
- Move to EDIT in the Install menu.
- Move the selection bar to the program number you want to skip
- Press the skip (Red) button, then the colour of the program number and channel will be changed to Red from White.
• The skipped program number will be displayed as red in the EDIT menu.
Selection of AV and Multimedia Input Signal
When watching video, Camcorder, DVD, Cable TV with AV
- See page 12 for connection method of Camcorder and Video.
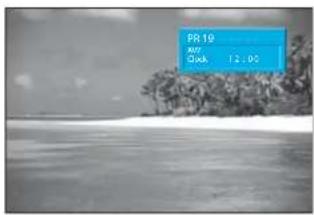
- When pressing "button" on the TV set, screen changes as follows:
TV => AV1 => AV2 => AV3/S-Video => PC => HDMI => Component => TV
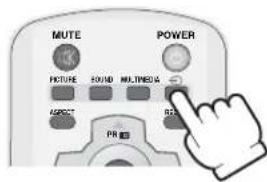
- Pressing the "button" on the remote controller.
• The screen changes as follows:
TV => AV1 => AV2 => AV3 => TV


Note :
Cautions in menu setup
• The menu disappears if you do not operate any button for 30 seconds from the menu.
- Don't connect the composite video signal and S-video signal to the video input terminal AV3 at the same time. If connecting both signals at the same time, the S-video takes precedence.
- If sound signal is mono only, connect it to the L-terminal of the sound input terminal.
Selection of AV and Multimedia Input Signal
When connecting PC, STB, DVD with Multimedia
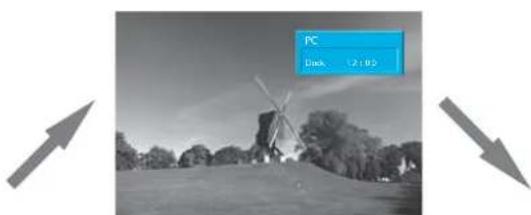
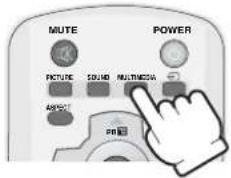
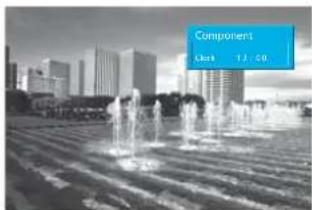
1. Pressing the "MULTIMEDIA" button on the remote controller.
• The screen changes as follows: PC => HDMI => Component => PC
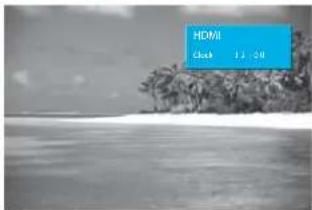
HDMI & PC mode
- For optimum picture quality, use 1024x768 computer or set top box output at a 60Hz refresh rate. Using other formats or refresh rates may result in reduced picture quality.
- If the message 'No signal' appears on the screen, adjust the PC output to a format listed in the Multimedia Input table.
Multimedia Input Format
| Resolution V-freq HDMI PC(D-Sub) Component Standard | |||||
| 640 X 480 | 60Hz o o x | ||||
| 72Hz o o x | |||||
| 75Hz o o x | VESA Standard | ||||
| 800 X 600 | 60Hz o o x | VESA Standard | |||
| 72Hz o o x | VESA Standard | ||||
| 75Hz o o x | |||||
| 1024 X 768 | 60Hz o o x | VESA Standard | |||
| 70Hz o o x | VESA Standard | ||||
| 75Hz o o x | VESA Standard | ||||
| 720 X 480 | 60Hz o x o | ||||
| 720 X 576 | 50Hz o o o | ||||
| 1280 X 720p | 50Hz o x o | ||||
| 60Hz o o o | |||||
| 1920 X 1080i | 50Hz o x o | ||||
| 60Hz o o o | |||||
| 720 X 480i | 60Hz | x | x o | ||
| 720 X 576i | 50Hz | x | x o | ||
Note :
- 1280 X 720 mode is commonly used for Component.
- So if this mode is used at PC mode, the screen can be enlarged.
Screen Adjustment
When setting up various screen modes
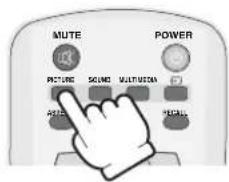
- The user may select various screens designed for a good picture without adjusting the brightness, contrast or colour individually.
1. Pressing the "PICTURE" button.
• The screen changes as follows:
Normal => Movie => Favourite => Normal
- The screen adjustment status changes as the following screens are displayed sequentially whenever pressing the "PICTURE" button.
• The screen returns to the mode prior to turning power off when you power on again.
![graph TD A["Normal Mode"] --> B["Favourite Mode"] B --> C["Movie"] C --> A](/content/2026/06/1325604/images/b387b7c1b3b2181faa44f29cbfe1f8a61b4edd2c67dacefca337ad608bd09909.jpg)
Note :
- Normal: For a highly defined image in a normally bright room
• Movie : Ideal for movies - Favourite: Allows the user to customize settings as desired.
Screen Adjustment
When adjusting the screen to taste
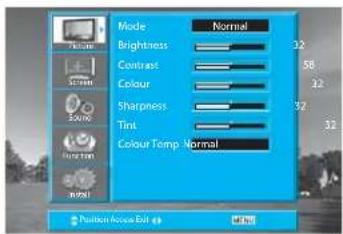
- You can enjoy various screens by adjusting Brightness, Contrast, Colour, Sharpness, etc to the user's taste.
1. Select "PICTURE" by pressing the "MENU" button.
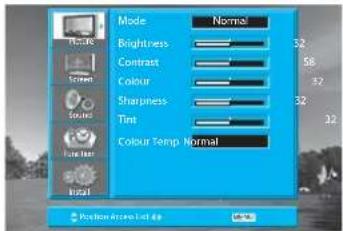
• The menu screen appears as follows.
2. Select and adjust each items.
- Move to the PICTURE menu.
- Whenever pressing the▼PR▲" button, you can select in order Brightness, Contrast, Colour, Sharpness and Colour Temp.
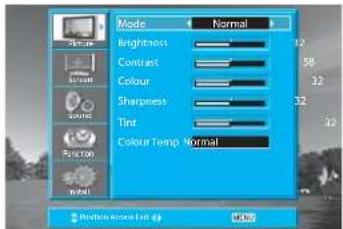
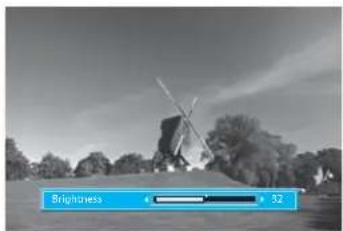
- The screen appears as on the right if pressing the "◀VOL▶" buttons after selecting items desired to adjust with the "▼PR▲" buttons.
- You can adjust all items by pressing the "◀VOL▶" button.
Note :
- Brightness: Adjusts the whole of screen brighter or darker.
- Contrast: Adjusts difference between brightness and darkness between objects and background on the screen.
• Colour: Adjusts colour saturation. - Sharpness: Adjusts outline of the screen smoothly or sharply.
• Colour Temp: Changing the tone of colour:
Normal: Normal white
Warm: Reddish white
Cool: Bluish white
- Tint actives when receiving a NTSC signal.
• The adjusted levels are stored automatically in Favourite mode.
Screen Adjustment
Adjustment of Screen Size in TV and AV mode
- Randomly change the size of the screen.
- The AUTO screen operates when power is first turned on.
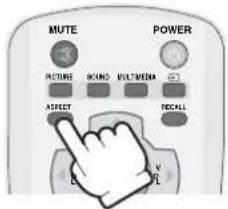
1. Pressing the "ASPECT" button on the remote controller.
• The screen changes as follows:
16:9 => 14:9 => 4:3 => Panorama => Zoom 1 => Zoom 2 => Auto => 16:9
![graph TD A["Aspect"] --> B["Aspect1"] B --> C["Aspect2"] C --> D["Aspect3"] D --> E["Aspect4"] E --> F["Aspect5"] F --> G["Aspect6"] G --> H["Aspect7"] H --> I["Aspect8"] I --> J["Aspect9"] J --> K["Aspect10"] K --> L["Aspect11"] L --> M["Aspect12"] M --> N["Aspect13"] N --> O["Aspect14"] O --> P["A…](/content/2026/06/1325604/images/a1c872075d53176e3adf14d5e018e3310beb6353942d5ffb6a913f814d444490.jpg)
• Auto : This mode will display depending on the signal information of a broadcasting station.
• 16:9 : 16:9 will display a true 16:9 (anamorphic) picture with no aspect distortions.
• 14:9 : 14:9 will display a 14:9 picture at its standard 14:9 size without any stretching.
• 4:3 : General TV screen currently broadcasted.
- Panorama: Screen that extends the 4:3 image to 16:9 and spreads the left or right part, and whose centre provides a natural shape.
- Zoom 1: Screen that vertically enlarges image by 1.33 times bigger than (Normal) image.
- Zoom 2: Screen that horizontally enlarges image by 1.33 times bigger than Zoom1 image.
Notices:
- "Aspect" function is not available in Multimedia (HDMI, PC, Component) mode.
- "WSS" mode like 16:9 and 14:9 is only available with CVBS signal.
Screen Adjustment
Adjustment of the screen in the PC mode
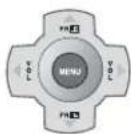
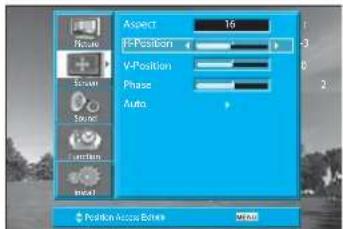
1. Adjustment of the H-Position
- Move to H-Position in the Screen menu.
- Press the "buttons to adjust the horizontal position of displayed image.
2. Adjustment of the V-Position
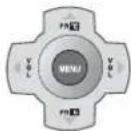
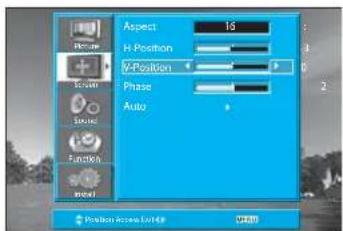
- Move to V-Position in the Screen menu.
- Press the "◀" buttons to adjust the vertical position of displayed image.
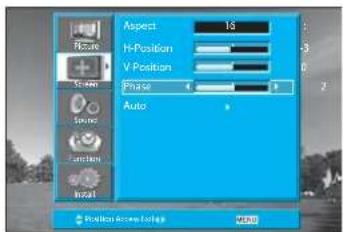
3. Adjustment of the Phase
- Move to Phase in the Screen menu.
- Press the "◀" buttons to adjust the phase to get a clear picture.
4. Auto Adjustment
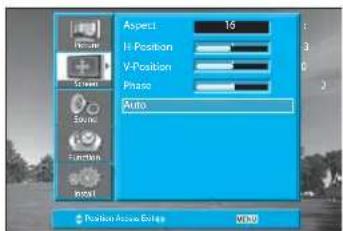
- Move to Auto in the Screen menu.
- Press the "buttons to detect optimal resolution automatically.

Note :
- During the Auto Adjust, you must not alter the screen on the monitor.
- During the moving picture, Auto Adjust is able to incorrectly work. So you must execute Auto Adjust in still image.
- Auto Adjust works incorrectly on a part graphic card or picture.
- When Auto Adjust is not correctly working, you can adjust with H/V position, and phase.
- When input signal is HD(576P,720P,1080i), Auto Adjust doesn't work.
POP Mode
1. POP mode when main picture is TV and AV.
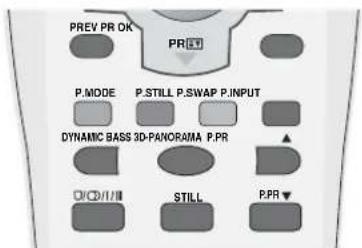
- Press the "P.MODE" button, then POP mode will function.
- Press the "P.STILL" button, then Sub screen will freeze.
- If you want to swap main for the Sub, press the "P.SWAP" button.
- If you want to change the sub screen input, press the "P.INPUT" button. Sub screen changes as follows: PC => HDMI => Component => PC
2. POP mode when main picture is Multimedia.
- Press the "P.MODE" button, then POP mode will function.
- Press the "P.STILL" button, then Sub screen will freeze.
- If you want to swap main for sub, press the "P.SWAP" button.
- If you want to change sub screen input, press the "P.INPUT" button.
- Sub screen changes as follows: TV => AV1 => AV2 => AV3 => TV
Note.
- If you change main source in POP mode, the POP mode is canceled.
- If you press the "▼" buttons in POP mode, POP is canceled.
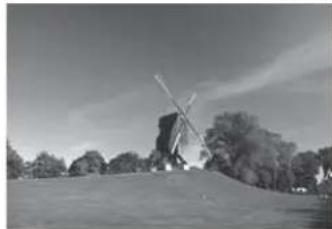
* POP mode change as followed.
![graph TD A["Stage 1: Windmill on Hill"] --> B["Stage 2: Building on River"] B --> C["Stage 3: Building on Ground"] C --> A](/content/2026/06/1325604/images/5c6f55e4cf2c26305f49b15b085ac7e844291e415afc2b05a7e667bf6d301bf2.jpg)
POP mode table.
| Main\Sub | TV AV1 | AV2 AV3 | PC HDMI | COMPONENT | |||
| TV | X | X | X | X | O | O | |
| AV1 | X | X | X | X | O | O | O |
| AV2 | X | X | X | X | O | O | O |
| AV3 | X | X | X | X | O | O | O |
| PC | O | O | O | O | X | X | X |
| HDMI | O | O | O | O | X | X | X |
| COMPONENT | O | O | O | O | X | X | X |
Note:
- If AV1 input is R/G/B, POP is not working.
• S-Video mode does not support POP funtion.
Sound Adjustment
When selecting various sound modes
1. Sound mode selects what you want.
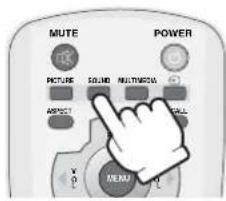
- Press the "SOUND" button, then the sound status changes as followed: Favourite => News => Music => Favourite
![graph LR A["Start"] --> B["Mode: News"] B --> C["Mode: Music"] C --> D["Mode: Capture"]](/content/2026/06/1325604/images/6738f7759f632c6dd318ca98f23d797a3b71db2ba64a073249ca331d280a583b.jpg)
Note :
- News: Allows human voice to be heard more clearly
• Music : Suitable for listening to music - Favourite: Allows the user to adjust as desired.
Sound Adjustment
When adjusting sound to taste
- The user can enjoy various sounds by adjusting Sound Mode, Equalizer, 3D Panorama, Dynamic Bass and Balance.
1. To adjust the audio equalizer
- Move to Equalizers in the Sound menu.
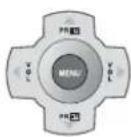
- Select and use the relevant frequency by pressing the "▼PR▲" button.
- You can adjust the degree of the frequency by using the "◀" button.

Note :
- Whenever you adjust the audio equalizer, it stores in the Favourite mode.
- Equalizer: High quality sound range adjustment method used for audio product.
100Hz, 300Hz: Low sound range
1KHz, 3KHz: Middle sound range
10KHz: High sound range
2. Select 3D Panorama Mode
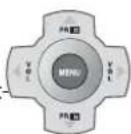
- Move to 3D Panorama in the Sound menu.
- Select either 3D Panorama ON or OFF using the "button.
- You can also operate this function using the "3D-PANORAMA" but ton on the Remote Control.

Note :
• 3D Panorama: This function generates virtual surround sound from the left and right speaker by developing the existing surround system function.
3. Select Dynamic bass Mode
- Move to Dynamic Bass in the Sound menu.
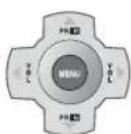
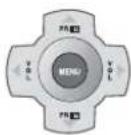
- Select either Dynamic Bass On or Off using the "button.
- You can also operate this function using the "DYNAMIC BASS" button on the Remote Control.
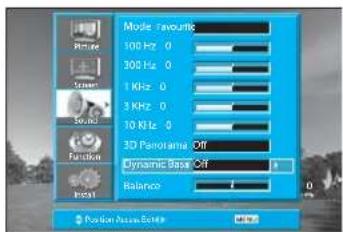
Note :
• Dynamic Bass: Using this function, you are able to enjoy the bass effect.
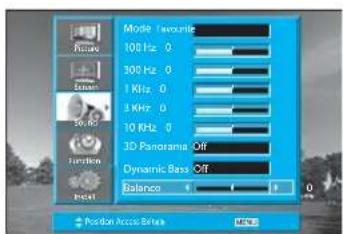
4. Select Balance Mode
- Move to Balance in the Sound menu.
- Select "Balance" by pressing "button", then the sound balance of left and right speaker is Adjusted.
Sound Adjustment
Multi-Sound and Stereo
1. Mono Sound Selection
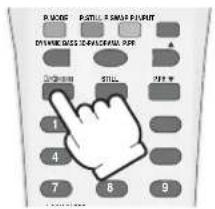
- During Stereo sound reception if the stereo is weak, you can switch to MONO by pressing the "MTS" button. Then the colour of "MONO" character will change to Red. In Mono reception the depth of sound is improved.
• To switch back to stereo, press the "MTS" button again.
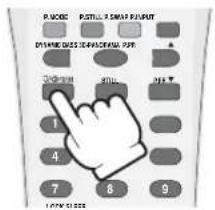


Note :
• MTS only works in RF mode.
2. Adjustment of Bilingual sound
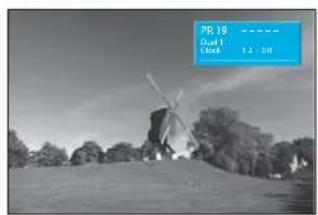
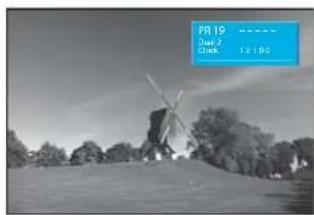
- In bilingual broadcast reception, you can switch from Dual 1 to Dual 2 by pressing the "MTS" button repeatedly.

Selection of Language
Selection of Language
When you first turn on the TV set, the window of language selection is displayed automatically.
- Press the "MENU" button and select "Function".
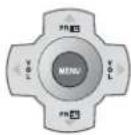
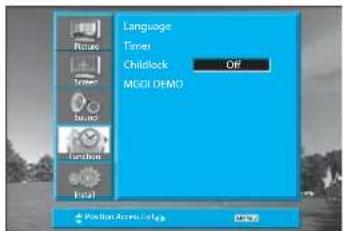
- Select "Language" by pressing "VOL▶" button.


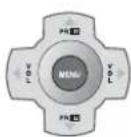
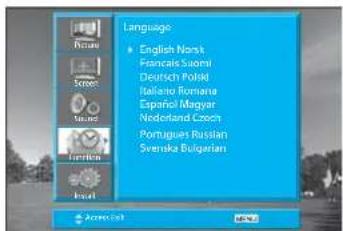
- Select your desired language by pressing the ▼'Button. Then, it will be setting automatically.
• The language change as the followed. English => Francais => Deutsch => Italiano => Espanol => Nederland => Portugues => Svenska => Norsk => Suomi => Polski => Romana => Magyar => Czech => Russian => Bulgarian
Adjustment of Time
Adjustment of Time
- You must previously adjust current time in order to reserve Automatic On/Off.
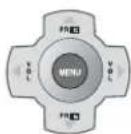
1. Setting the Clock
- Move to Timer in the Function menu.
• To go to the Clock, press the "VOL▶" button. - Place the cursor to Hour / Minute with "◀VOL▶" buttons.
- Set the Hour / Minute with the "▼PR▲" buttons.
- Place the cursor to Clock with "◀VOL▶" buttons and then press the "MENU" button to complete.

2. Automatic clock setting and correction
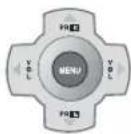
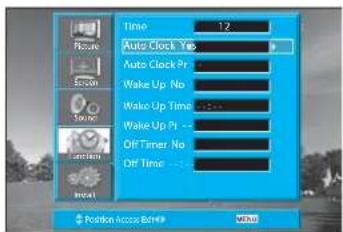
- Move to Timer in the Function menu.
• To go to the Auto Clock, press the "▼ PR ▲" button. - Select the Auto Clock to "Yes".
- Choose the Auto Clock Pr using the "◀VOL▶" button.
Note :
- Even though you turn the AC off, if you select a program of your country which has Teletext or PDC transmission, the clock will be set and corrected automatically.
• This function is only available for the following countries: Deutschland, Great Britain, France, Italy, Sweden, Switzerland, Netherlands, Ireland.
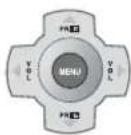
3. Setting the Wake up time / Program
- Move to Timer in the Function menu.
• To go to the Wake Up, press the "▼ PR ▲" button. - Select the Wake Up to "Yes".
- Set the Wake up time and Program in the same way to the above for the Clock. The set will turn on at the at selected time.
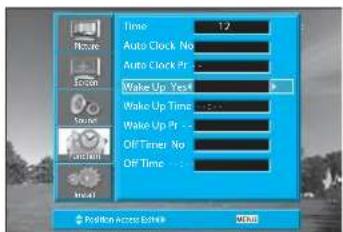
Note :
- Confirm the Time is set. The Wake up time is only available when the Time is set.
- If adjusted once, the On-time continues to operate everyday unless canceling setup or you turn the AC power off.
• It is a convenient method to wake you up in the morning.
Adjustment of Time
4. Set up of Off Time
- Move to Timer in the Function menu.
• To go to the Off Timer, press the "▼ PR▲" button. - Select Off Timer to "Yes"
- Set the Off time in the same way as above for the Clock. The set will turn off at the selected time.
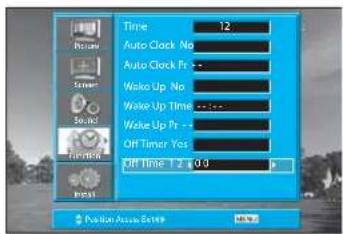
Note :
- If the TV set is set up either for Wake Up time or Off time, "⏻/丨" LED will cycle through red/green for the ST-BY mode.
- This function is very convenient since the TV automatically turns off at the fixed time
- On/Off time setup is erased if you turn the AC power off.
5. Sleep Mode
- By pressing the "SLEEP" button on the remote controller repeatedly, you can select one of the following settings:
Sleep Timer: Off => 10 => 20 => 30 => 40 => 50 => 60 => 70 => 80
• The set will turn off after the time you select.
= gt; 9 0 = gt; 1 0 0 = gt; 1 1 0 = gt; 1 2 0 = gt; Off
Note :
- If an active signal is not present for about 30 minutes, the set will automatically turn to ST-BY mode.
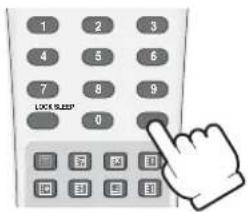
Other Functions
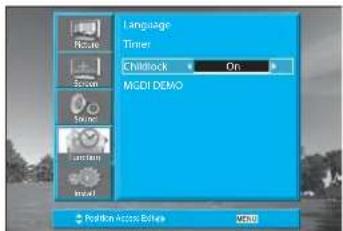
1. Setup of Child Lock
- Move to Child Lock in the Function menu.
- Select Child Lock to "On" using the "VOL ►" button
- You can also select this function using the "LOCK" button on the remote controller.
Note :
• This prevents the use of the TV set without the remote control.
- If TV set is set up Child Lock, LED will cycle through red/green for the ST-BY mode.
- If the Child Lock is "On", then the set can only be switched back on using the remote control.
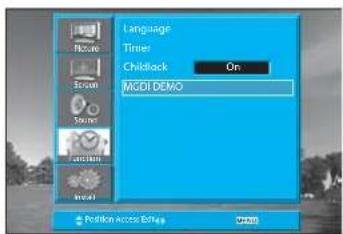
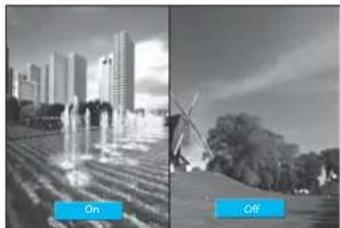
2. Setup of MGDI Demo
- Move to MGDI Demo in the Function menu.
- Press the "VOL▶" button, and then screen changes as below.
- Press the "MENU" button, and then return to origin screen.
Teletext
Teletext
SWITCHING TELETEXT ON/OFF
Press the "TELETEXT" button (回)
The index page or the page viewed last will appear.
Press the "TELETEXT" button again to return to the TV mode.
NOTE: Teletext works only in TV/AV mode.
COLOUR BUTTONS IN TOP/FLOF TELETEXT
A red, green, yellow and blue field is shown at the bottom of the screen.
If TOP or FLOF Teletext is transmitted by the station, pressing the corresponding colour button R,G,Y,B on the remote controller, enables you to select the desired page easily.
SELECTING PAGES
The "NUMBER" buttons are used to enter a page number.
The selected page number appears at the top of the screen and the page appears after a short time.
The "PR" buttons increase or decrease the current page number by 1.
INDEX PAGE
You can switch directly to the programme preview(with TOP text) or the overview page of the station you are currently viewing by pressing the "INDEX" button (图1)
PAGE HOLD
Several sub pages can be combined under a page number and are scrolled at an interval determined by the television station. The presence of sub pages is indicated by, for example, 3/6 beneath the time, which means that you are looking at the 3rd page of a total of 6 pages.
If you want to look at a subpage for a longer period of time, press the "HOLD" button (☐).
The HOLD symbol appears and the contents of the subpage shown are kept on the screen and no longer updated or switched to other subpages. Pressing the "HOLD" button again, the current subpage appears.
CALLING UP SUBPAGE DIRECTLY
Pressing the "SUBPAGE" button (☐), "----" appears.
Enter the subpage number that you want to call up with the "NUMBER" button, for example, the 2nd page, sequence 0002. The desired subpage will eventually be displayed on the screen and holds it there.
Meanwhile whilst you are waiting, it is possible to go back to the TV picture by pressing the "CANCEL" button (≡) on the remote and after a while, press the "CANCEL" button again to revert back to the saved Teletext sub page.
WATCHING TV DURING TELETEXT MODE
Some pages are continually updated, for example, stock market reports, sports announcements, and the latest news.
If you want to watch television and stay informed at the same time, press "CANCEL" button ☒).
The regular programme is still visible and the updated Teletext page number appears at the top of the screen.
Pressing the "CANCEL" button again, the Teletext page appears with the updated information.
REVEAL ANSWER
This function can be used on certain pages to reveal the solution of riddles.
Press the "REVEAL" button (☐) to reveal a hidden answer and press again to hide it.
DOUBLING CHARACTER SIZE
Repeatedly pressing the "SIZE" button (☐) doubles the character size in the following order:
Upper half of the page => Lower half of the page => Normal size => Upper half of the page
MIX
By pressing the "MIX" button (☐), the teletext pages will be separated with the TEXT on the left of the TV picture.
Press the "MIX" button again to return back to teletext pages.
Assemble / separate parts
How to arrange the connecting lines and assemble/separate parts
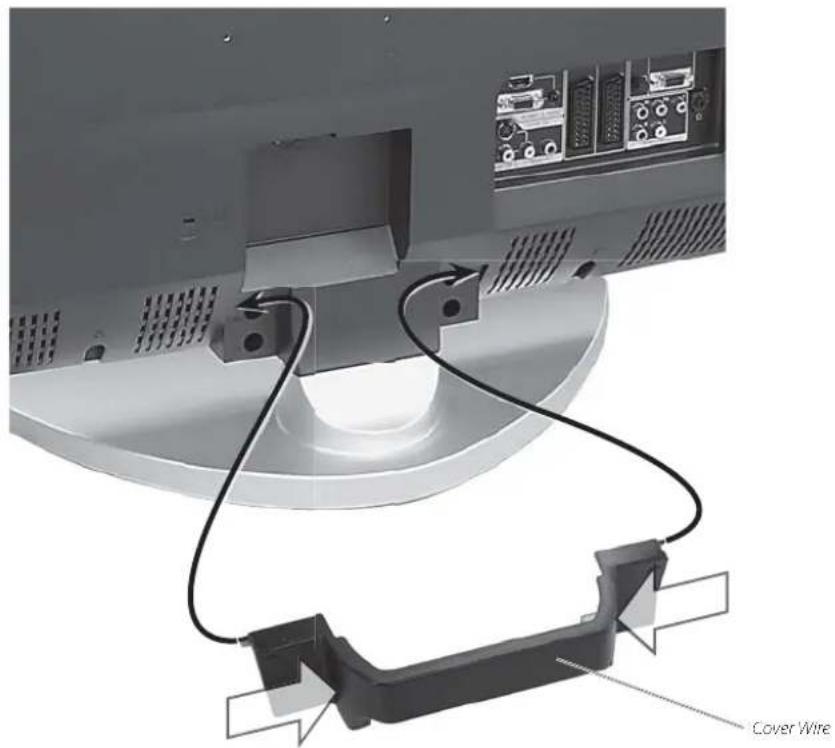
- COVER WIRE assembly, decomposition method.
- When separate: After pressing both sides to the direction of arrow, pull backward.
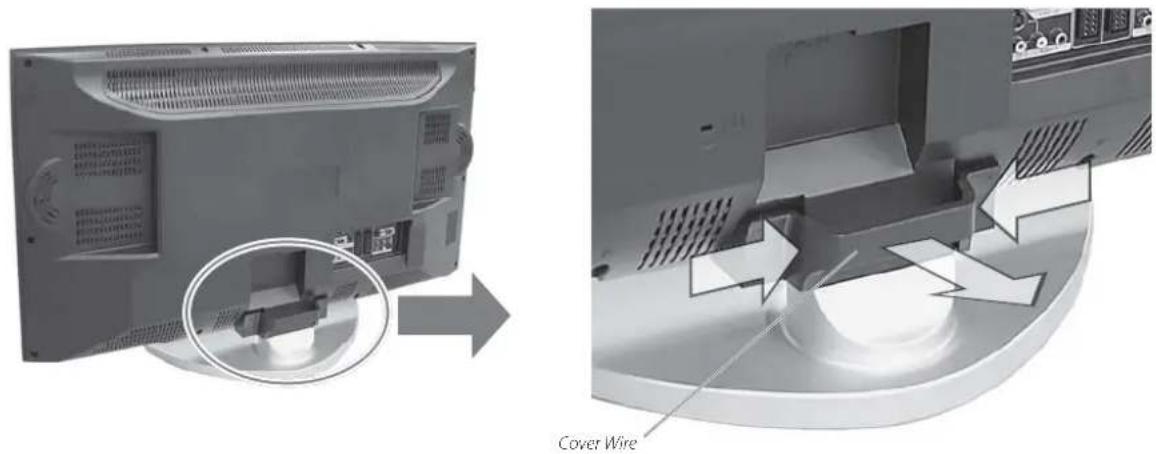
- When assemble: Push both sides of COVER WIRE, and insert two protrusions of both sides to the holes of COVER BACK
Assemble / separate parts
- How to arrange the connecting lines.
• After connecting the lines to the TV SET, you can pass the lines through the room of COVER WIRE, and then connect the lines to the other instruments

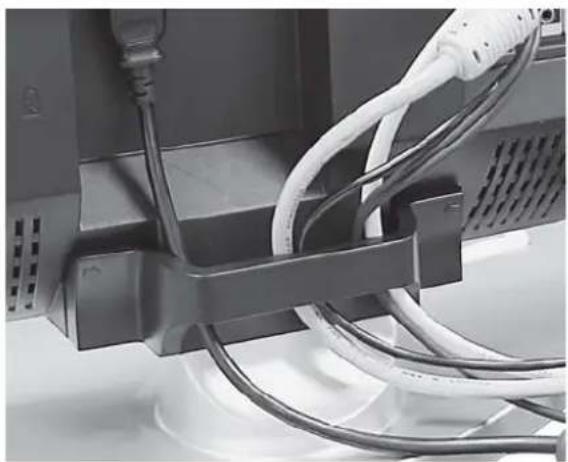
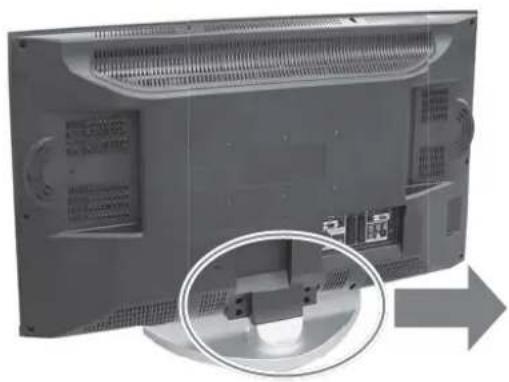
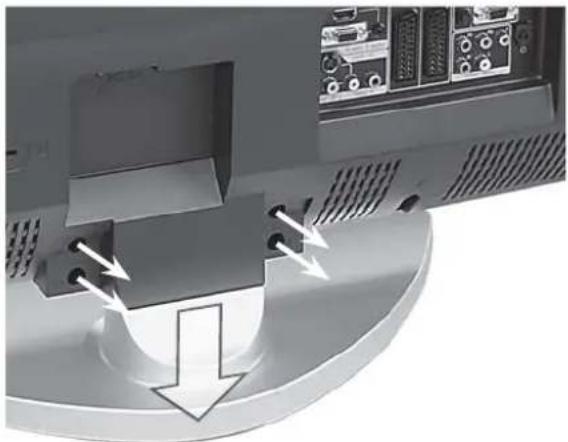
How to separate the STAND AS' from the TV SET and how to assemble/separate the COVER BOTTOM to/from the TV SET when using the wall mount
-
How to separate the STAND AS' from the TV SET.
-
Separate the COVER WIRE from the COVER BACK.
- Unscrew the 4 screw from the COVER BACK holes.
- Pull the STAND AS to the downside, separate the STAND AS from the COVER BACK.
Assemble / separate parts
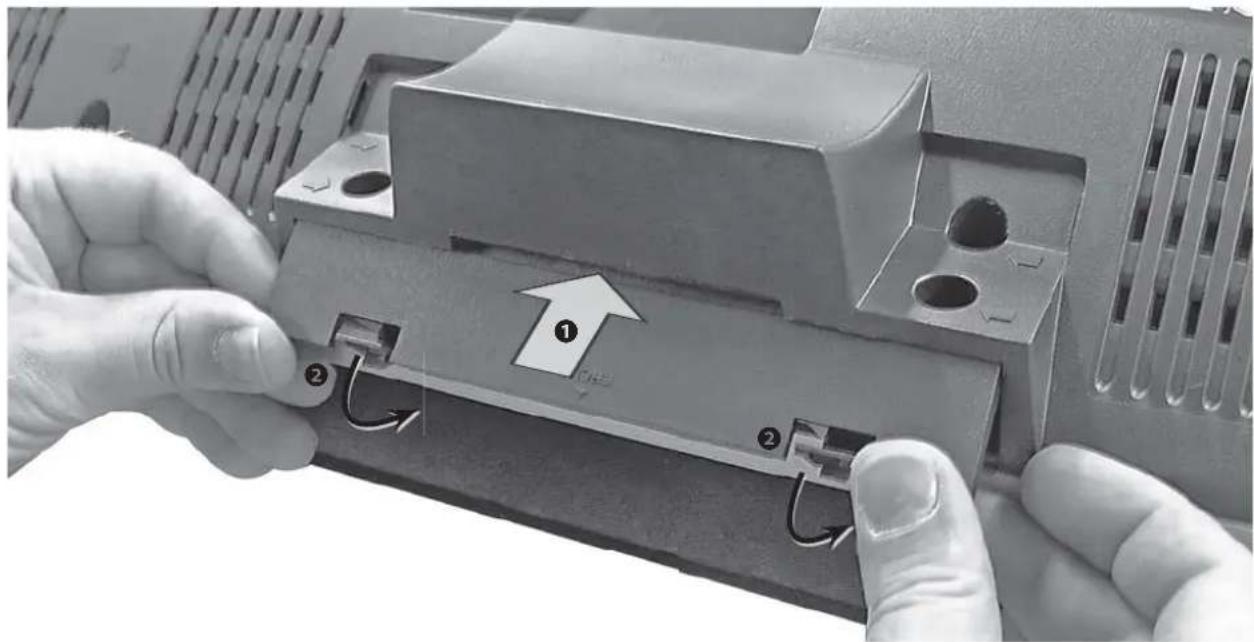
- How to assemble the COVER BOTTOM to the TV SET.
① Inset the backside hook of the COVER BOTTOM to the room of the COVER BACK.
② And then rotate the COVER BOTTOM until front snap-fit of the COVER BOTTOM is locked.
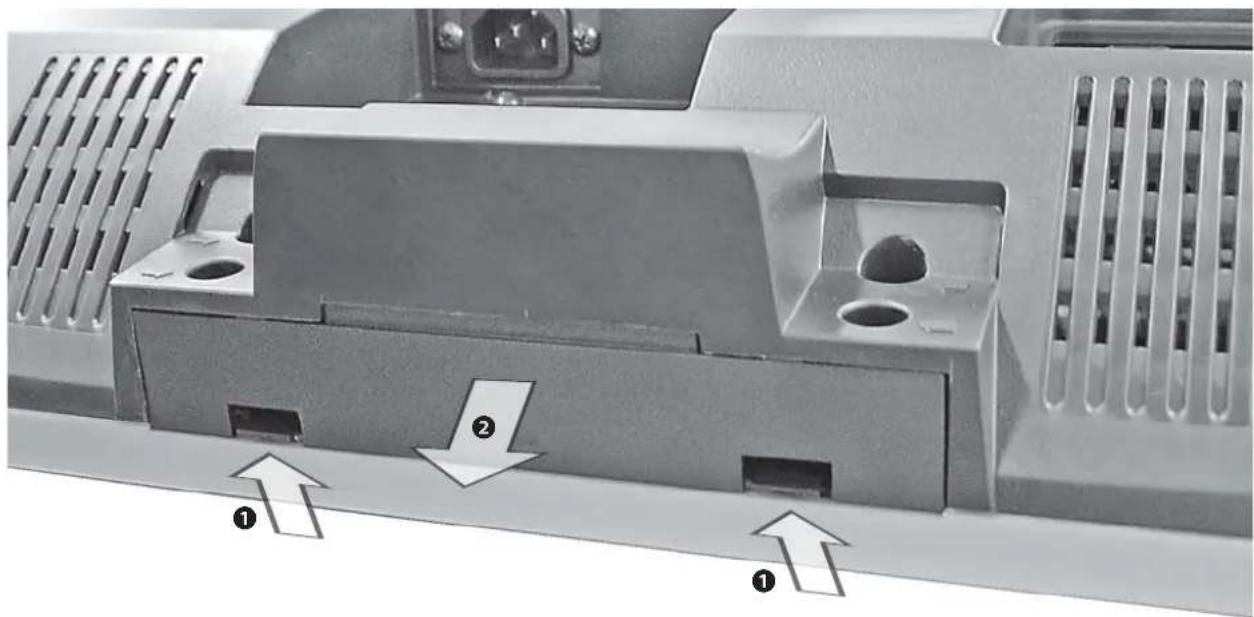
- How to separate the COVER BOTTOM from the TV SET.
① Push the two protrusions of COVER BOTTOM with one finger of each hand and then
② pull downside the COVER BOTTOM.
Troubleshooting
Symptoms and Solutions
Please check the following list prior to calling Daewoo Electronics Service Centre for assistance.
| Symptom Check items | |
Neither picture nor sound 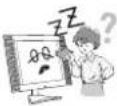 | - Check the contact of sockets is all right.- Check the TV main power is on. |
Picture is OK but no sound 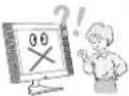 | - Check the Volume control is set to minimum or mute. |
Sound is OK, but no colour. 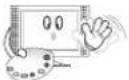 | - Check the colour control and adjust it properly.- Check the program is in colour and not in black & white. |
The picture has image. 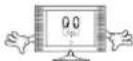 | - Check the antenna is installed correctly and if not, adjust the overlapped antenna toward the broadcasting station. |
Picture has “snow noise”. 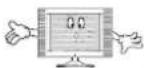 | - Check the antenna or its connection is correct and if not, correct the antenna fault or connection cable fault.- Check if car traffic or neon sign disturbs the sound effect. |
Stripes on picture. 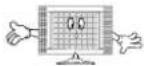 | - Check the susceptible interference by other electronic devices such as radio and television and keep magnetic or electronic devices away from the TV. |
Bad stereo or Dual sound. 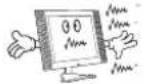 | - Long distance from the station or other radio waves can generate bad sound reception. If so, change the mode to Mono. |
Remote control does not work. 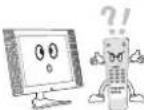 | - Check if the batteries in the Remote control are dead.- Check if any object between IR sensor of the TV and the Remote control does not obstruct. |
Troubleshooting
In PC mode
| Symptom Check items | ||
| "OUT OF RANGE" appears on the screen | 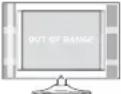 | - Check the resolution and frequency of your PC. Then, adjust them to optimum condition for LCD TV.- Refer to the table of PC mode input format (If registered resolution and frequency on the table no listed then no picture will be displayed.) |
| "NO SIGNAL" appears on the screen. | 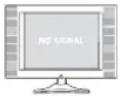 | - Ensure that the signal cable is firmly connected to PC and TV. |
| Image is not clear. | 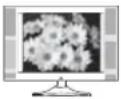 | - Adjust the PHASE control. |
| Image is not centered. |  | - Adjust the H-POSITION and V-POSITION control. |
• AFTER SALES SERVICE
Do not hesitate to contact your retailer or service agent if a change in the performance of your product indicates that a faulty condition may be present.
Standard of Product
| Model DLP-26C2 DLP-32C2 | |||
| LCD Panel Screen Size 26" 32" | |||
| Aspect Ratio 16:9 16:9 | |||
| Resolution 1366 x 768 (WXGA) 1366 x 768 (WXGA) | |||
| Pixel Pitch 0.4215 mm 0.51075 mm | |||
| Contrast Ratio 3000:1 3000:1 | |||
| Dimension (W x H x D) | Set Dimension | 812 X 502.7 X 240mm | 944 X 585.5 X 240mm |
| Power Consumption | Max. | 120W | 160W |
| TV System | PAL B/G, D/K, I/I, SECAM B/G, D/K, L/L; NTSC(AV) | ||
| Power Source | 110 -240V, 50-60Hz | ||
| Model DLP-26C3 DLP-32C1 / DLP-32C3 | |||
| LCD Panel Screen Size 25" 32" | |||
| Aspect Ratio 16:9 16:9 | |||
| Resolution 1366 x 768 (WXGA) 1366 x 768 (WXGA) | |||
| Pixel Pitch 0.4215mm 0 | 51075mm | ||
| Contrast Ratio 3000:1 3000:1 | |||
| Dimension (W x H x D) | Set Dimension | 676 X 548 X 230 mm | |
| Power Consumption | Max. | 120W | |
| TV System | PAL B/G, D/K, I/I, SECAM B/G, D/K, L/L; NTSC(AV) | ||
| Power Source | 110 -240V, 50-60Hz | ||
| Model DLP-37C3 DLP-42C1 | |||
| LCD Panel Screen Size 3 | 7" 42" | ||
| Aspect Ratio 16:9 16:9 | |||
| Resolution 1366 x 768 (WXGA) 1366 x 768 (WXGA) | |||
| Pixel Pitch 0.200 X 0.600 mm 0.227 X 0.681 mm | |||
| Contrast Ratio 3000:1 3000:1 | |||
| Dimension (W x H x D) | Set Dimension | 940 X 720 X 328.5 mm | 1060 X 823 X 328 mm |
| Power Consumption | Max. | 190W | 210W |
| TV System | PAL B/G, D/K, I/I, SECAM B/G, D/K, L/L; NTSC(AV) | ||
| Power Source | 110 -240V, 50-60Hz | ||
※ Owing to our policy of continuous improvement, specifications may change.

- DISPOSAL OF USED ELECTRICAL & ELECTRONIC EQUIPMENT (EUROPE ONLY)
- IMPORTANT SAFEGUARDS
- READ, RETAIN AND FOLLOW ALL INSTRUCTIONS
- HEED WARNINGS
- CLEANING
- ATTACHMENTS AND EQUIPMENT
- WATER AND MOISTURE
- SETTING
- VENTILATION
- POWER SOURCE
- GROUNDING OR POLARIZATION
- POWER-CORD PROTECTION
- LIGHTNING
- WALL OR CEILING MOUNTING
- POWER LINES
- OVERLOADING
- OBJECT AND LIQUID ENTRY
- OUTDOOR ANTENNA GROUNDING
- SERVICING
- DAMAGE REQUIRING SERVICE
- REPLACEMENT PARTS
- SAFETY CHECK
- HEAT
- WARNING
- CAUTION
- TABLE OF CONTENTS
- INSTALLATION AND MAINTENANCE
- BASIC GUIDE
- APPLICATION GUIDE
- SUPPLIED ACCESSORIES
- ANTENNA CONNECTION
- INDOOR ANTENNA CONNECTION
- CTV ANTENNA CONNECTION
- OUTDOOR ANTENNA CONNECTION
- VIDEO CONNECTION
- CONNECTING WITH AN EXTERNAL SOURCE
- CONNECTING WITH SCART VIDEO
- NOTE
- CAMCORDER & VIDEO
- GAME CONNECTION
- WATCHING THE CAMCORDER RECORDING ON TV
- DVD PLAYER
- CONNECTION
- WHEN CONNECTING WITH A COMPONENT CABLE AND EURO SCART CABLE
- WHEN CONNECTING WITH A S-VHS CABLE AND RCA CABLE
- STB(SET TOP BOX)
- PC
- WHEN CONNECTING WITH PC(D-SUB) CABLE
- WHEN CONNECTING WITH A HDMI CABLE
- PC CONNECTION
- PC CONNECTION NOTES
- CABLE TV BROADCASTING CONNECTION
- EXTERNAL INPUT CONNECTION SOURCE
- ANTENNA INPUT CONNECTION
- CONNECT WITH THE DOLBY DIGITAL AMP
- NAME OF
- EACH PART
- FRONT PANEL (DLP-26C2 / DLP-32C2)
- CONTROL KEY BUTTONS
- NAME OF EACH PART
- FRONT PANEL (DLP-26C3 / DLP-32C3 / DLP-37C3)
- FRONT PANEL (DLP32C1 / DLP-42C1)
- PARTS OF THE REMOTE
- CONTROLLER
- PARTS OF THE REMOTE CONTROLLER
- INSERTING BATTERIES INTO THE REMOTE CONTROL UNIT
- METHOD TO USE
- BASIC MENU
- PRESS THE "MENU" BUTTON
- PRESS THE "▼ PR ▲" BUTTON
- TO WATCH TV
- ON/OFF, NUMBER, MUTE, RECALL,◀/▶ ▼/▲
- PRESS THE "ON/OFF" BUTTON OF THE MAIN BODY
- PRESS THE "▼ BUTTON
- ADJUST VOLUME
- PRESS THE "POWER" BUTTON FOR TURNING THE TV OFF
- SETTING UP TV
- STATIONS
- AUTO TUNING
- PRESS THE "MENU" BUTTON TO SELECT THE INSTALL MENU
- SELECT THE "AUTO TUNING
- SELECT THE COUNTRY YOU REQUIRE WITH THE "◀VOL▶" BUTTON
- PLEASE WAIT UNTIL THE EDIT MENU APPEARS
- MANUAL TUNING
- SETUP
- THE SETUP MENU SHOWS YOU INFORMATION AS FOLLOWS
- SEARCHING FOR CHANNELS IN THE SETUP MENU
- ENTER A STATION NAME
- FINE TUNING
- EDIT
- THE EDIT MENU SHOWS YOU INFORMATION AS FOLLOWS
- DELETING THE PROGRAM POSITIONS
- MOVING THE PROGRAM POSITIONS
- SKIPPING THE PROGRAMS
- SELECTION OF AV AND MULTIMEDIA INPUT SIGNAL
- WHEN WATCHING VIDEO, CAMCORDER, DVD, CABLE TV WITH AV
- CAUTIONS IN MENU SETUP
- WHEN CONNECTING PC, STB, DVD WITH MULTIMEDIA
- PRESSING THE "MULTIMEDIA" BUTTON ON THE REMOTE CONTROLLER
- HDMI & PC MODE
- SCREEN ADJUSTMENT
- WHEN SETTING UP VARIOUS SCREEN MODES
- PRESSING THE "PICTURE" BUTTON
- WHEN ADJUSTING THE SCREEN TO TASTE
- SELECT "PICTURE" BY PRESSING THE "MENU" BUTTON
- SELECT AND ADJUST EACH ITEMS
- ADJUSTMENT OF SCREEN SIZE IN TV AND AV MODE
- PRESSING THE "ASPECT" BUTTON ON THE REMOTE CONTROLLER
- NOTICES
- ADJUSTMENT OF THE SCREEN IN THE PC MODE
- ADJUSTMENT OF THE H-POSITION
- ADJUSTMENT OF THE V-POSITION
- ADJUSTMENT OF THE PHASE
- AUTO ADJUSTMENT
- POP MODE
- POP MODE WHEN MAIN PICTURE IS TV AND AV
- POP MODE WHEN MAIN PICTURE IS MULTIMEDIA
- SOUND ADJUSTMENT
- WHEN SELECTING VARIOUS SOUND MODES
- SOUND MODE SELECTS WHAT YOU WANT
- WHEN ADJUSTING SOUND TO TASTE
- TO ADJUST THE AUDIO EQUALIZER
- SELECT 3D PANORAMA MODE
- SELECT DYNAMIC BASS MODE
- SELECT BALANCE MODE
- MULTI-SOUND AND STEREO
- MONO SOUND SELECTION
- ADJUSTMENT OF BILINGUAL SOUND
- SELECTION OF LANGUAGE
- ADJUSTMENT OF TIME
- SETTING THE CLOCK
- AUTOMATIC CLOCK SETTING AND CORRECTION
- SETTING THE WAKE UP TIME / PROGRAM
- SET UP OF OFF TIME
- SLEEP MODE
- OTHER FUNCTIONS
- SETUP OF CHILD LOCK
- SETUP OF MGDI DEMO
- TELETEXT
- SWITCHING TELETEXT ON/OFF
- ASSEMBLE / SEPARATE PARTS
- HOW TO ARRANGE THE CONNECTING LINES AND ASSEMBLE/SEPARATE PARTS
- HOW TO SEPARATE THE STAND AS' FROM THE TV SET AND HOW TO ASSEMBLE/SEPARATE THE COVER BOTTOM TO/FROM THE TV SET WHEN USING THE WALL MOUNT
- TROUBLESHOOTING
- SYMPTOMS AND SOLUTIONS
- IN PC MODE
- AFTER SALES SERVICE
- STANDARD OF PRODUCT
Brand : DAEWOO
Model : DLP-37C3
Category : Television