
AS20S2SD1FA - Air conditioner HAIER - Free user manual and instructions
Find the device manual for free AS20S2SD1FA HAIER in PDF.


| Product Type | Split Air Conditioner (Inverter) |
| Cooling Capacity | 2.0 kW (approx. 6800 BTU/h) |
| Heating Capacity | 2.2 kW (approx. 7500 BTU/h) |
| Energy Efficiency Ratio (EER) | 3.2 (Cooling) |
| Power Supply | 220-240V, 50Hz, 1 Phase |
| Indoor Unit Dimensions (WxHxD) | 790 x 275 x 225 mm |
| Outdoor Unit Dimensions (WxHxD) | 720 x 495 x 265 mm |
| Indoor Unit Weight | 9 kg |
| Outdoor Unit Weight | 22 kg |
| Refrigerant Type | R32 |
| Airflow Rate (High) | 550 m³/h |
| Noise Level (Indoor) | 28-38 dB(A) |
| Noise Level (Outdoor) | 51 dB(A) |
| Operating Temperature Range | Cooling: 16-32°C, Heating: -7-24°C |
| Key Functions | Cooling, Heating, Dehumidification, Fan, Auto, Sleep, Timer, Turbo |
| Fan Speeds | 3 (Low, Medium, High) + Auto |
| Remote Control | Included (Infrared) |
| Air Filter | Washable (Anti-bacterial, Deodorizing) |
| Filter Cleaning Indicator | Yes |
| Self-Cleaning Function | Yes (Anti-mildew) |
| Refrigerant Leakage Detection | Yes |
| Compressor Type | Rotary (Inverter) |
| Installation Type | Wall-mounted (Indoor), Floor/roof (Outdoor) |
Frequently Asked Questions - AS20S2SD1FA HAIER
User questions about AS20S2SD1FA HAIER
0 question about this device. Answer the ones you know or ask your own.
Ask a new question about this device
Download the instructions for your Air conditioner in PDF format for free! Find your manual AS20S2SD1FA - HAIER and take your electronic device back in hand. On this page are published all the documents necessary for the use of your device. AS20S2SD1FA by HAIER.
USER MANUAL AS20S2SD1FA HAIER
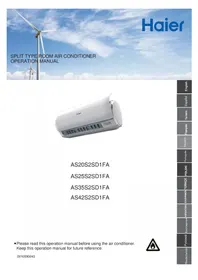
SPLIT TYPE ROOM AIR CONDITIONER OPERATION MANUAL

AS20S2SD1FA
AS25S2SD1FA
AS35S2SD1FA
AS42S2SD1FA
- Please read this operation manual before using the air conditioner. Keep this operation manual for future reference.
0010590043


Read the precautions in this manual carefully before operating the unit.

This appliance is filled with R32.
Keep this manual where the user can easily find it.
WARNING:
■ Do not use means to accelerate the defrosting process or to clean, other than those recommended by the manufacturer. ■ The appliance must be stored in a room without continuously operating ignition sources (for example: open flames, an operating gas appliance or an operating electric heater). ■ Do not pierce or burn. ■ Be aware that refrigerants may not contain an odour. ■ The appliance must be installed, operated and stored in a room with a floor area larger than 3 m². ■ If the supply cord is damaged, it must be replaced by the manufacturer, its service agent or similarly qualified persons in order to avoid a hazard. This appliance can be used by children aged 8 years and above and persons with reduced physical, sensory or mental capabilities or lack of experience and knowledge if they have been given supervision or instruction concerning use of the appliance in a safe way and understand the hazards involved. Children shall not play with the appliance. Cleaning and user maintenance shall not be made by children without supervision. ■The wiring method should be in line with the local wiring standard. All the cables shall have got the European authentication certificate. During installation, when the connecting cables break off, it must be assured that the grounding wire is the last one to be broken off. The explosion-proof breaker of the air conditioner should be all-pole switch. Distance between its two contacts should not be no less than 3mm. Such means for disconnection must be incorporated in the wiring. ■ Make sure installation is done according to local wiring regulation by professional persons. ■ Make sure ground connection is correct and reliable. ■ A leakage explosion-proof breaker must be installed. ■ Do not use a refrigerant other than the one indicated on the outdoor unit(R32) when installing, moving or repairing. Using other refrigerants may cause trouble or damage to the unit, and personal injury.
Contents
PARTS AND FUNCTIONS 1
OPERATION 2
INDOOR UNIT INSTALLATION 11
MAINTENANCE 14
CAUTIONS 15
TROUBLE SHOOTING 16
Parts and Functions
Indoor Unit

Actual inlet grille may vary from the one shown in the manual according to the product purchased.
Display board
1 Signal receiver hole ② HEAT display 3 DRY display 4 HEALTH display 5 COOL display 6 Ambient temp. display. When receiving the remote control signal, display the set temperature.

7 WIFI display 8 SENSOR display
Outdoor Unit

① OUTLET
③ CONNECTING PIPING AND ELECTRICAL WIRING
② INLET DRAIN HOSE
Remote controller
Outer side of the controller

- ECOPILOT button
- DRY button
Used to set DRY operation.
- COOL button Used to set COOL operation.
- TEMP button used to change setting temperature
NOTE:
a. Humidity display is unavailable on some models b. If the model you buy has a WIFI function, press the "ON/OFF" button for 5s to emit the WIFI binding signal. Once in the binding mode, the APP will show how to bind.
Operation

- buttonTIMER
- buttonCLOCK
- 10 °C button special heating set function: 10 degree heating maintaining (valuable for RS)
- HEALTH button
- SMART button Used to set SMART operation. (This function is unavailable on some models.)
- SWING up/down button
- SWING left/right button
- SLEEP button
- HEALTH AIRFLOW button
- LIGHT button Controls the lighting and extinguishing of the indoor LED display board.
- CODE button A-b yard
- APPLY button
- °F/°C button
Note:
- SMART+SLEEP: When the light sensing function is enabled, the appliance will be in the mode. If the appliance detects that indoor light is weak (lower than the setting value) for several minutes, the light sensing function works automatically. If the appliance detects no movements of people for 20 minutes, during which the light is weaker than the setting value, it will enter the "SMART+SLEEP" mode automatically. The appliance will operate as per the sleep curve. (See the "SLEEP" function in Page 7).
Conditions to exit:
1) The appliance detects that the indoor light is stronger than the setting value for 20 minutes. 2) The appliance is in the 8h "SMART + SLEEP" mode. 3) The "LIGHT SENSING" function is disabled.
When any of the above conditions is met, the appliance will exit from the "SMART+SLEEP" mode. Once out of the "SMART+SLEEP" mode, the appliance will operate under the operation status initially set on the remote controller.
Note: 1) This function is not available in the "AIR SUPPLY" mode.
2) This function is not available in the "SLEEP" mode. 3) When it is in the "REMOTE SLEEP" mode or the "TIMER" is on, the appliance will exit from this function. 4) Light sources like indoor lamps and TV's LED light, and frequent movements of pets will affect this function.
- Press "HEALTH"+"HEALTH AIRFLOW" simultaneously can set and cancel the "LOCK" function (💡)
Clock set

1. Press the CLOCK button.

2. Press "+" or "-" to set the correct time.

Each press will increase or decrease by 1 minute. If the button is kept pressed, the time will change quickly.
3. Confirm the time.

After the time setting is confirmed, press APPLY. "AM" and "PM" stop flashing, and the clock starts working.
Note:
The distance between the signal transmission head and the receiver hole should be within 7 m without any obstacles. When an electronic-started type fluorescent lamp or a change-over wireless telephone is installed in the room, the receiver is apt to be disturbed in receiving the signals, so the distance to the indoor unit should be shorter.
Full display or unclear display during operation indicates that the batteries have been used up. Please change the batteries. If the remote controller cannot run normally during operation, please remove the batteries and reload them several minutes later.
Hint:
Remove the batteries in case the unit will not be in use for a long period.
Operation
QUIET Operation


You can use this function when silence is needed for rest or reading.
For each press, √ is displayed. The air conditioner starts QUIET function operation. In QUIET operation mode, fan speed automatically takes the low speed of AUTO fan mode.
Press QUIET button again, the display disappears, and the operation stops.
COOL, HEAT and DRY Operation

Press the HEAT button on the remote control.
Press the DRY button on the remote control.
- In DRY mode, when room temperature becomes lower than the set temperature +2 °C, the unit will run intermittently at LOW speed regardless of the FAN setting.
- The remote controller can memorize each operation status. When starting it next time, just press the ON/OFF button and the unit will run in the previous status.
Operation


Press the FAN SPEED button. For each press, the fan speed changes as follows:
![graph LR A["Start"] --> B["Step 1"] B --> C["Step 2"] C --> D["Step 3"] D --> E["Step 4"] E --> F["Step 5"] F --> G["Step 6"] G --> H["Step 7"] H --> I["Step 8"] I --> J["Step 9"] J --> K["Step 10"] K --> L["End"]](/content/2026/06/1325290/images/4c34d8262ccc3506f82e415d828ad957c3e587aba387b5202c55ddb2bb3d5adf.jpg)
The unit will run at the selected fan speed.

Press the ECOPILOT button. For each press, it changes as follows:
![graph LR A[" "] --> B[" "] B --> C["cancel"]](/content/2026/06/1325290/images/ee237527e760dabdaa328da055b4834ecf520d320b70436f6581976e6a1fa33a.jpg)
People can choose the airflow to follow or avoid their movements.
NOTE:
A human sensor is used to detect changes in the infrared radiation emitted by human bodies. In case of the following conditions, the detection may not be accurate:
- High room temperature, where the ambient temperature is close to body temperature. • People wear a lot or lie on their stomach or back. • People wear a lot or lie on their stomach or back.
- Frequent movements of pets, or frequent swing of curtains or other indoor objects due to the wind. • The left and right deflectors deviate to the right.
- The left and right ends of the indoor unit are installed too close to the wall. • There is direct sunlight inside the room. The air conditioner operates in a room where ambient temperature fluctuates sharply.
Besides, if a person is at the border of two or three air blowing areas, the following air will be sent to these two areas respectively or be swept automatically. The avoiding air will avoid these two areas or be swept automatically.
Operation
Human Sensing Function
- "Follow" function: It can detect where a person is and adjust the swing flap accordingly and send air to the location of this person. If it detects people in two locations, the swing flap will blow alternatively between these two locations and stay at each location for 15s. If the appliance detects people in three or more locations, the left and right swing flaps will swing automatically.
"Avoid" function: When the appliance detects a person in a location, it will adjust the swing flap to avoid such a location. If it detects people in three or more locations, the left and right swing flaps will swing automatically. Note:
1) When there are people in several locations or a person frequently moves between several locations, if this person is in the in-between location or the crossing location, whether the appliance is in a "Follow" mode or an "Avoid" mode, the swing flap will swing automatically to send air to these locations. 2) Whether the setting is "Follow" or "Avoid", it takes some time to adjust their air direction after the appliance identifies the location of the people and the air direction will not change immediately. 3) If the actual airflow cannot reach (or avoid) the location where a person is due to such factors as fan speed setting, temperature setting, ambient temperature difference and layout of the room, pressing the left and right swing flaps can adjust the air direction and set the airflow direction by hand. 4) Set the health airflow when the human sensing (including follow/avoid) function is enabled and exit from the human sensing (including follow/avoid) function. 5) Press the upper and lower swing flaps when the human sensing (including follow/avoid) function is enabled, there is no upper and lower full swing status. 6) When the appliance is in the upper and lower full swing status, set the human sensing function (including follow/avoid), the upper and lower swing flaps are in their standard positions of relevant mode. 2. When the human sensing function is enabled, if the appliance cannot detect people for a long time (at least 20 minutes), it will automatically enter the power saving mode. In the power saving mode, the operating frequency will lower down and the fan speed is low. Once a person is detected, the appliance will exit from the power saving mode. 3. When the human sensing function is enabled, the appliance will have a real-time detection of human movements and adjust the frequency and fan speed according to the movements. In the heating mode, if the movements are frequent, the frequency and fan speed will lower down; when the movements become less, the frequency and fan speed will rise but cannot exceed the setting values set by the remote controller. The cooling mode is contrary to the heating mode.
HEALTH AIRFLOW Operation ECO PIL


The setting of health airflow function
1). Press the button of health airflow, appears on the display. Avoid the strong airflow blows direct to the body.
2). Press the button of health airflow again, 📄 appears on the display. Avoid the strong airflow blows direct to the body.

The cancel of the health airflow function
Press the button of health airflow again, both the inlet and outlet grills of the air conditioner are opened, and the unit goes on working under the condition before the setting of health airflow function. After stopping, the outlet grille will close automatically.
Notice:
Cannot pull direct the outlet grille by hand. Otherwise, the grille will run incorrectly. If the grille is not run correctly, stop for a minute and then start, adjusting by remote controller.
The remote controller can memorize each operation status. When starting it next time, just press the ON/OFF button and the unit will run in the previous status.
Note:
- After setting the health airflow function, the position of the inlet and outlet grilles is fixed.
- In heating, it is better to select the mode.
- In cooling, it is better to select the mode.
- In cooling and dry modes, using the air conditioner for a long time under high air humidity may cause water droplets to fall from the outlet grille.
- Select the appropriate fan direction according to the actual conditions.
Operation
SWING Operation

2. Left and right air flow direction

For each press of the "SWING" button, the remote controller displays as follows:
Remote controller:
Initial state
- When humidity is high, condensate water might occur at the air outlet if all vertical louvers are adjusted to the left or right.
- It is advisable not to keep the horizontal flap at the downward position for a long time in COOL or DRY mode; otherwise, condensate water might occur.
- As cold air flows downward in COOL mode, adjusting air flow horizontally will be much more helpful for a
TIMER Operation
Set Clock correctly before starting Timer operation. You can let unit start or stop automatically at the following times: Before you wake up in the morning, or get back from outside, or after you fall asleep at night.

1 min, if kept depressed, it will increase rapidly. It can be adjusted within 24 hours.
3 Confirming your setting.
After setting correct time, press APPLY button to confirm "ON" or "OFF" on the remote controller stops flashing.
To cancel TIMER mode Just press TIMER button several times until TIMER display disappears.
Operation
Comfortable SLEEP
Before going to bed, you can simply press the SLEEP button and unit will operate in SLEEP mode and bring you a sound sleep.


Press SLEEP button.
Operation Mode
- In COOL, DRY mode
1 hour after SLEEP mode starts, temp. will become 1 °C higher than temp. setting. After another 1 hour, temp. rises by 1 °C further. The unit will run for further 6 hours then stops. Temp. is higher than temp. setting so that room temperature won't be too low for your sleep.
![graph TD A["SLEEP operation starts"] --> B["Approx. 6hrs"] B --> C["1 hr"] C --> D["Rises 1 °C"] D --> E["1 hr"] E --> F["Rises 1 °C"] F --> G["Unit stop"] style A fill:#f9f,stroke:#333 style B fill:#ccf,stroke:#333 style C fill:#cfc,stroke:#333 style D fill:#fcc,stroke:#333 style E fill:#cff,stroke…](/content/2026/06/1325290/images/86f141c29199cf96ae9965bb2cec510b2ed16ca5f7d93869cce7b40e76c9f769.jpg)
2. In HEAT mode
1 hour after SLEEP mode starts, the temperature will become 2 °C lower than the set temperature. After another 1 hour, the temperature decreases by a further 2 °C. After another 3 hours, the temperature rises by 1 °C further. The unit will run for a further
3 hours then stops. The temperature is lower than the set temperature so that the room temperature won't be too high for your sleep.
![graph TD A["Temp. setting"] --> B["1 hr"] B --> C["Decreases 2 °C"] B --> D["1 hr"] D --> E["Decreases 2 °C"] D --> F["3 hrs"] F --> G["Rises 1 °C"] G --> H["3 hrs"] style A fill:#f9f,stroke:#333 style B fill:#ccf,stroke:#333 style C fill:#cfc,stroke:#333 style D fill:#fcc,stroke:#333 style E fill:#…](/content/2026/06/1325290/images/bd0c280c7054c152683046010f8d33a7519d2f09250e01ec009bd5fb568e0929.jpg)
3. In SMART mode
The unit operates in the corresponding sleep mode, which is adapted to the automatically selected operation mode.
- When the quiet sleeping function is set to 8 hours, the quiet sleeping time cannot be adjusted. When the TIMER function is set, the quiet sleeping function cannot be set up. After the sleeping function is set up, if the user resets the TIMER function, the sleeping function will be cancelled; the machine will be in the state of timing-on. If the two modes are set up at the same time, whichever operation time ends first, the unit will stop automatically, and the other mode will be cancelled.
Power Failure Resume Function
If the unit is started for the first time, the compressor will not start running unless 3 minutes have elapsed. When the power resumes after a power failure, the unit will run automatically, and 3 minutes later the compressor starts running.
Note to the power failure resume:
Press the sleep button ten times in five seconds and enter the function after hearing four sounds. And press the sleep button ten times within five seconds and leave this function after hearing two sounds.
Operation
SMART Operation ECO Operation

Automatic adjusting with the environmental temperature, running with power saving.


Press the ECO button " " is displayed on the remote controller, the unit will run in ECONOMY operation.

Press the ECO button
again, disappears,
the operation stops.
- SMART FRESH
- SMART Defrost
- SMART FAN SPEED • SMART FAN HEALTH
- SMART DRY
- SMART SOFT • SMART Control temperature

or SMART stops
Under the cooling, heating and dehumidifying mode, press the smart key to enter the smart function. Under the smart running mode, when the air conditioning is running, it will automatically select cooling, heating, dehumidifying or blowing mode as When the smart function is running, press the "cooling" "heating" or "dehumidifying" key to switch to the other mode, you will exit from the smart function.
- The power saving function only works under the cooling, heating or dehumidifying mode, after the power saving function is set, press the sharp, mute, sleep, or smart key to exit the power saving function.
- After the power saving is set, the host machine will automatically adjust the setting temperature, and automatically control the switch of the compressor, which may be inconsistent with the user's setting.
- The power saving function is more effective after the air conditioning has been running for a long time (more than 2 hours)
Operation
HEALTH Operation

The water-ion generator in the airconditioner can generate a lot of anion effectively balance the quantity of position and anion in the air and also to kill bacteria and speed up the dust sediment in the room and finally clean the air in the room.

Press HEALTH button
For each press, the air conditioner starts the health anion function operation.

Press the HEALTH button twice, the display disappears, and the operation stops.
When the indoor fan motor is running, it has a healthy process function. (It's available under any mode) When the fan in the indoor unit does not work, the health lamp lights up, but the anion generator does not release anions.
ON/OFF operation and test operation
ON/OFF Operation:
- Use this operation only when the remote controller is defective or lost. With the emergency running function, the air conditioner can run automatically for a while.
- When the emergency operation switch is pressed, a "Pi" sound is heard once, which indicates the start of this operation.
- When the power switch is turned on for the first time and emergency operation starts, the unit will run automatically in the following modes:
| Room temperature | Designated temperature | Timer mode | Fan speed | Operation mode |
| Above 24 °C | 24 °C No AUTO COOL | |||
| Below 24 °C | 24 °C No AUTO HEAT | |||

- It is impossible to change the settings of temperature and fan speed. It is also not possible to operate in timer or dry mode.
Test operation:
The test operation switch is the same as the emergency switch.
- Use this switch in the test operation when the room temperature is below 16 °C. Do not use it in normal operation.
- Continue to press the test operation switch for more than 5 seconds.
- Use this switch in the test operation when the room temperature is below 16 °C. Do not use it in normal operation. - Continue to press the test operation switch for more than 5 seconds.
After you hear the "Pi" sound twice, release your finger from the switch:
The cooling operation starts with the air flow speed "Hi".

Loading of the battery
1

Remove the battery cover;
2

Load the batteries as illustrated. 2 R-03 batteries, resetting key (cylinder); Be sure that the loading is in line with the “+”/“-”;
3

Load the battery, then put on the cover again.
IMPORTANT INFORMATION REGARDING THE REFRIGERANT USED

This product contains fluorinated greenhouse gases covered by the Kyoto Protocol. Do not vent into the atmosphere.
Refrigerant type: R32
GWP* value: 675
GWP = global warming potential
Please fill in with indelible ink,
• 1 the factory refrigerant charge of the product • 2 the additional refrigerant amount charged in the field and • 1+2 the total refrigerant charge on the refrigerant charge label supplied with the product. The filled out label must be adhered in the proximity of the product charging port (e.g. onto the inside of the stop value cover). A contains fluorinated greenhouse gases covered by the Kyoto Protocol B factory refrigerant charge of the product: see unit name plate C additional refrigerant amount charged in the field D total refrigerant charge E outdoor unit F refrigerant cylinder and manifold for charging
EUROPEAN REGULATIONS CONFORMITY FOR THE MODELS
Climate: T1 Voltage: 230V
CE
All the products are in conformity with the following European provisions:
- Low Voltage Directive 2014/35/EU
- Electromagnetic Compatibility 2014/30/EU
ROHS
The products fulfill the requirements of Directive 2011/65/EU of the European Parliament and of the Council on the restriction of the use of certain hazardous substances in electrical and electronic equipment (EU RoHS Directive).
WEEE
In accordance with the directive of the European Parliament, we hereby inform the consumer about the disposal requirements for electrical and electronic products.
DISPOSAL REQUIREMENTS:

Your air conditioning product is marked with this symbol. This means that electrical and electronic products shall not be mixed with unsorted household waste. Do not try to dismantle the system yourself: the dismantling of the air conditioning system, treatment of the refrigerant, of oil, and of other parts must be done by a qualified installer in accordance with relevant local and national legislation. Air conditioners must be treated at a specialized treatment facility for reuse, recycling, and recovery. By ensuring this product is disposed of correctly, you will help to prevent potential negative consequences for the environment and human health. Please contact the installer or local authority for more information. Batteries must be removed from the remote controller and disposed of separately in accordance with relevant local and national legislation.
Indoor Unit Installation
Necessary Tools for Installation
- Driver Nipper
- Hacksaw, hole core drill
- Spanner (17, 19 and 26 mm), gas leak detection soap-and-water solution
Torque wrench (17 mm, 22 mm, 26 mm), pipe cutter, flaring tool, knife, measuring tape, reamer
Power Source
Before inserting power into receptacle, check the voltage without fail. The power supply is the same as the corresponding nameplate. Install an exclusive branch circuit of the power. A receptacle shall be set up in a distance where the power cable can be reached. Do not extend the cable by cutting it.
Selection of Installation Place
Place, robust not causing vibration, where the body can be supported sufficiently. Place, not affected by heat or steam generated in the vicinity, where inlet and outlet of the unit are not disturbed. Place, possible to drain easily, where piping can be connected with the outdoor unit. Place, where cold air can be spread in a room entirely. Place, nearby a power receptacle, with enough space around. Place where the distance of more than 1 m from televisions, radios, wireless apparatuses and fluorescent lamps can be left. In the case of fixing the remote controller on a wall, place where the indoor unit can receive signals when the fluorescent lamps in the room are lightened.
| Remote controller (1) | Drain hose (1) |
| R-03 dry battery (2) | Plastic cap (4)∅4X25 Screw (4) |
| Mounting plate (1) | Air purifying filter(Optional) (1) |
Accessory Parts
| ntirely. | Selection of Pipe |
| FOR 09K 12K | Liquid pipe | 6.35x0.8mm |
| Gas pipe | 9.52x0.8mm | |
| FOR 18K | Liquid pipe | 6.35x0.8mm |
| Gas pipe | 12.7x0.8mm | |
| FOR 24K | Liquid pipe | 9.52x0.8mm |
| Gas pipe | 15.88x1.0mm |
Selection of Pipe
The models adopt HFC free refrigerant R32


If using the left side drain pipe, make sure the hole is got through.
The distance between the indoor unit and the floor should be obtained.
Please be subject to the actual product purchased, the above picture is just for your reference.
Indoor Unit Installation
1. Fitting of the Mounting Plate and Positioning of the Wall Hole
When the mounting plate is first fixed
- Carry out, based on the neighboring pillars or lintels, a proper leveling for the plate to be fixed against the wall, then temporarily fasten the plate with one steel nail.
- Make sure once more the proper level of the plate, by hanging a thread with a weight from the central top of the plate, then fasten securely the plate with the attachment steel nail.
- Find the wall hole location A/C using a measuring tape

[ Left • Left-rear piping ]
- In case of left side piping, cut away, with a nipper, the lid for left piping.
- In case of left-rear piping, bend the pipes according to the piping direction to the mark of hole for left-rear piping which is marked on heat insulation materials.
- Insert the drain hose into the dent of heat insulation materials of indoor unit.
- Insert the indoor/outdoor electric cable from backside of indoor unit, and pull it out on the front side, then connect them.
- Coat the flaring seal face with refrigerant oil and connect pipes. Cover the connection part with heat insulation materials closely, and make sure fixing with adhesive tape
- Insert the drain hose into the dent of heat insulation materials of indoor unit.
- Insert the indoor/outdoor electric cable from backside of indoor unit, and pull it out on the front side, then connect them.
- Coat the flaring seal face with refrigerant oil and connect pipes. Cover the connection part with heat insulation materials closely, and make sure fixing with adhesive tape

- Indoor/outdoor electric cable and drain hose must be bound with refrigerant piping by protecting tape.
[ Other direction piping ]
- Cut away, with a nipper, the lid for piping according to the piping direction and then bend the pipe according to the position of the wall hole. When bending, be careful not to crush the pipes.
- Connect the indoor/outdoor electric cable beforehand, and then pull out the connected part and insulate the connecting part specially.
Fixing the indoor unit body
● Hang the unit body surely onto the upper notches of the mounting plate. Move the body from side to side to verify its secure fixing. - In order to fix the body onto the mounting plate, hold up the body from the underside and then put it perpendicularly.
mounting plate
When the mounting plate is fixed to side bar and lintel
● Fix to side bar and lintel a mounting bar, which is separately sold, and then fasten the plate to the fixed mounting bar. - Refer to the previous article, "When the mounting plate is first fixed", for the position of the wall hole.
2 Making a Hole on the Wall and Fitting the Piping Hole Cover
● Make a hole of 70 mm in diameter, slightly descending to outside the wall. ● Install piping hole cover and seal it off with putty after installation.

(Section of wall hole) © Piping hole pipe
3 Installation of the Indoor Unit
Drawing of pipe
[ Rear piping ]
● Draw pipes and the drain hose, then fasten them with the adhesive tape.
Unloading of indoor unit body
- When unloading the indoor unit, use your hand to lift the body to release it from the mounting plate, then lift the bottom of the body outward slightly and lift the unit at an angle until it clears the mounting plate.

4 Connecting the indoor/outdoor electric cable
Removing the wiring cover
- Remove the terminal cover at the right bottom corner of the indoor unit, then take off the wiring cover by removing its screws.

When connecting the cable after installing the indoor unit
- Insert the cable from outside the room into the left side of the wall hole, where the pipe already exists.
- Pull the cable out on the front side, and connect the cable making a loop.
When connecting the cable before installing the indoor unit
- Insert the cable from the side of the unit, then pull it out on the front side.
- Loosen the screws and insert the cable ends fully into the terminal block, then tighten the screws. ● Pull the cable slightly to make sure the cables have been properly inserted and tightened. After the cable connection, always fasten the connected cable with the wiring cover.


To outdoor unit
Note:
When connecting the cable, confirm the terminal numbers of the indoor and outdoor units carefully. If the wiring is not correct, proper operation cannot be carried out and will cause defects.
| Connecting wiring | 4G1.0mm2 |
- If the supply cord is damaged, it must be replaced by the manufacturer or its service agent or a similarly qualified person. The type of connecting wire is H05RN-F or H07RN-F.
- If the fuse on the PC board is broken, replace it with the type T.3.15A/250VAC (Indoor).
- The wiring method should be in line with the local wiring standard.
- After installation, the power plug should be easily reached.
- A breaker should be incorporated into fixed wiring. The breaker should be all-pole switch and the distance between its two contacts should be not less than 3mm.
5 Power Source Installation
●The power source must be exclusively used for air conditioner. - In the case of installing an air conditioner in a moist place, please install an earth leakage breaker. ● For installation in other places, use a circuit breaker as far as possible.
6 Cutting and Flaring Work of Piping
● Pipe cutting is carried out with a pipe cutter and burs must be removed. ● After inserting the flare nut, flaring work is carried out.
| Flare tool for R410A | Conventional flare tool | ||
| Clutch-type | clutch-type(Rigid-type) | Wing-nut type (Imperial-type) | |
| A | 0~0.5mm | 1.0~1.5mm | 1.5~2.0mm |
Flare tooling die
1.Cut pipe
- Insert the flare nut

- Remove burs

4.Flare pipe
| Correct | Incorrect | ||||
| Lean | Damage of flare | Crack | Partial | Too outside | |
7 On Drainage
- Please install the drain hose so as to be downward slope without fail.
- Please don't do the drainage as shown below.

● Please pour water in the drain pan of the indoor unit, and confirm that drainage is carried out surely to outdoor. - In case that the attached drain hose is in a room, please apply heat insulation to it without fail.
8 On Drainage
 |
9 Check for Installation and Test Run
■ Please kindly explain to our customers how to operate through the instruction manual.
Check Items for Test Run
□ Put check mark √ in boxes
□Gasleakfrompipeconnecting? □ Heat insulation of pipe connecting? □Are the connecting wirings of indoor and outdoor firmly inserted to the terminal block? □Is the connecting wiring of indoor and outdoor firmly fixed? □Is drainage securely carried out? □Is the earth line securely connected? □Is the indoor unit securely fixed? □ Is power source voltage abided by the code? □Is there any noise? □Is the lamp normally lighting? Arecoolingandheating(wheninheatpump)perform □Is the operation of room temperature regulator normal?
Maintenance
For Smart Use of The Air Conditioner
Setting of proper room temperature | Do not block the air inlet or outlet |
| Close doors and windows during operationDuring cooling operation prevent the penetration of direct sunlight with curtain or blind | Use the timer effectively |
| If the unit is not to be used for a long time, turn off the power supply main switch.OFF | Use the louvers effectively |


Do not use the following for cleaning


Gasoline, benzine, thinner or cleanser may damage the coating of the unit.
Hot water over 40°C(104°F) may cause discoloring or deformation.
Air Filter cleaning
1. Press the "SMART" button for 5 seconds to partially raise the panel. 2. Open the panel by hand and support it with a holder. 3. Remove the filter. 4. Clean the filter. 5. Fit the filter. 6. Remove the holder and close the panel. 7. Long press the "SMART" button and the panel will automatically lower down and become closed.


Replacement of Air Purifying Filter
1. Open the Inlet Grille
Press the "SMART" button for 5 seconds to partially raise the panel.

2. Detach the standard air filter
Slide the knob slightly upward to release the filter, then withdraw it.

3. Attach Air Purifying Filter
Put air purifying filter appliances into the right and left filter frames.

4. Attach the standard air filter (Necessary installation)
ATTENTION:
The white side of the photocatalyst air purifying filter faces outside, and the black side faces the unit. The green side of the bacteria-killing medium air purifying filter faces outside, and the white side faces the unit.

5. Close the Inlet Grille
Long press the "SMART" button and the panel will automatically lower down and become closed.
NOTE:
- The photocatalyst air purifying filter will be solarized in fixed time. In normal family, it will be solarized every 6 months.
- The bacteria-killing medium air purifying filter will be used for a long time, no need for replacement. But in the period of using them, you should remove the dust frequently by using vacuum cleaner or flapping them lightly, otherwise, its performance will be affected.
- Please keep the bacteria-killing medium air purifying filter in the cool and dry conditions avoid long time directly sunshine when you stop using it, or its ability of sterilization will be reduced.
Cautions

WARNING
Please call Sales/Service Shop for the Installation.
Do not attempt to install the air conditioner by yourself because improper works may cause electric shock, fire, water leakage.

WARNING
When abnormality such as burnt-small found, immediately stop the operation button and contact sales shop.
OFF

STRICT
ENFORCEMENT
Use an exclusive power source with a circuit breaker

Check proper installation of the drainage securely
STRICT
ENFORCEMENT

Connect power supply cord to the outlet completely

STRICT
ENFORCEMENT
Use the proper voltage

STRICT ENFORCEMENT
- Do not use an extended power supply cord or connect it halfway.
- Do not install the unit in a place where there is any possibility of flammable gas leakage around it.
- Do not expose the unit to vapor or oil steam.
PROHIBITION
Do not use the power supply cord in a bundle.

PROHIBITION

PROHIBITION
Do not insert objects into the air inlet or outlet.

PROHIBITION
Do not start or stop the operation by disconnecting the power supply cord, etc.

PROHIBITION
Do not channel the air flow directly at people, especially at infants or the aged.

PROHIBITION
Do not try to repair or reconstruct by yourself.

Connect the earth cable.


CAUTION
Do not use for the purpose of storage of food, art work, precise equipment, breeding, or cultivation.

PROHIBITION
Take fresh air occasionally especially when gas appliance is running at the same time.

STRICT ENFORCEMENT
Do not operate the switch with wet hand.

PROHIBITION
Do not install the unit near a fireplace or other heating apparatus.


PROHIBITION
Check good condition of the installation stand

PROHIBITION
Do not pour water onto the unit for cleaning

PROHIBITION
Do not place animals or plants in the direct path of the air flow

PROHIBITION

PROHIBITION
PROHIBITION

Troubleshooting
Before asking for service, check the following first.
| Phenomenon | Cause or check points | |
| Normal Performance inspection | The system does not restart immediately. | When unit is stopped, it won't restart immediately until 3 minutes have elapsed to protect the system.When the electric plug is pulled out and reinserted, the protection circuit will work for 3 minutes to protect the air conditioner. |
Noise is heard | During unit operation or at stop, a swishing or gurgling noise may be heard.At first 2-3 minutes after unit start, this noise is more noticeable.(This noise is generated by refrigerant flowing in the system.)During unit operation, a cracking noise may be heard.This noise is generated by the casing expanding or shrinking because of temperature changes.Should there be a big noise from air flow in unit operation, air filter may be too dirty. | |
| Smells are generated. | This is because the system circulates smells from the interior air such as the smell of furniture, paint, cigarettes. | |
Mist or steam are blown out. | During COOL or DRY operation, indoor unit may blow out mist.This is due to the sudden cooling of indoor air. | |
| In dry mode, fan speed can't be changed. | In DRY mode, when room temperature becomes lower than temp. setting+2 °C,unit will run intermittently at LOW speed regardless of FAN setting. | |
| Multiple check |  | Is power plug inserted?Is there a power failure?Is fuse blownout? |
Poor cooling | Is the air filter dirty?Normally it should be cleaned every 15 days.Are there any obstacles before inlet and outlet?Is temperature set correctly?Are there some doors or windows left open?Is there any direct sunlight through the window during the cooling operation?(Use curtain)Are there too much heat sources or too many people in the room during cooling operation? |
Cautions
- Do not obstruct or cover the ventilation grille of the air conditioner. Do not put fingers or any other things into the inlet/outlet and swing louver.
- This appliance is not intended for use by persons (including children) with reduced physical, sensory or mental capabilities or lack of experience and knowledge, unless they have been given supervision or instruction concerning use of the appliance by a person responsible for their safety. Children should be supervised to ensure that they do not play with the appliance.
Specifications
• The refrigerating circuit is leak-proof.
The machine is adaptive in the following situations
- Applicable ambient temperature range:
| Cooling | Indoor | Maximum:D.B/W.B 32°C/23°CMinimum:D.B/W.B 21°C/15°C |
| Outdoor | Maximum:D.B/W.B 46°C/26°CMinimum:D.B -20°C | |
| Heating | Indoor | Maximum:D.B 27°CMinimum:D.B 15°C |
| Outdoor | Maximum:D.B/W.B 24°C/18°CMinimum:D.B/W.B -7°C/-8°C | |
| Outdoor(INVERTER) | Maximum:D.B/W.B 24°C/18°CMinimum:D.B -30°C |
- If the power supply cord is damaged, it must be replaced by the manufacturer or its service agent or a similar qualified person.
- If the fuse of indoor unit on PC board is broken, please change it with the type of T. 3.15A/250V. If the fuse of outdoor unit is broken, change it with the type of T.25A/250V
- The wiring method should be in line with the local wiring standard.
- After installation, the power plug should be easily reached.
- The waste battery should be disposed properly.
- The appliance is not intended for use by young children or infirm persons without supervision.
- Young children should be supervised to ensure that they do not play with the appliance.
- Please employ the proper power plug, which fit into the power supply cord.
- The power plug and connecting cable must have acquired the local attestation.
- In order to protect the units, please turn off the A/C first, and at least 30 seconds later, cutting off the power.
Haier
Address: No.1 Haier Road, Hi-tech Zone, Qingdao 266101 P.R.China
Contacts: TEL +86-532-8893-6943; FAX +86-532-8893-1010
Website: www.haier.com
① AIR OUTLET ② AIR INLET
③ PIPES
CONNECTION
WIRING
ELECTRICAL
④ DRAIN PIPE
■ Remote Control
Outer side of the remote control

① AIR OUTLET ② AIR INLET
③ PIPE
ELECTRICAL CONNECTION AND WIRING
④ DRAIN PIPE
Remote control
GWP=global warming potential
- SPLIT TYPE ROOM AIR CONDITIONER OPERATION MANUAL
- WARNING
- CONTENTS
- PARTS AND FUNCTIONS
- INDOOR UNIT
- DISPLAY BOARD
- OUTDOOR UNIT
- REMOTE CONTROLLER
- OUTER SIDE OF THE CONTROLLER
- NOTE
- OPERATION
- CLOCK SET
- HINT
- QUIET OPERATION
- COOL, HEAT AND DRY OPERATION
- HUMAN SENSING FUNCTION
- HEALTH AIRFLOW OPERATION ECO PIL
- NOTICE
- SWING OPERATION
- TIMER OPERATION
- COMFORTABLE SLEEP
- IN HEAT MODE
- IN SMART MODE
- POWER FAILURE RESUME FUNCTION
- NOTE TO THE POWER FAILURE RESUME
- SMART OPERATION ECO OPERATION
- HEALTH OPERATION
- ON/OFF OPERATION AND TEST OPERATION
- ON/OFF OPERATION
- TEST OPERATION
- LOADING OF THE BATTERY
- IMPORTANT INFORMATION REGARDING THE REFRIGERANT USED
- EUROPEAN REGULATIONS CONFORMITY FOR THE MODELS
- CE
- ROHS
- WEEE
- DISPOSAL REQUIREMENTS
- INDOOR UNIT INSTALLATION
- NECESSARY TOOLS FOR INSTALLATION
- POWER SOURCE
- SELECTION OF INSTALLATION PLACE
- ACCESSORY PARTS
- SELECTION OF PIPE
- FITTING OF THE MOUNTING PLATE AND POSITIONING OF THE WALL HOLE
- WHEN THE MOUNTING PLATE IS FIRST FIXED
- [ LEFT • LEFT-REAR PIPING ]
- [ OTHER DIRECTION PIPING ]
- FIXING THE INDOOR UNIT BODY
- MAKING A HOLE ON THE WALL AND FITTING THE PIPING HOLE COVER
- INSTALLATION OF THE INDOOR UNIT
- DRAWING OF PIPE
- [ REAR PIPING ]
- UNLOADING OF INDOOR UNIT BODY
- CONNECTING THE INDOOR/OUTDOOR ELECTRIC CABLE
- REMOVING THE WIRING COVER
- WHEN CONNECTING THE CABLE AFTER INSTALLING THE INDOOR UNIT
- WHEN CONNECTING THE CABLE BEFORE INSTALLING THE INDOOR UNIT
- POWER SOURCE INSTALLATION
- CUTTING AND FLARING WORK OF PIPING
- ON DRAINAGE
- CHECK FOR INSTALLATION AND TEST RUN
- CHECK ITEMS FOR TEST RUN
- MAINTENANCE
- FOR SMART USE OF THE AIR CONDITIONER
- DO NOT USE THE FOLLOWING FOR CLEANING
- AIR FILTER CLEANING
- REPLACEMENT OF AIR PURIFYING FILTER
- OPEN THE INLET GRILLE
- DETACH THE STANDARD AIR FILTER
- ATTACH AIR PURIFYING FILTER
- ATTACH THE STANDARD AIR FILTER (NECESSARY INSTALLATION)
- ATTENTION
- CLOSE THE INLET GRILLE
- CAUTIONS
- CAUTION
- TROUBLESHOOTING
- SPECIFICATIONS
- THE MACHINE IS ADAPTIVE IN THE FOLLOWING SITUATIONS
- HAIER
- REMOTE CONTROL
- OUTER SIDE OF THE REMOTE CONTROL
Brand : HAIER
Model : AS20S2SD1FA
Category : Air conditioner