
IAN 273428 - Grinder SILVERCREST - Free user manual and instructions
Find the device manual for free IAN 273428 SILVERCREST in PDF.


| Product Type | Electric Spice & Herb Grinder |
| Model Number | IAN 273428 |
| Brand | SilverCrest |
| Dimensions (approx.) | 10 x 10 x 15 cm |
| Weight | 0.5 kg |
| Power Supply | AC 230V, 50Hz, 150W |
| Capacity | Up to 50g of spices or herbs |
| Blade Material | Stainless Steel |
| Bowl Material | Stainless Steel |
| Lid Safety Lock | Yes - prevents operation without lid |
| Operating Modes | Pulse function |
| Cord Length | Approx. 1.0 m |
| Non-Slip Feet | Yes |
| Cleaning | Wipe with damp cloth; bowl and lid are hand washable |
| Maintenance | Keep blades clean and dry; do not immerse in water |
| Spare Parts | Available from customer service; blade set and bowl can be replaced |
| Warranty | 3 years |
Frequently Asked Questions - IAN 273428 SILVERCREST
User questions about IAN 273428 SILVERCREST
0 question about this device. Answer the ones you know or ask your own.
Ask a new question about this device
Download the instructions for your Grinder in PDF format for free! Find your manual IAN 273428 - SILVERCREST and take your electronic device back in hand. On this page are published all the documents necessary for the use of your device. IAN 273428 by SILVERCREST.
USER MANUAL IAN 273428 SILVERCREST
Operating instructios
GR CY
GB IE NI CY
Before reading, unfold the page containing the illustrations and familiarise yourself with all functions of the device.
GR CY
GB/IE/NI/CY Operating instructions Page 1
Safety instructions 3
Unpacking 5
Placement 6
Adjustment 6
Sharpening 6
Knife with smooth edge 7
Knife with serrated edge 7
Scissor sharpening 7
Flat-head screwdriver....7
Grinding directly on the grindstone 8
Cleaning and Care 8
Cleaning the appliance 8
Maintenance 9
Disposal....9
Kompernass Handels GmbH warranty ..... 10
Service 12
Importer 12
Introduction
Congratulations on the purchase of your new appliance. You have clearly decided in favour of a quality product. These operating instructions are a part of this product. They contain important information in regard to safety, use and disposal. Before using the product, familiarise yourself with all of these operating and safety instructions. Use the product only as described and only for the specified areas of application. In addition, pass these documents on, together with the product, to any future owner.
Intended use
This appliance is intended for the sharpening of knives, screwdrivers and scissors in domestic households. This appliance is not intended for commercial or industrial applications.
Items supplied
■ Electric All-Purpose Sharpener
Operating Instructions
Technical data
| Power consumption | 20 W max. |
| Mains voltage 230 V | ~, 50 Hz |
| Revolutions 3000 min | -1 |
| Protection class | II/☐ |
| C.O. Time 3 min. |
The C.O. Time (Continuous Operation) details how long an appliance may be used without the motor overheating and being damaged. When the specified C.O. Time has been reached, the appliance must be switched off until the motor has cooled itself down to room temperature (approx. 30 minutes).
Appliance description
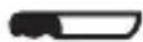
① Function "Knife with smooth edge"
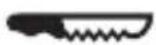
② Function "Knife with serrated edge"
③ Function "Scissor sharpening"
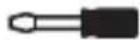
4 Grinder openings for slot-screwdrivers
5 Grindstone
6 Function and protective cap
⑦ Abrade collector
8 Switch

Safety instructions

DANGER – ELECTRIC SHOCK!
▶ Protect the appliance against moisture. Use it only in dry rooms, do not use it outdoors or in damp areas.
▶ Ensure that the power cable cannot be damaged when the appliance is in use, particularly not by sharpened knife or scissor blades.
▶ Arrange for defective power plugs and/or cables to be replaced as soon as possible by a qualified technician or by our Customer Service Department to avoid the risk of injury.
▶ NEVER open any housing components, other than those specified herein.

DANGER - ELECTRIC SHOCK!
▶ After use or during extended absences, ALWAYS remove the plug from the power socket. For as long as the plug is inserted in the wall socket the appliance itself is under electrical power.
▶ Ensure that the power plug is at all times easily accessible, so that it can be quickly and easily removed in the event of potential danger or risk.
WARNING! RISK OF INJURY!
▶ Always check to ensure that the appliance is in a serviceable condition before taking it into use. If there is recognisable damage to the appliance it may not be used. Arrange for it to be safety-checked by Customers Services before using it again.
▶ Take steps to ensure that hair, loose clothing and parts of the body do not come into contact with the revolving grindstone ⑤.
▶ Wear protective gloves so as to avoid injury from sharp blades, or, if you are operating the knife sharpener with the function and protective cap ⑥ removed.
This appliance may not be used by children.
WARNING! RISK OF INJURY!
The appliance should always be disconnected from the mains when not supervised and before assembly, disassembly or cleaning.
The appliance and its connecting cable must be kept away from children.
▶ Children must not play with the device.
This appliance may be used by people with reduced physical, sensory or mental capabilities or lack of experience and/or knowledge if they are supervised and have been instructed in how to use the appliance safely and have understood the potential risks.
Unpacking
- Check that all items listed are available and that they show no signs of visible damage.
■ Remove all parts from the packaging and all packaging remnants from the items.
■ Retain the packaging, either for storing the appliance or for reuse in the event of posting it to Customer Services for repair.
Before the first usage thoroughly clean all component parts as described in the section "Cleaning and care".
Placement
■ Place the appliance on a stable and slip-free surface.
■ Then insert the plug into the power socket.
Adjustment
To select the required sharpening function ① ② ③, turn the function and protective cap ⑥ until the cap perceptibly engages.
In position ② "Knife with serrated edge", the corresponding symbol points to the grinder opening (See Fig. C) – however, the cap engages at the point at the end of the symbol.
- Hold the switch ⑧ pressed down. The grindstone ⑤ revolves continuously until the switch ⑧ is released.
Sharpening
■ First present the blade when the grindstone ⑤ is revolving.
■ Always draw the knife or scissors back, from the blade stop, in an even movement, not in a repetitive back and forth movement – otherwise the result will be an uneven sharpening.
- Do not apply any great pressure and always sharpen only clean blades, so as to avoid a premature wearing-out of the grindstone.
■ Always sharpen knives and scissors so that the blade is at an acute angle to the grindstone (as alluded to in the shape of the opening). Sharpening at the false angle can destroy any blade.
■ After sharpening, remove any possible grinding remnants that may be on the blade with a moist cloth.
Knife with smooth edge
If you have selected the setting „Knife with smooth edge“ ① (Fig. B):
■ Always sharpen knives with a smooth edge on both sides – for this, left and right side sharpening guides are available.
In the left guide hold the knife inclined to the left, and in the right guide inclined to the right, whilst drawing the blade through.
Knife with serrated edge
If you have selected the setting "Knife with serrated edge" ② (Fig. C):
- Sharpen these only on the side with the serration – the draw through direction for the knife is dependant on which side of the blade this is on. The side with the serrated edge must be pointing in the direction of the grindstone ⑤ during sharpening.
In general, serrated blades can only be sharpened up to a point. Knifes with a fine sawtoothing (e.g. table knives) do not require sharpening.
Scissor sharpening ✗
If you have selected the setting "Scissor sharpening" ③ (Fig. D):
■ Sharpen both scissor blades one after the other. For this, open the scissors out and draw both blades, one after the other, through the guide.
Flat-head screwdriver
Should you wish to grind a slot-screwdriver ④ flat (Fig. E):
This is possible in every position of the function and protective cap ⑥. Appropriate to its width, insert the screwdriver through one of the two grinding openings ④ on the front of the function and protective cap ⑥ (see fold-out side). The end face of the screwdriver will now be ground level and flat.
Grinding directly on the grindstone
Certain edges can possibly be more easily sharpened directly on the grindstone ⑤, without the function and protective cap ⑥: For these cases, the function and protective cap ⑥ is removable (Fig. F):
■ Turn the function and protective cap ⑥ until the arrow ↔ is at the top. You can now take off the function and protective cap ⑥.
To replace the function and protective cap ⑥, hold it so that the arrow ↔ is once again at the top. You can now push the function and protective cap ⑥ on and secure it by turning it to the left or right.
Cleaning and Care
To avoid risks of personal injury and damage:
■ Before carrying out any maintenance work, first remove the plug from the wall socket.
■ NEVER submerse the appliance in water or other liquids! Additionally, there is a potentially fatal risk of electric shock should moisture come into contact with electrical components. These could damage the appliance.
Cleaning the appliance
■ Turn the function and protective cap ⑥, until the arrow ↔ is at the top. You can now remove the function and protective cap ⑥ and clean the area around the grindstone ⑤ with a dry brush.
Dismantle the abrade collector ⑦ and clean it with a brush and, if necessary, a lightly moistened cloth.
■ Clean the remaining parts of the appliance also with a lightly moistened cloth, not with abrasive or aggressive detergents. They can damage the surfaces.
To replace the function and protective cap ⑥, hold it so that the arrow ↔ is once again at the top. You can now push the function and protective cap ⑥ cap on and secure it by turning it to the left or right. To conclude, reassemble the abrade collector ⑦ into the appliance.
Maintenance
The appliance is maintenance-free. No form of maintenance, either on or in the appliance, is intended for execution by the user. In the event of malfunction or apparent damage, make contact with Customer Services.
■ For storage, wrap the power cable around the appliance housing (Fig. A).
Disposal
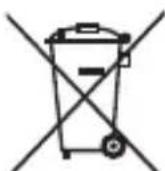
Do not dispose of the appliance in your normal domestic waste. This product is subject to the European guideline 2012/19/EU.
Dispose of the appliance through an approved disposal centre or at your community waste facility. Observe the currently applicable regulations. In case of doubt, please contact your waste disposal centre.

Dispose of all packaging materials in an environmentally friendly manner.
This appliance has a 3-year warranty valid from the date of purchase. If this product has any faults, you, the buyer, have certain statutory rights. Your statutory rights are not restricted in any way by the warranty described below.
Warranty conditions
The validity period of the warranty starts from the date of purchase. Please keep your original receipt in a safe place. This document will be required as proof of purchase.
If any material or production fault occurs within three years of the date of purchase of the product, we will either repair or replace the product for you at our discretion. This warranty service is dependent on you presenting the defective appliance and the proof of purchase (receipt) and a short written description of the fault and its time of occurrence.
If the defect is covered by the warranty, your product will either be repaired or replaced by us. The repair or replacement of a product does not signify the beginning of a new warranty period.
Warranty period and statutory claims for defects
The warranty period is not prolonged by repairs effected under the warranty. This also applies to replaced and repaired components. Any damage and defects present at the time of purchase must be reported immediately after unpacking. Repairs carried out after expiry of the warranty period shall be subject to a fee.
Scope of the warranty
This appliance has been manufactured in accordance with strict quality guidelines and inspected meticulously prior to delivery.
The warranty covers material faults or production faults. The warranty does not extend to product parts subject to normal wear and tear or fragile parts such as switches, batteries, baking moulds or parts made of glass.
The warranty does not apply if the product has been damaged, improperly used or improperly maintained. The directions in the operating instructions for the product regarding proper use of the product are to be strictly followed. Uses and actions that are discouraged in the operating instructions or which are warned against must be avoided.
This product is intended solely for private use and not for commercial purposes. The warranty shall be deemed void in cases of misuse or improper handling, use of force and modifications / repairs which have not been carried out by one of our authorised Service centres.
Warranty claim procedure
To ensure quick processing of your case, please observe the following instructions:
■ Please have the till receipt and the item number (e.g. IAN 12345) available as proof of purchase.
■ You will find the item number on the type plate, an engraving on the front page of the instructions (bottom left), or as a sticker on the rear or bottom of the appliance.
If functional or other defects occur, please contact the service department listed either by telephone or by e-mail.
■ You can return a defective product to us free of charge to the service address that will be provided to you. Ensure that you enclose the proof of purchase (till receipt) and information about what the defect is and when it occurred.

You can download these instructions along with many other manuals, product videos and software on www.lidl-service.com.
Service
GB Service Great Britain Tel.: 0871 5000 720 (£ 0.10/Min.) E-Mail: kompernass@lidl.co.uk
IE Service Ireland Tel.: 1890 930 034 (0,08 EUR/Min., (peak)) (0,06 EUR/Min., (off peak)) E-Mail: kompernass@lidl.ie
CY Service Cyprus Tel.: 8009 4409 E-Mail: kompernass@lidl.com.cy IAN 279058
Importer
Please note that the following address is not the service address. Please use the service address provided in the operating instructions.
KOMPERNASS HANDELS GMBH
BURGSTRASSE 21
44867 BOCHUM
GERMANY
www.kompernass.com
Περιεχόμενα
Εισαγωγή 14
KOMPERNASS HANDELS GMBH
BURGSTRASSE 21
44867 BOCHUM
GERMANY
www.kompernass.com
Inhaltsverzeichnis
Einleitung 26
Verwendungszweck 26
Lieferumfang 26
Technische Daten 26
KOMPERNASS HANDELS GMBH
BURGSTRASSE 21
44867 BOCHUM
GERMANY
www.kompernass.com
KOMPERNASS HANDELS GMBH
BURGSTRASSE 21
44867 BOCHUM
DEUTSCHLAND / GERMANY
www.kompernass.com

- GB IE NI CY
- GR CY
- Introduction
- Intended use
- Items supplied
- Appliance description
- Safety instructions
- DANGER – ELECTRIC SHOCK!
- DANGER - ELECTRIC SHOCK!
- WARNING! RISK OF INJURY!
- Unpacking
- Placement
- Adjustment
- Sharpening
- Knife with smooth edge
- Knife with serrated edge
- Scissor sharpening ✗
- Flat-head screwdriver
- Grinding directly on the grindstone
- Cleaning and Care
- To avoid risks of personal injury and damage:
- Cleaning the appliance
- Maintenance
- Disposal
- Do not dispose of the appliance in your normal domestic waste. This product is subject to the European guideline 2012/19/EU.
- Warranty conditions
- Warranty period and statutory claims for defects
- Scope of the warranty
- Warranty claim procedure
- Service
- Importer
- Περιεχόμενα
- Inhaltsverzeichnis
- KOMPERNASS HANDELS GMBH
Brand : SILVERCREST
Model : IAN 273428
Category : Grinder