
FGT-001 ZW5 EU - Thermostat Fibaro - Free user manual and instructions
Find the device manual for free FGT-001 ZW5 EU Fibaro in PDF.


| Product Type | Z-Wave Thermostat |
| Brand | Fibaro |
| Model | FGT-001 ZW5 EU |
| Dimensions | 86 x 86 x 28 mm |
| Weight | 150 g |
| Power Supply | 2x AA batteries (recommended) or 24V AC/DC |
| Wireless Protocol | Z-Wave Plus (500 series) |
| Wireless Range | Up to 30 m indoors (line of sight) |
| Operating Temperature | 0°C to 40°C (ambient) |
| Control Type | Rotary encoder with push button |
| Display | LCD, backlit |
| Temperature Sensor | Built-in NTC sensor |
| Setting Range | 5°C to 35°C |
| Accuracy | ±0.5°C |
| Schedule | 7-day programmable, up to 4 events per day |
| Compatibility | Z-Wave gateways (e.g., Home Center, Vera, SmartThings) |
| Maintenance | Clean with soft dry cloth; do not use liquids |
| Security Features | Overheat protection, low battery alert, child lock |
| Spare Parts | Not available as spare; replace device if faulty |
| Repairability | Not user-serviceable; no internal parts replaceable |
| Mounting | Wall mount (flush or surface box) |
| Standards | CE, EN 300 220, EN 301 489 |
Frequently Asked Questions - FGT-001 ZW5 EU Fibaro
User questions about FGT-001 ZW5 EU Fibaro
0 question about this device. Answer the ones you know or ask your own.
Ask a new question about this device
Download the instructions for your Thermostat in PDF format for free! Find your manual FGT-001 ZW5 EU - Fibaro and take your electronic device back in hand. On this page are published all the documents necessary for the use of your device. FGT-001 ZW5 EU by Fibaro.
USER MANUAL FGT-001 ZW5 EU Fibaro
1: Description and features 3
2: Basic activation 4
3: Adding to Z-Wave network 5
4: Removing the device 6
5: Controlling the temperature 7
6: Extra temperature sensor 8
7: Dismounting the device 9
8: Menu 10
9: Local protection 11
10: Head calibration 12
11: Standby Mode 13
12: Factory reset 14
13: Z-Wave range test 15
14: Battery and charging 16
15: Normal Schedules 17
16: Override Schedule 18
17: Z-Wave specification 19
18: Advanced parameters 23
19: Specifications 24
20: Accessory specification (FGBRS-001)26
21: Regulations 27
Important safety information

Read this manual before attempting to install the device!
Failure to observe recommendations included in this manual may be dangerous or cause a violation of the law. The manufacturer, Fibar Group S.A. will not be held responsible for any loss or damage resulting from not following the instructions of operating manual.
This product is not a toy. Keep away from children and animals! CR2032 coin cell battery is harmful if swallowed!
Battery pack warning!
The Heat Controller contains lithium-ion polymer battery pack, heed all following warnings:
- If an unusual odor or malfunction is detected, avoid sources of open flame and remove the device from the radiator.
- In the event of damage from crashes, etc., carefully remove to a safe place for at least a half hour to observe.
- Do not leave the device unattended while charging.
- Do not attempt to replace the battery!
General information about the FIBARO System
FIBARO is a wireless smart home automation system, based on the Z-Wave protocol. All of available devices can be controlled through a computer (PC or Mac), smartphone or tablet. Z-Wave devices are not only receivers, but can also repeat the signal, increasing the Z-Wave network's range. It gives advantage over traditional wireless systems that require direct link between transmitter and receiver, as a result the construction of the building could affect network's range negatively.
Every Z-Wave network has its unique identification number (home ID). Multiple independent networks can exist in the building without interfering. Transmission security of FIBARO System is comparable to wired systems.
Z-Wave technology is the leading solution in smart home automation. There is a wide range of Z-Wave devices that are mutually compatible, independently of manufacturer. It gives the system the ability to evolve and expand over time. For more information visit: www.fibaro.com.
#1: Description and features
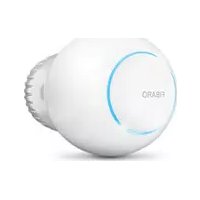
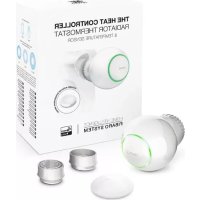
FIBARO Heat Controller is a remotely controlled thermostatic head to control temperature in your room. It measures the temperature and automatically adjust the heat level.
It can be mounted without tools on three types of thermostatic radiator valves.
You can create schedules via app to easily manage temperature throughout the week.
Main features of FIBARO Heat Controller:
- to be installed on three types of valves: M30 x 1.5, Danfoss RTD-N and Danfoss RA-N,
- compatible with any Z-Wave or Z-Wave+ Controller,
- supports Z-Wave network Security Modes: S0 with AES-128 encryption and S2 with PRNG-based encryption,
• built-in battery recharged through standard micro-USB port, - easy installation - no tools required,
- can use a dedicated temperature sensor - FGBRS-001,
• supports heating schedules,
• automatic calibration, - anti-freeze function,
- decalc function,
- unconstrained rotation spherical knob to set desired temperature.

FIBARO Heat Controller is a fully compatible Z-Wave PLUS device.
i NOTE
This device may be used with all devices certified with Z-Wave Plus certificate and should be compatible with such devices produced by other manufacturers.
i NOTE
Z-Wave Controller must support Z-Wave Security Mode in order to fully utilize the product.

NOTE
First charging may take up to 3 hours.

CAUTION
Install the device in horizontal position only!

CAUTION
Do not cover or veil the thermostatic head.
#2: Basic activation
- Connect the charger to the micro-USB port to charge the device.
If you have the temperature sensor:
a. Use a coin to open the battery cover by turning it counter-clockwise.
b. Remove the sticker underneath the battery.
c. Use a coin to close the battery cover by turning it clockwise.
- Disconnect the charger when the LED ring pulses green (device fully charged).
- Dismount your current thermostatic head.
- Depending on type of your thermostatic valve:
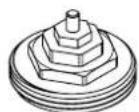
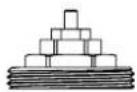
Proceed normally
M30 x 1.5
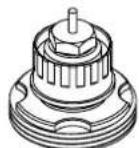

Use adapter:
Danfoss RTD-N
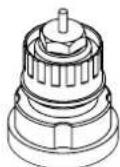
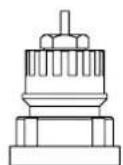
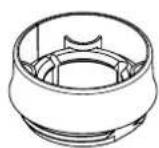
Use adapter:
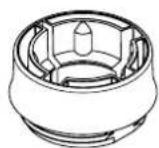
Danfoss RA-N
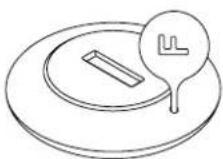
- Mount the device on the valve and tighten it by turning the cap clockwise.
- Use the included key to click the button.
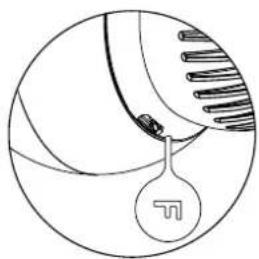
natural_image
Simple line drawing of a spherical object with internal lines and a hanging tag, no text or symbols present.- The LED ring will start blinking blue.
If you have the temperature sensor:
a. Click the button on it now.
b. The LED ring will blink green 5 times if the connection was successful.
#3: Adding to Z-Wave network
Adding (Inclusion) - Z-Wave device learning mode, allowing to add the device to existing Z-Wave network.
To add the device to the Z-Wave network:
- Make sure the device is within the direct range of your Z-Wave controller.
- Set the main controller in (security/non-security) add mode (see the controller's manual)
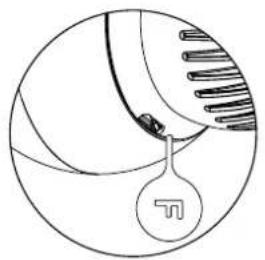
- Use the included key to quickly triple click the button on the thermostatic head.
natural_image
Diagram of a spherical object with internal structures and a hanging tag, no text or symbols present- The LED ring will start blinking white.
- If you are adding in S2 authenticated mode, type in the device pin code (underlined part of the public key on the label).
- Wait for the adding process to end.
- Successful adding will be confirmed by the Z-Wave controller.

NOTE
Removing the device from the Z-Wave network restores all the default parameters of the device.
#4: Removing the device
Removing (Exclusion) - Z-Wave device learning mode, allowing to remove the device from existing Z-Wave network.
To remove the device from the Z-Wave network:
- Make sure the device is within the direct range of your Z-Wave controller.
- Set the main controller into remove mode (see the controller's manual).
- Use the included key to quickly triple click the button on the thermostatic head.

natural_image
Simple line drawing of a basketball with a flag and ribbons, no text or symbols present.- The LED ring will start blinking white.
- Wait for the removing process to end.
- Successful removing will be confirmed by the Z-Wave controller.
#5: Controlling the temperature
You can set temperature using app (10-30°C) or directly on the device (16-24°C).
During manual temperature change LED ring colour corresponds to the temperature set-point.
To check and change the temperature on the device:
- Bring your hand close to the sphere.
-
LED ring will:
-
Glow if temperature was set manually,
- Pulse slowly if device is in schedule mode,
- Pulse quickly if device is in override schedule mode.
With colour depending on set temperature:
| Z-Wave Mode Temperature [°C] Colour | ||
| OFF | Valve closed (anti-freeze) | White |
| HEAT | 16°C or lower | Blue |
| 17°C | Azure | |
| 18°C | Cyan | |
| 19°C | Spring green | |
| 20°C | Green | |
| 21°C | Chartreuse | |
| 22°C | Yellow | |
| 23°C | Orange | |
| 24°C or higher | Red | |
| MANUFACTURER SPECIFIC | Valve fully opened | Magenta |
- Turn the sphere counter-clockwise to lower temperature or turn clockwise to raise the temperature.
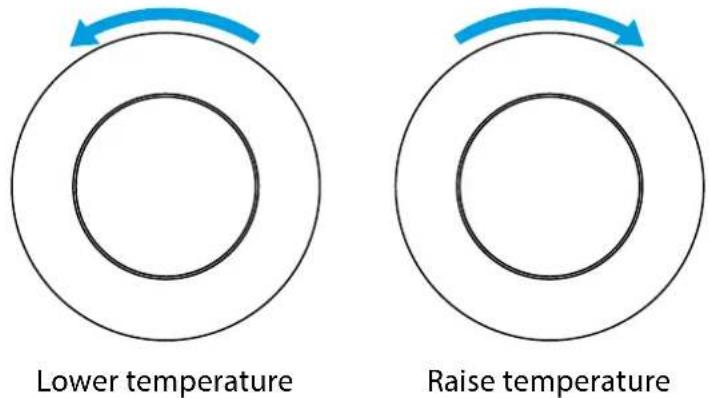
- Remove the hand from the sphere, after 5 seconds LED will fade and new temperature will be set.

NOTE
If device is currently during normal schedule, setting temperature manually will set Override Schedule (see "Override Schedule" on page 18).

NOTE
FGBRS-001 is the only compatible temperature sensor.

CAUTION
This product is not a toy. Keep away from children and animals!
#6: Extra temperature sensor
The device can be used with an additional, dedicated temperature sensor (FGBRS-001) to provide the best temperature regulation.
It can be placed anywhere in the room and the device will use it as a reference point for the room temperature.
Before using, the sensor must be paired with the thermostatic head. One thermostatic head can be paired with only one sensor, but one sensor can be paired with up to three thermostatic heads.
To pair the FGBRS-001 with the device:
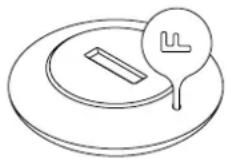
- Use the included key to press and hold the button.

natural_image
Diagram of a spherical object with internal structures and a hanging tag, no text or symbols present-
Release the button when you see blue LED colour.
-
Click the button to confirm the selection, the LED ring will start blinking blue.
-
Within 1 minute click button on the sensor.
-
The LED ring on thermostatic head will blink to confirm the result:
-
5 times green – sensor paired successfully,
-
5 times red – sensor not paired.
-
Place the sensor in same room as head, no further than 5 meters from it.
To remove all paired heads from the sensor's memory:
- Press and hold the button on the sensor for 2 seconds.
- The LED on the sensor will blink 3 times to confirm unpairing.
#7: Dismounting the device
Before dismounting, the device must be put in Standby Mode to ensure safe removal. See chapter „Standby Mode“ on page 13 for more information.
To dismount the device:
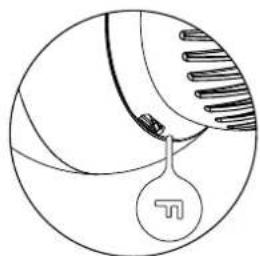
- Use the included key to press and hold the button.
natural_image
Simple line drawing of a basketball and a soccer ball with a flag (no text or symbols)-
Release the button when you see cyan LED colour.
-
Click the button to confirm the selection.
-
Turn the cap counter-clockwise and remove adapter if used.
-
Store the device in temperature: -10°C to 25°C.
#8: Menu
Menu allows to perform important configuration and maintenance actions. In order to use the menu:
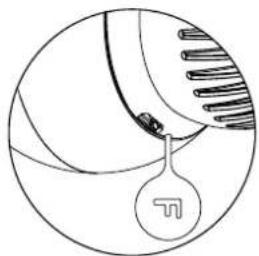
- Use the included key to press and hold the button.
natural_image
Simple line drawing of a basketball with a flag and a flag symbol (no text or labels)- Release the button when you see desired LED colour:
| Colour Action | |
| Blue pair dedicated temperature sensor | |
| Red | enable/disable local control protection |
| White perform | head calibration |
| Green | adding/removing to/from Z-Wave network |
| Magenta Z-Wave network's range test | |
| Cyan put device in Standby Mode | |
| Yellow factory reset | |
- Click the button to confirm the selection.
#9: Local protection
After enabling the local protection changing temperature directly on the device (by turning it) will not be possible.
Enabling local protection is recommended if you want to prevent accidental temperature change, e.g. by children.
When attempting to change temperature if local protection is enabled:
- The device will not set new target temperature,
• The LED ring will blink red 3 times.
To change the temperature use the app or disable the local protection.
To enable/disable local protection using the menu:
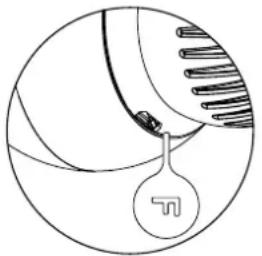
- Use the included key to press and hold the button.
natural_image
Diagram of a spherical object with internal structures and a hanging circular symbol (no text or labels)- Release the button when you see red LED colour.
- Click the button to confirm the selection.
i NOTE
Local protection can also be enabled/disabled using Z-Wave protocol Command Class Protection

NOTE
Calibration cannot be performed while the device is being charged.
#10: Head calibration
Calibrating the device to your radiator valve is required for proper controlling the temperature.
Calibration is performed:
- Automatically, after 10 minutes from turning on if no operation on the device has been made (only at first installation),
- Automatically, after 10 minutes from last state change (only at first installation),
- Manually, using the menu (see below),
- Manually, via application.
To perform calibration using the menu:
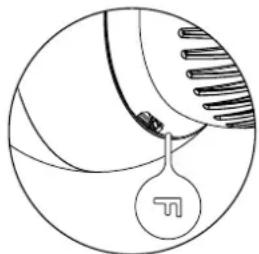
- Use the included key to press and hold the button.
natural_image
Simple line drawing of a spherical object with internal lines and a hanging tag, no text or symbols present.- Release the button when you see white LED colour.
- Click the button to confirm the selection.
#11: Standby Mode
In Standby Mode the device is in deep sleep state allowing safe dismounting, transporting and low as possible battery consumption.
The device is shipped in Standby Mode.
Entering the device in Standby Mode will not factory reset the device nor will result in loosing any data.
To enter Standby Mode:
- Use the included key to press and hold the button.

natural_image
Simple line drawing of a basketball court with a flag and patterned ribbons (no text or symbols)-
Release the button when you see cyan LED colour.
-
Click the button to confirm the selection.
To exit Standby Mode click the button once, the device will enter first installation procedure.
#12: Factory reset
Reset procedure allows to restore the device back to its factory settings, which means all information about the network and user configuration will be deleted.
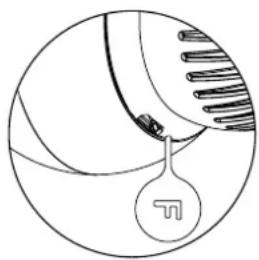
To perform factory reset:
- Use the included key to press and hold the button.
natural_image
Diagram of a mechanical or electrical component with a hanging tag and internal structure (no text or symbols)- Release the button when you see yellow LED colour.
- Click the button to confirm the selection.
- After finishing resetting the device will be put in Standby Mode. Click the button to activate it again.
#13: Z-Wave range test
The device has a built in Z-Wave network main controller's range tester.
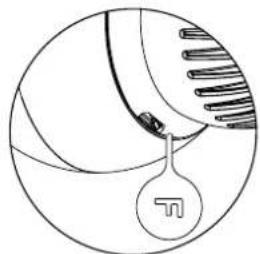
To perform range test:
- Use the included key to press and hold the button.
natural_image
Simple line drawing of a basketball with a flag and a tennis racket, no text or symbols present.-
Release the button when you see magenta LED colour.
-
Click the button to confirm the selection.
-
LED ring will indicate the Z-Wave network's range:
- Pulsing green - the device attempts to establish a direct communication with the main controller. If a direct communication attempt fails, the device will try to establish a routed communication, through other modules, which will be signaled by visual indicator pulsing yellow.
- Glowing green - the device communicates with the main controller directly.
- Pulsing yellow - the device tries to establish a routed communication with the main controller through other modules (repeaters).
- Glowing yellow - the device communicates with the main controller through the other modules. After 2 seconds the device will retry to establish a direct communication with the main controller, which will be signaled with visual indicator pulsing green.
- Pulsing magenta - the device does communicate at the maximum distance of the Z-Wave network. If connection proves successful it will be confirmed with a yellow glow. It's not recommended to use the device at the range limit.
- Glowing red - the device is not able to connect to the main controller directly or through another Z-Wave network device (repeater).
- To exit Z-Wave range test, press the button briefly.

CAUTION
Make sure you are using certified charger Class II, marked ☐ which complies with parameters specified in the manual.

CAUTION
Do not leave the device unattended while charging.

NOTE
Do not use cables longer than 3 meters for charging the device.
#14: Battery and charging
The device is equipped with a rechargeable lithium-polymer battery pack that can be charged via micro-USB port using standard 5V charger (not included).
When battery is low the LED ring will start to blink red. The device will also report low battery status of itself and dedicated temperature sensor (if paired) to the controller.
To charge the battery:
- Connect charger to the micro-USB port.
- During charging the LED ring will pulse red and valve control will be disabled.
- When LED starts pulsing green, disconnect the charger.
- The device will restore its previous operation.
#15: Normal Schedules
The device allows to create multiple heating schedules to manage temperature in the room throughout the week. Schedules are created via controller interface or app.
- Up to 253 normal schedules can be created.
- The lower the schedule ID number, the higher the priority.
- Schedules with higher priority override those with lower priority in case of overlapping schedules.
- Schedules can be disabled without deleting it.
- Schedules allow to set target temperature for HEAT mode (using Thermostat Setpoint CC) and one of operating modes: HEAT, OFF or MANUFACTURER SPECIFIC (using Thermostat Mode CC)
- Only SET commands are permitted.
To create normal schedules user must specify:
- Day of the week,
- Starting time (hour and minute),
- Duration,
- Temperature Setpoint for HEAT mode in range 10-30°C (using Thermostat Setpoint CC)
• One of the operating modes (using Thermostat Mode CC):
»HEAT for setting temperature,
» OFF for valve fully closed,
» MANUFACTURER SPECIFIC for valve fully opened.

NOTE
Schedule CC Set command payload must not be greater than 22 bytes limit or it would be rejected.
#16: Override Schedule
Override Schedule is a special type schedule that has the highest priority; thus it overrides other schedules.
The Override Schedule starts right after setting and lasts for specified time, then it is removed and current schedule or normal operation is restored.
To create Override Schedule user must specify:
- Starting time (START NOW),
- Duration,
- Temperature Setpoint for HEAT mode in range 10-30°C (using Thermostat Setpoint CC)
• One of the operating modes (using Thermostat Mode CC):
»HEAT for setting temperature,
» OFF for valve fully closed,
» MANUFACTURER SPECIFIC for valve fully opened.
Override Mode can be enabled in two ways:
- By turning the knob, while normal schedule is active. The LED ring will pulse with selected adjustment.
- Via controller, by creating schedule with ID set 255, start time set to NOW and duration (in minutes/hours/days).
To exit Override Mode grab knob with your hand for 5 seconds.
#17: Z-Wave specification
Endpoint 1:
Generic Device Class: GENERIC_TYPE_THERMOSTAT
Specific Device Class: SPECIFIC_TYPE_THERMOSTAT_GENERAL_V2
Description: represents thermostatic head, allows to set temperature, schedules and check its battery level.
Endpoint 2:
Generic Device Class: GENERIC_TYPE_SENSOR_MULTILEVEL
Specific Device Class: SPECIFIC_TYPE_ROUTING_SENSOR_MULTILEVEL
Description: represents dedicated temperature sensor, allows to check temperature and its battery level (if not paired reported temperature and battery level are always 0).
Response to Basic Command Class:
| Value Action | |
| 0 Set | OFF mode (unfreeze function) |
| 99 Set | HEAT mode (last set temperature) |
| 255 Set | MANUFACTURER SPECIFIC mode (valve fully opened) |
Association Command Class:
The device supports only "Lifeline" association group that reports the device status and allows for assigning single device only (main controller by default).
Supported Command Classes:
| Command Class Version Secure | ||
| ZWAVEPLUS_INFO [0x5E] V2 | ||
| ASSOCIATION [0x85] V2 YES | ||
| MULTI_CHANNEL_ASSOCIATION [0x8E] V3 YES | ||
| BASIC [0x20] V1 YES | ||
| APPLICATION_STATUS [0x22] V1 | ||
| THERMOSTAT_MODE [0x40] V3 YES | ||
| THERMOSTAT_SETPOINT [0x43] V3 YES | ||
| SCHEDULE [0x53] V1 YES | ||
| TRANSPORT_SERVICE [0x55] V2 | ||
| ASSOCIATION_GRP_INFO [0x59] | V2 YES | |
| DEVICE_RESET_LOCALLY [0x5A] | V1 YES | |
| MULTI_CHANNEL [0x60] | V4 YES | |
| SUPERVISION [0x6C] | V1 YES | |
| NOTIFICATION [0x71] | V8 YES | |
| MANUFACTURER_SPECIFIC [0x72] | V2 YES | |
| POWERLEVEL [0x73] | V1 YES | |
| PROTECTION [0x75] | V1 YES | |
| FIRMWARE_UPDATE_MD [0x7A] | V4 | |
| BATTERY [0x80] | V1 YES | |
| CLOCK [0x81] | V1 YES | |
| VERSION [0x86] | V2 YES | |
| SECURITY [0x98] | V1 | |
| SECURITY_2 [0x9F] | V1 | |
| CONFIGURATION [0x70] | V1 YES | |
| CRC_16_ENCAP [0x56] | V1 | |
| SENSOR_MULTILEVEL [0x31] | V5 YES |
Multichannel Command Class:
| Command Class Version Secure | ||
| Endpoint 1 | ||
| ZWAVEPLUS_INFO [0x5E] V2 | ||
| ASSOCIATION [0x85] V2 YES | ||
| MULTI_CHANNEL_ASSOCIATION [0x8E] V3 YES | ||
| BASIC [0x20] V1 YES | ||
| THERMOSTAT_MODE [0x40] V3 YES | ||
| THERMOSTAT_SETPOINT [0x43] V3 YES | ||
| SCHEDULE [0x53] V1 YES | ||
| ASSOCIATION_GRP_INFO [0x59] V2 YES | ||
| SUPERVISION [0x6C] V1 YES | ||
| NOTIFICATION [0x71] | V8 YES | |
| BATTERY [0x80] | V1 YES | |
| CLOCK [0x81] | V1 YES | |
| PROTECTION [0x75] | V1 YES | |
| SECURITY [0x98] | V1 | |
| SECURITY_2 [0x9F] | V1 | |
| Endpoint 2 | ||
| ZWAVEPLUS_INFO [0x5E] V2 | ||
| ASSOCIATION [0x85] | V2 YES | |
| MULTI_CHANNEL_ASSOCIATION [0x8E] V3 YES | ||
| SENSOR_MULTILEVEL [0x31] | V5 YES | |
| ASSOCIATION_GRP_INFO [0x59] V2 YES | ||
| SUPERVISION [0x6C] V1 YES | ||
| NOTIFICATION [0x71] | V8 YES | |
| BATTERY [0x80] | V1 YES | |
| SECURITY [0x98] | V1 | |
| SECURITY_2 [0x9F] | V1 | |
Notification Command Class:
The device uses Notification Command Class to report different events to the controller ("Lifeline" group).
Endpoint 1:
| Notification Type | Event Event Parameters | |
| Power Management [0x08] | Charge battery soon [0x0E] | |
| Charge battery now! [0x0F] | ||
| Battery is charging [0x0C] | ||
| Battery is fully charged [0x0D] | ||
| System [0x09] | System Hardware Failure [0x03] | External sensor remove [0x02] |
| Motor error [0x03] | ||
| Calibration error [0x04] |
Endpoint 2:
| Notification Type | Event Event Parameters | |
| Power Management [0x08] | Replace battery soon [0x0A] | |
| Replace battery now! [0x0B] |
#18: Advanced parameters
The device allows to customize its operation to user's needs. The settings are available in the FIBARO interface as simple options that may be chosen by selecting the appropriate box.
In order to configure the device (using the FIBARO Home Center controller):

- Go to the device options by clicking the icon:
- Select the „Advanced“ tab.
- Modify values of chosen parameters.
- Save the changes.
GENERAL SETTINGS
1. Override Schedule duration
This parameter determines duration of Override Schedule after turning the knob while normal schedule is active (set by Schedule CC).
| Available settings: | 10-10 000 (in minutes) | ||
| Default setting: | 240 (4h) | Parameter size: | 4 [bytes] |
2. Additional functions
This parameter allows to enable different additional functions of the device.
| Available settings: | 1 (bit 0) - enable Open Window Detector2 (bit 1) - enable fast Open Window Detector4 (bit 2) - increase receiver sensitivity (shortens battery life)8 (bit 3) - enabled LED indications when controlling remotely16 (bit 4) - protect from setting Full ON and Full OFF mode by turning the knob manually | ||
| Default setting: 1 P | parameter size: | 4 [bytes] | |
3. Additional functions status (READ-ONLY)
This parameter allows to check statuses of different additional functions.
| Available settings: | 1 (bit 0) - optional temperature sensor connected and operational2 (bit 1) - open window detected | ||
| Default setting: 0 P | parameter size: | 4 [bytes] | |
i NOTE
Entering invalid value of parameter will result in not setting the value and response with Application Rejected or Supervision CC frame (depending on the controller).
i NOTE
Parameter 2 values may be combined, e.g. 1+8=9 means that Open Window Detector and LED indications when controlling remotely are enabled.
i NOTE
Parameter 3 values may be combined, e.g. 1+2=3 means optional sensor works properly and open window detection was triggered.
#19: Specifications

NOTE
Charger type: Unit shall be supplied by a source certified as Limited Power Source (LPS) as defined in clause 2.5 of IEC60950-1 2nd edition + Amd. 1 + Amd. 2.
| Power supply: | SELV 3.7V Li-Poly battery pack (non-replaceable) |
| Charging port: | micro-USB |
| Charger voltage (not included): | 5V DC (±5%) |
| Minimum charger current (not included): | 0.5A |
| Operating temperature: | 0–40°C |
| Storage temperature (standby mode) | -10–25°C |
| Maximum water temperature: | 90°C |
| Temperature measuring accuracy: | 0.5°C (within 0–40°C range) |
| Regulator class: | Type 1 class |
| Device Firmware Class: | A-grade |
| Motor protection: | Impedance Protected |
| Actuator action: | Linear variable position actuator |
| Actuator stroke: | 5mm |
| Purpose of control: | Operating control |
| Construction of control: | Integrated control |
| Degree of protection by enclosure: | IP20 |
| Classification of control according to protection against electric shock: | Class III |
| Action type: | type 1 |
| Control pollution degree: | pollution degree 2 |
| Rated impulse voltage: | 330V (when connected to the USB power supply) |
| Dimensions (Diameter x Length): | 56 x 74 mm (without the adapter)56 x 87 mm (with the adapter) |
| EU Directive compliance: | RoHS 2011/65/EURED 2014/53/EU |
For communication with the controller:
| Radio protocol: | Z-Wave (500 series chip) |
| Radio frequency band: | 868 MHz ISM band (for EU) |
| Maximum transmit power: | EIRP up to -4dBm |
For communication with the extra sensor (FGBRS-001):
| Radio frequency band: | 2.4 GHz ISM band |
| Maximum transmit power: | EIRP up to 6dBm |
#20: Accessory specification (FGBRS-001)

CAUTION
Using batteries other than specified may result in explosion. Dispose of properly, observing environmental protection rules.

CAUTION
CR2032 coin cell battery is harmful if swallowed!
| Power supply: | CR2032, 3.0V battery (included) |
| Operating temperature: | 0–40°C |
| Storage temperature: | -10–40°C |
| Temperature measuring accuracy: | 0.5°C (within 0–40°C range) |
| Dimensions(Diameter x Height): | 38 x 12 mm |
| Radio frequency band: | 2.4 GHz ISM band |
| Maximum transmit power: | EIRP up to 6.5dBm |
| EU Directive compliance: | RoHS 2011/65/EURED 2014/53/EU |
#21: Regulations
Legal Notices
All information, including, but not limited to, information regarding the features, functionality, and/or other product specification are subject to change without notice. Fibaro reserves all rights to revise or update its products, software, or documentation without any obligation to notify any individual or entity.
FIBARO and Fibar Group logo are trademarks of Fibar Group S.A.
The Bluetooth word mark and logos are registered trademarks owned by Bluetooth SIG, Inc. and any use of such marks by Fibar Group S.A. is under license.
All other brands and product names referred to herein are trademarks of their respective holders.
Warning
This product is not a toy. Keep away from children and animals! CR2032 coin cells are harmful if swallowed!
Declaration of conformity
CE Hereby, Fibar Group S.A. declares that the device is in compliance with the essential requirements and other relevant provisions of Directive 2014/53/EU. The full text of the EU
declaration of conformity is available at the following internet address: www.manuals.fibaro.com
WEEE Directive Compliance
Device labelled with this symbol should not be disposed with other household wastes. It shall be handed over to the applicable collection point for the recycling of waste electrical and electronic equipment.


- 1: Description and features 3
- 2: Basic activation 4
- 3: Adding to Z-Wave network 5
- 4: Removing the device 6
- 5: Controlling the temperature 7
- 6: Extra temperature sensor 8
- 7: Dismounting the device 9
- 8: Menu 10
- 9: Local protection 11
- 10: Head calibration 12
- 11: Standby Mode 13
- 12: Factory reset 14
- 13: Z-Wave range test 15
- 14: Battery and charging 16
- 15: Normal Schedules 17
- 16: Override Schedule 18
- 17: Z-Wave specification 19
- 18: Advanced parameters 23
- 19: Specifications 24
- 20: Accessory specification (FGBRS-001)26
- 21: Regulations 27
- Important safety information
- Read this manual before attempting to install the device!
- This product is not a toy. Keep away from children and animals! CR2032 coin cell battery is harmful if swallowed!
- Battery pack warning!
- General information about the FIBARO System
- #1: Description and features
- Main features of FIBARO Heat Controller:
- i NOTE
- NOTE
- CAUTION
- #2: Basic activation
- If you have the temperature sensor:
- #3: Adding to Z-Wave network
- #4: Removing the device
- #5: Controlling the temperature
- To check and change the temperature on the device:
- #6: Extra temperature sensor
- #7: Dismounting the device
- To dismount the device:
- #8: Menu
- #9: Local protection
- To enable/disable local protection using the menu:
- #10: Head calibration
- Calibration is performed:
- To perform calibration using the menu:
- #11: Standby Mode
- To enter Standby Mode:
- #12: Factory reset
- To perform factory reset:
- #13: Z-Wave range test
- To perform range test:
- #14: Battery and charging
- To charge the battery:
- #15: Normal Schedules
- To create normal schedules user must specify:
- #16: Override Schedule
- To create Override Schedule user must specify:
- #17: Z-Wave specification
- Endpoint 1:
- Endpoint 2:
- Association Command Class:
- Notification Command Class:
- #18: Advanced parameters
- GENERAL SETTINGS
- Override Schedule duration
- Additional functions
- Additional functions status (READ-ONLY)
- #19: Specifications
- #20: Accessory specification (FGBRS-001)
- #21: Regulations
- Legal Notices
- Warning
- Declaration of conformity
- WEEE Directive Compliance
Brand : Fibaro
Model : FGT-001 ZW5 EU
Category : Thermostat