
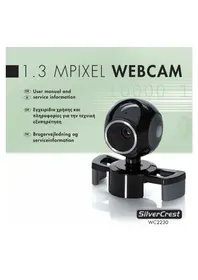
WC2230 - Webcam SILVERCREST - Free user manual and instructions
Find the device manual for free WC2230 SILVERCREST in PDF.


| Product Type | Webcam |
| Brand | SilverCrest |
| Model | WC2230 |
| Resolution | Full HD 1080p (1920 x 1080) at 30 fps |
| Frame Rate | 30 fps (max) |
| Field of View | 75° (diagonal) |
| Focus Type | Fixed focus |
| Built-in Microphone | Yes, mono |
| Connection | USB 2.0 Type-A |
| Cable Length | 1.5 m |
| Mounting | Clip-on for monitor/laptop or tripod mount (1/4 inch thread) |
| Compatibility | Windows, macOS, Chrome OS; Plug & Play (no driver needed) |
| Dimensions (W x H x D) | 95 x 45 x 50 mm |
| Weight | 120 g |
| Power Supply | Via USB (5V, 500 mA) |
| LED Indicator | Blue light when active |
| Privacy Shutter | No (manual lens cap included) |
| System Requirements | 1 GHz processor, 1 GB RAM, USB port, internet for drivers (optional) |
| Cleaning | Wipe lens with soft, dry cloth; do not use solvents |
| Ambient Temperature | 0°C to 40°C |
| Spare Parts Availability | Contact SilverCrest service for replacements |
| Repairability | Not user-serviceable; consult technician |
Frequently Asked Questions - WC2230 SILVERCREST
User questions about WC2230 SILVERCREST
0 question about this device. Answer the ones you know or ask your own.
Ask a new question about this device
Download the instructions for your Webcam in PDF format for free! Find your manual WC2230 - SILVERCREST and take your electronic device back in hand. On this page are published all the documents necessary for the use of your device. WC2230 by SILVERCREST.
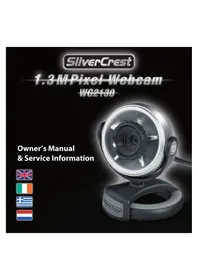
USER MANUAL WC2230 SILVERCREST
SilverCrest
WC2230
Contents
English....2
Greek....14
Danish....26
Overview
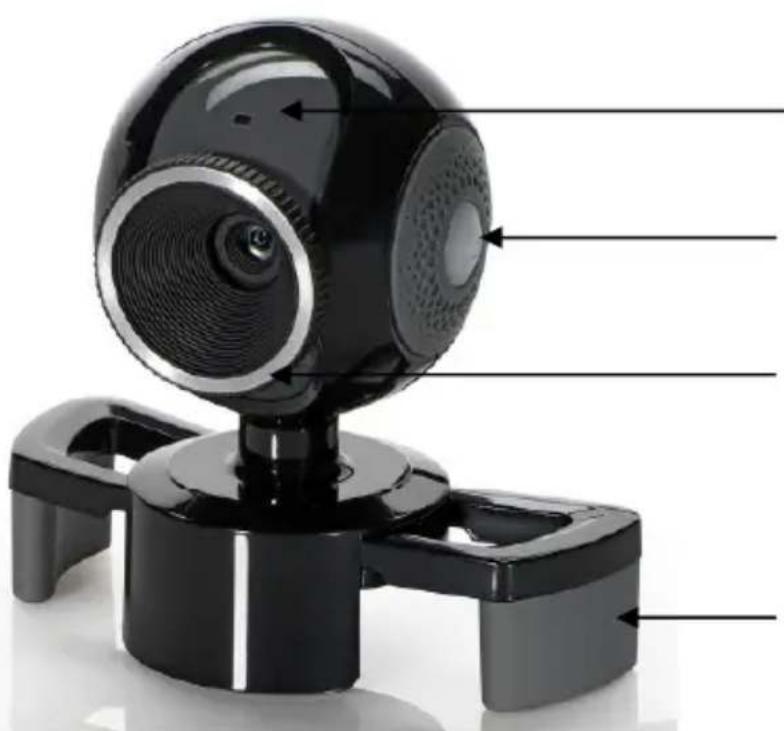
Microphone
Status LED (On = recording active) and Page key (requires the advanced device driver; Page 4)
Focus ring for adjusting the definition
Variable base
Package contents
- Webcam WC2230
- Software CD
- User instructions
Important notes
Before using the device for the first time, please read through the following instructions carefully and note all warnings, even if you are familiar with handling electronic equipment. Store this manual in a safe place for future reference. If you sell or give away the device, please ensure you hand over these instructions too.
OPERATING ENVIRONMENT
- The device is not designed for use in rooms with a high temperature or humidity (e.g. bathrooms) or excessive dust.
Please ensure that:
- no direct heat sources (e.g. heaters) act on the device
- the device is not exposed to direct sunlight or strong artificial light
- contact with splashing and dripping water and aggressive liquids is avoided
- the device is not exposed to large temperature fluctuations, otherwise humidity can condense
- the device is not exposed to excessive impacts and vibrations
- there are no naked flames or fire sources (e.g. burning candles) next to the device
MAINTENANCE AND CARE
Clean the device with a clean, dry cloth only. Never open the housing.
CHILDREN
Do not allow children to play with the webcam as if they swallow the small components there is a risk of suffocation.
DISPOSAL OF OLD DEVICES

If this symbol of a crossed-out wheeled bin is attached to a product, the product is subject to the European Directive 2002/96/EC. All waste electrical and electronic equipment must be disposed of separately from normal domestic waste in officially provided collection points. By properly disposing of old equipment you avoid environmental damage and a risk to your own personal health.
CE DECLARATION OF CONFORMITY

This device has been tested regarding compliance with the basic requirements and other relevant provisions of the EMC Directive 2004/108/EC.
Installing the Webcam
Connect the connector of the PC camera to the computer's USB connection.
(Example - figure)
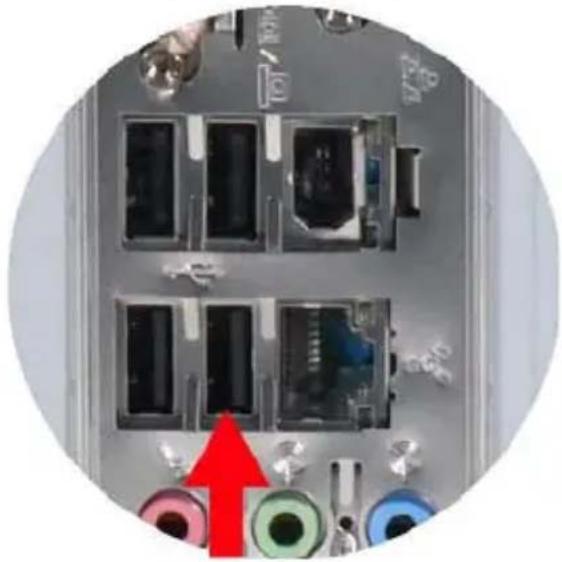
Ensure the connector is inserted correctly.
Windows automatically detects the webcam. It is not necessary to install drivers. To use the full functional scope of the webcam we recommend installation of the additional software (see following pages).
Note
If you use Windows Vista as your operating system, problems with the microphone can occur if a USB 1.1 connection is used. Please connect the webcam to a USB 2.0 connection.
Installing the Software
Please insert the software CD supplied in your CD/DVD drive. The CD starts automatically. If the installation window does not appear automatically, please right-click your CD/DVD drive in My Computer and select "Open". Then click "Setup.exe" to start the installation. In general you should follow the instructions on the screen.
Please select "Advanced Driver" first.

Installing the advanced device driver

Installation of the driver starts. Please click "Next" in the following window.

The software is now installed. This process can take a while.
Now click "Finish". Installation of the device driver is now completed.

Installing the application software
Please select the programs you wish to install from the menu of the software-CD and then click "Applications". The following programs are installed, depending on your selection.
Select the application software you wish to install. The installation steps are the same for each application software on the CD.
At the start of the installation, please select the language in which you wish to install the software and click OK.
Please click "Next" in the following window.
In the next window you must now click "Yes" to accept the licence agreement.
The target folder for the installation is then specified. Here you can select any folder or leave the default setting. Then click "Next".
At this point you can select at which position of the Start menu the program folder is deposited. Here too, please select a folder manually or leave the default setting and then click "Next".
The files required are now copied. This process can take several minutes.
Installation of the software is now completed. Please confirm this by clicking "Finish". Repeat the installation for any other software you require.
Closing the installation
After you have installed the required programs you should restart your computer. If you click "Exit" in the CD menu you can choose whether the computer is restarted directly or whether to do it yourself later.
USB-Webcam WC2230
SilverCrest
USB-Webcam Setup complete.
Recording Photos and Videos
After installing the advanced device driver you can start the webcam software by pressing the Page key.

Window: Video Capture Pin
Now point the camera at the required motif. In the main window of the webcam program you can see a live preview which enables you to precisely position the camera. Press the Page key to take the photo. You can then save the image with the menu item File / Save As....
The webcam also enables you to record films. To do this, select the item Options/Video Capture Pin from the menu. A window opens in which you can make the settings for your film. Select an individual frame
rate and an output size. You can equip your film, as well as the photos, with filters and effects under the Options/Video Capture Filter item. If you have made all the settings, close the window with the OK button.
You can specify where the videos are stored using the Files / Set Capture File... menu item. Now start recording with the menu item Capture/Start Capture. End the recording with Capture/Stop Capture and the video file is saved on the hard disk. The video can then be played with any video program, e.g. with the Windows Media Player.

Window: Video Capture Filter
Note
To use the Face Tracking feature, click the Zoom tab and set a tick next to Activate Face Tracking. Your face is automatically focussed in the preview and is enlarged to full window size.
First Steps with VideoImpression
When you start the program a Wizard is automatically opened which helps you to use the software. Select "Create a New Video" to start a recording with the webcam. A new window opens. It contains several options for compiling your video content.
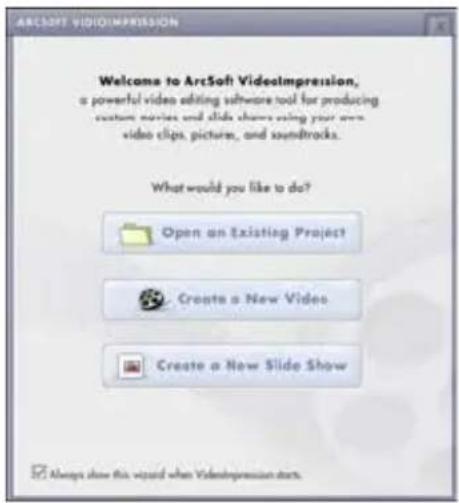

Here you can select which source you wish to use to create a video. If you want to record a video from the webcam, select "Transfer from device".
Another window opens in which the live image of the webcam is displayed. If the webcam image is not displayed you may have to select "USB 2.0 PC Camera" under Device. End the recording with "Finish".
If you want to see a complete introduction to using VideoImpression, select "Help" in the menu and then "Basics".
Note
If the image is out of focus, rotate the focus ring of the webcam until the image is focused.
First Steps with PhotoImpression
When you start the program a Wizard is automatically opened which helps you to use the software. Select "Camera/Scanner" to record and edit images with the webcam.

A new window opens. Select "USB 2.0 PC Camera" to display the current webcam image or select "Record" to save an image.
Interactive Help is available under the "Help" menu item.

An error message appears if you select "Camera/Scanner" and then "USB 2.0 PC Camera". This is because the webcam does not contain an internal memory from which the images can be read. At this point you can, e.g. read out a digital camera or read in an image from a scanner.
| 36 month warranty from date of purchase | 36 month warranty from date of purchase | United Kingdom |
| Important warranty informationSilverCrest | Important warranty informationSilverCrest | |
| Dear Customer,Thank you for purchasing a SILVERCREST product.Please carefully read through the enclosed documentation or online help before putting your SILVERCREST product into service. If you have a problem, which can't be solved in this way, please contact our hotline.If the problem cannot be solved over the phone, you will be given a reference number (RMA), which you should enclose together with a copy of the proof of purchase. After you have packaged the unit safe for transport and in plain packaging, please send it for warranty processing, with the FMA noted on the outside of the package, so the address given to you by our hotline employee. After receiving the unit we will correct the manufacturing and material defect free of charge.Up to date information and answers to the next frequently asked questions are available on the internet from:www.silvercrest.ccThis guarantee is valid in the IrelandYour statutory guarantees from the seller are in addition to this warranty and are not limited by it. | Dear Customers,Thank you for purchasing a SILVERCREST product.Please carefully read through the enclosed documentation or online help before putting your SILVERCREST product into service. If you have a problem, which can't be solved in this way, please contact our hotline.If the problem cannot be solved over the phone, you will be given a reference number (FMA), which you should enclose together with a copy of the proof of purchase. After you have packaged the unit safe for transport and in plain packaging please send it for warranty processing, with the FMA noted on the outside of the package, to the address given to you by our hotline employee. After receiving the unit we will correct the manufacturing and material defect free of charge.Up-to-date information are answers to the most frequently asked questions are available on the internet from:www.silvercrest.ccThis guarantee is valid in the UK.Your statutory guarantees from the seller are in addition to this warranty and are not limited by it. | www.silvercrest.cc |
| 36MONTH NARRIETYHotline number:01-2421583(Please have your initial number to hand) | 36MOUTH NARRIANTYHotline number:0207-3650744(Please have your serial number to hand) |
Summary

Microphone

Microphone
Check that the plug is inserted correctly.
Installation of application software

- CONTENTS
- OVERVIEW
- PACKAGE CONTENTS
- IMPORTANT NOTES
- OPERATING ENVIRONMENT
- MAINTENANCE AND CARE
- CHILDREN
- DISPOSAL OF OLD DEVICES
- CE DECLARATION OF CONFORMITY
- INSTALLING THE WEBCAM
- NOTE
- INSTALLING THE SOFTWARE
- INSTALLING THE ADVANCED DEVICE DRIVER
- INSTALLING THE APPLICATION SOFTWARE
- CLOSING THE INSTALLATION
- RECORDING PHOTOS AND VIDEOS
- FIRST STEPS WITH VIDEOIMPRESSION
- FIRST STEPS WITH PHOTOIMPRESSION
- SUMMARY
- INSTALLATION OF APPLICATION SOFTWARE
Brand : SILVERCREST
Model : WC2230
Category : Webcam