
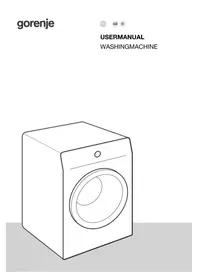
WA74SY2W - Washing machine GORENJE - Free user manual and instructions
Find the device manual for free WA74SY2W GORENJE in PDF.


| Product Type | Freestanding Washing Machine |
| Brand | Gorenje |
| Model | WA74SY2W |
| Dimensions (W x H x D) | 60 cm x 85 cm x 55 cm |
| Weight | 70 kg |
| Power Supply | 220-240 V, 50 Hz, 10 A |
| Energy Class | A++ |
| Capacity | 7 kg |
| Maximum Spin Speed | 1400 rpm |
| Number of Programs | 15 |
| Key Programs | Cotton, Synthetics, Delicates, Wool, Quick Wash, Rinse & Spin, Drain |
| Special Features | Child Lock, Delay Start, Time Save, Extra Rinse, Anti-Allergy |
| Display | LED digital display |
| Drum Material | Stainless steel |
| Safety Features | Overflow protection, Anti-flood system, Unbalanced load detection |
| Noise Level (Wash/Spin) | 58 dB / 78 dB |
| Annual Water Consumption | 9,000 L |
| Annual Energy Consumption | 200 kWh |
| Maintenance | Clean filter and detergent drawer regularly; run drum clean program |
| Spare Parts Availability | Available for up to 10 years after model discontinuation |
| Repairability Index | 8.0 / 10 |
Frequently Asked Questions - WA74SY2W GORENJE
User questions about WA74SY2W GORENJE
0 question about this device. Answer the ones you know or ask your own.
Ask a new question about this device
Download the instructions for your Washing machine in PDF format for free! Find your manual WA74SY2W - GORENJE and take your electronic device back in hand. On this page are published all the documents necessary for the use of your device. WA74SY2W by GORENJE.
USER MANUAL WA74SY2W GORENJE
Instructions for Use

We thank you for your trust and the purchase of our washing machine.
Your new washing machine complies with the requirements of modern laundry care. Your laundry will be impeccably white even at low temperatures.
Your washing machine is highly economical when it comes to use of power, water, and detergent.
The washing machine is intended exclusively for use in households, for washing the laundry that is indicated as machine washable.
Table of contents
| 4 | SAFETY PRECAUTIONS | INTRODUCTION |
| 10 | WASHING MACHINE | |
| 11 | Technical information | |
| 12 | Front panel | |
| 14 | INSTALLATION AND CONNECTION | PREPARINGTHEAPPLIANCEFOR THE FIRSTUSE |
| 14 | Removal of transport brackets | |
| 15 | Selecting the room | |
| 15 | Installation | |
| 17 | Water inlet connection | |
| 18 | Aqua-stop | |
| 18 | Total aqua - stop | |
| 19 | Water outlet connection | |
| 20 | Connect the appliance to the mains supply | |
| 21 | Moving and transport | |
| 21 | Subsequent transport | |
| 22 | BEFORE THE USE | |
| 23 | WASHING STEPS (1 - 7) | STEPS OF THEWASHINGPROCESS |
| 23 | 1. Step: Check the tags on your laundry | |
| 24 | 2. Step: Preparing the washing process | |
| 26 | 3. Step: Choosing a programme | |
| 28 | 4. Step: Choosing the settings | |
| 31 | 5. Step: Selecting additional functions | |
| 33 | 6. Step: Program start | |
| 33 | 7. Step: End of washing program | |
| 34 | CLEANING AND MAINTENANCE | CLEANING &MAINTENANCEOF THEAPPLIANCE |
| 34 | Cleaning the detergent dispenser | |
| 35 | Cleaning the dispenser housing, inlet hose screen and door rubbergasket | |
| 36 | Cleaning the filter | |
| 37 | Cleaning the washing machine | |
| 38 | INERRUPTING AND CHANCHING THE PROGRAM | TROUBLE-SHOOTING |
| 40 | What to do ...? | |
| 41 | Troubleshooting table | |
| 43 | RECOMMENDATIONS FOR WASHING AND ECONOMIC USE YOURWASHING MACHINE | OTHER |
| 45 | Grandma's advice for natural stain removal | |
| 47 | DISPOSAL | |
| 48 | TYPICAL CONSUMPTION TABLE |
SAFETY PRECAUTIONS

Please, do not use the washing machine without reading and understanding these instructions or use first.
Be sure to remove transport brackets prior first use of the appliance. Attempted operation of the blocked machine may result in irreparable damage which is not covered by the manufacturer's warranty!
When connecting your washing machine to water supply, be sure to use the supplied water inlet hose and sealing gaskets.
Failure to observe the instructions for use or inappropriate use of the washing machine may result in damage to the laundry or machine, or injury to the user. Keep the instructions for use handy, near the washing machine.
Do not install the machine in a room where temperature can drop below 0°C. Parts of the machine may be damaged if the water inside them freezes.
Install the washing machine in a perfectly horizontal position, on solid flat (concrete) floor.
Follow the instructions for correct installation and water and mains connections (see chapter "Installation and connections").
Never immerse the end of the drain hose into the draining water.
Before starting the washing cycle, lock the door by pressing it at the designated spot.
The door may not be opened during the washing cycle.
We recommend running the self-cleaning program before the first wash in order to remove any impurities from the washing machine drum. (See chapter on "Selecting additional functions".)
Use only detergents and softeners intended for machine wash.
The manufacturer may not assume responsibility for any damage and eventual discoloration of gaskets and plastic components as a consequence of incorrect use of bleach and/or coloring agents.
For removal of lime residues, use such agents with added anti-corrosion agents. Follow the manufacturer's instructions. Finish the lime removal by multiple rinsing to completely remove eventual acid residues (e.g., vinegar, etc.).
Never use detergents containing solvents, since there is a danger of creating toxic gases which may damage the machine and result in ignition or explosion.
This product does not release silver ions during the washing cycle.
Upon completion of the washing cycle, close the water faucet and unplug the mains cord.
Before transporting the machine after it has been used, block the drum by inserting at least one transport blocking rod. Disconnect the appliance from the mains power before inserting the rod!
The rating plate with basic information is located above the opening of the machine.
Leave any repairs and similar tasks on the washing machine to an expert. Unprofessional repair may result in an accident or major malfunction.
The warranty shall not apply to consumables, minor discoloration or deviations of color, increased noise level as a consequence of appliance age, which does not affect appliance functionality, and aesthetic deficiencies which do not affect appliance functionality or safety.
The appliance is intended exclusively for use in households. If the appliance is used for professional purposes, for profit, or for purposes beyond regular use in a household, or if the appliance is used by a person who is not a consumer, the warranty period equals the shortest warranty period possible as stipulated by the relevant legislation.
Children under 3 years should be kept away from the machine unless they are constantly supervised at all times.
The appliance is manufactured in compliance with all relevant safety standards.
This appliance can be used by children aged from 8 years and above and persons with reduced physical, sensory or mental capabilities or lack of experience and knowledge if they have been given supervision or instruction concerning use of the appliance in a safe way and understand the hazards involved. Children shall not play with the appliance. Cleaning and user maintenance shall not be made by children without supervision.
BEFORE CONNECTING THE WASHING MACHINE

Carefully read the instructions for use before connecting the washing machine. Repair or any warranty claim resulting from incorrect connection or use of the washing machine shall not be covered by the warranty.
The appliance is to be connected to the water mains using new hose-sets and that old hose-sets should not be reused.
To avoid hazard, damaged power cord may only be replaced by the manufacturer, authorized service technician, or other authorized person.
WASHING MACHINE
(WASHING MACHINE DESCRIPTION)
FRONT
1 Front panel 2 Dispenser 3 Door 4 Filter

BACK
1 Water inlet pipe 2 Power cord 3 Water discharge pipe 4 Adjustable feet

TECHNICAL INFORMATION
(DEPENDING ON THE MODEL)
The rating plate with the basic information on the washing machine is located under the washing machine door.
| Maximum load See rating plate See rating plate (SLIM) | ||
| Width | 600 mm 600 mm | |
| Height | 850 mm 850 mm | |
| Depth | 600 mm 440 mm | |
| Depth with door open | 108 cm 92 cm | |
| Washing machine weight | x kg(depending on the model) | x kg(depending on the model) |
| Rated Voltage | See rating plate See rating plate | |
| Nominal power | See rating plate See rating plate | |
| Connection | See rating plate See rating plate | |
| Water pressure | See rating plate See rating plate | |
| Current | See rating plate See rating plate | |
| Frequency | See rating plate See rating plate | |
Rating plate
TYPE: PS10/XXX MODEL: XXXXXX
Art.No.: XXXXXX Ser.No.: XXXXXX
AC 220-240V 50/60 Hz 10A Pmax.: 2400W
2000W XXX/min (Xkg0,05-0,8 MPa
IPX4


FRONT PANEL

1 Washing machine ON/OFF and program SELECTOR DIAL
2 TEMPERATURE INDICATION FOR THE SELECTED PROGRAM, displayed on the circumference of the knob


3 SPIN CYCLE RATE (RPM) SELECTION KEY
SPINNING RATE indicator LIGHTS
3a Regular spin 3b Minimum spin 3c Pumping without the spin cycle
4 START DELAY key
4a START DELAY display, or time remaining until the end of the washing cycle
3+4 SELF-CLEANING PROGRAM (STERILTUB)
5 ADDITIONAL FUNCTION KEYS
5a Prewash
5b Extra water
5c Eco care
5d CHILD LOCK indicator light (activation using the combination of keys 5b + 5c)
5b+5c
ACTIVATION AND
DEACTIVATION OF THE
CHILD LOCK
6 START/PAUSE key Use this key to start or stop the program.
When the machine is turned on, the signal light on the key starts to flash; when the program is started, it is lit continuously.
ACTIVATION AND
INSTALLATION AND CONNECTION
REMOVAL OF TRANSPORT BRACKETS

1 Move the pipes. Loosen screws at the rear of the machine.
2 Remove the brackets.
3 Slide brackets into the groove on the blocking rod - the right one should be turned around.
4 Use the brackets to rotate blocking rods for 90° and pull them out.

Be careful to prevent personal injury.
In removing the wrapping be careful not to damage the appliance with a sharp object.
Remove transport protection devices; as running the washing machine with the blocking rods in place could result in damage. Save transport brackets for eventual later use.
Warranty shall be void in cases of such damage.
SELECTING THE ROOM

The appliance should be placed on a surface with concrete base; the surface should be dry and clean in order to prevent slipping. The adjustable feet should also be cleaned before installation.
INSTALLATION
Use a water scale and spanner No. 32 (for feet) and 17 (for the nut).

1 Put the appliance in horizontal position by turning the adjustable legs. The legs are adjustable up to +/- 1 cm.
2 After adjusting the height of the feet, firmly tighten the jam nuts (counter nuts) using a spanner No 17, by turning them towards the bottom of the washing machine ↑(see figure).

Incorrect levelling of the washing machine with the adjustable legs may cause vibration, moving of the appliance across the space, and loud operation. Incorrect levelling of the washing machine is not subject to warranty.
If you have a tumble dryer of the same dimensions, you can place it on top of the washing machine by using the vacuum feet or side by side.


Before connecting the appliance, let it warm up to room temperature (wait at least two hours).
WATER INLET CONNECTION
Insert the gasket with a filter net into the straight inlet hose attachment nut and screw the nut onto the water tap (with some models, the gasket with filter net is already fitted and any additional fitting into the nut on the straight attachment is not required).


A
AQUASTOP
B
TOTAL AQUASTOP
C
REGULAR ATTACHMENT

To ensure correct operation of the appliance, water pressure inlet must be between 0.05 and 0.8 MPa. Minimum water pressure can be established by measuring the quantity of poured out water. 3 litres of water must be poured out from completely opened tap in 15 seconds.
If your model has connections for both hot and cold water, then connect one hose to the cold water supply (blue wing nut or blue mark on the hose) and the other one to the hot water supply (red wing nut or red mark on the hose), as indicated on the back wall of the appliance (letters C and H) (C - cold; H - hot).
Warm water (mixture of hot and cold water) is only added for programs at 60 °C or higher.
The inlet hose should be tightened manually (max. 2 Nm), firmly enough to prevent any leaks. After tightening the hose, check for any leaks. Use of pliers, wrenches, or other similar tools is not allowed when installing the hose, as these tools can damage the nut thread.
AQUA-STOP (CERTAIN MODELS ONLY)
In case of damage on the interior pipe, leaking is prevented by automatic closing system which stops water inlet to the machine. In such cases display (A) turns red. Inlet pipe must be replaced.

TOTAL AQUA - STOP (CERTAIN MODELS ONLY)
In case of damage to the interior pipe, leaking is prevented by an automatic closing system which stops water inlet to the machine. The protection system will also detect whether there is any water leakage in the washing machine interior. In such cases, washing is suspended, water supply is cut off, and the machine switches on the pump and signals an error.


Do not immerse the Aqua-stop system inlet pipe into water, because it contains the electric valve!
WATER OUTLET CONNECTION
Fix the drain hose to run into the sink or the bathtub, or connect it directly to the wall drain outlet (diameter min. 4 cm). The end of the outlet hose should be placed between minimum 60 cm and maximum 100 cm above the floor level. It can be attached in three ways (A, B, C).


A: Outlet hose can be led into a wash basin or a bathtub. Use a string to attach the hose to the opening in the elbow support to prevent it from slipping to the floor.
B: Drain hose can also be attached directly to the basin drain.
C: Drain hose can also be connected to a wall drain with a trap that is properly installed to allow cleaning.
CONNECT THE APPLIANCE TO THE MAINS SUPPLY

After it is installed for the first time, the washing machine should be left to stand still for two hours before it is connected to the power mains.
Use the power cord to connect the washing machine to the power mains through a power outlet. The washing machine may not be connected to the power mains through an extension cable (danger of overheating and fire). Nominal voltage and other information is given on the rating plate located under the door frame.
To prevent damage by excess voltage on the mains due to lightning strike, we recommend using a class I over-voltage protector between the machine and the mains.

The wall socket must be accessible at all times and must be equipped with an earth lead (in accordance with the local safety regulations).
The permanent connection must be fitted by authorized personnel only.
Never plug the appliance into the electric shaver socket or hair dryer socket.
MOVING AND TRANSPORT

After transport, the washing machine should be left to stand still for at least two hours before it is connected to the power mains.
We recommend that installation and connection should be done by a qualified person.
Before connecting the appliance, read the instructions for use. Repair or any warranty claim resulting from incorrect connection or use of the appliance shall not be covered by the warranty.
SUBSEQUENT TRANSPORT
Before transporting the washing machine, insert at least one blocking rod (transport protection) in order to avoid damage to the washing machine.
BEFORE THE USE
Open the door of the unplugged washing machine by pulling the lever towards you.

1

2

Clean the washing machine drum before using the appliance for the first time. Use a damp cloth and a mild cleaning agent, or run the self-cleaning program (SterilTub).
WASHING STEPS (1 - 7)
1. STEP: CHECK THE TAGS ON YOUR LAUNDRY
| Normal washDelicate wash | Max.washing95°C  | Max.washing60°C  | Max.washing40°C [5SZW] [5SZW] | Max.washing30°C  | Manual washing[B24A] | Washing not allowed |
| Whitening Whitening in cold water | Whitening not allowed | |||||
| Dry cleaning Dry cleaning in all solvents[A] | Perchloret-yhlene R11, R113,Petrolej[P] | Dry cleaning in kerosene, in pure alcohol and in R 113[F] | Dry cleaning not allowed | |||
| Ironing Hot iron max.200°C[IMAGE] | Hot iron max.150°C[IMAGE] | Hot iron max.110°C[IMAGE] | Ironing not allowed | |||
| Drying Place on flatsurface[—] | Hang wet[||||]Hang[IMAGE] | High temp.[IMAGE]Low temp.[IMAGE] | Tumble drying not allowed | |||
2. STEP: PREPARING THE WASHING PROCESS
- Sort the laundry by type of fabric, colour, soiling, and allowed washing temperature (see Program table).
- Close the buttons and zippers, tie any ribbons, and turn the pockets inside-out; remove any metal clips that could damage the laundry and washing machine interior, or clog the drain.
- Place very delicate laundry and small items in a special protective sack. (The special-purpose textile bag is available separately.)

SWITCHING ON THE WASHING MACHINE
Connect the washing machine to the power mains using the power cord, and connect it to water supply.
To light up the drum (certain models only), rotate the program selector dial to any position.

LOADING THE WASHING MACHINE
Open the door of the washing machine by pulling the lever towards you.
Load the laundry into the drum (check that the drum is empty).
Close the door of the washing machine.

1

2

3
3. STEP: CHOOSING A PROGRAMME
To select a program, rotate the program selector dial to the left or to the right (according to the type or how soiled the laundry is). See Program Table.


During operation, the dial will not rotate automatically.
Washing programs are complete programs that include all washing stages, including conditioning and spinning.
PROGRAM TABLE
| Program: °C Type of laundry Possible | combinations | Max. load | |||
| Cotton: Non-sensitive cotton and linen | • spinning• normal• eco care□• prewash*• extra water(*except for at 20°C) | 7 kg/6 kg6 kg" | |||
 | Heavily soiled | 95° | laundry (towels, underwear, T-shirts, terry towelling and underwear, stockinette, tablecloths, kitchen cloths etc.). | ||
| [56K7] | Medium soiled | 60°□ | |||
| [544C] | Soiled | 40°□ | |||
| [TH2Y] | Lightly soiled | 20° | |||
 | Softening | ● | for softening, starching, or impregnating previously washed laundry. It can also be used as a short rinse, but without adding any conditioner.It is completed with an additional rinse."Extra water" can be selected by pressing the (5b) key. | ||
| [741K] | |||||
| [SWZC] | |||||
| [85HS] | Spinning/Pumping | ● | for spinning the laundry.If you wish to pump out the water from the machine, without spinning, then press the (3) key several times to decrease the setting to ♦. | ||
| [8470] | |||||
| [340Z] | Sportswear | 30° Slightly soiled sportswear made of cotton, microfibers, synthetic fibres, at low spinning rate and with a short final spin. | • spinning• normal• extra water• prewash | 2,5 kg/2,5 kg2 kg" | |
 | |||||
| [THXO] | Quick Wash 17' | 30° Slightly soiled laundry, laundry refreshment etc. - to save time and energy. | • spinning• normal | 2 kg/2 kg1,5 kg" | |
| [YAGC] | |||||
| Q | and Wash/Delicate | 30° Delicate laundry made of linen, silk, wool, or viscose silk, labelled for hand wash only (dresses, skirts, blouses etc.) and curtains. Very gentle program that preserves the fabric of your clothes. | • spinning• normal• extra water• prewash* | 2,5 kg/2,5 kg1,5 kg" | |
 | |||||
 | /Synthetics: Coloured laundry (of like colours) made of durable mixed fabrics (trousers, T-shirts, dresses etc.) and other clothing made of polyester, polyamide, or mixes of these fibres with cotton (shirts, blouses, etc.). | • spinning• normal• eco care• prewash• extra water | 3,5 kg/3 kg3 kg" | ||
| [K2CZ] | More delicate | 40° | |||
| [K560] | Less delicate | 60° | |||
Data for SLIM

To improve your washing results, we recommend a 2/3 load on Cotton programs.
STEP 4: CHOOSING THE SETTINGS
Each program has basic settings that can be changed.
To change a setting, press the relevant key (before pressing the START/PAUSE key). Some settings cannot be selected with some programs; an acoustic signal and a flashing light will remind you of such cases (see Program Table).

3
Spinning
To change the spinning rate by levels, from the preset spinning rate for each program (3a) to the minimum spin rate (3b). The last choice is pumping without a spin cycle (3c).
| Program: °C Spinning | [rpm] | ||||||
| 1400 1200 1000 | |||||||
| Regular | Minimum | Regular | Minimum | Regular | Minimum | ||
| Cotton Heavily soiled | 95°C 1400 | 1000 | 1200 | 1000 | 800 | ||
| Cotton Medium soiled | 60°C 1400 | 1000 | 1200 | 1000 | 800 | ||
| Cotton Soiled | 40°C 1400 | 1000 | 1200 | 1000 | 800 | ||
| Cotton Lightly soiled | 20°C 1400 | 1000 | 1200 | 1000 | 800 | ||
| Softening | 1400 | 1000 | 1200 | 1000 | 800 | ||
| Spinning | 1400 | 1000 | 1200 | 1000 | 800 | ||
| Sportswear | 30°C 1000 | 800 | 1000 | 800 | 1000 | 800 | |
| Quick Wash 17' | 30°C 1000 | 800 | 1000 | 800 | 1000 | 800 | |
| Hand Wash | 30°C 800 | 600 | 800 | 600 | 800 | 600 | |
| Mix/Synthetics More delicate | 40°C 1000 | 800 | 1000 | 800 | 1000 | 800 | |
| Mix/Synthetics Less delicate | 60°C 1000 | 800 | 1000 | 800 | 1000 | 800 | |
4
Start delay
Use this function to start the washing cycle after a certain amount of time has elapsed. Press the (4) key to display 00:00 on the display unit (4a).
By pressing the (4) key, you can adjust the time in 30-minute steps up to 2 hours, and by 1-hour steps up to 24 hours.
If nothing is pressed for 5 seconds, the actual washing time will be displayed.
To reset the program end time, press the (4) key again.
The function is activated when the START/PAUSE key is pressed. Time is counted down by minutes. When the countdown reaches zero, the selected washing program will start automatically.
- To interrupt or change the program delay time, press the START/PAUSE key. Press the (4) key to select a new delay time and confirm it by pressing the START/PAUSE key.
- To quickly cancel the setting of delay time, press the (4) key and hold it for 3 seconds; then, press the START/PAUSE key to resume the washing program.
- In case of a power supply failure before the delay time has elapsed, press the START/PAUSE key to resume the delay time countdown.
3 + 4
SterilTub
Removing impurities, bacteria, and any unpleasant odour from the washing machine interior.
Before selecting the auto-clean program, set the spinning rate to maximum (3a), if you have used the drain function prior to that (3c).
Then, press the keys (3) and (4) simultaneously and rotate the program selector dial to Cotton 95 °C (heavily soiled).
"cln" will appear on the display. No other function can be selected simultaneously.
Empty the washing machine drum and add some powder detergent. There should be no laundry in the washing machine during this program.
We recommend running the self-cleaning program at least once a month.
5. STEP: SELECTING ADDITIONAL FUNCTIONS
5a
5b
5c


To activate/deactivate a function, press the relevant key (before pressing the START/PAUSE key).
Some functions cannot be selected with some programs; an acoustic signal and a flashing light will remind you of such cases (see Program Table).
5a
Prewash
Washing heavily soiled laundry, particularly with stubborn superficial stains.
5b
ExtraWater
Washing with an extra amount of water and an additional rinse with some programs.
5
Style
ECOcare (energy-saving wash - longer washing time, less water).
NORMALcare (basic settings)
5b+
Child Lock
A safety feature. To activate the child lock, press the (5b) and (5c) keys simultaneously and hold them for at least three seconds.
The selection will be confirmed by an acoustic signal and by a signal light (the key will be lit). Follow the same procedure to deactivate the child lock. As long as the child lock is activated, program, settings, or additional functions cannot be changed. The washing machine can only be switched off by rotating the program selector dial (1) to the "OFF" (0) position.
Child lock remains active even after the washing machine is switched off. To select a new program, the child lock must first be deactivated.
ACOUSTIC SIGNAL
Select the acoustic signal loudness by simultaneously pressing the (5c) key and rotating the program selector dial (1) clockwise to the initial position (if nothing is pressed for 5 seconds, actual washing time will be displayed).
Each time a key is pressed, the final loudness level is changed (three levels; press the (5a) key to increase the setting and (5c) to decrease it.). Confirm the selection by pressing the (5b) key. Selected loudness (sound volume) level is indicated on the display unit. The most recent setting is stored.

After the machine is disconnected from the power mains, all extra functions selected for any program (spinning, pre-wash, extra amount of water) will be saved, except for ECOstyle and delayed start.
OPTIMIZING PROGRAM DURATION
Using advanced technology, the appliance perceives the amount of laundry in the early stage of the wash.
After detecting the amount of the load, the appliance automatically adjusts the program duration.
STANDBY MODE
If no program is selected and started and no other action is taken within five minutes after turning on the machine, the display will be automatically turned off to save energy. Signal light on the START/PAUSE key will flash. Signal lamps of additional functions flash intermittently.
The display will turn on again when you rotate the program selector dial or press any button. If no action is taken after the end of the program, the display will also be turned off after five minutes. The indicator light on the START/PAUSE key will blink and the lights on extra functions will blink alternately.
P o = weighted power in 'off mode' [W] 0,25
P I = weighted power in the 'left on mode' [W] 1.00
T / = time in 'left on mode' [min] 10.0

Low water temperature, low mains voltage and different washing load may affect the washing time; the remaining time displayed is adjusted accordingly during the washing process.
6. STEP: PROGRAM START
Press the (6) key START/PAUSE.

Time remaining to the end of the program or start delay time (if set) will appear on the display.
Signal lights on the selected functions will be lit.
After pressing the START/PAUSE key, you may adjust the spinning speed and activate or deactivate the child lock; other settings, however, cannot be changed.

7. STEP: END OF WASHING PROGRAM
End of washing program will be signalled by an acoustic signal; "End" will appear on display.

- Open the washing machine door.
- Take the laundry from the drum.
- Close the door!
- Shut off the water supply tap.
- Switch off the appliance (rotate the program selector dial (1) to the "OFF" (0) position).
- Unplug the power cord from the outlet.

CLEANING AND MAINTENANCE

Disconnect the washing machine from the mains before cleaning!
Do not allow children to clean the appliance or perform any maintenance tasks without proper supervision!
CLEANING THE DETERGENT DISPENSER
If necessary, clean the detergent dispenser.
Pull it out from its casing completely by pressing the flap.

1. Wash it under running water using a brush, and dry it. Remove any leftover dried detergent from the bottom of the casing.
2. If required, remove and clean the plug cap.
3. Clean the plug cap under running water and replace it.
CLEANING THE DISPENSER HOUSING, INLET HOSE SCREEN AND DOOR RUBBER GASKET

1. Clean the water inlet hose screen frequently under running water.
2. Clean the entire rinsing area of the washing machine with a brush, especially the nozzles on the upper side of the rinsing chamber.
3. After each wash, wipe the door rubber gasket. This will prolong its useful life.
CLEANING THE FILTER
During cleaning, some water may leak. Therefore, we recommend spreading an absorbent cloth on the floor before starting.

1. Open the filter lid using a flat screwdriver or similar tool.
2. Remove the water outlet funnel before cleaning the filter.
3. Gradually rotate the filter in the counter-clockwise direction. Pull out the filter (and let the water slowly drain).
4. Clean the filter under running water.

Insert the filter back as shown in the picture, and tighten by turning it in the clockwise direction. To ensure good sealing, the gasket surface must be dirt free.
The filter needs occasional cleaning, especially after heavily shaggy or old laundry.
CLEANING THE WASHING MACHINE
The casing should be cleaned with a soft cloth and mild detergent.


Disconnect the washing machine from the mains before cleaning!
INTERRUPTING AND CHANGING THE PROGRAM
Manual (physical) termination
The program can be cancelled / terminated by rotating the program selector dial (1) to the "OFF" position.
If there is water in the machine, select an independent spinning program (using the program selector knob) and select the spinning rate using one of the keys (3).
PAUSE KEY
The program can always be stopped by pressing the START/PAUSE button. If there is no water in the drum, the door can be opened after a while; otherwise, the door cannot be opened. To resume the program, press the START/PAUSE button.
FAULTS
In case of a fault, the program will be interrupted. Flashing signal lights and an acoustic signal will warn about such occurrence (see section Troubleshooting), and the fault will be indicated on the display (E).
Power failure
At electric cutout the program is interrupted. When the power supply is re-established, press the START/PAUSE button to resume the washing program. Delay time will not be reset.
Washing time will resume from the point at which it was interrupted.
The most recently selected program, including all extra functions selected (spin, pre-wash, extra water), will be saved, except for ECOstyle and delayed start.
Opening the door in case of a power outage
In models with an electromagnetic door lock, the door can only be opened by simultaneously pulling the special lever (located at the filter) and the door handle.
Opening the door (Temporary interruption/ Permanent suspension - change of program)
Washing machine door may only be opened if the water level is sufficiently low. If it is not, the water must first be pumped out of the machine. Use the additional water pumping or spinning program).


If a power failure occurs when the drum is still full of water, be careful not to open the door before you pump the water out. (see Programs/partial programs: Spinning/pumping).
WHAT TO DO ...?
The washing machine shall automatically control the operation of particular functions during the washing cycle. If any irregularity is identified, this will be indicated by reporting (Ex) on the display.
The machine will signal the fault until it is turned off. If the fault is on the heating system, the machine will complete the washing program, but without heating the water.
Various interferences from the environment (e.g. electric devices) may also cause the machine to signal faults.
In such case:
- turn off the appliance and wait a few seconds,
- turn on the appliance and repeat the washing program.
- If the fault reoccurs, call the service center (Call centre).

The warranty does not cover faults caused by interference from the environment (lightning strike, electric circuit, natural disasters, etc.).
TROUBLESHOOTING TABLE
| Failure Possible cause What to do...? | ||
| The machine does not work - the display is not lit. | Machine is not powered. Check if:power in the socket,the fuse is OK,plug is in the socket. | |
| Water is leaking from the machine. | Filter is not tightly screwed in.Inlet pipe is not tightly screwed to the machine or to the water faucet.Outlet pipe fell to the floor. | Tighten the filter properly.Tighten the inlet pipe.Affix the outlet pipe to the drain. |
| The machine moves during operation. | The machine is not properly levelled.Transport brackets are not removed. | Level the machine with the adjustable legs.Remove transport brackets. |
| The machine vibrates during the spin. | Unevenly distributed laundry, especially with very small quantities (for ex. only the bathrobe). | This is normal, the machine will reduce the RPM if vibrations are too strong. Wash larger quantity of laundry. |
| Excessive foaming during washing. | Excessive measure of detergent. | Use washing powder according to the instructions by the producer and according to the water hardness and soiled laundry. Use only detergents for machine washing. |
| Laundry is not properly spun. No failure is reported. | The machine switched on the UKS* function. Because of bad laundry balance, the machine has automatically reduced spin RPM. | The machine operates normally. Wash large and small pieces of laundry together. |
| Greasy wads appear on the laundry. | Too little detergent (laundry was very greasy). | Wash the laundry again. Add more detergent for such soiled laundry, or use liquid detergent. |
| Laundry is stained after washing. | You used liquid detergent or detergent for coloured laundry which does not contain whitener.Unsuitable program has been selected. | Use the detergent containing whitener.Use special stain removers. |
| White powdery residues on the laundry. | It is not the consequence of bad rinsing, but because of neo-phosphate detergents containing non soluble components (zeolites) for water softening.Such substances may be deposited upon the laundry. | Immediately rinse the laundry once again.Use liquid detergents which do not contain zeolites.Try removing the residues with the brush |
| Detergent residues in the dispenser. | Low water flow pressure. Some detergents may stick to the dispenser rather hard if it is wet. | Clean the inlet pipe filter net.Wipe the dispenser prior loading detergent. |
| Softener is not completely rinsed, or water is left in the dispenser dish. | Sucking cover is not correctly positioned or is clogged. | Clean the dispenser and firmly fix the cover to its place. |
| Unpleasant smell in the washing machine drum. | Remains of fabrics, washing agent and softener in the filter.Development of germs. | Check whether the filter is clean.Run the auto-clean (SterilTub) program (see chapter: selecting additional functions). |
| Washing time is longer than usual. Time indicated on the display is corrected during the washing cycle. | Low temperature of inlet water.The machine switched on the UKS* system because of uneven laundry load.Low mains voltage.There has been a failure in the power supply. | Washing program time may be up to 60% longer; however, this does not imply a fault in the machine.Washing time is extended by the power supply down-timeAdditional rinses may prolong the washing program time. |
| E2Washing program does not startAt the start of the washing cycle: washing time will flash | Open door or door not properly closed. | Close the door by pushing it towards the machine.Push START again. |
| E3Water is not supplied to the machine. | Water level has not been reached.Disturbed water inlet. | Check if:the water tap is open,inlet pipe net filter is clean.Push the START button. |
| E6Program temperature not reached. | Heater failure.Inlet water too cold.Manual addition of water. | Turn off the appliance and wait for a few seconds.Turn the appliance back on and repeat the washing program.If the failure is reported again, call a service technician. |
| E7Water is poorly pumped out or not at all. | Water outlet is clogged. Check if: | the filter is clean,outlet pipe is not jammed,the drain is clogged,outlet pipe is positioned higher than 1m.Push START again. |
Unevenly distributed laundry or lumps of laundry in the washing machine drum can cause problems such as vibration and noisy operation. The appliance will sense such problems and activate the UKS.*
Smaller loads (e.g. one towel, one sweater, one bathrobe etc.) or clothes made of materials with special geometrical properties are virtually impossible to distribute evenly across the washing machine drum (slippers, large items etc.). This results in several attempts to redistribute the laundry, which in turn leads to longer program duration. In extreme cases of unfavourable conditions, the program can be completed without the spinning cycle.
UKS allows stable operation and extends the useful life of the appliance.
In case you were not successful in repairing the malfunctions in spite of the above suggestion chart, call the nearest authorized service shop. Repairing the failure arising from inappropriate connections or use of the appliance is not covered by the guarantee, and the repair expenses are paid by the customer.
RECOMMENDATIONS FOR WASHING AND ECONOMIC USE YOUR WASHING MACHINE
Wash new coloured garments separately the first time.
Wash heavily soiled laundry in smaller amounts, with more detergent or a prewash cycle.
Treat stubborn stains with a special stain removal agent before the wash. We recommend using the "Grandma's advice for natural stain removal".
With lightly soiled laundry, we recommend a program without pre-wash and a lower washing temperature.
Frequent, or predominant, washing at low temperatures, using liquid detergents, may result in development of bacteria which causes odour in the washing machine. To prevent this, we recommend running the auto-clean (SterilTub) program occasionally (see section WASHING/ selecting additional functions).
We recommend avoiding washing very small amounts of laundry as this will lead to excessive use of energy and poorer performance.
Loosen the stacked laundry prior inserting it into the drum.
Use only detergents for machine wash.
Add the powder or liquid detergents as instructed by the manufacturer, according to the washing temperature and selected washing program.
If water hardness level exceeds 14° dH degrees, the use of water conditioner is required. Any damage to the heater due to failure to use a water conditioning agent shall not be covered by this warranty.
Check the information on water hardness with your local water supply company or authority.
Chlorine-based whitening agents are not recommended, as it can damage the heater.
Do not add hardened balls of detergent into the detergent dispenser as this may clog the piping in the washing machine.
If you use thick liquid softener it is recommended to dilute it with water, to prevent clogging of dispenser compartment ducts.
Liquid detergents are intended for main wash only, without pre-wash.
High spin RPM leave less moisture in laundry which dries out much quicker in the tumble dryer, thereby saving energy.
| Hardness scale Degree of hardness | |||
| °dH (°N) m mol/l °fH(°F) p.p.m. | |||
| 1 - soft < 8,4 < 1,5 < 15 < 150 | |||
| 2 - medium 8,4 - 14 1,5 - 2,5 15 - 25 150 - 250 | |||
| 3 - hard >14 >2,5 >25 >250 | |||
In case of hard water add detergent according to the Chart for degree 1 and add appropriate quantity of water softener (see manufacturer's instructions

Washing machine is equipped with the dispenser left gate, so you may pour liquid detergent also into the central compartment (depending on model). If you use powder detergent the gate is lifted up, and in case of liquid detergent it is slid down.
If you select the pre-wash cycle, then only add powder detergent to the washing compartment of the detergent dispenser.
| Prewash | |
| Wash | |
| Softening |
GRANDMA'S ADVICE FOR NATURAL STAIN REMOVAL
Before using special-purpose stain removers, try using natural methods that do not harm the environment on less stubborn stains.
However, prompt action is required! Soak the stain with an absorbent sponge or a paper towel; then, rinse with cold (lukewarm) water - but never with hot water!
| Stain Stain removal | |
| Colour lacquers use paint | thinner; rinse with soapsuds (test on a hidden spot first) |
| Blueberries linen - soak in | buttermilk; rinse with cold water first, then with warm waterwool - first, apply lemon juice, then rinse silk - wipe with spirit (denatured alcohol) |
| Tearinse with cold water (stain removal soap, if required) | |
| Chocolate rinse with lukewarm soapsuds; apply lemon juice and rinse; | |
| Ink apply warm lemon juice; rinseapply milk, wait until it dries; rinse | |
| Felt tip pens use a mixture of vinegar and spirit/denatured alcohol (1:1); rinseapply warm lemon juice; rinse | |
| Mustard rinse with lukewarm water or soak with soda, rinse | |
| Strawberries soak in a mixture of vinegar and water | |
| Eggs sprinkle with salt and wait until it dries | |
| Cocoa white fabrics - soak in salt water | |
| Curry, turmeric use a solution of glycerine; rinse | |
| Tar apply regular or peanut butter; then wash | |
| Coffee rinse with salt water or soak in salt water | |
| (Ball Point) Pen spray with hair lacquer; dry, rinse with a mixture of vinegar and water,moisten with vodka and soak | |
| Carrots | apply hard soap, soak in water, rinse |
| Shoe polish | apply cooking oil; rinse |
| Blood | rinse with cold water |
| Dried blood | soak the stain with water, soak in salt water, wash with soapsuds |
| Adhesive tape | iron; place a paper towel between the ironing board and the fabric |
| Glue soak in spirit/denatured alcohol (or a mixture of vinegar and water); rinse | |
| Make-up use a glass cleaner and a paper towel | |
| Butter rinse with hot soapsuds (if the fabric permits); | |
| Fat tablecloth - sprinkle with baking soda, brush after a while wool - remove with mineral water use a mixture of baking soda + water (or toothpaste); dry; scrape off fresh stain - sprinkle with potato starch, then brush milk - rinse first with cold and then with hot water | |
| Burnt parts moisten the burnt parts (e.g. from ironing) with vinegar, lemon juice, or onion juice; rinse | |
| Tomatoes line the stain with slices of raw potato; rinse with warm soapsuds | |
| Mould soak in hot buttermilk; rinse with cold water | |
| Sweat soak in citric acid (12g/l of water); solution of borax; or in undiluted vinegar; wash delicate, wool - wipe with diluted vinegar silk - boil potatoes in unsalted water, cool, add some alcohol, and use the solution to wash the silk | |
| Red beet rinse with cold water (or apply borax), soak; wash | |
| Red wine sprinkle with salt, rub with lemon juice; rinse | |
| Lipstick rinse with lukewarm mixture of water and shampoo | |
| Rust coat with a mixture of lemon juice and salt; sundry (test on a hidden part first) soak in juice of cooked rhubarb stalk | |
| Fruit rinse with water, wipe the remaining part with vinegar or lemon juice; wash | |
| Fruit juice cover with salt and water; leave for 15 minutes to take effect; wash | |
| Soot do not rub, blow off, sprinkle with flour; alternatively, sprinkle with salt and beat out; or soak up with white bread | |
| Resin place the garment in a bag and freeze it; scrape the frozen stain; put butter or fat on wool and wash | |
| Machine grease/lubricant wipe with butter; wash | |
| Spinach | rub with raw potatoes; wash |
| Stamps | rub with lemon and salt; rinse |
| Grass apply diluted lemon juice; wash; if the stain is on jeans, apply toothpaste, dry, wash | |
| Wax | place the garment in a bag and freeze; scrape the wax; place a paper towel on the rest and iron; wash |
| Chewing gum | place the garment in a bah and freeze; remove the gum |
DISPOSAL

Our appliances are packed in environmentally friendly materials which may be recycled, deposited or decomposed without any threat to the environment.
To this end all wrappings are marked accordingly.
The symbol on the product or on its packaging indicates that this product may not be treated as household waste. Instead it shall be handed over to the applicable collection point for the recycling of electrical and electronic equipment.
When disposing of an obsolete appliance, make sure you remove the power cord and destroy the door switch and latch to prevent the door from closing (children safety).
By ensuring this product is disposed of correctly, you will help prevent potential negative consequences for the environment and human health, which could otherwise be caused by inappropriate waste handling of this product. For more detailed information about recycling of this product, please contact your local city office, your household waste disposal service or the shop where you purchased the product.
TYPICAL CONSUMPTION TABLE
| Program | Max. load [kg] | Temp. [°C] | Spinning [rpm] | Remaining moisture content [%] | Duration [min.] | Water- Consumption [L] | Power- consumption [kWh] |
| Cotton | |||||||
| (A-30%) ECO* □ | 7 / 3,5** | 60 | 800-1400 | 62-53 | 181 / 161** | 51 | 0,84 / 0,73** |
| (A-30%) ECO* □ | 7 / 3,5** | 40 | 800-1400 | 62-53 | 160 / 150** | 51 0,67 / 0,58** | |
| (A-30%) ECO* □ | 6 / 3** | 60 | 800-1400 | 62-53 | 181 / 160** | 49 0,70 / 0,67** | |
| (A-30%) ECO* □ | 6 / 3** | 40 | 800-1400 | 62-53 | 160 / 150** | 49 0,66 / 0,54** | |
| (A-20%) ECO* □ | 7 / 3,5** | 60 | 800-1400 | 62-53 | 181 / 161** | 52 0,95 / 0,80** | |
| (A-20%) ECO* □ | 7 / 3,5** | 40 | 800-1400 | 62-53 | 160 / 150** | 52 0,67 / 0,58** | |
| (A-20%) ECO* □ | 6 / 3** | 60 | 800-1400 | 62-53 | 181 / 160** | 50 0,85 / 0,72** | |
| (A-20%) ECO* □ | 6 / 3** | 40 | 800-1400 | 62-53 | 160 / 150** | 50 0,66 / 0,54** | |
| SLIM | |||||||
| (A-30%) ECO* □ | 6 / 3** | 60 | 800-1400 | 62-53 | 181 / 160** | 49 0,79 / 0,64** | |
| (A-30%) ECO* □ | 6 / 3** | 40 | 800-1400 | 62-53 | 160 / 148** | 49 0,55 / 0,48** | |
| (A-30%) (I)- ECO* □ | 6 / 3** | 60 | 800-1400 | 62-53 | 181 / 160** | 49 0,76 / 0,62** | |
| (A-30%) (I)- ECO* □ | 6 / 3** | 40 | 800-1400 | 62-53 | 160 / 148* | 49 0,52 / 0,46** | |
| (A-20%) ECO* □ | 6 / 3** | 60 | 800-1400 | 62-53 | 181 / 160** | 50 0,89 / 0,71** | |
| (A-20%) ECO* □ | 6 / 3** | 40 | 800-1400 | 62-53 | 160 / 148** | 50 0,60 / 0,52** | |
* Testing program by EN 60456 with the selection of max. spin RPM ** Half load - BPM motor (inverter motor)
'Standard 60°C ECO cotton programme □' and the 'standard 40°C ECO cotton programme □' are the standard washing programmes to which the information in the label relates. These programmes are suitable for cleaning normally soiled cotton laundry and they are the most efficient programmes in terms of combined energy and water consumption. For this reason, actual water temperature may differ from the nominal cycle temperature.

Due to variations in the type and quantity of laundry, spin speed, variations in power voltage, and the temperature and moisture of ambient, the measured values of the duration of the program and power consumption with the end user may vary somewhat from the displayed values.
We reserve the rights to make any changes or mistakes in these operation instructions.
www.gorenje.com
simplicity
COLLECTION
- INSTRUCTIONS FOR USE
- SAFETY PRECAUTIONS
- USE ONLY DETERGENTS AND SOFTENERS INTENDED FOR MACHINE WASH
- THE APPLIANCE IS MANUFACTURED IN COMPLIANCE WITH ALL RELEVANT SAFETY STANDARDS
- BEFORE CONNECTING THE WASHING MACHINE
- WASHING MACHINE
- (WASHING MACHINE DESCRIPTION)
- FRONT
- BACK
- TECHNICAL INFORMATION
- (DEPENDING ON THE MODEL)
- FRONT PANEL
- SPIN CYCLE RATE (RPM) SELECTION KEY
- SPINNING RATE INDICATOR LIGHTS
- START DELAY KEY
- SELF-CLEANING PROGRAM (STERILTUB)
- ADDITIONAL FUNCTION KEYS
- B+5C
- START/PAUSE KEY USE THIS KEY TO START OR STOP THE PROGRAM
- INSTALLATION AND CONNECTION
- REMOVAL OF TRANSPORT BRACKETS
- SELECTING THE ROOM
- INSTALLATION
- WATER INLET CONNECTION
- AQUA-STOP (CERTAIN MODELS ONLY)
- TOTAL AQUA - STOP (CERTAIN MODELS ONLY)
- WATER OUTLET CONNECTION
- CONNECT THE APPLIANCE TO THE MAINS SUPPLY
- MOVING AND TRANSPORT
- SUBSEQUENT TRANSPORT
- BEFORE THE USE
- WASHING STEPS (1 - 7)
- STEP: CHECK THE TAGS ON YOUR LAUNDRY
- STEP: PREPARING THE WASHING PROCESS
- SWITCHING ON THE WASHING MACHINE
- LOADING THE WASHING MACHINE
- STEP: CHOOSING A PROGRAMME
- PROGRAM TABLE
- STEP 4: CHOOSING THE SETTINGS
- SPINNING
- START DELAY
- STERILTUB
- STEP: SELECTING ADDITIONAL FUNCTIONS
- PREWASH
- EXTRAWATER
- STYLE
- CHILD LOCK
- ACOUSTIC SIGNAL
- OPTIMIZING PROGRAM DURATION
- STANDBY MODE
- STEP: PROGRAM START
- STEP: END OF WASHING PROGRAM
- CLEANING AND MAINTENANCE
- CLEANING THE DETERGENT DISPENSER
- CLEANING THE DISPENSER HOUSING, INLET HOSE SCREEN AND DOOR RUBBER GASKET
- CLEANING THE FILTER
- CLEANING THE WASHING MACHINE
- INTERRUPTING AND CHANGING THE PROGRAM
- MANUAL (PHYSICAL) TERMINATION
- PAUSE KEY
- FAULTS
- POWER FAILURE
- OPENING THE DOOR IN CASE OF A POWER OUTAGE
- OPENING THE DOOR (TEMPORARY INTERRUPTION/ PERMANENT SUSPENSION - CHANGE OF PROGRAM)
- WHAT TO DO
- TROUBLESHOOTING TABLE
- RECOMMENDATIONS FOR WASHING AND ECONOMIC USE YOUR WASHING MACHINE
- GRANDMA'S ADVICE FOR NATURAL STAIN REMOVAL
- DISPOSAL
- SIMPLICITY
- COLLECTION
Brand : GORENJE
Model : WA74SY2W
Category : Washing machine