
IA0448 - Deep fryer Ambiano - Free user manual and instructions
Find the device manual for free IA0448 Ambiano in PDF.


| Product Type | Deep Fryer |
| Brand | Ambiano |
| Model | IA0448 |
| Dimensions (approx.) | 30 x 25 x 20 cm |
| Weight (approx.) | 2.5 kg |
| Power | 1500 W |
| Oil Capacity | 2.5 L |
| Food Capacity | 1.2 kg |
| Temperature Range | 150°C - 190°C |
| Adjustable Thermostat | Yes |
| Indicator Lights | Power and Ready |
| Safety Features | Cool-touch handles, automatic shut-off, overheat protection |
| Material | Stainless steel body, non-stick interior |
| Filter Type | Reusable mesh filter |
| Dishwasher Safe Parts | Removable oil container and basket |
| Cord Storage | Yes, cord wrap |
| Viewing Window | Yes |
| Accessories Included | Frying basket, lid |
Frequently Asked Questions - IA0448 Ambiano
User questions about IA0448 Ambiano
0 question about this device. Answer the ones you know or ask your own.
Ask a new question about this device
Download the instructions for your Deep fryer in PDF format for free! Find your manual IA0448 - Ambiano and take your electronic device back in hand. On this page are published all the documents necessary for the use of your device. IA0448 by Ambiano.
USER MANUAL IA0448 Ambiano
Congratulations on choosing to buy an Ambiano® appliance.
All appliances brought to you by Ambiano® are manufactured to the highest standards of performance and safety, and, as part of our philosophy of customer service and satisfaction, are backed by our comprehensive 36 month warranty.
We hope you will enjoy using your purchase for many years to come.
Contents
02 Welcome
04 Warranty Details
05 General Information and Safety Instructions
08 Product Overview
11 Getting Started
13 Instructions
15 Other Useful Information
19 Recipes
30 FAQ
32 Repair and Refurbished Goods or Parts Notice

AMBIANO
Professional
DIGITAL AIR FRYER
Warranty Details
The appliance is guaranteed to be free from defects in workmanship and parts for a period of 36 months from the date of purchase. Defects that occur within this warranty period, under normal use and care, will be repaired, replaced or refunded at our discretion. The benefits conferred by this warranty are in addition to all rights and remedies in respect of the appliance that the consumer has under the Competition and Consumer Act 2010 and similar state and territory laws.
Our goods come with guarantees that cannot be excluded under the Australian Consumer Law. You are entitled to a replacement or refund for a major failure and for compensation for any other reasonably foreseeable loss or damage. You are also entitled to have the goods repaired or replaced if the goods fail to be of acceptable quality and the failure does not amount to a major failure.
General Information and Safety Instructions
Read this manual thoroughly before first use, even if you are familiar with this type of product. The safety precautions enclosed herein reduce the risk of fire; electric shock and injury when correctly adhere to. Please keep this user manual in a safe place along with your purchase receipt, warranty card and carton for future reference. If applicable, pass these instructions and packaging on to the next owner of the appliance. Always follow basic safety precautions and accident prevention measures when using an electrical product.
Electrical Safety and Cord Handling
- Before turning on the Air Fryer ensure the electrical voltage and frequency of the circuit corresponds to those indicated on the rating label of the product.
- To protect against fire and electric shock, do not immerse this appliance, cord set or plug in water or any other liquid.
- Do not use an extension cord unless completely necessary with the Air Fryer. If an extension cord is used please ensure that it has a rating equal or exceeding the rating of this product.
- Do not pull or carry by cord, use cord as a handle, close a door on the cord, or pull cord around sharp edges or corners. Keep cord away from heated surfaces.
- Do not bend or damage the power cord.
- Never force the plug into an outlet.
- Always unplug the Air Fryer when not in use. To disconnect from the power supply, grip the plug and pull from the power outlet. Never pull by the cord. The plug must be removed from the power outlet before cleaning, servicing, maintenance or moving the Air Fryer.
- Do not move or lift the Air Fryer while the power cord is still connected to the power outlet or still on. Always ensure it is switched off and has cooled down before moving.
- Do not use the Air Fryer if the plug, cord or the Air Fryer itself is damaged. Please contact our After Sales Support Line for further advice.
- Unless your home is already fitted with a residual current device (safety switch), we recommend installing an RCD with a rated residual operating current not exceeding 30mA to provide additional safety protection when using electrical appliances. See your electrician for professional advice.
General Information and Safety Instructions (cont)
Usage Conditions and Restrictions
- The Air Fryer is intended for indoor household use only and not for commercial purposes.
- Do not use the Air Fryer for other than its intended use.
- The Air Fryer is not a toy. Supervise young children to ensure they do not play with this product.
- The Air Fryer is not intended for use by persons (including children) with reduced physical, sensory or mental capabilities or lack of experience or knowledge unless they have been given supervision or instruction concerning use of the product by a person responsible for their safety.
- Do not leave the Air Fryer unattended when plugged in. Always switch off and unplug when you are not using the Air Fryer.
- Do not operate or place any part of the Air Fryer on or near any hot surfaces (such as a gas or electric burner, or a heated oven).
- Do not cover the appliance whilst in use. If covered there may be a risk of fire.
- This unit has no user-serviceable parts contained within. Do not attempt to repair, disassemble or modify the Air Fryer. This will void the warranty.
- Improper installation may result in the risk of fire, electric shock or injury to person.
- The manufacturer is not responsible for any eventual damage caused by improper or faulty use.
- The use of attachments not sold or recommended by the manufacturer may cause fire or electric shock or injury.
- The Air Fryer is not intended to be operated by means of an external timer or any type of separate remote control system.
- Do not place the Air Fryer against a wall or against other appliances. Leave at least 10cm of free space around the appliance.
General Information and Safety Instructions (cont)
Handling and Usage
- Do not touch hot surfaces. The temperature of the outer surface can get very hot while the Air Fryer is in operation. Always use oven mitts when handling hot materials and allow metal parts to cool before cleaning. Allow the unit to cool completely before cleaning.
- Always operate the Air Fryer on a dry, level surface. Operating on sinks or uneven surfaces should be avoided.
- Do not clean with metal scouring pads. Pieces may break off or shift and come in contact with the electrical parts, creating a risk of electrical shock.
- Always put the ingredients to be cooked into the supplied frying basket. Do not allow food to come into contact with the heating elements.
- Do not touch the inside of the Air Fryer while in operation.
- During hot air frying, hot steam is released through the air outlet. Keep your hands and face at a safe distance from the steam and from the air outlet. Also be careful of hot steam and hot air when removing the pan from the appliance.
- Do not place the Air Fryer on or near combustible materials such as curtains and tablecloth.
- Do not place anything on top of the Air Fryer.
- The pan and frying basket will become very hot whilst in use, always use oven mitts when handling the pan and frying basket.
- Allow for the Air Fryer to cool down for approximately 30 minutes before cleaning.
WARNING: Do not press the basket release button at any time to remove the frying basket from the pan unless you are able to place it on a heat resistant surface.
Product Overview

Scope of Delivery
- Built-in Carry Handle
- Preset Icons with Indicator Light
- LED Display Panel
- Touch Sensor Control Panel
- Frying Basket
- Basket Release Button
- Frying Basket Handle
- Pan
- Air Outlet & Oil Smoke Filter

Included (not pictured)
Instruction Manual
Quick Start Guide
Warranty Card
Power Cord
Product Overview (cont)

Scope of Delivery
- Heating Icon - will illuminate when the Air Fryer is ON
- Fan Icon - will illuminate and spin when the fan is ON
- Temperature/Timer Decrease Button
- Power ON/OFF Button
- Temperature/Timer Display - will alternate between the temperature and timer when ON
- Temperature/Timer Increase Button
- Start/Pause Button
- Function Button
Product Overview (cont)
Standby Mode
When the Air Fryer is plugged into a power outlet and turned on it will default into standby mode. You will hear the Air Fryer beep and the LED display panel will display ⏻ —— when in this mode. Press the power button ⚙ and hold for 3 seconds to turn the Air Fryer ON, the LED display panel will show the default temperature setting of 180°C.
Function
Press the function button ☐ to scroll through the function settings in the same order as listed in the table below. The LED display panel will display the temperature while also alternating between the timer setting. When the auto presets are selected, the indicator light under the present icon will illuminate.
| Function Button Pressed Setting | |
| Default Setting Temperature | |
| 1 Timer | |
| 2 Chips | |
| 3 Seafood | |
| 4 Chicken Pieces | |
| 5 Steaks/Chops |
Temperature Setting
Press and icons to adjust the temperature setting by - / + 5°C increments (minimum of 60°C to a maximum of 200°C ). Press also alternate from the temperature to timer setting.
Timer Setting
Use ▼ and icoms to adjust the timer settings by -/+1 minute increments (minimum of 1 minute to a maximum of 60 minutes). Press ▼ to alternate from the timer to the auto presets.
NOTE: Only one setting (temperature or time) can be adjusted prior to cooking. If you wish to adjust both, it is recommended to change the temperature first, commence cooking (by pressing on the control panel), and then adjust the timer setting.
Getting Started
Quick Start Cooking
For quick and easy use, you can simply press the start button to commence cooking at the default setting of 180° C and 10 minutes. You can adjust the temperature or time at any point.
Auto Preset Options
For extra convenience, the Air Fryer features auto presets to make using the Air Fryer even easier! The auto preset options include chips/seafood/chicken pieces/steaks and chops, and are pictured at the top of the Air Fryer.
To enter the auto presets, continue to press Ⓞ until the indicator light appears under the preset icon of your chosen setting. You can also adjust the temperature or timer setting in these auto presets.
The default temperature and timer for the presets are listed in the table below.
| Type Temp (°C) Time (min) Remark | |||
Chips 180 15  | matically stops after | 15 minutes | |
Seafood 200 1  | matically stops after | 12 minutes | |
Chicken Pieces  | 180 20 Automatically stops after | 20 minutes | |
Steaks / Chops  | 200 15 Automatically stops after | 15 minutes | |
Getting Started
Before First Use
Prior to using your Air Fryer, please read all safety and operating instructions thoroughly. Please ensure you follow the steps below before using this appliance. We recommend you keep the original packaging for storing your Air Fryer when not in use.
- Unpack the product but keep all packaging material until you have made sure your new Air Fryer is undamaged and in good working order. Plastic wrapping can be a suffocation hazard for babies and young children so ensure all packaging materials are out of their reach.
- Remove the twist-tie which is securing the electrical cord. Uncoil the cord and straighten it to remove any kinks. Do not use the product if these parts are damaged. In case of damage, phone the After Sales Support Line.
- Place the Air Fryer on a flat, stable and heat resistant surface.
- Remove the frying basket and pan from the Air Fryer by pulling the handle and sliding it out of the unit.
- Ensure you remove the power cord and all contents that have been packed inside the Air Fryer before turning the unit on, or putting food into the frying basket.
WARNING: Before pressing the basket release button make sure you place the Air Fryer on a heat resistant surface, the pan will be very hot and as you press the basket release button the pan will automatically detach itself from the frying basket.
- To release the frying basket from the pan, press the basket release button, then lift the frying basket out of the pan. Wash the frying basket and pan in warm soapy water and dry thoroughly.
- Wipe the exterior housing and inner surface of the Air Fryer with a damp cloth and then dry thoroughly. Do not immerse it in water or other liquids.
- Place the frying basket back into the pan, you will hear it click once it is secure. Then slide the frying basket and pan back into the Air Fryer.
CAUTION: Do not fill the Air Fryer with oil or any other liquids. Do not place anything on top of the Air Fryer.
Instructions
The Air Fryer works by circulating hot air in all directions at a high speed. Food is cooked quickly and more evenly, while locking in the flavours.
Operating the Air Fryer
- Remove the frying basket and pan from the Air Fryer by pulling the handle carefully.
- Place the food to be cooked into the frying basket.
WARNING: Do not overfill the frying basket or exceed the amount indicated in the cooking guide (refer to page 15) as this can affect the quality of the cooked food.
- Push the pan (with the frying basket inside) back into the Air Fryer (see Fig. 1).
- Plug the power cord into a power outlet and switch on, the Air Fryer will default to standby mode. Press ☐ for 3 seconds to turn the Air Fryer ON, the LED display panel will show the default setting of 180°C and 10 minutes.
- Press Ⓤ to scroll through to your desired setting (see Fig. 2). Use one of the auto presets or customise the temperature and timer settings to suit your cooking needs (refer to the cooking guide on page 15).
WARNING: Only one setting (temperature or time) can be adjusted prior to cooking. If you wish to adjust both, it is recommended to change the temperature first, commence cooking (by pressing ▶ on the control panel), and then adjust the timer setting.

Instructions (cont)
- Once you have chosen your setting, press 📄 begin cooking. You will hear the fan turn on and the 🔊 symbols will appear. The temperature and time remaining will then alternate on the LED display panel.
- When the Air Fryer has finished cooking it will beep to alert you it has finished. The LED display panel will then show the symbols. The fan will continue to spin until the Air Fryer has cooled down sufficiently and will automatically shut off. The will then disappear from the LED display panel and the Air Fryer will go into standby mode.
- To turn OFF the Air Fryer, press (see Fig. 3). Once turned OFF, the LED display panel will show ⏻ ——
- To remove the food from the Air Fryer, use the handle to pull the pan out of the appliance and then place it on a heat resistant surface.
NOTE: Only one setting (temperature or time) can be adjusted prior to cooking. If you wish to adjust both, it is recommended to change the temperature first.
WARNING: Before pressing the basket release button make sure you place the Air Fryer on a heat resistant surface, the pan will be very hot and as you press the basket release button the pan will automatically detach itself from the frying basket.
- Press the release button and lift the frying basket away from the pan and place on a heat resistant surface before releasing the frying basket. Then use a pair of tongs to remove your food from the frying basket or empty it onto a plate or into a bowl.

Safety Switch
The Air Fryer is equipped with a safety switch. When you remove the pan from the Air Fryer whilst it is still turned ON (eg. shaking or flipping over food), the heating will stop, but the fan will still operate, along with the timer. You may need to adjust the timer to account for the time the pan has been removed. Cooking will resume once the pan is reinserted into the Air Fryer.
NOTE: You may notice a slight odour being emitted from the Air Fryer during initial use. This is normal and the odour will cease with continued use.
CAUTION: The frying basket and food will be very hot once cooked. Use kitchen tongs or other suitable utensils to remove food from the frying basket, never use your hands. Do not touch the pan or frying basket during use. Do not use metal utensils as this could damage the non-stick coating.
Other Useful Information
Cooking Guide
The table below is to be used as a guide only, and the time and temperature settings can vary depending on the amount of food being cooked.
| Type Min - | Max (g) | Time (min) Temp (°C) Additional Info | |
| Frozen Chips 200-500 | 12-20 200 | Shake | |
| Home Made Chips 200 | -500 18-30 | 180 Add 1/2 tbsp oil | in a bowl and then mix prior to placing in the frying basket |
| Chicken Nuggets 100 | -500 10-15 | 200 Shake | |
| Chicken Fillets 100-500 | 18-25 200 | Turn over if | required |
| Drumsticks 100-500 | 18-22 180 | Turn over if | required |
| Steak | 100-500 10 | -20 180 Turn over if | required |
| Pork Chops | 100-500 10 | -20 180 Turn over if | required |
| Hamburger Patties 100 | -500 7-14 | 180 Add 1/2 tbspn | of oil |
| Frozen Fish Fingers | 100-400 6-12 | 200 Add 1/2 tbsp oil | in a bowl and then mix prior to placing in the frying basket |
| Cupcakes | 5 pieces | 15-18 200 | |
NOTE: Depending on your food, it is recommended to either shake your food (for smaller items such as chips, nuggets) or flip over for larger pieces of meat (steaks or chops) halfway during cooking for best results. The Air Fryer is equipped with a safety switch, the heating will stop, but the fan will still operate, along with the timer.
Other Useful Information
| Cooking Tips |
| ·The higher volume of food being cooked, the longer the cooking time. |
| ·Shaking smaller food products halfway through cooks food more evenly. To shake or turn over the food, pull the pan out of the Air Fryer using the handle and then shake or turn over. |
| ·Add some oil to fresh potatoes for a crispier result. Please ensure you cook your food in the Air Fryer within a few minutes of adding in the oil for best results. Mix the oil in a bowl prior to placing into the frying basket. Never add oil directly into the frying basket. |
| ·Do not cook greasy or oily foods such as sausages in the Air Fryer. |
| ·Snacks that can be cooked in an oven can also be cooked in the Air Fryer. |
| ·For crispy, homemade chips or fries, the optimal amount of food to cook at a time is 500g. |
| ·When making home made chips or fries, the best types of potatoes to use are the starchy varieties (kennebec, king edward, golden delight or sebago). |
| ·For best cooking results, it is advisable to minimise the time and frequency that the pan is taken out whilst the Air Fryer is on. The temperature inside the Air Fryer needs to remain consistent to ensure best cooking results. |
| ·Cakes and pastries can be also cooked in the Air Fryer. Please follow your own recipes and use a baking pan suitable for cooking in a conventional oven. |
WARNING: Please be careful when using metal utensils with this product as the non-stick coating can be scratched.
WARNING: Never press the basket release button when shaking or turning over food.
WARNING: Never use your hands to touch or handle food as it will be very hot. Please ensure you use kitchen tongs or other suitable utensils.
Other Useful Information
Cleaning and Maintenance
- Switch the Air Fryer OFF and ensure you have unplugged it from the power outlet. Ensure you allow for the appliance to cool down completely before cleaning.
NOTE: Remove the pan to allow the Air Fryer to cool down more rapidly.
- Wash the frying basket and pan in hot soapy water. Never use abrasive or strong household cleaners as they will damage the non-stick coating. If there is a build-up of food stains on the frying basket or bottom of the pan, soak in hot soapy water for 10 minutes, then wipe down with a non-abrasive cloth and rinse then dry thoroughly. Repeat if required for extra stubborn foods. Please note that both the pan and frying basket are dishwasher safe.
- To clean the interior and exterior of the Air Fryer, wipe over with a non-abrasive damp cloth and dry thoroughly.
- Clean the heating elements with a cleaning brush to remove any food particles.
- Make sure all parts are clean and dry before placing them back inside the Air Fryer.
NOTE: Always ensure the Air Fryer is switched off and unplugged when not in use. The unit should have completely cooled down before cleaning.
WARNING: Never immerse the Air Fryer, cord or plug into water or any liquid when cleaning.
Storage
- Before packing away the Air Fryer for storage, ensure it is clean and dry.
- We recommend storing the Air Fryer in its original carton to protect it from dust, with all the parts and accessories (frying basket and pan).
- Store the Air Fryer in a clean and dry place, out of children's reach.
- Do not place heavy objects on top during storage.
Other Useful Information (cont)
Responsible Disposal
At the end of its working life, do not throw this product out with your household rubbish. Electrical and electronic products contain substances that can have a detrimental effect on the environment and human health if disposed of inappropriately. Observe any local regulations regarding the disposal of electrical consumer goods and dispose of it appropriately for recycling. Contact your local authorities for advice on recycling facilities in your area.
Please keep the original packaging carton and materials in a safe place. It will help to prevent any damage if the product needs to be transported in the future. In the event it is to be disposed of, please recycle all packaging material where possible.
If you require another copy of this instruction manual please contact service@unclebills.com.au to obtain an electronic copy.
The Air Fryer has been fully tested and meets all requirements as set out by the below testing standards:
AS/NZS 60335.1
AS/NZS 60335.2.9
Specification Table
MODEL: IA0448
COLOUR: White
VOLTAGE: 220-240V\~50-60Hz
POWER: 1200 - 1400W
SIZE (cm): 34.3 x 28.5 x 31.4
NET WEIGHT: 3kg
WARRANTY: 3 Years
Version No: 1.1
Issue Date: 14 th June, 2016
Recipes
We have included a handful of recipes to help you get started with the Air Fryer. We encourage you to experiment with your own recipes for new and exciting meals or snack options.
French Fries 20
Sweet Potato Chips 21
Potato Slices 22
Potato Wedges 23
Spicy Fried Chicken Wings 24
Fried Dumplings 25
Fried Eggplant 26
Spicy Prawns 27
Lamb Cutlets 28
Chocolate Brownies 29

Recipes (cont)
French Fries
Ingredients
- 500g potatoes
• 1 tbsp of olive oil
- Salt to taste
Method
- Peel the potatoes and slice them length ways into 15mm thick pieces.
- Soak the potato slices in water for approximately 20 minutes, then drain and pat dry on a paper towel.
- Mix the olive oil and salt in a bowl until evenly combined, then run the mixture over the potatoes.
- Place the potato slices into the frying basket.
- Select the chips auto preset, then press Ⓜ commence cooking.
- For more even cooking, remember to shake the fries halfway through.
NOTE: When making home made chips or fries, the best types of potatoes to use are the starchy varieties (kennebec, king edward, golden delight or sebargo).

Note: These images are for illustrative purposes only and the finished product may differ from the illustration.
Recipes (cont)
Sweet Potato Chips
Ingredients
- 500g sweet potatoes
• 1 tbsp of olive oil - Salt and garlic salt to taste
Method
- Peel the sweet potatoes and slice them length ways into 15mm thick pieces.
- Soak the sweet potatoes in water for approximately 20 minutes, then drain and pat dry on a paper towel.
- Mix the olive oil, salt and garlic salt in a bowl until evenly combined, then rub the mixture over the sweet potato slices.
- Place the sweet potato slices into the frying basket.
- Select the chips auto preset, then press to commence cooking.
- For even cooking, remember to shake halfway through.
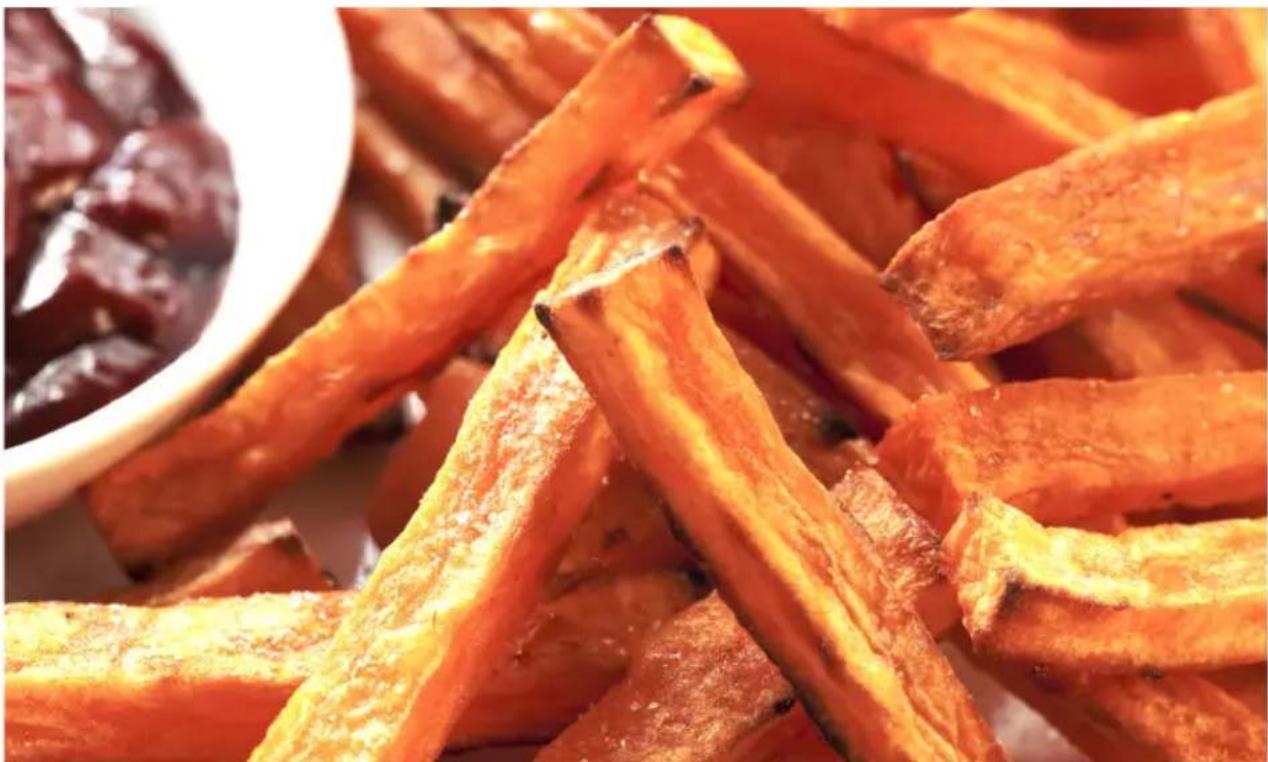
Note: These images are for illustrative purposes only and the finished product may differ from the illustration.
Recipes (cont)
Potato Slices
Ingredients
- 500g potatoes
- 1 minced garlic clove
• 1 tbsp of fresh thyme - 1 tbsp of olive oil
Method
- Peel potatoes and cut then into 5mm thick slices.
- Mix the garlic, thyme and olive oil in a bowl until evenly combined, then rub the mixture over the potato slices.
- Place the potato slices into the frying basket.
- Select the chips auto preset, then press ⏻ commence cooking.
-
For even cooking, remember to shake halfway through.
-
Soak potato slices in water for approximately 20 minutes, then drain and pat dry on a paper towel.

Note: These images are for illustrative purposes only and the finished product may differ from the illustration.
Recipes (cont)
Potato Wedges
Ingredients
- 500g potatoes
- 1 tbsp of ground cumin
- 1 tbsp of olive oil
• 1 tbsp of ground coriander
- Salt to taste
• 1 tbsp of ground paprika
Method
-
Slice the potatoes into wedges.
-
Soak potato wedges in water for approximately 20 minutes, then drain and pat dry on a paper towel.
-
Mix the olive oil, salt, ground cumin, ground coriander and paprika in a bowl until evenly combined. Then rub the mixture over the potato wedges.
-
Place the potato wedges into the frying basket.
-
Select the chips auto preset, then press Ⓞ to commence cooking.
-
Serve with sour cream and sweet chilli sauce (optional).
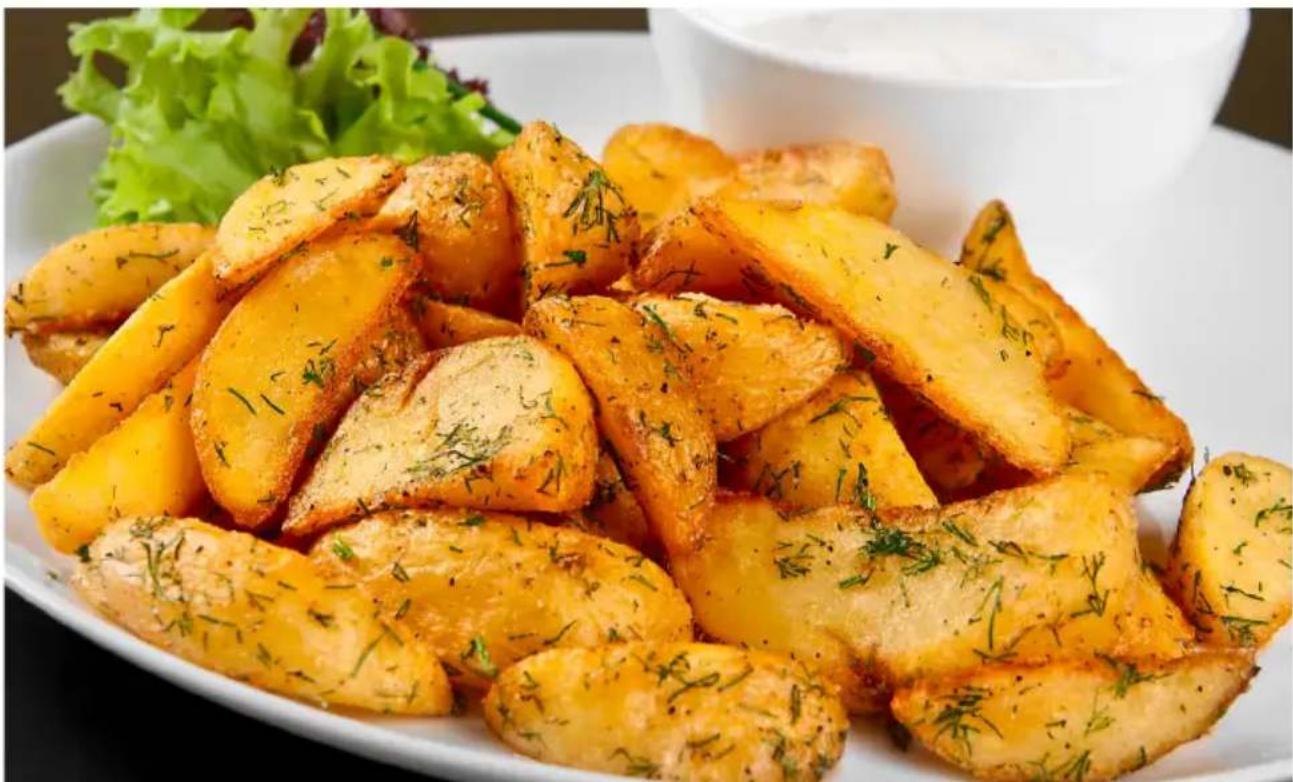
Note: These images are for illustrative purposes only and the finished product may differ from the illustration.
Recipes (cont)
Spicy Fried Chicken Wings
Ingredients
• 1 minced garlic clove
- 1 / 2 tbsp of mustard
• 1 tsp of paprika
• 1 tbsp of olive oil
• 12 chicken mid wings and drumettes
Method
- Mix the minced garlic, mustard and paprika in a bowl until evenly combined, then add in the olive oil and stir.
- Rub the mixture onto the chicken wings and allow it to marinate for at least 1 hour prior to cooking.
- Place the chicken wings into the frying basket.
- Select the chicken pieces preset and then press Ⓞ commence cooking.
- Rotate the chicken wings during the cooking process. Cook until the skin is crispy and golden brown.
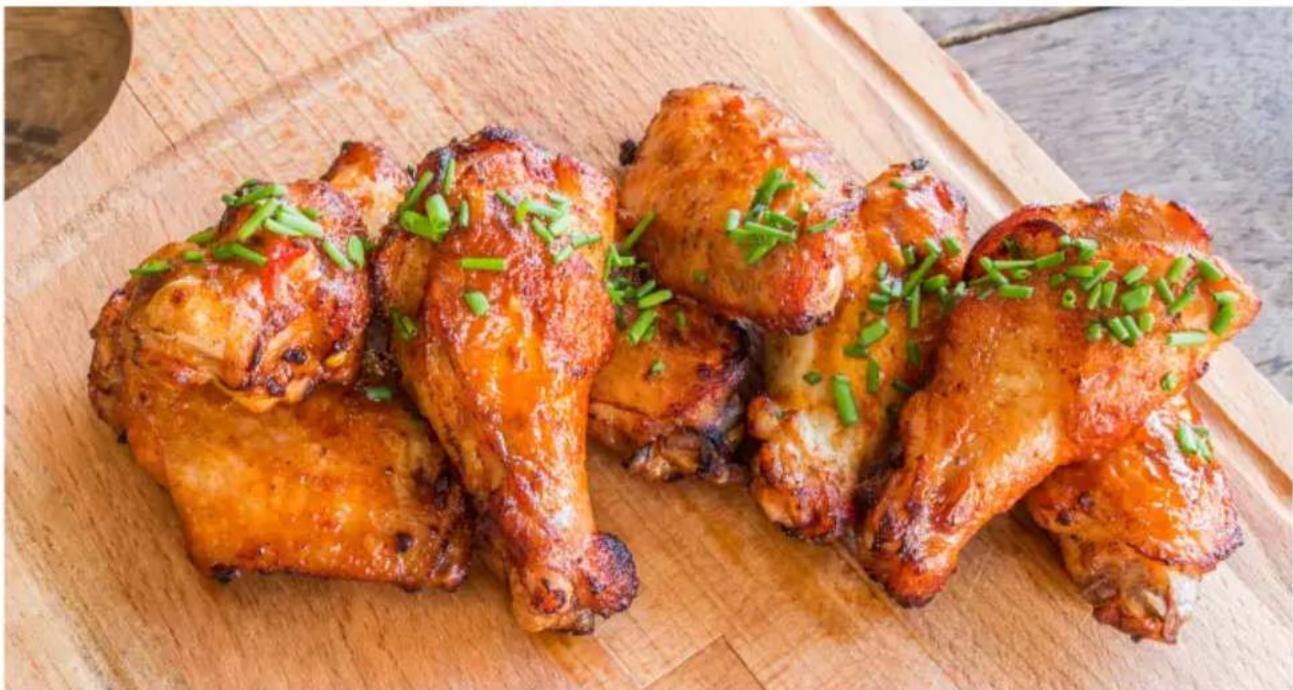
Note: These images are for illustrative purposes only and the finished product may differ from the illustration.
Recipes (cont)
Fried Dumplings
Ingredients
- Frozen dumplings, thawed
- Olive oil
Method
- Lightly brush a thin layer of olive oil over the dumplings.
- Place the dumplings in the frying basket, ensuring they are evenly spaced.
- Set the temperature at 180° C and timer to 12-15 minutes, then press ☑ commence cooking.
- Serve with soy sauce, red vinegar and chilli (optional).

Note: These images are for illustrative purposes only and the finished product may differ from the illustration.
Recipes (cont)
Fried Eggplant
Ingredients
- 400g eggplant
• 1 small piece of ginger, diced
• 1 glove of garlic - 1 tsp of olive oil
• 1 tsp of ground cumin
• 1 tbsp of soy sauce
Method
- Slice off the pedicle of the eggplant and rinse, then slice the eggplant into thinner strips.
- Mince the ginger, garlic and shallots, then combine and add in the soy sauce and cumin.
- Place the eggplant slices into the frying basket.
- Set the temperature at 180° C and timer to 3-5 minutes, then press ☑ no commence cooking.
- Cook the eggplant till they soften and then sprinkle the eggplant with the seasoning and cook for a further 8-10 minutes.
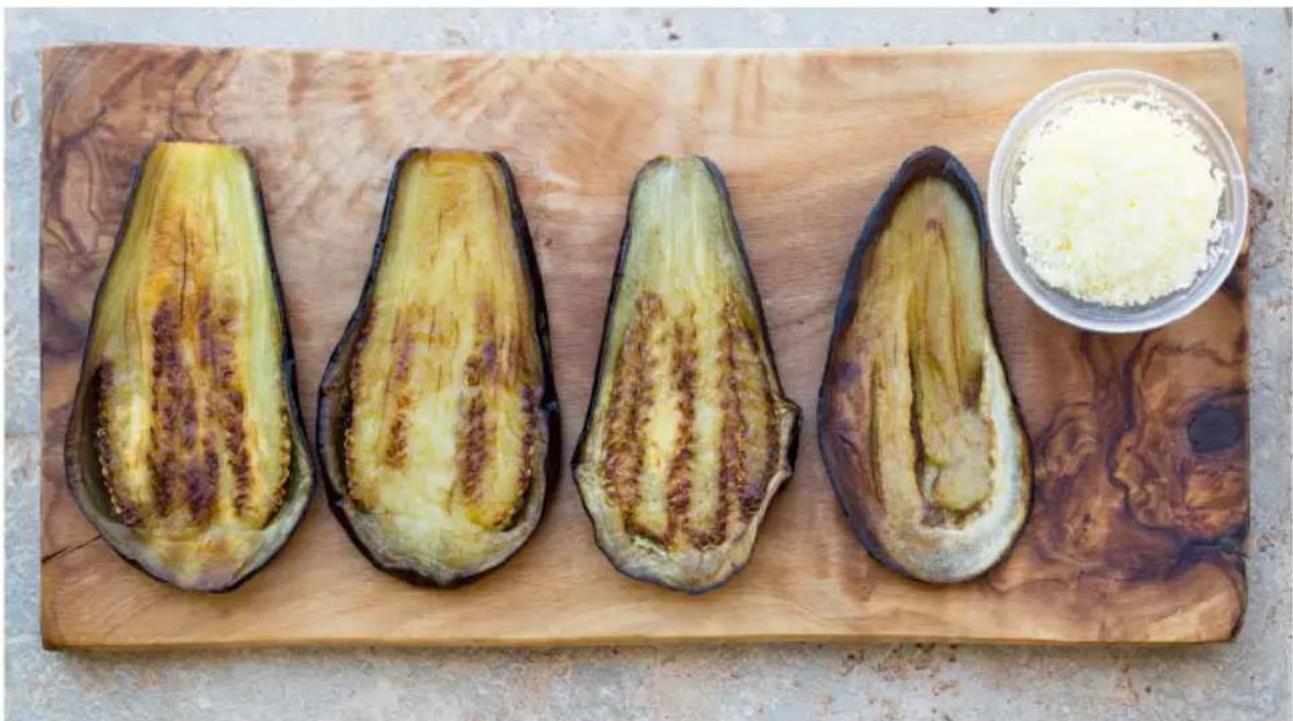
Note: These images are for illustrative purposes only and the finished product may differ from the illustration.
Recipes (cont)
Spicy Prawns
Ingredients
- 1 tsp of olive oil
• 1 clove of garlic, minced
• Red chillies, finely diced - Spicy black pepper
- Paprika (optional)
• 10 medium sized prawns, whole
Method
- Lightly coat the prawns with olive oil, then place them into the frying basket.
- Set the temperature at 200° C and timer to 5-8 minutes, then press ☑ to commence cooking.
- Combine the diced chillies, minced garlic and black pepper, then mix in the olive oil.
- Use the mixture as a dipping sauce for the prawns.
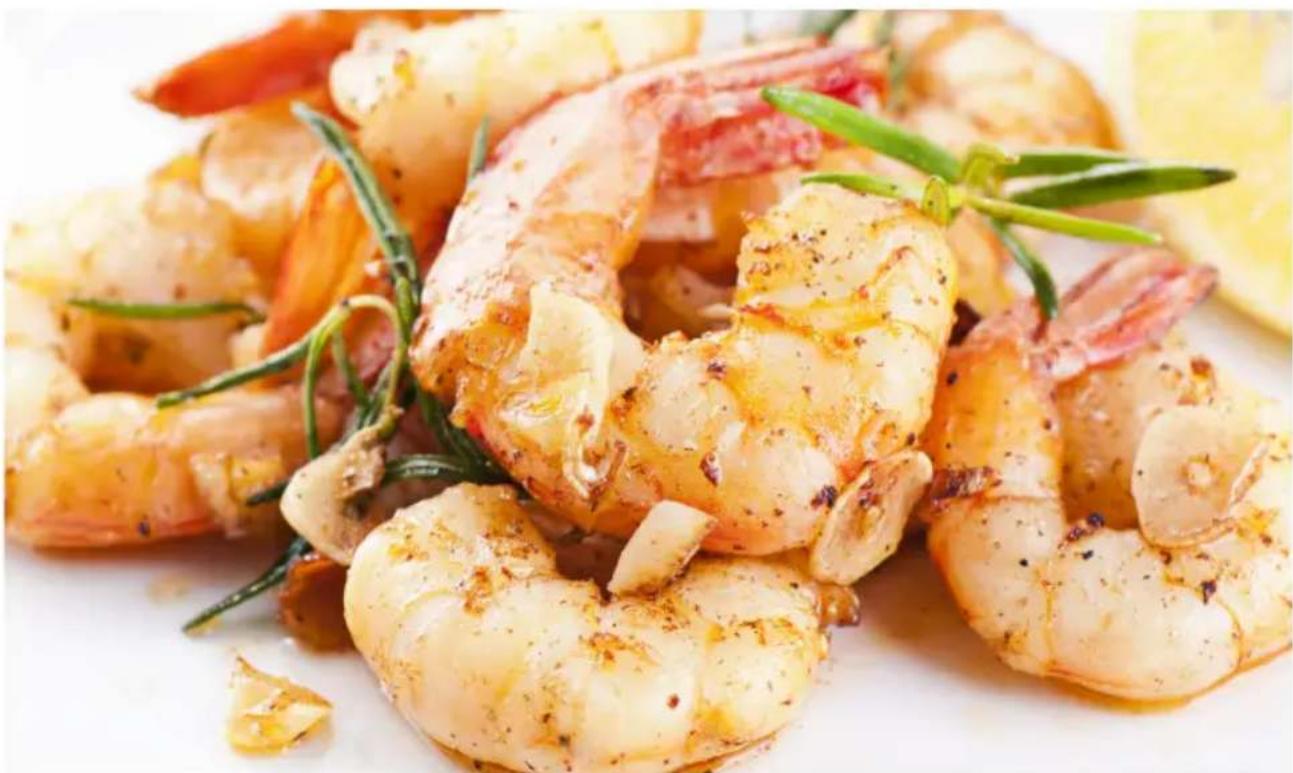
Note: These images are for illustrative purposes only and the finished product may differ from the illustration.
Recipes (cont)
Lamb Cutlets
Ingredients
- 300g lamb cutlets
- 2 tsp of soy sauce
- Ground black pepper
- Dash of brandy
- Olive oil
Method
- Combine the soy sauce, ground pepper, brandy and olive oil until mixed evenly.
- Rub the mixture onto the lamb cutlets and allow it to marinate for at least 1 hour prior to cooking.
- Place the lamb cutlets into the frying basket.
- Select the steak/chops auto preset, then press ⏻ commence cooking.
- Serve on a bed of salad or a side of homemade chips (optional).

Note: These images are for illustrative purposes only and the finished product may differ from the illustration.
Recipes (cont)
Chocolate Brownies
Ingredients
- 70g pure chocolate, pieces
- 1/2 tsp vanilla extract
- 70g unsalted butter, chopped
- 50g self raising flour
• 1 large egg, lightly beaten
• 30g walnuts, chopped
- 50g brown sugar
Method
- Melt the chocolate and butter together in a pan on the stove at low heat, mixing thoroughly. Allow to cool and set aside.
- Mix the eggs, sugar, vanilla extracts in a separate mixing bowl until light and creamy. Then add the chocolate mixture, self raising flour and stir in the walnuts.
- Line a small cake tin with baking paper and then fill with the brownie mixture. Place the cake tin into the frying basket.
- Set the temperature to 180° C and timer to 20 minutes, then press commence cooking. Bake through until the top is crispy.
- Remove the cake tin from the frying basket and allow it to cool down. Once cool, slice into small squares to serve.
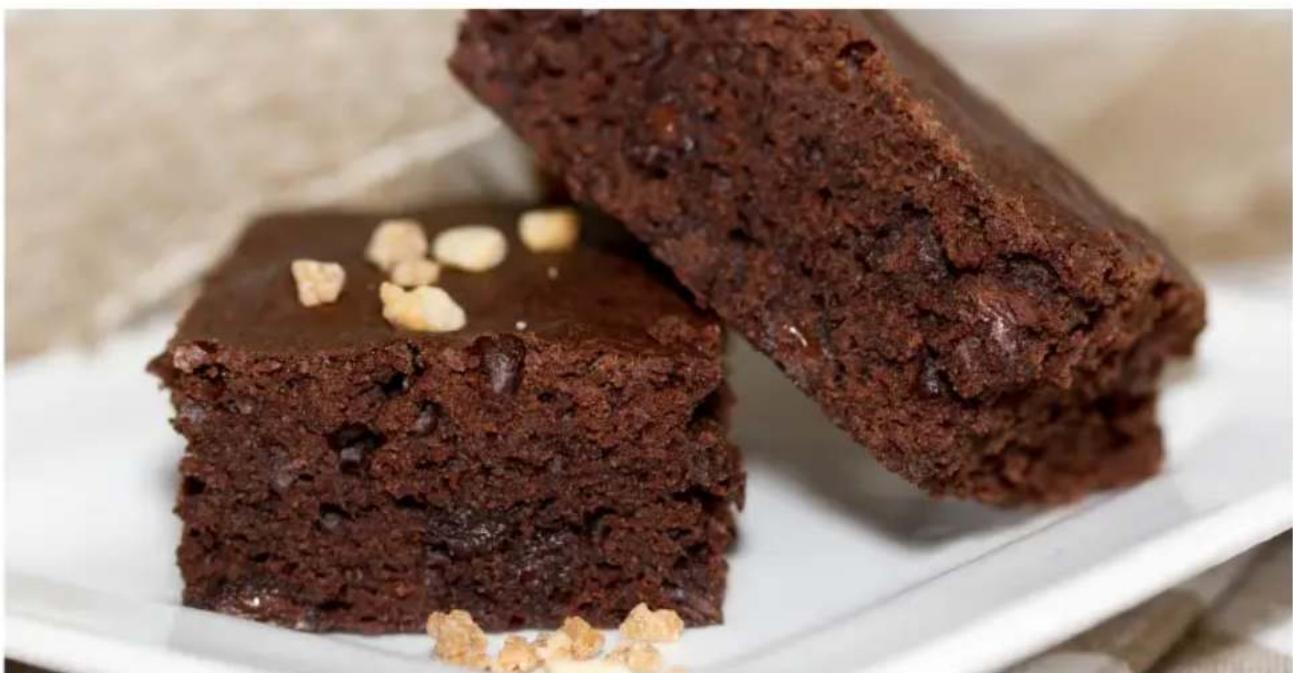
Note: These images are for illustrative purposes only and the finished product may differ from the illustration.
FAQ
| Problem Solution | |
| Why won’t the Air Fryer turn ON? | Check that the Air Fryer is correctly plugged in and switched on at the power outlet. |
| Why isn’t the food being cooked thoroughly? | The food capacity has been exceeded, remove some food and cook in another batch. This will cook the food more evenly and thoroughly.The temperature has been set too low, increase the heat.The food has not had enough time to cook, increase the cooking time. |
| Why has the food cooked unevenly? | Certain foods may need to be shaken midway through the cooking process. |
| Why won’t the pan slide back into the housing properly? | There is too much food in the frying basket, remove some food and try again.The pan has not been aligned correctly, align the pan with the grooves located on the inside of the Air Fryer housing. |
| Why is there white smoke being emitted during cooking? | The food contained within may be too greasy. Greasy and fatty foods will emit fat/oil into the pan of the Air Fryer and when it is heated, may emit a white smoke. Try to avoid cooking greasy/fatty foods in the Air Fryer. The white smoke will not affect the cooking process. |
| Why aren’t the chips crispy? | There may be a lack of oil and too much moisture. Ensure you have dried the chips after rinsing. Possibly add more oil to the chips before cooking.The chip pieces may be too large, try cutting the potatoes into smaller pieces for crispier results.When making home made chips/fries, we recommend you use starchy varieties (kennebec, king edward, golden delight or sebago). |
Notes

AMBIANO
Professional
DIGITAL AIR FRYER
Repair and Refurbished Goods or Parts Notice
Unfortunately, from time to time, faulty products are manufactured which need to be returned to the Supplier for repair.
Please be aware that if your product is capable of retaining user-generated data (such as files stored on a computer hard drive, telephone numbers stored on a mobile telephone, songs stored on a portable media player, games saved on a games console or files stored on a USB memory stick) during the process of repair, some or all of your stored data may be lost.
We recommend you save this data elsewhere prior to sending the product for repair.
You should also be aware that rather than repairing goods, we may replace them with refurbished goods of the same type or use refurbished parts in the repair process.
Please be assured though, refurbished parts or replacements are only used where they meet ALDI's stringent quality specifications.
If at any time you feel your repair is being handled unsatisfactorily, you may escalate your complaint. Please telephone us on 1300 777 137 or write to us at:
UNCLE BILL'S AUSTRALIA PTY LTD
PO Box 6292
Silverwater NSW 1811 Australia
1300 777 137
Opening Hours - 9:00am - 4:30pm (Mon-Fri), 9:00am - 3:00pm (Sat)
UNCLE BILLS
Ambiano AIR FRYER - WHITE
Artwork Size: 148 x 210mm
3mm BLEED
Item Code #:IA0448
Model #: 55080
UBA AMENDMENTS: K
DATE: 16-06-2016
UB MODIFIED: Mary (Move plus)
ALDI AMENDMENTS: V1.1
Aldi / SGS
DATE: 14-06-2016
MODIFIED: Lorena

ARTWORK SIGN OFF
SIGNATURE
SIGNATURE

PRINTER FILELOW RES
DO NOT PRINT CATCHLINE



- CONTENTS
- AMBIANO
- WARRANTY DETAILS
- GENERAL INFORMATION AND SAFETY INSTRUCTIONS
- ELECTRICAL SAFETY AND CORD HANDLING
- GENERAL INFORMATION AND SAFETY INSTRUCTIONS (CONT)
- USAGE CONDITIONS AND RESTRICTIONS
- HANDLING AND USAGE
- PRODUCT OVERVIEW
- SCOPE OF DELIVERY
- INCLUDED (NOT PICTURED)
- PRODUCT OVERVIEW (CONT)
- STANDBY MODE
- FUNCTION
- TEMPERATURE SETTING
- TIMER SETTING
- GETTING STARTED
- QUICK START COOKING
- AUTO PRESET OPTIONS
- BEFORE FIRST USE
- INSTRUCTIONS
- OPERATING THE AIR FRYER
- INSTRUCTIONS (CONT)
- SAFETY SWITCH
- OTHER USEFUL INFORMATION
- COOKING GUIDE
- CLEANING AND MAINTENANCE
- STORAGE
- OTHER USEFUL INFORMATION (CONT)
- RESPONSIBLE DISPOSAL
- SPECIFICATION TABLE
- RECIPES
- RECIPES (CONT)
- FRENCH FRIES
- INGREDIENTS
- METHOD
- SWEET POTATO CHIPS
- POTATO SLICES
- POTATO WEDGES
- SPICY FRIED CHICKEN WINGS
- FRIED DUMPLINGS
- FRIED EGGPLANT
- SPICY PRAWNS
- LAMB CUTLETS
- CHOCOLATE BROWNIES
- FAQ
- NOTES
- PROFESSIONAL
- DIGITAL AIR FRYER
- REPAIR AND REFURBISHED GOODS OR PARTS NOTICE
- UNCLE BILLS
- UBA AMENDMENTS: K
- ALDI AMENDMENTS: V1.1
- ARTWORK SIGN OFF
Brand : Ambiano
Model : IA0448
Category : Deep fryer