
GT7P2 - Cooker GORENJE - Free user manual and instructions
Find the device manual for free GT7P2 GORENJE in PDF.


| Product Type | Freestanding Electric Cooker |
| Brand | Gorenje |
| Model | GT7P2 |
| Energy Source | Electric |
| Hob Type | Ceramic Glass |
| Number of Cooking Zones | 4 |
| Oven Type | Multifunction Electric |
| Oven Capacity | 77 Liters |
| Oven Functions | Conventional, Grill, Fan, Defrost |
| Controls | Knobs and Digital Timer |
| Dimensions (H x W x D) | 850 mm x 600 mm x 600 mm |
| Weight | 52 kg |
| Voltage / Frequency | 230 V / 50 Hz |
| Power Rating | 10.8 kW |
| Cleaning Type | Enamel Interior, Easy-Clean Hob |
| Safety Features | Child Lock, Auto Shut-off, Residual Heat Indicator |
| Spare Parts Availability | Yes, through Authorized Service |
| Reparability Index | 7.2 / 10 |
| Warranty | 2 Years |
Frequently Asked Questions - GT7P2 GORENJE
User questions about GT7P2 GORENJE
0 question about this device. Answer the ones you know or ask your own.
Ask a new question about this device
Download the instructions for your Cooker in PDF format for free! Find your manual GT7P2 - GORENJE and take your electronic device back in hand. On this page are published all the documents necessary for the use of your device. GT7P2 by GORENJE.
USER MANUAL GT7P2 GORENJE
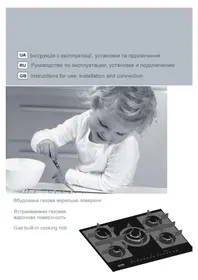
Gas built-in cooking hob


Gas burners


Fig. 1
Fig. 2
Fig. 3
Fig. 4
Fig. 5
Gas burner
GB Instructions for use, installation and connection

Gas built-in cooking hob

The Manufacturer strives for continuous improvements. For this reason, the text and illustrations in this book are subject to change without notice.
Dear customer!
This electric integrated gas cooker is manufactured for household use.
Our appliances are packed in environmentally friendly materials which may be recycled, deposited or destroyed without any hazard to the environment. Such packaging materials are also labeled accordingly.
Once the life cycle of your appliance is over, make sure not to pollute the environment, and deliver it to an authorized collector of old household appliances.
Instructions for use
Instructions for use have been prepared for the user. They describe the appliance and the way how the appliance is handled. These instructions are intended for various types of the appliances, so you may find some descriptions of functions that your particular appliance may not have.
These instructions are only valid in countries whose symbol is indicated on the appliance. If there is NO country symbol on the appliance, technical instructions should be checked for adapting the appliance to comply with the requirements and regulations for use in your country.
Connection Instructions
The appliance must be connected in compliance with the instructions attached to it, as well as in compliance with relevant regulations and standards. The connection may only be performed by a qualified person.
Rating plate
The rating plate indicating the basic information on the appliance is attached to the lower side of the hob.
Important warnings 40
Installation 41
Connecting the appliance to power mains 42
Connecting the cooking hob to gas supply 43
Nozzle table 46
Technical information 46
Appliance description 49
Electronic self-test 51
Cleaning and maintenance 52
Important warnings
- Installation of the appliance into a kitchen worktop and its connection to the power mains and gas supply may only be performed by an adequately qualified technician.
- When the appliance is in use, additional heat and moisture are emitted into the room. When the appliance is used for a prolonged period of time at a high performance level, intensive ventilation or use of a kitchen hood may be required in the room where the appliance is installed.
- Do not use the gas burners if the flame seems unstable.
- If you smell gas in the room, immediately close the gas supply valve either on the gas bottle or gas pipeline, extinguish all sources of open fire (including cigarettes), aerate the room, do not turn on any electric appliances, and call a natural gas expert.
- The main gas supply valve should be closed if gas burners will be out of use for a long period of time (e.g., when going on holiday).
- Do not leave small children unattended when the appliance is in operation. Risk of burning and scalding!
- During cooking, overheated fat or oil on the hob may ignite. There is a risk of burning and fire; therefore, control the cooking process at all times.
- Do not use the cooking hob for room heating.
- Do not place empty pans on the hob.
- Make sure that the parts of the burners are correctly positioned/installed.
- Glass ceramic hobs should not be used as a worktop. Sharp objects may cause scratches.
- Preparing food in thin aluminum or plastic containers on hot cooking zones is not allowed. Do not place any plastic objects or aluminum foil on the glass ceramic hob.
- If there is a wall power outlet located near the hob and another appliance is plugged into it, make sure the power cord does not come into contact with the hot cooking zones.
- Do not store any temperature-sensitive objects, materials, or substances underneath the hob, e.g. detergents, sprays, etc.
- Do not use the glass ceramic hob if it is cracked or broken. If any visible crack appears, immediately unplug the appliance from the power supply.
- In case of a fault on the appliance, immediately disconnect appliance from the power mains and contact a service center.
- Do not use steam cleaners or high-pressure cleaners to clean the cooking hob, as this may result in an electric shock.
- Appliance is manufactured in compliance with the relevant effective safety standards.
- Nevertheless, we strongly recommend that persons with impaired physical, motoric, or mental capacity, or persons with inadequate experience or knowledge, do not use the appliance unless attended by a qualified person. The same recommendation applies when appliance is used by persons of less-than-legal age.
• After a prolonged use of cast iron plates, the area of the plate and the edge of the cooking zone may discolour. Repair service is not covered by the warranty.
- The hob cannot be activated by external timers or remote controls systems.

The symbol on the product or on its packaging indicates that this product may not be treated as household waste. Instead it shall be handed over to the applicable collection point for the recycling of electrical and electronic equipment. By ensuring this product is disposed of correctly, you will help prevent potential negative consequences for the environment and human health, which could otherwise be caused by inappropriate waste handling of this product. For more detailed information about recycling of this product, please contact your local city office, your household waste disposal service or the shop where you purchased the product.
INSTALLATION Important warnings
| A | 680mm |
| B | 510mm |
| C | 660mm |
| D | 490mm |
| E | 55mm |
| F | 10mm |
| G | 50mm |
| H | 5mm |
Installing the foam gasket
- Installation of the appliance into a kitchen worktop and its connection to the power mains may only be performed by an adequately qualified technician.
- Veneer or other finish of the kitchen cabinet into which the hob is to be built in should be treated with heat resistant glue (100°C); otherwise, the worktop finish may be discolored or deformed.
- Cooking hob is dimensioned to be built into the worktop over a cabinet with a width of 600 mm or more.
- After installation, the front two fastening elements should be freely accessible from below.
- The kitchen cabinet underneath the hob should not be fitted with a drawer. If the kitchen cabinet has a horizontal partition wall, it should be installed no less than min 20mm from the lower surface of the worktop. The space between the partition wall and the hob must be empty; no objects should be placed into that gap.
- Hanging, or wall-mounted kitchen cabinets should be installed high enough not to interfere with the work process.
- The distance between the cooking hob and the kitchen hood should be no less as indicated in the instructions for kitchen hood installation. The minimum distance is 700 mm.
- The distance between the appliance edge and the adjacent tall kitchen cabinet or cupboard should be no less than 150 mm.
- Use of massive wood decoration plates or boards on the worktops behind the cooking hob is permitted, if the minimum distance remains the same as indicated in the installation drawings.
- Minimum distance between the built-in cooking hob and the rear wall is indicated on the installation drawing.
- Cooking hobs can be installed into worktops that are 25 to 40 mm thick. The front part must have an opening of no less than 5 mm.

Before inserting the appliance into the opening in the kitchen worktop, the supplied foam gasket must be attached to the lower side of the glass ceramic (glass) cooking hob (see figure above).
Do not install the appliance without the foam gasket!

Kitchen worktop cutoff dimensions

Installation procedure
The gasket should be attached to the appliance in the following way:
- Remove the protective film from the gasket.
- Then, attach the gasket to the lower side of the glass, approximately 2-3 millimeters from the edge (as shown in the figure). The gasket must be attached along the entire length of the glass edge and should not overlap at the corners.
- When installing the gasket, make sure that the glass does not come in contact with any sharp objects.
- Only ovens fitted with a cooling fan may be installed underneath this cooking hob.
- Before installing an oven, the rear wall of the kitchen cabinet should be removed in the area of the cooking hob cutout. Furthermore, there should be a gap of at least 5 mm at the front side.
• Worktop must be placed absolutely horizontally. - Protect the edges of the cut aperture suitably. - Connect the cooking hob to the power mains (see instructions for the connection of the cooking hob to power mains). - Insert the hob into the cut aperture. - Press the hob firmly towards the worktop from above.

CONNECTING THE APPLIANCE TO THE POWER MAINS
• The appliance may only be connected by an authorized skilled technician. • Electric system protection should comply with all relevant regulations. - The connection clips can be accessed when the connection clip covers are opened / removed. - Before connecting the appliance, make sure the voltage indicated on the rating plate is consistent with the voltage in your home circuit. • The rating plate with basic information is attached on the lower side of the hob. - Appliance is manufactured for use with the power supply voltage 220-240V ~. - The electric circuit should also include an omnipolar switch that will separate appliance from the mains, if required, with at least 3 mm distance between contacts. Suitable devices include fuses, current protection switches, etc. - Given the protection against the risk of fire, appliances of this type may be installed in a worktop next to a kitchen cabinet or cupboard that is taller than appliance (when installed); however, in this case, the kitchen cabinet must be installed on the other side, adjacent to the appliance. - The current-conducting and isolated parts must be protected against possibility of direct contact.
WARNING!
- Before any intervention, disconnect the appliance from the power mains. Connect the appliance in compliance with the electric connections diagram supplied; make sure the relevant network voltage is observed! The ground wire (PE) should be connected to the clip indicated by the earthing symbol.
- The mains cable should be fed through the fastening clip which protects it from being accidentally pulled out.
• After connecting the appliance, turn on all cooking zones / heaters for approximately three minutes to make sure they operate correctly.
- Incorrect connection may destroy parts of the appliance, making the warranty
Connecting:

Setting the clock
void.
- Before connecting the appliance, make sure the voltage indicated on the rating plate is consistent with the voltage in your home network. Connection voltage should be checked by a qualified technician using a corresponding measuring device!
- Connection cable on the back of the appliance should be led in such way that it does not touch appliances back wall, as this part will get very hot during operation.
The following can be used for connection:
- Type H05RR-F rubber connection cables with a green/yellow protective wire,
- Type H07RN-F rubber connection cables with a green/yellow protective wire.

- Turn on the hob with all burners switched off.
- Within 1 minute, press and hold (F) and (B) simultaneously for at least 3 seconds

- The flashing numbers to the left of the decimal dot indicates hours, while minutes are indicated to the right.
- The hours can be increased or decreased by pressing (E) or (D). • To set the minutes, press (F) again.
- The numbers to the right of the decimal dot start flashing and the minutes can be set in the same way as hours.
- Press (F) to memorize the set time.

CONNECTING THE COOKING HOB TO THE GAS SUPPLY
- The appliance must be connected in compliance with all relevant regulations, and it may only be used in well-ventilated rooms. Before connecting or using the appliance, please read the instruction manual.
- Before installing and connecting, make sure the local natural gas supply network and connection (type of gas and pressure) are compatible with your appliance version.
The category with the related types of gas that can be used are included in Table 1.
- The version of this appliance is indicated on the rating plate.
- This appliance is not suitable for connection to a burning fumes exhaust system (i.e., a chimney).
The appliance must be installed and connected in compliance with the relevant effective installation regulations.
Special care must be taken to ensure adequate ventilation/aeration.

Connection


- When connecting the appliance to the gas supply, follow the regulations of the local gas distributor.

Selecting the type of gas
- On the lower side, the cooking hob is fitted with a gas connection plug with an ISO7-1 R1/2 thread.
- Also supplied with the appliance is an adapter for liquid gas, a taper male, and a non-metal gasket.

- When connecting, the knee R1/2 should be held firmly to prevent it from rotating.
- For sealing of the connection joints, use non-metal approved gaskets and approved sealants.
- The gaskets should only be used once. The thickness of the flat non-metal gaskets should not be deformed by more than 25 percent.
- To connect the appliance to the gas supply, use a tested and certified flexible hose.
- The flexible connection hose should be able to move freely.
It should not come into contact with the movable parts of the furniture or the bottom of the cooking hob.
- If an electric oven is built into the kitchen cabinet below the cooking hob, it should be fitted with a cooling fan.
After connecting the gas hob, check the joints for any leaks.
Gas supply connection plug
A ISO7-1 R1/2 connection plug
B Non-metal gasket with thickness of 2 mm
C Pipe adapter for liquid gas (depending on the model)
Only use pipes and seals in accordance with the Standards. These pipes must be installed in a way that, when fully extended, their length does not exceed 2000 mm. For easier installation and to prevent gas leaks, attach the swivel coupling to the cook top first, and then to the gas mains pipe. Inverting this sequence may hamper the gas seal between the pipe and the cook top.
Important: when the installation is complete, check that all couplings are completely sealed by using a soapy solution. Never use a flame. Also ensure that the flexible pipe cannot come into contact with any moving part of the cook top (e.g., drawer) and that it is not in a position where it could be damaged.
The hob can be configured for use with three types of gas.
Procedure to select the type of gas used
• The hob must be turned on with all burners off.

- Press combination of A1 (-), A2 (-) and (D) simultaneously and hold it for at least 2 seconds.
- The burner level displays turning off and the timer displays showing the text "GAS1", "GAS2" or "GAS3", depending on the current configuration.
• The required setting can be selected with (E) and (D).

• To complete the procedure, press (F).
After the connection, check if the burners are operating correctly.
The flames have to be clearly visible, and should be blue and green at the center. If the flame is unstable, increase the minimum power. Explain the use of the
Adaptation to a different gas type

Setting the minimum burner level
burners to the user and read the instructions for use together.
- The procedure of adapting the cooker to another type of gas does not require removal of the appliance from the worktop.
- Before adapting, disconnect the appliance from the power mains and close the gas supply valve.
- Remove the support grid and burner covers with respective crowns.
- Replace the existing nozzles for nominal thermal load with corresponding nozzles for the new gas type supplied (see table below).
- After finishing this sequence, replace the old settings label with the new one provided for the new injectors. Open the gas valve and continue with minimum burner level setting.
• The hob must be turned on with all burners off. - Press combination of A1 ((+) and (-)) and A4 ((+) and (-)) and hold it for 3 sec.

- When the procedure is activated, text "MIN" is shown on timer display and decimal dot is shown on A1 display.

- Use buttons (E) and (D) to select the burner. The decimal dot moves to the burner on which you wish to set the minimum.
- Confirm with the button (F).
- The burner will switch on at the minimum level and on the relating display level 1 will appear. At the same time the timer display will show alternately "MIN" and the relating numeric value (decimal).

- The level can be increased or decreased with buttons (D) or (E). • To confirm the required minimum level, press (F).
- The text "MIN" remains on display, and none of the LEDs blink.
- Press (F) to exit the procedure, or buttons (E) or (D) to select another burner and set the relative minimum level.
Setting can be done for levels from 1 to 6.
• The hob must be turned on with all burners off. - Press combination of A1 ((+) and (-)) and A4 ((+) and (-)) and hold it for 3 sec.

- When the procedure is activated, text "MIN" is shown on timer display and decimal dot is shown on A1 display.

Setting the intermediate burner levels
- Use buttons (E) and (D) to select the burner. The decimal dot moves to the burner on which you want to set the intermediate levels.
- Confirm with button (F).
- The burner will switch on at the minimum level.
- Press (+) or (-) of the relevant burner to select the level you wish to set.
- Press (D) or (E) to increase or decrease the flow for the selected level. During the setting, the burner display will show the level being set. At the same time, the timer display will alternately show "MIN" and the corresponding numeric value (decimal).
- When setting the intermediate levels of a burner, you can:
- Press F twice to exit the procedure;
- Press F once to confirm the setting, then press (D) or (E) to set other burners and fix their respective flows.
Driving cooling motor
The touch control allows driving of the cooling motor. The motor is activated when the hob is switched on and the touch control detects a temperature higher than 45°C (independently of burner activation), and it stops working when the hob is switched off and the temperature is lower than 65°C.
The cooling motor is functioning correctly if it is activated:
- Every time the hob is plugged in (switched on). (The motor is active for about 2 seconds.) • During the display test procedure.
Warning: These tasks may only be carried out by a qualified technician authorized by the gas distribution company or an authorized service center!
TECHNICAL INFORMATION (TABLE 1)
| Type | GT7P2 | |
| Appliance dimensions (height/width/depth)mm | 55/680/510 mm | |
| Operating voltage | 220-240 V~, 50/60 Hz | |
| Burner | A: Auxiliary burnerR: Rapid burnerSR: Semi-rapid burnerTC: Triple Crown burner | |
| Front left (kW) | A: 1.0 | |
| Rear left (kW) | R: 3.0 | |
| Central (kW) | TC: 3.8 | |
| Rear right (kW) | SR: 1.75 | |
| Front right (kW) | SR: 1.75 | |
| Category Gas usage | II2H3+ | G20=20mbar |
| G30/G31=28-30/37mbar | ||
| Total Power (kW) | 11.3 | |
NOZZLE TABLE
| Burner | Gas Type | A | SR | R | TC |
| Rated heat output | 1.00 kW | 1.75 kW | 3.00 kW | 3.80 kW | |
| ∅ INJECTOR | |||||
| G30/G31=28-30/37mbar | GAS 3 | 0.50 mm | 0.65 mm | 0.85 mm | 0.98 mm |
| G20 20mbar | GAS 2 | 0.72 mm - X | 0.97 mm - Z | 1.16 mm - Y | 1.35 mm |
Important warnings

Unlocking burners
Cookware

- If you wish to quickly cook some food, set the gas burner to maximum power and then reduce the power to continue cooking.
- The gas burners are fitted with a spark plug as a flame failure device. If the burner flame is extinguished accidentally or unintentionally (e.g., when some liquid boils over or when there is a draught in the room):
- Gas supply is automatically cut off, thus preventing gas from being emitted into the room.
- The hob is equipped with a device that automatically tries to reignite the burner three times.
- The gas burner cover should always be placed on the burner crown very carefully. Make sure the slots on the burner crown are never obstructed.
1 Burner crown cover 2 Burner crown with the support for the burner cover 3 Spark plug flame failure device 4 Ignition spark plug 5 Nozzle
Burners in lock status are marked with the sign "b".
To unlock burners, press and hold the combination of buttons A1 (-) and (B) for at least 2 seconds. Burners are now restored to level 0 and are ready to be switched on again.
NOTE: If you use the unlocking burners combination 5 times in a row during a 15-minute period, the timer display will show error "FLT06". This means that you will not be able to repeat the unlocking procedure for the next 15 minutes.

- Correctly selected cookware will enable optimum cooking time and gas consumption. Pan diameter is the most important parameter.
- Flames that reach over the edge of a pan (due to too small a pan) can damage the cookware; furthermore, gas consumption is higher in such cases.
- For combustion, the gas also needs air. If a pan is too large, air supply to the burner is insufficient; as a result, combustion effect is poorer.
| Burner type | Pan diameter |
| Rapid (3.0 kW) | 220 - 260 mm |
| Semi-rapid (1.75 kW) | 180 - 220 mm |
| Auxiliary (1.0 kW) | 120 - 180 mm |
| Triple Crown (3.8 kW) | 220 - 300 mm |
Important warnings regarding the glass ceramic hob
- Cooking zones reach the selected power level or temperature very quickly; however, the area surrounding the cooking zones remains relatively cool.
- The hob is resistant to temperature changes.
- The hob is also impact-resistant. Pans may be placed onto the hob roughly without danger of damaging the hob.
- Glass ceramic hobs should not be used as a worktop. Sharp objects can cause scratches.
- Preparing food in thin aluminum or plastic containers on hot cooking zones is not allowed. Do not place any plastic objects or aluminum foil on the glass ceramic hob.
- Never use a glass-ceramic hob that is cracked or broken.
If an object falls on the hob with a sharp edge downwards, this could cause the hob / glass ceramic panel to break. Damage can be seen immediately, or only after a while. If any visible crack should appear, immediately disconnect the appliance from the power supply.
- If sugar or any sugar-laden food is spilt on a hot glass ceramic hob, wipe the hob immediately.
APPLIANCE DESCRIPTION

Hob control elements
- Gas cooking zone front left (A)
- Gas cooking zone rear left (R)
- Gas cooking zone rear right (SR)
- Gas cooking zone front right (SR)
- Gas cooking zone central (TC)
- Hob control panel

Hob control
A. ON/OFF sensor of cooking zones B. Safety lock on/off and child lock sensor C. ON/OFF sensor of cooktop D. Sensor (-) of timer E. Sensor (+) of timer F. Timer
Activating the hob
- After turning on the ceramic glass gas hob, all displays will be lit for a moment. The hob is ready for operation.
- The hob is fitted with electronic sensors which are activated when the relevant circle is touched for at least one second. • Each sensor activation is followed by a sound signal.
- Avoid placing objects on sensor surface. Always keep the sensor surface clean.
Touch the ON/OFF sensor (C) and hold it for at least 2 seconds. The hob is now active and all cooking zone power indicators will indicate "0".
Now you need to select the next setting within 1 minute, otherwise the hob will switch off again.
Turning on the cooking zones
After turning the hob on using the ON/OFF sensor (C), activate one of the cooking zones within the next 1 minute.
- When the desired cooking zone sensor is touched (+, 2 times), the relevant power indicator will indicate "7" and the decimal dot will light up.
- Touch the sensors "+" or "-" to set the desired cooking power from 1 to 7.
Continuous pressing of "+" or "-" sensors will automatically increase or reduce the power level. Power level can also be changed in steps by touching the relevant sensors intermittently.
Settings are always possible for only one cooking zone at the time. Power display indicates "0", or "H", depending on the existing temperature of the cooking zone (see Section Remaining Heat Indicator).
Switching off the cooking zones
- Selected cooking zone must be activated - decimal dot is on.
- Touching the cooking zone sensor "-" sets the power level to "0", and the cooking zone is turned off.
Switching the hob off: Turning off all the burners.
Locking the control unit / child safety lock.
Programming the burner auto-off time.
Fast deactivation.
- The selected cooking zone must be activated - the decimal dot is on.
- Press both (+) and (-) sensors of the selected cooking zone simultaneously, and the cooking zone is immediately switched off.
- The hob can be switched off at any time by pressing the ON/OFF sensor (C). To simultaneously turn off all the burners, briefly press the ON/OFF button to set the hob to standby.
By activating the child lock protection, you can stop the operation of the appliance, i.e., the use of cooking zones, protecting children from accidental start and eventual injury.
Activating child lock.
• The hob must be active. - Press sensor (B) for at least 2 seconds. Displays show symbol "L" alternating with the cooking level. Child lock is now activated. - If the hob is switched off by mistake, the lock function is still active when you turn it on again.
Turning child lock off.
- The hob must be active - displays are showing symbol "L".
- Press and hold the combination of buttons B and A (+) for at least 2 seconds. Child lock is now off.

Each burner can be set with a shutdown time, after which the burner is switched off automatically.
The timer can be programmed only with the respective burner in function.
Timer setting
During programming, if no button is pressed for more than 10 seconds, the setting procedure is interrupted automatically and the display returns to the main menu (current modifications to the selected burner will be lost).
- The hob must be on and the burner for which you intend to set the timer must be in function.
- Touch (F), "0.00" will be displayed on the timer display and the decimal dot of the cooking zone display will start to flash.
- Press (E) or (D) within 10 seconds to select the burner. This will be indicated by the flashing of the decimal dot on its respective display.

- Press (F) within 10 seconds to confirm the burner on which you want to set the timer.
- "0.00" will be displayed on the timer display. The flashing numbers on the left of the decimal dot are showing hours, while the flashing numbers on the right of the decimal dot are showing minutes.
- Press (E) or (D) within 10 seconds to set the hours (to speed up the timer setting, keep (E) or (D) constantly pressed).
- Press (F) again to set the number of minutes, within 10 seconds. The numbers on the right of the decimal dot start flashing.
- Proceed in the same way, as specified for the hours, to set the minutes.
- Press (F) to confirm the time shown on the display, within 10 seconds.
If the time is not confirmed, the timer will not be set at all.
- On the display of the burner for which you have set the timer function, there will be a flashing decimal dot; on the timer display, the selected time will be shown, preceded by (t).

- When programming the time, the current setting can be reset at any time by pressing (E) and (D) simultaneously. The zero time setting deactivates the burner timer.
Altering preset cooking time
- Press (F).
- To modify current settings, follow the same instructions as described in the section Timer setting.
Remaining cooking time
The timer display will show the shortest time of all timers currently set (the decimal dot on the timer currently displayed will flash notably faster than the decimal dots for other burners on which timer is also counting down at that moment).
To see the residual cooking time :
- Press (F).
- Press (E) or (D) to choose the burner display for which you want to see the residual time.

- The time shown on the display timer refers to the cooking zone for which the decimal dot is flashing.
- Press (F) three times to quit, or it ends automatically after 10 seconds.
Switching off the timer
At expiry of time, the timed burner will be turned off automatically and at the same time a sequence of beeps will be emitted for 30 seconds.
The acoustic signal can be switched off by pressing (F).
If you turn off the burner, the timer will be automatically switched off.
Residual heat indicator
Glass ceramic hob also features residual heat indicator "H".
After turning off the cooking zone, the display shows the symbol "H".
Even when the symbol "H" disappears, the cooking zone may still be hot.
Be careful to avoid burns!
Safety switch off
Continuous operation of a particular cooking zone is limited. Each burner not programmed with the relative timer turns off automatically after 4 hours of continuous operation.
When the cooking zone is switched off by the safety mechanism, the indicator displays symbols "0" or "H" in case there is any residual heat left.
In such cases, switch the cooking zone off by touching the relevant power setting sensor.
Protection from overheating
The cooking zone is also fitted with a safety device against overheating which protects electronic parts from damage. When the temperature of the cooking zone rises excessively, the safety device activates the fan. If this is not enough, the safety device turns off the overheated cooking zones completely. When the cooking zone cools off, its full power is again available.
Electronic self-test
The electronic boards run a continuous check of their status. In the event of any hardware problems or internal board faults which may constitute a hazard to the final user, the appliance switches to "safe" status in which the solenoid valves are shut down and the displays indicate the relative error code.
| Error displayed | Solution |
| b | There is no gas; restore gas and unblock the burners.Clean or re-position the spark plug for flame failure device and unblock the burners.Check if there is a spark when activating the burner.Clean the burner, than perform the burners unblocking procedure.If the problem persists, contact authorized center for technical assistance - specifying the error code. |
| F | Check wiring, if the problem persists, contact authorized center for technical assistance - specifying the error code. |
| FLt00 | Contact authorized center for technical assistance - specifying the error code. |
| FLt01 | Contact authorized center for technical assistance - specifying the error code. |
| FLt02 | Contact authorized center for technical assistance - specifying the error code. |
| FLt03 | Contact authorized center for technical assistance - specifying the error code. |
| FLt04 | Contact authorized center for technical assistance - specifying the error code. |
| FLt05 | Contact authorized center for technical assistance - specifying the error code. |
| FLt06 | Burners unblocking procedure has been executed more than 5 times in 15 minutes.Wait 15 minutes, then repeat the burner unblocking procedure; if the problem persist, contact authorized center for technical assistance - specifying the error code. |
| FLt08 | Contact authorized center for technical assistance - specifying the error code. |
| FLt09 | Main power has been switched off due to another type of error.Perform the burner unblocking procedure.If the problem persists, contact the authorized center for technical assistance - specifying the error code. |
| FLt0A | There is no gas; restore gas and perform the burner unblocking procedure.Clean or re-position the spark plug for flame failure device and perform the burner unblocking procedure.If the problem persists, contact authorized center for technical assistance - specifying the error code. |
| FLt0C | Contact authorized center for technical assistance - specifying the error code. |
| FtL0E | Wait a few seconds for control panel recalibration.If the error persists, switch off and on again.If the problem persists, contact authorized center for technical assistance - specifying the error code. |
| No error shown | Contact authorized center for technical assistance - specifying the error. |
| The cooking hob switches off | Switch off the hob if there is built-in oven mounted under the hob and wait until both are completely cooled.Check if air vents on the cabinet are made correctly.Switch on the hob and check if cooling fan is functioning properly.If cooling fan is not functioning properly (no noise from its rotation),contact authorized center for technical assistance - specifying the error. |
| L | No error!Control unit locking / Child safety Lock activated.Use Unlock procedure for control unit / Child safety system |
CAUTION: The use of a gas cooking appliance results in the production of heat, moisture and other combustion products in the room in which it is installed. Ensure that the kitchen is well ventilated, especially when the appliance is in use: keep natural ventilation vents open or install a mechanical ventilation device (mechanical extractor hood).
Prolonged intensive use of the appliance may require additional ventilation, for example opening a window, or more effective ventilation, for example increasing the level of mechanical ventilation where present.
CAUTION: Accessible parts may be hot when the grill is in use. Young children should be kept away.
CAUTION: This appliance is intended for cooking purposes only. It must not be used for other purposes, for example room heating.
CLEANING AND MAINTENANCE

Fig.1
Fig.2
Fig.3
Fig.4
Fig.5
Gas burner
After each use of the glass-ceramic hob, wait for it to cool down and then clean it; otherwise, even the smallest food residue will be burnt onto the hot surface next time you use the appliance.
For regular cleaning and maintenance of the glass-ceramic surface, use special conditioning agents that form a protective layer on the surface, shielding it from dirt. Before each use, wipe any dust or other particles from the hob surface and pan bottom as they could scratch the surface (Figure 1).
Careful: steel wool, abrasive sponges, and abrasive detergents can scratch the hob surface. Glass ceramic surface can also be damaged by aggressive sprays and inappropriate or insufficiently shaken (mixed) liquid cleaning agents (Figure 1 and Figure 2).
Signs and indications on the hob may be worn if aggressive cleaning aids are used on cooking zone edges, or if pans with damaged bottom are used. Light stains can be removed by a damp soft cloth; then, wipe the surface dry (Figure 3).
Water stains can be removed using a mild solution of vinegar; however, do not use this solution to clean the frame (only with some models, as it may become dull). Do not use aggressive sprays or decalcification agents (Figure 3).
Heavier stains can be removed using special agents and utensils for cleaning the glass-ceramic hobs. When using these products, follow the instructions provided by their manufacturers.
Make sure any residues of cleaning agents are thoroughly removed, as they could damage the glass-ceramic hob when the cooking zones heat up (Figure 3).
Stubborn and burnt residues can be removed using a scraper.
Make sure the plastic part of the scraper does not come into contact with a hot cooking zone. Be careful not to cut yourself with the scraper!
Sugar and sugar-laden food may permanently damage the glass-ceramic surface (Figure 5); therefore, they should be removed from the glass-ceramic surface as soon as possible, even when the cooking zone is still hot (Figure 4).
Any change in the color of the glass-ceramic surface does not affect its operation or the stability of the surface. Such discolorations are mostly a result of burnt food residues or use of cookware made of materials such as aluminum or copper; these stains are difficult to remove.
Warning: All damage described above predominantly relates to the aesthetics, i.e. appearance of the appliance and do not affect its functionality directly. Such errors cannot be the subject of a warranty claim.
•To clean the grid, cooking hob surfaces, and parts of the burner, use hot water with some dishwashing detergent. - Clean the thermo-element and the spark plug with a soft brush. These parts must be kept impeccably clean, as only then will they operate correctly. - Clean the crown and the burner cover. Be particularly careful to keep all exit slots on the crown clean and unobstructed. •After cleaning, dry all parts thoroughly and replace or reassemble them correctly. Parts that are placed askew will make lighting the burners more difficult.
Warning: Burner covers are coated in black enamel. Due to high temperatures, discoloration is unavoidable; however, this will not affect the operation of the burners.
- GAS BURNERS
- GAS BURNER
- DEAR CUSTOMER
- INSTRUCTIONS FOR USE
- CONNECTION INSTRUCTIONS
- RATING PLATE
- IMPORTANT WARNINGS
- INSTALLATION IMPORTANT WARNINGS
- INSTALLING THE FOAM GASKET
- THE GASKET SHOULD BE ATTACHED TO THE APPLIANCE IN THE FOLLOWING WAY
- CONNECTING THE APPLIANCE TO THE POWER MAINS
- WARNING
- CONNECTING
- THE FOLLOWING CAN BE USED FOR CONNECTION
- CONNECTING THE COOKING HOB TO THE GAS SUPPLY
- THE CATEGORY WITH THE RELATED TYPES OF GAS THAT CAN BE USED ARE INCLUDED IN TABLE
- SELECTING THE TYPE OF GAS
- AFTER CONNECTING THE GAS HOB, CHECK THE JOINTS FOR ANY LEAKS
- GAS SUPPLY CONNECTION PLUG
- PROCEDURE TO SELECT THE TYPE OF GAS USED
- ADAPTATION TO A DIFFERENT GAS TYPE
- SETTING THE INTERMEDIATE BURNER LEVELS
- DRIVING COOLING MOTOR
- UNLOCKING BURNERS
- COOKWARE
- IMPORTANT WARNINGS REGARDING THE GLASS CERAMIC HOB
- APPLIANCE DESCRIPTION
- HOB CONTROL ELEMENTS
- HOB CONTROL
- ACTIVATING THE HOB
- TURNING ON THE COOKING ZONES
- SWITCHING OFF THE COOKING ZONES
- SWITCHING THE HOB OFF: TURNING OFF ALL THE BURNERS
- LOCKING THE CONTROL UNIT / CHILD SAFETY LOCK
- PROGRAMMING THE BURNER AUTO-OFF TIME
- FAST DEACTIVATION
- ACTIVATING CHILD LOCK
- TURNING CHILD LOCK OFF
- TIMER SETTING
- ALTERING PRESET COOKING TIME
- REMAINING COOKING TIME
- SWITCHING OFF THE TIMER
- RESIDUAL HEAT INDICATOR
- SAFETY SWITCH OFF
- PROTECTION FROM OVERHEATING
- ELECTRONIC SELF-TEST
- CLEANING AND MAINTENANCE
Brand : GORENJE
Model : GT7P2
Category : Cooker