
Espresseria Automatic XP7240 - Coffee machine KRUPS - Free user manual and instructions
Find the device manual for free Espresseria Automatic XP7240 KRUPS in PDF.


| Product Type | Automatic espresso machine |
| Brand | Krups |
| Model | Espresseria Automatic XP7240 |
| Dimensions (W x D x H) | 28.5 x 34.5 x 37.0 cm |
| Weight | 8.0 kg |
| Power | 1450 W |
| Voltage | 220-240 V, 50-60 Hz |
| Water Tank Capacity | 1.8 L |
| Bean Hopper Capacity | 250 g |
| Pump Pressure | 15 bar |
| Milk System | Integrated steam wand |
| Ground Coffee Option | Yes, bypass doser |
| Coffee Strength Settings | 3 levels |
| Temperature Settings | 3 levels |
| Cup Warmer | Yes, on top |
| Auto Clean Cycle | Yes |
| Descaling Indicator | Yes |
| Energy Saving Mode | Yes |
| Quick Steam Function | Yes |
| Programmable Water Hardness | Yes |
| Removable Brew Unit | Yes |
| Safety | Auto shut-off |
| Spare Parts Availability | Brew unit, water filter, seals |
Frequently Asked Questions - Espresseria Automatic XP7240 KRUPS
User questions about Espresseria Automatic XP7240 KRUPS
0 question about this device. Answer the ones you know or ask your own.
Ask a new question about this device
Download the instructions for your Coffee machine in PDF format for free! Find your manual Espresseria Automatic XP7240 - KRUPS and take your electronic device back in hand. On this page are published all the documents necessary for the use of your device. Espresseria Automatic XP7240 by KRUPS.
USER MANUAL Espresseria Automatic XP7240 KRUPS
For domestic use only
The warranty excludes espresso machines that do not work or work incorrectly due to lack of cleaning, failure to remove scale, or due to the presence of foreign bodies in the grinder.
CONTENTS
PAGE
2 Description
3 Information on espresso coffee Safety instructions
4 BEFORE FIRST USE Measuring water hardness Claris - Aqua Filter System cartridge
5-6 PREPARING THE APPLIANCE First use / Setting machine parameters Installing the filter Coffee-making system rinsing Preparing the grinder
6-7 PREPARING ESPRESSO AND ORDINARY COFFEE Preparing an espresso (from 20 to 70 ml) Preparing ordinary coffee (from 80 to 220 ml) 2-cup function
7-8 PREPARING STEAM Frothy milk Set Auto-Cappuccino
8 PREPARING WITH HOT WATER
9 MAINTAINING YOUR APPLIANCE Emptying the coffee grounds collector, the cleaning tray and the drip tray Rinsing the coffee-making system Automatic cleaning program
10 Automatic scale removal program General maintenance
11 OTHER FUNCTIONS Maintenance Settings
12 Product information Demonstration mode MOVING THE APPLIANCE ELECTRICAL OR ELECTRONIC PRODUCT AT END OF SERVICE LIFE
13 PROBLEMS AND CORRECTIVE ACTIONS 14 RECIPES
This product may differ from the photos.
DESCRIPTION
Thank you for purchasing this Krups Espresseria Automatic. We are sure you will enjoy both the quality of the coffee it makes and how easy it is to use.
Whether you want a short, strong shot of ristretto, a good espresso, a bigger and milder lungo, or a creamy cappuccino, your automatic coffee/espresso machine has been designed so you can enjoy the same quality at home as at the bistro, whatever the time of day and right through the week.
Thanks to its Thermoblock System, its 15 bar pump, and because it uses real coffee beans that are ground just before the coffee is made, your Espresseria Automatic will give you a drink containing maximum aroma, with a fine creamy golden brown top produced by the natural oils contained in coffee beans.
Drink your espresso from small porcelain cups rather than the usual coffee cup or mug.
To obtain an espresso at just the right temperature and a nice compact creamy top, we advise you to pre-heat your cup.
After a few trial runs you will find the type of mix and roast of the coffee beans that suits your taste. The quality of the water used is obviously another essential factor in the coffee you get.
Make sure the water has come fresh out of the tap (contact with the air tends to make it stagnate), that it is free from chlorine odours and relatively cold.
Espresso coffee is richer in aroma than a conventional filter coffee. Despite its stronger, longer-lasting taste, espresso in fact contains less caffeine than filter coffee (about 60 to 80 mg a cup as compared with 80 to 100 mg a cup). This is due to the shorter percolation time.
Due to the visibility of the containers and its automatic cleaning and scale removal programs, your Espresseria Automatic is extremely easy to use.
Important: Safety instructions
- Read the instructions for use carefully before first using your appliance and keep them for reference: Incorrect use of the appliance will release KRUPS from any responsibility.
- Place on a flat, stable, heat-resistant surface.
- Connect the appliance only to an earthed mains socket. Check that the power supply voltage shown on the appliance's rating plate corresponds to that of your electrical installation.
- Make certain not to place the appliance on a hot surface such as a hot-plate or use it close to a bare flame.
- Immediately take the plug out of the socket if you notice any problem while coffee is being made.
- Do not pull the power supply cord to remove the plug. Do not let the power supply cord hang down from a table or work surface.
- Do not put your hand or the power supply cord on the hot parts of the appliance. Never soak the appliance, the power cord or the electric plug in water or any other liquid.
- Keep the appliance out of reach of children and do not let the power supply cord hang down.
- Do not use the appliance if the power supply cord or the appliance itself is damaged.
- For safety reasons, do not use the appliance if the power supply cord or plug are damaged. Only have the power supply cord replaced by an authorised KRUPS service centre. Always refer to the instructions when removing scale from the appliance.
- Protect the appliance against humidity and freezing.
- Do not use the appliance if it does not run correctly or if it has been damaged. In this case, have the appliance examined by a KRUPS authorized service centre (see list in KRUPS Service handbook).
- Apart from cleaning and scale removal in accordance with the appliance's user instructions, any intervention on the appliance must be performed by a certified KRUPS service centre.
- In the interests of safety, only use accessories and consumables certified by KRUPS for your appliance.
- Any error in connection negates the warranty. Disconnect the appliance as soon as you stop using it over a prolonged period and when you clean it.
- All appliances are subject to stringent quality control. Practical tests using appliances taken at random are conducted and this may explain any marks showing prior use.
- You are advised against using multiple plugs and/or extensions.
- Do not put water into the coffee bean container and/or under the servicing flap.
- Be careful of the direction of the steam nozzle as steam can cause scalding.
- Failure to ensure scale removal, cleaning and regular maintenance or the presence of foreign bodies in the grinder will mean that warranty will not be valid.
Limits to use
This Espresso machine must only be used to prepare espressos or coffee, to froth up milk and heat liquids. This product has been designed for domestic use only. Any commercial use, inappropriate use or failure to comply with the instructions, the manufacturer accepts no responsibility and the guarantee will not apply.
BEFORE FIRST USE
MEASURING WATER HARDNESS
Before using the appliance for the first time or if you have noted a change in water hardness, it is advisable to adapt the appliance to the observed water hardness. To determine the water hardness, use the measuring stick delivered with the appliance or get in contact with your water board. The appliance will ask you for the hardness of your water on first use (see First use / Setting machine parameters section)
| Degree of hardness | 0very soft | 1soft | 2moderately hard | 3hard | 4extremely hard |
| °f | <5,4° | >7,2° | >12,6° | >25,2° | >37,8° |
| °dH | <3° | >4° | >7° | >14° | >21° |
| °TH | <3,75° | >5° | >8,75° | >17,5° | >26,25° |

Fill a glass with water and immerse a stick in it

After 1 minute the hardness measurement will appear (moderately hard water)
CLARIS · AQUA FILTER SYSTEM F 088 CARTRIDGE (SOLD SEPARATELY)
To get the best taste from your coffee and extend your appliance's service life, we advise you to use the Claris - Aqua Filter System cartridge sold as an accessory.
It comprises a scale-removing substance and activated carbon that reduces chlorine, impurities, lead, copper, pesticides, etc. that are present in the water. Minerals and trace elements will then be preserved.

Filter the water using the Claris - Aqua Filter System cartridge to reduce carbonate hardness by as much as 75 %* Chlorine - up to 85 %* Lead - up to 90 %* Copper - up to 95 %* Aluminium - up to 67 %*

Mechanism to memorise the month the cartridge was fitted and when to replace it (after 2 months at most).

Installing the cartridge in the machine. On first use, screw the filter cartridge into the bottom of the water tank.

To fit the cartridge, also refer to the "First use" section.

Your appliance will give you a message telling you when to replace your Claris - Aqua Filter System cartridge. The Claris cartridge needs to be replaced for about every 50 litres of water or every two months at least.
PREPARING THE APPLIANCE

Pull out and fill the water tank.

Put it back in place by pressing firmly and close the lid again.
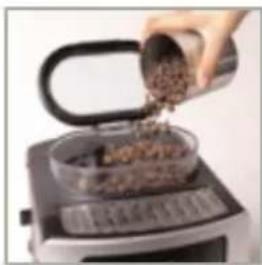
Open the coffee bean container lid. Add the coffee beans (250 g maximum).
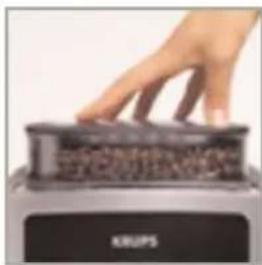
Close the coffee bean container lid again.

Do not fill the water tank with hot water, mineral water, milk or any other liquid. If you turn on the appliance when the water tank is not in place or not correctly filled (under the "min." level,), the "fill water tank" light will come on and making an espresso or a cup of coffee will be made impossible.
Never put ground coffee in the coffee container.

Check that the coffee beans do not contain any foreign particles such as grit, as any damage caused by the presence of foreign particles will negate the warranty.
Do not put water into the coffee bean container.
Remember to fit the drip tray to avoid waste water flowing onto the work surface and staining it or scalding you.
FIRST USE / SETTING MACHINE PARAMETERS
Use the rotating button to select a function, increase or reduce values. Confirm your choice using the OK key.

Select

Confirm
When you first use your appliance, it will ask you to set several parameters. If you disconnect your appliance, you will again be asked for some of these parameters.

Press "On / Off" to turn your appliance on. Follow the instructions that appear on the "choice of language" screen.
![graph TD A["Language"] --> B["English"] B --> C["Français"] C --> D["OK"] C --> E["PROG"]](/content/2026/06/1310121/images/2dcd8100063d21e86846c59e1789caeac7952af6751acaf548b3578c946c26a7.jpg)
Use the rotating button to choose a language (highlighted). Press the OK key to validate.
The appliance will ask you to set:
![graph TD A["Language"] --> B["Measurement unit"] B --> C["Date"] C --> D["Clock"] D --> E["Auto-off"] E --> F["Auto-on"] F --> G["Water hardness"] G --> H["Filter"]](/content/2026/06/1310121/images/a6b187d676e8e2b346cac38a9d4832e74114bd72cd27a9d5a91fb9db45806440.jpg)
You can select your chosen language from those offered.
Choose either ml or oz as your measurement unit
You must set the date.
You can choose between 12 hour or 24 hour time display.
You can choose the period after which your appliance will stop automatically, from 30 minutes to 4 hours by 30 minute increments.
You can automatically start pre-heating of your appliance at your chosen time.
You must set your water hardness between 0 and 4. See "Water hardness measurement" section.
You must indicate whether a filter is fitted or not (Claris - Aqua Filter System cartridge)
INSTALLING THE FILTER (CLARIS - AQUA FILTER SYSTEM CARTRIDGE)
Use a 0.5 litre recipient, choose the "Yes" option in the "Filter" function and follow the instructions on the screen.
COFFEE-MAKING SYSTEM RINSING
![graph TD A["Rinsing"] --> B{Yes} B -->|Yes| C["No"] C --> D["OK"] D --> E["Feedback Loop"]](/content/2026/06/1310121/images/09e645a43347a6e1f91dc4d2bebaf54908bb2a48677425dda6b0c139695527b2.jpg)
You can rinse the coffee-making system once the appliance has been turned on and pre-heating has been completed.

Place a recipient under the coffee outlets then select "YES" from the menu proposed. The rinsing cycle will stop automatically after about 40 ml.
Press prog at any time to display menus to perform rinsing and then select MAINTENANCE => OK => RINSING.

It is best to perform rinsing after the appliance has remained unused for several days.
PREPARING THE GRINDER
Adjust the fineness of your coffee grinding to set the strength of your coffee. The finer the grind setting, the stronger and creamier the coffee will be.
Turn the "Grinding fineness setting" button to set the degree of grinding fineness.
Turn anticlockwise for a finer grind.

Turn clockwise for a coarser grind.

CHANGE THE SETTING DURING GRINDING. NEVER FORCE THE GRINDING FINENESS SETTING BUTTON.
PREPARING EXPRESSO AND ORDINARY COFFEE

YOUR APPLIANCE IS DESIGNED TO MAKE COFFEE FROM COFFEE BEANS ONLY. When you first make coffee with the machine or after a long period of absence or a cleaning or scale removal procedure, a little steam and hot water will come out of the steam nozzle (priming). Splashing or scalding may occur if the coffee outlets are set too high in relation to the size of the cups.
PREPARING AN EXPRESSO (FROM 20 TO 70 ML)
The quantity of water for an espresso must be between 20 and 70 ml.
PREPARING A CUP OF COFFEE (FROM 80 TO 220 ML)
The quantity of water for a cup of coffee must be between 80 and 220 ml.
Press the Ⓐ button, wait for the end of pre-heating and perform a rinsing operation if you wish.

The drink selection menu will be displayed.
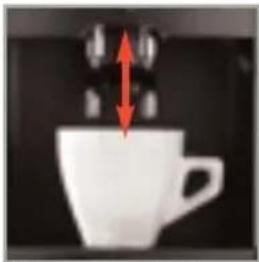
Put a cup under the coffee outlets. You can lower or raise the coffee outlets to suit the size of your cups.

Use the rotating button to select your drink and confirm by pressing the OK key.

You can change the volume of water at any time using the rotating button.
To stop coffee flowing into the cup, you can either again press a key or turn the rotating button to reduce volume.

The ground coffee is first moistened with a little hot water after the grinding stage. A few moments later, percolation as such starts.
There is a temperature setting function to control how hot your coffee is (see Settings).
TWO-CUP FUNCTION
You can use your appliance to make 2 cups of coffee or espresso. Remember not to remove the cups after the first cycle. You have now prepared your appliance. The drink select menu will be displayed.

Put two cups under the coffee outlets. You can lower or raise the coffee outlets to suit the size of your cups.
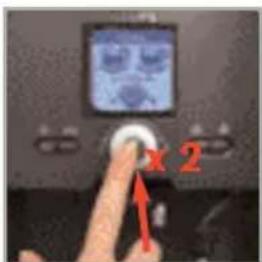
Select your drink and confirm by clicking twice on the OK key. A message will appear to tell you that you have chosen two cups.
The appliance will automatically sequence 2 complete coffee-making cycles.

If the tray is full or the water tank is empty while preparing the first coffee, the second cycle will not be run. You will then have to restart your second cycle after you have seen to things.
PREPARING STEAM
Steam froths up the milk to make a cappuccino or a caffe latte, for example, and also heats up liquids. As you need a higher temperature to produce steam than to make an espresso, the appliance runs an additional pre-heating phase for steam.

While the screen displays the drink selection menu, press the "steam" key. A screen will inform you that the appliance is being pre-heated. Once the pre-heating phase has been completed, a message will ask you to place a recipient under the steam nozzle. Press the "steam" key again to start generating steam. A little water will be produced first and then steam will start. Use the same key to stop steam generation.
FROTHING MILK

We advise you to use very fresh milk.
The milk and its recipient must be cold, ideally between 6 and 10 °C.
We therefore advise you against putting the recipient under hot water before using it.
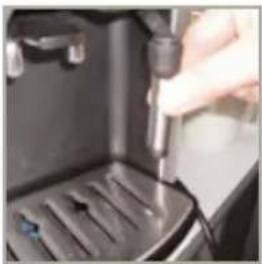
Check that the steam nozzle is correctly fitted.

Pour the milk into your milk jug. Only half fill it. Immerse the nozzle in the milk.
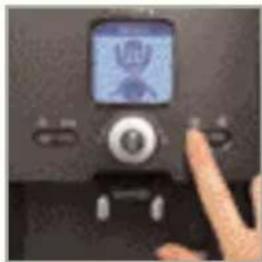
Press the "steam" key and follow the instructions on the screen.

Once your milk is frothy enough...
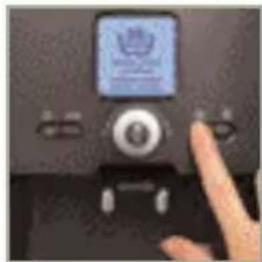
again press the "steam" to stop the cycle.

To remove any remaining milk from the steam nozzle, place a recipient under the nozzle and press the "steam" key.

Let the steam escape for at least 10 seconds and then press the "steam" key again to stop steam generation.


You can remove the steam nozzle for thorough cleaning. Wash it using a brush with water and a little non-abrasive washing up liquid. Rinse and dry it. Before re-fitting, make certain that the air inlet holes are not clogged by milk residues. Clean out the holes with a needle if necessary.

To interrupt the steam function, just press any key.
If the nozzle is blocked, clean it out with a fine needle.
The maximum duration for production of steam per cycle is limited to 2 minutes.
SET AUTO-CAPPUCCINO XS 6000 (SOLD SEPARATELY)


The auto-cappuccino accessory makes it easy to prepare a cappuccino or a caffe latte. It comprises a special nozzle with two-positions / markings and a brushed stainless steel milk jug and tubes. Just join the various components to each other (photo on left) and put your cup or glass under the autocappuccino nozzle.

To prevent the milk drying on the auto-cappuccino accessory, be sure to clean it with a moist cloth.
You are advised to wash it immediately by running a cycle with water to clean the inside.
PREPARING HOT WATER

While the screen displays the drink selection menu, press the "hot water" key. A message will invite you to place a recipient under the steam nozzle. Again press the "hot water" key to produce hot water.

To interrupt the steam function, just press any key.
If the nozzle is blocked, clean it out with a fine needle.
The maximum amount of hot water per cycle is limited to 300 ml.
MAINTAINING YOUR APPLIANCE
The drip tray receives waste water and the coffee grounds collector receives used coffee grounds.
The coffee cleaning tray allows you to eliminate any deposits of coffee grounds above the percolation chamber.

If the above message appears, remove, empty and clean the drip tray.

Remove the coffee cleaning tray.

Clean it under water and dry thoroughly before re-fitting.

Remove, empty and clean the coffee grounds collector.

The drip tray is equipped with floats to tell you when to empty it.

As soon as you remove the coffee grounds collector, you will have to empty it completely to avoid any overflow.

The warning message will remain displayed if the coffee grounds collector is not slotted in fully or not fitted correctly. If the coffee grounds collector is fitted within less than 8 seconds, the appliance will ask you to confirm that you have correctly emptied it. You cannot make espresso or coffee while the warning message is displayed. The coffee grounds collector has a maximum capacity of 12 coffees.
AUTOMATIC CLEANING PROGRAM - TOTAL DURATION: ABOUT 20 MINUTES
You should perform the cleaning program about every 360 preparations of espresso or coffee.
The appliance will let you know when you need to proceed with cleaning through the 'clean' light coming on.
RINSING THE COFFEE-MAKING SYSTEM - SEE "BEFORE FIRST USE" SECTION

Caution! To benefit from the warranty conditions, it is essential to perform the appliance cleaning cycle when informed to do so. Be sure to follow the order of operations.
You can continue to use the appliance, but you are advised to perform the program as soon as possible.
To perform the cleaning program, you will need a container with a minimum capacity of 0.6 liters and KRUPS (XS 3000) cleaning tablets.

Press the prog key to start the automatic cleaning program when the "Cleaning needed" message is displayed.

Just follow the instructions shown on the screen.
The automatic cleaning program consists of three parts: the cleaning cycle itself, followed by two rinsing cycles. This program lasts about 20 minutes.
Press prog to perform cleaning at any time and then choose MAINTENANCE => OK => CLEANING from the menus displayed.

If you press the 'On/Off' key during cleaning or in the event of a power failure, the cleaning program will start again from the beginning. You will not be able to postpone this operation. This is essential due to water system rinsing reasons. In this case, you will need to use another cleaning tablet. Be sure to complete the entire cleaning cycle to avoid any risk of irritation (seek medical advice if cleaning solutions are accidentally swallowed). The cleaning cycle is a discontinuous cycle. Do not put your hands under the coffee outlets during the cycle.

Only use KRUPS (XS3000) cleaning tablets. We cannot be held responsible for any damage that may result from the use of tablets from other brands. You can obtain cleaning tablets from KRUPS Service Centres.

Make sure to protect your work surface during cleaning cycles, especially if it is made of marble, stone, or wood.
AUTOMATIC SCALE REMOVAL PROGRAM - TOTAL DURATION: ABOUT 22 MINUTES

If your product is equipped with our Claris - Aqua Filter System cartridge F088 - Please remove this cartridge during the descaling operation.
The quantity of scale deposited depends on the hardness of the water used. The appliance will automatically warn you with a message when you need to proceed with scale removal.

Caution! To benefit from the warranty conditions, it is essential to perform the appliance scale removal cycle when the appliance tells you to do so. Be sure to follow the order of operations.
You can continue to use the appliance but you are advised to perform the operation as soon as possible.
To perform the cleaning program, you will need a container with a minimum capacity of 0.6 liters and a KRUPS F 054 (40 g) cleaning sachet.

Press the prog key to start the automatic cleaning program when the "Scale removal needed" message is displayed.

Just follow the instructions shown on the screen, making sure the sachet dissolves fully.
The scale removal program is in three parts - the scale removal cycle itself, then 2 rinsing cycles.
Press prog to perform cleaning at any time and then choose MAINTENANCE => OK => SCALE REMOVAL from the menus displayed.

Only use KRUPS scale removal products, citric acid or tartaric acid. You can obtain scale removal products from KRUPS Service Centres. In no event must you use conventional starchy sulphonic acid or other products containing that acid.
The manufacturer may not be held responsible for damage to the appliance through use of other products.

If the coffee grounds collector is not fitted you will be warned by a message being displayed. Fit the collector again for the cycle to continue automatically.
If a power failure occurs during the cycle, you will have to start it again right from the beginning. You will not be able to postpone this operation.

Be sure to complete the entire scale removal cycle to avoid any risk of intoxication.
The scale removal cycle is a discontinuous cycle. Do not put your hands under the coffee outlets during the cycle.

Make certain to protect your work surface during scale removal cycles, especially if they are made of marble, stone or wood.
GENERAL MAINTENANCE
Always remove the power supply cord from the socket and let your appliance cool down before cleaning it.
Do not use utensils or cleaning products likely to scratch or corrode the appliance.
Wipe the body of the appliance on the outside using a moist cloth.

Clean the cleaning tray, the drip tray, the coffee grounds collector and the drip tray grid with hot water and a liquid detergent.
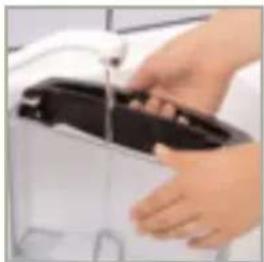
Rinse the water tank with fresh water.
OTHER FUNCTIONS: prog KEY
Press the prog key from the drinks choice screen to access the appliance's other functions menu. Use the rotating button to browse through menus and options for all settings and validate your choice using the OK button. Press the prog button to cancel a choice and go back to the drink selection menu.
![graph TD A["PROG"] --> B["Maintenance"] A --> C["Settings"] A --> D["Product information"] A --> E["Demonstration"] A --> F["Quit"] style A fill:#000,stroke:#fff,color:#fff style B fill:#999,stroke:#333 style C fill:#999,stroke:#333 style D fill:#999,stroke:#333 style E fill:#999,stroke:#333 style F…](/content/2026/06/1310121/images/838aa356d156d811a6ef32b71197888b956b2f61e2dc91284a98d3767a1a57e0.jpg)
MAINTENANCE
You can use all the following options to start selected programs. Then follow the instructions on screen.
![graph TD A["MAINTENANCE"] --> B["Rinsing"] A --> C["Cleaning"] A --> D["Scale removal"] A --> E["Filter"] A --> F["Quit"] B --> G["To access rinsin"] C --> H["To access cleaning"] D --> I["To access scale removal"] E --> J["To access filter mode"] F --> K["To quit"]](/content/2026/06/1310121/images/341d48076aae5741f082da8f0d9134d9b7d2edbc28ed4cfbf983f583699535f2.jpg)
SETTINGS
![graph TD A["OPTIONS"] --> B["Language"] A --> C["Screen contrast"] A --> D["Date"] A --> E["Clock"] A --> F["Auto-off"] A --> G["Auto-on"] A --> H["Measurement unit"] A --> I["Water hardness"] A --> J["Coffee temperature"] A --> K["Quit"] B --> L["You can select your chosen language from those offer…](/content/2026/06/1310121/images/6414005c9e3924b72908513fc2dea6be2583892373e9afe6e2a7d5fd9669e136.jpg)
PRODUCT INFORMATION
![graph TD A["PRODUCT INFORMATION"] --> B["Coffee cycles"] A --> C["Water cycles"] A --> D["Steam cycles"] A --> E["Rinsing"] A --> F["Cleaning"] F --> G["Last"] F --> H["Next"] F --> I["Clean"] I --> J["Displays the total number of coffees the machine has made."] I --> K["Displays the total number of…](/content/2026/06/1310121/images/52b56d8e2aa19e9d22990e1c955140a604dc0b0fc69fd41214bb27e97d145615.jpg)
* You must first have correctly installed a filter through the program accessible via MAINTENANCE => FILTER => INSTALL before being able to access the first two options of the filter information sub-menu.
DEMONSTRATION MODE
When this mode is activated and the screen displays the drink selection menu, the appliance will scroll the various functions available at regular intervals, so you can access them.
![graph TD A["Demo mode"] --> B["Activate"] B --> C["Cancel"] C --> D["OK"] C --> E["PROG"]](/content/2026/06/1310121/images/72c03034286f03b4a7522ed3dfcb09df24ac7cecc67ef5d3870da6d9b0ad4785.jpg)
Use this sub-menu to disable or activate this function.
MOVING THE APPLIANCE
Keep the packing and use it again to move the appliance.

If the unpacked appliance is dropped, it is advisable to take it back to an authorized service centre to avoid any risk of fire or electrical problems.
ELECTRICAL OR ELECTRONIC PRODUCT AT END OF SERVICE LIFE


Let's all help protect the environment!
Your appliance contains many recyclable materials that can be re-used.
Take it to a civic waste collection point.
TROUBLESHOOTING, CORRECTIVE ACTIONS
| The appliance fails to come on when you press the On/Off key. | Check that the power supply cord plug is correctly inserted in the socket. |
| The espresso or coffee is not hot enough. | Heat the cups by rinsing them in hot waterChange the coffee temperature setting. |
| The coffee is too weak or not strong enough. | Check that the coffee bean container contains coffee.Reduce the volume of coffee selected using the rotating button.Select the strong coffee key.Turn the grinding fineness button to the left to obtain a finer grind. |
| The coffee flows too slowly. | Turn the grinding fineness button to the right to obtain a coarser grind (may depend on the type of coffee used). |
| The coffee is not creamy enough. | Turn the grinding fineness button to the left to obtain a finer grind (may depend on the type of coffee used). Ensure coffee beans are fresh. |
| You used ground coffee instead of coffee beans. | Use your vacuum cleaner to remove the ground coffee in the coffee bean container. |
| The coffee does not come out of the outlet holes. | The outlet hole is blocked by dry coffee. Use a fine needle to clear the holes. |
| The grinder makes a strange noise | There are foreign bodies in the grinderContact your Krups service centre. |
| The grind setting button of the mill is hard to turn | Change the mill setting only when in operation. |
| Steam does not come out of the nozzle. | First turn off your appliance and let it cool down:- Clean out the outlet hole with a needle- Clean out the steam nozzle support pipe with a needle. |
| Not enough froth on the milk. | Check that the steam really comes out of the nozzle and dry the hole.Use a recipient and cold milk at the temperature it comes out of the refrigerator. Change the type or brand of milk as appropriate. |
| The milk froth is too bubbly | Check that the two ends of the small stainless steel tube fit correctly into the steam nozzle seal. |
| The Auto-Cappuccino accessory does not suck in the milk (accessory sold separately). | Check that the tube immersed in the milk is not blocked.Check for correct joining of the flexible tube with the accessory to avoid any air leakage.First turn off your appliance and let it cool before clearing the Auto-Cappuccino accessory outlet hole. |
| You have filled the water tank, but the warning message remains displayed. | Check for correct positioning of the tank in the coffee maker.Check that the float at the bottom of the tank moves freely.Rinse the accessory and if necessary remove scale. |
| The cleaning program refuses to start. | Disconnect the appliance for a few moments then turn on again. |
| The scale removal program refuses to start. | Disconnect the appliance for a few moments then turn on again. |
| You have emptied the coffee grounds collector, but the warning message remains displayed. | Remove the collector, make certain that it is empty, wait for 8 seconds and then fit it again.Check that the collector is correctly pushed in. |
| You have washed the cleaning tray, but the warning message remains displayed. | Remove the tray, wait 8 seconds and then fit it again.Check that the cleaning tray is correctly pushed in. |
| A power failure occurred during a cycle. | The appliance will re-initialise automatically when power is turned on and be ready for a new cycle. |
| There is water or coffee under the appliance. | The drip tray is overflowing. Empty and clean the cleaning tray.Check for correct positioning of the drip tray. |
| A "Fault No. XX" message appears. | Disconnect the appliance for a few moments then bring it back into service.If the failure persists, note the fault number and contact the Krups service centre. |

Here are some recipes you can make using your Espresseria Automatic:
• Cappuccino
For a cappuccino in the rules of the art, the ideal proportions are as follows: 1/3 hot milk, 1/3 coffee, 1/3 milk froth.
• Caffe Latte
To make coffee with milk, also often called Latte Macchiato, the proportions are as follows: 3/5 hot milk, 1/5 coffee, 1/5 milk froth.
- For these milk-based preparations, it is best to use cold skimmed milk straight from the refrigerator (ideally between 6 and 8°C).
• To finish off, you can sprinkle with cocoa.
• Café Crème
• Prepare a conventional espresso in a large cup.
- Add a little cream to get a café crème.
• Café corretto*
• Prepare a cup of espresso as usual.
- Then add 1/4 or 1/2 of a liqueur glass of Cognac to taste. You can also use anisette, brandy, Sambuca, Kirsch or Cointreau. There are many other ways to give some punch to your espresso. Just use your imagination.
• Coffee liqueur*
• Mix 3 cups of espresso, 250 g of brown sugar candy and 1/2 litre of Cognac or Kirsch in an empty 0.75 litre bottle.
- Leave the mixture to macerate for at least 2 weeks. You will obtain a delicious liqueur. A real treat for coffee lovers
• Italian style iced coffee
4 scoops of vanilla ice-cream, 2 cups of espresso with sugar to taste, 1/8 l milk, fresh cream, grated chocolate.
• Mix the cold espresso with the milk.
- Serve the scoops of ice-cream into the glasses, pour the coffee onto them and decorate with fresh cream and grated chocolate.
- Add a small glass of rum to a cup of sweetened espresso.
• Decorate with a good layer of fresh cream and serve.
- Flambéed espresso*
2 cups of espresso, 2 small glasses of Cognac, 2 teaspoons of brown sugar, fresh cream.
- Pour the Cognac into heat-resistant glasses, heat and light.
- Add the sugar, mix, pour in the coffee and decorate with fresh cream.
- Perfect Espresso*
2 cups of espresso, 6 egg yolks, 200g sugar, 1/8 litre of sweetened fresh cream, 1 small glass of orange liqueur.
- Beat the egg yolks with the sugar until it forms a thick, frothy mass.
- Add the cold espresso and the orange liqueur.
- Then mix in the whipped fresh cream.
• Pour the mix into saucer champagne glasses or ordinary.
- Put the champagne glasses in the freezer.
(*: Remember, over-indulgence in alcohol is bad for the health.)


- CONTENTS
- PAGE
- IMPORTANT: SAFETY INSTRUCTIONS
- LIMITS TO USE
- BEFORE FIRST USE
- MEASURING WATER HARDNESS
- CLARIS · AQUA FILTER SYSTEM F 088 CARTRIDGE (SOLD SEPARATELY)
- PREPARING THE APPLIANCE
- NEVER PUT GROUND COFFEE IN THE COFFEE CONTAINER
- FIRST USE / SETTING MACHINE PARAMETERS
- INSTALLING THE FILTER (CLARIS - AQUA FILTER SYSTEM CARTRIDGE)
- COFFEE-MAKING SYSTEM RINSING
- PREPARING THE GRINDER
- PREPARING EXPRESSO AND ORDINARY COFFEE
- PREPARING AN EXPRESSO (FROM 20 TO 70 ML)
- PREPARING A CUP OF COFFEE (FROM 80 TO 220 ML)
- TWO-CUP FUNCTION
- PREPARING STEAM
- FROTHING MILK
- SET AUTO-CAPPUCCINO XS 6000 (SOLD SEPARATELY)
- PREPARING HOT WATER
- MAINTAINING YOUR APPLIANCE
- AUTOMATIC CLEANING PROGRAM - TOTAL DURATION: ABOUT 20 MINUTES
- RINSING THE COFFEE-MAKING SYSTEM - SEE "BEFORE FIRST USE" SECTION
- AUTOMATIC SCALE REMOVAL PROGRAM - TOTAL DURATION: ABOUT 22 MINUTES
- GENERAL MAINTENANCE
- OTHER FUNCTIONS: PROG KEY
- MAINTENANCE
- SETTINGS
- PRODUCT INFORMATION
- DEMONSTRATION MODE
- MOVING THE APPLIANCE
- ELECTRICAL OR ELECTRONIC PRODUCT AT END OF SERVICE LIFE
- CAPPUCCINO
- CAFFE LATTE
- CAFÉ CRÈME
- CAFÉ CORRETTO
- COFFEE LIQUEUR
- ITALIAN STYLE ICED COFFEE
- FLAMBÉED ESPRESSO
- PERFECT ESPRESSO
Brand : KRUPS
Model : Espresseria Automatic XP7240
Category : Coffee machine