
FANTOM X - Synthesizer ROLAND - Free user manual and instructions
Find the device manual for free FANTOM X ROLAND in PDF.


| Product Type | Workstation Synthesizer |
| Brand | Roland |
| Model | Fantom X |
| Category | Synthesizer |
| Keys | 76 keys (velocity and aftertouch) |
| Polyphony | 128 voices |
| Sampling | 128 MB (16-bit linear) |
| Sequencer | 16 MIDI tracks, 480 ticks per quarter note resolution |
| Built-in Effects | Multi-effects (90 types), Chorus (3 types), Reverb (4 types) |
| Power Supply | AC adapter 117/230V, 50/60 Hz (included) |
| Power Consumption | 45 W |
| Dimensions (W × D × H) | 1366 × 400 × 142 mm |
| Weight | 18.5 kg |
| Connectivity | USB (MIDI), MIDI In/Out/Thru, Audio jacks L/Mono, R, Headphones |
| Maintenance | Clean with a soft dry cloth, avoid solvents |
| Safety | Unplug before cleaning, avoid heat sources and humidity |
| Spare Parts | Available from Roland authorized service centers |
| Warranty | 2 years (with conditions) |
| Included Accessories | Power cable, warranty card, user manual |
| Main Functions | PCM synthesis, sequencing, sampling, arpeggiator, MIDI controller |
| Repairability | Repair by Roland authorized technician only |
Frequently Asked Questions - FANTOM X ROLAND
User questions about FANTOM X ROLAND
0 question about this device. Answer the ones you know or ask your own.
Ask a new question about this device
Download the instructions for your Synthesizer in PDF format for free! Find your manual FANTOM X - ROLAND and take your electronic device back in hand. On this page are published all the documents necessary for the use of your device. FANTOM X by ROLAND.
USER MANUAL FANTOM X ROLAND
Guide to the Added Functionality
Before using this unit, carefully read the sections entitled: "USING THE UNIT SAFELY" and "IMPORTANT NOTES" (p. 3; p. 4). These sections provide important information concerning the proper operation of the unit. Additionally, in order to feel assured that you have gained a good grasp of every feature provided by your new unit, this guide should be read in its entirety. This guide should be saved and kept on hand as a convenient reference.
This guide applies to the Fantom-X6, the Fantom-X7, the Fantom-X8 (this guide uses the term “Fantom-X” to indicate all these three models), and FANTOM-X Audio Track Expansion Kit.
Customers who purchased the “FANTOM-X Audio Track Expansion Kit” (update card):
You must first update your Fantom-X. Begin reading from "Check the contents of the package" (p. 8).
Customers who purchased the Fantom-X (synthesizer workstation):
You don't need to update your Fantom-X. Begin reading from "Main features" (p. 12).
Copyright © 2005 ROLAND CORPORATION
All rights reserved. No part of this publication may be reproduced in any form without the written permission of ROLAND CORPORATION.
AFRICA
EGYPT
Al Fanny Trading Office
9, EBN Hagar A1 Askalany
Street,
ARD E1 Golf, Heliopolis,
Cairo 11341, EGYPT
TEL: 20-2-417-1828
REUNION
That Other Music Shop(PTY)Ltd.
11 Melle St., Braamfontein,
Johannesbourg,
SOUTH AFRICA
TEL: (011) 403 4105
FAX: (011) 403 1234
Paul Bothner(PTY)Ltd.
17 Werdemuller Centre,
Main Road, Claremont 7708
SOUTH AFRICA
TEL: (021) 674 4030
ASIA
CHINA
Roland Shanghai Electronics
Co., Ltd.
5F. No.1500 Pingliang Road
Shanghai 200090, CHINA
TEL: (021) 5580-0800
Roland Shanghai Electronics
Co., Ltd.
(BEIJING OFFICE)
10F. No.18 3 Section Anhuaxili
Chaoyang District Beijing
100011 CHINA
TEL: (010) 6426-5050
Roland Shanghai Electronics
Co., Ltd.
(GUANGZHOU OFFICE)
2/F., No.30 Si You Nan Er Jie
Yi Xiang, Wu Yang Xin Cheng,
Guangzhou 510600, CHINA
TEL: (020) 8736-0428
HONG KONG
Tom Lee Music Co., Ltd.
Service Division
22-32 Pun Shan Street, Tsuen
Wan, New Territories,
HONG KONG
TEL: 2415 0911
Parsons Music Ltd.
8th Floor, Railway Plaza, 39
Chatham Road South, T.S.T.
Kowloon, HONG KONG TEL: 2322-1062
TEL: 2333 1863
INDIA
Rivera Digitec (India) Pvt. Ltd.
409, Nirman Kendra
Mahalaxmi Flats Compound
Off. Dr. Edwin Moses Road, Moulai: 400011, INDIA
Mumbai-400011, INDIA TEI : (022) 2493 9051
INDONESIA
PT Citra IntiRama
J1. Cideng Timur No. 15J-150
Jakarta Pusat
INDONESIA TEL (021) (02
TEL: (021) 6324170
KOREA
Cosmos Corporation
1461-9, Seocho-Dong,
Seocho Ku, Seoul, KOREA
TEL: (02) 3486-8855
MALAYSIA
Roland Asia Pacific Sdn. Bhd.
45-1, Block C2, Jalan PJU 1/39,
Dataran Prima, 47301 Petaling
Jaya, Selangor, MALAYSIA
TEL: (03) 7805-3263
PHILIPPINES
G.A. Yupangco & Co. Inc.
339 Gil J. Puyat Avenue
Makati, Metro Manila 1200, PL III IPRINTC
PHILIPPINES TEL: (02) 999
SINGAPORE
SWEE LEE MUSIC
COMPANY PTE. LTD.
150 Sims Drive,
SINGAPORE 387381
TEL: 6846-3676
CRISTOFORI MUSIC PTE LTD
Blk 3014, Bedok Industrial Park E, #02-2149, STIGAPGRE 100000
02-2148, SING
TEI - 6243-0555
TEL: 6243-9555
TAIWAN
ROLAND TAIWAN
ENTERPRISE CO., LTD.
Room 5, 9fl. No. 112 Chung
Shan N.Road Sec.2, Taipei,
TAIWAN, R.O.C.
TEL: (02) 2561 3339
THAILAND
Theera Music Co., Ltd.
330 Verng NakornKasem, Soi 2,
Bangkok 10100, THAILANI
TEL: (02) 2248821
VIETNAM
Saigon Music
Suite DP-8
40 Ba Huyen Thanh Quan Street
Hochiminh City, VIETNAM
TEL: (08) 930-1969
AUSTRALIA/ NEW ZEALAND
AUSTRALIA/
NEW ZEALAND
Roland Corporation
Australia Pty., Ltd.
38 Campbell Avenue
Dee Why West. NSW 2099
AUSTRALIA
For Australia
Tel: (02) 9982 8266
For New Zealand
Tel: (09) 3098 715
CENTRAL/LATIN AMERICA
ARGENTINA
Instrumentos Musicales S.A.
Av.Santa Fe 2055
(1123) Buenos Aires
ARGENTINA
TEL: (011) 4508-2700
BARBADOS
A&B Music Supplies LTD
12 Webster Industrial Park
Wildey, St.Michael, Barbados TEL: (216) 120-1100
TEL: (246)430-1100
BRAZIL
Roland Brasil Ltda.
Rua San Jose, 780 Sala B
Parque Industrial San Jose
Cotia - Sao Paulo - SP, BRAZIL TEL: (011) 1617 5666
TEL: (011) 4615 5666
CHILE
Comercial Fancy II S.A.
Rut.: 96.919.420-1
Nataniel Cox #739, 4th Floor
Santiago - Centro, CHILE TEI (02) (00 0540
TEL: (02) 688-9540
COLOMBIA
Centro Musical Ltda.
Cra 43 B No 25 A 41 Bododega 9
Medellin, Colombia
TEL: (574)3812529
COSTA RICA
JUAN Bansbach Instrumentos
Musicales
Ave.1. Calle 11, Apartado 10237,
San Jose, COSTA RICA
TEL: 258-0211
CURACAO
Zeelandia Music Center Inc.
Orionweg 30
Curacao, Netherland Antilles
TEL:(305)5926866
DOMINICAN REPUBLIC
Instrumentos Fernando Giraldez
Boulevard Andrews, Albrook,
Panama City, REP. DE
PANAMA
TEL: 315-0101
PARAGUAY
Distribuidora De
Instrumentos Musicales
J.E. Olear y ESQ. Manduvira
Asuncion PARAGUAY
TEL: (595) 21 492147
PERU
Audionet
155, New National Road
Patras 26442, GREECE
USING THE UNIT SAFELY
INSTRUCTIONS FOR THE PREVENTION OF FIRE, ELECTRIC SHOCK, OR INJURY TO PERSONS
About ⚠️ WARNING and ⚠️ CAUTION Notices
| WARNING | Used for instructions intended to alert the user to the risk of death or severe injury should the unit be used improperly. |
| CAUTION | Used for instructions intended to alert the user to the risk of injury or material damage should the unit be used improperly.* Material damage refers to damage or other adverse effects caused with respect to the home and all its furnishings, as well to domestic animals or pets. |
About the Symbols
| The △ symbol alerts the user to important instructions or warnings. The specific meaning of the symbol is determined by the design contained within the triangle. In the case of the symbol at left, it is used for general cautions, warnings, or alerts to danger. | |
| The Ⓧ symbol alerts the user to items that must never be carried out (are forbidden). The specific thing that must not be done is indicated by the design contained within the circle. In the case of the symbol at left, it means that the unit must never be disassembled. | |
| The ● symbol alerts the user to things that must be carried out. The specific thing that must be done is indicated by the design contained within the circle. In the case of the symbol at left, it means that the power-cord plug must be unplugged from the outlet. |
ALWAYS OBSERVE THE FOLLOWING
! WARNING
- Before using this unit, make sure to read the instructions below, and the Guide to the Added Functionality.

- Do not open or perform any internal modifications on the unit.

- Do not attempt to repair the unit, or replace parts within it (except when this guide provides specific instructions directing you to do so). Refer all servicing to your retailer, the nearest Roland Service Center, or an authorized Roland distributor, as listed on the “Information” page.

- Never use or store the unit in places that are:

- Subject to temperature extremes (e.g., direct sunlight in an enclosed vehicle, near a heating duct, on top of heat-generating equipment); or are

- Damp (e.g., baths, washrooms, on wet floors); or are
- Humid; or are
- Exposed to rain; or are
- Dusty; or are
- Subject to high levels of vibration.
! WARNING
- Do not allow any objects (e.g., flammable material, coins, pins); or liquids of any kind (water, soft drinks, etc.) to penetrate the unit.

- In households with small children, an adult should provide supervision until the child is capable of following all the rules essential for the safe operation of the unit.

- Protect the unit from strong impact. (Do not drop it!)

- DO NOT play a CD-ROM disc on a conventional audio CD player. The resulting sound may be of a level that could cause permanent hearing loss. Damage to speakers or other system components may result.

CAUTION
- Never climb on top of, nor place heavy objects on the unit.

In addition to the items listed under “USING THE UNIT SAFELY” on page 3, please read and observe the following:
Placement
- Do not expose the unit to direct sunlight, place it near devices that radiate heat, leave it inside an enclosed vehicle, or otherwise subject it to temperature extremes. Excessive heat can deform or discolor the unit.
Before Using Cards
Using DATA Cards
- Insert the CompactFlash card correctly into the PC card adapter, and insert it all the way into the PC card slot.
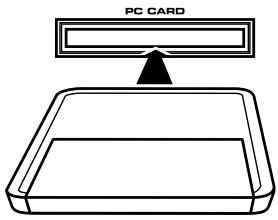
- Never touch the terminals of the Compact-Flash and PC card adapter. Also, avoid getting the terminals dirty.
Handling CD-ROMs
- Avoid touching or scratching the shiny underside (encoded surface) of the disc. Damaged or dirty CD-ROM discs may not be read properly. Keep your discs clean using a commercially available CD cleaner.
Other Notes
* All product names mentioned in this document are trademarks or registered trademarks of their respective owners.
* CompactFlash and CF™ are trademarks of SanDisk Corporation and licensed by CompactFlash association.
* In the interest of product improvement, the specifications and/or contents of this package are subject to change without prior notice.
Check the contents of the package 8
Updating the Fantom-X 9
What is the FANTOM-X Audio Track Expansion Kit? 9
Items required for performing the update....9
Cautions when performing the update (Important) 9
Update procedure.... 10
Verifying the update .... 11
Main features 12
Using audio tracks 13
What are audio tracks?.... 13
To access the Audio Track Edit screen 14
To access the Audio Track Mixer screen.... 14
Items in the Audio Track Edit screen.... 15
Editing audio tracks (Audio Track Edit screen).... 16
Moving a sample event (Move).... 16
Selecting and auditioning a sample event (Preview) 16
Using the pads to mute audio tracks (Mute/Solo).... 16
Viewing a list of markers (Marker List) 17
Opening the Loop/Locate window (Loop/Locate) 17
Inserting a sample event at a specified location (Insert).... 17
Deleting the selected sample event from an audio track (Delete)....18
Copying a sample event (Copy)....18
Unloading a sample (Unload Sample).... 18
Combining the contents of the tracks into one audio track (Mixdown).... 18
Erasing audio tracks (Clear).... 19
Naming an audio track (Track Name).... 20
Switching the display mode.... 20
Zooming In and Zooming Out in the display 20
Editing MIDI tracks.... 20
Items in the Audio Track Mixer screen 21
Controlling the audio tracks (Audio Track Mixer screen).... 22
Controlling the audio track settings 22
Using the knobs to control the mixer.... 23
Opening the Loop/Locate window (Loop/Locate) 23
Using the pads to mute audio tracks (Mute) 23
Recording an audio track.... 24
Recording an audio track (SOLO/RE-SAMPLING).... 24
Combining multiple audio tracks into one track (AUDIO MERGE) 25
Saving your audio tracks.... 26
Using the Skip Back Sampling function.... 27
What is Skip Back Sampling? 27
Using Skip Back Sampling.... 27
Editing the data created by Skip Back Sampling 28
Isolating the desired portion of the sampled data (Start Beat/End Beat) 28
Cancelling the sample (Skip Back Cancel) 28
Assigning the sampled waveform to the keyboard or a pad (Assign to Keyboard/Pad)....28
Assigning the sampled waveform to an audio track
(Assign to Audio Track) 29
Multisample editing functions.... 30
Creating a multisample.... 30
Creating a multisample in the Patch Edit screen 31
Creating a multisample in the Create Multisample screen 31
Editing a multisample 33
About the Multisample Edit screen 33
Selecting the notes to edit 34
Changing the multisample assigned to a tone (List) 34
Erasing the data from the selected region of notes (Erase).... 34
Assigning a sample to the selected region (Assign) 34
Copying a sample from a key to another key (Copy) 35
Opening the Tone Switch/Select window (Tone Sw/Sel) 35
Moving the split point (Split Point) 35
Returning a multisample to the last-written state (Reload) 36
Erasing all notes (Erase All) 36
Replacing the sample of the current zone (Sample Select) 36
Specify the original key (Org Key) of the sample 37
Sorting samples in the order of their original key (Sort) 37
Moving all samples to left or right (Shift) 37
Moving the data of the current zone to left or right (Move) 37
Saving a multisample....38
Sample-related changes 39
Extended patch groups 39
Saving a sample auto patch.... 39
Bank Select and Program Change Correspondence Chart 39
Newly added sample parameters 40
Sample BPM calculator (BPM Calc) 40
Selecting a sample (Sample Number).... 40
Changes in the saved sample content (Save All Samples)...... 40
Changes in the Patch/Rhythm Edit screen 41
Newly added Patch Overview screen 41
Changes due to the upgraded editor software 42
Newly added PC mode screen.... 42
Cautions when using S-700 series sounds with the Fantom-X 42
Before you connect the Fantom-X to your computer 42
Importing patches and rhythm sets 43
Fantom-X Editor System Requirements 45
Other changes 46
Changes in the Patch Edit screen.... 46
Changes in the Performance Mixer screen.... 47
Changes in the Performance Layer screen 47
Newly added Layer List window 47
Changes in the Key Range window 48
Playing different sounds across the keyboard (Split).... 48
Changes in the Song Edit screen.... 48
Changes in the Song List screen 49
Deleting a Song 49
Using the pads for realtime erase.... 49
CC Filter added to the Microscope.... 50
Improved functionality for step recording 50
Changes in the demo song loaded when you start up the Fantom-X...... 50
Improved functionality in Live Setting 51
Registering a song file in a Live Setting 51
Recalling a song file you registered 52
Switching the font....52
Removing the text....52
Improvements in Arpeggio functionality 52
Using the pads to switch arpeggio styles.... 52
Changing the arpeggio styles assigned to the pads 53
Improvements in Chord Memory functionality.... 53
Using the pads to switch chord forms.... 53
Changing the chord forms assigned to the pads.... 54
Changes in the librarian....54
New shortcut from the Input Setting screen to MFX Edit 55
New parameters available for the assignable switches.... 55
Newly added DIMM check function 56
Index 57
Check the contents of the package
This package contains the following items. As soon as you open the package, please make sure that all items are present. You may wish to check off (☑) each box as you verify each item. If anything is missing, please contact your dealer.
* This page is for verifying the contents of the FANTOM-X Audio Track Expansion Kit (update card). If you purchased the Fantom-X (synthesizer workstation), please begin reading from "Main features" (p. 12).
☐ FANTOM-X Audio Track Expansion Kit CompactFlash card
For the update procedure, refer to "Updating the Fantom-X" (p. 9).
□ PC card adapter
This is an adapter for inserting the "FANTOM-X Audio Track Expansion Kit" CompactFlash card into the Fantom-X synthesizer.
□ CD-ROM (Editor)
☐ Fantom-X Sound List (Leaflet)
√ Guide to the Added Functionality (this document)
This is the document you are reading. It explains the functionality added by the FANTOM-X Audio Track Expansion.
□ Sticker
What is the FANTOM-X Audio Track Expansion Kit?
The FANTOM-X Audio Track Expansion Kit consists of a CompactFlash card containing an upgrade program that adds audio tracks to your Fantom-X and enhances the multisample functionality, together with a PC card adapter for inserting this card into your Fantom-X. Once you perform the update procedure, the Fantom-X will always start up with the added FANTOM-X Audio Track Expansion functionality.
NOTE
Keep this product in a safe place after you have completed the upgrade.
Items required for performing the update
- "FANTOM-X Audio Track Expansion Kit" CompactFlash card and PC card adapter (hereafter referred to as "this product")
- Fantom-X6/X7/X8 synthesizer workstation
NOTE
Use only the CompactFlash card and PC card adapter included with this product.
Cautions when performing the update (Important)
- Never use this product with any device other than the Fantom-X. Doing so may damage the data or system of this product or of the other device.
- Do not turn off the power while the update is in progress. Doing so may render the Fantom-X incapable of starting up correctly.
- As a precaution, we recommend that you back up your user data before you begin. (Owner's Manual; p. 235)
- Do not format this product on the Fantom-X or on any other device.
- Please note that once you have completed the update using this product, it will not be possible to return the Fantom-X to its prior version.
- Once you have completed the update, do not insert this product into the Fantom-X.
The files contained in this product may not be reproduced, modified, or included in any magazine or commercial product without the permission of Roland Corporation.
Update procedure
- Insert the "FANTOM-X Audio Track Expansion Kit" CompactFlash card into the PC card adapter.
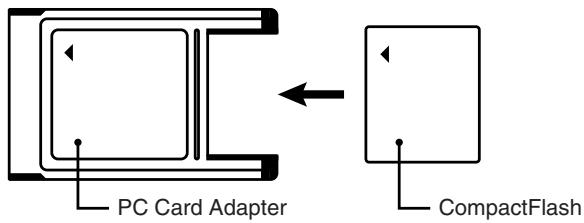
flowchart
graph LR
    A["PC Card Adapter"] --> B["CompactFlash"]
    style A fill:#f9f,stroke:#333
    style B fill:#ccf,stroke:#333
- Make sure that your Fantom-X is switched OFF.
- Insert the PC card adapter (see step 1) into the Fantom-X.
- Switch ON the power on your Fantom-X.
After the opening movie is displayed, a caution regarding the update procedure will appear.
* If the screen shown below does not appear, switch off the Fantom-X's power, and repeat the operation from step 1.
![CAUTION! When you execute Program Update, the data of the internal user memory will be lost. Is the internal memory or the Fance-X Series contains data that you want to keep, you must save it on PC Card or via USB to your computer. Never turn off the power while Program Update is being executed. Doing so may destroy the contents of memory. Are you sure? Press [F7 (OK)]. Exit OK](/content/2025/01/130993/images/e99f048d5268307d709a84d0d0e5c8d8c587709529a9a20950aa62d5b07a9b2a.jpg)
- Read the warning, and if you wish to proceed, press [F7 (OK)].
* If you wish to abort the update procedure at this point, press [F1 (EXIT)], turn off the power, and remove the PC card.
A screen will ask you for confirmation.
![Roland FantomX AUDIO TRACK EXPANSION KIT Press [F8 (Update)] to update. Exit Update](/content/2025/01/130993/images/310678559ddd27b349d4d06a386fbe3dceb870b0424c98441998bb2a50c939c0.jpg)
6. Press [F8 (UPDATE)] to execute the update.
* If you wish to abort the update procedure at this point, press [F1 (EXIT)], turn off the power, and remove the PC card.
* Do not turn off the power while the update is in progress.
* The update will require approximately two minutes for completion.
7. When the process has been completed, the following screen will appear. Turn off the power of the Fantom-X and remove the PC card.
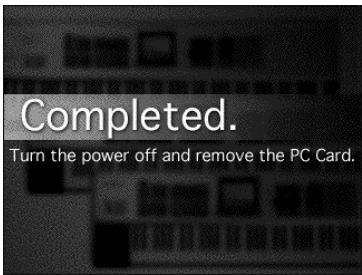
This completes the update.
The next time you turn on the power, the FANTOM-X Audio Track Expansion will start up.
MEMO
Keep this product in a safe place after you have completed the upgrade.
Verifying the update
- Press [MENU] to access the Menu window.
- Use ▲ ▼ to choose "System," and then press [ENTER].
The System Setup screen will appear. - Press [F4 (Info)].
The System Information screen will appear. - Use [F1 (↑)][F2 (↓)] to choose the “Version Info” tab.
Verify that the version indication in the lower right of the Version Info screen reads "Version 2.**" (2.00 or higher).
The Fantom-X Audio Track Expansion adds audio tracks, providing a significant leap in music-making power. With its comprehensive unification of synth, sampler, and audio functionality, the Fantom-X is reborn as an even more powerful music workstation.
Audio tracks (p. 13)
Eight dedicated audio tracks (stereo) have been added to the sequencer of the Fantom-X series. This lets you use recorded or imported audio phrases directly in your songs. In addition to the ability to play back a sample from midway (not just from its beginning), each track provides a Timestretch function which allows the audio to follow tempo changes.
Sample Auto Patch function (p. 39)
As with patches and rhythm sets, you can now easily select samples from the patch list as well. New sample parameters have also been added, making it much easier to handle samples.
Multisample editing (p. 30)
The new Multisample Edit screen lets you easily create and edit multisamples.
Sample Editor, Multisample Editor, and S-700 series sample converter (p. 42)
The included editors have been significantly expanded.
You can now use your computer to directly edit samples and multisamples inside the Fantom-X.
In addition, you can now load S-700 series data.
New patches
* 128 new patches have been added.
Many other functions have been added, making the Fantom-X even more powerful and easier to use. In order to take full advantage of its dramatically enhanced functionality, please read this guide carefully.
What are audio tracks?
Eight dedicated audio tracks (stereo) have been added to the sequencer of the Fantom-X series. This lets you use recorded or imported audio phrases directly in your songs.
The audio tracks are “time-stretched” so that they will stay in synchronization even if the tempo changes during the song. The audio tracks can also be played back from midway through an event.
Song structure
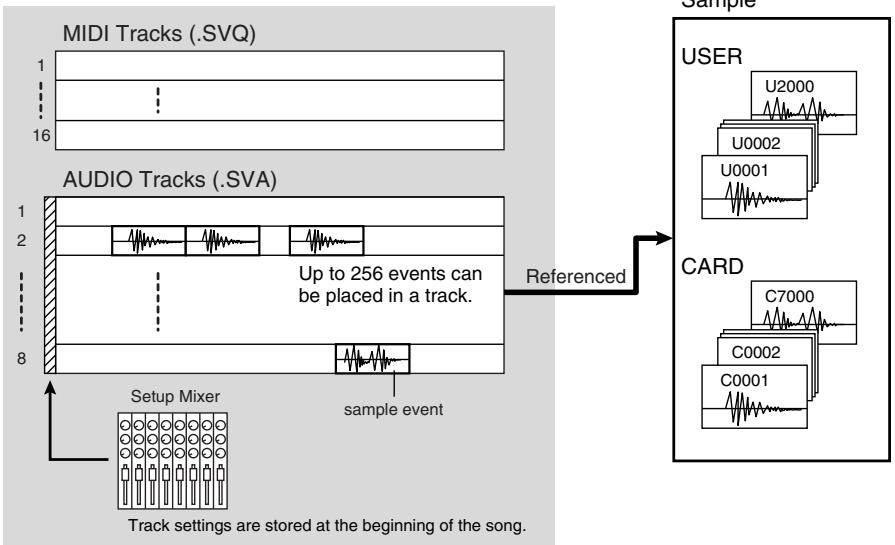
flowchart
graph TD
    A["MIDI Tracks (.SVQ)"] --> B["16"]
    C["AUDIO Tracks (.SVA)"] --> D["2"]
    D --> E["8"]
    E --> F["Setup Mixer"]
    F --> G["Sample event"]
    G --> H["Referenced"]
    H --> I["Sample"]
    I --> J["CARD"]
    J --> K["C7000"]
    J --> L["C0002"]
    J --> M["C0001"]
    K --> N["U2000"]
    L --> O["U0002"]
    M --> P["U0001"]
    style A fill:#f9f,stroke:#333
    style C fill:#f9f,stroke:#333
    style I fill:#ccf,stroke:#333
    style J fill:#ccf,stroke:#333
    style K fill:#ccf,stroke:#333
    style L fill:#ccf,stroke:#333
    style M fill:#ccf,stroke:#333
An audio track in a song does not directly record samples. Instead, the audio track contains references to samples, and plays the samples via these references. In other words, the audio track merely contains data (a “sample event”) that says “play User (or Card) sample number ‘x’ at this point,” and even if you delete the sample event from an audio track, the sample data itself will remain.
Up to 256 sample events can be placed on each audio track.
You will use the following two screens to edit audio tracks.
• Audio Track Edit screen
Here you can edit each audio track.
- Audio Track Mixer screen
In this screen you can adjust the mixing of the audio tracks, such as their level and pan.
NOTE
In order to play back an audio track, the song must be loaded into the temporary area (Owner's Manual; p. 177). Audio tracks will not play back when using the Quick Play function (Owner's Manual; p. 164) or Chain Play function (Owner's Manual; p. 165).
NOTE
Patterns (Owner's Manual; p. 31) do not have audio tracks.
To access the Audio Track Edit screen
- Press [SONG EDIT].
- Press [F3 (Audio Track)].
The Audio Track Edit screen will appear.
![Audio Track Edit [New Songs] M=0001 STOP /Beat 0001:01 Audio Track Current Position Track 1 1:01:000 Edit Marker Measure 1 2 3 4 5 6 7 8 1. Record 1:01:000 2. Seq Phrase 4 3. Synth Offset 4. Rhythm Loop 5. 6. 7. 8. Current Event Track 1 3:01:000 P0044 Rhythm Loop MOND [▲▼]=Track, [◀▼]=Search, [SHIFT]=Move Audio Mixer Audio Edit Mute /Solo Marker List Loop/ Locate Insert Delete Copy](/content/2025/01/130993/images/5303b2a4a0aa62d87cc267b4e22d168a5ab24b9a1c3c3d93054d5f6c36bedfcf.jpg)

"Items in the Audio Track Edit screen" (p. 15)
To access the Audio Track Mixer screen
- With the Audio Track Edit screen displayed, press [F1 (Audio Mixer)].
The Audio Track Mixer screen will appear.
![Audio Track Mixer [New Songs] M=0001 STOP HFX 128 4/4 1000 MASTER Track Trk1 Audio Trk Level 100 LEFT RIGHT Edit Marker Measure 1 2 3 4 1 User 0001 2 Seq Phrase 4 3 Synth Riff 4 Rhythmic Loop 5 6 7 8 Audio Mixer Audio Mute Loop/LOCate Track](/content/2025/01/130993/images/562a91517c6d8193401573cc555fbd79c392f04f87e47fa13992666091e62cc1.jpg)
- Press [F6] to switch the Audio Track Mixer screens.
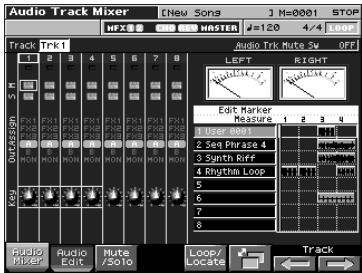

"Items in the Audio Track Mixer screen" (p. 21)
Items in the Audio Track Edit screen
Audio Track Edit Screen
![Audio Track Edit Meas 0001-01 Audio Track Current Position Edit Marker Measure 1 User 0001 2 Seq Phrase 4 3 Synth Diff 4 Rhythm Loop 5 6 7 Current Event Track1 S:01:000 P0044 Rhythm Loop [▲/▼]=Track, [◄/►]=Search, [SHIFT]=Move Audio Mixer Audio Edit Mute/Solo Marker List Loop/Locte Insert Delete Copy 10 11 12 13 14 15 16 17](/content/2025/01/130993/images/1687660523f032abbf2b5c1cdc6d62ed78d31edda8ab84649c90fc12153cc6a6.jpg)
- Indicates the name of the currently selected song, the measure location, and the status of the sequencer.
- Indicates the current location of the audio track.
- Audio level meter.
- Indicates the song's time signature, tempo, and loop play on/off status.
- Indicates the currently selected audio track.
- Indicates the current location.
- Indicates the name, contents, and markers of audio tracks.
If the audio file referenced by the selected sample event has not been loaded, the file name is displayed in the sample event. - Shows details of the currently selected event. If this indicates "unload," the audio file referenced by the selected sample event has not been loaded.
- Indicates the order of the currently selected sample event within all events of the currently selected audio track.
If there are overlapping events at the same time location, this is indicated by a red frame, and the later event will be given priority for playing. - Displays the Audio Track Mixer screen (p. 14).
If you hold down [SHIFT]
![Audio Track Edit [New Songs] M=0003 STOP 0003-01 Track 1 3:01:00 Edit Marker Measure 1 2 3 4 5 6 7 8 1 User 0001 2 Sea Phase 4 3 Synth Riff 4 Rhythm Loop 5 6 7 8 Current Event 1/4 Track1 3:01:000 P0044 Rhythm Loop MONO MOVE [←→]=Meas, [VALUE]=A(120Tick), [INC/DEC]=Tick Mix-down Clear Track Name Unload Sample Zoom 18 19 20 21 22 23](/content/2025/01/130993/images/7b84a273f52b1fcea236e2ca549ae1afff823b65191d6407a8955f2a3eecc13a.jpg)
- Displays the Audio Track Edit screen (p. 14).
- Lets you use the pads to mute audio tracks (p. 16).
- Displays the marker list (p. 17).
- Opens the Loop/Locate window (p. 17).
- Inserts a sample event at the specified location (p. 17).
- Deletes the selected sample event (p. 18).
- Copies the sample event (p. 18).
- Combines the contents of the tracks into a single audio track (p. 18).
- Erases audio tracks (p. 19).
- Names an audio track (p. 20).
- Unloads the sample (p. 18).
- Switches the display mode (p. 20).
- Zooms in/out in the display (p. 20).
Editing audio tracks (Audio Track Edit screen)
Moving a sample event (Move)
Here's how to move the currently selected sample event to another track or location.
- Use [CURSOR] to select the sample event you want to move.
The selected event is displayed in orange.
- Press [SHIFT].
The cursor will change shape as follows.
![Audio Track Edit [New Song] M=0003 STOP Meas 0003-01 Audio Track Current Position Track 1 3:01:00:00 Edit Marker Measure 1 2 3 4 5 6 7 8 User Label 2 Seq Phrase 4 3 Smith Riff 4 Rhythm Loop 5 C 6 C 7 B Current Event Track 1 3:01:00:00 P0044 Rhythms Loop MOND MOVE [←→]=Meas, [VALUE]=#(120Tick), [INC/DEC]=Tick Mix- down Clear Track Name Unload Sample Zoom](/content/2025/01/130993/images/fd22bf4a1fef22523c2a721960d82e27b9fa240e051e1a02810ebc56a2b55659.jpg)
- While continuing to hold down [SHIFT], press ▲ or ▼.
Move the sample event to the desired track.
- While continuing to hold down [SHIFT], use the following buttons to move the sample event to the desired location.
• [INC][DEC]
Move the sample event in steps of one tick.
• ◀ ▶
Move the sample event in steps of one measure.
- VALUE dial
Move the sample event in steps of 16th note (120 ticks).
Selecting and auditioning a sample event (Preview)
- Use ▲ ▼ to select a track.
- Press [ENTER].
The sample in the track you selected in step 1 that is closest to the current location will be selected.
While the play is stopped, you can audition (preview) the sample by continuing to hold down [ENTER].
Using the pads to mute audio tracks (Mute/Solo)
You can use the pads to switch muting on/off for the audio tracks.
Pad numbers 1–8 correspond to audio track numbers 1–8.
- Press [F3 (Mute/Solo)].
The Muting Audio Tracks with Dynamic Pads window will open.
In this state, the pads will function as mute on/off buttons. Each time you press a pad, muting will be enabled or disabled.
- Pad blinking: muted
- Pad lit: un-muted
MEMO
You can "solo" tracks 1–8 by pressing pads 9–16.
MEMO
You can press [F6 (All Mute)] to mute all audio tracks. Press [F7 (All Play)] to unmute all audio tracks.
Viewing a list of markers (Marker List)
You can assign markers to desired measures within a song. This gives you a visual indication of the structure of your song, and is a real convenience when editing audio tracks since you can move rapidly to a desired marker. Here's how you can view a list of the markers in the song, and edit the markers.
![Audio Track Edit Measure 0001:01 Track 1 1:01:000 Edit Marker Feature 1 2 Edit Marker List 1 1:01:000 Intro 3:01:000 B 5:01:000 B 7:01:000 Ending 3 4 Current Event Track 1 3:01:000 P00 [←/→] = Track, [←/→] = Search Audio Mixer Audio Edit Mute Mark List Set Clear Name Close](/content/2025/01/130993/images/78aed87e767658c85766bf749e56fdf4a2e7e4bdeeac39e482914890d796abeb.jpg)
1. Press [F4 (Marker List)].
The Edit Marker List window will appear.
The buttons have the following functions.
- VALUE dial, [INC][DEC], ▲ ▼ Select a marker within the list. The current location will jump accordingly.
- [F5 (Set)] Adds a marker at the beginning of the current measure.
- [F6 (Clear)] Deletes the selected marker.
- [F7 (Name)] Assigns a name to the currently selected marker. Choose a name from the displayed list, and press [F7 (Name)] to finalize your choice.
![Audio Track Edit [New Song] M=0001 STOP /Beat 0001-01 Audio Track Current Position Track 1 1:01:000 Edit Marker Intro Measure User(s) 2 Set Phrase 4 3 Smith Riff 4 Rhythm Loop 5 6 7 8 Current Event Track 1 3:01:000 P00- [...]Track, [...] =5ear Audio Mixer Audio Edit Mute Mark List Edit Marker L Intro 1:01:000 2 3:01:000 3 5:01:000 4 7:01:000 Verse Bridge Interlude Chorus Loop Solo Melody Fade Break Tag Hook Voy Drums Bass Set Clear Name Close](/content/2025/01/130993/images/4314563c700845ca8b6cacbd6b6cc620d85b5003e7df9d117bba28a505779783.jpg)
2. Press [F8 (Close)] to close the window.
MEMO
You can press pads 1–16 to jump to the marker of the corresponding number.
Opening the Loop/Locate window (Loop/Locate)
1. Press [F5 (Loop/Locate)].
The Loop/Locate window will appear.
* For details on operations in the Loop/Locate window, refer to p. 179 of the owner's manual.
Inserting a sample event at a specified location (Insert)
- Use ▲ ▼ to select the audio track into which you want to insert a sample event.
- Specify the location at which you want to insert a sample event.
The buttons have the following functions.
- [RESET]
Moves the current location to the beginning of the song.
• [INC][DEC]
Move the current location in steps of one tick.
• [BWD][FWD]
Move the current location in steps of one measure. - VALUE dial
Moves the current location in steps of 1 beat.
3. Press [F6 (Insert)].
The Sample Select screen will appear.
- Select the sample event that you want to insert, and press [F8 (Select)].
The sample event will be inserted at the location you specified.
MEMO
If inserting the sample event would exceed the current length of the song, a screen will ask you whether you really want to extend the length of the song.
When you press [F8 (Exec)], the song will automatically be lengthened as necessary to accommodate the newly inserted sample event.
Deleting the selected sample event from an audio track (Delete)
- Use [CURSOR] to select the sample event that you want to delete from an audio track.
- Press [F7 (Delete)].
The selected sample event will be deleted from the track.
* This merely deletes the sample event; the sample data itself will remain in the sample list.
Copying a sample event (Copy)
Here's how to copy the currently selected sample event.
- Use [CURSOR] to select the sample event that you want to copy.
- Press [F8 (Copy)].
The currently selected sample event will be copied to a location immediately following itself.
MEMO
If copying the sample event would make the track exceed the current length of the song, a screen will ask you whether you really want to extend the length of the song.
When you press [F8 (Exec)], the song will automatically be lengthened as necessary to accommodate the newly copied sample event.
Unloading a sample (Unload Sample)
This operation deletes the currently selected sample event and also unloads it from the sample list.
-
Hold down [SHIFT] and press [F5 (Unload Sample)]. A message will ask you for confirmation.
-
Press [F8 (Exec)] to execute.
* If you decide to cancel, press [F7 (Cancel)].
Combining the contents of the tracks into one audio track (Mixdown)
This operation lets you specify a region, then have the performance of all audio tracks and MIDI tracks in that region be combined into a single track.
After creating a sample in this way, you can save it on your computer as the audio data for a single song.
- Hold down [SHIFT] and press [F1 (Mixdown)].
The [REC] indicator will blink, and the Mixdown Standby window will appear.
- In the Mixdown Standby window, specify the region that you want to mix down.
Use [CURSOR] to move the cursor to each parameter, and turn the VALUE dial or use [INC][DEC] to set the value.
![Audio Track Edit [New Songs 1 M=0007 STB] Meas/Beat 8007-01 Audio Track Current Position Track 1 7:01:000 Edit Marker Measure 1 2 3 4 5 6 7 Use Case 4 2 Seq Phase 4 3 Synth Step 4 Rhythm Loop 5 6 7 8 Mixdown Standby Current Track Start Point 3 1 000 End Point 7 1 000 Audio Mixer Cancel Start](/content/2025/01/130993/images/e7591131f5b8a184ece4080e54ec2ee1e25f8b9a43ff6498ffbb9def9cc3ae99.jpg)
- Start Point
Specify the measure at which the mixdown is to start. - End Point
Specify the measure at which the mixdown is to end.
3. Press [PLAY] or [F8 (Start)].
The Mixdown Standby window will close, and [REC] indicator will change from blinking to lit, and the mixdown will begin.
When the mixdown begins, the Mixdown window will appear.
To close the Mixdown window, press [F8 (Close)] or [PLAY]. To open it again, press [PLAY].
4. The mixdown will end automatically.
The [REC] indicator will go out.
* You can also press [STOP] to stop before you reach the end.
5. The Mixdown Sample Assign window will open.
![Audio Track Edit [New Songs] M=0003 STOP 0003-01 Audio Track Current Position Track 7 5:01:000 Edit Marker Measure 1 User 0001 2 S### R### 4 3 S### R### 4 4 Rhythm Loop 5 6 Current Event [▲▼▼]=Track, [▲▼▼]= Audio Mixer Audio Addis Mute /Soto Mixdown Sample Assign [▲▼▼]=Track, [VALUE]=(120Tick) Unload Cancel Assign](/content/2025/01/130993/images/bd84871b91735213816b21609a8667dfc31ee4a3b3b96bca985234fd1aa48e77.jpg)
Use [RESET][BWD][FWD] or [CURSOR] to specify the location at which the sample event will be assigned.
6. Press [F8 (Assign)] to assign the sample event to the audio track.
A sample event that plays the mixed-down sample will be assigned to the audio track, and you will return to the previous screen.
- If you press [F6 (Unload)], the samples you just mixed down will be deleted (unloaded). A message will ask you for confirmation; press [F8 (Exec)] to confirm.
- If you want to neither assign nor unload the sample, press [F7 (Cancel)].
* Even if you cancel, the mixed-down sample data itself will remain in the sample list.
Erasing audio tracks (Clear)
1. Hold down [SHIFT] and press [F2 (Clear)].
The Audio Track Clear Menu window appears.
![Audio Track Edit [New Song] J=120 4/4 1000 Mean 0003-01 Audio Track Current Position Track 7 3:01:000 Edit Marker Feature 1 User 0001 2 Seq Phase 4 3 Synth Riff 4 Digital Loop 5 6 7 8 Current Event Audio Track Clear Menu 1 Clear All 2 Clear Track Audio Mixer Audio Edit Mute /Solo Cancel Select](/content/2025/01/130993/images/38a59ec50f15ba9b6596a551b0b79b7dbb85f57b8afba1e9f62e17dbd6ba4cbd.jpg)
2. Turn the VALUE dial, or press [INC] [DEC] to select the menu.
- Clear All
All audio tracks will be erased.
(The track names and setup data will also revert to their default settings.)
- Clear Track
The selected audio track will be erased. (The track name and setup data will also revert to its default settings.)
3. Press [F8 (Select)].
A message will ask you for confirmation.
4. Press [F8 (Exec)].
* If you decide to cancel, press [F7 (Cancel)].
* This operation will not change the length of the song.
Naming an audio track (Track Name)
Here's how to assign a name to an audio track (you can use up to twelve characters).
- Use ▲ ▼ to select the audio track that you want to name.
- Hold down [SHIFT] and press [F3 (Track Name)].
The Audio Track Name screen will appear.
- Assign the desired name.
* For details on how to assign a name, refer to "Assigning a name" (Owner's Manual; p. 36).
- Press [F8 (Write)] to confirm the name.
Switching the display mode
By holding down [SHIFT] and pressing [F6] you can cycle through the following three display modes.
- Wave Mode
Displays the waveform of the sample.
![Audio Track Edit [New] Songs M=0003 STOP /Beat 0003-01 Audio Track Current Position Track 1 3:01:00:00 Edit Marker Measure 1 2 3 4 5 6 7 8 User Active 2 Seq Phase 4 3 Synth Riff 4 Rhythm Loop Wave Mode Wave Mode Wave Mode Wave Mode Wave Mode Wave Mode Wave Mode Wave Mode Wave Mode Wave Mode Wave Mode Wave Mode Wave Mode Wave Mode Wave Mode Wave Mode Wave Mode Wave Mode Wave Mode Wave Mode Wave Mode Wave Mode Wave Mode Wave Mode Wave Mode Wave Mode Wave Mode Wave Mode Wave Mode Wave Mode Wave Mode Wave Mode Wave Mode Wave Mode](/content/2025/01/130993/images/97c595c63eae6dd252d41003cf7945915b7bdbd071aef6f2bd1ec1e2fcf4c2e6.jpg)
- Number Mode
Displays the sample numbers.
![Audio Track Edit [New Songs] J M=0003 STOP Mean: 0003-01 #=128 4/4 LOOP Audio Track Current Position Track 1 3:01:000 Edit Marker Feature 1 2 3 4 5 6 7 8 User Symbol P0044 P0044 2 Seq Phrase 4 P0050 Seq Ph P0050 Seq Ph P0050 Seq Ph 3 Synth Eff P0046 Synth P0046 Synth 4 Rhythm Loop P0044 P0044 Number Mode B C D E F G Current Event Track 1 3:01:000 P0044 Rhythm Loop MOND [<=>>Track, [<=>]=Search, [SHIFT]=Move Audio Mixer Audio Edis Mute Marker List Loop/locate Insert Delete Copy](/content/2025/01/130993/images/2e25140f148e04e2bf2e07e342b05c7fd6a01aa9a4e1f17d4f6d7d1a3d31d694.jpg)
- Overview Mode
Displays the contents of the song in a “condensed” form that lets you view all of the audio tracks. This is a convenient way to view the overall structure of the song.
![Audio Track Edit Mears 0003-01 /Beat Audio Track Current Position Track 1 3:01:000 User 0001 Seq Phrase 4 Synth Riff Rhythm Loop Overview Mode Current Event Track1 3:01:000 P0044 Rhythm Loop MOND [<<=>Track, [<=>]=Search, (SHIFT)=Move Audio Mixer Audio Edit Mute /Solo Marker List Loop/Locate Insert Delete Copy](/content/2025/01/130993/images/99e3bd86d16d6a7161d48133a7c9febd8b9fc01306f643ed507da4864f57d8ca.jpg)
Zooming In and Zooming Out in the display
- Hold down [SHIFT] and press [F7 (Zoom )] (reduce) / [F8 (Zoom )] (magnify).
You can zoom in/out to display between two and thirty-two measures in the screen.
Editing MIDI tracks
When you execute one of the MIDI track edit operations (Owner's Manual; p. 180) listed below, the audio tracks will also be edited at the same time.
- Delete (Owner's Manual; p. 184) If you've selected Track/Pattern ALL
- Copy (Owner's Manual; p. 184) If you've selected Src Track/Pattern ALL Dst Track/Pattern ALL
- Insert (Insert measure) (Owner's Manual; p. 185) If you've selected Track/Pattern ALL.
* When editing an audio track in the Audio Track Edit screen, the “Undo/Redo” of the Menu window is not available.
Items in the Audio Track Mixer screen
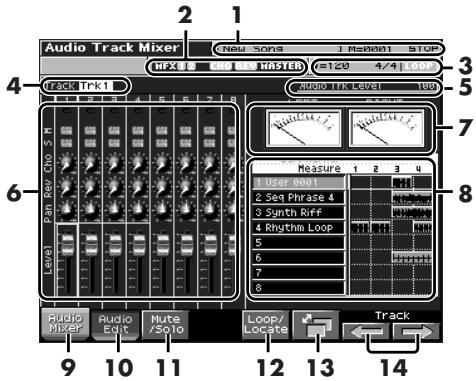
Audio Track Mixer1 Screen
Audio Track Mixer2 Screen
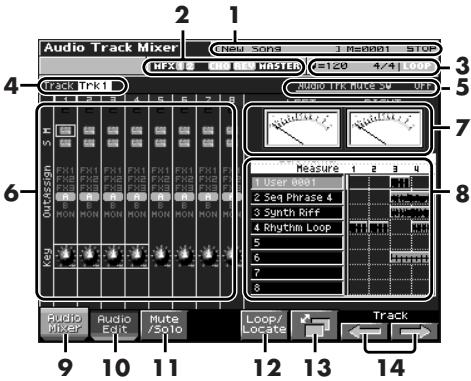
- Indicates the name of the currently selected song, the measure location, and the status of the sequencer.
- Indicates the on/off status of the multi-effects (MFX 1–3), chorus (CHO), reverb (REV), and mastering effect (MASTER).
- Indicates the song's time signature, tempo, and loop play on/off status.
- Indicates the number of the currently selected audio track.
- Indicates the name and value of the currently selected parameter.
- Shows the parameters that can be controlled for each audio track.
- Audio level meters.
- Displays a simplified view of the Audio Track Edit screen.
- Displays the Audio Track Mixer screen (p. 14).
-
Displays the Audio Track Edit screen (p. 14).
-
Lets you use the pads to mute audio tracks (p. 16).
- Displays the Loop/Locate window (p. 17).
- Switches the Audio Track Mixer screens.
- Selects the four audio tracks that will be controlled by the Realtime Control knobs (p. 23).
Controlling the audio tracks (Audio Track Mixer screen)
It's convenient to use the Audio Track Mixer screen when you want to adjust mixing parameters, such as the level and pan of the eight audio tracks.
Controlling the audio track settings
- Access the Audio Track Mixer 1 or 2 screen.
- Use ▲ ▼ to move the cursor to the parameter you want to edit.
- Use ◀ ▶ to move the cursor to the audio track you want to edit.
Current track Indicates the name and value of the parameter where the cursor is located.
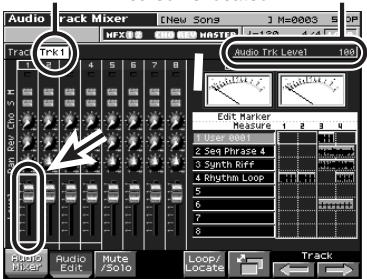
- Turn the VALUE dial or use [INC][DEC] to adjust the value.
MEMO
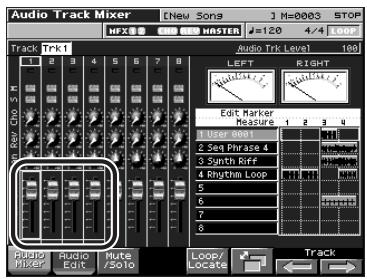
The green frame that encloses four tracks corresponds to the parameters controlled by the four REALTIME CONTROL knobs (p. 23).
Audio Track Mixer 1 Screen
| Indication in the Mixer screen | Parameter |
| Level | Track LevelAdjusts the volume of each audio track. This is used mainly to set the volume balance between audio tracks.Value: 0–127 |
| Pan | Track PanAdjusts the pan of each audio track.“L64” is far left, “0” is center, and “63R” is far right.Value: L64–0–63R |
| Rev | Track Reverb Send LevelAdjusts the amount of signal sent from each audio track to the reverb.Value: 0–127 |
| Cho | Track Chorus Send LevelAdjusts the amount of signal sent from each audio track to the chorus.Value: 0–127 |
| S | Solo SwitchPlays only the specified audio track.Value: ON, OFF |
| M | Mute SwitchMutes (silences) the specified audio track.Value: ON, OFF |
Audio Track Mixer 2 Screen
| Indication in the Mix-er screen | Parameter |
| S | Solo SwitchPlays only the specified audio track.Value: ON, OFF |
| M | Mute SwitchMutes (silences) the specified audio track.Value: ON, OFF |
| Output Assign | Output AssignSpecifies how the direct sound from each audio track will be output.ValueMFX 1–3:The sound will be routed through the multi-effect and output in stereo. You can also apply chorus or reverb to the sound that has passed through the multi-effect.A, B:The sound will be output in stereo from the OUTPUT A (MIX) jacks or OUTPUT B jacks without passing through a multi-effect.MON:The sound will be output in stereo from the OUTPUT A (MIX) jacks without passing through a multi-effect. Use this setting if you want only to hear the sound without resampling or recording it. |
| Key | Audio Track Key ShiftAdjusts the pitch of each track in semitone steps (+/-2 octaves).Value:-24– +24 |
Using the knobs to control the mixer
In the Audio Track Mixer screen, you can use [F7()] [F8()] to select the four audio tracks that will be controlled by the REALTIME CONTROL knobs. The currently selected audio tracks are indicated by a light green frame around them. Use ▲ ▼ to select the parameter that you want to control.
Opening the Loop/Locate window (Loop/Locate)

Owner's Manual; p. 179
Using the pads to mute audio tracks (Mute)
p. 16
Recording an audio track
Owner's Manual; p. 168
Recording an audio track (SOLO/RE-SAMPLING)
Here's how to record the input from an AUDIO INPUT jack or from the internal sound generator.
1. In the Audio Track Edit screen, press [REC].
The [REC] indicator will blink, and the Audio Rec Standby window will appear.
2. Use the Audio Rec Mode (Audio Recording Mode) field to select the recording method you want to use.
Use [CURSOR] to move the cursor to Audio Rec Mode, and turn the VALUE dial or use [INC][DEC] to select the desired recording mode.
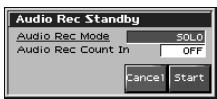
• SOLO
The internal sound generator will play as usual, and only the sound from the external audio input will be recorded.
* You won't be able to apply effects to the external audio input.
- RE-SAMPLING
The sound from the internal sound generator (including the audio tracks) will be recorded. The external audio input will not be heard.
* The volume of a resampled phrase may be less than the original volume of the phrase. As necessary, use Normalize (Owner's Manual; p. 156) to raise the volume.
* Audio tracks whose Audio Track Output Assign (p. 23) parameter is set to MON (Monitor) will not be recorded.
- AUDIO MERGE
Multiple audio tracks will be combined into one audio track. For details, refer to "Combining multiple audio tracks into one track (AUDIO MERGE)" (p. 25).
3. Use the Audio Rec Count In (Audio Recording Count In) field to specify how you want recording to start.
Use [CURSOR] to move the cursor to Audio Rec Count In, and turn the VALUE dial or use [INC][DEC] to choose the desired setting.
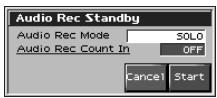
- OFF
Recording will start the moment you press [PLAY].
• 1 MEAS
When you press [PLAY], there will be a count-in ( playback) beginning one measure before the recording start point. Recording will start when you reach the recording start point.
- 2 MEAS
When you press [PLAY], there will be a count-in ( playback) beginning two measures before the recording start point. Recording will start when you reach the recording start point.
4. When you've chosen the desired setting in the Audio Rec Standby window, press [PLAY] or [F8 (Start)].
The Audio Rec Standby window will close, the [REC] indicator will change from blinking to steadily lit, and recording will start.
When recording starts, the Audio Recording window will appear.
![ROLAND FANTOM X - When you've chosen the desired setting in the Audio Rec Standby window, press [PLAY] or [F8 (Start)]. - 1](/content/2025/01/130993/images/53bdb82c0ed2a6866faca48521ee004addbc3c85dfb78b34c8b1057006cc2e78.jpg)
To close the Audio Recording window, press [F8 (Close)] or [PLAY]. To open it once again, press [PLAY].
5. When you've finished recording, press [STOP].
The [REC] indicator will go dark.
6. The Audio Rec Sample Assign window will open.
![Audio Track Edit [New Song] M=0003 STOP 0003-01 #128 4/4 0007 Audio Track Current Position Track 7 5:01:000 Edit Marker Measure 1 2 3 4 5 6 7 8 User 0001 Set Phrase 4 Switch RFF Rhythm Loop C C B Current Event [▲/▼] = Track, [▲/▼]= Audio Rec Sample Assign [▲/▼] = Track, (VALUE) = (120Tick) Audio Mixer Audio Edit Mute /Solo Unload Cancel Assign](/content/2025/01/130993/images/b01c06890e3ec5209af6f43d969b2282758e632fbd9e061ce8dfadf37f7232e6.jpg)
Use [RESET][BWD][FWD] or [CURSOR] to specify the location to which the sample event is to be assigned.
7. Press [F8 (Assign)] to assign the sample event to the audio track.
A sample event that plays the recorded sample will be assigned to the audio track, and you will return to the previous screen.
- If you press [F6 (Unload)], the samples you just recorded will be deleted (unloaded). A message will ask you for confirmation; press [F8 (Exec)] to confirm.
- If you want to neither assign nor unload the sample, press [F7 (Cancel)].
* Even if you cancel, the recorded sample data itself will remain in the sample list.
Combining multiple audio tracks into one track (AUDIO MERGE)
A maximum of eight tracks are available for you to use. By combining (merging) several audio tracks, you can free up audio tracks for other uses.
When you record using AUDIO MERGE, all MIDI tracks will automatically be muted, and the audio tracks will be recorded according to their current Mute/Solo settings.
- In the Audio Track Edit screen, mute any audio tracks that you don't want to merge.
- Press [REC].
The [REC] indicator will blink, and the Audio Rec Standby window will appear.
- In the Audio Rec Mode (Audio Recording Mode) field, choose "AUDIO MERGE."
Use [CURSOR] to move the cursor, and turn the VALUE dial or use [INC][DEC] to make the setting.
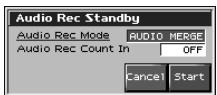
- In the Audio Rec Count In (Audio Recording Count In) field, specify how you want recording to start.
Refer to step 3 of "Recording an audio track (SOLO/RE-SAMPLING)" (p. 24).
- When you've finished making settings in the Audio Rec Standby window, press [PLAY] or [F8 (Start)].
The Audio Rec Standby window will close, the [REC] indicator will change from blinking to steadily lit, and recording will start.
When recording starts, the Audio Recording window will appear.
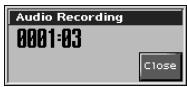
To close the Audio Recording window, press [F8 (Close)] or [PLAY]. To open it once again, press [PLAY].
6. When you've finished recording, press [STOP].
The [REC] indicator will go dark.
7. The Audio Rec Sample Assign window will open.
![Audio Track Edit [New Song] M=0003 STOP 0003-01 #128 4/4 0007 Audio Track Current Position Track 7 5:01:000 Edit Marker Measure 1 2 3 4 5 6 7 8 User 0001 Set Phrase 4 Switch RFF Rhythm Loop C C B Current Event [▲/▼] = Track, [▲/▼]= Audio Rec Sample Assign [▲/▼] = Track, (VALUE) = (120Tick) Audio Mixer Audio Edit Mute /Solo Unload Cancel Assign](/content/2025/01/130993/images/149eb1c587128e3af8a46c7e2b4a153174973140cd5ea478c29756204be0a936.jpg)
The location at which the recorded sample event is to be assigned will blink. Use [RESET][BWD][FWD] or [CURSOR] to specify the location at which you want to assign the sample event.
8. Press [F8 (Assign)] to assign the sample event to the audio track.
A sample event that plays the recorded sample will be assigned to the audio track, and you will return to the previous screen.
- If you press [F6 (Unload)], the samples you just recorded will be deleted (unloaded). A message will ask you for confirmation; press [F8 (Exec)] to confirm.
- If you want to neither assign nor unload the sample, press [F7 (Cancel)].
* Even if you cancel, the recorded sample data itself will remain in the sample list.
Saving your audio tracks
When you save a song that contains audio tracks, the audio track data is automatically saved in a file with a filename extension of ".SVA" and the same name as the song, together with the identically named ".SVQ" data file.

Owner's Manual; p. 223
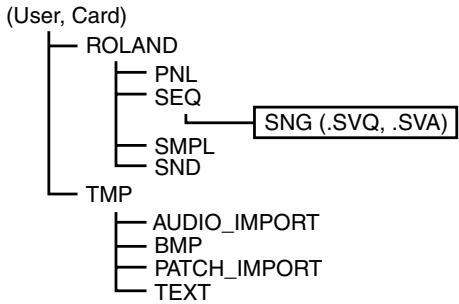
flowchart
graph TD
    A["(User, Card)"] --> B["ROLAND"]
    A --> C["TMP"]
    B --> D["PNL"]
    B --> E["SEQ"]
    E --> F["SNG (.SVQ, .SVA)"]
    C --> G["SMPL"]
    C --> H[" SND"]
    G --> I["AUDIO_IMPORT"]
    G --> J["BMP"]
    G --> K["PATCH_IMPORT"]
    G --> L["TEXT"]
System Setup (Owner's Manual; p. 198) includes the following audio tracks' parameters.
- Level
- Output Assign
- Pan
- Mute/Solo
- Reverb Send
- Key Shift
- Chorus Send
* Changes in the parameter value are not recorded.

"Deleting a Song" (p. 49)
What is Skip Back Sampling?
Skip Back Sampling is a function that lets you sample what were playing immediately prior to that point, even if you were not recording.
When you press the SKIP BACK SAMPLING button, the performance that you were playing for a certain length of time before that moment will be sampled.
This is extremely convenient if you've been playing a phrase repeatedly, and want to sample it only after you've managed to play it correctly.
The FANTOM-X Audio Track Expansion makes it easier to handle the sample data created by Skip Back Sampling.

Owner's Manual; p. 145
Using Skip Back Sampling
- Perform on the Fantom-X's keyboard and/or pads, or connect an instrument or other device to the AUDIO IN jacks or DIGITAL IN, and input sound or phrases.
- Press [SKIP BACK SAMPLING].
The following screen will appear, and Skip Back Sampling will be carried out.
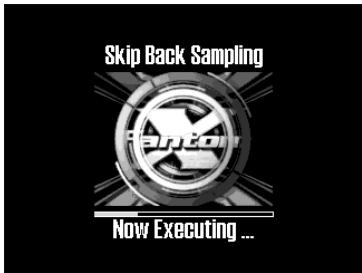
When Skip Back Sampling has been completed, the Skip Back Preview screen will appear.
![Skip Back Preview U0001 [User 0001] STEREO Audio Track Current Position Track 7 31:01:000 Skip Back Sampling Top End Skip Back Range -31:01:000 + 31:01:000 Start Beat End Beat Skipk Cancel Assign KB/Pad Assign Audio Pre-view](/content/2025/01/130993/images/bedc0884151f8956440db6f50c1dce54eb82da188c57c7600c2b4c6d37b139c9.jpg)
Editing the data created by Skip Back Sampling
In the Skip Back Preview screen, you can isolate just the desired portion of the sample, and assign it to the keyboard or to an audio track.
Isolating the desired portion of the sampled data (Start Beat/End Beat)
1. In the Skip Back Preview screen, use [F1]–[F4] to isolate the desired portion of the sample.
The buttons have the following functions.
- [F1 ()] / [F2()] (Start Beat)
Move the start point of the sample forward or backward in steps of one beat. (When you move the Start point, the End point will also move in tandem.) - [F3 ()] / [F4()] (End Beat)
Move the end point of the sample forward or backward in steps of one beat.
Cancelling the sample (Skip Back Cancel)
1. In the Skip Back Preview screen, press [F5 (SkipBkCancel)].
A message will ask you for confirmation.
2. Press [F8 (Exec)].
The sampled waveform will be erased (unloaded) from memory, and you will return to the previous screen. If you decide to cancel, press [F7 (Cancel)].
Assigning the sampled waveform to the keyboard or a pad (Assign to Keyboard/Pad)
1. In the Skip Back Preview screen, press [F6 (Assign KB/Pad)].
The Assign to Kbd/Pad window will appear.
![ROLAND FANTOM X - In the Skip Back Preview screen, press [F6 (Assign KB/Pad)]. - 1](/content/2025/01/130993/images/c3ac0fdb6d423eb897aa653428de67ae559325b4c8afe2e834b0c7ac744a96c8.jpg)
- To assign the sample to the keyboard Press [F6 (Assign to Kbd)].
For the subsequent steps, refer to p. 152 of the owner's manual. - To assign the sample to a pad Press [F7 (Assign to Pad)].
For the subsequent steps, refer to p. 151 of the owner's manual.
If you decide to cancel, press [F8 (Cancel)].
Assigning the sampled waveform to an audio track (Assign to Audio Track)
1. In the Skip Back Preview screen, press [F7 (Assign Audio)].
The Audio Track Edit screen will appear, and the Skip Back Sample Assign window will open.
![Audio Track Edit [New Song] M=0003 STOP /Beat 0003-01 Audio Track Current Position Track 7 5:01:000 Edit Marker Measure 1 2 3 4 5 6 7 8 User 0001 Set Phrase 4 Switch Rer Rhythm Loop C C B Current Event [▲/▼] = Track, [▲/▼]= Audio Mixer Audio Edit Mute /Solo Skip Back Sample Assign [▲/▼] = Track, [VALUE] = (120Tick) Cancel Assign](/content/2025/01/130993/images/cadd79176c7f4b791d88621c6fe234306960c0fcd58124743ec6e8d1d1df017d.jpg)
Use [RESET][BWD][FWD] or [CURSOR] to specify the location at which the sample is to be assigned.
2. Press [F8 (Assign)] to assign the sample to a track.
3. Press [F8 (Exec)].
The recorded sample data will be assigned to the selected track, and you will return to the previous screen.
If you decide to cancel, press [F7 (Cancel)].
![ROLAND FANTOM X - Press [F8 (Exec)]. - 1](/content/2025/01/130993/images/a78b73a4f94f782a461acec70f9ab7dd0a9b232d5a29b26a129ec1a8a43fec39.jpg)
Owner's Manual; p. 153
The FANTOM-X Audio Track Expansion adds a Multisample Edit screen that makes it easy to create and edit multisamples.
Creating a multisample
A “multisample” is a set of different samples assigned to the notes of the keyboard. One multisample can split up to 128 samples across the keyboard. You can store 128 multisamples in user memory, and another 128 multisamples in a memory card.
* In order to hear a multisample, you must assign it to a patch.
How patches, multisamples, and samples are related
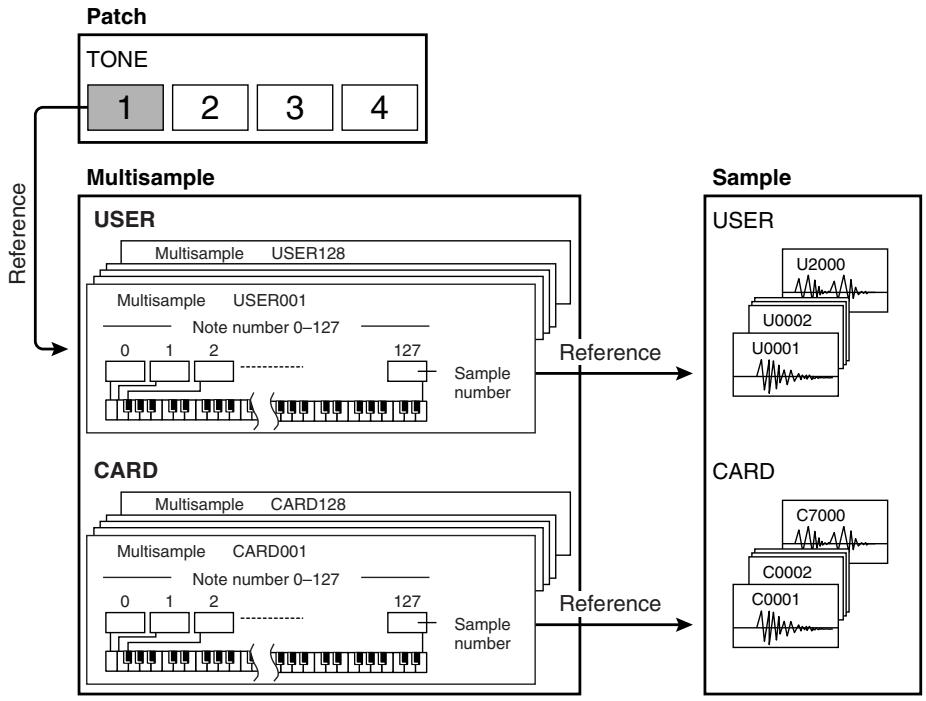
flowchart
graph TD
    A["Patch"] --> B["TONE"]
    B --> C["Multisample"]
    C --> D["USER"]
    D --> E["CARD"]
    E --> F["Sample"]

    subgraph Reference
        G["1"] --> H["2"] --> I["3"] --> J["4"]
    end

    subgraph Sample
        K["USER"] --> L["U2000"]
        K --> M["U0002"]
        K --> N["U0001"]
    end

    subgraph CARD
        O["C7000"]
        P["C0002"]
        Q["C0001"]
    end

    style Reference fill:#f9f9f9,stroke:#333
    style Sample fill:#e6f7ff,stroke:#333
NOTE
User multisamples consist only of user samples, and card multisamples consist only of samples on the card.
Creating a multisample in the Patch Edit screen
MEMO
You should start by initializing the patch settings. (Owner's Manual; p. 57)
- Press [PATCH/RHYTHM] to get the Patch Play screen.
MEMO
You can't create a multisample if the patch type is "Rhythm."
- Press [PATCH EDIT].
- Press [F6 (Pro Edit)].
The Patch Edit screen will appear.
- Press [F1 (↑)] or [F2 (↓)] to select "Wave."
- Set the parameters as follows to assign the multisample to the desired Tone 1-4.
• Wave Group: MSAM (Multisample waveforms)
• Wave Bank: USER or CARD
• Wave No. L (Mono): Multisample number
* For details on making this setting, refer to "How to Make Patch Settings" (Owner's Manual; p. 56).
* If you want to use a stereo multisample, specify the same number for L and R.
- Press [F4 (Multisample Edit)].
The Multisample Edit screen will appear.
* For details on editing, refer to “Editing a multisample” (p. 35).
7. Save the multisample.
* For details on how to save, refer to “Saving a multisample” (p. 40).
8. Save the patch.
* For details on how to save the patch, refer to "Saving Patches You've Created (Write)" (Owner's Manual; p. 59).
Creating a multisample in the Create Multisample screen
- Press [SAMPLE LIST] to get the Sample List screen, and select the sample(s) of which you want the multisample to consist.
Press [F5 (Mark Set)] to assign a check mark (√) to the desired sample or samples. You can press [F4 (Mark Clear)] to remove the check mark.
You can press [F8 (Preview)] to audition the sample.
If the total number of marks exceeds 128, the multisample will be created using the first 128 samples, starting with the lowest-numbered sample.
* You cannot create a multisample that uses samples belonging to different groups.
- Press [F7 (Load Utility)], and then press [F3 (Create Multi-Sample)].
The Create Multisample screen will appear.
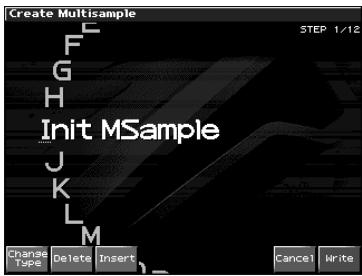
- Assign a name.
* For details on how to assign a name, refer to "Assigning a Name" (Owner's Manual; p. 36).
4. When you've finished inputting the name, press [F8 (Write)].
A screen will appear, allowing you to select the write destination.
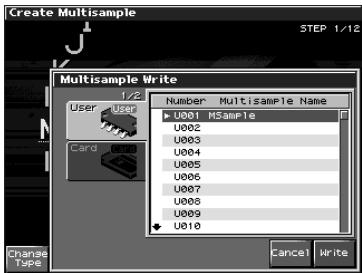
5. Turn the VALUE dial or use [INC][DEC] to select the write destination.
Multisamples consisting of user samples will be written to User memory, and multisamples consisting of card samples will be written to Card memory.
6. Press [F8 (Write)].
A message will ask you to confirm the Write operation.
![Create Multisample STEP 1/12 K L MSample N Message from Fantom-X Create New Multisample. If you want to create a new multisample, press [F8 (Execute)]. Cancel Exec](/content/2025/01/130993/images/5b4315a48898c596ad955e08c6d74a216ed0ea2be11f540aeefbe93a5f1af82f.jpg)
7. If you are sure you want to write the multisample, press [F8 (Exec)].
Never turn off the power while data is being written.
8. When the multisample has been written, the Assign to Keyboard window will appear.
![Create Multisample STEP 1/12 Assign to Keyboard Multisample U0001 [MSample] Assign to KBD Part Tempo Sync Cancel Exec Change Type](/content/2025/01/130993/images/562f55e7f3aed74ac4beb808b5f30cb9b5eb7ac8d05d38acd357d08a934291c2.jpg)
* If you're in Performance mode, a screen will appear, allowing you to select the Part to which the multisample is to be assigned. Use ▲ or ▼ to select a part, and then press [F8 (Select)].
9. Press [F8 (Exec)].
A screen will ask you for confirmation. If you decide to cancel, press [F7 (Cancel)].
10. Press [F8 (Exec)] once again.
Never turn off the power while data is being written.
11. The Multisample Edit screen will appear.
* For details on editing, refer to “Editing a multisample” (p. 35).
![MultiSample Edit KBD Part -[CreatePatch] Multi Sample USER:001 (MSample 1) Note Sample Number/Name Original Key Offset 60(C 4) U0007 User 0007 60(C 4) 0 AOS Note Range Sample Number/Name Ch 0(C -)→ 59(B 3) U0001 User 0001 STEREO 60(C 4)→ 72(C 5) U0007 User 0007 STEREO 73(C#5)→127(G 9) [SHIFT],[VALUE],[INC/DEC],[4/*] = Select Note List Erase Assign Copy Ors Tone Split Point MFX WNTER](/content/2025/01/130993/images/25ec202ff8653abd01b0a13951595fbf373707ba46d2d8f42af5489f608a6b86.jpg)
12. Save the multisample.
* For details on how to save, refer to “Saving a multisample” (p. 40).
13. Save the patch.
* For details on how to save a patch, refer to "Saving Patches You've Created (Write)" (Owner's Manual; p. 59).
Editing a multisample
About the Multisample Edit screen
Multisample Edit Screen
![Multisample Edit KBD Part *LUNISON P TaSJ Multi Sample CARD:001 (Unison P 1a1) 3 Note Sample Number/Name Original Key Offset 60(C 4) C0025 ORC:ORcUniP13a ---(---) +61 Note Range Sample Number/Name Un 37(C#2) 39(Eb2) C0011 ORC:ORcUniP6a STEREO 40(E 2) 44(G#2) C0013 ORC:ORcUniP7a STEREO 45(A 2) 46(Bb2) C0015 ORC:ORcUniP8a STEREO 47(B 2) 48(C 3) C0017 ORC:ORcUniP9a STEREO 49(C#3) 51(Eb3) C0019 ORC:ORcUniP10a STEREO 52(E 3) 54(F#3) C0021 ORC:ORcUniP11a STEREO 55(G 3) 57(A 3) C0023 ORC:ORcUniP12a STEREO 58(Bb3) 60(C 4) C0025 ORC:ORcUniP13a STEREO [SHIFT], [VALUE], [INC/DEC], [<=>] = Select Note List Erase Assign Copy Org Key Tone Switch Split Point 7 8 9 10 11 12 13](/content/2025/01/130993/images/e567e9a518d61dfb2b699ec64ac90dda6bcfab4c722979e22f83a53fe367460d.jpg)
- Shows information about the patch.
- Shows the name of the multisample.
- Indicates whether the multisample has been edited.
- Shows information about the current note.
- Indicates the original key of the sample.
- Shows a list of the samples assigned to the multisample.
- Changes the multisample assigned to a tone (p. 34)/
- Erases the data from the selected region of notes (p. 34).
- Assigns a sample to the selected region (p. 34).
- Copies a sample from a key to another key (p. 35).
If you hold down [SHIFT]
![Multisample Edit KED Part *[Unison P 1a5] Multi Sample CARD:001 (Unison P 1a1) Note Sample Number/Name Original Key Offset 60(C 4) C0025 ORC:ORCUnIP13a ---(---) +1 Note Range Sample Number/Name Ch 37(C#2)+ 39(Eb2) C0011 ORC:OrchUnip6a STEREO 40(E 2)+ 44(G#2) C0013 ORC:OrchUnip7a STEREO 45(A 2)+ 46(Bb2) C0015 ORC:OrchUnip8a STEREO 47(E 2)+ 48(C 3) C0017 ORC:OrchUnip9a STEREO 49(C#3)+ 51(Eb3) C0019 ORC:OrchUnip10a STEREO 52(E 3)+ 54(F#3) C0021 ORC:OrchUnip11a STEREO 55(G 3)+ 57(A 3) C0023 ORC:OrchUnip12a STEREO 58(Bb3)+ 60(C 4) C0025 ORC:OrchUnip13a STEREO [SHIFT],[VALUE],[INC/DEC],[4,>] = Select Note Reload Erase Sample Sort Shift Move 14 15 16 17 18 19](/content/2025/01/130993/images/1521c2be1af688fe1f59fd83745da4c87704d4aee7f42c9cf5a577b756c78b52.jpg)
- Specifies the original key of the sample (p. 37).
- Opens the Tone Switch/Select window (p. 35).
- Moves the split point (p. 35).
- Returns a multisample to the last-written state (p. 36).
- Erases all notes (p. 36).
- Assigns a sample to the current zone (p. 36).
- Sorts samples in a multisample in the order of their original key (p. 37).
- Moves all samples to left or right (p. 37)
- Moves the data of the current zone to left or right (p. 37).
Selecting the notes to edit
1. Press the keyboard to select the sample you want to edit.
You can select a region by pressing two notes.

You can also make your selection by
turning the VALUE dial, by using ◀ ▶, or by using [INC][DEC]. In this case, hold down [SHIFT] to select a region of notes.
Changing the multisample assigned to a tone (List)
Here's how you can change the multisample that's assigned to the current tone.
1. In the Multisample Edit screen, press [F1 (List)].
The Multisample List window will open.
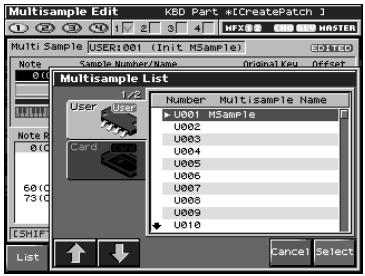
The buttons have the following functions.
- Value, ▲ ▼ , [INC][DEC]
Change the number of the multisample to be assigned.
• [F2 (↑)]/[F3 (↓)]
Change the group of the multisample to be assigned.
• [F7 (Cancel)] or [EXIT]
Cancel the operation and return to the previous screen.
• [F8 (Select)]
Assigns the selected multisample to the current tone, and return to the previous screen.
Erasing the data from the selected region of notes (Erase)
1. In the Multisample Edit screen, press [F2 (Erase)].
The data for the selected region of notes will be erased.
Assigning a sample to the selected region (Assign)
1. In the Multisample Edit screen, press [F3 (Assign)].
The Sample Select screen will appear, allowing you to assign the selected sample to the selected region.
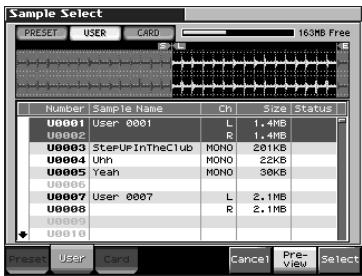
The buttons have the following functions.
• [F2 (User)] [F3 (Card)]
Select the group of the sample to be assigned.
You will see only the groups of the samples that can be selected.
• [F6 (Cancel)] or [EXIT]
Cancel the operation and return to the previous screen.
• [F7 (Preview)]
Auditions the sample.
• [F8 (Select)]
Selects the sample and return to the Multisample Edit screen.
Copying a sample from a key to another key (Copy)
Here's how the sample assigned to a note can be copied to a different note of the keyboard.
1. In the Multisample Edit screen, press the key to which the copy-source sample is assigned.
You can also select the note by using VALUE, ▲ ▼ , or [INC][DEC].
The Sample Data area shows information about the sample assigned to the current note.
![Multisample Edit KBD Part (Unison P 1a5) 1 2 3 4 5 6 7 8 9 HASTED Multi Sample CARD:001 (Unison P 1a1) Note Sample Number/Name Original Key Offset 60(C 4) C0025 ORC1ORcUn:P13a 60(C 4) 0 AID Note Range Sample Number/Name Ch 37(③)(2)+ 39(Eb2) C0011 ORC1ORcUnPi6a STEREO 40(E 2)+ 44(Gb2) C0013 ORC1ORcUnPi7a STEREO 45(A 2)+ 46(Bc2) C0015 ORC1ORcUnPi8a STEREO 47(E 2)+ 48(C 3) C0017 ORC1ORcUnPi9a STEREO 49(③)(3)+ 51(Eb3) C0019 ORC1ORcUnPi10a STEREO 52(E 3)+ 54(FB3) C0021 ORC1ORcUnPi11a STEREO 55(G 3)+ 57(A 3) C0023 ORC1ORcUnPi12a STEREO 58(③)(3)+ 60(E 4) C0025 ORC1ORcUnPi13a STEREO [SHIFT],[VALUE],[INC/DEC],[<<>] = Select Note List Erase Assign Copy Ora Tone Split Point ←→ ←→](/content/2025/01/130993/images/ccdc06dd314ca0360c4452202f6cc9e0cb7d491bee2fce3a690693cc8a04c90e.jpg)
2. Press [F4 (Copy)] so it lights in red.
3. Press the copy-destination key.
If you specify a region by pressing more than one key, the data will be copied to the region between the lowest and highest keys you press.
4. Take your hand off the keyboard.
[F4 (Copy)] will go dark, and you will return to the normal Multisample Edit screen.
Opening the Tone Switch/Select window (Tone Sw/Sel)
1. In the Multisample Edit screen, press [F6 (Tone Sw/Sel)].
The Tone Switch/Select window will open.
![Multisample Edit KBD Part [Unison P 1a5] Multi Sample CARD:001 [Unison P 1a1] Note Sample Number/Name Original Key Offset 60(C 4) C0025 ORC1ORCUnIP13a 60(C 4) 0 NOTE Range Sample Number/Name Ch 58(Bb3)+ 68(C 4) C0025 ORC1ORCUnIP13a STEREO 61(CB4)+ 63(Bb4) C0027 ORC1ORCUnIP14a STEREO 64(E 4)+ 66(FB4) C0029 ORC1ORCUnIP15a STEREO 67(G 4)+ 68(GB4) C0031 ORC1ORCUnIP17a STEREO 69(R 4)+ 70(Bb4) C0033 ORC1ORCUnIP19a STEREO 71(B 4) C0031 ORC1ORCUnIP17a STEREO Tone Sw/Select (Push EXIT to close) Tone Sw Tone Select 1 2 3 4](/content/2025/01/130993/images/b5031fa20606d250e0751394f58b9f2ec968ba208e53b64de8a4aebabd6c5c72.jpg)
This is the same as when you press [F5 (Tone Sw/Sel)] in the Patch Play screen.
2. Press [EXIT] to close the window.
Moving the split point (Split Point)
The “Split Point” is the boundary between zones (p. 36).
1. In the Multisample Edit screen, press [F7 (Split⇐)][F8 (Split⇒)].
The split point of the selected sample and the adjacent sample will move to left or right.
Returning a multisample to the last-written state (Reload)
Here's how you can return the currently edited multisample to the state in which it was last written.
- In the Multisample Edit screen, hold down [SHIFT] and press [F1 (Reload)].
A screen will ask you for confirmation.
- Press [F8 (Exec)].
If you decide to cancel, press [F7 (Cancel)].
Erasing all notes (Erase All)
Here's how to erase all notes.
- In the Multisample Edit screen, hold down [SHIFT] and press [F2 (Erase All)].
A screen will ask you for confirmation.
- Press [F8 (Exec)].
If you decide to cancel, press [F7 (Cancel)].
Replacing the sample of the current zone (Sample Select)
A “zone” is a region to which the same sample is assigned. Here's how to assign a sample to the currently selected zone (the “current zone”).
![Multisample Edit KBD Part [Unison P 1a5] Multi Sample CARD:001 [Unison P 1a1] Note Sample Number/Name Original Key Offset 71 (B 4) C0031 ORC1ORCUnIP17a 72 (C 5) -1 A/C4 Note Range Sample Number/Name Ch 55 (G 3) + 57 (A 3) C0023 ORC1ORCUnIP12a STEREO 58 (Bb3) + 60 (C 4) C0025 ORC1ORCUnIP13a STEREO 61 (Cb4) + 63 (Eb4) C0027 ORC1ORCUnIP14a STEREO 64 (E 4) + 66 (Fb4) C0029 ORC1ORCUnIP15a STEREO 67 (G 4) + 68 (Gb4) C0031 ORC1ORCUnIP16a STEREO 69 (A 4) + 70 (Bb4) C0033 ORC1ORCUnIP17a STEREO 71 (B 4) C0031 ORC1ORCUnIP18a STEREO 72 (C 5) + 73 (Cb5) C0035 ORC1ORCUnIP20a STEREO [SHIFT].[VALUE].[INC/DEC].[+/-] = Select Note List Erase Assign Copy Ors Tone Split Point MFX SE W/S](/content/2025/01/130993/images/79417f0a7c373de83e2106ec9a6c87d57cb71835d92531987225144c8e09d858.jpg)
- In the Multisample Edit screen, hold down [SHIFT] and press [F3 (Sample Select)].
The Sample Select screen will appear, allowing you to assign the selected sample to the current zone.
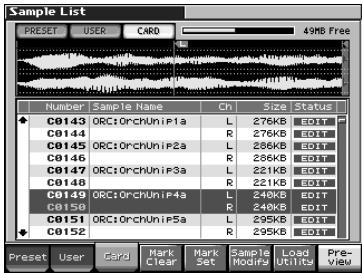
The buttons have the following functions.
• [F2 (User)][F3 (Card)]
You will see only the groups of samples that can be selected.
• [F6 (Cancel)] or [EXIT]
Cancel the operation and return to the previous screen.
• [F7 (Preview)]
Auditions the sample.
• [F8 (Select)]
Selects the sample and return to the Multisample Edit screen.
Specify the original key (Org Key) of the sample
Samples you record or import are set so that they will play at their original pitch when you press the C4 note.
In order to correctly match the key of the sample to the keyboard, you must modify the “original key” of the sample.
For example, if you sampled a sound whose pitch was E4, you'll need to change its “original key” setting to E4 so that it will play at its original pitch when you press the E4 note of the keyboard.
Similarly, when you execute Create Multisample, you will need to specify the original key of the samples that make up that multisample, so that they are correct for the keys to which they are assigned.
* A sample will not play more than two octaves higher than its original key.
1. In the Multisample Edit screen, press [F5 (Org Key)].
The Original Key window will open.
![Multisample Edit KED Part [Unison P 1a5] Multi Sample CRD:001 [Unison P 1a1] Note Sample Number/Name Original Key Offset 60(C 4) C0025 ORC:ORCUnIP13a 60(C 4) 0 A/C Note Range Sample Number/Name Ch 58(Bb3)+ 60(C 4) C0025 ORC:ORCUnIP13a STEREO 61(C4)+ 63(Bd4) C0027 ORC:ORCUnIP14a STEREO 64(E 4)+ 66(FB4) C0029 ORC:ORCUnIP15a STEREO 67(G 4)+ 68(GB4) C0031 ORC:ORCUnIP17a STEREO 69(R 4)+ 70(Rb4) C0033 71(C 4)+ 73(CB5) C0035 74(D 5)+ 76(E 5) C0037 [SHIFT].CYRUE3. INC./DEC.) Sample Original Key C0025 ORC:ORCUnIP13a Original Key 60(C 4) List Erase Assign Copy Pre- VIEW Close](/content/2025/01/130993/images/9f3da5bbfa5ae797a06403012b2827e488205fc6743d6545a2ea2fe97e0035c6.jpg)
The buttons have the following functions.
- Value, [INC][DEC]
Change the original key of the sample assigned to the current note.
• [F7 (Preview)]
The sample will play at its current original key while you continue holding down the button.
• [F8 (Close)]
Closes the Original Key window. - Keyboard
When you play the keyboard, the original key of the sample assigned to the most recently pressed note will be displayed.
2. Save the sample whose original key you changed.
* For details on saving a sample, refer to “Saving a Sample” (Owner’s Manual; p. 159).
Sorting samples in the order of their original key (Sort)
This operation reassigns all samples currently assigned to the multisample, so that they are placed in the order of their original key setting. (This produces the same result as Create Multisample.)
- In the Multisample Edit screen, hold down [SHIFT] and press [F4 (Sort)].
A screen will ask you for confirmation.
If you decide to cancel, press [F7 (Cancel)].
2. Press [F8 (Exec)].
Moving all samples to left or right (Shift)
Here's how all samples assigned to notes can be shifted to the left or right.
- In the Multisample Edit screen, hold down [SHIFT] and press [F5 (⇐)][F6 (⇒)].
Moving the data of the current zone to left or right (Move)
Here's how the sample of the current zone can be moved to left or right.
- In the Multisample Edit screen, hold down [SHIFT] and press [F7 (⇐)][F8 (⇒)].
Saving a multisample
Once you've edited a multisample, the word "EDITED" appears beside the multisample name.
Be aware that if you turn off the power or select another screen when the “EDITED” indication is shown, the changes you made to the multisample will be lost.
![Multisample Edit KBD Part -#ULTinaGrand1 Multi Sample USER:001 (Init MSample) 60(C 4) ---- (No Assign) Original Key Note Sample Number/Name 60(C 4) ---- (No Assign) Note Range Sample Number/Name Ch 0(C -)→ 56(83) U0001 User 0001 STEREO 57(A 3) U0003 SteUpInTheClub MONO 58(83) U0004 Unh MONO 59(B 3) U0005 Yeah MONO 60(C 4)→ 60(C 4) 61(C4)→ 72(C 5) U0007 User 0007 STEREO 73(C5)+127(C 9) [SHIFT],[VALUE],[INC/DEC],[<=>] = Select Note List Erase Assign Copy Org Key Tone SW Sel Split Point](/content/2025/01/130993/images/6221cf0d6bea1c910f0e9cd98b9f9d9eb2aeb466f909ddc56e4cbd42f5cd7e1f.jpg)
1. In the Multisample Edit screen, press [WRITE].
The Multisample Name screen will appear.
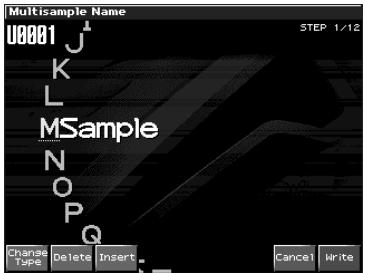
2. Assign a name to the multisample.
* For details on how to assign a name, refer to "Assigning a Name" (Owner's Manual; p. 36).
3. When you've finished inputting a name, press [F8 (Write)].
The Multisample Write window will appear.
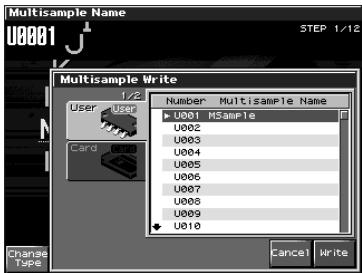
4. Turn the VALUE dial or use [INC][DEC] or ▲ ▼ to select the multisample number of the write destination.
5. Press [F8 (Write)].
A message will ask you to confirm the Write operation.
6. To write the data, press [F8 (Exec)].
If you decide to cancel, press [F7 (Cancel)]. The multisample will be written, and you will return to the Multisample Edit screen.
NOTE
Never turn off the power while data is being written.
Sample-related changes
Extended patch groups
You can now select samples (card/user) from the patch list as well (Sample Auto Patch). This allows you to play a sample in a pitched manner just as you would play a normal patch.
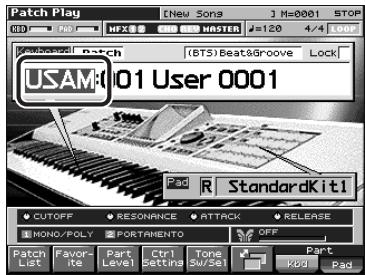
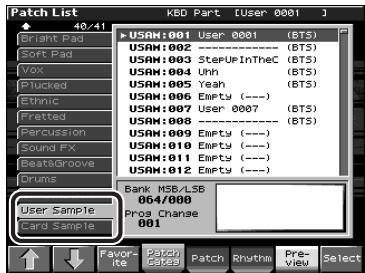
The following two groups have been added to the patch groups. If there are samples in memory, sample names will be displayed as patch names.
User Sample (USAM): 1–2000
Samples in user memory can be used as patches.
Card Sample (CSAM): 1–7000
Samples in the memory card can be used as patches.
* If there are no samples in memory, this will indicate "Empty."
* In the case of a stereo sample, choose the sample number for the L channel. It will play as a stereo patch. (If you choose the sample number for the R channel, “---” will be indicated for it, and it will not be playable.
Saving a sample auto patch
When you edit and save these patches, they will be saved in the USER or CARD group in the same way as conventional patches.
* Note that in this case, there will be no sound if you unload (Owner's Manual; p. 147) the sample.
* Unsaved samples will be lost when you turn off the power. If you want to keep your sample, press [WRITE] to save it (Owner's Manual; p. 159).
Bank Select and Program Change Correspondence Chart
| Group | Number | Bank Select | Program Number | |
| MSB | LSB | |||
| PR-I | 001-128 | 87 | 72 | 1-128 |
| USAM | 0001-2000 | 64 | 0:14 | 1-128 |
| 15 | 1-80 | |||
| CSAM | 0001-7000 | 65 | 0:53 | 1-128 |
| 54 | 1-88 | |||
Newly added sample parameters
The following sample parameters have been added.

Owner's Manual; p. 150
![Sample Prm U0007 [User 0007] J STEREO Sample Parameter Loop Mode FND Loop Tune 0 Original Key 60(°C 4) BPM =120.00 Time Stretch Type TYPE01 Start Fine 0 Loop Start Fine 0 Sample Gain +6 Sample Fine Tune 0 Sample Level 127 Sample Number BPM Calc Reset Grd Id Pre- view](/content/2025/01/130993/images/8caef7b745617697b8d0164675a67f0bb41f66ed5dfcc0dfb095e7183bd5cf98.jpg)
- Sample Gain
This adjusts the gain of the sample, letting you boost the volume if it decreased in the process of sampling.
Value: 0, +6, +12 [dB]
- Sample Fine Tune
This adjusts the pitch of the sample in steps of one cent (over a range of +/-50 cents).
Value: -50--+50

1 cent = 1/100th of a semitone
- Sample Level
This adjusts the volume of the sample.
Value: 1–127
Sample BPM calculator (BPM Calc)
Here's how to specify the original tempo of the sample.
- In the Sample Prm screen, press [F6 (BPM Calc)] to open the BPM Calculator window.
![Sample Prm U0007 [User 0007] STEREO Sample Parameter Loop Mode FMD Loop Tune 0 Original Key 60( C 4 ) BPM #=120.00 Time Stretch Type TYPE01 Start Fine 0 Loop Start Fine 0 Loop End Fine Sample Gain Sample Fine Tune Sample Level BPM Calculator Measure 1 Beat 4 / 4 CLOSE EXEC Sample Number](/content/2025/01/130993/images/441f00072a085b28c8178d36b94db8c4dae816287d995c3cb212926af7aae9c8.jpg)
- Input the length (Measure) and time signature (Beat) of the sample.
- Press [F8 (EXEC)]. The tempo will be calculated, and the value will be input in the BPM field of the Sample Prm screen.
Selecting a sample (Sample Number)
Now you can switch samples in the Sample Prm screen as well.
You can use [F1][F2] to select samples in the order in which they appear in the sample list.
Changes in the saved sample content (Save All Samples)

Owner's Manual; p. 200
When you execute "Save All Samples," multisamples are now saved as well as all samples in sample memory.
Changes in the Patch/Rhythm Edit screen
The behavior that occurs when you press [PATCH EDIT] has changed; the screen that was formerly called the Zoom Edit screen (Owner's Manual; p. 57, p. 84) will now appear first.
![TVF Edit K&D Part [User 0001] MFX MASTER TVF EDIT Cutoff Reso Filter Type Key Follow 127 0 LPF 0 Pitch Env TVF TVF Env TVR Env Pro Edit Part Select Tone SW/SEI](/content/2025/01/130993/images/9e95645e6efc6b7631ab8b2faa73a79f8da0e238ab4e3169735f4fe081b77c45.jpg)
In the Zoom Edit screen, you can press [F6 (Pro Edit)] to access the Patch Edit screen (or Rhythm Edit screen).
![Patch Edit KBD Part [50 true...] 1/19 General Wave TMT Pitch Pitch Env TVF TVF Env TVA TVA Env Output LFO1 LFO2 Patch Category Patch Level Patch Pan Patch Priority Octave Shift Patch Coarse Tune Patch Fine Tune Stretch Tune Depth iNaloos Feel Cutoff Offset Resonance Offset Attack Time Offset Release Time Offset Velocity Sens Offset Util Menu Msepl Edit Zoom Part Select Tone SW/Set](/content/2025/01/130993/images/1f2d005e7f0297525e71eac4d95cee4c70fec2e9cce24e52785e77340d01e57f.jpg)
Newly added Patch Overview screen
You can now use the REALTIME CONTROL knobs to edit a patch.
- Patch Edit
![Patch Overview KBD Part [50 true...] Patch Edit Filter Attack Decay Fine EnvOptn FILTER Cutoffs Reso F.Tube EnvOptn 35 LPF 4.53 Attack Decay Sustan Release 70 AMP Attack Decay Sustan Release 35 LFO 1 Rate Pitch Filter Ampl 94 Rate Pitch Filter Ampl 100 Pro Edit Part Select Tone SW/5A](/content/2025/01/130993/images/073f8ca0233993adaf80b765c3844799f4321bc6fae3c795259a7772d6955a29.jpg)
- Rhythm Tone Edit
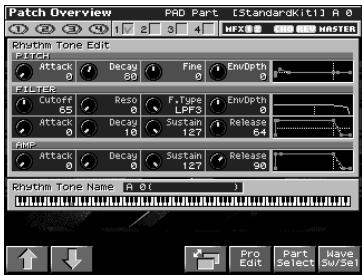
- Press [PATCH EDIT].
- Press [F5] several times to display the Patch Overview screen.
- Use [F1 (↑)] or [F2 (↓)] ( ▲ ▼ ) to select the parameter group that you want to edit.
- Use the REALTIME CONTROL knobs to edit the parameters.
MEMO
If you're editing a rhythm set, you can press a note on the keyboard to select the rhythm tone you want to edit.
Changes due to the upgraded editor software
The included "Fantom-X Editor" software has been upgraded, allowing you to use an editor program to edit samples and multisamples.
Newly added PC mode screen
In conjunction with the addition of the sample editor, a PC mode screen has been added to the Fantom-X.
When you start up the sample editor, the Fantom-X will automatically enter PC mode, and will be inoperable using its own controls. This ensures that operations on your computer and on the Fantom-X will not interfere with each other.
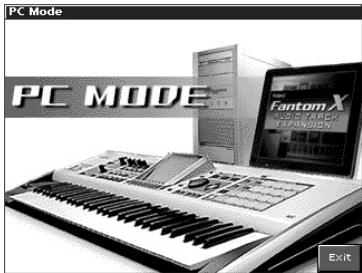
When you close the editor on your computer, the Fantom-X will exit PC mode and return to the normal screen.
MEMO
The Fantom-X will also enter PC mode when you execute a Write operation from the librarian (p. 54).
NOTE
When you must exit PC mode due to unavoidable circumstances, such as when your computer has frozen, you can do so by pressing [F8 (EXIT)]. A screen will ask you for confirmation. Press [F8 (OK)] to force the Fantom-X to return to the normal operation screen.
Cautions when using S-700 series sounds with the Fantom-X
The new editor adds a Fantom-X Sample Converter, which converts S-700 series patches/partial/samples into a form that can be read by the Fantom-X. When loading S-700 series files you converted using this converter from your computer via USB into the Fantom-X, please be aware of the following points.
Before you connect the Fantom-X to your computer
In order for S-700 series sound data files converted by Fantom-X Sample Converter to be loaded from your computer via USB, the Fantom-X must be in Storage mode. The power will be turned off in the course of changing System settings, so make sure that you save any unsaved data before switching to Storage mode. For details on how to make this change, refer to "Switching the USB Mode and the MIDI Mode" (p. 218) in the Owner's Manual.
* You don't need to perform this operation when loading data from a card without using the USB.
NOTE
You must switch the USB mode (Storage mode/MIDI mode) before you connect the Fantom-X to your computer.
For details on using USB Storage mode, refer to "Transferring Files to or from Your Computer (Storage Mode)" (p. 219) in the Owner's Manual.
Importing patches and rhythm sets
Here's how patches, rhythm sets, multisamples, and samples placed in the following directory using Fantom-X Sample Converter can be imported into the Fantom-X.
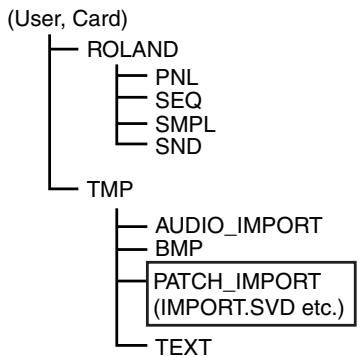
flowchart
graph TD
    A["(User, Card)"] --> B["ROLAND"]
    B --> C["PNL"]
    B --> D["SEQ"]
    B --> E["SMPL"]
    B --> F[" SND"]
    B --> G["TMP"]
    G --> H["AUDIO_IMPORT"]
    G --> I["BMP"]
    G --> J["PATCH_IMPORT (IMPORT.SVD etc.)"]
    G --> K["TEXT"]
* If you used Fantom-X Sample Converter only to convert partials or samples, load them using Import Audio. (Owner's Manual; p. 220)
* If this directory does not exist, use your computer to create it.
1. Press [MENU].
2. Press ▲ or ▼ to select "Utility," and then press [ENTER].
The Utility Menu screen will appear.
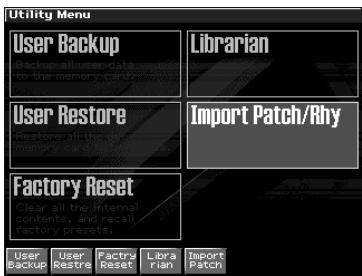
3. Press [F5 (Import Patch)].
The Import Patch/Rhythm screen will appear.
* From this point onward, the screens are shown in "wizard" format to guide you through the process.
4. The screen will indicate STEP 1.
The Fantom-X will check whether there are any files that can be imported. If such files are found, the User and/or Card icons will appear.
Turn the VALUE dial or use [INC][DEC] or ▲ ▼ to choose whether you want to import from User or from Card.
* If there is no data that can be imported, these icons will not appear.
5. Press [F8 (⇒)].
6. STEPS 2–4 will appear.
Turn the VALUE dial or use [INC][DEC] or ▲ ▼ to select the starting number of the write destination for patch, multisample, and rhythm set respectively. (The user or card data will be overwritten by the imported data.)
NOTE
If you specify a high number as the starting number, the imported patches, rhythm sets, and/or multisamples may exceed their maximum numbers, making them impossible to import the remains.
NOTE
You can't change the write-destination group (User/Card). It will be the same as the loaded group.
MEMO
If there is no data to import, a screen like the following will appear.
![Import Patch/Rhythm 1 2 3 4 5 6 7 STEP 4: Select Destination Rhythm Set No Import Rhythm Set(s) Press [F8] to next step.](/content/2025/01/130993/images/cc204bacb467007ac6a6a2ff30edf7e4b79b11b3ae4805c7746cc655de5b5ebd.jpg)
MEMO
Sample data will be assigned automatically to numbers at the write destination.
7. Press [F8 (⇒)].
8. STEP 5 will appear.
This screen shows details about the patch being imported.
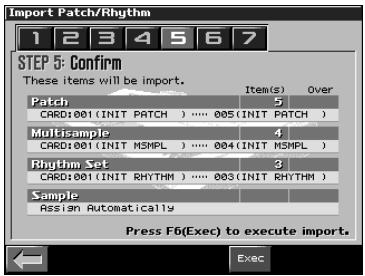
If you are satisfied with what the screen shows, press [F6 (Exec)] to begin the import.
9. A screen like the following is shown during the import.
NOTE
Never turn off the power while data is being imported.
NOTE
If some of the data being imported is missing, the error message "File Not Found" will appear. In this case, delete all of the files in the PATCH_IMPORT folder, and use Fantom-X Sample Converter to replace the data.
10. When the import is completed, you are asked whether you can delete the source files located in the User or Card PATCH\_IMPORT directory.
Press [F8 (Exec)] to delete the files. (To cancel, press [F7 (Cancel)].)
* It may take some time for files to be deleted.
MEMO
If the Import was successful, there is normally no need to keep the source file.
11. Press [F8 (OK)] to return to the normal screen.
12. Save the sample.
Unlike patches, rhythm sets, and multisamples, samples are not saved automatically when the import procedure finishes. You must save samples as described in “Saving Samples (Save All Samples)” (Owner's Manual; p. 200).
* In some cases, an imported patch, rhythm set, or sample may sound differently than when played back on the S-700 series.
Fantom-X Editor System Requirements
If you're using Fantom-X Editor version 2.0 or later, please refer to the following.
System Requirements (Windows)
- Operating System
Microsoft® Windows® 98
Microsoft® Windows® Me
Microsoft® Windows® 2000 Professional
Microsoft® Windows® XP
- CPU/Clock:
Pentium®/Celeron™ processor 400 MHz or higher
Pentium® III 500 MHz or higher (recommended)
- Memory (RAM)
128 MB or more
256 MB or more (recommended)
- Hard Disk
140 MB or more
- CD-ROM Drive
Built-in CD-ROM drive (IDE)
- Display/Colors
800 x 600 or higher/65,536 colors (16 bit High Color) or more
1024 x 768 or higher (recommended)
* Microsoft and Windows are registered trademarks of Microsoft Corporation.
* Windows® is known officially as: "Microsoft® Windows® operating system."
* Pentium is a registered trademark of Intel Corporation.
System Requirements (Mac OS)
- Operating System
Mac OS (Classic) 8.6 and 9.x
Mac OS (X) 10.2 and 10.3
- CPU/Clock
PowerPC G3 233 MHz or higher (Classic) PowerPC G3 500 MHz or higher (X)
- Memory (RAM)
128 MB or more
256 MB or more (recommended)
- Hard Disk
140 MB or more
- CD-ROM Drive
Built-in CD-ROM drive (IDE)
- Display/Colors
800 x 600 or higher/32,000 colors or more 1024 x 768 or higher (recommended)
- Others
OMS 2.0 or later (Classic)
* Apple and Macintosh are registered trademark of Apple Computer, Inc.
* MacOS is a trademark of Apple Computer, Inc.
* OMS is a registered trademark of Opcode Systems, Inc.
Changes in the Patch Edit screen
Due to the newly added Multisample Edit screen, the following buttons in the Patch Edit screen have changed.
MEMO
The method for displaying the Patch Edit screen has changed. For details, refer to "Changes in the Patch/Rhythm Edit screen" (p. 41).
Before the update (Patch Edit screen)
![Patch Edit kBD Part [UltimateGrand] 1/19 General Wave TMT Pitch Pitch Env TVF TVF Env TVA TVA Env Output LFO1 LFO2 Patch Category Patch Level Patch Pan Patch Priority Octave Shift Patch Coarse Tune Patch Fine Tune Stretch Tune Depth Ahalos Feel Cutoff Offset Resonance Offset Attack Time Offset Release Time Offset Velocity Sens Offset Zoom Edit Init Tone Copy Sort Tone SW561](/content/2025/01/130993/images/1fff449633fe30f7eeb6f30b14d31e5ab35f84396a55edca4f1378d23543bb4c.jpg)
After the update (Patch Edit screen)
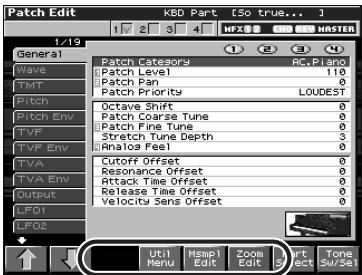
After the update (Zoom Edit screen)
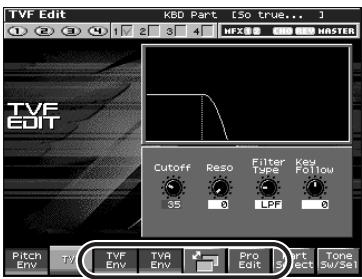
- Newly added [F4 (Util Menu)]
The previous [F4 (Init)] and [F5 (Tone Copy)] have been moved to a menu.
(Example)
When you have pressed [F4 (Util Menu)] to open the Patch Utility Menu window
![Patch Edit KBD Part [50 true...] 1/19 General Wave TMT Pitch Pitch Env TVF TVF Env TVA TVA Env Output LFO1 LFO2 Patch Cateory Patch Level Patch Pan Patch Priority Octave Shift Patch Coarse Tune Patch Fine Tune Stretch Tune Depth #Nalos Feel Cutoff Offset Resonance Mode Attack Release Velocity Patch Utility Menu 1 Patch Initialize 2 Patch Tone Copy Cancel Select](/content/2025/01/130993/images/3642c978c22cc85663f0580dfa465427706d3824a112cd07a27637ff6f58c579.jpg)
Select the desired menu item, and press [F8 (Select)] to perform the same operation as before.
MEMO
The same applies to the Rhythm Edit screen.
Press [F4 (Util Menu)] to open the Rhythm Utility Menu. Choose the desired menu item, "Rhythm Set Initialize," "Rhythm Key Initialize" (initialize a specific key), or "Rhythm Tone Copy," and then press [F8 (Select)].
- Newly added [F5 (Multisample Edit)]
In the Patch Edit screen, [F5 (Multisample Edit)] has been added to let you jump to the Multisample Edit screen by pressing a single button.
Changes in the Performance Mixer screen
[F5]–[F8] buttons have been added to the screen that appears when you press [SHIFT] in the Performance Mixer screen.
After the update
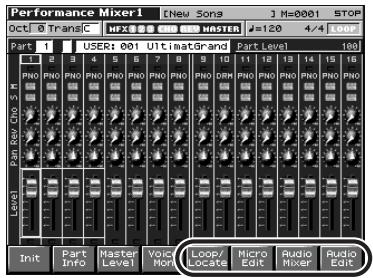
These buttons have the following functions.
• [F5 (Loop/Locate)]
Displays the Loop/Locate window.
* For details, see p. 179 in the Owner's Manual.
• [F6 (Micro Edit)]
Displays the Microscope screen.
* For details, see p. 192 in the Owner's Manual.
• [F7 (Audio Mixer)]
Displays the Audio Track Mixer screen (p.21).
• [F8 (Audio Edit)]
Displays the Audio Track Edit screen (p.15).
Changes in the Performance Layer screen
[F5]–[F8] buttons have been added to the screen that appears when you press [SHIFT] in the Performance Layer screen.
After the update
![Performance Layer [Heu Sons] 1 H=0001 STOP Oct ▶ Trans C NFX ▶ MHD ▶ MASTER ▶ 120 4/4 LOOP USER: 81 ShapeURMusic Part 1 [UltimatGrand] PRINT NO. 1 2 3 4 CUTOFF RESONANCE ATTACK RELEASE TRANS DOWN TRANS DOWN OFF Init Part Info Master Level Voice Mon Loop/LOCATE Micro Edit Audio Mixer Audio Edit](/content/2025/01/130993/images/6b445ec7538ecbb6c7329cb341c5f0fd046179171dc849630ec0bee54cc4eb90.jpg)
These buttons have the following functions.
• [F5 (Loop/Locate)]
Displays the Loop/Locate window.
* For details, see p. 179 in the Owner's Manual.
• [F6 (Micro Edit)]
Displays the Microscope screen.
* For details, see p. 192 in the Owner's Manual.
• [F7 (Audio Mixer)]
Displays the Audio Track Mixer screen (p.21).
• [F8 (Audio Edit)]
Displays the Audio Track Edit screen (p. 15).
Newly added Layer List window
In the Performance Layer screen, you can now press [F6 (Layer List)] to open the Layer List window and view a list of the sounds used in each part.
Changes in the Key Range window
In the Performance Layer screen, you can press [F3 (Key Range)] to open the Key Range window and make split settings in this window.
Owner's Manual; p. 102
Playing different sounds across the keyboard (Split)
- Press [LAYER/SPLIT] to access the Layer screen.
- Press [F3 (Key Range)].
The Key Range window will open.
![Performance Layer [New Songs] M=0001 STOP Oct 0 Trans C NFX8 0000 MRSTER #120 4/4 100 USER: 01 ShapeURMusic Part 1 [UltimatGrand] PART 1 1 2 3 4 Key Range Part 1 KBD Lower Upper C - C - Set Set Lower Upper Close](/content/2025/01/130993/images/b96e3a2843af744ec5f2deaa72e79145a934df45234823e62dbd87e3cc52e469.jpg)
Use [F1 (↑)][F2 (↓)] to select the part you want to edit.
- Hold down [F4 (Set Lower)] and play a note on the keyboard to specify the lowest note in the range.
Range: C-1–UPPER - Hold down [F5 (Set Upper)] and play a note on the keyboard to specify the highest note in the range.
Range: LOWER-G9 - When you've finished making settings, press [F8 (Close)] to close the Key Range window.
Changes in the Song Edit screen
Due to the addition of the audio tracks, the following buttons in the Song Edit screen have changed.
Before the update
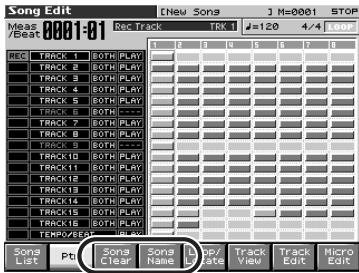
After the update
![Song Edit Meas /Beat 0001-01 See Track [New Songs] J M=0001 STOP RCK 1 #=120 4/4 Store LPG TRACK 1 BOTH PLAY TRACK 2 BOTH PLAY TRACK 3 BOTH PLAY TRACK 4 BOTH PLAY TRACK 5 BOTH PLAY TRACK 6 BOTH PLAY TRACK 7 BOTH PLAY TRACK 8 BOTH PLAY TRACK 9 BOTH PLAY TRACK10 BOTH PLAY TRACK11 BOTH PLAY TRACK12 BOTH PLAY TRACK13 BOTH PLAY TRACK14 BOTH PLAY TRACK15 BOTH PLAY TRACK16 BOTH PLAY TEMPURED Songs List PC Audio Track Songs Utilities Stop Track View Track Edit Micro Edit](/content/2025/01/130993/images/b5dc3d92866aa78a4e87b0457d812bb367a24b48a7438e60100abc1b5507230a.jpg)
Newly added [F4 (Song Utility)]
The previous [F3 (Song Clear)] and [F4 (Song Name)] have been moved to a menu.
(Example)
When you have pressed [F4 (Song Utility)] to open the Song Utility Menu window
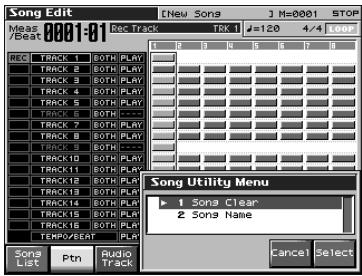
Select the desired menu item, and press [F8 (Select)] to perform the same operation as before.
Changes in the Song List screen
Due to the new addition of audio tracks, the contents displayed in the Song List screen have changed.

Owner's Manual; p. 177
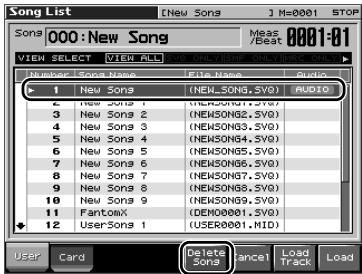
Songs containing audio tracks are indicated by the "AUDIO" symbol.

The “AUDIO” symbol is also shown in the Save Song screen.
When you load a song that has this symbol, the audio track data (.SVA) will also be loaded automatically (p. 26).
* Samples will not be loaded automatically. You'll need to use a command such as Load All Samples (Owner's Manual; p. 202) to load them.
Deleting a Song
You can now delete a song from the Song List screen.
- In the Song List screen, select the song that you want to delete, and press [F5 (Delete)].
A message will ask you for confirmation.
- Press [F8 (Exec)] to execute.
* If you decide to cancel, press [F7 (Cancel)].
When you delete a song from the song list, the .SVA and .SVQ files will both be deleted simultaneously.
* If you use your computer to delete files, you must delete both the .SVA and the .SVQ files.
Using the pads for realtime erase

Owner's Manual; p. 173
While realtime-recording a song, you can now use the pads to erase data that you input from the pads.
- Begin realtime recording (Owner's Manual; p. 170).
The Realtime Recording window will appear.
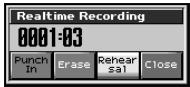
- Press [F6 (Erase)].
The Realtime Erase window will appear.
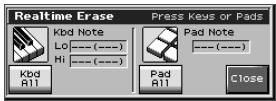
-
Erase the unwanted data.
-
[F3 (Keyboard All)] Erase all the data for the keyboard part for as long as you hold down the button.
- [F6 (Pad All)] Erases all the data for the pad part for as long as you hold down the button.
- To erase notes of a specific key (pad); Hold down that key (pad). Data for that note will be erased for as long as you hold down that key (pad).
-
To erase notes of a specific key range; Hold down the top and bottom keys of that range. Data for that range will be erased for as long as you hold down those keys.
-
Press [F8 (Close)] to close the Realtime Erase window.
You will return to the normal recording state.
CC Filter added to the Microscope
You can now specify the controller numbers that will be shown in the Microscope.

Owner's Manual; p. 194
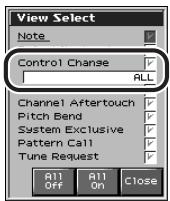
- Access the View Select window.
- Press ▲ or ▼ to choose “Control Change.”
- Turn the VALUE dial or use [INC][DEC] to specify the CC numbers you want to see.
If you select "ALL," all messages will be shown.
Improved functionality for step recording
A function that enables you to remove a previously input Tie has been added.
In the Step Rec (Note) screen, press [F6 (Untie)].
Owner's Manual; p. 174, step 7.
![Step Rec (Note) [New Songs] M=0001 STOP REC: PACK 1 CE CE CK Rac Position 0002-01-248 Note Type Gate Velo 1/8 (J) 80% REKL Step Back Tie Rest Zoom In Zoom Out Untie Step](/content/2025/01/130993/images/a3970ae6d2e4ded1f0b70701f2c1f6cb4620342904d4d7b0b7a968ba42fac8b5.jpg)
Changes in the demo song loaded when you start up the Fantom-X

Owner's Manual; p. 42
Changes to the following song:
Song name: Start Chillin'
Copyright© Roland Coroporation
Improved functionality in Live Setting

Owner's Manual; p. 42
Registering a song file in a Live Setting
In addition to patches and performances, you can now register song files to a live setting.
- Press [MENU].
- Turn the VALUE dial or use ▲ or ▼ to select "Live Setting Edit," and then press [ENTER].
The Live Setting Edit screen will appear.
![Live Setting Edit [New Songs] M=0001 STOP Oct 0 Trans C HFX MRSTER #120 4/4 907 USER-01 ShapeURMusic 1/20 Bank 1 Bank 2 Bank 3 Bank 4 Bank 5 Bank 6 Bank 7 Bank 8 Bank 9 Bank 10 1-01 Empty Press [F8(Resist)] to resist here. This is a free memo space. Fantom-X can load in text files (.txt) and display it in this space. A handy reference to your song list, concert schedule, or any other information. Please see the Owner's Manual for loading procedures.](/content/2025/01/130993/images/01c30be65e4201ce8e150329d7f6001f3831b30e00eb461ca9010ebe41d13f9b.jpg)

You can also access the Live Setting Edit screen by holding down [SHIFT] and pressing [ENTER].
- Use ▲ or ▼ ([F1 (↑)] or [F2 (↓)]) to select the bank in which you want to register the song file.
- Use ◀ or ▶ to select the number (step) in which you want to register the song file.
You can register the song file to any of the sixteen steps. You will probably want to make your registrations in the order of the titles in your live stage set.
5. Press [F5 (Set Song)].
The Song Select screen will appear.
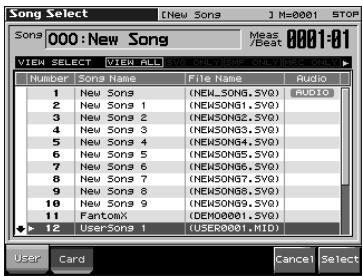
* By pressing ◀ or ▶ in the above screen you can specify the type of songs that will be displayed. This lets you view only the desired type of songs, making it easier to find the desired file if there are several different types of songs.
• VIEW ALL: show all songs
• SVQ ONLY: show only SVQ files
- SMF ONLY: show only Standard MIDI Files
• MRC ONLY: show only MRC files
- Press [F1 (User)] or [F2 (Card)] to select the load destination, and press ▲ or ▼ to select the song.
If you decide to cancel, press [F7 (Cancel)].
- Press [F8 (Select)] to register the song file.
For example, if you registered the song to number 02 of Bank 1, the screen will indicate "Regist to 1-02."
Recalling a song file you registered
You can recall a song in the same way that you recall a patch or performance. (Owner's manual p. 42)
In the Live Setting Play screen, when you recall a step for which a song has been registered, that song will be loaded.
Switching the font
Now you can switch the font of the Live Setting screen.
In the Live Setting Edit screen, repeatedly press [F4 (Font)] to switch the displayed font.
Removing the text

Owner's Manual; p. 42
Now you can delete the imported text displayed as the bank information.
- In the Live Setting Edit screen, use ▲ or ▼ ([F1 (↑)] or [F2 (↓)]) to select the bank that you want to remove its text.
- Hold down [SHIFT] and press [F6 (Remove Text)].
Improvements in Arpeggio functionality
When playing arpeggios, you can now use the pads to switch arpeggio styles.
Using the pads to switch arpeggio styles

Owner's Manual; p. 128
1. Hold down [SHIFT] and press [ARPEGGIO].
A screen like the following will appear.
* If you've selected Performance mode, "Performance" is indicated at the right of "Arpeggio."
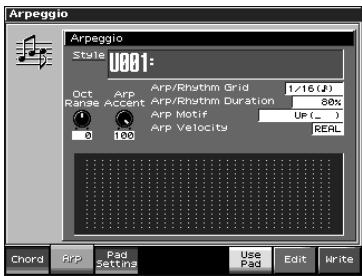
2. Press [F6 (Use Pad)].
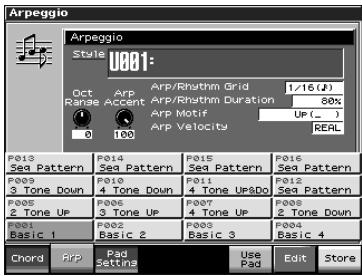
Now you can use the pads to switch arpeggio styles.
![ROLAND FANTOM X - Press [F6 (Use Pad)]. - 2](/content/2025/01/130993/images/d601796972b6645959a07a89b2b87c9b97f4ba729f3c35320bbf5a731fb7943f.jpg)
You can also access the above screen by pressing [PAD SETTING] to access the Pad Setting screen, and then pressing [F2 (Arp)].
Changing the arpeggio styles assigned to the pads
- In the above window, use [CURSOR] to move the cursor to "Style," and turn the VALUE dial or use [INC][DEC] to select the desired style.
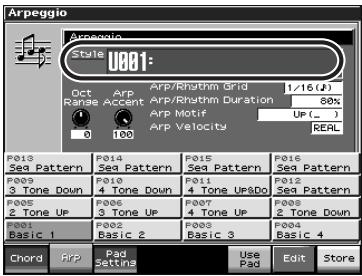
- Press [F8 (Store)].
The pads will blink.
- Press one of the pads 1–16.
Press the pad to which you want to assign the style you selected in step 1. The style will be assigned to that pad.
Improvements in Chord Memory functionality
When using chord memory, you can now use the pads to switch chord forms.
Using the pads to switch chord forms

Owner's Manual; p. 133
- Hold down [SHIFT] and press [Chord Memory].
A screen like the following will appear. If you've selected Performance mode, "Performance" is indicated at the right of "Chord Form."
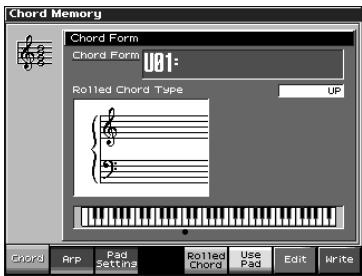
- Press [F6 (Use Pad)].
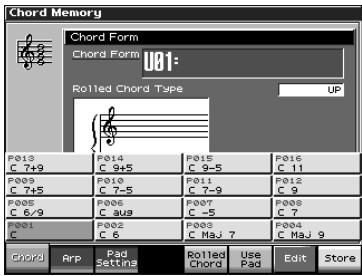
Now you can use the pads to switch chord forms.

You can also access the above screen by pressing [PAD SETTING] to access the Pad Setting screen, and then pressing [F1 (Chord)].
Changing the chord forms assigned to the pads
- In the above window, use [CURSOR] to move the cursor to "Chord Form," and turn the VALUE dial or use [INC][DEC] to select the desired chord form.
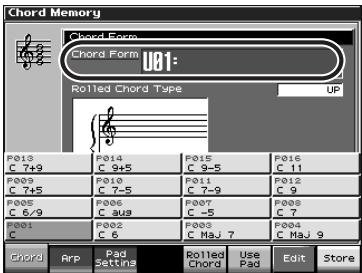
- Press [F8 (Store)].
The pads will blink.
- Press one of the pads 1–16.
Press the pad to which you want to assign the chord form you selected in step 1. The chord form will be assigned to that pad.
Changes in the librarian

Owner's Manual; p. 236
When using the Fantom-X librarian, you no longer need to manually select Librarian mode.
When Fantom-X Librarian begins to transmit the data, the Fantom-X will automatically enter PC mode, and will no longer respond to operations performed on its control panel. This ensures that operations on the Fantom-X will not conflict with operations on your computer.
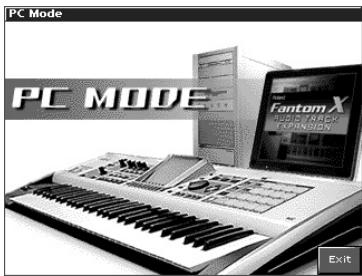
When you close the librarian on your computer, the Fantom-X will automatically exit PC mode and return to the normal operating screen.
NOTE
When you must exit PC mode due to unavoidable circumstances, such as when your computer has frozen, you can do so by pressing [F8 (EXIT)]. A screen will ask you for confirmation, and you can press [F8 (OK)] to force the Fantom-X to return to its normal operating screen.
New shortcut from the Input Setting screen to MFX Edit
In the Input Setting screen, [F6 (MFX Edit)] has been added to let you jump to the MFX Edit screen by pressing a single button.

Owner's Manual; p. 141
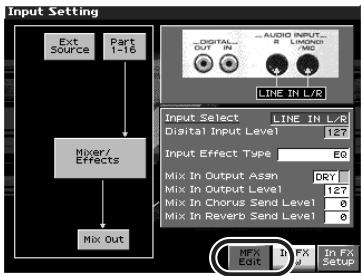
flowchart
graph TD
    A["Ext Source"] --> B["Mixer/Effects"]
    C["Part 1-16"] --> B
    B --> D["Mix Out"]
    E["Digital Input Level"] --> F["Line IN L/R"]
    G["Audio Input"] --> H["Line IN L/R"]
    I["Input Select"] --> J["Digital Input Level"]
    K["Input Effect Type"] --> L["0"]
    M["Mix In Output Asan"] --> N["DRY"]
    O["Mix In Output Level"] --> P["127"]
    Q["Mix In Chorus Send Level"] --> R["0"]
    S["Mix In Reverb Send Level"] --> T["0"]
    U["HPX Edit"] --> V["FX Setup"]
New parameters available for the assignable switches
Several more choices have been added to the functions that can be controlled by the assignable switches 1 and 2.
The newly added parameters are listed below.

Owner's Manual; p. 125
• Master Key Shift Down
Shifts down the System parameter Master Key Shift (Owner's Manual; p. 230) in semitone steps.
• Master Key Shift Up
Shifts up the System parameter Master Key Shift (Owner's Manual; p. 230) in semitone steps.
- Scale Tune Switch
Switches the System parameter Scale Tune Switch (Owner's Manual; p. 232)
- CC01-CC31
Controller numbers 1–31
- CC33-CC95
Controller numbers 33–95
Newly added DIMM check function
When you power up the Fantom-X, it will automatically check whether the DIMM memory (Owner's Manual; p. 242) is operating correctly.
If the DIMM contacts are faulty, a screen like the following will appear.
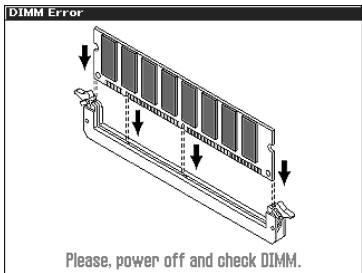
If this occurs, turn off the power immediately, and re-insert the DIMM memory correctly.
A
Arpeggio 52
Assign
Multisample 34
Assignable Switch 55
AUDIO MERGE 25
Audio Track 13
Display Mode 20
Editing 16
Erasing 19
Merge 25
MIDI track 20
Mute 16
Naming 20
Recording 24
Saving 26
Settings 22
Zooming In / Zooming Out 20
Audio track
Combining 18
Erasing 19
Audio Track Edit Screen 14–16
Audio Track Mixer 1 Screen 22
Audio Track Mixer 2 Screen 23
Audio Track Mixer Screen 14, 21–22
B
Bank Select 39
BPM Calc
Sample 40
C
Cancelling
Skip Back Sampling 28
CC Filter
Microscope 50
Chord Memory 53
Clear 19
Copy 18
Multisample 35
Current Zone 36
D
Delete 18
Deleting
Song 49
Demo song 50
DIMM 56
E
Erase
Multisample 34
Erase All 36
Multisample 36
Erasing
Audio track 19
Multisample 36
F
FANTOM-X Audio Track Expansion Kit ..... 9
Fantom-X Sample Converter 42
Font
Live Setting 52
|
Import Patch/Rhythm 43
Importing
Patch 43
Input Setting Screen 55
Insert 17
K
Key Range Window 48
Knob
Mixer 22
L
Layer List window 47
Librarian 54
Live Setting 51
Loop/Locate 17
Loop/Locate Window 17
M
Marker
Viewing a List 17
Marker List 17
MFX Edit Screen 55
Mixdown 18
Audio Track 18
Mixer
Controlling 23
Move 16,37
Multisample
Create Multisample Screen 31
Editing 33
List 34
Move 37
Original Key 37
Patch Edit Screen 31
Reload 36
Sample Select 36
Saving 38
Shift 37
Sort 37
Multisample Edit Screen 33
Multisample Editing 30
Mute
Audio Track 16
Mute/Solo 16
0
Org Key
Multisample 37
P
Patch Edit Screen 41, 46
Patch Group 39
Patch Overview Screen 41
PC Mode Screen 42
Performance Layer Screen 47
Performance Mixer Screen 47
Preview 16
Pro Edit 41
Program Change 39
R
REALTIME CONTROL Knobs
Mixer 22
Realtime Erase
Realtime Recording 49
Reload
Multisample 36
Rhythm Edit Screen 41
S
S-700 Series 42
Sample
BPM 40
Saving 39
Selecting 40
Unloading 18
Sample Auto Patch 39
Sample Event
Auditioning 16
Copying 18
Deleting 18
Inserting 17
Moving 16
Selecting 16
sample event 13
Sample Fine Tune 40
Sample Gain 40
Sample Level 40
Sample Number 40
Sample Parameter 40
Sample Select 36
Saving
Audio Track 26
Multisample 38
Sample Auto Patch 39
Shift
Multisample 37
Skip Back Sampling 27
Assign to Audio Track 29
Assign to Keyboard/Pad 28
Cancelling 28
Editing 28
Skip Back Cancel 28
Start Beat/End Beat 28
SOLO/RE-SAMPLING 24
Song 49
Song Edit Screen 48
Song File Live Setting 51
Song List screen 49
Sort Multisample 37
Split Point 35
Multisample 35
Step Recording UNTIE 50
T
Tone Sw/Sel 35
Tone Switch/Select Window 35
Track Name 20
U
Unload Sample 18
UNTIE Step Recording .... 50
Updating 9
Z
Zone 36
Zooming In / Zooming Out 20
MEMO
- Guide to the Added Functionality
- Customers who purchased the “FANTOM-X Audio Track Expansion Kit” (update card):
- Customers who purchased the Fantom-X (synthesizer workstation):
- Copyright © 2005 ROLAND CORPORATION
- AFRICA
- EGYPT
- REUNION
- ASIA
- CHINA
- HONG KONG
- INDIA
- INDONESIA
- KOREA
- MALAYSIA
- PHILIPPINES
- SINGAPORE
- 02-2148, SING
- TAIWAN
- THAILAND
- VIETNAM
- AUSTRALIA/ NEW ZEALAND
- AUSTRALIA/
- NEW ZEALAND
- CENTRAL/LATIN AMERICA
- ARGENTINA
- BARBADOS
- BRAZIL
- CHILE
- COLOMBIA
- COSTA RICA
- CURACAO
- DOMINICAN REPUBLIC
- PARAGUAY
- PERU
- USING THE UNIT SAFELY
- ALWAYS OBSERVE THE FOLLOWING
- ! WARNING
- CAUTION
- Placement
- Before Using Cards
- Using DATA Cards
- Handling CD-ROMs
- Other Notes
- Check the contents of the package 8
- Updating the Fantom-X 9
- Main features 12
- Using audio tracks 13
- Using the Skip Back Sampling function.... 27
- Multisample editing functions.... 30
- Sample-related changes 39
- Changes in the Patch/Rhythm Edit screen 41
- Changes due to the upgraded editor software 42
- Other changes 46
- Index 57
- Check the contents of the package
- ☐ FANTOM-X Audio Track Expansion Kit CompactFlash card
- □ PC card adapter
- □ CD-ROM (Editor)
- ☐ Fantom-X Sound List (Leaflet)
- √ Guide to the Added Functionality (this document)
- □ Sticker
- What is the FANTOM-X Audio Track Expansion Kit?
- NOTE
- Items required for performing the update
- Cautions when performing the update (Important)
- Update procedure
- Press [F8 (UPDATE)] to execute the update.
- When the process has been completed, the following screen will appear. Turn off the power of the Fantom-X and remove the PC card.
- MEMO
- Verifying the update
- Audio tracks (p. 13)
- Sample Auto Patch function (p. 39)
- Multisample editing (p. 30)
- Sample Editor, Multisample Editor, and S-700 series sample converter (p. 42)
- New patches
- What are audio tracks?
- To access the Audio Track Edit screen
- To access the Audio Track Mixer screen
- Items in the Audio Track Edit screen
- Editing audio tracks (Audio Track Edit screen)
- Moving a sample event (Move)
- Selecting and auditioning a sample event (Preview)
- Using the pads to mute audio tracks (Mute/Solo)
- Viewing a list of markers (Marker List)
- Press [F4 (Marker List)].
- Press [F8 (Close)] to close the window.
- Opening the Loop/Locate window (Loop/Locate)
- Press [F5 (Loop/Locate)].
- Inserting a sample event at a specified location (Insert)
- Press [F6 (Insert)].
- Deleting the selected sample event from an audio track (Delete)
- Copying a sample event (Copy)
- Unloading a sample (Unload Sample)
- Combining the contents of the tracks into one audio track (Mixdown)
- Press [PLAY] or [F8 (Start)].
- The mixdown will end automatically.
- The Mixdown Sample Assign window will open.
- Press [F8 (Assign)] to assign the sample event to the audio track.
- Erasing audio tracks (Clear)
- Hold down [SHIFT] and press [F2 (Clear)].
- Turn the VALUE dial, or press [INC] [DEC] to select the menu.
- - Clear All
- - Clear Track
- Press [F8 (Select)].
- Press [F8 (Exec)].
- Naming an audio track (Track Name)
- Switching the display mode
- Zooming In and Zooming Out in the display
- Editing MIDI tracks
- Items in the Audio Track Mixer screen
- Controlling the audio tracks (Audio Track Mixer screen)
- Controlling the audio track settings
- Using the knobs to control the mixer
- Using the pads to mute audio tracks (Mute)
- Recording an audio track
- Recording an audio track (SOLO/RE-SAMPLING)
- In the Audio Track Edit screen, press [REC].
- Use the Audio Rec Mode (Audio Recording Mode) field to select the recording method you want to use.
- • SOLO
- - RE-SAMPLING
- - AUDIO MERGE
- Use the Audio Rec Count In (Audio Recording Count In) field to specify how you want recording to start.
- - OFF
- • 1 MEAS
- - 2 MEAS
- When you've chosen the desired setting in the Audio Rec Standby window, press [PLAY] or [F8 (Start)].
- When you've finished recording, press [STOP].
- The Audio Rec Sample Assign window will open.
- Press [F8 (Assign)] to assign the sample event to the audio track.
- Combining multiple audio tracks into one track (AUDIO MERGE)
- When you've finished recording, press [STOP].
- The Audio Rec Sample Assign window will open.
- Press [F8 (Assign)] to assign the sample event to the audio track.
- Saving your audio tracks
- What is Skip Back Sampling?
- Using Skip Back Sampling
- Editing the data created by Skip Back Sampling
- Isolating the desired portion of the sampled data (Start Beat/End Beat)
- In the Skip Back Preview screen, use [F1]–[F4] to isolate the desired portion of the sample.
- Cancelling the sample (Skip Back Cancel)
- In the Skip Back Preview screen, press [F5 (SkipBkCancel)].
- Press [F8 (Exec)].
- Assigning the sampled waveform to the keyboard or a pad (Assign to Keyboard/Pad)
- In the Skip Back Preview screen, press [F6 (Assign KB/Pad)].
- Assigning the sampled waveform to an audio track (Assign to Audio Track)
- In the Skip Back Preview screen, press [F7 (Assign Audio)].
- Press [F8 (Assign)] to assign the sample to a track.
- Press [F8 (Exec)].
- Creating a multisample
- Creating a multisample in the Patch Edit screen
- Creating a multisample in the Create Multisample screen
- When you've finished inputting the name, press [F8 (Write)].
- Turn the VALUE dial or use [INC][DEC] to select the write destination.
- Press [F8 (Write)].
- If you are sure you want to write the multisample, press [F8 (Exec)].
- When the multisample has been written, the Assign to Keyboard window will appear.
- Press [F8 (Exec)].
- Press [F8 (Exec)] once again.
- The Multisample Edit screen will appear.
- Save the multisample.
- Save the patch.
- Editing a multisample
- About the Multisample Edit screen
- Selecting the notes to edit
- Press the keyboard to select the sample you want to edit.
- Changing the multisample assigned to a tone (List)
- In the Multisample Edit screen, press [F1 (List)].
- Erasing the data from the selected region of notes (Erase)
- In the Multisample Edit screen, press [F2 (Erase)].
- Assigning a sample to the selected region (Assign)
- In the Multisample Edit screen, press [F3 (Assign)].
- Copying a sample from a key to another key (Copy)
- In the Multisample Edit screen, press the key to which the copy-source sample is assigned.
- Press [F4 (Copy)] so it lights in red.
- Press the copy-destination key.
- Take your hand off the keyboard.
- Opening the Tone Switch/Select window (Tone Sw/Sel)
- In the Multisample Edit screen, press [F6 (Tone Sw/Sel)].
- Press [EXIT] to close the window.
- Moving the split point (Split Point)
- In the Multisample Edit screen, press [F7 (Split⇐)][F8 (Split⇒)].
- Returning a multisample to the last-written state (Reload)
- Erasing all notes (Erase All)
- Replacing the sample of the current zone (Sample Select)
- Specify the original key (Org Key) of the sample
- In the Multisample Edit screen, press [F5 (Org Key)].
- Save the sample whose original key you changed.
- Sorting samples in the order of their original key (Sort)
- Moving all samples to left or right (Shift)
- Moving the data of the current zone to left or right (Move)
- Saving a multisample
- In the Multisample Edit screen, press [WRITE].
- Assign a name to the multisample.
- When you've finished inputting a name, press [F8 (Write)].
- Turn the VALUE dial or use [INC][DEC] or ▲ ▼ to select the multisample number of the write destination.
- Press [F8 (Write)].
- To write the data, press [F8 (Exec)].
- Sample-related changes
- Extended patch groups
- User Sample (USAM): 1–2000
- Card Sample (CSAM): 1–7000
- Saving a sample auto patch
- Bank Select and Program Change Correspondence Chart
- Newly added sample parameters
- - Sample Gain
- - Sample Fine Tune
- - Sample Level
- Sample BPM calculator (BPM Calc)
- Selecting a sample (Sample Number)
- Changes in the saved sample content (Save All Samples)
- Changes in the Patch/Rhythm Edit screen
- Newly added Patch Overview screen
- Changes due to the upgraded editor software
- Newly added PC mode screen
- Cautions when using S-700 series sounds with the Fantom-X
- Before you connect the Fantom-X to your computer
- Importing patches and rhythm sets
- Press [MENU].
- Press ▲ or ▼ to select "Utility," and then press [ENTER].
- Press [F5 (Import Patch)].
- The screen will indicate STEP 1.
- Press [F8 (⇒)].
- STEPS 2–4 will appear.
- Press [F8 (⇒)].
- STEP 5 will appear.
- A screen like the following is shown during the import.
- When the import is completed, you are asked whether you can delete the source files located in the User or Card PATCH\_IMPORT directory.
- Press [F8 (OK)] to return to the normal screen.
- Save the sample.
- Fantom-X Editor System Requirements
- System Requirements (Windows)
- - Operating System
- - CPU/Clock:
- - Memory (RAM)
- - Hard Disk
- - CD-ROM Drive
- - Display/Colors
- System Requirements (Mac OS)
- - CPU/Clock
- - Others
- Changes in the Patch Edit screen
- - Newly added [F4 (Util Menu)]
- - Newly added [F5 (Multisample Edit)]
- Changes in the Performance Mixer screen
- Changes in the Performance Layer screen
- Newly added Layer List window
- Changes in the Key Range window
- Playing different sounds across the keyboard (Split)
- Changes in the Song Edit screen
- Newly added [F4 (Song Utility)]
- Changes in the Song List screen
- Deleting a Song
- Using the pads for realtime erase
- CC Filter added to the Microscope
- Improved functionality for step recording
- Changes in the demo song loaded when you start up the Fantom-X
- Improved functionality in Live Setting
- Registering a song file in a Live Setting
- Press [F5 (Set Song)].
- Recalling a song file you registered
- Switching the font
- Removing the text
- Improvements in Arpeggio functionality
- Using the pads to switch arpeggio styles
- Hold down [SHIFT] and press [ARPEGGIO].
- Press [F6 (Use Pad)].
- Changing the arpeggio styles assigned to the pads
- Improvements in Chord Memory functionality
- Using the pads to switch chord forms
- Changing the chord forms assigned to the pads
- Changes in the librarian
- New shortcut from the Input Setting screen to MFX Edit
- New parameters available for the assignable switches
- • Master Key Shift Down
- • Master Key Shift Up
- - Scale Tune Switch
- - CC01-CC31
- - CC33-CC95
- Newly added DIMM check function
- A
- B
- C
- D
- E
- F
- |
- K
- L
- M
- 0
- P
- R
- S
- T
- U
- Z
Brand : ROLAND
Model : FANTOM X
Category : Synthesizer