
UX-T550 - Hi-Fi System JVC - Free user manual and instructions
Find the device manual for free UX-T550 JVC in PDF.
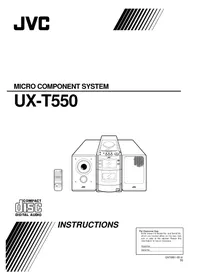


| Product Type | Micro Hi-Fi System |
| Brand | JVC |
| Model | UX-T550 |
| Color | Black |
| Power Output (RMS) | 20 W per channel (2 x 20 W) |
| Supported Media | CD, CD-R/RW, MP3 CD |
| Radio Tuner | FM/AM with 30 presets |
| Connectivity | AUX Input (3.5 mm), USB port, Headphone jack |
| Display | LCD with backlight |
| Remote Control | Included |
| Dimensions (Main Unit) | 170 x 250 x 300 mm (W x H x D) |
| Weight (Main Unit) | 3.5 kg |
| Power Supply | AC 230 V, 50 Hz |
| Power Consumption | 40 W |
| Standby Power | < 1 W |
| Speaker Type | 2-way bass reflex |
| Number of Speakers | 2 (stereo pair) |
| Impedance | 6 ohms |
| Frequency Response | 50 Hz - 20 kHz |
| Signal-to-Noise Ratio | 70 dB (CD) |
| Total Harmonic Distortion | < 0.5% |
| Inputs | AUX (RCA), USB, FM/AM antenna |
| Outputs | Speaker terminals, Headphone (3.5 mm) |
| Additional Features | Sleep timer, Alarm clock, Equalizer presets |
Frequently Asked Questions - UX-T550 JVC
User questions about UX-T550 JVC
0 question about this device. Answer the ones you know or ask your own.
Ask a new question about this device
Download the instructions for your Hi-Fi System in PDF format for free! Find your manual UX-T550 - JVC and take your electronic device back in hand. On this page are published all the documents necessary for the use of your device. UX-T550 by JVC.
USER MANUAL UX-T550 JVC

INSTRUCTIONS
For Customer Use:
Enter below the Model No. and Serial No. which are located either on the rear, bottom or side of the cabinet. Retain this information for future reference.
Model No.
Serial No.
Caution – switch!
Disconnect the mains plug to shut the power off completely. The ⏻/1 switch in any position does not disconnect the mains line. The power can be remote controlled.
CAUTION
To reduce the risk of electrical shocks, fire, etc.:
1.Do not remove screws, covers or cabinet.
- Do not expose this appliance to rain or moisture.
WARNING
The unit contains a built-in lithium battery for memory back-up that must only be replaced by suitably qualified service personnel.
For battery replacement, take the unit to your dealer or a JVC service station.
IMPORTANT FOR LASER PRODUCTS
PRECAUTIONS
- CLASS 1 LASER PRODUCT
- DANGER: Invisible laser radiation when open and interlock failed or defeated. Avoid direct exposure to beam.
- CAUTION: Do not open the rear cover. There are no user serviceable parts inside the unit; leave all servicing to qualified service personnel.
- CAUTION: The CD player uses invisible laser radiation and is equipped with safety switches which prevent the emission of radiation when the CD holder or CD tray is open. It is dangerous to defeat the safety switches.
- CAUTION: Use of controls for adjustments and the performance of procedures other than those specified herein may result in exposure to hazardous radiation.
IMPORTANT (In the United Kingdom)
Mains Supply (AC 230 V~, 50 Hz only)
DO NOT cut off the mains plug from this equipment. If the plug fitted is not suitable for the power points in your home or the cable is too short to reach a power point, then obtain an appropriate safety approved extension lead or consult your dealer.
BE SURE to replace the fuse only with an identical approved type, as originally fitted, and to replace the fuse cover.
If nonetheless the mains plug is cut off ensure to remove the fuse and dispose of the plug immediately, to avoid a possible shock hazard by inadvertent connection to the mains supply.
REPRODUCTION OF LABELS AND THEIR LOCATION
Caution: This production contains a laser component of higher laser class than Class 1.
IMPORTANT
DO NOT make any connection to the terminal which is marked with the letter E or by the safety earth symbol or coloured green or green-and-yellow.
The wires in the mains lead on this product are coloured in accordance with the following code:

As these colours may not correspond with the coloured markings identifying the terminals in your plug proceed as follows:
The wire which is coloured blue must be connected to the terminal which is marked with the letter N or coloured black.
The wire which is coloured brown must be connected to the terminal which is marked with the letter L or coloured red.
IF IN DOUBT — CONSULT A COMPETENT ELECTRICIAN.
SAFETY PRECAUTIONS
Prevention of Electric Shocks, Fire Hazards and Damage
- Even when the button is set to STANDBY, a very small current will flow. To save power and for safety when not using the unit for an extended period of time, disconnect the power cord from the household AC outlet.
- Do not handle the power cord with wet hands.
- When unplugging from the wall outlet, always grasp and pull the plug, not the power cord.
- Consult your nearest dealer when damage, disconnection, or contact failure affects the cord.
- Do not bend the cord severely, or pull or twist it.
- Do not modify the power cord in any manner.
- To avoid accidents, do not remove screws to disassemble the unit and do not touch anything inside the unit.
Caution:
Proper Ventilation
To avoid risk of electric shock and fire, and to prevent damage, locate the apparatus as follows:
1. Front:
No obstructions and open spacing.

- Do not insert any metallic objects into the unit.
- Unplug the power cord when there is a possibility of lightning.
- Do not use this apparatus in a bathroom or places with water. Also do not place any containers filled with water or liquids (such as cosmetics or medicines, flower vases, potted plants, cups, etc.) on top of this apparatus.
- Do not block the ventilation openings or holes. (If the ventilation openings or holes are blocked by a newspaper or cloth, etc., the heat may not be able to get out.)
- Do not place any naked flame sources, such as lighted candles, on the apparatus.
- When discarding batteries, environmental problems must be considered and local rules or laws governing the disposal of these batteries must be followed strictly.
2. Sides/Top/Back:
No obstructions should be placed in the areas shown by the dimensions below.
3. Bottom:
Place on a level surface. Maintain an adequate air path for ventilation by placing on a table with a height of 10 cm or more.

SAFETY INSTRUCTIONS
"SOME DOS AND DON'TS ON THE SAFE USE OF EQUIPMENT"
This equipment has been designed and manufactured to meet international safety standards but, like any electrical equipment, care must be taken if you are to obtain the best results and safety is to be assured.

Do read the operating instructions before you attempt to use the equipment.
Do ensure that all electrical connections (including the mains plug, extension leads and interconnections between pieces of equipment) are properly made and in accordance with the manufacturer's instructions. Switch off and withdraw the mains plug when making or changing connections.
Do consult your dealer if you are ever in doubt about the installation, operation or safety of your equipment.
Do be careful with glass panels or doors on equipment.

DON'T continue to operate the equipment if you are in any doubt about it working normally, or if it is damaged in any way—switch off, withdraw the mains plug and consult your dealer.
DON'T remove any fixed cover as this may expose dangerous voltages.
DON'T leave equipment switched on when it is unattended unless it is specifically stated that it is designed for unattended operation or has a standby mode.
Switch off using the switch on the equipment and make sure that your family know how to do this.
Special arrangements may need to be made for infirm or handicapped people.
DON'T use equipment such as personal stereos or radios so that you are distracted from the requirements of traffic safety. It is illegal to watch television whilst driving.
DON'T listen to headphones at high volume as such use can permanently damage your hearing.
DON'T obstruct the ventilation of the equipment, for example with curtains or soft furnishings.
Overheating will cause damage and shorten the life of the equipment.
DON'T use makeshift stands and NEVER fix legs with wood screws — to ensure complete safety always fit the manufacturer's approved stand or legs with the fixings provided according to the instructions.
DON'T allow electrical equipment to be exposed to rain or moisture.
ABOVE ALL
— NEVER let anyone, especially children, push anything into holes, slots or any other opening in the case -this could result in a fatal electrical shock.; — NEVER guess or take chances with electrical equipment of any kind — it is better to be safe than sorry!
Thank you for purchasing this JVC product. Please read these instructions carefully before starting operation to be sure to obtain optimum performance and a longer service life from the unit.
CONTENTS

Features .... 1
Handling precautions .... 1
Connections 2
Power supply 4
Names of parts and their functions.... 5
Remote control unit 6
Switching the power on/off 6
Volume, tone and other controls 7
Handling CDs....7
Playing CDs 8
Handling cassette tapes 10
Cassette playback 10
Radio reception 11
Recording 12
Clock adjustment 13
Timer operations 14
Maintenance 16
Troubleshooting 16
Specifications...... Back page
FEATURES
- CD-size micro component system consisting of 3 units ● Active Hyper-Bass PRO circuit for low-frequency sound reproduction • One-touch operation (COMPU PLAY)
- 35-key remote control unit operates all CD, cassette deck and tuner functions
- Multi-function CD player
- Programmed play of up to 20 tracks
- Repeat Play
- Random Play • U-Turn auto-reverse full-logic mechanism • Auto tape select mechanism
- Metal (type IV) and CrO2 (type II) tape can be played back for superior tone quality
- CrO2 (type II) tape recording capability
- 2-band digital synthesizer tuner with 45-station (30 FM and 15 AM (MW/LW)) preset capability
- Seek/manual tuning • Auto preset tuning
- Timer/Clock function
- Timer on/off with preset volume function
- Sleep timer can be set for up to 120 minutes
HANDLING PRECAUTIONS


Do not use this unit in direct sunlight where it would be exposed to high temperatures above 40°C (104°F).
- Avoid installing in the following places
- Where it could be subject to vibrations.
- Where it is excessively humid, such as in a bathroom.
- Where it could be magnetized by a magnet or speaker.
- Pay attention to dust Be sure to close the CD holder or CD tray so that dust does not collect on the lens.
- Condensation In the following cases, condensation may occur in the unit, in which case the unit may not operate correctly.
- In a room where a heater has just been switched on.
- In a place where there is smoke or high humidity.
- When the unit is moved directly from a cold to a warm room. In these cases, set the button to STANDBY and wait 1 or 2 hours before use.
- Volume setting CDs produce very little noise compared with analog sources. If the volume level is adjusted for these sources, the speakers may be damaged by the sudden increase of output level. Therefore, lower the volume before operation and adjust it as required during play.
- Safety mechanism This unit incorporates a safety interlock mechanism which switches the laser beam on and off, so that when the CD holder or CD tray is open, the laser beam stops automatically.
- Do not place cassette tapes, etc. near the speakers Since there are magnets in the speakers, do not place tapes or magnetic cards on them as recorded data could be erased.
- Keep this unit away from your TV When this unit is used near a TV, the TV picture could be distorted. If this happens, move this unit away from the TV. If this does not correct the situation, avoid using this unit when the TV is turned on.
- Cleaning the cabinet If the cabinet gets dirty, wipe it with a soft, dry cloth. Never use benzine or thinner as these could damage the surface finish.
- When listening with headphones
- Do not listen at high volumes as this could damage your hearing.
- For safety, do not drive while listening to this unit.
CONNECTIONS
- Do not switch the power on until all connections are completed.
Antenna connection and adjustment
- AM (MW/LW) loop antenna adjustment

AM (MW/LW) loop antenna (provided)
Insert in the direction of the arrow.

- Keep the loop antenna away from the unit and install it so that the best reception is obtained. (Do not leave the antenna wire in a bundle.)
• FM antenna connections and adjustments


FM outdoor antenna (option)
Notes:
- Do not place the loop antenna on a metal desk or near a TV or personal computer.
- Installing an outdoor antenna requires expertise; we recommend that you consult an audio dealer.
- Install the antenna cord away from the power and speaker cords as these could generate noise. Do not install the loop antenna so that it touches the rear of the unit.
- Use an outdoor antenna when stable reception cannot be obtained with the provided antenna.
Speaker cord connection![graph TD A["Start"] --> B["Connect the black cord to the ⊖ terminal."] B --> C["Connect the black cord from the left to the (LEFT) terminal and the cord from the speaker on the right to the (RIGHT) terminals."] C --> D["Connect the black cord from the left to the (LEFT) terminal and the cord from th…](/content/2026/06/1307373/images/3e479dcd4dfe73487b93641e6b2abe7da20b4f90a89c831def0d6fc2014e0ffe.jpg)
- The speaker grilles can be removed.
- When removing.
- Insert your fingers at the top and pull towards you.
- Also pull the bottom towards you.
- Attaching the speaker grille

Notes:
- The polarity of the two connected speakers will be the same if the black speaker cords are connected to the ⊖ terminals. If the speakers are connected with polarities reversed, stereo effect and tone will be degraded.
- The speakers of this unit are not magnetically shielded. When they are placed directly on or adjacent to a TV, the TV's picture could be distorted. Install the speakers more than 20 cm away from your TV.
- When connecting the speaker cord make sure that the wire core, not the insulating cover, is connected to the speaker terminal. Otherwise, sound cannot be heard.
Connection of external audio units
- Connection with a turntable (or MD player)


Note:
Regarding the connection with external units and their operations, refer to the instructions provided with those units.
POWER SUPPLY
A. Connection of AC power cord
- Connect the AC power cord after all other connections have been made.


CAUTIONS:
- ONLY USE WITH JVC POWER CORD PROVIDED WITH THIS UNIT TO AVOID MALFUNCTION OR DAMAGE TO THE UNIT.
- BE SURE TO UNPLUG THE POWER CORD FROM THE OUTLET WHEN GOING OUT OR WHEN THE UNIT IS NOT IN USE FOR AN EXTENDED PERIOD OF TIME.
B. Operation on car battery (DC 12 V)


- First connect the car adapter to the DC IN 12 V jack, not the cigarette lighter socket, because shorting of a plug on the car may cause the fuse to blow out. In addition, be careful not to make a short-circuit between the plugs.
- When using a car battery, be sure to use the specified car adapter (JVC model CA-R120E) to prevent mishaps or damage resulting from different polarity design.
Note:
When there is a power failure or the AC power cord is disconnected, the timer/clock setting is erased from memory. Reset the clock when the power supply is restored.
NAMES OF PARTS AND THEIR FUNCTIONS
CD player/General section Front ① button and power STANDBY indicator ②AUX button ③ Remote sensor section ④ Display window ①Function/Track number display ②Play time display ③Music calendar display ④Program mode indicator (PROGRAM) ⑤RANDOM play indicator ⑥Repeat play indicator (ATL) ⑦OVER indicator ⑤ VOLUME buttons +: Use to increase the volume. - : Use to decrease the volume. (Control range from VOL. 0 to VOL. 50.) ⑥Headphones jack (PHONES) (3.5 mm dia. stereo mini) Connect headphones (impedance 16Ω to 1kΩ) to this jack. Speaker sound is automatically switched off when the headphones are connected. ⑦CD holder 8ACTIVE HYPER BASS PRO button ⑨CD operations buttons CD search buttons (◀◀, ▶▶▶): Press to locate the beginning of a track and to start forward/reverse search operations. Stop button (■): Press to stop playing a CD. CD play/pause button (▶III): Press to play a CD or to stop temporarily. ⑩ MULTI JOG dial When the function is CD and the dial is turned, the beginning of a track can be searched. (1 track is selected by 2 clicks.) CD holder OPEN (▲) button
Tuner/Deck section
① Button and power STANDBY indicator ② AUX button ③ Remote sensor section ④ Display window ① Function/Track number display ② Play time display ③ Music calendar display ④ Program mode indicator (PROGRAM) ⑤ RANDOM play indicator ⑥ Repeat play indicator (ATL) ⑦ OVER indicator ⑤ VOLUME buttons +: Use to increase the volume. - : Use to decrease the volume. (Control range from VOL. 0 to VOL. 50.) ⑥ Headphones jack (PHONES) (3.5 mm dia. stereo mini) Connect headphones (impedance 16Ω to 1kΩ) to this jack. Speaker sound is automatically switched off when the headphones are connected. ⑦ CD holder ⑧ ACTIVE HYPER BASS PRO button ⑨ CD operations buttons CD search buttons (◀◀, ▶▶▶): Press to locate the beginning of a track and to start forward/reverse search operations. Stop button (■): Press to stop playing a CD. CD play/pause button (▶III): Press to play a CD or to stop temporarily. ⑩ MULTI JOG dial When the function is CD and the dial is turned, the beginning of a track can be searched. (1 track is selected by 2 clicks.) CD holder OPEN (▲) button
REMOTE CONTROL UNIT
① Display window ①Band indicator ②Radio frequency display ③MONO indicator ④STEREO indicator ⑤Recording indicator (REC) ⑥ Tape direction indicator (◀, ▶) ⑦Reverse mode indicator (/→) ⑧Tape (TAPE) mode display ②Cassette holder ③Cassette holder eject (▲) button 4 ONE TOUCH REC button ⑤TUNER/BAND button Press to select tuner mode. Press to select the band. Tuning buttons (◄◄◄/►►) ⑥Cassette operation buttons ◀◀ : Press to rewind the tape. ■ : Press to stop the tape. ▶▶1 : Press to fast wind the tape. TAPE (◀) : Press to select the TAPE mode. : Press to play back the tape in the forward direction. The ▶ indicator lights in the display window. : Press to play back the tape in the reverse direction. ◀ indicator lights in the display window. ⑦ MULTI JOG Dial The preset station can be selected. (1 station is selected by 2 clicks.)
REMOTE CONTROL UNIT
Preparation before use
- Installing batteries in the remote control unit
- Remove the battery cover from the back of the remote control unit.
- Insert two "R6/AA (15F)" size batteries.
- Insert the batteries with the ⊕ and ⊖ terminals matching the indication inside the battery compartment.
- Replace the cover. Insert the ⊖ ends first.

- Battery replacement
When the remote control operation becomes unstable or the distance from which remote control is possible decreases, replace the batteries.
Using the remote control unit
- Point at the remote sensor and operate within about 7 m (approx. 23 ft).
- The remote control range is less when the unit is used at an angle.
- Do not expose the remote sensor to strong direct sunlight or artificial lighting.
- Make sure that there are no obstacles between the remote sensor and the unit.
The following operations can be performed using the remote control unit.
- Check the operation button functions carefully and operate them correctly.

①Track number buttons (No. 1 to No. 10. +10) Pres station buttons (No. 1 to No. 10. +10) ② REVERSE MODE button
For signal-side recording or playback. For recording or playback on both sides. For continuous play.
③ BEAT CUT button ④ PROGRAM button ⑤ BASS buttons (+, -) (Control range from -6 to 6.) ⑥ TREBLE buttons (+, -) (Control range from -6 to 6.) ⑦ location ⑧ SLEEP button ⑨ DISPLAY button Use to display the current time. ⑩ STEREO AUTO/MONO button ⑪ AUTO PRESET button ⑫ REPEAT button ⑬ RANDOM button - Buttons not mentioned here have the same functions as those on the main unit.
SWITCHING THE POWER ON/OFF


Switching the power on/off
- Switching on:

The STANDBY indicator goes out.
- The indicator in the display window lights.
- Switching off:

The STANDBY indicator lights.
- The indicator in the display window goes out and only the clock is indicated.
One touch operation (COMPU PLAY)
Even when the power is set to STANDBY, pressing the button shown below switches on the power and selects the source.
| Function mode | Operations | ||
 | CD | When this button is pressed with a CD loaded, CD playback begins. | |
 | TAPE | When this button is pressed with a tape loaded, tape playback begins. | |
 | TUNER | When this button is pressed, the tuner is engaged. | |
 | AUX | A sound source connected to the AUX terminal can be engaged. | |
Notes:
- When switching off the power, be sure to press the button.
- The COMPU PLAY function the remote control has the same function as that on the main unit.
VOLUME, TONE AND OTHER CONTROLS
VOLUME buttons
+: Use to increase the volume.
-: Use to decrease the volume.
(Control range from VOLUME 0 to VOLUME 50.)

BASS/TREBLE buttons (using the remote control unit)
To set the bass or treble level, press the corresponding button. The level setting ranges from -6 to 6.

ACTIVE HYPER-BASS PRO button
ON: The BASS indicator lights up. Set to this position to activate ACTIVE HYPER-BASS PRO sound.
OFF: The BASS indicator goes out. Set to this position when ACTIVE HYPER-BASS PRO sound is not required.
HANDLING CDs
Since dirty, damaged and warped CDs may damage the unit, take care regarding the following:
1. Usable CDs
Use CDs with the mark shown.
2. Notes on handling CDs
- Do not touch the reflective recorded surface.
- Do not stick or write anything on the label side.
- Do not bend CDs.
3. Storage
- After removing a CD from the unit, be sure to put it back in its case.
- Do not expose CDs to direct sunlight, high temperatures from a heater, etc., high humidity, or dust.
4. Cleaning CDs
- Before loading a CD, wipe off any dust, dirt or fingerprints with a soft cloth. CDs should be cleaned by wiping radially from the center to the edge.
- Never use thinner, benzine, record cleaner or antistatic spray.
- Removing the CD from its storage case and loading it.


- Press the center and lift out.

- Press to secure the CD.
- Handling

- Cleaning


Note:
CDs shaped like a heart, flower, etc. (specially-shaped CDs) cannot be used with this unit. If this type of CD is loaded, it will cause a trouble.
Playing an entire CD
The following example of playing an entire CD assumes a CD with 12 tracks and a total playing time of 48 minutes 57 seconds.
Operate in the order shown

①Press to open the CD holder. ②Load a CD with the label side facing up and close the CD holder. ③Press to start play. (The power is switched on.) ④Adjust.
- As tracks are played, their track numbers go out one by one.
- 8-cm (3") CDs can be used in this unit without an adapter.
• To stop in the middle of a CD
During play, press the stop/clear (■) button to stop play.

12 48:57 1 2 3 4 5 6 7 8 9 10 11 12
- The total number of tracks and total playback time are displayed.
• To stop a CD temporarily
Press the ▷▶▶ button to stop play temporarily and the playing time display blinks.
When pressed again, play resumes from the point where it was paused.
Caution:
- To change CDs, press the stop/clear (■) button; check that the CD has stopped rotating completely before unloading it.
Notes:
- The following indication may appear when a CD is dirty or scratched, or when the CD is loaded upside down. In such a case, check the CD and insert again after cleaning the CD or turning it over.
- Do not use the unit at excessively high or low temperatures. The recommended temperature range is from 5°C (41°F) to 35°C (95°F). ● After play, unload the CD.
- If mistracking occurs during play, lower the volume.
Skip play
- During play, it is possible to skip forward to the beginning of the next track or back to the beginning of the track being played or the previous track; when the beginning of the required track has been located, play starts automatically.
To listen to the next track...
Press the ▶▶1 button once to skip to the beginning of the next track.
To listen to the previous track...
Press the ◀◀ button to skip to the beginning of the track being played. Press twice quickly to skip to the beginning of the previous track.
- By using the MULTI JOG dial, the beginning of tracks can be searched and played.

Search play (to locate the required position on the CD)
- The required position can be located using fast-forward or reverse search while playing a CD.
Keep pressing for fast-forward search.

Keep pressing for fast-reverse search.
- Hold down the button; search play starts slowly and then gradually increases in speed.
- Since low-volume sound (at about one quarter of the normal level) can be heard in the search mode, monitor the sound and release the button when the required position is located.
Direct access play (using the remote control unit)
- Pressing any of the track number buttons will start play from the beginning of the designated track. (This function cannot be used during programmed play.)

① Press the CD ▶/Ⅱ button to set to the CD mode. ② Designate the required track using the track number buttons.
- To designate track numbers 1 to 10, press the track number button corresponding to the track number.
- To designate track number 11 or higher, press the +10 button the required number of times, then a track number button. (Example: To designate the 20th track, press the +10 button once, then press track number button 10.) * +10 button:
Each time this button is pressed, the number increases by 10. First press this button to set the 10's digit, then press the track number button to set the 1's digit.
• To skip to another track during play
When the required track number button is pressed, the display shows the designated track number and play starts from the beginning of the designated track.
Programmed play (using the remote control unit)
- Up to 20 tracks can be programmed to be played in any required order.
The total playing time of programmed tracks is displayed (up to 99 minutes, 59 seconds).
(Example: When programming the 2nd track to be played first, and the 6th track next, then the 12th track, etc.)
![graph LR A["1: C/D"] --> B["2: ●"] B --> C["3: PROGRAM"] C --> D["4: To designate the 2nd track."] D --> E["5: Program"] E --> F["6: 02 03:57"]](/content/2026/06/1307373/images/1aea02ba99e7700d63b47197edd3e86b8f651c6dc162d78d51f6e5815b21649a.jpg)

① Press the CD ▶/□ button to set to the CD mode. ② Press the ■ button. ③ Press the PROGRAM button to set to the programming mode.
To confirm the details of a program...
Press the PROGRAM button; the tracks making up the program will be displayed in programmed order.

④ Press to designate the required track number. ⑤ Designate the remaining tracks by pressing the track number buttons. ⑥ Press the ▶/□ button when programming is completed. Programmed play starts.
To clear the programmed tracks...
Press the ■ button before playing a CD. During programmed play, press this button twice. When the CD holder is opened, programmed tracks are cleared automatically.
Notes:
- If the total playing time of the programmed tracks exceeds 99 minutes 59 seconds, the total playing time indication will go out.
- When programming a track number higher than 21 on a disc containing more than 21 tracks, the total playback time of all the programmed tracks will not be displayed.
- When a disc with 16 or more tracks is loaded, the "OVER" indicator will appear.
Repeat play (using the remote control unit)
Press the REPEAT button before or during play. A single track or all the tracks can be repeated.
Whether a single track or all tracks are to be repeated can be specified. Each time the REPEAT button is pressed, the mode will change from a single track (to all the tracks (Att), to the clear mode, in this order.
![graph LR A["REPEAT"] --> B["Single track"] B --> C["ALL"] C --> D["All tracks"] D --> E["Repeat playback is released."] E --> F["Goes off."]](/content/2026/06/1307373/images/4328aa2f7ee3e53b2ae6b9cf40545231ea6fcb16f427162655f4ecbf158708df.jpg)
- Single track repeat ( The current or specified track will be played repeatedly.
- All tracks repeat (CALL): All tracks or the programmed tracks of a CD will be played repeatedly.
Random play (using the remote control unit)
Press the RANDOM button, and all tracks on a CD play once in random order.

HANDLING CASSETTE TAPES
Cassette tapes
- Loose tape may cause trouble. Using a pencil or like object, gently tighten the tape as shown.
- To prevent recordings from being erased accidentally, remove the tab(s) with a screwdriver, etc. Reseal the slots with adhesive tape to erase and re-record after the tabs have been removed.
- C-120 cassettes are not recommended because they are prone to malfunction.


Cassette loading
- Press the eject (▲) button to open the cassette holder.
- Load a cassette as shown.
- Close the cassette holder by pressing it gently. Listen for the click indicating that the holder is securely shut.


Note:
If the power is switched off while tape is running, it may be impossible to remove the cassette. If this happens, switch the power on again before attempting to remove the cassette.
Auto tape select mechanism
This unit has an Auto Tape Select mechanism which distinguishes between different types of tape using detection holes in the cassette. After the type of tape has been detected, bias and equalization suitable for the tape are set.
- Cassettes with detection holes: Metal tape (EQ: 70 μs).... Type IV CrO2 (chrome) tape (EQ: 70 μs).... Type II
- Cassettes without detection holes: Normal tape (EQ: 120 μs) .... Type I

Metal/CrO2 tape detection holes
CASSETTE PLAYBACK

Operate in the order shown

①Load a cassette tape. ②Press to start playback. (The power is switched on and the TAPE mode is engaged to start tape playback.) ③ Select the reverse mode ( ⇄ / ⇄ / (⇄) ). ④Adjust.
- After loading a cassette tape, simply press the TAPE ◀ button. The power is switched on and the tape starts playback. (To select the playback direction, press the TAPE ◀ button. The change in direction can be checked in the tape direction indicator (◀ or ▶).)
- When the tape plays back with the reverse mode set to → (single side play) or → (both side play) mode, the tape stops automatically at the end of tape after playing one or both sides. When the reverse mode is set to the (→) (continuous play) mode, the tape continuously plays one side after the other until you stop operation.
How to fast-wind tapes
- Press the TAPE (◀) button (to set TAPE mode).
- Press the ◀◀◀ or ▶▶▶ button.
- A tape can be fast-wound in either tape playback direction, and when it reaches the end of a side, it stops automatically.
RADIO RECEPTION
Operate in the order shown
Press the TUNER/BAND button. The power is switched on and a band and radio frequency will be shown in the display. Select the band. Tune to the required station. Adjust.
STEREO AUTO/MONO button (using the remote control unit)
Auto mode:
Set to this position when listening to or recording an FM stereo broadcast. The STEREO indicator lights when the FM stereo broadcast is received.
MONO:
Set to this position when FM stereo reception is noisy.
When another station is tuned to in the MONO mode, the unit automatically enters Auto mode.
Seek tuning
Press the ◄◀ or ▶▶1 button for one second or more. The unit enters the seek tuning mode to tune in the nearest station automatically, so the broadcast can be heard. In AM operation, the frequency moves continuously from the MW to the LW band and vice versa.
Manual tuning
Each time the i◀◀ or ▶▶▶ button is pressed, the unit steps through the current frequency band. Tuning is done in steps of 50 kHz for FM and 9 kHz for AM (MW/LW).
In AM operation, the tuned frequency moves continuously from the MW (522–1,629 kHz) to the LW (144–288 kHz) band and vice versa.
Press to move to higher frequency.

Press to move to lower frequencies.
Notes:
- When seek tuning to the required station is not possible because the broadcast signal is too weak, press the ◀◀◀ or ▶▶▶ button momentarily to perform manual tuning.
- When the power is set to STANDBY, or another mode (TAPE, CD or AUX) is selected, the last tuned frequency is stored in memory. When the power is switched on again and TUNER/BAND button is pressed, the same station will be tuned to.
Auto preset tuning (using the remote control unit)
This function scans the current band, detecting frequencies used to broadcast signals, and stores the first 30 FM frequencies and 15 AM (MW/LW) frequencies in memory automatically.
- Press the AUTO PRESET button for more than 2 seconds. The frequencies of stations broadcasting signals can be stored in memory automatically in the order of increasing frequency. (30 stations in FM band and 15 stations in AM (MW/LW) band.)

Press for more than 2 seconds.
Presetting stations (using the remote control unit)
30 stations in FM band and 15 stations in AM (MW/LW) band can be preset as follows:
- Example: (Presetting an FM station broadcasting on 103.5 MHz to preset button "15")


①Press the TUNER/BAND button.
②Select the FM band using the TUNER/BAND button.
③Tune to the required station.
④ Press preset button "+10", then "5" for more than 2 sec. (When "15" blinks in the preset station display, the station has been stored.)
- Repeat the above procedure for each of the other stations, using a different preset button each time.
- Repeat the above procedure for the other band.
• To change preset stations
Perform step 4 above after tuning to the required station.
Notes:
- The previous stored station is erased when a new station is stored, because the new station's frequency replaces the previous frequency in memory.
- When listening to an AM (MW/LW) broadcast, noise may be heard if the remote control unit is used.
- All preset stations will be erased when the power cord is disconnected or a power failure occurs for more than 24 hours. In such cases, store the stations again.
Using the antennas (see page 2)
FM: Connect the provided FM wire antenna.
AM (MW/LW): Adjust the position of AM (MW/LW) loop antenna.
Preset tuning
- The stations must be preset before this operation can be performed.
(Using the main unit)
①Press the TUNER/BAND button. ②Select the band using the TUNER/BAND button. ③To select the required preset station, turn the MULTI JOG dial.
Down

Up
(Using the remote control unit)
① Press the TUNER/BAND button. ② Select the band using the TUNER/BAND button. ③ Press the required preset station buttons (No. 1 – No. 10 and +10). - The preset station number and frequency corresponding to the button pressed are shown.
RECORDING

- During recording, the ALC (Automatic Level Control) circuit automatically optimizes the recording level, so manual recording level adjustment is unnecessary.
- Check that the safety tab on the cassette tape is not broken off.
Note: This unit has recording characteristics suitable for normal and CrO2 tapes. Normal and CrO2 tapes have different characteristics from metal tapes.
Synchronized recording with the CD player
- In this system, the CD player starts play when the cassette deck enters the recording mode.
Operate in the order shown

① Load a cassette with side A facing out. (Wind past the tape leader before starting recording.) ② Load a CD and close the CD holder. ③ Set to the CD mode. ④ Press the ■ button to set stop mode. ⑤ Select the required reverse mode (→ or →).
- When programmed play is required, program the required tracks using the remote control. (See page 9.)
- Select tracks with a total playing time which does not exceed the tape length.
⑥ Press the ONE TOUCH REC button; synchronized recording will start.
(The recording indicator lights up.)
- Recording starts in the forward direction and CD play starts automatically.
- After the CD player has played the entire CD or programmed tracks, the deck stops automatically.
- Non-recorded sections of approximately 4 seconds are automatically left between tunes.
- To stop recording in the middle, press the ■ button. The cassette deck also stops after 4 seconds.
Note:
- During CD synchro recording, the ▷II, SEARCH (◀◀, ▶▶I) buttons and MULTI JOG dial do not function.
When non-recorded section between tunes is not required...
① Press the ▷■ button twice. The CD player enters the pause mode. ② Press the ONE TOUCH REC button to start recording.
Note:
- Depending on the CD used, non-recorded sections of different lengths may be left between tunes.
- CD complete recording function (Synchro recording mode only) If the tape is reversed while a CD is being played, recording will be done on the reverse side of the tape as follows:
* When less than 12 seconds of the last tune on the forward side of the tape have been recorded, recording on the other side of the tape will start from the beginning of the previous track. * When more than 12 seconds of the last tune on the forward side of the tape have been recorded, recording on the other side of the tape will start from the beginning of the current track.
• To record one track
Play the track to be recorded. Then pressing the ONE TOUCH REC button locates the beginning of the track and enters the one track recording mode. After the recording is finished, the CD player and cassette deck both stop.
Recording from the radio or an external source connected to the AUX terminals
Operate in the order shown

①Load a cassette with side A facing out.
(Wind past the tape leader before starting recording.)
②Select the source to be recorded.
TUNER: Press the TUNER/BAND button. Tune to the required station.
AUX: Press the AUX button.
③Select the required reverse mode ( or ). ④Press the ONE TOUCH REC button.
BEAT CUT button (using the remote control unit)
When recording an AM broadcast, beats may be produced which are not heard when listening to the broadcast. In such case, set this button after setting the deck to the record mode so that the beats are eliminated. Normally set this button to "CUT-1".
![graph LR A["BEAT CUT"] --> B["CUT-1"] B --> C["CUT-2"] C --> D["CUT-3"] D --> E["CUT-4"]](/content/2026/06/1307373/images/2b1a5411296721e3fc91e91a91052a3d0d0f82fb5fe8c98c9905d0a2aea6d08a.jpg)
Erasing
A recorded tape can be erased by recording new material over the previous material.
To erase a tape without making a new recording...
- Press the TAPE (◀▶) button to set to the TAPE mode.
- Press the ■ button.
- Insert the cassette with the side to be erased facing out.
- Press the ONE TOUCH REC button.
It should be noted that it may be unlawful to re-record pre-recorded tapes, records, or discs without the consent of the owner of copyright in the sound or video recording, broadcast or cable programme and in any literary, dramatic, musical, or artistic work embodied therein.
CLOCK ADJUSTMENT
Names of parts in the clock/timer section, and their functions:

①Timer mode indicator ②Timer indicator (ON/OFF) ③ CLOCK indicator ④SLEEP indicator ⑤Time display ⑤CLOCK button ⑦TIMER/SNOOZE button 8 MULTI JOG dial
It is used to set the current time and perform timer setting.
Setting the current time (when this unit is used for the first time)
(Example: To set the clock to 13:15.)

![graph LR A["One hour is advanced/moved back every 2 clicks."] --> B["One minute is advanced/moved back every 2 clicks."] B --> C["One minute is advanced/moved back every 2 clicks."] D["Back"] --> E["Advance"] E --> F["CLOCK: 13:00"] F --> G["CLOCK: 13:00"] G --> H["CLOCK: 13:15"] H --> I["CLOCK: 13:…](/content/2026/06/1307373/images/718703b671b9a4d32fa86bf4e3c2bb93e0dbb0c577a1742c66b2945c7accd0f9.jpg)
①Connect the AC power cord: "CLOCK" will blink in the display. ②Press the CLOCK button for 2 seconds or more. ③Set to 13: 15 using the MULTI JOG Dial and CLOCK button.
- Setting the current time.
Use the time signal of television and radio broadcasts.
When adjusting the clock, follow steps ② - ③.
Notes:
- Before performing timer recording or playback, it is necessary to set the current time.
- It is recommended to set the current time with the button set to STANDBY so that the current display mode is maintained.
- When the power cord is plugged in again after being disconnected or power is restored after a power failure, "CLOCK" will blink in the display. Set the current time again.
TIMER OPERATIONS
Setting the timer
- The current time must be set before the timer can be used. ①Press the TIMER/SNOOZE button for 2 seconds or more.

② Set the start time.
(Example: To set the timer to 12:15.)

③Set the stop time.
(Example: To set the timer stop time to 13:15.)
![graph TD A["State 1: 60s clock"] --> B["State 2: 120s clock"] B --> C["State 3: 13:00 timer/snooze"] C --> D["State 4: 13:00 timer/snooze"] D --> E["State 5: 13:15 timer/snooze"] E --> F["State 6: TUNER timer/snooze"] style A fill:#f9f,stroke:#333 style B fill:#f9f,stroke:#333 style C fill:#ccf,stro…](/content/2026/06/1307373/images/8c0ef0ca9eb863eb6674e7e0907e03228b590c487e5c8b50d6f2b6607688dc3d.jpg)
④ Select the TIMER mode
- The selected TIMER mode is shown in the display.
![graph TD A["Multi JOG dial"] --> B["TUNER ↔ TUNER REC ↔ CD ↔ TAPE"] B --> C["When the MULTI JOG dial is turned to select the timer mode, the mode changes from TUNER (timer reception of a broadcast), to TUNER/REC (timer recording of a broadcast), to CD (timer play of a CD), to TAPE (timer playback of…](/content/2026/06/1307373/images/84b59dea13facb282ac91221ffd18dab08cf09fa2ee4ad6e007c76d3e165b01e.jpg)
⑤Set the volume.
![graph TD A["UNIT"] --> B["VOLUME 0"] B --> C["VOLUME 1"] C --> D["VOLUME 5"] D --> E["VOLUME 6"] E --> F["VOLUME 7"] F --> G["VOLUME 8"] G --> H["VOLUME 9"] H --> I["VOLUME 10"] I --> J["VOLUME 11"] J --> K["VOLUME 12"] K --> L["VOLUME 13"] L --> M["VOLUME 14"] M --> N["VOLUME 15"] N --> O["VOLUME 1…](/content/2026/06/1307373/images/9a88bff1218f9f05b64e980b81d63bf157176efd670d3c30578cb1e1b2832986.jpg)
- The selected volume is set.
- When the volume setting is set to "VOLUME -" (volume level is not specified), the timer playback volume is at the level used before setting the timer. • To confirm the timer setting
- When ( ) is displayed.
Press the TIMER/SNOOZE button for more than 2 seconds (the timer setting disappears).
- Press the TIMER/SNOOZE button for more than 2 seconds once again.
Then each time the TIMER/SNOOZE button is pressed, the timer setting can be confirmed. When the previous function mode is restored, it indicates that the timer setting has been completed.
Note:
- If the timer is set incorrectly or the correct mode is not selected, perform "Setting the timer" from the beginning.
Timer recording of broadcast
- The current time must be set before the timer can be used.
- Make sure that the safety tabs of the cassette have not been broken off.
Operations
① Set the button to ON.
② Load a cassette.
- Insert the cassette with the side to be recorded facing out.
- Select the required reverse mode. (or)
③ Set the timer. (Refer to "Setting the timer" on page 14.) - Set the timer about a minute before the broadcast to be recorded is scheduled to start. ④ Tune to the station to be recorded. (Refer to page 13.) ⑤ Set the button to STANDBY. - Timer recording will start at the timer start time and the power will be switched off at the timer stop time. (The timer mode is then released.)

• To cancel timer operation
Press the TIMER/SNOOZE button for more than 2 seconds so that the timer mode indicator (⊕) goes out.
If you do this, timer recording will not start at the timer start time.
Notes:
Once the timer has been set, the start and stop times, etc., are stored in memory. When timer recording or playback is required at different times, the timer must be set again.
- After setting the timer start and stop times, check that the tuner is tuned to the required frequency.
- When the power cord is disconnected or there is a power failure, timer settings will be erased from memory. If this happens, set the current time and perform the timer setting again.
Timer playback
- Timer playback of tapes, broadcasts and CDs is possible.
Operations
① Set the button to ON. ② Set the timer. (Refer to "Setting the timer" on page 14.)
| Source sound | Timer mode | Operations |
| CD play | CD | Load a disc. |
| Tape playback | TAPE | Load a cassette tape. |
| Broadcast | TUNER | Tune to the required station. |
③ Set the button to STANDBY.
- Timer playback will start at the timer start time and the power will be switched off at the timer stop time. The unit remains in the same timer mode even after the power is switched off. The same timer function will repeat at the same time on the following day.
- When the power is switched on, it is possible to fade in the sound from volume level 0 (zero) to the preset volume.

• To cancel timer operation
Press the TIMER/SNOOZE button for more than 2 seconds so that the timer mode indicator (⊕) goes out.
Notes:
- When the volume setting is set to "VOLUME -" (volume level is not specified), the timer playback volume is set to the level used before setting the timer.
- To stop during timer playback, press the button to switch the unit off.
• To get an extra 5 minutes of sleep....
When timer playback starts, press the TIMER/SNOOZE button. The power is switched off and timer playback restarts after 5 minutes (snooze function).

Sleep timer operations (using the remote control unit)
A. Use this when you want to fall asleep while listening to a tape, broadcast or CD.
①Set to the required source and tune (broadcast) or play back (CD or tape).
②Press the SLEEP button to set the sleep time.
SLEEP is shown in the display.
![graph LR A["30"] --> B["60"] B --> C["90"] C --> D["120"] D --> E["Source mode display (Releasing the sleep mode)"]](/content/2026/06/1307373/images/f266062f3a0ca86aff0ec1316a0dfa218d474378a496af4b5a571db7a203fb56.jpg)
- Sleep time settings of 30, 60, 90 or 120 minutes can be set. When you release the SLEEP button, the source is displayed after 5 sec.
- The sleep timer operation will start and the power will be switched off after the specified time.
- Checking the sleep time
When the SLEEP button is pressed, the remaining sleep time is displayed. If it is pressed again, a new sleep time can be set.
- To cancel the sleep timer operation
Press the button to switch the power off, or press the SLEEP button until the sleep time indicator disappears.
B. To fall asleep while listening to a tape, broadcast, or CD, and to perform timer playback the following morning:
1. Set the timer. (Refer to "Setting the timer" on page 14.) 2. Set to the required source (broadcast, tape, or CD). 3. Press the SLEEP button to set the sleep time.
![graph LR A["SLEEP"] --> B["30"] B --> C["60"] C --> D["90"] D --> E["120"] E --> F["Source mode display (Releasing the sleep mode)"]](/content/2026/06/1307373/images/c596f7626c06df91a9880a2a24ebed8b1eb1f0e3fcab9da9a8f41f46c3cde20c.jpg)
Any source can be selected for sleep timer operation and timer playback. For example:
- CD play for sleep timer operation and broadcast reception for timer playback.
- Tape playback for sleep timer operation and CD play for timer playback.
However, when broadcast reception is selected for both sleep timer operation and timer playback, the station you heard at night will be tuned to the following morning.
MAINTENANCE

Cleaning is important!
When the tape is running, magnetic powder and dust naturally accumulate on the heads, capstan, and pinch roller. When they become too dirty...
• Sound quality deteriorates. - The output sound level drops. - Previously recorded tape is not completely erased. - Recording is not performed satisfactorily. Therefore, you should clean the heads, etc. after every 10 hours of use for optimal recording conditions.
Cleaning the heads, capstan, and pinch roller
Open the cassette holder.
Clean the heads, pinch roller, and capstan.
For effective cleaning, use a cleaning kit available from an audio store. After cleaning, be sure that the cleaning fluid has dried completely before loading a cassette.

Cautions:
- Keep magnets and metallic objects away from the head.
If the head becomes magnetized, noise will increase and the sound will deteriorate. Demagnetize the head every 20–30 hours of use with a head eraser (available from an audio store). (When demagnetizing the head, the button should be set to STANDBY.)
- Do not use anything other than alcohol for cleaning.
Thinner and benzine will damage the rubber pinch roller.
Cleaning the lens
If the lens in the CD pickup is dirty, dropout, etc., could degrade sound. Open the CD holder and clean the lens as shown. - Use a blower (available from a camera store) to blow dust off the lens. - If there are fingerprints, etc. on the lens, gently wipe clean with a cotton swab.

TROUBLESHOOTING

What appears to be trouble is not always serious. First make sure....
- Power cannot be turned on. * Is the power cord unplugged?
- No sound from the speakers. * Are headphones connected?
CD Player Section
- The CD player does not play. * Is the CD upside down? * Is the CD dirty?
- A certain portion of the CD does not play correctly. * Is the CD scratched?
Cassette Deck Section
- Playback sound is at a very low level. * Is the head dirty?
- The ONE TOUCH REC button does not function. * Have the safety tabs of the cassette been broken off?
Tuner Section
- Reception is noisy. * Try adjusting the antenna.
Timer Section
- Timer operation does not start. * Is the current time set correctly? * Is the timer mode ( ) displayed?
Remote Control
- Remote control is impossible.
* Are the batteries in the remote control exhausted? * Is the remote sensor section exposed to bright light (direct sunlight, etc.)?
Note:
Before making an important recording, be sure to make a test recording first to check that the deck, etc. is working correctly.
- When the above remedies do not help
Many operations of this unit are performed by the control of a microprocessor. If none of the buttons function, unplug the power cord, wait for a while, then plug it back in. Reset the correct values for the clock and timer.
SPECIFICATIONS
CD player section
Type: Compact disc player
Signal detection system: Non-contact optical pickup
Number of channels: 2 channels
Frequency response: 20 Hz - 20,000 Hz
Signal-to-noise ratio: 90 dB
Wow & flutter: Less than measurable limit
Radio section
Frequency range: FM 87.5 - 108 MHz
AM (MW) 522 - 1,629 kHz
AM (LW) 144 - 288 kHz
Antennas: Loop antenna for AM (MW/LW) External antenna terminal for FM (75 Ω)
Antennas: Loop antenna for AM (MW/LW) External antenna terminal for FM (75 Ω)
Track system: 4-track 2-channel stereo
Motor: Electronic governor DC motor for capstan
Motor: Electronic governor DC motor for capstan
Heads: Hard permalloy head for recording/playback, 2 gap
ferrite head for erasure (combination head)
Frequency response: 60 - 15,000 Hz (with CrO2 tape)
Wow & flutter: 0.15% (WRMS)
Fast wind time: Approx. 130 sec (C-60 cassette)
Speaker section (each unit)
Speakers
(Impedance): 8 cm (4 Ω),
Dimensions: 131 (W) x 203 (H) x 194 (D) mm
Mass: Approx. 1.6 kg
General
Power output: 28 W (14 W + 14 W) at 4 Ω (Max.)
20 W (10 W + 10 W) at 4 Ω (10% THD)
Input terminals: AUX IN (300 mV/47 kΩ)
Output terminals: PHONES (Output level: 0-15 mW/ch, 32 Ω, Matching
impedance: 16 Ω - 1 kΩ)
SPEAKER (Matching impedance 4 Ω - 16 Ω)
Power requirements: AC 230 V, 50 Hz
Ext. DC 12V (car battery via optional CA-R120E car adapter)
Power consumption: 35 W (with ⏻/I button ON)
2.8 W (with ⏻/I button STANDBY)
Dimensions: 404 (W) x 209 (H) x 270 (D) mm, including knobs
Mass: Approx. 6.5 kg
Accessories provided: Power cord x 1
Remote control unit (RM-RXUT100) x 1
"R6/AA (15F)" batteries x 2 (for the remote control)
FM wire antenna x 1
Loop antenna stand x 1
Design and specifications are subject to change without notice.

VICTOR COMPANY OF JAPAN, LIMITED

- INSTRUCTIONS
- CAUTION – SWITCH
- CAUTION
- WARNING
- IMPORTANT FOR LASER PRODUCTS
- PRECAUTIONS
- IMPORTANT (IN THE UNITED KINGDOM)
- MAINS SUPPLY (AC 230 V~, 50 HZ ONLY)
- IMPORTANT
- SAFETY PRECAUTIONS
- PREVENTION OF ELECTRIC SHOCKS, FIRE HAZARDS AND DAMAGE
- PROPER VENTILATION
- FRONT
- SIDES/TOP/BACK
- BOTTOM
- SAFETY INSTRUCTIONS
- SOME DOS AND DON'TS ON THE SAFE USE OF EQUIPMENT
- ABOVE ALL
- CONTENTS
- FEATURES
- HANDLING PRECAUTIONS
- CONNECTIONS
- ANTENNA CONNECTION AND ADJUSTMENT
- NOTES
- CONNECTION OF EXTERNAL AUDIO UNITS
- NOTE
- POWER SUPPLY
- CONNECTION OF AC POWER CORD
- CAUTIONS
- OPERATION ON CAR BATTERY (DC 12 V)
- NAMES OF PARTS AND THEIR FUNCTIONS
- CD PLAYER/GENERAL SECTION FRONT ① BUTTON AND POWER STANDBY INDICATOR ②AUX BUTTON ③ REMOTE SENSOR SECTION ④ DISPLAY WINDOW ①FUNCTION/TRACK NUMBER DISPLAY ②PLAY TIME DISPLAY ③MUSIC CALENDAR DISPLAY ④PROGRAM MODE INDICATOR (PROGRAM) ⑤RANDOM PLAY INDICATOR ⑥REPEAT PLAY INDICATOR (ATL) ⑦OVER INDICATOR ⑤ VOLUME BUTTONS +: USE TO INCREASE THE VOLUME. - : USE TO DECREASE THE VOLUME. (CONTROL RANGE FROM VOL. 0 TO VOL. 50.) ⑥HEADPHONES JACK (PHONES) (3.5 MM DIA. STEREO MINI) CONNECT HEADPHONES (IMPEDANCE 16Ω TO 1KΩ) TO THIS JACK. SPEAKER SOUND IS AUTOMATICALLY SWITCHED OFF WHEN THE HEADPHONES ARE CONNECTED. ⑦CD HOLDER 8ACTIVE HYPER BASS PRO BUTTON ⑨CD OPERATIONS BUTTONS CD SEARCH BUTTONS (◀◀, ▶▶▶): PRESS TO LOCATE THE BEGINNING OF A TRACK AND TO START FORWARD/REVERSE SEARCH OPERATIONS. STOP BUTTON (■): PRESS TO STOP PLAYING A CD. CD PLAY/PAUSE BUTTON (▶III): PRESS TO PLAY A CD OR TO STOP TEMPORARILY. ⑩ MULTI JOG DIAL WHEN THE FUNCTION IS CD AND THE DIAL IS TURNED, THE BEGINNING OF A TRACK CAN BE SEARCHED. (1 TRACK IS SELECTED BY 2 CLICKS.) CD HOLDER OPEN (▲) BUTTON
- REMOTE CONTROL UNIT
- PREPARATION BEFORE USE
- USING THE REMOTE CONTROL UNIT
- SWITCHING THE POWER ON/OFF
- ONE TOUCH OPERATION (COMPU PLAY)
- VOLUME, TONE AND OTHER CONTROLS
- VOLUME BUTTONS
- BASS/TREBLE BUTTONS (USING THE REMOTE CONTROL UNIT)
- ACTIVE HYPER-BASS PRO BUTTON
- HANDLING CDS
- USABLE CDS
- NOTES ON HANDLING CDS
- STORAGE
- CLEANING CDS
- PLAYING AN ENTIRE CD
- OPERATE IN THE ORDER SHOWN
- SKIP PLAY
- TO LISTEN TO THE NEXT TRACK
- TO LISTEN TO THE PREVIOUS TRACK
- SEARCH PLAY (TO LOCATE THE REQUIRED POSITION ON THE CD)
- DIRECT ACCESS PLAY (USING THE REMOTE CONTROL UNIT)
- PROGRAMMED PLAY (USING THE REMOTE CONTROL UNIT)
- TO CONFIRM THE DETAILS OF A PROGRAM
- TO CLEAR THE PROGRAMMED TRACKS
- REPEAT PLAY (USING THE REMOTE CONTROL UNIT)
- RANDOM PLAY (USING THE REMOTE CONTROL UNIT)
- HANDLING CASSETTE TAPES
- CASSETTE TAPES
- CASSETTE LOADING
- AUTO TAPE SELECT MECHANISM
- CASSETTE PLAYBACK
- HOW TO FAST-WIND TAPES
- RADIO RECEPTION
- STEREO AUTO/MONO BUTTON (USING THE REMOTE CONTROL UNIT)
- AUTO MODE
- MONO
- SEEK TUNING
- MANUAL TUNING
- AUTO PRESET TUNING (USING THE REMOTE CONTROL UNIT)
- PRESETTING STATIONS (USING THE REMOTE CONTROL UNIT)
- TO CHANGE PRESET STATIONS
- USING THE ANTENNAS (SEE PAGE 2)
- PRESET TUNING
- (USING THE MAIN UNIT)
- (USING THE REMOTE CONTROL UNIT)
- RECORDING
- SYNCHRONIZED RECORDING WITH THE CD PLAYER
- WHEN NON-RECORDED SECTION BETWEEN TUNES IS NOT REQUIRED
- TO RECORD ONE TRACK
- RECORDING FROM THE RADIO OR AN EXTERNAL SOURCE CONNECTED TO THE AUX TERMINALS
- BEAT CUT BUTTON (USING THE REMOTE CONTROL UNIT)
- ERASING
- TO ERASE A TAPE WITHOUT MAKING A NEW RECORDING
- CLOCK ADJUSTMENT
- SETTING THE CURRENT TIME (WHEN THIS UNIT IS USED FOR THE FIRST TIME)
- TIMER OPERATIONS
- SETTING THE TIMER
- TIMER RECORDING OF BROADCAST
- TIMER PLAYBACK
- SLEEP TIMER OPERATIONS (USING THE REMOTE CONTROL UNIT)
- USE THIS WHEN YOU WANT TO FALL ASLEEP WHILE LISTENING TO A TAPE, BROADCAST OR CD
- CHECKING THE SLEEP TIME
- TO CANCEL THE SLEEP TIMER OPERATION
- TO FALL ASLEEP WHILE LISTENING TO A TAPE, BROADCAST, OR CD, AND TO PERFORM TIMER PLAYBACK THE FOLLOWING MORNING
- MAINTENANCE
- CLEANING IS IMPORTANT
- CLEANING THE HEADS, CAPSTAN, AND PINCH ROLLER
- CLEANING THE LENS
- TROUBLESHOOTING
- WHAT APPEARS TO BE TROUBLE IS NOT ALWAYS SERIOUS. FIRST MAKE SURE
- CD PLAYER SECTION
- CASSETTE DECK SECTION
- TUNER SECTION
- TIMER SECTION
- REMOTE CONTROL
- SPECIFICATIONS
- FREQUENCY RANGE: FM 87.5 - 108 MHZ
- TRACK SYSTEM: 4-TRACK 2-CHANNEL STEREO
- SPEAKER SECTION (EACH UNIT)
- GENERAL
Brand : JVC
Model : UX-T550
Category : Hi-Fi System