
CA-MXG700R - Hi-Fi System JVC - Free user manual and instructions
Find the device manual for free CA-MXG700R JVC in PDF.
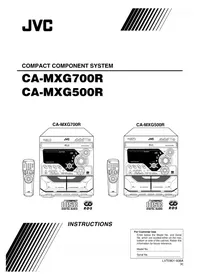


| Product Type | Hi-Fi System |
| Brand | JVC |
| Model | CA-MXG700R |
| Dimensions (Main Unit) | Approximately 200 x 300 x 350 mm |
| Weight (Main Unit) | Approximately 5.5 kg |
| Power Consumption | 60 W (standby: 1 W) |
| Power Output (RMS) | 2 x 30 W (6 ohms) |
| Frequency Response | 40 Hz - 20 kHz |
| Supported Media | CD, CD-R/RW, Cassette Tape |
| Radio Tuner | FM/AM with 30 presets |
| Inputs | AUX (RCA), Microphone (6.3 mm) |
| Outputs | Speaker terminals (4-pin), Headphone (3.5 mm) |
| Equalizer | Preset EQ modes (Rock, Pop, Classic, etc.) |
| Remote Control | Included (IR) |
| Speaker Impedance | 6 ohms |
| Power Source | AC 230V, 50 Hz |
| Cleaning | Use a dry, soft cloth; avoid solvents |
| Safety | Do not expose to moisture; ensure ventilation |
| Repairability | Spare parts available through JVC service centers |
| Warranty | 1 year manufacturer warranty |
Frequently Asked Questions - CA-MXG700R JVC
User questions about CA-MXG700R JVC
0 question about this device. Answer the ones you know or ask your own.
Ask a new question about this device
Download the instructions for your Hi-Fi System in PDF format for free! Find your manual CA-MXG700R - JVC and take your electronic device back in hand. On this page are published all the documents necessary for the use of your device. CA-MXG700R by JVC.
USER MANUAL CA-MXG700R JVC
For Customer Use:
Enter below the Model No. and Serial No. which are located either on the rear, bottom or side of the cabinet. Retain this information for future reference.
Model No.
Serial No.
IMPORTANT for the U.K.
DO NOT cut off the mains plug from this equipment. If the plug fitted is not suitable for the power points in your home or the cable is too short to reach a power point, then obtain an appropriate safety approved extension lead or consult your dealer.
BE SURE to replace the fuse only with an identical approved type, as originally fitted.
If nonetheless the mains plug is cut off ensure to remove the fuse and dispose of the plug immediately, to avoid a possible shock hazard by inadvertent connection to the mains supply.
If this product is not supplied fitted with a mains plug then follow the instructions given below:
IMPORTANT:
DO NOT make any connection to the terminal which is marked with the letter E or by the safety earth symbol or coloured green or green-and-yellow.
The wires in the mains lead on this product are coloured in accordance with the following code:
Blue : Neutral
Brown : Live
As these colours may not correspond with the coloured markings identifying the terminals in your plug proceed as follows:
The wire which is coloured blue must be connected to the terminal which is marked with the letter N or coloured black.
The wire which is coloured brown must be connected to the terminal which is marked with the letter L or coloured red.
IF IN DOUBT - CONSULT A COMPETENT ELECTRICIAN.
Caution — STANDBY/ON switch!
Disconnect the mains plug to shut the power off completely. The STANDBY/ON switch in any position does not disconnect the mains line. The power can be remote controlled.
CAUTION
To reduce the risk of electrical shocks, fire, etc.:
- Do not remove screws, covers or cabinet.
- Do not expose this appliance to rain or moisture.
IMPORTANT FOR LASER PRODUCTS
REPRODUCTION OF LABELS
①CLASSIFICATION LABEL, PLACED ON EXTERIOR SURFACE

②WARNING LABEL, PLACED INSIDE THE UNIT
- CLASS 1 LASER PRODUCT
- CAUTION: Invisible laser radiation when open and interlock failed or defeated. Avoid direct exposure to beam.
- CAUTION: Do not open the top cover. There are no user serviceable parts inside the Unit; leave all servicing to qualified service personnel.
CAUTION
- Do not block the ventilation openings or holes. (If the ventilation openings or holes are blocked by a newspaper or cloth, etc., the heat may not be able to get out.)
- Do not place any naked flame sources, such as lighted candles, on the apparatus.
- When discarding batteries, environmental problems must be considered and local rules or laws governing the disposal of these batteries must be followed strictly.
- Do not expose this apparatus to rain, moisture, dripping or splashing and that no objects filled with liquids, such as vases, shall be placed on the apparatus.
Caution: Proper Ventilation
To avoid risk of electric shock and fire, and to prevent damage, locate the apparatus as follows:
1 Front:
No obstructions and open spacing.
2 Sides/ Top/ Back:
No obstructions should be placed in the areas shown by the dimensions below.
3 Bottom:
Place on the level surface. Maintain an adequate air path for ventilation by placing on a stand with a height of 10 cm or more.

SAFETY INSTRUCTIONS "SOME DOS AND DON'TS ON THE SAFE USE OF EQUIPMENT"
This equipment has been designed and manufactured to meet international safety standards but, like any electrical equipment, care must be taken if you are to obtain the best results and safety is to be assured.
Do read the operating instructions before you attempt to use the equipment.
Do ensure that all electrical connections (including the mains plug, extension leads and interconnections between pieces of equipment) are properly made and in accordance with the manufacturer's instructions. Switch off and withdraw the mains plug when making or changing connections.
Do consult your dealer if you are ever in doubt about the installation, operation or safety of your equipment.
Do be careful with glass panels or doors on equipment.
DON'T continue to operate the equipment if you are in any doubt about it working normally, or if it is damaged in any way - switch off, withdraw the mains plug and consult your dealer.
DON'T remove any fixed cover as this may expose dangerous voltages.
DON'T leave equipment switched on when it is unattended unless it is specifically stated that it is designed for unattended operation or has a standby mode.
Switch off using the switch on the equipment and make sure that your family know how to do this.
Special arrangements may need to be made for infirm or handicapped people.
DON'T use equipment such as personal stereos or radios so that you are distracted from the requirements of traffic safety. It is illegal to watch television whilst driving.
DON'T listen to headphones at high volume as such use can permanently damage your hearing.
DON'T obstruct the ventilation of the equipment, for example with curtains or soft furnishings.
Overheating will cause damage and shorten the life of the equipment.
DON'T use makeshift stands and NEVER fix legs with wood screws — to ensure complete safety always fit the manufacturer's approved stand or legs with the fixings provided according to the instructions.
DON'T allow electrical equipment to be exposed to rain or moisture.
ABOVE ALL
— NEVER let anyone, especially children, push anything into holes, slots or any other opening in the case - this could result in a fatal electrical shock.; — NEVER guess or take chances with electrical equipment of any kind — it is better to be safe than sorry!
We would like to thank you for purchasing one of our JVC products. Before operating this unit, read this manual carefully and thoroughly to obtain the best possible performance from your unit, and retain this manual for future reference.
About This Manual
This manual is organized as follows:
- The manual mainly explains operations using the buttons and controls on the unit. You can also use the buttons on the remote control if they have the same or similar names (or marks) as those on the unit. If operation using the remote control is different from that using the unit, it is then explained.
- Basic and common information that is the same for many functions is grouped in one place, and is not repeated in each procedure. For instance, we do not repeat the information about turning on/off the unit, setting the volume, changing the sound effects, and others, which are explained in the section “Common Operations” on pages 9 and 10. • The following marks are used in this manual:

Gives you warnings and cautions to prevent damage or risk of fire/electric shock. Also gives you information which is not good for obtaining the best possible performance from the unit.

Gives you information and hints you had better know.
Precautions
Installation
• Install in a place which is level, dry and neither too hot nor too cold—between 5°C and 35°C. • Install the unit in a location with adequate ventilation to prevent internal heat built-up in the unit. - Leave sufficient distance between the unit and the TV. - Keep the speakers away from the TV to avoid interference with TV.

DO NOT install the unit in a location near heat sources, or in a place subject to direct sunlight, excessive dust or vibration.
Power sources
- When unplugging from the wall outlet, always pull the plug, not the AC power cord.

DO NOT handle the AC power cord with wet hands.
Moisture condensation
Moisture may condense on the lens inside the unit in the following cases:
• After starting heating in the room - In a damp room - If the unit is brought directly from a cold to a warm place. Should this occur, the unit may malfunction. In this case, leave the unit turned on for a few hours until the moisture evaporates, unplug the AC power cord, and then plug it in again.
Others
- Should any metallic object or liquid fall into the unit, unplug the unit and consult your dealer before operating any further.
- If you are not going to operate the unit for an extended period of time, unplug the AC power cord from the wall outlet.

DO NOT disassemble the unit since there are no user serviceable parts inside.
If anything goes wrong, unplug the AC power cord and consult your dealer.
Location of the Buttons and Controls .... 3
Front Panel 3
Remote Control 5
Getting Started....6
Unpacking 6
Putting the Batteries into the Remote Control ...... 6
Connecting Antennas 6
Connecting Speakers 7
Connecting Other Equipment 8
Canceling the Display Demonstration 8
Common Operations 9
Turning On or Off the Power 9
Saving the Power Consumption While on Standby —ECO mode .... 9
Setting the Clock 9
Selecting the Sources....9
Adjusting the Volume 10
Reinforcing the Bass Sound 10
Selecting the Sound Modes 10
Listening to the Radio 11
Tuning in a Station 11
Presetting Stations 11
Tuning in a Preset Station 11
Receiving FM Stations with RDS 12
Changing the RDS Information 12
Searching for Programs by PTY Codes (PTY Search) 12
Switching to a Traffic Announcement Temporarily 13
Playing Back CDs 14
Loading CDs 14
Playing Back CDs—All Disc and One Disc 14
Basic CD Operations 15
Programming the Playing Order of the Tracks—Program Play 16
Playing at Random—Random Play 17
Repeating Tracks or CDs—Repeat Play 17
Prohibiting Disc Ejection—Tray Lock 17
Playing Back Tapes 18
Playing Back a Tape 18
Recording 19
Recording a Tape on Deck B.... 19
Dubbing Tapes 20
CD Synchronized Recording 20
Using the Timers 21
Using Daily Timer 21
Using Recording Timer 22
Using Sleep Timer 23
Timer Priority 23
Maintenance 24
Additional Information 25
Troubleshooting 25
Specifications 26
Location of the Buttons and Controls
Become familiar with the buttons and controls on your unit.
Front Panel
Display Window![graph TD A["1"] --> B["2"] B --> C["3"] C --> D["4"] D --> E["5"] E --> F["6"] F --> G["7"] G --> H["8"] H --> I["9"] I --> J["10"] J --> K["11"] style A fill:#f9f,stroke:#333 style B fill:#ccf,stroke:#333 style C fill:#cfc,stroke:#333 style D fill:#fcc,stroke:#333 style E fill:#cff,stroke:#333 styl…](/content/2026/06/1307343/images/bc17481fcddf67a0354275b93d0f98602fddefdf32a3541d1d5a72fd7863dfc9.jpg)
See pages in the parentheses for details.
Front Panel
1 STANDBY/ON button and STANDBY lamp (9) 2 ECO button (9) 3 CLOCK/TIMER button (9, 21 - 23) 4 DISPLAY button (9) 5 PRESET +/- buttons (11)
|◀◀/▶▶| (reverse search/forward search) buttons (9, 15 – 17, 21 – 23)
6 ■ (stop) button (14 - 20) 7 TUNING +/- buttons (11)
◀◀/▶▶ (fast rewind/fast forward) buttons (15, 18)
8 Display window 9 Remote sensor 10 TAPE ▶ button and lamp (9, 18, 20)
Pressing this button also turns on the unit.
11 CD ▶/Ⅱ (play/pause) button and lamp (9, 14–16) Pressing this button also turns on the unit. 12 FM/AM button and lamp (9, 11) Pressing this button also turns on the unit. 13 AUX button and lamp (9) Pressing this button also turns on the unit. 14 PHONES jack (10) 15 REPEAT button (14, 15, 17) PROGRAM button (16) RANDOM button (17) 16 REC START/STOP button (19) CD REC START button (20) DUBBING button (20) 17 TAPE A button (18) TAPE B button (18) 18 Deck A cassette holder (18, 20) Pressing the ▲ EJECT portion opens the holder. 19 Carrousel 20 ▲ (Carrousel open/close) button (14 - 17) Pressing this button also turns on the unit.
21 DISC CHANGE button (14, 15) [22] Disc number buttons and lamps (CD1, CD2, and CD3) (15 - 17, 20) Pressing one of these buttons also turns on the unit. 23 SET button (9, 11, 16, 21 - 23) 24 CANCEL/DEMO button (8, 9, 16, 22, 23) 25 SOUND MODE control (10) 26 VOLUME control (10) 27 SUBWOOFER LEVEL control (10) 28 RDS operation buttons (12, 13) • DISPLAY MODE, PTY/EON, an 29 Deck B cassette holder (18 - 20) Pressing the EJECT ▲ portion opens the holder.
Display window
1 Timer indicators - DAILY (daily timer), REC (recording timer), SLEEP (sleep timer), and @timer) indicators 2 Tape operation indicators - A/B (operating deck), REC (recording), and ◀▶ (tape running) indicators 3 CD play mode indicators - REPEAT (1, 1 DISC, ALL DISC), PRGM (program), and RANDOM indicators 4 Tuner operation indicators • MONO and ST (stereo) 5 SOUND MODE indicator 6 Disc indicators 7 Volume level, Subwoofer level and Sound Mode pattern indicators 8 SUBWOOFER LEVEL indicator 9 CD track number indicators 10 Main display • Shows the source name, frequency, etc. 11 RDS operation indicators • RDS, EON, and TA indicators
Remote Control

When using the remote control, point it at the remote sensor on the front panel.
Remote Control
1 STANDBY/ON button (9) 2 SLEEP button (23) 3 AUX button (9)
Pressing this button also turns on the unit.
4 Number buttons (11, 15) 5 TAPE ▶ button (9, 18)
Pressing this button also turns on the unit.
6 FM/AM button (9, 11)
Pressing this button also turns on the unit.
7 CD ▶/■ button (9, 14–16)
Pressing this button also turns on the unit.
8 |◀◀/◀◀ (reverse search/fast rewind) button (11, 15, 18) 9 VOLUME - button (10) 10 SUBWOOFER LEVEL button (10) 11 SOUND MODE button (10) 12 FM MODE button (11) 13 RDS operation buttons (12, 13)
- DISPLAY MODE, PTY/EON, and SELECT +/- buttons
14 TAPE A/B button (18) 15 FADE MUTING button (10) 16 DISC SKIP button (14, 15) 17 VOLUME + button (10) 18 ▶▶/▶▶ (forward search/fast forward) button (11, 15, 18) 19 ■ (stop) button (14 - 20)
Unpacking
After unpacking, check to be sure that you have all the following items.
The number in the parentheses indicates the quantity of the pieces supplied.
• AM (MW/LW) loop antenna (1)
• FM antenna (1)
- Remote control (1)
- Batteries (2)
If any is missing, consult your dealer immediately.
Putting the Batteries into the Remote Control
Insert the batteries—UM-4/AAA/IEC R03—into the remote control, by matching the polarity (+ and −) on the batteries with the + and − markings on the battery compartment.
When the remote control can no longer operate the unit, replace both batteries at the same time.


- DO NOT use an old battery together with a new one.
- DO NOT use different types of batteries together.
- DO NOT expose batteries to heat or flame.
- DO NOT leave the batteries in the battery compartment when you are not going to use the remote control for an extended period of time. Otherwise, it will be damaged from battery leakage.
Connecting Antennas
FM antenna
![ANTENNA: FM [75Ω], AM, FM antenna (supplied)](/content/2026/06/1307343/images/0ad7bfc02f0da7aad4b3785e0792426524a61beed97fee8e8999031eabeacc04.jpg)
1 Attach the FM antenna to the FM [75 Ω] coaxial terminal. 2 Extend the FM antenna. 3 Fasten it up in the position which gives you the best reception, then fix it on the wall, etc.

About the supplied FM antenna
The FM antenna supplied with this unit can be used as temporary measure. If reception is poor, you can connect an outdoor FM antenna.
To connect an outdoor FM antenna
Before connecting it, disconnect the supplied FM antenna.

AM (MW/LW) antenna![graph TD A["1"] --> B["2, 3"] B --> C["Antenna FM [75 Ω"]] B --> D["AM"] C --> E["Vinyl-covered wire (not supplied)"] D --> F["AM (MW/LW) loop antenna (supplied)"]](/content/2026/06/1307343/images/e00dd4c1ff67ddb377111c800c2aaf2129df71e2326ee0de4b4427725680fa65.jpg)
1 Press and hold the clamp of the AM terminal on the rear of the unit.
2 Insert the end of the AM (MW/LW) loop antenna cord into the terminal.
- If the AM (MW/LW) loop antenna wire is covered with vinyl, remove the vinyl by twisting it as shown in the diagram.

3 Release the finger from the clamp.
4 Turn the AM (MW/LW) loop antenna until you have the best reception.
To connect an outdoor AM (MW/LW) antenna
When reception is poor, connect a single vinyl-covered wire to the AM terminal and extend it horizontally. (The AM (MW/LW) loop antenna must remain connected.)

For better reception of FM, MW, and LW
- Make sure the antenna conductors do not touch any other terminals and connecting cords.
- Keep the antennas away from metallic parts of the unit, connecting cords, and the AC power cord.
Connecting Speakers![Speaker cord (blue/black) and (red/black): Black, Blue, Red; MAIN SPEAKER [4-8 Ω], SUBWOOFER [5-16 Ω]; L, R; From right main speaker's terminals, from right subwoofer's terminals, from left main speaker's terminals, from left subwoofer's terminals](/content/2026/06/1307343/images/613b1ec95aaa34fc72b385a85985aabeef4e4d1d4edeb3bd76f1d8d49c23e9de.jpg)
1 Press and hold the clamp of the speaker terminal on the rear of the unit.
2 Insert the end of the speaker cord into the terminal.
Match the polarity (colors): Blue (+) to blue (+) and black (−) to black (−); red (+) to red (+) and black (−) to black (−).
- If the wire is covered with vinyl, remove the vinyl by twisting it as shown in the diagram.

3 Release the finger from the clamp.
IMPORTANT:
- Use only speakers with the same speaker impedance as indicated by the speaker terminals on the rear of the unit.
- DO NOT connect more than one speaker to one speaker terminal.
Only for CA-MXG700R: To remove the speaker grilles
The speaker grilles are removable as the illustration below.

To remove the speaker grille, insert your fingers around the projection at the top of the speaker grille, then pull gently towards you while holding the side. Do the same for each of the other projections, one at a time.
To attach the speaker grille, fit the projections of the speaker grille into the holes of the speaker.
Connecting Other Equipment
You can connect both analog and digital equipment.

- DO NOT connect any equipment while the power is on.
- DO NOT plug in any equipment until all connections are complete.
To connect an analog component
Be sure that the plugs of the audio cords are color coded: White plugs and jacks are for left audio signals, and red ones for right audio signals.
![graph TD A["To audio output"] --> B["R"] A --> C["L"] B --> D["AUX IN"] C --> D D --> E["R"] D --> F["L"] B --> G["L"] C --> H["LEFT"] C --> I["RIGHT"] G --> J["Audio/video equipment"]](/content/2026/06/1307343/images/ec64b7994a4f3144fb7069e6b25dc51572b233a3da93636ea5bb9e5570115d0e.jpg)
For playing the other equipment through this unit, connect between the audio output jacks on the other equipment and AUX IN jacks by using audio cords (not supplied).
To connect audio equipment with an optical digital input terminal
You can record CD sound onto the connected digital equipment.
![graph TD A["To optical digital input"] --> B["Digital OUT (OPTICAL)"] B --> C["Protective plug"] C --> D["Before connecting the other equipment, remove the protective plug from the terminal."] E["Audio equipment with an optical digital input"] --> C](/content/2026/06/1307343/images/586c887be839fb366e8707c6813d036d0c6a4228c07dd5cc18457da32e87b930.jpg)
Connect an optical digital cord (not supplied) between the optical digital input terminal on the other equipment and the DIGITAL OUT [OPTICAL] terminal.
NOW, you can plug in the unit and other connected equipment FINALLY!
Canceling the Display Demonstration
When connecting the AC power cord into a wall outlet, the unit automatically starts display demonstration.
On the unit ONLY:
To cancel the display demonstration, press CANCEL/DEMO.


When you press other buttons
The display demonstration stops temporarily. It will start automatically again (if no operation is done for 2 minutes) and continue until you cancel it by pressing CANCEL/DEMO.
To start the display demonstration manually
Press and hold CANCEL/DEMO again for more than 2 seconds.

Turning On or Off the Power
To turn on the unit, press STANDBY/ON so that the STANDBY lamp goes off.


To turn off the unit (on standby), press Ⓗ/| STANDBY/ON again so that the STANDBY lamp lights up.


A little power is always consumed even while the unit is on standby.
To switch off the power supply completely, unplug the AC power cord from the AC outlet.

When you unplug the AC power cord or if a power failure occurs
The clock is reset to “--:--” soon, while the tuner preset stations (see page 11) will be erased in a few days.
Saving the Power Consumption While on Standby—ECO mode
You can save the power consumption while the unit is turned off (on standby).
To activate the ECO mode, press ECO while the unit is turned off (on standby). The display illumination (including the display demonstration) disappears.

To deactivate the ECO mode, press ECO again. The display illumination appears.

About ECO mode
While ECO mode is activated, the display demonstration is canceled temporarily.
Setting the Clock
Before operating the unit any further, first set the clock built in this unit. You can set the clock whether the unit is on or off.
On the unit ONLY:
1 Press CLOCK/TIMER.


The hour digits start flashing on the display.
2 Press |◀◀ or ▶▶| to adjust the hour, then press SET.


The minute digits start flashing on the display.
- If you want to correct the hour after pressing SET, press CANCEL/DEMO. The hour digits start flashing again.
3 Press |◀◀ or ▶▶| to adjust the minute, then press SET.
![graph TD A["Close-up of finger"] --> B["SET"] B --> C["Display"]](/content/2026/06/1307343/images/a0290131a030f9933918d3d86ca045ba956c424cdd52e1e5b22b04337351f24d.jpg)

To check the clock time
Press DISPLAY while playing any source.
• Each time you press the button, the source indication and the clock time alternate on the display.
To adjust the clock again
If you have adjusted the clock before, you need to press CLOCK/TIMER repeatedly until "CLOCK" is selected.
• Each time you press the button, the clock/timer setting modes change as follows:
![graph LR A["DAILY"] --> B["ON TIME (Daily Timer)"] B --> C["REC"] C --> D["ON TIME (Recording Timer)"] D --> E["CLOCK"] E --> F["Canceled"]](/content/2026/06/1307343/images/dabba67eab68d7910908e3b6b576b302f4658b2b70ca60335d23a7a781d0779b.jpg)

If there is a power failure
The clock loses the setting and is reset to “--:--.” You need to set the clock again.
Selecting the Sources
To listen to the radio, press FM/AM. (See page 11.)
To play back CDs, press CD ▶/II. (See pages 14–17.)
To play back tapes, press TAPE ▶. (See page 18.)
To select the external equipment as the source, press AUX.

When you press the play button for a particular source (AUX, FM/AM, CD ▶/II, and TAPE ▶), the unit turns on (and starts playing the source if it is ready—COMPU PLAY CONTROL).
Adjusting the Volume
You can adjust the volume level only while the unit is turned on.
Turn the VOLUME control clockwise to increase the volume or counterclockwise to decrease it.
- The volume level can be adjusted in 32 steps (VOL MIN, VOL 1 — VOL 30, and VOL MAX).

When using the remote control, press VOLUME + to increase the volume or press VOLUME - to decrease it.

For private listening
Connect a pair of headphones to the PHONES jack. No sound comes out of the speakers. Be sure to turn down the volume before connecting or putting on headphones.

DO NOT turn off (on standby) the unit with the volume set to an extremely high level; otherwise, a sudden blast of sound can damage your hearing, speakers and/or headphones when you turn on the unit or start playing any source next time. REMEMBER you cannot adjust the volume level while the unit is on standby.
To turn down the volume level temporarily
Press FADE MUTING on the remote control. The volume level gradually decreases to "VOL MIN."
To restore the sound, press the button again.

Reinforcing the Bass Sound
This function only affects the playback sound, not your recording.
Turn the SUBWOOFER LEVEL control clockwise to increase the subwoofer sound or counterclockwise to decrease it.
- The subwoofer level can be adjusted in 4 steps (LEVEL 1 — LEVEL 4.) If you turn the control clockwise up to the LEVEL 4, "MAX" flashes on the display for a few seconds.
SUBWOOFER LEVEL indicator always lights up while the unit is on.

When using the remote control, press SUBWOOFER LEVEL to adjust the subwoofer level. Each time you press the button, the subwoofer level changes as LEVEL 1 → LEVEL 2 → LEVEL 3 → LEVEL 4 → (back to the beginning).

Selecting the Sound Modes
This function only affects the playback sound, not your recording.
You can select one of the 6 preset sound modes (3 surround modes and 3 SEA—Sound Effect Amplifier—modes).
To select the sound modes, turn the SOUND MODE control until the sound mode you want appears on the display.
SOUND MODE

The SOUND MODE indicator also lights up on the display.
![I, [L] (BOUND MODE) ①②③](/content/2026/06/1307343/images/21487e34327d02179d3f7e0f5a0a97334c8eee96968b6a52909baf7b2bd1fdc5.jpg)
As you turn the control, the sound modes change as follows:
![graph LR A["D.CLUB (Dance CLUB)"] --> B["HALL STADIUM ROCK"] B --> C["OFF (Canceled)"] C --> D["CLASSIC"] D --> E["POP"] E --> C](/content/2026/06/1307343/images/5c6f2e31cffa35e18a5b8fdd18f4ab58d59d5c1afd68b099d7b9ca14f0731ca4.jpg)
Surround modes*:
D.CLUB: Increases resonance and bass.
HALL: Adds depth and brilliance to the sound.
STADIUM: Adds clarity and spreads the sound, like in an outdoor stadium.
SEA (Sound Effect Amplifier) modes:
ROCK: Boosts low and high frequency. Good for acoustic music.
POP: Good for vocal music.
CLASSIC: Good for classical music.
OFF: Cancels the sound mode.
Surround elements are added to the SEA elements to create a sense of presence in your room.
When one of these modes is selected, the SOUND MODE indicator lights up as — (SOUND MODE).
While one of the SEA modes (SEA elements without surround elements) is selected, the SOUND MODE indicator lights up as

When using the remote control, press SOUND MODE to select the sound mode.
• Each time you press the button, the sound modes change as follows:
![graph LR A["D.CLUB"] --> B["HALL STADIUM ROCK"] B --> C["POP"] C --> D["CLASSIC"] D --> E["OFF (Canceled)"] E --> A](/content/2026/06/1307343/images/435538433914013e91fb3527c6efa94af198fa5aa1210c42d185088cbb648124.jpg)
Tuning in a Station
1 Press FM/AM.
The unit automatically turns on and tunes in the previously tuned station (either FM, MW or LW).
• Each time you press the button, the band changes as follows:


2 Start searching for stations. On the unit:
Press and hold TUNING + or TUNING – for more than 1 second.
On the remote control:
Press and hold |◀◀/◀◀ or
▶▶/▶▶ for more than 1 second.
The unit starts searching for stations and stops when a station of sufficient signal strength is tuned in.
If a program is broadcast in stereo, the ST (stereo) indicator lights up.


To stop during searching, press TUNING + or TUNING - (or |◀◀/◀◀ or ▶▶|/▶▶ on the remote control).

When you press TUNING + or TUNING - (or |◀◀/◀◀ or ▶▶/▶▶ on the remote control) briefly and repeatedly
The frequency changes step by step.
To change the FM reception mode
When an FM stereo broadcast is hard to receive or noisy, press FM MODE on the remote control so that "MONO" appears and the MONO indicator also lights up on the display. Reception improves.

To restore the stereo effect, press FM MODE again so that "STEREO" appears on the display.
In this stereo mode, you can hear stereo sounds when a program is broadcast in stereo.
Presetting Stations
You can preset 30 FM, 8 MW, and 7 LW stations.
In some cases, test frequencies have been already memorized for the tuner since the factory examined the tuner preset function before shipment. This is not a malfunction. You can preset the stations you want into memory by following the presetting method.
- There is a time limit in doing the following steps. If the setting is canceled before you finish, start from step 2 again.
On the unit ONLY:
1 Tune in the station you want to preset (in this example, of FM 87.50).
• See “Tuning in a Station.”
FM 8750
2 Press SET.


3 Press PRESET + or PRESET - to select a preset number.


4 Press SET again.
STORED

The tuned station in step 1 is stored in the preset number selected in step 3.
- Storing a new station on a used number erases the previously stored one.

When you unplug the AC power cord or if a power failure occurs
The preset stations will be erased in a few days. If this happens, preset the stations again.
Tuning in a Preset Station
1 Press FM/AM.
- See "Tuning in a Station," step 1 for details.
2 Select a preset number.
On the unit: Press PRESET + or PRESET -. On the remote control: Press the number buttons.
Ex.: For preset number 5, press 5.
For preset number 15, press +10 then 5.
For preset number 20, press +10, then 10.
For preset number 25, press +10, +10, then 5.
For preset number 30, press +10, +10, then 10.


RDS allows FM stations to send an additional signal along with their regular program signals. For example, the stations send their station names, as well as information about what type of program they broadcast, such as sports or music, etc.
When tuned to an FM station which provides the RDS service, the RDS indicator lights up on the display.
With the unit, you can receive the following types of RDS signals.
PS (Program Service):
Shows commonly known station names.
RT (Radio Text):
Shows text messages the station sends.
CT (Clock Time):
Shows clock time the station sends.
PTY (Program Type):
Shows types of broadcast programs.
Enhanced Other Networks:
Provides information about the types of programs sent by other RDS stations.

More about RDS
- Some FM stations do not provide RDS signals.
- RDS services may vary among FM RDS stations. For details on RDS services in your area, check with local radio stations.
- RDS may not work correctly if the received station is not transmitting the signals properly or if the signal strength is weak.
Changing the RDS Information
You can see RDS information on the display while listening to an FM station.
Press DISPLAY MODE.
• Each time you press the button, the display changes as follows:
DISPLAY MODE
![graph LR A["PS NAME\n(Program Service name)"] --> B["RT\n(Radio Text)"] B --> C["CT\n(Clock Time)"] C --> D["Station frequency\n(or preset channel no.)"] D --> E["Feedback to PS"]](/content/2026/06/1307343/images/b8adaea7ff16330783f96cc9f33b75a433323aebed3c97d05300a2aeda949550.jpg)
About characters shown on the display
When the display shows PS name, RT or CT signals, the following characters are used.
- The display cannot differentiate upper case and lower case letters and always uses upper case letters.
- The display cannot show accented letters, “A,” for instance, may stand for accented “A’s” like “Â, Ã, Â, Á, Â, Â, ă, ä, ä, á, and â.”

If no PS name, RT, or CT signals are sent by a station,
"NO PS," "NO RT," or "NO CT" appears on the display.
Searching for Programs by PTY Codes (PTY Search)
One of the advantages of RDS is that you can locate a particular kind of program by specifying PTY codes.
For details on the PTY codes, see "Additional Information" on page 25.
To search for a program using PTY codes:
- PTY Search is applicable only to preset FM RDS stations. If not yet done, see "Presetting Stations" on page 11.
- There is a time limit in doing the following steps. If the setting is canceled before you finish, start from step 1 again.
1. Press PTY/EON while listening to an FM station.

2. Press SELECT + or SELECT - until the PTY code you want appears on the display.

NEWS
• Each time you press the button, PTY codes change as follows:
NEWS ⇌ AFFAIRS ⇌ INFO ⇌ SPORT ⇌ EDUCATE ⇌ DRAMA ⇌ CULTURE ⇌ SCIENCE ⇌ VARIED ⇌ POP M ⇌ ROCK M ⇌ M.O.R. M ⇌ LIGHT M ⇌ CLASSICS ⇌ OTHER M ⇌ WEATHER ⇌ FINANCE ⇌ CHILDREN ⇌ SOCIAL A ⇌ RELIGION ⇌ PHONE IN ⇌ TRAVEL ⇌ LEISURE ⇌ JAZZ ⇌ COUNTRY ⇌ NATIONAL ⇌ OLDIES ⇌ FOLK M ⇌ DOCUMENT ⇌ (back to the beginning)
3. Press PTY/EON again while the PTY code selected in the previous step is still on the display.

The preset FM stations appear on the display with their preset numbers.
The unit searches 30 preset FM stations, stops when it finds the one you have selected and tunes in that station.
- If no program is found, the unit returns to the last received station.
To stop during searching
Press SELECT + or SELECT -.
To check the PTY, press PTY/EON once so that the current PTY code appears.
- "NO PTY" appears if no signal is sent.
Switching to a Traffic Announcement Temporarily
By receiving the service called “Enhanced Other Networks” function, the unit switches temporarily to a broadcast of a traffic announcement (TA) from the current FM RDS station.
- The EON indicator lights up on the display while receiving a station with Enhanced Other Networks data.
To activate the Enhanced Other Networks function
- Enhanced Other Networks function is applicable only to preset FM RDS stations. If not yet done, see “Presetting Stations” on page 11.
1 Press and hold PTY/EON while listening to an FM station.
Each time you press and hold PTY/EON, "TA ON" and "TA OFF" alternately appear on the display.

TA OFFTA ON
TA ON: Switches to a traffic announcement, if any.
TA OFF: This function is canceled.
How the Enhanced Other Networks function actually works:
CASE 1
If there is no station broadcasting a traffic announcement
The unit continues tuning in the current station.

When a station starts broadcasting a traffic announcement, the unit automatically switches to the station. The TA indicator starts flashing.

When the program is over, the unit goes back to the previously tuned station, but the Enhanced Other Networks function still remains activated.
CASE 2
If there is a station broadcasting a traffic announcement
The unit tunes in the program. The TA indicator starts flashing.

When the program is over, the unit goes back to the previously tuned station, but the Enhanced Other Networks function still remains activated.
CASE 3
If the FM station you are listening to is broadcasting a traffic announcement
The unit continues to receive the station but the TA indicator starts flashing.

When the program is over, the TA indicator stops flashing, but the Enhanced Other Networks function still remains activated.

More about the Enhanced Other Networks function
- Enhanced Other Networks data sent from some stations may not be compatible with this unit. In this case, the Enhanced Other Networks function may not work correctly.
- While listening to a program tuned in by this function, the station does not change even if another network station starts broadcasting a program of the same Enhanced Other Networks data.
- If the stations alternate intermittently between the station tuned by this function and the currently tuned station, press PTY/EON to cancel this function.
- The Enhanced Other Networks function is canceled when you change the source to CD, TAPE or AUX, while it is temporarily canceled when you change the band to MW or LW.
This unit has been designed to playback the following CDs: Audio CD, CD-R, and CD-RW.
When playing a CD-R or CD-RW
User-edited CD-Rs (CD-Recordable) and CD-RWs (CD-ReWritable) can be played back when they are already "finalized."
- You can play back your original CD-Rs or CD-RWs recorded in music CD format ONLY. (If CD-RWs have been recorded in different format, erase all the data on CD-RWs completely before re-recording on the discs.)

DO NOT play back CD-Rs or CD-RWs recorded the sound files such as MP3.
- Before playing back CD-Rs or CD-RWs, read their instructions or cautions carefully.
- Some CD-Rs or CD-RWs may not be played back on this unit because of their disc characteristics, damage or stain on them, or if the player's lens is dirty.
Important notices:
- In general, you will have the best performance by keeping your CDs and the mechanism clean.
- Store CDs in their cases, and keep them in cabinets or on shelves.
- Keep the unit's carrousel closed when not in use.
- Continuous use of irregular shaped discs (heart-shape, octagonal, etc.) can damage the disc rotating mechanism.


- CD-RWs may require a longer readout time since the reflectance of CD-RWs is lower than for regular CDs.
Loading CDs
1 Press ▲.
The unit automatically turns on and the carrousel comes out.

2 Place one or two discs correctly on the front recesses of the disc tray, with its label side up.

- When using a CD single (8 cm), place it on the inner recess of the disc tray.
3 If you wish to load a third disc, press DISC CHANGE on the unit or DISC SKIP on the remote control.
The disc tray rotates by 120°.
4 Press ▲ again.
The carrousel closes.


About the disc indicators
Each disc indicator corresponds to the disc tray of the same number.

- The disc marker lights up for the disc number you have selected.
- The disc indicator rotates while the corresponding CD is being played.
- The disc indicator goes off when the unit has detected that there is no CD on the corresponding disc tray.
Playing Back CDs—All Disc and One Disc
You can play all loaded CDs continuously—All Disc play, or one selected disc—One Disc play.
All Disc play
1 Load CDs.
- If the current playing source is not the CD player, press CD ▶/Ⅱ, then ■ before going to the next step.
2 Press REPEAT repeatedly so that the ALL DISC indicator lights up on the display.

Track number of the currently playing disc flashes (Track numbers exceeding 16 are not displayed.)

• Each time you press the button, the indication on the display changes as follows:
![graph LR A["ALL DISC\n(initial setting)"] --> B["1 DISC"] B --> C["REPEAT 1*"] D["REPEAT ALL DISC*"] --> E["REPEAT 1 DISC*"] C --> D](/content/2026/06/1307343/images/f7de85743c0e6cad00c7ecc291c295ff0ffacb02be751526dbe5a5c150d96a24.jpg)
* See page 17.
3 Press one of the disc number buttons (CD1, CD2 or CD3) for the disc you want to start to play from.

CD play starts from the first track of the selected disc.
- Pressing CD ▶/Ⅱ instead of the disc number buttons starts playing back if a CD is on the trays.
To stop during play, press ■.
To remove the disc, press ▲.

CD playback sequence
When 3 CDs are loaded on the disc trays, they are played in one of the following sequences.
- When CD1 is pressed: CD1 → CD2 → CD3 (then stops)
- When CD2 is pressed: CD2 → CD3 → CD1 (then stops)
- When CD3 is pressed: CD3 → CD1 → CD2 (then stops) * When only 2 CDs are loaded, they are played in the same order, but the disc tray without a CD is skipped.
One Disc play
When 2 or 3 CDs are loaded on the disc trays, you can select one particular disc to be played back.
1 Load CDs.
- If the current playing source is not the CD player, press CD ▶/■, then ■ before going to the next step.
2 Press REPEAT repeatedly so that the 1 DISC indicator lights up on the display.


• Each time you press the button, the indication on the display changes as follows:
![graph LR A["ALL DISC\n(initial setting)"] --> B["1 DISC"] B --> C["REPEAT 1*"] D["REPEAT ALL DISC*"] --> E["REPEAT 1 DISC*"] C --> D](/content/2026/06/1307343/images/f9dd724fb8d2ccce97da5efa99ba0576e6eba551a33cd0e5613a911e5f2d6eb6.jpg)
* See page 17.
3 Press one of the disc number buttons (CD1, CD2 or CD3) you want to listen.

Playback stops when all tracks of the selected disc are played once and resumes All Disc play.
To stop during play, press ■.
To remove the disc, press ▲.
To exit from One Disc play, press REPEAT repeatedly so that ALL DISC indicator lights up on the display.

The following operations will also cancel the One Disc play and restore All Disc play when—
- Turning off the power,
- Ejecting the carrousel, or
- Changing the source to play.
Basic CD Operations
While playing a CD, you can do the following operations.
To exchange CDs during playback of another
Press DISC CHANGE to change the CD and the carrousel comes out.
If you change CDs during play, the current play will not stop until all CDs you have changed are played.

To close the carrousel, press DISC CHANGE or ▲.
To skip to the another CD in the carrousel
Press DISC SKIP on the remote control.
To stop play for a moment
Press CD ▶/II.
While pausing, "PAUSE" appears on the display.
To resume play, press CD ▶/Ⅱ again.


To locate a particular point in a track
During play, press and hold ◀◀ or ▶▶.
- ◀◀: Fast reverses the disc.
- ▶▶: Fast forwards the disc.
When using the remote control, press and hold
or ▶▶▶/▶▶.

To go to another track
Press |◀◀ or ▶▶▶| repeatedly before or during playback.
- |◀◀: Goes back to the beginning of the current or previous tracks.
- ▶▶▶:Skips to the beginning of the next or succeeding tracks.

If you press and hold |◀◀ or ▶▶| on the unit before playing
The track number keeps changing until you release it.

To go to another track directly using the number buttons
Pressing the number button(s) before or during play allows you to start playing the track number you want.
Ex.: For track number 5, press 5.
For track number 15, press +10, then 5.
For track number 20, press +10, then 10.
For track number 32, press +10, +10, +10, then 2.


Programming the Playing Order of the Tracks — Program Play
You can arrange the order in which the tracks play before you start playing. You can program up to 32 tracks.
- To use Repeat play (see page 17) for Program play, press REPEAT after starting Program play.
On the unit ONLY:
1 Load CDs.
- If the current playing source is not the CD player, press CD ▶/■, then ■ before going to the next step.
2 Press PROGRAM so that "PROGRAM" appears on the display.

The PRGM (program) indicator also lights up on the display.
- All Disc play is selected automatically. You cannot select One Disc play for Program play.

- If a program has been stored in memory, the program is called up.
3 Press one of the disc number buttons (CD1, CD2, and CD3) to select the disc number you want to play.


Disc number Program step number
4 Press |◀◀ or ▶▶| to select the track number, then press SET.
Each time you select a track and press SET, the selected track number is added to the track number indicator.

5 Program other tracks you want.
- To program tracks from the same disc, repeat step 4. - To program tracks from a different disc, repeat steps 3 and 4.
6 Press CD ▶/II.
The tracks are played in the order you have programmed.

To stop during play, press ■
To exit from Program play, press PROGRAM again before or after play so that the unit enters All Disc play. (The program you have made is stored in memory until you turn off the unit, eject the carrousel, or erase the program.)
- Program play is also canceled when you press ▲.
To modify the program
Before playing, you can erase the last programmed track shown on the display by pressing CANCEL/DEMO.

• Each time you press the button, the last programmed track is erased from the program.
To check the program during play, press ▶▶l (or |◀◀) so that the playing track will change according to the program (or reverse) order.
To add tracks in the program before play, simply select the disc numbers and/or track numbers you want to add by following steps 3 and 4 of the programming procedure.
To erase the entire program before or during play, press ■ twice.
- Turning the power off or ejecting the carrousel will also erase the stored memory.

If you try to program a 33rd track
“FULL” will appear on the display.

If your entry is ignored
You have tried to program a track from an empty tray, or a track number that does not exist on the CD. Such entries are ignored.
Playing at Random——Random Play
The tracks of the selected CD will play at random.
• To use Random play, you have to cancel the Program play.
1 Load a CD.
2 Press one of the disc number buttons (CD1, CD2, and CD3) for the disc you want to play, then press ■.

3 Press RANDOM so that "RANDOM" appears on the display.

The RANDOM indicator also lights up on the display.
- Activating Random play cancels Repeat play or All Disc play. (One Disc play is automatically selected.)

- The tracks are played automatically at random. Random play ends when all tracks are played once.
To stop during play, press ■.
To exit from Random play, press RANDOM again during play so that the unit enters All Disc play mode.
- Random play is also canceled when you press ▲.

If you press |◀◀ or ▶▶
Skips to the next track selected randomly.
Repeating Tracks or CDs—Repeat Play
You can have all the CDs, the program or the individual track currently playing repeat as many times as you like.
- Repeat play and Random play cannot be used at the same time.
To repeat play, press REPEAT during or before playing.
• Each time you press the button, Repeat play mode changes as follows, and the following indicator lights up on the display:


REPEAT 1: Repeats one track on one CD.
REPEAT 1 DISC** : Repeats all the tracks on one CD.
REPEAT ALL DISC: Repeats all the tracks on all the CDs, or all the tracks on the program.
* See pages 14 and 15.
** REPEAT 1 DISC is not used for Program play.
To cancel Repeat play, press REPEAT repeatedly until the REPEAT indicator (REPEAT 1, REPEAT 1 DISC or REPEAT ALL DISC) goes off from the display.
- Repeat play is also canceled when you press ▲.
Prohibiting Disc Ejection—Tray Lock
You can prohibit CD ejection from the unit and can lock the carousel.
- This operation is possible only while the unit is on with CD selected as the source.
On the unit ONLY:
To prohibit disc ejection, press ▲ for the carousel while holding ■.
"LOCKED" appears for a while, and the carousel is locked.
To cancel the prohibition and unlock the carousel, press ▲ for the carousel while holding ■.
"UNLOCKED" appears for a while, and the carousel is unlocked.

If you try to eject CDs
"LOCKED" appears to inform you that the Tray Lock is in use.
Playing Back a Tape
1 Press EJECT (▲) for the deck you want to use.

For Deck A
2 Put a cassette in, with the exposed part of the tape down and the side you want to play facing front.
- You can play back only type I tapes.

3 Close the cassette holder gently.
If you put cassettes in both decks A and B, the last deck which you have put a cassette into is selected.
To operate the other deck, press TAPE A or TAPE B (or TAPE A/B on the remote control).
4 Press TAPE▶.
The tape play starts and the tape running indicator (▶) starts flashing slowly.
When the tape plays to the end, the deck automatically stops.

To stop during play, press ■.
To operate the other deck, press TAPE A or TAPE B (or TAPE A/B on the remote control), then TAPE ▶.
To fast-forward the tape, press ▶▶ (or ▶▶/▶▶ on the remote control). The tape running indicator (▶) starts flashing quickly.
To rewind the tape, press ◀◀ (or |◀◀/◀◀ on the remote control). The tape running indicator (◀) starts flashing quickly.
To remove the cassette, press ▲ EJECT for deck A or EJECT ▲ for deck B.


The use of C-120 or thinner tape is not recommended, since characteristic deterioration may occur and this tape easily jams in the pinch-rollers and the capstans.
IMPORTANT:
- It should be noted that it may be unlawful to re-record pre-recorded tapes, records, or discs without the consent of the owner of copyright in the sound or video recording, broadcast or cable program and in any literary, dramatic, musical, or artistic work embodied therein.
- The recording level is automatically set correctly, so it is not affected by the VOLUME, the SUBWOOFER LEVEL, and the SOUND MODE controls. Thus, during recording you can adjust the sound you are actually listening to without affecting the recording level.
- While recording, you can hear sound modes through the speakers or headphones. However, the sound is recorded without these effects (see page 10).
- If recordings you have made have excessive noise or static, the unit may be too close to a TV. Place the unit away from the TV.
- You can use type I tape for recording.
To protect your recording
Cassettes have two small tabs on the back to protect unexpected erasure or re-recording.
To protect your recording, remove these tabs.
To re-record on a protected tape, cover the holes with adhesive tape.


To keep the best recording and playback sound quality
If the heads, capstans, and pinch rollers of the cassette decks become dirty, the following will occur:
- Impaired sound quality
- Discontinuous sound
- Fading
- Incomplete erasure • Difficulty in recording
To clean the head, capstan, and pinch roller
Use a cotton swab moistened with alcohol.

To demagnetize the head
Turn off the unit, and use a head demagnetizer (available at electronics and audio shops).
Recording a Tape on Deck B
On the unit ONLY:
1 Press EJECT ▲ for deck B.

2 Put a recordable cassette in, with the exposed part of the tape down and the side you want to record facing front. 3 Close the cassette holder gently. 4 Start playing the source—FM, MW, LW, CD player or auxiliary equipment connected to AUX IN jacks.
- For duplicating tapes, see "Dubbing Tapes" on page 20.
- For recording from CD, see “CD Synchronized Recording” on page 20.
5 Press REC START/STOP.
The REC (recording) indicator lights up on the display and recording starts.

To stop during recording, press REC START/STOP again or ■.
To remove the cassette, press EJECT ▲ for deck B.
Dubbing Tapes
On the unit ONLY:
1 Press TAPE▶, then ■.

2 Put the source cassette in deck A, and a recordable cassette into deck B.
3 Press DUBBING.
Dubbing starts.
“DUBBING” appears, and the REC (recording) indicator lights up on the display.


To stop during dubbing, press REC START/STOP or ■.
To remove the cassette, press ▲ EJECT for deck A and EJECT ▲ for deck B.
CD Synchronized Recording
You can easily record a CD onto a tape.
- You can also record the tracks in the order you have made the program.
On the unit ONLY:
1 Put a recordable cassette into deck B.
2 Place a disc correctly on the recess of the disc tray, with its label side up.
3 Press one of the disc number buttons (CD1, CD2, and CD3) to select the disc, then ■.

4 Press CD REC START.
"CD REC" appears, and the REC (recording) indicator lights up on the display.


Deck B starts recording and the CD player starts playing. When the recording is done, the CD player and deck B stop.
To stop during CD Synchronized Recording, press REC START/STOP or ■.
To remove the cassette, press EJECT ▲ for deck B.
There are three timers available—Daily Timer, Recording Timer, and Sleep Timer.
Before using the timers, you need to set the clock built in the unit. (See "Setting the Clock" on page 9.)
Using Daily Timer
With Daily Timer, you can wake to your favorite music or radio program. You can set the timer whether the unit is on or off.
How Daily Timer actually works
The unit automatically turns on, set the volume level to the preset level, and starts playing the specified source when the on-time comes (the ④Indicator flashes while the timer is operating). Then, when the off-time comes, the unit automatically turns off (stands by).
Daily Timer works every day unless you cancel it.
- There is a time limit for completing the following steps. If the setting is canceled before you finish, start again from step 1.
- If you make a mistake while setting the timer, press CANCEL/DEMO. (However, this does not always work. If CANCEL/DEMO does not work, press CLOCK/TIMER repeatedly and start again from step 1.)
Before you start...
- When using a CD as the source to play: —Make sure there is a CD on the currently selected disc number tray.
- When using a tape as the source to play: —Make sure that a tape is in the deck whose deck indicator (A or B) is lit on the display.
- When using the external component as the source to play: —Set the timer equipped with the external component at the same time.
On the unit ONLY:
1 Press CLOCK/TIMER repeatedly until "DAILY" appears on the display.
The ∅ indicator lights up and the DAILY (daily timer) indicator starts flashing on the display.


• Each time you press the button, the clock/timer setting modes change as follows:
![graph LR A["DAILY"] --> B["RECON TIME"] B --> C["ON TIME"] C --> D["Canceled"] D --> A style A fill:#f9f,stroke:#333 style B fill:#ccf,stroke:#333 style C fill:#cfc,stroke:#333 style D fill:#fcc,stroke:#333](/content/2026/06/1307343/images/52e90c49e710c03bd92c4b7bfc51705ccc6de728c267d3382572e1e4445b1e84.jpg)
2 Press CLOCK/TIMER again.
"ON TIME" appears for 2 seconds, then the unit enters on-time setting mode.


3 Set the on-time you want the unit to turn on at.
1) Press |◀◀ or ▶▶| to set the hour, then press SET. 2) Press |◀◀ or ▶▶| to set the minute, then press SET. "OFF TIME" appears for 2 seconds, then the unit enters off-time setting mode.

4 Set the off-time you want the unit to turn off (on standby) at.
1) Press |◀◀ or ▶▶| to set the hour, then press SET. 2) Press |◀◀ or ▶▶| to set the minute, then press SET. The unit enters source selecting mode.


5 Press |◀◀ or ▶▶| to select the source to play, then press SET.
• Each time you press |◀◀ or ▶▶, the source changes as follows:

![graph LR A["TUNER FM"] <--> B["TUNER MW"] B <--> C["TUNER LW"] D["AUX"] <--> E["TAPE"] E <--> F["CD"]](/content/2026/06/1307343/images/9bcc508dd1340d7eb2c58149b18054d2485945ec4574d3757bf49fbdd03edc41.jpg)
TUNER FM : tunes in to a specified preset FM station. → go to step 6.
TUNER MW: tunes in to a specified preset MW station. → go to step 6.
TUNER LW : tunes in to a specified preset LW station. → go to step 6.
CD : plays a disc from the first track. → go to step 7.
TAPE : plays a tape in deck A or B. → go to step 7.
AUX : plays an external source. → go to step 7.
6 Select the preset station number.
Press |◀◀ or ▶▶| to select the preset station number, then press SET. The unit enters volume setting mode.

7 Press |◀◀ or ▶▶| to set the volume level.
- You can select the volume level from VOL MIN, VOL 1 — VOL 30, and VOL MAX.


8 Press SET to complete the Daily Timer setting.
The DAILY (daily timer) indicator stops flashing and remains lit. The settings you have done are shown on the display in sequence for your confirmation.

Press STANDBY/ON to turn off the unit (on standby) if you have set the Daily Timer with the unit turned on.


If the unit is turned on when the timer-on time comes
Daily Timer does not work.
To turn on or off Daily Timer after its setting is done
Press CLOCK/TIMER repeatedly until "DAILY" appears on the display. To turn off the Daily Timer, press CANCEL/DEMO.
The DAILY (daily timer) indicator goes off from the display ("OFF" appears for a while).
The Daily Timer is canceled, but the setting for the Daily Timer remains in memory until you change it.

To turn on the Daily Timer, press SET.
The DAILY (daily timer) indicator lights up on the display. The settings you have done are shown on the display in sequence for your confirmation.

Using Recording Timer
With Recording Timer, you can make a tape of a radio broadcast automatically. You can set the timer whether the unit is on or off.
How Recording Timer actually works
The unit automatically turns on, tunes into the specified station, sets the volume level to "VOL MIN," and starts recording when the on-time comes (the ④ indicator flashes while the timer is operating). Then, when the off-time comes, the unit automatically turns off (stands by).
Recording Timer works only once, but the timer setting remains in memory until you change it.
- There is a time limit in doing the following steps. If the setting is canceled before you finish, start from step 2 again.
- If you have made a mistake while setting the timer, press CANCEL/DEMO. (However, this does not always work. If CANCEL/DEMO does not work, press CLOCK/TIMER repeatedly and start from step 2 again.)
On the unit ONLY:
1. Put a recordable cassette into deck B.
2. Press CLOCK/TIMER repeatedly until "REC" appears on the display.
The indicator lights up and the REC (recording timer) indicator starts flashing on the display.


• Each time you press the button, the clock/timer setting modes change as follows:
![graph LR A["DAILY"] --> B["RECON TIME"] B --> C["ON TIME"] C --> D["CLOCK"] D --> E["Canceled"] E --> A style A fill:#f9f,stroke:#333 style B fill:#ccf,stroke:#333 style C fill:#cfc,stroke:#333 style D fill:#fcc,stroke:#333 style E fill:#cff,stroke:#333](/content/2026/06/1307343/images/f564b91886a558b4ce5e630c9d38405d22cddf5f2d0c08279ef8263141545b9e.jpg)
3. Press CLOCK/TIMER again.
"ON TIME" appears for 2 seconds, then the unit enters on-time setting mode.


4. Set the on-time you want the unit to turn on at.
1) Press |◀◀ or ▶▶| to set the hour, then press SET. 2) Press |◀◀ or ▶▶▶ to set the minute, then press SET. "OFF TIME" appears for 2 seconds, then the unit enters off-time setting mode.

5. Set the off-time you want the unit to turn off (on standby) at.
1) Press |◀◀ or ▶▶| to set the hour, then press SET. 2) Press |◀◀ or ▶▶▶ to set the minute, then press SET. The unit enters preset station selecting mode.
6. Select the preset station.
1) Press |◀◀ or ▶▶| to select the band ("TUNER FM," "TUNER MW," or "TUNER LW"), then press SET. 2) Press |◀◀ or ▶▶▶ to select a preset channel number, then press SET. The REC (recording timer) indicator stops flashing and remains lit. The settings you have done are shown on the display in sequence for your confirmation.


7. Press STANDBY/ON to turn off the unit (on standby) if necessary.


About the recording source
If you change the source while recording, the recording source also changes.
To turn on or off Recording Timer after its setting is done
1 Press CLOCK/TIMER repeatedly until "REC" appears on the display. 2 To turn off the Recording Timer, press CANCEL/DEMO.
The REC (recording timer) indicator goes off from the display ("OFF" appears for a while). The Recording Timer is canceled, but the setting for the Recording Timer remains in memory until you change it.
To turn on the Recording Timer, press SET. The REC (recording timer) indicator lights up on the display. The settings you have done are shown on the display in sequence for your confirmation.


Using Sleep Timer
With Sleep Timer, you can fall asleep to music. You can set Sleep Timer when the unit is turned on.
How Sleep Timer actually works
The unit automatically turns off after the specified time length passes.
On the remote control ONLY:
1 Press SLEEP.

The time length until the shut-off time appears and the SLEEP indicator starts flashing on the display.
• Each time you press the button, the time length changes as follows:
![graph LR A["SLEEP10"] --> B["SLEEP20"] --> C["SLEEP30"] --> D["SLEEP60"] E["OFF"] --> F["SLEEP120"] <--_G["SLEEP90"] H["(Canceled)"] --> I](/content/2026/06/1307343/images/12c9b43cb3683360c3737f651a781332d1d6caacb2778fdb34b0a7c69a2ae3b7.jpg)
2 Wait for about 5 seconds after specifying the time length.
The SLEEP indicator stops flashing and remains lit.
To check the remaining time until the shut-off time, press SLEEP once so that the remaining time until the shut-off time appears for about 5 seconds.
To change the shut-off time, press SLEEP repeatedly until the desired time length appears on the display.
To cancel the setting, press SLEEP repeatedly until "OFF" appears on the display so that the SLEEP indicator goes off from the display.
- Sleep Timer is also canceled when you turn off the unit.
Timer Priority
Since each timer can be set separately, you may wonder what happens if the setting for these timers overlaps. Here are some examples.
- Recording Timer has priority over Daily Timer. If Recording Timer is set to come on while Daily Timer is operating, Daily Timer is canceled and Recording Timer starts working.

- If Sleep Timer overlaps with another timer (either Daily Timer or Recording Timer), a timer with the earlier shut-off time has priority.

When using the Recording Timer and Sleep Timer at the same time, pay special attention to the shut-off time.
To get the best performance of the unit, keep your discs, tapes, and mechanism clean.
Cleaning the unit
• Stains on the unit
Should be wiped off with a soft cloth. If the unit is heavily stained, wipe it with a cloth soaked in water-diluted neutral detergent and wrung well, then wipe clean with a dry cloth.
- Avoid the following since they may cause damage to the unit.
- Do not wipe it with a hard cloth.
- Do not wipe it forcefully.
- Do not wipe it with thinner or benzine.
- Do not apply any volatile substance such as insecticides to it.
- Do not allow any rubber or plastic to remain in contact with it for a long time.
Handling discs

- Remove the disc from its case by holding it at the edge while pressing the center hole lightly.
- Do not touch the shiny surface of the disc, or bend the disc.
- Put the disc back in its case after use to prevent warping.

- Be careful not to scratch the surface of the disc when placing it back in its case.
- Avoid exposure to direct sunlight, temperature extremes, and moisture.

To clean the disc
Wipe the disc with a soft cloth in a straight line from center to edge.

Do not use any solvent—such as conventional record cleaner, spray, thinner, or benzine—to clean the disc.
Handling cassette tapes

- If the tape is loose in its cassette, take up the slack by inserting a pencil in one of the reels and rotating.
- If the tape is loose, it may get stretched, cut, or caught in the cassette.

- Be careful not to touch the tape surface.

- Avoid the following places to store the tape:
— In dusty places
— In direct sunlight or heat
— In moist areas
— Near a magnet
Description of the PTY codes:
| NEWS: News. | |
| AFFAIRS: Topical program expanding or enlarging upon the news — debate, or analysis. | |
| INFO: Program the purpose of which is to impart advice in the widest sense. | |
| SPORT: Program concerned with any aspect of sports. | |
| EDUCATE: Educational programs. | |
| DRAMA: All radio plays and serials. | |
| CULTURE: Programs concerning any aspect of national or regional culture, including language, theatre, etc. | |
| SCIENCE: Programs about natural sciences and technology. | |
| VARIED: Used for mainly speech-based programs like quizzes, panel games and personality interviews. | |
| POP M: Commercial music of current popular appeal. | |
| ROCK M: Rock music. | |
| M.O.R. M: Current contemporary music considered to be “easy-listening.” | |
| LIGHT M: Instrumental music, and vocal or choral works. | |
| CLASSICS: Performances of major orchestral works, symphonies, chamber music, etc. | |
| OTHER M: Music not fitting into any of the other categories. | |
| WEATHER: Weather reports and forecasts. |
| FINANCE: | Stock Market reports, commerce, trading etc. |
| CHILDREN: | Programs targeted at a young audience. |
| SOCIAL A: | Programs about sociology, history, geography, psychology and society. |
| RELIGION: | Religious programs. |
| PHONE IN: | Involving members of the public expressing their views either by phone or at a public forum. |
| TRAVEL: | Travel information. |
| LEISURE: | Programs about recreational activities. |
| JAZZ: | Jazz music. |
| COUNTRY: | Songs which originate from, or continue the musical tradition of the American Southern States. |
| NATIONAL: | Current popular music of the nation or region in that country's language. |
| OLDIES: | Music from the so-called “golden age” of popular music. |
| FOLK M: | Music which has its roots in the musical culture of a particular nation. |
| DOCUMENT: | Program concerning factual matters, presented in an investigative style. |
Classification of the PTY codes for some FM stations may be different from the above list.
Troubleshooting
If you are having a problem with your unit, check this list for a possible solution before calling for service.
If you cannot solve the problem from the hints given here, or the unit has been physically damaged, call a qualified person, such as your dealer, for service.
| Symptom | Cause | Action |
| Unable to cancel the display demonstration. | Other buttons are pressed to cancel the display demonstration. | Press CANCEL/DEMO on the unit.(See page 8.) |
| No sound is heard. | Connections are incorrect or loose. | Check all connections and make corrections. (See pages 6 to 8.) |
| Hard to listen to broadcasts because of noise. | Antennas are disconnected.The AM (MW/LW) loop antenna is too close to the unit.The FM antenna is not properly extended and positioned. | Reconnect the antennas correctly and securely.Change the position and direction of the AM (MW/LW) loop antenna.Extend the FM antenna at the best position. |
| The disc sound is discontinuous. | The disc is scratched or dirty. | Clean or replace the disc. (See page 24.) |
| The carrousel does not open or close. | The AC power cord is not plugged in.The carrousel is locked. | Plug the AC power cord.Unlock the carrousel. (See page 17.) |
| The disc does not play. | The disc is placed upside down. | Place the disc with the label side up. |
| The cassette holders cannot be opened. | Power supply from the AC power cord has been cut off while the tape was running. | Turn on the unit. |
| Impossible to record. | Small tabs on the back of the cassette are removed. | Cover the holes with adhesive tape. |
| Operations are disabled. | The built-in microprocessor may malfunction due to external electrical interference. | Unplug the AC power cord and then plug it back in. |
| Unable to operate the unit from the remote control. | The path between the remote control and the remote sensor on the unit is blocked.The batteries are exhausted. | Remove the obstruction.Replace the batteries. |
CA-MXG700R
Amplifier section
Output Power
SUBWOOFERS: 90 W per channel, min. RMS, driven
into 6 Ω at 63 Hz with no more than 10% total harmonic distortion. (IEC268-3)
70 W per channel, min. RMS, driven into 6 Ω at 63 Hz with no more than 0.9% total harmonic distortion. (DIN)
MAIN SPEAKERS: 45 W per channel, min. RMS, driven into 4 Ω at 1 kHz with no more than 10% total harmonic distortion. (IEC268-3) 30 W per channel, min. RMS, driven into 4 Ω at 1 kHz with no more than 0.9% total harmonic distortion. (DIN)
Audio input sensitivity/Impedance
(at 1 kHz, measured at MAIN SPEAKERS) AUX: 400 mV/50 kΩ
Digital output: DIGITAL OUT (OPTICAL)
Signal wave length: 660 nm Output level: -21 dBm to -15 dBm
Speakers/Impedance: Subwoofers: 6 Ω - 16 Ω
Main speakers: 4 Ω - 8 Ω
Tuner
FM tuning range: 87.50 MHz - 108.00 MHz
AM tuning range: MW: 522 kHz – 1 629 kHz LW: 144 kHz – 288 kHz
CD player
CD Capacity: 3 CDs
Dynamic range: 85 dB
Signal-to-noise ratio: 85 dB
Cassette deck
Frequency response
Normal (type I): 50 Hz — 14,000 Hz
Wow and flutter: 0.15% (WRMS)
General
Power requirement: AC 230 V ~, 50 Hz
Power consumption: 150 W (at operation)
19 W (on standby; with power saving off—Normal Mode)
2.3 W (on standby; with power saving on—Eco mode)
Dimensions (approx.): 270 mm x 317 mm x 449 mm (W/H/D) (10 11/16 in. x 12 1/2 in. x 17 11/16 in.)
Mass (approx.): 9.1 kg (20.1 lbs)
Supplied accessories
See page 6.
CA-MXG500R
Amplifier section
Output Power
SUBWOOFERS : 60 W per channel, min. RMS, driven into 6 Ω at 63 Hz with no more than 10% total harmonic distortion. (IEC268-3) 40 W per channel, min. RMS, driven into 6 Ω at 63 Hz with no more than 0.9% total harmonic distortion. (DIN)
MAIN SPEAKERS : 30 W per channel, min. RMS, driven into 4 Ω at 1 kHz with no more than 10% total harmonic distortion. (IEC268-3) 20 W per channel, min. RMS, driven into 4 Ω at 1 kHz with no more than 0.9% total harmonic distortion. (DIN)
Audio input sensitivity/Impedance (at 1 kHz, measured at MAIN SPEAKERS) AUX : 400 mV/50 kΩ
Digital output: DIGITAL OUT (OPTICAL)
Signal wave length : 660 nm Output level : -21 dBm to -15 dBm
Speakers/Impedance : Subwoofers : 6 Ω - 16 Ω Main speakers : 4 Ω - 8 Ω
Tuner
FM tuning range : 87.50 MHz - 108.00 MHz
AM tuning range: MW: 522 kHz - 1629 kHz LW : 144 kHz - 288 kHz
CD player
CD Capacity : 3 CDs
Dynamic range : 85 dB
Signal-to-noise ratio: 85 dB
Cassette deck
Frequency response Normal (type I): 50 Hz — 14 000 Hz Wow and flutter : 0.15% (WRMS)
General
Power requirement : AC 230 V ∼, 50 Hz
Power consumption : 130 W (at operation)
17 W (on standby; with power saving off—Normal Mode) 2.3 W (on standby; with power saving on—Eco mode)
Dimensions (approx.): 270 mm x 317 mm x 449 mm (W/H/D) (10 11/16 in. x 12 1/2 in. x 17 11/16 in.) Mass (approx.) : 8.8 kg (19.4 lbs)
Supplied accessories
See page 6.
JVC
VICTOR COMPANY OF JAPAN, LIMITED
SPEAKER SYSTEM
SP-MXG700
OPERATING INSTRUCTIONS: SPEAKER SYSTEM MANUEL D'INSTRUCTIONS: SYSTEME DES ENCEINTES GEBRUIKSAANWIJZING: LUIDSPREKERSYSTEEM MANUAL DE INSTRUCCIONES: SISTEMA DE ALTAVOCES ISTRUZIONI: SISTEMA DI ALTOPARLANTI BRUKSANVISNING: HÖGTALARSYSTEM KÄYTTÖOHJE: KAIUTINJÄRJESTELMÄ VEJLEDNING: HÖJTTALERSYSTEM
Thank you for purchasing JVC speakers.
Before you begin using them, please read the instructions carefully to be sure you get the best possible performance. If you have any questions, consult your JVC dealer.
"SOME DOS AND DON'TS ON THE SAFE USE OF EQUIPMENT"
This equipment has been designed and manufactured to meet international safety standards but, like any electrical equipment, care must be taken if you are to obtain the best results and safety is to be assured.
Do read the operating instructions before you attempt to use the equipment.
Do ensure that all electrical connections (including the mains plug, extension leads and interconnections between pieces of equipment) are properly made and in accordance with the manufacturer's instructions. Switch off and withdraw the mains plug when making or changing connections.
Do consult your dealer if you are ever in doubt about the installation, operation or safety of your equipment.
Do be careful with glass panels or doors on equipment.
DON'T continue to operate the equipment if you are in any doubt about it working normally, or if it is damaged in any way — switch off, withdraw the mains plug and consult your dealer.
DON'T remove any fixed cover as this may expose dangerous voltages.
DON'T leave equipment switched on when it is unattended unless it is specifically stated that it is designed for unattended operation or has a standby mode.
Switch off using the switch on the equipment and make sure that your family know how to do this.
Special arrangements may need to be made for infirm or handicapped people.
DON'T use equipment such as personal stereos or radios so that you are distracted from the requirements of traffic safety. It is illegal to watch television whilst driving.
DON'T listen to headphones at high volume as such use can permanently damage your hearing.
DON'T obstruct the ventilation of the equipment, for example with curtains or soft furnishing.
Overheating will cause damage and shorten the life of the equipment.
DON'T use makeshift stands and NEVER fix legs with wood screws — to ensure complete safety always fit the manufacturer's approved stand or legs with the fixings provided according to the instructions.
DON'T allow electrical equipment to be exposed to rain or moisture. ABOVE ALL
- NEVER let anyone, especially children, push anything into holes, slots or any other opening in the case. – this could result in a fatal electrical shock;
- NEVER guess or take chances with electrical equipment of any kind – it is better to be safe than sorry!
Connection
Connection
Connection
Connection
Connection
Connection
Connection
Connection
Connection
Right speaker
- DO NOT use other amplifier to operate this speaker system except for CA-MXG700R.
- Turn off power to the whole system before connecting the speakers to the amplifier.
- The maximum power handling capacity of the SP-MXG700 main speaker is 40 W. Subwoofer is 80 W. Excessive input will result in abnormal noise and possible damage. In cases where the signals described below are applied to the speakers, even if the signals are below the maximum allowable input, they may cause an overload and burn the wiring of the speakers. Be sure to lower the amplifier volume beforehand. 1) Noise during FM tuning. 2) High level signals containing high frequency components produced by a tape deck in the fast forward mode. 3) Click noise produced when turning power of other components on and off. 4) Click noise produced when connecting or disconnecting cords with the power on. 5) Click noise produced when the cartridge is replaced with the power on. 6) Click noise produced when operating amplifier switches. 7) Continuous high frequency oscillation or high pitch electronically produced musical instrument sound. 8) Howling when using a microphones.

DO NOT carry the speaker by holding the duct tube (on the top of the speaker).
SPECIFICATIONS
Type : 3-way 3-speaker Bass-Reflex
Type
Speakers:
Power Handling Capacity:
Subwoofer : 110 W
Main Speaker : 55 W
Impedance:
Subwoofer : 6 Ω
Main Speaker: 4 Ω
Frequency Range:
Subwoofer: 30 Hz — 95 Hz
Main Speaker: 95 Hz — 20,000 Hz
Sound Pressure Level:
Subwoofer: 81 dB/W·m
Main Speaker: 82 dB/W·m
Design and specifications subject to change without notice.
Principal: 82 dB/W·m

- FOR CUSTOMER USE
- IMPORTANT FOR THE U.K
- IMPORTANT
- CAUTION — STANDBY/ON SWITCH
- CAUTION
- IMPORTANT FOR LASER PRODUCTS
- REPRODUCTION OF LABELS
- CAUTION: PROPER VENTILATION
- SAFETY INSTRUCTIONS "SOME DOS AND DON'TS ON THE SAFE USE OF EQUIPMENT
- ABOVE ALL
- WE WOULD LIKE TO THANK YOU FOR PURCHASING ONE OF OUR JVC PRODUCTS. BEFORE OPERATING THIS UNIT, READ THIS MANUAL CAREFULLY AND THOROUGHLY TO OBTAIN THE BEST POSSIBLE PERFORMANCE FROM YOUR UNIT, AND RETAIN THIS MANUAL FOR FUTURE REFERENCE
- ABOUT THIS MANUAL
- PRECAUTIONS
- INSTALLATION
- POWER SOURCES
- MOISTURE CONDENSATION
- OTHERS
- LOCATION OF THE BUTTONS AND CONTROLS
- GETTING STARTED
- COMMON OPERATIONS
- LISTENING TO THE RADIO
- RECEIVING FM STATIONS WITH RDS
- PLAYING BACK CDS
- PLAYING BACK TAPES
- RECORDING
- USING THE TIMERS
- MAINTENANCE
- ADDITIONAL INFORMATION
- TROUBLESHOOTING
- SPECIFICATIONS
- FRONT PANEL
- DISPLAY WINDOW
- REMOTE CONTROL
- UNPACKING
- PUTTING THE BATTERIES INTO THE REMOTE CONTROL
- CONNECTING ANTENNAS
- FM ANTENNA
- TO CONNECT AN OUTDOOR FM ANTENNA
- TO CONNECT AN OUTDOOR AM (MW/LW) ANTENNA
- FOR BETTER RECEPTION OF FM, MW, AND LW
- ONLY FOR CA-MXG700R: TO REMOVE THE SPEAKER GRILLES
- CONNECTING OTHER EQUIPMENT
- TO CONNECT AN ANALOG COMPONENT
- TO CONNECT AUDIO EQUIPMENT WITH AN OPTICAL DIGITAL INPUT TERMINAL
- NOW, YOU CAN PLUG IN THE UNIT AND OTHER CONNECTED EQUIPMENT FINALLY
- CANCELING THE DISPLAY DEMONSTRATION
- ON THE UNIT ONLY
- WHEN YOU PRESS OTHER BUTTONS
- TO START THE DISPLAY DEMONSTRATION MANUALLY
- TURNING ON OR OFF THE POWER
- SAVING THE POWER CONSUMPTION WHILE ON STANDBY—ECO MODE
- SETTING THE CLOCK
- PRESS CLOCK/TIMER
- PRESS |◀◀ OR ▶▶| TO ADJUST THE HOUR, THEN PRESS SET
- PRESS |◀◀ OR ▶▶| TO ADJUST THE MINUTE, THEN PRESS SET
- TO CHECK THE CLOCK TIME
- TO ADJUST THE CLOCK AGAIN
- SELECTING THE SOURCES
- ADJUSTING THE VOLUME
- TURN THE VOLUME CONTROL CLOCKWISE TO INCREASE THE VOLUME OR COUNTERCLOCKWISE TO DECREASE IT
- FOR PRIVATE LISTENING
- TO TURN DOWN THE VOLUME LEVEL TEMPORARILY
- REINFORCING THE BASS SOUND
- TURN THE SUBWOOFER LEVEL CONTROL CLOCKWISE TO INCREASE THE SUBWOOFER SOUND OR COUNTERCLOCKWISE TO DECREASE IT
- SELECTING THE SOUND MODES
- SURROUND MODES
- SEA (SOUND EFFECT AMPLIFIER) MODES
- TUNING IN A STATION
- PRESS FM/AM
- START SEARCHING FOR STATIONS. ON THE UNIT
- TO CHANGE THE FM RECEPTION MODE
- PRESETTING STATIONS
- YOU CAN PRESET 30 FM, 8 MW, AND 7 LW STATIONS
- TUNE IN THE STATION YOU WANT TO PRESET (IN THIS EXAMPLE, OF FM 87.50)
- PRESS SET
- PRESS PRESET + OR PRESET - TO SELECT A PRESET NUMBER
- PRESS SET AGAIN
- TUNING IN A PRESET STATION
- SELECT A PRESET NUMBER
- PS (PROGRAM SERVICE)
- RT (RADIO TEXT)
- CT (CLOCK TIME)
- PTY (PROGRAM TYPE)
- ENHANCED OTHER NETWORKS
- MORE ABOUT RDS
- CHANGING THE RDS INFORMATION
- PRESS DISPLAY MODE
- ABOUT CHARACTERS SHOWN ON THE DISPLAY
- IF NO PS NAME, RT, OR CT SIGNALS ARE SENT BY A STATION
- SEARCHING FOR PROGRAMS BY PTY CODES (PTY SEARCH)
- TO SEARCH FOR A PROGRAM USING PTY CODES
- PRESS PTY/EON WHILE LISTENING TO AN FM STATION
- PRESS SELECT + OR SELECT - UNTIL THE PTY CODE YOU WANT APPEARS ON THE DISPLAY
- PRESS PTY/EON AGAIN WHILE THE PTY CODE SELECTED IN THE PREVIOUS STEP IS STILL ON THE DISPLAY
- TO STOP DURING SEARCHING
- SWITCHING TO A TRAFFIC ANNOUNCEMENT TEMPORARILY
- TO ACTIVATE THE ENHANCED OTHER NETWORKS FUNCTION
- PRESS AND HOLD PTY/EON WHILE LISTENING TO AN FM STATION
- HOW THE ENHANCED OTHER NETWORKS FUNCTION ACTUALLY WORKS
- CASE
- IF THERE IS NO STATION BROADCASTING A TRAFFIC ANNOUNCEMENT
- IF THERE IS A STATION BROADCASTING A TRAFFIC ANNOUNCEMENT
- IF THE FM STATION YOU ARE LISTENING TO IS BROADCASTING A TRAFFIC ANNOUNCEMENT
- MORE ABOUT THE ENHANCED OTHER NETWORKS FUNCTION
- WHEN PLAYING A CD-R OR CD-RW
- IMPORTANT NOTICES
- LOADING CDS
- PRESS ▲
- PLACE ONE OR TWO DISCS CORRECTLY ON THE FRONT RECESSES OF THE DISC TRAY, WITH ITS LABEL SIDE UP
- IF YOU WISH TO LOAD A THIRD DISC, PRESS DISC CHANGE ON THE UNIT OR DISC SKIP ON THE REMOTE CONTROL
- PRESS ▲ AGAIN
- ABOUT THE DISC INDICATORS
- PLAYING BACK CDS—ALL DISC AND ONE DISC
- ALL DISC PLAY
- LOAD CDS
- PRESS REPEAT REPEATEDLY SO THAT THE ALL DISC INDICATOR LIGHTS UP ON THE DISPLAY
- PRESS ONE OF THE DISC NUMBER BUTTONS (CD1, CD2 OR CD3) FOR THE DISC YOU WANT TO START TO PLAY FROM
- TO STOP DURING PLAY, PRESS
- TO REMOVE THE DISC, PRESS ▲
- CD PLAYBACK SEQUENCE
- ONE DISC PLAY
- PRESS REPEAT REPEATEDLY SO THAT THE 1 DISC INDICATOR LIGHTS UP ON THE DISPLAY
- PRESS ONE OF THE DISC NUMBER BUTTONS (CD1, CD2 OR CD3) YOU WANT TO LISTEN
- BASIC CD OPERATIONS
- TO EXCHANGE CDS DURING PLAYBACK OF ANOTHER
- TO SKIP TO THE ANOTHER CD IN THE CARROUSEL
- TO STOP PLAY FOR A MOMENT
- TO LOCATE A PARTICULAR POINT IN A TRACK
- TO GO TO ANOTHER TRACK
- TO GO TO ANOTHER TRACK DIRECTLY USING THE NUMBER BUTTONS
- PROGRAMMING THE PLAYING ORDER OF THE TRACKS — PROGRAM PLAY
- PRESS PROGRAM SO THAT "PROGRAM" APPEARS ON THE DISPLAY
- PRESS ONE OF THE DISC NUMBER BUTTONS (CD1, CD2, AND CD3) TO SELECT THE DISC NUMBER YOU WANT TO PLAY
- PRESS |◀◀ OR ▶▶| TO SELECT THE TRACK NUMBER, THEN PRESS SET
- PROGRAM OTHER TRACKS YOU WANT
- PRESS CD ▶/II
- TO MODIFY THE PROGRAM
- PLAYING AT RANDOM——RANDOM PLAY
- REPEATING TRACKS OR CDS—REPEAT PLAY
- PROHIBITING DISC EJECTION—TRAY LOCK
- PLAYING BACK A TAPE
- TO PROTECT YOUR RECORDING
- TO KEEP THE BEST RECORDING AND PLAYBACK SOUND QUALITY
- TO CLEAN THE HEAD, CAPSTAN, AND PINCH ROLLER
- TO DEMAGNETIZE THE HEAD
- RECORDING A TAPE ON DECK B
- PRESS EJECT ▲ FOR DECK B
- PRESS REC START/STOP
- DUBBING TAPES
- CD SYNCHRONIZED RECORDING
- USING DAILY TIMER
- HOW DAILY TIMER ACTUALLY WORKS
- BEFORE YOU START
- PRESS CLOCK/TIMER REPEATEDLY UNTIL "DAILY" APPEARS ON THE DISPLAY
- PRESS CLOCK/TIMER AGAIN
- SET THE ON-TIME YOU WANT THE UNIT TO TURN ON AT
- SET THE OFF-TIME YOU WANT THE UNIT TO TURN OFF (ON STANDBY) AT
- PRESS |◀◀ OR ▶▶| TO SELECT THE SOURCE TO PLAY, THEN PRESS SET
- SELECT THE PRESET STATION NUMBER
- PRESS |◀◀ OR ▶▶| TO SET THE VOLUME LEVEL
- PRESS SET TO COMPLETE THE DAILY TIMER SETTING
- PRESS STANDBY/ON TO TURN OFF THE UNIT (ON STANDBY) IF YOU HAVE SET THE DAILY TIMER WITH THE UNIT TURNED ON
- TO TURN ON OR OFF DAILY TIMER AFTER ITS SETTING IS DONE
- USING RECORDING TIMER
- HOW RECORDING TIMER ACTUALLY WORKS
- PUT A RECORDABLE CASSETTE INTO DECK B
- PRESS CLOCK/TIMER REPEATEDLY UNTIL "REC" APPEARS ON THE DISPLAY
- SELECT THE PRESET STATION
- PRESS STANDBY/ON TO TURN OFF THE UNIT (ON STANDBY) IF NECESSARY
- TO TURN ON OR OFF RECORDING TIMER AFTER ITS SETTING IS DONE
- USING SLEEP TIMER
- HOW SLEEP TIMER ACTUALLY WORKS
- ON THE REMOTE CONTROL ONLY
- PRESS SLEEP
- WAIT FOR ABOUT 5 SECONDS AFTER SPECIFYING THE TIME LENGTH
- TIMER PRIORITY
- CLEANING THE UNIT
- STAINS ON THE UNIT
- AVOID THE FOLLOWING SINCE THEY MAY CAUSE DAMAGE TO THE UNIT
- HANDLING DISCS
- TO CLEAN THE DISC
- HANDLING CASSETTE TAPES
- CA-MXG700R
- AMPLIFIER SECTION
- TUNER
- CD PLAYER
- CASSETTE DECK
- GENERAL
- SUPPLIED ACCESSORIES
- CA-MXG500R
- JVC
- SPEAKER SYSTEM
- SP-MXG
- SOME DOS AND DON'TS ON THE SAFE USE OF EQUIPMENT
- CONNECTION
Brand : JVC
Model : CA-MXG700R
Category : Hi-Fi System