
RX-EX70 - Hi-Fi System JVC - Free user manual and instructions
Find the device manual for free RX-EX70 JVC in PDF.
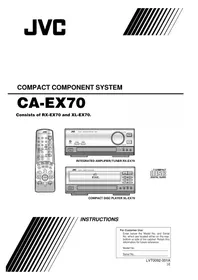


| Product Type | Hi-Fi System |
| Brand | JVC |
| Model | RX-EX70 |
| Dimensions (W x H x D) | Approx. 200 x 300 x 300 mm (main unit) |
| Weight | Approx. 5 kg (main unit) |
| Power Supply | AC 120V/60Hz or AC 230V/50Hz (switchable) |
| Power Consumption | 60 W (typical) |
| Speakers | 2-way bass reflex, 5-inch woofer, 1-inch tweeter |
| Amplifier Output | 20 W + 20 W (RMS, 4 ohms) |
| Disc Player | CD player (compatible with CD, CD-R, CD-RW) |
| Cassette Deck | Stereo cassette deck, auto-reverse, Dolby B NR |
| Tuner | FM/AM digital tuner with 30 presets |
| Inputs | AUX (RCA), headphone jack (3.5mm) |
| Outputs | Speaker terminals, headphone jack |
| Additional Features | Clock, sleep timer, timer play, equalizer presets |
| Cleaning | Wipe with a soft, dry cloth. Do not use solvents. |
| Safety | Do not expose to moisture or place heavy objects on top. |
| Spare Parts & Repairability | Contact JVC authorized service centers for spare parts. |
| General Information | For detailed instructions, refer to the user manual. |
Frequently Asked Questions - RX-EX70 JVC
User questions about RX-EX70 JVC
0 question about this device. Answer the ones you know or ask your own.
Ask a new question about this device
Download the instructions for your Hi-Fi System in PDF format for free! Find your manual RX-EX70 - JVC and take your electronic device back in hand. On this page are published all the documents necessary for the use of your device. RX-EX70 by JVC.
USER MANUAL RX-EX70 JVC
Consists of RX-EX70 and XL-EX70.


INTEGRATED AMPLIFIER/TUNER RX-EX70

COMPACT DISC PLAYER XL-EX70

INSTRUCTIONS
For Customer Use:
Enter below the Model No. and Serial No. which are located either on the rear, bottom or side of the cabinet. Retain this information for future reference.
Model No.
Serial No.
Welcome!
We would like to thank you for purchasing one of our JVC products. Before connecting this unit to the wall outlet, please read the instructions carefully to ensure that you obtain the best possible performance. If you have any questions, please consult your JVC dealer.
Important cautions
Installation of the Unit
- Select a place which is level, dry and neither too hot nor too cold (Between 41°F - 95°F or 5°C and 35°C).
- Leave sufficient distance between the Unit and a TV.
- Be sure to place the Unit in a location with good ventilation.
- Do not use the Unit in a place subject to vibrations.
- Do not place the Unit on a carpet.
- Do not place the Unit on top of another heat-generating piece of equipment.
Power cord
- Do not handle the power cord with wet hands!
- When unplugging the Unit from the wall outlet, always pull the plug, not the power cord.
Malfunctions, etc.
- There are no user serviceable parts inside. If anything goes wrong, turn off the power immediately. If the same problem reoccurs when the power is turned on once more, turn off the power again, unplug the power cord and consult your dealer.
- Do not insert any metallic object into the Unit.
For safe use, observe the following
Avoid moisture, water and dust
Do not set your machine in moist or dusty places.
Avoid high temperatures
Do not expose your machine to direct sunlight or set near a heating device.
Do not block the vents
Poor ventilation may damage your machine. Do not block the vents or place the unit in a poorly ventilated area.
When you're away
When away on travel or for an extended period, turn off the power and unplug the machine from the electrical outlet.
Do not insert foreign matter into the machine
Do not insert wires, hairpins, coins, etc. into your machine.
Care of the cabinet
When cleaning your machine, use a soft cloth and follow the instructions for chemically-coated cloths. Avoid using benzene, thinner, or other organic solvents and disinfectants, as they may cause deformation or discoloration.
If water gets inside the machine
Turn off the power and unplug the machine from the electrical outlet, then contact the store where you made your purchase. Using the machine in this state may cause fire or electrical shock.
Table of Contents
Welcome! 3
Important cautions 3
For safe use, observe the following 3
Parts Index 5
Front Panels 5
Displays....7
Rear Panels 9
Remote control 11
Setting up the System 13
Supplied Accessories 13
Placement 13
Connections 14
Connecting the Power 16
Remote control batteries 17
Setting the Clock 18
Amplifier Operations 19
Turning on the Power 19
Adjusting the Volume 19
Adjusting the Sound 20
Adjusting the Balance 21
Direct Playback 21
Selecting a Source 22
Tuner Operations 23
Manual and Automatic Tuning 23
Presetting Stations 25
Listening to Preset Stations 26
CD Operations 27
Loading CDs 27
Basic Operations 28
Program Play Mode 30
Random Play Mode 32
Repeat Play Mode 33
Tray Lock 33
Timer Operations 34
Introduction 34
Daily Timer 35
Recording Timer 37
Sleep Timer 39
Timer Priority 39
COMPU LINK 40
Linked Operation of the Other Optional
Components (Compu Link) 40
Shortcut Playback
(From the RX-EX70 Amplifier/tuner) 41
Shortcut Playback
(From a Source Component) 42
Remote Control of the Other Components ..... 43
Synchronized Recording 45
Additional Information 47
Troubleshooting 47
Specifications 49
Front Panels
Amplifier/tuner
CD player

Amplifier/tuner front panel
1 POWER button
Press to switch the power between ON and STANDBY.
STANDBY indicator
Lights up when the power is in STANDBY mode. Turns off when power is ON.
2 Display
3 Remote sensor
4 KEY MODE button
Press to switch the operation mode of the < and > (cursor) buttons.
The PRESET indicator in the display lights in the preset tuning mode.
The PRESET indicator in the display turns off in the auto/manual tuning mode.
5 <, > (Cursor buttons)
Press to switch preset channels or for auto/manual tuning.
6 INPUT button
Press repeatedly to select the desired input source.
7 BAND button
Press to switch between the FM and AM radio bands.
8 VOLUME control
Rotate to adjust the volume.
Rotating toward UP increases the volume and toward DOWN decreases it.
9 DIRECT button and indicator
Press to turn the direct signal function on or off. This function allows the source signal to bypass the tone control circuitry (BASS, TREBLE, S.A. BASS, and BALANCE) during playback. The indicator lights up when this function is on.
10 S.A. BASS button and indicator
Press to turn the bass enhancement function on or off. The indicator lights up when this function is on.
11 PHONES jack
Connect headphones with a stereo mini-plug to this jack. No sound comes from the speakers when headphones are connected.
CD player front panel
12 POWER button
Press to switch the power between ON and STANDBY.
STANDBY indicator
Lights up when the power is in the STANDBY mode. Turns off when power is ON.
13 Display
14 REPEAT button
Press to switch repeat play modes (All disc repeat, 1 disc repeat, 1 track repeat or off).
15 PLAY MODE button
Press to switch play modes (continuous play, Program play, or Random play).
16 |◀◀, ▶▶| buttons
Press to skip to the beginning of a desired track or press and hold to search in fast forward or fast reverse.
17 Disc control buttons
▲: Press to open or close the respective disc tray.
CD 1 to CD 3: Press to start playing the respective CD.
18 ▷/II button
Press to start or pause CD playback.
19□/CANCEL button
Press to stop CD playback.
Press to clear a track during program mode.
20 Main tray
This accommodates three disc trays inside.
Displays
Amplifier/tuner![graph LR A["TUNED STEREO FM AM"] --> B["12 34 567"] B --> C[" "] D["PRESET"] --> E[" "] F["VOLUME"] --> G[" "] H["DAILY"] --> I[" "] J["SLEEP"] --> K[" "] L["REC"] --> M[" "] N["MD CO TAPE"] --> O[" "] P["TUNER"] --> Q["AUX"] R[" "] --> S[" "]](/content/2026/06/1307341/images/913d3ed87f539230b41bb932ab72604a563a1d9bc5cffa2fe7d163a31af67f05.jpg)
CD player![graph LR A["DISC"] --> B["8"] A --> C["9"] A --> D["10"] A --> E["11"] A --> F["12"] A --> G["13"] H["REPEAT ALL 1 CD"] --> I["1 2 3 4 5"] H --> J["6 7 8 9 1 0"] K["PROGRAM RANDOM"] --> L["11 12 13 14 15"]](/content/2026/06/1307341/images/797e06a02502d62a72241005e28d7ac0a4eea22f5a05e1dc27b43205cc677e3a.jpg)
Amplifier/tuner display
1 Receiving condition indicators
TUNED: Lights up when radio broadcast is received.
STEREO: Lights up when FM stereo broadcast is received.
2 Receiving band indicators
FM: Lights up when the FM band is selected.
AM: Lights up when the AM band is selected.
3 Character display
Shows the selected source, radio frequency, preset channel number, timer setting item and contents.
Shows the clock in the power STANDBY mode.
4 PRESET indicator
Lights up when < and > (cursor buttons) are set to the preset channel selection mode.
5 Volume indicator
Shows the volume level.
6 Timer indicators
• DAILY: Lights up when the daily timer operation is selected.
- SLEEP: Lights up when the sleep timer operation is selected.
- REC: Lights up when the recording timer operation is selected.
7 Source indicators
The "▶" marking on the left of the selected source lights up.
CD player display
8 Play indicators
▷: Lights up during CD playback. □□: Lights up during pause.
9 Disc indicator
Shows the CD disc number being played or selected.
10 Character display
Shows the track number, play time, program sequence, etc.
11 Repeat mode indicators
Show the repeat mode.
REPEAT ALL: Lights up when all tracks in all the CDs loaded in the main tray or all tracks in the program are played repeatedly.
REPEAT 1 CD: Lights up when a CD is played repeatedly.
REPEAT 1: Lights up when a single track is played repeatedly.
12 Play mode indicators
PROGRAM: Lights up in the program play mode.
RANDOM: Lights up in the random play mode.
13 Track indicators
Shows the number of tracks in the selected or played CD.
Rear Panels
Amplifier/tuner
CD player
Amplifier/tuner rear panel
1 CD input jacks
Connect to the ANALOG OUT jacks of the CD player.
2 MD input/output jacks
Connect to the output/input jacks of the MD recorder.
OUT (REC): Connect to the IN (REC) jacks of the MD recorder.
IN (PLAY): Connect to the OUT (PLAY) jacks of the MD recorder.
3 TAPE input/output jacks
Connect to the output/input jacks of the cassette deck.
OUT (REC): Connect to the IN (REC) jacks of the cassette deck.
IN (PLAY): Connect to the OUT (PLAY) jacks of the cassette deck.
4 AUX input jacks
Connect to the audio output jacks of a VCR or TV.
5 SUB-WOOFER OUT jack
Connect to the input jack of a subwoofer amplifier or powered subwoofer.
6 Power cord
Connect to a wall power outlet.
7 COMPU LINK-3 (SYNCHRO) jacks
Connect each jack with the COMPU LINK-3
(SYNCHRO) jack of another component.
Either jack can be used for the connection.
8 SPEAKERS terminals
Connect speakers with rated impedance of 6 to 16 ohms.
9 ANTENNA terminals
Connect the FM and AM antennas.
CD player rear panel
10 COMPU LINK-3 (SYNCHRO) jacks
Connect each jack with the COMPU LINK-3 (SYNCHRO) jack of another component. Either jack can be used for the connection.
11 AC POWER CORD receptacle
Connect the provided AC power cord.
12 DIGITAL OUT jack
Connect to the DIGITAL IN jack of the MD recorder using an optical digital cable.
When connecting to the XM-EX90 MD recorder, connect to its DIGITAL IN 1 jack.
13 ANALOG OUT jacks
Connect to the CD input jacks on the amplifier/tuner using the provided audio pin cord.
Remote control

Remote control
1 POWER
Press to switch the power between ON and STANDBY.
2 Number buttons
- Use to select preset channels when listening to the tuner.
- Use to select tracks after pressing CD, CD1, CD2, CD3 or PLAY MODE.
3 FM MODE/MUTING
Press to switch the FM mode between AUTO and MONO.
4 CD controls
PLAY MODE: Press repeatedly to select the play mode you desire (PROGRAM, RANDOM, or off (continuous play)).
REPEAT: Press repeatedly to select the repeat mode (REPEAT ALL, REPEAT 1 CD, REPEAT 1, or off). CD1, CD2, CD3: Press to select a CD tray.
5 DIRECT
Press to listen to the original sound of the source.
6 S.A.BASS
Press to activate Signal Adaptive BASS function for enhancing the low frequencies.
7 Tone control buttons
BASS: Press to adjust low frequencies. After pressing BASS, press +/R or -/L to adjust the bass.
TREBLE: Press to adjust high frequencies. After pressing TREBLE, press +/R or -/L to adjust the treble.
BALANCE: Press to adjust the balance. After pressing BALANCE, press +/R or -/L to adjust the balance
8 CANCEL
- Press to cancel a timer operation.
- Press to erase a CD program step.
9 TAPE DIRECTION
Press to change the tape direction when using the cassette deck.
10 ◀◀◀ ◀◀ (skip back) / <
- Press to skip or search backward on the CD player after pressing CD, CD1, CD2, CD3, or PLAY MODE.
- Press to rewind on the cassette deck after pressing TAPE or TAPE CONTROL.
- Press to select the preset channel after pressing TUNER.
11 REC PAUSE
Press to set the cassette deck to record pause mode.
12 ■ (stop) / v
- Press to stop playback on the CD player after pressing CD, CD1, CD2, CD3, or PLAY MODE.
- Press to stop playback or recording on the cassette deck after pressing TAPE or TAPE CONTROL.
- Press to tune manually to a lower frequency after pressing TUNER.
13 VOLUME
Press Λ (up) to increase the volume. Press V (down) to decrease the volume.
14 FADE MUTING
Press to turn the volume all the way down. To restore the volume, press it again.
15 ▶▶▶ (skip forward) / >
- Press to skip or search forward on the CD player after pressing CD, CD1, CD2, CD3, or PLAY MODE.
- Press to fast-forward on the tape deck after pressing TAPE or TAPE CONTROL.
- Press to select the preset channel after pressing TUNER.
16 ▶ (play) / ∧
- Press to start playback on the CD player after pressing CD, CD1, CD2, CD3, or PLAY MODE.
- Press to start playback on the cassette deck after pressing TAPE or TAPE CONTROL.
- Press to automatically tune to higher frequencies after pressing TUNER.
17 TAPE CONTROL
Press to set the buttons on the remote to operate the cassette deck.
18 SET
Press to set the preset channel, timer, clock, etc.
19 CLOCK/TIMER
Press to set the timer or clock.
20+/R,-/L
Press to set the BASS level, TREBLE level, BALANCE, timer, clock, etc.
21 Source buttons
AUX: press to select the component connected to the amplifier/tuner's AUX jacks as the sound source.
TUNER: press to select the tuner as the sound source and set some buttons on the remote to operate the tuner. Press repeatedly to switch the band (FM or AM).
CD: press to select the CD player as the sound source and make it start playback of a loaded CD. Press to set some buttons on the remote to operate the CD player.
TAPE: press to select the cassette deck as the sound source and make it start playback of a loaded tape. Press to set some buttons on the remote to operate the cassette deck (when using the cassette deck).
22 SLEEP
Press to set or release the sleep timer.
Setting up the System
Supplied Accessories
Before setting up your system make sure you received all of the following supplied accessories.
AC power cord x 1
Stereo Audio pin cord x 1
Compu Link cable x 1
AM loop antenna x1
FM wire antenna x1
Batteries (R6P(SUM-3)/AA (15F)) x2
Remote Control x1
Cautions for Placement
Place the system in the following manner to ensure proper ventilation and many years of trouble-free use.
Do not place in any of the following areas.
- Near a heater or other heat-emitting appliance.
- In direct sunlight.
- Do not place the CD player on top of the amplifier/tuner.
- In a place warmer than 35°C (or 95°F).
- In a bathroom, kitchen, or other area with steam, humidity, or hot water.
- In a place with lots of static electricity or dust.
- In an unstable area.
- Near appliances that receive electronic wave broadcasts, such as a television or tuner.
When stacking, place the components as illustrated below.

RX-EX70
(Amplifier/tuner)
XL-EX70
(CD player)
Connections
Before Making Any Connections
- Be sure to confirm the locations of the left and right, + and -, and IN and OUT terminals on each component and make connections correctly and firmly. Incorrect or incomplete connections may result in degradation of the stereo effect, or no sound at all. As a general rule, use the red plugs on the connecting cords to connect the right channels and the white plugs to connect the left channels.
- Do not connect the AC power cord until all other connections are complete.
Connecting the supplied antennas
Connect the supplied FM (wire) antenna and AM loop antenna as shown below.

FM antenna
Affix the antenna to a wall (etc.) in a position which provides the best reception.
AM loop antenna
Fold the loop over the base and push in the direction of the arrow. Place in a position which provides the best reception.
CAUTION
To avoid noise, keep antennas away from this unit's metallic parts, the audio pin cords, and the AC power cord.
Connecting external antennas
- Connect external antennas if reception is not satisfactory with the supplied antennas.

- To improve reception of FM stations, disconnect the supplied FM wire antenna and connect a 75-Ohm FM antenna wire (not supplied).
- To improve reception of AM stations, connect a vinyl-covered wire (not supplied) to the AM EXT terminal in addition to the supplied AM loop antenna.

Audio pin cord
Use to connect the CD player's ANALOG OUT jacks to the CD input jacks on the RX-EX70 amplifier/tuner.
Be sure to connect jacks with plugs of the same colors for correct L (Left) and R (Right) connections.
COMPU LINK cable
Use the supplied COMPU LINK cable to connect one of the CD player's COMPU LINK-3 (SYNCHRO) jacks to either of the COMPU LINK-3 (SYNCHRO) jacks on the amplifier/tuner.
Optical digital cable (not supplied)
Use to connect the CD player's DIGITAL OUT jack to the optical DIGITAL IN jack of an MD recorder. When making connections to the MD recorder, connect the CD player's DIGITAL OUT jack to the MD recorder's DIGITAL IN jack.
Refer to the instructions provided with the MD recorder for details.
Connecting other components![graph TD A["CD player"] --> B["MD recorder"] B --> C["Cassette deck"] C --> D["VCR, TV, etc."] E["XL-EX70 (CD player)"] --> A F["Speaker"] --> G["Powered subwoofer, etc."] H["AUX"] --> I["Speaker"] J["COMPU LINK 3 SYNCHRO"] --> G K["OUT"] --> A L["OUT"] --> B M["OUT"] --> C N["OUT"] --> D](/content/2026/06/1307341/images/e95b17c082863982459f6b3d50cadbaadb85338e6873840f371bd4437355e066.jpg)
Audio pin cord
Be sure to connect jacks with plugs of the same colors for correct L (Left) and R (Right) connections. Connect this unit's OUT (REC) jacks to the IN (REC) jacks on an MD recorder or cassette deck.
Connect this unit's IN (PLAY) jacks to the OUT (PLAY) jacks on an MD recorder or cassette deck.
Connect this unit's AUX IN jacks to the sound output jacks on your video deck, TV, etc.
COMPU LINK cable
Use COMPU LINK cables to connect the COMPU LINK-3 (SYNCHRO) jacks of the optional components.
Optical digital cable
Use to connect the DIGITAL OUT jack of the CD player and DIGITAL IN 1 jack of the MD recorder.
Connecting the Speakers
Connect the left speaker to the LEFT speaker terminals and connect the right speaker to the RIGHT speaker terminals. Be sure that the speaker cords do not touch the rear panel of this unit. This may damage the unit.
Be sure to connect this unit's + terminals to the + terminals on the speakers, and connect this unit's - terminals to the - terminals on the speakers.
• Refer also to the manual supplied with your speakers.

IMPORTANT
- Use speakers with the correct impedance only. The correct impedance is indicated on the back panel.
- If a TV is installed near the speakers, the TV may display irregular colors. In this case, move the speakers farther away from the TV.
Connecting the Power
Amplifier/Tuner
After completing all other connections, connect the power cord to a wall outlet.
CD player
After completing all other connections, use the supplied AC power cord to connect the AC POWER CORD terminal on the back of the CD player to a wall outlet.
Remote control batteries
Load the supplied batteries (2) into the remote control.

①Open the battery case.
Push down and pull the lid in the direction of the arrow.

②Load the batteries.
Insert two R6P(SUM-3)/AA(15F) batteries. Match the polarity (+ and -) of the batteries with the + and - marks inside the battery compartment.

③Close the battery case.
Operating the Remote Control
Point the remote control toward the remote sensor on the front panel. The signal may not reach the remote sensor if the remote control is used at an angle, or if there are objects between the remote control and the remote sensor.

Cautions
Observe the following to avoid battery leakage or explosion:
- If the range or effectiveness of the remote control decreases, replace the batteries using R6P(SUM-3)/AA(15F) type dry cells.
- Do not use an old battery together with a new one.
- Do not use different types of batteries together.
- Do not disassemble the batteries or subject them to high temperatures, like an open fire.
- Remove the batteries if the remote control will not be used for a long time.
Setting the Clock
This unit incorporates a clock with a 12-hour display. Be sure to set the clock before operating the unit. The clock can be set either in ON or STANDBY mode of power.
Use the remote control unit to set the clock.


① Press CLOCK/TIMER.
② Set the time of the day.
① Set the hour.
Use +/R or -/L to display the appropriate hour, then press SET.
Hold down +/R or -/L to change the hour sequentially.
After setting the hour (before pressing SET)

2 Set the minutes.
Use +/R or -/L to display the appropriate minute, then press SET.
Hold down +/R or -/L to change the minutes in 10-minute steps.

- If you set the clock while the power is on, the display returns to the previous information after completing the clock setting.
To set the clock precisely
After setting the minutes, press SET in sequence with the time announcement on the TV, radio, or telephone service. This starts the clock counting from 0 seconds of the set minute.
Why set the time?
Setting the time allows you to use the daily and recording timer operations.
The daily and recording timer operations cannot be set unless the clock has been set. To correct the previously set time, press CLOCK/TIMER repeatedly (5 times) so that the hour blinks to enter the clock set mode.
Notes
- Pressing buttons other than those described above while setting the clock will cancel the clock setup. If this occurs, resume setting the clock from step ①.
- In case of a power failure (or when the power cord has been unplugged) the clock may show the time of the power failure, or a blinking "AM 0:00". If this occurs, reset the clock to the correct time.
Amplifier Operations
Turning on the Power
Front panel Goes out.
Remote control
Press POWER.
The STANDBY indicator goes out and "HELLO" appears in the display.
- Pressing POWER of RX-EX70 turns on the source component previously selected.
- Pressing POWER of the other components also turns on the amplifier/tuner.
To turn off the power
Press POWER again.
The STANDBY indicator lights up and the display shows "GOOD-BYE", then turns to the clock.
If you have made the Compu Link connection (page 40):
- Other components also turns off.
Adjusting the Volume
From the front panel
Rotate VOLUME.
The volume level appears in the display.
- Rotate to the right (UP) to increase the volume, rotate to the left (DOWN) to decrease the volume.
- Rotate VOLUME quickly to make large changes, rotate slowly to make small changes.
From the remote control
Press VOLUME ∧ or . √
Press ↗ to increase the volume, press ↘ to decrease the volume. Hold down to make a continuous change.
- The volume can be set between 0 and 50.
Notes
- The volume cannot be changed while the unit is in the STANDBY mode.
- Be sure to turn the volume down before setting the unit to the STANDBY mode.

To mute the sound
Press FADE MUTING.
When you press FADE MUTING, the volume level decreases to 0 (MUTING). Pressing it again restores the volume.
Adjusting the Sound Emphasizing the bass
Front panel Remote/control


Press S.A.BASS.
"S.A.BASS" and "ON" appear in the display and the S.A.BASS indicator lights up.

To cancel the bass emphasis
Press S.A.BASS again.
"S.A.BASS" and "OFF" appear in the display and the S.A.BASS indicator goes out.
- The S.A.BASS cannot be adjusted during DIRECT playback.
Adjusting the bass and treble
Use the remote control for these operations.

Adjusting the bass
1. Press BASS.
2. Press +/R or -/L to adjust the bass level. Press +/R to increase the bass. Press -/L to decrease the bass.

- The bass can be adjusted in 7 steps from -3 to +3.
Adjusting the treble
1. Press TREBLE.
②Press +/R or -/L to adjust the treble level. Press +/R to increase the treble. Press -/L to decrease the treble.

- The treble can be adjusted in 7 steps from -3 to +3.
- The BASS and TREBLE cannot be adjusted during DIRECT playback.
Adjusting the Balance
Use the remote control for these operations.


①Press BALANCE.
②Press -/L or +/R to adjust the balance level. Press -/L to shift the sound to the left speaker. Press +/R to shift the sound toward the right speaker.
Moves to the left when you press -/L
Moves to the right when you press +/R
- Even if you shift the balance all the way to the right or left, the sound does not completely disappear from the opposing speaker.
- The BALANCE cannot be adjusted during DIRECT playback.
Direct Playback
Use this function to listen to the original sound of the sound source without any sound adjustments.
Front panel
Remote control
Press DIRECT.
"DIRECT" and "ON" appear in the display and the DIRECT indicator lights up.

To cancel the DIRECT playback
Press DIRECT again.
"DIRECT" and "OFF" appear in the display and the DIRECT indicator goes out.
- The S.A.BASS, BASS, TREBLE and BALANCE cannot be adjusted during DIRECT playback.
Selecting a Source
Select the input source to be played.
From the front panel

Press INPUT repeatedly.
The name of the selected source appears in the display. Each press of INPUT switches the input source as shown below.
![graph TD A["TUNER (FM/AM)"] --> B["MD"] --> C["CD TAPE"] B --> D["AUX"] D --> E["Example) This indicator lights when MD is selected"] E --> F["MD CD TAPE"] F --> G["TUNER"] --> H["AUX"] H --> I["Source indicators"]](/content/2026/06/1307341/images/432d4d3e4cbe5646efa89e06c392afe4672366711e1722244e6eaa12dcab5869.jpg)
- When the TUNER source is selected, the display shows the frequency of the last received radio station.
One touch operation
When the unit is in the STANDBY mode, press INPUT to automatically turn the power on and switch to the last source you listened to.
From the remote control

Press AUX, TUNER, CD, or TAPE.
The respective input source is selected. Press TUNER repeatedly to select the band (FM or AM).
One touch operation
When the power is in the STANDBY mode, press AUX, TUNER, CD, or TAPE to automatically turn the power on and switch to the selected source.
When using other optional components together with this unit via the Compu Link connection (page 40)
When a source is selected, the selected source component switches ON automatically. If the component is ready for playback, it also starts to play (see page 41).
Tuner Operations
Manual and Automatic Tuning
This section shows you how to tune in an FM or AM broadcast.
From the front panel


①Press BAND to select the band you desire (FM or AM).
Each press of BAND switches the band between FM and AM.
One touch operation
When the unit is in the STANDBY mode, press BAND to automatically turn the power on and tune in the last station you listened to.
②Press KEY MODE so that "PRESET" does not appear in the display.
After storing stations in the receiver's preset memory (page 25), you can use the preset tuning feature (page 26).
③ Tune in the station you desire.
For manual tuning:
Press > (for higher frequencies) or < (for lower frequencies) repeatedly to locate the frequency of the station you desire. When a station is received, the TUNED indicator lights up.
For automatic tuning:
Hold down > or < until the frequencies start to change, then release.
When a station is tuned in, “TUNED” appears in the display and the frequency stops changing. If you know the frequency of the station you want to receive, keep holding > or < until the amplifier/tuner nears the frequency you desire (this prevents the amplifier/tuner from stopping at other intermediate stations).
When a stereo broadcast is received, the STEREO indicator lights up.
From the remote control:


① Press TUNER to select the band you desire (FM or AM).
In addition to selecting the FM band, this operation also sets the remote control to tuner operation mode. The remote control must be set to the tuner operation mode before proceeding to the following steps, even if the band was previously set to FM using the controls on the front panel.
② Tune in the station you desire.
For manual tuning:
Press Λ (▶) (for higher frequencies) or ∨ (■) (for lower frequencies) repeatedly to locate the frequency of the station you desire. When a station is received, the TUNED indicator lights up.
For automatic tuning:
Hold down \(\Lambda(\blacktriangleright)\) or V(■) until the frequencies start to change, then release. When a station is tuned in, the TUNED indicator lights up and the frequency stops changing. If you know the frequency of the station you want to receive, keep holding \(\Lambda(\blacktriangleright)\) or V(■) until the amplifier/tuner nears the frequency you desire (this prevents the amplifier/tuner from stopping at other intermediate stations).
Stereo and monaural reception
Switching to monaural reception is an effective way to reduce noise when receiving weak FM stereo broadcast.

To switch to monaural reception
Press FM MODE/MUTING on the remote control so that "MONO" appears in the display. This switches the reception mode to mono. In this mode, stereo broadcasts are also received in mono.
To switch to stereo reception
Press FM MODE/MUTING on the remote control again so that "AUTO" appears in the display. This switches the reception mode to auto tuning. When a program is broadcast in stereo the STEREO indicator lights up and you hear the stereo sound. When in monaural, the STEREO indicator goes off and you hear monaural sound.
Normally, it is recommended to use Automatic tuning. If clear reception is not possible with the supplied antenna, connect an external antenna (see page 14).
Presetting Stations
Once stations are preset, they can be called up quickly with preset tuning. You can preset a total of 40 stations, either FM or AM.

① ② ③
④ ⑤ ⑥
⑦ ⑧ ⑨
10 +10


①Tune in the station you want to preset.
Use the buttons on the remote control to tune in the station; otherwise, the following operation will not be possible.
② Press SET.
The unit switches to preset memory mode ("— —" and PRESET blink in the display).
Proceed to step ③ during the 4 seconds that “— —” and PRESET are blinking. After 4 seconds, preset memory mode is released. If this happens, press SET again to reactivate it.
③ Use the number buttons on the remote control to specify the desired preset number.
The preset number and PRESET blink in the display. Proceed to step ④ during the 4 seconds that the preset number and PRESET are blinking. After 4 seconds, preset memory mode is released. If this happens, start again from step ②.
④ Press SET again.
"MEMORY" is displayed and the station is stored at the selected preset number.
If another station was previously stored at that preset number, that station is erased and the new station is memorized in its place.
Listening to Preset Stations
This section explains how to tune in preset stations.
From the front panel

① Press KEY MODE so that "PRESET" appears in the display.
② Press > (for higher numbers) or < (for lower numbers) repeatedly to select the desired preset.
From the remote control
You can tune in the preset stations from the remote control either by switching through the presets one by one, or by specifying the preset you desire.

① Press TUNER to select the tuner operations. In addition to selecting the FM band, this operation also sets the remote control to tuner operation mode. The remote control must be set to the tuner operation mode before proceeding to the following steps, even if the band was previously set to FM using the controls on the front panel.
② Select the preset station you desire.
To switch through the preset stations one by one:
Press > (▶▶▶▶▶) (for higher numbers) or < (◀◀◀◀) (for lower numbers) repeatedly to select the preset number you desire.
To specify the preset stations:
Use the number buttons to select a preset number.
- For preset number 5, press 5.
- For preset number 15, press +10 then 5.
- For preset number 20, press +10 then 10.
- For preset number 30, press +10, +10, then 10.
CD Operations
Loading CDs
The CD player's unique 3-disc changer mechanism houses 3 individual disc trays inside the main tray.


① Press ▲ (open) for the disc tray (CD 1 to 3) you want to load.
The main tray opens to the selected disc tray. The disc tray number and "OPEN" appear in the display.

Example) When CD1 ▲ is pressed
- The disc trays housed in the main tray are numbered CD 1, CD 2, and CD 3 starting from the bottom tray.
One touch operation
When the unit is in the STANDBY mode, press one ▲ to automatically turn the power on and open to the selected tray.
②Place a CD with the label side facing up. Place CD singles (8 cm) in the depressed inner circle.
③Press the same ▲ you pressed in step ①. The main tray closes.
The disc tray number and "CLOSE" appear in the display.

Example) When CD 1 ▲ is pressed
- Repeat steps ① to ③ to load up to 3 CDs.
Displayed information
When a CD is loaded, the disc number for that CD is displayed and the player reads the disc's data. After the data is read, the display shows the total number of tracks and total playing time of the disc, then switches to show the playing time for the first track.

Reading data
Total number of tracks and total playing time (shown for 4 seconds)
Playing time for track 1
Likewise, when playback is stopped, the display shows the total number of tracks and total playing time of the current disc for 4 seconds, then it shows the playing time for track 1.
Tip
When loading more than one CD, instead of closing the main tray, press ▲ for the next tray you want to load, the main tray automatically closes and then reopens to the selected disc tray.
CAUTION
The disc tray will close if pushed inward. Be careful not to push the tray inward when placing a CD.
Basic Operations
The following operations play all 3 CDs once, one after another.


①Load CDs.
See "Loading CDs" on page 27.
②Press CD 1, CD 2 or CD 3 for the disc you want to play.
The amplifier/tuner automatically switches to the CD input and the CD starts to play.
The ▷ indicator lights up.

Press ▷/■ instead of CD 1, CD 2 or CD 3 to start playing the CD whose disc number appears in the display.
One touch operation
When the unit is in the STANDBY mode, press CD 1, CD 2 or CD 3 or ▷/■ to automatically turn on the power to the CD player and amplifier/tuner, set the amplifier/tuner to the CD input and start playing the CD.
CD playback sequence
When 3 CDs are loaded, they are played in one of the following sequences.
When CD 1 is pressed
CD 1 ⇒ CD 2 ⇒ CD 3 (then stops)
When CD 2 is pressed
CD 2 ⇒ CD 3 ⇒ CD 1 (then stops)
When CD 3 is pressed
CD 3 ⇒ CD 1 ⇒ CD 2 (then stops)
* When only 2 CDs are loaded, they play in the same order, but the disc tray without a CD is skipped.


To stop playback
Press □/CANCEL.
When playback is stopped, the display shows the total number of tracks and total playing time of the current disc for 4 seconds, then it shows the playing time for track 1.
To pause playback
Press ▷/■. The □□ indicator lights up.
Press again to resume playback from the position where it was paused.
To remove a CD:
Press the respective ▲.
To exchange CDs during playback of another
Press ▲ corresponding to a disc number not shown in the display to open that disc tray and exchange the CD. When CDs are exchanged during playback, playback stops after playing the last exchanged CD.

To skip to the beginning of a track
Press ▶▶ once to skip to the beginning of the next track. Press ◀◀ once to skip to the beginning of the current track.
• Each additional press skips to another track.
To check the playing time of a track
Press ◀◀◀ or ▶▶▶ during stop mode to display the desired track number. The playing time for that track is also displayed.
Fast forward / reverse
Press ◀◀◀ or ▶▶◀ on the front panel. For fast forward, press and hold down ▶▶◀. For reverse, press and hold down ◀◀◀. Release the button when the part you wish to listen to is reached.
- These operations cannot be controlled from the remote control unit.
Notes
- When CD 1, CD 2 or CD 3 is pressed, if there is no CD in the corresponding disc tray, "NO DISC" appears in the display and the unit enters stop mode.

Example) When disc tray of disc number 2 does not contain CD
- When ▷/Ⅱ is pressed, if the disc tray corresponding to the disc number shown in the display does not contain a CD, the unit checks the other disc trays and automatically plays the first CD it finds. If there are no CDs, the unit enters stop mode when it reaches the last disc tray.
Program Play Mode
This play mode lets you play tracks from up to 3 CDs in the order you desire.

①Load CDs.
See "Loading CDs" on page 27.
②Press PLAY MODE repeatedly to select PROGRAM.
"PROGRAM" appears in the display and the PROGRAM indicator lights up.
- If some tracks were previously programmed, the disc, track, and program numbers of each track are displayed.

Each time you press PLAY MODE, the play modes switch as follows:
![graph LR A["PROGRAM RANDOM"] --> B["Off (Continuous play)"]](/content/2026/06/1307341/images/a72ddc403a3f523d2e81982d3b68235b96d5b5eff98a9605ba21eae7198cf916.jpg)
- The CD player must be in stop mode when switching the play modes. If necessary, press □/CANCEL to stop playback before pressing PLAY MODE.
③Program the tracks.
1 Press CD 1, CD 2 or CD 3 to select the disc containing the track you want to program.


Blinks Example) Selecting disc 2.
②Select a track number by pressing ◀◀◀ or ▶▶◀.


Blinks Example) Selecting track 4.
③Press PLAY MODE to register the track. The display stops blinking and lights steadily, and the program number is incremented by 1.


Notes
- Repeat steps ① to ③ to program up to 32 tracks. If you attempt to program more than 32 tracks "FULL" appears in the display.
- Perform step ② within 4 seconds of step ①. If 4 seconds elapse between any operations, the unit automatically returns to the previous state.
- When using the remote control, see page 44.


④Press ▷/Ⅱ to start program playback.
Program playback stops automatically after playing all the programmed tracks.
To check the programmed tracks
Press ◀◀◀ or ▶▶◀ on the remote control during stop mode.
Pressing ▶▶I shows programmed track numbers in the programmed order.
Pressing ◀◀◀ shows them in the reverse order.
- Programmed tracks cannot be checked by pressing I◄◄ or ►►I on the front panel.
To remove programmed tracks
Press □/CANCEL (or CANCEL on the remote control) during stop mode.
Each time you press the button, a track is removed from the end of the program.
If you make a mistake during programming
Press □/CANCEL (or CANCEL on the remote control) repeatedly during stop mode to remove tracks from the end of the program until you reach the mistake, then reprogram from that point.
To cancel program playback
Press PLAY MODE repeatedly during stop mode to select a different play mode.
The program remains in memory even after exiting the program play mode.
- The program is cleared from memory if the power cord is unplugged or there is a power failure.
When you remove a disc containing programmed tracks
The tracks from that disc are cleared from the program.
To play the program repeatedly
Use the repeat play mode in combination with the program play mode.
For details on the repeat mode, see page 33.
Random Play Mode
This play mode lets you play tracks from up to 3 CDs at random. You can enjoy listening to the tracks in a different order each time.

①Load CDs.
See "Loading CDs" on page 27.
②Press PLAY MODE repeatedly to select RANDOM.
"RANDOM" appears in the display and the RANDOM indicator lights up.

Each time you press PLAY MODE, the play modes switch as follows:
PROGRAM RANDOM
Off (Continuous play)
- The CD player must be in stop mode when switching the play modes. If necessary, press □/CANCEL to stop playback before pressing PLAY MODE.

③Press ▷/■ to start random playback.
Random playback stops automatically after playing each track once.
- The CD player creates an order so that no tracks will be repeated.
- Random playback stops if the main tray is opened.
To cancel random playback
Press PLAY MODE repeatedly during stop mode to select a different play mode.
To play the track at random repeatedly
Use the repeat play mode in combination with the random play mode. The tracks are played again in a different order after playing each track once.
For details on the repeat mode, see page 33.
Repeat Play Mode
This play mode lets you repeat the current track, the current CD, or all the tracks on all the CDs.

① Press REPEAT repeatedly to select the repeat mode.
Each time you press REPEAT, the repeat modes switch as follows:
![graph LR A["Start"] --> B["REPEAT 1 CDREPEAT ALL REPEAT 1"] B --> C["Off (mode cancelled)"]](/content/2026/06/1307341/images/a28a00d68595e6b3ebbc38c2fbba82e0b7b97ab3cd931b58f000d32de64b2050.jpg)
REPEAT ALL
Repeats all the tracks on all CDs.
This mode can be selected in any play mode.
REPEAT 1 CD
Repeats all the tracks on the current CD.
This mode can only be selected during the normal (continuous) play mode.
REPEAT 1
Repeats the current track.
This mode can be selected in any play mode.

② Press ▷/Ⅲ to start repeat playback.
Note: The repeat mode can also be selected while playing
To cancel repeat playback
Press REPEAT repeatedly to turn off the REPEAT indicator.
Tray Lock
This function electronically locks the main tray so that it cannot be opened simply by pressing one of the ▲ buttons.

① Set the power to the STANDBY mode.
If the power is presently ON, press POWER.
② Press ▲ for CD 1 while holding down □/CANCEL.
"LOCKED" appears in the display and the main tray is locked.
- When the main tray is locked, the display shows "LOCKED" and the main tray cannot be opened.
- When a ▲ is pressed, "LOCKED" appears in the display and the unit remains in the STANDBY mode.
To unlock the tray
Repeat steps ① and ② above.
"UNLOCKED" appears in the display and the main tray is unlocked.
- Pressing a ▲ opens the selected tray.
- When a ▲ is pressed during the STANDBY mode, the power is turned on and the selected tray opens automatically.
Timer Operations
Introduction
This unit incorporates three different timers.
Use the remote control for timer settings.
The timer can also be used to operate other optional components connected to this unit.
To operate the other optional components using the timer, be sure Compu Link cables are connected between the COMPU LINK-3 jacks on each component.
DAILY timer (Wake-up timer, page 35)
The daily timer operates every day at the same time and can be used as an alarm clock.
- Specify the start time (power ON), the end time (power STANDBY), the source you want to hear, and the volume.
REC timer (Recording timer, page 37)
This timer operates only once and allows you to make an unattended recording at a preset time.
- Set the time you want the recording to start (power ON), the time you want the recording to end (power STANDBY), and the source to be recorded (radio station).
SLEEP timer (Sleep timer, page 39)
Use this timer when you want to fall asleep listening to music.
- Specify how long you want to listen. When the specified period has elapsed, the power automatically switches to the STANDBY mode.
Notes:
- Be sure to set the clock before setting the timer.
- Timer sets are stored in memory until they are changed.
- Timer settings may be erased if the power cord is unplugged or if there is a power failure. The timer memory provides for about 2~3 days of backup, but if the settings are lost, please reset them.
Daily Timer
Use the remote control to set this timer. It can be set during either power ON or STANDBY. Be sure to set the clock before attempting this operation.

①Press CLOCK/TIMER to display "DAILY".
Blinks

Blinks

②Press CLOCK/TIMER again.
"ON" appears in the display.

③Set the start time (ON).
1 Set the hour.
Use +/R or -/L to display the appropriate hour, then press SET.
Hold down +/R or -/L to change the hour sequentially.
2 Set the minutes.
Use +/R or -/L to display the appropriate minute, then press SET.
Hold down +/R or -/L to change the minutes in 10-minute steps.

After setting the minutes (before pressing SET)
④Set the end time (OFF).
Set the end time (OFF) in the same way you set the start time (ON). Blinks

After setting the minutes (before pressing SET)
⑤Select the source to be played when the timer activates.
Press +/R or -/L repeatedly to select the source, then press SET.
Each time +/R or -/L is pressed, the source switches as follows.
![graph LR A["TUNER"] <--> B["MD GD-TAPE"] B --> C["←"]](/content/2026/06/1307341/images/24045adf0fe9846916a103c671a088411aa27f7c4989bcd143b36399e7c24373.jpg)
When selecting TUNER
Press +/R or -/L repeatedly to select desired preset channel, then press SET.
When selecting MD
Press +/R or -/L repeatedly to select desired track number, then press SET.
- You can select any track number from 1 to 20.
- Pressing SET without selecting a track starts playback from the first track of the MD.


When CD is selected:
①Press +/R or -/L repeatedly to select the desired disc number, then press SET. ②Press +/R or -/L repeatedly to select the desired track number, then press SET. - You can select any track number from 1 to 20. - Pressing SET without selecting the disc and track numbers starts playback from the first track of the last disc selected before timer operation.
⑥Set the volume.
Press +/R or -/L repeatedly to set the volume, then press SET.
- The volume can be set between 0 and 50.

After setting the volume (before pressing SET)
After SET is pressed, the display shows the start time, the end time, the source, and the volume settings.
- If the power is ON, press POWER to enter the STANDBY mode once your settings are complete.
Timer operation
Once set, the DAILY timer operates every day, at the same time, unless the DAILY timer is canceled.
When the end time (OFF) arrives, the unit automatically switches to the STANDBY mode.
Switching the DAILY timer OFF and ON
The DAILY timer settings are stored in memory. To turn off the timer without changing the settings, switch the timer operation OFF. The next time you want to use the timer, switch it back ON (the previous settings are still available).
Switching OFF
Press CLOCK/TIMER, so that "DAILY" blinks in the display (as described in step ① of the main operations), then press CANCEL. The DAILY indicator turns off and "OFF" appears in the display.
Switching ON
Press CLOCK/TIMER, so that "DAILY" blinks in the display (as described in step ① of the main operations), then press SET. The DAILY indicator lights up and the start time, the end time, the source, and the volume settings appear in the display.
Recording Timer
Use the remote control to set this timer.
It can be set during either power ON or STANDBY.
Be sure to set the clock before attempting this operation.

①Press CLOCK/TIMER 3 times to display "REC".

②Press CLOCK/TIMER again.
"ON" appears in the display.

③Set the start time (ON).
1 Set the hour.
Use +/R or -/L to display the appropriate hour, then press SET.
Hold down +/R or -/L to change the hour sequentially.
2 Set the minutes.
Use +/R or -/L to display the appropriate minute, then press SET.
Hold down +/R or -/L to change the minutes in 10-minute steps.

After setting the minutes (before pressing SET)
④ Set the end time (OFF).
Set the end time (OFF) in the same way you set the start time (ON).

After setting the minutes (before pressing SET)
⑤ Select the preset station to be recorded when the timer activates.
Select the radio station.
Press +/R or -/L repeatedly to select the desired preset station, then press SET.


⑥ Select the recording component (MD or TAPE).
Press +/R or -/L so that the desired component is blinking, then press SET.
- The blinking component is selected.
After SET is pressed, the display shows the start time, the end time, the source, and the volume settings.
- If you plan to record while you are away, set the volume to 0 before switching the power to the STANDBY mode.
Timer operation
When the start time arrives, the power turns on and recording begins.
When the end time arrives, the power automatically switches to STANDBY mode.
Switching the REC timer ON and OFF
The REC timer operates only once, but the settings are stored in memory.
To use the same REC timer again, switch the REC timer ON (the previous settings are still available).
To cancel the REC timer before the start time arrives, switch the REC timer OFF.
Switching ON
Press CLOCK/TIMER so that "REC" blinks in the display (as described in step ① of the main operations), then press SET. The REC indicator lights up and the start time, end time, source, and volume settings appear in the display.
Switching OFF
Press CLOCK/TIMER so that "REC" blinks in the display (as described in step ① of the main operations), then press CANCEL. The REC indicator turns off and "OFF" appears in the display.


Sleep Timer
Use the remote control to set this timer.

① Start playing a source.
② Press SLEEP repeatedly to set the timer. Each time you press SLEEP, the timer changes as follows.

The setting is complete when the SLEEP indicator stops blinking and lights steadily.
When the specified period of time has elapsed, the power automatically switches to the STANDBY mode.
To change the timer length
After setting the timer, press SLEEP once to display the time remaining.
To change the timer, press SLEEP again to select the length you desire.
To cancel the SLEEP timer:
After setting the timer, press SLEEP repeatedly until the timer length disappears. The SLEEP indicator turns off and the timer is cancelled.
Timer Priority
When more than one timer is set for a certain time, this unit operates as shown below.
When more than one timer is set to operate at a given time.
| Setting | Actual operation | |
| REC timer is given priority.· There is no sound for a few seconds immediately before the REC timer turns on. | ||
| Case 1 | REC timerSLEEP timer  2:00 2:00 |  |
| Case 2 |  30 30 |  |
Linked Operation of the Other Optional Components (Compu Link)
The EX series components can be controlled under linked operation provided by the JVC's Compu Link remote control system.
What is Compu Link
The world of single components, in which you purchase a cassette deck, CD player, amplifier and other components separately and enjoy your own composition, is an effective means for pursuit of high-quality reproduction. However, in terms of operability, the need of controlling components independently makes their control complicated and their linked operation impossible. Then, isn't it possible to combine single components and control them as simply as an integrated audio system? The Compu Link remote control system is the response to such a requirement.
The components in the JVC EX series are equipped with jacks named COMPU LINK-3 (COMPU LINK jacks). By connecting the COMPU LINK jacks of these components, they can be controlled simply with a systematized, linked operation.
Compu Link connections
Using Compu Link cables, connect the COMPU LINK jacks of EX series components. Connect so that the Compu Link cables can bridge all of the EX series components you have as shown below. The components can be connected in any order.
Compu Link-3 features
The Compu Link-3 system of the EX series components makes the following operations possible.
![graph LR A["Compu Link cables"] --> B["Amplifier/tuner RX-EX70"] A --> C["CD player XL-EX70"] A --> D["MD recorder Cassette deck"] A --> E["JVC audio equipment"]](/content/2026/06/1307341/images/803ad16db5824cb505bf50376b4ea62f04fcf295b7bae6f47a486eec2fe285de.jpg)
Shortcut playback
Simply selecting an input source of the amplifier/tuner starts playback of the selected source component (CD player, MD recorder or cassette deck).
Also, even if you do not touch the amplifier/tuner, starting playback of a source component sets the amplifier's input source automatically to the played component.
(See "Shortcut Playback" on page 41.)
A single remote control unit
The remote control unit provided with the units can also be used to control other EX series components.
(See "Remote Control of the Other Optional Components" on page 43.)
Synchronized recording
Recording can be started automatically in synchronism with the start of playback of a source component.
(See "Synchronized Recording" on page 45.)
Timer operation
The timer function built into the amplifier/tuner can be used to start recording or playback of other components at the reserved time of the day or switch the power to the STANDBY mode in the reserved time period.
Shortcut Playback (From the RX-EX70 Amplifier/tuner)
By simply pressing INPUT of the amplifier/tuner (RX-EX70) to select an input source, the selected source component can automatically be turned on and its playback started.

Playing CDs
Press INPUT to select "CD".

The CD player is turned on and playback of the CD with the disc number displayed on the CD player starts. If no CD has been loaded in the CD player, its display shows "NO DISC".
- When another input source is selected by pressing INPUT, the CD player stops automatically in a few seconds.

Playing an MD
Press INPUT to select "MD".

The MD recorder is turned on, and if an MD has been loaded in it, playback of the MD starts. If no MD has been loaded in the MD recorder, its display shows "NO DISC".
- When another input source is selected by pressing INPUT, the MD recorder stops automatically in a few seconds.

Playing a cassette tape
Press INPUT to select "TAPE".

The cassette deck is turned on, and if a tape has been loaded in it, playback of the tape starts.
- When another input source is selected by pressing INPUT, the cassette deck stops automatically in a few seconds.
Shortcut Playback (From a Source Component)
By starting playback of a source component, the amplifier/tuner's input source is automatically switched to that source and playback can be monitored through it.
If playback is started while the amplifier/tuner's power is in the STANDBY mode, it is also switched ON automatically.


CD player operation
Press ▷/■ or CD 1, CD 2, or CD 3.
The amplifier/tuner's input source is set to "CD" and CD playback starts.
If the amplifier/tuner's power is in the STANDBY mode, it is automatically switched ON.
MD recorder operation
Press ▷/■ of the MD recorder or ▶ of the remote control unit provided with the MD recorder.
The amplifier/tuner's input source is set to "MD" and MD playback starts.
If the amplifier/tuner's power is in the STANDBY mode, it is automatically switched ON.
Tape deck operation
Press ◀ or ▷.
The amplifier/tuner's input source is set to "TAPE" and tape playback starts.
If the amplifier/tuner's power is in the STANDBY mode, it is automatically switched ON.
- It takes about 5 seconds after the amplifier/tuner is turned ON until it can start audio reproduction. In this period, the audio cannot be reproduced even when the source component has started playback. As a result, the beginning of playback may not be heard in this case.
- When another source component is played, the source component which has been played stops automatically in a few seconds.
Remote Control of the Other Optional Components
The remote control provided with the units can be used to control other optional components such as the CD player (XL-EX70) and cassette deck.
Operate the remote control by pointing it to the remote sensor of the amplifier/tuner.

① ② ③
④ ⑤ ⑥
⑦ ⑧ ⑨
10 +10

Controlling the CD player (XL-EX70)
Use the following buttons to remote control the CD player.
CD: Selects the CD player as the sound source and make it start playback of a loaded CD.
▶: Starts playback.
◀◀◀ ◀◀◀, ▶▶▶▶: Skips to the beginning of a track.
■: Stops playback.
CD 1: Starts playback of the CD with disc No. 1.
CD 2: Starts playback of the CD with disc No. 2.
CD 3: Starts playback of the CD with disc No. 3.
Shortcut playback
Pressing CD or one of CD1 to 3 starts playback immediately.
Number buttons
1 to 10, +10: Used to specify a track number directly after pressing CD, CD1, CD2, CD3 or PLAY MODE.
To select track No. 5: Press 5.
To select track No. 15: Press +10 then 5.
To select track No. 20: Press +10 then 10.
To select track No. 32: Press +10 three times then press 2.
Controlling the cassette deck
Use the following button to remote control the cassette deck.
TAPE: Selects the cassette deck as the sound source and make it start playback of the inserted tape.
TAPE CONTROL: Switches the remote control mode to the tape mode without selecting the cassette deck as the sound source.
TAPE DIRECTION: Switches the tape running direction.
▶: Starts playback or recording.
◀◀ ◀◀, ▶▶▶ ▶▶: Press during playback to skip to the beginning of a piece of music.
Press during stop to fast forward or rewind tape.
■: Stops playback or recording.
REC PAUSE: Initiates record-pause mode.
Shortcut playback
Pressing TAPE (or TAPE CONTROL then ▶) starts playback immediately.
Program playback of CD

① While the CD player is in stop mode, press PLAY MODE of the CD player to "PROGRAM". ② Specify the disc number. Press one of CD1, CD 2 and CD 3. ③ Specify a track number using the number buttons. Specify while the display is blinking (for 4 sec.). ④ Program required tracks by repeating steps ② and ③ for each. ⑤ Press ▶. Program playback starts.
Recording of cassette deck

①.Load the tape for use in recording in the tape tray. ②Press TAPE DIRECTION to select the tape running direction. ③Press REC PAUSE. The cassette deck enters the record-pause mode. ④Play the source to be recorded. ⑤Press ▶. Recording starts.
Synchronized Recording
When recording CD audio onto an MD, CD audio onto a cassette tape or MD audio on a cassette tape, the recording operation can be synchronized with the playback operation.
Recording CD audio onto an MD (1: Recording the digital input from the CD player)

① Prepare the MD recorder.
Load a recordable MD (Mini Disc) in the MD recorder.
② Prepare the CD player.
Load the CD to be recorded in the CD player. Program tracks if required.
③ Press CD REC of the MD recorder.
Synchronized recording starts.
- To stop the recording, press □/CANCEL on either the MD recorder or the CD player.
- Refer also to the instruction manual of the MD recorder.
Recording CD audio onto an MD (2: Recording the analog input from the CD player)

① Prepare the MD recorder.
Load a recordable MD (Mini Disc) in the MD recorder.
② Prepare the CD player.
Load the CD to be recorded in the CD player. Program tracks if required.
③ Press REC PAUSE of the MD recorder.
The MD recorder enters record-pause mode.

④ Press INPUT of the MD recorder to select the analog input.

⑤ Press ▷/Ⅱ of the CD player.
Synchronized recording starts.
- To stop the recording, press □/CANCEL on either the MD recorder or the CD player.
- Refer also to the instruction manual of the MD recorder.
Recording CD audio onto a cassette tape (1)

① Prepare the cassette deck. Load a tape for use in recording in the cassette deck. ② Prepare the CD player. Load the CD to be recorded in the CD player. Program tracks as required. ③ Press CD REC of the cassette deck. Synchronized recording starts. - To stop recording, press □/CANCEL on the CD player or ■ on the cassette deck. - Refer also to the instruction manual of the cassette deck.
Recording CD or MD audio onto a cassette tape (2)

① Prepare the cassette deck. Load a tape for use in recording in the cassette deck. ② Prepare the CD player or MD recorder. To record CD: Load the CD to be recorded in the CD player and program tracks as required. To record MD: Load the MD to be recorded in the MD recorder and program tracks as required.
③ Press REC PAUSE of the cassette deck.
The cassette deck enters the recording standby mode.

④ Press ▷/Ⅱ of the CD player or MD recorder.
Synchronized recording starts.
- Refer also to the instruction manuals of the other components.
Additional Information
Troubleshooting
If you experience any difficulty with your units, check the following list for a possible solution before calling for service. If you cannot solve the problem from the hints given here, or the units have been physically damaged, call a qualified person, such as your dealer, for service.
| SYMPTOM | POSSIBLE CAUSE | ACTION |
| Amplifier/tunerAmplifier/tuner does not respond. | The AC power cord is disconnected. | Connect the power. |
| No sound. | Connections are incorrect or incomplete. | Refer to “Connections” and make sure all equipment is connected correctly. |
| The speaker cords are not connected. | Connect the speaker cords. | |
| Headphones are connected. | Disconnect the headphones. | |
| The volume control is turned all the way down. | Turn VOLUME to the right. | |
| Sound placement and/or motion is undefined. | The polarity (+, -) of one speaker is reversed. | Make sure both speakers are connected with the correct polarity. |
| Sound comes from only one speaker. | The balance is turned all the way to the right or left.A speaker cords is disconnected. | Adjust the balance toward the center.Make sure the speaker cords are connected securely. |
| Noise in broadcast signal makes it difficult to hear. | Antenna is not connected.The AM loop antenna is too close to the unit. | Make sure the antennas are connected securely.Change the location and direction of the AM loop antenna. |
| The FM wire antenna is laying in a pile on the floor. | Strech the wire antenna out and pin it in a position that provides good reception. | |
| Remote control does not work | Batteries are exhausted.Battery polarity (+, -) is reversed.Incorrect operation. | Replace the batteries.Reinsert batteries correctly.Point remote control at the remote sensor on the amplifier/tuner. |
| The remote sensor is in direct sunlight. | Keep the remote sensor away from direct sunlight. | |
| CD playerPlayback is not possible. | No disc has been loaded.The disc was inserted upside-down.The disc is not flat in the groove on the disc trayThe playback is paused.The disc is damaged.Moisture has condensed inside the unit. | Load a disc (see page 27).Load the disc so that the label side faces up in the disc tray.Load the disc so that it lies flat in the disc tray (see page 27).Press ▷/II.Load a different disc.Leave the unit turned on until the moisture evaporates. |
| Sound is intermittent. | The disc is dirty.The disc is warped or scratched. | Wipe the surface disc with a soft cloth.Replace the disc with a new one. |
| No sound. | Connections are incorrect or incomplete.Volume control on amplifier /tuner is turned all the way down. | Check to make sure the all equipment is connected correctly.Adjust the volume on the amplifier/tuner. |
| Disc tray does not open. | Power cord is not connected.Power is not turned on. | Connect the power cord.Turn the power on. |
| CD player does not respond. | The power cord is disconnected.The Compu Link cable is not connected.Power is not turned on. | Connect the power cord.Connect the Compu Link cable.Turn the power on. |
Specifications
Amplifier/tuner (RX-EX70)
Output Power 20 watts per channel, min. RMS, both channels driven, into 6 ohms from 70 Hz to 20 kHz, with no more than 0.9% total harmonic distortion.
Total Harmonic Distortion (6 ohms, 1 kHz) 0.08% at 14 watts output (* Measured by JVC
Audio Analysis System)
Audio Input Sensitivity/Impedance (1 kHz)
CD, MD 260 mV/49 kohms
TAPE 290 mV/54 kohms
AUX 370 mV/49 kohms
Audio output level/Impedance (1 kHz)
TAPE, MD 210 mV/400 ohms
SUB-WOOFER OUT 1.8V/1k ohms
Speaker terminals
Impedance 6 - 16 ohms
Tuner Section
FM Tuner Tuning Range 87.5 - 108.0 MHz
AM Tuner Tuning Range 530 - 1710 kHz
General
Dimensions 200 · 80 · 323.4 mm (W/H/D)
(7-7/8 · 3-3/16 · 12-3/4 inches)
Mass 3.3 kg (7.3 lbs)
Power Specifications
Power Requirements AC 120 V ∼ , 60 Hz
Power Consumption 48 watts (at operation)
CD Player (XL-EX70)
13 watts (in standby mode)
CD Capacity 3 CDs
Dynamic Range 95 dB
Signal-To-Noise Ratio 100 dB
Wow And Flutter Unmeasurable
General
Mass 2.8 kg (6.2 lbs)
Power Specifications
Power Requirements AC 120 V ∼ , 60 Hz
Power Consumption 8 watts (at operation)
3 watts (in standby mode)
Accessories
AC power cord (1)
Stereo Audio pin cord (1)
Compu Link cable (1)
AM loop antenna (1)
FM wire antenna (1)
Batteries (R6P(SUM-3)/AA (15F)) (2)
Remote Control (1)
Design and specifications are subject to change without notice.
HOW TO LOCATE YOUR JVC SERVICE CENTER
TOLL FREE : 1-800-537-5722
Dear customer:
In order to receive the most satisfaction from your purchase, read the instruction booklet before operating the unit. In the event that repair is necessary, or for the address nearest your location, please refer to the factory service center list below or within the Continental United States, Call 1-800-537-5722 for your authorized servicer. Remember to retain your Bill of Sale for Warranty Service.
—JVC
JVC SERVICE & ENGINEERING
COMPANY OF AMERICA
DIVISION OF US JVC CORP.
FACTORY SERVICE CENTER LOCATIONS
107 Little Falls Road
Fairfield, NJ 07004-2105
(201) 808-9279
1500 Lakes Parkway
Lawrenceville, GA 30243-5357
(770) 339-2522
705 Enterprise Street
Aurora, IL 60504-8149
(630) 851-7855
5665 Corporate Avenue
Cypress, CA 90630-0024
(714) 229-8011
2969 Mapunapuna Place
Honolulu, HI 96819-2040
(808) 833-5828
10700 Hammerly, Suite 110
Houston, TX 77043
(713) 935-9331
230 Eliot Street
Ashland, MA 0172-2377
(508) 881-5923
14505 Commerce Way
Miami Lakes, FL 33016-1512
(305) 362-6252
890 Dubuque Avenue
South San Francisco, CA 94080-1804
(415) 871-2666
Sophisticated electronic products may require occasional service. Just as quality is a keyword in the engineering and production of the wide array of JVC products, service is the key to maintaining the high level of performance for which JVC is world famous. The JVC service and engineering organization stands behind our products.
NATIONAL HEADQUARTERS
JVC SERVICE & ENGINEERING COMPANY OF AMERICA
DIVISION OF US JVC CORP.
107 Little Falls Road
Fairfield, NJ 07004-2105
If you ship the product · · ·
Pack your JVC unit in the original carton or one of equivalent size and strength. Enclose, with the unit, a letter stating the problem or symptom that exists and also a copy of the receipt or bill of sale you received when you purchased your JVC unit. Print your home return address on the outside and the inside of the carton. Send to the appropriate JVC Factory Service Center as listed above.
Do not service it yourself.
CAUTION
To prevent electrical shock, do not open the cabinet. No user serviceable parts inside.
Refer servicing to qualified service personnel.
ACCESSORIES
To purchase accessories for your JVC product, you may contact your local JVC Dealer. Or from the 48 Continental United States call toll free: 800-882-2345
JVC
LIMITED WARRANTY AUDIO-1
JVC COMPANY OF AMERICA warrants this product and all parts thereof, except as set forth below ONLY TO THE ORIGINAL PURCHASER AT RETAIL to be FREE FROM DEFECTIVE MATERIAL AND WORKMANSHIP from the date of original retail purchase for the period as shown below. ("The Warranty Period.")
| PARTS LABOR1YR 1YR |
THIS LIMITED WARRANTY IS VALID ONLY IN THE FIFTY (50) UNITED STATES, THE DISTRICT OF COLUMBIA AND IN COMMONWEALTH OF PUERTO RICO.
WHAT WE WILL DO:
If this product is found to be defective, JVC will repair or replace defective parts at no charge to the original owner. Such repair and replacement services shall be rendered by JVC during normal business hours at JVC authorized service centers. Parts used for replacement are warranted only for the remainder of the Warranty Period. All products and parts thereof may be brought to a JVC authorized service center on a carry-in basis except for Television sets having a screen size 25 inches and above which are covered on an in-home basis.
WHAT YOU MUST DO FOR WARRANTY SERVICE:
Return your product to a JVC authorized service center with a copy of your bill of sale. For your nearest JVC authorized service center, please call toll free: (800) 537-5722.
If service is not available locally, box the product carefully, preferably in the original carton, and ship, insured, with a copy of your bill of sale plus a letter of explanation of the problem to the nearest JVC Factory Service Center, the name and location of which will be given to you by the toll-free number.
If you have any questions concerning your JVC Product, please contact our Customer Relations Department.
WHAT IS NOT COVERED:
This limited warranty provided by JVC does not cover:
- Products which have been subject to abuse, accident, alteration, modification, tampering, negligence, misuse, faulty installation, lack of reasonable care, or if repaired or serviced by anyone other than a service facility authorized by JVC to render such service, or if affixed to any attachment not provided with the products, or if the model or serial number has been altered, tampered with, defaced or removed;
- Initial installation and installation and removal for repair;
- Operational adjustments covered in the Owner's Manual, normal maintenance, video and audio head cleaning;
- Damage that occurs in shipment, due to act of God, and cosmetic damage;
- Signal reception problems and failures due to line power surge;
- Video Pick-up Tubes/CCD Image Sensor, Cartridge, Stylus(Needle) are covered for 90 days from the date of purchase;
- Accessories;
- Batteries (except the Rechargeable Batteries are covered for 90 days from the date of purchase);
There are no express warranties except as listed above.
THE DURATION OF ANY IMPLIED WARRANTIES, INCLUDING THE IMPLIED WARRANTY OF MARCHANTABILITY, IS LIMITED TO THE DURATION OF THE EXPRESS WARRANTY HEREIN.
JVC SHALL NOT BE LIABLE FOR THE LOSS OF USE THE PRODUCT, INCONVENIENCE, LOSS OR ANY OTHER DAMAGES, WHETHER DIRECT, INCIDENTAL OR CONSEQUENTIAL (INCLUDING, WITHOUT LIMITATION, DAMAGE TO TAPES, RECORDS OR DISCS) RESULTING FROM THE USE OF THIS PRODUCT, OR ARISING OUT OF ANY BREACH OF THIS WARRANTY. ALL EXPRESS AND IMPLIED WARRANTIES, INCLUDING THE WARRANTIES OF MERCHANTABILITY AND FITNESS FOR PARTICULAR PURPOSE, ARE LIMITED TO THE WARRANTY PERIOD SET FORTH ABOVE.
Some states do not allow the exclusion of incidental or consequential damages or limitations on how long an implied warranty last, so these limitations or exclusions may not apply to you. This warranty gives you specific legal rights and you may also have other rights which vary from state to state.
JVC COMPANY OF AMERICA 41 Slater Drive
DIVISION OF US JVC CORP. Elmwood Park, New Jersey 07407
REFURBISHED PRODUCTS CARRY A SEPARATE WARRANTY, THIS WARRANTY DOES NOT APPLY. FOR DETAILS OF REFURBISHED PRODUCT WARRANTY, PLEASE REFER TO THE REFURBISHED PRODUCT WARRANTY INFORMATION PACKAGED WITH EACH REFURBISHED PRODUCT.
For customer use:
Enter below the Model No. and Serial No. which is located either on the rear, bottom or side of the cabinet. Retain this information for future reference.
Model No.: Serial No.:
Purchase date: Name of dealer:

- INSTRUCTIONS
- WELCOME
- IMPORTANT CAUTIONS
- INSTALLATION OF THE UNIT
- POWER CORD
- MALFUNCTIONS, ETC
- FOR SAFE USE, OBSERVE THE FOLLOWING
- AVOID MOISTURE, WATER AND DUST
- AVOID HIGH TEMPERATURES
- DO NOT BLOCK THE VENTS
- WHEN YOU'RE AWAY
- DO NOT INSERT FOREIGN MATTER INTO THE MACHINE
- CARE OF THE CABINET
- IF WATER GETS INSIDE THE MACHINE
- TABLE OF CONTENTS
- PARTS INDEX
- SETTING UP THE SYSTEM
- AMPLIFIER OPERATIONS
- TUNER OPERATIONS
- CD OPERATIONS
- TIMER OPERATIONS
- COMPU LINK
- ADDITIONAL INFORMATION
- FRONT PANELS
- AMPLIFIER/TUNER FRONT PANEL
- POWER BUTTON
- STANDBY INDICATOR
- DISPLAY
- REMOTE SENSOR
- KEY MODE BUTTON
- (CURSOR BUTTONS)
- INPUT BUTTON
- BAND BUTTON
- VOLUME CONTROL
- DIRECT BUTTON AND INDICATOR
- S.A. BASS BUTTON AND INDICATOR
- PHONES JACK
- CD PLAYER FRONT PANEL
- REPEAT BUTTON
- PLAY MODE BUTTON
- ◀◀, ▶▶| BUTTONS
- DISC CONTROL BUTTONS
- ▷/II BUTTON
- CANCEL BUTTON
- MAIN TRAY
- DISPLAYS
- AMPLIFIER/TUNER DISPLAY
- RECEIVING CONDITION INDICATORS
- RECEIVING BAND INDICATORS
- CHARACTER DISPLAY
- PRESET INDICATOR
- VOLUME INDICATOR
- TIMER INDICATORS
- SOURCE INDICATORS
- CD PLAYER DISPLAY
- PLAY INDICATORS
- DISC INDICATOR
- REPEAT MODE INDICATORS
- PLAY MODE INDICATORS
- TRACK INDICATORS
- REAR PANELS
- AMPLIFIER/TUNER REAR PANEL
- CD INPUT JACKS
- MD INPUT/OUTPUT JACKS
- TAPE INPUT/OUTPUT JACKS
- AUX INPUT JACKS
- SUB-WOOFER OUT JACK
- COMPU LINK-3 (SYNCHRO) JACKS
- SPEAKERS TERMINALS
- ANTENNA TERMINALS
- CD PLAYER REAR PANEL
- AC POWER CORD RECEPTACLE
- DIGITAL OUT JACK
- ANALOG OUT JACKS
- REMOTE CONTROL
- POWER
- NUMBER BUTTONS
- FM MODE/MUTING
- CD CONTROLS
- DIRECT
- S.A.BASS
- TONE CONTROL BUTTONS
- CANCEL
- TAPE DIRECTION
- ◀◀◀ ◀◀ (SKIP BACK)
- REC PAUSE
- (STOP) / V
- VOLUME
- FADE MUTING
- (SKIP FORWARD)
- (PLAY) / ∧
- TAPE CONTROL
- SET
- CLOCK/TIMER
- R,-/L
- SOURCE BUTTONS
- SLEEP
- SUPPLIED ACCESSORIES
- CAUTIONS FOR PLACEMENT
- CONNECTIONS
- BEFORE MAKING ANY CONNECTIONS
- CONNECTING THE SUPPLIED ANTENNAS
- FM ANTENNA
- AM LOOP ANTENNA
- CAUTION
- CONNECTING EXTERNAL ANTENNAS
- AUDIO PIN CORD
- COMPU LINK CABLE
- OPTICAL DIGITAL CABLE (NOT SUPPLIED)
- OPTICAL DIGITAL CABLE
- CONNECTING THE SPEAKERS
- IMPORTANT
- CONNECTING THE POWER
- AMPLIFIER/TUNER
- CD PLAYER
- REMOTE CONTROL BATTERIES
- OPERATING THE REMOTE CONTROL
- CAUTIONS
- SETTING THE CLOCK
- TO SET THE CLOCK PRECISELY
- WHY SET THE TIME
- NOTES
- TURNING ON THE POWER
- PRESS POWER
- TO TURN OFF THE POWER
- ADJUSTING THE VOLUME
- ROTATE VOLUME
- PRESS VOLUME ∧ OR . √
- TO MUTE THE SOUND
- ADJUSTING THE SOUND EMPHASIZING THE BASS
- TO CANCEL THE BASS EMPHASIS
- ADJUSTING THE BASS AND TREBLE
- ADJUSTING THE BASS
- ADJUSTING THE TREBLE
- ADJUSTING THE BALANCE
- DIRECT PLAYBACK
- TO CANCEL THE DIRECT PLAYBACK
- SELECTING A SOURCE
- FROM THE FRONT PANEL
- ONE TOUCH OPERATION
- FROM THE REMOTE CONTROL
- WHEN USING OTHER OPTIONAL COMPONENTS TOGETHER WITH THIS UNIT VIA THE COMPU LINK CONNECTION (PAGE 40)
- MANUAL AND AUTOMATIC TUNING
- FOR MANUAL TUNING
- FOR AUTOMATIC TUNING
- STEREO AND MONAURAL RECEPTION
- TO SWITCH TO MONAURAL RECEPTION
- TO SWITCH TO STEREO RECEPTION
- PRESETTING STATIONS
- LISTENING TO PRESET STATIONS
- TO SWITCH THROUGH THE PRESET STATIONS ONE BY ONE
- TO SPECIFY THE PRESET STATIONS
- LOADING CDS
- DISPLAYED INFORMATION
- TIP
- BASIC OPERATIONS
- CD PLAYBACK SEQUENCE
- WHEN CD 1 IS PRESSED
- WHEN CD 2 IS PRESSED
- WHEN CD 3 IS PRESSED
- TO STOP PLAYBACK
- TO PAUSE PLAYBACK
- TO REMOVE A CD
- TO EXCHANGE CDS DURING PLAYBACK OF ANOTHER
- TO SKIP TO THE BEGINNING OF A TRACK
- TO CHECK THE PLAYING TIME OF A TRACK
- FAST FORWARD / REVERSE
- PROGRAM PLAY MODE
- TO CHECK THE PROGRAMMED TRACKS
- TO REMOVE PROGRAMMED TRACKS
- IF YOU MAKE A MISTAKE DURING PROGRAMMING
- TO CANCEL PROGRAM PLAYBACK
- WHEN YOU REMOVE A DISC CONTAINING PROGRAMMED TRACKS
- TO PLAY THE PROGRAM REPEATEDLY
- RANDOM PLAY MODE
- PROGRAM RANDOM
- OFF (CONTINUOUS PLAY)
- TO CANCEL RANDOM PLAYBACK
- TO PLAY THE TRACK AT RANDOM REPEATEDLY
- REPEAT PLAY MODE
- REPEAT ALL
- REPEAT 1 CD
- REPEAT
- TO CANCEL REPEAT PLAYBACK
- TRAY LOCK
- TO UNLOCK THE TRAY
- INTRODUCTION
- DAILY TIMER (WAKE-UP TIMER, PAGE 35)
- REC TIMER (RECORDING TIMER, PAGE 37)
- SLEEP TIMER (SLEEP TIMER, PAGE 39)
- DAILY TIMER
- WHEN SELECTING TUNER
- WHEN SELECTING MD
- WHEN CD IS SELECTED
- ⑥SET THE VOLUME
- TIMER OPERATION
- SWITCHING THE DAILY TIMER OFF AND ON
- SWITCHING OFF
- SWITCHING ON
- RECORDING TIMER
- SWITCHING THE REC TIMER ON AND OFF
- SLEEP TIMER
- TO CHANGE THE TIMER LENGTH
- TO CANCEL THE SLEEP TIMER
- TIMER PRIORITY
- LINKED OPERATION OF THE OTHER OPTIONAL COMPONENTS (COMPU LINK)
- WHAT IS COMPU LINK
- COMPU LINK CONNECTIONS
- COMPU LINK-3 FEATURES
- SHORTCUT PLAYBACK
- A SINGLE REMOTE CONTROL UNIT
- SYNCHRONIZED RECORDING
- SHORTCUT PLAYBACK (FROM THE RX-EX70 AMPLIFIER/TUNER)
- PLAYING CDS
- PLAYING AN MD
- PLAYING A CASSETTE TAPE
- SHORTCUT PLAYBACK (FROM A SOURCE COMPONENT)
- CD PLAYER OPERATION
- MD RECORDER OPERATION
- TAPE DECK OPERATION
- REMOTE CONTROL OF THE OTHER OPTIONAL COMPONENTS
- CONTROLLING THE CD PLAYER (XL-EX70)
- CONTROLLING THE CASSETTE DECK
- PROGRAM PLAYBACK OF CD
- RECORDING OF CASSETTE DECK
- RECORDING CD AUDIO ONTO AN MD (1: RECORDING THE DIGITAL INPUT FROM THE CD PLAYER)
- RECORDING CD AUDIO ONTO AN MD (2: RECORDING THE ANALOG INPUT FROM THE CD PLAYER)
- RECORDING CD AUDIO ONTO A CASSETTE TAPE (1)
- RECORDING CD OR MD AUDIO ONTO A CASSETTE TAPE (2)
- TROUBLESHOOTING
- SPECIFICATIONS
- TUNER SECTION
- GENERAL
- POWER SPECIFICATIONS
- ACCESSORIES
- HOW TO LOCATE YOUR JVC SERVICE CENTER
- JVC SERVICE & ENGINEERING
- COMPANY OF AMERICA
- FACTORY SERVICE CENTER LOCATIONS
- IF YOU SHIP THE PRODUCT
- DO NOT SERVICE IT YOURSELF
- JVC
- LIMITED WARRANTY AUDIO
- WHAT WE WILL DO
- WHAT YOU MUST DO FOR WARRANTY SERVICE
- WHAT IS NOT COVERED
Brand : JVC
Model : RX-EX70
Category : Hi-Fi System