
CA-UXG60 - Hi-Fi System JVC - Free user manual and instructions
Find the device manual for free CA-UXG60 JVC in PDF.
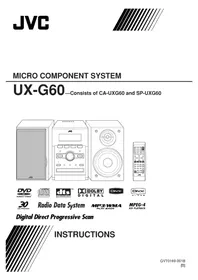


| Product Type | Mini Hi-Fi System |
| Model | CA-UXG60 |
| Brand | JVC |
| Dimensions (Approx.) | 250 mm (W) x 200 mm (H) x 300 mm (D) |
| Weight (Approx.) | 5.0 kg |
| Power Consumption | 60 W |
| Power Supply | AC 120 V, 60 Hz |
| Amplifier Output Power | 30 W per channel (RMS) |
| Supported Media | CD, CD-R/RW, MP3 (CD) |
| Tuner | FM/AM digital tuner with presets |
| Cassette Deck | Yes, auto-reverse |
| Audio Inputs | Auxiliary (3.5 mm), USB (playback) |
| Headphone Jack | Yes (3.5 mm) |
| Remote Control | Included |
| Display | Multi-function fluorescent display |
| Clock/Timer | Yes, with sleep timer |
| Equalizer | Preset EQ modes (Rock, Pop, Classic, etc.) |
| Speaker System | Two-way bass-reflex speakers (included) |
| Cleaning Instructions | Wipe with soft dry cloth; avoid solvents |
| Safety Features | Auto power-off after inactivity |
| Repairability | Spare parts available via authorized service |
Frequently Asked Questions - CA-UXG60 JVC
User questions about CA-UXG60 JVC
0 question about this device. Answer the ones you know or ask your own.
Ask a new question about this device
Download the instructions for your Hi-Fi System in PDF format for free! Find your manual CA-UXG60 - JVC and take your electronic device back in hand. On this page are published all the documents necessary for the use of your device. CA-UXG60 by JVC.
USER MANUAL CA-UXG60 JVC
UX-G60—Consists of CA-UXG60 and SP-UXG60

Radio Data System
MP3/WMA PLAYBACK
MPEG-4 ASF PLAYBACK
Digital Direct Progressive Scan

INSTRUCTIONS
IMPORTANT for the U.K.
DO NOT cut off the mains plug from this equipment. If the plug fitted is not suitable for the power points in your home or the cable is too short to reach a power point, then obtain an appropriate safety approved extension lead or consult your dealer.
BE SURE to replace the fuse only with an identical approved type, as originally fitted.
If nonetheless the mains plug is cut off ensure to remove the fuse and dispose of the plug immediately, to avoid a possible shock hazard by inadvertent connection to the mains supply.
If this product is not supplied fitted with a mains plug then follow the instructions given below:
IMPORTANT:
DO NOT make any connection to the terminal which is marked with the letter E or by the safety earth symbol or coloured green or green-and-yellow.
The wires in the mains lead on this product are coloured in accordance with the following code:
Blue: Neutral
Brown: Live
As these colours may not correspond with the coloured markings identifying the terminals in your plug, proceed as follows:
The wire which is coloured blue must be connected to the terminal which is marked with the letter N or coloured black.
The wire which is coloured brown must be connected to the terminal which is marked with the letter L or coloured red.
IF IN DOUBT - CONSULT A COMPETENT ELECTRICIAN.
CAUTION—(Standby/on) button!
Disconnect the mains plug to shut the power off completely (the STANDBY lamp goes off). When installing the apparatus, ensure that the plug is easily accessible. The Standby/on button in any position does not disconnect the mains line.
- When the System is on standby, the STANDBY lamp lights red.
- When the System is turned on, the STANDBY lamp goes off. The power can be remote controlled.
CAUTION
To reduce the risk of electrical shocks, fire, etc.:
- Do not remove screws, covers or cabinet.
- Do not expose this appliance to rain or moisture.
Caution: Proper Ventilation
To avoid risk of electric shock and fire, and to prevent damage, locate the apparatus as follows:
- Front: No obstructions and open spacing.
- Sides/ Top/ Back: No obstructions should be placed in the areas shown by the dimensions below.
- Bottom: Place on the level surface. Maintain an adequate air path for ventilation by placing on a stand with a height of 10 cm or more.
Front view Side view

IMPORTANT FOR LASER PRODUCTS
- CLASS 1 LASER PRODUCT
- CAUTION: Do not open the top cover. There are no user serviceable parts inside the unit; leave all servicing to qualified service personnel.
- CAUTION: Visible and/or invisible class 1M laser radiation when open. Do not view directly with optical instruments.
CAUTION
- Do not block the ventilation openings or holes. (If the ventilation openings or holes are blocked by a newspaper or cloth, etc., the heat may not be able to get out.)
- Do not place any naked flame sources, such as lighted candles, on the apparatus.
- When discarding batteries, environmental problems must be considered and local rules or laws governing the disposal of these batteries must be followed strictly.
- Do not expose this apparatus to rain, moisture, dripping or splashing and that no objects filled with liquids, such as vases, shall be placed on the apparatus.
Information for Users on Disposal of Old equipment
[European Union]

Attention:
This symbol is only valid in the European Union.
This symbol indicates that the electrical and electronic equipment should not be disposed of as general household waste at its end-of-life. Instead, the product should be handed over to the applicable collection point for the recycling of electrical and electronic equipment for proper treatment, recovery, and recycling in accordance with your national legislation.
By disposing of this product correctly, you will help to conserve natural resources and help prevent potential negative effects on the environment and human health, which could otherwise be caused by inappropriate waste handling of this product. Please contact your local municipal office, your household waste disposal service, or the shop where you purchased the product.
Penalties may be applicable for incorrect disposal of this waste, in accordance with national legislation.
(Business users)
If you wish to dispose of this product, please visit our web page www.jvc-europe.com to obtain information about the take-back of the product.
[Other Countries outside the European Union]
If you wish to dispose of this product, please do so in accordance with applicable national legislation or other rules in your country for the treatment of old electrical and electronic equipment.
Introduction
Playable Disc/File Types
| MP3/WMAPLAY BACK | MPEG-4ASF PLAYBACK | |||
 | Video CD |  |  | COMPACTDISCOCTITAL AUDIO |
| • CD-R/-RW: Recorded in the Audio CD, Video CD, and SVCD formats. MP3, WMA, JPEG, MPEG-1, MPEG-2, ASF and DivX files written in accordance with the “ISO 9660” format can also be played. | ||||
| • DVD-R/-RW, +R/+RW: Recorded in the DVD Video format. MP3, WMA, JPEG, MPEG-1, MPEG-2, ASF and DivX files written in the UDF format can also be played. | ||||
| • DVD-RW/-ROM: Recorded in the DVD Video Recording (VR) format. | ||||
| • USB mass storage class device: MP3, WMA, JPEG, MPEG-1, MPEG-2, ASF and DivX files. | ||||
In addition to the above discs/files, this System can play back audio data recorded on CD-Extra.
- The following discs cannot be played back: DVD-RAM, CD-I (CD-I Ready), CD-ROM, Photo CD, CD-G (CD-Graphics), and DVD/CD Text. Playing back these discs will generate noise and damage the speakers.
- In this manual, "file" and "track" are interchangeably used for MP3/WMA/JPEG/MPEG-1/MPEG-2/ASF/DivX operations.
- It is possible to play back finalized +R/+RW (DVD Video Format only) discs. "DVD" lights on the front display panel when a +R/+RW disc is loaded.
Note on Region Code
DVD players and DVDs have their own Region Code numbers. This system can play back only DVDs with Region Code numbers including "2."
Example:


Audio formats
The system can play back the following digital audio formats.
- LPCM (Linear PCM), Dolby Digital, DTS (Digital Theater Systems), MLP (Meridian Lossless Packing)
When playing multi-channel encoded DVDs, the system properly converts these multi-channel signals into 2 channels and emits the downmixed sound from the speakers.
- To enjoy the powerful sound of these multi-channel encoded DVDs, connect a proper decoder or an amplifier with a proper built-in decoder to the OPTICAL DIGITAL OUT terminal on the rear.
IMPORTANT: Before playing a disc, make sure of the following...
- Turn on the TV and select an appropriate input mode on the TV to view the pictures or on-screen displays.
- For disc playback, you can change the initial setting to your preference. See "Setup Menu Operations" on page 31.
If "☐" appears on the TV screen when you press a button, the disc cannot perform the operation you have tried to do.
How to Read This Manual
- Button and control operations are explained in the table below.
- Some related tips and notes are explained later in the sections "Learning More about This System" and "Troubleshooting," but not in the same section explaining the operations (INFO) indicates that the content has some information.
 | Indicates that you press the button briefly. |
 | Indicates that you press the button briefly and repeatedly until an option you want is selected. |
 | Indicates that you press one of the buttons. |
 | Indicates that you press and hold the button for a specified period. |
 | Indicates that you turn the control toward the specified direction(s). |
 | Indicates that this operation is only possible using the remote control. |
 | Indicates that this operation is only possible using the main unit. |
“DVD Logo” is a trademark of DVD Format/Logo Licensing Corporation registered in the US, Japan and other countries.
Caution for DualDisc playback
The Non-DVD side of a “DualDisc” does not comply with the “Compact Disc Digital Audio” standard. Therefore, the use of the Non-DVD side of a DualDisc in this product is not recommended.
Precautions
Installation
- Install the System in a location with adequate ventilation to prevent internal heat build-up in the System.

DO NOT install the System in a location near heat sources, or in a place subject to direct sunlight, excessive dust or vibration.
- Install in a place which is level, dry and neither too hot nor too cold—between 5°C and 35°C.
- Leave sufficient distance between the System and the TV.
- Keep the speakers away from the TV to avoid interference with the TV.
Power sources
- When unplugging the System from the wall outlet, always pull on the plug, not the AC power cord.

DO NOT handle the AC power cord with wet hands.
Moisture condensation
Moisture may condense on the lenses inside the System in the following cases:
• After starting to heat the room - In a damp room - If the System is brought directly from a cold to a warm place.
Should this occur, the System may malfunction. In this case, leave the System turned on for a few hours until the moisture evaporates, unplug the AC power cord, then plug it in again.
Internal heat
- Make sure there is good ventilation around the unit. Poor ventilation could overheat and damage the unit.

DO NOT block the ventilation openings or holes. If they are blocked by a newspaper or cloth, etc., the heat may not be able to get out.
Others
- Should any metallic object or liquid fall into the System, unplug the AC power cord and consult your dealer before operating any further.

DO NOT disassemble the System since there are no user serviceable parts inside.
- If you are not going to operate the System for an extended period of time, unplug the AC power cord from the wall outlet.
If anything goes wrong, unplug the AC power cord and consult your dealer.
Contents
Connections 3
Display Indicators......6
Daily Operations—Playback ....7
Daily Operations—Sound & Other Adjustments .....11
Adjusting the Volume 11
Adjusting the Sound.... 11
Creating 3-dimensional Sound Field—3D Phonic...... 12
Presetting Automatic DVD Video Sound Increase Level .... 12
Adjusting the Audio Input Level 12
Changing the Display Brightness.... 13
Changing the Scanning Mode 13
Changing the Picture Tone.... 13
Setting the Clock.... 14
Turning Off the Power Automatically 14
Advanced Radio Operations....15
Unique DVD/VCD Operations ......17
Selecting the Audio Track.... 17
Selecting the Subtitle Language.... 18
Selecting the View Angle 18
Selecting the Browsable Still Pictures 18
Playing Back Bonus Group.... 18
Making Dialogues Clear—Clear Voice 19
Special Effect Playback 19
Advanced Playback Operations ....20
Programming the Playing Order—Program Play ...... 20
Playing at Random—Random Play 21
Playing Repeatedly 22
Prohibiting Disc Ejection—Child Lock.... 22
On-screen Disc Operations 23
Audio/Video File Operations ......27
Timer Operations....29
Setup Menu Operations ....31
Additional Information ....33
Learning More about This System.... 33
Troubleshooting 36
Operating JVC's TVs Using the Remote Control...... 38
Specifications 39
Parts Index 40
Connections INFO
Do not connect the AC power cord until all other connections have been made.
- Connect AV directly to the video input of your TV. Connecting AV to a TV via a VCR may interfere with your viewing when playing back a copy-protected disc. Connecting AV to an integrated TV/VCR system may also interfere with your viewing.
Supplied accessories
Check to be sure that you have all the following items.
- FM antenna (x1) • AM loop antenna (x1)
- Remote control (x1)
- Batteries (x2)
If any item is missing, consult your dealer immediately.
Rear panel
Front panel
Pull down the cover until you hear a clicking sound.

From the portable audio device
See page 5.
From the USB mass storage class device
See page 5.
From the headphones
See page 7.
1 AM/FM antenna
To assemble the AM loop antenna![graph LR A["Device with cable"] --> B["Screen Display"] B --> C["Printer Application"]](/content/2026/06/1306996/images/e66fdc3d473ef49038c4e9a508bd4e061272bd52449d1c5f11abbf70695f87bb.jpg)
To connect AM/FM antenna
Extend it so that you can obtain the best reception. Keep it connected.
For better AM/FM reception
AM loop antenna (supplied)

- Disconnect the supplied FM antenna, and connect to an outdoor FM antenna using a 75Ω wire with coaxial type connector (IEC or DIN45325).
② Speakers
- When connecting the speaker cords, match the polarity of the speaker terminals: red color to (+) and black color to (−).


- DO NOT connect more than one speaker to each terminal.
- DO NOT push or pull the speakers as this will damage the foot spacers at the bottom of the speakers.
③ TV/monitor
Connect only component cord or scart cord at one time.

• To select progressive scanning mode (see page 13), use VIDEO OUT jacks.

- This connection sends the video signal (Composite, Y/C, or RGB) and receives audio signal from TV. To listen to the TV sound, see page 8.
Scart cord (not supplied)
- After connecting a TV, select the proper video signal mode according to the connection method. See “Changing the Scanning Mode” on page 13.
4 To connect the powered subwoofer

The subwoofer connected can reproduce the bass sounds recorded in front left and right channels, but cannot reproduce the LFE signals in DVD multi-channel discs.
- Before plugging the unit to the main supply, make sure that the powered subwoofer is turned off.
5 Digital audio component

- Set “DIGITAL AUDIO OUTPUT” in the “AUDIO” menu correctly according to the connected digital audio equipment (see page 32). If the setting is incorrect, loud noise may be generated causing damage to the speakers.
When connecting a portable audio device (AUX)
- By using QP Link (Quick Portable Link), you can easily start playing back a portable audio device on this unit. See page 10 for details. - If an external device is not equipped with a stereo mini plug audio output, use a plug adaptor to convert the stereo mini plug to the corresponding plug of the audio output.
When connecting a USB mass storage class device
- You can connect a USB mass storage class device such as a USB flash memory device, hard disk drive, multimedia card reader, etc. to this System. See pages 9 and 33 for details. - If you press USB MEMORY ▶, the System detects the USB mass storage class device and the control screen appears on the TV screen. See page 27 for details.
Preparing the remote control
- Dispose of batteries in the proper manner, according to federal, state, and local regulations.

DO NOT recharge, short, disassemble, heat the battery or dispose of it in a fire.
When using the remote control
Point the top of the remote control toward the remote sensor as directly as possible. If you operate it from a diagonal position, the operating range (approx. 5 m) may be shorter.
The indications on the display tell you a lot of things while you are operating the System.
Before operating the System, be familiar with when and how the indicator illuminates on the display.

1 QP Link (Quick Portable Link) indicator
- Lights when QP Link is activated.
2 Disc format indicators
- SVCD: lights when playing back an SVCD. • VCD: lights when playing back a VCD.
- CD: lights when playing back a CD. • D VD: lights when playing back a DVD.
3 Audio file format indicators
- MP3: lights when an MP3 track is detected. • WMA: lights when a WMA track is detected.
4 3D PHONIC indicator
- Lights when 3D Phonic is activated.
5 C.VOICE (Clear Voice) indicator - Lights when Clear Voice is activated.
6 PG/PL indicators
- PG: lights when a DVD-VR formatted disc is called up.
- PL: lights when a Play List recorded on a DVD-VR formatted disc is called up.
7 Radio band indicators
- AM: lights when tuning in to an AM station. • FM: lights when tuning in to an FM station.
8 FM reception indicators
- ST (stereo): lights while an FM stereo station with sufficient signal strength is tuned in.
- MONO: lights while receiving an FM stereo station in monaural.
9 S.TURBO (Sound Turbo) indicator
- Lights when Sound Turbo II is activated.
10 PRGR. (Progressive) indicator - Lights when the progressive scanning mode is selected.
11 Main display
- While listening to radio: band (or preset number) and station frequency appear.
- While selecting “AUX”: “AUX” appears.
- While selecting "TV SOUND": "TV SOUND" appears.
- While playing a disc or file: current status appears.
[12]B.S.P. (Browsable Still Picture) indicator
- Lights when Browsable Still Pictures are detected while playing a DVD Audio disc.
13AHB PRO indicator
- Lights when Active Hyper Bass Pro is activated.
14|BONUS indicator
- Lights when a DVD Audio disc with a bonus group is detected.
15USB indicator
- Lights when "USB MEMORY" is selected as the source.
16|Playback mode indicators
• PRGM: lights when Program Play is activated. • RND: lights when Random Play is activated.
• ↩ (repeat)1:
- 1: lights when One Track/Chapter/Step Repeat is activated.
- → : lights when One Group/Title/All Tracks Repeat is activated.
17 Radio Data System indicators
• T A/NEWS/INFO—Program type (PTY) indicators:
– Lights to indicate the currently selected program type for PTY Standby Reception. - Flashes when a program is automatically tuned in with PTY Standby Reception.
[18]A.STBY (Auto Standby) indicator
- Lights when Auto Standby is activated.
- Flashes when disc playback stops with Auto Standby activated.
19|SLEEP indicator
- Lights when the Sleep Timer is activated.
20Daily Timer indicators
• ⏻ : lights when Daily Timer is on standby or is being set. - 1/2/3: lights when a Daily Timer (1, 2, or 3) is on standby; flashes while working or being set.
Daily Operations—Playback

![graph TD A["1"] --> B["2"] B --> C["3"] C --> D["4"] D --> E["End"]](/content/2026/06/1306996/images/3a1228b3358b21ee346352d0f23c9208ed537d2e9c4a33c1dab621fe3e774fd2.jpg)
In this manual, operations using the remote control are mainly explained; however, you can use the buttons and controls on the main unit if they have the same (or similar) name and marks.
1 Turn on the power.
The STANDBY lamp on the main unit turns off.
- Without pressing &AUDIO, the System turns on by pressing one of the source buttons.
- The System turns on and activates the AUX source by starting playback on an external device when QP Link is activated. (See page 10 for details.)
2 Select the source.
Playback automatically starts if the selected source is ready.
- If you press AUX, start playback on the external component.
3 Adjust the volume.
4 Operate the target source as explained later.
To turn off (standby) the unit

The STANDBY lamp on the main unit lights in red.
- A small amount of power is always consumed even while on standby.
You can reduce power consumption by pressing DIMMER (while holding SHIFT) to turn the display off while on standby.
- When the display is turned off, QP Link does not work.
For private listening
Connect a pair of headphones to the PHONES jack on the main unit. The sound will no longer come out of the speakers. Be sure to turn down the volume before connecting or putting on the headphones.
- Disconnecting the headphones will activate the speakers again.

DO NOT turn off (standby) the System with the volume set to an extremely high level; otherwise, the sudden blast of sound may damage your hearing, speakers and/or headphones when you turn on the System or start playback.
Listening to the Radio INFO
To select the band (FM or AM)
| Remote control: | Main unit: |
 |  |
To tune in to a station
While FM or AM is selected...

Frequency starts changing on the display.
When a station (frequency) with sufficient signal strength is tuned in, the frequency stops changing.
- When you repeatedly press the button, the frequency changes step by step.
To stop searching manually, press either button.
If the FM station has poor reception


The MONO indicator lights on the display. Reception will improve though stereo effect is lost—Monaural reception. To restore the stereo effect, press the button again (the MONO indicator disappears).
To preset the stations

You can preset 30 FM and 15 AM stations.
1 Tune in to a station you want to preset.
- You can also store the monaural reception mode for FM preset stations if selected.
2 Activate the preset number entry mode.
ENTER/SET

- Finish the following process while the indication on the display is flashing.
3 Select a preset number for the station you store.

Examples:
To select preset number 5, press 5.
To select preset number 10, press 10.
To select preset number 15, press ≥ 10, 1, then 5.
To select preset number 30, press ≥ 10, 3, then 0.
- You can also use the ▶▶ or ◀◀ button.
4 Store the station.


To tune in to a preset station

1 Select the band (FM or AM).
![graph TD A["FM/AM"] --> B["→"] B --> C["FM"] B --> D["AM"]](/content/2026/06/1306996/images/4c7dce718ecfe8da717afd6f73e3ab6f6a1223507a76ebc243fd793b0080f0d0.jpg)
2 Select the preset number for the station you stored.

Examples:
To select preset number 5, press 5.
To select preset number 10, press 10.
To select preset number 15, press ≥ 10, 1, then 5.
To select preset number 30, press ≥ 10, 3, then 0.
- You can also use the ▶▶ or ◀◀ button.
Listening to the TV Sound INFO
You can listen to the TV sound through this System.
| Remote control: | Main unit: |
 | TV SOUND |
Playing Back a Disc/File INFO
Before operating a disc/file, be familiar how a disc/file is recorded.
- DVD Video comprises of "Titles" which includes "Chapters." DVD Audio/MP3/WMA/MPEG-1/MPEG-2/ASF/DivX comprises of "Groups" which includes "Tracks," JPEG comprises of "Groups" which includes "Files," and CD/SVCD/VCD comprises of only "Tracks."
- For playback of MP3/WMA/JPEG/MPEG-1/MPEG-2/ASF/DivX files in a USB mass storage class device, see also page 27.
To insert a disc
You can insert a disc while playing another source.

- When using an 8 cm disc, place it on the inner circle of the disc tray.
To close the disc tray, press ▲ again.
- If you press DVD/CD ▶, the disc tray closes automatically and playback starts (depending on how the disc is programmed internally).
To connect a USB mass storage class device
You can connect a USB mass storage class device (see page 5) while playing another source.
- If you press USB MEMORY ▶, the System detects the USB mass storage class device, the control screen appears on the TV screen, and playback starts.
- To disconnect the USB mass storage class device safely, disconnect the device after turning the System off.
To play back a disc/file

- While playing a disc/file: This System can store the stop point, and when you start playback again by pressing DVD/CD ▶ or USB MEMORY ▶ (even while on standby), it starts from the position where you have stopped—Resume Play. (“RESUME” appears on the display when you stop playback.)
To stop completely while Resume is activated, press ■ twice. (To cancel Resume, see "RESUME" on page 32.)
- When operating the System, the on-screen guide icon (see the following table) appears on the TV.
On-screen guide icons
- During DVD Video playback, the following icons may appear on the TV:

At the beginning of a scene containing multi-angle views.

At the beginning of a scene containing multi-audio sounds.

At the beginning of a scene containing multi-subtitles.
- The following icons will also be shown on the TV to indicate your current operation.

||, >>, ◀◀, ||▶, ◀◀
- To deactivate the on-screen guide icon, see "ON SCREEN GUIDE" in "OTHERS" menu on page 32.
To select a title/group

While playing a disc/file...

- You can select a title/group directly by pressing a number button after pressing GROUP/TITLE (except for DVD-VR disc).
- Group name appears for MP3/WMA playback.
To select a chapter/track
- For VCD/SVCD, cancel PBC (see next page).
While playing a disc/file...

- First time you press ◀◀◀, you will go back to the beginning of the current chapter/track.
To locate a particular portion

While playing a disc/file...
![graph LR A["Slow"] --> B["x2"] B --> C["x5"] C --> D["x10"] D --> E["x20"] E --> F["x60"] G["Slow"] --> H["x2"] H --> I["x5"] I --> J["x10"] J --> K["x20"] K --> L["x60"]](/content/2026/06/1306996/images/5b381a69bc4a36ac9409396afdcec1c46c646a436fc23251bf21b52d483a27cb.jpg)
- Search speed changes as illustrated above except for MP3/WMA/DivX discs/files. For MP3/WMA/DivX discs/files, search speed and the indications on the TV are different.
- No sound comes out if searching is carried out while showing the moving picture.
To return to normal playback, press DVD/CD ▶ or USB MEMORY ▶ (depending on the source type).
- For DivX, each time you press the > or < button, you can skip to a scene for 30 seconds or 5 minutes depending on the DivX file.

To locate an item directly
You can select a title/chapter/track directly and start playback.
- For DVD Video, you can select a title before starting playback, while you can select a chapter after starting playback.

Examples:
To select number 5, press 5.
To select number 10, press 10.
To select number 15, press 10, 1, then 5.
To select number 30, press 10, 3, then 0.
To play back using the disc menu

■ For DVD Video/DVD Audio:
1 Show the disc menu.

2 Select an item on the disc menu.

- With some discs, you can also select items by entering the number using the number buttons.
■ For SVCD/VCD with PBC:
While playing a disc with PBC, "PBC" appears on the display.
When disc menu appears on the TV, select an item on the menu. Playback of the selected item starts.

Examples:
To select number 5, press 5.
To select number 10, press 10. To select number 15, press +0, 1, then 5.
To select number 30, press 0, 3, then 0.
To move to the next or previous page of the current menu:

Moves to the next page. Moves to the previous page.
To return to the previous menu:

To cancel PBC, press ■, then select a track. Playback starts with the selected track.
To reactivate PBC, press ■ (twice if Resume is turned "ON"), then press DVD/CD ▶.
Playing Back a
Portable Audio Device

By using QP Link (Quick Portable Link), you can easily start playing back a portable audio device connected to the AUX jack.
- Make sure to set the volume of your portable audio device loud enough so that the System can detect the sound signal.
To activate QP Link
![graph LR A["AHB PRO QPL LINK"] --> B["QPL ON (Initial setting)"] B --> C["QPL OFF"]](/content/2026/06/1306996/images/b34244d7b8c8258495535d28235f2ee454b75f000d7d13fa8ce7552ce7f754b7.jpg)
When QP Link is activated, connecting a portable device to the AUX jack and starting playback performs the following:
• While listening to another source...
Changes the source to AUX automatically. (If you change from AUX to another source, QP Link will be canceled.)
• While the System is on standby...
Turns on the System and activates the AUX source automatically (except when the display is turned off).

Bubbles appear when QP Link works.
While QP Link plays back the device...

Bubbles disappear when the sound signal stops or is too weak.
Daily Operations—Sound & Other Adjustments
Remote control
Main unit

Adjusting the Volume

You can adjust the volume level from VOL MIN to level 40 (VOL MAX).
| Remote control: | Main unit: |
 |  |
To drop the volume in a moment


To restore the volume, press again, or adjust the volume level.
Adjusting the Sound INFO

To reinforce the heavy sound
This boosts the low and high frequency sound—Sound Turbo II.

- When Sound Turbo II is turned on, AHB Pro is automatically turned on, and cannot be turned off. (AHB PRO indicator does not light even though the function is turned on.)
To reinforce the bass sound

While Sound Turbo II is off, the richness and fullness of the bass sound is clearly maintained regardless of how you set the volume—Active Hyper Bass Pro.
![graph LR A["SHIFT"] --> B["AHB PRO QP LINK"] B --> C["AHB ON"] B --> D["AHB OFF"]](/content/2026/06/1306996/images/a99d2c0d9d5a52c1349d210630b82b63e7ed708cc0198a27713c52673f97fde7.jpg)
- When Sound Turbo II is turned on, AHB Pro setting cannot be changed.
To adjust the tone

You can adjust the bass and treble level from -3 to +3.
To adjust the bass![graph LR A["BASS/TREBLE"] -->|BASS/TREBLE Canceled| B["TV VOL"] B --> C["+/-"] C --> D["+/-"] D --> E["TV VOL AUDIO VOL"]](/content/2026/06/1306996/images/27241346f8226a416d538f2d59aaa8292d15ec5e939668c69c25916bdb14572b.jpg)
To adjust the treble![graph LR A["BASS/TREBLE"] -->|BASS| B["TREBLE"] B -->|Canceled| C["TV VOL"] C --> D["AUDIO VOL"]](/content/2026/06/1306996/images/a612d8449eb9575b10395078cc5fdd21875d920367ca95e1c8d87d8878a32293.jpg)
Creating 3-dimensional Sound Field
—3D Phonic
- This does not function for MPEG-1/MPEG-2/ASF/DivX discs.
While playing a disc...

![graph LR A["3D PHONIC"] --> B["ACTION"] C["3D PHONIC"] --> D["OFF"] E["3D PHONIC"] --> F["DRAMA"] G["3D PHONIC"] --> H["THEATER"]](/content/2026/06/1306996/images/f458df0b68076b6c0cc9e6a48e6f4774112f9c7cd54d5ad1b279890689cc0f7f.jpg)
| ACTION | Suitable for action movies and sports programs. |
| DRAMA | Creates natural and warm sound. Enjoy movies in a relaxed mood. |
| THEATER | Enjoy sound effects like in a major theater. |
Presetting Automatic DVD Video Sound
Increase Level

DVD Video sound is sometimes recorded at a lower level than other discs and sources. You can set the increase level for the currently loaded DVD Video, so you do not have to adjust the volume when you change the source.
- This only functions for DVD Video and DVD-VR format disc.
![graph TD A["DVDAUX LEVEL"] --> B["NORMAL MIDDLE"] B --> C["HIGH"]](/content/2026/06/1306996/images/737f1bc4c655f4b86df3b2b55098a614f50606afc74c933621a093fb7bd7f953.jpg)
| NORMAL | Original recording level. |
| MIDDLE | Output level is increased (less than “HIGH”). |
| HIGH | Output level is increased (more than “MIDDLE”). (initial setting) |
Adjusting the Audio Input Level

If the sound from the component connected to the AUX jack is too loud or is too quiet when changing from another source to "AUX," you can change the audio input level through the AUX jack (without changing the volume level).
While the "AUX" is selected as a source...
![graph TD A["Hand pointing to DVD/AUX LEVEL"] --> B["AUX LVL1-AUX LVL2"] B --> C["AUX LVL3"]](/content/2026/06/1306996/images/877902eebb670146e5c4747719a3df1aa80e908ee538219afc637e7c195eb70a.jpg)
AUX LVL1 Select this when the sound is too loud with "AUX LVL2" selected. This setting is recommended when connecting an audio device other than a portable audio device to the AUX jack.
AUX LVL2 Select this when the sound is too loud with "AUX LVL3" selected.
AUX LVL3 Select this when listening to a portable audio device (initial setting).
Changing the Display Brightness

You can dim the display window.
![graph TD A["SHIFT"] --> B["DIMMER"] B --> C["DIM OFF (Canceled)"] B --> D["AUTO DIM"] C --> E["→ DIM ON"] D --> F["→ AUTO DIM"]](/content/2026/06/1306996/images/9ae2fd2e2629ec9befce5c6a3ca5d091cdb195d5d3443b3068fe8698d83dc5c7.jpg)
DIM ON
Dims the display.
AUTO DIM* Removes the display illumination when starting playback of a disc with a video source.
• The display illuminates when playback stops.
* "AUTO DIM" does not work for CD/MP3/WMA.
Changing the Scanning Mode

This system supports progressive scanning.
Select the video signal mode according to the type of your TV. If you connect a progressive TV through the VIDEO OUT jacks, you can enjoy a high quality picture from the built-in DVD player by selecting "PROGRE."
![graph TD A["SHIFT\n(while holding...)"] --> B["SCAN MODE\n9"] B --> C["Y/CRGB\nPROGRE"] B --> D["ENTER/SET"]](/content/2026/06/1306996/images/36db81678226a9b1dd6b3295431d9aa43a807eb99b6a0eb6b6c360f157a839e4.jpg)
RGB
For a conventional TV.
Select to send the composite video signals or RGB signals through the SCART terminal.
Y/C
For a conventional TV.
Select to send S-Video signals through the SCART terminal.
PROGRE
For a progressive TV.
Select to enjoy a progressive scanned picture through the Video Component out terminal.
• The PRGR. indicator lights up.
Changing the Picture Tone


- While showing a playback picture on the TV, you can select a preset picture tone, or adjust it and store your own taste.
To select a preset picture tone
1 While playing, display VFP setting screen.


2 Select a preset picture tone.
![graph TD A["PTY"] --> B["NORMAL"] A --> C["CINEMA"] A --> D["USER2"] A --> E["USER1"] F["PTY"] --> G["NORMAL"] F --> H["CINEMA"] F --> I["USER2"] F --> J["USER1"]](/content/2026/06/1306996/images/f6a657e57d771a6929e5d23fa612ed1ef33ee6c98240457d9ce99ade064dafd6.jpg)
| NORMAL | Normally select this. |
| CINEMA | Suitable for a movie source. |
| USER1/USER2 | You can adjust parameters and can store the settings. |
To remove the screen, press VFP again while holding SHIFT.
To adjust the picture tone
1 Select "USER1" or "USER2."
- Follow steps 1 and 2 explained above.
2 Select a parameter you want to adjust.

GAMMA
Adjust if the neutral color is bright or dark (-3 to +3).
BRIGHTNESS
Adjust if the entire picture is bright or dark (-8 to +8).
CONTRAST
Adjust if the far and near positions are unnatural (-7 to +7).
SATURATION
Adjust if the picture is whitish or blackish (-7 to +7).
TINT
Adjust if the human skin color is unnatural (-7 to +7).
SHARPNESS
Adjust if the picture is indistinct (-8 to +8).
3 Adjust the parameter.
![graph TD A["TV CH"] --> B["Arrow pointing to Screen"] C["TV CH"] --> D["Arrow pointing to Screen"] E["ENTER/SET"] --> F["Arrow pointing to Screen"]](/content/2026/06/1306996/images/5083da698f5ddac0ae3e8b337bd8ae1855c7d1dd6cddd19a68d9fe7f1ccf576b.jpg)
4 Repeat steps 2 to 3 to adjust other parameters.
To erase the screen, press VFP again while holding SHIFT.
Setting the Clock

INFO
Without setting the built-in clock, you cannot use Daily Timers (see page 29) and Sleep Timer.
- To correct a mis-entry during the process, press CANCEL (while holding SHIFT) or CLOCK/TIMER (while holding SHIFT). You can return to the previous step.
1 Activate the clock setting mode.

- If you have already adjusted the clock before, press the button repeatedly until the clock setting mode is selected.
2 Set the time.
- Adjust the hour, then the minute.

Now the built-in clock starts working.
To check the current clock time during play
![graph LR A["DISPLAY"] --> B["Source information"] B --> C["Disc type"] C --> D["Clock"] D --> A](/content/2026/06/1306996/images/ff217ecfeaf2a6b0902bd6714a059cc976707ab3100ab770486eb7fa9d1e220c.jpg)
Turning Off the Power Automatically Remote ONLY
Auto Standby
![graph TD A["SHIFT\n(while holding...)"] --> B["A.STANDBY\n3"] B --> C["On\nCanceled"] C --> D["End"]](/content/2026/06/1306996/images/664b70714a6c4f237b1fe6dd2dc6d08a458ab824831e7f4d495406b8a78327a9.jpg)
When Auto Standby is in use, the A.STBY indicator lights on the display.
When disc play stops, the A.STBY indicator starts flashing. If no operation is done for about 3 minutes while the indicator is flashing, the System turns off (standby) automatically.
Sleep Timer
You can set the shut-off time so that you can go to bed without turning it off yourself.
1 Specify the time (in minutes).
![graph TD A["SHIFT (while holding...)"] --> B["SLEEP 2"] B --> C["10 → 20 → 30 → 60 → 90 → 120 → 150"] C --> D["Canceled"]](/content/2026/06/1306996/images/d52206f3be25f2006b76eb58be1e6e57ae5043374ffb8b1959c2829611a906cd.jpg)
2 Wait until the set time disappears.
To check the time remaining until the shut-off time, press SLEEP while holding SHIFT.
- If you press the button repeatedly, you can change the shut-off time.
Advanced Radio Operations INFO
Remote control
Receiving FM Stations with Radio Data
System

Radio Data System allows FM stations to send an additional signal along with their regular program signals.
This System can receive the following types of Radio Data System signals.
| PS (Program Service) | Shows commonly known station names. |
| PTY (Program Type) | Shows types of broadcast programs. |
| RT (Radio Text) | Shows text messages the station sends. |
| Enhanced Other Networks | Provides information about the types of the programs broadcast by the Radio Data System stations of the different networks. |
To show the Radio Data System information
While listening to an FM station...
![graph TD A["DISPLAY"] --> B["PS PTY RT"] B --> C["Frequency ← Clock"] C --> D["(Non-Radio Data System signal)"]](/content/2026/06/1306996/images/4f352c5048e881f32e5d50e53a564b1ba687fbc6634a07af939e9eff754d86bb.jpg)
| PS | Station names are displayed. “NO PS” will appear if no signal is sent. |
| PTY | The broadcast program type is displayed. “NO PTY” will appear if no signal is sent. |
| RT | Text messages the station sends are displayed. “NO RT” will appear if no signal is sent. |
Searching for a Program by
PTY Codes

You can locate a particular kind of program from the preset channels (see page 8) by specifying the PTY codes.
To search for a program using the PTY codes
1 While listening to an FM station...

(while holding...)

2 Select a PTY code.
![graph TD A["SHIFT"] --> B["PTY <"] B --> C["PTY >"] style A fill:#f9f,stroke:#333 style B fill:#ccf,stroke:#333 style C fill:#cfc,stroke:#333 note right of A (while holding...)](/content/2026/06/1306996/images/5a6e9770900c2da8812076f7704de174c48cd059e65172342961b91daa5cec80.jpg)
3 Start searching.


The receiver searches 30 preset FM stations, stops when it finds the one you have selected, and tunes in to that station.
- If no program is found, "NOTFOUND" appears on the display.
- To stop searching any time during search, press PTY SEARCH (while holding SHIFT).
To continue searching after it stops on an unwanted station
While the indications on the display are flashing, press PTY SEARCH again (while holding SHIFT).
Switching Temporarily to a Program of
Your Choice Automatically

The Enhanced Other Networks function allows the System to switch temporarily to a preset FM station broadcasting a program of your choice (TA, NEWS, or INFO).
- This function works while listening to an FM station providing the required signals.
While listening to an FM station, select the program type.![graph TD A["SHIFT"] --> B["SET UP"] B --> C["TA/News Info"] C --> D["TA NEWS OFF (Canceled)"] D --> E["INFO"] style A fill:#f9f,stroke:#333 style B fill:#ccf,stroke:#333 style C fill:#cfc,stroke:#333 style D fill:#fcc,stroke:#333 style E fill:#ffc,stroke:#333](/content/2026/06/1306996/images/dc4eee4a3300836d663934163c789e3641022bad18f3d866b61fde685241a8a2.jpg)
| TA | Traffic announcement in your area |
| NEWS | News |
| INFO | Program the purpose of which is to impart advice in the widest sense |
How the Enhanced Other Networks function works:
CASE 1
If a station is not broadcasting the program of your choice
The System continues tuning in to the current station.

When a station starts broadcasting the program of your choice, the System automatically switches to that station. The PTY code indicator starts flashing.

When the program is over, the System goes back to the previously tuned station, but the function still remains active (the indicator stops flashing and remains lit).
CASE 2
If a station is broadcasting the program of your choice The System automatically switches to the station. The PTY code indicator starts flashing.

When the program is over, the System goes back to the previously tuned station, but the function still remains active (the indicator stops flashing and remains lit).
CASE 3
If the station currently tuned in is broadcasting the program of your choice
The PTY code indicator starts flashing.

When the program is over, the indicator stops flashing (the function still remains active).
Description of the PTY codes
NEWS: News.
AFFAIRS: Topical program expanding or enlarging upon the news—debate, or analysis.
INFO: Programs the purpose of which is to impart advice in the widest sense.
SPORT: Programs concerned with any aspect of sports.
EDUCATE: Educational programs.
DRAMA: All radio plays and serials.
CULTURE: Programs concerning any aspect of national or regional culture, including language, theater, etc.
SCIENCE: Programs about natural sciences and technology.
VARIED: Used for mainly speech-based programs such as quizzes, panel games and personality interviews.
POP M: Commercial music of current popular appeal.
ROCK M: Rock music.
EASY M: Current contemporary music considered to be “easy-listening”.
LIGHT M: Instrumental music, and vocal or choral works.
CLASSICS: Performances of major orchestral works, symphonies, chamber music, etc.
OTHER M: Music not fitting into any of the other categories.
WEATHER: Weather reports and forecasts.
FINANCE: Stock Market reports, commerce, trading etc.
CHILDREN: Programs targeted at a young audience.
SOCIAL: Programs about sociology, history, geography, psychology and society.
RELIGION: Religious programs.
PHONE IN: Involving members of the public expressing their views either by phone or at a public forum.
TRAVEL: Travel information.
LEISURE: Programs about recreational activities.
JAZZ: Jazz music.
COUNTRY: Songs which originate from, or continue the musical tradition of the American Southern States.
NATION M: Current popular music of the nation or region in that country's language.
OLDIES: Music from the so-called "golden age" of popular music.
FOLK M: Music which has its roots in the musical culture of a particular nation.
DOCUMENT: Programs concerning factual matters, presented in an investigative style.
TEST: Broadcasts for testing emergency broadcast equipment or unit.
ALARM: Emergency announcement.
NONE: No program type, undefined program, or difficult to categorize into particular types.
- Classification of the PTY codes for some FM stations may be different from the above list.
Unique DVD/VCD Operations
Remote control
Selecting the Audio Track

For DVD Video/DivX: While playing back a chapter containing audio languages, you can select the language to listen to.
For DVD Audio: While playing back a track containing audio channels, you can select the audio channel to listen to. For DVD-VR and SVCD/VCD: When playing back a track, you can select the audio channel to play.
- You can also select the audio track using the on-screen bar (see page 23).
While playing a DVD Video...
Ex.:![graph TD A["1/3 ENGLISH"] --> B["Hello"] C["2/3 FRENCH"] --> D["Bonjour"] E["3/3 JAPANESE"] --> F["おはよう"] B --> G["→"] D --> H["→"] F --> I["→"]](/content/2026/06/1306996/images/e17236147fa366c99f185514649592eaac4b33ec29496f5a41780b995cee2e0a.jpg)
While playing a DVD Audio/DivX...
Ex.:![graph LR A["1/3"] --> B["2/3"] B --> C["3/3"] D["1"] --> E["2"] E --> F["3"]](/content/2026/06/1306996/images/301e02565ab6ebf74b4c199bda2fcbfd7c44326e18c9b29ffb8d7f18a75511c0.jpg)
While playing a DVD-VR, or SVCD/VCD...
![graph TD A["AUDIO/MPX"] --> B["SVCD"] B --> C["ST1"] B --> D["ST2"] B --> E["L1"] B --> F["R2"] B --> G["L2"] B --> H["R1"] I["DVD-VR/VCD"] --> J["ST"] I --> K["L"] I --> L["R"]](/content/2026/06/1306996/images/cf928a6269371f3c52acdf4ab02ad6238a174a7917777eca560e13e7f9b1bb5f.jpg)
ST1/ST2/ To listen to normal stereo (2-channel) ST playback.
L1/L2/L To listen to the left audio channel.
R1/R2/R To listen to the right audio channel.
- SVCD can have 4 audio channels. SVCD usually uses these 4 channels to record two 2-channel recordings (ST1/ST2).
Selecting the Subtitle Language

For DVD Video/DivX Ultra: While playing back a chapter containing subtitles in different languages, you can select the subtitle language to display on the TV.
For DVD-VR: While playing, you can turn the subtitles on or off.
For SVCD: While playing, you can select the subtitles even if no subtitles are recorded on the disc.
- You can also select the subtitle language using the on-screen bar (see page 23).
While playing a DVD Video/DivX Ultra...
1

2

Ex.:
![graph TD A["1/3 ENGLISH"] --> B["Hello"] C["2/3 FRENCH"] --> D["Bonjour"] E["3/3 JAPANESE"] --> F["おはよう"] B <--> D D <--> F](/content/2026/06/1306996/images/fde86298d76969cd4d2dcd472711dc2ceb3bf36d879729d7ca9d5f33c40573be.jpg)
While playing a DVD-VR...
![graph LR A["ON"] --> B["OFF"] style A fill:#f9f,stroke:#333 style B fill:#ccf,stroke:#333](/content/2026/06/1306996/images/ea3eeec9abb3898189af2a1678c77ea0e81ee2f22af361c51f8ce45f4cb7bf13.jpg)
While playing an SVCD...
![graph TD A["OFF"] --> B["1"] B --> C["2"] C --> D["3"] D --> E["4"] E --> F["4/4"] F --> G["-/4"] style A fill:#f9f,stroke:#333 style G fill:#f9f,stroke:#333](/content/2026/06/1306996/images/619f2c600b907d11f204eefc56f24992d86af1f51525e901a6588eef54651f85.jpg)
Selecting the View Angle

For DVD Video only: While playing back a chapter containing multi-view angles, you can view the same scene from different angles.
- You can also select the multi-view angles using the on-screen bar (see page 23).
While playing...

Ex.:
![graph TD A["1/3"] --> B["1"] B --> C["Car Icon 1"] D["2/3"] --> E["2"] E --> F["Car Icon 2"] G["3/3"] --> H["3"] H --> I["Car Icon 3"] J["Car Icon 1"] --> K["Car Icon 2"] K --> L["Car Icon 3"]](/content/2026/06/1306996/images/6176793170096579f0750271db8fe07bbff6b673314f249f640d6574280c2936.jpg)
Selecting the Browsable Still Pictures

For DVD Audio only: While playing back a track linked to browsable still pictures (B.S.P.), you can select the still picture (turn the page) to be shown on the TV screen.
- If a track is linked to browsable still pictures (B.S.P.), they are usually shown automatically during playback.
- You can also select the page using the on-screen bar (see page 23).

(while holding...)
Each time you press the button (while holding SHIFT), the still picture changes one after another (if available).
Playing Back Bonus Group


For DVD Audio only: Some DVD Audio discs have a special group called "bonus group" whose contents are not open to the public.
- To play back a bonus group, you have to enter the specific "key number" (a kind of password) for the bonus group. The way of getting the key number depends on the disc.
1 Select the bonus group.
- The bonus group is usually recorded as the last group (for example, if a disc contains 4 groups including a bonus group, “group 4” is the bonus group).
- For how to select the group, see “To select a title/group” on page 9.
Continued on the next page
2 Enter the key number.

3 Follow the interactive instructions shown on the screen.
To cancel the key number entry, press ■.
Making Dialogues Clear—Clear Voice

When you play back a disc, you can make the singer's voices or dialogues of the movie clear—Clear Voice. When Clear Voice is in use, the C.VOICE indicator lights on the display.
- This function only works for center-channel encoded multi-channel disc.
![graph TD A["SHIFT"] --> B["5"] B --> C["C.VOICE"] C --> D["Off"] style A fill:#f9f,stroke:#333 style B fill:#ccf,stroke:#333 style C fill:#cfc,stroke:#333 style D fill:#fcc,stroke:#333](/content/2026/06/1306996/images/a291ab1c2181c028a476813d6b92db3e7c49915e3c1eee3ab42a6442628ae77f.jpg)
Special Effect Playback


Pause playback
| To pause: | To resume normal playback: |
While playing... |  |
Frame-by-frame playback
1 While playing...

Still picture playback starts.
2 Advance the still picture frame by frame.

To resume normal playback, press DVD/CD ▶.
Slow-motion playback
- This does not function for MPEG-1/MPEG-2/ASF/DivX discs.
1 While playing...

Still picture playback starts.
2 Select slow motion speed.
![graph TD A["SLOW"] --> B["Forward slow motion starts."] B --> C["1/32"] C --> D["1/16"] D --> E["1/8"] E --> F["1/4"] F --> G["1/2"] H["Reverse slow motion* starts."] --> I["1/32"] I --> J["1/16"] J --> K["1/8"] K --> L["1/4"] L --> M["1/2"]](/content/2026/06/1306996/images/58409dfb02ac0f907bd192e8f8064c47bb29acc1c01b68cd5a2e061b1381b812.jpg)
* Only available for DVD Video.
To resume normal playback, press DVD/CD ▶.
To replay the previous scenes (One-Touch Replay)
- This function is only used while playing DVD Video/DVD-VR.
While playing back...

The playback position moves back about 10 seconds before the current position (only within the same title).
Zoom
1 While playing back...
![graph LR A["SHIFT"] --> B["ZOOM 7"] B --> C["ZOOM 1"] B --> D["ZOOM 2"] B --> E["ZOOM 3"] B --> F["ZOOM 4"] B --> G["ZOOM OFF"] G --> H["ZOOM 6"] G --> I["ZOOM 5"] style A fill:#f9f,stroke:#333 style B fill:#ccf,stroke:#333 style C fill:#cfc,stroke:#333 style D fill:#fcc,stroke:#333 style E fill:#cf…](/content/2026/06/1306996/images/cc01698327e69b688b2a1cc4d2d33add58880f75208a691482a13929b3010d28.jpg)
2 Move the zoomed-in position.

To cancel Zoom, press ZOOM (while holding SHIFT) repeatedly until "ZOOM OFF" appears on the TV.
Advanced Playback Operations
Remote control
Main unit
Programming the Playing Order
—Program Play


You can arrange the playing order of the chapters or tracks (up to 99) before you start playback.
- Program play cannot be used for DVD-VR/JPEG/MPEG-1/MPEG-2/ASF/DivX and files in a USB mass storage class device.
- Resume does not work for Program Play.
1 Before starting playback, activate Program Play.![graph TD A["FM/PLAY MODE"] --> B["PROGRAM RANDOM"] B --> C["Canceled"] C --> D["On the display"]](/content/2026/06/1306996/images/0ab8079787bf210a0d7a1fc4265254df3a9c70b1fcad3c01be659ec453f1ef59.jpg)

2 Select chapters or tracks you want for Program Play.
• For DVD Video/DVD Audio/MP3/WMA:
① Select a title or group number. ② Select a chapter or track number. ③ Repeat the above steps ① and ②.
• For SVCD/VCD/CD:
① Select tracks.
To enter the numbers directly:
DIMMER

3D PHONIC

ZOOM

RETURN

SLEEP

C.VOICE

ANGLE

CANCEL

A.STANDBY

CLOCK/TIMER

SCAN MODE

VFP

Examples:
To enter number 5, press 5. To enter number 10, press 10. To enter number 15, press 1, then 5. To enter number 30, press 3, then 10.
Continued on the next page
3 Start playback.

Playback starts in the order you have programmed.
| To skip: | To pause: To stop: | |
To check the programmed contents
Before or after playback...
![graph TD A["TV CH"] --> B["In the reverse order."] C["TV CH"] --> D["In the programmed order."]](/content/2026/06/1306996/images/fbcb5bf2738fd52440e3ddda2f5bc84b111e2c5a8200ee2f5401b11c56eead3a.jpg)
- You can also use |◀◀ or ▶▶| to check the programmed contents.
To modify the program
Before or after playback...
 |
To exit from Program Play
Before or after playback...
![graph LR A["FM/PLAY MODE"] --> B["PROGRAM"] B --> C["RANDOM"] C --> D["Canceled"]](/content/2026/06/1306996/images/8606cb3d02b57a271ffc49a27fcd3320fb5886cfbb56d5a2b2015c0e4bda7596.jpg)
Playing at Random—Random Play

You can play all chapters or tracks at random.
- Random Play cannot be used for DVD-VR/JPEG/MPEG-1/MPEG-2/ASF/DivX, some DVDs and files in the USB mass storage class device.
1 Before starting playback, activate Random Play.
![graph TD A["FM/PLAY MODE"] --> B["PROGRAM"] B --> C["RANDOM"] C --> D["Canceled"] D --> A](/content/2026/06/1306996/images/d32f3d1169a67f975568a70c12417777e8de260ef2e495babfb3a294180e63da.jpg)
2 Start playback.

Playback starts in random order. Random Play ends when the entire disc has been played.
| To skip a chapter/ track: | To pause: To stop: | |
 |  To release, press DVD/CD ▶. To release, press DVD/CD ▶. |  |
To exit from Random Play
Before or after playback...
![graph LR A["FM/PLAY MODE"] --> B["PROGRAM"] B --> C["RANDOM"] C --> D["Canceled"]](/content/2026/06/1306996/images/695e0821dd3db153c78794c03c479d409eed0bfa32bdc1e864c3e166d06c023f.jpg)
Playing Repeatedly

INFO
- You can also select the repeat mode using the on-screen bar (see pages 24 and 25).
- For MP3/WMA/JPEG/MPEG-1/MPEG-2/ASF/DivX, see page 28.
Repeat Play
You can repeat playback.
- For DVD Video:
While playing...
![graph TD A["REPEAT"] --> B["REP CHAP* REP TTL"] B --> C["REP OFF (Canceled)"]](/content/2026/06/1306996/images/4047f1a889e4c1b18499a55d7f18608f20ab2909c122445a2b4c3cd6ebd1b2f8.jpg)
- For DVD Audio:
While playing or before playback...
![graph TD A["REPEAT"] --> B["REP TRK* REP GRP"] B --> C["REP OFF (Canceled)"] C --> D["Next Step"]](/content/2026/06/1306996/images/4c2448bf43fe35147577ec14a46c2f8784b95778dff843478ed8304501109ceb.jpg)
• For CD/SVCD/VCD:
While playing (without PBC for SVCD/VCD) or before playback...
![graph TD A["REPEAT"] --> B["REP TRK*"] B --> C["REP ALL"] C --> D["REP OFF (Canceled)"]](/content/2026/06/1306996/images/50132a18f8364c5113461dbc9c125b9ca4af01a1f03028cf743a1e791c826285.jpg)
- For DVD-VR:
While playing an original program...
![graph TD A["REPEAT"] --> B["REP CHAP"] B --> C["REP PG"] C --> D["REP OFF"] D --> E["REP ALL"] E --> F["(Canceled)"]](/content/2026/06/1306996/images/21c2957f9b1f3b86633e516338d87875ca511a912e25941ad299aa1f5d5f2a51.jpg)
While playing a Program List...
![graph TD A["REPEAT A-B REPEAT"] --> B["→ REP CHAP REP PL"] B --> C["REP OFF (Canceled)"] C --> D["←"]](/content/2026/06/1306996/images/0cd61c7a2eaeca1d7ac4e84e0ad0611c9705a35287c92e7b5371919c94cf471c.jpg)
REP CHAP* Repeats the current chapter.
REP TTL Repeats the current title.
REP TRK* Repeats the current track.
REP GRP Repeats the current group.
REP PG Repeats the current program.
REP ALL Repeats the disc or program.
REP PL Repeats the current Program List.
* During Program Play and Random Play, "REP STEP" appears instead of these indications, and repeat modes change as follows for all the discs.
![graph TD A["→ REP STEP REP ALL"] --> B["REP OFF (Canceled)"] B --> C["→"]](/content/2026/06/1306996/images/a3adf1953c6cab4cf4bd09d508b482789bd6943b041a9f97e979bfcbcc97e4f8.jpg)
A-B Repeat
You can repeat playback of a desired portion by specifying the beginning (point A) and the ending (point B).
- A-B Repeat cannot be used for MP3/WMA/MPEG-1/MPEG-2/ASF/DivX, some DVDs and files in the USB mass storage class device.
1 While playing (without PBC for SVCD/VCD), select the start point (A).

starts flashing on the display. • A- appears on the TV if the TV is turned on.
2 Select the end point (B).

stops flashing. • appears on the TV. • You can search for the end point using the button.
To cancel A-B Repeat, press REPEAT A-B again while holding SHIFT.
- A-B Repeat will also be canceled when you stop play or skip the chapter or track.
Prohibiting Disc Ejection—Child Lock

You can lock the disc tray so that no one can eject the loaded disc.
• This is possible only while the System is on standby.
While the disc tray is closed...

To cancel the prohibition, repeat the same procedure. "UNLOCKED" appears on the display.
On-screen Disc Operations

You can check the disc information and use some functions through the on-screen bar.
On-screen bars DVD Video
DVD Audio
On-screen Bar Information
① Disc type
2 | Playback information
Indication Meanings
Dolby D, LPCM Audio format
3/2.1ch, 2/0.0 ch Channel number
TITLE 2 Current title
CHAP 3 Current chapter
GROUP 1 Current group
TRACK 14 Current track
TOTAL 1:25:58 Time indications
3 Operation modes
Indication Meanings
Playback
Forward/Reverse search
Forward/Reverse slow-motion
II Pause
Stop
4 Function icons (on the pull-down menu)
Indication Meanings
TIME Select to change the time indication.
OFF Select to repeat playback.
Select for time search.
CHAP. Select for chapter search.
TRACK→ Select for track search.
1/3 Select to change the audio language or channel (see also page 17).
1/3 Select to change subtitle language (see also page 18).
1/3 Select to change the view angle (see also page 18).
PAGE 1/5 Select to change the page (see also page 18).
To operate using the On-screen Bar
Ex.: Selecting a subtitle (French) for DVD Video
While a disc is selected as the source...
1 Display the entire on-screen bar.

* This does not appear for MP3/WMA/JPEG/MPEG-1/MPEG-2/ASF/DivX discs and files in a USB mass storage class device.
2 Select (highlight) the item you want.

3 Display the pop-up window.
ENTER/SET

4 Select the desired option in the pop-up window.


5 Finish the setting.
ENTER/SET
Pop-up window disappears.
To remove the on-screen bar
ON SCREEN
For detailed operations of the following functions, see also "To operate using the On-screen Bar" on the left.
To change the time information
You can change the time information in the on-screen bar and the display window on the main unit.
1 While playing, display the on-screen bar with the pull-down menu.

2 Make sure iTIME is selected (highlighted).
3 Change the time indication.
![graph TD A["ENTER/SET"] --> B["TIME 0:00:58"] A --> C["T. REM 0:35:24"] B --> D["REM 0:11:23"] C --> E["TOTAL 1:01:58"]](/content/2026/06/1306996/images/05acd2e4c87ff163d0258e4474e03baeab901cb146b66b579cd8a2dfbf2a8bc7.jpg)
| TIME | Elapsed playing time of the current chapter/track (except for DVD-VR). |
| REM | Remaining time of the current chapter/ track (except for DVD-VR). |
| TOTAL | Elapsed disc time. |
| T. REM | Remaining disc time. |
To remove the on-screen bar
ON SCREEN
Repeat Play
• See also page 22.
1 While playing a disc (without PBC for SVCD/VCD), display the entire on-screen bar.
- Repeat Play can be selected before starting playback, except for DVD Video/DVD-VR.
2 Select OFF.
3 Display the pop-up window.

Continued on the next page
4 Select the repeat mode you want.
| A-B | Repeats a desired portion (see below). |
| TITLE* Repeats the current title. | |
| GROUP | Repeats the current group. |
| ALL | Repeats the disc (except for DVD) or program. |
| CHAPTER** | Repeats the current chapter. |
| TRACK** | Repeats the current track. |
| OFF | Cancels Repeat Play. |
* While playing a DVD-VR disc, "PG" appears, and while playing a Play list, "PL" appears.
** During Program Play and Random Play, "STEP" appears.
5 Finish the setting.
ENTER/SET

A-B Repeat
• See also page 22.
1 While playing, display the entire on-screen bar. 2 Select OFF. 3 Display the pop-up window.

4 Select "A-B."

5 Select the start point (A).
ENTER/SET


6 Select the end point (B).
ENTER/SET

A-B Repeat starts. The selected portion plays repeatedly.
- Before pressing ENTER/SET, you can search for the end point using the ▶ button.
To cancel A-B Repeat, repeat steps 1 to 3, and select "OFF" in step 4.
Time Search
You can move to a particular point by specifying the elapsed playing time from the beginning.
1 While playing (without PBC for SVCD/VCD), display the entire on-screen bar.
- Time Search can be used before starting playback, except for DVD Video/DVD-VR.
2 Select 3 Display the pop-up window.

4 Enter the time.
You can specify the time in hours/minutes/seconds.

Examples:
To move to a point of 1 (hours): 02 (minutes): 00 (seconds), press 1, 0, 2, 0, then 0.
To move to a point of 54 (minutes): 00 (seconds), press 0, 5, 4, 0, then 0.
- It is always required to enter the hour digit (even "0" hour), but it is not required to enter trailing zeros (the last two digits in the examples above).
- To correct a mis-entry, press cursor < to erase the last entry.
5 Finish the setting.
ENTER/SET
The System starts playing the disc from the selected playing time.

Chapter/Track Search
You can search for the chapter (DVD Video/DVD-VR) or track (DVD Audio) number to play.
1 While playing, display the entire on-screen bar. 2 Select CHAP.→ or TRACK→. 3 Display the pop-up window.

4 Enter the desired chapter/track number.

Examples:
To select chapter/track 5, press 5.
To select chapter/track 10, press 1, then 0.
To select chapter/track 15, press 1, then 5.
To select chapter/track 30, press 3, then 0.
- To correct a mis-entry, press the number keys until the desired number is shown in the pop-up window.
5 Finish the setting.
ENTER/SET
The system starts playing the searched chapter or track.
Browsable Still Pictures
For DVD Audio only: While playing back a track linked to browsable still pictures (B.S.P.), you can select the still picture (turn the page) to be shown on the TV.
- If a track is linked to browsable still pictures (B.S.P.), they are usually shown automatically during playback.
1 While playing a DVD Audio, display the entire on-screen bar. 2 Select PAGE 1/5. 3 Display the pop-up window.

4 Select a still picture you want.

5 Finish the setting.
ENTER/SET
Control screen for DVD-R/-RW in DVD-VR format
The control screen is superimposed on the TV screen when you call up Program List (PG) or Play List (PL).
To select playback type
| To select the Program List: | To select the Play List: |
 |  |
To remove the list, press the same button again.
Ex.: When Program List is selected.

Ex.: When Play List is selected.

① Listed number ② Recording date ③ Recording channels ④ Recording time ⑤ Title ⑥ Highlight bar (current selection) ⑦ Chapters included ⑧ Playback time
To select an item in the list and start playback

Audio/Video File Operations
Remote control
Operations on the

Control Screen INFO
You can search for and play the desired items through the control screen for MP3/WMA/JPEG/MPEG-1/MPEG-2/ASF/DivX files.
Control screen for MP3/WMA/JPEG/MPEG-1/MPEG-2/ASF/DivX files
The control screen automatically appears on the TV screen when you load a disc or connect and select a USB mass storage class device in which MP3, WMA, JPEG, MPEG-1, MPEG-2, ASF, or DivX is recorded.
Ex.: When the MP3 disc is loaded.
① Current group number/total group number ② Current group ③ Group list ④ Track information (ID3 Tag Version 1.0: only for MP3/WMA) ⑤ Current track ⑥ Repeat Play setting ⑦ Elapsed playing time of the current track (except for JPEG) ⑧ Operation mode icon ⑨ Current track number/total number of tracks in the current group (total number of tracks on the loaded disc) ⑩ Highlight bar ⑪ Track list
- If files of different types (MP3, WMA, JPEG, MPEG-1, MPEG-2, ASF and DivX) are recorded on a disc or device, select the file type to play (see page 31).
To move the highlight bar between group list and track list![graph TD A["PTY <"] --> B["Moves the bar to the track list."] C["PTY >"] --> D["Moves the bar to the group list."]](/content/2026/06/1306996/images/9ac484c617abf68b3075452b175da087675e6ba83a804bb9a15a2c4c33df8962.jpg)
To select an item in the list
Move the highlight bar to the desired item.
- If you move the highlight bar while playing back an MP3/WMA file or DVD-VR (PG/PL) disc, the selected track starts playback automatically.
To start playback
| For JPEG: | |
ENTER/SET | The selected track (still picture) is displayed until you change it. |
DVD/CD USB | Press one of the buttons depending on the current source.Slide-show playback starts.Each track (still picture) is shown on the screen for about 3 seconds, then changes one after another. |
| For the other files: | |
ENTER/SET | Playback starts with the selected track.Pressing DVD/CD ▶ orUSB MEMORY ▶ also starts playback. |
- Once you start viewing a JPEG/MPEG-1/MPEG-2/ASF/DivX track, the control screen disappears.
- To cancel slide-show, and display the current still picture, press II.
To select a group:![graph LR A["SHIFT\n(while holding...)"] --> B["GROUP/TITLE SKIP"]](/content/2026/06/1306996/images/baa0331ac2ede7dc5a103894db228eca01a1e7fde9d1228d951b257c9c646fa4.jpg)
To skip a track: To stop playback:

- You can select a group directly by pressing a number button after pressing GROUP/TITLE (except for DVD-VR disc).
To repeat MP3/WMA playback
While playing or before playback...
![graph TD A["REPEAT"] --> B["REP TRK*"] B --> C["REP GRP"] C --> D["REP ALL"] D --> E["REP OFF (Canceled)"]](/content/2026/06/1306996/images/5051b89279a6acbc9f3b34b35c8dfb586c752bc258d8e532f518239a527e49a2.jpg)
To repeat slide-show for JPEG
While playing or before playback...
![graph TD A["REPEAT A-B REPEAT"] --> B["REP GRP REP ALL"] B --> C["REP OFF (Canceled)"]](/content/2026/06/1306996/images/1a098f6f6a8f0eecd1932bf6fb979fe608b313c69421a0de90217b9c4317ac6d.jpg)
To repeat MPEG-1/MPEG-2/ASF/DivX playback
While playing or before playback...
![graph LR A["REPEAT"] --> B["REP TRK*"] B --> C["REP GRP"] C --> D["Canceled"] D --> E["REP OFF"] E --> F["REP ALL"]](/content/2026/06/1306996/images/475e6beef8791e488c3006eee64aa634647a41f2b800ccdefb8e7e43e6a05d8d.jpg)
REP TRK* Repeats the current track.
REP GRP Repeats the current group.
REP ALL Repeats the disc.
* During Program Play and Random Play, "REP STEP" appears instead of this indication.
To zoom in the JPEG files
- You cannot zoom in the still picture during slide-show.
1 While playing back a still picture...
- During slide-show, press II to display the still picture, then...
![graph LR A["SHIFT"] --> B["ZOOM 7"] B --> C["ZOOM 1"] C --> D["ZOOM 2"] D --> E["ZOOM OFF"] style A fill:#f9f,stroke:#333 style B fill:#ccf,stroke:#333 style C fill:#cfc,stroke:#333 style D fill:#fcc,stroke:#333 style E fill:#ffc,stroke:#333](/content/2026/06/1306996/images/de5f3cc4e67f922f6c16389d2020c2ad5302c18b2b696cf5a7f8e0ceb19f908f.jpg)
2 Move the zoomed-in position.

To cancel Zoom, press ZOOM (while holding SHIFT) repeatedly until "ZOOM OFF" appears on the TV.
Timer Operations
Remote control
Setting the Timer

INFO
Using Daily Timer, you can wake up with your favorite music.
You can store three Daily Timer settings; however, you can activate only one of the timers at the same time.
- To exit from the timer setting, press CLOCK/TIMER (while holding SHIFT) as required.
- To correct a mis-entry during process, press CANCEL (while holding SHIFT). You can go back to the previous step.
Daily Timer initial settings when shipped from the factory
- DAILY 1: ON Time (6:00)/OFF Time (8:00)/Source (TUNER FM 1)/Volume level (--)
- DAILY 2: ON Time (7:00)/OFF Time (9:00)/Source (TUNER FM 1)/Volume level (--)
- DAILY 3: ON Time (10:00)/OFF Time (12:00)/Source (TUNER FM 1)/Volume level (--)
1 Select one of the timer setting modes you want to set—DAILY 1 ON time, DAILY 2 ON time, or DAILY 3 ON time.
![graph TD A["SHIFT"] --> B["CLOCK/TIMER 6"] style A fill:#f9f,stroke:#333 style B fill:#bbf,stroke:#333 note right of A: (while holding...)](/content/2026/06/1306996/images/dd1c412bba62ac91d2c8fdb52ca50e19e08488d38f20afeceba69ae22a22b871.jpg)
![graph LR A["DAILY 1"] --> B["ON (Time)"] B --> C["DAILY 2"] C --> D["ON (Time)"] D --> E["DAILY 3"] E --> F["ON (Time)"] F --> G["Canceled"] G --> H["Clock setting (see page 14)"]](/content/2026/06/1306996/images/26327f7743b24e8bd7d90eea268cdf573fdb2d7bea480f69330fb1ac15237792.jpg)

Ex. When Daily Timer 1 setting mode is selected
- When the clock has not been set, pressing CLOCK/TIMER (while holding SHIFT) makes the System enter the clock setting mode.
2 Make the timer setting as you want.
Repeat the procedure for the following settings until finished—
![graph TD A["PTY"] --> B["<"] C["PTY"] --> D[">"] E["ENTER/SET"] --> F["Next Step"]](/content/2026/06/1306996/images/82b61c1805c2f1530dbd65ea62153b0058bcfa6d2273078bce891d721ec76a98.jpg)
① Set the hour then the minute for on-time. ② Set the hour then the minute for off-time. ③ Select the playback source—“TUNER FM,” “TUNER AM,” “DISC,” “AUX,” “USB MEM,” or “TV SOUND.”

④ For “TUNER FM” and “TUNER AM”: Select a preset channel.
For "DISC": Select the title/group number, then the chapter/track number.
For "USB MEM": Select the group number, then the track/file number.
⑤ Select the volume level.
- You can adjust the volume level ("1" to "40" and "VOL--").
If you select "VOL --," the volume is set to the last level when the unit has been turned off.
Once settings are completed, the Timer setting information appears in sequence.
- This function is not available for VCD with PBC activated.
3 Turn off the unit (on standby) if you have set the on-time.

How Daily Timer works
Once the Daily Timer has been set, the timer indicator (④) and timer number indicator (1/2/3) are lit on the display. Daily Timer is activated at the same time everyday until the timer is turned off manually (see the next column) or another timer is activated.
When the on-time comes
The System turns on, tunes in to the specified station or starts playing the loaded disc with the specified chapter or track, and sets the volume level gradually to the preset level after about 30 seconds.
- While Daily Timer is working, the timer indicator ( ) and timer number indicator (1/2/3) flash on the display.
When the off-time comes
The System stops playback, and turns off (on standby) automatically.
- The timer setting remains in memory until you change it.
To turn on or off the Timer
Since Daily Timer is activated at the same time everyday, you may need to cancel it on some particular days.
To cancel the Timer
1 Select the Timer (DAILY 1, DAILY 2, or DAILY 3) you want to cancel.
![graph TD A["SHIFT"] --> B["Clock/Timer 6"] B --> C["Daily Timer 1 → ON (Time)"] C --> D["Daily Timer 2 → ON (Time)"] D --> E["Daily Timer 3 → ON (Time)"] E --> F["Clock setting (see page 14)"] F --> G["Ex. To cancel Daily Timer 1"] style A fill:#f9f,stroke:#333 style B fill:#f9f,stroke:#333 style C…](/content/2026/06/1306996/images/b328c2e20ccc2d1208eb1fbcdccbd8aad545eb46b39c54948676b4c2556afce5.jpg)
2 Turn off the selected Timer.

To turn on the Timer
1 Select the Timer (DAILY 1, DAILY 2, or DAILY 3) you want to activate.
![graph TD A["SHIFT"] --> B["CLOCK/TIMER"] B --> C["6"] C --> D["Daily Timer 1 ON Time"] D --> E["DAILY 1"] E --> F["Daily Timer 2 ON Time"] F --> G["DAILY 2"] G --> H["Daily Timer 3 ON Time"] H --> I["DAILY 3"] I --> J["Clock setting (see page 14)"] style A fill:#f9f,stroke:#333 style B fill:#f9f,str…](/content/2026/06/1306996/images/c2d6e1603c87c8f10425cc49667ebcb23744fc5da1961d7a5f3e51a41362e125.jpg)
2 Activate the selected Timer.

3 Wait until the indication disappears.
Setup Menu Operations INFO
Remote Control
Initial settings


The Setup Menu cannot be activated during playback.
1 Press SET UP.

2 Press < or > to select the menu. 3 Press ∧ or ∨ to move to select the item. 4 Press ENTER/SET. 5 Press ∧ or ∨ to select the options, then press ENTER/SET.
- For settings of the LANGUAGE menu, see also "Language Code List" on page 37.
To remove a preference display
Press SET UP.
LANGUAGE menu
| Item | Contents |
| MENU LANGUAGE | You can select the initial menu language of the DVD Video. |
| AUDIO LANGUAGE | You can select the initial audio language of the DVD Video. |
| SUBTITLE | You can select the initial subtitle language of the DVD Video. |
| ON SCREEN LANGUAGE | You can select “ENGLISH,” “FRENCH,” “GERMAN,” “CZECH,” “SLOVAK,” “POLISH” or “HUNGARIAN” as the on-screen language. |
PICTURE menu
| Item | Contents |
MONITOR TYPE16:9 4:3 LB  4:3 PS 4:3 PS | You can select the monitor type to match your TV when you play back DVD Video discs recorded for wide-screen televisions.16:9 (Wide television screen): For a wide-screen (16:9) TV.4:3 LB (Letter Box conversion): For a conventional (4:3) TV. Displays a wide-screen picture to fit the width of the TV screen keeping the aspect ratio.4:3 PS (Pan Scan conversion): For a conventional (4:3) TV. The picture is zoomed in to fill the screen vertically and the left and right sides of the picture are cut off. |
| PICTURE SOURCE | You can obtain optimal picture quality by selecting the source type of the disc contents.AUTO: Normally, select this option. The System recognizes the picture type (film or video source) of the current disc according to the disc information.FILM: For a film source disc.VIDEO: For a video source disc. |
| SCREEN SAVER | You can set the screen saver function to ON or OFF. If no operation is done for about 5 minutes, the display dims. |
| FILE TYPE | You can select the file type to play.AUDIO: To play MP3/WMA files.STILL PICTURE: To play JPEG files.VIDEO: To play MPEG-1, MPEG-2, ASF and DivX files. |
AUDIO menu
| Item | Contents |
| DIGITAL AUDIO OUTPUT | Set this item correctly when using the OPTICAL DIGITAL OUT terminal on the rear.PCM ONLY: When connecting to audio equipment which can decode only linear PCM signals.DOLBY DIGITAL/PCM: When connecting to a Dolby Digital decoder or an amplifier with a built-in Dolby Digital decoder.STREAM/PCM: When connecting to a DTS decoder or an amplifier with a built-in DTS decoder. |
| DOWN MIX | This setting is effective for digital audio output if “DIGITAL AUDIO OUTPUT” is set to “PCM ONLY.”DOLBY SURROUND: Select this when connecting to a surround decoder.STEREO: Select this when connecting to a stereo receiver, MD player, TV, etc. |
| D. RANGE COMPRESSION | Set this item to listen to DVD Video recorded in Dolby Digital format at low or middle volume.AUTO: You can enjoy powerful playback sound with full dynamic range.ON: Select this when you want to fully apply the compression effect to make the sound at lower volume clear (useful at midnight). |

OTHERS menu
| Item | Contents |
| RESUME | You can select Resume.ON: The System resumes playback from the position where playback has been stopped if the disc is still in the disc tray.OFF: Resume is deactivated. |
| ON SCREEN GUIDE | Activate or deactivate the on-screen guide. |
| DivX REGISTRATION | The System has its own Registration Code.If necessary, you can confirm it.Once you have played back a disc in which the Registration Code is recorded, the System’s Registration Code is overwritten for copyright protection. |
Additional Information
Learning More about This System
Connections (see pages 3 to 5)
- Make sure the antenna conductors do not touch any other terminals, connecting cords or the power cord. Also, keep the antennas away from metallic parts of the System, connecting cords, and the AC power cord. This could cause poor reception.
- Use only speakers with the same speaker impedance as indicated by the speaker terminals on the rear of the System.
- The speakers are magnetically shielded to avoid color distortions on TVs. However, if not installed properly, it may cause color distortions. So, pay attention to the following when installing the speakers.
- When placing the speakers near a TV set, turn off the TV's main power switch or unplug it before installing the speakers. Then wait at least 30 minutes before turning on the TV's main power switch again.
- Some TVs may still be affected even though you have followed the above instructions. If this happens, move the speakers away from the TV.
Daily Operations—Playback (see pages 7 to 10)
Listening to the Radio:
- If you store a new station into an occupied preset number, the previously stored station in that number will be erased.
- When you unplug the AC power cord or if a power failure occurs, the preset stations will be erased in a few days. If this happens, preset the stations again.
Listening to the TV Sound:
- When you use this function, connect the System and TV with the Scart cable.
Playing Back a Disc/File:
- When you change the source to DVD/CD or USB MEMORY, it may take a while to activate the source.
- The following functions cannot be used for the files in the USB mass storage class device:
- Selecting the View Angle (page 18)
– Special Effect Playback (page 19)
– Program Play (page 20)
-A-B Repeat (page 22)
Time Search (page 25)
- On some DVD, SVCD, or VCD discs, the actual operations may be different from what is explained in this manual, due to the programming and disc structure; such differences are not a malfunction of this System.
- Some DVD Audio discs prohibit downmix. When you play back such a disc, “LR ONLY” appears on the display and the System plays back the left front and right front signals.
- When playing back a DVD Audio disc recorded in MLP (Meridian Lossless Packing; a lossless audio compression system that can completely recreate the PCM signal), the signals are recognized as the linear PCM signals, however, no indicator lights up on the display.
- This System can recognize up to 4000 tracks in a disc. Also, the System can recognize up to 150 tracks per group and up to 99 groups in a disc. - If there are any unplayable files in a folder, those files are also counted in the total file number. - Playable files which do not belong to any groups are handled as GROUP 1.
- For playback of files in the USB mass storage class device...
- While the System is reading a disc, changing the source to USB MEMORY may cause the System to continue playback the DVD/CD source. In this case, press ■ on the main unit to reactivate the USB source.
- When connecting a USB mass storage class device, refer also to its manual.
- Connect one USB mass storage class device to the System at a time. Do not use a USB hub.
- You cannot charge any USB device through the USB MEMORY jack of this System.
- While playing back a file in a USB mass storage class device, do not disconnect the device. It may cause malfunction on both the System and the device. – JVC bears no responsibility for any loss of data in the USB mass storage class device while using this System.
- When connecting with a USB cable, use the cable whose length is less than 1 m.
- This System is compatible with USB Full-Speed (not compatible with USB 1.1).
- You can play back the following types of files from a USB mass storage class device (maximum data transfer rate: 2 Mbps): – Music: MP3, WMA – Picture: JPEG
- Movie: MPEG-1, MPEG-2, ASF, DivX (maximum frame rate of 30 fps for progressive)
- You cannot play back a file larger than 2 Gigabytes.
- When playing a file with a high transfer rate, frames or sounds may be dropped during playback.
- This System cannot recognize a USB mass storage class device whose rating is other than 5V and does not exceed 500mA.
- This System may not play back some USB mass storage class devices and does not support DRM (Digital Rights Management).
- This System may not play back some files even though their formats are listed above.
- For DVD-VR playback...
- This System can play only a disc of UDF-Bridge format.
- For details about DVD-VR format and play list, refer to the manual of the recording equipment.
- You cannot use reverse slow motion, Program Play, or Random Play. • For MP3/WMA playback...
- MP3/WMA discs require a longer readout time than regular CDs. (It depends on the complexity of the group/file configuration.)
- Some MP3/WMA files cannot be played back and will be skipped. This results from their recording processes and conditions.
- This System can play only a disc of ISO 9660 Level 1 or Level 2.
- This System can play back MP3/WMA files with the extension code .mp3 or .wma (regardless of the letter case—upper/lower).
- It is recommended that you make each MP3/WMA file at a sampling rate of 44.1 kHz and at a bit rate of 128 kbps. This System cannot play back files made at a bit rate of less than 64 kbps.
- For JPEG files playback...
- It is recommended that you record a file at 640 x 480 resolution. (If a file has been recorded at a resolution of more than 640 x 480, it will take a long time to be shown.)
- This System can play only baseline JPEG files*.
Progressive JPEG files* or lossless JPEG files* cannot be played.
* Baseline JPEG format: Used for digital cameras, web, etc.
Progressive JPEG format: Used for web.
Lossless JPEG format: An old type and rarely used now.
- This System can playback JPEG files with the extension code .jpg or .jpeg (regardless of the letter case—upper/lower).
- This System may not playback JPEG files properly if they are recorded from a device other than a digital camera.
– During slide-show playback, zoom cannot be operated.
- For MPEG-1/MPEG-2 playback...
- The stream format should conform to MPEG system/program stream.
- 720 x 576 pixels (25 fps)/720 x 480 pixels (30 fps) is recommended for the highest resolution.
- This System also supports the resolutions of 352 x 576/480 x 576/352 x 288 pixels (25 fps) and 352 x 480/480 x 480/352 x 240 pixels (30 fps).
- The file format should be MP@ML (Main Profile at Main Level)/SP@ML (Simple Profile at Main Level)/MP@LL (Main Profile at Low Level).
- Audio streams should conform to MPEG1 Audio Layer-2 or MPEG2 Audio Layer-2.
- For ASF playback...
- This System can play back ASF files with the extension code .asf (regardless of the letter case—upper/lower).
- This System supports ASF files whose resolution is 352 x 288 pixels or less.
- Some recorded files may not be able to playback depending on file characteristics, kind of digital camera/video camera, or recording conditions.
- You cannot use the following functions—One Touch Replay, Slow motion, A-B Repeat, Program Play and Random Play.
- For DivX playback...
- This System can play only a disc of UDF-Bridge format. "Multi-border" is not supported.
- The System supports all versions of DivX® video (including DivX® 6).
- The System supports DivX files whose resolution is 720 x 480 pixels or less (30 fps), and 720 x 576 pixels or less (25 fps).
- Audio stream should conform to MPEG1 Audio Layer-2 or MPEG Audio Layer-3 (MP3).
- This System can play back DivX files with the extension code .divx .div .avi (regardless of the letter case—upper/lower).
- The System does not support GMC (Global Motion Compression).
– The file encoded in the interlaced scanning mode may not be played back correctly.
- You cannot use the following functions: One Touch Replay, Slow motion, A-B Repeat, Program Play, Random Play, and on-screen operations.
Playing Back a portable audio device:
- When QP Link fails due to a weak sound signal from the AUX jack, Auto Standby may turn the System off even if you can hear the sound from the speakers. In such cases, adjust the volume level of the component louder so that the System can detect the sound signal properly.
- Changing from AUX to another source while QP Link works will deactivate QP Link temporarily. In this case, the following reactivates QP Link:
- Pressing QP LINK on the remote control twice.
- Unplug the component from the AUX jack, then plug it in again.
- If you press Ⓑ/1 (Standby/on) to turn the System off or if preset Timer turns the System off while QP Link works, the System will deactivate QP Link temporarily.
In such cases, the following reactivates QP Link:
- When the sound signal from the AUX jack stops or is too weak for about 30 seconds after the System is turned off.
- When you turn on the power again.
- QP Link may start working when you just plug in the component to the AUX jack or unplug it. This is not a malfunction.
Daily Operations—Sound & Other Adjustments
(see pages 11 to 14)
Adjusting the Sound:
- This function also affects the sound through the headphones.
Changing the Scanning Mode:
- You cannot change the scanning mode to progressive in the following cases:
- When your TV does not support the progressive video input.
- When you have not connected your TV to the system using a component video cord.
Setting the Clock:
- “0:00” will flash on the display until you set the clock.
- The clock may gain or lose 1 to 2 minutes per month. If this happens, reset the clock.
Advanced Radio Operations (see pages 15 and 16)
- If you want to know more about Radio Data System, visit «http://www.rds.org.uk».
- If the System takes time to show the Radio Data System information—PS, PTY, RT signals, “WAIT PS,” “WAIT PTY,” or “WAIT RT” will appear while searching.
Unique DVD/VCD Operations (see pages 17 to 19)
Selecting the Audio Track:
- On some DVD Video discs, you cannot change audio languages while playing back.
Special Effect Playback:
- During slow-motion playback, no sound will be reproduced.
- While zoomed in, the picture may look coarse.
Advanced Playback Operations (see pages 20 to 26)
Programming the Playing Order—Program Play:
• While programming steps...
Your entry will be ignored if you have tried to program an item number that does not exist (for example, selecting track 14 on a disc that only has 12 tracks).
Playing Repeatedly:
- A-B Repeat can be used within the same title while playing a DVD Video, and within the same track for the other discs.
On-screen Disc Operations:
- For DVD-R/-RW in the VR format, “PG” or “PL” appears instead of “TITLE” on the on-screen bar.
Audio/Video File Operations (see pages 27 and 28)
Operations on the Control Screen:
- If you press ON SCREEN on the remote control during playback, playback information appears on the TV screen.
Timer Operations (see pages 29 and 30)
Setting the Timer:
- If you do not specify the preset station or track number correctly while setting a timer, the currently selected station or the first track will be played when the timer is activated.
- When you unplug the AC power cord or if a power failure occurs, the timer will be canceled. You need to set the clock first, then the timer again.
- If you set DVD Video as the source, Daily Timer will not work correctly.
Timer Priority:
- If you set the Sleep Timer after Daily Timer starts playing the selected source, Daily Timer is canceled.
Setup Menu Operations (see pages 31 and 32)
General:
- If the upper and lower parts of the menu are cut off, adjust the picture size control of the TV.
LANGUAGE menu:
- When the language you have selected for MENU LANGUAGE, AUDIO LANGUAGE, or SUBTITLE is not recorded on a disc, the original language is used as the initial language.
PICTURE menu—MONITOR TYPE:
- Even if “4:3 PS” is selected, the screen size may become 4:3 letter box while playing a disc. This depends on how the discs are recorded.
- When you select "16:9" for a picture whose aspect ratio is 4:3, the picture slightly changes due to the process for converting the picture width.
OTHERS menu—ON SCREEN GUIDE:
- The setup menu and on-screen bar will be displayed (and recorded) even though this function is set to “OFF.” Subtitles and the information for zoom-in always appear on the display regardless of this setting.
Maintenance
To get the best performance of the System, keep your discs and mechanism clean.
Handling discs
- Remove the disc from its case by holding it at the edge while pressing the center hole lightly.
- Do not touch the shiny surface of the disc, or bend the disc.
- Put the disc back in its case after use to prevent warping.
- Be careful not to scratch the surface of the disc when placing it back in its case.
- Avoid exposure to direct sunlight, extreme temperature, and moisture.
To clean the disc:
Wipe the disc with a soft cloth in a straight line from center to edge.
Cleaning the System
- Stains should be wiped off with a soft cloth. If the System is heavily stained, wipe it with a cloth soaked in water-diluted neutral detergent and wrung well, then wipe clean with a dry cloth.
- Since the System may deteriorate in quality, become damaged or get its paint peeled off, be careful about the following:
- DO NOT wipe it with a hard cloth.
- Do not wipe it forcefully.
- Do not wipe it with thinner or benzine.
- Do not apply any volatile substance such as insecticides to it.
- Do not allow any rubber or plastic to remain in contact for a long time.
To remove the speaker grilles:

Troubleshooting
General:
Adjustments or settings are suddenly canceled before you finish.
There is a time limit. Repeat the procedure again.
Operations are disabled.
The built-in microprocessor may malfunction due to external electrical interference. Unplug the AC power cord and then plug it back in.
Unable to operate the system from the remote control.
The path between the remote control and the remote sensor on the system is blocked.
The batteries are exhausted.
No sound is heard.
⇒ Speaker connections are incorrect or loose.
⇒ Headphones are connected.
No picture appears on the screen.
⇒ The video cord connections are incorrect or loose.
No picture is displayed on the TV screen, the picture is blurred, or the picture is divided into two parts.
⇒ The System is connected to a TV which does not support progressive video input.
The left and right edges of the picture are missing on the screen.
⇒ Select "4:3 LB" for "MONITOR TYPE" (see page 31).
⇒ When you unplug the AC power cord and plug it back again, the scanning mode may change back to the initial setting (“RGB”) (see page 13).
Radio Operations:
Hard to hear broadcasts because of noise.
⇒ Antennas connections are incorrect or loose.
⇒ The AM loop antenna is too close to the System.
⇒ The FM antenna is not properly extended and positioned.
Disc/File Playback Operations:
The disc does not play.
⇒ You have inserted a disc whose Region Code is not "2." ("RG ERROR" appears on the display.)
⇒ The disc is placed upside down. Place the disc with the label side up.
ID3 Tag on an MP3/WMA file cannot be shown.
⇒ There are two types of ID3 Tag—Version 1 and Version 2. This System can only show ID3 Tag Version 1.
Groups and tracks are not played back as you expect.
⇒ The playing order is determined when the groups and tracks were recorded. It depends on the writing application.
MP3, WMA, JPEG, MPEG-1, MPEG-2, ASF or DivX files are not played back.
⇒ The disc or the USB mass storage class device may include both type of tracks (MP3/WMA files and JPEG files). In this case, you can only play back the files selected by the "FILE TYPE" setting (see page 31).
⇒ You have changed the "FILE TYPE" setting after the System read the disc or the USB mass storage class device. In this case, reload the disc or disconnect the USB mass storage class device and connect it again.
"NO AUDIO" appears.
⇒ This System cannot play back illegally produced DVD Audio discs.
"LR ONLY" appears.
⇒ Some DVD Audio discs prohibit downmixed output. When you play back such a disc, this System plays back the left front and right front signals only.
The disc sound is discontinuous.
⇒ The disc is scratched or dirty.
No subtitle appears on the display though you have selected the initial subtitle language.
⇒ Some DVDs are programmed to always display no subtitle initially. If this happens, press SUBTITLE after starting playback (see page 18).
Audio language is different from the one you have selected as the initial audio language.
⇒ Some DVDs are programmed to always use the original language initially. If this happens, press AUDIO/MPX after starting playback (see page 17).
The disc tray does not open or close.
⇒ The AC power cord is not plugged in.
⇒ Child Lock is in use. "LOCKED" appears in the display window (see page 22).
QP Link Operations:
The System automatically turns on even if the Timer turns the System to standby or if you turn the System to standby while playback is going on the portable audio device.
⇒ In this case, deactivate QP Link or stop playback on the device connected to the AUX jack.
Timer Operations:
Daily Timer does not work.
⇒ The System has been turned on when the on-time comes. Timer starts working only when the System is turned off.
Daily Timer does not start playback.
⇒ The disc loaded is a DVD Video. Change the disc.
⇒ Title/group number and chapter/track number are not entered while setting the Daily Timer. Do not skip these steps when you want to play a disc using Daily Timer.
Language Code List
| AA | Afar |
| AB | Abkhazian |
| AF | Afrikaans |
| AM | Ameharic |
| AR | Arabic |
| AS | Assamese |
| AY | Aymara |
| AZ | Azerbaijani |
| BA | Bashkir |
| BE | Byelorussian |
| BG | Bulgarian |
| BH | Bihari |
| BI | Bislama |
| BN | Bengali, Bangla |
| BO | Tibetan |
| BR | Breton |
| CA | Catalan |
| CO | Corsican |
| CS | Czech |
| CY | Welsh |
| DA | Danish |
| DZ | Bhutani |
| EL | Greek |
| EO | Esperanto |
| ET | Estonian |
| EU | Basque |
| FA | Persian |
| FI | Finnish |
| FJ | Fiji |
| FO | Faroese |
| FY | Frisian |
| GA | Irish |
| GD | Scots Gaelic |
| GL | Galician |
| GN | Guarani |
| GU | Gujarati |
| HA | Hausa |
| HI | Hindi |
| HR | Croatian |
| HU | Hungarian |
| HY | Armenian |
| IA | Interlingua |
| IE | Interlingue |
| IK | Inupiak |
| IN | Indonesian |
| IS | Icelandic |
| IW | Hebrew |
| JI | Yiddish |
| JW | Javanese |
| KA | Georgian |
| KK | Kazakh |
| KL | Greenlandic |
| KM | Cambodian |
| KN | Kannada |
| KO | Korean (KOR) |
| KS | Kashmiri |
| KU | Kurdish |
| KY | Kirghiz |
| LA | Latin |
| LN | Lingala |
| LO | Laothian |
| LT | Lithuanian |
| LV | Latvian, Lettish |
| MG | Malagasy |
| MI | Maori |
| MK | Macedonian |
| ML | Malayalam |
| MN | Mongolian |
| MO | Moldavian |
| MR Marathi | |
| MS Malay (MAY) | |
| MT Maltese | |
| MY Burmese | |
| NA Nauru | |
| NE Nepali | |
| NL Dutch | |
| NO Norwegian | |
| OC Occitan | |
| OM (Afan) Oromo | |
| OR Oriya | |
| PA Panjabi | |
| PL Polish | |
| PS Pashto, Pushto | |
| PT Portuguese | |
| QU Quechua | |
| RM Rhaeto-Romance | |
| RN Kirundi | |
| RO Rumanian | |
| RW Kinyarwanda | |
| SA Sanskrit | |
| SD Sinohi | |
| SG Sangho | |
| SH Serbo-Croatian | |
| SI Singhalese | |
| SK Slovak | |
| SL Slovenian | |
| SM Samoan |
| SN Shona |
| SO Somali |
| SQ Albanian |
| SR Serbian |
| SS Siswati |
| ST Sesotho |
| SU Sundanese |
| SV Swedish |
| SW Swahili |
| TA Tamil |
| TE Telugu |
| TG Tajik |
| TH Thai |
| TI Tigrinya |
| TK Turkmen |
| TL Tagalog |
| TN Setswana |
| TO Tonga |
| TR Turkish |
| TS Tsonga |
| TT Tatar |
| TW Twi |
| UK Ukrainian |
| UR Urdu |
| UZ Uzbek |
| VI Vietnamese |
| VO Volapuk |
| WO Wolof |
| XH Xhosa |
| YO Yoruba |
| ZU Zulu |
OPTICAL DIGITAL OUT Signals
| PLAYBACK disc/file STREAM/PCM-DOL | Output Signals | ||
| BY DIGITAL/PCM PCM ONLY | |||
| DVD Videowith 48 kHz, 16/20/24 bit Linear PCM | 48 kHz, 16 bit Linear PCM* | ||
| with 96 kHz, Linear PCM 48 kHz, 16 | bit Linear PCM | ||
| with Dolby Digital Dolby Digital bitstream 48 kHz, 16 bit Linear PCM | |||
| with DTS DTS bitstream 48 kHz, 16 | bit Linear PCM | ||
| DVD Audiowith 48/96/192 kHz, 16/20/24 bitLinear PCM | 48 kHz, 16 bit Linear PCM* | ||
| with 44.1/88.2/176.4 kHz,16/20/24 bit Linear PCM | 44.1 kHz, 16 bit Linear PCM* | ||
| with Dolby Digital Dolby Digital bitstream 48 kHz, 16 bit Linear PCM | |||
| with DTS DTS bitstream 48 kHz, 16 | bit Linear PCM | ||
| DVD-R/-RW in DVD-VR formatwith 48 kHz, 16/20/24 bit Linear PCM | 48 kHz, 16 bit Linear PCM* | ||
| with Dolby Digital Dolby Digital bitstream 48 kHz, 16 bit Linear PCM | |||
| SVCD, VCD, CD | 44.1 kHz, 16 bit Linear PCM/48 kHz, 16 bit Linear PCM | ||
| CD with DTS | DTS bitstream 44.1 kHz, 16 bit Linear PCM | ||
| MP3/WMA/MPEG-1/MPEG-2/DivXdisc/file | 32/44.1/48 kHz, 16 bit Linear PCM | ||
| ASF disc/file | 32 kHz, 16 bit Linear PCM | ||
* While playing some DVDs, digital signals may be emitted at 20 bits or 24 bits (at their original bit rate) through the OPTICAL DIGITAL OUT terminal if the discs are not copy-protected.
Operating JVC's TVs Using the Remote Control

You can use the remote control to operate JVC's TVs.
| ∅/I TV | Turn on/off TV. |
| TV/VIDEO | Change the input mode. |
While holding SHIFT, press...
| TV VOL +,- | Adjust the volume. |
| TV CH ⊕ ⊖ | Change the channels. |
Specifications
Amplifier section—CA-UXG60
Output Power:
120 W (60 W + 60 W) at 6 Ω (10% THD)
Audio Input AUX: 500 mV/50 k Ω (at “AUX LVL1”)
250 mV/50 kΩ (at "AUX LVL2")
125 mV/50 kΩ (at "AUX LVL3")
Digital output: DVD OPTICAL DIGITAL OUT:
-21 dBm to -15 dBm (660 nm ±30 nm)
Digital input: USB MEMORY
Video Out:
Color system: PAL (interlaced/progressive)
Composite video: 1 V(p-p)/75 Ω
S-VIDEO: Y (luminance) 1 V(p-p)/75 Ω
C (chrominance, burst) 0.3 V(p-p)/75 Ω
RGB: 0.7 V(p-p)/75 Ω
COMPONENT: (Y) 1 V(p-p)/75 Ω
(PB/PR) 0.7 V(p-p)/75 Ω
Speaker impedance: 6 Ω - 16 Ω
Tuner section
FM tuning range: 87.50 MHz – 108.00 MHz
AM (MW) tuning range: 522 kHz – 1 629 kHz
Disc/file player section
Playable discs: DVD Video/DVD Audio/CD/VCD/SVCD/
CD-R/CD-RW (CD/SVCD/VCD/MP3/
WMA/JPEG/MPEG-1/MPEG-2/ASF/DivX format)
DVD-R/-RW (DVD-VR/DVD Video/MP3/
WMA/JPEG/MPEG-1/MPEG-2/ASF/DivX format)
+R/+RW (DVD-Video format)
DVD-ROM (DVD Video/DivX format)
Playable files: MP3/WMA/JPEG/MPEG-1/MPEG-2/ASF/
DivX format
Dynamic range: 80 dB
Horizontal resolution: 500 lines
Wow and flutter: Immeasurable
General
Power requirement: AC 230 V ∼ , 50 Hz
Power consumption: 125 W (at operation)
13 W (at standby)
1 W (at standby dimmer OFF mode)
Dimensions (approx.): 170 mm x 250 mm x 342 mm
(W/H/D)
Mass (approx.): 5 kg
Speakers—SP-UXG60
Speaker units: Tweeter: 4 cm cone x 1
Woofer: 12 cm cone x 1
Impedance: 6 Ω
Dimensions (approx.): 145 mm x 250 mm x 195 mm
(W/H/D)
Mass (approx.): 2.2 kg each
Supplied Accessories
See page 3.
Design and specifications are subject to change without notice.
- Manufactured under license from Dolby Laboratories. "Dolby", "Pro Logic", "MLP lossless", and the double-D symbol are trademarks of Dolby Laboratories.
- "DTS" and "DTS 2.0+ Digital Out" are trademarks of Digital Theater Systems, Inc.
- "Official DivX® Ultra Certified product" "Plays all versions of DivX® video (including DivX® 6) with enhanced playback of DivX® media files and the DivX® Media Format" "DivX, DivX Ultra Certified, and associated logos are trademarks of DivX, Inc. and are used under licence."
- USE OF THIS PRODUCT IN ANY MANNER THAT COMPLIES WITH THE MPEG-4 VISUAL STANDARD IS PROHIBITED, EXCEPT FOR USE BY A CONSUMER ENGAGING IN PERSONAL AND NON-COMMERCIAL ACTIVITIES.
- This product incorporates copyright protection technology that is protected by U.S. patents and other intellectual property rights. Use of this copyright protection technology must be authorized by Macrovision, and is intended for home and other limited viewing uses only unless otherwise authorized by Macrovision. Reverse engineering or disassembly is prohibited.
"CONSUMERS SHOULD NOTE THAT NOT ALL HIGH DEFINITION TELEVISION SETS ARE FULLY COMPATIBLE WITH THIS PRODUCT AND MAY CAUSE ARTIFACTS TO BE DISPLAYED IN THE PICTURE. IN CASE OF 525 OR 625 PROGRESSIVE SCAN PICTURE PROBLEMS, IT IS RECOMMENDED THAT THE USER SWITCH THE CONNECTION TO THE 'STANDARD DEFINITION' OUTPUT. IF THERE ARE QUESTIONS REGARDING OUR TV SET COMPATIBILITY WITH THIS MODEL 525p AND 625p DVD PLAYER, PLEASE CONTACT OUR CUSTOMER SERVICE CENTER."
Parts Index
Remote control
| Button Page | ||
| ∅/1 AUDIO | 25 | 7 |
| ∅/1 TV | 26 | 38 |
| ■ | 15 | 9, 10, 19, 21, 28 |
| ▶▶, ◀◀◀◀ | 17 | 8, 9, 22, 25 |
| ▶▶, ◀◀◀◀ | 38 | 8, 9, 10, 21, 28 |
| || | 16 | 9, 19, 21, 28 |
| ^, v, >, < , ENTER/SET | 11 | 8, 10, 13, 14, 15, 19, 24, 25, 26, 28, 29, 30, 31 |
| ◎ (One-Touch Replay) | 36 | 19 |
| 3D PHONIC | 5 | 12 |
| AHB PRO | 20 | 11 |
| ANGLE | 7 | 18 |
| AUDIO/MPX | 19 | 17 |
| AUDIO VOL +, - | 41 | 7, 12 |
| AUX/TV SOUND | 35 | 7, 8 |
| A.STANDBY | 24 | 14 |
| BASS/TREBLE | 43 | 12 |
| C.VOICE | 4 | 19 |
| CANCEL | 9 | 21, 30 |
| CLOCK/TIMER | 27 | 14, 29, 30 |
| DIMMER | 3 | 13 |
| DISPLAY | 30 | 14 |
| DVD/AUX LEVEL | 21 | 12 |
| DVD/CD ▶▶ | 14 | 7, 9, 19, 28 |
| FADE MUTING | 42 | 11 |
| FM/PLAY MODE | 39 | 8, 20, 21 |
| FM/AM | 34 | 7, 8 |
| GROUP/TITLE | 37 | 9, 28 |
| GROUP/TITLE SKIP | 38 | 9, 28 |
| MENU/PL | 32 | 10, 26 |
| Number buttons | 1 | 8, 10, 19, 20, 25, 26 |
| ON SCREEN | 33 | 24 |
| PAGE/SUBTITLE | 18 | 18 |
| PTY SEARCH | 32 | 15 |
| PTY ◆◀◀◀ | 11 | 15 |
| QP LINK | 20 | 10 |
| REPEAT | 40 | 22 |
| REPEAT A-B | 40 | 22 |
| RETURN | 8 | 10 |
| SCAN MODE | 29 | 13 |
| SET UP | 12 | 31 |
| SHIFT | 22 | 9 – 16, 18, 19, 21, 22, 28, 29, 30, 38 |
| SLEEP | 2 | 14 |
| SLOW ◆◀◀◀ | 17 | 19 |
| SOUND TURBO II | 23 | 11 |
| TA/News/Info | 12 | 16 |
| TOP MENU/PG | 10 | 10, 26 |
| TV CH ◆◀◀◀ | 11 | 38 |
| TV VOL +, - | 41 | 38 |
| TV/VIDEO | 28 | 38 |
| USB MEMORY ▶▶ | 13 | 7, 9, 28 |
| VFP | 31 | 13 |
| ZOOM | 6 | 19, 28 |
Main unit
| Button Page | ||
| ∅/I & STANDBY lamp | 7 | 7 |
| ■ | 9 | 9, 22 |
| ▲ | 16 | 9, 22 |
| 3D-PHONIC | 14 | 12 |
| AUX | 12 | 7 |
| AUX jack | 18 | 5 |
| Display | 2 | 6 |
| DISPLAY | 5 | 14 |
| DVD/CD ▷|||| | 4 | 7, 9, 28 |
| FM/AM | 11 | 8 |
| PHONES | 10 | 7 |
| Remote sensor | 1 | 5 |
| SOUND TURBO II | 6 | 11 |
| TV SOUND | 13 | 8 |
| ▶▶UP, DOWN ◀◀◀◀ | 817 | 8, 21 |
| USB MEMORY jack | 19 | 5 |
| USB MEMORY ▷|||| | 3 | 7, 9, 28 |
| VOLUME +,- | 15 | 11 |
Remote control
This remote control can also operate JVC's TVs (see page 38).
Main unit
SAFETY INSTRUCTIONS
"SOME DOS AND DON'TS ON THE SAFE USE OF EQUIPMENT"
This equipment has been designed and manufactured to meet international safety standards but, like any electrical equipment, care must be taken if you are to obtain the best results and safety is to be assured.
Do read the operating instructions before you attempt to use the equipment.
Do ensure that all electrical connections (including the mains plug, extension leads and interconnections between pieces of equipment) are properly made and in accordance with the manufacturer's instructions. Switch off and withdraw the mains plug when making or changing connections.
Do consult your dealer if you are ever in doubt about the installation, operation or safety of your equipment.
Do be careful with glass panels or doors on equipment.
DON'T continue to operate the equipment if you are in any doubt about it working normally, or if it is damaged in any way—switch off, withdraw the mains plug and consult your dealer.
DON'T remove any fixed cover as this may expose dangerous voltages.
DON'T leave equipment switched on when it is unattended unless it is specifically stated that it is designed for unattended operation or has a standby mode.
Switch off using the switch on the equipment and make sure that your family know how to do this.
Special arrangements may need to be made for infirm or handicapped people.
DON'T use equipment such as personal stereos or radios so that you are distracted from the requirements of traffic safety. It is illegal to watch television whilst driving.
DON'T listen to headphones at high volume as such use can permanently damage your hearing.
DON'T obstruct the ventilation of the equipment, for example with curtains or soft furnishings.
Overheating will cause damage and shorten the life of the equipment.
DON'T use makeshift stands and NEVER fix legs with wood screws—to ensure complete safety always fit the manufacturer's approved stand or legs with the fixings provided according to the instructions.
DON'T allow electrical equipment to be exposed to rain or moisture.
ABOVE ALL
- NEVER let anyone, especially children, push anything into holes, slots or any other opening in the case —this could result in a fatal electrical shock.;
- NEVER guess or take chances with electrical equipment of any kind—it is better to be safe than sorry!
JVC

- UX-G60—CONSISTS OF CA-UXG60 AND SP-UXG
- IMPORTANT FOR THE U.K
- IMPORTANT
- IF IN DOUBT - CONSULT A COMPETENT ELECTRICIAN
- CAUTION—(STANDBY/ON) BUTTON
- CAUTION
- CAUTION: PROPER VENTILATION
- IMPORTANT FOR LASER PRODUCTS
- INFORMATION FOR USERS ON DISPOSAL OF OLD EQUIPMENT
- ATTENTION
- (BUSINESS USERS)
- [OTHER COUNTRIES OUTSIDE THE EUROPEAN UNION]
- INTRODUCTION
- PLAYABLE DISC/FILE TYPES
- NOTE ON REGION CODE
- AUDIO FORMATS
- IMPORTANT: BEFORE PLAYING A DISC, MAKE SURE OF THE FOLLOWING
- HOW TO READ THIS MANUAL
- CAUTION FOR DUALDISC PLAYBACK
- PRECAUTIONS
- INSTALLATION
- POWER SOURCES
- MOISTURE CONDENSATION
- INTERNAL HEAT
- OTHERS
- CONTENTS
- CONNECTIONS INFO
- SUPPLIED ACCESSORIES
- FRONT PANEL
- AM/FM ANTENNA
- ② SPEAKERS
- ③ TV/MONITOR
- SCART CORD (NOT SUPPLIED)
- TO CONNECT THE POWERED SUBWOOFER
- DIGITAL AUDIO COMPONENT
- WHEN USING THE REMOTE CONTROL
- DAILY OPERATIONS—PLAYBACK
- TURN ON THE POWER
- SELECT THE SOURCE
- ADJUST THE VOLUME
- OPERATE THE TARGET SOURCE AS EXPLAINED LATER
- TO TURN OFF (STANDBY) THE UNIT
- FOR PRIVATE LISTENING
- LISTENING TO THE RADIO INFO
- TO SELECT THE BAND (FM OR AM)
- TO TUNE IN TO A STATION
- IF THE FM STATION HAS POOR RECEPTION
- TO PRESET THE STATIONS
- SELECT A PRESET NUMBER FOR THE STATION YOU STORE
- EXAMPLES
- STORE THE STATION
- TO TUNE IN TO A PRESET STATION
- LISTENING TO THE TV SOUND INFO
- PLAYING BACK A DISC/FILE INFO
- TO INSERT A DISC
- TO CONNECT A USB MASS STORAGE CLASS DEVICE
- TO PLAY BACK A DISC/FILE
- ON-SCREEN GUIDE ICONS
- TO SELECT A TITLE/GROUP
- TO SELECT A CHAPTER/TRACK
- TO LOCATE A PARTICULAR PORTION
- TO LOCATE AN ITEM DIRECTLY
- TO PLAY BACK USING THE DISC MENU
- FOR DVD VIDEO/DVD AUDIO
- SHOW THE DISC MENU
- SELECT AN ITEM ON THE DISC MENU
- FOR SVCD/VCD WITH PBC
- TO MOVE TO THE NEXT OR PREVIOUS PAGE OF THE CURRENT MENU
- TO RETURN TO THE PREVIOUS MENU
- PLAYING BACK A
- PORTABLE AUDIO DEVICE
- TO ACTIVATE QP LINK
- DAILY OPERATIONS—SOUND & OTHER ADJUSTMENTS
- ADJUSTING THE VOLUME
- TO DROP THE VOLUME IN A MOMENT
- ADJUSTING THE SOUND INFO
- TO REINFORCE THE HEAVY SOUND
- TO REINFORCE THE BASS SOUND
- TO ADJUST THE TONE
- CREATING 3-DIMENSIONAL SOUND FIELD
- D PHONIC
- PRESETTING AUTOMATIC DVD VIDEO SOUND
- INCREASE LEVEL
- ADJUSTING THE AUDIO INPUT LEVEL
- CHANGING THE DISPLAY BRIGHTNESS
- CHANGING THE SCANNING MODE
- CHANGING THE PICTURE TONE
- TO SELECT A PRESET PICTURE TONE
- TO ADJUST THE PICTURE TONE
- ADJUST THE PARAMETER
- REPEAT STEPS 2 TO 3 TO ADJUST OTHER PARAMETERS
- SETTING THE CLOCK
- ACTIVATE THE CLOCK SETTING MODE
- SET THE TIME
- TO CHECK THE CURRENT CLOCK TIME DURING PLAY
- TURNING OFF THE POWER AUTOMATICALLY REMOTE ONLY
- AUTO STANDBY
- SLEEP TIMER
- SPECIFY THE TIME (IN MINUTES)
- WAIT UNTIL THE SET TIME DISAPPEARS
- ADVANCED RADIO OPERATIONS INFO
- RECEIVING FM STATIONS WITH RADIO DATA
- SYSTEM
- TO SHOW THE RADIO DATA SYSTEM INFORMATION
- SEARCHING FOR A PROGRAM BY
- PTY CODES
- WHILE LISTENING TO AN FM STATION
- SELECT A PTY CODE
- START SEARCHING
- TO CONTINUE SEARCHING AFTER IT STOPS ON AN UNWANTED STATION
- SWITCHING TEMPORARILY TO A PROGRAM OF
- YOUR CHOICE AUTOMATICALLY
- HOW THE ENHANCED OTHER NETWORKS FUNCTION WORKS
- CASE
- DESCRIPTION OF THE PTY CODES
- UNIQUE DVD/VCD OPERATIONS
- SELECTING THE AUDIO TRACK
- SELECTING THE SUBTITLE LANGUAGE
- SELECTING THE VIEW ANGLE
- SELECTING THE BROWSABLE STILL PICTURES
- PLAYING BACK BONUS GROUP
- SELECT THE BONUS GROUP
- ENTER THE KEY NUMBER
- FOLLOW THE INTERACTIVE INSTRUCTIONS SHOWN ON THE SCREEN
- MAKING DIALOGUES CLEAR—CLEAR VOICE
- SPECIAL EFFECT PLAYBACK
- PAUSE PLAYBACK
- FRAME-BY-FRAME PLAYBACK
- WHILE PLAYING
- ADVANCE THE STILL PICTURE FRAME BY FRAME
- SLOW-MOTION PLAYBACK
- SELECT SLOW MOTION SPEED
- TO REPLAY THE PREVIOUS SCENES (ONE-TOUCH REPLAY)
- WHILE PLAYING BACK
- ZOOM
- MOVE THE ZOOMED-IN POSITION
- ADVANCED PLAYBACK OPERATIONS
- PROGRAMMING THE PLAYING ORDER
- PROGRAM PLAY
- SELECT CHAPTERS OR TRACKS YOU WANT FOR PROGRAM PLAY
- TO ENTER THE NUMBERS DIRECTLY
- START PLAYBACK
- TO CHECK THE PROGRAMMED CONTENTS
- TO MODIFY THE PROGRAM
- TO EXIT FROM PROGRAM PLAY
- PLAYING AT RANDOM—RANDOM PLAY
- BEFORE STARTING PLAYBACK, ACTIVATE RANDOM PLAY
- TO EXIT FROM RANDOM PLAY
- PLAYING REPEATEDLY
- REPEAT PLAY
- FOR DVD VIDEO
- FOR DVD AUDIO
- FOR CD/SVCD/VCD
- FOR DVD-VR
- A-B REPEAT
- WHILE PLAYING (WITHOUT PBC FOR SVCD/VCD), SELECT THE START POINT (A)
- SELECT THE END POINT (B)
- PROHIBITING DISC EJECTION—CHILD LOCK
- WHILE THE DISC TRAY IS CLOSED
- ON-SCREEN DISC OPERATIONS
- ON-SCREEN BAR INFORMATION
- ① DISC TYPE
- PLAYBACK INFORMATION
- INDICATION MEANINGS
- OPERATION MODES
- FUNCTION ICONS (ON THE PULL-DOWN MENU)
- TO OPERATE USING THE ON-SCREEN BAR
- DISPLAY THE ENTIRE ON-SCREEN BAR
- SELECT (HIGHLIGHT) THE ITEM YOU WANT
- DISPLAY THE POP-UP WINDOW
- SELECT THE DESIRED OPTION IN THE POP-UP WINDOW
- FINISH THE SETTING
- TO REMOVE THE ON-SCREEN BAR
- TO CHANGE THE TIME INFORMATION
- WHILE PLAYING, DISPLAY THE ON-SCREEN BAR WITH THE PULL-DOWN MENU
- MAKE SURE ITIME IS SELECTED (HIGHLIGHTED)
- CHANGE THE TIME INDICATION
- WHILE PLAYING A DISC (WITHOUT PBC FOR SVCD/VCD), DISPLAY THE ENTIRE ON-SCREEN BAR
- SELECT OFF
- SELECT THE REPEAT MODE YOU WANT
- TIME SEARCH
- ENTER THE TIME
- CHAPTER/TRACK SEARCH
- ENTER THE DESIRED CHAPTER/TRACK NUMBER
- BROWSABLE STILL PICTURES
- CONTROL SCREEN FOR DVD-R/-RW IN DVD-VR FORMAT
- TO SELECT PLAYBACK TYPE
- EX.: WHEN PROGRAM LIST IS SELECTED
- EX.: WHEN PLAY LIST IS SELECTED
- TO SELECT AN ITEM IN THE LIST AND START PLAYBACK
- AUDIO/VIDEO FILE OPERATIONS
- OPERATIONS ON THE
- CONTROL SCREEN INFO
- CONTROL SCREEN FOR MP3/WMA/JPEG/MPEG-1/MPEG-2/ASF/DIVX FILES
- TO REPEAT MP3/WMA PLAYBACK
- TO REPEAT SLIDE-SHOW FOR JPEG
- TO REPEAT MPEG-1/MPEG-2/ASF/DIVX PLAYBACK
- TO ZOOM IN THE JPEG FILES
- WHILE PLAYING BACK A STILL PICTURE
- TIMER OPERATIONS
- SETTING THE TIMER
- HOW DAILY TIMER WORKS
- WHEN THE ON-TIME COMES
- WHEN THE OFF-TIME COMES
- TO TURN ON OR OFF THE TIMER
- SETUP MENU OPERATIONS INFO
- INITIAL SETTINGS
- AUDIO MENU
- OTHERS MENU
- ADDITIONAL INFORMATION
- LEARNING MORE ABOUT THIS SYSTEM
- CONNECTIONS (SEE PAGES 3 TO 5)
- DAILY OPERATIONS—PLAYBACK (SEE PAGES 7 TO 10)
- LISTENING TO THE RADIO
- LISTENING TO THE TV SOUND
- PLAYING BACK A DISC/FILE
- PLAYING BACK A PORTABLE AUDIO DEVICE
- (SEE PAGES 11 TO 14)
- ADJUSTING THE SOUND
- ADVANCED RADIO OPERATIONS (SEE PAGES 15 AND 16)
- UNIQUE DVD/VCD OPERATIONS (SEE PAGES 17 TO 19)
- ADVANCED PLAYBACK OPERATIONS (SEE PAGES 20 TO 26)
- PROGRAMMING THE PLAYING ORDER—PROGRAM PLAY
- AUDIO/VIDEO FILE OPERATIONS (SEE PAGES 27 AND 28)
- OPERATIONS ON THE CONTROL SCREEN
- TIMER OPERATIONS (SEE PAGES 29 AND 30)
- TIMER PRIORITY
- SETUP MENU OPERATIONS (SEE PAGES 31 AND 32)
- GENERAL
- LANGUAGE MENU
- PICTURE MENU—MONITOR TYPE
- OTHERS MENU—ON SCREEN GUIDE
- MAINTENANCE
- HANDLING DISCS
- TO CLEAN THE DISC
- CLEANING THE SYSTEM
- TO REMOVE THE SPEAKER GRILLES
- TROUBLESHOOTING
- RADIO OPERATIONS
- DISC/FILE PLAYBACK OPERATIONS
- QP LINK OPERATIONS
- OPTICAL DIGITAL OUT SIGNALS
- OPERATING JVC'S TVS USING THE REMOTE CONTROL
- SPECIFICATIONS
- AMPLIFIER SECTION—CA-UXG
- TUNER SECTION
- DISC/FILE PLAYER SECTION
- SPEAKERS—SP-UXG
- PARTS INDEX
- SAFETY INSTRUCTIONS
- SOME DOS AND DON'TS ON THE SAFE USE OF EQUIPMENT
- ABOVE ALL
- JVC
Brand : JVC
Model : CA-UXG60
Category : Hi-Fi System