
SC-AKX12 - Hi-Fi System PANASONIC - Free user manual and instructions
Find the device manual for free SC-AKX12 PANASONIC in PDF.


| Product Type | Mini Hi-Fi System |
| Brand | Panasonic |
| Model | SC-AKX12 |
| Dimensions (W x H x D) | 200 x 250 x 150 mm |
| Weight | 2.5 kg |
| Power Consumption | 30 W |
| Power Supply | AC 110-240 V, 50/60 Hz |
| Speaker Output Power | 10 W + 10 W (RMS) |
| Audio Playback | CD, USB, Bluetooth, AUX |
| Radio Tuner | FM/AM with presets |
| Bluetooth Version | 2.1 + EDR |
| USB Playback | MP3, WMA files |
| CD Type | CD, CD-R/RW |
| Additional Features | Clock, alarm, sleep timer, bass/treble control |
| Cleaning | Wipe with dry cloth; clean CD lens with cleaning disc |
| Safety | Operate on stable surface; avoid moisture |
| Spare Parts & Repairability | Contact Panasonic service center for genuine parts |
Frequently Asked Questions - SC-AKX12 PANASONIC
User questions about SC-AKX12 PANASONIC
0 question about this device. Answer the ones you know or ask your own.
Ask a new question about this device
Download the instructions for your Hi-Fi System in PDF format for free! Find your manual SC-AKX12 - PANASONIC and take your electronic device back in hand. On this page are published all the documents necessary for the use of your device. SC-AKX12 by PANASONIC.
USER MANUAL SC-AKX12 PANASONIC
Dear Customer
Thank you for purchasing this system.
For optimum performance and safety, read these instructions fully before you connect, operate or adjust this system.
Keep this manual for future reference.
Your system and the illustrations can look differently.
Dear Customer
Do the procedures with the remote control. You can also use the buttons on the main unit if they are the same.
These operating instructions are applicable to the following system.
| System SC-AKX12 | |
| Main unit SA-AKX12 | |
| Speakers SB-AKX12 |


Back of product
| CAUTION | - LASER RADIATION WHEN OPEN,DO NOT SHARE INTO BEAM,FDA 21 CFR (Class II) |
| CAUTION | - CLASS INVIBLE AND INVIBLE LASER RADIATION WHEN OPEN,DO NOT VIEW DIRECTLY WITH OPTICAL INSTRUMENTS,EDR0925-1 + AZI Class 'M' |
| VARNING | - KLAIS 'M' SYNLOG OCH OSYSLID LASERSTRALING NAR DIENNA DEL AR OPPNAD,BETRAKTA EU STRÄLEN DIRECT GENOM OPT BXT INSTRUMENT, |
| FORSIGTIG | - SYNLOG OD USYNLID LASERSHÄND KLASI 'M' NÄR LÄGETER ABERIT,UNDÅ AT BELDE PÅ MED OPTIKIE INSTRUMENTER, |
| VARO! | - AVATTASSIA OLET ALTINHA LUOKAN I NÄKIVÄRA JAK NÄKYMÄTONTEA,LASERSHÄTEVA,ÄLA KÄTOSO OPTIBELLA LÄTTEELA SUDRAAN SÄTESTE, |
| VORSICHT | - SICHTBARE UND USICHTBARE LASERSTRALING KLASI 'M', WEIN ABZECKUNGGEÖFNET, NICHT DIRECT IM OPTIRCHEN LETTELEEN BETRACHTEN, |
| ATTENTION | - RAYONNEMENT LASER VIBLE ET INVIBLE, CLASIE 'M', EN CAS D'OUERTURE,NE PAS REGARDER DIRECTEMENT A LUNDE D'INSTRUMENTS OPTIQUE, |
| PRECAUCIÓN | - RADIMACIÓN LASER VIBLE ET INVIBLE DE CLASIE 'M' AL ESTAR ABERTO,NO VIA DIRECTAMENTE CON INSTRUMENTOS ÓPTICO,S.RQLXS0106 |
Inside of product
Information for Users on Collection and Disposal of Old Equipment and used Batteries

These symbols on the products, packaging, and/or accompanying documents mean that used electrical and electronic products and batteries should not be mixed with general household waste.
For proper treatment, recovery and recycling of old products and used batteries, please take them to applicable collection points, in accordance with your national legislation and the Directives 2002/96/EC and 2006/66/EC.
By disposing of these products and batteries correctly, you will help to save valuable resources and prevent any potential negative effects on human health and the environment which could otherwise arise from inappropriate waste handling.
For more information about collection and recycling of old products and batteries, please contact your local municipality, your waste disposal service or the point of sale where you purchased the items.
Penalties may be applicable for incorrect disposal of this waste, in accordance with national legislation.

For business users in the European Union If you wish to discard electrical and electronic equipment, please contact your dealer or supplier for further information.
[Information on Disposal in other Countries outside the European Union]
These symbols are only valid in the European Union. If you wish to discard these items, please contact your local authorities or dealer and ask for the correct method of disposal.

Note for the battery symbol (bottom two symbol examples):
This symbol might be used in combination with a chemical symbol. In this case it complies with the requirement set by the Directive for the chemical involved.
CAUTION!
THIS PRODUCT UTILIZES A LASER. USE OF CONTROLS OR ADJUSTMENTS OR PERFORMANCE OF PROCEDURES OTHER THAN THOSE SPECIFIED HEREIN MAY RESULT IN HAZARDOUS RADIATION EXPOSURE. DO NOT OPEN COVERS AND DO NOT REPAIR YOURSELF. REFER SERVICING TO QUALIFIED PERSONNEL.
WARNING:
TO REDUCE THE RISK OF FIRE, ELECTRIC SHOCK OR PRODUCT DAMAGE,
- DO NOT EXPOSE THIS APPARATUS TO RAIN, MOISTURE, DRIPPING OR SPLASHING AND THAT NO OBJECTS FILLED WITH LIQUIDS, SUCH AS VASES, SHALL BE PLACED ON THE APPARATUS.
- USE ONLY THE RECOMMENDED ACCESSORIES.
- DO NOT REMOVE THE COVER (OR BACK); THERE ARE NO USER SERVICEABLE PARTS INSIDE. REFER SERVICING TO QUALIFIED SERVICE PERSONNEL.
CAUTION!
- DO NOT INSTALL OR PLACE THIS UNIT IN A BOOKCASE, BUILT-IN CABINET OR IN ANOTHER CONFINED SPACE. ENSURE THE UNIT IS WELL VENTILATED. TO PREVENT RISK OF ELECTRIC SHOCK OR FIRE HAZARD DUE TO OVERHEATING, ENSURE THAT CURTAINS AND ANY OTHER MATERIALS DO NOT OBSTRUCT THE VENTILATION VENTS.
- DO NOT OBSTRUCT THE UNIT'S VENTILATION OPENINGS WITH NEWSPAPERS, TABLECLOTHS, CURTAINS, AND SIMILAR ITEMS.
- DO NOT PLACE SOURCES OF NAKED FLAMES, SUCH AS LIGHTED CANDLES, ON THE UNIT.
- DISPOSE OF BATTERIES IN AN ENVIRONMENTALLY FRIENDLY MANNER.
The socket outlet shall be installed near the equipment and easily accessible.
The mains plug of the power supply cord shall remain readily operable.
To completely disconnect this apparatus from the AC Mains, disconnect the power supply cord plug from AC receptacle.
This product may receive radio interference caused by mobile telephones during use. If such interference is apparent, please increase separation between the product and the mobile telephone.
THIS UNIT IS INTENDED FOR USE IN MODERATE CLIMATES.
MPEG Layer-3 audio coding technology licensed from Fraunhofer IIS and Thomson.
Placement
Set the system up on an even surface away from direct sunlight, high temperatures, high humidity, and excessive vibration. These conditions can damage the cabinet and other components, thereby shortening the service life of the system.
Place it at least 15 cm away from wall surfaces to avoid distortion and unwanted acoustical effects.
Do not place heavy items on the system.
Voltage
Do not use high voltage power sources. This can overload the system and cause a fire.
Do not use a DC power source. Check the source carefully when setting up the system on a ship or other place where DC is used.
AC mains lead protection
Ensure the AC mains lead is connected correctly and not damaged. Poor connection and lead damage can cause fire or electric shock. Do not pull, bend, or place heavy items on the lead.
Grasp the plug firmly when unplugging the lead. Pulling the AC mains lead can cause electric shock.
Do not handle the plug with wet hands. This can cause electric shock.
Foreign matter
Do not let metal objects fall inside the system. This can cause electric shock or malfunction.
Do not let liquids get into the system. This can cause electric shock or malfunction. If this occurs, immediately disconnect the system from the power supply and contact your dealer.
Do not spray insecticides onto or into the system. They contain flammable gases which can ignite if sprayed into the system.
Service
Do not attempt to repair this system by yourself. If sound is interrupted, indicators fail to light, smoke appears, or any other problem that is not covered in these instructions occurs, disconnect the AC mains lead and contact your dealer or an authorized service center. Electric shock or damage to the system can occur if the system is repaired, disassembled, or reconstructed by unqualified persons.
Extend operating life by disconnecting the system from the power source if it is not to be used for a long time.
Supplied accessories
Please check and identify the supplied accessories.
1 x AC mains lead
1 x AM loop antenna
1 x FM indoor antenna
1 x Remote control battery
1 x Remote control
(N2QAYB000636)
Table of contents
Safety precautions 3
Supplied accessories .... 3
Preparing the remote control 4
Placement of speakers.... 4
Making the connections 5
Overview of controls 6
Discs....7
USB 8
Radio 8
Clock and timers.... 8
Sound effects 9
External equipment 9
Remote control code 9
Troubleshooting guide 10
Maintenance....10
Specifications 11

Use alkaline or manganese battery.
Install the battery so that the poles (+ and -) align with those in the remote control.
Point the remote control at the remote control sensor ( → 6), away from obstacles, at a maximum range of 7 m directly in front of the main unit.
CAUTION!
- Do not break open or short-circuit the battery.
- Do not charge the alkaline or manganese battery.
- Do not use the battery if the cover has peeled off.
- Do not heat or expose to flame.
- Do not leave the battery(ies) in an automobile exposed to direct sunlight for a long period of time with doors and windows closed.
- Mishandling of battery can cause electrolyte leakage, which can cause a fire.
- Remove the battery if you do not use the remote control for a long period of time. Keep in a cool, dark area.
CAUTION!
Danger of explosion if battery is incorrectly replaced. Replace only with the same or equivalent type recommended by the manufacturer. Dispose of used batteries according to the manufacturer's instructions.

The right and left speakers are the same.
You cannot remove the net of the speakers.
Use only the supplied speakers.
The combination of the main unit and speakers give the best sound. You can cause damage to the system and decrease the sound quality if you use other speakers.
Note:
- Keep your speakers more than 10 mm from the main unit for ventilation.
- Put the speakers on a flat safe surface. • These speakers do not have magnetic shielding. Do not put them near TVs, PCs or other equipment easily influenced by magnetism.
- When you play at high levels for a long period, it can cause damage to the system and decrease the life of the system.
- Decrease the volume in these conditions to prevent damage:
- When you play distorted sound.
- When you adjust the sound quality.
CAUTION!
- Use the speakers only with the recommended system. If not, you can cause damage to the amplifier and speakers and can cause a fire. Consult an approved service personnel if damage occurs or if there is a sudden apparent change in performance.
- Do the procedures included in these instructions when you attach the speakers.
Connect the AC mains lead only after all the other connections have been made.
Conserving power
The system consumes approximately 0.3 W when it is in standby mode. Disconnect the power supply if you do not use the system. Some settings will be lost after you disconnect the system. You have to set them again.
Connect the antennas
Place the antenna where reception is best.
FM indoor antenna
AM loop antenna![graph TD A["Device with sensor"] -->|↑| B["Switch"] B -->|↓| C["Carcase with switch"] C -->|→| D["Switch"] D --> E["Monitor with mouse"] E --> F["Click!"] G["AM ANT LOOP"] --> H["Switch"] H --> I["Carcase with switch"] I --> J["Switch"] J --> K["Click"]](/content/2026/06/1306709/images/a69236c14db72d100791f10d8ecb0b78a61827130390bf08e55178fc8b24cff2.jpg)

To household mains socket
Connect the AC mains lead
Use the included AC mains lead with this system only. Do not use an AC mains lead from other equipment.


Be careful not to cross (short-circuit) or reverse the polarity of the speaker wires as doing so may damage the speakers.
Refer to "Using the auxiliary input" (→ 9) for more information on AUX connection.
Remote control
Main unit

1 Standby/on switch [↓], [↓/↓] (→ 9, 10) Press to switch the unit from on to standby mode or vice versa. In standby mode, the unit still consumes a small amount of power.
2 Numeric buttons [1 to 9, 0, ≥10] To select a 2-digit number Example: 16: [≥10] → [1] → [6]
③ Delete a programmed track (→ 7)
1 Select source [USB]: Select USB (→ 8) [CD]: Select disc (→ 7) [RADIO, EXT-IN]: Select radio, USB or AUX (→ 8, 9)
5 Basic operation [▶/■]: Playback or pause operation [■]: Stop playback [◀◀], [▶▶]: Skip track Select preset radio station [◀◀], [▶▶]: Search track Tune in to the radio station [◀◀/◀◀], [▶▶/▶▶]: Skip and search track Select preset radio station
6 Select the sound effects (→ 9)
⑦ Auto preset the radio station (→ 8)
8 View the information shown on the display panel. Decrease the brightness of the display panel. Press and hold the button to use this function. To cancel, press and hold the button again.
⑨ Set the sleep timer (→ 8) Set the clock and timer (→ 8)
⑩ Set the program function (→ 7, 8)
11 Adjust the volume of the system
12 Mute the sound of the system Press the button again to cancel. "MUTE" is also cancelled when you adjust the volume or when you switch off the system.
⑬ Set the play menu item (→ 7)
⑭ Set the radio menu item (→ 8)
15 [▲, ▼]: Skip album Adjust clock setting [◀, ▶]: Select the item in the menu [OK]: Confirm the setting
16 Automatically switch off the system When you are in disc or USB source, the auto off function switches off the system if you do not use the system for 30 minutes. To cancel, press the button again.
17 Remote control sensor
18 USB port (←)
19 Display panel
20 Set the Manual EQ effects (→ 9)
② Browse tracks or albums
CD
Turn the knob to browse track. Press [▶/■] to start playback from the selection.
MP3
Press [ALBUM/TRACK] to select album or track and turn the knob to browse. Press [▶/■] to start playback from the selection.
22 Open or close the disc tray
23 Disc tray
Playing discs
1 Press [▲, OPEN/CLOSE] on the main unit to open the disc tray.
Put in a disc with the label facing up.
Press [▲, OPEN/CLOSE] again to close the disc tray.
2 Press [CD] and then press [▶/III] to start playback.
| Stop playback | Press [■] during playback. |
| Pause playback | Press [▶/■] during playback.Press again to continue playback. |
| Skip album | MP3Press [▲, ▼]. |
| Skip track | Press [◀◀] or [▶▶] (main unit: [◀◀/◀◀] or [▶▶/▶▶]]). |
| Search through track | CDPress and hold [◀◀] or [▶▶] (main unit:[◀◀/◀◀] or [▶▶/▶▶]]). |
Playmode function
1 Press [PLAY MENU] to select "PLAYMODE". 2 Press [◀, ▶] and then press [OK] to select the desired mode.
| OFFPLAYMODE | Play all tracks. |
| 1-TRACK1TR | Play one selected track on the disc.Press the numeric buttons to select the track.Playback starts from the selected track. |
| 1-ALBUM1ALBUM | MP3Play one selected album on the disc.Press [▲, ▼] to select the album. |
| RANDOMRND | Play a disc randomly. |
| 1- ALBUMRANDOM1ALBUM RND | MP3Play all tracks in one selected album randomly.Press [▲, ▼] to select the album. |
Note:
- This function does not work with "Program playback".
- The setting returns to the default "OFF PLAYMODE" when you open the disc tray.
Repeat playback
You can repeat "Program playback" or other selected "Playmode function".
1 Press [PLAY MENU] to select "REPEAT". 2 Press [◀, ▶] to select "ON REPEAT" and then press [OK]. "○" is shown.
To cancel, select "OFF REPEAT".
Viewing available information
You can view the available information on the display panel.
Press [DISPLAY].
Note:
• Maximum characters that can be shown: approximately 16 • This system supports ver. 1.0 and 1.1 ID3 tags. • Text data that the system does not support can show differently.
Program playback
This function allows you to program up to 24 tracks.
CD
1 Press [PROGRAM] in the stop mode. "PGM" is shown. 2 Press the numeric buttons to select the desired track. Do this step again to program other tracks. 3 Press [▶/III] to start playback.
MP3
1 Press [PROGRAM] in the stop mode. 2 Press [▲, ▼] to select the desired album. 3 Press [▶▶] and then press the numeric buttons to select the desired track. 4 Press [OK]. Do steps 2 through 4 again to program other tracks.
5 Press [▶/II] to start playback.
| Cancel program mode | Press [PROGRAM] in the stop mode. |
| Replay the program | Press [PROGRAM] and then press [▶/■]. |
| Check program contents | Press [◀◀] or [▶▶] when “PGM” is shown in the stop mode.To check while programming, press [PROGRAM] two times after “PGM” is shown, then press [◀◀] or [▶▶]. |
| Clear the last track | Press [DEL] in the stop mode. |
| Clear all programmed tracks | Press [■] in the stop mode. “CLR ALL” is shown. Within 5 seconds, press [■] again. |
Note:
The program memory is cleared when you open the disc tray.
Note on CDs
• This system can access up to 99 tracks. - This system can play MP3 files and CD-DA format audio CD-R/RW that have been finalised. - This system can fail to play some CD-R/RW because of the condition of the recording.
Note on MP3s
- Files are treated as tracks and folders as albums.
- This system can access up to 999 tracks, 255 albums, and 20 sessions.
- Disc must conform to ISO9660 level 1 or 2 (except for extended formats).
- To play in a certain order, prefix the folder and file names with 3-digit numbers in the order you want them to play.
Limitations on MP3 playback
- If you have recorded MP3s on the same disc as CD-DA, only the format recorded in the first session can be played.
- Some MP3s cannot be played because of the condition of the disc or recording.
- Recordings will not necessarily be played in the order you recorded them.
USB
MP3
You can connect and play MP3 tracks from your USB mass storage device.
Do not use a USB extension cable. The system cannot recognize USB mass storage devices connected through a cable.
1 Decrease the volume and connect the USB mass storage device to the USB port.
2 Press [USB] and then press [▶/II] to start playback.
| Stop playback | Press [■] during playback. “RESUME” is shown. Press [▶/■] to continue playback. OR Press [■] two times to stop the playback fully. |
For other operations, refer to "Discs" (→ 7).
Compatible devices
- USB mass storage devices that support bulk-only transfer. • USB mass storage devices that support USB 2.0 full speed.
Supported format
- Folders are defined as album.
- Files are defined as track.
- Track must have the extension ".mp3" or ".MP3". • CBI (Control/Bulk/Interrupt) is not supported.
- NTFS file system is not supported (only FAT 12/16/32 file system is supported).
- Some files can fail to work because of the sector size.
Note:
• Maximum album: 255 albums (include albums without MP3 tracks) • Maximum track: 2500 tracks • Maximum track in one album: 999 tracks
Radio
Manual tuning
1 Press [RADIO, EXT-IN] to select "FM" or "AM". 2 Press [◀◀] or [▶▶] to select the frequency of the required station. To tune automatically, press and hold the button until the frequency starts changing quickly.
To improve the sound quality
When "FM" is selected
1 Press [RADIO MENU] to select "FM MODE". 2 Press [◀, ▶] to select "MONO" and then press [OK]. To cancel, select "STEREO". - "MONO" is also cancelled when you change the frequency. - Switch off "MONO" for normal listening.
When "AM" is selected
1 Press [RADIO MENU] to select "B.PROOF". 2 Press [◀, ▶] to select "BP 1" or "BP 2" and then press [OK].
RDS broadcasting
This system can display the text data transmitted by the radio data system (RDS) available in some areas.
Press [DISPLAY].

Note:
RDS displays may not be available if reception is poor.
Memory presetting
30 FM and 15 AM stations can be preset.
Preparation
Press [RADIO, EXT-IN] to select "FM" or "AM".
Automatic presetting
1 Press [OK] to select "CURRENT" or "LOWEST" frequency. 2 Press [AUTO PRESET] to start presetting. To cancel, press [■].
Manual presetting
1 Press [◀◀] or [▶▶] to tune in to the station. 2 Press [PROGRAM]. 3 Press the numeric buttons to select a preset number. The new station replaces any station that occupies the same preset number. 4 Do steps 1 through 3 again to preset more stations.
Selecting a preset station
Press the numeric buttons, [|◀◀] or [▶▶] (main unit: [|◀◀/◀◀] or [▶▶/▶▶]]) to select the preset station.
AM allocation setting (by main unit only)
This system can also receive AM broadcasts allocated in 10 kHz steps.
1 Press [RADIO, EXT-IN] to select "FM" or "AM".
2 Press and hold [RADIO, EXT-IN].
After a few seconds, the display panel shows the current minimum radio frequency. Release the button when the minimum frequency changes.
• To go back to the initial setting, do the above steps again. • After you change the setting, preset frequencies are erased.
Clock and timers
Setting the clock
This is a 24-hour clock.
1 Press [CLOCK/TIMER] to select "CLOCK". 2 Within 10 seconds, press [▲, ▼] to set the time. 3 Press [OK].
Press [CLOCK/TIMER] to show the clock for a few seconds.
Note:
Reset the clock regularly to maintain accuracy.
Sleep timer
The sleep timer switches off the system after the set time.
Press [SLEEP] to select the setting (in minutes).
To cancel, select "OFF"
30 MIN → 60 MIN → 90 MIN → 120 MIN → OFF
To show the remaining time
Press [SLEEP].
Note:
• The sleep timer can be used together with the play timer. - The sleep timer always comes first. Be sure not to set an overlap of timers.
Play timer
You can set the timer to come on at a certain time to wake you up.
Switch on the system and set the clock.
Prepare the music source you want to listen to (disc, radio, USB or AUX) and set the volume.
1 Press [CLOCK/TIMER] to select "PLAY". 2 Within 10 seconds, press [▲, ▼] to set the start time. 3 Press [OK]. 4 Do steps 2 and 3 again to set the end time.
To start the timer
5 Press [PLAY] to start the timer.
6 Press [⏻] to switch off the system.
The system must be switched off for the timer to operate.
| Change the settings | Do steps 1 through 4 and 6 again (→ above). |
| Change the source or volume | 1) Press [∅, PLAY] to remove the timer indicator on the display panel.2) Change the source or volume.3) Do steps 5 and 6 (→ above). |
| Check the settings | Press [CLOCK/TIMER] to select “∅PLAY”. |
| Cancel | Press [∅, PLAY] to remove the timer indicator on the display panel. |
Note:
- The play timer starts at a low volume and increases gradually to the preset level. • The timer comes on at the set time every day if the timer is on.
- If you switch off the system and switch on again while a timer is in operation, the timer will not stop at the end time.
Sound effects
Changing the sound quality
1 Press [SOUND] to select a sound effect. 2 Press [◀, ▶] to select the desired setting.
| BASS -4 to +4 | |
| TREBLE | |
| SURROUND "ON SURROUND" or "OFF SURROUND" | |
| INPUT LEVEL(For AUX source) | "NORMAL" or "HIGH" |
| RE-MASTERMP3 | "ON RE-MASTER" or "OFF RE-MASTER" |
By main unit only
1 Press [MANUAL EQ] to select "BASS" or "TREBLE". 2 Press [◀◀/◀◀] or [▶▶/▶▶] to adjust the level.
Preset EQ
Press [PRESET EQ] to select a setting.
| HEAVY Adds punch to rock |
| SOFT For background music |
| CLEAR Clarifies higher frequencies |
| VOCAL Adds gloss to vocal |
| FLAT Cancels the sound effect |
D.BASS
Press [D.BASS] to select "D.BASS", "AUTO D.BASS" or "OFF D.BASS".
| D.BASS | Enhances bass effect |
| AUTO D.BASS | Automatically adjusts the bass effect according to the sound or music track |
| OFF D.BASS | Cancels the function |
External equipment
Using the auxiliary input
You can connect a VCR, DVD player etc. and listen to the audio through this system.
Preparation
- Disconnect the AC mains lead.
- Switch off all equipment and read the appropriate operating instructions.
1 Connect the external equipment. 2 Press [RADIO, EXT-IN] to select "AUX". 3 Play the external equipment.
Note:
- Components and cables are sold separately.
- If you want to connect equipment other than those described, refer to the audio dealer. • Sound distortion can occur when you use an adaptor.
Remote control code
When other Panasonic equipment responds to the remote control of this system, change the remote control code for this system.
Preparation
Press [RADIO, EXT-IN] to select "AUX".
To set the code to "REMOTE 2"
1 Press and hold [RADIO, EXT-IN] on the main unit and [2] on the remote control until "REMOTE 2" is shown. 2 Press and hold [OK] and [2] for a minimum of 4 seconds.
To set the code to "REMOTE 1"
1 Press and hold [RADIO, EXT-IN] on the main unit and [1] on the remote control until "REMOTE 1" is shown. 2 Press and hold [OK] and [1] for a minimum of 4 seconds.
Troubleshooting guide
Before requesting service, make the following checks. If you are in doubt about some of the check points, or if the solutions indicated do not solve the problem, consult your dealer for instructions.
■Common problems
The display panel lights up and changes continuously in standby mode.
- Press and hold [■] on the main unit to select "DEMO OFF".
No operations can be done with the remote control.
- Examine that the battery is installed correctly.
Sound is distorted or no sound.
- Increase the volume.
- Switch off the system, determine and correct the cause, then switch the system on again. It can be caused by straining of the speakers through excessive volume or power, and when using the system in a hot environment.
A "humming" sound can be heard during playback.
- An AC mains lead or fluorescent light is near the cables. Keep other appliances and cords away from the cables of this system.
Discs
Display not shown correctly.
Playback does not start.
- You have not put in the disc correctly. Put it in correctly. • Disc is dirty. Clean the disc.
- Replace the disc if it is scratched, warped, or non-standard.
- There is condensation. Let the system dry for 1 to 2 hours.
The total number of tracks displayed is incorrect.
The disc cannot be read.
Distorted sound is heard.
- You put in a disc that the system cannot play. Change to a playable disc.
- You put in a disc that has not been finalised.
Radio
Sound is distorted.
- Use an optional FM outdoor antenna. The antenna should be installed by a competent technician. A beat sound is heard.
- Switch off the TV or move it away from the system.
- Set to "BP 1" or "BP 2" when in AM tuner mode. A low hum is heard during AM broadcasts.
- Move the antenna away from other cables and cords.
USB
The USB mass storage device or the contents in it cannot be read.
- The format of the USB mass storage device or the contents in it is/are not compatible with the system.
- USB mass storage devices with storage capacity of more than 32 GB cannot work in some conditions.
Slow operation of the USB mass storage device.
- Large content size or large memory USB mass storage device takes longer time to read.
■Main unit displays
"NO PLAY"
- Examine the content. You can only play supported format.
- If there are more than 255 albums or folders (audio and non-audio), some of the MP3 files in these albums cannot be read and played. Transfer these music albums to another USB mass storage device. Alternatively, reformat the USB mass storage device and save these music albums prior to saving the other non-audio folders.
"F61"
- Examine and correct the speaker cords connection.
- Disconnect the USB mass storage device. Switch off the system and then switch it on again.
"ERROR"
- An incorrect operation was done. Read the instructions and try again.
"NOT MP3/ERROR"
- An unsupported MP3 format. The system will skip that track and play the next one.
"VBR-"
- The system cannot show the remaining play time for variable bit rate (VBR) tracks.
"NORMAL"
- The "INPUT LEVEL" of AUX source automatically charges from "HIGH" to "LOW" when the system detects distorted music sounds.
"NODEVICE"
- The USB mass storage device is not connected. Examine the connection.
Memory reset (Initialisation)
When the following situations occur, refer to the instructions below to reset the memory:
- There is no response when buttons are pressed.
- You want to clear and reset the memory contents.
To reset the memory
1 Disconnect the AC mains lead. (Wait 3 minutes before you continue with step 2.)
2 While you press and hold [☐/☐] on the main unit, connect the AC mains lead again. “----” shows on the display panel.
3 Release [∅/l]. All the settings are set back to the factory preset. It is necessary to set the memory items again.
Maintenance
To clean this system, wipe with a soft, dry cloth.
- Never use alcohol, paint thinner or benzine to clean this system.
- Before using chemically treated cloth, read the instructions that came with the cloth carefully.
Amplifier section
RMS output power stereo mode
Front Ch (both ch driven)
FM/AM tuner, terminals section
Preset station FM 30 stations
AM 15 stations
Frequency modulation (FM)
Frequency range
87.50 MHz to 108.00 MHz (50 kHz step)
Antenna terminals 75
Ω (unbalanced)
Amplitude modulation (AM)
Frequency range
522 kHz to 1629 kHz (9 kHz step)
520 kHz to 1630 kHz (10 kHz step)
Aux input RCA pin jack
Disc section
Disc played (8 cm or 12 cm)
(1) CD-Audio (CD-DA)
(2) CD-R/RW (CD-DA, MP3 *formatted disc)
(3) MP3
* MPEG-1 Layer 3
Pick up
Wavelength 790 nm (CD)
Laser power CLASS 1 (CD)
Audio output (Disc)
Number of channels
2 ch (FL, FR)
FL = Front left channel
FR = Front right channel
USB section
USB port
USB standard
USB 2.0 full speed
Media file format support
MP3 (*.mp3)
USB device file system
FAT 12, FAT 16, FAT 32
USB port power
500 mA (max)
Bit rate
16 kbps to 320 kbps (playback)
Speaker section
Type
2-way, 2-speaker system (bass reflex)
Speaker unit(s)
Woofer
16 cm cone type
Tweeter
6 cm cone type
Impedance
4 Ω
Output sound pressure
85 dB/W (1 m)
Frequency range
48 Hz to 22 kHz (-16 dB)
52 Hz to 20 kHz (-10 dB)
Dimensions (W x H x D)
200 mm x 334 mm x 189 mm
Mass
2.5 kg
General
Power supply
AC 220 to 240 V, 50 Hz
Power consumption
62 W
Dimensions (W x H x D)
220 mm × 334 mm × 245 mm
Mass
3.0 kg
Operating temperature range
0°C to +40°C
Operating humidity range
35% to 80% RH (no condensation)
Power consumption in standby mode
0.3 W (approximate)
Note:
1) Specifications are subject to change without notice. Mass and dimensions are approximate.
2) Total harmonic distortion is measured by the digital spectrum analyzer.
CLASS 1 LASER PRODUCT
| CAUTION | - LASER RADICTION WHEN OPEN,DO NOT STAGE INTO BEAM.FDA 21 EFR / Class II |
| CAUTION | - CLASS IV MIBLES AND INVISIBLE LASER RADICTION WHEN OPEN,DO NOT VIEW DIRECTLY WITH OPTICAL INSTRUMENTS,ESORSIS-1, A42 Class TM |
| VARNING | - KLAS IM SYN IL CO-D OSYN IL LASERSTRAHING NAR GRANA GIR, AR OPINAO,BETRAKTA EU STRAIEN DIRECT GENOM OPTIKE INSTRUMENTE. |
| FORSIGTIG | - SYN ILG CG UPYNLG LASERSTRAING KLAS IM, NAR LAGET ER,ABERT, UNIDAD AT SELIDE PA MED OPTIKE INSTRUMENTER. |
| VARO! | - AWATASSA QLET ACTINA LUCIAN IM NAYVAAL, LA NAYMATONTA,LASERSTRALETA, ALA KATO OPTICELLA LAITRELLA SUDIRAN SATESEEN. |
| VORSICHT | - MICHARE LD UNID/THARE LASERSTRAHING KLASE IM, WEHN ABEOCKUNGGEOPINET, NOTIE OPINET MT OPTIDEN INSTRUMENTEN BETRACHEN. |
| ATTENTION | - RAYONNEMENT LASER VIBILE ET INVISIBLE, CLASTE IM, EN CAS D'OUVERTURE,NE PAS RESISTED DIRECTMENT A UNICE D'INSTRUMENTS OPTIQUE. |
| PRECAUCION | - RADIACION LASER VIBILE E INVISIBLE DE CLASTE IM AL ESTAR ABERTO,NO VEA DIRECTAMENTE CON INSTRUMENTOS OPTICOS.RQJ.KSS006 |
Inside the player
THIS DEVICE IS DESIGNED FOR USE IN TEMPERATE CLIMATES.

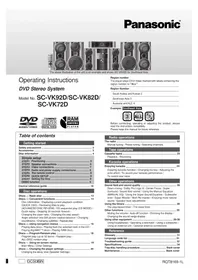
- DEAR CUSTOMER
- INFORMATION FOR USERS ON COLLECTION AND DISPOSAL OF OLD EQUIPMENT AND USED BATTERIES
- CAUTION
- WARNING
- PLACEMENT
- VOLTAGE
- AC MAINS LEAD PROTECTION
- FOREIGN MATTER
- SERVICE
- SUPPLIED ACCESSORIES
- TABLE OF CONTENTS
- USE ONLY THE SUPPLIED SPEAKERS
- NOTE
- CONNECT THE AC MAINS LEAD ONLY AFTER ALL THE OTHER CONNECTIONS HAVE BEEN MADE
- CONSERVING POWER
- CONNECT THE ANTENNAS
- CONNECT THE AC MAINS LEAD
- PLAYING DISCS
- PLAYMODE FUNCTION
- REPEAT PLAYBACK
- VIEWING AVAILABLE INFORMATION
- PRESS [DISPLAY]
- PROGRAM PLAYBACK
- NOTE ON CDS
- NOTE ON MP3S
- LIMITATIONS ON MP3 PLAYBACK
- USB
- MP
- COMPATIBLE DEVICES
- SUPPORTED FORMAT
- RADIO
- MANUAL TUNING
- TO IMPROVE THE SOUND QUALITY
- RDS BROADCASTING
- MEMORY PRESETTING
- PREPARATION
- AUTOMATIC PRESETTING
- MANUAL PRESETTING
- SELECTING A PRESET STATION
- AM ALLOCATION SETTING (BY MAIN UNIT ONLY)
- CLOCK AND TIMERS
- SETTING THE CLOCK
- SLEEP TIMER
- PLAY TIMER
- SOUND EFFECTS
- CHANGING THE SOUND QUALITY
- PRESET EQ
- D.BASS
- EXTERNAL EQUIPMENT
- USING THE AUXILIARY INPUT
- REMOTE CONTROL CODE
- TROUBLESHOOTING GUIDE
- COMMON PROBLEMS
- DISCS
- MAIN UNIT DISPLAYS
- MEMORY RESET (INITIALISATION)
- TO RESET THE MEMORY
- MAINTENANCE
- AMPLIFIER SECTION
- RMS OUTPUT POWER STEREO MODE
- FM/AM TUNER, TERMINALS SECTION
- PRESET STATION FM 30 STATIONS
- FREQUENCY MODULATION (FM)
- AMPLITUDE MODULATION (AM)
- DISC SECTION
- DISC PLAYED (8 CM OR 12 CM)
- PICK UP
- AUDIO OUTPUT (DISC)
- USB SECTION
- USB PORT
- SPEAKER SECTION
- TYPE
- SPEAKER UNIT(S)
- GENERAL
- POWER SUPPLY
Brand : PANASONIC
Model : SC-AKX12
Category : Hi-Fi System