
RX-D21 - Radio PANASONIC - Free user manual and instructions
Find the device manual for free RX-D21 PANASONIC in PDF.
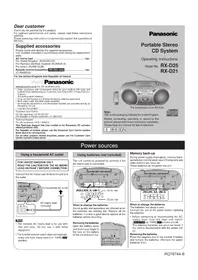


| Product Type | Portable AM/FM Radio |
| Brand | Panasonic |
| Model | RX-D21 |
| Dimensions (approx.) | 200 x 120 x 70 mm |
| Weight (approx.) | 500 g |
| Power Source | 3V DC (2 x AA batteries) |
| Tuning Range | FM: 88-108 MHz, AM: 530-1600 kHz |
| Built-in Speaker | Yes, 8 cm (3 inches) |
| Headphone Jack | Yes, 3.5 mm stereo |
| Display | Analog dial with FM/AM scale |
| Controls | Volume, tuning, band selector |
| Antenna | Telescopic rod for FM |
| Material | Plastic casing |
| Color | Black / Silver (typical) |
| Battery Life (approx.) | 20 hours with alkaline batteries |
| Cleaning Instructions | Wipe with a soft dry cloth. Do not use solvents. |
| Safety Precautions | Keep away from water and heat sources. |
| Spare Parts / Repairability | Contact Panasonic service center for parts. |
| General Information | User manual available online at notice-facile.com |
Frequently Asked Questions - RX-D21 PANASONIC
User questions about RX-D21 PANASONIC
0 question about this device. Answer the ones you know or ask your own.
Ask a new question about this device
Download the instructions for your Radio in PDF format for free! Find your manual RX-D21 - PANASONIC and take your electronic device back in hand. On this page are published all the documents necessary for the use of your device. RX-D21 by PANASONIC.
USER MANUAL RX-D21 PANASONIC
Thank you for purchasing this product.
For optimum performance and safety, please read these instructions carefully.
These operating instructions fundamentally explain the operation of RX-D25.
Supplied accessories
Please check and identify the supplied accessories.
Use numbers indicated in parentheses when asking for replacement parts.
AC mains lead ....1pc.
For United Kingdom: (RJA0053-2X)
For Australia and New Zealand: (RJA0035-X)
For others: (RJA0019-2K)
Remote control transmitter RX-D25 only 1pc.
(EUR648258)
For the United Kingdom and Republic of Ireland
shop@Panasonic
www.panasonic.co.uk (for UK customers only)
- Order accessory and consumable items for your product with ease and confidence by telephoning our Customer Care Centre Mon–Fri 9:00 am–5:30 pm.
(Excluding public holidays.)
- Or go online through our Internet Accessory ordering application.
- Most major credit and debit cards accepted.
- All enquiries, transactions and distribution facilities are provided directly by Panasonic UK Ltd.
- It couldn't be simpler!
Customer Care Centre
For UK customers: 08705 357357
For Republic of Ireland customers: 01 289 8333
Technical Support
For UK customers: 0870 1 505610
This Technical Support Hot Line number is for Panasonic PC software related products only.
For Republic of Ireland, please use the Customer Care Centre number listed above for all enquiries.
For all other product related enquiries, please use the Customer Care Centre numbers listed above.
Panasonic
Portable Stereo
CD System
Operating Instructions
Model No. RX-D25
RX-D21

The illustrations show RX-D25.
Note:
"EB" on the packaging indicates the United Kingdom.
Before connecting, operating or adjusting this product, please read these instructions completely.
Please keep this manual for future reference.

E EB GN
Power sources
Using a household AC outlet
FOR UNITED KINGDOM ONLY READ THE CAUTION FOR THE AC MAINS LEAD ON PAGE 7 BEFORE CONNECTION.
Connect the AC mains lead firmly to the unit and the outlet.

Note
- The included AC mains lead is for use with this unit only. Do not use it with other equipment.
- The function selector switch does not separate the entire unit from the mains even when in the "TAPE/OFF" position.
Using batteries (not included)
The unit cannot be powered by batteries if the AC mains lead is connected.

When to change the batteries
Sound quality and operations are affected when the batteries are running low. Replace all six batteries. It is also a good idea to replace all the batteries before recording.
Removing the batteries
Open the battery cover and insert your finger in the hole on the bottom of the unit and push out.

Memory back-up
During power supply interruption, memory backup batteries (not included) save CD programs and radio stations you have set.
These batteries do not power the unit.

When to change the batteries
The batteries last about a year.
Connect the unit to AC power before replacing the batteries.
Before connecting or disconnecting the AC mains lead, stop the tape and switch [SELECTOR] to "TAPE/OFF" to turn the unit off. The memory batteries are worn out faster if the cord is disconnected with the power still on.
Removing the batteries
Press the negative end of the number 4 battery and remove the batteries. (Remove the power batteries first.)
Controls
Main unit:

RX-D25
Harmonic Enhancer Sound button (H.E.S.)
Press to give a clear vocal sound.
Press again to turn off.
RX-D21
XBS button (XBS)
Press to boost the bass sound.
Press again to turn off.
Remote control RX-D25 only:
The functions of the buttons without descriptions are the same as on the main unit.

Concerning the remote control
RX-D25 only
Battery installation
Insert the batteries (not included) observing the correct polarities (⊕, ⊖).
R6, AA, UM-3

Correct method of use

Operation notes
- Do not place obstacles between the remote control signal sensor and the remote control unit.
- Do not expose the remote control signal sensor to direct sunlight or to the bright light of fluorescent light. • Take care to keep the remote control signal sensor and end of the remote control unit free from dust.
To prevent damage
- Never place heavy items on it.
- Do not disassemble or reconstruct it.
- Do not spill water or other liquids into it.
The Radio
Normal tuning Preset tuning

1 Switch [SELECTOR] on. (Unit comes on.)
2 Press [BAND] to select "FM" or "AM".
3 (Omit this step if using the remote control) If "PCM" on the display, press [TUNE MODE] to clear it off.

4 Press [-/◄◄] or [►►I/+] to tune to the desired station. The frequency changes one step each time a button is pressed.

Automatic tuning
"ST" lights when an FM stereo broadcast is being received.
Keep [-/◄◄] or [►►I/+] depressed and release when the frequency display starts to change. A station with good reception is automatically selected and the process stops. To stop automatic tuning, press [-/◄◄] or [►►I/+] again.
Note
Automatic tuning may stop on a frequency where there is no station if there is interference. Press [-/◄◄] and [►►I/+] to tune if this occurs.
5 Adjust the volume.
To use auto scan
You can search for a station by listening to all tuned-in stations for 8 seconds each.
Preparation: Switch [SELECTOR] to "TUNER".
- Press [BAND] to select "FM" or "AM".
- Press [AUTO SCAN].
Auto scan starts.

- Press [AUTO SCAN] when you find the desired station.
Auto scan ends when it reaches the original frequency again.
To stop during the process, press [AUTO SCAN].
To improve reception
FM: Extend the whip antenna and adjust its direction.
AM: Adjust facing of the unit.
If noise is excessive in the FM stereo mode
Press [FM MODE]. ("MONO" lights up.)
Sound will be produced in monaural, but this also reduces noise.
Press the button again to cancel. ("MONO" goes out.)

Preset the stations (twelve FM and twelve AM) to make tuning simpler.

How to preset
Preparation: Tune to the desired station. (Do steps 1–4 on the left.)
1 Press [MEMORY].

2 While "PGM" and the frequency are flashing, press [MEMORY].

3 While "PGM" and the preset channel are flashing, press [-/l◄◄] or [►►I/+] to select the desired channel. (Remote control: [V] or [∧])

4 Press [MEMORY]. (This completes presetting.)

Repeat the above to preset other stations.
Note
If "PGM" goes off during presetting, return to step 1.
To listen to preset channels
① Press [BAND] to select "FM" or "AM".
2 (Omit this step if using the remote control) Press [TUNE MODE] to display "PGM".

3 Press [-/I◄◄] or [►►I/+] to select the desired channel (1-12). (Remote control: [V] or [∧])

Preset channel
To use preset scan
You can search for a station by listening to all preset channels for 8 seconds each.
- Do steps ① to ② above.
For remote control, replace [-A◀◀] or [▶▶I/+] described below with [V] or [∧].
- Press and hold [-I◄◄] or [►►I/+ ] until "PS" appears on the display.

- Press [-I◄◄] or [►►I/+] when you find the desired channel.
Preset scan ends after searching through each preset channel once.
To stop during the process, press [-I◄◄] or [►►I/+].
CDs
Normal play Program play

1 Switch [SELECTOR] to "CD". (Unit comes on.)
2 Push [△ CD OPEN/CLOSE] to open the CD lid and insert the CD.
Label must face upward.

3 Push [▲ CD OPEN/CLOSE] to close the CD lid.

4 Press [▶/II] to start play. Play starts from the first track and continues to the last track.

5 Adjust the volume.
To stop play, press [■].
| To pause | Press [▶/■] during playback.To resume, press [▶/■]. |
| To search forward/backward | Hold down [-/■◀◀] (backward) or [▶▶/+] (forward) during playback or when paused. |
| To skip forward/backward | Press [-/■◀◀] (backward) or [▶▶/+] (forward) during playback or when paused. |
"NO DISC" is displayed if there is no disc in the unit.
Note
- If interference occurs to radios or televisions, place the unit as far as possible from this equipment.
- Do not press [▲ CD OPEN/CLOSE] during play, pause, or immediately after you inserted the CD and closed the CD lid. The CD may be scratched.
This unit can play CD-DA (digital audio) format audio CD-R that has been finalized (a process that enables CD-R players to play audio CD-R) upon completion of recording. It may not be able to play some CD-R due to the condition of the recording. It cannot play CD-RW.
You can program up to 24 tracks.

Ensure the CD is stopped before programming.
1 Press [-/l◄◄] or [►►l/+] to select the desired track.

2 Press [MEMORY]. The track is programmed.

Repeat steps 1 and 2 until you have programmed all the tracks you want.

3 Press [▶/II]. Play starts in the programmed order.

To stop play
Press [■].
"P" is displayed indicating that the program is still active.
Press [■] again and "CLr" is displayed; the program is cleared, and the normal play mode is restored.
To check program contents
Press [-/◄◄] or [►►I/+] when "P" is displayed.
Display
“— —:— —”: Program equals, or exceeds, 100 minutes but programming and play are still possible.
"FULL": 24 tracks have already been programmed. The program is full.
CD play modes
You can repeat one track (1); track() or play the tracks in random order (RANDOM).
Press [CD PLAY MODE] before or during playback to select the desired mode.

These modes remain active until cancelled. You can use repeat mode with program play
Note
Random and program play cannot be done at the same time.
Cassettes
This unit is suitable for playing normal tapes, but high and metal position tapes will not be played to their full potential.

1 Switch [SELECTURE/OFF".
2 Press [☐/△ STOP/EJECT] to open the deck and load a cassette. Close deck by hand.
Exposed tape facing upward
Side to be played facing you

3 Press [◀ PLAY] to start play. Unit comes on and play starts.

4 Adjust the volume.
To stop play
Press [■/▲ STOP/EJECT]. (Unit is switched off.)
| To pause | Press [II PAUSE] during playback.To resume, press [II PAUSE]. |
| To rewind/fast-forward | Press [▶▶REW/REV] (to rewind) or [◀◀FF/CUE] (to fast-forward) in the stop mode. |
| To find a particular spot | Press [▶▶REW/REV] (to search backward) or [◀◀FF/CUE] (to search forward) during playback.Play is resumed when the button is released. |
Note
- The unit is on in the pause mode. Stop tape to turn the unit off by pressing [■/▲ STOP/EJECT] when leaving the unit.
- Do not press [◀ PLAY] when rewinding or fast-forwarding, as this may jam the tape. Be sure to press [■/▲ STOP/EJECT] before the next operation.
Full auto-stop
The automatic stop system will release the buttons when the tape reaches the end during play, recording, fast forwarding or rewinding.
Recording
You can record radio broadcasts or CDs. Before recording
- This unit is suitable for recording normal tapes, but it cannot record onto high and metal position tapes to their full potential and prior recordings will not be erased correctly. • The recording level is set automatically. • Take up the leader tape before proceeding.

Leader tape (Recording cannot be made.)

1 Press [■/▲ STOP/EJECT] to open the deck and load a cassette. Close deck by hand.
Side to be recorded facing you
Exposed tape facing upward

2 Select the source to be recorded. When recording radio broadcasts
Tune in the station.
(Do steps 1–4 of "Normal tuning" on page 3.)
When recording CDs
Insert the CD to be recorded.
(Do steps 1–3 of "Normal play" on page 4.)
If you want to record programmed tracks, program desired tracks before proceeding to step 3.
3 Press [● FEC start recording.
[◀ PLAY] is also depressed with [● REC].
Recording starts (one side only).
The CD also starts playing if in CD mode.
To stop recording
Press [■/▲ STOP/EJECT]. (The CD does not stop.)
To stop recording temporarily
Press [III PAUSE]. (The CD does not stop.)
Press once again to resume recording.
To record on the other side of the cassette
Turn the cassette over and press [● REC].
If the CD finishes before the cassette
Recording continues. Press [■/▲ STOP/EJECT] to stop it.
If the cassette finishes before the CD
The CD continues playing. Press [■] to stop it.
Erasure prevention
Use a screwdriver or similar object to break out the tab.
Side A

Tab for Side B
Tab for Side A
To re-record on a protected cassette
Cover the hole with adhesive tape.
To erase a tape
- Set [SELECTOR] to "TAPE/OFF"
- Insert the cassette with the side to be erased facing towards you and the exposed tape facing up.
- Press [● REC].
[◀ PLAY] is depressed at the same time.
Note
Noise may be recorded if this unit is near a TV. Keep the units at least 1.5 meters apart.
Changes to volume and sound quality do not affect recording.
To prevent interruptions to recording, supply AC power to the unit or replace the batteries.
Your attention is drawn to the fact that recording pre-recorded tapes or discs or other published or broadcast material may infringe copyright laws.
CAUTION!
THIS PRODUCT UTILIZES A LASER.
USE OF CONTROLS OR ADJUSTMENTS OR PERFORMANCE OF PROCEDURES OTHER THAN THOSE SPECIFIED HEREIN MAY RESULT IN HAZARDOUS RADIATION EXPOSURE.
DO NOT OPEN COVERS AND DO NOT REPAIR YOURSELF. REFER SERVICING TO QUALIFIED PERSONNEL.
CAUTION!
- DO NOT INSTALL, OR PLACE THIS UNIT, IN A BOOKCASE, BUILT-IN CABINET OR IN ANOTHER CONFINED SPACE. ENSURE THE UNIT IS WELL VENTILATED. TO PREVENT RISK OF ELECTRIC SHOCK OR FIRE HAZARD DUE TO OVERHEATING, ENSURE THAT CURTAINS AND ANY OTHER MATERIALS DO NOT OBSTRUCT THE VENTILATION VENTS.
- DO NOT OBSTRUCT THE UNIT'S VENTILATION OPENINGS WITH NEWSPAPERS, TABLECLOTHS, CURTAINS, AND SIMILAR ITEMS.
- DO NOT PLACE SOURCES OF NAKED FLAMES, SUCH AS LIGHTED CANDLES, ON THE UNIT.
- DISPOSE OF BATTERIES IN AN ENVIRONMENTALLY FRIENDLY MANNER.
WARNING:
TO REDUCE THE RISK OF FIRE, ELECTRIC SHOCK OR PRODUCT DAMAGE, DO NOT EXPOSE THIS APPARATUS TO RAIN, MOISTURE, DRIPPING OR SPLASHING AND THAT NO OBJECTS FILLED WITH LIQUIDS, SUCH AS VASES, SHALL BE PLACED ON THE APPARATUS.
THIS UNIT IS INTENDED FOR USE IN MODERATE CLIMATES.
SUOMI
WARNING!
USING THE DEVICE IN A WAY OTHER THAN DESCRIBED IN THIS MANUAL MAY EXPOSE THE USER TO INVISIBLE LASER RADIATION EXCEEDING SAFETY CLASS 1.
WARNING!
- DO NOT INSTALL OR PLACE THIS DEVICE IN A CABINET-TYPE BOOKCASE OR ANY OTHER ENCLOSED SPACE TO ENSURE PROPER VENTILATION. MAKE SURE THAT CURTAINS OR ANY OTHER MATERIALS DO NOT IMPEDE VENTILATION TO AVOID THE RISK OF ELECTRIC SHOCK OR FIRE HAZARD RESULTING FROM OVERHEATING.
- DO NOT COVER THE DEVICE'S VENTILATION OPENINGS WITH A NEWSPAPER, TABLECLOTH, CURTAIN, OR OTHER SIMILAR OBJECT.
- DO NOT PLACE A BURNING CANDLE OR OTHER SOURCE OF OPEN FLAME ON TOP OF THE DEVICE. •DISPOSE OF BATTERIES IN AN ENVIRONMENTALLY FRIENDLY MANNER.
WARNING:
TO REDUCE THE RISK OF FIRE, ELECTRIC SHOCK, OR OTHER DAMAGE TO THE PRODUCT, DO NOT EXPOSE THE DEVICE TO RAIN, MOISTURE, WATER DROPS, OR SPLASHES, AND DO NOT PLACE OBJECTS CONTAINING LIQUIDS, SUCH AS VASES, ON TOP OF THE DEVICE.
THIS DEVICE IS INTENDED FOR USE IN A TEMPERATE CLIMATE.
NORWEGIAN
WARNING!
THIS PRODUCT USES A LASER. OPERATING CONTROLS, MAKING ADJUSTMENTS, OR PERFORMING PROCEDURES OTHER THAN THOSE SPECIFIED IN THIS USER MANUAL MAY RESULT IN HAZARDOUS RADIATION EXPOSURE. DO NOT OPEN COVERS AND NEVER ATTEMPT TO REPAIR THE APPARATUS YOURSELF. ALL SERVICE AND REPAIR WORK MUST BE PERFORMED BY QUALI- FIED PERSONNEL.
WARNING!
- DO NOT PLACE THE APPARATUS IN A BOOKCASE, BUILT-IN CABINET, OR OTHER ENCLOSED SPACE WHERE VENTILATION IS INSUFFICIENT. ENSURE THAT CURTAINS OR SIMILAR DO NOT IMPAIR VENTILATION, SO AS TO AVOID THE RISK OF ELECTRIC SHOCK OR FIRE CAUSED BY OVERHEATING.
- DO NOT COVER THE APPARATUS'S VENTILATION OPENINGS WITH NEWSPAPERS, TABLECLOTHS, CURTAINS, OR SIMILAR ITEMS.
- DO NOT PLACE OPEN FLAMES, SUCH AS LIT CANDLES, ON TOP OF THE APPARATUS.
- DISPOSE OF USED BATTERIES IN AN ENVIRONMENTALLY SAFE MANNER.
WARNING:
TO REDUCE THE RISK OF FIRE, ELECTRIC SHOCK, OR DAMAGE TO THE PRODUCT, DO NOT EXPOSE THIS APPARATUS TO RAIN, MOISTURE, WATER DROPS, OR WATER SPLASHES. DO NOT PLACE OBJECTS FILLED WITH WATER, SUCH AS FLOWER VASES, ON TOP OF THE APPARATUS.
THIS APPARATUS IS DESIGNED FOR USE UNDER MODERATE CLIMATIC CONDITIONS.
Precautions
- Avoid using or placing this unit near sources of heat. Do not leave it in an automobile exposed to direct sunlight for a long time with the doors and windows closed as this may deform the cabinet.
- Avoid cuts, scratches, or poor connections in the AC mains lead, as they may result in possible fire or electric shock hazard. Also, excessive bending, pulling or splicing of the lead should be avoided.
- Do not unplug the AC mains lead by pulling on the lead. To do so may cause premature failure or shock hazard.
- Do not operate this unit on AC mains in a bathroom, as a potential shock hazard may result.
- When not in use, disconnect the AC mains lead from the household AC outlet.
(Back of product)
CLASS 1 LASER PRODUCT
LUOKAN 1 LASERLAITE KLASS 1 LASER APPARAT
| DANGER | INSIGLE LASER DAVIATION WHEN OPEN AND INTERLOCK DETECTED AVOID DIRECT EXPOSURE TO SEM |
| ADVARSEL | USYNL LASERSTRALING VED ABNING. VÄRISIKER-ESUSA-BYDERE ER LUC AT FUNKION. UNIGÄDUSSETTELSE FOR STRALING. |
| VARO! | NAATTESA AS SUODA UKITIUS CHITTETTA-OLE CLET ALTIVA NÄKMYATATÄ LASERSTÄTELY LYLE. ÄLÄ KATSO SÄTESSEN |
| VARNING | USYNL LASERSTRALING NÄR. DÖVMA DEL AH ÖPPMAD OCH SPÄRNEN AT UNKOPPLAD. BETRAKTA DJ STRALD. |
| ADVARSEL | USYNL LASERSTRALING NÄR GRISEL ARNIS DE SKERRHEDS. JÄ BYETE. UNIGÄ DSKPOVERING FOR STRALEN. |
| VORSICHT | UNSIGITÄTÄRE LASERSTRALUNG, INEM MEOCKUNG GEÖTTNET UND SICHENETSACRIEGELUNG ÜBERNÖKT. NICHT DEM STRAHL. ALSSEIDEN. |
Inside of product
Tuotteen sisällä
Produktets innside
This product may receive radio interference caused by mobile telephones during use. If such interference is apparent, please increase separation between the product and the mobile telephone.
Maintenance
If the surfaces are dirty
To clean this unit, wipe with a soft, dry cloth.
If the surfaces are extremely dirty, use a soft cloth dipped in a soap-and-water solution or a weak detergent solution. Never use alcohol, paint thinner, or benzine to clean this unit. Before using chemically treated cloth, read the instructions that came with the cloth carefully.
Tape head care
Clean the heads regularly to assure good quality playback and recording.
Use a cleaning tape (not included).
Lens care
Clean the lens regularly to prevent malfunctions.
Use a blower to remove dust and a cotton swab if it is extremely dirty.
Recommended product:
Lens cleaner kit (SZZP1038C).
Lens
Using headphones (not included)
Turn down the volume and connect the headphones to the [PHONES] jack.
Plug type: 3.5mm stereo
Note
Avoid listening for prolonged periods of time to prevent hearing damage.

Use of Batteries
- If this unit is not used for a long period of time or is used only from an AC power source, remove all the batteries to prevent potential damage due to possible battery leakage.
- Align the poles (+ and -) properly when inserting the batteries.
- Do not mix old and new batteries or different types of batteries.
- Do not recharge ordinary dry cell batteries.
- Do not heat or disassemble the batteries. Do not allow them to contact flame or water.
- Do not keep together with metallic objects such as necklaces.
- Do not use rechargeable type batteries.
- Do not use batteries if the covering has been peeled off.
Mishandling of batteries can damage other items, cause damage to the unit, and may cause a fire through short-circuiting or electrolyte leakage. If electrolyte leaks from the batteries, consult your dealer.
Wash thoroughly with water if electrolyte comes in contact with any part of your body.
Caution for AC Mains Lead
(For United Kingdom)
("EB" area code model only)
For your safety, please read the following text carefully.
This appliance is supplied with a moulded three pin mains plug for your safety and convenience.
A 5-ampere fuse is fitted in this plug.
Should the fuse need to be replaced please ensure that the replacement fuse has a rating of 5-ampere and that it is approved by ASTA or BSI to BS1362.
Check for the ASTA mark or the BSI mark on the body of the fuse.
If the plug contains a removable fuse cover you must ensure that it is refitted when the fuse is replaced.
If you lose the fuse cover the plug must not be used until a replacement cover is obtained.
A replacement fuse cover can be purchased from your local dealer.
CAUTION!
IF THE FITTED MOULDED PLUG IS UNSUITABLE FOR THE SOCKET OUTLET IN YOUR HOME THEN THE FUSE SHOULD BE REMOVED AND THE PLUG CUT OFF AND DISPOSED OF SAFELY. THERE IS A DANGER OF SEVERE ELECTRICAL SHOCK IF THE CUT OFF PLUG IS INSERTED INTO ANY 13-AMPERE SOCKET.
If a new plug is to be fitted please observe the wiring code as stated below.
If in any doubt please consult a qualified electrician.
IMPORTANT
The wires in this mains lead are coloured in accordance with the following code:
Blue: Neutral, Brown: Live.
As these colours may not correspond with the coloured markings identifying the terminals in your plug, proceed as follows:
The wire which is coloured Blue must be connected to the terminal which is marked with the letter N or coloured Black or Blue.
The wire which is coloured Brown must be connected to the terminal which is marked with the letter L or coloured Brown or Red.
WARNING: DO NOT CONNECT EITHER WIRE TO THE EARTH TERMINAL WHICH IS MARKED WITH THE LETTER E, BY THE EARTH SYMBOL ⊥ OR COLOURED GREEN OR GREEN/YELLOW.
THIS PLUG IS NOT WATERPROOF—KEEP DRY.
Before use
Remove the connector cover.
How to replace the fuse
The location of the fuse differs according to the type of AC mains plug (figures A and B). Confirm the AC mains plug fitted and follow the instructions below.
Illustrations may differ from actual AC mains plug.
- Open the fuse cover with a screwdriver.
Figure A
Figure B

- Replace the fuse and close or attach the fuse cover.
Figure A
Figure B
Audio software
Take note of the following points to extend the life of your equipment. Always read the instructions provided with the software.
Discs
Choose discs with this mark:

Continued use of irregular shaped CDs can damage the unit.
Do not
- use CDs with labels and stickers that are coming off or with adhesive exuding from under labels and stickers.
- attach scratch-proof covers or any other kind of accessory. • write anything on the CD.
- clean CDs with liquids. (Wipe with a soft, dry cloth.)
- use CDs printed with label printers available on the market.
- load a blank CD-R as it will cause abnormal malfunction and may damage the CD-R.

Cassette tapes
- Tapes exceeding 100 minutes are thin and can break or get caught in the mechanism.
- Tape slack can get caught up in the mechanism and should be taken up before the tape is played.
- Endless tapes can get caught up in the deck's moving parts if used incorrectly.
Specifications
Frequency range
FM 87.50–108.00 MHz (50 kHz steps)
AM 522–1629 kHz (9 kHz steps)
Sampling frequency 44.1 kHz
Decoding 16 bit linear
Beam source Semiconductor laser (wavelength 780 nm)
Pickup
Wavelength 780 nm
No. of channels 2 channel, stereo
Wow and flutter Less than possible measurement data
D/A converter 1 bit DAC
Track system 4 track, 2 channel, stereo
Monitor system Variable sound monitor
Recording system AC bias
Erasing system Multi Pole magnet
Frequency range
Normal position
50–12000 Hz
Speakers
Full range
10cm 4Ω x 2
Centre speaker (RX-D25 only)
1.5 cm
Jacks
Output
PHONES: 3.5 mm stereo (32Ω)
Power requirement
AC
230-240 V, 50 Hz
Power consumption: 11 W
Battery
9 V (Six R20/LR20, D, UM-1 batteries)
Memory back-up
- Do not use rechargeable type batteries.
6 V (Four R6/LR6, AA, UM-3 batteries)
- Do not use rechargeable type batteries.
420 x 167 x 275 mm
(RX-D25) 3.6 kg without batteries
(RX-D21) 3.4 kg without batteries
Note
Specifications are subject to change without notice. Mass and dimensions are approximate.
Troubleshooting guide
If you are in doubt about some of the check points, or if the remedies indicated in the chart do not solve the problem, refer to the directory of Authorized Service Centers (enclosed with this unit) to locate a convenient service center, or consult your dealer for instructions.
Common Problem
| The unit doesn’t work on batteries. | Is the AC mains lead connected to the unit? Disconnect when using batteries.Have the batteries been inserted correctly? Check that the poles (+ and −) are correctly aligned. |
| “UO1” is displayed. | Replace the batteries or use household AC power. |
CD
| “E” is displayed. | Indicates an incorrect operation. Read the instructions. |
| Play doesn’t start or display is incorrect. | Clean the CD. |
| Wait for an hour for condensation to dry, then try again. | |
| Make sure the label is facing up. | |
| Replace the CD if it is scratched, warped, or irregularly shaped. |
Cassette
| Recording not possible. | Has the cassette's tab been removed? Cover the hole with adhesive tape. |
| Poor sound quality. | Clean the heads. |
| The cassette cannot be ejected or the lid can't be closed when loading a cassette. | The batteries are flat. Replace the batteries or connect to household AC power. Press [◀ PLAY] then [■/▲ STOP/EJECT]. |
Radio
| A lot of noise. | Is another remote control being used? Use it further away from this unit.Is a TV on? Move the unit away from the TV or turn it off. |
Remote control RX-D25 only
| The remote control doesn't work. | Check the batteries are inserted correctly.Replace the batteries if they are worn. |


- SUPPLIED ACCESSORIES
- FOR THE UNITED KINGDOM AND REPUBLIC OF IRELAND
- SHOP@PANASONIC
- PANASONIC
- PORTABLE STEREO
- CD SYSTEM
- NOTE
- POWER SOURCES
- USING A HOUSEHOLD AC OUTLET
- FOR UNITED KINGDOM ONLY READ THE CAUTION FOR THE AC MAINS LEAD ON PAGE 7 BEFORE CONNECTION
- USING BATTERIES (NOT INCLUDED)
- WHEN TO CHANGE THE BATTERIES
- REMOVING THE BATTERIES
- MEMORY BACK-UP
- CONTROLS
- RX-D
- REMOTE CONTROL RX-D25 ONLY
- CONCERNING THE REMOTE CONTROL
- OPERATION NOTES
- TO PREVENT DAMAGE
- THE RADIO
- NORMAL TUNING PRESET TUNING
- HOW TO PRESET
- TO LISTEN TO PRESET CHANNELS
- CDS
- NORMAL PLAY PROGRAM PLAY
- TO STOP PLAY
- TO CHECK PROGRAM CONTENTS
- DISPLAY
- CD PLAY MODES
- CASSETTES
- ADJUST THE VOLUME
- FULL AUTO-STOP
- RECORDING
- CAUTION
- WARNING
- SUOMI
- NORWEGIAN
- PRECAUTIONS
- LUOKAN 1 LASERLAITE KLASS 1 LASER APPARAT
- MAINTENANCE
- IF THE SURFACES ARE DIRTY
- TO CLEAN THIS UNIT, WIPE WITH A SOFT, DRY CLOTH
- TAPE HEAD CARE
- LENS CARE
- USING HEADPHONES (NOT INCLUDED)
- USE OF BATTERIES
- CAUTION FOR AC MAINS LEAD
- (FOR UNITED KINGDOM)
- ("EB" AREA CODE MODEL ONLY)
- IMPORTANT
- THIS PLUG IS NOT WATERPROOF—KEEP DRY
- BEFORE USE
- HOW TO REPLACE THE FUSE
- AUDIO SOFTWARE
- DISCS
- DO NOT
- CASSETTE TAPES
- SPECIFICATIONS
- TROUBLESHOOTING GUIDE
Brand : PANASONIC
Model : RX-D21
Category : Radio