
NV-FJ631 - VCR PANASONIC - Free user manual and instructions
Find the device manual for free NV-FJ631 PANASONIC in PDF.
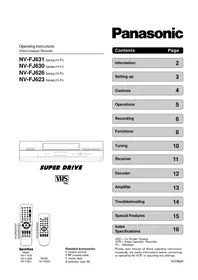


| Product Type | VHS Video Cassette Recorder (VCR) |
| Model | Panasonic NV-FJ631 |
| Video System | PAL |
| Recording Format | VHS |
| Audio | Hi-Fi Stereo |
| Dimensions (W x H x D) | 430 x 89 x 325 mm |
| Weight | Approx. 4.5 kg |
| Power Supply | 220-240 V AC, 50 Hz |
| Power Consumption | Approx. 25 W (standby: 5 W) |
| Inputs | RF antenna, SCART (Euroconnector) |
| Outputs | SCART, RF loop-through, audio/video RCA |
| Recording Speed | SP, LP, EP (depending on region) |
| Timer Recording | Up to 8 programs, 1 month advance |
| Playback Features | Still, Slow, Frame Advance, Search |
| Heads | 4-head drum |
| Cleaning | Use a dry cleaning cassette; avoid abrasive materials |
| Maintenance | Keep vents clear; do not expose to humidity |
| Safety | Do not disassemble; unplug during storms |
| Spare Parts | Belt, pinch roller, head drum (available online) |
| Repairability | Moderate; known service manuals available |
| Remote Control | Infrared remote included |
| Accessories | RF cable, SCART adapter (if applicable) |
Frequently Asked Questions - NV-FJ631 PANASONIC
User questions about NV-FJ631 PANASONIC
0 question about this device. Answer the ones you know or ask your own.
Ask a new question about this device
Download the instructions for your VCR in PDF format for free! Find your manual NV-FJ631 - PANASONIC and take your electronic device back in hand. On this page are published all the documents necessary for the use of your device. NV-FJ631 by PANASONIC.
USER MANUAL NV-FJ631 PANASONIC
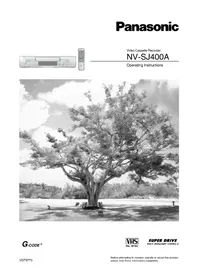
Operating Instructions
Video Cassette Recorder
NV-FJ631 Series (Hi-Fi)
NV-FJ630 Series (Hi-Fi)
NV-FJ626 Series (Hi-Fi)
NV-FJ623 Series (Hi-Fi)
SUPER DRIVE
PAL
N2QAKB000027
N2QAKB000022

N2QAHB000022
SHOWVIEW
Model:
NV-FJ626
NV-FJ630
NV-FJ631
Model:
NV-FJ623
Standard Accessories:
1 remote control
1 RF coaxial cable
1 mains lead
2 batteries, type R6
Panasonic
Contents
Page
Information
2
Setting up
3
Controls
4
Operations
5
Recording
6
Functions
8
Tuning
10
Receiver
11
Decoder
12
Amplifier
13
Troubleshooting
14
Special Features
15
Index
16
Specifications
OSD = On Screen Display
VCR = Video Cassette Recorder
TV = Television
Please read through all these operating instructions (especially the safety information) before connecting or operating the VCR, or adjusting any settings.
Warning and Important Information Safety Information
• This unit is intended for use in moderate climates. - Please observe copyright laws when recording sound tracks and film.
Caution!
- Do not install or place this unit in a bookcase, built-in cabinet, or any other confined space. Ensure the unit is well ventilated. To prevent the risk of electric shock or fire hazard due to overheating, ensure that curtains and any other materials do not obstruct the ventilation vents.
- Do not obstruct the unit's ventilation openings with newspapers, tablecloths, curtains, or similar items.
- Do not place sources of naked flames, such as lighted candles, on the unit.
- Dispose of batteries in an environmentally friendly manner.
Batteries, packaging, and old equipment should not be disposed of as domestic waste, but in accordance with the applicable regulations.

- Do not remove the outer cover to prevent electric shock. There are no user-serviceable parts inside. Refer all servicing to qualified service personnel.
- Only transport and set up this equipment in a horizontal position.
- Only connect cables when all parts of this equipment are switched off.
- Only clean the outside of this equipment using a soft cloth and no cleaning fluid. The mains lead must not be used for other equipment.
- In case of rapid temperature changes, do not operate this equipment for a minimum of 1 hour.
Warning:
To reduce the risk of fire, electric shock, or product damage, do not expose this apparatus to rain, moisture, dripping, or splashing, and do not place objects filled with liquids, such as vases, on the apparatus. This equipment, the remote control, and the mains lead must not be used if damaged. Protect them from:
- Direct sunlight, heat, cold, rain, wetness, oil, soiling, and dust
- Insertion of fingers or objects
- Shock, vibrations, and mechanical stress (do not bend the mains lead), electric and magnetic fields, and lightning strikes during thunderstorms (disconnect mains and aerial plugs).
Instructions on inserting Remote Control Batteries:
- The lifetime of the battery is about 1 year, depending on the frequency of use.
- Do not use one old and one new battery, or different types of batteries together (e.g. one alkali and one zinc-carbon battery).
- Only insert batteries which contain no toxic materials (such as lead, cadmium, mercury).
- Do not use rechargeable type batteries.
- If the remote control will not be used for a long time, remove the batteries and store them in a cool and dry place.
- Do not heat or short-circuit the batteries.
- Remove empty batteries immediately and replace them with type AA, UM3 or R6.
- Observe the + and - polarities when replacing the batteries.
Conserve the environment:
• See Power save on page 9.

CE
This equipment complies with European conformity requirements, in accordance with the conditions of electromagnetic compatibility and product safety.

This equipment complies with the requirements of protection class 2.

This equipment complies with the safety requirements of the VDE. (German Association of Electrical Engineers)
Connections
NV-FJ631, NV-FJ630, NV-FJ626

NV-FJ623EC/ECN
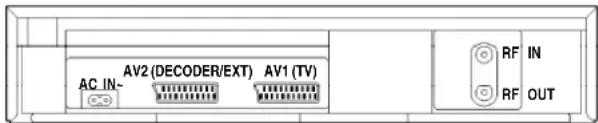
NV-FJ623EG/EGY

AC IN~ = Power supply
AUDIO OUT = Audio output (L=left channel, R=right channel)
RF IN = Antenna input
RF OUT = Antenna output
INFO!
Information about the Special Features of this VCR see page 15.
Connecting and Setting up
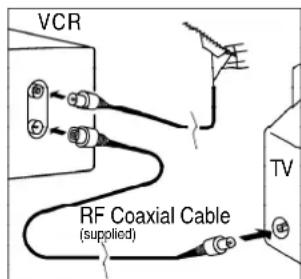
Set up the connections shown here, and connect the mains lead (supplied) to your AC mains.

Note:
- The RF (radio frequency) coaxial cable must be connected for TV reception, even if the video recorder is already connected with a 21-pin Scart cable.
- More information about the remote control buttons and of cursors, see page 4-5.
Automatic Setting without Q Link
- Switch on the VCR and the [Country] setting menu will appear.
- Use the cursors ▲▼◀▶ on the remote control to select your country.
- After pressing OK, all the TV stations which can be received will be tuned automatically in about 5 minutes.
- When the menu [Clock setting] appears, use the cursors ▲▼◀▶ on the remote control to select the Time and Date manually. • To end this procedure, press OK.
- To cancel this settings press EXIT.
Notes:
- If the selection for the Country menu does not appear after switching on the VCR, you can restart the Automatic Setting; see page 8.
- An incorrect setting of Time or Date (observe summer- and wintertime) will influence the Timer recording.
- If you select the country [Suisse] the menu [Power save] will appear. Select the settings with the cursors ▲▼ and store with OK. More information see on page 9.
Notes about Link :
(for NV-FJ631, NV-FJ630, NV-FJ626)
- Following systems from other manufacturers have similar function with Q Link from Panasonic.
- List of registered trademarks: Q Link (Panasonic), DATA LOGIC (Metz), Easy Link (Philips), Megalogic (Grundig), SMARTLINK (Sony)
On Screen Display

Automatic Setting with Q Link
(for NV-FJ631, NV-FJ630, NV-FJ626)
If your TV is equipped with Q Link or with a similar function from other manufacturers (see notes), the TV programme positions can be downloaded with a fully-wired 21-pin Scart cable (not supplied).
The programme positions must be tuned on the TV first.
- Connect the Scart cable.
- Set the AV channel of the TV.
- Set the remote control to VCR.
- Switch on the VCR • Downloading of the TV data starts.
- When the indication appears on the VCR display, the downloading is complete.

On Screen Display
VCR display
Manual download start
(for NV-FJ631, NV-FJ630, NV-FJ626)
- Set the AV channel of the TV.
- press MENU
- Select [Tuning]
- Access by pressing OK
- Select [Download] • Press OK
- Confirm by pressing OK
- When the indication appears on the VCR display, the downloading is complete.


If you want to connect the TV only with a RF Coaxial Cable
(supplied), you must ensure that the video output channel is adjusted to the input channel of the TV.
For this purpose, please also read the operating instructions for your TV.
- Switch on the VCP
- Press the MENU Button for about 7 seconds until the number of the channel appears on the VCR display (the pre-setting is channel 36).
- Tune the TV until the test screen appears. A distorted picture on the channel can be reduced, by adjusting the VCR and the TV to another channel.
- Use this button to select the channel number (e.g. channel 39).
- Tune the TV until the test screen appears.
- To store this adjustment, press OK.
- After that, please continue with the Automatic Setting with the [Country] setting menu.
VCR display On Screen Display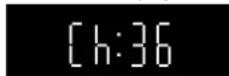


Controls

Menu Operation

These buttons are also used as cursors ▲▼◀▶ in order to select items on the menu.

Display the Main menu. (indicated by = MENU )

EXIT a menu. (indicated by = EXIT)

Select or store a function. (indicated by = OK)

Playback

Playback (indicated by = ▷)
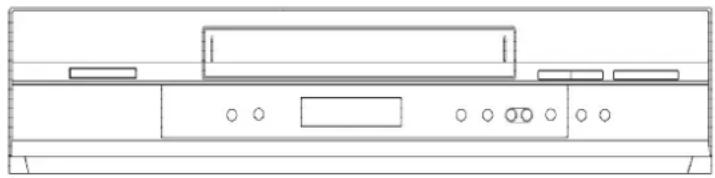
VCR display


Fast Forward and Forward Search (Cue)


Fast Rewind and Backward Search (Review)

- To select Fast Forward or Fast Rewind, press these buttons when the video has stopped.
- To briefly watch the picture during Fast Forward or Fast Rewind, hold down the corresponding button.
- To Search press these buttons briefly during playback, and the search will continue until the Playback Button > is pressed. Two times pressing increases search speed (JET SEARCH).
- If you keep this button pressed, the search function will continue until you release the button.

Stop (indicated by = □)

• To stop winding a tape, recording or playback.

Still Playback

- Press this button during playback on the remote control or on the VCR.
- Resume normal playback by pressing this button again or the Playback Button ▷.


Slow Playback
- Resume normal playback by pressing the Playback Button ▷.
- Keep this button pressed down on the remote control for more than 2 seconds during playback.
Notes:
To preserve the video heads, the following functions are switched off automatically after 5 - 10 minutes (Distorted pictures and tape transport noises during these functions are not functional faults):
• Forward Search (Cue) • Backward Search (Review) - Jet Search - Still Playback - Slow Playback.
Operations
TV Operation
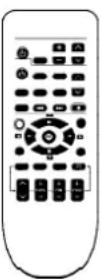
With this remote control you can operate some Panasonic TV. Please also read the operating instructions for your TV.


Switch the TV on and off.
Select the AV input on the TV.
Select the TV channel.
Operate the TV volume.
VCR Operation

Remove the cassette.
Press the EJECT button on the VCR or press the button □ for more than 3 seconds on the remote control.


Switch the VCR on and off.
Press to switch the unit from on to standby mode or vice versa. In standby mode, the unit is still consuming a small amount of power.


Select the VCR channel.


Display the time, tape counter, or remaining tape time.
Press this button repeatedly.

Reset the tape counter.
Press this button. When inserting a cassette, the counter is reset to 0:00.00.

Operate the REPLAY function.
Press this button during playback.

Switch to the AV channel.
Press this button repeatedly.


Change the sound mode.
Press this button repeatedly.
Stereo sound: Display shows L R
Left channel: Display shows L
Right channel: Display shows R
Mono sound: No display appears.
Notes:
The functions of these buttons are not used on this VCR:
- STILL ALBUM
- LIBRARY
Model: NV-FJ626 / NV-FJ630 / NV-FJ631




Select the channel or the ShowView number.
Use the numeric buttons.
Example: 18


Switch to teletext mode.




Switch to the AV channel.
Press this button repeatedly.

Switch the screen format between

the wide screen and other formats.

Set the remote control to TV operation.

Recording
- Turn on the TV to the video output channel, and insert a cassette with an intact erasure prevention tab into the VCR.
- Before recording, select the channel.
Select the AV channel you want to record a program fed via a 21-pin Scart cable.

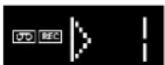
VCR display
- Press to start recording.
- Press the Stop button to stop recording.
- Use the ▪/▶ button to pause recording.
- Restart recording by pressing this button again. To preserve the video heads, the function will be switched off after 5 minutes.

Note:
These functions can also be used with the VCR buttons:

(rec), ○ (pause), □ (stop) and ◊ (channel)
Direct TV Recording (for NV-FJ631, NV-FJ630, NV-FJ626)
This ☐ button allows you to immediately start recording the same programme that you are viewing on the TV, if your TV is equipped with Q Link or with a similar function from other manufacturers (see page 3) and connected with a fully-wired 21-pin Scart cable (not supplied).
OTR Function
(OTR = One Touch Recording)
To record for a specific length of time, press this button on the VCR.
You can extend the recording time
from 30, 60, 120, 180 to 240 minutes
by pressing the button repeatedly. To stop in advance press □.
The selected length of recording time will appear on the VCR display.

If you want to watch another TV programme at the same time as you are recording, select the channel on the TV.
Erasure prevention of a cassette
To prevent the accidental erasure of a cassette, remove the erasure prevention tab.
If you want to record again on a cassette with erasure prevention, and this symbol 📄 is flashing on the VCR display, then cover the hole with adhesive tape.

Tape Speed
Press this button before recording, in order to select the tape speed for the recording.
SP/LP/EP

The following information appears on the VCR display:
SP standard recording time: optimum picture quality.
LP double recording time: slightly reduced picture quality.
EP (SUPER LP) triple recording time: slightly reduced picture quality.
Note:
Distorted pictures produced when playing back some cassettes (e.g. type E300) after LP or EP recordings are not functional faults.
Timer Recording with On Screen Menu
With the On Screen Menu you can programme Timer recordings (up to 16 programmes).
Switch on the TV to the video output channel, and insert a cassette with an intact erasure prevention tab into the VCR.
Set the remote control to VCR operation.
- Switch on the VCR

- Press display [Timer recording] menu
| Timer recording | Panasonic | VCR1/2 | |||
| Pos | Start | Stop | VPS | ||
| Name | DATE | ON | OFF | [IMAGE] | PDC |
| 1.***32 Mo-Sa | 13:30 | 14:00 | LP | ON | |
| 2.***32 20/9 | 15:00 | 16:00 | SP | OFF | |
| 3.---- --/-- | --/-- | --/-- | -- | --- | |
- Set the channel
You can use the cursors ▲▼◀▶ on the remote control to move around the menu, in order to make changes.
- Set the recording date, day or week. For example: Sa means that the programme will be recorded every Saturday, or Mo - Sa means that the programme will be recorded every day from Monday to Saturday. Su=Sunday, Mo=Monday, Tu=Tuesday, We=Wednesday, Th=Thursday, Fr=Friday, Sa=Saturday
- Set the start time. If you keep this button pressed down, the time will change in 30 minute jumps.
- Set the stop time.
- Set the Tape Speed SP/LP/EP or A (automatic). See also the description for Recording.
- In the setting A (automatic), the VCR automatically switches (with a short picture distortion) to the slow tape speed LP, to record the programme as long as possible.
- The preset [VPS / PDC] settings, can be manually changed (for NV-FJ631, NV-FJ630, NV-FJ626).
[ON] The broadcaster is providing VPS / PDC signals. If the program is starting earlier or later than planned the timer recording will be synchronised to the actual broadcast start.
Important ! The time and the date settings must be exact same as programme information (programme magazine). If there is an special VPS / PDC time noted, it must be used. (The recording can not start, if the settings are not exact.)
The broadcaster is not providing VPS / PDC signals.
The broadcaster is providing VPS / PDC signals, but the function is set off.
With this setting, you have to add to the start and stop time so that the whole film can be recorded completely, in case the film is broadcast outside the planned start time.
To check the remaining tape time, look at the VCR display REMAIN.
Make sure that the remaining time on the cassette is longer than the time set for recording, otherwise the whole programmes cannot be recorded.
To store the programme, press OK. To preset other recordings, repeat this procedure.

Press to switch the VCR to Standby mode for Timer recording.
Make sure that the VCR display ☐ appears.


Timer Recording with ShowView (not for NV-FJ623)
Switch on the TV to the video output channel, insert a cassette with an intact erasure prevention tab into the VCR and set the remote control to VCR operation.
SV/V +


- Enter the ShowView number. For correction use ◀. To access [Timer recording], press OK.
- If the channel name is not set automatically, select your Channel [Pos]
▲▼ and store with OK.
The name of channel will be saved. To modify the [Name], see page 10.
- Set the tape speed to SP, LP, EP, or A (automatic).
- Check the remaining tape time. • To store the programme, press OK.
- To preset other recordings, repeat the procedure.
TIMER
- Press ☐ to switch the VCR to Standby mode. Make sure that the VCR display ☐ appears.
| Timer recording | Panasonic | VCR1/2 | |||
| Pos Start Stop VPS | |||||
| Name | DATE | ON | OFF | PDC | |
| 1. ARD | 20/9 | 15:00 | 16:00 | SP | ON |
| 2.---- | --/-- | --/-- | --/-- | -- | -- |
| 3.---- | --/-- | --/-- | --/-- | -- | -- |
| Timer recording | Panasonic | VCR1/2 | |||
| Pos Start Stop VPS | |||||
| Name | DATE | ON | OFF | [IMAGE] | PDC |
| 1. -- | ---- | 15:00 | 16:00 | SP | --- |
| 2. ---- | --/-- | --/-- | --/-- | -- | --- |
| 3. ---- | --/-- | --/-- | --/-- | -- | --- |

For more information, see page 6.
SHOWVIEW is a trademark of Gemstar Development Corporation. The SHOWVIEW system is manufactured under licence from Gemstar Development Corporation.
Recording with Intelligent Timer Function
To easily set the timer for programmes that are broadcast on the same channel and at the same time each day (for example, series), the Intelligent Timer Function remembers the channel number along with the start and end times of the last 8 programmes that you have recorded using Timer Recording.
I-TIMER
- Press
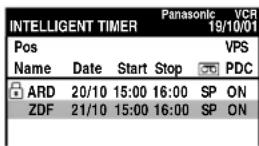
• To select the programme, use ▲▼
TIMER
- Press 📋 to switch the VCR to Standby mode for Timer recording.
If you want to modify the data first, follow the next steps.
- If more than 8 programmes are stored, the oldest data will be lost. To delete recording data manually, press
CANCEL
- To protect a programme press ▶ and the lock symbol 🔒 will appear. To unlock a programme press ◀.
- To modify the data, press OK and Timer recording Menu will appear.
- Change the data ▼◀▶.
TIMER
- Press ☐ to switch the VCR to Standby mode for Timer recording.
For more information, see page 6.

Note:
- These functions can be also used with the VCR buttons: INTELLIGENT TIMER, TIMER, REC, ○, ○
- When [Shipping condition], [Auto - Setup Restart] etc. is done, Intelligent Timer data will be lost.
- To use Intelligent Timer Function, at least one timer recording has to be done.
To cancel Standby mode for Timer recording,
TIMER
press the VCR display
will disappear..
Now you can playback a cassette or make a recording.
After that, you must press the button again to switch the VCR to the Standby mode for Timer recording.
To check the Timer recording,
PROG. / CHECK
- press □ to display the [Timer recording] menu.

- Press to quit the menu.
To delete or change a Timer recording,
PROG. / CHECK
- press □ to display the [Timer recording] menu. • Use ▲▼ to select the entry to be changed.
CANCEL
- Press to delete the Timer recording.
- Use the relevant function buttons to change the entries. • Press OK to store these changes.
EXIT
- Press to quit the menu.


Programme List
The List of the Timer recordings are stored if:
• the recordings are longer than 15 minutes (EP mode 25 minutes) • the cassette was not removed of the VCR.
SEARCH
- Press display the [Programme List].

- Select the programme ▲▼.
- By pressing the SEARCH Button again, the VCR will wind the tape to the selected programme and start to playback.
- If you select another programme, press the SEARCH Button again, the playback will stop and the [Programme List] will appear.
- Press quit the menu.
Note:
If you have removed the cassette, or the power supply was interrupted, the Intro Jet Scan will be activated when pressing the SEARCH Button (see page 8).
Functions
- When a cassette is inserted, the VCR switches on automatically.
- When a cassette without an erasure prevention tab is inserted, the VCR will automatically start playback.
- The cassette will automatically be rewound when reaching the tape end.
- The CVC System (Crystal View Control) ensures optimum picture quality.
Repeat Playback Function
Press the Playback Button ▷ for more than 5 seconds when the VCR is on stop mode (the letter R will appear on the OSD). The VCR will keep replaying the cassette until the end of the recorded part. Press the Stop Button □ to exit this function.
Child Lock Function
To deactivate the buttons on the VCR and the remote control,
press the OK and +CFFttons at the same time until this display appears.

This display will also appear if attempts are made to operate the VCR when this function is activated, to inform that the VCR cannot be operated.
To cancel the Child Lock Function, press the same buttons until the display disappears.
If the power supply of the VCR is disconnected, the Child Lock Function is cancelled after about 60 minutes.
Playback Off Timer Function
To stop the playback after a preset time, press the Playback Button ▷ on the VCR for more than 3 seconds during playback.
You can extend the playback time from 30, 60, 120, 180 to 240 minutes by pressing the button repeatedly. To stop in advance press □. The selected length of playback time will appear on the VCR display.
Intro Jet Scan Function
You can playback the beginning of each recording with the Intro Jet Scan Function. Press the 📄 Button. The VCR will rewind to the start of the tape, and play with high speed for 10 seconds the beginning of each recording (which is longer than 15 minutes). Once you have found the recording, press the Playback Button ▷ . To cancel the search function, press the Stop Button □ .
Note:
For more explanation of the SEARCH Button, see Programme List on page 7.
VHS Index Search System
To quickly find the beginning of a programme, press fast forward INDEX Button ▶▶, or press backward INDEX Button ◀◀.

This function only works on playback mode or in stop mode.
Depending on how many times you press these INDEX Buttons (up to a maximum of 20 times), the VCR will search through the tape to find the start of the programme, and will automatically start playback (for each programme which is longer than 5 minutes). For example, if you press the INDEX Button three times, the VCR will search for the third programme.
To cancel the Index Search System, press the Stop Button □.
Language setting
- Press MENU
- Select [Other settings] ▼
- Access by pressing OK
- Select [Language]
- Select the input field
- Select the setting ▼
- Store by pressing OK
- Press EXIT
| Main menu | Panasonic | VCR |
| Timer recording | ||
| Tuning | ||
| Clock setting | ||
| Other settings | ||
| Other settings | Panasonic | VCR |
| Tape length : AUTO (←E-240) | ||
| SQPB: AUTO | ||
| Power save : OFF | ||
| VCR display : DIMMED | ||
| OSD : 4:3 | ||
| AV : TV/EXT | ||
| TV system : PAL | ||
| Language : English | ||
Restart Automatic settings
- Press MENU
- Select [Tuning]
- Access by pressing OK
- Select [Auto - Setup Restart] • Press OK
- Confirm by pressing OK
| Main menu | Panasonic | VCR |
| Timer recording | ||
| Tuning | ||
| Clock setting | ||
| Other settings | ||
| Tuning | Panasonic | VCR |
| Manual | ||
| Auto - Setup Restart | ||
| Shipping condition |
Restoring the original settings of the VCR (Shipping condition)
- Press MENU
- Select [Tuning] ▼
- Access by pressing OK
- Select [Shipping condition] • Press OK
- Confirm by pressing OK
| Main menu | Panasonic | VCR |
| Timer recording | ||
| Tuning | ||
| Clock setting | ||
| Other settings | ||
MESECAM setting
- Press MENU
- Select [Other settings]
- Access by pressing OK
- Select [TV system]
- Select the input field
- Set [MESECAM]▼
- Store by pressing
- Press EXIT
| Main menu | ||
| Timer recording | ||
| Tuning | ||
| Clock setting | ||
| Other settings | ||
| Other settings | ||
| Tape length : AUTO ( ←E-240) | ||
| SQPB : AUTO | ||
| Power save :OFF | ||
| VCR display : DIMMED | ||
| OSD : 4:3 | ||
| AV : TV /EXT | ||
| TV system : MESECAM |
Tape length setting
- Press MENU
- Select [Other settings] ▼
- Access by pressing OK
- Select the input field
- Set [Tape length] ▲▼
- Store by pressing OK
- Press EXIT
| Main menu | Panasonic | VCR |
| Timer recording | ||
| Tuning | ||
| Clock setting | ||
| Other settings |
| Other settings | Panasonic | VCR |
| Tape length : E - 195 | ||
| SQPB : AUTO | ||
| Power save :OFF | ||
| VCR display : DIMMED | ||
Clock setting
If the broadcaster is providing the time signal, the Time and Date is set automatically (NV-FJ631, NV-FJ630, NV-FJ626). [Clock setting] is set on [AUTO].
To set the time manually:
- Press MENU
- Select [Clock setting]
- Access by pressing OK
- Select [MAN]
- Access by pressing OK
- Set the Time and Date using ▲▼◀▶. Store these settings by pressing OK.
- Press EXIT
| Main menu | Panasonic | VCR |
| Timer recording | ||
| Tuning | ||
| Clock setting | ||
| Other settings | ||
Functions
Setting of On Screen Displays (OSD)
- Press MENU
- Select [Other settings]
- Access by pressing OK
- Select [OSD]
- Select the input field
- Select the setting ▲▼
- Store by pressing OK
- Press EXIT

4:3 displays are on the edge of the screen (the displays are not visible during playback in 16:9 format). 16:9 displays are on the edge of the screen in 16:9 format (the displays are in the centre of the screen in 4:3 format).
OFF: No On Screen Displays
Setting of SQPB
(S-VHS Quasi Playback)
- Press MENU
- Select [Other settings] ▼
- Access by pressing OK
- Select [SQPB]
- Select the input field
- Select the settings ▲▼
- Store by pressing OK
- Press EXIT

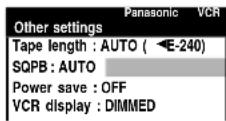
SQPB settings:
AUTO VCR automatically recognises types of recordings
ON Only S-VHS recordings should be played
OFF Only VHS recordings should be played
Note:
Distorted pictures during these playback functions are not functional faults.
Settings of Power save and the Brightness of the VCR display
- Press MENU
- Select [Other settings]
- Access by pressing
- Select [Power save] or [VCR display] ▼
- Select the input field
- Select the settings ▲▼
- Store by pressing OK
- Press EXIT
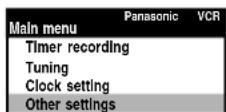

Power save (when the VCR is switched off):
OFF The VCR is in normal operating mode
ON The VCR display is not illuminated
(the VCR is saving power)
To switch ON the VCR use ⏻/1 button on the VCR
Adjust the Brightness of the VCR display:
(only when the Power save function is set to OFF)
ON The VCR display is brightly illuminated
DIMMED The VCR display is dimmed
OFF The VCR display is not illuminated
NTSC Playback on PAL TV (For NV-FJ630, NV-FJ631)
This function allows to playback tapes which where recorded in NTSC.
On some TV pictures may be distorted during NTSC playback.
Try to adjust your TV. For this purpose, please also read the operating instructions for your TV.
Dubbing or recording of NTSC tapes with this VCR is not possible.
Setting the sound system
The EC/ECN/ECY Series can receive transmissions which are broadcast with NICAM sound.
This is a sound system with two sound channels which broadcasts either stereo sound or two separate mono channels (M1 and M2).
- Press MENU
- Select [Tuning] ▼
- Access by pressing OK
- Access [Manual] by pressing PK
- Select the channel
- Access by pressing OK
- Select [Mono]
- Select the input field
- Select the sound setting [ON] or [OFF] ▲▼
- Store by pressing OK
- Press EXIT

Set [Mono] to [ON] to record a normal mono sound on the Hi-Fi tracks of the VCR, for example, if the stereo sound is distorted due to reception conditions.
To change the order of the channel positions and the names of the TV stations
- Press MENU
- Select [Tuning]
- Press OK to access
- Press OK to access [Manual]
- Select the channel to be changed using ▲▼
- Press OK to access
- Select the input field for [POS]
- Input the channel position using ▲▼ • Press OK to store the setting
- Select [Name] using ▼
- Select the input field
- Input the name of the TV station by selecting the first letter using ▲▼
- Select the next letter
- Select the next letter using ▲▼. To input an empty character, select the blank character between Z and *. • Press OK to store the setting
- Press EXIT

Note:
Distorted pictures can be adjusted with [Fine tuning] and [Video system].
Setting a new Channel
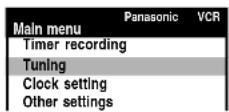
Add / Delete / Move a Channel on the list
- Press MENU
- Select [Tuning] ▼
- Access by pressing • Access [Manual] by pressing OK
- Search for an unused Channel position ▲▼ (for rapid search, keep the cursor button pressed down), or [Add] between other Channels using the DATE Button and add by pressing OK

- Access by pressing OK
- Select the new Channel ▲▼
- Store by pressing OK
- Select [Tuning] menu by pressing MENU

- Select the Channel to be deleted ▲▼
- Select [Delete] by pressing the button
- Delete by pressing OK

- Select the Channel to be moved ▲▼
- Select [Move] by pressing the ON Button
- Move the Channel to the new position ▲▼
• Store this new position by pressing PK
- Press EXIT
With some Satellite- or Digital Receivers it is possible to start a Timer recording, with a 21-pin Scart cable (not supplied) by using EXT LINK function. (Please read the operating instructions for your Satellite- or Digital Receiver for further information).

Controls for external recordings
- Press MENU
- Select [Other settings]
- Access by pressing OK • Select [AV2]▼ (NV-FJ623EG/EGY = AV)
- Select the input field
- Select the setting ▲▼
- Store by pressing OK
- Press EXIT


After you have preset the recording in the Satellite- or Digital Receiver, set the VCR on Standby Recording by pressing EXT LINK on the VCR.

As long as a video picture is being transmitted by the Satellite- or Digital Receiver, the VCR will record it.

This notice is displayed on the screen. In order to delete this notice, press OK.
To stop the recording, press the EXT LINK Button on the VCR.
EXT LINK2 To control external recording
with some Satellite- or Digital Receiver (Videosignal).
EXT LINK1 For a Digital Receiver which transmits a special control signal for recordings, for example the F.U.N. Receiver (TU-DSF31).
EXT To connect an external equipment (e.g. TV), the EXT LINK Button on the VCR is not activated. (TV/EXT = NV-FJ623EG/EGY)
Note:
The programmes to be recorded on your VCR should not overlap with the recordings of the Satellite- or Digital Receiver.

Connecting a Decoder
with a 21-pin Scart cable (not supplied) to AV2 of the VCR
(for NV-FJ631, NV-FJ630, NV-FJ626, NV-FJ623EC/ECN/ECY).
This device is used to decode scrambled broadcasts (Pay TV).
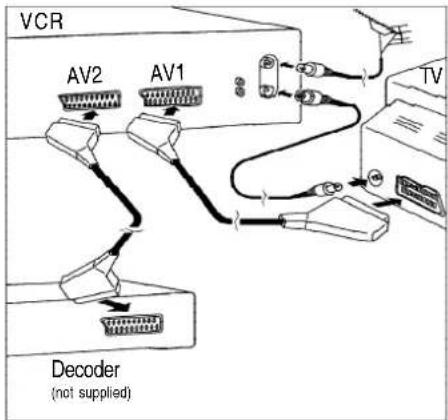
Set AV2 to Decoder:
- Press MENU
- Select [Other settings]
- Access by pressing
- Select [AV2]
- Select the input field
- Select the settings ▲▼
- Store by pressing OK
- Press EXIT


DECODER: For connecting a Decoder.
EXT LINK2: To control external recording with some Satellite- or Digital Receiver (Videosignal).
EXT LINK1: For a Digital Receiver which transmits a special control signal for recordings, for example the F.U.N. Receiver (TU-DSF31).
EXT: To connect an external equipment (e.g. second VCR), the EXT LINK Button on the VCR is not activated.
EXT To connect an external equipment (e.g. second VCR),
The EXT LINK button on the VCR is not activated.
Set the Channel to Decoder
- Press MENU
- Select [Tuning]
- Access by pressing OK • Access [Manual] by pressing OK
- Select the encoded channel ▼
- Access by pressing OK
- Select [Decoder]
- Select the input field • Select the Decoder to [ON] ▲▼ (the picture in the background should become clear) • Store change by pressing OK
- Press EXIT


AV LINK Function
You can select the TV or video reception with the 📄ron. If video reception has been selected, the VCR display will indicate VCR.
AV LINK
Amplifier
Connect your VCR (NV-FJ631, NV-FJ630, NV-FJ626) with an Audio cable (not supplied) to the stereo amplifier.
Take care on the direction of the connection: left = white (L) right = red (R)

With a special scart cable (not supplied) you can connect the VCR's AV out with an amplifier. This is also possible with the NV-FJ623.
Troubleshooting
Adjusting the Playback Picture
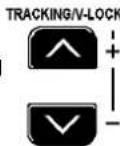
If the picture is distorted with noise bars, press the TRACKING / V-LOCK Button in the (+) or (-) direction during Playback, Still Playback, or Slow Playback.
Noise bars on the TV picture
For automatic adjustment, press (+) and (-) at the same time.
Note:
The tracking cannot be adjusted on certain cassettes.
This is not a functional fault of the VCR.
The meaning of some On Screen Displays
Please use tape with unbroken recording tab!
The REC Button or REC/OTR Button was pressed to record, but the cassette's erasure prevention tab has been broken off.
- In order to record, use a video cassette with an intact erasure prevention tab (see page 6).
This action is not possible before time and date are set
The PROG./CHECK Button or SV/V+ Button was pressed without a date and time being set on the VCR.
• Set the date and time (see page 8).
No timer programmes to be done!
The TIMER Button was pressed, but no timer recording was programmed.
• Programme a timer recording (see pages 6-7).
Please put VCR into stop mode first
An attempt was made to change the programmed data while a timer recording was still in progress.
- You must stop the recording first by pressing the TIMER Button before you can change the programming.
Before Requesting Service
The VCR display is not illuminated:
The mains lead is not connected.
- Check the connection.
The VCR is set to Power save mode.
- Settings can be changed (see page 9).
The VCR display is set to OFF.
- Settings can be changed (see page 9).
Safety devices are operating.
- Disconnect the VCR from AC mains for one minute, then check if the VCR can be operated.
The VCR display is illuminated, but the VCR cannot operate:
The VCR is in Timer recording Standby mode.
- Cancel Standby mode by pressing the TIMER Button.
The child lock is activated.
- Settings can be changed (see page 8).
Tape transport noise
During JET SEARCH the tape transport noise will increase.
• This is not a functional fault.
The picture or the sound is distorted:
The TV reception is not adjusted to the VCR.
- Readjust the reception (see page 3).
The tracking is not set correctly.
- Adjust the tracking manually (see page 14).
Picture distortion can be caused by using E300 cassettes which were recorded with a slow tape speed (LP or EP).
• You are advised not to use E300 cassettes.
The cassette is recorded in a tape speed, colour or video standard which is not corresponding to the VCR setting.
- Check which standard was used when the video cassette was recorded. Setting of PAL or MESECAM can be adjusted manually (see page 8). For more information about NTSC see page 9.
The aerial cable or scart cable is not correctly connected or is defective.
- Check the connections, aerial signal and cables (replace cables if necessary).
Setting for SQPB (S-VHS Quasi Playback) is not correct.
- Setting can be changed (see page 9).
The playback picture is distorted when you record the tape on EP mode using MESECAM system. (This is not a functional fault).
• We recommend PAL system for recording on EP mode.
The video heads are soiled or worn out.
- Please contact service center for assistance.
Head cleaning by a service center is not covered by warranty.
This product may receive radio interference caused by mobile telephones during use.
- In such interference is apparent, please increase separation between the product and the mobile telephone.
Automatic Clock correction is not working correctly:
[Clock setting] is on manually [MAN.]
• Set clock to [AUTO] (see page 8).
The VCR is set to Power save mode.
- Settings can be changed (see page 9).
There is no programme with clock signal available.
- Set the clock manually (see page 8).
The remote control does not work correctly
The signal from the remote control does not reach the VCR's window, or the distance is too long.
- Remove obstructions between the VCR and the remote control (its transmitting distance is about 7 metres).
The batteries in the remote control are exhausted,
or the batteries have not been inserted with the correct polarity.
- Check the batteries and if necessary insert new batteries (see page 2).
The VCR is set to Power save mode.
- Settings can be changed (see page 9).
The recording function does not work correctly
The VCR display flashes when you try to record.
- In order to record, use a video cassette with an intact erasure prevention tab (see page 6).
The Programmed recording function does not work.
• The time and date must be set correctly (see page 8).
The VCR does not record, even though the recording has been programmed.
- Set the start time and the time to stop recording correctly, and set the VCR on Standby Recording by pressing the TIMER Button (see pages 6-7).
- The VPS / PDC function was used to set the recording, but the Start time input was incorrect (see pages 6-7).
If problems occur which you cannot deal with yourself,
consult a service center (see the Guarantee Information).
Special Features
I-TIMER
page 7
Through this INTELLIGENT TIMER function, programming and recording will be even easier than before. The INTELLIGENT TIMER stores the programme data for up to 8 timer recordings.
For example, if you want to record the continuation of your favourite series, you need only to press the I-TIMER button and the stored programme data will be displayed with today's date. Now you can select the programme, and with the confirmation of the TIMER REC button the programming is ready.
If your remote control is not at hand, you are also able to programme directly with the button on your VCR.
Easy Guide OSD
The Easy Guide OSD directs you step by step to your destination. There are many individual settings and languages, with a quick overview of all functions.
SQBP
page 9
Super VHS Quasi Play Back (SQBP) Do you want to watch tapes recorded with an S-VHS VCR from time to time?
No problem anymore: This VCR can play back tapes in VHS quality that were recorded in S-VHS and S-VHS-ET formats.
SUPER Long Play
page 6, 7
Super Long Play (EP mode) allows you to record three times longer than in Standard Play (SP) mode. You can record up to 720 minutes (7 hours) on a 240-minute cassette.
AUTO Long Play
page 6, 7
If the remaining tape length is shorter than the required recording time, this VCR supports a recording mode that automatically switches from Standard Play (SP) to Long Play (LP) to complete the recording of the film.
Intro-Jet Scan
page 7, 8
To check the content of the tape, you can use the Search button to play back 10 seconds of every recording. If you find the title, simply press the Play button to watch the film.
Jet Rewind
page 4
The Panasonic VCRs are equipped with a Jet Rewind Drive. To rewind a E180 cassette it will take only 60 seconds.
For convenient winding and searching, the tape transportation speeds up extremely fast and stops softly in a very short time.
QLink
page 3, 6
for model: NV-FJ631 NV-FJ630 NV-FJ626
With a Euro AV connection and with the Q Link function the VCR is able to communicate with the TV: - copying automatically the tuning positions of the TV - after finishing the playback, the VCR will switch automatically into Standby mode if you switch off the TV - one touch on DIRECT TV REC and the VCR will record the film you are watching on the TV - if you insert a tape into your VCR, the TV in Standby mode will be switched on automatically.
External Link
page 12
With External Link the timer recording from the Satellite- or Digital Receiver is now very simple.
Set your programme in the receiver and switch your VCR with the External Link function into the Standby mode and at the stated time the recording will start automatically.
NTSC Playback
page 10 for model: NV-FJ631 NV-FJ630
In Europe colour system PAL is mainly used, but some other countries use NTSC colour format.
With the NTSC Playback function of the VCR NV-FJ631 and NV-FJ630 you can watch a NTSC VHS tape (for example: from overseas) on your PAL TV.
REC/OTR
page 6
When you want to record manually you can easily set the recording time to 30, 60, 120, 180 or 240 minutes, only by pressing the REC/OTR button repeatedly. The selected recording time will be displayed.
VPS/PDC
page 6
for model: NV-FJ631 NV-FJ630 NV-FJ626
Some stations broadcasting this signal to control the start and stop time of a timer recorded programme. The VCR (NV-FJ631, NV-FJ630 and NV-FJ626) can interpret this signal to record correctly the beginning and end of the film also if the broadcasting time is shifted (for example if a live show is running longer than scheduled).
SHOWVIEW
page 7
for model: NV-FJ631 NV-FJ630 NV-FJ626
The ShowView numbers make it extremely easy to set the VCR for timer recording. Only by typing the numeric code (for example out of the TV magazine) and the VCR (NV-FJ631, NV-FJ630 and NV-FJ626) will translate this number into the timer recording data. After the data are confirmed (by pressing the TIMER REC button) the recording is already programmed.
Index
Add 10
Aerial 3
AUDIO 5,13
Automatic Setting 3
AV input 2, 3, 5, 12
AV LINK 12
Battery 2
Brightness of VCR display 9
CANCEL 7
Channel 3, 9, 12
Child Lock 8
Clock 3, 8
Country 3
CVC 8
DATE 3, 6, 8
Decoder 12
Delete 10
Digital Receiver 11
DIMMED 9
DIRECT TV REC 6
Disposal 2
EJECT 5
EP (SUPER LP) 6,7
Erasure prevention 6
EXT LINK 11, 12
Fast Forward 4
Fast Rewind 4
INDEX (VHS Index Search System) 8
INPUT 5,6
I-TIMER (INTELLIGENT TIMER) 7
Intro Jet Scan 8
JET SEARCH 4
Page
Language setting 8
LP 6,7
Menu Operation 4
MESECAM 8
Mono sound 5,9
Move 10
NICAM sound 9
NTSC 9
OFF 6
ON 6
On Screen Displays 9,14
On Screen Menu 6
OSD/DISPLAY 5
PDC 6
Picture distorted 3,14
Playback 4
Playback Off Timer 8
Power save 9
PROG. / CHECK 6,7
Programme List 7
Q Link 3,6
REC 6
REC/OTR (One Touch Recording) 6
Recording 6
Remaining tape time (REMAIN) 5, 6, 7
Remote control 2, 4, 5
Repeat Playback 8
REPLAY 5
RESET 5
Restart Automatic settings 8
RF Coaxial cable 3
Page
Safety 2
Satellite Receiver 11
Scart cable 3, 11, 12, 13
SEARCH 7,8
Search (Backward, Forward) 4
Shipping condition 8
ShowView 7
Slow playback 4
Sound mode 5
Sound system 9
SP 6,7
SQPB (S-VHS Quasi Playback) 9
Stereo 5,9
Still playback 4,6
Stop 4
SUPER LP (EP) 6,7
SV/V+ 7
Tape counter 5
Tape Speed 6,7
Teletext 5
TIMER 6,7
Timer recording 6,7
TRACKING / V-LOCK 14
TV / TEXT 5
TV ASPECT 5
TV Operation 5
VCR display 9
VCR Operation 5
Volume 5
VPS 6
Specifications
Power supply
Power consumption
220-240 V AC, 50/60 Hz
18W (in operation) / approx. 3W (in Power save)
Controls
Playback functions
multifunctional remote control (VCR and Panasonic TV) / VCR direct controls (main functions)
PAL and NTSC Playback on PAL TV (NV-FJ630 / NV-FJ631)
S-VHS Quasi Playback (SQBP)
Video and Audio heads (helical scanning system)
Tape speed / Record and playback time
Fast forward or fast rewind time
4 heads (Super Ferrite Head) / 2 heads Hi-Fi
SP: 23.39 mm/s, 240 min / LP: 11.7 mm/s, 480 min (E240 cassette)
approx. 60 s (E180 cassette)
Video TV Colour system
Video input and output level
RF modulated
Audio Input level
Audio Output level
PAL colour signal
1.0 V peak-to-peak, 75 Ohm, terminated
UHF channel (21-69), 75 Ohm
-6 dBV, more than 10 kOhm
-6 dBV, less than 1 kOhm
Horizontal resolution (colour)
Signal-to-noise ratio video
Dynamic range audio
Audio frequency response
more than 240 lines (SP)
more than 43 dB (SP)
more than 43 dB (SP) / more than 90 dB (Hi-Fi sound tracks)
80 Hz to 8 kHz / 20 Hz to 20 kHz (Hi-Fi sound tracks)
Operating temperature / humidity
Weight and Dimensions (approximate value)
5°C to 40°C / 35-80% relative humidity
3.5 kg / 430 (width)x87 (height)x282 mm (depth)
Matsushita Electric Industrial Co., Ltd.
- PANASONIC
- CONTENTS
- PAGE
- WARNING AND IMPORTANT INFORMATION SAFETY INFORMATION
- CAUTION
- WARNING
- INSTRUCTIONS ON INSERTING REMOTE CONTROL BATTERIES
- CONSERVE THE ENVIRONMENT
- CE
- CONNECTIONS
- CONNECTING AND SETTING UP
- NOTE
- AUTOMATIC SETTING WITHOUT Q LINK
- NOTES
- NOTES ABOUT LINK
- AUTOMATIC SETTING WITH Q LINK
- MANUAL DOWNLOAD START
- IF YOU WANT TO CONNECT THE TV ONLY WITH A RF COAXIAL CABLE
- CONTROLS
- MENU OPERATION
- PLAYBACK
- OPERATIONS
- TV OPERATION
- VCR OPERATION
- MODEL: NV-FJ626 / NV-FJ630 / NV-FJ
- RECORDING
- DIRECT TV RECORDING (FOR NV-FJ631, NV-FJ630, NV-FJ626)
- OTR FUNCTION
- ERASURE PREVENTION OF A CASSETTE
- TAPE SPEED
- TIMER RECORDING WITH ON SCREEN MENU
- TIMER RECORDING WITH SHOWVIEW (NOT FOR NV-FJ623)
- SV/V
- TIMER
- RECORDING WITH INTELLIGENT TIMER FUNCTION
- I-TIMER
- TO CANCEL STANDBY MODE FOR TIMER RECORDING
- TO CHECK THE TIMER RECORDING
- PROG. / CHECK
- TO DELETE OR CHANGE A TIMER RECORDING
- CANCEL
- EXIT
- PROGRAMME LIST
- SEARCH
- FUNCTIONS
- REPEAT PLAYBACK FUNCTION
- CHILD LOCK FUNCTION
- PLAYBACK OFF TIMER FUNCTION
- INTRO JET SCAN FUNCTION
- VHS INDEX SEARCH SYSTEM
- LANGUAGE SETTING
- RESTART AUTOMATIC SETTINGS
- RESTORING THE ORIGINAL SETTINGS OF THE VCR (SHIPPING CONDITION)
- MESECAM SETTING
- TAPE LENGTH SETTING
- CLOCK SETTING
- SETTING OF ON SCREEN DISPLAYS (OSD)
- SETTING OF SQPB
- SETTINGS OF POWER SAVE AND THE BRIGHTNESS OF THE VCR DISPLAY
- SETTING THE SOUND SYSTEM
- TO CHANGE THE ORDER OF THE CHANNEL POSITIONS AND THE NAMES OF THE TV STATIONS
- SETTING A NEW CHANNEL
- ADD / DELETE / MOVE A CHANNEL ON THE LIST
- CONTROLS FOR EXTERNAL RECORDINGS
- CONNECTING A DECODER
- SET THE CHANNEL TO DECODER
- AV LINK FUNCTION
- AMPLIFIER
- TROUBLESHOOTING
- ADJUSTING THE PLAYBACK PICTURE
- THE MEANING OF SOME ON SCREEN DISPLAYS
- PLEASE USE TAPE WITH UNBROKEN RECORDING TAB
- THIS ACTION IS NOT POSSIBLE BEFORE TIME AND DATE ARE SET
- NO TIMER PROGRAMMES TO BE DONE
- PLEASE PUT VCR INTO STOP MODE FIRST
- BEFORE REQUESTING SERVICE
- THE VCR DISPLAY IS NOT ILLUMINATED
- THE VCR DISPLAY IS ILLUMINATED, BUT THE VCR CANNOT OPERATE
- TAPE TRANSPORT NOISE
- THE PICTURE OR THE SOUND IS DISTORTED
- AUTOMATIC CLOCK CORRECTION IS NOT WORKING CORRECTLY
- THE REMOTE CONTROL DOES NOT WORK CORRECTLY
- THE RECORDING FUNCTION DOES NOT WORK CORRECTLY
- IF PROBLEMS OCCUR WHICH YOU CANNOT DEAL WITH YOURSELF
- SPECIAL FEATURES
- EASY GUIDE OSD
- SQBP
- SUPER LONG PLAY
- AUTO LONG PLAY
- INTRO-JET SCAN
- JET REWIND
- QLINK
- EXTERNAL LINK
- NTSC PLAYBACK
- REC/OTR
- VPS/PDC
- SHOWVIEW
- INDEX
- ADD
- SPECIFICATIONS
Brand : PANASONIC
Model : NV-FJ631
Category : VCR