
ZHG 713 G - Range hood ZANUSSI - Free user manual and instructions
Find the device manual for free ZHG 713 G ZANUSSI in PDF.



| Product type | Decorative kitchen hood |
| Brand | Zanussi |
| Model | ZHG 713 G |
| Dimensions (W x D x H) | 70 cm x 50 cm x 15 cm (estimated) |
| Net weight | 8 kg (estimated) |
| Power supply | 220-240 V ~ 50 Hz |
| Maximum power | 150 W (estimated) |
| Control type | Manual with pull or push button |
| Number of speeds | 3 speeds |
| Lighting | 1 incandescent bulb (40 W max) |
| Air outlet diameter | 120 mm |
| Maximum airflow (extraction) | 450 m³/h (estimated) |
| Maximum noise level | 65 dB(A) (estimated) |
| Filter type | Washable metal grease filter |
| Optional charcoal filter | Yes, for air recirculation |
| Filter maintenance | Hand wash or dishwasher every 2 months |
| Bulb replacement | Unclip the diffuser, replace with identical bulb |
| Safety | Automatic shut-off in case of overheating (estimated) |
| Repairability index | Availability of spare parts: filters, bulbs, motor |
| Manufacturer warranty | 2 years for manufacturing defects |
Frequently Asked Questions - ZHG 713 G ZANUSSI
User questions about ZHG 713 G ZANUSSI
0 question about this device. Answer the ones you know or ask your own.
Ask a new question about this device
Download the instructions for your Range hood in PDF format for free! Find your manual ZHG 713 G - ZANUSSI and take your electronic device back in hand. On this page are published all the documents necessary for the use of your device. ZHG 713 G by ZANUSSI.
USER MANUAL ZHG 713 G ZANUSSI
Cooker hood, kitchen hood, extractor hood, range hood
ZHC 511-513-514 713-714
INSTALLATION, USE AND MAINTENANCE HANDBOOK MANUEL D'INSTRUCTIONS POUR L'INSTALLATION, L'EMPLOI ET L'ENTRETIEN HANDBUCH FÜR INSTALLATION, BEDIENUNG UND WARTUNG MANUALE DI INSTALLAZIONE, USO E MANUTENZIONE INSTRUCTIES VOOR MONTAGE, GEBRUIK EN ONDERHOUD
English ...... page 3
French ...... page 7
German ...... page 11
Italian ...... page 15
This canopy hood is designed to be fitted into cabinets or chimney cooker hoods, placed above a hotplate. It can be used either in the extraction mode (ducted to the outside) or in the recirculation mode (internal recycling).
Before starting the installation, consideration should be given to the difficulties to be found during installation. The installation work must be undertaken by a qualified and competent person in conformity to the rules concerning the evacuation of contaminated air.
The manufacturer disclaims all liability for any damage or injury caused as a result of not following the instructions for installation contained in the following text.
2 - SAFETY WARNINGS
2.1 - When used in the extraction mode, the cooker hood ducting must not be connected to a flue which is used for exhausting fumes from appliances supplied with energy other than electric, such as a central heating flue or water heating flue. 2.2 - Before connecting to the mains supply ensure that the mains voltage corresponds with the voltage on the rating plate inside the hood. 2.3 - Connect the cooker hood to the mains via a bipolar switch which has 3mm clearance between the contacts. 2.4 - The appliance must be earthed. 2.5 - When installed, the hood must be positioned at least 65 cm above the hotplate. 2.6 - Never do flambé cooking under this cooker hood. 2.7 - Never leave frying pans unattended during use as overheated fat and oil may catch fire. 2.8 - Before carrying out any kind of maintenance or cleaning, disconnect the hood from the mains supply. 2.9 - If the room where the cooker hood is to be used contains a fuel burning appliance such as a central heating boiler then this must be of the room sealed or balanced flue type. If other types of flue or appliance are fitted, ensure that there is an adequate supply of air into the room. When the cooker hood is used in conjunction with appliances supplied with energy other than electric, the negative pressure in the room must not exceed 0.04 mbar to prevent fumes being drawn back into the room by the cooker hood.
3 - INSTALLATION
The following scheme has to be observed:
3.1 - Installation of the built-in group 3.2 - Set the hood for recirculation or evacuation
3.3 - Connect the hood to the mains supply and ensure that it works properly.

| Cooker Hood Dimensions | Side A | Side B |
| 520 mm | 497 mm | 259 mm |
| 700 mm | 677 mm | 259 mm |
3.1 - Installation of the fitted group
1 - Make a rectangular opening in the base of the overhead cupboard or hood, leaving a minimum of 13 mm from the outer edges according to the dimensions indicated in the table. 2 - Drill a hole into the upper side of the cabinet in accordance with the dimensions of the duct used for both the evacuation and recirculation mode. 3 - Dismantle the ducting support (version with grill or version with filters), pulling the two pommels A (fig. 1) simultaneously:
a) Fixing frame with screws:
Fix the fitted group to the hood or cupboard, using the self-threading screws (No. 8) provided with the accessories (fig. 2).
b) Rapid fixing with side supports:
The device B is set up to deal with a panel thickness of from 15 mm to 30 mm. Insert the group into the opening until the two devices B connect. Lock the adjustment screw C until the fitted group adheres tightly to the surface (fig. 2).
4 - Close the ducting support by pushing and connecting the two pommels A (fig. 3).
3.2 - Ducting or recirculation fitting
1 - Ducting fitting:
a) The hood can be ducted to the outside using either a rigid or a flexible ∅ 100 or 120 mm duct to be fixed with suitable clamps, not provided (fig. 2). b) If the hood is provided with the charcoal filters fitted, the filters should be removed (see par. 3.2 part 2).
2 - Recirculation fitting:
a) When used in the recirculation mode, the charcoal filters must be fitted into the cooker hood (see par. 3.2 part 2). b) The air is recirculated into the kitchen through the opening located on the upper side of the cabinet or of the hood (fig. 3).
3.3 - Electrical connection and working test
1 - The safety measures 2.2, 2.3 and 2.4 of paragraph 2 are to be strictly observed. 2 - Once the electrical connection has been completed, check that the worktop illumination, motor and speeds work properly.
Part 2 - USE AND MAINTENANCE INSTRUCTIONS
1 - SAFETY WARNINGS
It is most important that all the warnings shown in paragraph 2 of the Installation Instructions are strictly observed.
Moreover, special attention must be paid to the following warnings during the use and maintenance of the cooker hood:
1.1 - The grease filters and the charcoal filters should be cleaned or replaced as recommended by the manufacturer or more frequently if the hood is used consistently (more than 4 hours per day). 1.2 - When using a gas hob in connection with the cooker hood, never leave the burners of the hob uncovered while the hood is in use or when the pans have been removed. Switch off the gas before removing the pan or for just short periods and never leave the hob unattended. 1.3 - Always ensure that the appliance is kept at the correct intensity to prevent the flame from
licking round from the bottom of the pan; this will save energy and will avoid a dangerous concentration of heat.
1.4 - Always ensure that the appliance is used in accordance with the manufacturer's instructions for the removal of contaminated odours during cooking.
2 - USE
Control panel
The cooker hood can be operated as follows:
LIGHT SWITCH L = controls the worktop illumination;
MOTOR SWITCH M = controls the power to the motor and the fan speed:
Position 1 = low speed, should be selected when simmering or using only one pan: the noise level is kept to the minimum.
Position 2 = medium speed, should be selected for normal cooking. This speed offers the best ratio between air capacity and noise level.
Position 3 = top speed, should be selected when frying or cooking food with strong odours, even for a long period.
3 - MAINTENANCE
Regular maintenance and cleaning will ensure good performance and reliability, while extending the working life of the hood. Special attention should be paid to the grease filters and to the charcoal filters when the hood is used in the recirculation mode.
3.1- Metal grease filters
1 - Cleaning
The metal grease filter should be cleaned every two months with normal usage and can be cleaned in a dishwasher or by hand using mild detergent or liquid soap.
2 - Replacement
The metal filters are easily removed, one at a time, applying a slight pressure towards the rear of the hood while pulling downwards (fig. 6).
ATTENTION: There could be a possible fire hazard if the filters are not replaced according to these instructions.
3.2- Synthetic filters
1 - This filter cannot be washed and should be replaced every two months. If the filter is provided with a saturation indicator, replace when the violet color of the dots which are visible from the outside is spread over the whole surface of the filter.
2 - Replacement:
a) Remove the ducting grill, referring to paragraph 3.1.3. on installation.
b) After having taken off the ducting grill, remove the filter stops (1). Replace the grease filter (2) (fig. 7).
c) Close the ducting grill up again.
3.3- Grease Filters (metal panels)
1 - Cleaning
The metal grease filter should be cleaned every two months with normal usage and can be cleaned in a dishwasher or by hand using mild detergent or liquid soap.
2 - Replacement:
a) Remove the ducting grill, referring to paragraph 3.1.3. on installation. b) After dismantling the ducting grill, remove the filter stops (1). Wash the metal panels (2) (fig. 7). c) Close the ducting grill up again.
ATTENTION: There could be a possible fire hazard if the filters are not replaced according to these instructions.
3.4- Charcoal filters
1 - Functioning
In the recycling mode the charcoal filters absorb smell and odours. The charcoal filter cannot be washed or regenerated and should be replaced every 2 months or more frequently if the hood is used consistently.
2 - Replacement:
a) Remove the ducting grill, referring to paragraph 3.1.3. on installation.
b) Replace the active charcoal filter (fig. 8).
3.5- Lighting
This is provided by 2 40W bulbs.
1 - If the bulbs are not working, remove the support of the ducting grill and check that they are properly screwed into place. 2 - If the bulbs are broken they must be replaced using new bulbs of the same voltage and power (fig. 9). 3 - Close the ducting support again.
3.6- Cleaning
When cleaning the hood:
- Never use a wet cloth or sponge, or running water.
- Never use thinners or products containing alcohol, as they might damage the paintwork.
- Never use abrasive cleaning materials, in particular when cleaning stainless steel surfaces.
It is recommended to use a damp cloth and mild liquid household cleaner.
Part 1 - INSTALLATION INSTRUCTIONS
1 - GENERAL INFORMATION

1


2


3

4


8

9

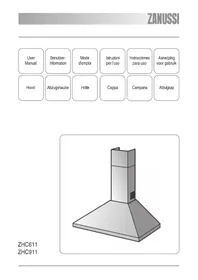
- COOKER HOOD, KITCHEN HOOD, EXTRACTOR HOOD, RANGE HOOD
- ZHC
- SAFETY WARNINGS
- INSTALLATION
- INSTALLATION OF THE FITTED GROUP
- DUCTING OR RECIRCULATION FITTING
- ELECTRICAL CONNECTION AND WORKING TEST
- PART 2 - USE AND MAINTENANCE INSTRUCTIONS
- USE
- CONTROL PANEL
- MAINTENANCE
- METAL GREASE FILTERS
- CLEANING
- REPLACEMENT
- SYNTHETIC FILTERS
- GREASE FILTERS (METAL PANELS)
- CHARCOAL FILTERS
- FUNCTIONING
- LIGHTING
- PART 1 - INSTALLATION INSTRUCTIONS
- GENERAL INFORMATION
Brand : ZANUSSI
Model : ZHG 713 G
Category : Range hood