
ZH 6022 n - Range hood ZANUSSI - Free user manual and instructions
Find the device manual for free ZH 6022 n ZANUSSI in PDF.



| Product Type | Under-cabinet hood |
| Brand | Zanussi |
| Model | ZH 6022 n |
| Width | 60 cm (23.6 in) |
| Depth | 50 cm (19.7 in) |
| Height (min-max) | 15-25 cm (5.9-9.8 in) |
| Weight | 8.5 kg (18.7 lbs) |
| Power Supply | 220-240 V ~ 50/60 Hz |
| Motor Power | 200 W |
| Extraction Rate (max) | 550 m³/h (194 cu ft/min) |
| Noise Level (max) | 62 dB(A) |
| Number of Speeds | 3 |
| Lighting Type | LED 1.5 W (warm white) |
| Grease Filter | Aluminum washable |
| Charcoal Filter | Optional (replaceable) |
| Installation Type | Under cabinet, recirculation or ducted |
| Control Type | Sliding switch |
| Grease Filter Cleaning | Monthly in dishwasher or warm soapy water |
| Charcoal Filter Replacement | Every 3-6 months |
| Spare Parts Availability | Filters, LED lamp, control switch |
Frequently Asked Questions - ZH 6022 n ZANUSSI
User questions about ZH 6022 n ZANUSSI
0 question about this device. Answer the ones you know or ask your own.
Ask a new question about this device
Download the instructions for your Range hood in PDF format for free! Find your manual ZH 6022 n - ZANUSSI and take your electronic device back in hand. On this page are published all the documents necessary for the use of your device. ZH 6022 n by ZANUSSI.
USER MANUAL ZH 6022 n ZANUSSI
The symbol 📄 on the product or on its packaging indicates that this product may not be treated as household waste. Instead it shall be handed over to the applicable collection point for the recycling of electrical and electronic equipment. By ensuring this product is disposed of correctly, you will help prevent potential negative consequences for the environment and human health, which could otherwise be caused by inappropriate waste handling of this product. For more detailed information about recycling of this product, please contact your local city office, your household waste disposal service or the shop where you purchased the product.

| DESCRIBING THE COOKER HOOD | 1 |
| IDENTIFICATION OF THE APPLIANCE | 5 |
| PRODUCT | 7 |
| SAFETY WARNINGS | 9 |
| DIMENSIONS | 23 |
| SETTING UP AND INSTALLATION | 25 |
| ELECTRICAL CONNECTION | 41 |
| CONTROLS | 43 |
| SWITCHING THE APPLIANCE ON AND OFF | 45 |
| MAINTENANCE AND CLEANING | 49 |
DESCRIBING THE COOKER HOOD
This cooker hood features a through flow retractable visor which allows the hood to be installed inside a wall cabinet with the minimum loss of space while offering a large collection area for contaminated air once extended into its working position.
The controls are located in a concealed control box which can be opened during use; the opening of the visor can be used to switch the appliance on when the controls have been pre-set.
The cooker hood can be installed in two different ways:


RECIRCULATION MODE using charcoal filters to purify the contaminated air.
EVACUATION MODE Using ducting to extract the contaminated air to the atmosphere. The grease filters are fitted to absorb grease and dust during cooking. The hood can be supplied with metal or paper filters. The paper filters have saturation indicators and should be located on the internal side of the grille with the spots facing outwards.
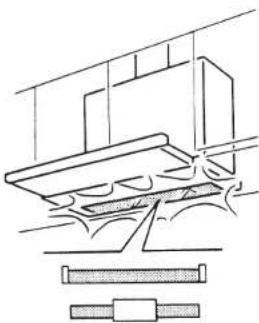
Worktop illumination consists of a fluorescent strip light or of two lamps.


IDENTIFICATION OF THE APPLIANCE
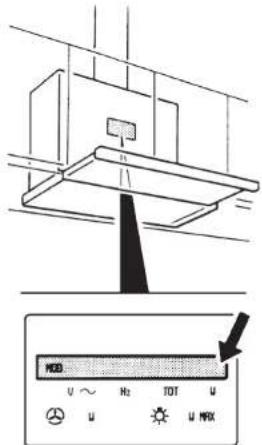
The rating plate is situated inside the casing. It gives the model number and serial number which should be quoted in any communication or if After Sales Service is required.
PRODUCT
This cooker hood has been designed for the purification of contaminated air and to remove odours in the kitchen.
ATTENTION: This cooker hood must not be used for the purification of air which could contain harmful gases or poisons or other substances not to be found during normal cooking.


SAFETY WARNINGS
ATTENTION: Before carrying out any kind of maintenance or cleaning disconnect the hood from the mains supply and unplug the cooker hood.
Connect the hood to the mains supply via a double pole switch which has 3mm minimum clearance between the contacts.

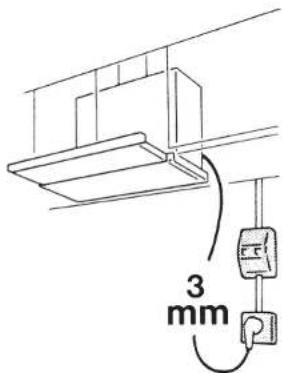
Before connecting this appliance to the mains supply, ensure that the mains voltage corresponds to the voltage on the rating plate inside the hood.
This appliance must be earthed.
ATTENTION: Only use earthed plugs or sockets.
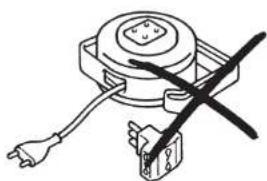
ATTENTION: Do not use any adapters or extensions.


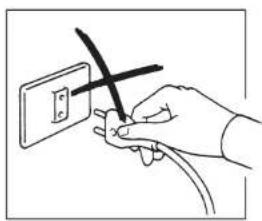
When used in the extraction mode the cooker hood ducting must not be connected to a flue which is used for exhausting fumes from appliances supplied with energy other than electric such as a central heating flue or water heating flue.
When installed, the hood must be positioned at least 65cm above a cooking appliance.
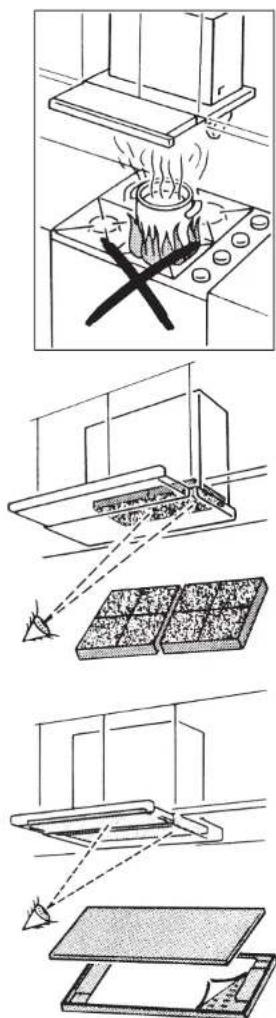
Never do flambè cooking under this cooker hood.
When using a gas hob in conjunction with this cooker hood never leave the burners of the hob uncovered while the hood is in use, or when the pans have been removed. Switch off the gas before removing the pan, or for just short periods and never leave the hob unattended.

Never leave frying pans unattended during use as overheated fat and oil may catch fire.
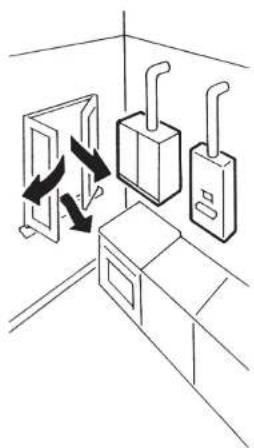
If the room where the cooker hood is to be used contains a fuel burning appliance such as a central heating boiler then this must be of the room sealed or balanced flue type.
If other types of flue or appliance are fitted ensure that there is an adequate supply of air to the room. The cooker hood in fact could extract the air which is needed for burning.
When the cooker hood and appliances supplied with energy other than electricity are simultaneously in operation the negative pressure in the room must not exceed 0,04 mbar in order to avoid a return of the gaz emissions.
This is possible through openings in doors, windows, or air inlet valves allowing fresh air to enter the kitchen. In any case, in connection with the discharge of exhaust air, the requirements of the authorities concerned have to be observed.

Always ensure that the flame is kept at the correct intensity to prevent the flame from licking round from the bottom of the pan: this will save energy and will avoid a dangerous concentration of heat.
ATTENTION: There could be a possible fire hazard if the grease filters are not cleaned or replaced when necessary and according to these instructions.
The grease filters and charcoal filters should be cleaned or replaced as recommended by the manufacturer or more frequently if the hood is used consistently for more than 4 hours per day.
ATTENTION: Please read the instruction booklet carefully before installing or using this appliance.
ATTENTION: Do not insert hands or any other object into the air outlet.
Do not use wet clothes or sponges to clean the surfaces of the cooker hood.

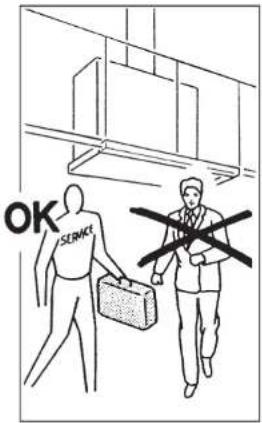
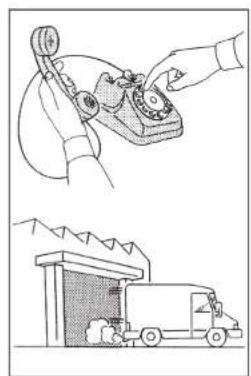
Should your cooker hood fail to function at any time, repairs should be carried out by a qualified electrician or a competent person.
When carrying out any kind of maintenance or in the event that your cooker hood stops functioning, switch off the mains supply and disconnect the plug from the socket. This appliance should be serviced by an authorized Service Centre, and only genuine spare parts should be used.
Not following this warning could affect the safety of your cooker hood.
DIMENSIONS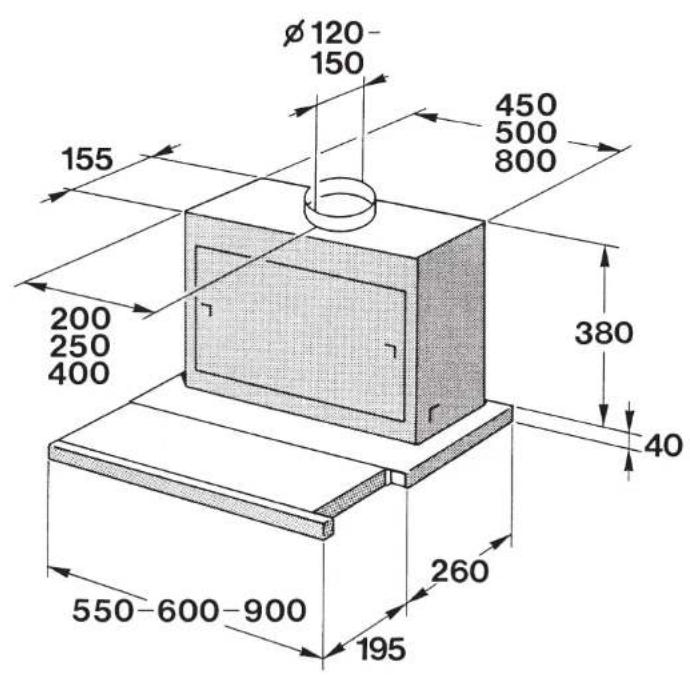
SETTING UP AND INSTALLATION
Before unpacking the cooker hood, position the carton with arrows pointing upwards as illustrated. Remove the cooker hood and polystyrene side protection complete from the carton.
Insert the ducting spigot into the aperture on the top of the cooker hood casing.
Position the cooker hood upside-down, and ensuring the hood is supported correctly, open the visor and remove the two metal grease filters or paper grease filter grilles. To remove the filters, press inwardly on the actuator bolts at either side of the grille and remove. Cooker hoods in 60 cm are provided with 2 metal filters or grilles.


The cooker hood in 90 cm is provided with 4 grease filters which should be removed using the same method as for the 60 cm model.
Cut a rectangular hole into the underside of the cabinet in accordance with the table below.
| MOD. | A | B |
| 55 453 162 | ||
| 60 503 162 | ||
| 90 | 803 162 | |
| 90* | 503 162 |
* Special execution: cooker hood 90 cm with casing in 60 cm.
Cut a round hole in the upper side of the cabinet, aligning it with the air outlet of the cooker hood.


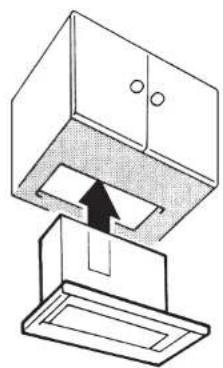
Insert the upper casing of the hood through the hole from the underside of the cabinet.
If you wish to replace the factory-fitted front strip with a personalized strip, remove the three screws. Remove the front strip.
Drill the new front strip, taking care to align it correctly.


Fix the new front strip with the screws provided.
Fasten the screws of the butterfly quick-fixing system.
If necessary, adjust the lower assembly horizontally by loosening the four screws and closing the visor.

Move the lower assembly as necessary to align the front with the cabinet door.
Hold the hood body steady, open the visor, and tighten the fixing screws.
Fix the controls support to the underside of the cabinet using a provided screw.
Now it is possible to install the cabinet to the wall.

The cooker hood can be installed in two different ways:
RECIRCULATION FITTING: using cleansing charcoal filters to purify the contaminated air from cooking and to recirculate it back into the kitchen.
DUCTING FITTING: (without cleansing charcoal filter) to pass contaminated air out through ducting to the atmosphere.
RECIRCULATION FITTING:
If the cooker hood is to be installed in the recirculation mode, then charcoal filters must be provided.
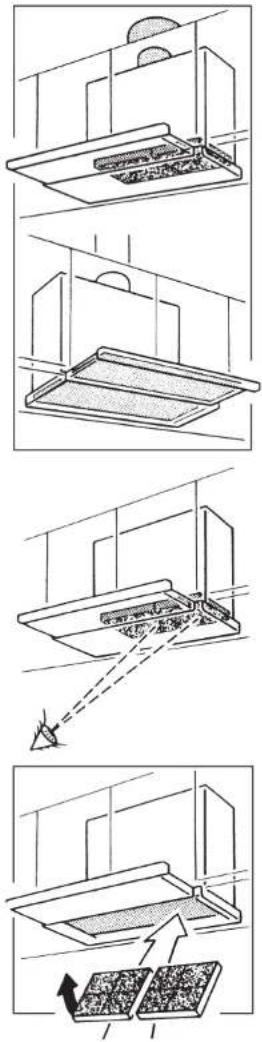
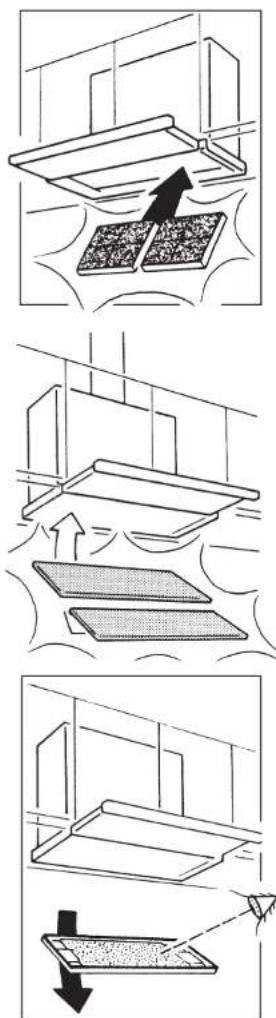
Insert the charcoal filters as illustrated, ensuring that they click into position correctly.
Connect a suitable length of ducting to the air outlet on the top of the cooker hood inside the cabinet. The ducting should be long enough to project through the hole in the top of the cabinet.
Fit the recirculation grille over the ducting and screw the grille to the top of the cabinet using the screws provided. Ensure that the blades in the grille are angled forwards as illustrated. Recycling installation is now completed.
DUCTING FITTING
When installed in the ducted mode, the charcoal filters are not required.
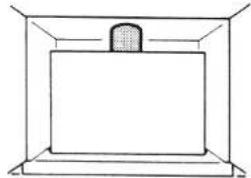


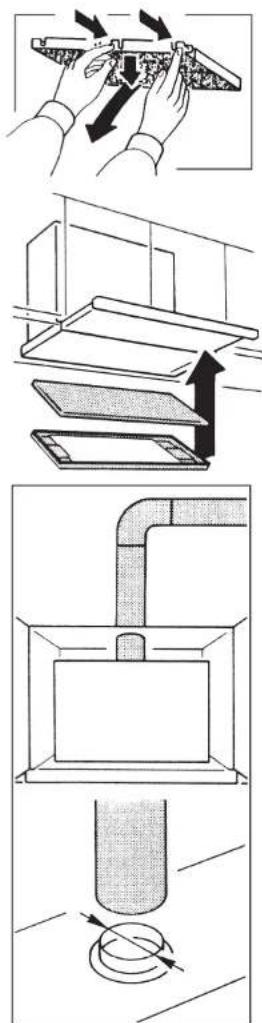
To remove the charcoal filters, press on the two charcoal filter catches and remove the filters as illustrated.
Replace the metal grease filters or grease filter grilles.
It is now possible to install the ducting. Care should be taken when selecting the ducting to ensure it is manufactured from a fire retardant material to National Standards. Attention should be taken when installing the ducting to choose the shortest possible run with the minimum number of bends. The use of bends may cause a loss of air capacity and should be avoided where possible.
The internal diameter of the ducting used should be the same as the external diameter of the ducting spigot. Now ducting installation is completed.
ELECTRICAL CONNECTION
Before connecting this appliance to the mains supply, ensure that the mains voltage corresponds to the voltage on the rating plate inside the hood.
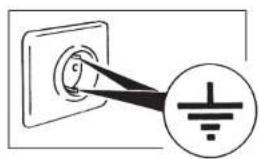
WARNING: This appliance must be earthed.
Insert the plug in the socket.
Switch on the power to the cooker hood at the socket on the wall. Now the cooker hood is ready to be used.


ELECTRICAL CONNECTION
POS. | DESCRIPTION
| C | Visor |
| S | Control box |
| V | Fan speed selector switch |
| M | Fan motor ON/OFF switch |
| L | Worktop lighting ON/OFF switch |
SWITCHING THE APPLIANCE ON AND OFF
Switch on the power to the cooker hood at the socket on the wall.
Lower the control box as illustrated.
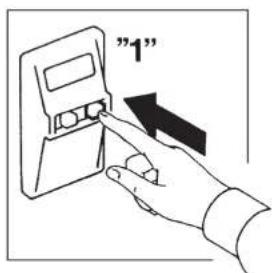
To switch on the fan, slide the switch marked "M" to position "1".

To select the fan speed required, slide the switch marked "V".
To switch on the worktop lighting, slide the switch marked "L" to position "1". At this point all the functions of the cooker hood have been demonstrated.
If desired, the control box can be closed during cooking.
The movement of the visor can be used to switch the appliance on and off if the controls were left switched on from the last operation.

MAINTENANCE AND CLEANING
To ensure the best performance from your cooker hood when used in the recirculation mode, charcoal filters should be replaced at least every 3 months.
Metal filters should be cleaned at least every two months. The filters may be washed by hand in hot water using mild detergent or liquid soap, or they can be machine washed in a dishwasher.
The paper filters have saturation indicators and the filters should be replaced when the red dots start to spread over the whole surface of the filter, or at least every 2 months.
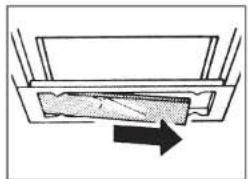
To replace the paper filters, remove the grille panels and the metal retaining clips. Place the new filter on the grille with the colored dots facing downwards.
To replace the fluorescent strip light or the two lamps (60cm and 90cm cooker hoods) proceed as follows: Disconnect the hood from the mains supply.
Unplug the cooker hood.
Remove the screws on the plastic terminal near the lighting diffuser.

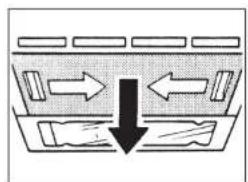
Move the glass strip until the opposite end is free. Pull the glass strip slightly down.
Move the glass strip towards one side and remove. Replace the fluorescent strip light or the two lamps.
To replace the starter remove the internal cover as follows:
Remove the metal filters or the metal grilles.
Loosen the two screws and rotate the cover upwards.
Turn the starter as shown in the picture and replace.
ATTENTION: For the models in 55cm widths it is also necessary to remove the internal cover when replacing the fluorescent strip lamp or the two lamps.



ATTENTION:
Do not use hose pipes,
pressure washers or
cloths with a heavy
concentration of water.
Wipe the cooker hood
over with a soft cloth
wrung out in hot water
and dry with a soft clean
cloth.

Brand : ZANUSSI
Model : ZH 6022 n
Category : Range hood