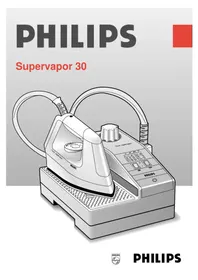
Supervapor 30 - Iron PHILIPS - Free user manual and instructions
Find the device manual for free Supervapor 30 PHILIPS in PDF.


| Product type | Iron |
| Brand | Philips |
| Model | Supervapor 30 |
| Power | 2400 W |
| Supply voltage | 220-240 V, 50/60 Hz |
| Reservoir capacity | 300 ml |
| Continuous steam output | 35 g/min |
| Variable steam output | Up to 130 g/min (boost) |
| Soleplate type | Ceramic soleplate |
| Vertical steam function | Yes |
| Automatic shut-off | Yes (30 s horizontal, 8 min vertical) |
| Anti-calc system | Yes, integrated |
| Self-cleaning function | Yes |
| Cord length | 2 m |
| Dimensions (L x W x H) | 30 x 12 x 15 cm |
| Net weight | 1.2 kg |
| Reservoir material | Transparent plastic |
| Heating indicator | Indicator light |
| Maintenance | Regular cleaning with damp cloth |
| Spare parts | Available on Philips website |
Frequently Asked Questions - Supervapor 30 PHILIPS
User questions about Supervapor 30 PHILIPS
0 question about this device. Answer the ones you know or ask your own.
Ask a new question about this device
Download the instructions for your Iron in PDF format for free! Find your manual Supervapor 30 - PHILIPS and take your electronic device back in hand. On this page are published all the documents necessary for the use of your device. Supervapor 30 by PHILIPS.
USER MANUAL Supervapor 30 PHILIPS
For U.K. only:
This appliance is supplied with a moulded 13 Ampere fused plug.
The plug must never be used without the fuse cover being in place.
If a replacement fuse cover is required it must be of the same type or colour as the coloured insert around the fuse cover.
Only fit a 13 Ampere BSI or ASTA BS 1362 approved replacement fuse. Always refit the fuse cover after changing the fuse.
Replacement fuse covers are available from Electrical Retailers or direct from Philips, tel. no. 081 - 689 - 2166 Ext. 8014.
If the moulded plug is not suitable for the socket in your home it can be removed and replaced by a plug of the correct type.
The moulded plug must be cut from the mains cord, the fuse removed, and the plug safely discarded to prevent further use. The removed plug can be hazardous if inserted into a live mains socket.
Wiring Instructions U.K
WARNING - THIS APPLIANCE MUST BE EARTHED
The wires in this mains lead are coloured in accordance with the following code:
As the colours of the wires in the mains lead of this appliance may not correspond with the coloured markings identifying the terminals in your plug, proceed as follows:
The wire which is coloured GREEN AND
YELLOW must be connected to the terminal which is marked with the letter "E" or by the earth symbol ± or coloured GREEN or
GREEN AND YELLOW.
The wire which is coloured BLUE must be connected to the terminal which is marked with a letter "N" or coloured BLACK.
The wire which is coloured BROWN must be connected to the terminal which is marked with the letter "L" or coloured RED.
Note: If the terminals of the plug are unmarked or if you are in any doubt consult a qualified electrician.
If a 13 amp. plug is used this must be fitted with a 13 amp. fuse.
English Page 4
- Keep page 3 open when reading these operating instructions.
Français Page 8
- Please read these instructions for use carefully in conjunction with the illustrations before using the appliance.
- Check if the voltage rating on the typeplate (under the steam tank) corresponds to the mains voltage in your home.
- Never unscrew the cap of the steam tank while the appliance is connected to the mains wall socket.
- Before using the first time remove any sticker or protective foil from the soleplate. Clean the soleplate with a soft cloth.
- Only connect the appliance to a mains earthed wall socket.
- Never use the appliance if damaged in any way.
- Fully unwind the mains cord and supply hose before starting to iron.
• Always unplug the iron and place it on the stand when leaving, even when only for a short while. - Always place the iron on the iron stand. Do not place the hot iron on the steam tank, the supply hose or the mains cord. The cordset should not be allowed to touch the soleplate when it is hot.
- Fill the steam tank from a beaker with a spout to avoid spillage.
- Never fill the steam tank with vinegar, descaling agents or other chemicals.
- Never immerse the iron or the steam tank in water.
- Some parts of the iron have been slightly greased and as a result the iron might slightly smoke when switched on for the first time. After a short while, however, this will cease.
• Take care that children cannot touch the iron when hot and that they cannot pull the mains cord or supply hose. - Always place the steam tank on a stable ironing board or table.
General description (fig. 1)
A Steam tank
Switch "Steam tank On/Off" with built-in pilot light "Heating-up". (The pilot light goes out when the appliance is ready for steam-ironing.)
Switch "Iron On/Off" with built-in pilot light
D Filling opening with screw cap
E Iron stand (removable)
F Steam activator (press-in for steam ironing)
G Pilot light "Iron heating-up"
H Temperature dial (rotate)
Soleplate
Supply hose with ball swivel for maximum ironing convenience
K Mains cord
L Ring spanner for unscrewing the cap
Ironing temperature
- Always check first if a label with ironing instructions is attached to the article to be ironed. Follow these ironing instructions in all cases.
- If ironing instructions are missing but you know the kind of fabric, then see the table for recommended ironing temperatures.
- After the pilot light (G) has gone out and come on again you can start ironing.
- During ironing the pilot light will come on from time to time. When this happens, the soleplate is being heated-up to the required temperature again. You can continue ironing.
- The table is valid for the fibre materials only. If some kind of finish has been applied (gloss, wrinkle, relief etc.), the textile can best be ironed at a lower temperature.
- First sort out the fabrics according to ironing temperature: wool with wool, cotton with cotton, etc.
The iron heats up quicker than it cools down.
Therefore, start ironing the articles requiring the lowest temperature such as those made of synthetic fibres. Then progress to the higher temperatures.
- If the article is made of a mixture of different fibres, you must always select the lowest ironing temperature of the composition of those fibres.
(E.g. an article consisting of "60% polyester and 40% cotton" should be ironed at the temperature indicated for polyester (●) and without steam.)
If you do not know what kind(s) of fabric(s) the article has been made of, find a spot which will be invisible when wearing or using the article to
| Table | |||
| Label with ironing instructions | Kind of textile | Temperature dial | Steam ironing |
 |  |  | |
| Synthetic e.g. acetate, acrylic, viscose, polyamide, polyester. Silk | MIN| | •| | | ||
| Wool | | ••| | ||
| Cotton Linen | | ••• MAX | ||
| Please note: This article cannot be ironed! | |||
Filling with water (for steam-ironing)
- Position the steam tank on a stable flat surface and unscrew the cap of the steam tank (D) by turning anti-clockwise.

- Fill the steam tank with water (max. 0.9 litre) (fig 2).
- You can use tapwater. However, if the water is very hard (hardness higher than 17°DH / 211/4° Clarke), it is advisable to use distilled water.
- Never use vinegar, descaling agents or other chemicals.
- Close the steam tank by turning the screw cap clockwise by hand until tight (fig. 3).

If you begin ironing
- Fill the steam tank before inserting the mains plug into the wall socket.
try out the ironing temperature. (Always start at a low temperature and increase to one which gives the required results.)
- Pure woollen fabrics (100% wool) may be pressed with the iron set to a steam position. It is recommended to apply shot-of-steam and use a dry pressing cloth. When steam-ironing woollen fabrics, shining of the fabric may occur. This can be prevented by turning the article inside out and ironing the inside.
- Velvet and other textures which rapidly acquire shiny spots should be ironed in one direction only (with the nap), applying only light pressure. Always keep the iron moving.
- Iron the reverse side of synthetic materials and silk to prevent shining spots. When ironing coloured silk, it is not advisable to use steam as this may cause stains.
While ironing
Caution: If heated-up, the steam tank will be under pressure.
Only refill if the steam tank is empty (i.e. when no more steam comes from the soleplate during steam-ironing).
- Switch the iron off by setting switch (C) to position O(fig. 4).
- Switch the steam tank off by setting switch (B) to position O(fig. 5).


- Remove the mains plug from the wall socket. - Using the spanner, carefully unscrew the cap of the steam tank (anti-clockwise) until you can hear steam escaping (fig. 6). Wait for the hissing sound to stop.

This high-pitched sound is completely normal and is not dangerous.
- Carefully unscrew the cap of the steam tank further, until you hear the hissing sound again. Wait again until the sound stops. Proceed in the same manner until the cap is unscrewed.
- Wait for a few minutes. Then slowly pour water into the filling opening (D) (fig. 2).
- Close the steam tank by turning the screw cap manually (clockwise) until tight (fig. 3).
Steam-ironing
- As indicated on the temperature dial (H) and the table, steam-ironing is only possible at higher ironing temperatures, so set the dial to
●● or ●●●.
- Insert the mains plug into a wall socket.
- Set switch "Steam tank On/Off" (B) to position I. The pilot light in the switch will come on (fig. 7).
• The iron heats up faster than the steam tank. Hence you can switch on the iron a few minutes later than the steam tank.
- Select the required ironing temperature with the temperature dial (H) (fig. 8).
- Set switch "Iron On/Off" (C) to position I. The pilot light in the switch as well as pilot light (G) will come on (fig. 9)
- After a few minutes, pilot light (G) will go out. This indicates that the soleplate has reached the set temperature.


- When pilot light (B) goes out, this indicates that the steam tank is heated up and that steam is ready. You can now start steam ironing.
- While steam-ironing keep the steam activator (F) pressed-in (fig. 10).
- During steam-ironing the two pilot lights (B) and (G) will come on from time to time. When this happens, either the iron or the steam tank is being h temperature. You can

Steaming in a vertical position
Hanging curtains and clothing (jackets, woman's suits, coats) can be steamed by holding the iron in a vertical position (fig. 11).

Dry-ironing
- For ironing without steam, do not press-in the steam activator (F).
- You may switch off the steam tank by setting switch (B) to Off-position (O).
When finished ironing
- Switch off the steam tank and the iron (fig. 12, 13).
- Remove the mains plug from the wall socket.
- Place the iron on the stand and let it cool down.
- It is not necessary to pour the remainder of the water out of the steam tank.


Cleaning
- Before cleaning remove the mains plug from the wall socket and allow the iron to cool down sufficiently.
- The appliance can be cleaned with a damp cloth.
Storage
- For transport there are handgrips on either side of the steam tank (fig. 14).

Regularly check if the mains cord and the supply hose are still in a good and safe condition.
Guarantee and service
This product is guaranteed by Philips for a period of one year after the date of purchase against defects due to faulty workmanship or materials. The guarantee covers both piece parts and labour.
Service under guarantee is only provided upon presentation of reasonable evidence (e.g. completed guarantee card or purchase receipt) that the date of the claim is within the guarantee period.
The guarantee is not valid if the defect is due to accidental damage, misuse or neglect and in case of alterations or repair carried out by unauthorised persons.
Service (during and after guarantee) is available in all countries where the product is officially distributed by Philips.
In countries where Philips do not distribute the product, the local Philips service organisation will also provide service although there may be a delay if the required spare parts are not readily available.
In the event of difficulty please contact:
Philips Domestic Appliances and Personal Care B.V.
Service Department,
P.O. Box 225,
9700 AE Groningen,
The Netherlands.
Fax: +31.50.138016.
For United Kingdom:
(These statements do not affect a consumer's statutory rights.)
Should service be required please apply to the dealer in the U.K. from whom the product was purchased or to a Philips Authorised Service Dealer.
For the address of your nearest Authorised Service Dealer simply contact our Consumer Help Desk,
Telephone No. 081-689-2166 Ext. 8014.
This product is manufactured to comply with the radio interference requirements of the Council Directive 87/308/EEC.
Wiring Instructions U.K:
please refer to page 2
Français
Important
Repassage à sec
Garantie et service
Service Department, P.O. Box 225, 9700 AE Groningen, The Netherlands. Fax: +31.50.138016.

Philips Domestic Appliances and Personal Care B.V.
Service Department
PO Box 225,
9700 AE Groningen
The Netherlands
Fax: +31.50.138016

Droogstrijken
Schoonmaken
Philips Domestic Appliances and Personal Care B.V. Service Afdeling,
Postbus 225,
9700 AE Groningen,
Nederland.
Fax: 050.138016.
Philips Domestic Appliances and Personal Care B.V.
Service Department
P.O. Box 225
9700 AE Groningen
The Netherlands
Fax: +31.50.138016
Planchado en seco
Philips Domestic Appliances and Personal Care B.V.
Service Department,
P.O. Box 225,
9700 AE Groningen,
The Netherlands.

- FOR U.K. ONLY
- WIRING INSTRUCTIONS U.K
- WARNING - THIS APPLIANCE MUST BE EARTHED
- GREEN AND YELLOW
- ENGLISH PAGE 4
- FRANÇAIS PAGE 8
- GENERAL DESCRIPTION (FIG. 1)
- IRONING TEMPERATURE
- FILLING WITH WATER (FOR STEAM-IRONING)
- IF YOU BEGIN IRONING
- WHILE IRONING
- STEAM-IRONING
- STEAMING IN A VERTICAL POSITION
- DRY-IRONING
- WHEN FINISHED IRONING
- CLEANING
- STORAGE
- GUARANTEE AND SERVICE
- FOR UNITED KINGDOM
- FRANÇAIS
- IMPORTANT
- REPASSAGE À SEC
- GARANTIE ET SERVICE
- DROOGSTRIJKEN
- SCHOONMAKEN
- PLANCHADO EN SECO
Brand : PHILIPS
Model : Supervapor 30
Category : Iron