
HD4219 - Deep fryer PHILIPS - Free user manual and instructions
Find the device manual for free HD4219 PHILIPS in PDF.
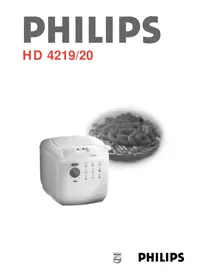


| Product Type | Electric Fryer |
| Brand | Philips |
| Model | HD4219 |
| Oil Capacity | 1.2 L |
| Food Capacity | 600 g fresh fries |
| Power | 1500 W |
| Voltage | 220-240 V ~ 50/60 Hz |
| Dimensions (W x D x H) | 34 x 28 x 24 cm |
| Weight | 2.8 kg |
| Color | White and Gray |
| Adjustable Thermostat | Yes, from 150°C to 190°C |
| Indicator Light | Yes, heating and power-on indicator |
| Basket | Removable, with non-slip handle |
| Lid | With viewing window and anti-odor filter |
| Bowl | Non-stick, removable for cleaning |
| Cleaning | Basket and bowl dishwasher safe |
| Safety | Automatic shut-off, cool-touch handles, overheat protection |
| Spare Parts | Replacement basket, anti-odor filter, bowl |
| Repairability | Repairability index: 7.5/10 (parts available) |
| Included Accessories | Basket, lid with window, removable bowl |
| Warranty | 2 years |
Frequently Asked Questions - HD4219 PHILIPS
User questions about HD4219 PHILIPS
0 question about this device. Answer the ones you know or ask your own.
Ask a new question about this device
Download the instructions for your Deep fryer in PDF format for free! Find your manual HD4219 - PHILIPS and take your electronic device back in hand. On this page are published all the documents necessary for the use of your device. HD4219 by PHILIPS.
USER MANUAL HD4219 PHILIPS
Keep page 3 open when reading these operating instructions.


Important
- Read these instructions in conjunction with the illustrations before using the appliance.
- Before plugging the fryer in, check if the voltage indicated on the type plate is the same as the mains voltage in your home.
- Only connect the appliance to an earthed wall socket.
- Never immerse the control unit with heating element in water.
- Clean the various parts thoroughly before using the fryer for the first time. Ensure that they are thoroughly dry before filling the frying pan with oil or melted fat. In general, we advise you to use liquid frying fat or frying oil in this appliance. Solid frying fat can also be used. However, when using solid frying fat extra precautions must be taken to prevent splashing fat when melting. (See section "When using solid fat".)
- Do not switch on until you have filled the frying pan with oil or (liquid / melted) fat.
- When using new fat (lumps or blocks), melt the fat in a separate pan and then pour it into the fryer before switching on.
- Only use oils and fats which contain an anti-foaming agent and which are recommended for deep fat frying. This information can be found on the packing of these oils/fats. Always fill with oil or fat to the level between the two measure indications. Before you start frying, always check if there is sufficient oil/fat in the fryer.
- Do not exceed the maximum quantities indicated in the table. If the basket is overfilled, hot fat/oil may flow over the top of the frying pan.
- During the process of frying hot steam comes from the appliance. Keep your hands and face away from this steam.
- Be careful of steam escaping when opening the lid.
- Keep the deep fat fryer out of the reach of children at all times, especially when in use.
- Do not let the mains cord hang over the edge of the table or sink.
- After use, set the temperature knob to the lowest position (rotate anti-clockwise until it stops). Remove the plug from the mains socket and let the oil or fat cool down. Do not move the fryer until it has cooled sufficiently.
- If the mains cord of this appliance is damaged, it must only be replaced by Philips or their service representative, as special tools and/or parts are required.
- Keep these instructions for future reference.
General description (fig. 1)
A Lid (removable)
B Anti-grease filter
C Lid release knob
D Control unit
E On / Off switch
F Temperature control
G Pilot light
Reset hole (restart)
Electrical safety connectors
Handgrip (removable / foldable) of frying basket.
K Handgrip release knobs
Frying basket
M Rest for frying basket (drain position)
N Frying pan
Level indications (oil/fat)
P Transport handles
Housing (Cool wall)
R Mains cord
S Cord storage compartment
T Type plate
Extra safety
• The electrical safety connectors ensure that the heating element can only be switched on if the control panel is correctly positioned (fig. 2).
- A safety thermostat switches the appliance off in case of overheating.


This may happen:
- if there is no (or too little) oil, melted fat, or previously used (and resolidified) fat in the fryer (fig. 3);
- if attempting to melt blocks or lumps of new fat in the fryer (fig. 4).
The heat cannot be released quickly enough in these cases.
If the safety thermostat has switched the appliance off:
- Allow the appliance to cool down.
- Using e.g. a small screwdriver or a toothpick, carefully press the restart button concealed in the "reset hole" (fig. 5) to make the appliance ready for use again.

Prior to first use: clean thoroughly
- Ensure that the mains plug is not in the wall socket.
- Never immerse the control unit with heating element and mains cord in water. Never rinse these items.


- Remove the lid (fig. 6), the frying basket (fig. 7) and the control unit with the heating element (fig. 8). Put the control unit with the heating element aside to a safe (dry) place.


- The frying pan can be removed (fig. 9) for quick and easy cleaning.
- Wash the frying basket, the lid and the hand grip in hot soapy water (fig. 10). Rinse with clean water and dry.
Deep fat frying
- Place the appliance on an horizontal, flat and stable surface.


- Pull out the mains cord completely (fig. 11).
- Using the release knob, open the lid (fig. 12).


- Press the handle knobs to fix the handgrip to the frying basket (fig. 13). Ensure that both rods of the hand grip fit securely in the corresponding holes of the frying basket (fig. 14).
- Press the handle knobs to put the hand grip into operational position (fig. 15).


- Ensure that both rods of the hand grip fit securely in the corresponding profiles of the frying basket (fig. 16).
- Fill the frying pan with oil, liquid fat or melted solid type fat to the highest indication line (fig. 17):
2.5 litres for type HD 4219;
3.5 litres for type HD 4220.
- Never mix two different types of oil and/or fat.
- Ensure that the mains cord will not touch hot surfaces and that it does not hang over the worktop edge.
- Insert the mains plug into the wall socket.


- Set the temperature knob to the position which is most appropriate for the kind of food to be fried (fig. 18). Refer to the table.
- After the pilot lamp has extinguished for the second time (after 10-15 minutes) the oil/fat is at the correct temperature.
- Open the lid and carefully lift the frying basket out of the pan (fig. 19).


- Put the food into the basket (fig. 20).
- Lower the frying basket into the pan (fig. 21). Ensure that the basket is fixed in the low position (i.e. "frying position").
- After the basket has been lowered into the pan, close the lid while cooking.
- For better overall browning, it is advised to open the lid and to lift and shake the basket a couple of times during frying (fig. 22). Be careful of steam escaping when opening the lid.

When using solid fat
New blocks of solid frying fat
- Melt the piece(s) of new solid frying fat in a separate pan on a low fire (fig. 23):
2 kg for type HD 4219; 3 kg for type HD 4220.
Please note: Always keep your eye on this
pan. Keep children away from it.
- Switch off the heat source as soon as the fat has melted.
- Place the fryer in a dry sink.
- Very carefully pour the melted fat into the fryer.
- Carefully move the filled fryer to the place where you want to use it. Then plug in and switch on.
Previously used solid frying fat which has curdled in the fryer
- Only use the melting procedure described below! Otherwise there is a risk of warm melted fat suddenly spouting from below through the still solid top layer of fat.


- Store the fryer containing solidified fat at room temperature. If the fat is very cold there is a greater risk of splashing.
- Carefully make some holes in the fat (fig. 24). Avoid damaging the heating element when doing so!
- Put the lid on the fryer.
- Switch the fryer on, selecting position 160 °C (fig. 25). Leave the lid on the fryer while the fat is melting to prevent splashing.
After frying


- After frying, hook the frying basket in the high position (i.e. "drain position") (fig. 26). Allow the fried food to drain for a while. If required you can shake the basket over the fryer to remove excess fat/oil (fig. 27).


- Remove the basket from the fryer and put the fried food in a colander with fat absorbing paper (e.g. tissue paper/kitchen roll) (fig. 28).
- After use, set the temperature knob to the lowest position (turn fully anti-clockwise), switch the fryer off (fig. 29) and remove the mains plug from the wall socket.
- Clean the fryer after the oil or fat has cooled down sufficiently.


- You can press the two knobs and tilt the hand grip backwards to store it inside the frying basket (fig. 30).
- You can push the mains cord into the appliance (fig. 31).
- Store the fryer with the lid on top. This will keep dust etc. from the pan.
"Cool Zone"
Loose food particles do not get burnt in this fryer, so that the oil/fat will remain longer in good condition. The loose particles will gather in the "cool zone" below the heating element.
After the appliance has cooled down, you can remove the control unit with heating element and mains cord, lift the frying pan out of the appliance and pour the oil/fat through a fine sieve.
Tables
The tables indicate what types of food can be prepared in one cooking cycle with the fryer, and what temperature and preparation times should be chosen.
The tables also indicate the maximum quantity per preparation for optimum results.
If you find different instructions (for the same quantities!) on the packaging of the food, follow these.
Please note which of the two tables applies to your appliance.
Fresh French fries
To obtain the nicest and most crispy fresh French fries:
- Use not too new potatoes.
- Cut the potatoes first into thick slices and then into sticks. Rinse the sticks in a colander under the cold water tap: this will prevent the fries from adhering to one another while frying. Dry the fries using e.g. kitchen towel.
- Fresh French fries must be prepared in two steps:
- firstly at 160 °C (320 °F), for 4-6 minutes.
- secondly at 190 °C (374 °F), for 2-4 minutes. During the second step shake the frying basket at small intervals; then the French fries will get a fine overall browning.
Deep frozen food
Food from your deep freezer or from the freezer compartment of your fridge (-16 to -18 °C or -1 to 3 °F) will cool down the oil/fat vastly when lowered into it, so that too much oil/fat may be absorbed.
- For that reason, do not put too big portions into the fryer.
- Let the fryer regain optimum frying temperature before you prepare a portion of deep frozen food (approx. 15 minutes).
Set the temperature knob to the frying temperature indications on the packaging of the deep frozen food. If these indications are not given, set the knob to the highest temperature (190 °C or 374 °F).
These instructions are also valid for certain types of food which require careful preparation, such as meat croquettes.
- Deep frozen French fries are pre-fried and can be fried in one step at 190 °C / 374 °F for about 5 minutes.
- Deep frozen food often contains too much ice. Shake off as much of the ice as possible in the sink. Then lower the food into the oil/fat carefully, as deep frozen articles can make the hot fat/oil bubble and splash excessively.
Tips
- Pure vegetable fat or oil containing polyunsaturated acids are often recommended by health specialists.
Please note that these types of fat and oil must be refreshed sooner than other types to maintain their good qualities.
Also, a sticky and tenacious film of fat deposits may set in the frying pan above the fat/oil level.
- Regularly replace the oil or fat. Never add fresh oil/fat to used oil/fat.
- In general, the fat/oil will be tainted rather quickly when frying food containing a lot of protein (such as meat and fish).
When the oil/fat is mainly used to deep fat fry potatoes and is filtered after each use, the oil/fat can be used ten to twelve times.
However, do not use it for more than six months.
Oil (after cooling down) can be poured into a bottle and solid fat can be wrapped in an old paper.
Solid fat inside the pan can be easily removed by heating it (at 160 °C/320 °F) until just melted. (See the instructions in section "Deep fat frying" on melting solid fat in the fryer.)
• Always replace all fat/oil as soon as it starts foaming when heated; when it has got a rancid smell or taste; when its colour has become dark and/or when it has turned syrupy. - Make sure that the food to be fried is dry, before lowering it into the hot fat/oil. - Clean the fryer with paper tissue. Do not forget the inside walls. - If you do not use the deep fat fryer frequently, you can best keep the oil in well-closed (glass) bottles; preferably in the fridge. Store fat in a well-closed (glass or stone) pot or bowl.
It is not advised to keep the fat/oil in the fryer for a long time.
If the oil/fat has a taste...
Certain types of food (esp. fish) may lose some fluid while being deep fat fried. This juice might adversely affect the taste of food to be fried later in the same oil/fat. To remove (or rather to prevent) this taste heat the oil/fat to 160 °C / 320 °F. Then fry two thin slices of bread (5-6 mm, or 0.25"). Wait until all the air bubbles have disappeared and the bread is brown all over. Then take the bread out of the fryer and discard it. Now the oil/fat has a neutral taste again.
Cleaning
• Always remove the mains plug from the wall socket before cleaning. • Always dry the inside and the outside of the fryer thoroughly after cleaning.
- Outside and control unit:
- Remove the control unit with the heating element for easy cleaning (fig. 32).
- Wipe the housing and the control unit clean with a damp cloth (if so required add some detergent) and/or paper tissue.
• Frying pan, frying basket, hand grip:
- Pour the oil or liquid fat out of the frying pan (fig. 33).
- Remove fat / oil residue from the inside of the frying pan with a spatula and kitchen paper.
- Pour hot water with a washing-up agent into the fryer. Ensure that the level of this soapy water is a little higher than that of the oil / fat you have used.
- Allow the soapy water to act for 30 minutes.
- Wash the frying pan with a brush and/or a plastic (nylon) scouring pad.
- Empty the frying pan and rinse it with hot water.
- Wash the frying basket in hot water with a washing-up agent and rinse it well. Do not clean the basket in a dishwasher.


• Lid and permanent filter:
Your deep fat fryer is equipped with a permanent vapour filter. We advise you to clean this metal filter at regular intervals.


- Open the fryer lid. Put the lid in upright position and pull it out of its hinges (fig. 34).
- Put the entire lid into hot soapy water and let it soak there for five to ten minutes (fig. 35).
- Rinse the lid with hot water. Shake the remaining water out of the lid and let it dry.


- For thorough cleaning you can unscrew the four screws which hold the permanent filter (fig. 36). Subsequently you can take the filter out of the lid (fig. 37).
Type HD 4219 (2.5 litres version)
| Temperature Type of food Max quantity per preparation Frying time *) unfrozen frozen (minutes) | |||
| 160 °C Chicken (fillet, 250 g 200 g 15-20 (320 °F) drumsticks)* | |||
| 170 °C Shrimp fritters 4 pcs. 2-4 (340 °F) Mussels 12 pcs. 3-4 Meat balls (small) | 10 pcs. 4-5 | ||
| 180 °C Cheese croquettes* 5 pcs. (356 °F) Apple fritters 4 pcs. 4-5 Fish fingers/fillet* Cheese fritters Cordon bleu | 3-4 pcs. 3-4 5 pcs. 3-4 pcs. 4 pcs. 2-4 2 pcs. 3-4 | 3-5 | |
| 190 °C French fries** (374 °F) Doughnuts ** 350 g 250 g 5-6 3 pcs. 2-3 Ball fritters Meat croquettes* Fish croquettes* Sliced potato* Wiener Schnitzel | 3 pcs. 2-3 4 pcs. 3-4 pcs. 5 pcs. 3-4 pcs. 350 g 300 g 4-5 1-2 pcs. | 5-7 4-5 3-5 | |
Type HD 4220 (3.5 litres version)
| Temperature Type of food Max quantity per preparation Frying time *) unfrozen frozen (minutes) | |||
| 160 °C Chicken (fillet, 300 g 250 g 15-20 (320 °F) drumsticks)* | |||
| 170 °C Shrimp fritters 5 pcs. 2-4 (340 °F) Mussels 15 pcs. 3-4 Meat balls (small) | 15 pcs. 4-5 | ||
| 180 °C Cheese croquettes* 5 pcs. (356 °F) Apple fritters 5 pcs. 4-5 Fish fingers/fillet* Cheese fritters Cordon bleu | 4 pcs. 3-4 6 pcs. 5 pcs. 5 pcs. 2-4 3 pcs. 3-4 | 3-5 | |
| 190 °C French fries** (374 °F) Doughnuts 4 pcs. 2-3 Ball fritters Meat croquettes* Fish croquettes* Sliced potato* Wiener Schnitzel | 450 g 350 g 5-6 4 pcs. 2-3 4 pcs. 2-3 5 pcs. 4-5 pcs. 6 pcs. 4-5 pcs. 450 g 400 g 4-5 2 pcs. 3-5 | 6-7 4-5 | |
*) For frozen food the preparation times may be longer than indicated.
**) For new French fries please refer to section "French fries".
Important


Housing (Cool wall)
R Snoer
S Snoeropbergplaats
T Typeplaatje
Extra veiligheid


CLEAN THE FRYER THOROUGHLY BEFORE USING IT FOR THE FIRST TIME


HOW TO USE SOLID FAT


- Check that the two handle clips are securely attached to the corresponding supports on the frying basket (fig. 16).
- As soon as the fat has melted, turn off the heat.


- IMPORTANT
- GENERAL DESCRIPTION (FIG. 1)
- EXTRA SAFETY
- PRIOR TO FIRST USE: CLEAN THOROUGHLY
- DEEP FAT FRYING
- WHEN USING SOLID FAT
- NEW BLOCKS OF SOLID FRYING FAT
- PREVIOUSLY USED SOLID FRYING FAT WHICH HAS CURDLED IN THE FRYER
- AFTER FRYING
- COOL ZONE
- TABLES
- FRESH FRENCH FRIES
- DEEP FROZEN FOOD
- TIPS
- IF THE OIL/FAT HAS A TASTE
- CLEANING
- LID AND PERMANENT FILTER
- EXTRA VEILIGHEID
- CLEAN THE FRYER THOROUGHLY BEFORE USING IT FOR THE FIRST TIME
- HOW TO USE SOLID FAT
Brand : PHILIPS
Model : HD4219
Category : Deep fryer