DSB 123 LH - Air Conditioning DAEWOO - Free user manual and instructions
Find the device manual for free DSB 123 LH DAEWOO in PDF.


| Product Type | Split Air Conditioner (Cooling Only) |
| Brand | Daewoo |
| Model | DSB 123 LH |
| Cooling Capacity (BTU/h) | 12,000 |
| Power Supply | 220-240V, 50Hz, 1 Phase |
| Indoor Unit Dimensions (W x H x D) | 800 x 275 x 200 mm |
| Outdoor Unit Dimensions (W x H x D) | 800 x 550 x 300 mm |
| Indoor Unit Weight | 10 kg |
| Outdoor Unit Weight | 35 kg |
| Refrigerant | R32 |
| Airflow (High Speed) | 600 m³/h |
| Energy Efficiency Ratio (EER) | 3.0 W/W |
| Noise Level (Indoor) | 35 dBA (Low), 45 dBA (High) |
| Noise Level (Outdoor) | 55 dBA |
| Functions | Cool, Fan, Dry, Sleep, Timer, Auto Restart |
| Control | Remote Control (Infrared) with LCD Display |
| Filter | Washable Mesh Filter (Antibacterial optional) |
| Installation | Wall-mounted indoor unit, ground or wall-mounted outdoor unit |
| Maintenance | Clean filter every 2 weeks; professional service annually |
| Safety Features | Auto shut-off at high pressure, compressor delay timer, overload protection |
| Repairability | Spare parts available via authorized Daewoo service centers |
| Warranty | 1 year on parts, 5 years on compressor (subject to terms) |
Frequently Asked Questions - DSB 123 LH DAEWOO
User questions about DSB 123 LH DAEWOO
0 question about this device. Answer the ones you know or ask your own.
Ask a new question about this device
Download the instructions for your Air Conditioning in PDF format for free! Find your manual DSB 123 LH - DAEWOO and take your electronic device back in hand. On this page are published all the documents necessary for the use of your device. DSB 123 LH by DAEWOO.
USER MANUAL DSB 123 LH DAEWOO
This air conditioner meets strict safety and operating standards. The installer of this unit must install or service this unit so it operates safely and efficiently.
IMPORTANT NOTES
- Adhere to all safety instructions and warnings throughout this manual.
- Read this manual carefully before installing or operating this unit to become familiar with its features and obtain the performance that will bring you continued enjoyment for many years.
- Follow each installation or repair step exactly as shown in the manual.
- Observe all local, state and national electric codes. Contact your local government for more information on electrical codes.
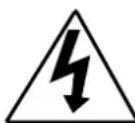
The lightning flash with arrowhead symbol, within an equilateral triangle is intended to alert the user to the presence of uninsulated dangerous voltage within the product's enclosure that may be of sufficient magnitude to constitute a risk of electric shock to persons.

The exclamation point within an equilateral triangle is intended to alert the user to the presence of important operating and maintenance (servicing) instructions in the literature accompanying the appliance.
Contact Installer if Necessary:
The installation instructions are for a experienced installer. If you are not an experienced installer, contact a local installer for help. If you require help with service, contact your certified dealer or Daewoo Electronics for additional instructions.
If Unit is Installed Improperly:
The manufacturer shall in no way be responsible for improper installation or maintenance service, including failure to follow the instructions in this manual.
WARNING:
- ELECTRICAL SHOCK CAN CAUSE SEVERE PERSONAL INJURY OR DEATH. ONLY A QUALIFIED, EXPERIENCED ELECTRICIAN/INSTALLER SHOULD ATTEMPT TO WIRE THIS SYSTEM.
- THE APPLIANCE IS NOT INTENDED FOR USE BY CHIL- DRENOR INFIRM PERSONS WITHOUT SUPERVISION.
- YOUNG CHILDREN SHOULD BE SUPERVISED TO ENSURE THAT DO NOT PLAY WITH THE APPLIANCE
Precautions When Wiring:
- Do not plug in the unit until all connections (tubing, drain hose, mounting, etc.) have been made and double-checked.
- High voltages are present in this unit and are very dangerous. Please refer to these instructions and diagrams when wiring. Improper connections or inadequate grounding can cause accidental injury.
- This unit must be grounded in accordance with local electrical codes.
- Connect wires and pipes securely and tightly as loose connections/wiring may cause overheating at connections and a possible fire hazard.
Precautions When Transporting:
- When transporting the unit, be very careful and get help as the units are very heavy. Be careful of sharp edges on the units also.
Precautions When Installing:
- When installing in a ceiling or wall, make sure the ceiling/wall is strong enough to hold the unit's weight. A frame may be necessary for added support.
- When installing in a room, make sure the tubes are well insulated to protect the walls and furniture from sweating of the tubes.
- When installing in moist or uneven locations, make sure to use a raised level concrete pad or concrete blocks to provide a level, solid foundation for the outdoor unit; this prevents water damage and vibration.
- When installing in an area of high winds, make sure to securely anchor the outdoor unit down with bolts and a metal frame.
When Connecting Refrigerant Tubing:
- Keep all tubing as short as possible.
- Use the flare method for connecting tubing.
- Apply refrigerant lubricant to the matching surfaces of the flare and union tubes before connecting them, then tighten, making sure not to overtighten.
- Check the tubes carefully for leaks before starting the test run.
When Servicing:
- Make sure the power is off and the unit is unplugged before opening the unit to troubleshoot or repair electrical parts and wiring.
- Keep your fingers and clothing away from any moving parts.
- Clean up the sight after you finish, making sure no metal scraps and wiring are left in the unit.
- The Air conditioner shall be installed in accordance with the na-tioned wiring regulation.
- The equipment fulfills the requirements in EN 61 000-3-11 and is subject to conditional connection to the mains.
- It may be connected in consultation with the supply authority.
- The equipment may only be connected to a mains supply with a system impedance of less than 0.3 ohm.
- The system impedance in the interface point may be obtained from the supply authority.
- If the mains supply has a higher system impedance, short voltage dips may appear when the equipment is started or during operation.
- This may influence or disturb the operation of other apparatuses, e.g. flickering lamps, especially those connected to the same supply mains.
ROOM AIR CONDITIONER INSTRUCTION
Remark per EMC Directive 89/336/EEC
To prevent flicker impressions during the start of the compressor (technical process) following installation conditions do apply.
- The power connection for the air conditioner has to be done at the main power distribution. This distribution has to be of an low impedance. Normally the required impedance is reached at a 32A fusing point. Air conditioner fuse has to be 16A max!
- No other equipment has to be connected to this power line.
- For detailed installation acceptance please refer to your contract with the power supplier. If restrictions do apply for products like washing machines, air conditioners or electrical ovens.
- For power details of the air conditioner refer to the rating plate of the product.
CONSIGINES D'INSTALLATION RACCORDEMENT ELECTRIQUE
It is recommended that you read the Installation and Operating instructions fully before installing and/or operating this unit.
Safety Instructions....1
Contents....3
Location of Controls....4
Indoor Unit....4
Outdoor Unit 4
Remote Controller 6
Remote Display....6
Operation....10
Connecting the AC Cord....10
Setting the Unit for Remote Operation....10
How to Install Batteries ....11
Celsius to Fahrenheit Conversion Chart....11
To Set Auto Mode 12
To Set Quick Mode 12
To Set Cool Mode 12
To Set Fan Only Mode....13
To Set Dehumidifier Mode 13
To Set Heat Mode (DSB-123LH/123PH Only) 14
To Select The Fan Direction 14
To Set Air-Cleaning (PLASMA) Mode (DSB-123PH)....15
To Set Air-Cleaning (OXYGEN) Mode (DSB-123AH)....16
To Set On Timer Mode 17
To Set Off Timer Mode....17
To Set Unit to Sleep Mode....18
To Set Turbo/Mild Mode 18
Emergency Operation....18
Changing/Cleaning the Air Filters....19
Cleaning the Indoor Cover ....19
Care and Maintenance 20
Troubleshooting Guide....21
LOCATION OF CONTROLS
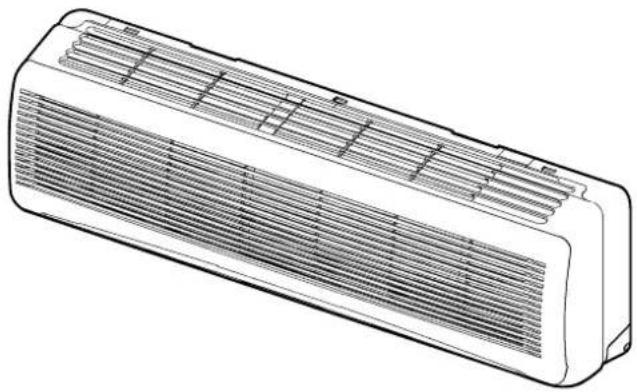
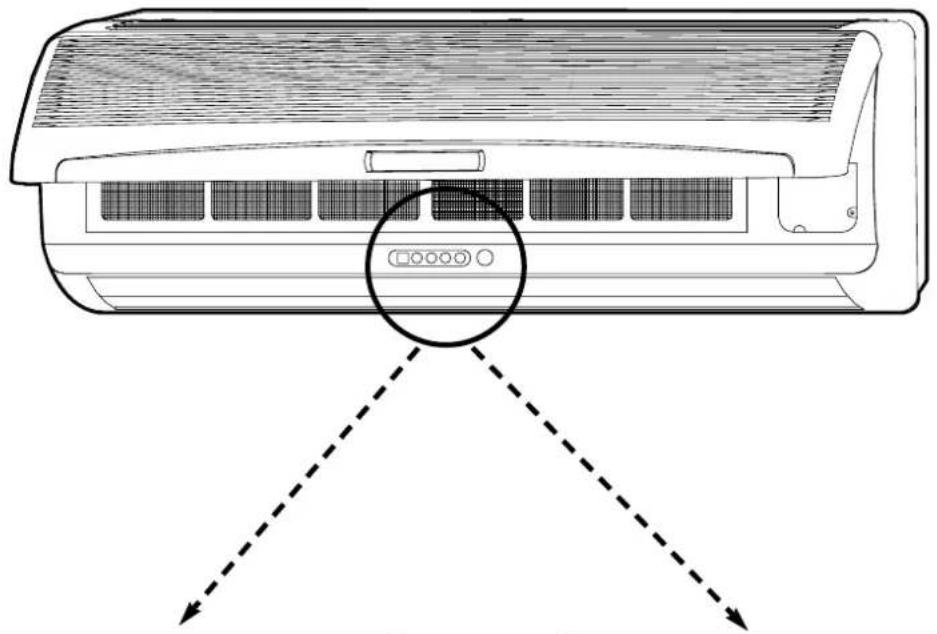
INDOOR UNIT

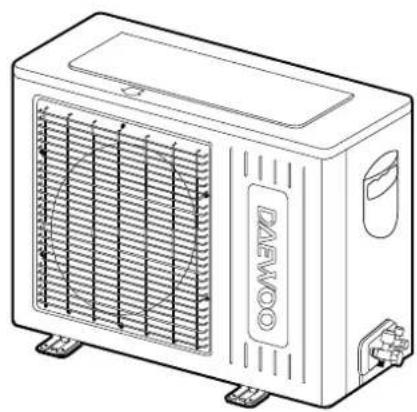
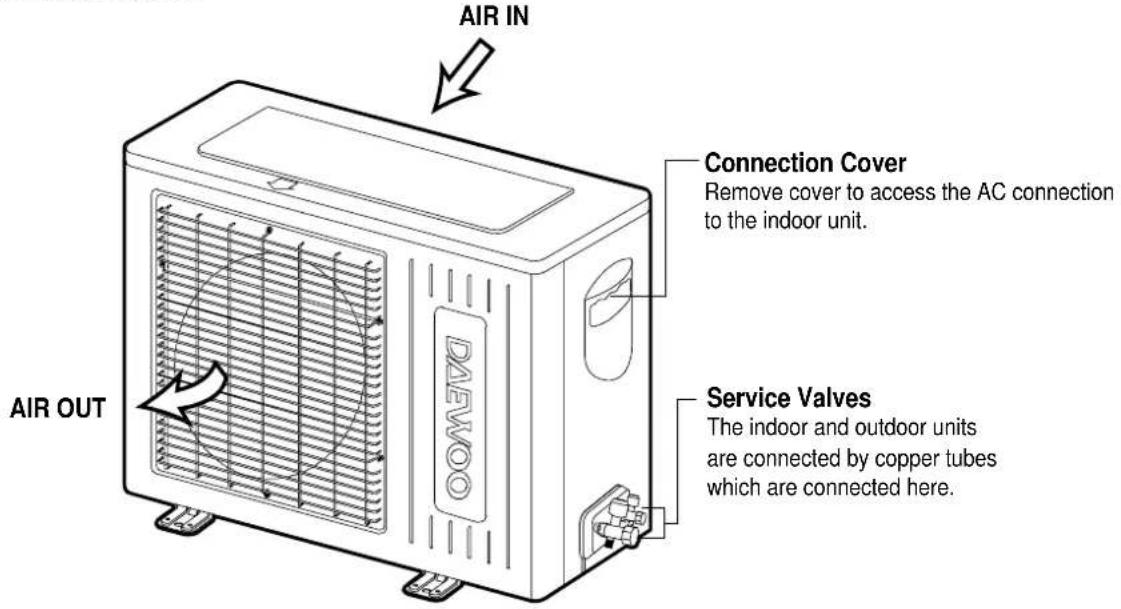
OUTDOOR UNIT
INDOOR UNIT
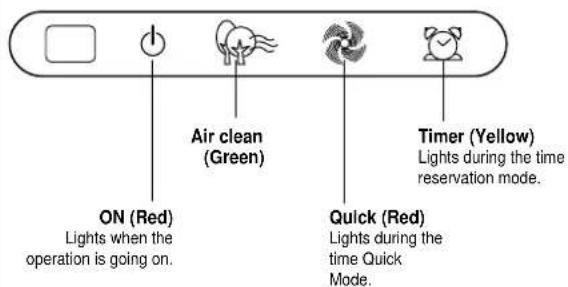
Indoor Unit Display Sw....Panel
■Remote Control Signal Receiver
This place is the part to receive the signal if it receives the signal, you can hear the signal "beep. beep".
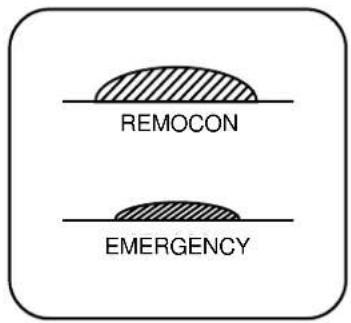
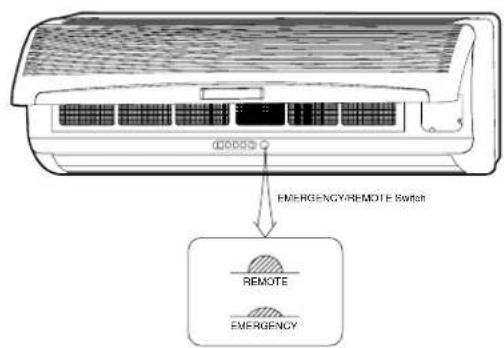
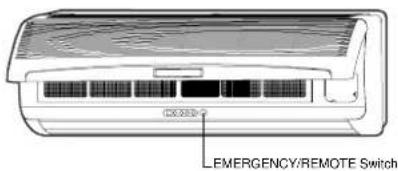
■There is a switch panel at inside of Front Panel. At the time of operating, open the Front Panel.
Emergency switch can be used when the remote controller is lost or Testing.
Remote switch is usually used by remote controller.
DSB-123L/DSB-F123L
REMOTE CONTROLLER

REMOTE DISPLAY
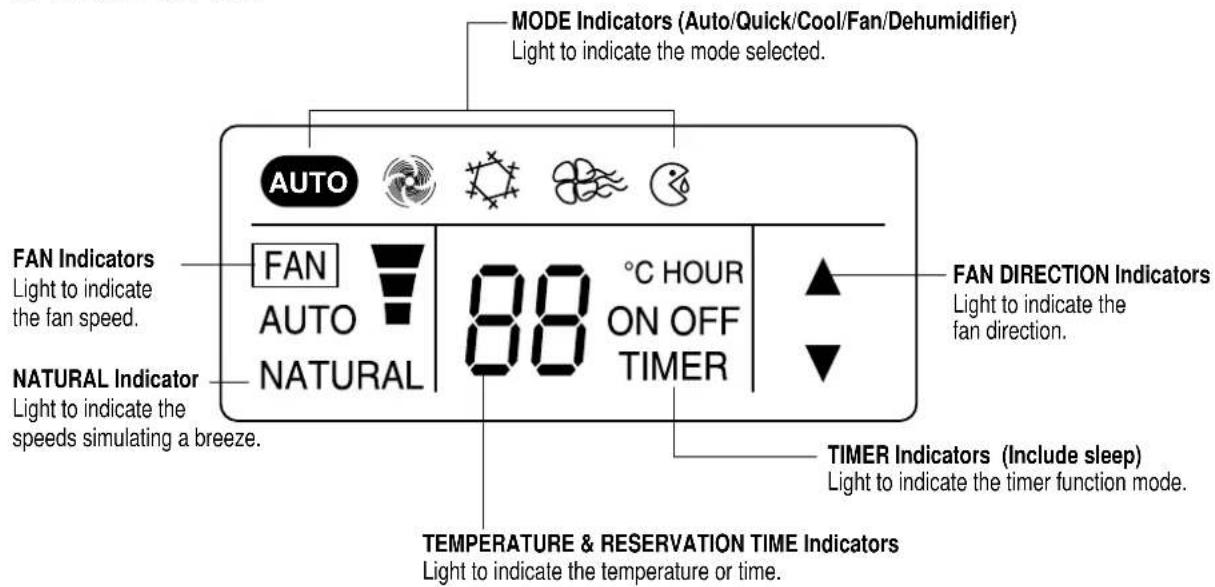
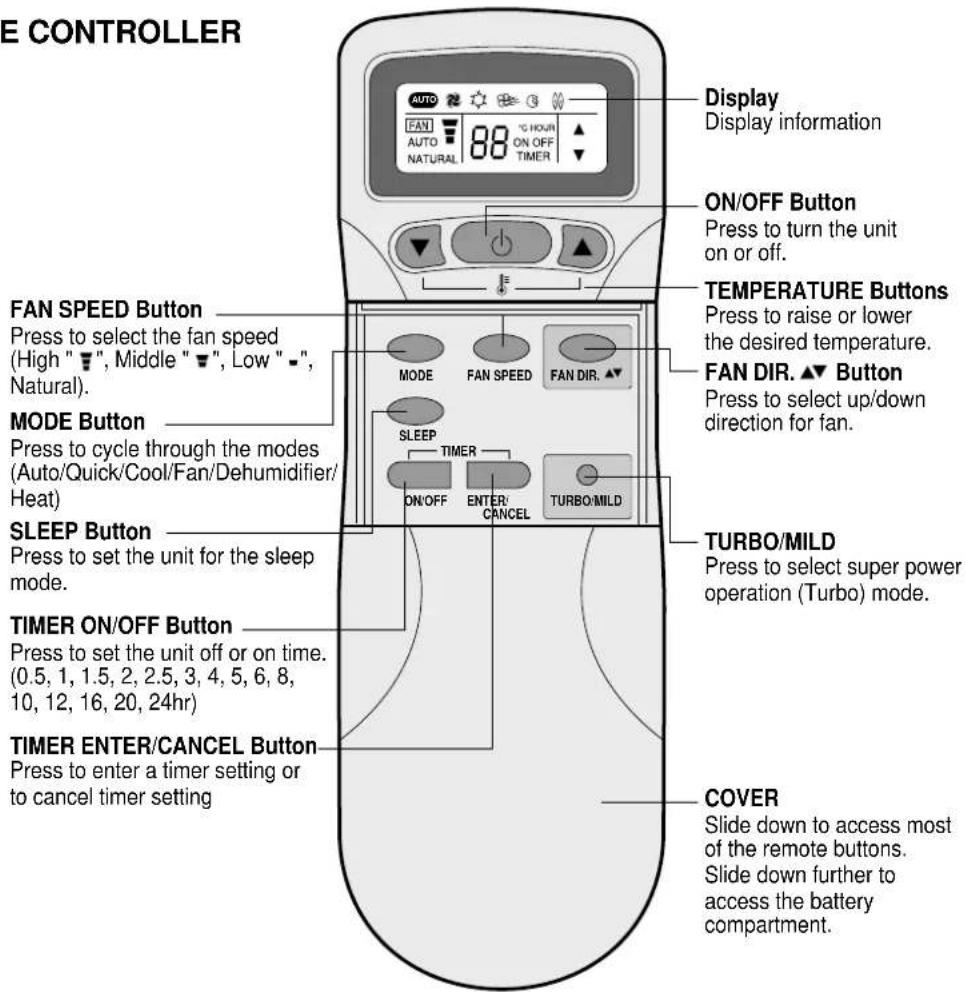
DSB-123LH
REMOTE CONTROLLER
REMOTE DISPLAY
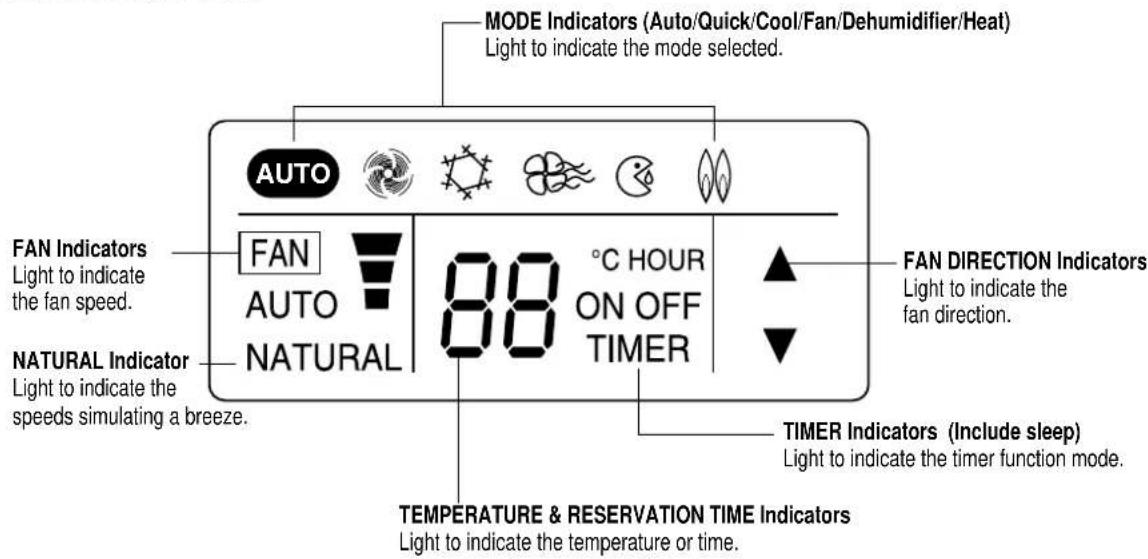
DSB-123PH
REMOTE CONTROLLER
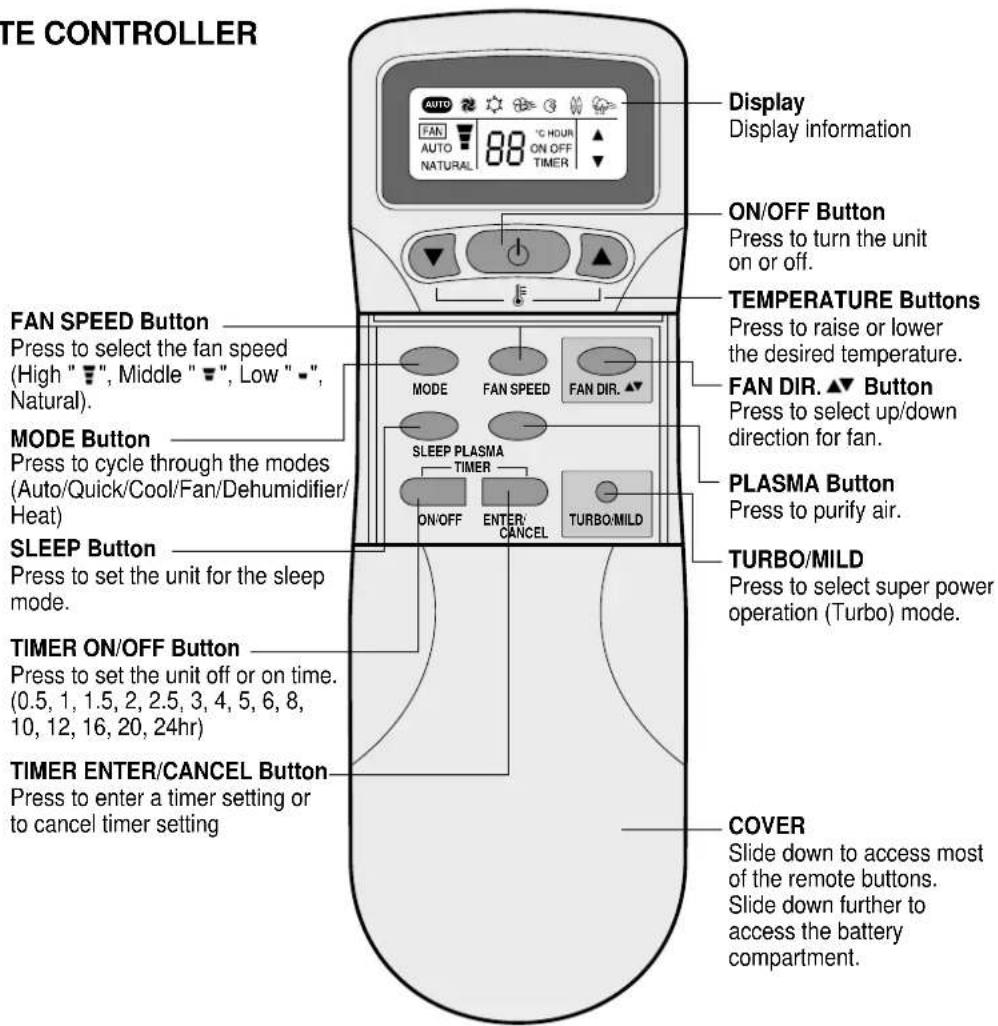
REMOTE DISPLAY
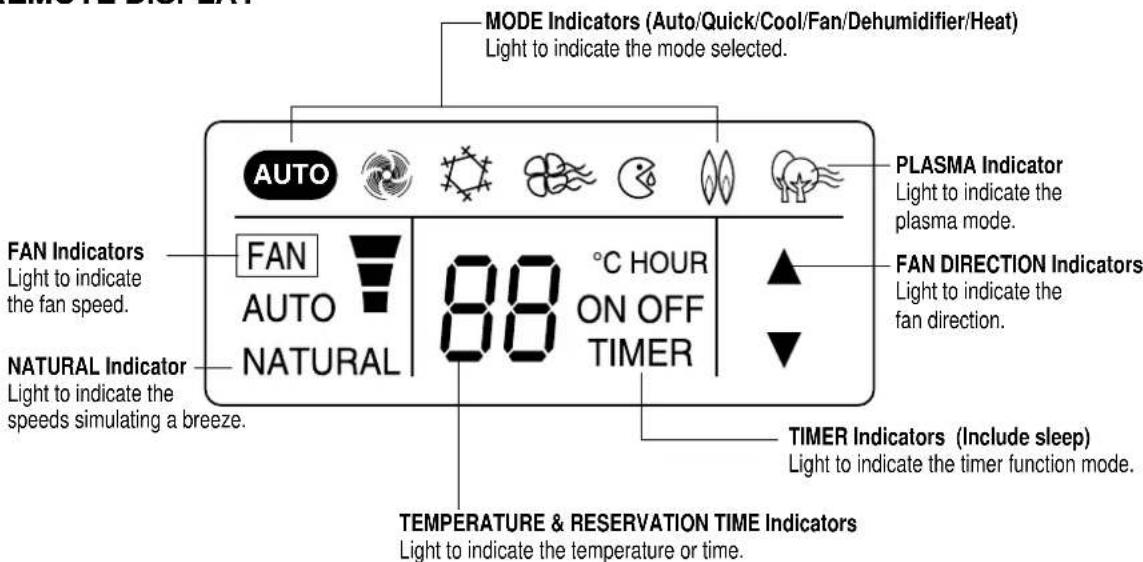
DSB-123AH
REMOTE CONTROLLER
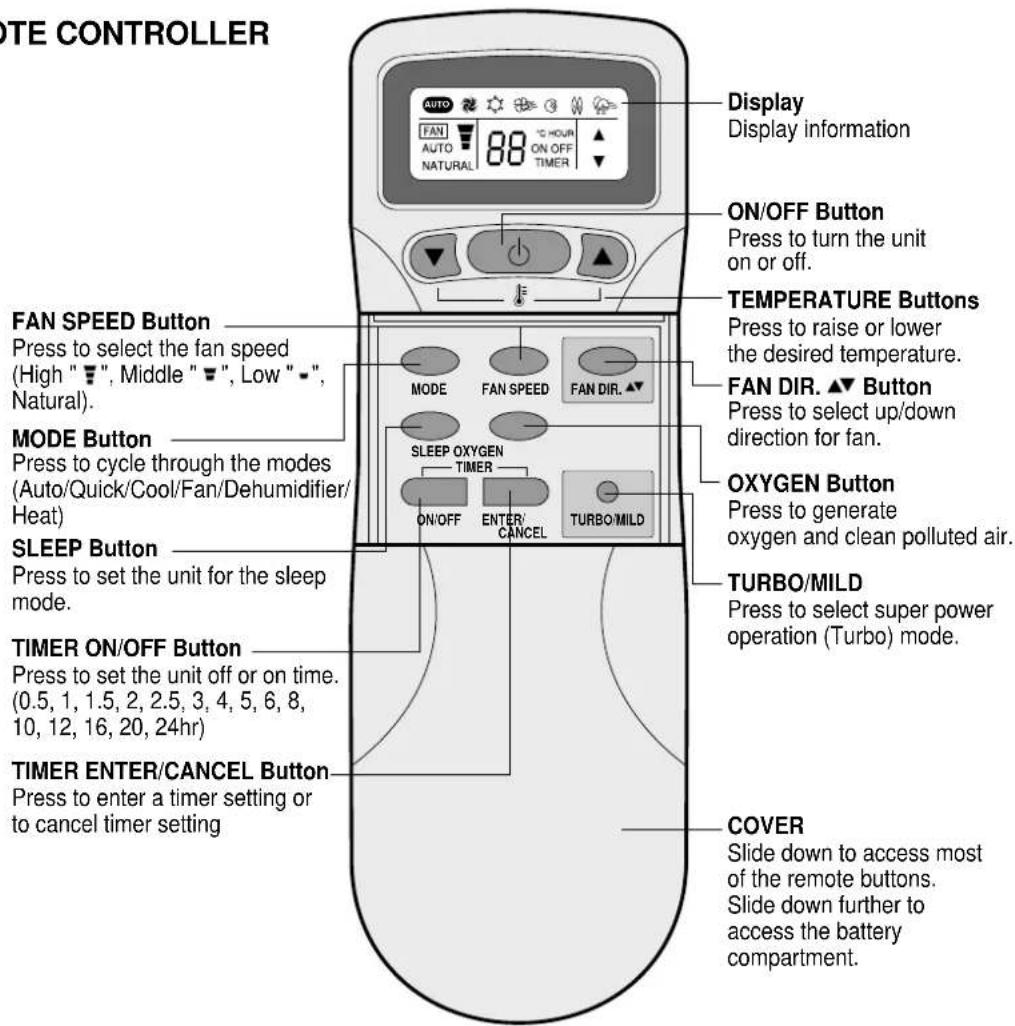
REMOTE DISPLAY
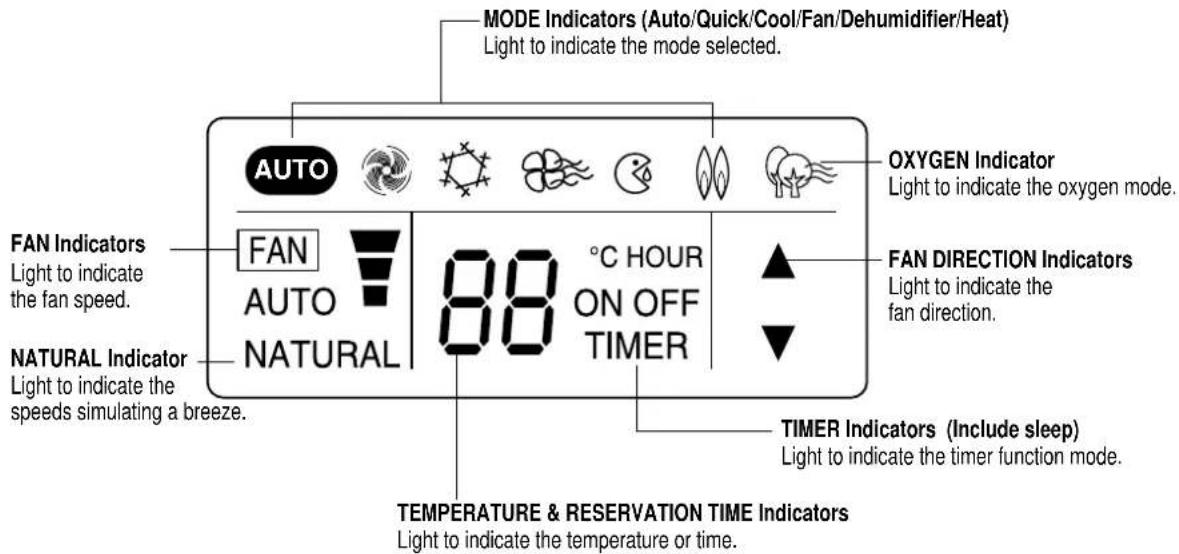
OPERATION
CONNECTING THE AC CORD
The outdoor unit is connected to the indoor unit through the AC connecting wire or connection cord. To connect the indoor unit to AC, follow the procedures below:
- Insert the attached AC plug into a 2-pronged only 220V or 220V-240V AC outlet.
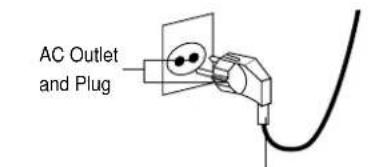
Plug into only 220V or 220V-240VAC Outlet.
NOTES:
- Never connect the AC line cord plug to other than the specified voltage (only 220V or 220-240V).
- Use the attached power cord only.
- If the outlet is a 3-pronged type or others, have an electrician install a new outlet.
- The new air conditioner system should be on it's own 220V circuit. Contact your local electrical installer for installation.
INFORMATION:
- The plug shall be connected to a ground socket outlet, and the interconnection cord shall be connected by an authorized electrician or specialist.
- Information for interconnection cable:
| Items Specifications | |
| Under 12K class AC 250V, 16A, H05VV-Fx1.0m | 2 |
| Above 12K class AC 250V, 16A, H05VV-Fx1.5m | 2 |
- Contact service man for the installation shall be in accordance with national wiring regulation
After the unit is fully connected and plugged in, it can be turned on. To turn the unit on and set it for remote operation, follow the procedures below:
- Open the indoor unit's cover and make sure the EMERGENCY/REMOTE switch is set to the REMOTE position; this will allow the unit to operate with the remote controller.
- Press the ON/OFF button on the remote controller to turn on the unit. The On LED will light on the indoor unit and "ON" will light in the remote display. To select the various modes and settings, read the following pages.
THREE MINUTE COMPRESSOR DELAY
• After turning the indoor unit on and setting it for air conditioner operation, the compressor (outdoor unit) will not come on for three minutes. This is a feature that will protect the compressor from damage due to quick start and stops.
HOW TO INSTALL BATTERIES
To install the batteries, follow the procedures below:
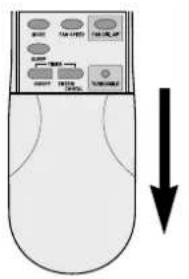
- Slide down the cover to access most of the remote buttons. Slide down further to access the battery compartment.
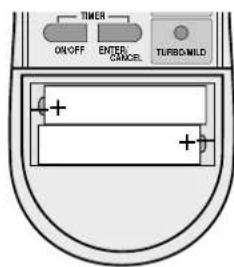
- Insert two "AAA" size Alkaline batteries following the polarity diagram below.
BATTERY PRECAUTIONS
The precautions below should be followed when using batteries in this device:
- Use only the size and type of batteries specified.
- Be sure to follow the correct polarity when installing the batteries as indicated in the battery compartment. Reversed batteries may cause damage to the device.
- Do not mix different types of batteries together (e.g. Alkaline and Carbon-zinc) or old batteries with fresh ones.
- If the device is not to be used for a long period of time, remove the batteries to prevent damage or injury from possible battery leakage.
- Do not try to recharge batteries not intended to be recharged; they can overheat and rupture. (Follow battery manufacturer's directions).
CELSIUS TO FAHRENHEIT CONVERSION CHART
| CELSIUS FAHRENHEIT | CELSIUS FAHRENHEIT |
| 18 64.4 | 26 78.8 |
| 19 66.2 | 27 80.6 |
| 20 68 | 28 82.4 |
| 21 69.8 | 29 84.2 |
| 22 71.6 | 30 86 |
| 23 73.4 | 31 87.8 |
| 24 75.2 | 32 89.6 |
| 25 77 |
NOTES:
- When operating the remote controller, make sure there are no obstructions between the remote controller and the remote sensor.
• After a while the display goes blank to conserve battery power. To check the settings, press the ON/OFF button once.
TO SET AUTO MODE
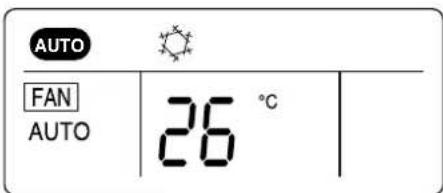
This unit will automatically operate the unit according to its surroundings while in the Auto mode. All you have to set is the desired temperature and it will control the fan, coolness and dehumidifier. Follow procedures below:
- Press the ON/OFF button on the remote control to turn the unit on; the On LED will light on the indoor unit and "ON" will light in the remote display.

-
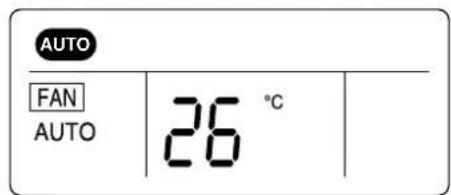
Make sure the AUTO indicator AUTOears in the remote display. Using the TEMP. ▼ or ▲ buttons, set the desired temperature. The desired temperature can be changed up or down 1 degree from the actual room temperature. For temperature setting: 24\~28°C
-
Then the unit will automatically operate.
TO SET QUICK MODE
To set this unit to cool at the highest power, follow the procedures below:
- Press the ON/OFF button on the remote control to turn the unit on; the On LED will light on the indoor unit and "ON" will light in the remote display.
- Press the MODE button until the Quick indicator appears in the display.

- The unit will then start cooling the room at the highest power.
TO SET COOL MODE
To set the unit to cool the room to a desired temperature, follow the procedures below:
- Press the ON/OFF button on the remote control to turn the unit on; the On LED will light on the indoor unit and "ON" will light in the remote display.
- Press the MODE button until the Cool indicator appears in the display.

- Using the TEMP. ▼ or ▲ buttons, set the desired temperature. The desired temperature can be changed up to 32°C and down to 18°C.
- To select the fan speed, press the FAN SPEED button until the desired speed appears in the display (see below).
FAN SPEEDS
"AUTO" The fan will automatically select the fan speed. "-" The fan will operate on low speed. "?" The fan will operate on medium speed. "?" The fan will operate on high speed.
“NATURAL” The fan will randomly cycle through the speeds simulating a cool breeze.
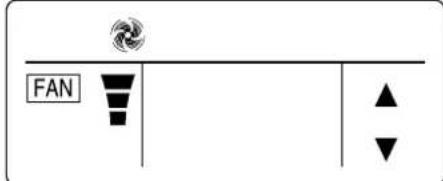
TO SET FAN ONLY MODE
To operate only the fan so the unit will circulate the air, proceed as follows:
- Press the ON/OFF button on the remote control to turn the unit on; the On LED will light on the indoor unit and "ON" will light in the remote display.
- Press the MODE button until the Fan indicator appears in the display. No allowance setting temperature
- To select a fan speed, press the FAN SPEED button until the desired speed appears in the display (see below).
FAN SPEED
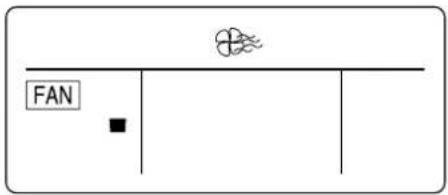
FAN SPEEDS
“—” The fan will operate on low speed.
“▼” The fan will operate on medium speed.
“” The fan will operate on high speed.
“NATURAL” The fan will randomly cycle through the speeds simulating a breeze.
NOTE:
- If "NATURAL" is selected, the NATURAL" indicator on the indoor unit will light.
TO SET DEHUMIDIFIER MODE
Select this mode when there is high humidity. To select, follow the procedures below.
- Press the ON/OFF button on the remote control to turn the unit on; the On LED will light on the indoor unit and "ON" will light in the remote display.
- Press the MODE button until the Dehumidifier indicator appears in the display.
- Using the TEMP. ▼ or ▲ buttons, set the desired temperature. The desired temperature can be changed up to 32°C and down to 18°C.
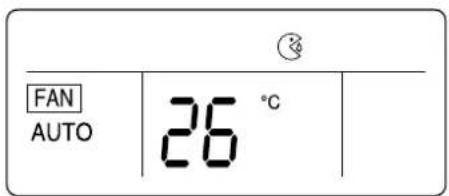
TO SET HEAT MODE (DSB-123LH/123PH/123AH ONLY)
To set the unit to heat the room to a desired temperature, follow the procedures below:
- Press the ON/OFF button on the remote control to turn the unit on; the On LED will light on the indoor unit and "ON" will light in the remote display.
- Using the TEMP. ▼ or ▲ buttons, set the desired temperature. The desired temperature can be changed up to 32°C and down to 18°C.
- Press the MODE button until the Heat indicator appears in the display. In the heat mode, the fan direction ▼ or ▲ is further downward than that in the cool mode for the good circulation.

MODE
- To select the fan speed, press the FAN SPEED button until the desired speed appears in the display (see below).
FAN SPEED
NOTE: When the heating operation is started, hot air delivery might be delayed due to warming up period.
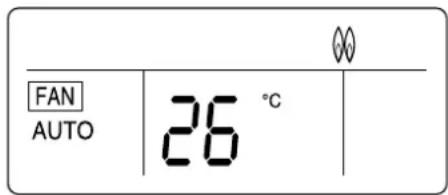
FAN SPEEDS
"AUTO" The fan will automatically select the fan speed.
“—” The fan will operate on low speed.
“▼” The fan will operate on medium speed.
“?” The fan will operate on high speed.
“NATURAL” The fan will randomly cycle through the speeds simulating a cool breeze.
TO SELECT THE FAN DIRECTION
Regardless of the mode the unit is set for, the fan direction can be changed so it moves up and down, left and right or both. Follow procedures below to set fan direction.
- Press the ON/OFF button on the remote control to turn the unit on; the On LED will light on the indoor unit and "ON" will light in the remote display.
- Press the MODE button to select the desired mode.
MODE
- Press the FAN DIR. button to select the fan direction. See chart below for detailed information on each of the three settings.

FAN DIR. First Press The air will flow up and down.
Second Press Normal air direction.
TO SET AIR-CLEANING (PLASMA) MODE (DSB-123PH)
Press PLASMA button to set Air-cleaning Mode
-
Air-cleaning mode is available while the unit is on auto mode, strong air-conditioning mode air-conditioning mode, ventilation mode, or dehumidification mode.
-
If you need air-conditioning and air-cleaning mode at the same time, press the PLASMA button while air-conditioning mode is on.
-
The unit keeps your rooms agreeable as the unit removes tiny impurities such as poisonous gas, small dust, cigarette smoke etc. which the other filters have not filtrated.

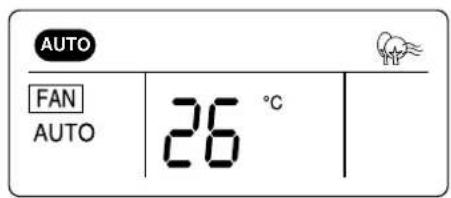
- If you need air-cleaning only, press the PLASMA button while the unit is off. Air-cleaning mode may be on independently all the year round.
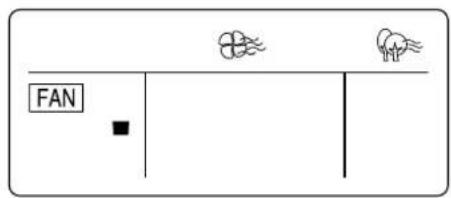
NOTES:
- While air-cleaning mode is on, there may be a fishlike smell due to a small amount of ozone, which is harmless to health.
- Press the PLASMA button if you cancel air-cleaning mode.
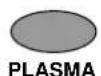
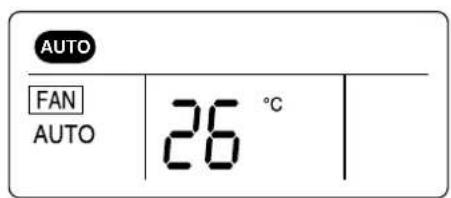
What's the air-cleaning plasma?
- With different air purity way using light, the polluted air (such as poisonous gas, small dust, cigarette smoke, germs etc.) that goes through the purity device with plasma is removed after being collected by ionization process and a separate antibiosis active carbon filter as a deodorization function purifies polluted air into fresh one in the forest.
TO SET AIR-CLEANING (OXYGEN) MODE (DSB-123AH)
To operate oxygen generation mode, follow the procedures as below.
-
Oxygen generation mode is available while the unit is on auto mode, strong air-conditioning mode, air-conditioning mode, ventilation mode, or dehumidification mode.
-
If you need air-conditioning and oxygen generation mode at the same time, press the OXYGEN button while air-conditioning mode is on.
-
The adequate oxygen give agreeable and healthful environments as the forest. Further, you need not open the door in order to ventilate room air.

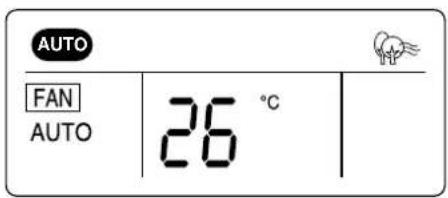
- If you need oxygen generation only, press the OXYGEN button while the unit is off. Oxygen generation mode may be on independently all the year round.

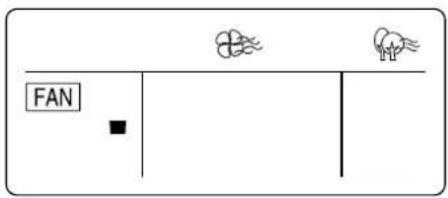
- Press the OXYGEN button if you cancel air-cleaning mode.

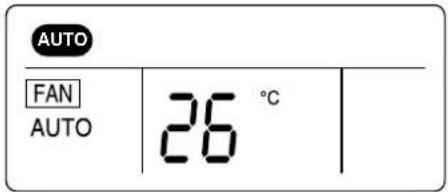
NOTES:
- You must use oxygen generation function above 0°C because of destructions of main parts. In the case of below 0°C , oxygen generation function is not operated and ventilation function supplies fresh outdoor air.
- With using long time, the air filter function is degraded by various particles.
Therefore, you can call A/S center and should check it usually every year.
What's the oxygen generation?
- The adequate oxygen (about 22% ) helps us agreeable and healthful. Oxygen generation system applies to membrane which can separate oxygen from the air by using the difference of physical and chemical molecular properties.
TO SET ON TIMER MODE
This unit can be set to automatically turn on after a predetermined amount of hours (up to 24) in the order of 0.5, 1, 1.5, 2, 2.5, 3, 4, 5, 6, 8, 10, 12, 16, 20, 24.
-
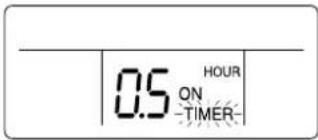
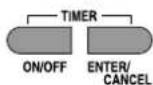
Press the ON/OFF button of timer on the remote control to set the on timer mode, "HOUR" and "ON" on the remote display will be displayed and "TIMER" will be flicked. When you increase to press "ON/OFF" you will get desired time. Then, if pressing "ENTER/CANCEL" button, ON TIMER Mode will be started. If you want to stop ON TIMER Mode, please press "ENTER/CANCEL" again.
-
While the unit is off, press the TIMER ON button; the display will light waiting input for the timer, but the actual unit will not turn on.
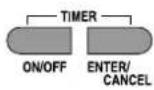
- Repeatedly press the TIMER ON button until the desired hour that you want the unit to turn on appears on the display. For example, if it is 1:00 P.M. and you want the unit to turn on at 4:00 P.M., select 3 hours.

- Place the remote controller so it is facing the unit. When the desired hour is reached, the unit will turn on to the selected mode.
NOTE : Press the ENTER button within 5 seconds of selecting the desired time. If note than 5 seconds elapse, steps 3 and 4 must be repeated.
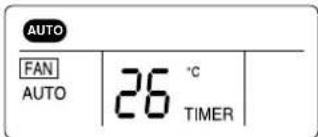
- Press the ENTER button to input the setting into memory; the unit will beep, the TIMER indicator will light on the unit and the TIMER indicator on the remote will light to indicate the unit is in the timer mode.
TO SET OFF TIMER MODE
This unit can be set to automatically turn off after a predetermined amount of hours (up to 12) in the order of 0.5, 1, 1.5, 2, 2.5, 3, 4, 5, 6, 8, 10, 12, 16, 20, 24.
-
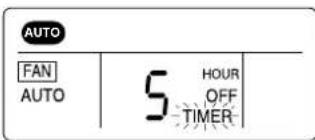
Press the ON/OFF button of timer on the remote control to set the off timer mode, "HOUR" and "OFF" on the remote display will be displayed and "TIMER" will be flicked. When you increase to press "ON/OFF" you will get desired time. Then, if pressing "ENTER/CANCEL" button, OFF TIMER Mode will be started. If you want to stop OFF TIMER Mode, please press "ENTER/CANCEL" again.
-
Press the TIMER OFF button once to enter the Timer screen.

- Repeatedly press the TIMER OFF button until the desired hour that you want the unit to shut off appears on the display. For example, if it is 8:00 P.M. and you want the unit to turn off at 10:00 P.M., select 2 hours.
- When the desired hour is reached, the unit will turn off.
NOTE: Press the ENTER button within 5 seconds of selecting the desired time. If more than 5 seconds elapse, steps 3 and 4 must be repeated.
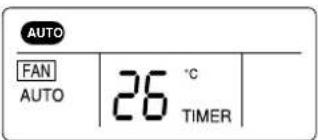
- Press the ENTER button to input the setting into memory; the unit will beep, the TIMER indicator will light on the unit and the TIMER indicator on the remote will light to indicate the unit is in the timer mode.
TO SET UNIT TO SLEEP MODE
When you are going to sleep, select this feature and the unit will cool off the room to the desired temperature and then increase that temperature throughout the night.
- Press the ON/OFF button on the remote control to turn the unit on; the On LED will light on the indoor unit and "ON" will light in the remote display.
- Press the MODE button to select the desired mode. Then, set the desired temperature using the TEMP. ▲ or ▼ buttons.
MODE
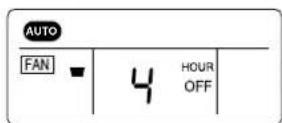
- Press the SLEEP button on the remote controller. The unit will then be in the sleep mode and will cool the room to the desired temperature. After a while the unit will increase the temperature again. This process will then repeat.

SLEEP
TO CANCEL SLEEP MODE:
To cancel sleep mode, press the SLEEP button again; the SLEEP indicator will disappear in the display.
TO SET TURBO/MILD MODE
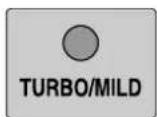
- The unit is fixed "MILD" mode on production.
- Press the "TURBO/MILD" button for powerful operation.
- When press the "TURBO/MILD" button one more time, it will be back to "MILD" mode.
EMERGENCY OPERATION
If the remote control is lost, broken or has no batteries, follow the procedures below:
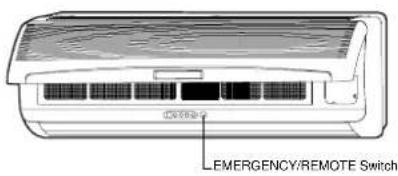
- Open the indoor unit's cover and press the EMERGENCY/REMOTE button.
-
The unit will then turn on and depending on the room temperature, it will select the cool or dehumidifier, fan speed and fan direction automatically.
-
To turn the unit off, press the EMERGENCY/ REMOTE button again.
CHANGING/CLEANING THE AIR FILTERS
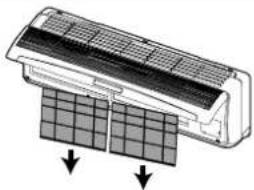
To change or clean the two black air filters, follow the procedures below:
- Open the indoor unit's cover and remove both black air filters by bending them slightly backward and the lifting out.
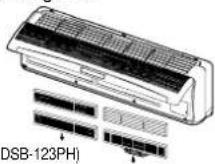
- Remove the two small filters (Deodorizing and
Electrostatic) from the indoor unit. After removing the connection terminal of electric dust collector, remove the electric dust collector. (Only DSB-123PH)
-
Examine the filters and determine if they need to be cleaned or replaced. To clean filters, use a vacuum and clean off dust. Use water and mild soap also if necessary.
-
Insert cleaned or new small filters (Deodorizing and
Electrostatic) back into the unit. After putting the connection terminal into electric dust collector, insert the electric dust collector into the unit. (Only DSB-123PH)
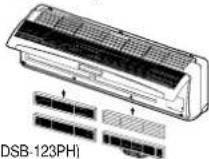
- Insert cleaned or new black filters back into the unit.
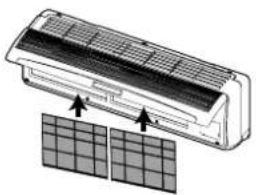
NOTES:
- The filters should be changed every 6 months. If in a climate with cold winters, once a year is adequate.
- After getting rid of vinyl bag in the filter (Deodorizing and Electrostatic), use it.

Caution : When you remove the electric dust collector, you must remove the power plug.
CLEANING THE INDOOR COVER
To clean the indoor cover, follow the procedures below:
- Remove the left and right side to open the indoor cover upward by two hands.
NOTE: Please remove or insert the indoor cover by two hands.
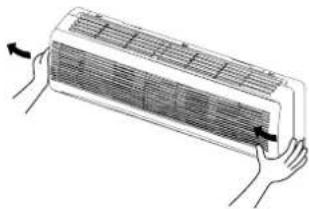
- Pushing forward the indoor cover.
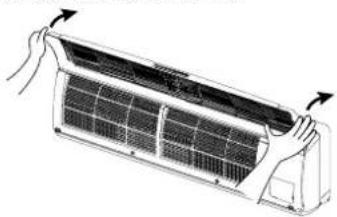
- Remove the indoor cover.
(Remove it when cleaning.)
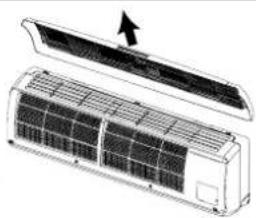
- Cleaning the indoor cover.
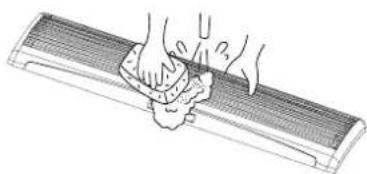
NOTES:
- Wipe the indoor cover with soft sponge or soft cloth.
- When cleaning up it in the state of opening the indoor cover, wipe it with soft cloth.
• After drying it completely in the shade, assemble it. - If you do not so, it may cause a trouble.
- Reassembly of the indoor cover is reverse process of assembly
CARE AND MAINTENANCE

warning
- Make sure the AC cord is unplugged and the unit is off before cleaning.
- Do not use water on the unit to clean it. This is a shock hazard and the unit can be damaged.
Clean the casing and front of the indoor unit with a vacuum brush or wipe with a clean damp cloth.
- NEVER USE Solvents, harsh chemicals or hot water to clean the unit.
- Some metal edges on the unit are sharp. Be careful when cleaning or handling.
- Internal parts in the outdoor unit may need cleaning or routine maintenance from time to time. Consult your local service center for more details.
AFTER THE SEASON:
- Operate the fan, then dry the indoor unit.
- Shut off the indoor unit and then unplug it from the wall.
- Clean the air filters.
- Cover the outdoor unit with the supplied cover; this is very important to protect this unit.
BEFORE THE SEASON:
- Make sure the air filters are clean.
- Make sure the inlet and outlet on the indoor and outdoor units are not blocked by obstructions.
- Make sure the unit is grounded. Consult a serviceman for help.
PRECAUTIONS:
- Do not use this unit for animal or plant storage.
- In a lightning or thunder storm, immediately unplug it from the wall.
TROUBLESHOOTING GUIDE
Before requesting service, please refer to the chart below for possible solutions:
| SYMPTOMS POSSIBLE CAUSE POSSIBLE SOLUTIONS | ||
| No power . Power failure. Restore the power | ||
| Line voltage too low. Contact electrician to install new outlet. | ||
| Unit is unplugged or not completely Insert plug all the way. plugged in. | ||
| Unit is off. Turn unit on. | ||
| Batteries in remote are weak or dead. Replace remote's batteries. | ||
| EMERGENCY/REMOTE Slide EMERGENCY/REMOTE switch is not set to REMOTE. to REMOTE. | ||
| The compressor does When the unit is first plugged in Wait 3 minutes for the unit to operate. not turn on. and turned on, the compressor (no cool air) will delay turn on for 3 minutes. | ||
| If the unit is turned off and then immediately back on, the compressor will delay for 3 minutes. | ||
| The air filter(s) is dirty or clogged. | ||
| Unit is located near a heat source (heater, stove, etc.) | ||
| A door or window is open. Shut door or window. | ||
| There is an obstacle in front of intake or indoor unit. | ||
| Thermostat is set too high. Set thermostat lower. | ||
| Strange sounds occur. | During operation, especially after turning it on or off, refrigerant flows inside the unit. | |
| Strange smells occur. | The fan is bringing out the smells of the carpet, walls, etc. | |
| No remote operation. | Batteries are weak, dead or inserted improperly. | |
| Remote is out of range. | ||
| Remote not aimed at sensor. | ||
| There is an obstruction between unit and remote. | ||
DAEWOO
OWNER'S MANUAL
SPLIT AIRCONDITIONING SYSTEM
MODEL #:
DSB-123L
DSB-123LH
DSB-123AH
DSB-123PH
DSB-F123L
ABOUT THIS MANUAL
- IMPORTANT NOTES
- WARNING
- PRECAUTIONS WHEN WIRING
- PRECAUTIONS WHEN TRANSPORTING
- PRECAUTIONS WHEN INSTALLING
- WHEN CONNECTING REFRIGERANT TUBING
- WHEN SERVICING
- ROOM AIR CONDITIONER INSTRUCTION
- CONSIGINES D'INSTALLATION RACCORDEMENT ELECTRIQUE
- LOCATION OF CONTROLS
- INDOOR UNIT DISPLAY SW....PANEL
- REMOTE CONTROL SIGNAL RECEIVER
- THERE IS A SWITCH PANEL AT INSIDE OF FRONT PANEL. AT THE TIME OF OPERATING, OPEN THE FRONT PANEL
- DSB-123L/DSB-F123L
- DSB-123LH
- DSB-123PH
- DSB-123AH
- OPERATION
- CONNECTING THE AC CORD
- NOTES
- INFORMATION
- THREE MINUTE COMPRESSOR DELAY
- HOW TO INSTALL BATTERIES
- BATTERY PRECAUTIONS
- CELSIUS TO FAHRENHEIT CONVERSION CHART
- TO SET AUTO MODE
- TO SET QUICK MODE
- TO SET COOL MODE
- FAN SPEEDS
- TO SET FAN ONLY MODE
- NOTE
- TO SET DEHUMIDIFIER MODE
- TO SET HEAT MODE (DSB-123LH/123PH/123AH ONLY)
- TO SELECT THE FAN DIRECTION
- TO SET AIR-CLEANING (PLASMA) MODE (DSB-123PH)
- WHAT'S THE AIR-CLEANING PLASMA
- TO SET AIR-CLEANING (OXYGEN) MODE (DSB-123AH)
- WHAT'S THE OXYGEN GENERATION
- TO SET ON TIMER MODE
- TO SET OFF TIMER MODE
- TO SET UNIT TO SLEEP MODE
- TO CANCEL SLEEP MODE
- TO SET TURBO/MILD MODE
- EMERGENCY OPERATION
- CHANGING/CLEANING THE AIR FILTERS
- CLEANING THE INDOOR COVER
- CARE AND MAINTENANCE
- AFTER THE SEASON
- BEFORE THE SEASON
- PRECAUTIONS
- TROUBLESHOOTING GUIDE
- DAEWOO
- OWNER'S MANUAL
- SPLIT AIRCONDITIONING SYSTEM
- ABOUT THIS MANUAL
Brand : DAEWOO
Model : DSB 123 LH
Category : Air Conditioning