
KGV3102 - Refrigerator BOSCH - Free user manual and instructions
Find the device manual for free KGV3102 BOSCH in PDF.
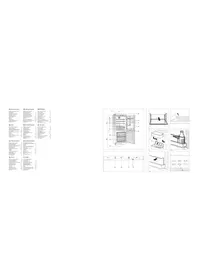


| Product Type | Refrigerator-freezer |
| Brand | Bosch |
| Model | KGV3102 |
| Height | 185 cm |
| Width | 60 cm |
| Depth | 65 cm |
| Weight | Approximately 70 kg |
| Power supply | 220-240 V, 50 Hz |
| Energy class | A+ |
| Refrigerator net volume | 180 L |
| Freezer net volume | 80 L |
| Cooling type | Static cooling |
| Defrosting | Manual for freezer, automatic for refrigerator |
| Lighting | Interior LED light |
| Shelves | Glass, adjustable height |
| Door bins | 3 door bins |
| Vegetable drawer | 1 drawer with humidity control |
| Freezer | 3 freezer drawers |
| Door reversibility | Yes, possible |
| Noise level | Approximately 42 dB |
| Climate class | SN-ST (temperate to subtropical) |
| Repairability index | 8.2/10 |
| Maintenance | Clean with warm water and mild soap |
| Adjustable feet | Yes, at the front |
Frequently Asked Questions - KGV3102 BOSCH
User questions about KGV3102 BOSCH
0 question about this device. Answer the ones you know or ask your own.
Ask a new question about this device
Download the instructions for your Refrigerator in PDF format for free! Find your manual KGV3102 - BOSCH and take your electronic device back in hand. On this page are published all the documents necessary for the use of your device. KGV3102 by BOSCH.
USER MANUAL KGV3102 BOSCH
| Price of 10.00 | A | 250000000000000000000000000000000000000000000000000000000000000000000000000000000000000000000000000000 | |
| Diluted shares | B | 25000000000000000000 | 85 |
| 25000000000000000000 | 85 | ||
| Dividend per share | C | 25000000000000000000 | 85 |
| Average number of shares | D | 25000000000000000000 | 85 |
| Risk-free interest rate | E | 25000000000000000000 | 85 |
| Weighted average price | F | 25000000000000000000 | 85 |
| Weighted average price per share | G | 25000000000000000000 | 85 |
| Held to issue | H | 25000000000000000000 | 85 |
| Authority | I | 2500000000000000000 | 85 |
| Perpetual | J | 2500000000000000000 | 85 |
| Risk-free interest rate | K | 2500000000000000000 | 85 |
| Common stock price | L | 2500000000000000000 | 85 |
| Dividend per share | M | 2500000000000000000 | 85 |
| Risk-free interest rate | N | 250000000000000000 | 85 |
| 10. Industrial and industrial variables | |
| In the way, chemical reaction is to be greater | 21 |
| Cement | 2 |
| Biomass | 2 |
| Total production of 35% temperature | 2 |
| Cement is smaller to be used for the | 2 |
| Energy resources | |
| Total consumption of (bonds) | 21 |
| Energy use | 2 |
| Fuel supply | 2 |
| For young food | 2 |
| Emissions | 1 |
| Costs & fees (in millions) | 3 |
| Costs | 2 |
| Purchased cost of business | 2 |
| Tensitiv teng (g) en la de 21 | |
| Larquiter (g) en la de 34 | |
| Larquiter (g) en la de 35 | |
| P.O. de la de 36 | 2 |
| Vorvishu di s##m la de 37 | 2 |
| Chaylo (g) en la de 38 | 2 |
| D. aldevedo (g) en la de 39 | 2 |
| P.O. de la de 40 | 2 |
| P. de la de 41 | 2 |
| N. del. L###d#e## (G#) en la de 42 | 2 |
| P.O. de la de 43, da #a ##, ##, ## | 2 |
| Uran (g) en la de 44 | 2 |
| A###y## (g) en la de 45 | 2 |


Safety Instructions and Regulations

Safety instructions
This unit contains the coolant isobutane (R 600a),
a natural gas which is very environmentally friendly but also combustible. When transporting and installing the unit care must be taken to ensure that none of the refrigeration circuit components become damaged. In the event of damage avoid naked flames or ignition sources and ventilate the room in which the unit is placed for a few minutes.
How to dispose of the old unit
Before disposing of an old, scrap unit no longer in use, it is imperative to render it safe and inoperative at once. Disconnect power supply plug and cut off connection lead. Remove or destroy all spring, latch or bolt-locks, ensuring that these have been made totally unserviceable. This will prevent the danger of children locking themselves in inadvertently.
Please observe refrigeration and freezer units contain insulating gases and coolants which require specialised waste disposal. They also contain valuable materials which can be recycled. Entrust the disposal of a scrap unit categorically to the competence of your local waste disposal service and contact your local authority or your dealer if you have any questions. Please ensure that the pipework of your refrigerating unit does not get damaged prior to being picked-up by the relevant waste disposal service, and contribute to environmental awareness by insisting on an appropriate, anti-pollution method of disposal.
Disposing of the packaging of your new appliance
All the packaging materials employed in the packing of your new appliance may be disposed of without any danger to the environment.
Our contribution towards a cleaner environment - we use recycled paper.
The cardboard box may be broken or cut into smaller pieces and given to a waste paper disposal service. The wrapping foil is made of polyethylene and the polystyrene pads and stuffing contain no fluorochloric hydrocarbons.
All these valuable materials may be taken to a waste materials collecting center and used again after adequate rework. (Recycling).
Consult your local authorities for the name and address of the waste materials collecting centers and waste paper disposal services nearest to your home.
Regulations
This appliance serves for the refrigeration and freezing of food and for making ice.
The unit is perfectly suitable for exposure to +10°C to 32°C ambient temperature (ST-models: +18°C to 38°C, see identification plaque).
The appliance is intended for household use only.
If the appliance is used for commercial purposes, the appropriate regulations must be observed.
It complies with the current German regulations for the prevention of accidents through refrigeration equipment (VBG 20) and has been tested for leaks.
It complies also with the current German safety regulations for electrical appliances.
This product complies with the regulations specified for the safety electrical appliances.
All necessary repairs are to be carried out by qualified persons.
Repairs carried out by persons lacking the necessary competence may result in major damages and could be extremely dangerous for the user of the appliance.
Disconnect appliance from mains when servicing or cleaning and always in the event of a failure. Remove plug and/or disengage household fuse. To unplug, pull at the plug itself and not at the wire.
Getting to know the appliance
Before reading on please unfold the pages at the back with the illustrations.
This manual of operating instructions applies to various models.
Some of the illustrated details may deviate from those present in your model.
General View
Fig 1
1 Ventilation grid compartment
2 Control panel
3 Bearing trays
4 Rear wall of the refrigerator compartment refrigerating unit)
5 Defrosting-water conductor
6 Defrosting wateroutlet
7 Glass plate
8 Vegetable baskets
9 Butter and cheese storage
10 Egg rack
11 Door shelf 12 Bottle shelf
13 Bottle holder
14 Frozen food bins
15 Freezer calendar
16 Interior light
17 Defrosting drain
18 Ventilator
A Refrigerator compartment
B Freezer compartment
Control panel
Figure 2
21 Main switch
22 Super-freezer switch.
23 Temperature selector
Setting-up the Appliance
Where to set-up
Set-up appliance in a dry, well ventilated room. Do not expose appliance to direct sunlight or place near a source of heat such as: cooker, radiator etc. If placement of the appliance near a source of heat can not be avoided, use an adequate insulation plate or observe the following safety distances between appliance and source of heat:
3 cm distance from cooker
30 cm distance to oil or gas boiler.
If the appliance is placed next to another refrigerator or freezer, keep a side clearance of 2 cm between them to prevent condensation.
Setting-up and changing the door hinging side
See enclosed manual for installation and modifications.
Electrical Connection
Connect appliance to a 220-240 V/50 Hz supply only. Protect with a 13 ampere fuse. The connection must be made via a properly installed socket with a non-fused earthing.
Ventilation
The air heated at the back of the appliance must be able to escape unhindered.
Otherwise, the refrigerating machine must work harder and use up more electricity.
Consequently, the ventilation inlet grill must never be covered.
Switching on and Selecting the Temperature
Clean the inside of the appliance before switching it on for the first time (see cleaning).
Switching on the appliance
Press the main switch, Figure 2/21, the green pilot light goes on. The appliance begins to cool.
It's possible that a certain amount of ice or condensation builds up on the rear wall of the refrigerator; this is normal, it's not necessary to wipe up the condensation or eliminate the ice build-up. The rear wall defrosts again automatically. The defrosting water is caught in the defrosting water conductor (Fig. 9/5), led to the compressor and condensed there.
If you have closed the door of the refrigerator compartment and then cannot open it again immediately, please allow two or three minutes for the partial vacuum that has arisen inside to level out.
Setting the temperature
The temperature setting dial (Fig. 2/23) serves to set the temperature in both compartments. High figures account for lower temperatures in both compartments.
We suggest a middle temperature setting (ca. "2-3").
Appliances provided with ventilator
If your appliance has a fan, you should know that it automatically starts when room temperature is over 26° Celsius.
Appliances not provided with ventilator
If the temperature in the place where the appliance is located falls below +18°C, the interior light will automatically remain on at low power when the refrigerator compartment door is closed. In this way, the correct temperature for the long-term conservation of food will be maintained in the freezer compartment.
This function disconnects when the temperature rises above +20°C.
Switching off and disconnecting the appliance
Switching off
Press the main switch, Figure 2/21, the green pilot light goes out, the cooling stops, and the interior light goes off.
Disconnecting the appliance
If the appliance is not to be used for a long period of time, switch off, pull the plug, defrost, and clean. Leave the doors of the appliance open.

Food Arrangement
Re-arrangement possibilities
The bearing trays in the refrigerator may be changed around and re-arranged.
To change, pull trays forward, push downwards, and remove from the appliance.
Replace in the desired position. (Fig. 3).
To store bottles, open the flap of the bearing tray (Fig. 4).
The insert in the egg rack may be flapped open so that the container may be used to store other items such as: tubes, small tins, or similar objects. (Fig. 4).
The wire frame on the bottle shelf (Fig. 6/A) may be rearranged to accommodate different size (diameter) bottles.
Use bottle holder (Fig. 6/B) to hold bottles securely in place and stop them from falling off the shelf when opening or closing the door of the appliance.
The containers on the inside of the door may be taken out for cleaning (Fig. 6/C).
To facilitate storage of tall items, you may remove the smaller section of the rack from the appliance (Fig. 12).
Do not place foodstuffs in front of the ventilator (Fig. 1/18) to permit the circulation of air.
Observe the following when arranging food:
- Allow food to cool before placing it in the appliance.
- Food should be sealed or well covered before placing it in the appliance. This will prevent food from drying out, loss of freshness, color, and flavor. It will also prevent food from tasting or smelling of other products.
Vegetables, greens, and fruit may be stored in the vegetable baskets and need not be wrapped.
Food Arrangement
- Oil and fats should not touch the plastic parts of the appliance or fall on the sealing strip of the door (these parts could easily become porous).
- Do not store explosive substances in the appliance.
- Store high-proof alcoholic beverages in tightly sealed containers and place containers always in an upright position.
- The coldest areas in the refrigerator are the rear wall and the glass plate. Store delicate food products in these areas.
- Glass bottles containing liquids that can freeze must never be stored in the freezer. Bottles burst when the contents freeze.
Example of food arrangement.
Fig. 1
Refrigerator compartment A
On the bearing trays (3) - top to bottom: bakery products, prepared dishes, dairy products.
On the glass plate (7): meat and cold cuts. In the vegetable baskets (8): vegetables, greens and fruit.
In the door compartment (9): butter and cheese.
Eggs in the egg container (10).
On the door shelf (11): small bottles, tubes, cans.
In the bottle shelf (12): larger bottles.
Freezer compartment B
On the upper freezing tray (14): freezing of fresh food, storage of frozen goods and preparation of ice.
On the lower freezing tray: storage of frozen goods.
Freezing food/Food storage and Making ice
Note refrigeration zones in the refrigerator compartment!
The air circulation in the refrigerator compartment means that there are zones at different temperatures.
Depending on the model, the zone for sensitive foods is right at the bottom between the arrow on the side and the glass surface below (fig. 16/1 and 2) or between the two arrows (fig. 17/1 and 2). Ideal for storing meat, fish, sausage and salad mixtures, etc.
Please observe the following when buying ready-frozen food:
• Package must be intact. - Do not exceed expiry date. - The thermometer of the freezer compartment where the food is bought must indicate a temperature of -18°C or colder. - When shopping, leave the frozen products right till the last moment. Bring home as quickly as possible and place at once in the freezer compartment.
Packing Food
If freezing food yourself, use only fresh products in perfect condition. Pack food in airtight containers so that it does not lose its taste, or dehydrate.
Suitable materials for wrapping are: Plastic sheets, polyethylene bags, aluminium foil and freezing containers.
Not suitable are:
Wrapping paper, vellum paper, cellophane, rubbish bags and used shopping carrier-bags.
Place food in container, press out excess air and seal tightly.
Freezing food/Food storage and Making ice
To seal use either of the following:
Rubber bands, plastic clips, string, cold-resistant adhesive tape or similar. Plastic sheets and polyethylene bags can be sealed together with a welding machine for plastic materials.
Before placing the wrapped food in the freezer, mark each package to show its contents and include the date of freezing.
Freezing capacity
Depending on the type of freezer, you can freeze the following amounts of food at one time:
SF-26/KGVA/... 4kg./24h.
SF-31/KGVA/... 5kg./24h.
SF-36/KGVA/... 5kg./24h.
Set temperature selector to freezing
If you are freezing fresh food, set the temperature selector to a moderate degree (approximately 4).
When loading the freezer please observe
That frozen products stored in the freezer should not be mixed with fresh food.
Freezing the food
If you need to freeze very large quantities of food, you may find it convenient to remove the frozen food bins (bottom bin may not be removed) from the unit and to stack your products directly on the freezing grids. To remove bins, pull forwards until they catch, tilt upwards and remove.
Observe that food should not project over the border line, figure 15/A, otherwise the air circulation within the unit will be adversely influenced.
Making ice
Fig. 8
Ice trays are obtainable at stores which specialize in this line of business. Fill the ice-tray three quarters full of water and place on the freezing tray or in the upper food bin. The ice-cubes can be easily removed from the ice-tray by slightly twisting it.
Use the ice container to store ice-cubes so that you always have an extra supply ready at hand.
Artificial ice blocks
(Fig. 13/30).
This accessory is only included with certain models, so if yours does not contain one, disregard this section.
The artificial ice blocks prevent food from warming up too quickly in the event of a power cut or failure.
They are most effective if they are placed in the upper drawer directly on top of the products.
The artificial ice blocks may be taken out of the appliance and used as a practical means to keep food temporarily cool, e.g. in an insulated cooling bag.
Freezer Calendar
Fig. 7/15
So as to avoid quality deterioration of the products it's important to observe the expiry date and to consume the products before this date expires.
The admissible length of storage depends on the individual type of products.
The figures next to the symbols show the number of months for which the particular kind of food may be stored.
In the case of purchased pre-frozen food, note the date of manufacture or the expiry date.
EN
Freezing food/Food storage and Making ice
Defrosting Food
Depending on the particular kind of food and the use you intend to make of it, you may choose among the defrosting methods given here:
at room temperature,
in the refrigerator,
in an electric oven,
with or without fan heater,
in a microwave oven.
Use-up food that has thawed out or partially begun to defrost as soon as possible.
Do not refreeze. If the food is cooked first, it may be refrozen as a prepared dish.
Defrosting
Refrigerator compartment
The refrigerator compartment will defrost automatically. The melting water is caught in the collecting channel (defrosting-water conductor) (Fig. 9/5) and then led to the compressor where it evaporates. Please keep the water conductor and defrosting outlet (Fig. 9/6) absolutely clean so that the water can drain away freely.
Freezer compartment
For safety reasons, the freezer compartment (Figure 1/B) does not defrost automatically since the products stored in this area should not accidentally defrost.
Intensive frost and ice build-ups adversely influence the transmission of cold to the frozen products and cause the rate of energy consumption to augment.
When a coat of ice of approximately 1/2 cm thickness has built up inside the freezer, it should be allowed to defrost. The most convenient time to defrost is, of course, when the freezer is totally or nearly empty. If there are still frozen products in the freezer you should switch on the super-freeze, Figure 2/22, approximately 4 hours prior to defrosting so as to extra deep-freeze. You may then remove the bins with contents from the appliance.
Wrap-up bins in several layers of newsprint paper or in a blanket and store in a cool place. Leave the door of the freezer open and unplug.
Figure 10/17, empty lowest frozen food bin and place underneath runoff to collect thaw water.
Try to defrost as quickly as possible. (The longer the food is kept at ambient temperature the shorter its shelf-life will be).
Clean interior of appliance thoroughly after defrosting.
Defrosting Cleaning
Defrosting Aids
To speed up defrosting it's best to put a saucepan with hot water on one of the freezing grids.
Caution when using defrosting sprays! These can form explosive mixtures, contain solvents or propellents which can affect plastics, or even damage your health.
If possible, do not scratch off frost or ice, since this can damage the freezer grids.
Local build-ups of frost or ice in some areas of the appliance can be reduced with a plastic scraper.
Never scrape the frost away, right down to the grid.
It's always preferable to let the appliance defrost by itself.
Before starting to clean always unplug from the power supply, switch off the household fuse or take it out.
Clean the refrigerator at least once a month.
It is practical to clean the freezer each time it is defrosted.
Do not allow cleaning water to get into the control panel or inside light. Lukewarm water with a little washing-up liquid or mild disinfectant is suitable for cleaning the whole of the appliance, except the door's insulating strip. Cleaning agents containing abrasives or acids are not suitable, and neither are chemical solvents.
Clean the door seal with clear water only, and then rub thoroughly dry.
The defrosting-water conductor (Fig. 9/5) and defrosting-water outlet (Fig. 9/6) should be cleaned more frequently so that the defrosting-water can drain away freely. To clean the holes, pierce with a toothpick or similar object. Do not allow cleaning water to filter through the outlet and reach the defrosting drain.
Keep the grooves of the ventilator case clean (Fig. 1/18).
The outside panels of the appliance can be treated with a normal enamel-cleaning agent. During cleaning keep the doors of the appliance closed to prevent the agent from reaching the plastic parts inside.
After cleaning remember to reconnect the appliance and switch it on.
Energy-saving Tips
• Install your appliance in a cool, well-ventilated room. Protect it from direct sunlight and do not place near a source of heat (radiator etc.). - Allow warm food to cool down before putting it into the appliance. - Put frozen food into your refrigerator to thaw out. In that way you use up the low temperature of the frozen food to assist cooling off the food in the refrigerator. - Defrost when thick layers of frost or ice have built-up. A thick coat of frost or ice impairs cold transfer to the frozen food, and increases electrical consumption.
- Keep the door open for as briefly as possible when putting in or taking out food. The shorter the time the door is kept open, the less ice and frost build-up on the inside walls.
Minor faults - and how to fix them yourself
Before you call in the After-Sales Service, please see if you can solve the problem on your own with the aid of the following tips. If the After-Sales Service is called in to rectify such simple faults, a full labor-charge must be made even during the guarantee period.
| Faults | Possible causes |
| Unusual noises: | - Either the appliance is not standing firmly, or something is trapped near the refrigerating machine.- A part on the rear side of the appliance cannot vibrate freely and touches the appliance itself or against the wall. In this case, carefully bend this part clear. |
| Interior light does not go on: | - The light switch sticks (Fig. 2/19). Try to make it move; if it won't budge call the After-Sales Service.Fused or faulty bulbs:- To change, remove the case by pressing the back part downwards (figure 1), and replace the BULB with a new one: 220-240 V, max. 15 W, base E 14. |
| The temperature in the refrigerating compartment is too cold: | - Temperature setting dial is set at a too low position. |
| The cooling performance deteriorates: | - The door is opend too often.- A large quantity of food has been placed in the refrigerator.- Large frost or ice build-up in the freezer compartment.- The ventilation inlet or outlet grills are covered.- Something is jammed between the refrigerating machine and the wall. |
| Total lack of cooling performance: | - Plug may not fit properly into power outlet.- The fuse has been burnt out.- The switch, Figure 2/21, is at setting “•”. |
| Temperature inside the refrigerator excessively cold: | Temperature selector set too low. |
Minor faults - and how to fix them yourself
If the fault cannot be rectified with the help of the above given tips, please call the After-Sales Service.
In this case, do not attempt to do any further work yourself, particularly not on the electrical components of the appliance.
To keep the temperature inside the appliance from rising, do not open the door any more often than absolutely necessary.
Important Note!
If a defect in the mechanism or a power cut causes the temperature inside the appliance to rise, check whether the food has started to thaw out.
Do not refreeze food that has thawed out completely or partially defrosted. Cook first (boil or roast) and refreeze afterwards as indicated for prepared dishes.
Disposal of old appliances
Safety indications
Old, scrap appliances should be at once rendered safe and inoperative as follows: Disconnect power-supply plug and cut connection lead.
Remove or destroy all spring latch or bolt-locks.
In doing so, the danger of children locking themselves in is avoided.
After-Sales Service
Identification plaque
Fig. 14
When requesting the assistance of the After-Sales Services, please quote the number of the appliance (24) and the serial number (25).
You will find this information in the panel outlined in black on the identification plaque. This plaque is fitted at the bottom left hand side of the appliance, next to the vegetable basket.
The address and telephone number of the nearest After-Sales Service can be found either in the list of After-Sales Service offices, or in your local telephone directory.
STOP AND DISCONNECT THE APPLIANCE.
The appliance is stopped.
21 Main switch 22 Switch for quick freezing 23 Temperature selector
Cleaning the cabinet
- SAFETY INSTRUCTIONS AND REGULATIONS
- SAFETY INSTRUCTIONS
- HOW TO DISPOSE OF THE OLD UNIT
- DISPOSING OF THE PACKAGING OF YOUR NEW APPLIANCE
- REGULATIONS
- GETTING TO KNOW THE APPLIANCE
- GENERAL VIEW
- FIG
- CONTROL PANEL
- FIGURE
- SETTING-UP THE APPLIANCE
- WHERE TO SET-UP
- SETTING-UP AND CHANGING THE DOOR HINGING SIDE
- ELECTRICAL CONNECTION
- VENTILATION
- SWITCHING ON AND SELECTING THE TEMPERATURE
- SWITCHING ON THE APPLIANCE
- SETTING THE TEMPERATURE
- APPLIANCES PROVIDED WITH VENTILATOR
- APPLIANCES NOT PROVIDED WITH VENTILATOR
- SWITCHING OFF AND DISCONNECTING THE APPLIANCE
- SWITCHING OFF
- DISCONNECTING THE APPLIANCE
- FOOD ARRANGEMENT
- RE-ARRANGEMENT POSSIBILITIES
- OBSERVE THE FOLLOWING WHEN ARRANGING FOOD
- EXAMPLE OF FOOD ARRANGEMENT
- REFRIGERATOR COMPARTMENT A
- FREEZER COMPARTMENT B
- FREEZING FOOD/FOOD STORAGE AND MAKING ICE
- NOTE REFRIGERATION ZONES IN THE REFRIGERATOR COMPARTMENT
- PLEASE OBSERVE THE FOLLOWING WHEN BUYING READY-FROZEN FOOD
- PACKING FOOD
- NOT SUITABLE ARE
- TO SEAL USE EITHER OF THE FOLLOWING
- FREEZING CAPACITY
- SET TEMPERATURE SELECTOR TO FREEZING
- WHEN LOADING THE FREEZER PLEASE OBSERVE
- FREEZING THE FOOD
- MAKING ICE
- ARTIFICIAL ICE BLOCKS
- (FIG. 13/30)
- FREEZER CALENDAR
- EN
- DEFROSTING FOOD
- DEFROSTING
- REFRIGERATOR COMPARTMENT
- FREEZER COMPARTMENT
- DEFROSTING CLEANING
- DEFROSTING AIDS
- ENERGY-SAVING TIPS
- MINOR FAULTS - AND HOW TO FIX THEM YOURSELF
- IMPORTANT NOTE
- DISPOSAL OF OLD APPLIANCES
- SAFETY INDICATIONS
- AFTER-SALES SERVICE
- IDENTIFICATION PLAQUE
- STOP AND DISCONNECT THE APPLIANCE
- THE APPLIANCE IS STOPPED
- CLEANING THE CABINET
Brand : BOSCH
Model : KGV3102
Category : Refrigerator