
RI9305 - Coffee machine GAGGIA - Free user manual and instructions
Find the device manual for free RI9305 GAGGIA in PDF.


| Type of product | Espresso coffee machine |
| Brand | Gaggia |
| Model | RI9305 |
| Dimensions (W × D × H) | Approx. 20 × 25 × 30 cm |
| Weight | Approx. 4.5 kg |
| Power supply | 220-240 V, 50 Hz, 1300 W |
| Water tank capacity | 1.4 L |
| Boiler type | Brass boiler |
| Pump pressure | 15 bars |
| Grind | Uses ground coffee or ESE pods (compatible) |
| Cup warmer | Integrated on top |
| Steam wand | Swivel, for frothing milk |
| Main functions | Espresso, cappuccino, latte |
| Maintenance and cleaning | Regular cleaning of the brewing unit and steam wand; periodic descaling |
| Safety | Automatic shut-off after 30 minutes of inactivity |
| Spare parts and repairability | Available, filter, basket, gaskets, boiler |
| Included accessories | Pod filter, measuring spoon, user manual |
| Warranty | 2 years (legal compliance) |
Frequently Asked Questions - RI9305 GAGGIA
User questions about RI9305 GAGGIA
0 question about this device. Answer the ones you know or ask your own.
Ask a new question about this device
Download the instructions for your Coffee machine in PDF format for free! Find your manual RI9305 - GAGGIA and take your electronic device back in hand. On this page are published all the documents necessary for the use of your device. RI9305 by GAGGIA.
USER MANUAL RI9305 GAGGIA
GAGGIA BRERA
Sup 037RG
Istruzioni per l'uso Operating instructions Bedienungsanleitung Mode d'emploi
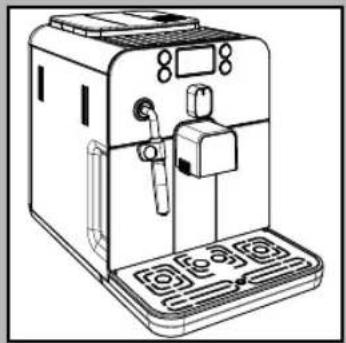
GENERALITÀ


INSTALLAZIONE
Imballaggio


B = Acqua media (standard)
C = Acqua dura






Gruppo caff è


GENERAL INFORMATION
The coff ee machine is suitable for preparing espresso coff ee using either coff ee beans or ground coff ee and is equipped with a device to dispense steam and hot water. The structure of the machine has been designed for domestic use only and is not suitable for continuous professional-type operation.
Keep these operating instructions in a safe place and make them available to anyone who may use the coffee machine.
For further information or in case of problems that are not included or not completely explained in these instructions, please contact an authorized service center.

Warning. No liability is held for damage caused by:
- Incorrect use not in accordance with the intended purposes;
• Repairs not carried out by authorized service centers;
• Tampering with the power cord;
• Tampering with any parts of the machine; - Storage or use of the machine at a temperature outside the operating temperature range (+15°C / +45°C);
- The use of non-original spare parts and accessories.
In these cases, the warranty shall be deemed null and void.

For your safety and the safety of others, carefully follow the instructions pro- n the "Important Safety Information" manual supplied with the machine. Keep Important Safety Information" manual together with the instruction manual.
TECHNICAL SPECIFICATIONS
The manufacturer reserves the right to make changes to the technical specifications of the product.
| Nominal Voltage - Power Rating - Power Supply | See label on the inside of the service door |
| Housing material | Thermoplastic material/Metal |
| Size (w x h x d) | 10" x 12.5" x 17" (256 x 320 x 432 mm) |
| Weight | 18.6 lbs. (8.450 kg) |
| Power Cord Length | 47" (1.2m) |
| Control Panel | Front side |
| Pannarello (only available for certain models) | Special for cappuccinos |
| Water tank | 1.2 litres – Removable type |
| Coffee Bean Hopper Capacity | 9.2 oz. (260 g) |
| Dregdrawer Capacity | 8 |
| Pump pressure | 15 bar |
| Boiler | Stainless steel type |
| Safety Mechanisms | Thermal fuse |

INSTALLATION
Machine Packaging
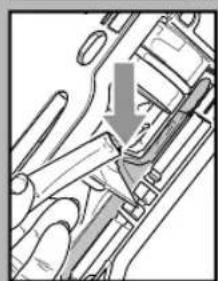
The original packaging has been designed and constructed to protect the machine during transport. We recommend keeping the packaging material for possible future transport.
Preliminary Operations
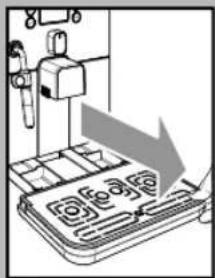
- Remove the coff ee bean hopper cover and the drip tray with grill from the packaging.
- Remove the coff ee machine from the packaging and position it in a place that meets the requirements described in the safety regulations.
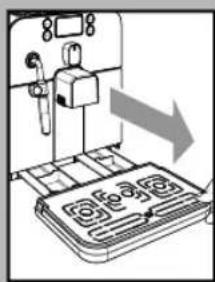
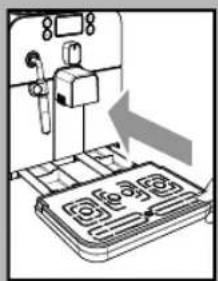
- Place the drip tray with grill into its appropriate seat on the machine. Make sure it is fully inserted to its limit stop.
- Insert the coffee bean hopper cover.
Note: Insert the plug in the machine and in the wall socket only when indicated and check that the power button is switched to "0".
i Important note: Carefully read the explanatory descriptions of all the warnings the machine displays to the user via the lights on the control panel display (see section "Display Warnings").
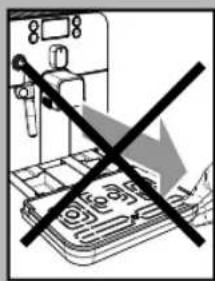
NEVER remove the drip tray when the machine is turned on. Wait a couple of minutes after turning on/off, as the machine will be carrying out a rinse/self-cleaning cycle (see section "Rinse/Self-cleaning Cycle").


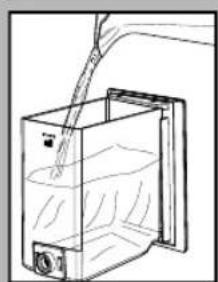
- Remove the water tank from its seat.
- Rinse and fi II it with fresh water making sure that it is not fi Iled exceeding the MAX level indicated in the water tank. Put the water tank back in its seat.
Fill the tank only with fresh, non-sparkling water. Hot water or any other liquid may damage the tank and/or the machine. Do not turn on the machine when the tank is empty: Make sure there is enough water in the tank.
- Remove the coff ee bean hopper cover.
Note: The hopper may be provided with different safety features according to the regulations of the country of use of the machine.
- Slowly pour the coffee beans into the hopper.
Only coffee beans must be put into the coff ee bean hopper. Ground coff ee, instant coff ee or any other object may damage the machine.
- Replace the coffee bean hopper cover.
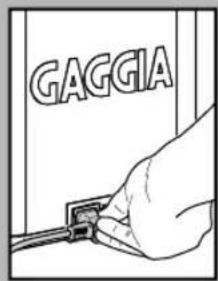
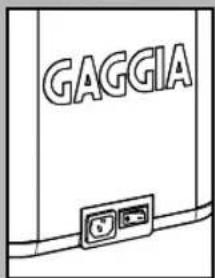
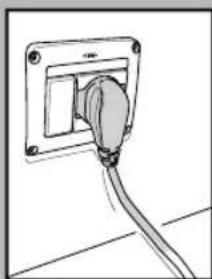
- Insert the plug into the socket on the back of the machine.
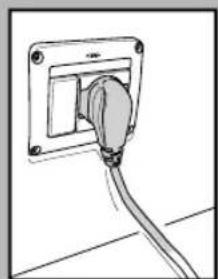
- Insert the plug of the other end of the cable into a wall socket with suitable power voltage.

- Switch the power button to "1" to turn the machine on.
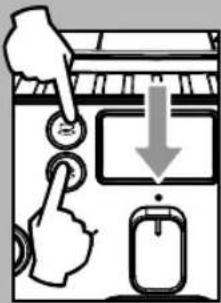
- The "STAND-BY" button blinks.
- Make sure the selector switch is in the "●" position; if this is not the case, set it to that position.
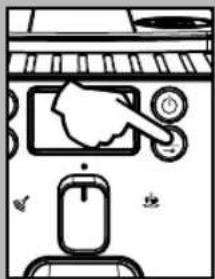
- To turn the machine on simply press the "STAND-BY" button.
- The blinking icons shown in the picture warn that the circuit must be primed.
Note: Before starting the machine for the first time, and after long periods of inactivity, prime the water circuit.
Note: This appliance has been tested using coffee. Although it has been thoroughly cleaned, some coffee residues may still be found. However, we guarantee that this is a brand-new machine and we suggest consulting the operating instructions before starting up the machine.
![graph TD A["Blinking"] --> B["Slow blinking"] B --> C["Cyclic blinking"]](/content/2026/06/1286822/images/40dcf734cba6dd7d8f3455a8285f46a8a00e0cabf1c1d5c68b4a55915f933b9d.jpg)
Circuit Priming
- To prime the water circuit, place a container under the steam wand (Pannarello, if supplied).
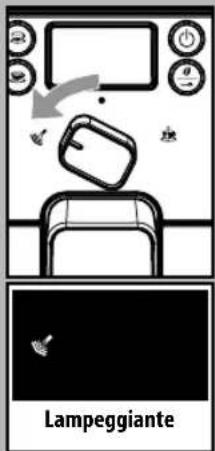
- Turn the selector switch clockwise to set it to the "💡" position. The machine starts the automatic priming of the circuit by letting out a preset quantity of water through the Pannarello.
Once the circuit has been primed, the icons shown in the figure will start to blink.
Turn the selection knob back to its central position "●".
- The icons displayed blink slowly to show that the machine is warming up.
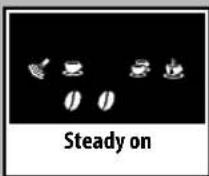
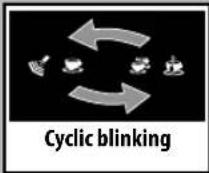
When warm-up is complete, the machine performs a rinse cycle of the internal circuits. During this phase, the icons displayed will blink in sequence. - When the operations described above are completed, the icons on the display will illuminate.
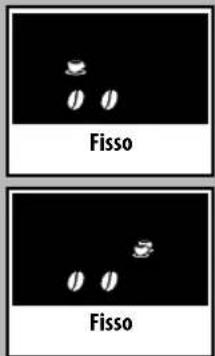
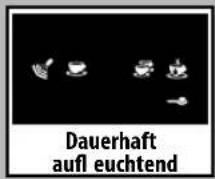
The display will appear as shown to the side. The displayed aroma is the factory setting when the machine is switch on for the first time, or it is the same as the aroma that was selected for the last brewed coffee.
The machine is then ready to brew beverages.
- To brew coffee, dispense hot water or steam, and properly use the machine, carefully follow the instructions provided.

Using the machine for the first time or after a long period of inactivity.
These simple operations will make it possible to always brew excellent coffee.
1 Place a large container under the dispensing spout.
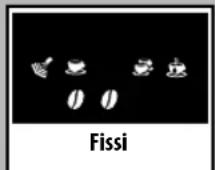
2 Before starting the procedure, check that the following icons are displayed.
3 Select the pre-ground coffee function by pressing the " 🔥 " button one or more times.
Do not add the pre-ground coffee to the compartment.
The icon will appear on the display.
4 Press the button to brew a long coffee.
5 Wait until brewing is completed and empty the water tank.
6 Repeat the operations from step 1 to step 5 for 3 times; then continue with step 7.
7 Place a container under the steam wand (Pannarello, if supplied).
8 Turn the selector switch clockwise to set it to the "☐" position.


The following icon will be displayed.
9 Dispense water until the no water signal is displayed, then turn the selector switch counter-clockwise to set it to the "●" position.
10 At the end, fill the water tank again. Then the products can be brewed as described in the following sections.
Rinse/Self-cleaning Cycle
This cycle allow rinsing the coff ee circuits with fresh water.
The cycle is carried out:
- At machine start (with cold boiler)
• After priming the water circuit (with cold boiler) - During the Stand-by preparation phase (if a coffee product has been brewed)
- During the phase of activating the stand-by mode after pressing the "STAND-BY" button (if a coffee product has been brewed).
A small amount of water will be dispensed to rinse and heat all the machine components; during this phase the icons blink in sequence.
Wait for the cycle to finish automatically. You can stop dispensing by pressing either coffee button and/or the "Stand-by" button.

"INTENZA" water filter (optional)
To improve the quality of the used water, it is advisable to install the water filter.
Remove the water filter from its packaging, immerse it vertically (with the opening positioned upwards) in cold water and delicately press the sides so as to let the air bubbles out.
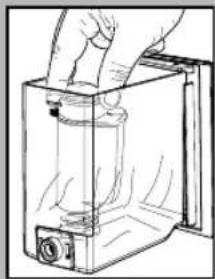
Remove the small white filter from the tank and store it in a dry place sheltered from dust.
Set the Intenza Aroma System as specified on the box.
A = Soft water
B = Medium water (standard)
C=Hard water

Put the water fi Iter into the empty tank. Press it until its limit stop.

Fill the tank with fresh drinking water and reinsert it into the machine.
Dispense the water in the tank by using the hot water function (see the "Hot water dispensing" section).
Fill the water tank again. The machine is now ready to be used.
Note: If there is no Intenza water fi Iter, insert the small white fi Iter previously removed into the water tank.
ADJUSTMENTS
The machine that you have bought allows for certain adjustments that will permit you to use it to its full potential.
Gaggia Adapting System
Coffee is a natural product and its characteristics may change according to its origin, blend and roast. The Gaggia coffee machine is equipped with a self-adjusting system that allows the use of all types of coffee beans available on the market (non caramelized).
- The machine automatically adjusts itself in order to optimise the extraction of the coffee, ensuring perfect compression of the tablet to obtain a creamy espresso coff ee that will release all the aromas, regardless of the type of coff ee used.
- The optimisation process is a learning process that requires the brewing of a certain number of coffees to allow the machine to adjust the compactness of the ground coffee.
- Attention should be given to special blends, which require grinder adjustments in order to optimise the extraction of the coff ee (see the "Coff ee Grinder Adjustment" section).
Coff ee Grinder Adjustment
Warning! The grinder adjustment knob, inside the coff ee bean hopper, must be turned only when the grinder is working. Do not pour ground and/or instant coffee into the coff ee bean hopper.
Do not insert any material other than coffee beans into the hopper. The grinder contains moving parts that may be dangerous. Therefore, do not insert fingers and/or other objects. The grind setting may only be adjusted using the knob. Turn off the machine and unplug it from the socket before carrying out any type of operation inside the coffee bean hopper. Do not pour coffee beans when the coffee grinder is working.

The machine allows slight adjustments to the coff ee grinder to adapt it to the kind of coff ee used.
To make any adjustment, press and turn the knob inside the coffee bean hopper.
Press and turn the knob by one notch at a time and brew 2-3 cups of coffee; this is the only way to notice differences in grind.
The reference marks inside the coffee bean hopper indicate the grind setting. There are 5 different grind settings to choose from with the following references:
Large Mark - Coarse Grind Small Mark - Fine Grind.

Adjusting the Coff ee Length
The machine allows you to adjust the amount of brewed coffee according to your taste and/or the size of your cups.
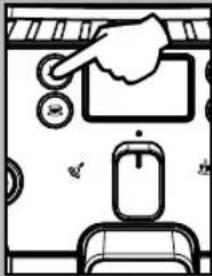
Each time the "3" or "buttons are pressed and released, the machine brews a pre-set amount of coffee, as per factory settings. This amount may be reprogrammed to your taste. Each button may be individually programmed for a specific brew setting.

As an example, the following procedure describes the programming of the button "☐", which is normally associated with espresso coffee.
- Place a cup under the dispensing spout.
- Hold the "button pressed for 5 seconds to enter the programming mode; the "icon will blink quickly and the coffee will start to be brewed; the icon will flash during the whole coffee brewing cycle.
- Press the "button again when the amount of coffee in the cup reaches the desired level.

At this point the button "is programmed; each time it is pressed and released, the machine will brew the same amount of coffee that was just programmed.
The same operation can be repeated for the "button. If the "or "button is pressed twice to brew coffee, the machine will brew double the stored quantity.
Standby
The machine is designed for energy saving. The machine automatically turns off after 60 minutes of inactivity.
The "☐" button blinks when the machine is in stand-by mode.
Note: During the turning off phase, the machine performs a rinse cycle, if a coffee product has been brewed.
Warning: When turning the machine on after it has been turned completely off, the machine will be in stand-by mode
To turn the machine on again simply press the STAND-BY button (if the power button is set to "I"). In this case the machine will go through the rinse cycle only if the boiler is cold.
Dispensing Spout Adjustment
Most cups on the market can be used with this coffee machine.
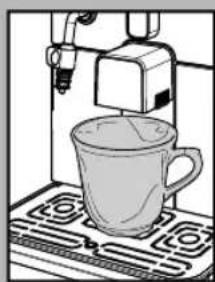
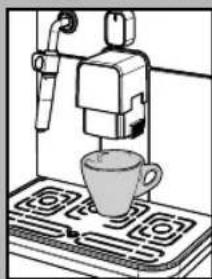
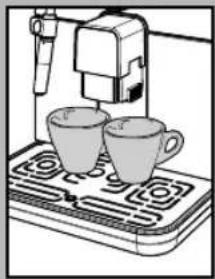
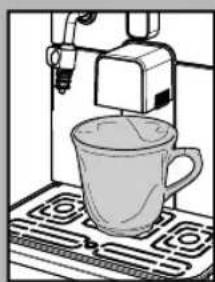
The height of the dispensing spout may be adjusted to better fit the dimensions of the cups that you wish to use.
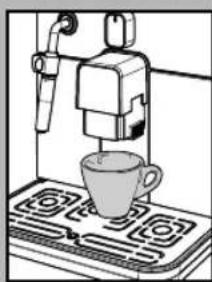
Manually move the dispensing spout up or down to adjust its height by placing your fingers as shown in the figure.
The recommended positions are:
For use with small cups;



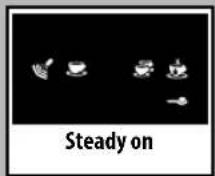
For use with large cups.
- Two cups can be placed under the dispensing spout for brewing two coffees at the same time.
"Aroma" Adjustment
The machine is set-up for an amount of coffee to grind to be adjusted from 7 g to 10.5 g per coffee.
Four choices are possible by pressing and releasing the "o" button (mild, medium or strong aroma, and ground coffee).
Selection can be made when the beans appear on the display.
Each time the "____" button is pressed and released, the aroma changes by one degree:
ⓞ = Mild aroma ⓞ Ⓞ = Medium aroma ⓞ Ⓞ Ⓠ = Strong aroma
Selection must be made prior to selecting the coffee. The system sets the aroma according to the personal taste of the user.
After selecting "Strong aroma", the function for brewing coffee with pre-ground coffee is displayed.
This selection is displayed by the icon on the side.
Refer to the relevant section to use this function.


COFFEE BREWING

Note: Should the machine not brew coff ee, make sure that ter tank contains water.

Before brewing coffee, check the messages on the display.
Check that the water tank and coffee been hopper are full.

Leave the selector on the coffee position "●" during pensing phase.

Before brewing the coffee, adjust the height of the using spout according to your hand and select the aroma or the pound coffee.
Using Coff ee Beans
- To brew coffee, press and release: the "button" button to select the desired aroma. the "button for an espresso coffee; the "button for a long coffee.
• The brewing cycle then starts:
To brew 1 cup of coffee, press the "or" button once. The display will show the icon.
To brew 2 cups of coffee, press the "or" button twice. The display will show the icon.

To brew 2 coffees, the machine automatically grinds doses the correct amount of Brewing two coffees requires ending cycles and two brewing which the machine carries out statically.
- After the prebrewing cycle, coffee begins to come out of the dispensing spout. - Coffee brewing stops automatically when the pre-programmed level is reached; however, it is possible to interrupt coffee brewing by pressing the button initially pressed.
The machine is adjusted to brew a true Italian espresso coffee. This feature may slightly lengthen the brewing time, allowing the intense fl avour of the coff ee to develop fully.
Using Pre-ground Coff ee
This function allows using pre-ground and decaffeinated coffee.
Pre-ground coffee must be poured into the appropriate compartment positioned next to the coff ee bean hopper. Only use ground coff ee for espresso machines and never coff ee beans or instant coff ee.
i Note:
- If no pre-ground coffee is poured into the compartment, only water will be dispensed;
- If the dose is excessive and 2 or more measuring scoops of coffee are used, the machine will not brew the product. Also in this case, the machine will run an empty cycle and discharge any ground coffee into the coffee grounds drawer.
To brew coffee:
- Press and release the “ 0 ” button until the pre-ground coffee function icon is displayed.
- Lift the pre-ground coffee compartment cover.
- Add 1 only 1 scoop of pre-ground coffee to the compartment. Use the measuring scoop supplied with the machine to perform this operation. Then, close the cover.

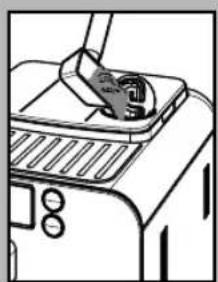
Warning: Only add pre-ground coffee to the compartment. Other substances and objects may cause severe damage to the machine. This damage will not be covered by warranty.
Press and release:
the "button for an espresso coffee; the" button for a long coffee.
- The brewing cycle then starts. After the prebrewing cycle, coffee begins to come out of the dispensing spout.
- Coffee brewing stops automatically when the pre-programmed level is reached; however, it is possible to interrupt coffee brewing by pressing the button initially pressed.
After dispensing the product, the coffee beans configuration of the machine is restored.

Repeat the operations described above to brew other s.
DISPENSING HOT WATER

Warning: At the beginning, short spurts of hot water may come out. Danger of scalding. The hot water wand may reach high temperatures. Never touch it with bare hands.
- Before dispensing hot water, check that the following icon is displayed.
When the machine is ready, proceed as follows:
- Place a container under the steam wand (Pannarello, if supplied).
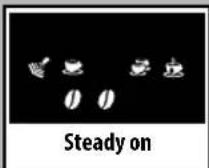

- Place a container under the steam wand (Pannarello, if supplied).
![graph TD A["Start"] --> B["Action: Screen with 'OK' icon"] B --> C{Steady on} C --> D["Action: Screen with 'OK' icon"] D --> E{Blinking} E --> F["Action: Screen with 'OK' icon"] F --> G{Blinking} G --> H["Action: Screen with 'OK' icon"]](/content/2026/06/1286822/images/8b36643669bacc78c097e1273a1a5f1f6846705f2dd9a4810812ab1421ff9cff.jpg)
- Turn the selector switch clockwise to set it to the "💡" position.
- Only the following icon will be displayed steady on.
- Fill the cup with hot water to the desired level; to stop hot water dispensing, turn selector switch counterclockwise back to the "●" position. The machine returns to the normal operating mode.
i Occasionally, after turning the selector switch, hot water may not be dispensed and the following displayed icon will start blinking. Simply wait until the end of the warm-up phase, at which point hot water will be dispensed from the Pannarello.
STEAM DISPENSING / PREPARING A CAPPUCCINO
Steam may be used to froth milk for a cappuccino, as well as to reheat other beverages.
Danger of scalding! Brewing may be preceded by small jets of hot water. The steam wand may reach high temperatures. Never touch it with bare hands.
i Important note: immediately after using the steam to froth the milk, clean the steam wand (or Pannarello when provided). When the machine is ready, brew a small amount of hot water in a glass and clean the steam wand (or Pannarello when provided) externally. In this way, all parts will be perfectly
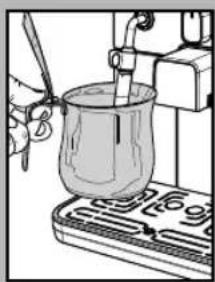
cleaned and free of any milk residue.
To prepare your cappuccino, we recommend discharging the water in the steam wand.
• To discharge the water in the steam wand, place a container under the steam wand (Pannarello, if supplied).

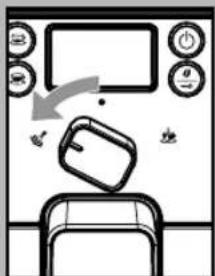
- When the machine is ready to brew coff ee, turn selector switch counterclockwise to set it onto the " 🔍" position. Residual water may come out of the steam wand (Pannarello, if supplied).
- The icon blinks during the preheating time required by the machine.

- Steam dispensing will begin when the icon is displayed steady on; soon after, only steam will begin to come out.
- Turn the selector switch clockwise and set it back to the "●" position to stop dispensing steam.

To ensure better results when preparing a cappuccino, use cold milk straight from the fridge.

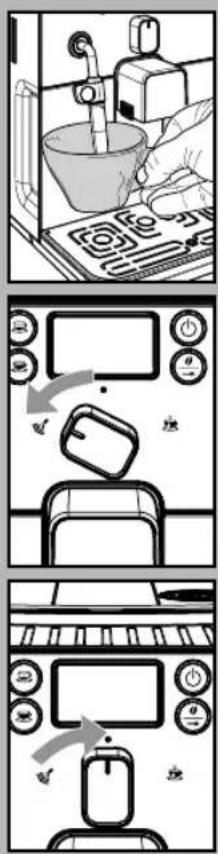
• To heat the milk directly in the cup, immerse the steam wand (Pannarello, if supplied) in the milk to be heated.
- Turn the selector switch counterclockwise to set it to the " 🔊" position. Rotate the container and move it gently up and down to obtain uniform foam.
- After dispensing steam for the desired time, turn the selector switch clockwise and set it back to the “●” position to stop dispensing steam.
• The same procedure can be used to heat other beverages.
After using the steam wand (Pannarello, if supplied), wash it as described in the "Cleaning and Maintenance" section.
After using steam to prepare a beverage, it is possible to brew coffee or to dispense steam straight after.
If the selector switch is left on the central position "●", the machine, in order to save energy, automatically reaches the temperature needed to dispense coffee.


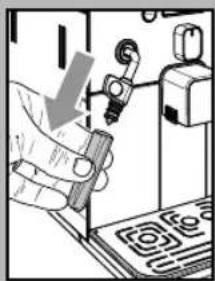

CLEANING AND MAINTENANCE
General Cleaning
• Empty and clean the coffee grounds drawer daily, with the machine turned on.
Note: We recommend emptying the container if the machine is not going to be used for some days.
- Maintenance and cleaning operations can only be carried out when the machine is cold and disconnected from the electric network.
- Do not immerse the machine in water.
- Do not wash any of its parts in the dishwasher.
- Do not use sharp objects or harsh chemical products (solvents) for cleaning.
- Use a soft, dampened cloth to clean the machine.
- Do not dry the machine and/or its components using a microwave and/or standard oven.
After preparing milk beverages, dispense hot water from the steam wand (Pannarello, if supplied) to obtain a thorough cleaning.
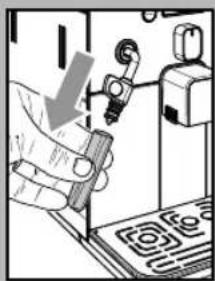
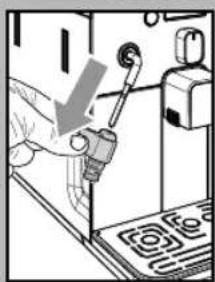
- Every day, after heating the milk, remove the external part of the Pannarello (if supplied) and wash it with fresh drinking water.
-
Clean the steam wand weekly. In order to do this, perform the following operations:
-
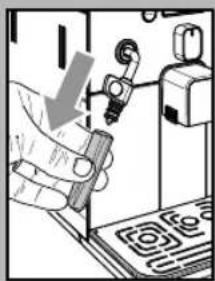
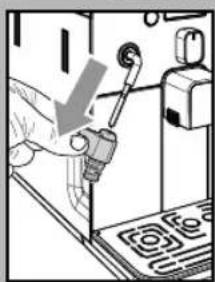
Remove the external part of the Pannarello (for standard cleaning);
- Remove the upper part of the Pannarello from the steam wand;
- Wash the upper part of the Pan-narello with fresh drinking water;
- Wash the steam wand with a wet cloth and remove any milk residue;
- Replace the upper part in the steam wand (make sure it is completely inserted).


Reassemble the external part of the Pannarello.
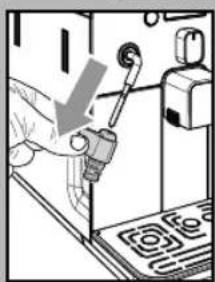
• We recommend cleaning the water tank daily. For an easier removal of the water tank, move the steam wand / Pannarello upwards:
- Remove the small white fi Iter in the water tank and wash it under running drinking water.
- Reposition the small white fi Iter in its housing by gently pressing and turning it at the same time.
- Fill the water tank with fresh drinking water.
- Empty and clean the drip tray daily. Perform this operation also when the float is raised.
- Also clean the seat of the tray every week through the openings on the bottom of the machine.
Brew Group
- The brew group should be cleaned every time the coff ee bean hopper is filled or at least once a week.
- Turn off the machine by pressing the ON/OFF button and remove the plug from the socket.
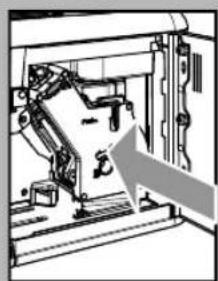
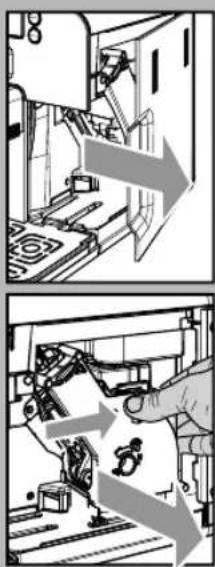
- Remove the coffee grounds drawer. Open the service door.
- To remove the brew group, pull it by the handle and press the «PUSH» button. The brew group must be washed only with lukewarm water with no detergent/soap.


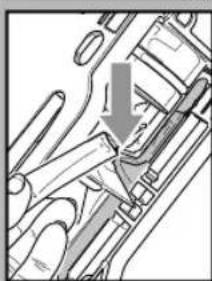

- Wash the brew group with lukewarm water and carefully clean the upper filter.
• Thoroughly wash and dry all the parts of the brew group. - Thoroughly clean the inside of the machine.
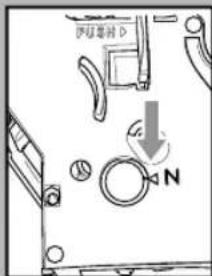
• Make sure that the two reference signs match up. - Make sure that the lever is in contact with the brew group. Press the "PUSH" button to make sure that the brew group is in the correct position.
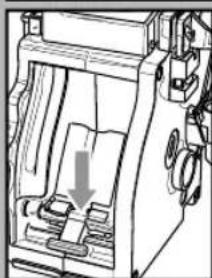
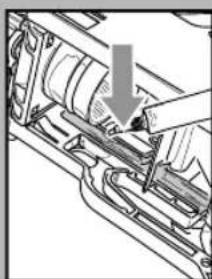
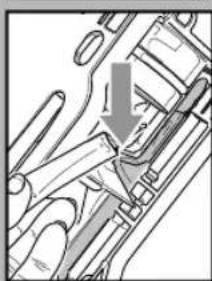
i Lubricate the brew group after approximately 500 brewing cycles. The grease to lubricate the brew group may be purchased at authorised service centres.
- Lubricate the brew group guides using the supplied grease only.
-
Apply the grease evenly on both side guides.
-
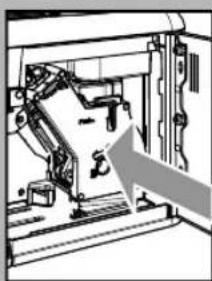
Insert the brew group in its seat until it locks into place WITHOUT pressing the "PUSH" button.
- Insert the coffee grounds drawer. Close the service door.


35'

DESCALING
Limescale normally builds up with the use of the appliance.
The machine must be descaled when the icon appears on the display.
Do not turn the machine off or put it in stand-by mode during the descaling process.

i Only use the GAGGIA descaling solution. Its formula has been designed to ensure better machine performance and operation for its whole operating life. If correctly used, it also avoids alterations in the brewed product.
Warning! Never drink the descaling solution or any products dispensed until the cycle has been carried out to the end. Never use vinegar as a descaling solution.
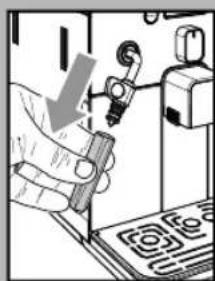
Before descaling the machine, perform the following operations:
- remove the Pannarello (if supplied) from the steam wand as described in the "Cleaning and Maintenance" chapter;
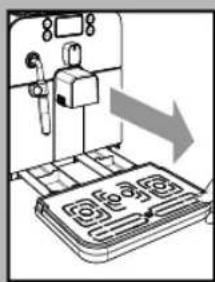
- empty the drip tray. Place it back in the machine before proceeding.

1 Place a large container under the dispensing spout.
Turn the machine off by pressing the "STAND-BY" button. Wait for the machine to complete the rinse process.
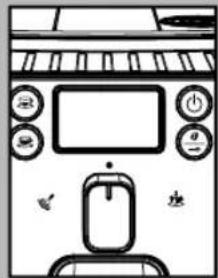
Warning! Remove the "Intenza" fi Iter before adding the descaling solution.
Note: should the containers fi ll up, temporarily suspend the dispensing process in order to empty the containers.
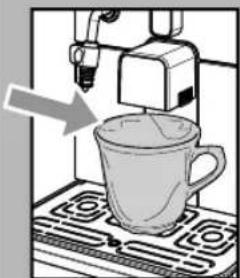
If descaling solution and/or water spills out of the dispensing spout:
PAUSE: turn the selector switch to the "☐" position;
START: turn the selector switch to the "●" position.

If descaling solution and/or water spills out of the steam wand:
PAUSE: turn the selector switch to the "●" position;
START: turn the selector switch to the "💡" position.
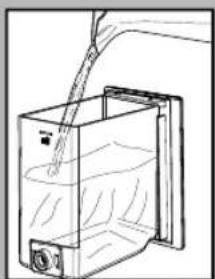
2 Pour the entire content of the GAGGIA concentrated descaling solution into the water tank and fill it with fresh drinking water up to the MAX level. Place the tank back into the machine.

3 Place an empty container under the steam wand and another one under the dispensing spout.
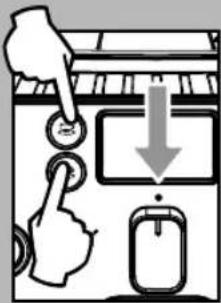
4 Make sure the selector switch is in the "●" position.
5 Press and hold the 2 brew buttons at the same time for 3 seconds: the descaling cycle is started.
![graph TD A["Monitor"] --> B["Device"] B --> C["Table"] style A fill:#f9f,stroke:#333 style B fill:#ccf,stroke:#333 style C fill:#cfc,stroke:#333](/content/2026/06/1286822/images/c3f4c4f64d391f2409fafa2187a4c1d36ef5d284e87fd801064dc74556d543d6.jpg)
Note: if the “⚠️ and ” indicator lights start blinking immediately after start-up, turn the selector switch right to the “💡” position. When the “⚠️,” “💡” and “💡” indicator lights start blinking, turn the selector switch back to the “●” central position.
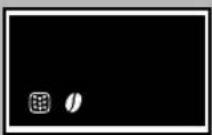
6 The light blinks to show the machine has entered the descaling automatic programme; when the "O" light is steady, the 1t limescale removal phase is on.

7 When the "Nights start blinking, turn the selector switch clockwise to the "position; in this case, the steam/hot water wand starts dispensing the descaling solution at regular intervals.
![graph TD A["Display"] --> B["Power"] B --> C["Control Button"] C --> D["Device Icon"] style A fill:#f9f,stroke:#333 style D fill:#ccf,stroke:#333](/content/2026/06/1286822/images/3c4c868b730565f9f6019b143005a41fcd8bf692298f1de41cc93f07b516caa3.jpg)

8 The "light blinks to show the machine has entered the descaling automatic programme; when the "0" light is steady, the 1 st limescale removal phase is on.
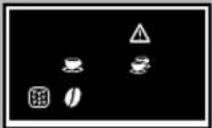
9 When there is no more descaling solution left in the water tank, the "⚠️", "💡" and " lights blink simultaneously.

10 Turn the selector switch to the "●" central position. Empty the container under the steam wand and the one under the dispensing spout.

11 The "night turns on and the water tank must be removed before entering the next stage.

12 Remove the water tank, rinse it and fill it up to the "MAX" level with fresh drinking water.

13 Place the tank back in the machine. The two "0" lights turn on showing the machine has entered the rinse phase. The "💡" and "▲ights are blinking in the display.

14 Place an empty container under the steam wand and another one under the dispensing spout. Turn the selector clockwise to the "position."

15 When the "△", "●" and "●" lights start blinking at the same time, turn the selector switch to the "● central position.
The machine starts rinsing directly from the dispensing spout.

16 When the "and " lights start blinking, turn the selector switch clockwise to the " position; in this case, the steam/hot water wand dispenses the rinsing water continuously.

17 When there is no more rinsing water left in the water tank, the "△", "♡" and "♡" lights blink simultaneously.

18 Turn the selector switch to the "central position.

19 The "night turns on and the water tank must be removed before entering the next stage. Empty the container under the steam wand and the one under the dispensing spout.
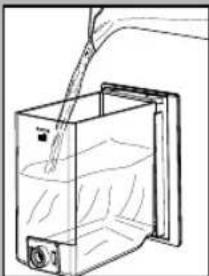
20 Remove the water tank, rinse it and fill it up to the "MAX" level with fresh drinking water.
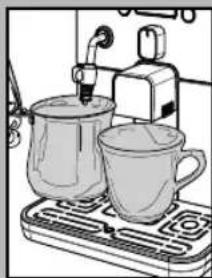
21 Place an empty container under the steam wand and another one under the dispensing spout.

22 When the "💡" and " lights start blinking, turn the selector switch clockwise to the "💡" position. The second rinse cycle is started.
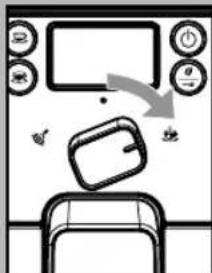
If the tank is not filled up to the MAX level, the cycle must be repeated from point 17.
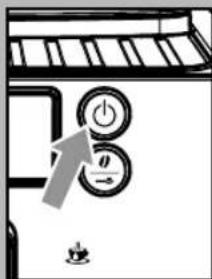
23 When the second rinse cycle is over, the machine enters the stand-by mode and the "☐" button starts blinking.
Empty the container under the steam wand.

24 Turn the selector switch to the "● central position.
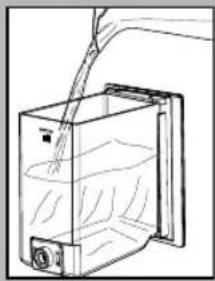
25 At the end, refi ll the water tank.

Reassemble the external part of the Pannarello.
The descaling cycle is complete.
Start the machine as described in the manual and perform normal warm-up and rinse operations: the machine is now ready for product brewing.
If the machine is switched off during the descaling cycle, next time the machine is switched on the cycle must be repeated from the point it has been paused.
The descaling solution is to be disposed of according to the manufacturer's instructions and/or the regulations in force in the country of use.
After completing the descaling cycle, wash the brew group as described in the "Brew Group" section in the "Cleaning and Maintenance" chapter.
Remarks on descaling
The machine you have purchased is equipped with advanced software to check the quantity of used water in order to provide reliable information about the right time to carry out descaling operations.
This software has been programmed for standard water hardness.
In these specific cases, it is recommended to perform descaling cycles every 1-2 months, even if the machine does not signal it.
CONTROL PANEL DISPLAY
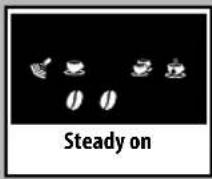
Ready Signals
• The machine is ready for brewing coffee from bean and hot water dispensing.

• The machine is ready for pre-ground coff ee brewing.
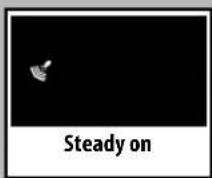
• The machine is in the steam dispensing phase.

- The machine is in the hot water dispensing phase.
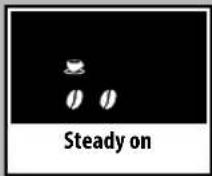
- The machine is brewing 1 espresso coffee or a long coffee.

• The machine is brewing 2 espresso coffees or 2 long coffees.

- The machine is programming the amount of coffee to be brewed each time the "☐" or "☐" button is pressed.

Warning Signals
- The machine is warming up to brew coffee and dispense hot water or steam.

- The machine is performing the rinse cycle. Wait until the machine stops the operation.

• The machine needs a descaling cycle.
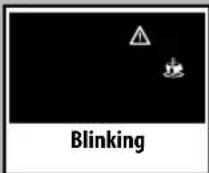
• The machine needs water circuit priming.

Alarm Signals
- Return the hot water / steam knob to its correct position.
- Insert the brew group in the machine.
- Close the service door.

• Empty the coffee grounds drawer.

- Insert the coffee grounds drawer.

- No coffee beans in the coffee bean hopper. After refi lling the hopper, the cycle can be restarted.

- Fill the water tank.
TROUBLESHOOTING
| Machine Actions Causes Solutions | ||
| The machine does not turn on. The machine is not connected to the power source. | Connect the machine to the power source. | |
| The coff ee is not hot enough. The cups are cold. Warm the cups with hot water. | ||
| No hot water or steam is dispensed. | The hole of the steam wand is clogged. | Clean the hole of the steam wand using a pin.Make sure that the machine is turned off and has cooled before performing this operation. |
| Pannarello is dirty (if supplied). Clean the Pannarello. | ||
| The coff ee has little crema.(see note) | The coff ee blend is unsuitable, the coff ee is not freshly roasted or the grind is too coarse. | Change coffee blend or adjust the grind as explained in the "Coff ee Grinder Adjustment" section. |
| The machine takes a long time to warm up or the amount of water dispensed from the wand is too little. | The machine circuit is obstructed by limescale build-up. | Descale the machine. |
| The brew group does not come out. The brew group is out of place. Turn the machine on. Close the service door.The brew group automatically returns to the correct position. | ||
| Dregdrawer is inserted. Remove the dregdrawer first, then the brew group. | ||
| The machine grinds the coff ee beans but no coff ee comes out.(See note) | Water tank is empty. | Fill the water tank and prime the circuit (sec-tion "Using the Machine for the First Time"). |
| Brew group is dirty. | Clean the brew group (section "Brew Group"). | |
| Circuit is not primed. | Prime the circuit (section "Using the Machine for the First Time"). | |
| Rare event that occurs when the machine is automatically adjusting the dose. | Brew a few coffees as described in section "Gaggia Adapting System". | |
| The dispensing head is dirty. | Clean the dispensing head. | |
| The coff ee is too weak.(see note) | Rare event that occurs when the machine is automatically adjusting the dose. | Brew a few coffees as described in section "Gaggia Adapting System". |
| Machine Actions Causes Solutions | |
| Coff ee is brewed slowly.(see note) | The coff ee grind is too fine. Change coffee blend or adjust the grind as explained in the "Coff ee Grinder Adjustment" section. |
| The circuit is not primed. Prime the circuit (section "Using the Machine for the First Time"). | |
| The brew group is dirty. Clean the brew group (section "Brew Group"). | |
| Coffee leaks out of the dispensing head. | The dispensing head is clogged. Clean the dispensing head and its holes. |
Note: These problems can be considered normal if the coffee blend has been changed or if the machine has just been installed. In this case wait until the machine performs a self-adjusting operation as described in section "Gaggia Adapting System".
Please contact Gaggia Customer Service or an authorized service center for any problems not covered in the above table or when the suggested solutions do not solve the problem.

ALLGEMEINES


INSTALLATION
Verpackung


Blinkend
Langsam blinkend

Zyklisch blinkend


Wasserfi Iter „INTENZA“ (optional)






35'

ENTKALKUNG

GÉNÉRALITÉS


MISE EN PLACE
Emballage





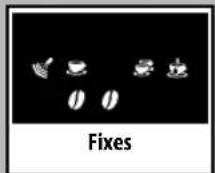
Réglage « Arôme »

DISTRIBUTION DE CAFÉ



NETTOYAGE ET ENTRE- TIEN
Nettoyage général




35'

DÉTARTRAGE


Sede Legale/Registered Office
Piazza A. Diaz, 1
20123 Milano - Italia
Capitale Sociale Euro 104.000 i.v.
REA MI1387376 - R.I. Cod.Fisc. 020069680367
Part. IVA : IT-13054780153


- GAGGIA BRERA
- GENERALITÀ
- INSTALLAZIONE
- IMBALLAGGIO
- GRUPPO CAFF È
- GENERAL INFORMATION
- TECHNICAL SPECIFICATIONS
- INSTALLATION
- MACHINE PACKAGING
- PRELIMINARY OPERATIONS
- CIRCUIT PRIMING
- USING THE MACHINE FOR THE FIRST TIME OR AFTER A LONG PERIOD OF INACTIVITY
- DO NOT ADD THE PRE-GROUND COFFEE TO THE COMPARTMENT
- RINSE/SELF-CLEANING CYCLE
- INTENZA" WATER FILTER (OPTIONAL)
- ADJUSTMENTS
- GAGGIA ADAPTING SYSTEM
- COFF EE GRINDER ADJUSTMENT
- ADJUSTING THE COFF EE LENGTH
- STANDBY
- DISPENSING SPOUT ADJUSTMENT
- AROMA" ADJUSTMENT
- COFFEE BREWING
- USING COFF EE BEANS
- USING PRE-GROUND COFF EE
- I NOTE
- TO BREW COFFEE
- PRESS AND RELEASE
- DISPENSING HOT WATER
- STEAM DISPENSING / PREPARING A CAPPUCCINO
- CLEANING AND MAINTENANCE
- BREW GROUP
- I LUBRICATE THE BREW GROUP AFTER APPROXIMATELY 500 BREWING CYCLES. THE GREASE TO LUBRICATE THE BREW GROUP MAY BE PURCHASED AT AUTHORISED SERVICE CENTRES
- DESCALING
- REMARKS ON DESCALING
- CONTROL PANEL DISPLAY
- READY SIGNALS
- WARNING SIGNALS
- ALARM SIGNALS
- ALLGEMEINES
- VERPACKUNG
- WASSERFI ITER „INTENZA“ (OPTIONAL)
- ENTKALKUNG
- GÉNÉRALITÉS
- MISE EN PLACE
- EMBALLAGE
- RÉGLAGE « ARÔME
- DISTRIBUTION DE CAFÉ
- NETTOYAGE ET ENTRE- TIEN
- DÉTARTRAGE
Brand : GAGGIA
Model : RI9305
Category : Coffee machine