
WPTOUCH - Remote control Ecler - Free user manual and instructions
Find the device manual for free WPTOUCH Ecler in PDF.


| Product type | Remote control |
| Brand | Ecler |
| Model | WPTOUCH |
| Dimensions (approx.) | 150 x 50 x 20 mm |
| Weight (with batteries) | Approximately 100 g |
| Power supply | 2 AAA batteries (not included) |
| Main functions | Remote control of Ecler equipment; menu navigation; source selection; volume adjustment |
| Range | Up to 10 m (depending on obstacles) |
| Transmission type | Infrared (IR) |
| Compatibility | Ecler devices equipped with an IR receiver |
| Material | ABS plastic |
| Color | Black |
| Display | No (capacitive touch keys) |
| Number of keys | 12 programmable keys |
| Care and cleaning | Clean with a soft, dry cloth. Do not use abrasive products. |
| Safety | Avoid shocks and exposure to moisture. Remove batteries if not used for an extended period. |
| Spare parts and repairability | AAA batteries easily replaceable. No spare parts available separately. |
| General information | User manual downloadable free from notice-facile.com |
Frequently Asked Questions - WPTOUCH Ecler
User questions about WPTOUCH Ecler
0 question about this device. Answer the ones you know or ask your own.
Ask a new question about this device
Download the instructions for your Remote control in PDF format for free! Find your manual WPTOUCH - Ecler and take your electronic device back in hand. On this page are published all the documents necessary for the use of your device. WPTOUCH by Ecler.
USER MANUAL WPTOUCH Ecler
All numbers subject to variation due to production tolerances. ECLER SA reserves the right to make changes or improvements in manufacturing or design which may affect specifications.
1. IMPORTANT REMARK
We appreciate your confidence in choosing our remote control wall panel WPTOUCH. In order to obtain the best performance and efficiency it's VERY IMPORTANT to carefully read and follow all considerations specified in this manual before connecting the product.
In order to guarantee the optimum operation of this unit, we strongly recommend that its maintenance be carried out by our Authorised Technical Services.
1.1. Safety Precautions

Do not expose the unit to rain or water splashes, and do not place liquid containers or incandescent objects like candles on top of the unit.
Should any connection / disconnection task be done, always disconnect the unit from the mains supply.
There are no user serviceable parts inside the unit.
The front panel should not be cleaned with dissolvent or abrasive substances because silk-printing could be damaged. To clean it, use a soft cloth slightly wet with water and neutral liquid soap; dry it with a clean cloth. Be careful that water never gets into the unit through the holes of the front panel.
2. INTRODUCTION
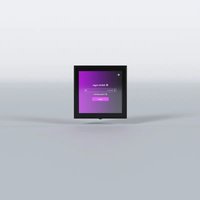
The WPTOUCH is a remote control wall panel with transflective LCD display and 3 touch controls: two push buttons and a rotating control wheel (“jog wheel”). In addition it features an infrared receiver to operate control functions from a remote control (see section FUNCTIONS DIAGRAM).
The WPTOUCH has two connection ports (voltage control analogue outputs and a MIMO-REMOTE digital control bus) able to operate in two different modes:
1. Analogue mode
In this mode, voltage control output terminals of the control panel provide the necessary DC voltage to be compatible with:
- MIMO54: source selection and volume functions are enabled for one of the MIMO54 output zones
- Equipment with a remote control port for volume (AMPACK series, AMIC and AMIC24, NZA series, MPA series, etc.): it allows to control the volume of one or more unit channels.
2. Digital mode.
In this mode, the WPTOUCH acts as a MIMO88 slave, being connected to it by means of the MIMO-REMOTE digital control bus. The functions of the buttons and control wheel and the information displayed on the WPTOUCH screen will depend on the MIMO88 setup. In this mode, control voltage outputs are disabled.
3. INSTALLATION AND CONNECTION
The WPTOUCH can be recessed in wall, inserted into a standard electrical box or surface mounted, by means of the provided bracket.
Connections between the WPTOUCH and other equipment to be remote controlled are:
- Connection with MIMO54 (analogue volume control, MUTE and source selection). See diagram.
- Connection with equipment featuring a 0-10V DC remote control port for volume (AMPACK series, AMIC and AMIC24, NZA series, MPA series, etc.). See diagram.
- Connection with MIMO88 (digital control, programmable functions). See diagram.
Note: in some cases, a WP-PSU power supply will be necessary due to the power consumption requirements of the installation, depending on the type of device WPTOUCH are connected to and/or the amount of them. In case of doubt, please contact our technical support.
4. OPERATION
4.1. WPTOUCH Operating Modes
After resetting the device (reset) or at startup, the WPTOUCH will be in analogue mode (ANALOG). If connected to a MIMO88 via its digital bus, this connection will be established, synchronized, and the digital mode will be automatically recalled (DIGITAL LOCKED, the icon of connection appears in LCD display).
Once in digital mode, and if communication is lost between the devices, the WPTOUCH remains in offline mode (UNLOCKED) until a new synchronization with MIMO88. If you want to return to analogue mode from the offline mode, you have to reset the device in order to come back to the initial stage.
In digital mode, the device can be disabled to prevent unwanted tampering (DISABLED).
The following diagram illustrates the different WPTOUCH status and possible transitions between them:

flowchart
graph TD
    A["RESET"] --> B["USER (ANALOG)"]
    B --> C["DIGITAL LOCKED"]
    C --> D["DISABLED"]
    D --> C
    C --> E["UNLOCKED"]
    E --> C
In analogue mode, the functions of the wall panel touch controls are:
- KEY 1 (left): MUTE ON / OFF. When the MUTE function is activated (MUTE ON), the volume indicator is replaced on the second line of the display by the word "MUTE" and an asterisk appears on the far left of the display. At the same time, the DC control voltage is modified so that it mutes the device connected to the WPTOUCH through the analogue remote control port for DC control voltage.
• KEY 2 (right): source selection, among the maximum number of selections defined in the CONFIGURATION menu (see below). The sequence to follow for the source selection is:
-
Press KEY 2: If the panel is set to display the device name on the first line of the screen, the name of the active selection will temporarily be displayed instead. The arrow on the far right of the display indicating the parameter the wheel is controlling will jump from the second to the first line of the display.
-
The rotating wheel allows to scroll available selections.
-
Press KEY 2 again to confirm the new selection (the one displayed) or KEY 1 to cancel the operation. The arrow on the far right returns to the second line of the display.
-
If the panel is set to display the device name on line 1 of the LCD display, it keeps showing the name of the active source until LCD backlight turns off (after 5 seconds since the last action on the panel controls).
If the new selection is not confirmed or cancelled while panel is illuminated, when illumination turns off (after 5 seconds) the panel will automatically exit the selection mode and the previous source selection will remain active.
Choosing one or another source on the panel generates a specific DC voltage level at its analogue control port, suitable for this selection by the connected MIMO54.
- Rotating wheel (JOG WHEEL): By default, in analogue mode, it changes volume, generating the DC control voltage suitable for MIMO54 or other equipment featuring a 0-10V DC remote control port for volume. After pressing KEY 1 or 2 it also has other functions such as source selection or device configuration in EDITION and CONFIGURATION modes.
In digital mode, functions of the panel controls depend on the setup of the master MIMO88 (MASTER) for each panel. A MIMO88 can manage up to 16 WPTOUCH units, each one with a custom setup to adjust some parameters of the master MIMO88. Using the panel controls generates an exchange of data with the MIMO88 through the WPTOUCH digital port, in order for the MIMO88 to recognize the commands, to translate them into actions and/or setup parameter changes and provide the WPTOUCH information to be displayed on the LCD screen (volume level, active source or memory, etc.). For example, in digital mode it's possible to assign the source selection function (as in analogue mode) or the memory selection (PRESET) to the following sequence: press WPTOUCH KEY 2 then turn the wheel. Similarly, KEY 1 can be assigned to an output MUTE function, cross-point of the MIMO88 audio matrix, global MUTE, activation of a GPO control output, etc. In this mode (digital), as in analogue mode, an asterisk appears at the far left of the LCD display when the function assigned to that key is activated.
4.2.WPTOUCH Edition and Configuration Modes
In addition to the modes and status described in the previous paragraph, to which a regular WPTOUCH user could access, there are two device setting modes allowing to adjust a set of operating parameters. These modes are "hidden" to a generic panel user: an advanced user, the system installer or programmer must type a key sequence to access them, and such a sequence is unlikely to happen accidentally. These modes are named EDITION Mode and CONFIGURATION Mode.

flowchart
graph TD
    A["RESET"] --> B["USER (ANALOG)"]
    B --> C["EDITION"]
    C --> D["CONFIGURATION"]
    D --> B
4.2.1. EDITION Mode
This mode lets you change the text displayed on the LCD screen for selecting an active source in analogue mode. From the digital mode, the EDITION Mode is not accessible, since selection and device names displayed on WPTOUCH screen are allocated from the MIMO88 and EclerNet Manager software.
Default names are "SOURCE n", where n is an integer between 1 and 17.
The sequence to follow is:
-
From USER mode, press KEY 2 and, without releasing, press KEY 1. Keep both keys pressed for 3 seconds.
-
On the screen, line 1 displays "EDIT SOURCE NAME" and line 2 displays the name of the active selection.
-
Releasing KEY 1 then KEY 2 gives access to the editing of the current selection's name. On the screen, line 1 displays the message "USE <> and ROTOR". Line 2 displays the name of the currently active selection, left justified and with a cursor blinking under the first character.
-
In this status, the wheel has two operating modes:
- as left/right navigation keys (clicking on the positions corresponding at 9 and 3 in the face of a clock), to move the cursor to the previous or next character.
- usual rotating mode, to change the character on the cursor position.
- Once all the changes are made press KEY 2 to validate or KEY 1 to cancel, automatically returning to USER Mode.
Note: If the panel is configured as a single volume control (VOLUME ONLY), editing the name of the current selection will not be allowed.
Each WPTOUCH can have assigned a device name that can be displayed on screen by default instead of the active selection (see CONFIGURATION Mode).
To change the device name of a panel, the sequence to follow is:
- From USER mode, press KEY 2 and, without releasing, press KEY 1. Keep both keys pressed for 3 seconds.
- On the screen, line 1 displays "EDIT SOURCE NAME" and line 2 displays the name of the active selection.
- Release KEY 1, holding KEY 2.
- Press again KEY 1.
- On the screen, line 1 displays "EDIT DEVICE NAME" and line 2 displays the name assigned to the device.
- Releasing KEY 1 then KEY 2 gives access to the editing of the name assigned to the device. On the screen, line 1 displays "USE <> and ROTOR". Line 2 displays the name of the device, left justified and with a cursor blinking under the first character.
- In this status, the wheel has two operating modes:
- as left/right navigation keys (clicking on the positions corresponding at 9 and 3 in the face of a clock), to move the cursor to the previous or next character.
- usual rotating mode, to change the character on the cursor position.
- Once all the changes are made press KEY 2 to validate or KEY 1 to cancel, automatically returning to USER Mode.
During the source or device name editing process, pressing KEY 2 confirms the changes and pressing KEY 1 cancels them. After 20 seconds since the last action, non-validated changes will also be discarded.
4.2.2. CONFIGURATION Mode
This mode allows you to modify the WPTOUCH following parameters:
- For both modes, analogue and digital
-
"EDIT SOURCE NAME", "EDIT DEVICE NAME". Type of information displayed on line 1 of the LCD display: selection of active source or device name.
-
"LCD CONTRAST". From 0 to 60.
- For analogue mode only:
-
"DC CONTROL". Type of analogue volume control: linear (LIN) or antilog (ANTILOG). Défaut: LIN. Defines the curve shape of the 0-10V DC voltage volume control related to the WPTOUCH volume control (wheel).
-
"REMOTE TYPE". Enables the remote control functions: volume and source selection (VOL + SELECT) or only volume (VOL). Please remember that the WPTOUCH is able to affect the volume remote control port (0 - 10V DC) of processors (AMIC, AMIC24), amplifiers (AMPACK 25, 80, 2-70 and 4-70, MPA series, NZA series, etc.). In these cases, the ideal setting is VOL.
-
"SOURCES". Max number of possible source selections: between 1 and 17. Default: 5. One source always corresponds to "OFF", i.e. no source selected. So, the number of sources must be set between 1 and n +1, where n is the number of available sources. For proper operation this parameter should never be set to a value greater than n +1.
-
"VOLUME MIN". Minimum volume level: between 0 and the maximum level. Default: 0
-
"VOLUME MAX". Maximum volume level: between the minimum and 100. Default: 100
-
"BACKLIGHT". LCD display illumination: ON / OFF. Default: ON. When ON, using the touch controls automatically activates LCD backlighting. It turns off a few seconds after the last action.
-
"FACTORY DEF". Restore all WPTOUCH default parameters.
To access the CONFIGURATION Mode, the sequence to follow is:
- From USER mode, press KEY 2 and, without releasing, press KEY 1. Keep both keys pressed for 3 seconds.
- On the screen, line 1 will display "EDIT SOURCE NAME" and line 2 will display the name of the active selection.
- Release KEY 1, holding KEY 2.
- Press again KEY 1.
- On the screen, line 1 will display "EDIT DEVICE NAME" and line 2 will display the name assigned to the device.
- Release again KEY 1, holding KEY 2.
- Press again KEY 1. The first parameter of the previous list will be displayed on screen.
- Release KEY 1 then KEY 2. In this status, the wheel has two operating modes:
- as left/right navigation keys (clicking on the positions corresponding at 9 and 3 in the face of a clock), to select the previous or next available parameter.
- usual rotating mode, to change the selected parameter value.
- Once the changes are made press KEY 2 to validate. The message "..." is temporarily displayed in line 2 of the screen then the previous display returns, showing the last modified parameter and its new value. If you want to cancel the parameter editing without leaving CONFIGURATION Mode, you must select a new parameter in the list (item 7), since selecting a new parameter cancels the changes you didn't validate with KEY 2. If, however, you want to leave CONFIGURATION Mode and return to USER mode, press KEY 1.
In CONFIGURATION mode and after 20 seconds since the last action, non-validated changes would be discarded, and the panel automatically returns to USER mode.
4.3. Infrared Control
The WPTOUCH features an IR receiver compatible with the optional REVO-IR remote control. The control of VOL UP/VOL DOWN functions and the function assigned to KEY 1 (MUTE in analogue mode and a programmable function in digital mode) are compatible with IR codes sent from the REVO-IR, so it's possible to use the REVO-IR to manage these functions at a distance of the WPTOUCH. The LCD display illumination flashes when the unit receives and accepts IR pulses emitted by the REVO-IR.
4.4. WPTOUCH special status
In digital mode, you can disable a WPTOUCH (DISABLED status) by sending the proper command from its master MIMO88. In this status, controls are disabled, the connection icon remains lit and the message "DISABLED DEVICE" is displayed. You can only enable the panel from the MIMO88.
This feature can be especially useful when the installation requires protection against unwanted tampering for some purposes or applications, in certain time slots, etc. while on other occasions some degree of interaction with generic system users should be allowed.
Another MIMO88 special status is the disconnected or "UNLOCKED" status. This status is automatic when the connection between WPTOUCH and MIMO88 is lost after connection and synchronization via the digital bus. You can change this status only if:
- WPTOUCH and MIMO88 are reconnected
- WPTOUCH is reset (RESET), then returns to analogue USER Mode (see Section 4.1.).


- TECHNICAL CHARACTERISTICS
- CARACTERÍSTICAS TÉCNICAS
- CARACTÉRISTIQUES TECHNIQUES
- TECHNISCHE DATEN
Power DC 10\~
Power consumption 32mA
Cable length:
Analog. Up to 500m long if a section of 0.5mm^2 (With WP-PSU power supply).
Digital. Up to 1000m with CAT5 or better. (With WP-PSU power supply).
Dimensions WxDxH 86x35
Weight 65g.



Brand : Ecler
Model : WPTOUCH
Category : Remote control