
MWHA 23223 X - Microwave HOTPOINT - Free user manual and instructions
Find the device manual for free MWHA 23223 X HOTPOINT in PDF.
| Brand | HOTPOINT |
| Model | MWHA 23223 X |
| Product type | Microwave with grill |
| Capacity | 23 L |
| External dimensions (W x H x D) | 520 x 341 x 479 mm |
| Net weight | 13.75 kg |
| Power supply | 230 V ~ 50 Hz |
| Microwave power (input) | 1250 W |
| Microwave power (output) | 800 W |
| Grill power (input) | 1000 W |
| Turntable diameter | 270 mm |
| Main functions | Microwave, Grill, Combination (C-1 and C-2), Defrost (weight and time), Auto menu (8 programs), Quick cook, Multi-stage cooking, Timer, Clock, Child lock |
| Microwave power levels | P100 (100%), P80 (80%), P50 (50%), P30 (30%), P10 (10%) |
| Included accessories | Glass turntable, roller ring, cooking rack |
| Care and cleaning | Clean the cavity with a damp cloth after each use. Use half a lemon and 300 ml of water for 10 minutes at full power for a deep clean. Do not use abrasive cleaners. |
| Safety | Safety lock system, child lock, earthing mandatory |
| Adjustment options | 24-hour clock, independent timer, incremental cooking time increase (30 sec) |
| General information | User manual available in multiple languages. High temperature of accessible surfaces during operation. Disconnect before cleaning. |
Frequently Asked Questions - MWHA 23223 X HOTPOINT
User questions about MWHA 23223 X HOTPOINT
0 question about this device. Answer the ones you know or ask your own.
Ask a new question about this device
Download the instructions for your Microwave in PDF format for free! Find your manual MWHA 23223 X - HOTPOINT and take your electronic device back in hand. On this page are published all the documents necessary for the use of your device. MWHA 23223 X by HOTPOINT.
USER MANUAL MWHA 23223 X HOTPOINT
natural_image
Illustration of a Hotpoint ARISTON microwave oven with control panel and display (no text or symbols on the device itself)IT Istruzioni per l'uso 1
EN Operating instructions 15
TR Kullanma Talimatlar 31
BG Указание за употреба 43
NL Gebruiksaanwijzing 57
CZ Návod k upotřebení 71
SK Návod na použitie 83
EL Οδηγίες χρήσεως 95

natural_image
Line drawing of a simple round table with slatted top and legs (no text or symbols)A) Microonde
B) Timer cucina/
Orologio
C) Arresta/Annulla
D) Grill/Combi
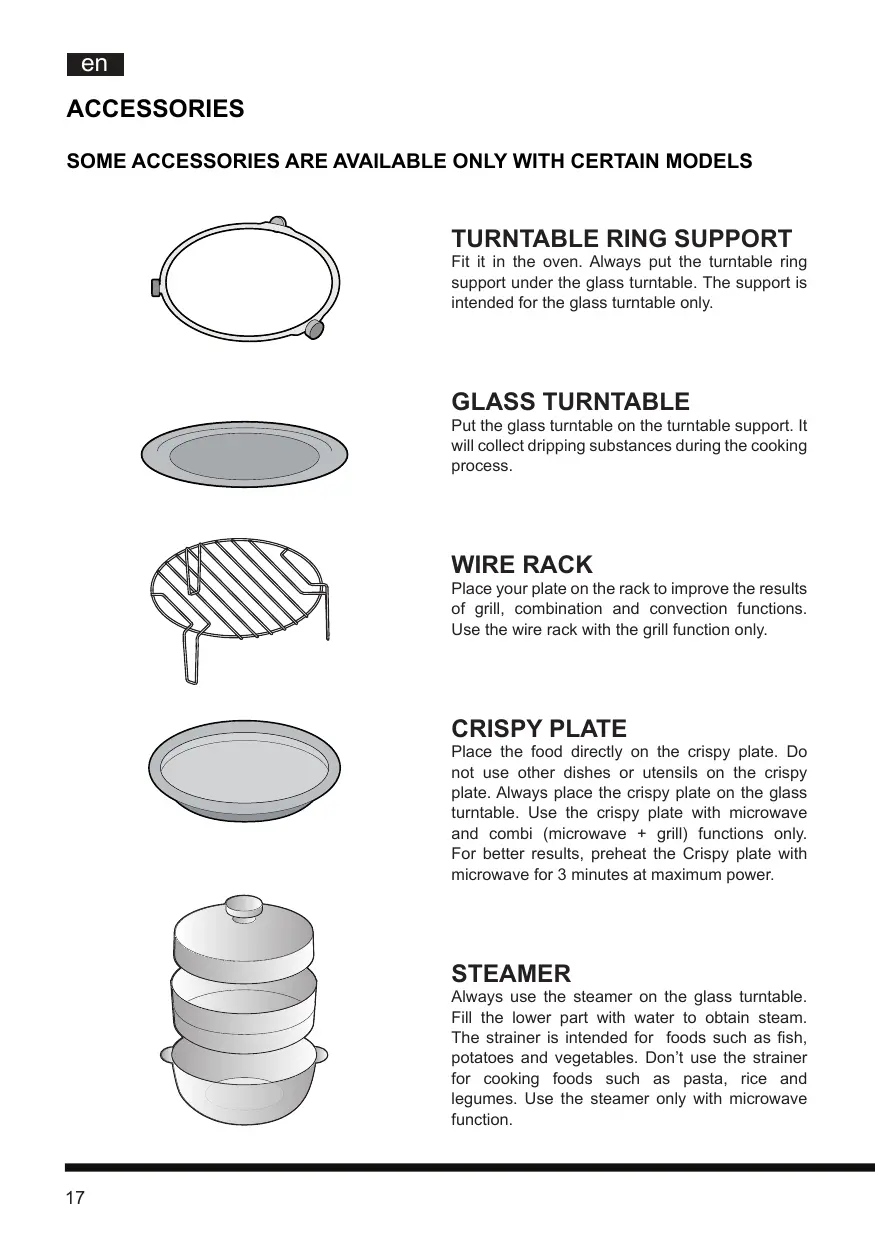
ALCUNI ACCESSORI SONO DISPONIBILI SOLO CON ALCUNI MODELLI
GUIDA AL PIATTO ROTANTE
The accessible surface may be hot during operation.
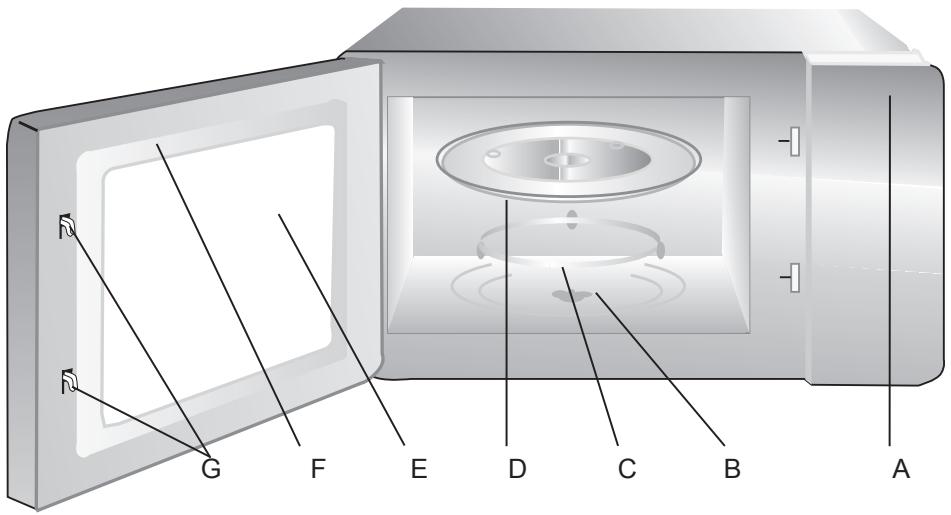
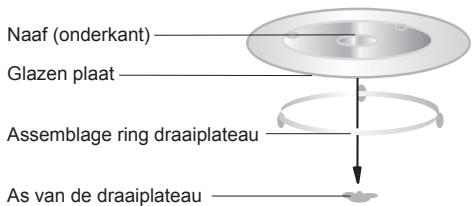
Names of Oven Parts and Accessories
Remove the oven and all materials from the carton and oven cavity.
natural_image
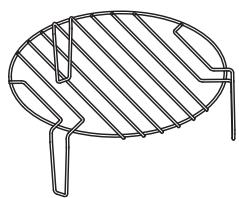
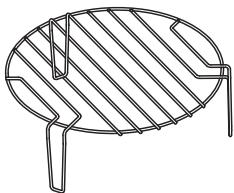
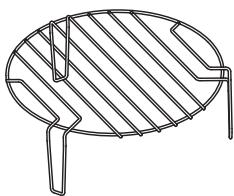
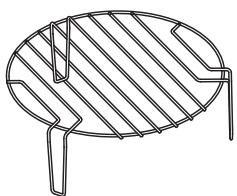
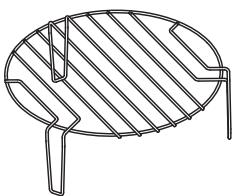
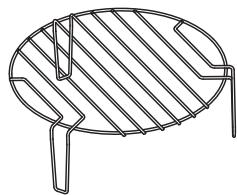
Line drawing of a simple round table with diagonal ribs and two legs (no text or symbols)Grill Rack (To be used in grill modeonly and placed on the glass tray)
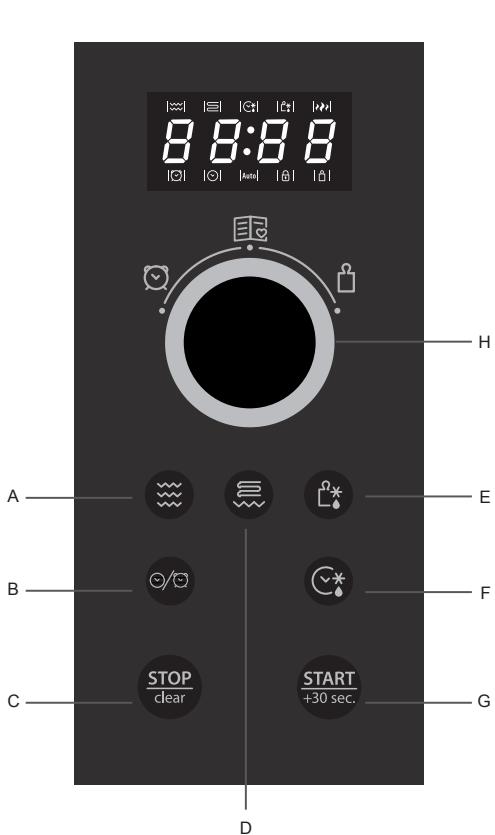
A) Control panel
B) Turntable spindle
C) Turntable ring support
D) Glass turntable
E) See-through oven window
F) Door assembly
G) Door safety interlock system
INTRODUCTION
Please read these instructions carefully before using this product, and save this manual for future use. Failure to follow these instructions could affect the life of the appliance and reduce oven performance.
READ THESE INSTRUCTIONS CAREFULLY
USER INTERFACE
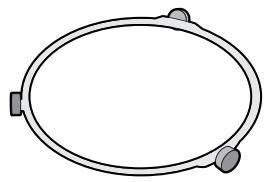
Fit it in the oven. Always put the turntable ring support under the glass turntable. The support is intended for the glass turntable only.
GLASS TURNTABLE
Put the glass turntable on the turntable support. It will collect dripping substances during the cooking process.
WIRE RACK
Place your plate on the rack to improve the results of grill, combination and convection functions. Use the wire rack with the grill function only.
CRISPY PLATE
Place the food directly on the crispy plate. Do not use other dishes or utensils on the crispy plate. Always place the crispy plate on the glass turntable. Use the crispy plate with microwave and combi (microwave + grill) functions only. For better results, preheat the Crispy plate with microwave for 3 minutes at maximum power.
STEAMER
Always use the steamer on the glass turntable. Fill the lower part with water to obtain steam. The strainer is intended for foods such as fish, potatoes and vegetables. Don't use the strainer for cooking foods such as pasta, rice and legumes. Use the steamer only with microwave function.
IMPORTANT SAFETY INSTRUCTIONS WARNING
-
To reduce the risk of fire, burns, electric shock, and injury to persons or overexposure to microwave energy when using this appliance, please follow basic safety precautions, including the following:
-
⚠️ WARNING: liquids or other food must not be heated in sealed containers since they are liable to explode.
-
⚠️ WARNING: it is hazardous for anyone other than a qualified person to carry out any service or repair operation which re-quires the removal of the anti-radiation protective cover of the microwave oven.
-
This appliance is not intended for use by children older than 8 and persons with reduced physical, sensory or mental capabilities, or lack of
experience and knowledge, unless they have been given supervision or instruction concerning use of the appliance so that they are able to use the oven in a safe way and understand the hazards of improper use. Children shall not play with the appliance. Do not allow children under 8 years of age to perform cleaning and maintenance operations without supervision.
-
Keep the appliance and power supply cord out of reach of children under 8 years of age.
-
Only use utensils suitable for microwave cooking.
-
Clean the oven at regular intervals and re-move any food remains.
-
Read and follow the specific: PRECAUTIONS TO PREVENT POSSIBLE OVEREX-POSURE TO MICROWAVE ENERGY
en
- Carefully attend appliance when paper, plastic, or other combustible materials are used to heat food in order to prevent the risk of fire.
- In case of smoke emission, switch off or unplug the appliance and keep the door closed in order to stifle any flames.
- Do not overcook food.
- Do not use the oven cavity for storage purposes. Do not store items, such as bread, cookies, etc. inside the oven.
- Remove wire twist-ties and metal handles from paper or plastic containers/bags before placing them in the oven.
- Follow the installation instructions strictly to finish installation or store the oven.
- Do not heat eggs in the shell and whole hard-boiled eggs in the microwave oven as they
may explode even after microwave heating has ended.
- This appliance is intended for household use and similar applications such as:
- staff kitchen areas in shops, offices and other working environments; - guest rooms in hotels, motels and other residential type environments; - farm houses; - bed and breakfast environments.
- In case of damage, power supply cord must be replaced by the manufacturer, any service technician or similarly qualified personnel in order to prevent any hazard.
- Do not store or use the appliance outdoors.
-
Do not use the appliance near water, on a wet basement or near a swimming pool.
-
The temperature of accessible surfaces may be high during appliance operation. The surfaces are likely to get hot during use. Keep cord away from hot surfaces, and do not cover any oven vent openings.
-
Do not let cord hang over edge of table or counter.
- Failure to maintain the oven in a clean condition could lead to deterioration of the surface that could adversely affect the life of the appliance and possibly result in a hazardous situation.
- The contents of feeding bottles and baby food jars shall be stirred or shaken and the temperature checked before consumption, in order to avoid burns.
-
Microwave heating of beverages can result in delayed eruptive boiling, therefore extra care must be taken when handling the container.
-
The appliance is not intended for use by per-sons (including children) with reduced physical, sensory or mental capabilities, or lack of experience and knowledge, unless they have been given supervision or instruction concerning use of the appliance by a person responsible for their safety.
-
Children should be supervised to ensure that they do not play with the appliance.
- The appliance is not intended to be operated by means of an external timer or separate remote-control system.
- Accessible parts may become hot during use. Young children should be kept away from appliance.
- Do not use Steam cleaners to clean the oven.
en
-
The oven becomes hot during use. Care should be taken to avoid touching heating elements inside the oven.
-
Only use the temperature probe recommended for this oven (for ovens provided with temperature-sensing probe tools.)
-
⚠️ WARNING: The appliance and its accessible parts become hot during use. Care should be taken to avoid touching heating elements. Children under 8 years of age shall be kept away unless continuously supervised.
-
The microwave oven must be operated with the decorative door open (for ovens with a decorative door).
-
The rear surface of appliance shall be placed against a wall.
-
The microwave oven shall not be placed in a cabinet unless it has been tested in a cabinet.
PRECAUTIONS TO PREVENT POSSIBLE OVEREXPOSURE TO MICROWAVE ENERGY
- Do not attempt to operate this oven with the door open as this can result in harmful exposure to microwave energy. Never tamper with or deactivate the interlocking devices on the door.
- Do not place any object between the oven front face and the door or allow any dust or cleaner deposits on sealing surfaces.
- ⚠️ WARNING: if the door or door seals are damaged, the oven must not be operated until it has been repaired by a qualified service technician.
ADDENDUM
Failure to maintain the oven in a clean condition could lead to deterioration of the surface that could adversely affect the life of the appliance and possibly result in a hazardous situation.
SPECIFICATIONS
| Model: | MWHA 2322 BMWHA 2322 XMWHA 23223 X |
| Rated Voltage: | 230V~ 50Hz |
| Rated InputPower(Microwave): | 1250W |
| Rated OutputPower(Microwave): | 800W |
| Rated InputPower(Grill): | 1000W |
| Oven Capacity: | 23L |
| Turntable Diameter: | 270 mm |
| External Dimensions: | 520mm X 341mm X479mm |
| Net Weight: | Approx.13.75kg |
GROUNDING INSTALLATION DANGER
Electrical Shock Hazard
Touching some of the internal components can cause serious personal injury or death. Do not disassemble this appliance.
WARNING
Electrical Shock Hazard
Improper use of the grounding can result in electrical shock. Do not plug into an outlet until the appliance is properly installed and earthed.
This appliance must be earthed. In the event of an electrical short circuit, this
reduces the risk of electrical shock through an appropriate current-carrying wire discharging any static charge. This appliance is supplied with a moulded three pin mains plug for your safety and convenience. The plug must be plugged into an outlet that is properly installed and earthed. Consult a qualified electrician or service technician if the instructions are not completely understood or to ensure the appliance has been properly earthed. If required, use a 3-wire extension cord, only.
- A short power-supply cord is provided to reduce the risks of entanglement or tripping over a longer cord.
- If a long cord set or extension cord is used:
1) The marked electrical rating of the cord set or extension cord should be at least as great as the electrical rating of the appliance.
2) The extension cord must be a earthed type 3-wire cord. 3) The long cord should never drape over the counter-top or tabletop where it can be pulled on by children or tripped over unintentionally.
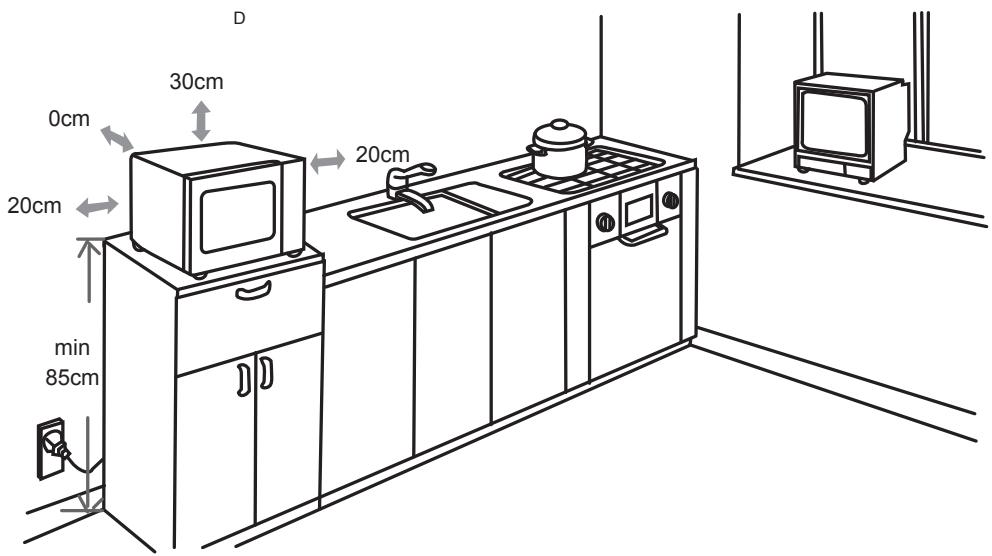
INSTALLATION
- Select a level surface that provide enough open space for the intake and/or outlet opening vents.
⚠ (1) The minimum installation height is 85cm. ⚠️ (2) The rear surface of appliance shall be placed against a wall. Leave a minimum clearance of 30cm above the oven; a minimum clearance of 20cm is required between the oven and any adjacent walls.
⚠ (3) Do not remove legs from the bottom of the oven.
⚠ (4) Blocking the intake and/or outlet openings can damage the oven.
⚠️ (5) Place the oven as far away from radios and TV as possible. Operation of microwave oven may cause interference to your radio or TV reception.
- Plug your oven into a standard household outlet. Be sure the voltage and the frequency is the same as the voltage and the frequency on the rating label.
⚠️ Do not install oven over any cooktop/hob or other heat-producing appliance. If installed in proximity of or over sources of heat, the oven could be damaged and the warranty would be void.
⚠ The accessible surface may be hot during operation.
TURNTABLE INSTALLATION
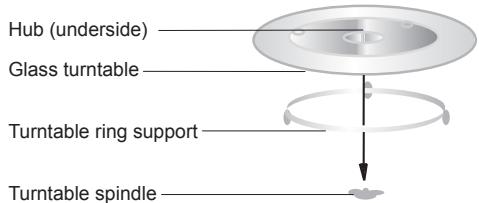
a. never place the glass tray upside down. The glass tray should never be restricted.
b. Both glass tray and turntable ring support must always be used during cooking.
c. Food and food containers must always be placed on the glass tray for cooking.
d. If glass tray or turntable ring support cracks or breaks, please contact your nearest authorized service centre.
COUNTERTOP INSTALLATION
⚠️ Remove all packaging material and accessories. Inspect the oven for damages such as
dents or broken door. Do not install if oven is damaged.
⚠️ Cabinet: Remove any protective film from the microwave oven cabinet surface.
Do not remove the light brown mica cover that is attached to the oven cavity to protect the magnetron.
This microwave oven uses modern electronic controls to adjust cooking parameters and meet your cooking needs.
CLOCK SETTING
When the microwave oven is Powered ON, the oven will display "0:00". The buzzer will ring once.
1) Press "TIMER/CLOCK" twice, until "00:00" displays;
2) Turn the KNOB to adjust the hour figures, the input time should be within 0--23.
3) Press "TIMER/CLOCK", the minute figures will flash.
4) Turn the KNOB to adjust the minute figures, the input time should be within 0--59.
5) Press "TIMER/CLOCK" to finish clock setting. ":" will flash.
Note:1) The clock function cannot be used if the clock is not set.
2) During clock setting, the oven will automatically go back to the previous status after 1 minute of inactivity.
en

Note: The upper and lower rows of the display will show the icons related to specific active functions.
TIMER
(1) Press "TIMER/CLOCK" once, until the LED will display 00:00.
(2) Turn the KNOB and enter time on the timer. (The maximum cooking time is 95 minutes).
(3) Press "START/+30SEC./CONFIRM" to confirm setting.
(4) When the time ends, the buzzer rings 5 times. If the clock has been set (24-hour system), the LED will display the current time.

While the timer is in operation, no other program can be set.

Note: The upper and lower rows of the display will show the icons related to specific active functions.
MICROWAVE COOKING
1) Press the "MICROWAVE" key once, and "P100" display.
2) Press "MICROWAVE" repeatedly or turn the KNOB to select the microwave power; "P100", "P80", "P50", "P30", "P10" will display in order.
3) Press "START/+30SEC./CONFIRM" to confirm.
4) Turn the KNOB to adjust the cooking time. (Time setting should be 0:05- 95:00.)
5) Press "START/+30SEC./CONFIRM" to start cooking.

Note: the time intervals to adjust cooking time in the timer knob are as follows:
Note: The upper and lower rows of the display will show the icons related to specific active functions.
GRILL COOKING
1) Press the "GRILL/COMBI" key once, and the screen will display "G".
2) Press "Start/+30Sec./Confirm" to confirm when the LED display "G".
3) Turn the KNOB to adjust grill time. (Time setting should be 0:05-95:00.)
4) Press "Start/+30Sec./Confirm" to start cooking.

Note: When half the grill time has passed, the oven buzzer rings twice. This is normal.
In order to have a better grilled food, turn the food over, close the door, and then press “START/+30 SEC./CONFIRM” to continue cooking. If no other action is taken, cooking will continue.

Note: The upper and lower rows of the display will show the icons related to specific active functions.
COMBINATION COOKING
1) Press the "GRILL/COMBI" key once, and the screen will display "G".
2) Press “GRILL/COMBI” repeatedly or turn the KNOB to select the combination power.” C-1 (55% microwave + 45% grill)” and “C-2 (36% microwave + 64% grill)” will display in order.
3) Press "START/+30SEC./CONFIRM" to confirm the desired combination setting.
4) Turn the KNOB to adjust cooking time. (Time setting should be 0:05- 95:00.)
5) Press "START/+30SEC./CONFIRM" to start cooking.

Note: The upper and lower rows of the display will show the icons related to specific active functions.

Note: Combination instructions
| Instructions | 1 | 2 |
| Display | C-1 | C-2 |
| Microwave | ● (5 5%) | ● (36%) |
| Grill | ● (45%) | ● (64%) |
MULTI-STAGE COOKING
The maximum cooking stage number is two. Always select defrost as first cooking stage. The buzzer will ring once after each stage and the next stage will begin.

Note: Auto menu cannot be set as part of the multi-stage.
Example: follow the steps below to defrost food for 5 minutes, and then cook with 80% microwave power for 7 minutes:
1) Press "TIME DEFROST", the screen will display "dEF2";
2) Turn the KNOB to adjust defrost time by 5 minutes;
3) Press "MICROWAVE" once;
4) Turn the KNOB to choose 80% microwave power until "P80" is displayed;
5) Press "START/+30SEC./CONFIRM" to confirm;
6) Turn the KNOB to adjust the cooking time by 7 minutes;
7) Press "START/+30SEC./CONFIRM" to start cooking.

Note: The upper and lower rows of the display will show the icons related to specific active functions.
SPEEDY COOKING
1) When in stand-by mode, press the "START/+30SEC./CONFIRM" button to cook with 100% power level for 30 seconds. Each additional press will increase the cooking time by another 30 seconds. The maximum cooking time is 95 minutes.
2) During microwave heating or defrost-by-time process, press "START/+30SEC./CONFIRM" to increase the cooking time.
3) When in stand-by mode, turn the KNOB left to choose the cooking time directly. After choosing the time, press “START/+30SEC./CONFIRM” to start cooking. The microwave power is 100%.

Note: When in auto menu and defrost-by-weight modes, cooking time cannot be increased by pressing "START/+30SEC./CONFIRM".

Note: The upper and lower rows of the display will show the icons related to specific active functions.
DEFROST BY TIME
1) Press "TIME DEFROST", the screen will display "dEF2".
2) Turn the KNOB to select the cooking time. The maximum time is 95 minutes.
3) Press "START/+30SEC./CONFIRM" button to start defrosting.
Note: The upper and lower rows of the display will show the icons related to specific active functions.

DEFROST BY WEIGHT
1) Press "WEIGHT DEFROST", the screen will display "dEF1".
2) Turn the KNOB to select the food weight. The range of weight is 100-2000g.
3) Press "START/+30SEC./CONFIRM" button to start defrosting.

Note: The upper and lower rows of the display will show the icons related to specific active functions.
AUTO MENU
1) When in stand-by mode, turn the KNOB right to choose from "A-1" to "A-8";
2) Press "START/+30SEC./CONFIRM" to confirm your selection;
3) Turn the KNOB to choose the food weight;
4) Press "START/+30SEC./CONFIRM" to start cooking;
5) The buzzer will ring five times to notify the termination of cooking.

Note: The upper and lower rows of the display will show the icons related to specific active functions.

Note: Auto Menu
| Menu | Weight(g) | Display |
| A-1PIZZA | 200 g | 200 |
| 400 g | 400 | |
| A-2MEAT | 250 g | 250 |
| 350 g | 350 | |
| 450 g | 450 | |
| A-3VEGETABLES | 200 g | 200 |
| 300 g | 300 | |
| 400 g | 400 | |
| A-4PASTA | 50g(with 450 ml cold water) | 50 |
| 100g(with 800 ml cold water) | 100 | |
| A-5POTATOES | 200 g | 200 |
| 400 g | 400 | |
| 600 g | 600 | |
| A-6FISH | 250 g | 250 |
| 350 g | 350 | |
| 450 g | 450 | |
| A-7BEVERAGES | 1 cup(120 ml) | 1 |
| 2 cup(240 ml) | 2 | |
| 3 cup(360 ml) | 3 | |
| A-8POPCORN | 50 g | 50 |
| 85 g | 85 | |
| 100 g | 100 |
INQUIRE FUNCTION
1) While cooking, press "CLOCK/KITCHEN TIMER" to check the current time. It will be displayed for 2-3 seconds.
2) While cooking, press "MICROWAVE", "GRILL/COMBI", the current power will be displayed for 2-3 seconds.
CHILDREN SAFETY LOCK
Lock: When in stand-by mode, press "STOP/CLEAR" for 3 seconds; a long "beep" will notify activation of the children safety lock mode and screen will display " [ - - ]" and " 🔒 " indicator will light.
Unlock: When in safety lock mode, press "STOP/CLEAR" for 3 seconds: a long "beep" will notify the lock is released, and " 🔒 " indicator will disappear.
SPECIFICATIONS
(1) The buzzer will ring once when turning the knob back to starting position;
(2) “START/+30SEC./CONFIRM” must be pressed to continue cooking if the door is opened during cooking;
(3) Once the cooking program has been set, "START/+30SEC./CONFIRM" must be pressed within 1 minute. If no action is taken, the current
time will be displayed and any programmed setting will be cancelled.
(4) The buzzer will ring once when the key is properly pressed. The buzzer will not ring if the key is improperly pressed.
(5) The buzzer will ring five times to notify the termination of cooking.
UTENSILS
CAUTION
Personal Injury Hazard
It is hazardous for anyone other than a qualified personnel to carry out any service or repair operation which requires the removal of the anti-radiation protective cover of the microwave oven. See the instructions on “Materials you can use in microwave oven or to be avoided in microwave oven.” Some non-metallic utensils may not be intended for microwaving use. If in doubt, test the utensil following the procedure below.
Utensil Test:
- Fill a microwave-safe container with 1 cup of cold water (250ml) along with the utensil.
- Cook on maximum power for 1 minute.
- Carefully feel the utensil. Do not use empty warm utensils for microwave cooking.

Do not exceed 1 minute cooking time.
MICROWAVE OVEN
Utensils Remarks
| Browning Dishes | Follow manufacturer's instructions. The bottom of browning dishes must be at least 3/16 inch (5mm) above the turntable. Improper use may causethe turntable to break. |
| Dinnerware | Microwave-safe only. Follow manufacturer's instructions. Do not use cracked or chipped glasses. |
| Glass jars | Always remove lid. Use only to heat food until just warm. Most glass jars are not heat resistant and may break. |
| Glassware | Heat-resistant oven glassware only. Make sure there is no metallic trim. Do not use cracked or chipped dishes. |
| Oven coo-king bags | Follow manufacturer's instruc-tions. Do not close with metal tie. Make slits to allow steam to pour out. |
| Paper plates and cups | Use for short-term cooking/war-ming only. Do not leave oven unattended while cooking. |
| Paper towels | Use to cover food for reheating and absorbing fat. Use with su-pervision for a short-term coo-king only. |
| Plastic | Microwave-safe only. Follow the manufacturer's instructions. Should be labelled “Microwave Safe”. Some plastic con-tainers may softenas the food inside gets hot. “Boiling bags” and tightly closed plastic bags should be slit, pierced or vented as directed by package instruc-tions. |
| Thermome-ters | Microwave-safe thermometers only (meat and candy thermo-meters). |
| Wax paper | Use as a cover to prevent splat-tering and retain moisture. |
MATERIALS TO BE AVOIDED IN MICROWAVE OVEN
| Utensils | Remarks |
| Aluminium tray | May cause arcing. Transfer food into a microwave-safe dish. |
| Food carton with metal handle | May cause arcing. Transfer food into a microwave-safe dish. |
| Metal or metal-trimmed utensils | Metal shields the food from microwave energy. Metal trim may cause arcing. |
| Metal twist ties | May cause arcing and could cause a fire in the oven. |
| Paper bags | May cause a fire in the oven. |
| Plastic foam | Plastic foam may melt or contaminate the liquid inside when exposed to high temperature. |
| Wood | Wood will dry out when used in the microwave oven and may split or crack. |
CLEANING
Ensure the appliance is unplugged from the power supply.
- Clean the oven cavity after use with a slightly damp cloth.
- Clean the accessories always with soapy water.
- The door frame, seal and surrounding surfaces must be cleaned carefully with a damp cloth when they are dirty.
- Do not use harsh abrasive cleaners or sharp metal scrapers to clean the oven door glass since they can scratch the surface and the glass may break.
Cleaning Tip- To easily clean the oven cavity walls that the cooked food can touch: Place half a lemon in a bowl, add 300ml (1/2 pint) of water and heat at 100% microwave power for 10 minutes. Wipe the oven clean using a soft, dry cloth.
TROUBLE SHOOTING
| NORMAL | |
| Microwave oven interference with TV | Radio and TV signals may be interfered during microwave oven operation. It is similar to the interference of small electrical appliances, like mixers, vacuum cleaners, and electric fans. It is normal. |
| Oven light is dim | In low power microwave cooking, oven light may become dim. It is normal. |
| Steam accumulating on door, hot air out of vent openings. | While cooking, steam may come out of food. Most steam will get out from vent openings. Anyway, some may accumulate on cool place like oven door. It is normal. |
| Oven started accidentally with no food in. | Do not operate the appliance without any food inside. It is very dangerous. |
| TROUBLE | POSSIBLE CAUSE | REMEDY |
| Oven cannot be started. | (1) Power cord not plugged in tightly. | Unplug. Then plug again after 10 seconds. |
| (2) Fuse blowing or circuit breaker in function. | Replace fuse or reset circuit breaker (repaired by professional personnel of our company) | |
| (3) Trouble with outlet. | Test outlet with other electrical appliances. | |
| Oven does not heat. | (4) Door not closed well. | Close door well. |
| Glass turntable makes noise when microwave oven operates. | (5) Turntable ring support and / or oven bottom is dirty. | Refer to “Maintenance of Microwave Oven” to clean dirty parts. |
According to Waste of Electrical and Electronic Equipment (WEEE) directive, WEEE should be separately collected and treated. If at any time in future you need to
dispose of this product please do NOT dispose of this product with household waste. Please send this product to WEEE collecting points where available.
GUARANTEE
12 months Parts and Labour Guarantee
This certificate of guarantee represents the guarantee (“Guarantee” hereinafter) offered by Indesit Company UK Limited with registered office
at Peterborough PE2 9JB in relation to products purchased in the United Kingdom and Indesit Ireland Limited with registered office in Dublin 9, Ireland for products purchased in the Republic of Ireland. This Guarantee does not affect your statutory rights.
Your product has the benefit of our manufacturer's Guarantee, which covers the product for twelve months from the date of purchase.
This gives you the reassurance that if, within that time, your product is proven to be defective because of either workmanship or materials, we will, at our discretion, either repair or replace the product at no cost to you. This Guarantee is subject to the following conditions:
• Documentary proof of original purchase date is provided.
• Cosmetic damage must be reported within 14 days from the date of purchase.
- The product has been installed and operated correctly and in accordance with our operating and maintenance instructions.
- The product is used only on the electricity supply printed on the rating plate.
- The product has been used for normal domestic purposes only.
- The product has not been altered, serviced, maintained, dismantled, or otherwise interfered with by any person not authorised by us.
• Any repair work must be undertaken by us or our appointed agent.
• Any parts removed during repair work or any product that is replaced become our property.
• The product is used in the United Kingdom or Republic of Ireland.
The Guarantee does not cover:
- Damage resulting from transportation, improper use, neglect or interference or as a result of improper installation.
- Accidental damage, this includes but is not limited to, damage which occurs as a result of an external action.
• Replacement of any consumable item or accessory. These include but are not limited to: - plugs, cables, light bulbs, hoses, brushes, covers and filters.
- Replacement of any removable parts made of glass or plastic.
After Sales Service
No one is better placed to care for your Hotpoint product during the course of its working life than us – the manufacturer.
Essential Contact Information Advice Line
We have a dedicated team who can provide free advice and assistance with your product if you experience any technical difficulties. Simply call our Hotpoint Service Hotline on 08448 240 055 (Republic of Ireland 0818 904 041) for telephone assistance.
Please note:
Our advisors will require the following information:
Model number:
Serial number:
Consumables and Accessories
We supply a full range of consumables and accessories to keep your product functioning efficiently throughout its life.
UK: 08448 225 225
Republic of Ireland: 0818 313 413
www.hotpoint.co.uk
Recycling and Disposal Information
As part of Hotpoint's continued commitment to helping the environment, Hotpoint reserves the right to use quality, recycled components to keep down customer costs and minimise material wastage.
Please dispose of packaging and old products carefully.
Register your new product and get a second year FREE!
We want to give you additional benefits of ownership of your product and offer you an additional free 1 year guarantee when you register your product with Hotpoint within 28 days of purchase. If you do not register your product with Hotpoint within 28 days, your product is guaranteed for 1 year only.
To activate your 2 year guarantee register with
us online at www.hotpoint.co.uk. Please note that the 2 year guarantee is only available in UK and Ireland and is subject to the same conditions as the 1 year Guarantee. Please refer to the certificate of guarantee for more information.
DISPOSAL OF OLD ELECTRICAL APPLIANCES

The European Directive 2002/96/EC on Waste Electrical and Electronic Equipment (WEEE), requires that old household electrical appliances must not be disposed of in the normal unsor-
ted municipal waste stream.
Old appliances must be collected separately in order to optimise the recovery and recycling of the materials they contain and reduce the impact on human health and the environment.
The crossed out “wheeled bin” symbol on the product reminds you of your obligation, that when you dispose of the appliance it must be separately collected. Consumers should contact their local authority or retailer for information concerning the correct disposal of their old appliance.
FIRININIZIN KURULUMU
natural_image
Line drawing of a simple oval-shaped object with horizontal slats and legs, resembling a fan or vent (no text or symbols)A) Mikrodalga
B) Pişirme
Zamanlayıcı /Saat
C) Durdur/Sifirla
D) Izgara/Kombi

natural_image
Line drawing of a simple oval-shaped object with diagonal slats and two legs (no text or symbols)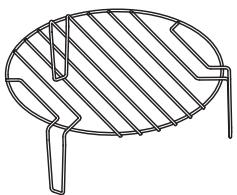
natural_image
Line drawing of a simple round table with diagonal ribs and two legs (no text or symbols)A) Magnetron
B) Kookwekker/Klok
C) Stop/Wissen
D) Grill/Combi
E) Ontdooien per Gewicht
F) Ontdooien per Tijdspanne
G) Start/+30Sec./Bevestigen

1) Bereiding in de Magnetron
2) Grill Bereiding
1) + 2) Combibereiding
1) + 3) Ontdooien per Tijdspanne
1) + 4) Ontdooien per Gewicht
5) Hoog vermogen
6) Wekker
7) Klok
1) + 8) Auto Menu
9) Kindervergrendeling
10) Gewicht
ACCESSOIRES
SOMMIGE ACCESSOIRES ZIJN ENKEL BESCHIKBAAR OP BEPAALDE
natural_image
Simple line drawing of a circular object with two small protrusions on top (no text or symbols)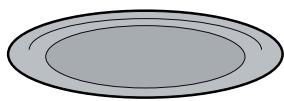
natural_image
Simple oval shape with concentric rings, no text or symbols present
natural_image
Line drawing of a circular object with horizontal slats and three legs, resembling a stylized fan or container (no text or symbols)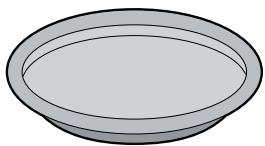
natural_image
Simple 3D illustration of a circular tray or bowl with no text or symbols
natural_image
Illustration of a multi-tiered cooking pot with lid and side handles (no text or symbols)MODELLEN
ONDERSTEUNING VAN DE DRAAITAFEL
WAARSCHUWING BELANGRIJKE VEILIGHEIDSINSTRUCTIES
INSTALLATIE DRAAIPLATEAU
| Instructies | 1 | 2 |
| Display | C-1 | C-2 |
| Magnetron | ● (55%) | ● (36%) |
| Grill | ● (45%) | ● (64%) |
MEERFASIGE BEREIDING
natural_image
Line drawing of a circular object with horizontal slats and three legs, resembling a pan or vent (no text or symbols)INSTALACE NA PRACOVNÍ DESKU
natural_image
Line drawing of a circular object with horizontal slats and legs, resembling a stylized fan or table (no text or symbols)A) Mikrovlnné
D) Gril./Kombi
B) Kuchynský
E) Hmotnost' Rozmrazovanie
časovač/hodiny
F) Čas Rozmrazovanie
C) Zastavit/
G) Štart/+30 sek./Potvrd'
Vymazat'
DÔLEŽITÉ BEZPEČNOSTNÉ POKYNY
natural_image
Line drawing of a simple open book or fan with slats and legs (no text or symbols)ΨΗΣΙΜΟ ΠΟΛΛΑΠΛΩΝ ΣΤΑΔΙΩΝ

natural_image
Line drawing of a simple outdoor table with slatted top and legs (no text or symbols)A) Mikrofale
B) Minutnik kuchen- ny /zegar
C) Zatrzymaj/
Wyczyść
D) Grill/Combi

natural_image
Line drawing of a simple round-bottom flask with slatted side and legs (no text or symbols)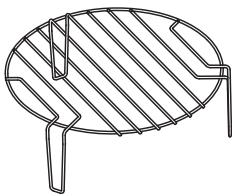
natural_image
Line drawing of a simple outdoor table with slatted top and legs (no text or symbols)hotpoint-ariston.com
КЕРЕК-ЖАРАКТАРЫ
КЕЙБІР КЕРЕК-ЖАРАҚТАР НАҚТЫ УЛГІЛЕРДЕ ғАНА БАР

natural_image
Simple line drawing of a circular object with two small protrusions at the top (no text or symbols)
natural_image
Simple oval shape with concentric rings, no text or symbols present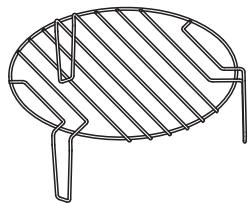
natural_image
Line drawing of a circular object with horizontal slats and two legs, resembling a stylized fan or container (no text or symbols)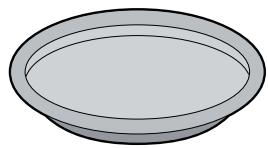
natural_image
Simple illustration of a bowl with no text or symbols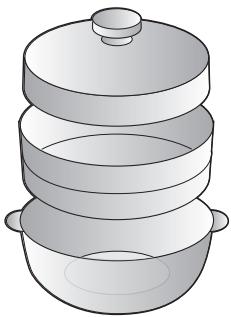
natural_image
Illustration of a multi-tiered cooking pot with lid and side handles (no text or symbols)
natural_image
Line drawing of a simple oval-shaped object with horizontal slats and legs, resembling a stylized fan or container (no text or symbols)natural_image
Simple line drawing of an oval-shaped object with two small protrusions on both sides (no text or symbols)
natural_image
Simple oval shape with concentric rings, no text or symbols present
natural_image
Line drawing of a simple oval-shaped object with horizontal slats and two legs (no text or symbols)
natural_image
Simple illustration of a bowl with no text or symbols
natural_image
Illustration of a multi-tiered cooking pot with lid and side handles (no text or symbols)DREHTELLER-TRÄGER
| Anweisungen | 1 | 2 |
| Anzeige | C-1 | C-2 |
| Mikrowelle | ● (55%) | ● (36%) |
| Grill | ● (45%) | ● (64%) |
MEHRSTUFIGES KOCHEN

natural_image
Line drawing of a circular object with horizontal slats and two legs, resembling a fan or vent (no text or symbols)
natural_image
Line drawing of a simple oval-shaped object with horizontal slats and legs, resembling a stylized fan or container (no text or symbols)A) Micro-ondes
B) Horloge/
When the microwave oven is Powered ON, the oven will display "0:00". Buzzer will ring once.
| Instructions | 1 | 2 |
| Écran | C-1 | C-2 |
| Micro-onde | ● (55%) | ● (36%) |
| Gril | ● (45%) | ● (64%) |

natural_image
Line drawing of a simple open book-shaped object with horizontal slats and a handle (no text or symbols)Surgirá C-1(55%microwave+45%grill)"
(C-1 (55% micro-ondas +45% grill) e “C-2(36%microwave+64%grill)” (C-2 (36% micro-ondas + 64% grill) por ordem.
| PROBLEMA | POSSÍVELCAUSA | SOLUÇÃO |
natural_image
Line drawing of a simple oval-shaped object with horizontal slats and two legs, resembling a fan or vent (no text or symbols)Touching some of the internal components can cause serious personal injury or death. Do not disassemble this appliance.
УВАГА
- ALCUNI ACCESSORI SONO DISPONIBILI SOLO CON ALCUNI MODELLI
- GUIDA AL PIATTO ROTANTE
- Names of Oven Parts and Accessories
- INTRODUCTION
- READ THESE INSTRUCTIONS CAREFULLY
- USER INTERFACE
- GLASS TURNTABLE
- WIRE RACK
- CRISPY PLATE
- STEAMER
- IMPORTANT SAFETY INSTRUCTIONS WARNING
- en
- PRECAUTIONS TO PREVENT POSSIBLE OVEREXPOSURE TO MICROWAVE ENERGY
- ADDENDUM
- GROUNDING INSTALLATION DANGER
- Electrical Shock Hazard
- WARNING
- INSTALLATION
- TURNTABLE INSTALLATION
- COUNTERTOP INSTALLATION
- CLOCK SETTING
- TIMER
- MICROWAVE COOKING
- GRILL COOKING
- COMBINATION COOKING
- MULTI-STAGE COOKING
- SPEEDY COOKING
- DEFROST BY TIME
- DEFROST BY WEIGHT
- AUTO MENU
- INQUIRE FUNCTION
- CHILDREN SAFETY LOCK
- SPECIFICATIONS
- UTENSILS
- CAUTION
- Personal Injury Hazard
- Utensil Test:
- CLEANING
- GUARANTEE
- months Parts and Labour Guarantee
- The Guarantee does not cover:
- After Sales Service
- Essential Contact Information Advice Line
- Consumables and Accessories
- Recycling and Disposal Information
- Register your new product and get a second year FREE!
- DISPOSAL OF OLD ELECTRICAL APPLIANCES
- FIRININIZIN KURULUMU
- ACCESSOIRES
- SOMMIGE ACCESSOIRES ZIJN ENKEL BESCHIKBAAR OP BEPAALDE
- MODELLEN
- ONDERSTEUNING VAN DE DRAAITAFEL
- WAARSCHUWING BELANGRIJKE VEILIGHEIDSINSTRUCTIES
- INSTALLATIE DRAAIPLATEAU
- MEERFASIGE BEREIDING
- INSTALACE NA PRACOVNÍ DESKU
- DÔLEŽITÉ BEZPEČNOSTNÉ POKYNY
- ΨΗΣΙΜΟ ΠΟΛΛΑΠΛΩΝ ΣΤΑΔΙΩΝ
- КЕРЕК-ЖАРАКТАРЫ
- КЕЙБІР КЕРЕК-ЖАРАҚТАР НАҚТЫ УЛГІЛЕРДЕ ғАНА БАР
- DREHTELLER-TRÄGER
- MEHRSTUFIGES KOCHEN
- УВАГА
Brand : HOTPOINT
Model : MWHA 23223 X
Category : Microwave