
MM-J320 - Hi-Fi System SAMSUNG - Free user manual and instructions
Find the device manual for free MM-J320 SAMSUNG in PDF.


| Product Type | Micro Hi-Fi System |
| Brand | Samsung |
| Model | MM-J320 |
| Dimensions (W x H x D) | Approx. 200 x 250 x 300 mm |
| Weight | Approx. 4.5 kg |
| Power Supply | 230 V ~ 50 Hz |
| Power Consumption | 50 W (max) |
| Output Power | 2 x 50 W RMS |
| Disc Player | CD, CD-R, CD-RW |
| Radio | FM/AM, 30 presets |
| Connectivity | USB (MP3 playback), Bluetooth, auxiliary audio input |
| Main Functions | Timer, equalizer (presets), repeat/shuffle, music alarm |
| Speakers | 2-way, bass-reflex |
| Maintenance and Cleaning | Wipe with a soft, dry cloth. Do not use solvents. |
| Safety | Do not expose to moisture. Use in a well-ventilated area. |
| Spare Parts and Repairability | Parts available from Samsung after-sales service. Repairability index not communicated. |
| General Information | Compact Hi-Fi system with vertical design. Remote control included. |
Frequently Asked Questions - MM-J320 SAMSUNG
User questions about MM-J320 SAMSUNG
0 question about this device. Answer the ones you know or ask your own.
Ask a new question about this device
Download the instructions for your Hi-Fi System in PDF format for free! Find your manual MM-J320 - SAMSUNG and take your electronic device back in hand. On this page are published all the documents necessary for the use of your device. MM-J320 by SAMSUNG.
USER MANUAL MM-J320 SAMSUNG
Micro Component System
MP3-CD/WMA-CD/CD-R/RW Playback user manual
imagine the possibilities
Thank you for purchasing this Samsung product.
To receive more complete service,
please register your product at
www.samsung.com/register
Safety Warnings
TO REDUCE THE RISK OF ELECTRIC SHOCK, DO NOT REMOVE THE COVER (OR BACK). NO USER-SERVICEABLE PARTS ARE INSIDE. REFER SERVICING TO QUALIFIED SERVICE PERSONNEL.
CAUTION
RISK OF ELECTRIC SHOCK. DO NOT OPEN
CAUTION: TO PREVENT ELECTRIC SHOCK, MATCH WIDE BLADE OF PLUG TO WIDE SLOT AND INSERT FULLY.
WARNING
- To reduce the risk of fire or electric shock, do not expose this appliance to rain or moisture.
- This product contains chemicals known to the State of California to cause cancer and reproductive toxicity.
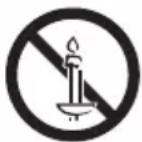
• TO PREVENT THE SPREAD OF FIRE, KEEP CANDLES AND OTHER ITEMS WITH OPEN FLAMES AWAY FROM THIS PRODUCT AT ALL TIMES.
This symbol indicates “dangerous voltage” inside the product that presents a risk of electric shock or personal injury.

This symbol indicates important instructions accompanying the product.
CLASS 1 LASER PRODUCT
This Compact Disc player is classified as a CLASS 1 LASER product. Use of controls, adjustments or performance of procedures other than those specified herein may result in hazardous radiation exposure.
Complies with 21CFR 1040.10 except for deviations pursuant to Laser Notice No. 50, dated June 24, 2007.
DANGER :
- VISIBLE AND INVISIBLE LASER RADIATION WHEN OPEN. AVOID DIRECT EXPOSURE TO BEAM. (FDA 21 CFR)
CAUTION :
- CLASS 3B VISIBLE AND INVISIBLE LASER RADIATION WHEN OPEN. AVOID EXPOSURE TO THE BEAM. (IEC 60825-1)
- THIS PRODUCT UTILIZES A LASER. USE OF CONTROLS OR ADJUSTMENTS OR PERFORMANCE OF PROCEDURES OTHER THAN THOSE SPECIFIED HEREIN MAY RESULT IN HAZARDOUS RADIATION EXPOSURE. DO NOT OPEN THE COVER AND DO NOT REPAIR YOURSELF. REFER SERVICING TO QUALIFIED PERSONNEL.
CLASS 1 LASER PRODUCT
KLASSE 1 LASER PRODUKT
LUOKAN 1 LASER LAITE
KLASS 1 LASER APPARAT
PRODUCTO LÁSER CLASE 1
Precautions
- Ensure that the AC power in your house matches the requirements listed on the identification sticker located on the back of your product.
- Install your product horizontally, on a suitable base (furniture), with enough space around it for ventilation (3 - 4 inches/7.5 - 10 cm).
- Do not place the product on amplifiers or other equipment which may become hot. Make sure the ventilation slots are not covered.
- Do not stack anything on top of the product.
- Before moving the product, ensure the Disc Insert Slot is empty.
- To turn off the product completely, disconnect the AC plug from the wall outlet. Disconnect the AC plug from the wall outlet if you will be leaving the device unused for a long period of time.
- During thunderstorms, disconnect the AC plug from the wall outlet. Voltage peaks due to lightning could damage the product.
- Do not expose the product to direct sunlight or other heat sources. This could cause the product to overheat and malfunction.
- Protect the product from moisture and excess heat and equipment creating strong magnetic or electric fields (i.e. speakers.).
- Disconnect the power cable from the AC wall outlet if the product malfunctions.
- This product is for personal use only. It is not intended for industrial use.
- Condensation may occur if your product or a disc has been stored in cold temperatures. If transporting the product during the winter, wait approximately 2 hours until the product has reached room temperature before using.
- The batteries used with this product contain chemicals that are harmful to the environment. Do not dispose of batteries in the general household trash.
- Place the loudspeakers at a reasonable distance on either side of the system to ensure good stereo sound.
- Direct the loudspeakers towards the listening area.
- Do not expose this apparatus to dripping or splashing. Do not place objects filled with liquids, such as vases, on the apparatus.
- To turn this apparatus off completely, you must disconnect it from the wall outlet. Consequently, the wall outlet and power plug must be readily accessible at all times.
- Use only a properly grounded plug and receptacle.
- An improper ground may cause electric shock or equipment damage. (Class I Equipment only.)
Disc Storage & Management
- Holding Discs
- Fingerprints or scratches on a disc may reduce sound and picture quality or cause skipping.
- Avoid touching the surface of a disc where data has been recorded.
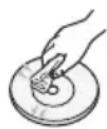
- Hold the disc by the edges so that fingerprints will not get on the surface.
- Do not stick paper or tape on the disc.
- Cleaning Discs
- If you get fingerprints or dirt on a disc, clean it with a mild detergent diluted in water and wipe with a soft cloth.
- When cleaning, wipe gently from the inside to the outside of the disc.
- Disc Storage
- Do not keep in direct sunlight.
- Keep in a cool, ventilated area.
- Keep in a clean, protective jacket and store vertically.
- Condensation may form if warm air comes into contact with cold parts inside the product. When condensation forms inside the product, it may not operate correctly. If this occurs, remove the disc and let the product stand for 1 or 2 hours with the power on.

Disc and Format Compatibility
This product does not support Secure (DRM) Media files.
CD-R Discs
- Some CD-R discs may not be playable depending on the disc recording device (CD-Recorder or PC) used to burn music onto the disc and the condition of the disc.
- Use 650MB/74 minute CD-R discs. Do not use CD-R discs over 700MB/80 minutes as they may not be played back.
- Some CD-RW (Rewritable) media may not be playable.
- Only CD-Rs that are properly "closed" can be fully played. If the session is closed, but the disc is left open, the product may not be able to fully play the disc.
MP3-CD Discs
- Only CD-R discs with MP3 files in ISO 9660 or Joliet format can be played.
- MP3 file names should contain no blank spaces or special characters (for example, /, =, +).
- Use discs recorded with a compression/decompression data rate greater than 128Kbps.
- Only consecutively written multisession discs can be played. If there is a blank segment in a Multisession disc, the disc can be played only up to the blank segment.
-
If a disc is not closed, it will take longer to begin playback and not all of the recorded files may play.
-
If a file is encoded in the Variable Bit Rate (VBR) format, (i.e. files encoded in both low bit rate and high bit rate - 32Kbps \~ 320Kbps), the sound may skip during playback.
- A maximum of 999 files can be played per CD.
Supported Audio Formats
| File Extension | Audio Codec | Sampling Rate | Bit Rate |
| *.mp3 | MPEG 1 Layer3 | 16KHz ~ 48KHz | 80Kbps ~ 320Kbps |
| MPEG 2 Layer3 | 16KHz ~ 48KHz | 80Kbps ~ 320Kbps | |
| MPEG 2.5 Layer3 | 16KHz ~ 48KHz | 80Kbps ~ 320Kbps | |
| *.wma | Wave_Format_MSAudio1 | 16KHz ~ 48KHz | 56Kbps ~ 128Kbps |
| Wave_Format_MSAudio2 | 16KHz ~ 48KHz | 56Kbps ~ 128Kbps |
Does not support the WMA Professional codec.
The table above shows supported formats, sampling rates, and bit rates. Files recorded in formats that are not supported may not be played properly.
Accessories
Check for the supplied accessories below.

| Symbols | Important | Note |
Contents
Thank you for buying this SAMSUNG Component System.
Please take time to read these instructions.
They will allow you how to operate your system and take full advantage of its features.
Safety Warnings ......2
Precautions ......3
Disc Storage & Management ....3
Disc and Format Compatibility ....4
Supported Audio Formats ......4
Accessories ....4
Contents 5
Description 6
Front/Top Panel 6
Rear Panel 7
Remote Control 8
CD/MP3/WMA-CD Playback 9
Selecting a Track 9
Searching for a Specific Music
Passage on a CD 10
Repeat One or All Tracks on a
Compact Disc....10
10 Skip Track .... 10
Playing a USB Device ....10
To Select a Track from
a USB Device ....10
To Search a Folder Quickly .....10
To Use High Speed Search ...... 10
To Repeat one or all Tracks ....10
10 Skip Track ....11
Listening to Radio 11
Using Bluetooth ....12
TV SoundConnect ....14
Setting the Clock....14
Timer Function 15
Cancelling the Timer 15
Recording Function ......16
Selecting EQ Mode 17
Software update ....17
Troubleshooting ....18
Specifications ....19
Figures and illustrations in this User Manual are provided for reference only and may differ from actual product appearance.
■An administration fee may be charged if either
a. an engineer is called out at your request and there is no defect in the product (i.e. where you have failed to read this user manual)
b. you bring the unit to a repair centre and there is no defect in the product (i.e. where you have failed to read this user manual).
The amount of such administration charge will be advised to you before any work or home visit is carried out.
Description
Front/Top Panel
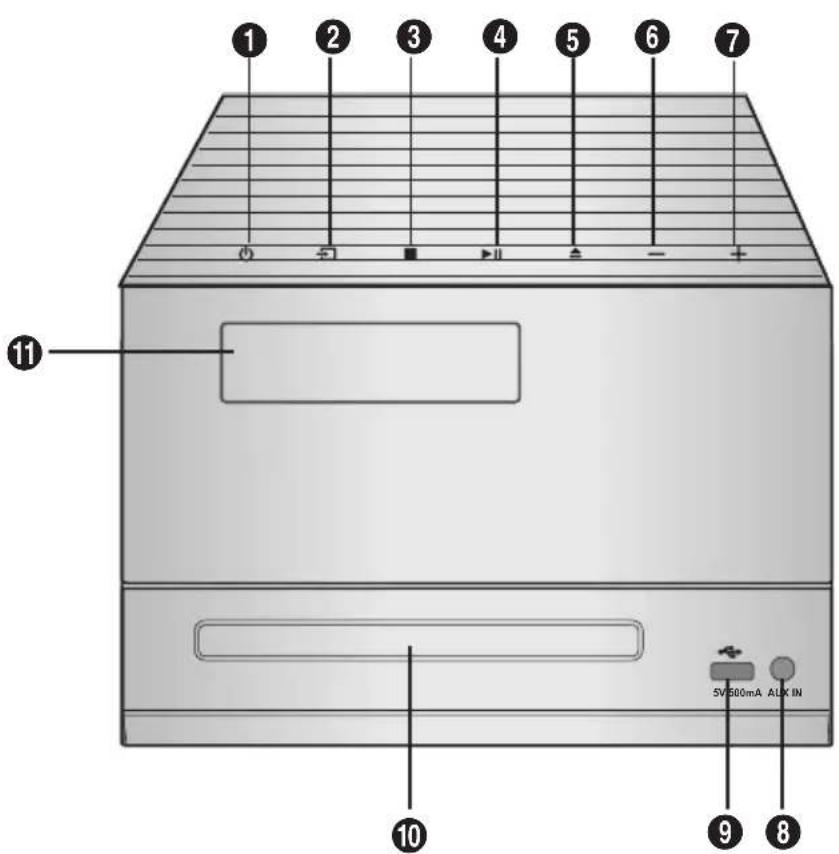
| 1 | POWER buttonPress this button to switch your product on or off. |
| 2 | Function button |
| 3 | STOP button |
| 4 | PLAY/PAUSE button |
| 5 | OPEN/CLOSE button |
| 6 | VOLUME CONTROL - button |
| 7 | VOLUME CONTROL + button |
| 8 | AUX IN JACK1. Use the Audio Cable (not supplied) to connect AUX IN on the player to Audio Out on the external analog component.2. Press-to switch the input mode to AUX.If no button actions for more than 8 hours in AUX mode, the power will automatically turn off. |
| 9 | USB jack |
| 10 | DISC slot |
| 11 | Display Panel |
◆ Tap on touch screen with your fingertip.
◆ To avoid damage to the touch screen, do not use any object other than your fingers to operate it.
◆ Do not tap on the touch screen if your fingers are not clean.
◆ Do not tap on the touch screen with gloves on.
◆ The touch screen may not function if you use your fingernail or other instrument such as a ballpoint pen.

1. ONLY FOR SERVICE
• This jack is for service only. Please do not use.
2. FM Antenna Connector Terminal
- Connect the FM antenna (supplied) to the FM Antenna jack.
- Slowly move the antenna wire until you find a location where reception is good, then fasten it to a wall or other rigid surface.
- If reception is poor, you may need to install an outdoor antenna. To do so, connect an outdoor FM antenna to FM antenna jack on the rear of the system using a 75Ω coaxial cable (not supplied).
3. 2.0 CH Speaker Connector Terminals
The speaker connector terminals are located on the rear of the system.
- To achieve the correct sound quality, insert the speaker connector cables identified below into the correct speaker terminals on the back of the system.
• Left speaker (marked L).
• Right speaker (marked R).
Remote Control

* This product may not have the RDS function.
Installing Batteries In The Remote Control
- Place batteries in the remote control so that the polarities match the illustrations in the battery compartment: (+) to (+) and (−) to (−).
- Do not dispose of batteries in a fire.
- Do not short circuit, disassemble, or overheat the batteries.
- There is the danger of an explosion if you replace the batteries with the wrong battery type. Replace only with the same or equivalent type.
- The remote control can be used up to approximately 23 feet (7 meters) in a straight line from the system.

CD/MP3/WMA-CD Playback
Lets you play 12 cm compact discs without an adapter.
This product is designed to play audio CDs, CDs, CD-Rs, CD-RWs, or MP3/WMA-CDs.
- Gently open or close the CD tray. Do not apply excessive force.
- Do not apply force to or place a heavy object on the product.
- Do not insert an out-of-spec, shaped CD such as a heart or octangle shaped CD. You can damage the product.
-
For the best sound, maintain your compact discs carefully and correctly.
-
Press the OPEN/CLOSE button to open the disc tray.
-
Place a disc gently into the tray with the disc's label facing up.
-
Press the OPEN/CLOSE button to close the disc tray. The disc will be played automatically.
-
For MP3/WMA-CD audio, it may take several minutes to finish scanning the disc tracks.
- If you play a file with an English name or a MP3/WMA-CD medium with an English title, the song title will be shown in the display. (Other languages besides English may not be displayed.)
- An English-titled track containing a special character will not display.
Track Indicator — 1 0:19 — Playtime Indicator
-
Adjust the volume by:
-
Tuning the VOLUME knob on the unit or pressing the Vol + or – button of the remote control.
-
The volume level can be adjusted in 31 steps (VOLUME MIN, VOLUME 01 - VOLUME 29, and VOLUME MAX).
-
To pause playback temporarily, press the PLAY/PAUSE (▶II) button. Press PLAY/PAUSE (▶II) again to continue playing the disc.
-
To end playing, press the STOP (■) button.
-
If there is no CD inserted in the DISC tray, the unit displays "NO DISC".
- The quality of MP3/WMA-CD playback may vary depending on the condition of the disc containing the music files or the condition of the recorder with which the disc was created.
-
If different types of files or unnecessary folders are on the same disc, you will have problems with playback.
-
Keep the tray closed whenever you are not using it to prevent dust from entering.
- You can load or unload a compact disc when the radio, USB or auxiliary source function is selected. Also, when you press the OPEN/CLOSE button, the product will automatically change to the MP3/CD mode.
- If no buttons are pressed on the product or remote control for more than 3 minutes when the product is in Pause mode, the product will change to Stop mode.
- If no buttons are pressed on the product or remote control for more than 25 minutes when the product is in Stop mode or no Disc mode, the power will automatically turn off.
Selecting a Track
You can select a desired track while a disc is being played.
To play the previous track
Press the ◀◀ button within 3 seconds after the current track starts playing.
Press the ◀ button twice, 3 seconds or more after the current track starts playing.
To play the next track
Press the ▶▶I button.
To play the current track from the beginning
Press the ◀◀ button once, 3 seconds after the current track starts playing.
To play the track of your choice
Press the ◀◀ or ▶▶I button to move to a desired track.
- You can select a track directly without the◀◀ or ▶▶ button. (refer to the page 10)
Searching for a Specific Music Passage on a CD
When listening to a compact disc, you can quickly search for a specific music passage on a track.
- Press the ◀◀, ▶▶ buttons for Search Function.
| Press ... | DDA MP3/WMA | |
| 1 2 3 4 | 4 | |
| 1 2 3 4 | 4 |
- The product does not play audio when in the◀,▶3 or ◀,▶4 fast search mode.
Repeat One or All Tracks on a Compact Disc
You can play a CD, a group of tracks in a folder, or a single track repeatedly:
- Press the REPEAT button.
Each time you press the REPEAT button, the repeat mode will change as follows:
MP3/WMA: OFF → TRACK → DIR → ALL → RANDOM CDDA: OFF → TRACK → ALL → RANDOM
- When you want to stop the Repeat function, press the REPEAT button until "OFF" is displayed.
• OFF: Cancels Repeat Playback.
• TRACK: Repeatedly plays the selected track.
- DIR: Repeatedly plays all tracks in the selected folder.
• ALL: Repeatedly plays the entire disc.
• RANDOM: Plays tracks in random order.
10 Skip Track
Press the +10 button while in playback mode.
This will skip the tracks as many as 10 from the current track.
Playing a USB Device
Connect an external storage device such as a USB flash memory stick or external HDD (Hard Disk Drive) to the product. You can play files in MP3/WMA format.
Before you begin!
- Connect the external USB storage device to your product.
- Select the USB mode by pressing the button on the main unit or select USB by pressing the FUNCTION button on the remote control.
- The first track of the first directory plays automatically.
to stop playing
Press the STOP ( ■ ) button to stop playing.
To remove the USB device
If you press the STOP ( ■ ) button once again, you can remove the USB device safely.
☐ not connect a USB recharger to the USB port of this product. You can damage the product.
To Select a Track from a USB Device
You can select an MP3 file during play.
- If you want to move to the previous/next track, press the ◀◀,▶◀I buttons briefly.
- The unit moves to the previous/next file within the directory.
- If you press the I◄◄,►►I buttons more times than the number of the files in the directory, the unit moves to the next directory.
To Search a Folder Quickly
- Press the TUNING/ALBUM ∧ or ∨ button on the remote control to move to the previous/next folder.
- When the search is done, you will see the previous/next folder name. The first track in the folder will start playing.
To Use High Speed Search
You can search through the section quickly during play.
- Press the ◀◀,▶▶ button.
• Each time you press the button, you will move backward/forward fast.
The sound will not output in fast playback mode.
To Repeat one or all Tracks
-
Press the REPEAT button. Each time you press the REPEAT button, the repeat mode will change as follows: OFF → TRACK → DIR → ALL → RANDOM
-
When you want to stop the Repeat function, press the REPEAT button until "OFF" is displayed.
• OFF: Cancels Repeat Playback.
• TRACK: Repeatedly plays the selected track.
- DIR: Repeatedly plays all tracks in the selected folder.
• ALL: Repeatedly plays all tracks.
• RANDOM: Plays tracks in random order.
10 Skip Track
Refer to the 10 Skip Track section. (Page 8)
Read through the instructions below before using a USB device with this unit.
- Some USB devices may not work properly with this product.
- The maximum current supported by the USB port for an external device is 500 mA (at 5V DC).
- This product only supports USB devices that are formatted in the FAT16 and FAT32 file system.
- USB HDD's should be connected to a separate power source. Otherwise, the HDD's will not work.
- If a USB external storage device is connected to multiple devices, only the files in the first HDD will be played.
- If a usb external device that has multi partition, only the first partition which support file system is recognized.
- DRM-applied files are not supported. Digital Right Management restricts unauthorized access to a DRM file so that the copyright of the file is protected from piracy.
- Even if the extension of the file is .mp3, the file cannot be played if it is formatted in MPEG layer 1 or 2.
- Do not use a USB hub. USB hubs are not supported.
- The unit displays only the first 15 characters of an MP3/WMA file name.
- This device is designed to support removable HDDs with less than 160GB. Depending on the device, a removable HDD with 160GB or more may or may not be supported.
- It can take several minutes for the product to recognize the files on a USB device.
- USB devices (particularly, USB HDDs) may cause a pause when moving to the next track.
- Some USB devices, digital cameras, USB card readers, iPods, iPhones, and Smart Phones may not be supported.
- With USB devices supporting only USB VER. 1.1, the unit may access files slowly or may not recognize file properties.
- If no buttons are pressed on the product or remote control for more than 3 minutes when the product is in Pause mode, it will be changed to Stop mode.
- If no buttons are pressed on the product or remote control for more than 25 minutes when the product is in Stop mode or no USB mode, the power will automatically turn off.
- A maximum of 999 files can be played per USB device.
Listening to Radio
To Store the Stations You Want
You can store up to 15 FM stations.
-
Select FM by pressing the FUNCTION button.
-
To search for a station, press the STOP on the product or TUNING MODE button one or more times until MANUAL is displayed.
-
Select a station by:
- Pressing and holding the TUNING/ALBUM , button on the remote control to automatically search for active broadcasting stations.
- Press the MO/ST button to switch between stereo and mono.
- In a poor reception area, select MONO for a clear, interference-free broadcast.
- This applies only when listening to an FM station.
- If you do not want to store the radio station found, go back to Step 3 and search for another station.
Otherwise:
a. Press the ENTER button.
- FM followed by a flashing number appears in the display. That number is the current preset number.
b. Press the , V buttons to scroll through and select a preset number.
- You can select a number from 1 to 15.
c. Press the 📄 button to save the preset.
- To store additional radio stations, repeat Steps 3 to 5.
Selecting a Stored Station
To listen to a stored station, follow these steps:
- Select FM by pressing the FUNCTION button.
- Press the STOP button on the product until "PRESET" is displayed.
- Press TUNING/ALBUM ∧, ∨ on the remote control to select a preset number.
Using Bluetooth
You can use a Bluetooth device to enjoy music with high quality stereo sound, all without wires!
What is Bluetooth?
Bluetooth technology lets Bluetooth-compliant devices interconnect easily with each other using a short, wireless connection.
- A Bluetooth device may cause noise or malfunction, depending on usage, when:
- A part of your body comes into contact with the receiving/transmitting system of the Bluetooth device or the product.
- It is subject to electrical variation from obstructions caused by a wall, corner, or by office partitioning.
- It is exposed to electrical interference from same frequency-band devices including medical equipment, Microwave ovens, and wireless LANs.
- Keep the Micro Component System and the Bluetooth device close together when pairing. The greater the distance between the system and Bluetooth device, the worse the quality.
- If the distance exceeds the Bluetooth operational range, the connection is lost.
- In poor reception-sensitivity areas, the Bluetooth connection may not work properly.
- The Micro Component System has an effective reception range of up to 16.25 feet (5 meters) in all directions if there are no obstacles. The connection will be automatically cut off if the Bluetooth device moves out of this range. Even within range, the sound quality may be degraded by obstacles such as walls or doors.
- This wireless device may cause electric interference during its operation.
To connect the Component to a Bluetooth device
Before you begin, confirm that your Bluetooth device supports the Bluetooth-compliant stereo headset function.
- Press the FUNCTION button to display the "BT" message.
- You will see WAIT for a short period of time and then BT READY on the front display of the Micro Component.
-
Select the Bluetooth menu on the Bluetooth device you want to connect. (Refer to the Bluetooth device's user's manual.)
-
Select the Stereo headset menu on the Bluetooth device.
- You will see a list of scanned devices.
-
Select "[Samsung] MICROxxxxxx" from the searched list.
-
When the product is connected to the Bluetooth device, it will display Device name BT on the front display.
-
If the Bluetooth device has failed to pair with the product, delete the previous “[Samsung] MICRO xxxxxx” found by the Bluetooth device and have it search for the product again.
-
You can listen to the music playing on the connected Bluetooth device over the Micro Component system.
- In Bluetooth mode, some model's Play/Stop/Next/Back functions are not available.
- The product only supports Middle Quality SBC data (up to 237kbps@48kHz), and does not support High Quality SBC data (328kbps@44.1kHz).
- Only one Bluetooth device can be paired at a time.
- The AVRCP feature is not supported.
- Connect only to a Bluetooth device that supports the A2DP (AV) function.
- You cannot connect to a Bluetooth device that supports only the HF (Hands Free) function.
- You may be required to enter a PIN code (password) when connecting the Bluetooth device to the Micro Component. If the PIN code input window appears, enter <0000>.
- Once you have turned off the Micro Component and pairing is terminated, pairing will not be restored automatically. To reconnect, you must pair the device again.
-
The Micro Component System may not search or connect properly in the following cases:
-
If there is a strong electrical field around the Micro Component.
- If the Bluetooth device is turned off, not in place, or malfunctions.
- Note that such devices as Microwave ovens, wireless LAN adaptors, fluorescent lights, and gas stoves use the same frequency range as the Bluetooth device, which can cause electric interference.
To disconnect the Bluetooth device from the Micro Component
You can disconnect the Bluetooth device from the Micro Component. For instructions, see the Bluetooth device's user manual.
- The Micro Component will be disconnected.
- When the Micro Component is disconnected from the Bluetooth device, the Micro Component will display BT DISCONNECTED → BT READY on the its display.
To disconnect the Micro Component from the Bluetooth device
Press another mode button on the front panel of the Micro Component to switch from Bluetooth mode to another mode or turn off the Micro Component. The currently connected device is disconnected.
- The connected Bluetooth device will wait a certain amount of time for a response from the Micro Component before terminating the connection. (Disconnection time may differ, depending on the Bluetooth device)
- In Bluetooth connection mode, the Bluetooth connection may be lost if the distance between the Micro Component and the Bluetooth device exceeds the effective reception range.
- If the Bluetooth device comes back into the effective range after disconnecting, you can restart the Micro Component to restore the pairing with the Bluetooth device.
- The Micro Component automatically turns off after 25 minutes in the BT Ready mode.
- When a Bluetooth device is connected to the Micro Component System, the Component system automatically switches to the Bluetooth mode if it is in a different mode (except when it is displaying "REQUEST" in the TV SoundConnect mode if the Bluetooth device haven't been paired with the Micro Component before.).
Using Bluetooth Power On
When the product is turned off, you can connect your smart device to the product via a Bluetooth connection to turn it on.
- Press and hold the FUNCTION button to set the Bluetooth Power On function on. ON-BLUETOOTH POWER appears on the display.
- When the product is off, connect your smart device to the product via Bluetooth. (For information on Bluetooth connections, refer to your smart device's manual.)
- The Bluetooth device must have been paired with the Micro Component before.
- When the connection is complete, the product turns itself on automatically in Bluetooth mode.
- Select the desired music to play from your smart device.
- Press and hold the FUNCTION button to turn the Bluetooth Power On function on or off. Each time you press and hold this button, the Micro Component displays ON-BLUETOOTH POWER
→ OFF-BLUETOOTH POWER on its display.
TV SoundConnect
You can listen to the sound from your SoundConnect Compatible Samsung TV through the Micro Component by using the TV SoundConnect function.
Connecting the Micro Component to a SoundConnect Compatible Samsung TV
Before activating this function, be sure to activate the Samsung TV's SoundConnect or SoundShare mode.
- Press the FUNCTION button on the main unit or the → button on the remote control to display the TV SOUNDCONNECT message.
WAIT → SEARCH → REQUEST - Set Add New Device to On in the TV's SoundConnect Settings menu. (Refer to the TV's user manual for details.)
- When the Micro Component is connected to the TV, it will display [TV] Name→ TV on the front display.
-
The audio from the connected TV plays over the Micro Component System.
-
In TV SoundConnect mode, the Play/Repeat/Stop/Next/Back functions are not available.
- The SoundConnect feature is available on some Samsung TVs released since 2012. Check whether your TV supports the SoundShare or SoundConnect function. (For further details, refer to the TV's user's manual.)
- If you unplug the Micro Component, the TV SoundConnect connection is terminated. To re-establish the connection, plug the Micro Component into an outlet, and then set the TV SoundConnect connection again.
- Only one Micro Component at a time can be connected to a TV via TV SoundConnect.
- To connect to another TV in TV Soundconnect mode, press the ▶II button for more than 5 seconds, and then connect to the other TV by following the directions above.
To disconnect the TV from the Micro Component
You can disconnect the TV from the Micro Component.
For instructions, see the TV's user manual.
- When the Micro Component is disconnected from the TV, the Micro Component will display TV DISCONNECTED REQUEST on its display.
To disconnect the Micro Component from the TV
Press another mode button on the front panel of the Micro Component to switch from TV SoundConnect mode to another mode or turn off the Micro Component. The currently connected device is disconnected.
- The connected TV will wait a certain amount of time for a response from the Micro Component before terminating the connection.(Disconnection time may differ, depending on the TV)
- The connection may be lost or sound may stutter if the distance between the TV and the Micro Component exceeds 6.5 feet (2 m).
- Instability in the network environment may cause the connection to be lost or sound to stutter.
- In TV SoundConnect mode, the Micro Component automatically turns off after 25 minutes if it is not connected to a TV.
Setting the Clock
During each step, you have a few seconds to set the required options. If you exceed this time, you must start again.
- Switch the system on by pressing the POWER ( ⏻ button.
- Press the TIMER CLOCK button and then press the ENTER(☐) button, "CLOCK" is displayed.
- Press the ENTER (☐) button. The hour flashes.
• To increase the hours, press: ∧
• To decrease the hours, press: V
- When the correct hour is displayed, press the ENTER(☐) button. The minutes flash.
• To increase the minutes, press: ∧
• To decrease the minutes, press: V
- When the correct minute is displayed, press the ENTER(☐) button. "TIME" appears in the display.
- The current time is now set.
- You can display the time, even when you are using another function, by pressing the TIMER CLOCK button once.
Timer Function
The timer enables you to switch the system on or off at specific times automatically.
- Before setting the timer, confirm that the current time is correct.
- During each step, you have a few seconds to set the required options. If you exceed this time, you must start again.
- If you no longer want the system to be switched on or off automatically, cancel the timer by pressing the TIMER ON/OFF button.
Example: You want to wake up to music every morning.
- Switch the system on by pressing the POWER (⏻)button.
- Press the TIMER CLOCK button until ☐ TIME is displayed.
-
Press the ENTER(☐) button. Result: ON is displayed for a few seconds. You can set the timer switch-on time.
-
Set the timer switch-on time.
a. Press the ∧ or ∨ button to set the hours.
b. Press the ENTER(□)button.
Result: The minutes flash.
C. Press the or V button to set the minutes.
d. Press the ENTER (☐) button.
Result: OFF is displayed for a few seconds. You can now set the timer switch-off time.
- Set the timer switch-off time.
a. Press the ∧ or ∨ button to set the hours.
b. Press the ENTER(□)button.
Result: The minutes flash.
c. Press the or V button to set the minutes.
d. Press the ENTER (☐) button.
Result: VOL XX is displayed, where XX corresponds to the volume already set.
-
Press the or button to adjust the volume level, and then press the ENTER(☐) button. Result: The source to be selected is displayed.
-
Press the or button to select the desired source to be played when the system switches on.
| If you select... | You must also... |
| FM (radio) | a Press the ENTER ( [IMAGE] ) button.b Select a preset station by pressing the ∧ or ∨ button. |
| CD/MP3(compact disc) | Load one compact disc. |
| USB Connect the | JSB device. |
-
Press the ENTER (☐) button.
Result: CHKREC (Do you want to record?) is displayed. -
Press the ENTER (☐) button.
Result: REC N is displayed. You can press the ∧ or ∨ button to select REC Y or REC N, and then press ENTER (☐) button.
1). If you select REC N, the Micro Component will not record when it turns on. If you have already set a tuner timer recording, selecting REC N cancels it. Note that the Micro Component will still turn on and off at the times you set earlier in this procedure.
2). If you select the REC Y, you can set the Micro Component to record when it turns on. The recording switch on and switch off times can be different from the timer switch on and off times you set earlier in this procedure.
a. Press the ENTER (☐) button. Result: ON is displayed for a few seconds. You can set the tuner timer recording switch-on time.
b. Press the ENTER (☐) button. Result: OFF is displayed for a few seconds. You can set the tuner timer recording switch-off time.
- The maximum tuner timer recording time is 5 hours.
- If the timer switch on and off times are identical, the word ERROR is displayed.
- When there is no disc in or USB connected to the Micro Component, if you select "MP3/CD" or "USB", the Micro Component automatically selects "FM".
- If the switch-on or -off time is the same as the timer recording time, only the switch-on or -off time is effective, and the timer recording time is not applied.
- If the auto timer is turned on, the MP3/CD or USB function may require an additional step to be activated depending on the disc (or device). It is better for you to select the tuner function instead.
Cancelling the Timer
After you have set the timer, the unit will start automatically at the time shown by the TIMER indication on the display. If you no longer want to use the timer, you must cancel it.
-
To cancel the timer, press TIMER ON/OFF once, ☐ is no longer displayed.
-
To resume the timer, press TIMER ON/OFF again. □s displayed again.
- When you select the TIMER OFF mode, the TIMER RECORDING and TIMER function are not available.
Recording Function
You can record from a CD, radio broadcast, or an external source to a USB storage device.
- Connect an external USB storage device to the USB jack on your product.
- Play a disc, tune to a station, or connect an external source to your product.
CD
- Press the button on the main unit or press the FUNCTION button on the remote control to select the MP3/CD function.
- Press the OPEN/CLOSE button to open the disc tray.
- Insert a CD and press the OPEN/CLOSE button to close the disc tray.
- Use the CD selection buttons◀◀ or ▶▶) to select the desired song.
Tuner
- Press the button on the main unit or press the FUNCTION button on the remote control to select the FM function.
- Tune to a station you want to record.
External Source
- Connect an External Component/MP3 player to your product.
- Press the button on the main unit or press the FUNCTION button on the remote control to select the
input. -
Play a song from the external device.
-
Press the USB REC button to start recording.
CD
- “TRACK RECORDING” is displayed and CD recording starts.
- Press and hold the USB REC button to start recording all tracks on the disc. "FULL CD RECORDING" is displayed.
MP3/WMA-CD
- Press the USB REC button. The currently playing file is copied onto the USB device.
- Press and hold the USB REC button. All the files in the current folder are copied onto the USB device.
COPY: "CHECK"→"START"→"COPY XX"→"COPY END" is displayed. When the recording is done, "STOP" will be displayed. - If there is a duplicate file name, "FILE EXIST" is displayed, and the function is canceled.
Tuner /External Source
- Tuner: "TUNER RECORDING"RECORD"
-
External Source"AUX RECORDING"→"RECORD"
-
To stop recording, press the STOP (■) button. The product automatically creates and saves recorded files in .MP3 format (SAM-XXXX.MP3).
- To remove the USB device safely, press the STOP (■) button once again. After recording, a directory named "RECORDING(DISCxxxx)"(FULL CD RECORDING), "RECORDING"(TRACK RECORDING), "CD COPY"(MP3/WMA-CD), "TUNER RECORDING" or "AUX RECORDING" is created on your USB device.
- Do not disconnect the USB or the AC Cord during recording as this may cause damage to the file.
- If you disconnect the USB device during a recording, the unfinished recording file may get damaged and cannot be deleted. If this occurs, please connect the USB device to a PC, back up the data stored in the USB, and then format it.
- When the USB memory has insufficient free space, the system will display "NOT ENOUGH MEMORY".
- The USB device or HDD you are recording to must be formatted in the FAT file system. The NTFS file system is not supported.
- When you use the CD high speed search function, CD recording is not available.
- Sometimes, the recording time may be longer with some USB devices.
- The REPEAT function is set to "OFF" automatically and is not available during a recording.
- You cannot record the radio when searching or when no available station is found in the Tuner mode.
- Note that setting the input level too loud when recording music from an external device through the AUX or USB channel may cause noise in the recording. If this occurs, lower the external device's volume level.
- The maximum TUNER/AUX recording time is 5 hours.
Selecting EQ Mode
Your Micro Component System provides pre-defined equalizer settings that are optimized for particular music genre.
- Press the EQ button.
Each time you press the EQ button repeatedly, the mode will change as follows:
OFF→FLAT→RANCHERA→CUMBIA→REGGAE
→MERENGUE→SALSA→REGGATON
→FOLKLORE→PARTY→POP→HIP HOP
→ROCK→JAZZ→CLASSICAL→ELECTRONIC→POWER BASS
- The EQ button will be disabled during the recording, and the product switches to "OFF" automatically.
- The equalizer mode may be different depending on your region.
Software Update
Samsung may offer updates for the Product's system firmware in the future.
If an update is offered, you can update the firmware by connecting a USB device with the firmware update stored on it to the USB port on your product.
Note that if there are multiple update files, you must load them onto the USB device singly and use them to update the firmware one file at a time.
Please visit samsung.com or contact the Samsung Call Center to receive more information about downloading updates files.
- Select USB function, insert a USB device containing the firmware update into the USB port on the main unit.
- Updating firmware may not work properly if audio files supported by the product are stored in the USB storage device.
- Do not disconnect the power or remove the USB device while updates are being applied. The main unit will turn off automatically after completing the firmware update.
- After the update, all settings are reset to their factory default settings. We recommend you write down your settings so that you can easily reset them after the update.
If the firmware fails to update, we recommend formatting the USB device in FAT16/FAT32 and trying again.
- Once the software update is completed, turn on the product with no disc inserted. The "NO DISC" message appears on the display. Press and hold the STOP button on the main unit for longer than 5 seconds. "INIT" appears on the display and the unit powers off. The upgrade is complete.
- Do not format the USB device in the NTFS format. The product does not support the NTFS file system.
- Depending on the manufacturer, some USB devices may not be supported.
- The product has a DUAL BOOT function. If the firmware fails to update, most functions will become inoperable and "UPGRADE FIRMWARE" will appear on the display. Update the firmware again.
Troubleshooting
Refer to the chart below when this unit does not function properly. If the problem you are experiencing is not listed below or if the instructions below do not help, turn off the unit, disconnect the power cord, and contact the nearest authorized dealer or Samsung Electronics Service Center.
| Symptom Check/Remedy | |
| I cannot eject the disc. | Is the power cord plugged securely into the outlet?Turn off the power and then turn it back on. |
| Playback does not start immediately when the Play/Pause button is pressed. | Are you using a deformed disc or a disc with scratches on the surface?Wipe the disc clean. |
| No sound. | The unit does not produce sound during fast playback and slow playback.Are the speakers connected properly?Is the disc severely damaged? |
| The remote control does not work. | Is the remote control being operated within its operational angle and distance range?Are the batteries drained? |
| The product is not working.(Example: The power goes out or the front panel key doesn't work or you hear a strange noise.)The product is not working normally. | Reset the unit: With no disc inserted and the “NO DISC” message on the display of the product, press and hold the STOP (■)button on the main unit for longer than 5 seconds.Using the RESET function will erase all stored settings.Do not use this unless necessary. |
| Can't receive radio broadcasts. | Is the antenna connected properly?If the antenna's input signal is weak, install an external FM antenna in an area with good reception. |
Specifications
| General | Weight | Main unit (MM-J320) | 1.23 Kg |
| Main unit (MM-J330) | 1.31 Kg | ||
| Front speaker (MM-J320) | 1.12 Kg | ||
| Front speaker (MM-J330) | 2.07 Kg | ||
| Dimensions | Main unit | 200.3 (W) x 114.0 (H) x 200.3 (D) mm | |
| Front speaker (MM-J320) | 132.0 (W) x 213.0 (H) x 140.5(D) mm | ||
| Front speaker (MM-J330) | 142.5 (W) x 260.0 (H) x 180.5(D) mm | ||
| Operating Temperature Range | +5°C~+35°C | ||
| Operating Humidity Range | 10 % to 75 % | ||
| FM Tuner | Signal/noise ratio | 50 dB | |
| Usable sensitivity | 12 dB | ||
| Total harmonic distortion | 0.6 % | ||
| CD Disc CD : 12 cm (COMPACT DISC) | Reading Speed : 4.8 ~ 5.6 m/sec. | ||
| Maximum Play Time : 74 min. | |||
| Amplifier | MM-J320- 20 Watts (MAX) | ||
| Front speaker output | 10 W/CH (8 Ω/100 Hz) | ||
| MM-J330- 70 Watts (MAX) | |||
| Front speaker output | 35 W/CH (8 Ω / 100 Hz) | ||
| Frequency range | 20 Hz~20 KHz | ||
| S/N Ratio | 60 dB | ||
| Channel separation | 50 dB | ||
| Input sensitivity | (AUX) 1.2 V | ||
*: Nominal specification
- Samsung Electronics Co., Ltd reserves the right to change the specifications without notice.
- Weight and dimensions are approximate.
- Design and specifications are subject to change without prior notice.
- For information on the power supply and power consumption, refer to the label attached to the product.
Open Source Announcement
To send inquiries and requests regarding open sources, contact Samsung via Email (oss.request@samsung.com).
CE
Hereby, Samsung Electronics, declares that this equipment is in compliance with the essential requirements and other relevant provisions of Directive 1999/5/EC.
The original Declaration of Conformity may be found at http://www.samsung.com, go to Support > Search Product Support and enter the model name.
This equipment may be operated in all EU countries.
SAMSUNG
Contact SAMSUNG WORLD WIDE
If you have any questions or comments relating to Samsung products, please contact the SAMSUNG customer care Centre.
| Area Contact Centre | Web Site | |
| ■ Europe | ||
| AUSTRIA | 0800 - SAMSUNG (0800 - 7267864) | www.samsung.com/at/support |
| BELGIUM 02-201-24-18 | www.samsung.com/be/support (Dutch)www.samsung.com/be_fr/support (French) | |
| BOSNIA 051 381 999 www.samsung.com/support | ||
| BULGARIA 07001 33 11 , sharing cost www.samsung.com/bg/support | ||
| CROATIA 062 726 786 www.samsung.com/hr/support | ||
| CZECH 800 - SAMSUNG (800-726786) www.samsung.com/cz/support | ||
| DENMARK 70 70 19 70 www.samsung.com/dk/support | ||
| FINLAND 030-6227 515 www.samsung.com/fi/support | ||
| FRANCE 01 48 63 00 00 www.samsung.com/fr/support | ||
| GERMANY | 0180 6 SAMSUNG bzw.0180 6 7267864*(0,20 €/Anruf aus dem dt.Festnetz, aus dem Mobilfunkmax. 0,60 €/Anruf) | www.samsung.com/de/support |
| CYPRUS | 8009 4000 only from landline, toll free | www.samsung.com/gr/support |
| GREECE | 80111-SAMSUNG (80111 726 7864) only from land line(+30) 210 6897691 from mobile and land line | |
| HUNGARY | 0680SAMSUNG (0680-726-786)0680PREMIUM (0680-773-648) | http://www.samsung.com/hu/support |
| ITALIA 800-SAMSUNG (800.7267864) www.samsung.com/it/support | ||
| Area Contact Centre | Web Site | |
| LUXEMBURG | 261 03 710 | www.samsung.com/support |
| MONTENEGRO | 020 405 888 www.samsung.com/support | |
| SLOVENIA | 080 697 267090 726 786 | www.samsung.com/si/support |
| NETHERLANDS | 0900-SAMSUNG (0900-7267864)(€ 0,10/Min) | www.samsung.com/nl/support |
| NORWAY 815 | 56480 www.samsung.com/no/support | |
| POLAND | 0 801-172-678* lub +48 22607-93-33 **(całkowity koszt połączenia jak za1 impuls według taryfy operatora** (koszt połączenia według taryfyoperatora) | www.samsung.com/pl/support |
| PORTUGAL | 808 20 7267 www.samsung.com/pt/support | |
| ROMANIA | 08008 SAMSUNG (08008 7267864) TOLL FREE No. | www.samsung.com/ro/support |
| SERBIA | 011 321 6899 | www.samsung.com/rs/support |
| SLOVAKIA | 0800 - SAMSUNG(0800-726 786) | www.samsung.com/sk/support |
| SPAIN 003490 | 2172678 www.samsung.com/es/support | |
| SWEDEN 0771 | 726 7864 (SAMSUNG) www.samsung.com/se/support | |
| SWITZERLAND | 0848 726 78 64 (0848-SAMSUNG) | www.samsung.com/ch/support(German)www.samsung.com/ch_fr/support(French) |
| U.K | 0330 SAMSUNG (7267864) | www.samsung.com/uk/support |
| EIRE | 0818 717100 | www.samsung.com/ie/support |
| LITHUANIA | 8-800-77777 | www.samsung.com/lt/support |
| LATVIA 8000-7267 www.samsung.com/w/support | ||
| ESTONIA 800-7267 www.samsung.com/ee/support | ||
[Correct disposal of batteries in this product]
(Applicable in countries with separate collection systems)
This marking on the battery, manual or packaging indicates that the batteries in this product should not be disposed of with other household waste at the end of their working life. Where marked, the chemical symbols Hg, Cd or Pb indicate that the battery contains mercury, cadmium or lead above the reference levels in EC Directive 2006/66. If batteries are not properly disposed of, these substances can cause harm to human health or the environment.
To protect natural resources and to promote material reuse, please separate batteries from other types of waste and recycle them through your local, free battery return system.

Correct Disposal of This Product (Waste Electrical & Electronic Equipment)
(Applicable in countries with separate collection systems)
This marking on the product, accessories or literature indicates that the product and its electronic accessories (e.g. charger, headset, USB cable) should not be disposed of with other household waste at the end of their working life. To prevent possible harm to the environment or human health from uncontrolled waste disposal, please separate these items from other types of waste and recycle them responsibly to promote the sustainable reuse of material resources.
Household users should contact either the retailer where they purchased this product, or their local government office, for details of where and how they can take these items for environmentally safe recycling.
Business users should contact their supplier and check the terms and conditions of the purchase contract. This product and its electronic accessories should not be mixed with other commercial wastes for disposal.
RISQUES D'ÉLECTROCUTION. NE PAS OUVRIR.
ATTENTION : POUR ÉVITER LES RISQUES DE DÉCHARGE ÉLECTRIQUE, VEILLEZ À FAIRE CORRESPONDRE LA BROCHE LA PLUS LARGE DE LA PRISE À L'EMPLACEMENT LE PLUS LARGE, EN L'INSÉRANT COMPLÈTEMENT.
AVERTISSEMENT
PRODUIT LASER DE CLASSE 1
CLASS 1 LASER PRODUCT
KLASSE 1 LASER PRODUKT
LUOKAN 1 LASER LAITE
KLASS 1 LASER APPARAT
PRODUCTO LÁSER CLASE 1
Consignes
1. UNIQUEMENT POUR LES RÉPARATIONS
MP3/WMA: OFF → TRACK → DIR → ALL → RANDOM
CDDA: OFF → TRACK → ALL → RANDOM
OFF → TRACK → DIR → ALL → RANDOM
WAIT → SEARCH → REQUEST
a. Appuyez sur le bouton ENTER (☐) Result: ON is displayed for a few seconds. You can set the tuner timer recording switch-on time.
1. ONLY FOR SERVICE
MP3/WMA: OFF → TRACK → DIR → ALL → RANDOM
CDDA: OFF → TRACK → ALL → RANDOM
WAIT → SEARCH → REQUEST
CLASS 1 LASER PRODUCT
KLASSE 1 LASER PRODUKT
LUOKAN 1 LASER LAITE
KLASS 1 LASER APPARAT
PRODUCTO LÁSER CLASE 1
Precauzioni
1. ONLY FOR SERVICE
natural_image
Mechanical assembly diagram showing a cylindrical component being inserted into a housing, with an arrow indicating the process (no text or symbols present)* Tipo di batterie: AAA
WAIT → SEARCH → REQUEST
Annuncio Open Source
CLASS 1 LASER PRODUCT
KLASSE 1 LASER PRODUKT
LUOKAN 1 LASER LAITE
KLASS 1 LASER APPARAT
PRODUCTO LÁSER CLASE 1
Środki ostrożności
1. TYLKO W CELACH SERWISOWANIA
WAIT → SEARCH → REQUEST
CLASS 1 LASER PRODUCT
KLASSE 1 LASER PRODUKT
LUOKAN 1 LASER LAITE
KLASS 1 LASER APPARAT
PRODUCTO LÁSER CLASE 1
Óvintézkedések
1. ONLY FOR SERVICE
WAIT → SEARCH → REQUEST
CLASS 1 LASER PRODUCT
KLASSE 1 LASER PRODUKT
LUOKAN 1 LASER LAITE
KLASS 1 LASER APPARAT
PRODUCTO LÁSER CLASE 1
1. LEN NA SERVISNÉ ÚČELY
WAIT → SEARCH → REQUEST
CLASS 1 LASER PRODUCT
KLASSE 1 LASER PRODUKT
LUOKAN 1 LASER LAITE
KLASS 1 LASER APPARAT
PRODUCTO LÁSER CLASE 1
1. Pouze pro servis
MP3/WMA: OFF → TRACK → DIR → ALL → RANDOM
CDDA: OFF → TRACK → ALL → RANDOM
WAIT → SEARCH → REQUEST
CLASS 1 LASER PRODUCT
KLASSE 1 LASER PRODUKT
LUOKAN 1 LASER LAITE
KLASS 1 LASER APPARAT
PRODUCTO LÁSER CLASE 1
Previdnostni ukrepi
1. ONLY FOR SERVICE
- Ta priključek je predviden samo za servis. Ne uporabljajte ga.
WAIT → SEARCH → REQUEST
CLASS 1 LASER PRODUCT
KLASSE 1 LASER PRODUKT
LUOKAN 1 LASER LAITE
KLASS 1 LASER APPARAT
PRODUCTO LÁSER CLASE 1
Προφυλάξεις
1. ONLY FOR SERVICE
WAIT → SEARCH → REQUEST
CLASS 1 LASER PRODUCT
KLASSE 1 LASER PRODUKT
LUOKAN 1 LASER LAITE
KLASS 1 LASER APPARAT
PRODUCTO LÁSER CLASE 1
Precauții
1. NUMAI PENTRU SERVICE
WAIT → SEARCH → REQUEST
CLASS 1 LASER PRODUCT
KLASSE 1 LASER PRODUKT
LUOKAN 1 LASER LAITE
KLASS 1 LASER APPARAT
PRODUCTO LÁSER CLASE 1
Предупреждения
1. ONLY FOR SERVICE
WAIT → SEARCH → REQUEST
CLASS 1 LASER PRODUCT
KLASSE 1 LASER PRODUKT
LUOKAN 1 LASER LAITE
KLASS 1 LASER APPARAT
PRODUCTO LÁSER CLASE 1
Mere opreza
- Osigurajte da AC mrežni napon u vašem domu bude u skladu sa zahtevima navedenim na identifikacionoj nalepnici na zadnjoj strani proizvoda.
- Proizvod instalirajte horizontalno na odgovarajuću podlogu (nameštaj), tako da oko njega ima dovoljno prostora za ventilaciju (7,5 - 10 cm/3 - 4 inča).
- Ne stavljajte proizvod na pojačala ili drugu opremu koja može da se zagreje. Uverite se da otvori za ventilaciju nisu pokriveni.
- Ne stavljajte ništa na gornji deo proizvoda.
- Pre pomeranja proizvoda proverite da li je prorez za ubacivanje diska prazan.
- Da biste u potpunosti isključili proizvod, isključite AC utikač iz zidne utičnice. Izvucite AC utikač iz zidne utičnice ako ovaj uređaj ne nameravate da koristite duže vreme.
- Za vreme grmljavine isključite utikač iz zidne utičnice. Pikovi napona zbog grmljavine mogu oštetiti proizvod.
- Ne izlažite proizvod direktnom sunčevom zračenju ili drugim izvorima toplote. To može izazvati pregrevanje ili kvar proizvoda.
- Zaštitite proizvod od vlage i prevelike toplote ili opreme koja stvara jaka magnetna ili električna polja (tj. zvučnika).
- Isključite mrežni kabl iz AC zidne utičnice ako proizvod ne funkcioniše ispravno.
- Ovaj proizvod koristite samo za ličnu upotrebu. Nije namenjen za industrijsku upotrebu.
- Ako je vaš proizvod ili disk čuvan na hladnom mestu može da se javi kondenzacija. Ako se proizvod transportuje zimi, pre korišćenja sačekajte oko 2 sata da proizvod postigne sobnu temperaturu.
- Baterije koje se koriste sa ovim proizvodom sadrže hemikalije koje su štetne po okolinu. Ne stavljajte baterije u kućni otpad.
- Zvučnike postavite na prihvatljivom rastojanju sa obe strane sistema da biste obezbedili dobar stereo zvuk.
- Usmerite zvučnike prema oblasti slušanja.
- Ne potapajte i ne prskajte ovaj aparat. Ne stavljajte na aparat predmete napunjene tečnostima, kao što su vaze.
- Da biste aparat isključili u potpunosti, morate ga isključiti iz zidne utičnice. Zbog toga, zidna utičnica i utikač stalno moraju biti lako dostupni i spremni.
1. ONLY FOR SERVICE (SAMO ZA SERVISIRANJE)
- Ovaj konektor služi samo za servisiranje. Ne koristite ga.
2. Priključak konektora za FM antenu
- Povežite isporučenu FM antenu na konektor FM antene.
- Polako pomerajte žicu antene dok ne nadete mesto sa dobrim prijemom, a zatim je učvrstite na zid ili neku drugu čvrstu površinu.
- Ako je prijem loš, možda će biti potrebno da instalirate spoljašnju antenu. Da biste to uradili, priključite spoljašnju FM antenu u konektor FM antene na zadnjoj ploči sistema koristeći koaksijalni kabl od 75 Ω (nije isporučen).
3. Priključci konektora za 2.0-kanalni zvučnik
Priključci konektora za zvučnike se nalaze na zadnjoj ploči sistema.
- Da biste postigli dobar kvalitet zvuka, kablove za povezivanje zvučnika identifikovane u nastavku umetnite u odgovarajuće priključke zvučnika na zadnjoj ploči sistema.
WAIT → SEARCH → REQUEST
- U meniju SoundConnect postavki na televizoru postavite stavku Add New Device (Dodaj novi uređaj) na opciju On (Uklj.). (Detalje potražite u korisničkom uputstvu za TV aparat.)
- Kada se mikro linija poveže na televizor, na prednjem displeju će se prikazati tekst [TV] Name → TV.
-
Zvuk sa povezanog televizora se reprodukuje preko mikro komponentnog sistema.
-
U TV SoundConnect modu, funkcije za reprodukciju/ponavljanje/zaustavljanje/sledeće/nazad nisu dostupne.
- Funkcija SoundConnect je dostupna na nekim Samsung TV aparatima proizvedenim posle 2012. Proverite da li vaš TV aparat podržava funkciju SoundShare ili SoundConnect. (Detaljnije informacije potražite u korisničkom uputstvu za TV aparat.)
- Ako mikro liniju uređaj isključite iz struje, TV SoundConnect veza će se prekinuti. Da biste ponovo uspostavili vezu, priključite mikro liniju u utičnicu, a zatim ponovo podesite TV SoundConnect vezu.
- Samo jedna mikro linija se može povezati na televizor preko funkcije TV SoundConnect.
- Za povezivanje na drugi televizor u modu TV SoundConnect, pritisnite taster ▶II i zadržite duže od 5 sekundi, a zatim povežite drugi televizor na osnovu gornjih uputstava.
Da raskinete vezu televizora i mikro linije
CLASS 1 LASER PRODUCT
KLASSE 1 LASER PRODUKT
LUOKAN 1 LASER LAITE
KLASS 1 LASER APPARAT
PRODUCTO LÁSER CLASE 1
Mjere opreza
1. SAMO ZA USLUGE
OFF → TRACK → DIR → ALL → RANDOM
- Kada želite zaustaviti funkciju ponavljanja pritisnite tipku REPEAT dok se ne pojavi „OFF".
• OFF: Poništava ponovnu reprodukciju.
- TRACK: Uzastopno reproducira odabranu pjesmu.
WAIT → SEARCH → REQUEST
- Mogućnost Add New Device to On postavite na On u izborniku postavki TV SoundConnect na TV-u. (Upute potražite u korisničkom priručniku TV-a)
- Kad je mikro-komponentni sustav spojen na TV, na prednjem zaslonu prikazat će se [TV] Name → TV.
-
Zvuk iz priključenog TV reproducira se putem mikrokomponentnog sustava.
-
U načinu rada TV SoundConnect nisu dostupne funkcije Reproduciraj/Ponovi/Zaustavi/Sljedeće/Natrag.
- SoundConnect značajka dostupna je na nekim Samsung televizorima na tržištu od 2012. Provjerite podržava li vaš TV SoundShare ili SoundConnect funkciju. (Više detalja potražite u korisničkom priručniku TV uređaja.)
- Ako isključite komponentu mikro-komponentnog sustava, veza funkcije TV SoundConnect se prekida. Da biste ponovno uspostavili vezu, priključite komponentu mikro-komponentnog sustava u utičnicu, a zatim ponovno postavite vezu funkcije TV SoundConnect.
- Pomoću funkcije TV SoundConnect može se povezati samo jedan komponentni mikrokomponentni sustav.
- Za spajanje na drugi TV u načinu rada TV SoundConnect, pritišćite tipku ▶II od 5 sekundi, a zatim se povežite s drugim TV-om slijedeći prethodne upute.
Za odspajanje TV-a od komponente mikro- komponentnog sustava
- Micro Component System
- MP3-CD/WMA-CD/CD-R/RW Playback user manual
- Safety Warnings
- CAUTION
- RISK OF ELECTRIC SHOCK. DO NOT OPEN
- WARNING
- CLASS 1 LASER PRODUCT
- DANGER :
- CAUTION :
- Precautions
- Disc Storage & Management
- Disc and Format Compatibility
- CD-R Discs
- MP3-CD Discs
- Accessories
- Contents
- Description
- Front/Top Panel
- ONLY FOR SERVICE
- FM Antenna Connector Terminal
- 2.0 CH Speaker Connector Terminals
- Remote Control
- Installing Batteries In The Remote Control
- CD/MP3/WMA-CD Playback
- Lets you play 12 cm compact discs without an adapter.
- Selecting a Track
- You can select a desired track while a disc is being played.
- To play the previous track
- To play the next track
- To play the current track from the beginning
- To play the track of your choice
- Searching for a Specific Music Passage on a CD
- Repeat One or All Tracks on a Compact Disc
- Skip Track
- Playing a USB Device
- Before you begin!
- To Select a Track from a USB Device
- To Search a Folder Quickly
- To Use High Speed Search
- To Repeat one or all Tracks
- Read through the instructions below before using a USB device with this unit.
- Listening to Radio
- To Store the Stations You Want
- Otherwise:
- Selecting a Stored Station
- Using Bluetooth
- What is Bluetooth?
- To connect the Component to a Bluetooth device
- To disconnect the Bluetooth device from the Micro Component
- To disconnect the Micro Component from the Bluetooth device
- Using Bluetooth Power On
- TV SoundConnect
- Connecting the Micro Component to a SoundConnect Compatible Samsung TV
- To disconnect the TV from the Micro Component
- You can disconnect the TV from the Micro Component.
- To disconnect the Micro Component from the TV
- Setting the Clock
- Timer Function
- The timer enables you to switch the system on or off at specific times automatically.
- Cancelling the Timer
- Recording Function
- CD
- Tuner
- External Source
- MP3/WMA-CD
- Tuner /External Source
- Selecting EQ Mode
- Software Update
- Troubleshooting
- Open Source Announcement
- CE
- SAMSUNG
- Contact SAMSUNG WORLD WIDE
- [Correct disposal of batteries in this product]
- (Applicable in countries with separate collection systems)
- Correct Disposal of This Product (Waste Electrical & Electronic Equipment)
- RISQUES D'ÉLECTROCUTION. NE PAS OUVRIR.
- AVERTISSEMENT
- PRODUIT LASER DE CLASSE 1
- Consignes
- UNIQUEMENT POUR LES RÉPARATIONS
- Precauzioni
- WAIT → SEARCH → REQUEST
- Annuncio Open Source
- Środki ostrożności
- TYLKO W CELACH SERWISOWANIA
- Óvintézkedések
- LEN NA SERVISNÉ ÚČELY
- Pouze pro servis
- Previdnostni ukrepi
- Προφυλάξεις
- Precauții
- NUMAI PENTRU SERVICE
- Предупреждения
- Mere opreza
- ONLY FOR SERVICE (SAMO ZA SERVISIRANJE)
- Priključak konektora za FM antenu
- Priključci konektora za 2.0-kanalni zvučnik
- Da raskinete vezu televizora i mikro linije
- Mjere opreza
- SAMO ZA USLUGE
Brand : SAMSUNG
Model : MM-J320
Category : Hi-Fi System