
SC-HTB65 - Home Theater System PANASONIC - Free user manual and instructions
Find the device manual for free SC-HTB65 PANASONIC in PDF.


| Product Type | Home Theater System (Soundbar + Wireless Subwoofer) |
| Model | SC-HTB65 |
| Channels | 2.1 |
| Soundbar Dimensions (W x H x D) | 800 mm x 50 mm x 60 mm |
| Subwoofer Dimensions (W x H x D) | 200 mm x 400 mm x 300 mm |
| Soundbar Weight | 2.5 kg |
| Subwoofer Weight | 5.0 kg |
| Power Consumption | 50 W (total) |
| Standby Power Consumption | 0.5 W |
| Power Supply | AC 220-240 V, 50/60 Hz |
| Audio Decoding | Dolby Digital, DTS |
| Connectivity | HDMI ARC, Optical, Bluetooth, USB |
| Bluetooth Version | 4.2 |
| Wireless Subwoofer | Yes |
| Wall Mountable | Yes (soundbar) |
| Remote Control | Included |
| Cleaning and Maintenance | Wipe with a soft, dry cloth. Do not use solvents. |
| Safety Certification | CE, RoHS |
| Spare Parts Availability | Contact authorized service center for replacement parts. |
| Reparability | Repairs should be carried out by qualified technicians. No user-serviceable parts inside. |
Frequently Asked Questions - SC-HTB65 PANASONIC
User questions about SC-HTB65 PANASONIC
0 question about this device. Answer the ones you know or ask your own.
Ask a new question about this device
Download the instructions for your Home Theater System in PDF format for free! Find your manual SC-HTB65 - PANASONIC and take your electronic device back in hand. On this page are published all the documents necessary for the use of your device. SC-HTB65 by PANASONIC.
USER MANUAL SC-HTB65 PANASONIC
Operating Instructions Home Theater Audio System
Model No. SC-HTB65


natural_image
Pure electrical circuit lines without any symbolsThank you for purchasing this product.
Please read these instructions carefully before using this product, and save this manual for future use.
Included Installation Instructions
The installation work should be done by a qualified installation specialist. (⇒ 10 to 14)
Before commencing work, carefully read these installation instructions and the operating instructions to ensure that installation is performed correctly.
(Please keep these instructions. You may need them when maintaining or moving this unit.)
Model number suffix "EB" denotes UK model.
Safety precautions
WARNING CAUTION
Unit
- To reduce the risk of fire, electric shock or product damage,
—Do not expose this unit to rain, moisture, dripping or splashing.
—Do not place objects filled with liquids, such as vases, on this unit. - Use only the recommended accessories.
- Do not remove covers.
—Do not repair this unit by yourself. Refer servicing to qualified service personnel.
AC mains lead
- To reduce the risk of fire, electric shock or product damage,
—Ensure that the power supply voltage corresponds to the voltage printed on this unit.
—Insert the mains plug fully into the socket outlet.
—Do not pull, bend, or place heavy items on the lead.
—Do not handle the plug with wet hands.
—Hold onto the mains plug body when disconnecting the plug.
—Do not use a damaged mains plug or socket outlet.
- The mains plug is the disconnecting device. Install this unit so that the mains plug can be unplugged from the socket outlet immediately.
Button-type battery (Lithium battery)
- Risk of fire, explosion and burns. Do not recharge, disassemble, heat above 60 °C or incinerate.
- Keep the Button-Type battery out of the reach of children. Never put Button-Type battery in mouth. If swallowed call your doctor.
Unit
- Do not place sources of naked flames, such as lighted candles, on this unit.
- This unit may receive radio interference caused by mobile telephones during use. If such interference occurs, please increase separation between this unit and the mobile telephone.
- This unit is intended for use in moderate climates.
- Product Identification Marking is located on the bottom of the unit.
Placement
- Place this unit on an even surface.
- To reduce the risk of fire, electric shock or product damage,
—Do not install or place this unit in a bookcase, built-in cabinet or in another confined space. Ensure this unit is well ventilated. - Do not obstruct this unit's ventilation openings with newspapers, tablecloths, curtains, and similar items.
—Do not expose this unit to direct sunlight, high temperatures, high humidity, and excessive vibration.
Button-type battery (Lithium battery)
- Danger of explosion if battery is incorrectly replaced. Replace only with the type recommended by the manufacturer.
- Insert with poles aligned.
- Mishandling of batteries can cause electrolyte leakage and may cause a fire.
- Remove the battery if you do not intend to use the remote control for a long period of time. Store in a cool, dark place.
—Do not heat or expose to flame.
—Do not leave the battery(ies) in a car exposed to direct sunlight for a long period of time with doors and windows closed. - When disposing the batteries, please contact your local authorities or dealer and ask for the correct method of disposal.
Caution for AC Mains Lead
(For the AC mains plug of three pins)
For your safety, please read the following text carefully.
This appliance is supplied with a moulded three pin mains plug for your safety and convenience. A 5-ampere fuse is fitted in this plug.
Should the fuse need to be replaced please ensure that the replacement fuse has a rating of 5-ampere and that it is approved by ASTA or BSI to BS1362.
Check for the ASTA mark 📍 or the BSI mark 🍽 on the body of the fuse.
If the plug contains a removable fuse cover you must ensure that it is refitted when the fuse is replaced.
If you lose the fuse cover the plug must not be used until a replacement cover is obtained.
A replacement fuse cover can be purchased from your local dealer.
Before use
Remove the connector cover.
How to replace the fuse
The location of the fuse differ according to the type of AC mains plug (figures A and B). Confirm the AC mains plug fitted and follow the instructions below. Illustrations may differ from actual AC mains plug.
- Open the fuse cover with a screwdriver.

- Replace the fuse and close or attach the fuse cover.

Table of contents
Safety precautions 2
Caution for AC Mains Lead 3
Before use
Supplied items 5
This system (SC-HTB65) 5
Accessories 5
Control reference guide 6
This system (Front) 6
This system (Rear) 7
Remote control 8
Getting started
Step 1 Selecting the placement method ...... 9
The main unit 9
Step 2 Placement 11
When placing the main unit in a rack or on a table 11
When attaching the main unit to a wall 12
Step 3 Connections ...... 15
Connection with the TV 15
Connection with other device 15
AC mains lead connection 16
Operations
Using this system 17
3D sound 18
Sound modes 18
Advanced operations 19
Reference
Troubleshooting 21
Unit care 22
Licenses 22
Indicator illumination 23
Specifications 24
- The illustrations shown may differ from your unit.
- Operations in this operating instructions are described mainly with the remote control, but you can perform the operations on the main unit if the controls are the same.
Supplied items
This system (SC-HTB65)

Accessories
Check the supplied accessories before using this system.
□ 1 Remote control (with a battery)(N2QAYC000084) | □ 1 AC mains leads(K2CT2YY00097) | □ 2 Safety holders(RXA0260) |
| □ 2 Screws(without washer×2:XSN4+8FJK) | □ 2 Wall mount brackets(RMQX1082-K) |

- Product numbers are correct as of December 2012. These may be subject to change.
- The supplied AC mains lead is for use with this system only.
Do not use it with other equipment. Also, do not use cords from other equipment with this system.
Control reference guide
This system (Front)
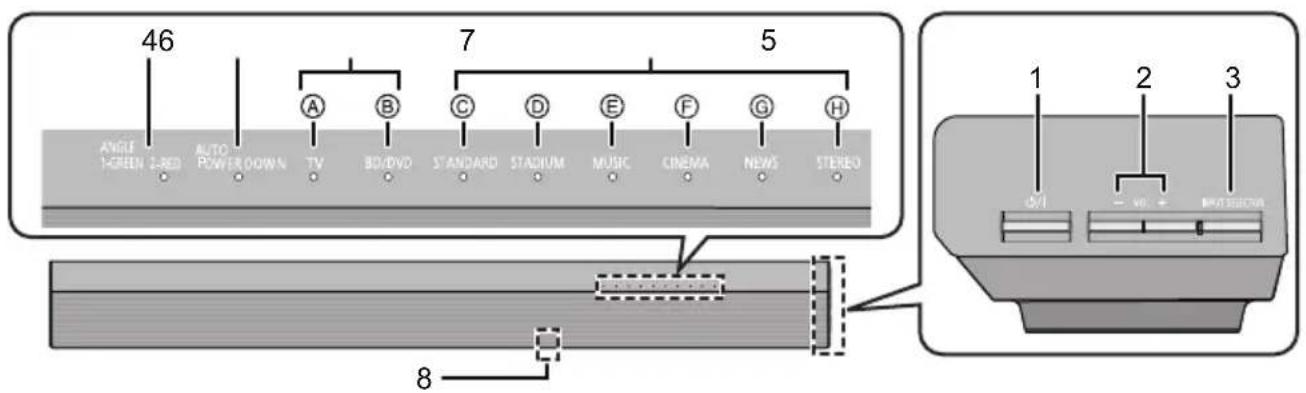
1 Standby/on switch (⏻/l)
Press to switch the unit from on to standby mode or vice versa. In standby mode, the unit is still consuming a small amount of power.
2 Adjust the volume of this system
3 Select the input source "TV" "BD/DVD"
4 Speaker angle indicator ( 9)
Angle 1: 0^ tilt
Speaker angle indicator lights green
Angle 2: Tilted at 90°
Speaker angle indicator lights red
5 AUTO POWER DOWN indicator
Lights green when the AUTO POWER
DOWN mode is on
6 Input selector indicators
Ⓐ TV indicator
Lights green when the TV is the audio source
⑧ BD/DVD indicator
Lights amber when the device connected to the BD/DVD terminal is the audio source
7 Sound mode indicators* 1
© STANDARD indicator
Lights when STANDARD is the current sound mode
(D) STADIUM indicator ^2 Lights when STADIUM is the current sound mode
⑤ MUSIC indicator ^® Lights when MUSIC is the current sound mode
⑤ CINEMA indicator
Lights when CINEMA is the current sound mode
⑤ NEWS indicator
Lights when NEWS is the current sound mode
H STEREO indicator
Lights when STEREO is the current sound mode
8 Remote control signal sensor ( 8)
This system (Rear)

1 AC IN terminal ( 16)
2 OPTICAL DIGITAL AUDIO IN (TV) terminal (⇒ 15)
3 BD/DVD terminal ( 15)
4 USB port (for service use only)
^1 The indicators will also blink in various conditions. ( 23)
^2 The indicator blinks for 5 sec when the main unit detects an audio format.
To manually verify the current audio format and the corresponding indicators, refer to page 19 (Audio format indicator).
Remote control

1 Turn the main unit on or off ( 17)
2 Adjust the dialog effect level ( 17)
3 Adjust the output level of the subwoofer (bass sound) ( 17)
4 Adjust the volume of this system ( 17)
5 Mute the sound ( 17)
6 Select the TV as the source ( 17)
7 Select the BD/DVD as the source ( 17)
8 Select the sound mode ( 18)
“STANDARD” → “STADIUM” → “MUSIC”
↑“STEREO”←“NEWS”←“CINEMA”←
■ Before using for the first time
Remove the insulation sheet A.

natural_image
Illustration of a remote control with a labeled point A and directional arrow (no text or symbols beyond label)■ To replace a button-type battery
Battery type: CR2025 (Lithium battery)
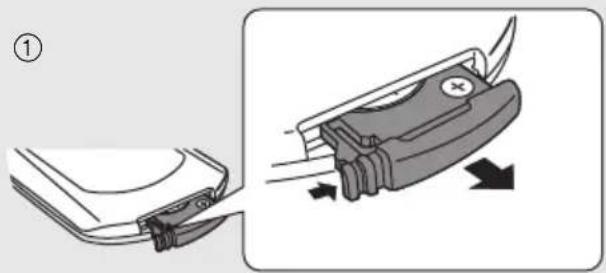
natural_image
Diagram showing a device being inserted into a plug, with arrows indicating direction (no text or symbols present)
natural_image
Diagram showing a device with a switch and a circular button, no text or symbols present- Set the button-type battery with its (+) mark facing upward.
- Keep the button-type battery out of reach of children to prevent swallowing.
■ Remote control operation range
The remote control signal sensor is located on the main unit.
- Use the remote control within the correct operation range.

natural_image
Illustration of a remote control device with an attached CD drive and a close-up view showing the cable being inserted (no text or symbols present)B Remote control signal sensor
• Operation range
Distance: Within approx. 7 m directly in front
Angle: Approx. 30° left and right
Step 1 Selecting the placement method
- Choose a placement method that suits you best.
The main unit
When placing the main unit in a rack or on a table

When attaching the main unit to a wall
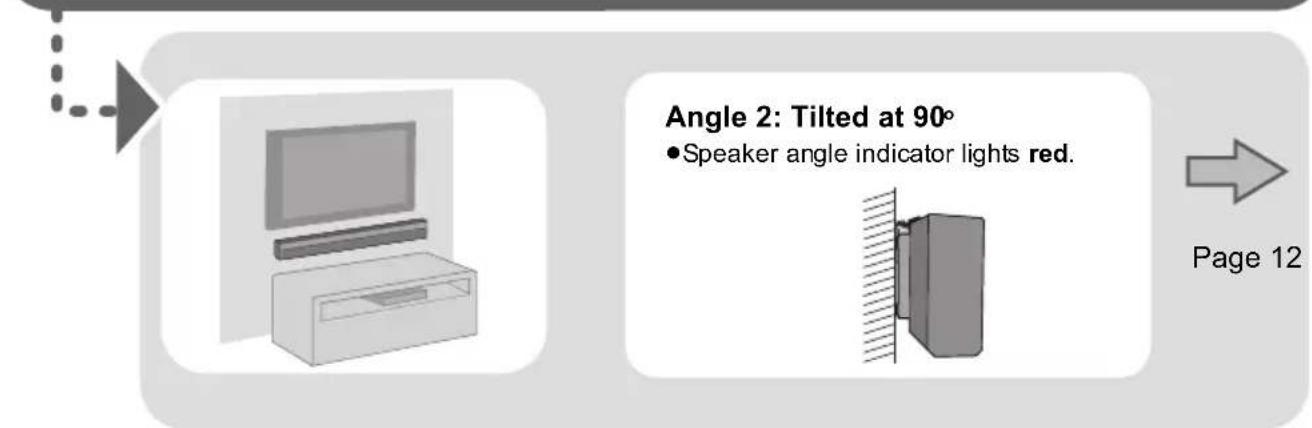
Professional installation is required.
The installation should never be done by any other than a qualified installation specialist. PANASONIC DISCLAIMS ANY PROPERTY DAMAGE AND/OR SERIOUS INJURY, INCLUDING DEATH RESULTING FROM IMPROPER INSTALLATION OR INCORRECT HANDLING.
- Be sure to install the main unit as indicated within this operating Instructions.
- Attach using techniques suited to the structure and materials of the installation location.
Caution
- This system is to be used only as indicated in these instructions. Failure to do so may lead to damage to the amplifier and/or the speaker, and may result in the risk of fire. Consult a qualified service person if damage has occurred or if you experience a sudden change in performance.
- Do not attempt to attach the main unit to a wall using methods other than those described in this manual.

- Keep the safety holders, screws and wall mount brackets out of reach of children to prevent swallowing.
- The safety holder is to minimize the possibility of damage and harm, but it does not completely guarantee this effect.
- Do not hold the main unit in one hand to avoid injury, you may drop the main unit when carrying it.
- To prevent damage or scratches, lay down a soft cloth and perform the assembly on it.
■ When placing the main unit in front of the TV
The main unit may block or interfere with the TV's various sensors (C.A.T.S. (Contrast Automatic Tracking System) sensor, remote control sensor, etc.) and the 3D Eyewear transmitters on a 3D compatible TV.
- If interference occurs, move the main unit further away from the TV. If the TV still does not function correctly, try using it in a rack or in the wall mount position.

- If irregular colouring occurs on your TV, turn the TV off for about 30 minutes. If it persists, move the main unit further away from the TV.
- Keep magnetised items away. Magnetised cards, watches, etc., can be damaged if placed too close to the main unit.
Step 2 Placement
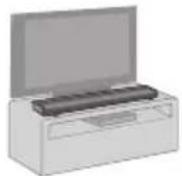
When placing the main unit in a rack or on a table
- Place the main unit on a flat and horizontal surface.
Additionally required accessories (commercially available)
- Fall prevention cord ........ × 2
- Screw eyes (to attach the fall prevention cord).... × 2

- Use commercially available screws that are capable of supporting over 33 kg.
- Use a cord that is capable of supporting over 33 kg (with a diameter of about 1.5 mm).
1 Attach the cord to the main unit.

A Cord\*
* If the cord cannot be threaded through the holes, try bending the cord in 2 locations, about 5 mm apart from the tip, at an angle of 45^ (as illustrated above).
2 Place the main unit in the desired position and attach each cord onto the rack or table.
- Make sure that the slack of the cord is minimal.

natural_image
Diagram of a mechanical setup with a lever and spring, showing a component labeled B (no text or symbols present)B Screw eye
- Attach at a position capable of supporting over 33 kg.
- Depending on the placement of the main unit, the screwing position of the screw eye may differ.

natural_image
Illustration of a TV set with a monitor and a box (no text or symbols)When attaching the main unit to a wall
- Place the main unit on a flat and vertical surface.
This unit can be wall mounted using the supplied wall mount brackets, etc. Make sure that the screw used and the wall are strong enough to support the weight of at least 33 kg.
The screws and other items are not supplied as the type and size will vary with each installation.
- Refer to step 2 for details about the required screws.
- Be sure to attach the fall prevention cord as a secondary safety measure.
Supplied accessories
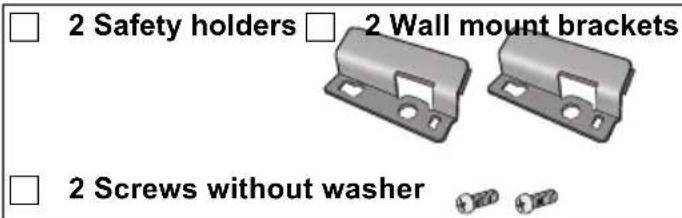

Additionally required accessories (commercially available)
- Screws for wall mounting.... × 4
- Fall prevention cord ........ × 2
- Screw eyes (to attach the fall prevention cord).... × 2

- Use a cord that is capable of supporting over 33 kg (with a diameter of about 1.5 mm).
1 Locate the screwing positions on the wall.
- Use the measurements indicated below to identify the screwing positions on the wall.
- Leave at least 100 mm of space above of the main unit to allow enough space for fitting the main unit.
- Position the main unit with at least 50 mm of free space to its right. If not, it may not be possible to access the buttons.
- Be sure to use a level to ensure that both screwing positions are horizontal to each other.

A 950 mm
B 153 mm
© 322 mm
D 310 mm
E 165 mm
F 105 mm
G 74 mm
H 31 mm
12.5 mm
J Wall mount bracket (supplied)

Attach the wall mount brackets to the wall.

A Wall mount bracket (supplied)
B Screws

© At least 30 mm
D ∅4.0 mm
E ∅7.5 mm to ∅9.4 mm
F Wall
G Wall mount bracket (supplied)

Complete all the necessary connections to the main unit. ( 15 to 16)
- Connect the AC mains lead cord to the main unit, but do not connect it to the household mains socket until the installation is completed.

Attach the cord to the main unit.

H Cord*
* If the cord cannot be threaded through the holes, try bending the cord in 2 locations, about 5 mm apart from the tip, at an angle of 45^ (as illustrated above).
5 Attach the main unit to the wall mount brackets.

A Wall mount bracket (supplied)
B Gently move the main unit down onto the wall mount bracket.
6 Screw the safety holder onto the wall mount brackets.
- Screw tightening torque: 80 N·cm to 120 N·cm.
- The safety holders are designed to prevent the main unit from falling off the wall mount bracket.

7 Secure the cord to the wall.
• Make sure that the slack of the cord is minimal.

H Screw eye
Cord
Step 3 Connections
- Turn off all equipment before connection and read the appropriate operating instructions. Do not connect the AC mains lead until all other connections are completed.
Connection with the TV

flowchart
graph LR
    A["TV"] --> B["OPTICAL OUT"]
    B --> C["Optical Digital Audio IN (TV)"]
    C --> D["Central Panel"]
    D --> E["External Cable"]
A Optical digital audio cable
- When you use the optical digital audio cable, insert the tip correctly into the terminal.
Connection with other device

flowchart
graph TD
    A["TV"] --> B["AUDIO OUT"]
    B --> C["Refering to the operating instructions of the respective devices for the optimal connection."]
    D["BD/DVD"] --> E["Audio IN"]
    E --> F["Output Box"]
    G["e.g., Set top box"] --> B
    style A fill:#f9f,stroke:#333
    style D fill:#f9f,stroke:#333
    style G fill:#f9f,stroke:#333
B Audio cable
AC mains lead connection
- Connect only after all other connections are completed.

A To a household mains socket
B AC mains lead (supplied)
- This system consumes a small amount of AC power ( 24) even when it is turned off. In the interest of power conservation, if you will not be using this system for a long time, unplug it from the household mains socket.
BE SURE TO READ THE CAUTION FOR THE AC MAINS LEAD ON PAGE 3 BEFORE CONNECTION.
Saving energy
The main unit is designed to conserve its power consumption and save energy.
- The main unit will automatically switch to standby mode when no signal is input and no operation is performed for approx. 2 hours. Refer to page 20, "Auto standby function" to turn this function off.
Using this system
Preparation
- Turn on the TV and/or connected device.

1 Press [💡] to turn on the main unit.
2 Select the source.
| Press To select | |
| [TV] “TV” | |
| [BD/DVD] “BD/DVD” | |
- This remote control cannot be used to control the operations of the connected devices.
■ When "BD/DVD" is selected as the source
On the TV and the connected device:
Select the TV's input for the device connected to "BD/DVD" terminal and start the playback on the connected device.
3 Adjust the volume and sound effect level.
■ To adjust the volume of this system
Press [+ VOL -].
• Volume range: 0 to 100*
■ To adjust the dialog effect level
This setting will change the level of the Clear-mode dialog effect. ( 18)
1 Press [+ DIALOG LEVEL -] to display the current level.
2 While the level is displayed: Press [+ DIALOG LEVEL -] to adjust the level.
| Indication Effect level | ||
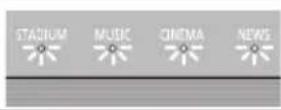 | 4 Highest | |
 | 3 | |
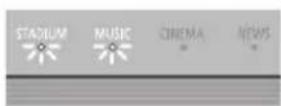 | 2 | |
 | 1 | Lowest |
■ To adjust the subwoofer level
1 Press [+ SUBWOOFER -] to display the current level.
2 While the level is displayed:
Press [+ SUBWOOFER -] to adjust the level.
- The level indication pattern is the same as dialog effect level.
■ To mute the sound
Press [MUTE].
- While muting, the sound mode indicators blink simultaneously.
• To cancel, press the button again or adjust the volume. - Muting is cancelled if the main unit is turned off.

If this system does not operate as expected or sound is unusual, returning the settings to the factory preset may solve the problem. ( 21)
* The sound mode indicators blink from left to right (+) or from right to left (−) while adjusting.
The indicators will not blink when it has reached the maximum or minimum.
- If there is sound coming out of the TV's speakers, reduce the volume of the TV to its minimum.
- If the main unit is turned off with the volume setting in the greater half (above 50), the main unit will automatically lower the volume to the middle (50) when the main unit is turned on (Volume limitation).
To turn this function off, refer to page 20.
3D sound
This system provides a feeling that the sound and the image are as one.
- To change the applied effect, refer to "Sound modes". (→ right)
e.g., Image of 3D sound field

natural_image
Illustration of a person watching television with arrows indicating direction (no text or symbols)| 3D sound | |
| Dolby®Virtual Speaker | With this effect you can enjoy a surround sound effect similar to 5.1ch. |
| 3D surround effect | Adding to the Dolby Virtual Speaker effect, Panasonic has applied its own sound field controlling technology to expand the sound field forwards, backwards, upwards, and downwards, providing a sound with depth and force that better matches 3D images. |
| Clear-mode dialog | Sports commentary and dialogs from TV dramas are heard as if the sound is coming from the TV, giving the feeling that the sound and the image are one. Also, the dialog will stand out from the other sounds during normal volume playback and when the volume is lowered for night time viewing. |

- To turn off Dolby Virtual Speaker and the 3D surround effects, select "STEREO" as the sound mode. ( right)
- To turn off the 3D surround and the Clear-mode dialog effects, refer to "Using the Dolby Virtual Speaker effect". ( 19)
Sound modes
By changing the sound mode, it is possible to enjoy the sound that is suitable to the TV program or image from the connected device.
■ To select the sound mode
Press [SOUND].
"STANDARD" → "STADIUM" → "MUSIC" ↑ "STEREO" ← "NEWS" ← "CINEMA" ←
- The indicator for the selected sound mode lights.
e.g., "STEREO"
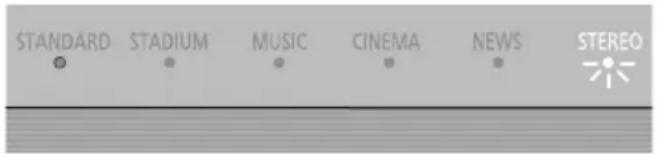
| Sound mode | |
| “STANDARD” | Produces a sound best suited for dramas and comedy shows. |
| “STADIUM” | Produces a highly realistic sound for live broadcasts of sports. |
| “MUSIC” | Re-creates the sound of musical instruments and songs with an expansive sound. |
| “CINEMA” | Produces a powerful, three-dimensional sound unique to movies. |
| “NEWS” | Enhances the voices of news and sports commentaries for clearer hearing. |
| “STEREO”(Factory preset) | You can play any source in stereo. Dolby Virtual Speaker and 3D surround effects are turned off. |

The setting is maintained until it is changed again.
Advanced operations
Audio format indicator
To display the current audio format.
Press and hold [SOUND] for more than 4 sec.
- The current audio format is indicated for 5 sec.

"STADIUM" indicator blinks:
Dolby Digital is the audio format.
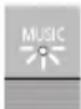
"MUSIC" indicator blinks:
DTS is the audio format.

"CINEMA" indicator blinks:
PCM is the audio format.

Audio format is not indicated when "BD/DVD" is selected as the source.
Changing the dual audio
Change the dual audio from main to secondary.
- This setting will only work if the audio output setting on the connected TV or player, etc. is set to "Bitstream" and dual audio is available in the audio source.

Press and hold [MUTE] for more than 4 sec.
![PANASONIC SC-HTB65 - Press and hold [MUTE] for more than 4 sec. - 1](/content/2026/06/1284616/images/96e68fac1134d8a70409227891aee854994d09052970d3608853db4d06c137c3.jpg)
"STANDARD" indicator blinks (A):
Main (Factory preset)
![PANASONIC SC-HTB65 - Press and hold [MUTE] for more than 4 sec. - 2](/content/2026/06/1284616/images/f21efa4c09e557dd871a162c2bf59a949a995b06a8a1adc98074e2c49101ce01.jpg)
"STEREO" indicator blinks (B):
Secondary
(SAP: Secondary Audio Program)
When Ⓐ and Ⓑ both blink: Main and secondary
![PANASONIC SC-HTB65 - Press and hold [MUTE] for more than 4 sec. - 3](/content/2026/06/1284616/images/b61f7d7fd0042ded9ba9a9e133c6bbb2a7637022b1975a496d26807157b1de23.jpg)
While the setting is displayed, press [MUTE] to change the setting.
- The setting changes each time [MUTE] is pressed.
- The indicator for the selected setting blinks for 20 sec and then exits the setting mode.
- The setting is maintained until it is changed again.
Auto gain control
With this function, you can prevent sudden loud sounds. The output will be reduced automatically when the input exceeds a certain level.

Press and hold [BD/DVD] on the remote control for more than 4 sec.
![PANASONIC SC-HTB65 - Press and hold [BD/DVD] on the remote control for more than 4 sec. - 1](/content/2026/06/1284616/images/6958d8a33d78169924f387855cfabde653c8200a395bfcad5cc2401cf8a06eac.jpg)
"STANDARD" indicator blinks:
Auto gain control is on.
![PANASONIC SC-HTB65 - Press and hold [BD/DVD] on the remote control for more than 4 sec. - 2](/content/2026/06/1284616/images/2850fce85ba7076534d6ab5efac45de06ab561e8e7799283873fc5359386b31f.jpg)
"STEREO" indicator blinks:
Auto gain control is off.
(Factory preset)
![PANASONIC SC-HTB65 - Press and hold [BD/DVD] on the remote control for more than 4 sec. - 3](/content/2026/06/1284616/images/a9e831f4e21eaadcf2cf19e663f98537baad8b6c54dccb86654bab18747fcc2e.jpg)
While the setting is displayed, press [BD/DVD] on the remote control to change the setting.
- The setting changes each time [BD/DVD] is pressed.
- The indicator for the selected setting blinks for 20 sec and then exits the setting mode.
- The setting is maintained until it is changed again.
![PANASONIC SC-HTB65 - While the setting is displayed, press [BD/DVD] on the remote control to change the setting. - 1](/content/2026/06/1284616/images/7a5d4e39d235243f3015ed16084dea87cc14a3949a5bf8078b08b78f15d25d03.jpg)
Using the Dolby Virtual Speaker effect
Depending on your preference, It is possible to turn off the 3D surround effect and the clear-mode dialog effect.

While pressing and holding [SOUND] on the remote control, press and hold [VOL +] on the main unit for more than 4 sec.
![PANASONIC SC-HTB65 - While pressing and holding [SOUND] on the remote control, press and hold [VOL +] on the main unit for more than 4 sec. - 1](/content/2026/06/1284616/images/9d3a0b99b773b434481dbea61c978076b73f748f6c3740db22e682443403aca8.jpg)
"STANDARD" indicator blinks: 3D surround effect and clear-mode dialog effect is on.
![PANASONIC SC-HTB65 - While pressing and holding [SOUND] on the remote control, press and hold [VOL +] on the main unit for more than 4 sec. - 2](/content/2026/06/1284616/images/70511fed35cf9cdfa2029390c9305501fcc9261d0762731cc0e70a99cabb2953.jpg)
"STEREO" indicator blinks: 3D surround effect and clear-mode dialog effect is off.
![PANASONIC SC-HTB65 - While pressing and holding [SOUND] on the remote control, press and hold [VOL +] on the main unit for more than 4 sec. - 3](/content/2026/06/1284616/images/e50e10806a3a0bb64e06352f8bd4df87b862941d0576b03206789c1304d0d8ce.jpg)
While the setting is displayed, press [SOUND] to change the setting.
- The setting changes each time [SOUND] is pressed.
- The indicator for the selected setting blinks for 20 sec and then exits the setting mode.
- This setting will be reset to on when the main unit is turned off.
- When off is selected, the dialog effect level cannot be adjusted.
Dimmer mode
You can turn off dimmer mode and keep the LED indicators bright.
While pressing and holding [BD/DVD] on the remote control, press and hold [— VOL] on the main unit for more than 4 sec to turn off Dimmer mode.
- The indicator for the current condition will turn brighter.
- The setting is maintained until it is changed again.
- Default setting of this function is on.
![PANASONIC SC-HTB65 - While pressing and holding [BD/DVD] on the remote control, press and hold [— VOL] on the main unit for more than 4 sec to turn off Dimmer mode. - 1](/content/2026/06/1284616/images/52931c078d6891a0e00f2ad1ed3833ca60044c291793c0fb400b01126f8b1040.jpg)
To turn on dimmer mode, repeat the operation above. After performing the operation, the indicator for the current condition will be dim.
Auto standby function
With this function turned on, this unit will automatically switch to standby mode if there is no signal input and no operation is performed for 2 hours.
To change the setting:
While pressing and holding [DIALOG LEVEL -] on the remote control, press and hold [INPUT SELECTOR] on the main unit for more than 4 sec to change the setting.

"AUTO POWER DOWN" indicator lights:
Auto standby function is on.
(Factory preset)
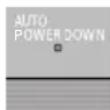
"AUTO POWER DOWN" indicator turns off:
Auto standby function is off.
- The setting is maintained until it is changed again.

- To change the setting again, repeat the operation above.
Others
■ Remote control code
When other Panasonic devices respond to this system's remote control, change the remote control code on this system and the remote control.
Preparation
- Turn off all other Panasonic products.
- Turn on the main unit.
Change the remote control code to code 2:
1 Aim the remote control at the main unit's remote control sensor.
2 Press and hold [MUTE] and [BD/DVD] on the remote control for more than 4 sec.
- All the indicators will blink for 10 sec when the code of this system is changed.

- The setting is maintained until it is changed again.

- If the main unit does not operate after changing the code, repeat steps 1 and 2.
- To change the remote control code to code 1, repeat the steps above, but replace[BD/DVD] with [TV].
■ To reduce the clear-mode dialog effect
When the dialog does not sound natural while the volume is set low, it is possible to reduce the dialog enhancing effect as follows:
While pressing and holding [SOUND] on the remote control, press and hold [— VOL] on the main unit for more than 4 sec.
- All the indicators will blink once when the clear-mode dialog effect is reduced.

- Even if clear-mode dialog effect is reduced, dialog effect level is still adjustable.

To reset the setting, return to the factory preset. ( 21)
■ To turn off the volume limitation
If a state of the lowered volume disturbs you every time the main unit turns on, for example, it is possible to turn off this function as follows:
While pressing and holding [MUTE] on the remote control, press and hold [VOL +] on the main unit for more than 4 sec.
- All the indicators will blink once when the volume limitation is turned off.


To reset the setting, return to the factory preset. ( 21)
Troubleshooting
Before requesting service, make the following checks. If you are in doubt about some of the check points, or if the solutions indicated in the following guide do not solve the problem, consult your dealer for instructions.
To return to the factory preset.
While the main unit is on, press [⏻/l] on the main unit for more than 4 sec.
(All the indicators will blink twice when this system is reset.)
If this system does not operate as expected, returning the settings to the factory preset may solve the problem.
- The remote control code will return to “1” when this system is returned to the factory preset. To change the remote control code, refer to page 20.
General operation
No power.
- Insert the AC mains lead securely. (⇒ 16)
- After turning the main unit on, if the indicators blink and the main unit immediately turns off, unplug the AC mains lead and consult your dealer.
The remote control does not work properly.
- The battery is depleted. Replace it with a new one. ( 8)
- It is possible that the insulation sheet has not been removed. Remove the insulation sheet. (⇒ 8)
- It may be necessary to set the code of the remote control again after changing the battery of the remote control. ( 20)
- Use the remote control within the correct operation range. ( 8)
The "TV" indicator blinks.
Remove the AC mains lead and consult your dealer. If there are any other indicators blinking, be sure to inform your dealer about the blinking indicators.
The main unit is automatically switched to standby mode.
The auto standby function is on.
The main unit will automatically switch to standby mode when no signal is input and no operation is performed for approx. 2 hours. Refer to page 20 to turn this function off.
The colour of the speaker angle indicator does not match the tilt of the main unit.
Change the speaker angle settings manually so that the indicator colour matches the tilt.
① Press and hold [INPUT SELECTOR] on the main unit for more than 4 sec.
• The speaker angle indicator blinks.
② While the indicator is blinking, press [INPUT SELECTOR] on the main unit repeatedly to match the indicator color with the placement method.
- Refer to "Step 1 Selecting the placement method" ( 9) for the relation between colour and tilt.
Sound
No sound (or image).
- Turn muting off. (⇒ 17)
- Check the connections to the other devices. (⇒ 15)
- Make sure that the received audio signal is compatible with this system. ( 24)
- Turn this system off and then on again.
- If the connections are correct, there might be a problem with the cables. Redo the connections with different cables.
- Check the audio output settings on the connected device.
The dual audio cannot be changed from main to secondary.
If the audio received from the connected device is not "Dolby Dual Mono" or the output setting is not "Bitstream", the setting cannot be changed from this system. Change the setting on the connected device.
The volume is lowered when the main unit is turned on.
If the main unit is turned off with the volume setting in the greater half (above 50), the main unit will automatically lower the volume to the middle (50) when the main unit is turned on. ( 20)
The dialog is too persistent or the dialog does not sound natural.
This system has a function to make the dialog stand out when the volume is low. ( 20)
There is no audio.
The power of the main unit turns off automatically.
(When the main unit detects a problem, a safety measure is activated and the main unit automatically switches to standby mode.)
- There is a problem with the amplifier.
• Is the volume extremely high?
If so, lower the volume. - Is this system placed in an extremely hot place? If so, move this system to a cooler place and wait a few moments and then try to turn it on again.
If the problem persists, confirm the TV indicator and BD/DVD indicator blink, turn this system off, remove the AC mains lead cord and consult your dealer. Please be sure to remember the indicators that were blinking and inform the dealer.
Unit care
■ Clean this system with a soft, dry cloth
- When dirt is heavy, wring a cloth moistened in water tightly to wipe the dirt, and then wipe it with a dry cloth.
- Never use alcohol, paint thinner or benzine to clean this system.
- Before using chemically-treated cloth, carefully read the instructions that came with the cloth.
■ To dispose or transfer this system
This system may keep the user settings information in the main unit. If you discard the main unit either by disposal or transfer, then follow the procedure to return all the settings to the factory presets to delete the user settings. ( 21, “To return to the factory preset.”)
- The operation history may be recorded in the memory of the main unit.
Licenses
Manufactured under license from Dolby Laboratories.
Dolby, Pro Logic, and the double-D symbol are trademarks of Dolby Laboratories.
Manufactured under license under U.S. Patent Nos: 5,956,674; 5,974,380; 6,487,535 & other U.S. and worldwide patents issued & pending. DTS, the Symbol, & DTS and the Symbol together are registered trademarks & DTS Digital Surround and the DTS logos are trademarks of DTS, Inc. Product includes software. © DTS, Inc. All Rights Reserved.
Indicator illumination
The indicators display the condition of this system by flashing. The indicator patterns illustrated below are displayed during normal operational conditions. They do not refer to the indications of a problem.
Indicator Description


The indicators blinks for 1 minute.
- When the Auto standby function is on ^ (⇒ 20)
The indicator blinks for 20 sec.
- When 3D surround effect and clear-mode dialog effect are on ( 19)
- When the dual audio setting is Main (⇒ 19)
- When the auto gain control is on (⇒ 19)
The indicator blinks for 5 sec.
- When the audio format is Dolby Digital (→ 19)
The indicator blinks for 5 sec.
- When the audio format is DTS ( 19)
The indicator blinks for 5 sec.
- When the audio format is PCM(→ 19)
The indicator blinks for 20 sec.
- When 3D surround effect and clear-mode dialog effect are off ( 19)
- When the dual audio setting is Secondary (SAP: Secondary Audio Program) ( 19)
- When the auto gain control is off (⇒ 19)
The indicators blink for 20 sec.
- When the dual audio setting is Main and Secondary ( 19)
The indicators blink for 10 sec.
- When the remote control code is changed (→ 20)
The indicators blink once.
- When changing the setting ("To reduce the clear-mode dialog effect" and "To turn off the volume limitation") ( 20)
The indicators blink twice.
- When the main unit is reset (⇒ 21)
Specifications
AMPLIFIER SECTION
RMS output power: Dolby Digital Mode
Front ch
30 W per channel (6 Ω), 1 kHz, 10 % THD
Subwoofer ch
30 W per channel (6 Ω), 100 Hz, 10 % THD
Total RMS Dolby Digital mode power
90 W
TERMINAL SECTION
Digital audio input (TV)
Optical digital input Optical terminal
Sampling frequency
32 kHz, 44.1 kHz, 48 kHz
88.2 kHz, 96 kHz (only LPCM)
Audio Format
LPCM, Dolby Digital, DTS Digital Surround
Analog audio input
Audio input Pin jack
USB Port For service use only.
SPEAKER SECTION
Front speakers (Built-in)
Type
2 way, 2 speaker system (Bass Reflex)
Woofer
5.7 cm Cone type
Tweeter
2.5 cm Semi-dome type
Subwoofer (Built-in)
Type
1 way, 1 speaker system (Bass Reflex)
Woofer
8 cm Cone type
GENERAL
Power consumption
20 W
Power consumption in standby mode
Approx. 0.4 W
Power supply AC 220 V to 240 V, 50 Hz
Dimensions (W×H×D)
950 mm×66 mm×105 mm
Mass
Approx. 3.2 kg
For wall mounting
Dimensions (W×H×D)
950 mm×105 mm×66 mm
Mass
Approx. 3.2 kg
Operating temperature range
0^ to +40^
Operating humidity range
20 % to 80 % RH (no condensation)

- Specifications are subject to change without notice.
- Weight and dimensions are approximate.
- Total harmonic distortion is measured by a digital spectrum analyzer.

natural_image
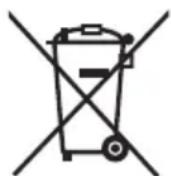
Symbol of a trash bin crossed with two crossed lines and a solid rectangle below (no text or labels)These symbols on the products, packaging, and/or accompanying documents mean that used electrical and electronic products and batteries should not be mixed with general household waste.
For proper treatment, recovery and recycling of old products and used batteries, please take them to applicable collection points, in accordance with your national legislation and the Directives 2002/96/EC and 2006/66/EC.
By disposing of these products and batteries correctly, you will help to save valuable resources and prevent any potential negative effects on human health and the environment which could otherwise arise from inappropriate waste handling.
For more information about collection and recycling of old products and batteries, please contact your local municipality, your waste disposal service or the point of sale where you purchased the items.
Penalties may be applicable for incorrect disposal of this waste, in accordance with national legislation.

For business users in the European Union
If you wish to discard electrical and electronic equipment, please contact your dealer or supplier for further information.
[Information on Disposal in other Countries outside the European Union]
These symbols are only valid in the European Union. If you wish to discard these items, please contact your local authorities or dealer and ask for the correct method of disposal.
![PANASONIC SC-HTB65 - [Information on Disposal in other Countries outside the European Union] - 1](/content/2026/06/1284616/images/6803ff138fcdab1a928b7870946ac9b21c9b8d12b185c29ceef5fdb614086fbb.jpg)
Note for the battery symbol (bottom two symbol examples):
This symbol might be used in combination with a chemical symbol. In this case it complies with the requirement set by the Directive for the chemical involved.
Cd
Sales and Support Information
Customer Communications Centre
- For customers within the UK: 0844 844 3899
• For customers within Ireland: 01 289 8333 - Monday–Friday 9:00 am – 5:00 pm (Excluding public holidays).
- For further support on your product, please visit our website:
www.panasonic.co.uk
Direct Sales at Panasonic UK
- Order accessory and consumable items for your product with ease and confidence by phoning our Customer Communications Centre Monday–Friday 9:00 am – 5:00 pm (Excluding public holidays).
- Or go on line through our Internet Accessory ordering application at www.pas-europe.com.
- Most major credit and debit cards accepted.
- All enquiries transactions and distribution facilities are provided directly by Panasonic UK.
- It couldn't be simpler!
- Also available through our Internet is direct shopping for a wide range of finished products. Take a browse on our website for further details.
Pursuant to the applicable EU legislation
Panasonic Marketing Europe GmbH
Panasonic Testing Centre
Winsbergring 15, 22525 Hamburg, Germany
EU
Panasonic Corporation
Web Site: http://panasonic.net



- Operating Instructions Home Theater Audio System
- Included Installation Instructions
- Safety precautions
- WARNING CAUTION
- Unit
- AC mains lead
- Button-type battery (Lithium battery)
- Placement
- Caution for AC Mains Lead
- (For the AC mains plug of three pins)
- Before use
- How to replace the fuse
- Table of contents
- Getting started
- Operations
- Reference
- Supplied items
- This system (SC-HTB65)
- Accessories
- Control reference guide
- This system (Front)
- Standby/on switch (⏻/l)
- This system (Rear)
- Remote control
- ■ Before using for the first time
- ■ To replace a button-type battery
- ■ Remote control operation range
- B Remote control signal sensor
- • Operation range
- Step 1 Selecting the placement method
- The main unit
- Professional installation is required.
- Caution
- ■ When placing the main unit in front of the TV
- Step 2 Placement
- When placing the main unit in a rack or on a table
- Additionally required accessories (commercially available)
- Attach the cord to the main unit.
- A Cord\*
- Place the main unit in the desired position and attach each cord onto the rack or table.
- B Screw eye
- When attaching the main unit to a wall
- Supplied accessories
- Locate the screwing positions on the wall.
- Attach the wall mount brackets to the wall.
- Complete all the necessary connections to the main unit. ( 15 to 16)
- Attach the cord to the main unit.
- Attach the main unit to the wall mount brackets.
- Screw the safety holder onto the wall mount brackets.
- Secure the cord to the wall.
- Step 3 Connections
- A Optical digital audio cable
- B Audio cable
- AC mains lead connection
- Saving energy
- Using this system
- Preparation
- 3D sound
- Sound modes
- ■ To select the sound mode
- Advanced operations
- Audio format indicator
- Changing the dual audio
- Press and hold [MUTE] for more than 4 sec.
- While the setting is displayed, press [MUTE] to change the setting.
- Auto gain control
- Press and hold [BD/DVD] on the remote control for more than 4 sec.
- While the setting is displayed, press [BD/DVD] on the remote control to change the setting.
- Using the Dolby Virtual Speaker effect
- While pressing and holding [SOUND] on the remote control, press and hold [VOL +] on the main unit for more than 4 sec.
- While the setting is displayed, press [SOUND] to change the setting.
- Dimmer mode
- While pressing and holding [BD/DVD] on the remote control, press and hold [— VOL] on the main unit for more than 4 sec to turn off Dimmer mode.
- Auto standby function
- Others
- ■ Remote control code
- Change the remote control code to code 2:
- ■ To reduce the clear-mode dialog effect
- ■ To turn off the volume limitation
- Troubleshooting
- To return to the factory preset.
- If this system does not operate as expected, returning the settings to the factory preset may solve the problem.
- General operation
- No power.
- The remote control does not work properly.
- The "TV" indicator blinks.
- The main unit is automatically switched to standby mode.
- The colour of the speaker angle indicator does not match the tilt of the main unit.
- Sound
- No sound (or image).
- The dual audio cannot be changed from main to secondary.
- The volume is lowered when the main unit is turned on.
- The dialog is too persistent or the dialog does not sound natural.
- There is no audio.
- The power of the main unit turns off automatically.
- Unit care
- ■ Clean this system with a soft, dry cloth
- ■ To dispose or transfer this system
- Licenses
- Indicator illumination
- The indicators blinks for 1 minute.
- The indicator blinks for 20 sec.
- The indicator blinks for 5 sec.
- The indicators blink for 20 sec.
- The indicators blink for 10 sec.
- The indicators blink once.
- The indicators blink twice.
- Specifications
- AMPLIFIER SECTION
- TERMINAL SECTION
- SPEAKER SECTION
- GENERAL
- For business users in the European Union
- [Information on Disposal in other Countries outside the European Union]
- Note for the battery symbol (bottom two symbol examples):
- Sales and Support Information
- Customer Communications Centre
- Direct Sales at Panasonic UK
Brand : PANASONIC
Model : SC-HTB65
Category : Home Theater System