
KC900ESS - Oven KELVINATOR - Free user manual and instructions
Find the device manual for free KC900ESS KELVINATOR in PDF.


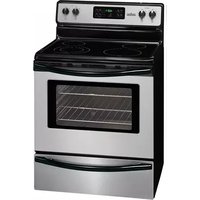
| Product Type | Built-in Electric Oven |
| Brand | Kelvinator |
| Model | KC900ESS |
| Color | Stainless Steel |
| Dimensions (H x W x D) | 59.5 cm x 59.5 cm x 54.6 cm |
| Weight | 35 kg |
| Power Supply | 220-240 V ~ 50 Hz |
| Power Consumption | 3450 W |
| Energy Efficiency Class | A+ |
| Oven Capacity | 71 L |
| Cleaning Type | Enamel Interior with Catalytic Liners |
| Heating Functions | 8 functions: Fan Forced, Conventional, Grill, Fan Grill, Defrost, Pizza, Bottom Heat, Light |
| Temperature Range | 50°C - 275°C |
| Control Type | Electronic Touch + Rotary Knobs |
| Display | Digital LED |
| Safety Features | Child Lock, Cool Touch Door, Automatic Shut-off |
| Dishwasher Safe Parts | Side Racks, Drip Tray |
| Warranty | 2 Years |
Frequently Asked Questions - KC900ESS KELVINATOR
User questions about KC900ESS KELVINATOR
0 question about this device. Answer the ones you know or ask your own.
Ask a new question about this device
Download the instructions for your Oven in PDF format for free! Find your manual KC900ESS - KELVINATOR and take your electronic device back in hand. On this page are published all the documents necessary for the use of your device. KC900ESS by KELVINATOR.
USER MANUAL KC900ESS KELVINATOR
Built-in Multifunction Oven
User Information

Notes and instruction for installation 3-4
Cooking functions 5-6
Using the grill 7
Electronic programmer 8-9-10
Cooking table 11
Removing and cleaning the oven door 12
Replacing the oven light 12
Cleaning and maintenance 13
Service and spares 15
Guarantee conditions 16
DECLARATION OF CE COMPLIANCE
This appliance is compliant with directive 73/23/EEC concerning low tension, and with directive 89/336/EEC concerning electromagnetic compatibility. This appliance is intended to come into contact with food products and is compliant with directive 89/109/EEC.
INSTRUCTIONS FOR THE USER
Unplug the appliance before undertaking any sort of intervention on it.
Attention: earth connection is required by law.
During oven operation, keep children away.
During operation the oven becomes very hot.
Do not touch heating elements on the inside.
Do not use steam cleaners to clean the oven.
Do not use the appliance to heat the room.
The manufacturer will not be held liable if accident prevention measures are not observed.
The manufacturer will not be held liable for damage to persons or property due to poor or lacking maintenance of the appliance.
The manufacturer reserves the right to make any changes to the product which are felt to be useful or necessary without any advance notice.
Preparation of the oven and pre-use
Attention: the oven must be unplugged from the electrical mains. Before using the oven, carefully clean the interior, the racks and the drip pan with non-abrasive soap and lukewarm water. Insert the racks and the drip pan into their respective runners. When this operation is complete, plug the oven into the electrical mains and bring it up to maximum temperature for at least 20 minutes in order to eliminate any residual grease, oil or resins from manufacturing which may cause unpleasant odours during cooking; then ventilate the room.
Once completed this simple operation, the oven is ready to cook for the first time.
Instruction for installation
Only qualified personnel must carry out installation.
All work must be performed with the appliance disconnected.
All electrical connections must be performed by a licensed contractor.
All care must be taken to ensure the installation is properly earthed and conforms to local laws.
Cabinet (see also the figure below):
This appliance is designed for building-in to a standard 865mm wide oven housing. The housing, adjacent furniture and all materials used in installation must be able to withstand a minimum temperature of 80^ C plus ambient temperature during periods of operation. In addition, adjacent furniture cabinet doors must be at minimum 3mm from the appliance at all points. Certain types of vinyl or laminate kitchen furniture cabinetry are particularly prone to heat damage and discoloration, any delamination or discoloration of materials which occurs below 80^ C plus ambient temperature or where materials are less than 3mm from the appliance will be the liability of the owner.

OVEN FUNCTIONS

OVEN LIGHT
The oven light remains on whilst the oven is in use.

SEMI FORCED AIR CONVECTION WITH LOWER ELEMENT
Select the desired temperature between 50^ C and 250^ C.
It is not recommended to pre-heat the oven.
Recommended use: for warming or very slow cooking of food.

TRADITIONAL OVEN COOKING
Select the desired temperature between 50^ C and 250^ C.
It is recommended to pre-heat the oven before introducing the food.

TRADITIONAL OVEN COOKING + FAN
Select the desired temperature between 50^ C and 250^ C.
This cooking mode integrates natural convection and ventilation.
Cooking mode suited to bake bread, pizzas and lasagne.
It is recommended that the oven is pre-heated.

CENTRAL GRILL ELEMENT
Select the desired temperature between 50^ C and 250^ C.
Recommended use: for grilling smaller items of food.

DOUBLE GRILL ELEMENT
Select the desired temperature between 50^ C and 250^ C.
It is not recommended to pre-heat the oven.
Recommended use: for grilling larger area of food.

SEMI FORCED AIR CONVECTION
Select the desired temperature between 50^ C and 250^ C.
The fan and the grill element allow a fast and deep cooking for particular food. It is recommended that the oven is pre-heated for a few minutes.
OVEN FUNCTIONS

MULTIFUNCTION
The fan and the circular element come on. The heat is diffused by the fan to give an even temperature in the oven by adjusting the termostat.
It is not necessary to pre-heat the oven before introducing the food.

DEFROSTING
The oven and the green light will stay on during this and all the following functions.
The fan motor comes on, but there is no heat. The oven door should be kept in the close position. Recommended use: for defrosting frozen foods in general, this will help cut down the defrosting time by about on third of the normal time.
HOW TO USE THE GRILL
Lay the food in the wire shelf, or in a tray in case of small pieces.
The rack must be positioned in the highest runner possible and the grease drip pan in the runner below.
Close the door and turn the selector on the position you prefer:


Each kind of food (fish, poultry, etc.) has to be turned over to permit the grilling on both sides.
See below for some cooking suggestions:
| Dishes for grilling | Cooking time in minutes | |
| Top side Under side | ||
| Slices of thin meat | 6 | 4 |
| Slices of meat of medium thickness | 8 | 5 |
| Slices of thin descaled fish | 10 | 8 |
| Fish (e.g. trout ,salmon) | 15 12 | |
| Sausages | 12 10 | |
| Toast | 5 | 2 |
USING THE 6 BUTTON ELECTRONIC TIMER
Description of button functions:
- Minute Minder
- Cooking on auto-function (duration)
- End of cooking time (end time)
- Manual operation
- Reducing numbers in all programs
- Increasing numbers in all programs

(Please note the buttons have been numbered for illustration only)
The timer only operates when the appliance is connected to the electricity supply.
1) TIME OF DAY AND MANUAL MODE:
To set the time of day, press and release the 'manual' button (any previously entered setting will be cancelled).
By pressing buttons + or - (numbers 5 or 6 in the illustration) the time setting can be adjusted. When the required time has been selected, release all buttons. There is a 5-second acceptance delay during which no button should be touched.
The ‘pot’ symbol will be illuminated indicating Manual cooking mode is available.
To revert the oven to manual mode at any chosen time, simply press and release the ‘manual’ button (4).
This will cancel any previously entered programs.
Set the oven to the required temperature and briefly press the 'duration' button (2).
Set the required cooking duration time using the + or – buttons. The ‘pot’ symbol will remain illuminated and ‘AUTO’ will appear in the display. The timer will revert to time mode after 5 secs. At the end of the selected duration time, the oven will switch OFF and an audible signal will be emitted, ‘AUTO’ will flash and the ‘pot’ symbol will be extinguished.
To cancel the alarm mode audible signal, briefly press the 'manual' button (4). As the oven is now set for manual operation, ensure the oven controls are in the OFF position.
3) COOK END MODE:
For the cooking end mode, set the oven to the desired temperature and briefly press the ‘end time’ button (3).
Set the required cooking end time using the + or - buttons.
'AUTO' will appear in the display. The time will revert to time mode after 5 seconds.
When the time of day equals the cooking end time, the oven will switch OFF and an audible signal will be emitted.
Cancelling the alarm is as above, ensure the oven controls are in the OFF position.
4) FULLY AUTOMATIC COOKING MODE:
Set the oven to the desired temperature and briefly press 'duration' button (2).
Set the required cooking duration time with the + or - buttons and 'AUTO' will appear in the display.
Press and release the 'end time' button (3) and set the required cooking end time with the + or - buttons.
The oven will turn ON with the ‘pot’ symbol illuminated at the chosen time and OFF at the end time selected. When the ‘end’ time is reached, an audible signal will be emitted, ‘AUTO’ flashes and the pot symbol is extinguished.
Cancelling the alarm mode is as above.
5) MINUTE MINDER MODE:
Briefly press the 'Minute Minder' button (1).
Set the required time by pressing the + or - buttons. The 'bell' symbol will appear in the display. The timer will revert to time mode after 5 seconds.
When the set time has elapsed, an audible signal is emitted, to cancel the alarm mode briefly press the ‘timer’ (1) or ‘manual’ (4) button.
The Minute Minder does not control any of the oven functions.
NOTES:
- If a setting error is made, this will be indicated by an audible signal and 'AUTO' symbol will flash. Delete the setting by pressing the 'manual' (4) button, then you can set the oven again.
- The audible signal that is emitted at the end of a program will continue for seven minutes unless cancelled by pressing the 'manual' (4) button. At the end of the seven minutes, the 'AUTO' symbol will continue to flash until cancelled.
- The audible signal has three pitch settings, low, medium and high. To adjust the pitch, ensure the timer is in manual mode, then press and hold the – button to hear the selected pitch.
Releasing the - button, then pressing again and holding will select another pitch.
Repeat the above procedure until the required pitch is heard.
| COOKING TABLE | ||||
| SHELF Temp. °C TIME | ||||
| BAKED PRODUCTS | 2-3 | 170-190 | 10-20 | |
| Bread Loaves 3 | 210-220 30-45 mins | |||
| Rolls 3 200-210 15-20 mins | ||||
| Cakes Butter 3 | 180 45-60 mins | |||
| Patty | 3 180 | 5 -20 mins | ||
| Rich fruit | 3-4 | 150-160 | 1.5-2 hrs | |
| Sponge | 3 180-190 | 15-25 mins | ||
| Meringues | 3 100-110 | 1.25-1.5 mins | ||
| Muffins | 3 200-220 | 15-20 mins | ||
| Pastry Short 2-3 200 10-15 mins | ||||
| Flacky | 2-3 230 | 10-20 mins | ||
| Puff | 3 230-250 | 10-20 mins | ||
| Choux | 3 190-230 | 40-60 mins | ||
| CASSEROLES | ||||
| Beef, Veal | 3-4 160 | 2.25-3 hrs | ||
| Lamb, Mutton, Pork | 3-4 160 | 2-2.5 hrs | ||
| Poultry | 3-4 170 | 1-1.5 hrs | ||
| VEGETABLES | ||||
| Baked potatoes | 2-3-4 | 200 45-60 mins | ||
| Oven baked rice | 2-3 180 | 40 mins | ||
| Roast | 2-3-4 | 160-180 | 1-1.5 hrs | |
| FISH | ||||
| Whole | 2-3 180 | 25-50 mins | ||
| Fillets | 2-3 180 | 15-30 mins | ||
| POULTRY | ||||
| CHICKEN | ||||
| Pieces | 2-3 180 | 30-45 mins | ||
| Whole | 3 160-170 | 25-30 mins | ||
| TURKEY | 3-4 150 | 15-20 mins | ||
| SOUFFLES | ||||
| Large | 3 180 | 45-55 mins | ||
| Individual | 3 180 | 35-50 mins | ||
mins
Removing the oven door (fig. 1)
To make it easier to clean the oven, the door may be removed.
The hinges "A" are fitted with two mobile U-bolts "B" which block the door when it is completely open if they are hooked onto sections "C" of the hinges. After this has been done, the door must be lifted up and taken out. When carrying out this operation, hold the sides of the oven door beside the hinges. To refit the door first slide the hinges into their grooves.
Lastly, before closing the door do not forget to detach the two mobile U-bolts "B" which were used to hook the two hinges.

Replacing the oven light (Fig. 2)
(NOT COVERED BY THE APPLIANCE WARRANTEE)
Disconnect the appliance from the electricity supply.
Remove the protective glass light-cover by twisting anticlockwise.
After replacing the bulb B, refit the protective cover A.
NOTE: the glass cover may be tight and may therefore require a tight grip to release.

Cleaning and maintenance
Important:
Before carrying out maintenance on the oven, it must always be switched off.
The stainless steel and enamelled parts will keep their finish if cleaned with water or using specific products, drying them thoroughly.
Avoid using products that contain chlorine or diluted chlorine solutions, caustic soda, abrasive detergents, hydrochloric acid, vinegar and other products that can scratch. Stains left on the bottom of the oven (sauces, sugary substances, egg white and fats) are caused by spatters or spillage of food. Spattering occurs during roasting and is due to the temperature being too high whereas spilling is due to containers being too small or the food increasing in volume during cooking.
These two problems can be solved by using high-sided containers or by using the dripping pan supplied with the oven. When cleaning the lower part of the oven, you are advised to remove any stains while the oven is still warm- the longer you wait, the more difficult it will be remove them. Immediately after use while the oven is still warm but switched off, you are also advised to place a cloth soaked in ammonia (a few drops are sufficient) on the bottom of the oven. Close the oven door, wait approximately 10 minutes and then dry thoroughly.
Warning: use only non caustic oven cleaners
Service and Spares
In the event of your appliance requiring service, or if you wish to purchase spare parts, contact your local Kelvinator Service Centre by telephoning:
0860 234 481 (South African Customers)
+27-11-579-0800 (International Customers)
Help us to help you
Please determine your type of enquiry before writing or telephoning. When you contact us we need to know:
- Your name
- Telephone Number
■ Physical Address where appliance is located
■ Model and Serial Number of the appliance - Clear and concise details of the fault
Customer Care
For general enquiries or information regarding Kelvinator appliances contact:
Customer Care Department
Kelvinator
P.O. Box 3657
Johannesburg
2000
South African Customers: 0860 234 481
International Customers: +27-11-579-0800
E-mail: service@electrolux.co.za
Guarantee Conditions
- The guarantee is valid for Twelve (12) months commencing when the appliance is handed over to the first retail purchaser, which must be verified by purchase invoice or similar documentation.
- Kelvinator guarantees the equipment against defective material or faulty manufacture, provided it is used for domestic use from the date of purchase by the original purchaser. If not used as above-mentioned, the warranty period will limited.
- If the appliance is used or installed more than Fifty (50) kilometres from the nearest Kelvinator Authorised Service Agent, the additional distance covered shall be for the account of the purchaser.
- The risk in regard to appliances to be repaired shall at all times remain with the purchaser.
- This guarantee is given on condition that only genuine Kelvinator parts and accessories are used at all times in the appliance.
- Kelvinator shall not be responsible for damage of any kind resulting from electricity fluctuations, faults in the building wiring, faulty installations, improper use of controls or failure to use the appliance in accordance with the operating instructions and/or general misuse and/or abuse, which would include unforeseen accidents, wear and tear, and/or earthquake, flood, lightning or any other natural disaster beyond the control of Kelvinator.
- Any attempt by an unauthorised person to repair or tamper with the appliance shall render this guarantee null and void.
- This guarantee does not include bulbs, loose glass, glass oven doors, enamelled surfaces, discolouring of stainless steel surfaces, filters and other parts subject to wear and tear.
- Kelvinator shall not be responsible in terms of this guarantee for the replacement or repair of any parts of the appliance if damaged during transit, where packaging damage is visible.
- Repairs carried out under guarantee do not extend the guarantee period for the appliance. Parts removed during guarantee repairs become the property of Kelvinator.
- This guarantee shall be available only to a purchaser of Kelvinator appliances from an authorised Electrolux Home Products/Kelvinator Dealer or Distributor in and where the appliance has been retained for use in the Republic South Africa, Namibia, Swaziland, Lesotho and Zimbabwe.
- Failure to produce documentary proof of the date or original acquisition by the original purchaser will result in normal charges being levied for the work carried out and the parts supplied.
- The liability of Kelvinator under this guarantee is limited to the replacement and/or repair of the defective parts within the guarantee period and does not extend to be installation or removal of the appliance. Furthermore, Kelvinator does not accept responsibility or liability to compensate for any consequential loss or damage of any kind caused by or due to the failure of operation or malfunction of any equipment to which this guarantee applies.
- It is at the sole discretion of Kelvinator that, in terms of guarantee, consideration be given to replace the appliance due to various parts failing of a similar nature or in the event of the appliance being in a state of beyond repair.
- User Information
- DECLARATION OF CE COMPLIANCE
- INSTRUCTIONS FOR THE USER
- Preparation of the oven and pre-use
- Instruction for installation
- Only qualified personnel must carry out installation.
- Cabinet (see also the figure below):
- OVEN FUNCTIONS
- OVEN LIGHT
- SEMI FORCED AIR CONVECTION WITH LOWER ELEMENT
- TRADITIONAL OVEN COOKING
- TRADITIONAL OVEN COOKING + FAN
- CENTRAL GRILL ELEMENT
- DOUBLE GRILL ELEMENT
- SEMI FORCED AIR CONVECTION
- MULTIFUNCTION
- DEFROSTING
- HOW TO USE THE GRILL
- USING THE 6 BUTTON ELECTRONIC TIMER
- 3) COOK END MODE:
- 4) FULLY AUTOMATIC COOKING MODE:
- 5) MINUTE MINDER MODE:
- NOTES:
- Removing the oven door (fig. 1)
- Replacing the oven light (Fig. 2)
- Cleaning and maintenance
- Important:
- Service and Spares
- Help us to help you
- Customer Care
- Guarantee Conditions
Brand : KELVINATOR
Model : KC900ESS
Category : Oven