
Speed XL HQ8100 - Razor PHILIPS - Free user manual and instructions
Find the device manual for free Speed XL HQ8100 PHILIPS in PDF.


| Product Type | Electric Shaver |
| Brand | Philips |
| Model | Speed XL HQ8100 |
| Shaving System | Rotary, 3 shaving heads |
| Trim | Pop-up trimmer for sideburns and mustache |
| Power Supply | Rechargeable battery |
| Battery Type | NiMH (Nickel-Metal Hydride) |
| Charging Time | 8 hours |
| Shaving Time | Approximately 30 minutes |
| Display | Battery level indicator |
| Waterproof | Washable: can be rinsed under running water |
| Cleaning | Rinse shaving heads under tap after use; periodic deep cleaning with brush |
| Shaving Head Replacement | Replace every 12 months; model HQ56 |
| Dimensions (approx.) | 6.5 x 4.5 x 18 cm (folded) |
| Weight | 200 g |
| Cordless Use | Yes, for up to 30 minutes per charge |
| Voltage | 100-240 V (auto-voltage) |
| Travel Lock | Press and hold on/off button for 3 seconds to activate |
| Wet/Dry Shaving | Dry use only (not for use with gel/foam) |
| Accessories Included | Protection cap, cleaning brush |
| Safety Features | Auto shut-off after 10 minutes of non-use |
Frequently Asked Questions - Speed XL HQ8100 PHILIPS
User questions about Speed XL HQ8100 PHILIPS
0 question about this device. Answer the ones you know or ask your own.
Ask a new question about this device
Download the instructions for your Razor in PDF format for free! Find your manual Speed XL HQ8100 - PHILIPS and take your electronic device back in hand. On this page are published all the documents necessary for the use of your device. Speed XL HQ8100 by PHILIPS.
USER MANUAL Speed XL HQ8100 PHILIPS
Read these instructions for use carefully before using the appliance and save them for future reference.
- Only use the powerplug supplied.
- The powerplug transforms 100-240 volts to a safe low voltage of less than 24 volts.
- The powerplug contains a transformer. Do not cut off the powerplug to replace it with another plug, as this will cause a hazardous situation.
- Do not use a damaged powerplug.
- If the powerplug is damaged, always have it replaced by one of the original type in order to avoid a hazard.
- Make sure the powerplug does not get wet.
- Store the appliance at a temperature between 5°C and 35°C.
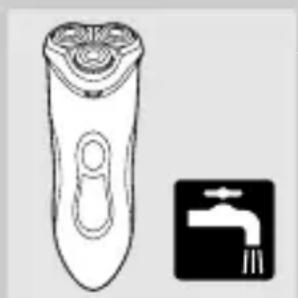
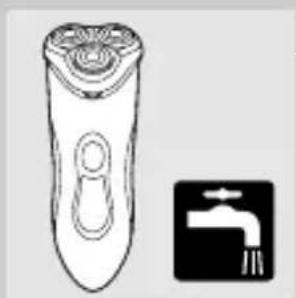
- Always unplug the shaver before cleaning it under the tap.
- The appliance complies with the internationally approved IEC safety regulations and can be safely cleaned under the tap.
Be careful with hot water. Always check if the water is not too hot, to prevent your hands from getting burnt.
- This washable shaver is not suitable for shaving in the shower.
- Do not immerse the shaver in water.


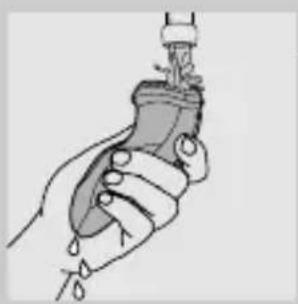
- Water may leak from the socket at the bottom of the appliance, when you rinse it. This is normal and not dangerous because all electronics are enclosed in a sealed shell inside the shaver.
Using the appliance

Put the appliance plug in the shaver.
2 Put the powerplug in the wall socket.
Shaving
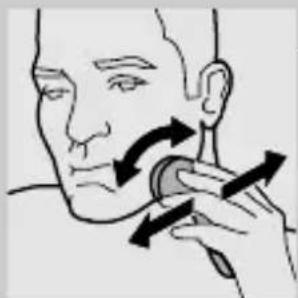
Switch the shaver on by pressing the on/off button once.
The green light ring round the on/off button goes on to indicate that the motor is running.
2 Move the shaving heads quickly over your skin, making both straight and circular movements.
- Shaving on a dry face gives the best results.
- Your skin may need 2 or 3 weeks to get accustomed to the Philips system.
3 Switch the shaver off by pressing the on/off button once.
The green light ring around the on/off button goes out.
ENGLISH6
4 Clean the shaver (see chapter 'Cleaning and maintenance').
5 Put the protection cap on the shaver every time you have used it, to prevent damage.
Trimming

For grooming sideburns and moustache.
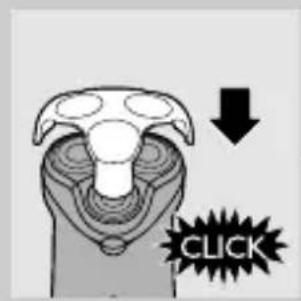
■ Open the trimmer by pushing the slide downwards.
The trimmer can be activated while the motor is running.

2 Close the trimmer ('click').
Cleaning and maintenance
Regular cleaning guarantees better shaving performance.
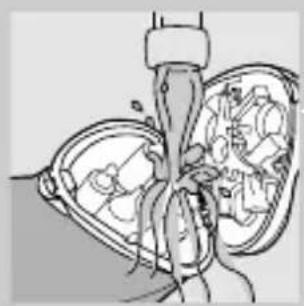
The normal way to clean the appliance is to rinse the shaving unit and the hair chamber with hot water every time you have used the shaver.
Be careful with hot water. Always check if the water is not too hot, to prevent your hands from getting burnt.
▶ Water may leak from the socket at the bottom of the appliance when you rinse it. This is normal and not dangerous.
Every day: shaving unit and hair chamber
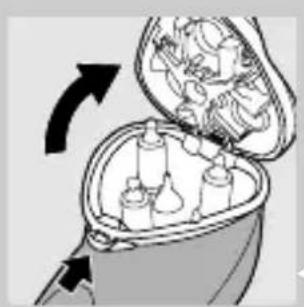
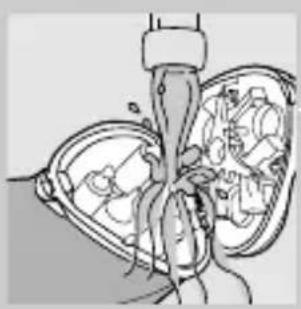
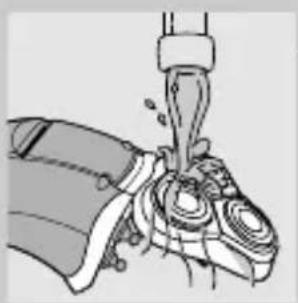

I Switch the shaver off, remove the powerplug from the wall socket and pull the appliance plug out of the shaver.
2 Press the release button to open the shaving unit.
3 Clean the shaving unit and the hair chamber by rinsing them under a hot tap for some time.
- Make sure you clean the inside as well as the outside of the shaving unit.
4 Close the shaving unit and shake off excess water.
Never dry the shaving unit with a towel or tissue as this may damage the shaving heads.
5 Open the shaving unit again and leave it open to let the appliance dry completely.
You can also clean the hair chamber without water by using the brush supplied.
Every six months: shaving heads
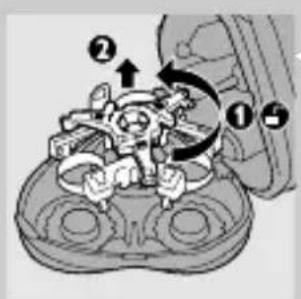
Open the shaving unit, turn the lock anticlockwise (1) and remove the retaining frame (2).
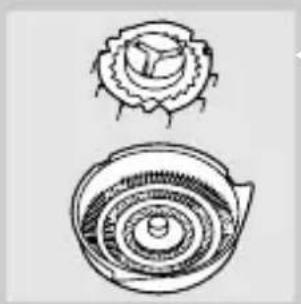
2 Clean the cutters and guards with the brush supplied.
Do not clean more than one cutter and guard at a time, since they are all matching sets. If you accidentally mix up the cutters and guards, it may take several weeks before optimal shaving performance is restored.

3 Put the shaving heads back into the shaving unit. Put the retaining frame back into the shaving unit and turn the lock clockwise.
4 Close the shaving unit.
Trimmer
Clean the trimmer every time you have used it.
Switch the shaver off, remove the powerplug from the wall socket and pull the appliance plug out of the shaver.
2 Clean the trimmer with the brush supplied.


3 Lubricate the trimmer teeth with a drop of sewing machine oil every six months.
Storage

- Put the protection cap on the shaver to prevent damage.
- The appliance can be stored in the pouch supplied.
Replacement
Replace the shaving heads every two years for optimal shaving results.
Replace damaged or worn shaving heads with HQ9 Philips shaving heads only.
- Do not mix up the cutters and the guards to guarantee optimal shaving performance.
I Switch the shaver off, remove the powerplug from the wall socket and pull the appliance plug out of the shaver.
2 Press the release button to open the shaving unit.
3 Turn the lock anticlockwise (1) and remove the retaining frame (2).
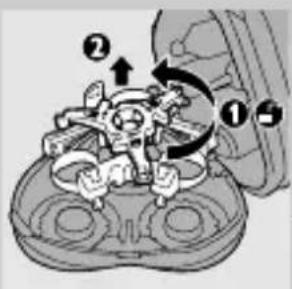

4 Remove the shaving heads and place new ones in the shaving unit. Put the retaining frame back into the shaving unit and turn the lock clockwise.
Make sure that the projections of the shaving heads fit exactly into the recesses.
5 Close the shaving unit.
Accessories
The following accessories are available:
- HQ8000 powerplug.
- HQ9 Philips shaving heads.
- HQ110 Philips shaving head cleaner (shaving head cleaning spray).
Guarantee & service
If you need information or if you have a problem, please visit the Philips website at www.philips.com or contact the Philips Customer Care Centre in your country (you will find its phone number in the worldwide guarantee leaflet). If there is no Customer Care Centre in your country, turn to your local Philips dealer or contact the Service Department of Philips Domestic Appliances and Personal Care BV.
Troubleshooting
I Reduced shaving performance.
▶ Cause 1: the shaving heads are dirty. The shaver has not been rinsed long enough or the water used was not hot enough.
- Clean the shaver thoroughly before you continue shaving. See chapter 'Cleaning and maintenance'.
▶ Cause 2: long hairs are obstructing the shaving heads.
- Clean the cutters and guards with the brush supplied. See chapter 'Cleaning and maintenance', section 'Every six months: shaving heads'.
▶ Cause 3: the shaving heads are damaged or worn.
- Replace the shaving heads. See chapter 'Replacement'.
2 The shaver does not work when the on/off button is pressed.
▶ Cause: the appliance is not connected to the mains.
- Put the powerplug in the wall socket.
3 The shaving unit has come off the shaver.
▶ The shaving unit has not been placed correctly.
- If the shaving unit becomes detached from the shaver, you can easily put it back by inserting the hinge into the slot in the rim of the hair chamber and pushing it home until it locks into place ('click').

Penting


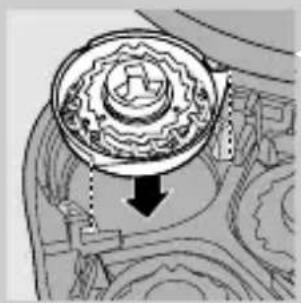


Buka unit cukur, putar kunci ke kiri (1) lalu lepaskan bingkainya (2).


TIÊNG VIÊT30


11
33


切勿将剃须刀浸入水中。

- 确保剃须刀的内部和外部都要清洗。
4 关闭剃须刀头部件并甩掉多余的水份。
每次使用后都要清洁修发器。
附件
可选配以下附件:
這個可水洗的電鬍刀並不適合沐浴時使用。
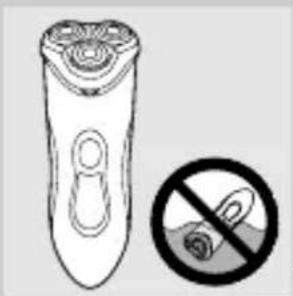
請勿將電鬍刀浸泡在水中。

按一下開/關(on/off)按鈕以啟動電鬍刀。
修剪鬢角及髭髒。
2 按下釋放按鈕,打開電鬍刀組。

請確實清洗電鬍刀組的內側以及外側。
4 蓋上電鬍刀組,並將多餘的水甩乾。
每次使用鬢角刀後,請進行清潔。



- USING THE APPLIANCE
- SHAVING
- ENGLISH6
- TRIMMING
- CLEANING AND MAINTENANCE
- EVERY DAY: SHAVING UNIT AND HAIR CHAMBER
- EVERY SIX MONTHS: SHAVING HEADS
- TRIMMER
- STORAGE
- REPLACEMENT
- ACCESSORIES
- GUARANTEE & SERVICE
- TROUBLESHOOTING
- I REDUCED SHAVING PERFORMANCE
- 2 THE SHAVER DOES NOT WORK WHEN THE ON/OFF BUTTON IS PRESSED
- 3 THE SHAVING UNIT HAS COME OFF THE SHAVER
- PENTING
- TIÊNG VIÊT30
- 附件
- 可选配以下附件:
- 修剪鬢角及髭髒。
Brand : PHILIPS
Model : Speed XL HQ8100
Category : Razor